project # 1—electric light & switch - wordpress.com · project # 3—sound activated switch...
TRANSCRIPT
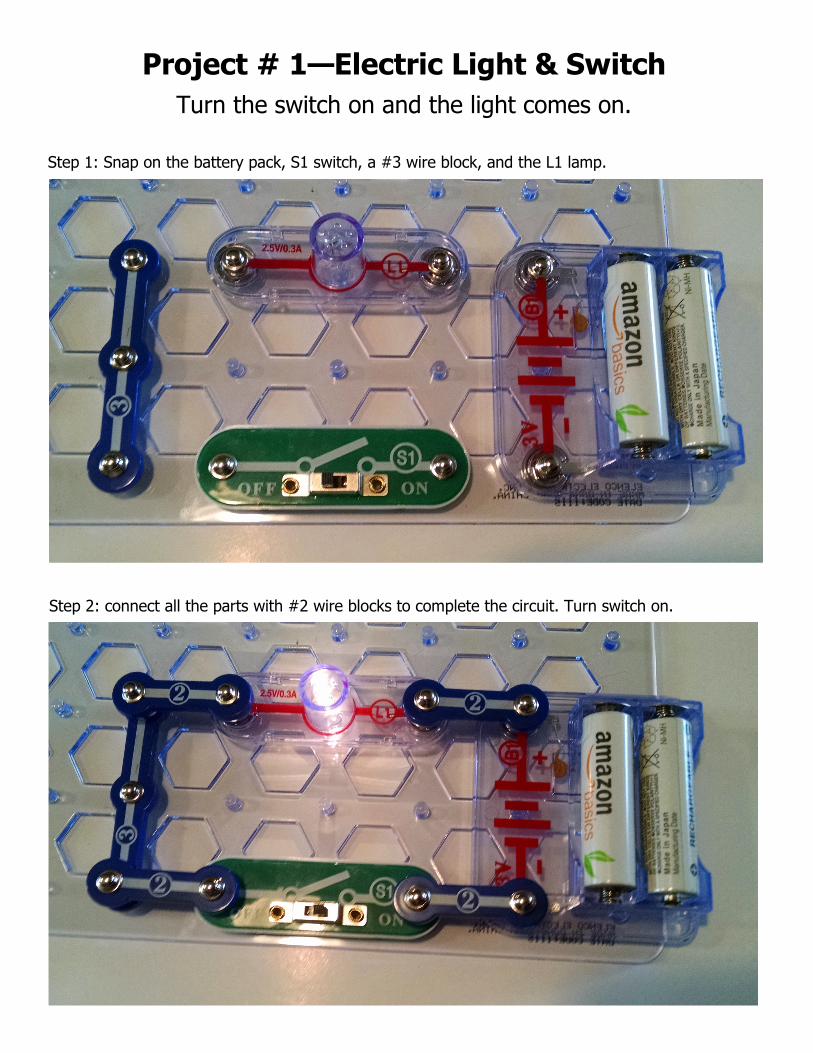
Project # 1—Electric Light & Switch
Turn the switch on and the light comes on.
Step 1: Snap on the battery pack, S1 switch, a #3 wire block, and the L1 lamp.
Step 2: connect all the parts with #2 wire blocks to complete the circuit. Turn switch on.
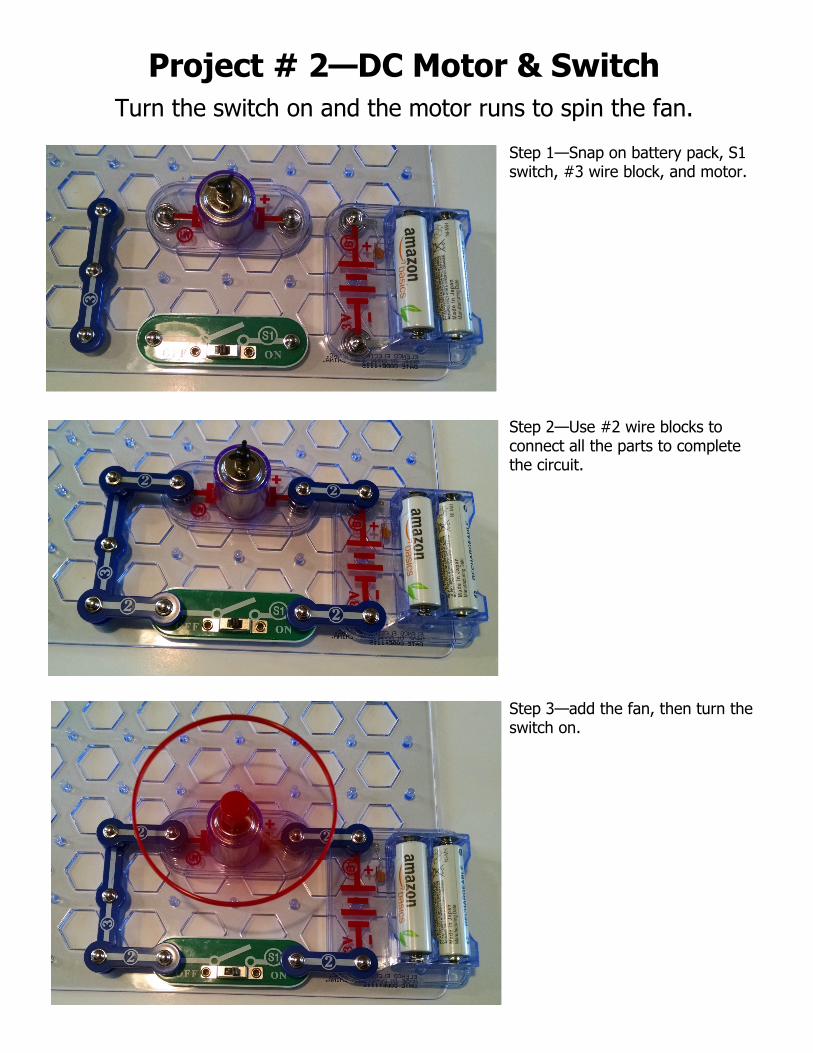
Project # 2—DC Motor & Switch
Turn the switch on and the motor runs to spin the fan.
Step 1—Snap on battery pack, S1 switch, #3 wire block, and motor.
Step 2—Use #2 wire blocks to connect all the parts to complete the circuit.
Step 3—add the fan, then turn the switch on.
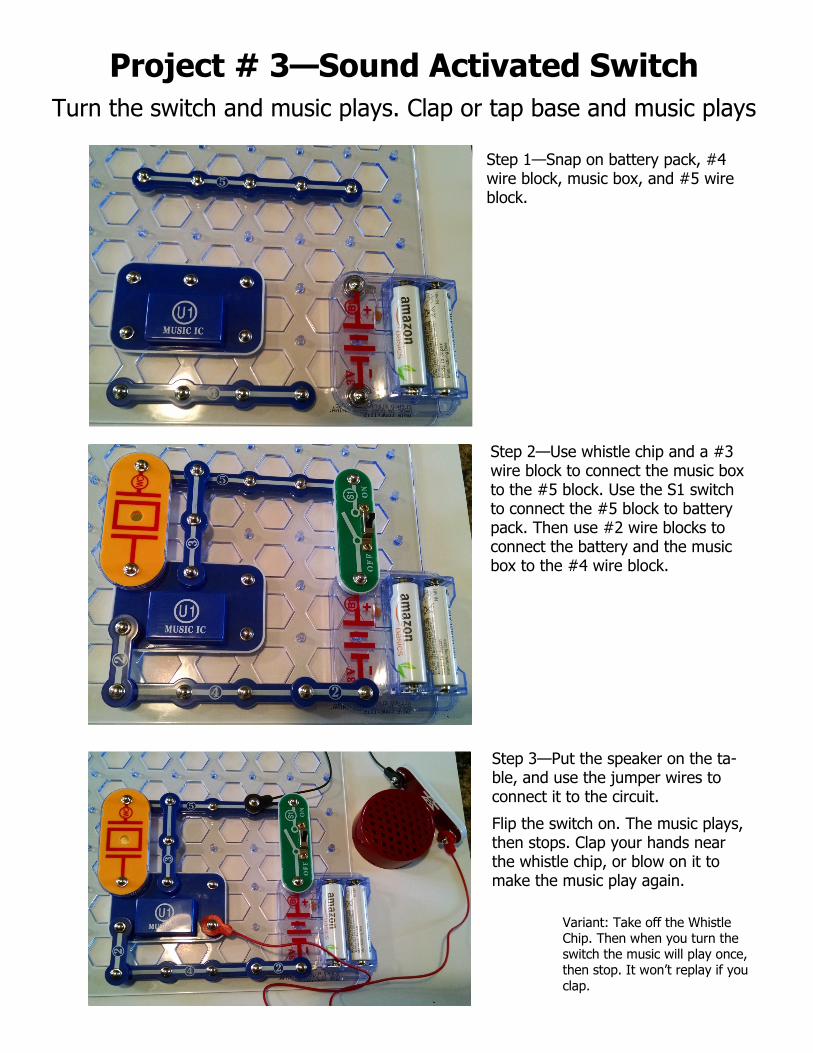
Project # 3—Sound Activated Switch
Turn the switch and music plays. Clap or tap base and music plays
Variant: Take off the Whistle Chip. Then when you turn the switch the music will play once, then stop. It won’t replay if you clap.
Step 1—Snap on battery pack, #4 wire block, music box, and #5 wire block.
Step 2—Use whistle chip and a #3 wire block to connect the music box to the #5 block. Use the S1 switch to connect the #5 block to battery pack. Then use #2 wire blocks to connect the battery and the music box to the #4 wire block.
Step 3—Put the speaker on the ta-ble, and use the jumper wires to connect it to the circuit.
Flip the switch on. The music plays, then stops. Clap your hands near the whistle chip, or blow on it to make the music play again.
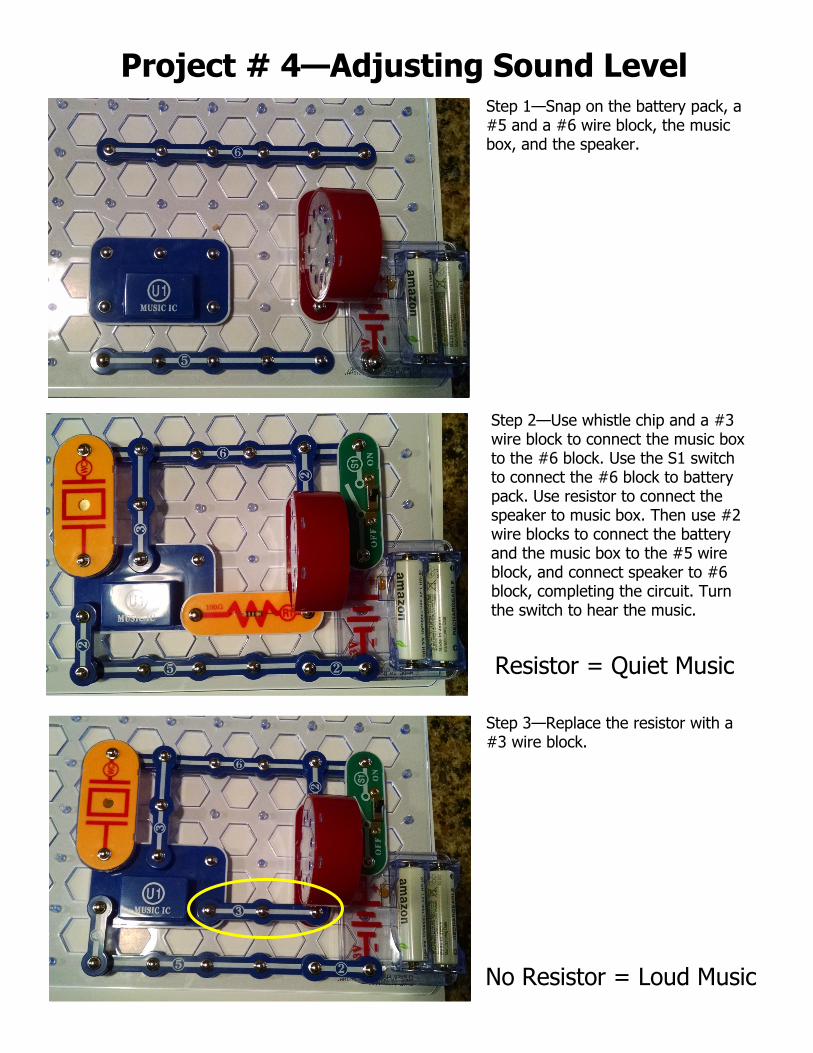
Step 3—Replace the resistor with a #3 wire block.
Project # 4—Adjusting Sound Level
Resistor = Quiet Music
No Resistor = Loud Music
Step 1—Snap on the battery pack, a #5 and a #6 wire block, the music box, and the speaker.
Step 2—Use whistle chip and a #3 wire block to connect the music box to the #6 block. Use the S1 switch to connect the #6 block to battery pack. Use resistor to connect the speaker to music box. Then use #2 wire blocks to connect the battery and the music box to the #5 wire block, and connect speaker to #6 block, completing the circuit. Turn the switch to hear the music.
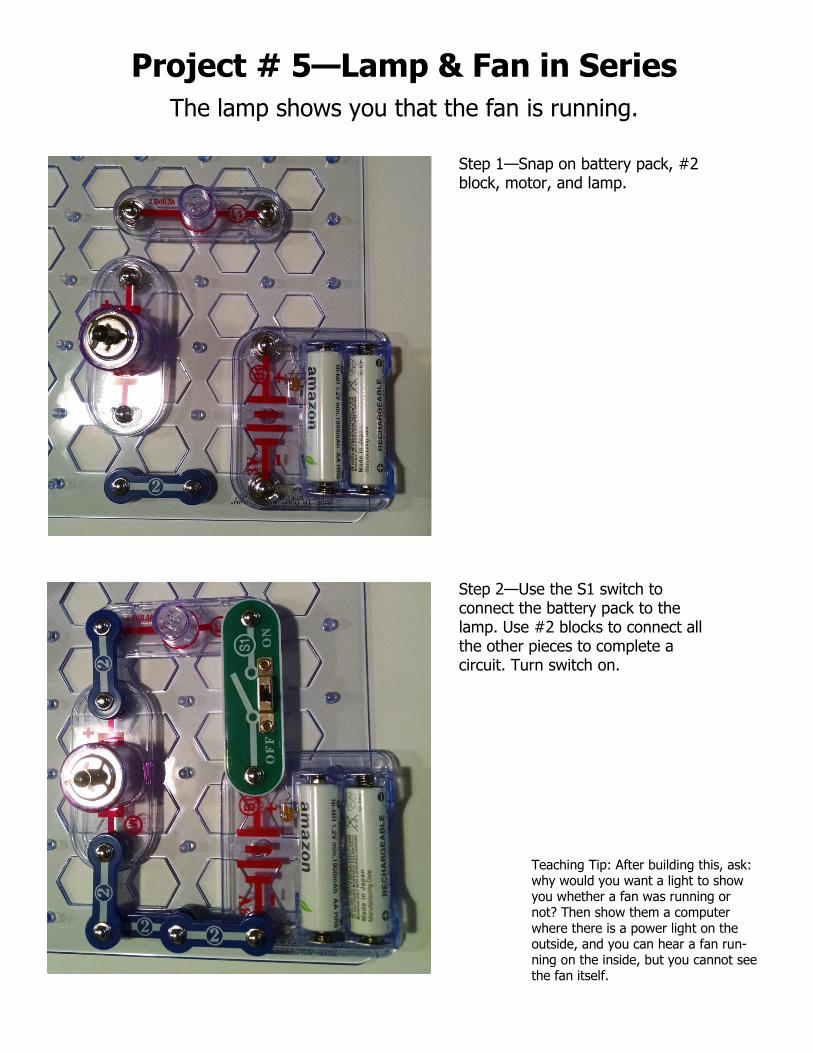
Project # 5—Lamp & Fan in Series
The lamp shows you that the fan is running.
Teaching Tip: After building this, ask: why would you want a light to show you whether a fan was running or not? Then show them a computer where there is a power light on the outside, and you can hear a fan run-ning on the inside, but you cannot see the fan itself.
Step 1—Snap on battery pack, #2 block, motor, and lamp.
Step 2—Use the S1 switch to connect the battery pack to the lamp. Use #2 blocks to connect all the other pieces to complete a circuit. Turn switch on.
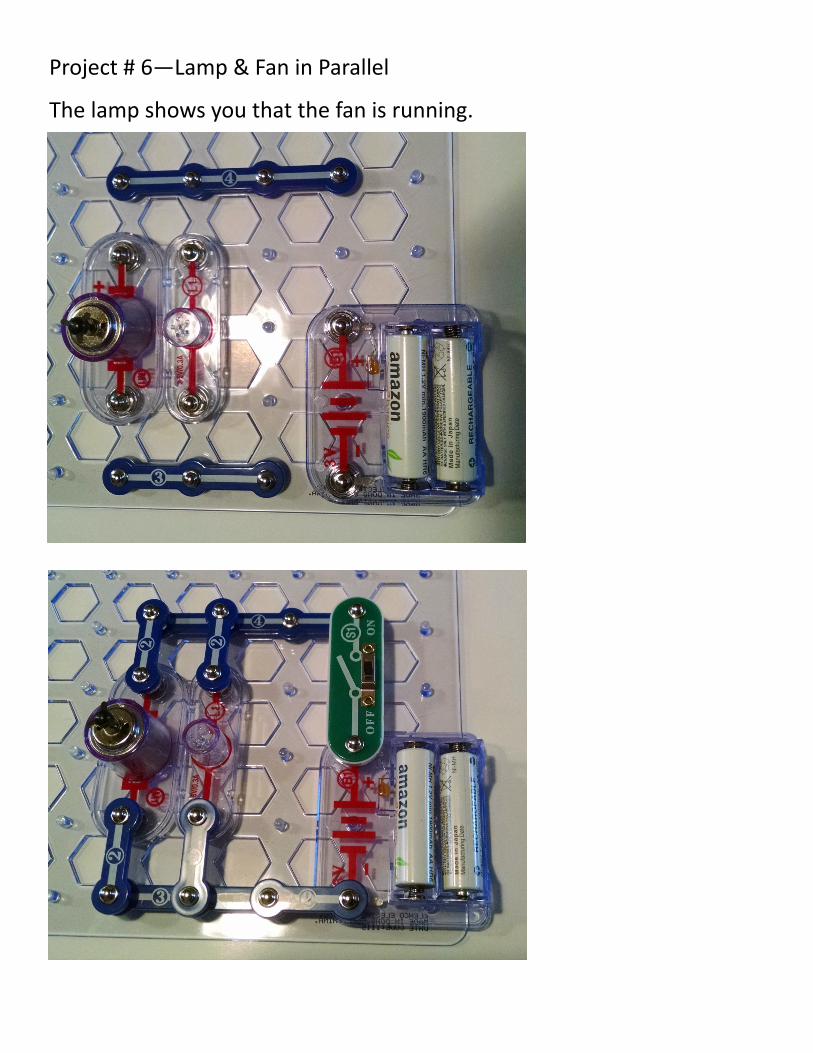
Project # 6—Lamp & Fan in Parallel
The lamp shows you that the fan is running.