quadstone paramics v4.2 programmer user guide...
TRANSCRIPT

Quadstone Paramics V4.2 Programmer User Guide
Quadstone Limited
Version No. 3.0 12/12/2003
Distribution Classification: Public Distribution
Quadstone Paramics V4 Programmer User Guide
Paramics is a registered Trademark. The contents of this document are the copyright of Quadstone Limited. All rights reserved. 12/12/2003/3.0
16 Chester Street Edinburgh EH3 7RA Scotland Telephone: +44 131 220 4491 Facsimile: +44 131 220 4492
http://www.paramics-online.com
Quadstone Paramics V4 1

Quadstone Paramics V4 Programmer User Guide
Project title: Quadstone Paramics v4 Document title: Programmer User Guide Document Identifier: es/pv4/rel04.2 Distribution Classification: Public Document history:
Personnel Date Summary Version
Ewan Speirs
28/05/2003 1st draft 1.0
Ewan Speirs 21/12/2003 3rd draft 2.0
Approval List: Ewan Speirs (Quadstone) Distribution List: Public Distribution Document Ownership and Confidentiality: This document and all ideas, methodologies, algorithms, design notes, descriptive software text, etc, contained within remain the sole property of Quadstone Limited. This document or any subpart of its contents must not be distributed, in whole or part and in any medium, to any third party not listed on the distribution list provided above. Any non-Quadstone employee listed on the distribution list provided above must seek the express permission of Quadstone before divulging any details of the contents of this document in any way, through any medium, to
Quadstone Paramics V4 2

Quadstone Paramics V4 Programmer User Guide
any third party not listed in the distribution list provide above for the document and its contents.
Quadstone Paramics V4 3

Quadstone Paramics V4 Programmer User Guide
1 Getting Started................................................................................... 6 1.1 Introduction .................................................................................. 6 1.2 Backwards Compatibility ................................................................. 6 1.3 Reference Material ......................................................................... 6 1.4 Example Plugins ............................................................................ 6 1.5 Java Support ................................................................................. 6
2 The New V4 API.................................................................................. 7 2.1 Overview ...................................................................................... 7 2.2 Naming Conventions ...................................................................... 7 2.3 Paramics Data Types ...................................................................... 8
3 Plugin Set-up ..................................................................................... 9 3.1 PC Set-up ..................................................................................... 9 3.2 Unix Set-up................................................................................... 9 3.3 Loading Plugins ............................................................................. 9 3.4 Starting A New Plugin Project ........................................................ 10 3.4.1 Introduction............................................................................. 10 3.4.2 Unix........................................................................................ 11 3.4.3 PC .......................................................................................... 11 3.5 Adding New C Files....................................................................... 11 3.5.1 Unix........................................................................................ 11 3.5.2 PC .......................................................................................... 12 3.6 Compiling ................................................................................... 12 3.6.1 Unix........................................................................................ 12 3.6.2 PC .......................................................................................... 12
Quadstone Paramics V4 4
Quadstone Paramics V4 Programmer User Guide
4 QPO – Override Functions .................................................................. 13 4.1 Overview .................................................................................... 13 4.2 Function Summery....................................................................... 13
5. QPX – Extending Functions................................................................. 16 5.1 Overview .................................................................................... 16 5.2 Function Summery....................................................................... 16
6 QPS – Set Functions.......................................................................... 19 6.1 Drawing Functions ....................................................................... 19 6.2 GUI Functions.............................................................................. 20 6.3 User Data Functions ..................................................................... 20
7 QPG – Get Functions ......................................................................... 22 7.1 Bus/PT Data ................................................................................ 22 7.2 Configuration Data....................................................................... 22 7.3 Demand Data .............................................................................. 22 7.4 Drawing Data .............................................................................. 22 7.5 Editor Actions .............................................................................. 22 7.6 Selection Actions ......................................................................... 22 7.7 User Data ................................................................................... 23 7.8 Category Data ............................................................................. 23 7.9 Positional Data ............................................................................ 23 7.10 Statistics Data ............................................................................. 23 7.11 Utility Functions........................................................................... 23 7.12 Ramps and Slip Lanes .................................................................. 23
8 Migrating from V3 to V4..................................................................... 24
9 Parameters Files ............................................................................... 25 9.1 Overview .................................................................................... 25 9.2 Associated Functions .................................................................... 25
10 Worked Examples ............................................................................. 27 10.1 Overview .................................................................................... 27
Quadstone Paramics V4 5
Quadstone Paramics V4 Programmer User Guide
1 Getting Started
1.1 Introduction
The aim of this document is to provide the reader with enough information to create a new plugin from scratch while illustrating how to use the different aspects of the API through worked example. As V3 users will know there is a lot to cover in the API and perhaps the best way to understand things is by worked example. To help introduce V4 there are 13 worked examples provided in the V4 installation package. Some of these examples re-work V3 plugins and other introduce new concepts like attaching data structures to objects and 3D graphics. The full function listing for the V4 API can be seen in the programmer.h file.
1.2 Backwards Compatibility
As you will see in the following section the Programmer API has changed significantly in V4, however every effort has been made to ensure that your existing V3 plugins will migrate to the V4 format with as little effort as possible. A worked example is presented later in this document.
1.3 Reference Material
No paper copy of a reference guide is provided for the V4 release, instead sets of HTML documents are provided covering the entire scope of the API. The HTML format was adopted as it was felt it would be quicker and simpler to use and also because it could be easily updated from the Paramics-Online web site at regular intervals by Quadstone technical staff.
1.4 Example Plugins
Experience gained from producing the V3 Programmer documentation taught us that the bet way to teach user how to use the Programmer API was through worked example. In response to this 13 new plugin worked examples have been developed. Some of these worked examples build on V3 plugins and others introduce completely new concepts and features such as 3D graphics and User Data Structures. In addition a V3 to V4 migration worked example is included.
1.5 Java Support
Java is fast becoming the most popular programmer language used by the software development industry today, in addition Java is also the most commonly taught programming language in graduate and undergraduate courses world wide. Java support for the V4 API is developed by Azalient Ltd.
Quadstone Paramics V4 6
Quadstone Paramics V4 Programmer User Guide
2 The New V4 API
2.1 Overview
The Programmer interface has undergone a significant overhaul for the V4 release, the new V4 API structure is more structured, easier to use, and inherently safer to use. The breadth of the core API has been extended considerably; there are around 700 new functions in the V4 API. In addition many new layers of information have been added allowing the user to access every aspect of the Paramics model.
2.2 Naming Conventions
The V4 Programmer interface uses a new standardised naming convention for all functions. The naming convention can be broadly split in to two sections, the action identifier and the object identifier. The action identifier is a 3-letter code that comprises the first three characters of a function name. The action identifier is intended to illustrate the core purpose of the function. The action identifiers are:
• QPO: Override Standard Code - define a function in the plugin that overrides the standard default behaviour inside Paramics. Each of the key parts of the model can be replaced by your own logic;
• QPX: Extend Standard Code - define a function in the plugin that adds
to the functionality in Paramics. It can be triggered by one of a large number of events i.e. when the network is loaded, saved refreshed, or at the start/end of each timestep etc. etc;
• QPG: Get a value from the Standard Code - retrieve data from within
either the simulation or graphics engines inside Paramics; and
• QPS: Set a value in the Standard Code - set a data value or change or add to the view displayed.
The QP? prefix is followed by a 3-character code dividing the interface into functional groupings, this is the object identifier:
• NET - Network • CFG - Configuration • STA - Statistics • DRW - Drawing • UTL - Utility • POS - Position • DMD - Demand • NDE - Node • LNK - Link • CAT - Link category • ZNE - Zone • VHC - Vehicle • TGV - Tagged vehicle
Quadstone Paramics V4 7

Quadstone Paramics V4 Programmer User Guide
• BUS - Bus • CLK - Clock/timing • SCO - Single-carriageway overtaking • GUI - User-interface controls • EDT - Editor controls • CFM - Car following model • LCM - Lane changing model • RTM - Routing model • VTP - Vehicle type • DTC - Detector • DTL - Loop-type detector • DTI - Detector using index • BCN - Beacons • BCI - Beacon using index • BSR - Bus Route • BST - Bus Stop • CPK - Car park • RMP - Ramp • SLP - Slip lane • SIG – Traffic signals
2.3 Paramics Data Types
In the V3 Programmer void pointers were used to access objects in the Paramics model, this had the inherent disadvantage of not providing any type checking. In V4 all Paramics data objects are typed so your code can be type checked by the compiler at compilation time reducing errors. Also this helps debugging and provides the user with much more readable code. Data types in V4 are: NODE, LINK, ZONE, VEHICLE, BUSSTOP, DETECTOR, CARPARK, BEACON, LOOP, SLIP, RAMP. In addition to the base data structures mentioned above you can now associate your own data structures with Paramics objects. For example imagine you need to store the details of a vehicles route choice with each vehicle in the simulation (like worked example 6). In V3 you would do this be creating a hash lookup table and creating entries; not the easiest method to use especially when you have dummy vehicles to contend with. In V4 you can create your own C data structures with their own variables/attributes. These data structures can then be stored directly with Paramics objects removing the need for lookup tables etc. and simplifying your code.
Quadstone Paramics V4 8

Quadstone Paramics V4 Programmer User Guide
3 Plugin Set-up
3.1 PC Set-up
On a PC, Paramics Programmer is implemented via “dll” files (Dynamic Linked Libraries). This means that when you have a Programmer license, Paramics Modeller will load user “dll” libraries representing the user plugins. Provided with the base plugin are Microsoft™ Visual C++ (MSVC) project and workspace files, these are used for compiling on the PC platform. To edit the plugin load the “Plugin.dsw” file in to MSVC, click on the File View tab on the left-hand panel, then expand the “Plugin files” folder and the “Source Files” folder then double click on plugin.c, this will then load the file. When you have made your modifications to the plugin (by editing plugin.c), you will then need to compile a new version. There are two types of compiles available:
• Debug compile will allow you to trace through your API code at run time for the purpose of finding errors in your code; and
• Release compile is optimised for faster execution at run time.
To select the type of compile that MSVC will perform select the Set Active Configuration option from the Build menu. This will bring up a window from which you can select either Debug or Release. You are now ready to compile Paramics Programmer. This is done by selecting Build plugin.dll from the Build Menu (or using the F7 shortcut key).
3.2 Unix Set-up
On UNIX, Paramics Programmer uses a shared library interface to link with the API code being developed. Provided with the base plugin is a “makefile” which is used to compile the user’s plugins on the UNIX platform. To make changes to the plugin simply edit the “plugin.c” file. To compile on UNIX simply change directory into the modified plugin directory and type “make”. This will recompile all the objects and build a new shared library.
3.3 Loading Plugins
In V4 plugins are load and unloaded dynamically i.e. each time the software is initialised or a new network is loaded; this means that you plugins can be network specific. Plugins are loaded by either directly specifying the plugin DLL/SO file, or specifying the path to the file to load. This can be done in a number of ways so to allow the user so control over this process a search hierarchy is defined i.e. the order in which Paramics Modeller will try to look for a load a plugin. The hierarchy is:
Quadstone Paramics V4 9

Quadstone Paramics V4 Programmer User Guide
1. Place the DLL/SO file in the default plugins directory i.e.
<PARAMICSHOME>\plugins\<PLATFORM>
i.e.
C:\Program Files\Paramics\plugins\windows Or /home/username/Paramics/plugins/spark/
2. Place the full path to the plugin in the default plugins load file i.e.
<PARAMICSHOME>\plugins\<PLATFORM>\plugins
i.e.
C:\Program Files\Paramics\plugins\windows\plugins Or /home/username/Paramics/plugins/spark/plugins
3. Place the name of the Plugin is a network specific file called ‘programming’.
The new ‘programming’ files can also be application and platform specific i.e.
programming programming.modeller programming.modeller.windows
The Plugin named in the programming file should be placed in the Paramics directory. Programming file are really designed to let you specify specific plugins for specific networks. In addition using a programming file gives you the option to specifically enable or disable a QPX function from being called improving execution performance and run times for your plugins.
3.4 Starting A New Plugin Project
3.4.1 Introduction
A good way to start a new project is to take a copy of the “base” plugin directory. Once you have copied the directory, it is a good idea to give the plugin project a new name. To save confusion it is usually a good idea to give the plugin and the plugin directory the same name. For example if your new project is called “plugin1” you should perform the following steps:
Quadstone Paramics V4 10

Quadstone Paramics V4 Programmer User Guide
• Copy the “programmer/plugins/base” directory to “programmer/plugins/plugin1”
• Rename the plugin to “plugin1” (see below for details).
3.4.2 Unix
To change the name that the shared library is compiled to on UNIX you will need to edit the “makefile”. In the “makefile” you will find a line that sets the “TARGET” variable. The “TARGET” variable defines the name that the shared library is given. So in our example to change the name of the plugin to “plugin1” you will need to change:
TARGET = base
to
TARGET = plugin1
3.4.3 PC
On a PC you can change the name that the “dll” is compiled to by editing the MSVC project file. To do this you will need to load the “Plugin.dsw” file into MSVC. To change the name first select the project settings (Project>>Setting or ALT+F7). This will bring up the project settings window, in this window select the “Link” tab. Then in the “Settings For” select “Win32 Debug”. You can now enter the name of the “dll” to be generated in the “Output file name” field. So in our example this should be changed to “Debug/plugin1.dll”. You will now need to repeat this for the “Win32 Release” settings so that the “Output file name” is set to “Release/plugin1.dll”.
3.5 Adding New C Files
3.5.1 Unix
You can change the C files that a plugin uses by editing the “makefile” for the plugin. The “OBJLIST” variable defined in the “makefile” defines the C files that are to be used. For example in the “base” plugin the “OBJLIST” is defined as follows:
OBJLIST = plugin.o
This means that the “base” plugin only uses the “plugin.c” file. So for example to add the lookup table utility (which has a C file called LT.c) to this plugin you would need to modify the “makefile” as follows:
OBJLIST = plugin.o LT.o
Quadstone Paramics V4 11

Quadstone Paramics V4 Programmer User Guide
This means that the “makefile” will now compile both the “plugin.c” file and the “LT.c” file into the plugin.
3.5.2 PC
You can change the list of C files that a plugin uses by editing the MSVC project files. To change the list of C files you will need to do the following:
• Load the “Plugin.dsw” file into MSVC.
• Select the file view tab in the bottom left of the screen.
• In the file view expand the “Plugin files” folder and select and expand the “Source Files” folder.
• Now to add a C file right click on “Source Files” and select “Add Files to Folder”.
• To delete a C file left click on the file and pressing the delete key.
3.6 Compiling
3.6.1 Unix
To compile up the plugin change directory into the plugin directory where the “makefile” is and type “make”. The make command will use the settings in the “makefile” to compile a new plugin. When the plugin is compiled the new shared library is then placed a subdirectory dependent on the platform type. For example on a Silicon Graphics system the subdirectory is “sgi”, and on a SUN Solaris Sparc system the subdirectory will be called “sparc”.
3.6.2 PC
In MSVC you are able to do two different types of compiles, a “Debug” compile or a “Release” compile. The Debug compile allows you to trace through your program as it is running, where as the “Release” compile is optimised for speed. You can select the type of compile from the “set active configuration” window in MSVC (Build>>Set Active Configuration). To compile select Build>>Build Plugin1.dll (or press F7). If you are set to compile a “Debug” version then the resulting “dll” will be placed in a subdirectory called “Debug” Similarly if you are compiling a “Release” version then the resulting “dll” will be placed in a subdirectory called “Release”.
Quadstone Paramics V4 12

Quadstone Paramics V4 Programmer User Guide
4 QPO – Override Functions
4.1 Overview
Override functions let the user replace algorithms / routines in the core Paramics model with their own code. This is useful for academic research where the researcher can utilise the power of the Paramics system while still maintaining the flexibility to experiment as needed.
4.2 Function Summery
The following text provides a brief summery of each override function purpose and how each can be used by the user to override the existing algorithms in the Paramics core model:
• void qpo_CFM_behaviour(VEHICLE* vehicle) – This function lets the user define how a vehicles behavioural characteristic are assigned;
• float qpo_CFM_constrainedAcceleration(VEHICLE* vehicle, LINK* link, float speed, float dist) – This function lets the user override the car following mode implemented in Paramics;
• float qpo_CFM_curveSpeed(float r, LINK* link) – This function defines how vehicles react to curved road segments and how the radius of the curve effects the vehicle speed;
• float qpo_CFM_followingAcceleration(VEHICLE* vehicle, VEHICLE* aheadvehicle, float gap, LINK* link) - This function lets the user override the car following mode implemented in Paramics;
• float qpo_CFM_gradientAcceleration(int type, int age, float speed, float gradient, float acc) - This function lets the user override the car following mode implemented in Paramics;
• float qpo_CFM_headwayFactor(VEHICLE* vehicle, LINK* link) - This function allows the user to influence a specific vehicles target headway;
• float qpo_CFM_linkSpeed(LINK* link, VEHICLE* vehicle) - This function defines the maximum obtainable speed the given vehicle can achieve on the given link;
• int qpo_CFM_lookAheadCount(int awareness) – This function defines how far in front a vehicle can see, i.e. 2 cars , 3 cars etc.
• float qpo_CFM_minimumGap(void) – This function defines the minimum gap between two vehicles;
• float qpo_CFM_rampMergeHeadway(VEHICLE* vehicle) – This function defines how a vehicles headway is effected in and around a ramp merging area;
• float qpo_CFM_rampRevertDistance(VEHICLE* vehicle) – This function defines when a vehicles headway returns to normal conditions after passing or merging from a ramp;
• float qpo_CFM_safeDistance(VEHICLE* vehicle, float speed) – This function defines how the safe distance between two vehicles is calculated;
Quadstone Paramics V4 13

Quadstone Paramics V4 Programmer User Guide
• float qpo_CFM_stoppingDistance(VEHICLE* vehicle) - This function defines how the stopping distance for a vehicle is calculated;
• float qpo_CFM_thresholdDistance(VEHICLE* vehicle) – This function defines the threshold distance for a vehicle;
• float qpo_LCM_forceMergeDistance(VEHICLE* vehicle, VEHICLE* remvehicle) – This function defines the distance between two vehicles where the minor vehicle can force into the major traffic stream;
• Bool qpo_LCM_gapExists(VEHICLE* vehicle, VEHICLE* aheadvehicle, VEHICLE* behindvehicle, LINK* link, Bool u) – This function defines gap acceptance for a vehicle;
• void qpo_LCM_laneUsage(VEHICLE* vehicle, LINK* link, int *loLane, int *hiLane) – This function defines how a vehicle lane range is effected in different types of links;
• Bool qpo_LCM_moveIn(VEHICLE* vehicle, VEHICLE* infrontvehicle[], VEHICLE* behindvehicle[], LINK* link) – This function defines the logic for a vehicle to change lane to a lane with a lower index;
• Bool qpo_LCM_moveOut(VEHICLE* vehicle, VEHICLE* infrontvehicle[], VEHICLE* behindvehicle[], LINK* link) – This function defines the logic for a vehicle to change lane to a lane with a higher index;
• int qpo_LCM_overtakeTime(VEHICLE* vehicle) – This function sets the time required for a vehicle to initiate a lane changing manoeuvre;
• int qpo_LCM_passTime(VEHICLE* vehicle) ) – This function sets the time required for a vehicle to complete a lane changing manoeuvre;
• int qpo_LCM_resetTime(VEHICLE* vehicle) ) – This function sets the time required to elapse before a new lane changing manoeuvre can be initiated;
• float qpo_LCM_signpostAllowDistance(VEHICLE* vehicle, float signposting) – This function sets the distance before a signpost where vehicles will create gaps to let other driver change lanes;
• float qpo_LCM_signpostMergeDistance(VEHICLE* vehicle, float signposting, Bool urgent) – This function sets the (urgent) distance inside a signpost where vehicles will create gaps to let other driver change lanes;
• int qpo_RTM_decision(LINK* link, VEHICLE* vehicle) – This function is used to calculate route choice through the network on a link by link basis;
• Bool qpo_RTM_enable(void) – This function is used to enable user defined route choice;
• void qpo_RTM_nextLink(LINK* link, VEHICLE* vehicle, int nextout, LINK* *nextlink, int *newdestp) – This function is used to set a vehicle stow node look ahead;
• Bool qpo_SCO_gapExists(VEHICLE* vehicle, VEHICLE* aheadvehicle, VEHICLE* behindvehicle, LINK* link, Bool u) – This function is used for sing carriageway overtaking, to check whether or not a gap in the oncoming traffic exists;
Quadstone Paramics V4 14

Quadstone Paramics V4 Programmer User Guide
• Bool qpo_SCO_pullIn(LINK* link, VEHICLE* vehicle) – This function defines the logic for a vehicle to change lane back out of the opposite side of the carriageway to avoid an head-on collision with on coming traffic;
• Bool qpo_SCO_pullOut(LINK* link, VEHICLE* vehicle) – This function defines the logic for a vehicle to change lane onto the opposite side of the carriageway to overtake a slow moving vehicle;
Quadstone Paramics V4 15

Quadstone Paramics V4 Programmer User Guide
5. QPX – Extending Functions
5.1 Overview
Extending functions let the user add new code to the Paramics simulation; they act as entry points to the Paramics software where the user can “hook” in their own code extending the model. In many cases a programmer plugin will have at least one QPX function. The breadth of the extending functions interface has been increased substantially in V4. There are many more entry points to the simulation and new functions to integrate with network editing and object selection in the main graphics display.
5.2 Function Summery
The following text provides a brief summery of each extending function indicating where the function is placed in the simulation loop:
• void qpx_CFG_parameterFile(char *filename, int count) – called when an API parameters file is specified by the user;
• void qpx_DRW_instrumentView(void) – called at the end of each simulation loop, this function lets the user add their own graphics to the Paramics display;
• void qpx_DRW_modelView(void) ) – called at the end of each simulation loop, this function lets the user add their own graphics to the Paramics display;
• void qpx_GUI_editorSelection(void) – called when the editor selections change, this function lets the user integrate their plugin with the Paramics network editor;
• void qpx_GUI_layer(char *name, Bool on) - called when a user defined menu entry in the Modeller GUI is pressed, this function lets users add and access menu bar items in Paramics Modeller;
• void qpx_GUI_parameterToggle(char *filename, int index, char *label, Bool value)
• void qpx_GUI_parameterValue(char *filename, int index, char *label, float value)
• void qpx_GUI_tool(char *name) - called when a user defined menu entry in the Modeller GUI is pressed, this function lets users add and access menu bar items in Paramics Modeller;
• void qpx_GUI_viewSelection(void) – called when the editor selections change, this function lets the user integrate their plugin with the Paramics simulation display;
• void qpx_LNK_timeStep(LINK* link) - called for each link in the Paramics network at each simulation timestep;
• void qpx_NET_close(void) – called once when the Paramics network is closed;
Quadstone Paramics V4 16
Quadstone Paramics V4 Programmer User Guide
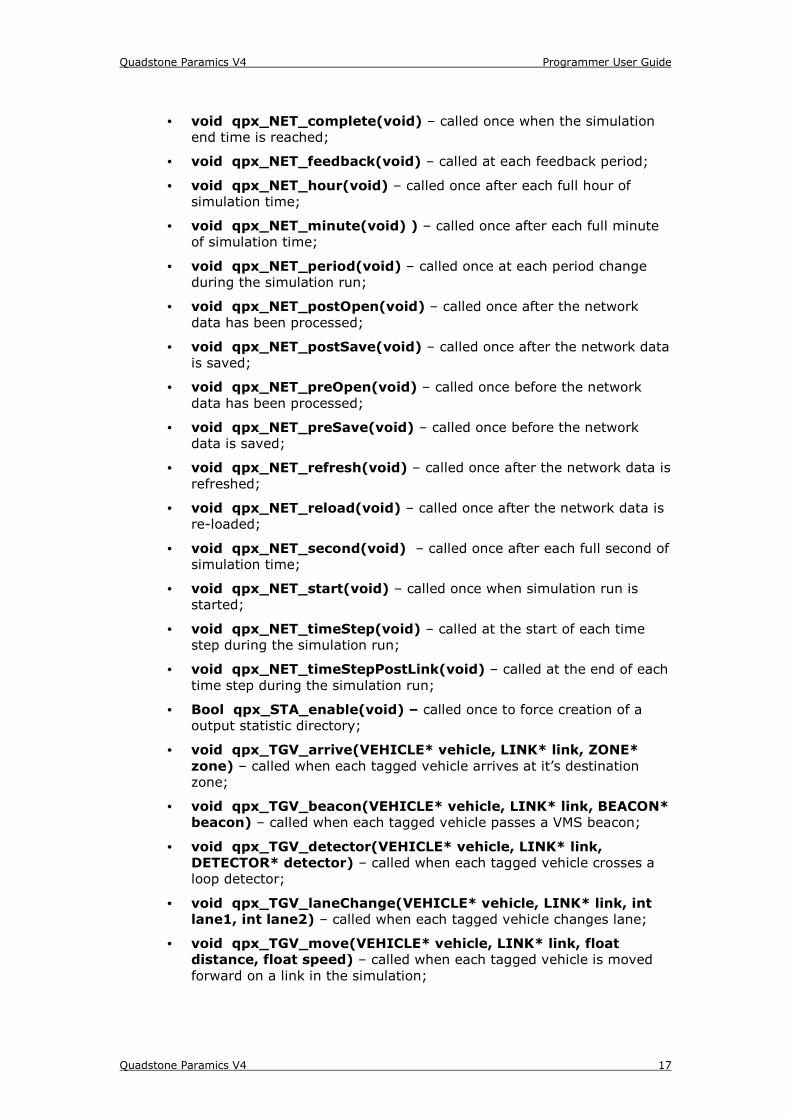
• void qpx_NET_complete(void) – called once when the simulation end time is reached;
• void qpx_NET_feedback(void) – called at each feedback period;
• void qpx_NET_hour(void) – called once after each full hour of simulation time;
• void qpx_NET_minute(void) ) – called once after each full minute of simulation time;
• void qpx_NET_period(void) – called once at each period change during the simulation run;
• void qpx_NET_postOpen(void) – called once after the network data has been processed;
• void qpx_NET_postSave(void) – called once after the network data is saved;
• void qpx_NET_preOpen(void) – called once before the network data has been processed;
• void qpx_NET_preSave(void) – called once before the network data is saved;
• void qpx_NET_refresh(void) – called once after the network data is refreshed;
• void qpx_NET_reload(void) – called once after the network data is re-loaded;
• void qpx_NET_second(void) – called once after each full second of simulation time;
• void qpx_NET_start(void) – called once when simulation run is started;
• void qpx_NET_timeStep(void) – called at the start of each time step during the simulation run;
• void qpx_NET_timeStepPostLink(void) – called at the end of each time step during the simulation run;
• Bool qpx_STA_enable(void) – called once to force creation of a output statistic directory;
• void qpx_TGV_arrive(VEHICLE* vehicle, LINK* link, ZONE* zone) – called when each tagged vehicle arrives at it’s destination zone;
• void qpx_TGV_beacon(VEHICLE* vehicle, LINK* link, BEACON* beacon) – called when each tagged vehicle passes a VMS beacon;
• void qpx_TGV_detector(VEHICLE* vehicle, LINK* link, DETECTOR* detector) – called when each tagged vehicle crosses a loop detector;
• void qpx_TGV_laneChange(VEHICLE* vehicle, LINK* link, int lane1, int lane2) – called when each tagged vehicle changes lane;
• void qpx_TGV_move(VEHICLE* vehicle, LINK* link, float distance, float speed) – called when each tagged vehicle is moved forward on a link in the simulation;
Quadstone Paramics V4 17

Quadstone Paramics V4 Programmer User Guide
• void qpx_TGV_targetHeadway(VEHICLE* vehicle, LINK* link) – called when a tagged vehicle reaches is target headway;
• void qpx_TGV_targetSpeed(VEHICLE* vehicle, LINK* link) – called when a tagged vehicle reaches it’s target speed;
• void qpx_TGV_transfer(VEHICLE* vehicle, LINK* link1, LINK* link2) – called when a tagged vehicle transfers from one link to another in the simulation;
• void qpx_VHC_arrive(VEHICLE* vehicle, LINK* link, ZONE* zone) – called when a vehicle arrives at it’s destination zone;
• void qpx_VHC_beacon(VEHICLE* vehicle, LINK* link, BEACON* beacon) – called when a vehicle passes a VMS beacon;
• void qpx_VHC_detector(VEHICLE* vehicle, LINK* link, DETECTOR* detector) – called when a vehicle passes a loop detector;
• void qpx_VHC_laneChange(VEHICLE* vehicle, LINK* link, int lane1, int lane2) – called when a vehicle changes lane;
• void qpx_VHC_move(VEHICLE* vehicle, LINK* link, float distance, float speed) – called when a vehicle moves forward on a link in the simulation;
• void qpx_VHC_release(VEHICLE* vehicle) – called when a vehicle is released from a zone;
• void qpx_VHC_targetHeadway(VEHICLE* vehicle, LINK* link) – called when a vehicle reaches is target headway;
• void qpx_VHC_targetSpeed(VEHICLE* vehicle, LINK* link) – called when a vehicle reaches it’s target speed;
• void qpx_VHC_timeStep(VEHICLE* vehicle) – called for each vehicle in the simulation each timestep;
• void qpx_LNK_vehicleTimeStep(LINK* link, VEHICLE* vehicle) – called for each vehicle on each link in the network each simulation time step;
• void qpx_VHC_transfer(VEHICLE* vehicle, LINK* link1, LINK* link2) – called for each vehicle in the network when it moves from one link to another;
• void qpx_ZNE_timeStep(ZONE* zone) – called for each zone in the network each simulation time step.
Quadstone Paramics V4 18
Quadstone Paramics V4 Programmer User Guide
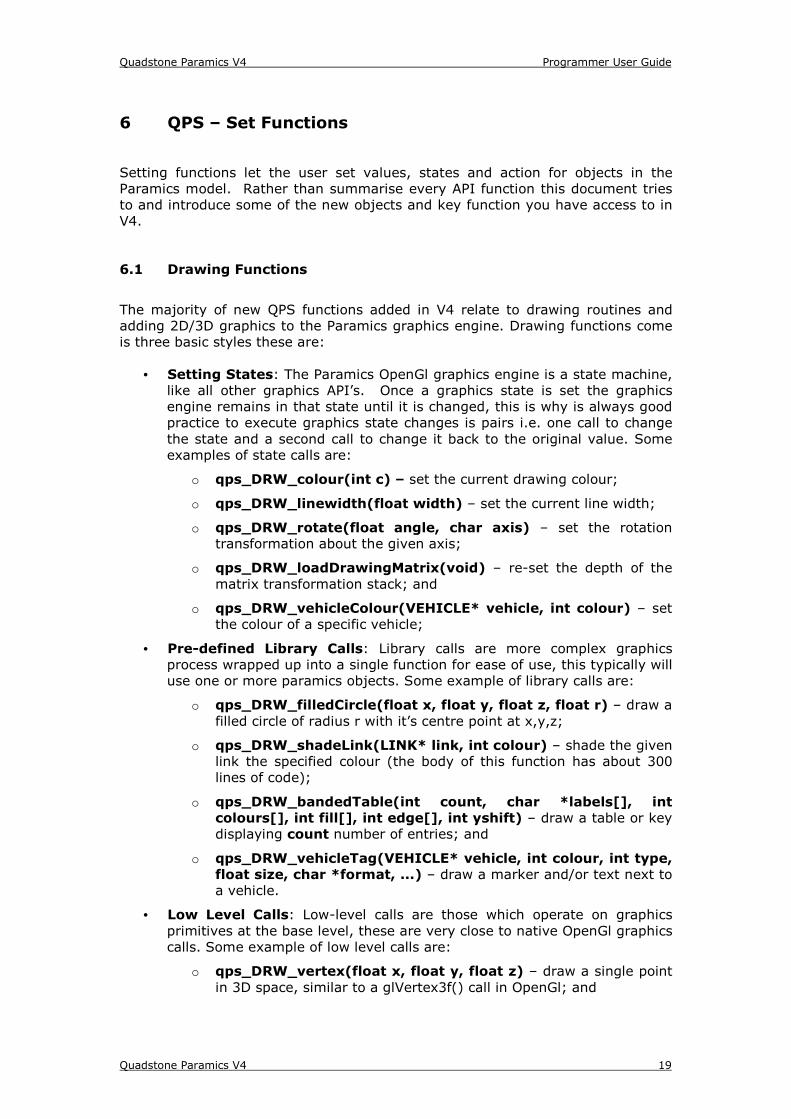
6 QPS – Set Functions
Setting functions let the user set values, states and action for objects in the Paramics model. Rather than summarise every API function this document tries to and introduce some of the new objects and key function you have access to in V4.
6.1 Drawing Functions
The majority of new QPS functions added in V4 relate to drawing routines and adding 2D/3D graphics to the Paramics graphics engine. Drawing functions come is three basic styles these are:
• Setting States: The Paramics OpenGl graphics engine is a state machine, like all other graphics API’s. Once a graphics state is set the graphics engine remains in that state until it is changed, this is why is always good practice to execute graphics state changes is pairs i.e. one call to change the state and a second call to change it back to the original value. Some examples of state calls are:
o qps_DRW_colour(int c) – set the current drawing colour;
o qps_DRW_linewidth(float width) – set the current line width;
o qps_DRW_rotate(float angle, char axis) – set the rotation transformation about the given axis;
o qps_DRW_loadDrawingMatrix(void) – re-set the depth of the matrix transformation stack; and
o qps_DRW_vehicleColour(VEHICLE* vehicle, int colour) – set the colour of a specific vehicle;
• Pre-defined Library Calls: Library calls are more complex graphics process wrapped up into a single function for ease of use, this typically will use one or more paramics objects. Some example of library calls are:
o qps_DRW_filledCircle(float x, float y, float z, float r) – draw a filled circle of radius r with it’s centre point at x,y,z;
o qps_DRW_shadeLink(LINK* link, int colour) – shade the given link the specified colour (the body of this function has about 300 lines of code);
o qps_DRW_bandedTable(int count, char *labels[], int colours[], int fill[], int edge[], int yshift) – draw a table or key displaying count number of entries; and
o qps_DRW_vehicleTag(VEHICLE* vehicle, int colour, int type, float size, char *format, ...) – draw a marker and/or text next to a vehicle.
• Low Level Calls: Low-level calls are those which operate on graphics primitives at the base level, these are very close to native OpenGl graphics calls. Some example of low level calls are:
o qps_DRW_vertex(float x, float y, float z) – draw a single point in 3D space, similar to a glVertex3f() call in OpenGl; and
Quadstone Paramics V4 19

Quadstone Paramics V4 Programmer User Guide
o qps_DRW_objectBegin(int object) – start a new drawing object, similar to a glBegin() call in OpenGl;
You can also add native OpenGl calls into your plugin code providing you include the relevant OpenGL header files and link against the public OpenGl libraries.
6.2 GUI Functions
A range of Graphical User Interface functions have been added to let you add and access menu items in the view and tools menu in Paramics Modeller. You can add a new menu item to the modeller toolbar and execute your custom code when the toolbar button is pressed or, if you add a toggle button, when the toggle is checked/unchecked.
• qps_GUI_addTool(char *name) – this function lets the user add a toolbar button to the main menu bar in Paramics modeller, it’s corresponding QPX function, qpx_GUI_tool(char *name), is called when the users menu item is pressed; and
• void qps_GUI_addViewLayer(char *name) – This function lets the user add a toggle button to the Views>>Context Layers menu bar in Paramics Modeller, it’s corresponding QPX function, qpx_GUI_layer(char *name, Bool on), is called when the users menu item is pressed.
If your are using an separate user interface API for your plugin code i.e. Java or MFC you can use these functions to open your dialogs/user interfaces.
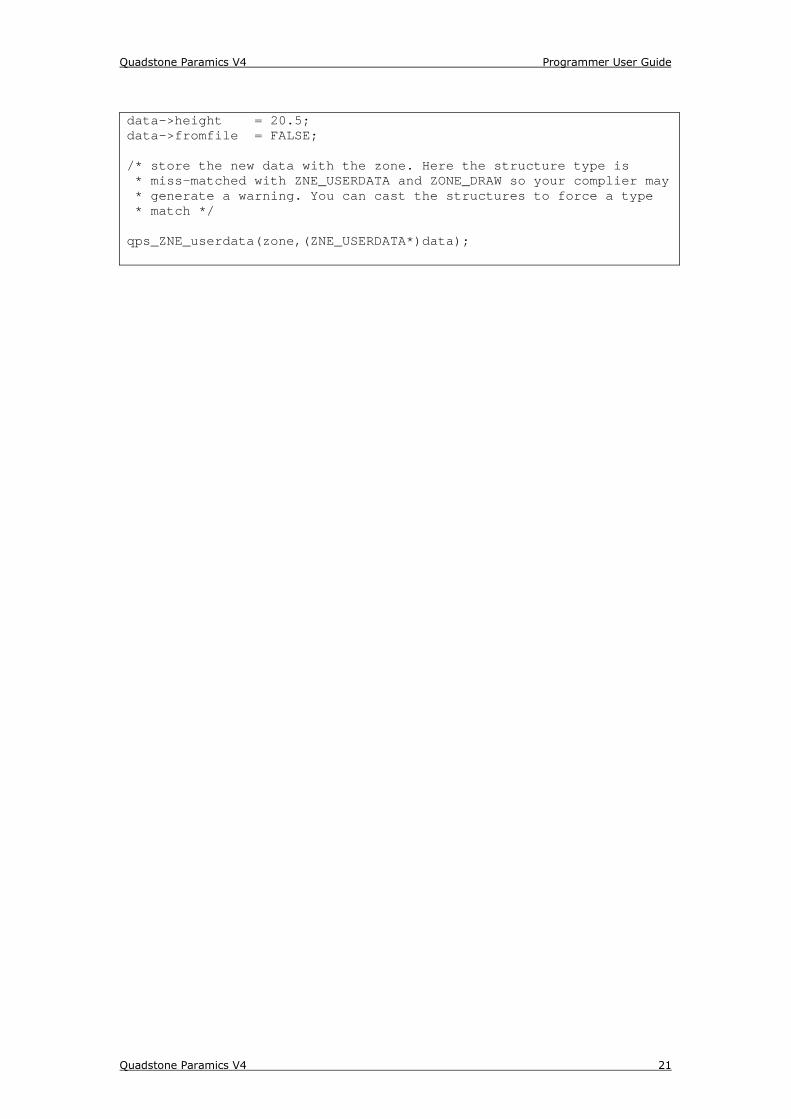
6.3 User Data Functions
User data functions are used to associate user defined data structures with objects in the Paramics code e.g. a zone. An example of how to use a user data function would be: typedef struct ZONE_DRAW_s ZONE_DRAW; struct ZONE_DRAW_s { float height; int colour; Bool fromfile; }; ZONE_DRAW *data = NULL; int index = 1; ZONE *zone = NULL; zone = qpg_NET_zone(index); /* get the zone pointer */ if(!zone) continue; /* check for a bad zone */ data = calloc(1,sizeof(ZONE_DRAW)); /* store the default attributes */ data->colour = API_BLUE2;
Quadstone Paramics V4 20
Quadstone Paramics V4 Programmer User Guide
data->height = 20.5; data->fromfile = FALSE; /* store the new data with the zone. Here the structure type is * miss-matched with ZNE_USERDATA and ZONE_DRAW so your complier may * generate a warning. You can cast the structures to force a type * match */ qps_ZNE_userdata(zone,(ZNE_USERDATA*)data);
Quadstone Paramics V4 21
Quadstone Paramics V4 Programmer User Guide
7 QPG – Get Functions
Getting functions let the user query the value and state of objects in the Paramics model. Rather than summarise every API function this document tries to and introduce some of the new objects and key function you have access to in V4. Needless to say the scope of data that can be accessed for core model objects i.e. Links, Vehicles, Zones etc. has been increased, however some new objects have been introduced, these are summarised below:
7.1 Bus/PT Data
Bus/PT data functions have the BSR and BST object codes. The bus/pt interface in Paramics Modeller has been completely reworked to provide more flexibility; this has followed through to the API. Bus/PT data function let you query specific information about the PT services and vehicle present in the network but also let you dynamically control when PT vehicles should be released, which PT line they should follow, and how long they should wait at a PT stop.
7.2 Configuration Data
Configuration data functions have the CFG object code. The configuration functions let you access the elements of the simulation configuration, essentially the network configuration file.
7.3 Demand Data
Demand data functions have the DMD object code. Demand object functions let you query demand information from the paramics model i.e. the number of matrices, the demand periods, individual OD cell values etc. Also you can set OD demand levels using the corresponding QPS functions.
7.4 Drawing Data
QPG drawing functions are mostly related to querying states in the graphics engine i.e. to query/store the current state of an aspect of the graphics engine before and after you change it.
7.5 Editor Actions
Editor functions have the EDT object code. These function let you query which objects are being currently edited in the paramics Modeller display i.e. which nodes, links, turning movements are selected and being changed. These functions can be used in conjunction with the QPX editor calls to integrate you plugin with the Paramics Modeller editor, allowing you to ad new functionality specific to your plugin.
7.6 Selection Actions
Selection functions have the GUI object code. These functions operate in the same manor as the EDT function mentioned above and can be used to integrate
Quadstone Paramics V4 22

Quadstone Paramics V4 Programmer User Guide
with the users mouse actions/selection in the Paramics modeller graphical display.
7.7 User Data
User data functions exist for all core object types, as seen above user data can be associated with Paramics objects to help extend the core model.
7.8 Category Data
Category data functions have the CAT object code. Category function can be used to query attribute of the link categories in the paramics model. Categories are read only objects and no QPS function exist for them.
7.9 Positional Data
Positional data functions have the POS object code. Positional functions are used to retrieve 3 dimensional position data about the location and orientation of paramics objects in the 3D paramics world. Positional data can be retrieved for core model objects like vehicles, nodes, zones, kerb point etc. but also for world positions like, the current viewpoint and cross hair.
7.10 Statistics Data
Statistic data functions have the STA object code. Statistics functions provide a series of general performance statistics together with more detailed link/lane based statistics.
7.11 Utility Functions
Utility functions have the UTL object code. Utility functions are provided to aid plugin development and provide services such as, access to random numbers and distribution algorithms, file access and permission checking, units switching, environment variables, and licensing.
7.12 Ramps and Slip Lanes
Ramp and slip lane access is provide in V4 with the RMP and SLP object codes. User can query the vehicles on ramps and slip lane for use in car following and lane changing models.
Quadstone Paramics V4 23
Quadstone Paramics V4 Programmer User Guide
8 Migrating from V3 to V4
So far you have seem that the V3 programmer API and the new V4 programmer API are significantly different however this does not mean that you cannot run your existing V3 plugins in v4 the migration process is very simple you don’t have to re-write a single line of code. To migrate an existing V3 plugin to V4 you will need to re-compile after you make the following minor adjustments:
1. Include the v4 API header file called programmer.h; this replaces the need to include api_user.h, plugin.h, and truefalse.h, in pre v4 plugins.
2. Add api_dllentry.c and api_oldnames.c to your project or makefiles,
these can be found in the 'include' directory.
3. Add '#define QPV3_TYPES' at the top of each of your plugin C files before any #include statements
4. On Win32, change your project settings to include modeller.lib and
simcore.lib for plugins you wish to use GUI or graphic elements with or just simcore.lib for projects with no GUI/graphics elements i.e. those you may use with Processor rather than Modeller.
A worked example for migrating from V3 to V4 is provided with the programmer examples shipped in V4.
Quadstone Paramics V4 24

Quadstone Paramics V4 Programmer User Guide
9 Parameters Files
9.1 Overview
Parameter files enable the definition of simple user interface elements for Paramics plugins. Paramics can be directed to parse a parameters file by adding the following line to the configuration file of the network being used:
read parameters file "MyParametersFile"
This directs Paramics to parse a file called “MyParametersFile” in the network data directory. An example of a parameters file follows:
api coefficients 3
0.81 "blah" range 0 to 2 precision 2 2.0 “wible” True "foo"
This indicates to Paramics that the plugin has three variables called “blah”, “wible” and "foo". The first two variables are floating point numbers, where as the third value is a Boolean variable. The range for “blah” defines the range of values that the variable can vary over. The precision indicates the degree of accuracy, i.e. precision 2 means use 2 decimal places, where as precision 0 means use integers only. When Paramics parses a parameters file, it adds a menu entry to the Tools menu of the Modeller main menu bar. By default a menu button will be created with a default name how ever you can supply a specific name for the menu entry using the following syntax in the associated parameters file: tool “Example…”
api coefficients 3
0.81 "blah" range 0 to 2 precision 2 2.0 “wible” True "foo"
This will create an entry called “Example…” in the Tools menu, selecting this menu option will raise a window with one slider for “blah”, one label for “wible” and a toggle for “foo”.
9.2 Associated Functions
The following QPX and QPS/QPG functions are associated with reading parameter files and updating/changing parameter variables.
Quadstone Paramics V4 25

Quadstone Paramics V4 Programmer User Guide
QPX functions:
• void qpx_CFG_parameterFile (char *filename,int count);
• void qpx_GUI_parameterValue (char *filename,int index,char *label, float value);
• void qpx_GUI_parameterToggle (char *filename,int index,char *label,Bool value);
QPS/QPG functions:
• void qps_GUI_value(char *filename, int index, float value);
• void api_toggle_set(char *filename, int index, Bool value);
Before a parameters file is parsed a call to qpx_CFG_parameterFile is made. This allows the plugin to setup any required structures for the parameters file. The function is passed the name of the parameters file and the number of variables defined in it. Then as each variable is parsed a call is made to qpx_GUI_parameterValue or qpx_GUI_parameterToggle . This allows the plugin to store the value of the variable defined in the parameters file. The function is passed the name of the parameters file, the name of the variable, the index of the variable (i.e. in the case above variables index 0, 1 or 2) and the value defined in the file. Once the network is loaded, if the value of the variable is changed via the sliders or toggles, then additional calls to qpx_GUI_parameterValue or qpx_GUI_parameterToggle are made so that the plugin can be updated with the new value. It is sometimes useful to know when a network is completely parsed (this includes all parametes files if one is available) a call is made to qpx_NET_postOpen. After the call to qpx_NET_postOpen all further calls to the qpx_GUI_parameterValue or qpx_GUI_parameterToggle are from the dynamic interface. This remains the case until the next call to qpx_CFG_parameterFile is made, at which point a new network is being loaded. The parameters can also be used to display current values that are dynamically changing in the plugin. For example, if the plugin needs to update the value of “foo”, then it can make a call to qps_GUI_value. This has the effect of updating the display in Paramics to a new value supplied by the user. In the same manner qps_GUI_toggle would be used for “foo”.
Quadstone Paramics V4 26

Quadstone Paramics V4 Programmer User Guide
10 Worked Examples
10.1 Overview
During the standard installation process the example Paramics Programmer plugins will be installed in to the default directory location:
<PARAMICSHOME>\programmer\plugins\
i.e.
C:\Program Files\Paramics\programmer\plugins\
Each example network is designed to illustrate a different aspect of the API interface, the table below summarises this. Example Name Purpose
Base The base template plugin, this should be used as the starting point for creating new plugins.
apiv3_migration_example An example V3 to V4 migration plugin, this illustrates how to update your code from V3 to V4 format.
apiv4_example1 This example is a basic example introducing the core concepts of the API using the “Hello World” program.
apiv4_example2 This plugin shows how to calculate the average all vehicle acceleration and deceleration (ms-2) for vehicles traversing each link in a network. Each vehicles acceleration (or deceleration) will be calculated as the rate of change in speed for a given time period (in this case a single time step).
apiv4_example3 The aim of this example is to illustrate the use of a Parameters files with the Programmer API. This allows the user to define parameters, and associated ranges, which Programmer will then translate to slider (or toggle button) controls on the API control panel while modeller is running. These can then be used interactively to 'change' variable used in the associated plugin.
apiv4_example4 The aim of this example is to introduce some of those functions that control the release of vehicles during a simulation. The example will allow the user to set up an API control panel from which the release of vehicles into the network can be controlled interactively.
apiv4_example5 The aim of this example is to illustrate the use of those functions associated with lane changing. Here we will construct a hypothetical High Occupancy Vehicle (HOV) lane-changing module. This module will motivate vehicles that can use HOV lanes to do so , but without restricting their lane choice to non-HOV lanes.
apiv4_example6 The aim of this example is to demonstrate how users can create a plugin to control/enhance the route choice of a vehicle. Here we will construct a Static Worst Cost Route
Quadstone Paramics V4 27
Quadstone Paramics V4 Programmer User Guide
Choice model such that drivers will always take the most expensive (time to destination) turn at the end of a link; provided that the cost of that turn is less than the cost of the last turn made (to avoid going around in circles). Basically DVU's will take the long way home !
apiv4_example7 The aim of this example is to illustrate the use of detectors and VMS beacons. Here we will construct a hypothetical 'ITS' situation where loop detectors will be used to collect data from our network and VMS beacons will be used to show associated information to our drivers. A combination of detectors and beacons will be used to implement a simple form of speed control requesting that driver reduce their speeds when link flows exceed defined thresholds.
apiv4_example8 Here we will construct a hypothetical 'TIS' situation where drivers (DVU's) are advised on network congestion through VMS signs and provided with details of available alternate route choices, avoiding the congested areas. In addition to the mechanics of influencing a driver route choice we must also consider each DVU's reaction to the ITS information being displayed to them. We need to consider the possible factors affecting a drivers understanding, perception, and trust in any VMS beacons message.
apiv4_example9 The aim of this example is to show some basic uses of the graphics API provided in Programmer V4. The three separate examples in this code use the Programmer API graphics interface to add some basic information to the Paramics display in 2D and 3D. This example does not try to explain how the much larger topic of 3D graphics works, nor is it intended to be an 'all you need to know' guide on the subject, but only an illustration of how to use the Programmer API graphics calls.
apiv4_example10 This plugin illustrate how you access the traffic signal in Paramics from the API. In this example we assume a ramp metering exercise. The user accesses the plugin control panel from the Paramics Modeller Tools menu to control the state of the traffic signals. In the real world these triggers can come directly from a hardware controller etc.
apiv4_example11 This example is designed to show how the user can take direct control of signalised junction in the Paramics model. In this example we let the user change the phasing of traffic signals manually overriding any default action implied by the software. This process is useful for controlling signals in the Paramics model from external sources i.e. other software application of hardware controllers.
apiv4_building-shade The aim of this example is to extend the use of the Programmer graphics API with a semi-practical example. Also the use of user-defined structures that can be associated with Paramics objects (zones, links, vehicles) will be introduced.
A set of licensed example plugins are provided in the default directory location to allow users who do not have a valid Programmer license to see the functionality
Quadstone Paramics V4 28
Quadstone Paramics V4 Programmer User Guide
of the example Plugin. These licenses plugins can be loaded in the same way a user defined Plugin as described in chapter 3 above.
Quadstone Paramics V4 29