quick! plant something! issue 1: raised beds
DESCRIPTION
Meet our brave survivors, Les and Kathy Sue, as they fight off zombies and get going growing fresh food!TRANSCRIPT

Welcome to the *irst issue of “Quick! Plant Something!”Keep an eye out for “Easter Egg Links” throughout this issue as well as links to our products page.
Don’t see something you’d like to have? Email us!
Share with your fellow survivors by liking us on facebook, or sharing the link to our website: http://www.zombievictorygardens.com, or sharing the link to this document.
Together, we can save the world, one garden at a time.
Quick! Plant Something! Issue 1: Raised Beds Copyright (c) 2012 by Kathy Voth and Leah Ashley Esser, Zombie Victory Gardens, LLCAll rights reserved.
This document is protected under the copyright laws of the United States and other countries. This publication is for home use only and all other rights are expressly reserved by the copyright owner.
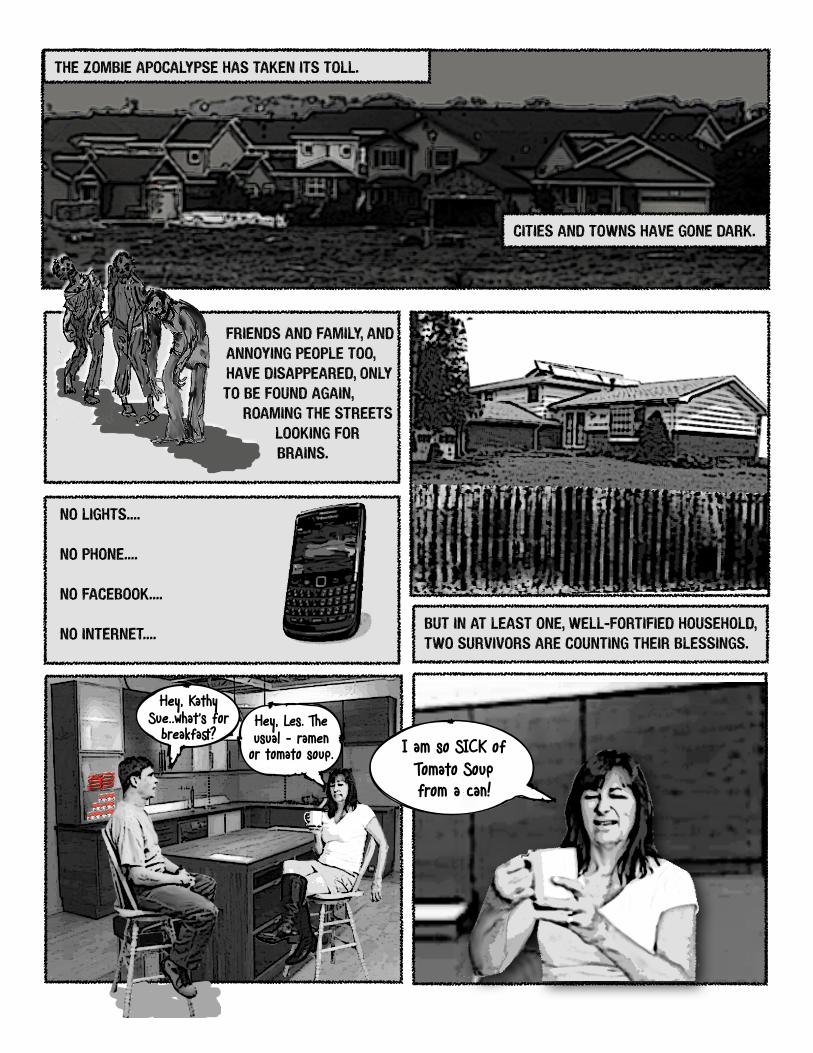
NO LIGHTS....
NO PHONE....
NO FACEBOOK....
NO INTERNET....
CITIES AND TOWNS HAVE GONE DARK.
BUT IN AT LEAST ONE, WELL-FORTIFIED HOUSEHOLD, TWO SURVIVORS ARE COUNTING THEIR BLESSINGS.
Hey, Kathy Sue..what’s for
breakfast?Hey, Les. The usual - ramen or tomato soup. I am so SICK of
Tomato Soup from a can!
THE ZOMBIE APOCALYPSE HAS TAKEN ITS TOLL.
FRIENDS AND FAMILY, AND ANNOYING PEOPLE TOO, HAVE DISAPPEARED, ONLY TO BE FOUND AGAIN,
ROAMING THE STREETS LOOKING FOR BRAINS.
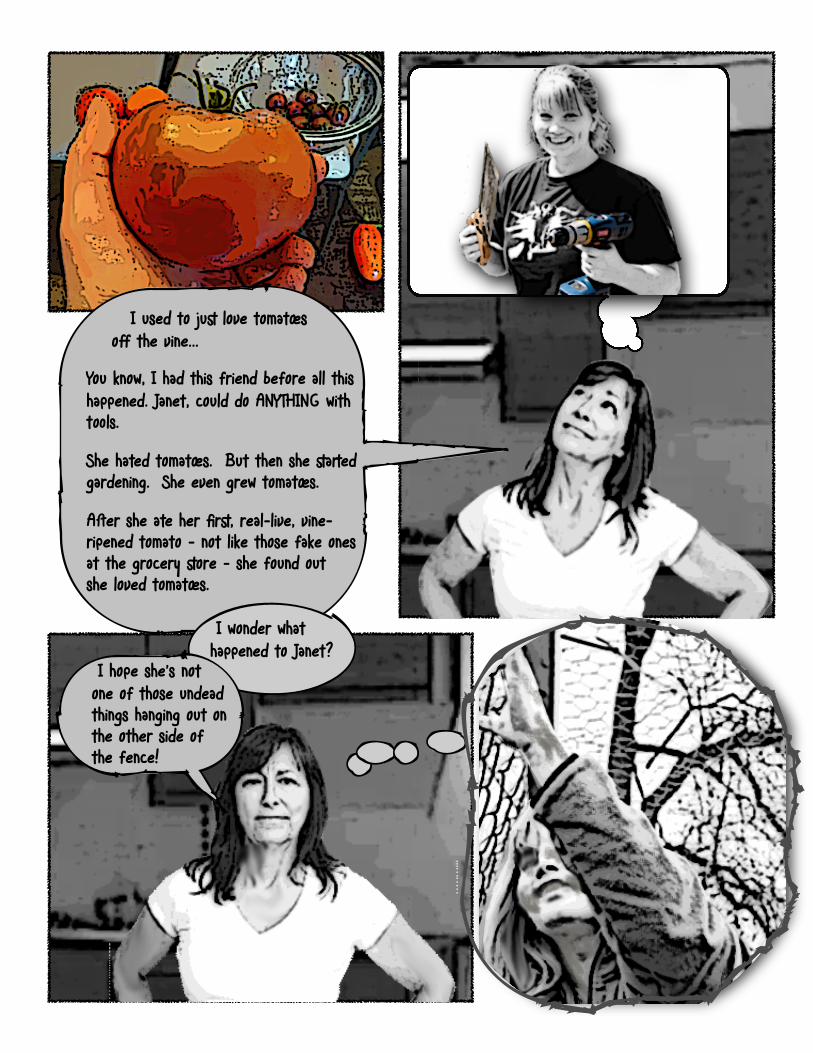
I used to just love tomatœs off the vine...
You know, I had this friend before all this happened. Janet, could do ANYTHING with t#ls. She hated tomatœs. But then she started gardening. She even grew tomatœs.
Aster she ate her first, real-live, vine-ripened tomato - not like those fake onesat the grocery store - she found out she loved tomatœs.
I wonder what happened to Janet?
I hope she’s not one of those undead things hanging out on the other side of the fence!

Strawberries...I used to just love fresh strawberries! And Gr%nbeans! But not together!
Kathy Sue, It’s time we started doing something more than just surviving!
Check out this b#k I’ve b%n reading.
This guy, Mel Bartholomew,writes all about how to grow f#d in raised beds.
I’ve got a bunch of other b#ks t#.
You are absolutely right, Les!
What this apocalypse n%ds is a little farming!
Quick! Let’s plant something!

Well, here’s what we’ve got to work with. L#ks like
we’ll have the 6 to 8 hours of sun we n%d.
THWACK!ZzzzT!ZzzzT!
There!That should k%p ‘em out!
SURVIVAL TIP: KEEP YOUR DRILL BATTERIES CHARGED AND READY FOR QUICK REPAIRS.
And it’s close to the house for quick access, and safety. If we make it
compact, it will be a lot less work.
And I can set up a watering system of some kind. Hey -
there’s an arm reaching thru’ the fence. We better take care of that.
I’ll get the machete. You get the drill and a board for repairs.
But I hate digging! How are we going to get the soil we n%d to fill the beds?
We’re not going to dig! We’re going to make our own soil from the best stuff out there.That’s the joy of raised beds!
STAY TUNED FOR:OUR ISSUE ON TURNINGDECOMPOSING THINGS INTO ENERGY. BROUGHT TO YOU BY ZOMBIE APOCALYPSE POWER (ZAP!)
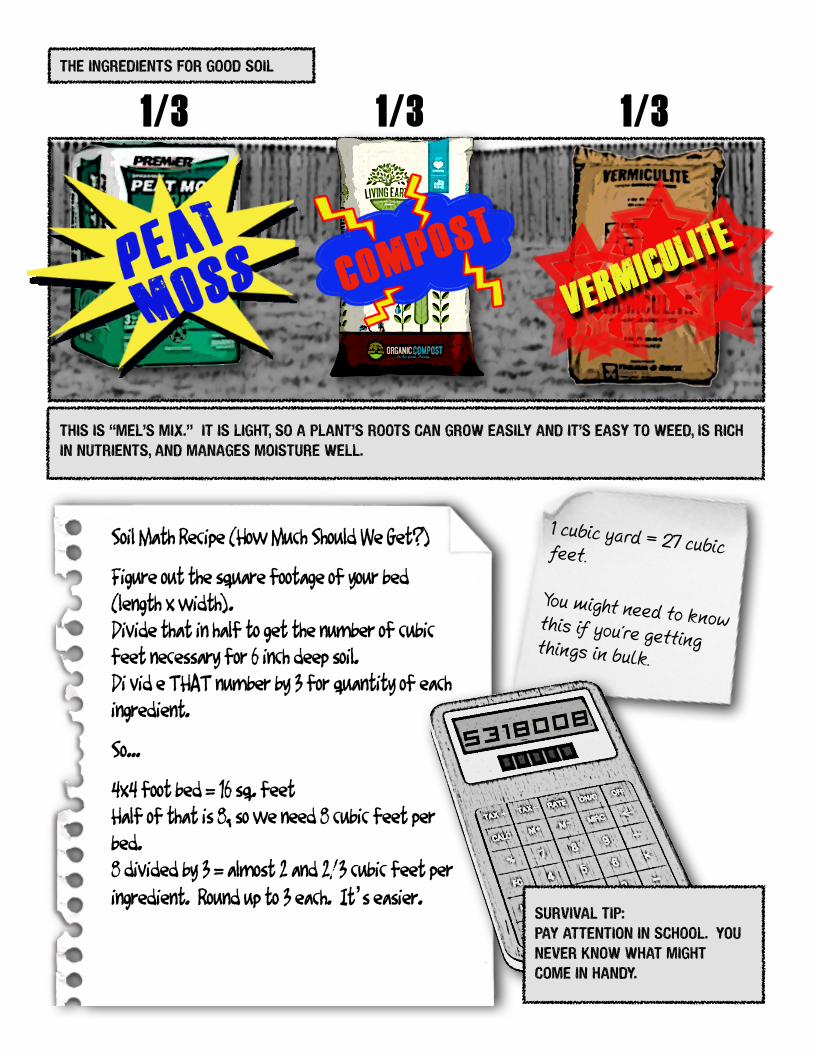
THE INGREDIENTS FOR GOOD SOIL
1/3 1/3 1/3
THIS IS “MEL’S MIX.” IT IS LIGHT, SO A PLANT’S ROOTS CAN GROW EASILY AND IT’S EASY TO WEED, IS RICH IN NUTRIENTS, AND MANAGES MOISTURE WELL.
Soil Math Recipe (How Much Should We Get?)
Figure out the square footage of your bed (length x width).Divide that in half to get the number of cubic feet necessary for 6 inch deep soil.Di vid e THAT number by 3 for quantity of each ingredient.
So...
4x4 foot bed = 16 sq. feetHalf of that is 8, so we need 8 cubic feet per bed.8 divided by 3 = almost 2 and 2/3 cubic feet per ingredient. Round up to 3 each. It’s easier.
1 cubic yard = 27 cubic feet.
You might need to know this if you’re getting things in bulk.
SURVIVAL TIP:PAY ATTENTION IN SCHOOL. YOU NEVER KNOW WHAT MIGHT COME IN HANDY.

How about if we call it a day so we can get an early start on shopping in the morning? Yeah. Besides, it’s harder to
s% the creatures at night, so we might as well go inside.Hey, I saved a can of Sirloin Burger soup. How about dinner?
Thanks for the sirloin, Les. S% you in the morning!
G’night. I might head out early because I’ve got a lot to load. I’ll take the truck. You take the Prius.
THE GENTLE SOUNDS OF ZOMBIES WAKE LES AT DAWN. HE TAKES CARE OF HIS MORNING CHORE, CLEANING THE FENCE LINE OF CREATURES, AND THEN WRITES A QUICK NOTE.
GRRR...ARGH...

Undead blessing of the day - I get todrive heavy machinery now. And if I dent the truck, I can get a new one!
SURVIVAL TIP: WHEN YOU ENCOUNTER THE UNDEAD IN THE STREETS, PUTTING YOUR VEHICLE IN 4 WHEEL DRIVE PREVENTS SLIPPING.
Kathy Sue,
Headed out early to get compost,
peat moss and vermiculite. Putting
you in charge of what to put it in.
See you back at the ranch this
afternoon.
Les

...AND TAKES CARE OF A FEW OF THE UNDEAD ALONG THE WAY.
AFTER A HEARTY BREAKFAST OF RAMEN COOKED IN TOMATO SOUP AND MOTIVATED BY DREAMS OF FRESH FOOD, KATHY SUE HEADS OUT TO PICK UP VICTORY GARDEN SUPPLIES, A FEW SURPRISES FOR LES....
Victory Garden Supplies
Hardware StorePots 2x8sDrill & Batteries ScrewsTape measure weed matnails hammer (pink if possible)wheelbarrow Shovel
Craft Storecute fabric beadssewing machine threadmagic markers blinds for plant markersstring pinsapron pattern scissors
Bookstoreanything on gardeningsewing booksjewelry making book/magazinejournal
Undead blessing of the day - I always get the best parking space!

KS Notes for
building
successful raised
beds from Mel’s
All New Square
Foot Gardening.
No wider than 4 ft.Mel says the avg. person can reach 2 ft, so our 4 ft. beds mean we can reach everything in them without having to step in them.Most plants only need 6 inches of soil so I can save time and material by only filling beds 6 inches deep.
Leave aisles wide enough to move the wheelbarrow through easily. Good for harvesting & for bringing in soil materials
6 to 8 hours of sunshine!(But Leafy Greens and herbs like some shade.)
Cover the ground
under your beds with
weed mat to keep
weeds and grass
from invading.Put the garden near
the house for its
safety and yours. It
makes it easier to
water and harvest...
...REMEMBER - we don’t want dead things in the garden!
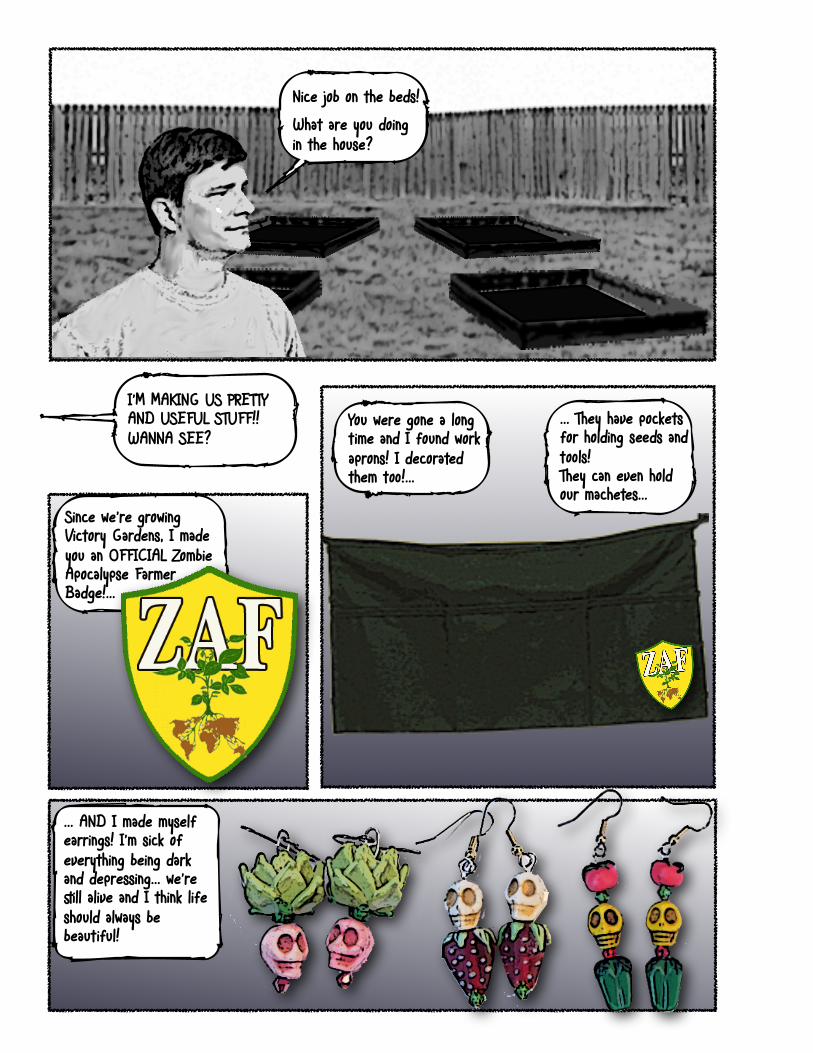
Nice job on the beds!What are you doing in the house?
I’M MAKING US PRETTY AND USEFUL STUFF!! WANNA SEE?
You were gone a long time and I found work aprons! I decorated them t#!...
... They have pockets for holding s%ds and t#ls! They can even hold our machetes...
Since we’re growing Victory Gardens, I made you an OFFICIAL Zombie Apocalypse Farmer Badge!...
... AND I made myself earrings! I’m sick of everything being dark and depressing... we’re still alive and I think life should always be beautiful!

I’m going back outside to make soil...
... I am not wearing an apron...
Now we n%d to mix all these things together and get them in the beds. Any thoughts on how to make that easy?
My old friend Janet mixed her own soil for her beds... She started out mixing on a tarp but then figured out a more efficient way....

WhatWould JanetDo?
Our wheelbarrow is a great place to mix the soil ingredients, and our shovel is the “measuring cup.” We put the same number of shovels-full of each ingredient into the wheelbarrow.
Each ingredient has a different weight, but we’re mixing for volume, so it’s only the size of your shovel full that matters.
We stir the ingredients up and then push the wheelbarrow to our beds. Rake it smooth and TA DA! We’re done!
SPECIAL PEAT MOSS NOTE:It has a lot of moisture in it, and early in the spring it can actually freeze into a block. So, first set bags in the sun to warm. Then,just before opening a bag, sit on it and bounce up and down to break it up. That way it’s easier to shovel.

Well done! Now we just n%d to get some s%ds and plants
I don’t know, Les, but I don’t think we have nearly enough beds for all the things I want to plant...
Well, I know we can put a lot of stuff in one square f#t with this method. So, let’s go plan it out before you work yourself to death.
WhatWould JanetDo?
Maybe so...and instead of more beds, there are lots of things I could plant in. Then we could use the patio and other small spots all over our yard for growing things t#! Like the stuff I remember at Janet’s place...
Plastic Pots and food containers
Empty pop bottles in wire hangers
Storage tubs and kiddie pools
Empty chicken feed sacks, canvas shopping bags, hanging tomato and pepper bags from the dollar store.
STAY TUNED FOR:OUR NEXT ISSUE“QUICK! PLANT TOMATOES!”AND LES WEARING AN APRON!
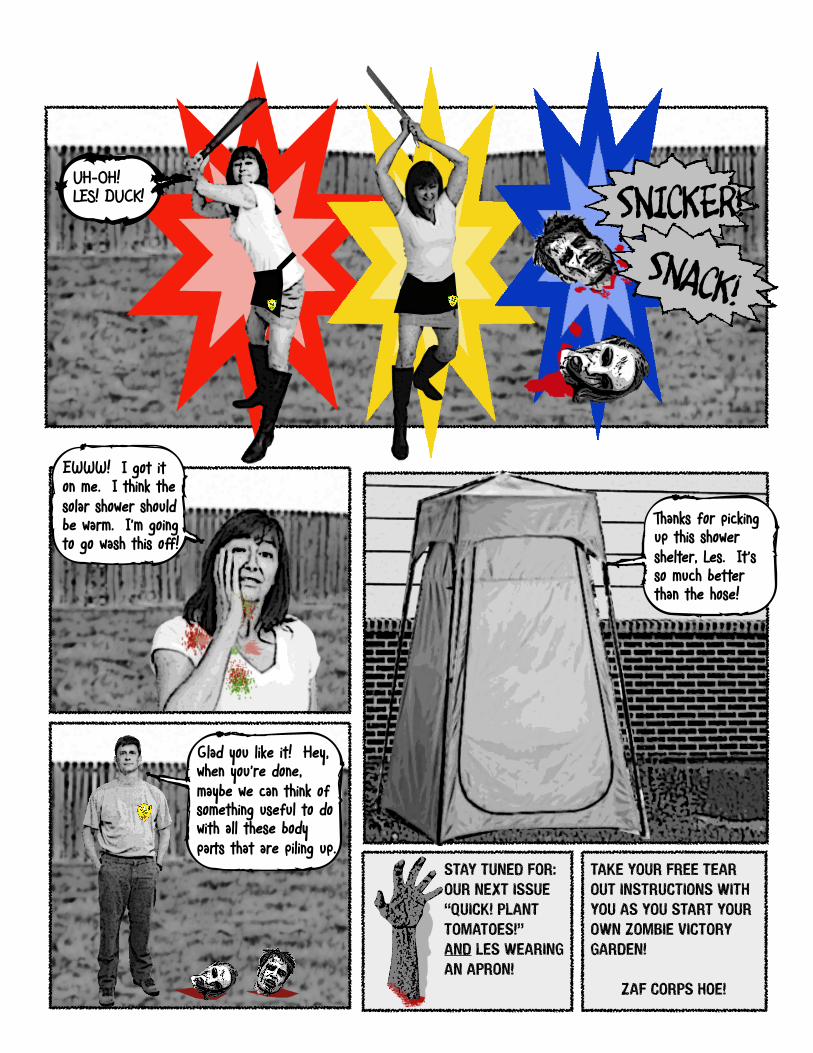
UH-OH! LES! DUCK!
EWWW! I got it on me. I think the solar shower should be warm. I’m going to go wash this off!
SNICKER!SNACK!
Glad you like it! Hey, when you’re done, maybe we can think of something useful to do with all these body parts that are piling up.
Thanks for picking up this shower shelter, Les. It’s so much better than the hose!
TAKE YOUR FREE TEAR OUT INSTRUCTIONS WITH YOU AS YOU START YOUR OWN ZOMBIE VICTORY GARDEN!
ZAF CORPS HOE!
Quick! Get your raised bed going!(Our job is to make it simple. Your job is to take a leap of faith and try.)
BRAINS REQUIRED (Dif]iculty): BODIES REQUIRED:
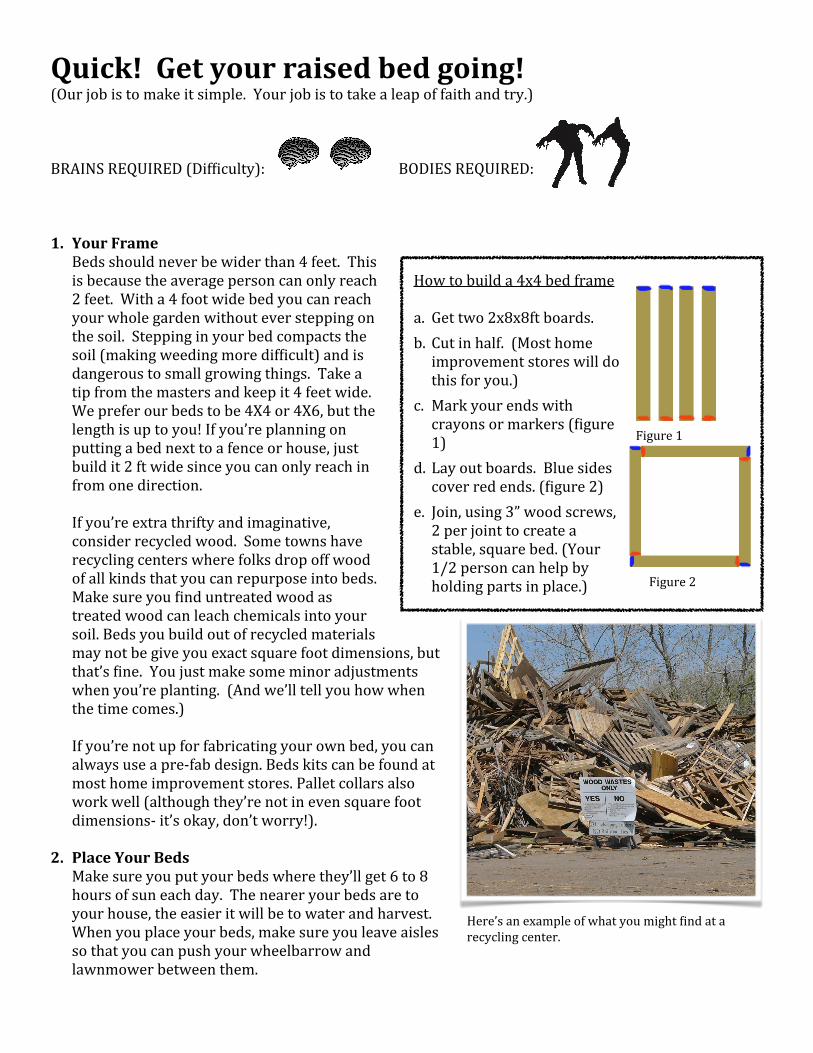
1. Your Frame Beds should never be wider than 4 feet. This is because the average person can only reach 2 feet. With a 4 foot wide bed you can reach your whole garden without ever stepping on the soil. Stepping in your bed compacts the soil (making weeding more dif]icult) and is dangerous to small growing things. Take a tip from the masters and keep it 4 feet wide. We prefer our beds to be 4X4 or 4X6, but the length is up to you! If you’re planning on putting a bed next to a fence or house, just build it 2 ft wide since you can only reach in from one direction.
If you’re extra thrifty and imaginative, consider recycled wood. Some towns have recycling centers where folks drop off wood of all kinds that you can repurpose into beds. Make sure you ]ind untreated wood as treated wood can leach chemicals into your soil. Beds you build out of recycled materials may not be give you exact square foot dimensions, but that’s ]ine. You just make some minor adjustments when you’re planting. (And we’ll tell you how when the time comes.)
If you’re not up for fabricating your own bed, you can always use a pre-‐fab design. Beds kits can be found at most home improvement stores. Pallet collars also work well (although they’re not in even square foot dimensions-‐ it’s okay, don’t worry!).
2. Place Your Beds Make sure you put your beds where they’ll get 6 to 8
hours of sun each day. The nearer your beds are to your house, the easier it will be to water and harvest. When you place your beds, make sure you leave aisles so that you can push your wheelbarrow and lawnmower between them.
How to build a 4x4 bed frame
a. Get two 2x8x8ft boards. b. Cut in half. (Most home improvement stores will do this for you.)
c. Mark your ends with crayons or markers (]igure 1)
d. Lay out boards. Blue sides cover red ends. (]igure 2)
e. Join, using 3” wood screws, 2 per joint to create a stable, square bed. (Your 1/2 person can help by holding parts in place.)
Figure 1
Figure 2
Here’s an example of what you might ]ind at a recycling center.
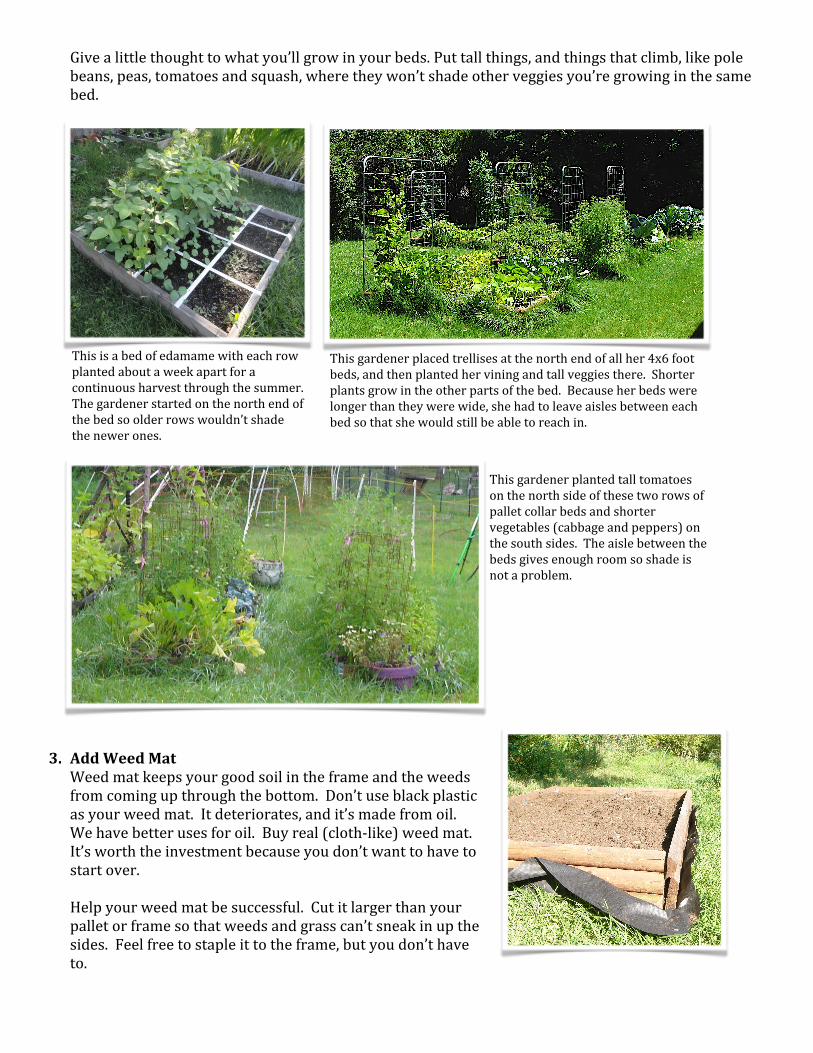
Give a little thought to what you’ll grow in your beds. Put tall things, and things that climb, like pole beans, peas, tomatoes and squash, where they won’t shade other veggies you’re growing in the same bed.
3. Add Weed Mat Weed mat keeps your good soil in the frame and the weeds from coming up through the bottom. Don’t use black plastic as your weed mat. It deteriorates, and it’s made from oil. We have better uses for oil. Buy real (cloth-‐like) weed mat. It’s worth the investment because you don’t want to have to start over.
Help your weed mat be successful. Cut it larger than your pallet or frame so that weeds and grass can’t sneak in up the sides. Feel free to staple it to the frame, but you don’t have to.
This is a bed of edamame with each row planted about a week apart for a continuous harvest through the summer. The gardener started on the north end of the bed so older rows wouldn’t shade the newer ones.
This gardener placed trellises at the north end of all her 4x6 foot beds, and then planted her vining and tall veggies there. Shorter plants grow in the other parts of the bed. Because her beds were longer than they were wide, she had to leave aisles between each bed so that she would still be able to reach in.
This gardener planted tall tomatoes on the north side of these two rows of pallet collar beds and shorter vegetables (cabbage and peppers) on the south sides. The aisle between the beds gives enough room so shade is not a problem.

4. Mix your soilThis is what your plants will be eating so that they can feed you. Don’t skimp here! A bit of an investment now will pay off for years and years!
If you’re thinking of buying topsoil, think of this-‐ It’s no better than whatever you have right now. Most gardeners spend 8 to 10 years getting their soil just right so that they can have excellent harvests. By mixing your own, you skip that 8 to 10 years. There’s something to be said for this kind of “instant grati]ication.” Plus, topsoil is very heavy... it’s hard on the plants trying to grow through it and hard on your back when you’re trying to get it into your bed.
Use Mel’s Mix from the “All New Square Foot Gardening” Book: 1/3 peat moss, 1/3 vermiculite and 1/3 bio-‐compost. It’s GREAT! For every new planting you do in a square foot, add two handfuls of bio-‐compost to keep nutrients up.
These items sell in cubic feet. To ]igure out how much you’ll need:Take the square footage of your bed (length times width) and divide by 2. That’s the cubic feet you will need for a 6 inch deep garden. Divide that number by 3 to ]ind out how much of each ingredient you need.
If you’re buying in large quantities, you’ll probably buy bio-‐compost by the yard. There are 27 cubic feet to a yard.
We’ve found it easy to mix by shovel full from the bags into a wheelbarrow and then driving the wheelbarrow over to our beds. Remember, we’re mixing soil parts by volume (not weight).
5. Fill your raised bed. It only needs to be ]illed to 6” deep. Yes, this is hard to believe, but non-‐root veggies don’t need deeper soil than that. I also successfully grew carrots in only 6” of soil. They were just a little shorter. Adding more soil than this just wastes time and money, so keep it simple, make you’re life easier and just do 6 inches!
6. Mark off your squaresIt’s easier to see where you’re planting each item if you can see the square itself. Mel recommends lath, but I’ve found that’s only necessary if you’re an engineer like him. For the rest of us string and nails is just ]ine.
You’ll need 6 nails, a hammer and some string. Starting on the long sides of the box, pound a nail in every foot. Don’t pound it all the way in because you want to be able to tie your string to it. When you have your nails pounded in on each side, tie the string to one nail, stretch it across to the other side, and tie it off. Then do the same on the short sides of the box. Our example box is a 2’ X 3’ bed.
Done! You’re ready to plant!
Nail
String