radial paper relief sculpture - mrs. gallant you for supporting ‘art with mrs. nguyen’ and...
TRANSCRIPT
!
Radial
(Grades 4+)
Paper Relief!
Sculpture!
Thank you for supporting ‘Art with Mrs. Nguyen’
and purchasing my ‘Radial Paper Relief Sculpture Project'!
Included in this package is a project sheet, a paper folding guide sheet, a
folding tutorial video, and most importantly – a fully animated
PowerPoint! The PowerPoint contains all the pertinent information you need for this project.. so
be sure to review it BEFORE teaching
(you’ll want to go through it in presentation mode yourself).
You can find the tutorial video here:
https://youtu.be/ITd733hCqIU

!!
Thank you so much for supporting ‘Art with Mrs. Nguyen’!
By purchasing this product, you are entitled to one classroom/personal use license.
Please note that I (Art with Mrs. Nguyen, LLC.) retain the copyright and reserve all rights to this product.
With this license you may NOT: - Claim this work as your own.
- Attempt to remove any watermarks/copyrights. - Repost any of this product’s contents (including images) on your
own website/blog. - Resell (or give away) this product on its own or in a bundle of other
resources. - Make or send copies to share with others.
Please support the creation of great resources like this one by
sharing the link to my TPT store - not the item itself. :)
If you have any comments, questions, or concerns, feel free to email me at [email protected]
I’m happy to help resolve any issues you may encounter.
Terms of Use
Get Social!
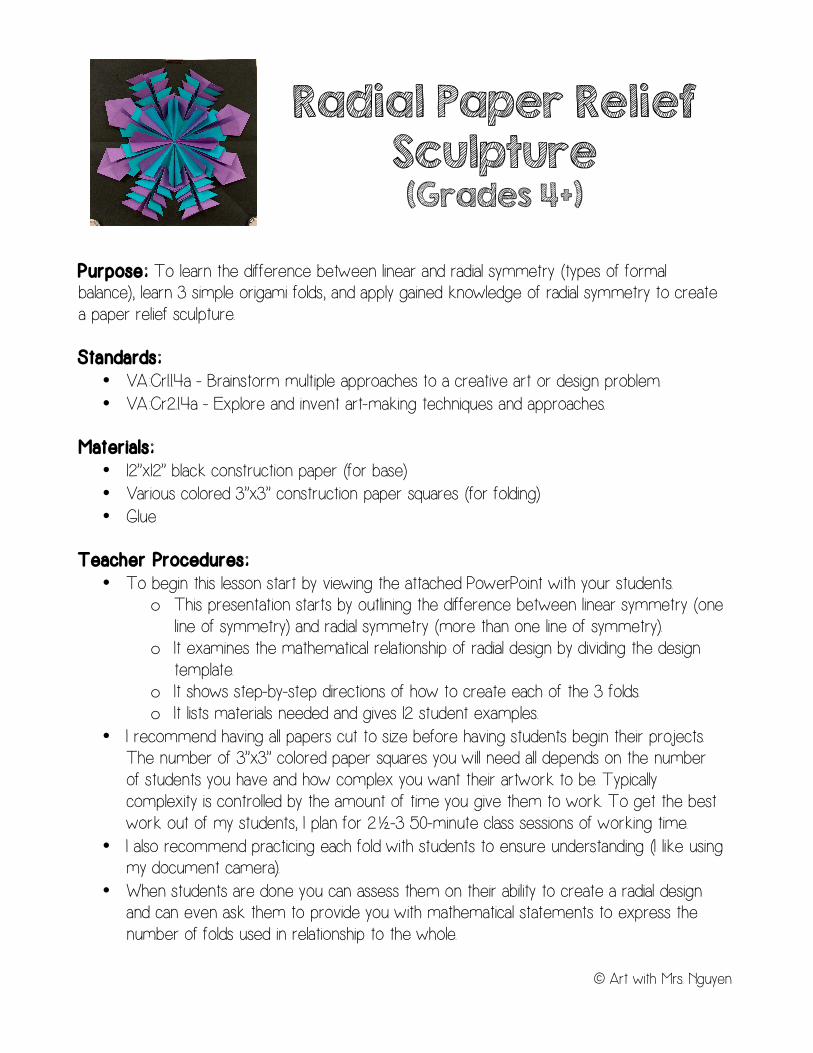
!Radial Paper Relief
Sculpture (Grades 4+)
Purpose: To learn the difference between linear and radial symmetry (types of formal balance), learn 3 simple origami folds, and apply gained knowledge of radial symmetry to create a paper relief sculpture. Standards:
• VA:Cr1.1.4a - Brainstorm multiple approaches to a creative art or design problem. • VA:Cr2.1.4a - Explore and invent art-making techniques and approaches.
Mater ia l s :
• 12”x12” black construction paper (for base) • Various colored 3”x3” construction paper squares (for folding) • Glue
Teacher Procedures:
• To begin this lesson start by viewing the attached PowerPoint with your students. o This presentation starts by outlining the difference between linear symmetry (one
line of symmetry) and radial symmetry (more than one line of symmetry). o It examines the mathematical relationship of radial design by dividing the design
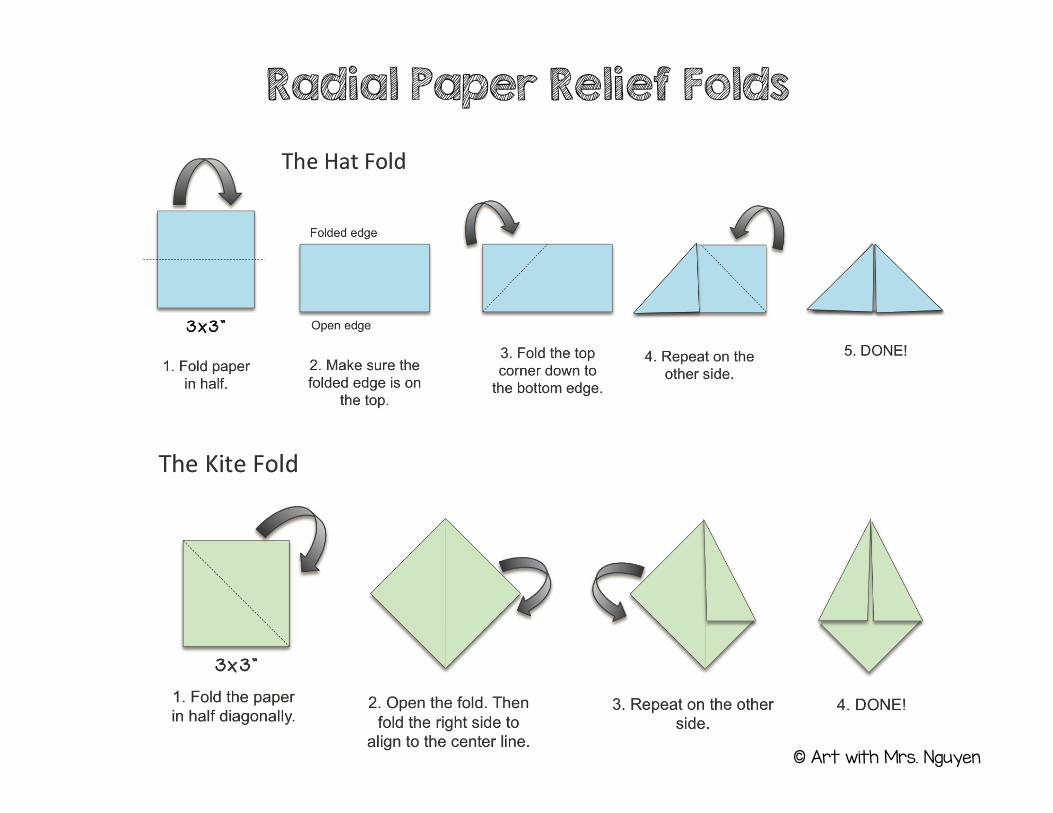
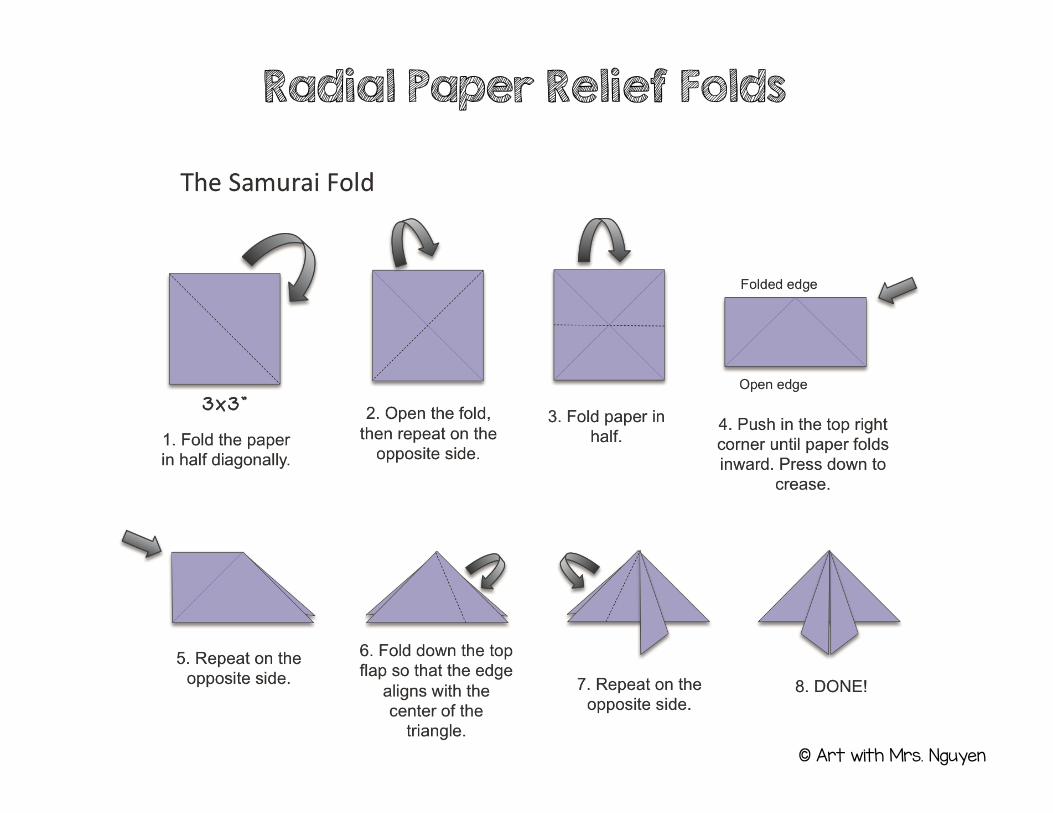
template. o It shows step-by-step directions of how to create each of the 3 folds. o It lists materials needed and gives 12 student examples.
• I recommend having all papers cut to size before having students begin their projects. The number of 3”x3” colored paper squares you will need all depends on the number of students you have and how complex you want their artwork to be. Typically complexity is controlled by the amount of time you give them to work. To get the best work out of my students, I plan for 2½-3 50-minute class sessions of working time.
• I also recommend practicing each fold with students to ensure understanding (I like using my document camera).
• When students are done you can assess them on their ability to create a radial design and can even ask them to provide you with mathematical statements to express the number of folds used in relationship to the whole.
© Art with Mrs. Nguyen
!
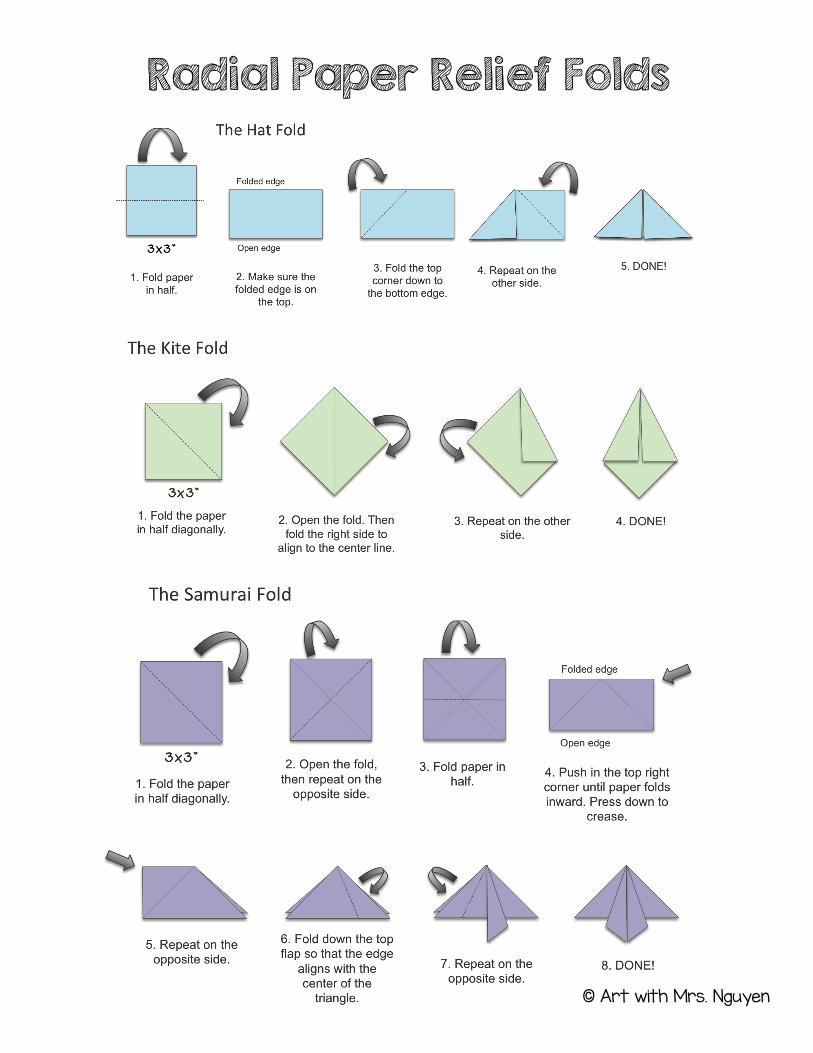
Radial Paper Relief Folds
© Art with Mrs. Nguyen
Radial Paper Relief Folds
© Art with Mrs. Nguyen!
!
Radial Paper Relief Folds
© Art with Mrs. Nguyen!