recycling tree - intel · this object is the central part of a main project called "recycling...
TRANSCRIPT

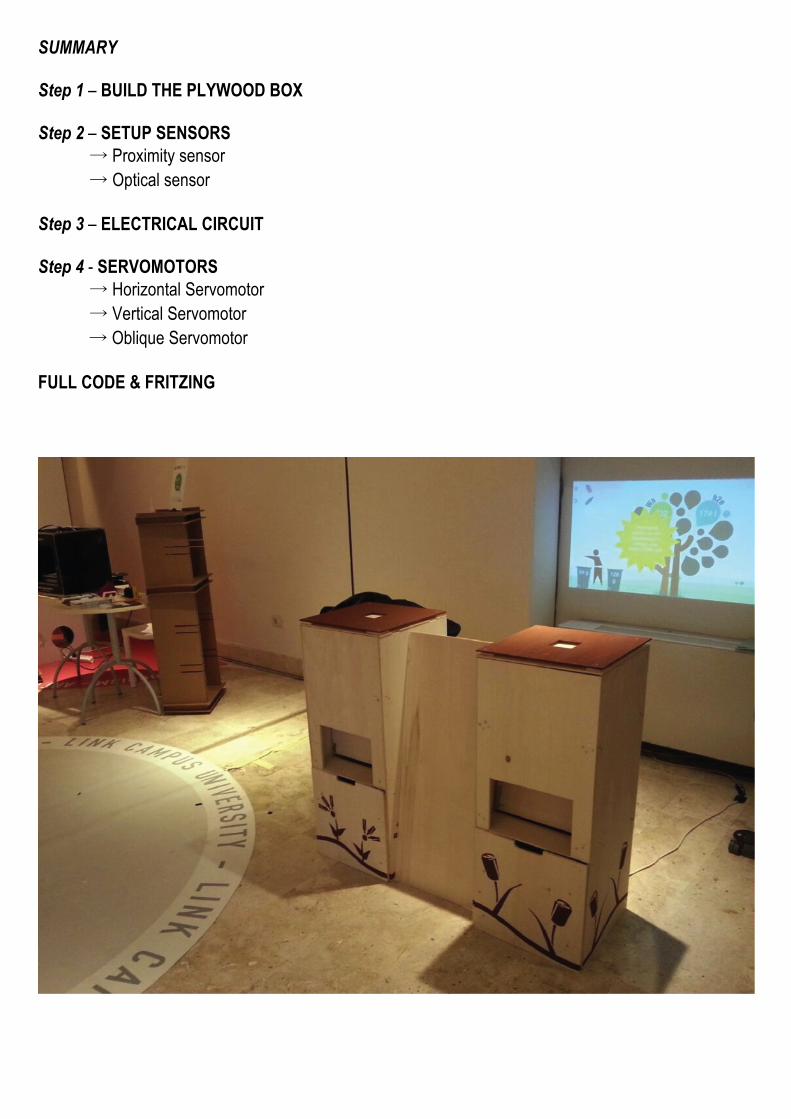
Recycling Tree

HOW TO BUILD A SMART BIN WITH INTEL GALILEO
A step-by-step tutorial to build, in a very simple way, a smart bin to handle the waste management with your Intel® Galileo! This object is the central part of a main project called "Recycling Tree", realized under the supervision of Carlo Maria Medaglia and Massimiliano Dibitonto, within the Digital Administration and Social Innovation Center (Dasic Lab), Link Campus University. This project has also been selected and showcased at the Maker Faire Rome 2014. The project is constituted by two different bins, each one handles a single material: aluminium or plastic. So the difference of these materials leads to the development of two different ways of operation.
Tutorial by Luca Pellegrino [email protected] Giovanni Ricciardi [email protected] Eugenio Passacantilli [email protected] Valentina Cipelli [email protected]
Required materials (each): • 1 Intel® 1st Gen Galileo • 1 proximity sensor • 1 optical sensor • 1 electric circuit • 3 servo-motor 0 -180 • 1 breadboard • some jumper wires M/F, M/M and F/F • some resistors • some plywood sheets (to build the box) • toolbox (hacksaw, drill, screws, small nails)
Recommended age: 17+ Recommended age to play with smart bin: 10+ Minimum setup time: 1 day for each Video (italian) https://www.youtube.com/watch?v=-1tfVK4FzWI
SUMMARY Step 1 – BUILD THE PLYWOOD BOX Step 2 – SETUP SENSORS � Proximity sensor � Optical sensor Step 3 – ELECTRICAL CIRCUIT Step 4 - SERVOMOTORS � Horizontal Servomotor � Vertical Servomotor � Oblique Servomotor FULL CODE & FRITZING
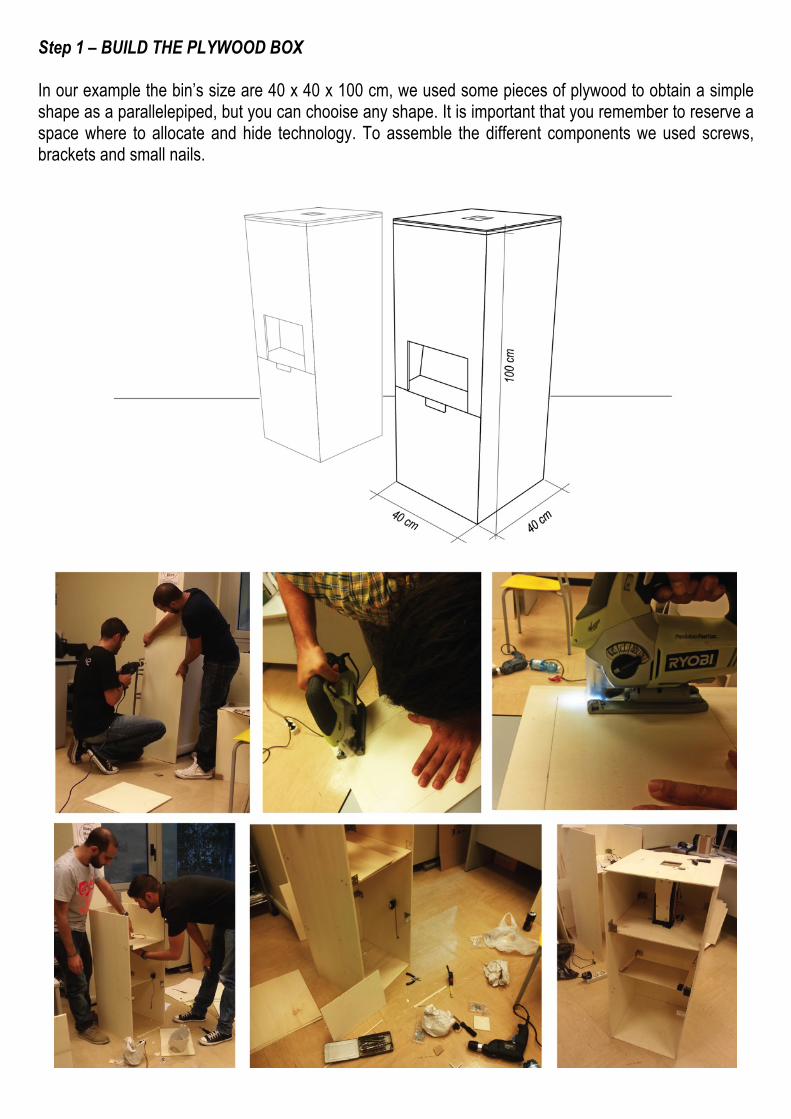
Step 1 – BUILD THE PLYWOOD BOX In our example the bin’s size are 40 x 40 x 100 cm, we used some pieces of plywood to obtain a simple shape as a parallelepiped, but you can chooise any shape. It is important that you remember to reserve a space where to allocate and hide technology. To assemble the different components we used screws, brackets and small nails.
Step 2 – SETUP SENSORS Serial port connection for communication INITIAL STATEMENT
Serial.begin(9600);
LOOP
Serial.println("Message");
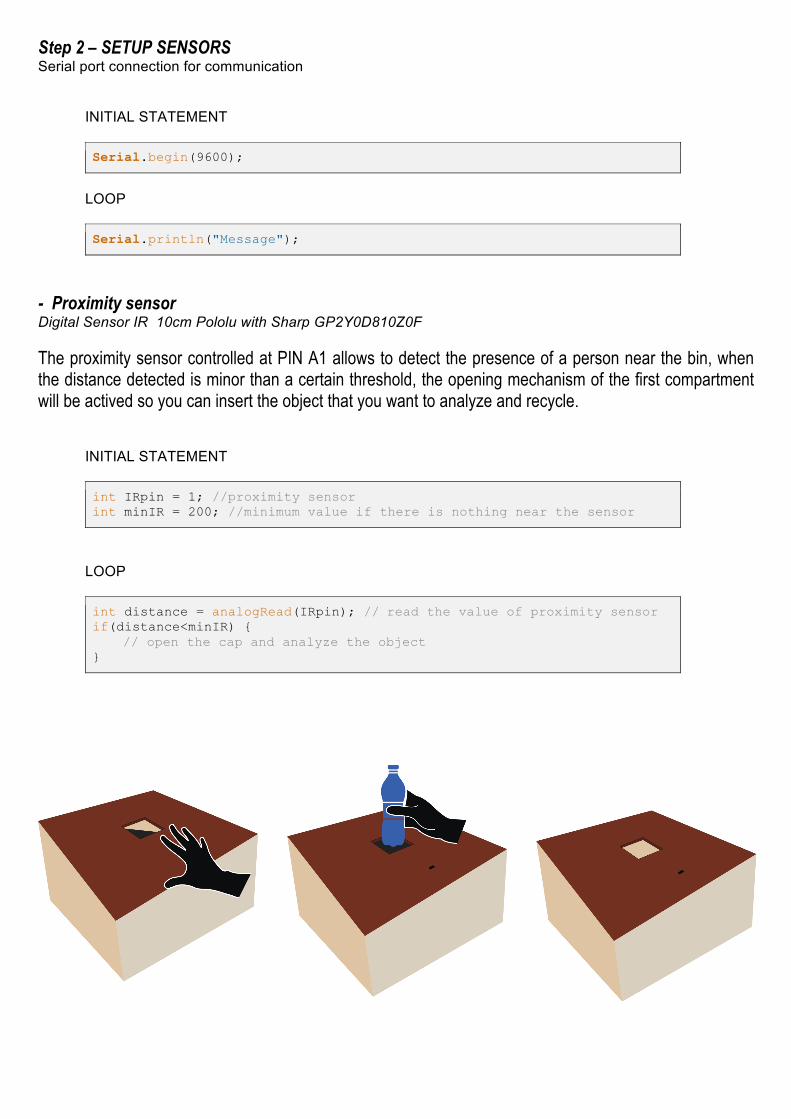
- Proximity sensor Digital Sensor IR 10cm Pololu with Sharp GP2Y0D810Z0F The proximity sensor controlled at PIN A1 allows to detect the presence of a person near the bin, when the distance detected is minor than a certain threshold, the opening mechanism of the first compartment will be actived so you can insert the object that you want to analyze and recycle. INITIAL STATEMENT
int IRpin = 1; //proximity sensor int minIR = 200; //minimum value if there is nothing near the sensor
LOOP
int distance = analogRead(IRpin); // read the value of proximity sensor if(distance<minIR) {
// open the cap and analyze the object }

- Optical sensor Photoresistor Starter Kit Arduino The plastic bin works thanks to an optical sensor. In the compartment in which we have placed the photoresistor there is also a RGB LED. This compartment has been obscured in order to perform a good detection of the white light generated by a RGB LED. INITIAL STATEMENT
int minPlastica = 50; //min light value for plastic object int maxPlastica = 700; //max light value for plastic object int lightVal = 0; //light value int lightSensor = 0; //light sensor
LOOP
lightVal = analogRead(lightSensor); switch(getMateriale(lightVal)) {
case -1: //error scarta(); break; case 0: //empty break; case 1: //plastic butta(); break;
} }
EXTERNAL FUNCTION
int getMateriale(int lightVal) { if(lightVal<minPlastica) {
Serial.println("0"); //not plastic delay(1000); return -1;
} else if(lightVal>=minPlastica && lightVal <= maxPlastica) {
Serial.println("1"); //plastic delay(1000); return 1;
} else { Serial.println("Vuoto"); //empty return 0;
} }


Step 3 - ELECTRICAL CIRCUIT To identify the aluminum we have used the electrical conductivity of the (Bottles) cans. The can is an integral part of the circuit, through the arrangement of an electric circuit opened (two poles) on the bottom of the compartment connected to two screws. When you insert the can within the compartment, it lays on the screws, it connects the two poles and closes the circuit. When the circuit is closed the system recognises the refuse and immediately it sends an impulse to open the door to dispose of waste. INITIAL STATEMENT
boolean chiuso = false; //circuit check
LOOP
checkcircuito = digitalRead(circuito); if(checkcircuito == HIGH) chiuso = true; if(chiuso==true) { // Serial.println("open the cap"); butta();
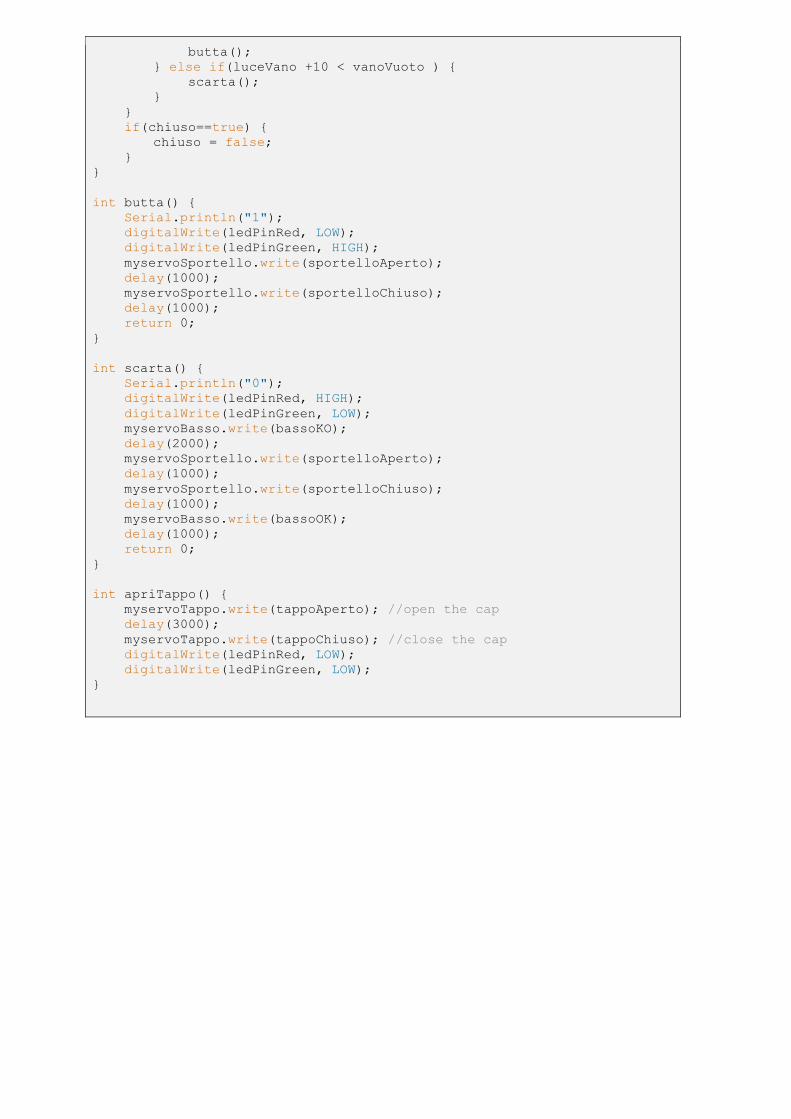
} else if(luceVano +10 < vanoVuoto ) { scarta(); } } if(chiuso==true){
// Serial.println("Reset"); chiuso = false; }

Step 4 – SERVOMOTORS HS-485HB Standard Servo In each bin were placed three servomotors to manage the opening / closing of each compartment. It was installed a fixed library to allow a correct use of the components. (https://communities.intel.com/message/221795)

a. Horizontal Servomotor (servoTappo) This servo starts to work once a presence has been detected by the proximity sensor. The servo allows the performance of a 90° horizontal rotation of the main door and consequently to start the waste management. This servo is connected to PIN 6 on the Galileo Board.

b. Vertical Servo (servoSportello) This servo starts to work once a waste has been recognized by the system. The servo allows the performance of a vertical rotation of the compartment door. This rotation's degree lies between 120° and 150° to in order to perform a good ejection of the waste. This servo is connected to PIN 10 on the Galileo Board.

c. Oblique Servo (servoBasso) This servo lies in a vertical position, and perform a 35° oblique rotation only is the system detects a wrong material. This rotation is performed before the Vertical Servo's rotation, in order to direct the waste to the right ejection. This servo is connected to PIN 11 on the Galileo Board.

Set up At the beginning the servomotor needs to be initialized by the attach() function. Then to avoid annoying servo’s vibrations, will need to invoke the set48hz() function, available thanks to the fixed library. INITIAL STATEMENT
Servo myservoTappo; Servo myservoSportello; Servo myservoBasso;
SETUP
int servobasso = 11; int servosportello = 10; int servotappo = 6; myservoTappo.attach(servotappo); myservoSportello.attach(servosportello); myservoBasso.attach(servobasso); myservoSportello.set48hz(); myservoBasso.set48hz(); myservoTappo.set48hz(); myservoBasso.write(bassoOK); myservoSportello.write(sportelloChiuso); myservoTappo.write(tappoChiuso);
LOOP
servo.write(val);

– FULL CODE & FRITZING Plastic Bin Fritzing
Plastic Bin Full Code
#include <Servo.h> Servo myservoTappo; Servo myservoSportello; Servo myservoBasso; int minPlastica = 50; //min light value for plastic object int maxPlastica = 700; //max light value for plastic object! int IRpin = 1; //proximity sensor int minIR = 200; //minimum value if there is nothing near the sensor int lightVal = 0; //light value int lightSensor = 0; //light sensor int ledPinRed = 3; //led if correct material detected int ledPinGreen = 9; //led if incorrect material detected

int coperchio = 2; int servobasso = 11; int servosportello = 10; int servotappo = 6; int tappoAperto = 90; //rotation value for servos (check for vibrations) int tappoChiuso = 0; int sportelloAperto = 120; int sportelloChiuso = 0; int bassoOK = 150; int bassoKO = 115; int red = 5; //red pin for RGB led int green = 12; //green pin for RGB led int blue = 13; //blue pin for RGB led void setup() { Serial.begin(9600); pinMode(ledPinRed,OUTPUT); pinMode(ledPinGreen,OUTPUT); pinMode(coperchio,INPUT); myservoTappo.attach(servotappo); myservoSportello.attach(servosportello); myservoBasso.attach(servobasso); myservoSportello.set48hz(); myservoBasso.set48hz(); myservoTappo.set48hz(); myservoBasso.write(bassoOK); myservoSportello.write(sportelloChiuso); myservoTappo.write(tappoChiuso); pinMode(red, OUTPUT); pinMode(green, OUTPUT); pinMode(blue, OUTPUT); digitalWrite(blue, 255); digitalWrite(red, 255); digitalWrite(green, 255); } void loop() { int distance = analogRead(IRpin); if(distance<minIR) { apriTappo(); lightVal = analogRead(lightSensor); switch(getMateriale(lightVal)) { case -1: //error scarta(); break; case 0: //empty break; case 1: //plastic butta();

break; } } accendi(); } int getMateriale(int lightVal) { if(lightVal<minPlastica) { digitalWrite(ledPinRed, HIGH); digitalWrite(ledPinGreen, LOW); digitalWrite(blue, 0); digitalWrite(red, 255); digitalWrite(green, 0); Serial.println("0"); //not plasticc delay(1000); return -1; } else if(lightVal>=minPlastica && lightVal <= maxPlastica) { Serial.println("1"); //plastic digitalWrite(ledPinRed, LOW); digitalWrite(ledPinGreen, HIGH); digitalWrite(blue, 255); digitalWrite(red, 0); digitalWrite(green, 0); delay(1000); return 1; } else { digitalWrite(ledPinRed, LOW); digitalWrite(ledPinGreen, LOW); return 0; } } int butta() { myservoSportello.write(sportelloAperto); delay(1000); myservoSportello.write(sportelloChiuso); delay(1000); return 0; } int scarta() { myservoBasso.write(bassoKO); delay(2000); myservoSportello.write(sportelloAperto); delay(1000); myservoSportello.write(sportelloChiuso); delay(1000); myservoBasso.write(bassoOK); delay(1000); return 0; } int apriTappo() { myservoTappo.write(tappoAperto); //open the cap delay(3000); myservoTappo.write(tappoChiuso); //close the cap digitalWrite(ledPinRed, LOW); digitalWrite(ledPinGreen, LOW); delay(1000); }

int accendi() { digitalWrite(blue, 255); digitalWrite(red, 255); digitalWrite(green, 255); }
Aluminium Bin Fritzing
Aluminium Bin Full Code
#include <Servo.h> Servo myservoTappo; Servo myservoSportello; Servo myservoBasso; int IRpin = 1; // proximity sensor int minIR = 200; // minimum value if there is nothing near the sensor int lightVal = 0; //light value

int lightSensor = 0; //light sensor int ledPinRed = 3; //led if correct material detected int ledPinGreen = 9; //led if incorrect material detected int ledLight = 13; //led in the cap int coperchio = 2; int servobasso = 11; int servosportello = 10; int servotappo = 6; int tappoAperto = 90; //rotation value for servos (check for vibrations) int tappoChiuso = 0; int sportelloAperto = 150; int sportelloChiuso = 0; int bassoOK = 90; int bassoKO = 55; boolean chiuso = false; //circuit check int circuito = 2; //circuit int checkcircuito = 0; //flag for circuit check void setup() { Serial.begin(9600); pinMode(circuito,INPUT); pinMode(ledPinRed,OUTPUT); pinMode(ledPinGreen,OUTPUT); pinMode(ledLight,OUTPUT); pinMode(coperchio,INPUT); digitalWrite(ledLight,HIGH); myservoTappo.attach(servotappo); myservoSportello.attach(servosportello); myservoBasso.attach(servobasso); myservoSportello.set48hz(); myservoBasso.set48hz(); myservoTappo.set48hz(); myservoBasso.write(bassoOK); myservoSportello.write(sportelloChiuso); myservoTappo.write(tappoChiuso); } void loop() { int vanoVuoto = analogRead(lightSensor); int distance = analogRead(IRpin); if(distance<minIR) { apriTappo(); for(int i=0;i<10;i++) { if(chiuso==false) { checkcircuito = digitalRead(circuito); if(checkcircuito == HIGH) chiuso = true; } delay(100); } int luceVano = analogRead(lightSensor); if(chiuso==true) {
butta(); } else if(luceVano +10 < vanoVuoto ) { scarta(); } } if(chiuso==true) { chiuso = false; } } int butta() { Serial.println("1"); digitalWrite(ledPinRed, LOW); digitalWrite(ledPinGreen, HIGH); myservoSportello.write(sportelloAperto); delay(1000); myservoSportello.write(sportelloChiuso); delay(1000); return 0; } int scarta() { Serial.println("0"); digitalWrite(ledPinRed, HIGH); digitalWrite(ledPinGreen, LOW); myservoBasso.write(bassoKO); delay(2000); myservoSportello.write(sportelloAperto); delay(1000); myservoSportello.write(sportelloChiuso); delay(1000); myservoBasso.write(bassoOK); delay(1000); return 0; } int apriTappo() { myservoTappo.write(tappoAperto); //open the cap delay(3000); myservoTappo.write(tappoChiuso); //close the cap digitalWrite(ledPinRed, LOW); digitalWrite(ledPinGreen, LOW); }