resource item - managing resource information - famit user guide resource item.pdf · resource item...
TRANSCRIPT
Resource Item ‐ managing resource information
This User Guide explains how to create and work with catalogs, categories, and resources. Resources are grouped together into five catalogs that correspond to the hardcopy Resource Order form. These catalogs include Aircraft, Crew, Equipment, Overhead, and Supply. Topics include:
• Working with the Resource Item screen;
• Downloading and printing the Resource Order Form and AssignmentHistory
• Identifying National Resources;
• Designating a Quick Fill resource;
• Adding external resources to inventory;
• Managing resource items for your center.
You must have the Data Manager role to access the Resource Item screen.
Working with the Resource Item screen
This section explains how to add and modify resources using the Resource Item screen. Topics include:
• Searching for resources;
• Working with Aircraft;
• Working with Crews;
• Working with Equipment;
• Working with Overhead;
• Working with Supplies;
• Working with the Organizations tab;
• Completing the Locations tab;
• Completing the Classification/Equipment Type/Qualification tab;
• Completing the Availability tab;
• Completing the Special Conditions tab;
• Completing the Features tab;
• Completing the Documentation tab;
• Completing the Contacts tab;
• Completing the Assignment History tab.
For more information about data entry standards for resources refer tohttp://ross.nwcg.gov/documentslibrary/implementation/ROSS_Resource_Item_Standards_2012.pdf
September 21, 2015 version 2.16.4 1
ROSS User Guide Resource Item ‐ managing resource information
To access the Resource Item screen
• On the Resource menu, click Resource Item.
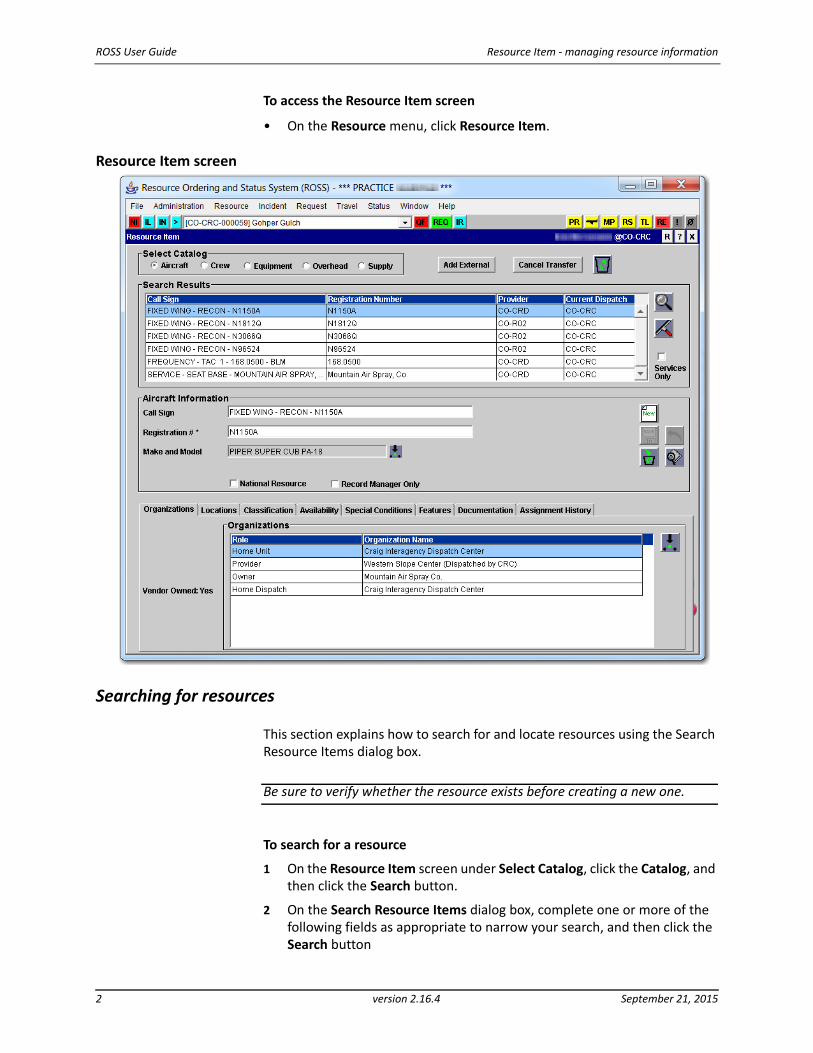
Resource Item screen
Searching for resources
This section explains how to search for and locate resources using the Search Resource Items dialog box.
Be sure to verify whether the resource exists before creating a new one.
To search for a resource
1 On the Resource Item screen under Select Catalog, click the Catalog, and then click the Search button.
2 On the Search Resource Items dialog box, complete one or more of the following fields as appropriate to narrow your search, and then click the Search button:
2 version 2.16.4 September 21, 2015
Resource Item ‐ managing resource information ROSS User Guide
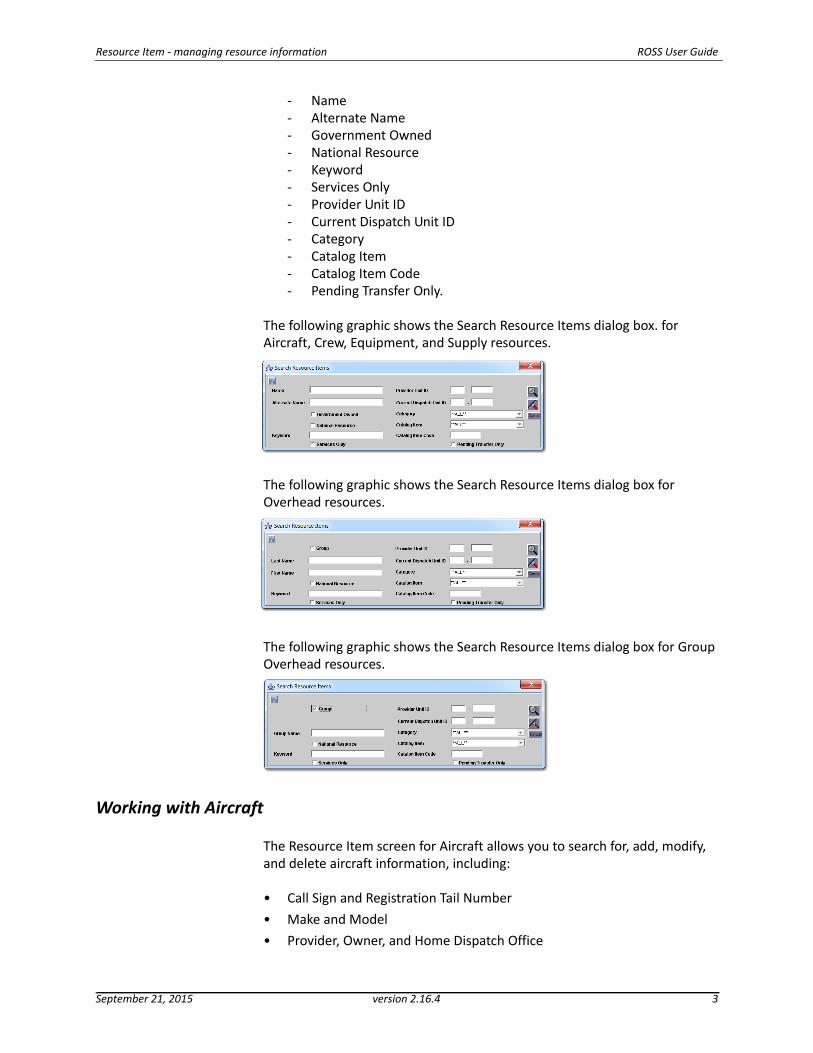
‐ Name;‐ Alternate Name;‐ Government Owned;‐ National Resource;‐ Keyword;‐ Services Only;‐ Provider Unit ID;‐ Current Dispatch Unit ID;‐ Category;‐ Catalog Item;‐ Catalog Item Code;‐ Pending Transfer Only.
The following graphic shows the Search Resource Items dialog box. for Aircraft, Crew, Equipment, and Supply resources.
The following graphic shows the Search Resource Items dialog box for Overhead resources.
The following graphic shows the Search Resource Items dialog box for Group Overhead resources.
Working with Aircraft
The Resource Item screen for Aircraft allows you to search for, add, modify, and delete aircraft information, including:
• Call Sign and Registration Tail Number
• Make and Model;
• Provider, Owner, and Home Dispatch Office;
September 21, 2015 version 2.16.4 3
ROSS User Guide Resource Item ‐ managing resource information
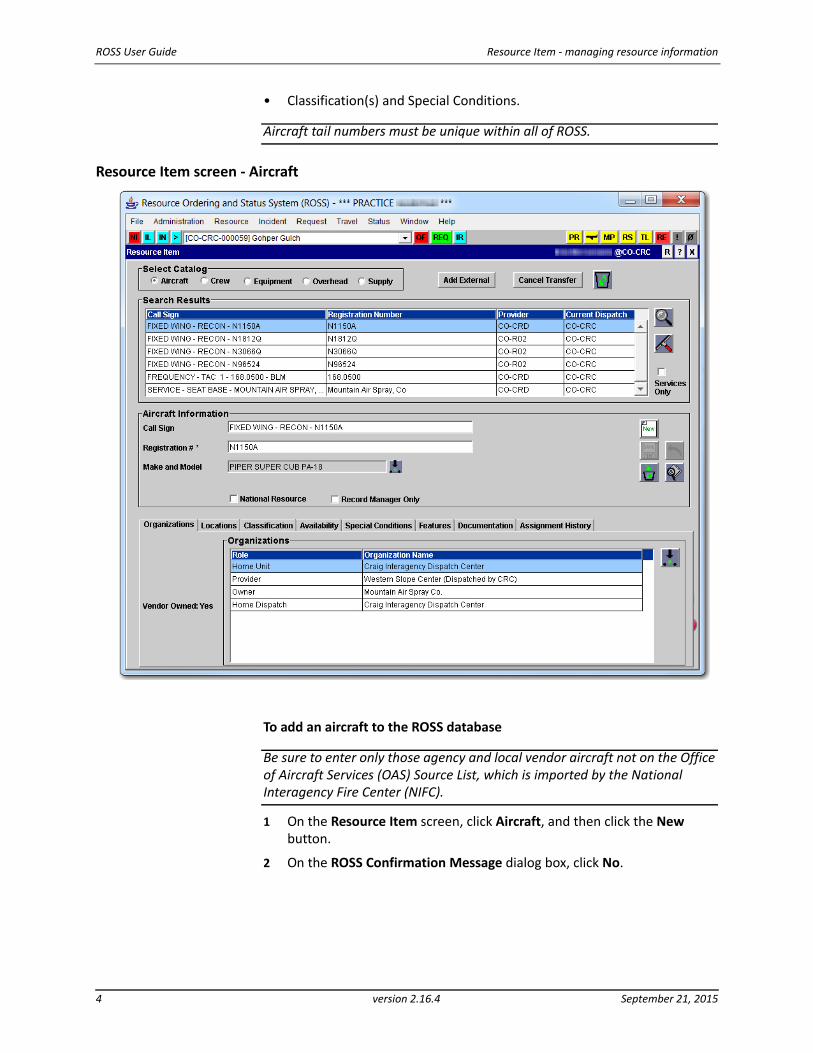
• Classification(s) and Special Conditions.
Aircraft tail numbers must be unique within all of ROSS.
Resource Item screen ‐ Aircraft
To add an aircraft to the ROSS database
Be sure to enter only those agency and local vendor aircraft not on the Office of Aircraft Services (OAS) Source List, which is imported by the National Interagency Fire Center (NIFC).
1 On the Resource Item screen, click Aircraft, and then click the New button.
2 On the ROSS Confirmation Message dialog box, click No.
4 version 2.16.4 September 21, 2015
Resource Item ‐ managing resource information ROSS User Guide
3 Under Aircraft Information in the Call Sign box, type the Call Sign of the new aircraft.
Call Signs are entered in UPPERCASE, for exampleFIXED WING ‐ TAC ‐ 230LEADPLANE ‐ 163Z
4 In the Registration Number box, type the Tail Number of the new aircraft.
5 In the Make and Model box, click Pick Make and Model, and then click the appropriate Make and Model of the new aircraft.
6 Click the Pick Provider button, perform the following on the Select Organization dialog box, and then click OK.
‐ If the resource has more than one Provider, click Resource has multiple Providers.
‐ If the resource has a single Provider, click Resource has single Provider, and then search for and click the Provider.
7 On the Resource Item screen, click the appropriate check boxes, and then click the Save button:
‐ National Resource;‐ Record Manager Only.
8 Complete the remaining Resource Item screen tabs as appropriate for that resource.
The following graphic shows the Ross Confirmation Message.
September 21, 2015 version 2.16.4 5
ROSS User Guide Resource Item ‐ managing resource information
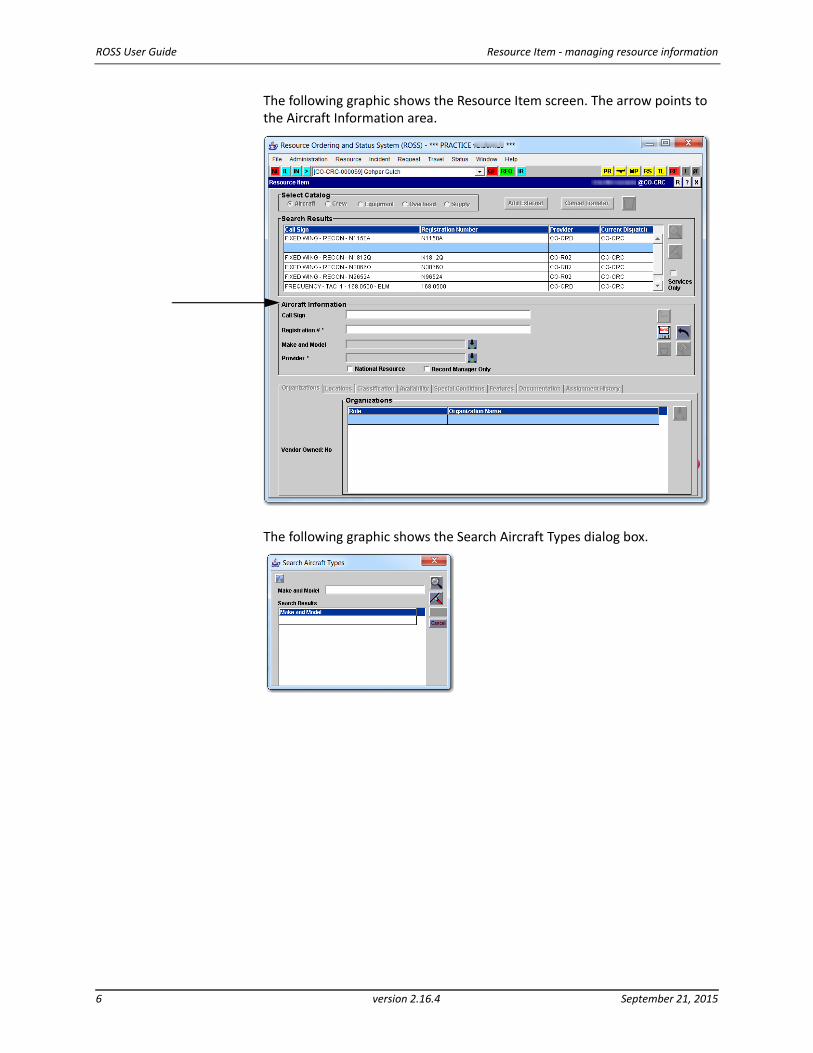
The following graphic shows the Resource Item screen. The arrow points to the Aircraft Information area.
The following graphic shows the Search Aircraft Types dialog box.
6 version 2.16.4 September 21, 2015
Resource Item ‐ managing resource information ROSS User Guide
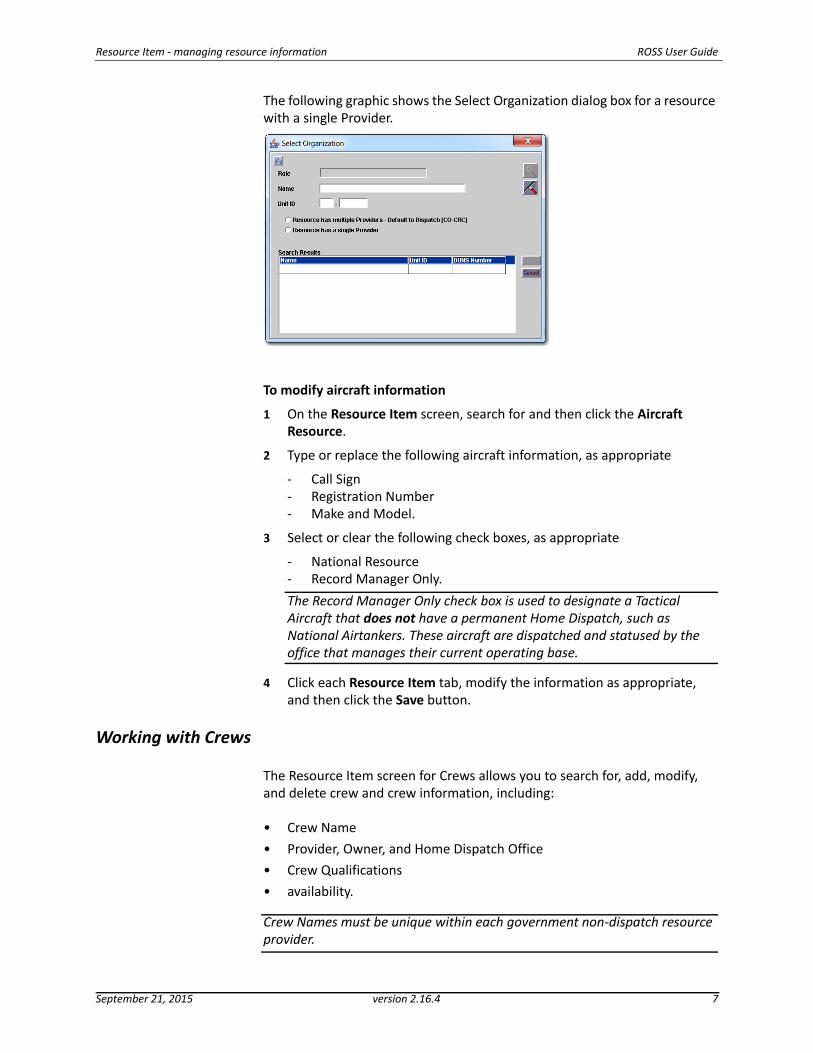
The following graphic shows the Select Organization dialog box for a resource with a single Provider.
To modify aircraft information
1 On the Resource Item screen, search for and then click the Aircraft Resource.
2 Type or replace the following aircraft information, as appropriate:
‐ Call Sign;‐ Registration Number;‐ Make and Model.
3 Select or clear the following check boxes, as appropriate:
‐ National Resource;‐ Record Manager Only.
The Record Manager Only check box is used to designate a Tactical Aircraft that does not have a permanent Home Dispatch, such as National Airtankers. These aircraft are dispatched and statused by the office that manages their current operating base.
4 Click each Resource Item tab, modify the information as appropriate, and then click the Save button.
Working with Crews
The Resource Item screen for Crews allows you to search for, add, modify, and delete crew and crew information, including:
• Crew Name;
• Provider, Owner, and Home Dispatch Office;
• Crew Qualifications;
• availability.
Crew Names must be unique within each government non‐dispatch resource provider.
September 21, 2015 version 2.16.4 7
ROSS User Guide Resource Item ‐ managing resource information
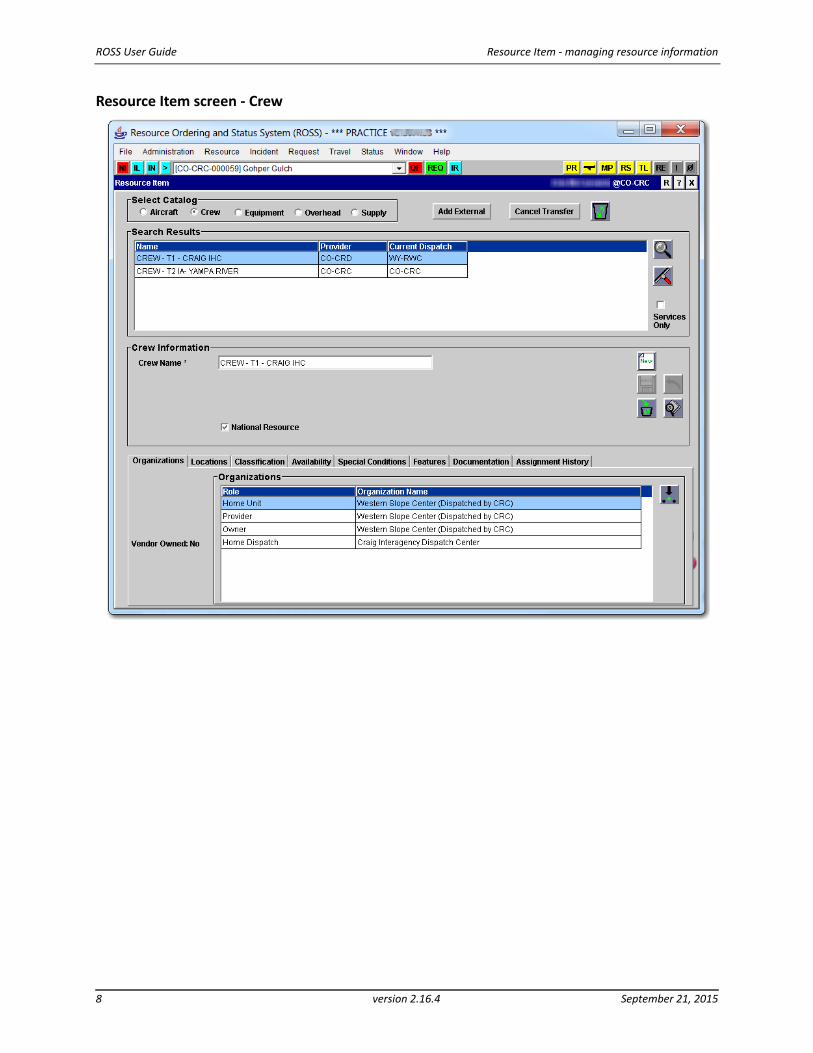
Resource Item screen ‐ Crew
8 version 2.16.4 September 21, 2015
Resource Item ‐ managing resource information ROSS User Guide
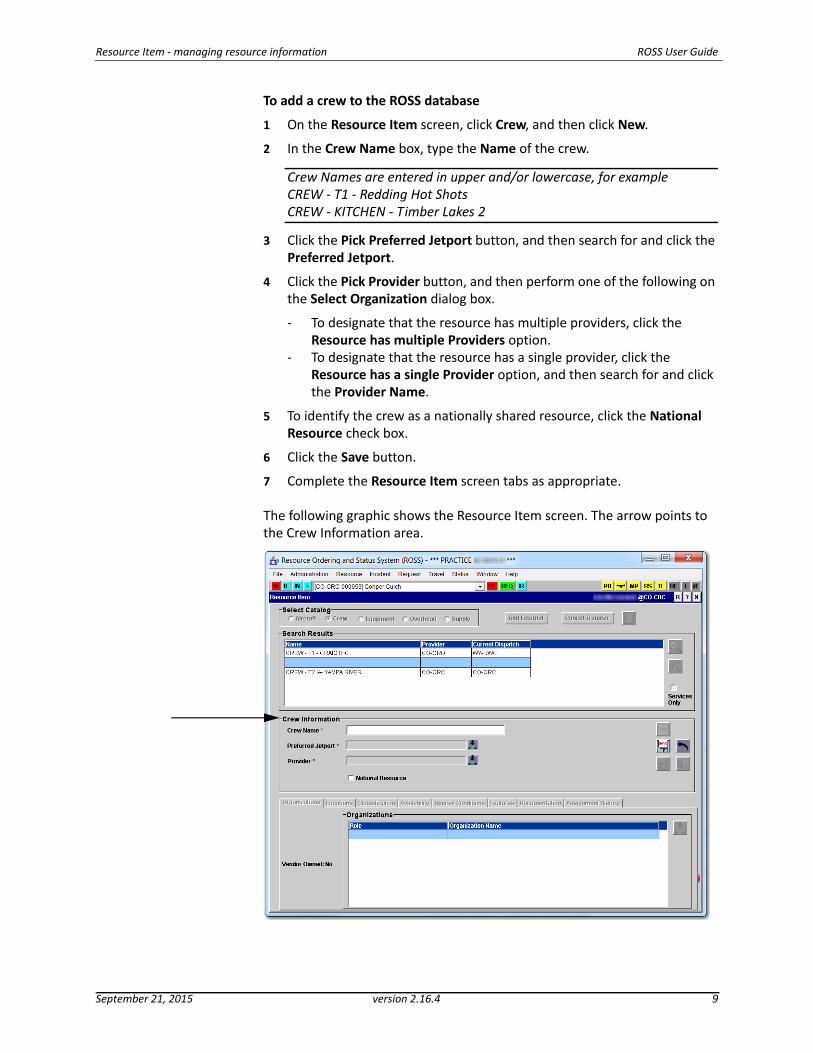
To add a crew to the ROSS database
1 On the Resource Item screen, click Crew, and then click New.
2 In the Crew Name box, type the Name of the crew.
Crew Names are entered in upper and/or lowercase, for exampleCREW ‐ T1 ‐ Redding Hot ShotsCREW ‐ KITCHEN ‐ Timber Lakes 2
3 Click the Pick Preferred Jetport button, and then search for and click the Preferred Jetport.
4 Click the Pick Provider button, and then perform one of the following on the Select Organization dialog box.
‐ To designate that the resource has multiple providers, click the Resource has multiple Providers option.
‐ To designate that the resource has a single provider, click the Resource has a single Provider option, and then search for and click the Provider Name.
5 To identify the crew as a nationally shared resource, click the National Resource check box.
6 Click the Save button.
7 Complete the Resource Item screen tabs as appropriate.
The following graphic shows the Resource Item screen. The arrow points to the Crew Information area.
September 21, 2015 version 2.16.4 9
ROSS User Guide Resource Item ‐ managing resource information
To modify crew information
1 On the Resource Item screen, click Crew.
2 Search for and then click the Crew Name.
3 Type or replace the Crew Name if appropriate.
4 Select or clear the National Resource check box, as appropriate.
5 Click each Resource Item tab, modify the information as appropriate, and then click the Save button.
Working with Equipment
The Resource Item screen for Equipment allows you to search for, add, modify, and delete equipment and equipment information, including:
• Name, number, or combination of characters that identifies the equipment;
• Alternate Name of the equipment;
• Equipment Type and Special Conditions;
• Availability, such as Activation/Deactivation Dates.
Equipment names must be unique within each government non‐dispatch resource provider.
10 version 2.16.4 September 21, 2015
Resource Item ‐ managing resource information ROSS User Guide
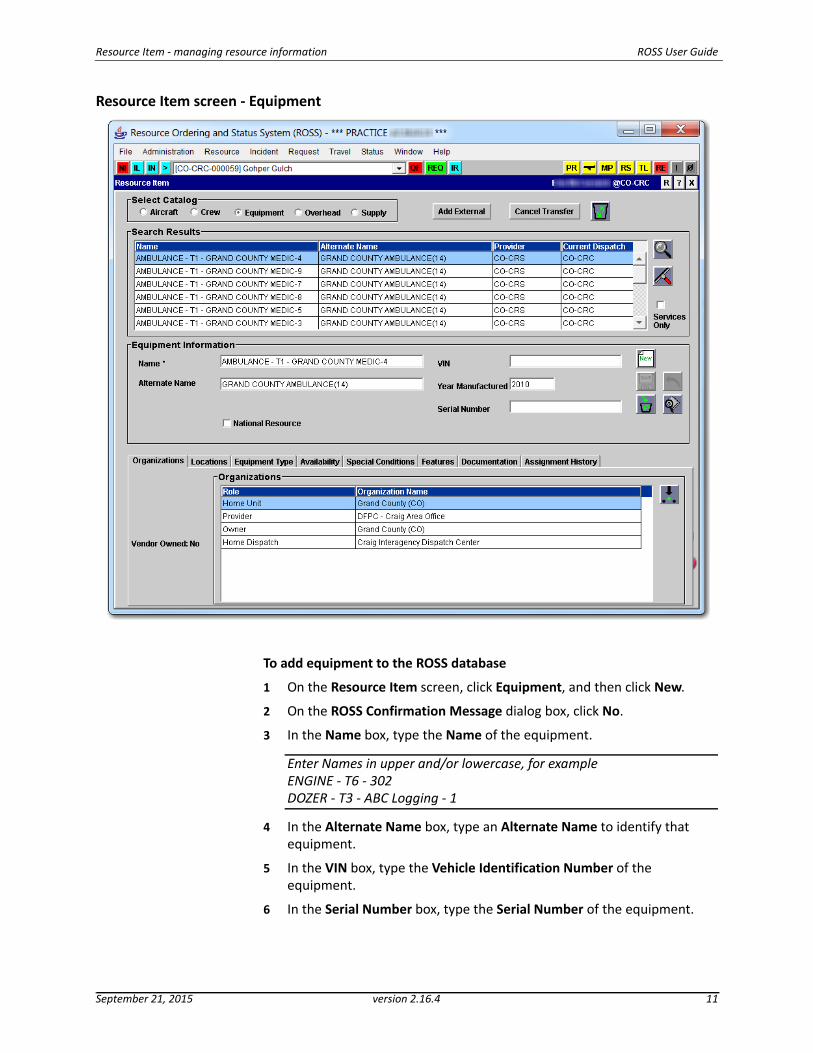
Resource Item screen ‐ Equipment
To add equipment to the ROSS database
1 On the Resource Item screen, click Equipment, and then click New.
2 On the ROSS Confirmation Message dialog box, click No.
3 In the Name box, type the Name of the equipment.
Enter Names in upper and/or lowercase, for exampleENGINE ‐ T6 ‐ 302DOZER ‐ T3 ‐ ABC Logging ‐ 1
4 In the Alternate Name box, type an Alternate Name to identify that equipment.
5 In the VIN box, type the Vehicle Identification Number of the equipment.
6 In the Serial Number box, type the Serial Number of the equipment.
September 21, 2015 version 2.16.4 11
ROSS User Guide Resource Item ‐ managing resource information
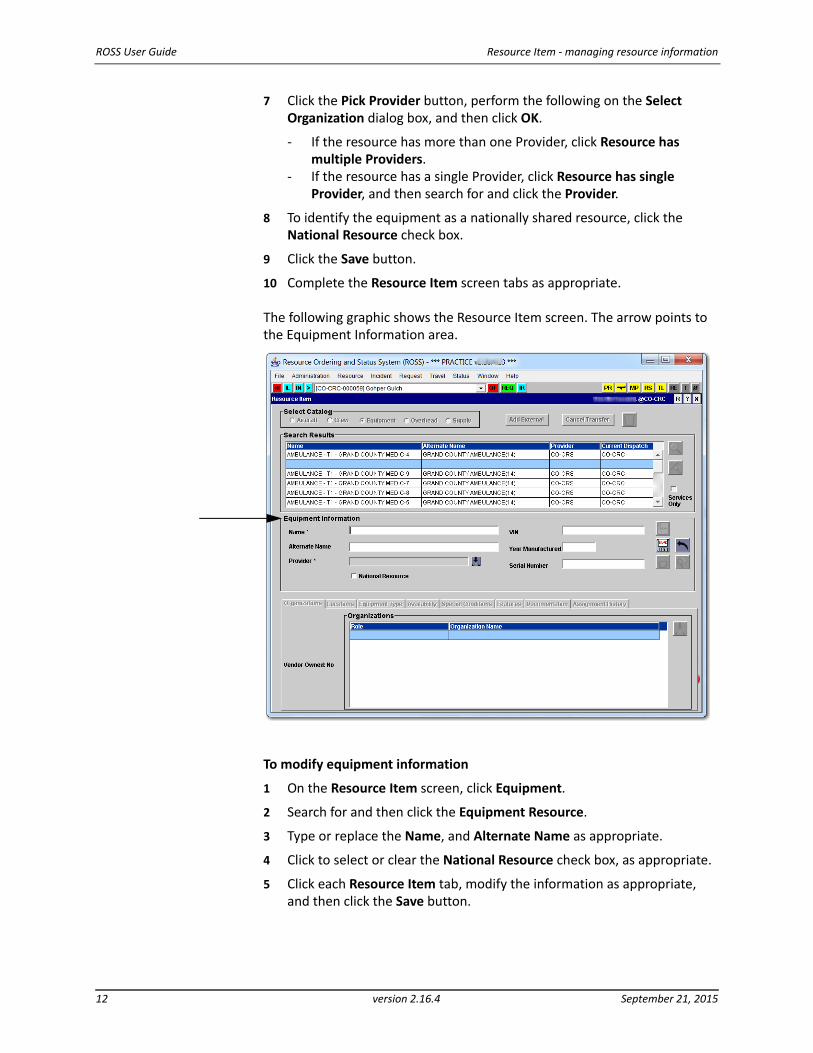
7 Click the Pick Provider button, perform the following on the Select Organization dialog box, and then click OK.
‐ If the resource has more than one Provider, click Resource has multiple Providers.
‐ If the resource has a single Provider, click Resource has single Provider, and then search for and click the Provider.
8 To identify the equipment as a nationally shared resource, click the National Resource check box.
9 Click the Save button.
10 Complete the Resource Item screen tabs as appropriate.
The following graphic shows the Resource Item screen. The arrow points to the Equipment Information area.
To modify equipment information
1 On the Resource Item screen, click Equipment.
2 Search for and then click the Equipment Resource.
3 Type or replace the Name, and Alternate Name as appropriate.
4 Click to select or clear the National Resource check box, as appropriate.
5 Click each Resource Item tab, modify the information as appropriate, and then click the Save button.
12 version 2.16.4 September 21, 2015
Resource Item ‐ managing resource information ROSS User Guide
Working with Overhead
The Resource Item screen for Overhead allows you to search for, add, modify, and delete overhead information, including:
• Last Name, First Name, and Middle Initial;
• Employment Status;
• current Qualifications including training positions;
• Name and Qualifications of Overhead Groups, such as for teams.
Remember these key points when working with overhead resources:
• Overhead group names must be unique within each government non‐dispatch resource provider.
• When creating a single overhead resource, you will automatically create a person record.
• You can search for an existing person who is managed by your dispatch center and convert them to an overhead resource. For example, you can search for and locate a person with a ROSS user account who currently has no qualifications, and add them as an overhead resource.
• The Contacts tab on the Resource Item screen allows you to add contact information that is shared between the Resource Item and User Account screens. You may create only one primary contact for the contact method.
• To modify an overhead record, that resource item must have a System of Record of ROSS and you must have the Data Manager access role for that resource’s Managing Dispatch.
‐ For resource items with a System of Record other than ROSS, you may only add information, which includes Owner, Home Unit, Preferred Jetport, Home Location, Body Weight, and Gender.
‐ Other changes to that resource item must be performed within their own System of Record.
September 21, 2015 version 2.16.4 13
ROSS User Guide Resource Item ‐ managing resource information
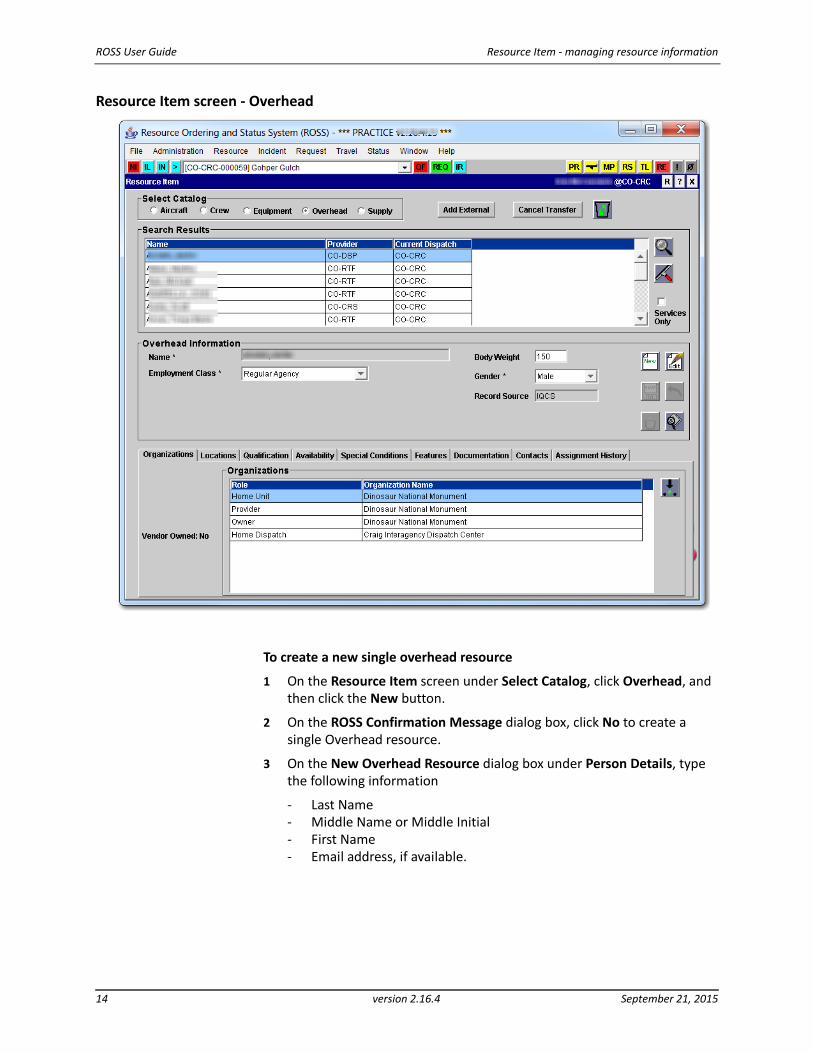
Resource Item screen ‐ Overhead
To create a new single overhead resource
1 On the Resource Item screen under Select Catalog, click Overhead, and then click the New button.
2 On the ROSS Confirmation Message dialog box, click No to create a single Overhead resource.
3 On the New Overhead Resource dialog box under Person Details, type the following information:
‐ Last Name;‐ Middle Name or Middle Initial;‐ First Name;‐ Email address, if available.
14 version 2.16.4 September 21, 2015
Resource Item ‐ managing resource information ROSS User Guide
4 Click the Pick Provider button, perform the following on the Select Organization dialog box, and then click OK.
‐ If the resource has more than one Provider, click Resource has multiple Providers.
‐ If the resource has a single Provider, click Resource has single Provider, and then search for and click the Provider.
5 Click the Employment Class drop‐down arrow, and then click the Employment Class.
6 Click the Pick Preferred Jetport button, and then search for and click the Preferred Jetport.
7 Click the Pick Owner button, and then search for and click the Owner Organization Name.
Leave this field blank to default the owner to the Provider organization.
8 Click the Pick Home Unit button, and then search for and click the Home Unit Organization Name.
Leave this field blank to default the home unit to the Provider organization.
9 In the Social Security Number box, type the Social Security Number of the overhead resource, without dashes, in the format “999999999.”
ROSS generates a unique identifier for its database using the person’s Social Security Number (SSN). As you type, this field displays asterisks (*), not numbers.
10 In the Confirm Social Security Number box, type the Social Security Number again.
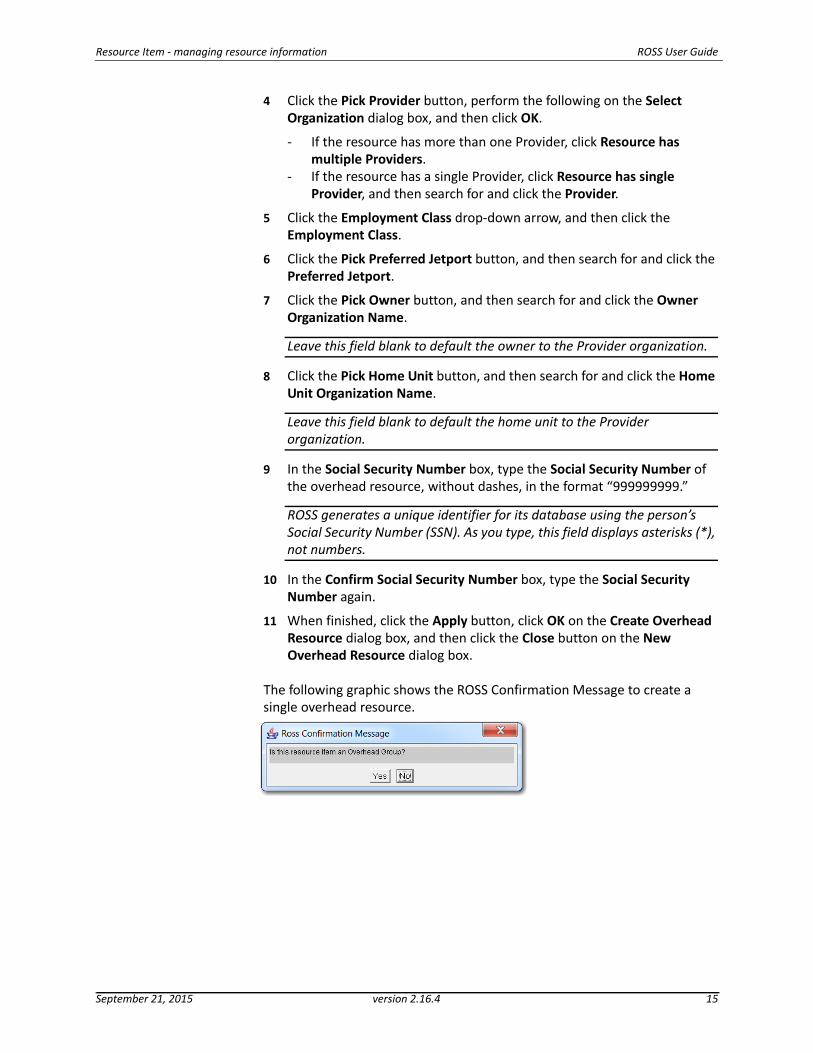
11 When finished, click the Apply button, click OK on the Create Overhead Resource dialog box, and then click the Close button on the New Overhead Resource dialog box.
The following graphic shows the ROSS Confirmation Message to create a single overhead resource.
September 21, 2015 version 2.16.4 15
ROSS User Guide Resource Item ‐ managing resource information
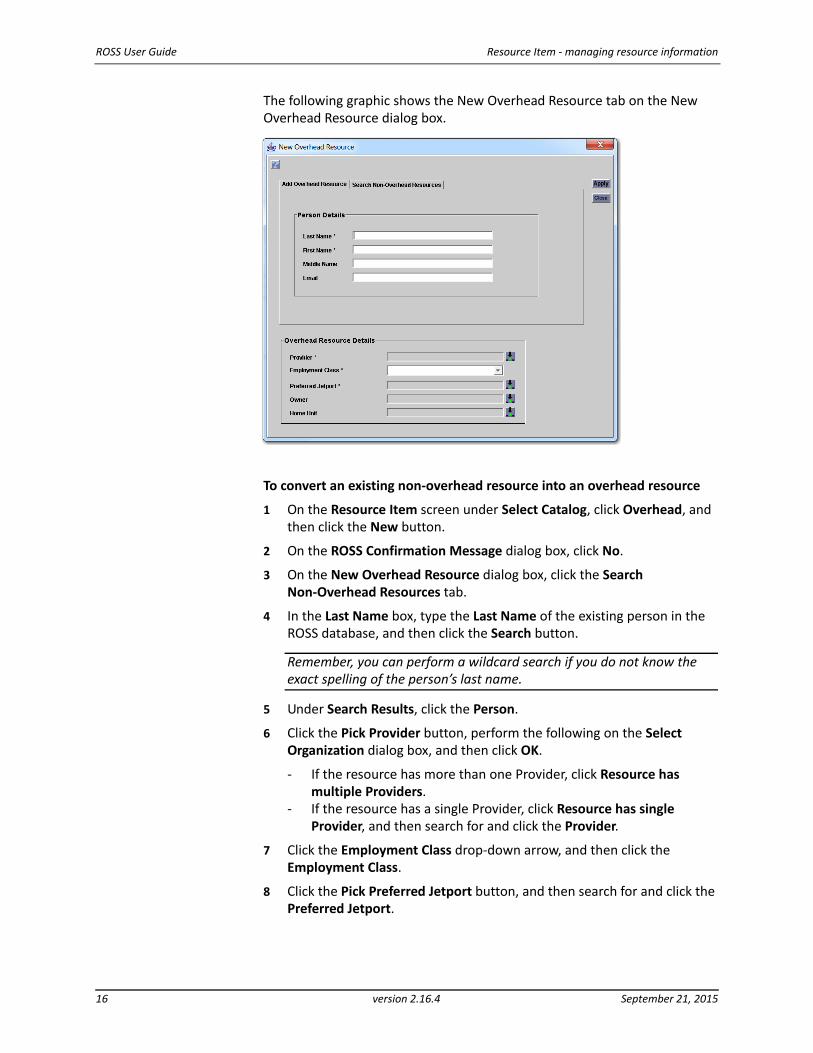
The following graphic shows the New Overhead Resource tab on the New Overhead Resource dialog box.
To convert an existing non‐overhead resource into an overhead resource
1 On the Resource Item screen under Select Catalog, click Overhead, and then click the New button.
2 On the ROSS Confirmation Message dialog box, click No.
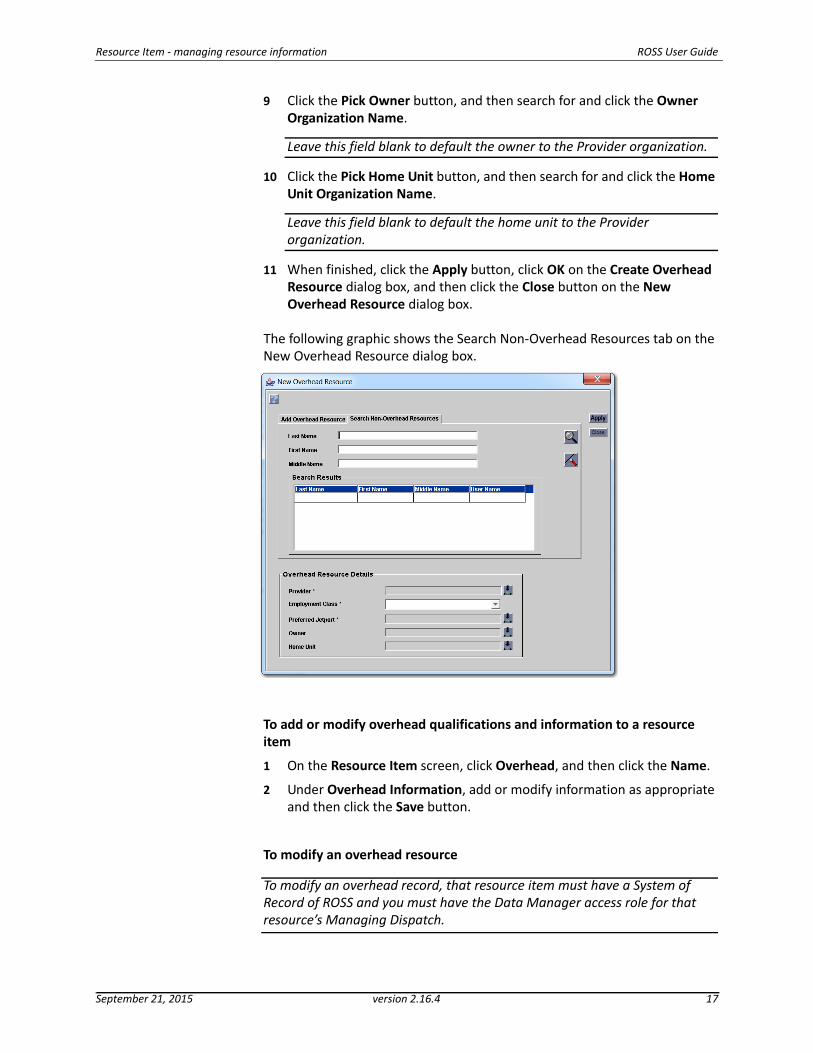
3 On the New Overhead Resource dialog box, click the Search Non‐Overhead Resources tab.
4 In the Last Name box, type the Last Name of the existing person in the ROSS database, and then click the Search button.
Remember, you can perform a wildcard search if you do not know the exact spelling of the person’s last name.
5 Under Search Results, click the Person.
6 Click the Pick Provider button, perform the following on the Select Organization dialog box, and then click OK.
‐ If the resource has more than one Provider, click Resource has multiple Providers.
‐ If the resource has a single Provider, click Resource has single Provider, and then search for and click the Provider.
7 Click the Employment Class drop‐down arrow, and then click the Employment Class.
8 Click the Pick Preferred Jetport button, and then search for and click the Preferred Jetport.
16 version 2.16.4 September 21, 2015
Resource Item ‐ managing resource information ROSS User Guide
9 Click the Pick Owner button, and then search for and click the Owner Organization Name.
Leave this field blank to default the owner to the Provider organization.
10 Click the Pick Home Unit button, and then search for and click the Home Unit Organization Name.
Leave this field blank to default the home unit to the Provider organization.
11 When finished, click the Apply button, click OK on the Create Overhead Resource dialog box, and then click the Close button on the New Overhead Resource dialog box.
The following graphic shows the Search Non‐Overhead Resources tab on the New Overhead Resource dialog box.
To add or modify overhead qualifications and information to a resource item
1 On the Resource Item screen, click Overhead, and then click the Name.
2 Under Overhead Information, add or modify information as appropriate and then click the Save button.
To modify an overhead resource
To modify an overhead record, that resource item must have a System of Record of ROSS and you must have the Data Manager access role for that resource’s Managing Dispatch.
September 21, 2015 version 2.16.4 17
ROSS User Guide Resource Item ‐ managing resource information
1 On the Resource Item screen, click Overhead, click the Name, and then click Edit.
2 On the Edit Person dialog box, modify the following boxes as appropriate and then click OK
‐ Last Name;‐ First Name;‐ Middle Name;‐ Email.
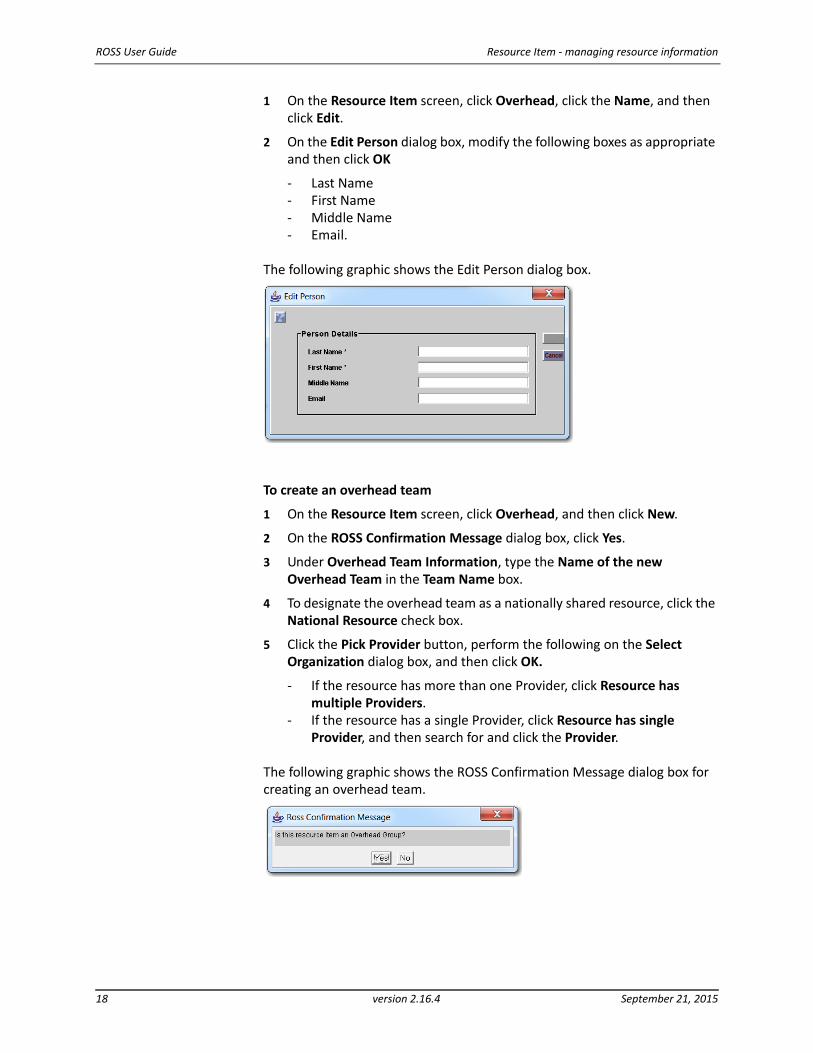
The following graphic shows the Edit Person dialog box.
To create an overhead team
1 On the Resource Item screen, click Overhead, and then click New.
2 On the ROSS Confirmation Message dialog box, click Yes.
3 Under Overhead Team Information, type the Name of the new Overhead Team in the Team Name box.
4 To designate the overhead team as a nationally shared resource, click the National Resource check box.
5 Click the Pick Provider button, perform the following on the Select Organization dialog box, and then click OK.
‐ If the resource has more than one Provider, click Resource has multiple Providers.
‐ If the resource has a single Provider, click Resource has single Provider, and then search for and click the Provider.
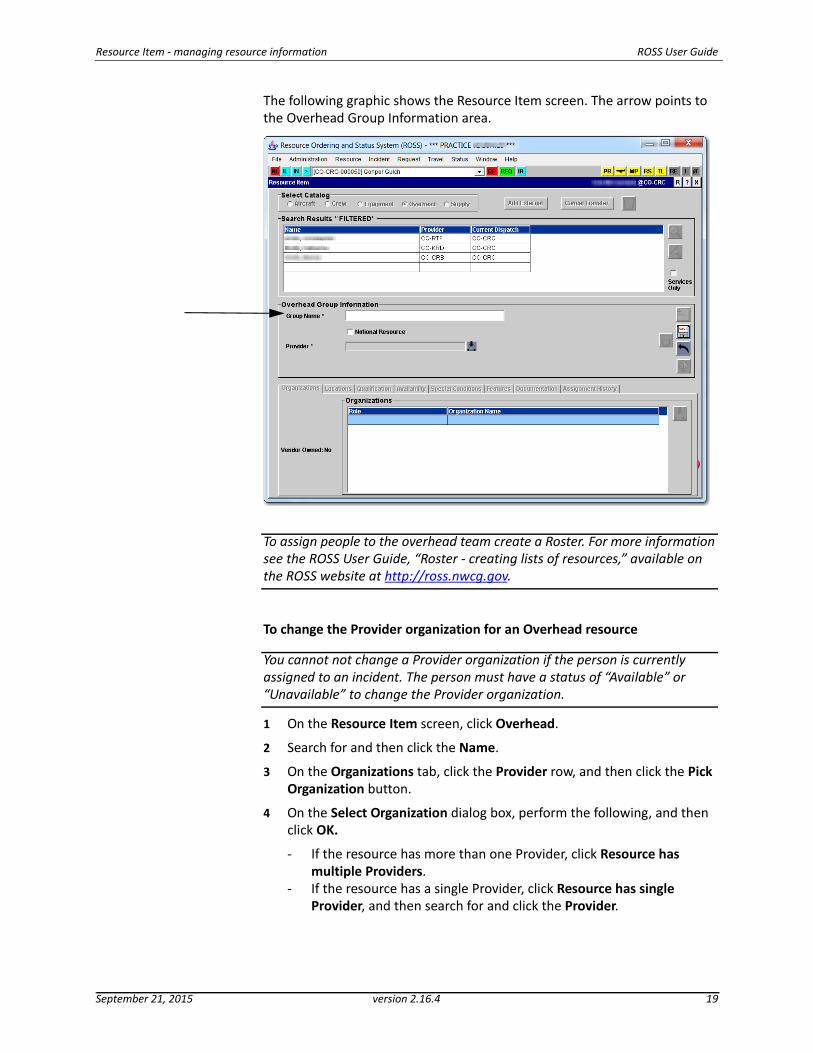
The following graphic shows the ROSS Confirmation Message dialog box for creating an overhead team.
18 version 2.16.4 September 21, 2015
Resource Item ‐ managing resource information ROSS User Guide
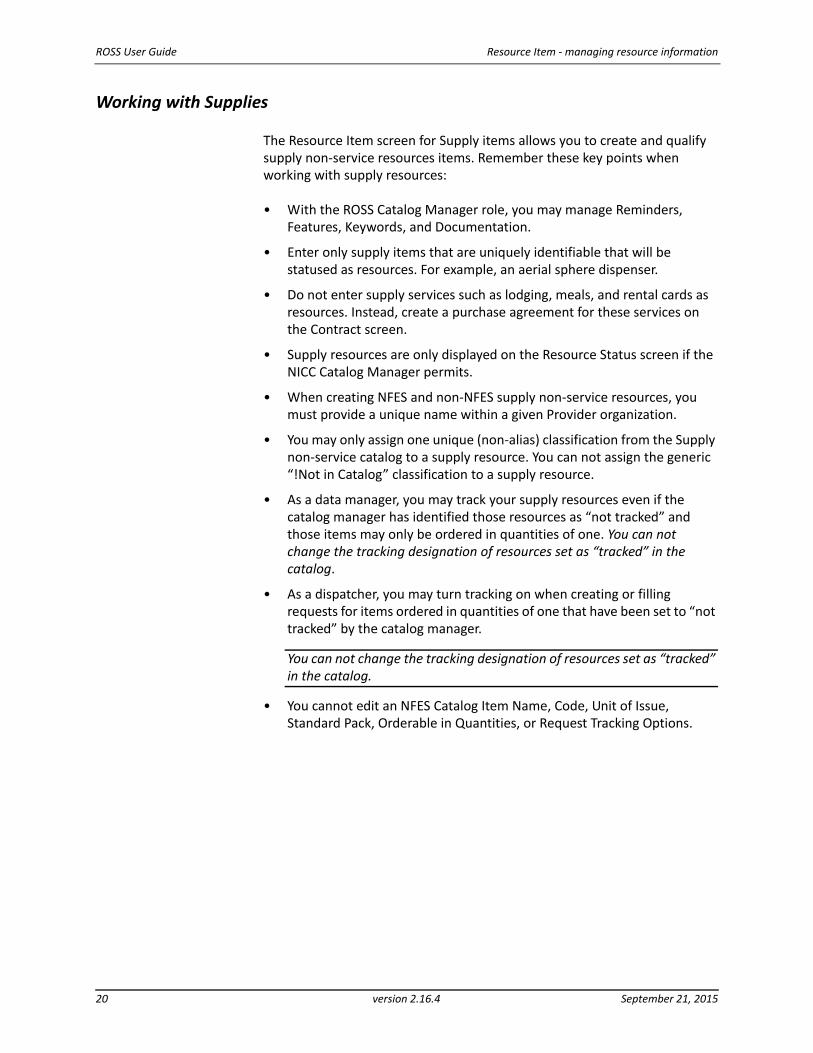
The following graphic shows the Resource Item screen. The arrow points to the Overhead Group Information area.
To assign people to the overhead team create a Roster. For more information see the ROSS User Guide, “Roster ‐ creating lists of resources,” available on the ROSS website at http://ross.nwcg.gov.
To change the Provider organization for an Overhead resource
You cannot not change a Provider organization if the person is currently assigned to an incident. The person must have a status of “Available” or “Unavailable” to change the Provider organization.
1 On the Resource Item screen, click Overhead.
2 Search for and then click the Name.
3 On the Organizations tab, click the Provider row, and then click the Pick Organization button.
4 On the Select Organization dialog box, perform the following, and then click OK.
‐ If the resource has more than one Provider, click Resource has multiple Providers.
‐ If the resource has a single Provider, click Resource has single Provider, and then search for and click the Provider.
September 21, 2015 version 2.16.4 19
ROSS User Guide Resource Item ‐ managing resource information
Working with Supplies
The Resource Item screen for Supply items allows you to create and qualify supply non‐service resources items. Remember these key points when working with supply resources:
• With the ROSS Catalog Manager role, you may manage Reminders, Features, Keywords, and Documentation.
• Enter only supply items that are uniquely identifiable that will be statused as resources. For example, an aerial sphere dispenser.
• Do not enter supply services such as lodging, meals, and rental cards as resources. Instead, create a purchase agreement for these services on the Contract screen.
• Supply resources are only displayed on the Resource Status screen if the NICC Catalog Manager permits.
• When creating NFES and non‐NFES supply non‐service resources, you must provide a unique name within a given Provider organization.
• You may only assign one unique (non‐alias) classification from the Supply non‐service catalog to a supply resource. You can not assign the generic “!Not in Catalog” classification to a supply resource.
• As a data manager, you may track your supply resources even if the catalog manager has identified those resources as “not tracked” and those items may only be ordered in quantities of one. You can not change the tracking designation of resources set as “tracked” in the catalog.
• As a dispatcher, you may turn tracking on when creating or filling requests for items ordered in quantities of one that have been set to “not tracked” by the catalog manager.
You can not change the tracking designation of resources set as “tracked” in the catalog.
• You cannot edit an NFES Catalog Item Name, Code, Unit of Issue, Standard Pack, Orderable in Quantities, or Request Tracking Options.
20 version 2.16.4 September 21, 2015
Resource Item ‐ managing resource information ROSS User Guide
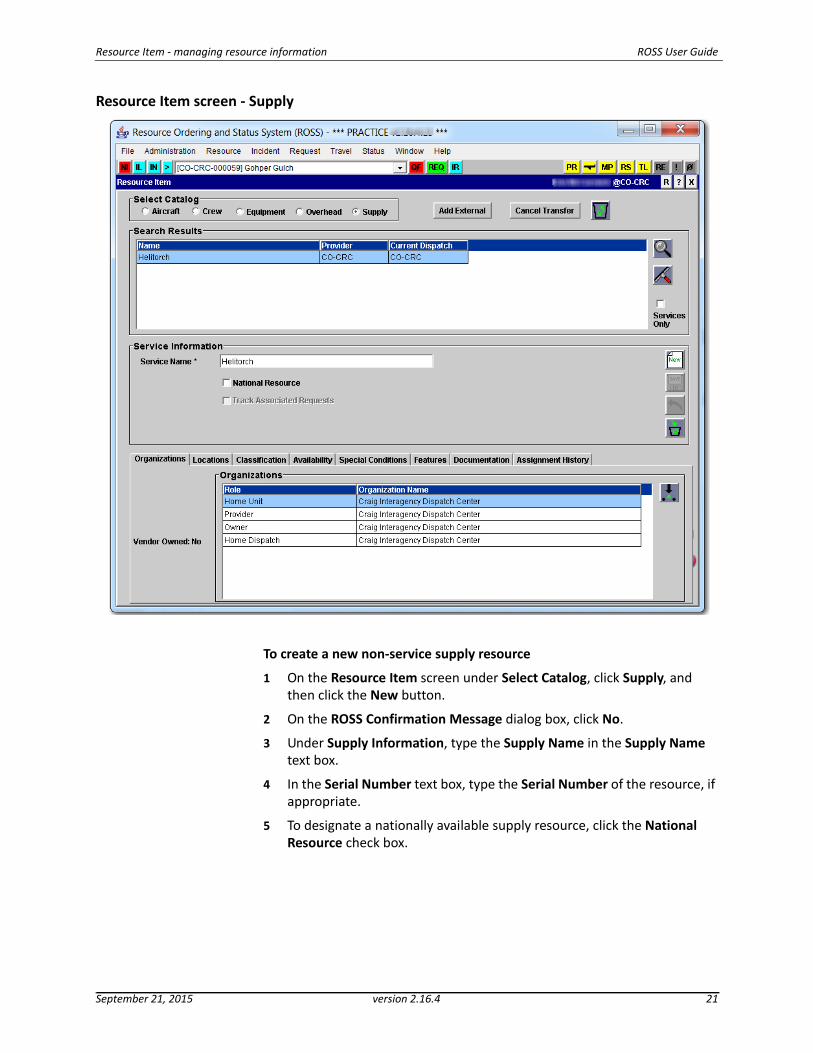
Resource Item screen ‐ Supply
To create a new non‐service supply resource
1 On the Resource Item screen under Select Catalog, click Supply, and then click the New button.
2 On the ROSS Confirmation Message dialog box, click No.
3 Under Supply Information, type the Supply Name in the Supply Name text box.
4 In the Serial Number text box, type the Serial Number of the resource, if appropriate.
5 To designate a nationally available supply resource, click the National Resource check box.
September 21, 2015 version 2.16.4 21

ROSS User Guide Resource Item ‐ managing resource information
6 Click the Pick Provider button, perform the following on the Select Organization dialog box, and then click OK.
‐ If the resource has more than one Provider, click Resource has multiple Providers.
‐ If the resource has a single Provider, click Resource has single Provider, and then search for and click the Provider.
7 Click the Save button.
The following graphic shows the ROSS Confirmation Message dialog box for creating a new supply item.
The following graphic shows the Resource Item screen. The arrow points to the Supply Information area.
Working with the Organizations tab
This section explains how to define government‐owned and vendor‐owned resource items and how to change role designations.
You can only change the Provider, Home Unit, and Owner information of resources that are currently statused At Home, Available, or Unavailable.
22 version 2.16.4 September 21, 2015
Resource Item ‐ managing resource information ROSS User Guide
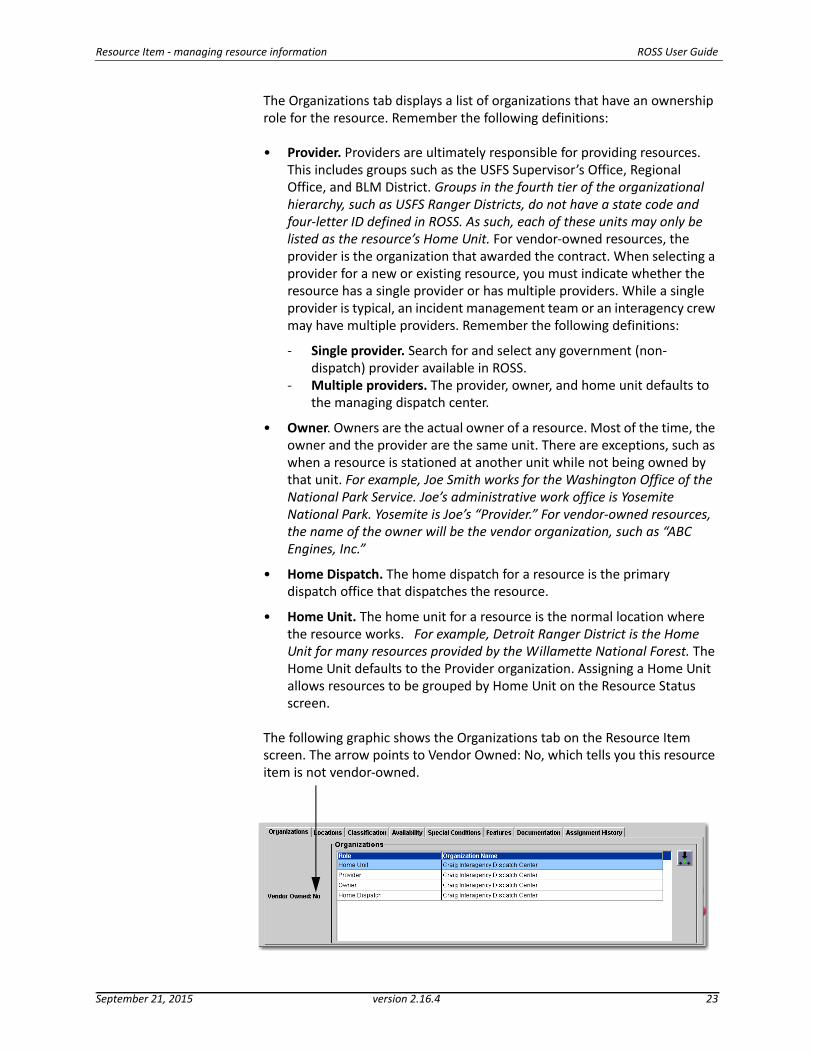
The Organizations tab displays a list of organizations that have an ownership role for the resource. Remember the following definitions:
• Provider. Providers are ultimately responsible for providing resources. This includes groups such as the USFS Supervisor’s Office, Regional Office, and BLM District. Groups in the fourth tier of the organizational hierarchy, such as USFS Ranger Districts, do not have a state code and four‐letter ID defined in ROSS. As such, each of these units may only be listed as the resource’s Home Unit. For vendor‐owned resources, the provider is the organization that awarded the contract. When selecting a provider for a new or existing resource, you must indicate whether the resource has a single provider or has multiple providers. While a single provider is typical, an incident management team or an interagency crew may have multiple providers. Remember the following definitions:
‐ Single provider. Search for and select any government (non‐dispatch) provider available in ROSS.
‐ Multiple providers. The provider, owner, and home unit defaults to the managing dispatch center.
• Owner. Owners are the actual owner of a resource. Most of the time, the owner and the provider are the same unit. There are exceptions, such as when a resource is stationed at another unit while not being owned by that unit. For example, Joe Smith works for the Washington Office of the National Park Service. Joe’s administrative work office is Yosemite National Park. Yosemite is Joe’s “Provider.” For vendor‐owned resources, the name of the owner will be the vendor organization, such as “ABC Engines, Inc.”
• Home Dispatch. The home dispatch for a resource is the primary dispatch office that dispatches the resource.
• Home Unit. The home unit for a resource is the normal location where the resource works. For example, Detroit Ranger District is the Home Unit for many resources provided by the Willamette National Forest. The Home Unit defaults to the Provider organization. Assigning a Home Unit allows resources to be grouped by Home Unit on the Resource Status screen.
The following graphic shows the Organizations tab on the Resource Item screen. The arrow points to Vendor Owned: No, which tells you this resource item is not vendor‐owned.
September 21, 2015 version 2.16.4 23
ROSS User Guide Resource Item ‐ managing resource information
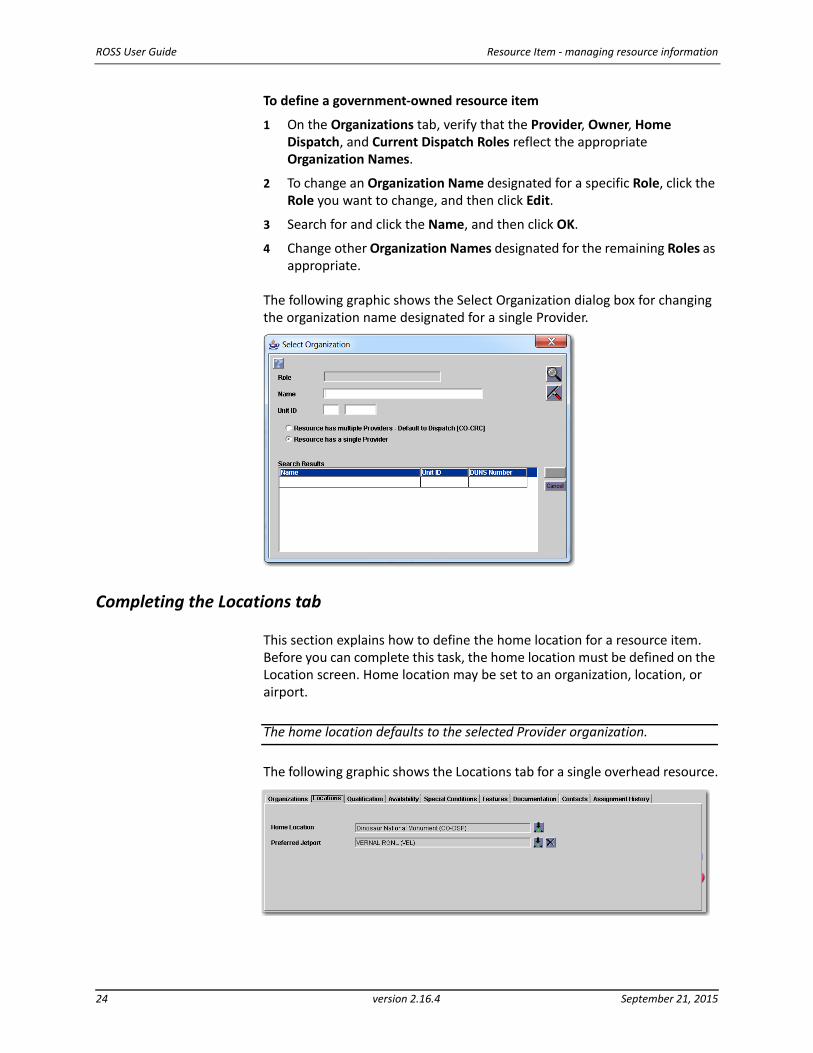
To define a government‐owned resource item
1 On the Organizations tab, verify that the Provider, Owner, Home Dispatch, and Current Dispatch Roles reflect the appropriate Organization Names.
2 To change an Organization Name designated for a specific Role, click the Role you want to change, and then click Edit.
3 Search for and click the Name, and then click OK.
4 Change other Organization Names designated for the remaining Roles as appropriate.
The following graphic shows the Select Organization dialog box for changing the organization name designated for a single Provider.
Completing the Locations tab
This section explains how to define the home location for a resource item. Before you can complete this task, the home location must be defined on the Location screen. Home location may be set to an organization, location, or airport.
The home location defaults to the selected Provider organization.
The following graphic shows the Locations tab for a single overhead resource.
24 version 2.16.4 September 21, 2015
Resource Item ‐ managing resource information ROSS User Guide
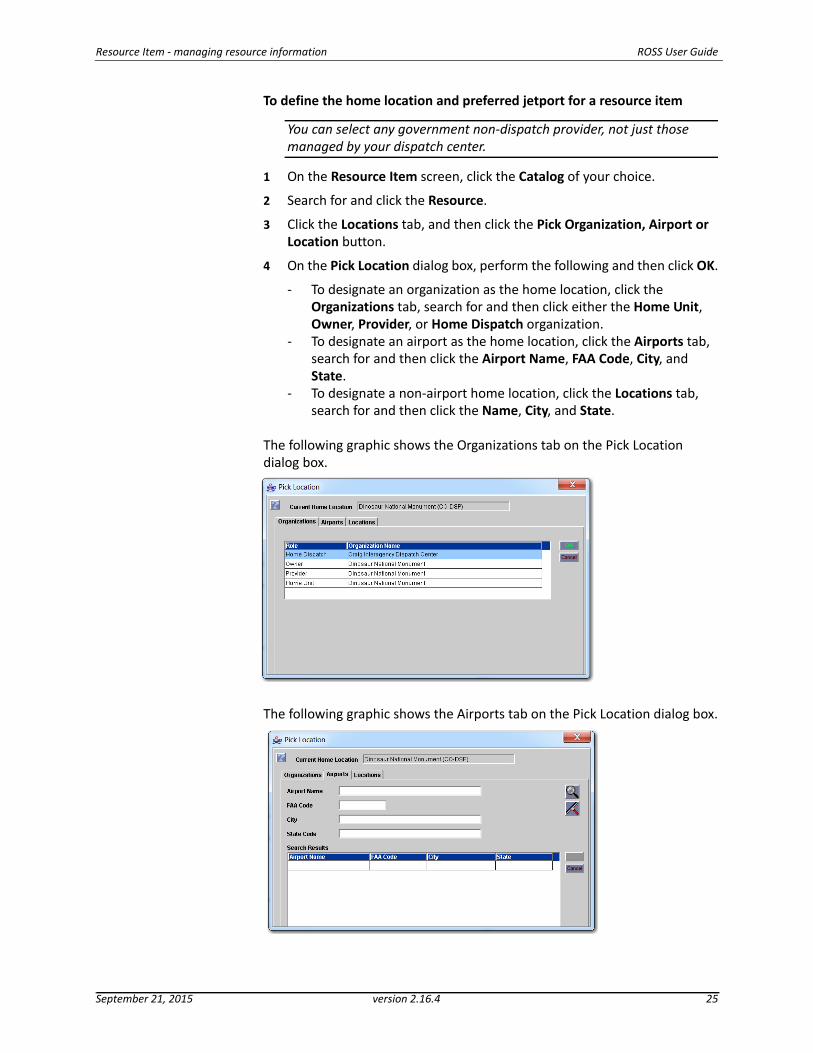
To define the home location and preferred jetport for a resource item
You can select any government non‐dispatch provider, not just those managed by your dispatch center.
1 On the Resource Item screen, click the Catalog of your choice.
2 Search for and click the Resource.
3 Click the Locations tab, and then click the Pick Organization, Airport or Location button.
4 On the Pick Location dialog box, perform the following and then click OK.
‐ To designate an organization as the home location, click the Organizations tab, search for and then click either the Home Unit, Owner, Provider, or Home Dispatch organization.
‐ To designate an airport as the home location, click the Airports tab, search for and then click the Airport Name, FAA Code, City, and State.
‐ To designate a non‐airport home location, click the Locations tab, search for and then click the Name, City, and State.
The following graphic shows the Organizations tab on the Pick Location dialog box.
The following graphic shows the Airports tab on the Pick Location dialog box.
September 21, 2015 version 2.16.4 25
ROSS User Guide Resource Item ‐ managing resource information
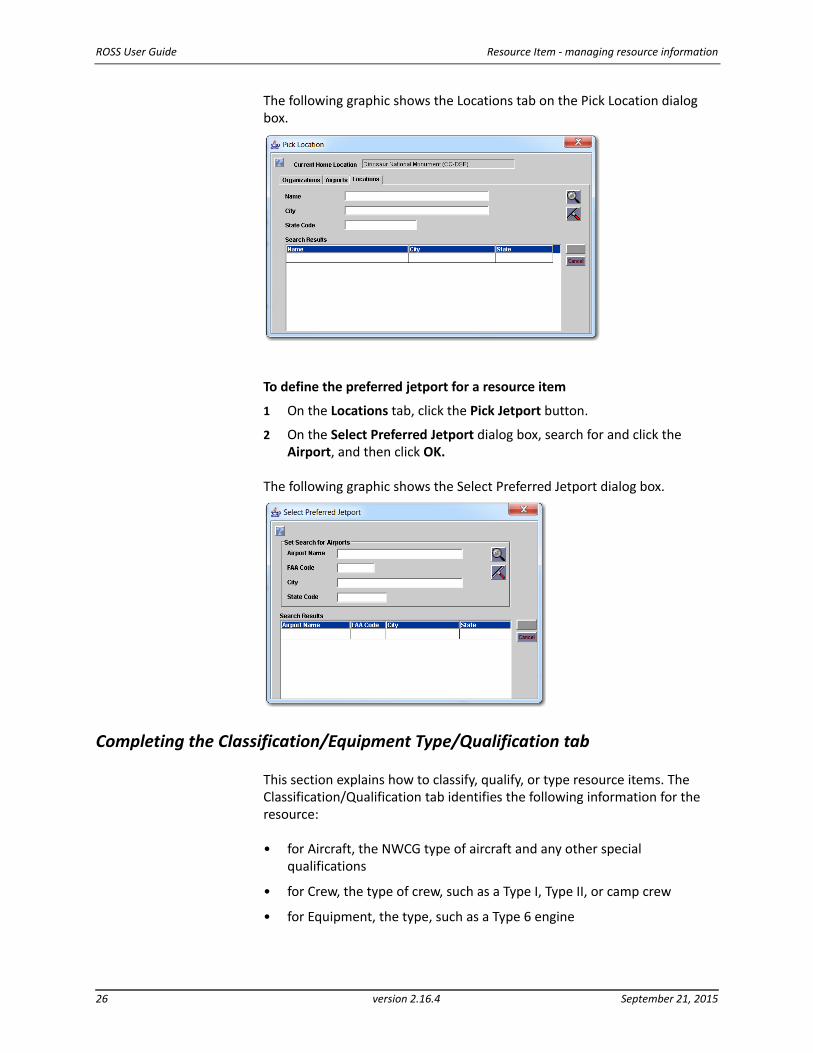
The following graphic shows the Locations tab on the Pick Location dialog box.
To define the preferred jetport for a resource item
1 On the Locations tab, click the Pick Jetport button.
2 On the Select Preferred Jetport dialog box, search for and click the Airport, and then click OK.
The following graphic shows the Select Preferred Jetport dialog box.
Completing the Classification/Equipment Type/Qualification tab
This section explains how to classify, qualify, or type resource items. The Classification/Qualification tab identifies the following information for the resource:
• for Aircraft, the NWCG type of aircraft and any other special qualifications;
• for Crew, the type of crew, such as a Type I, Type II, or camp crew;
• for Equipment, the type, such as a Type 6 engine;
26 version 2.16.4 September 21, 2015
Resource Item ‐ managing resource information ROSS User Guide
• for Overhead, the current qualifications for which the resource is qualified;
• for Supply, the unique (non‐alias) classification from the supply non‐service catalog.
You cannot delete the primary classification for aircraft, crew, and equipment non‐service resources. You must first change the primary classification to “No,” set another primary classification to “Yes” and save your changes, and then delete the non‐primary classification.
Aircraft, equipment, and overhead qualifications may have assigned expiration dates.
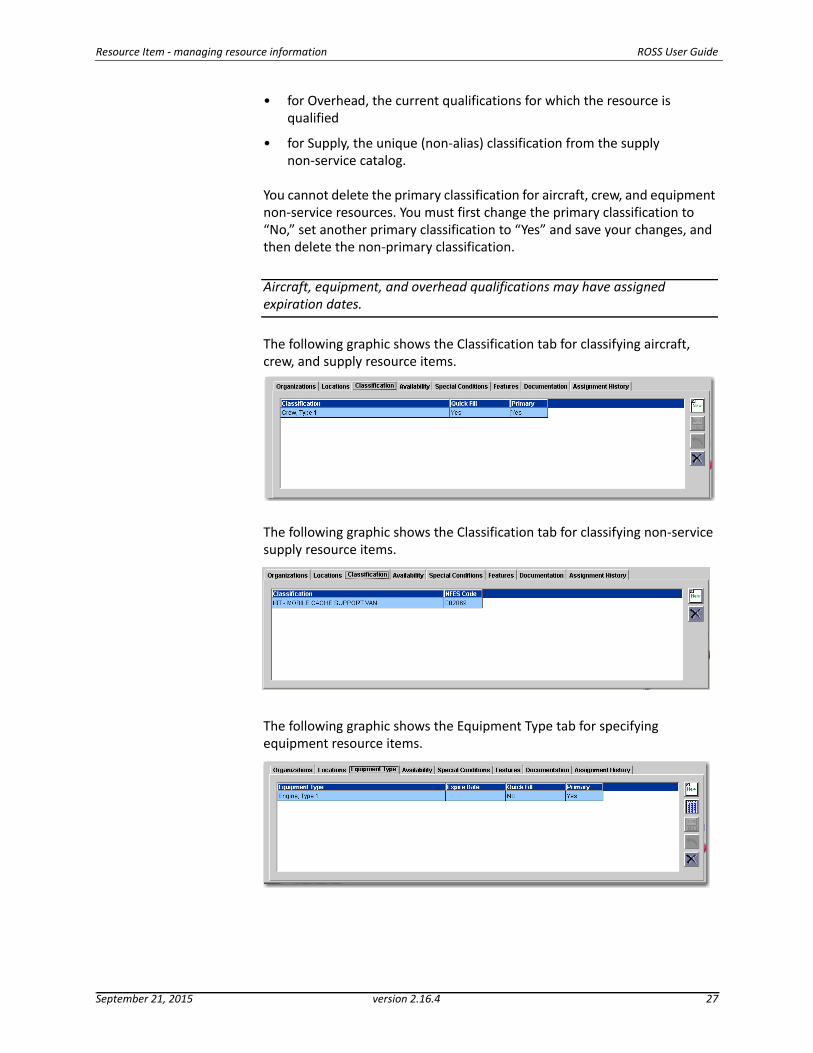
The following graphic shows the Classification tab for classifying aircraft, crew, and supply resource items.
The following graphic shows the Classification tab for classifying non‐service supply resource items.
The following graphic shows the Equipment Type tab for specifying equipment resource items.
September 21, 2015 version 2.16.4 27
ROSS User Guide Resource Item ‐ managing resource information
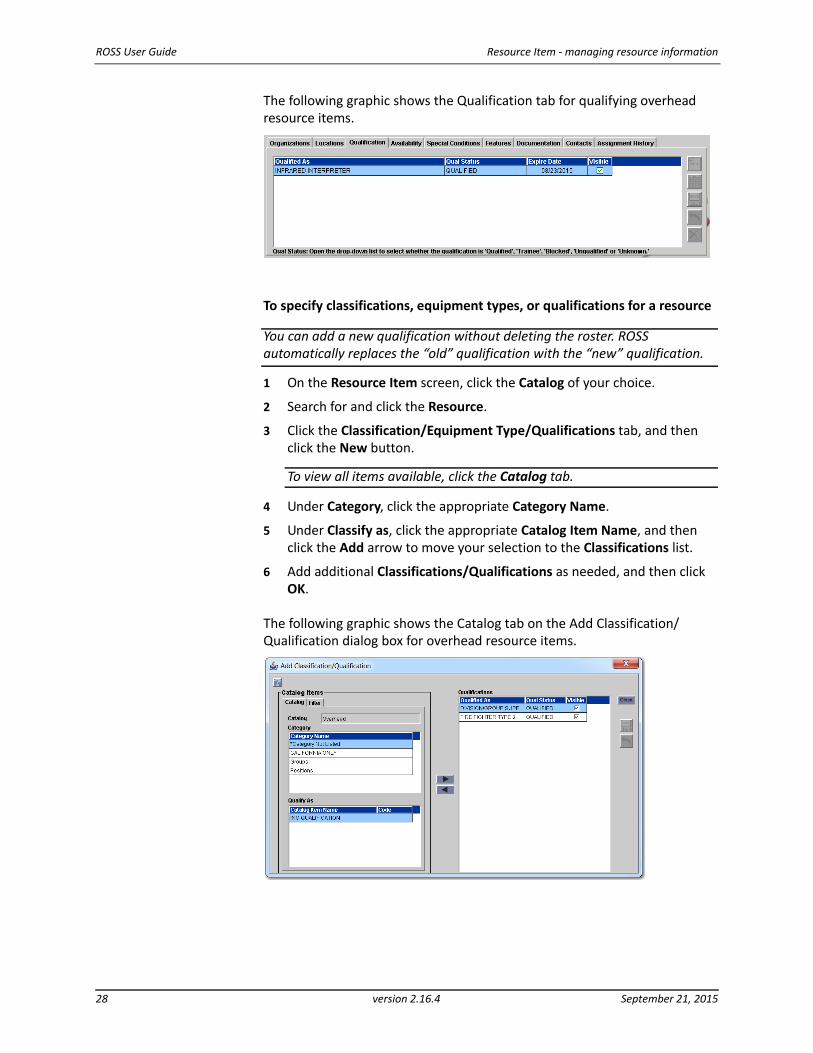
The following graphic shows the Qualification tab for qualifying overhead resource items.
To specify classifications, equipment types, or qualifications for a resource
You can add a new qualification without deleting the roster. ROSS automatically replaces the “old” qualification with the “new” qualification.
1 On the Resource Item screen, click the Catalog of your choice.
2 Search for and click the Resource.
3 Click the Classification/Equipment Type/Qualifications tab, and then click the New button.
To view all items available, click the Catalog tab.
4 Under Category, click the appropriate Category Name.
5 Under Classify as, click the appropriate Catalog Item Name, and then click the Add arrow to move your selection to the Classifications list.
6 Add additional Classifications/Qualifications as needed, and then click OK.
The following graphic shows the Catalog tab on the Add Classification/Qualification dialog box for overhead resource items.
28 version 2.16.4 September 21, 2015
Resource Item ‐ managing resource information ROSS User Guide
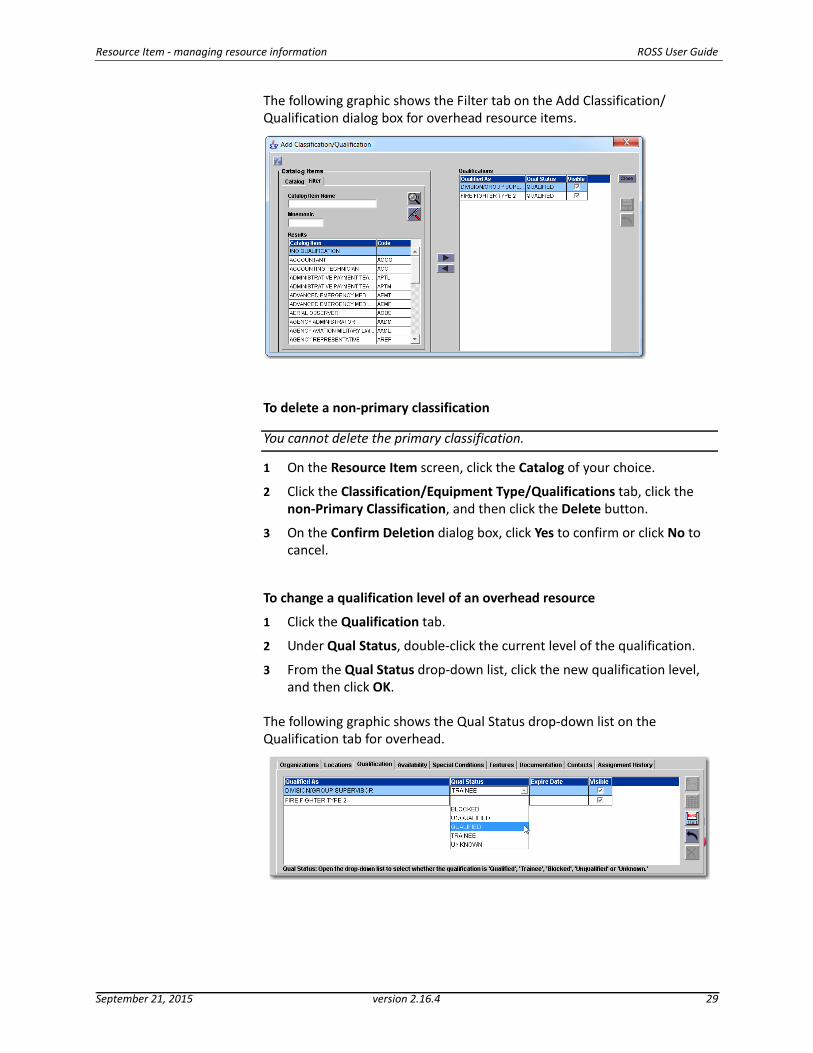
The following graphic shows the Filter tab on the Add Classification/Qualification dialog box for overhead resource items.
To delete a non‐primary classification
You cannot delete the primary classification.
1 On the Resource Item screen, click the Catalog of your choice.
2 Click the Classification/Equipment Type/Qualifications tab, click the non‐Primary Classification, and then click the Delete button.
3 On the Confirm Deletion dialog box, click Yes to confirm or click No to cancel.
To change a qualification level of an overhead resource
1 Click the Qualification tab.
2 Under Qual Status, double‐click the current level of the qualification.
3 From the Qual Status drop‐down list, click the new qualification level, and then click OK.
The following graphic shows the Qual Status drop‐down list on the Qualification tab for overhead.
September 21, 2015 version 2.16.4 29
ROSS User Guide Resource Item ‐ managing resource information
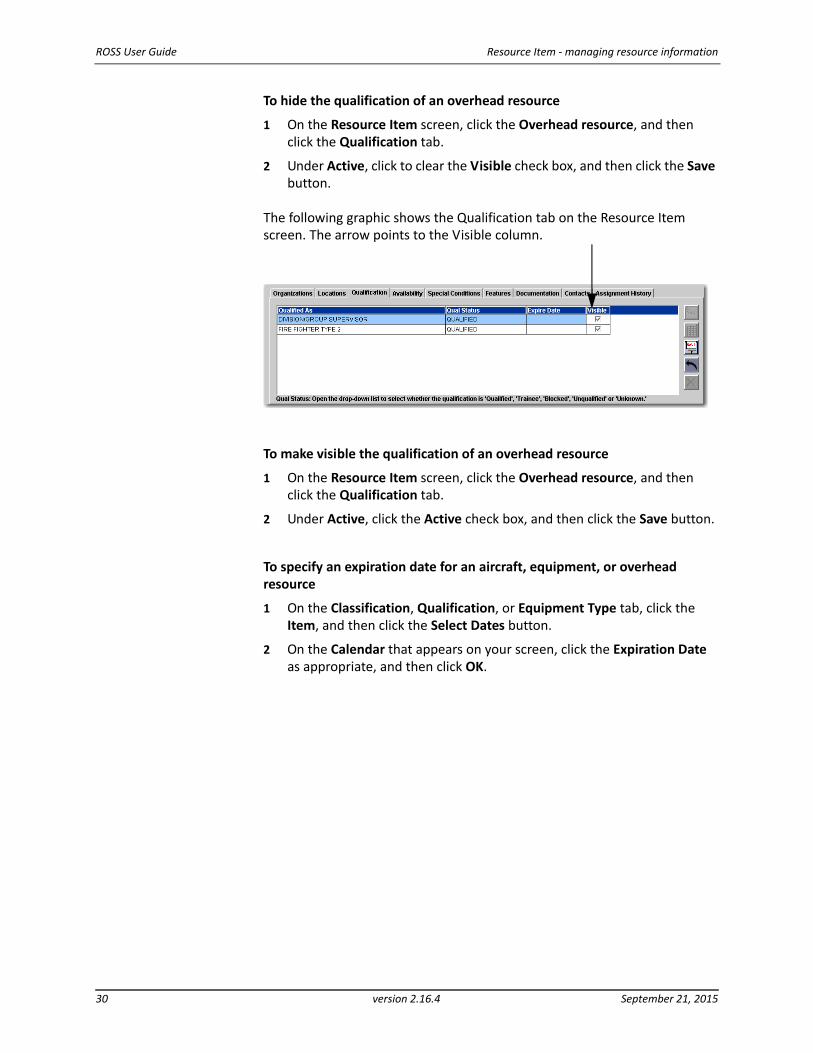
To hide the qualification of an overhead resource
1 On the Resource Item screen, click the Overhead resource, and then click the Qualification tab.
2 Under Active, click to clear the Visible check box, and then click the Save button.
The following graphic shows the Qualification tab on the Resource Item screen. The arrow points to the Visible column.
To make visible the qualification of an overhead resource
1 On the Resource Item screen, click the Overhead resource, and then click the Qualification tab.
2 Under Active, click the Active check box, and then click the Save button.
To specify an expiration date for an aircraft, equipment, or overhead resource
1 On the Classification, Qualification, or Equipment Type tab, click the Item, and then click the Select Dates button.
2 On the Calendar that appears on your screen, click the Expiration Date as appropriate, and then click OK.
30 version 2.16.4 September 21, 2015
Resource Item ‐ managing resource information ROSS User Guide
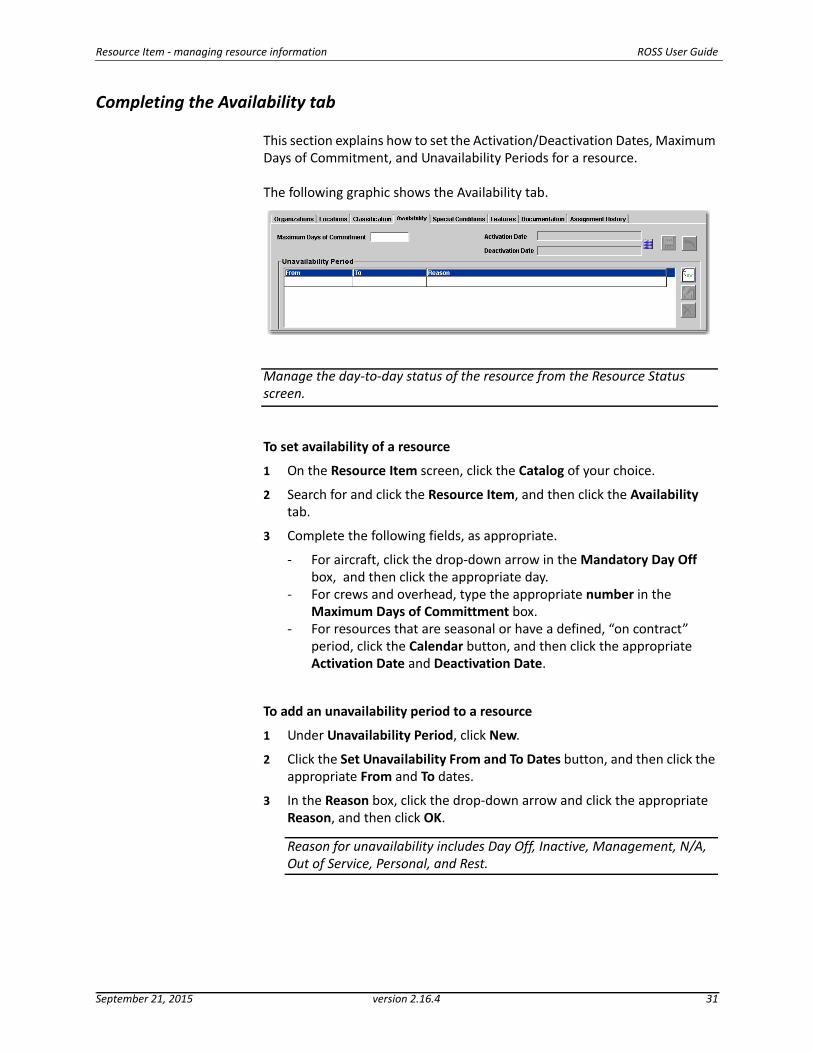
Completing the Availability tab
This section explains how to set the Activation/Deactivation Dates, Maximum Days of Commitment, and Unavailability Periods for a resource.
The following graphic shows the Availability tab.
Manage the day‐to‐day status of the resource from the Resource Status screen.
To set availability of a resource
1 On the Resource Item screen, click the Catalog of your choice.
2 Search for and click the Resource Item, and then click the Availability tab.
3 Complete the following fields, as appropriate.
‐ For aircraft, click the drop‐down arrow in the Mandatory Day Off box, and then click the appropriate day.
‐ For crews and overhead, type the appropriate number in the Maximum Days of Committment box.
‐ For resources that are seasonal or have a defined, “on contract” period, click the Calendar button, and then click the appropriate Activation Date and Deactivation Date.
To add an unavailability period to a resource
1 Under Unavailability Period, click New.
2 Click the Set Unavailability From and To Dates button, and then click the appropriate From and To dates.
3 In the Reason box, click the drop‐down arrow and click the appropriate Reason, and then click OK.
Reason for unavailability includes Day Off, Inactive, Management, N/A, Out of Service, Personal, and Rest.
September 21, 2015 version 2.16.4 31
ROSS User Guide Resource Item ‐ managing resource information
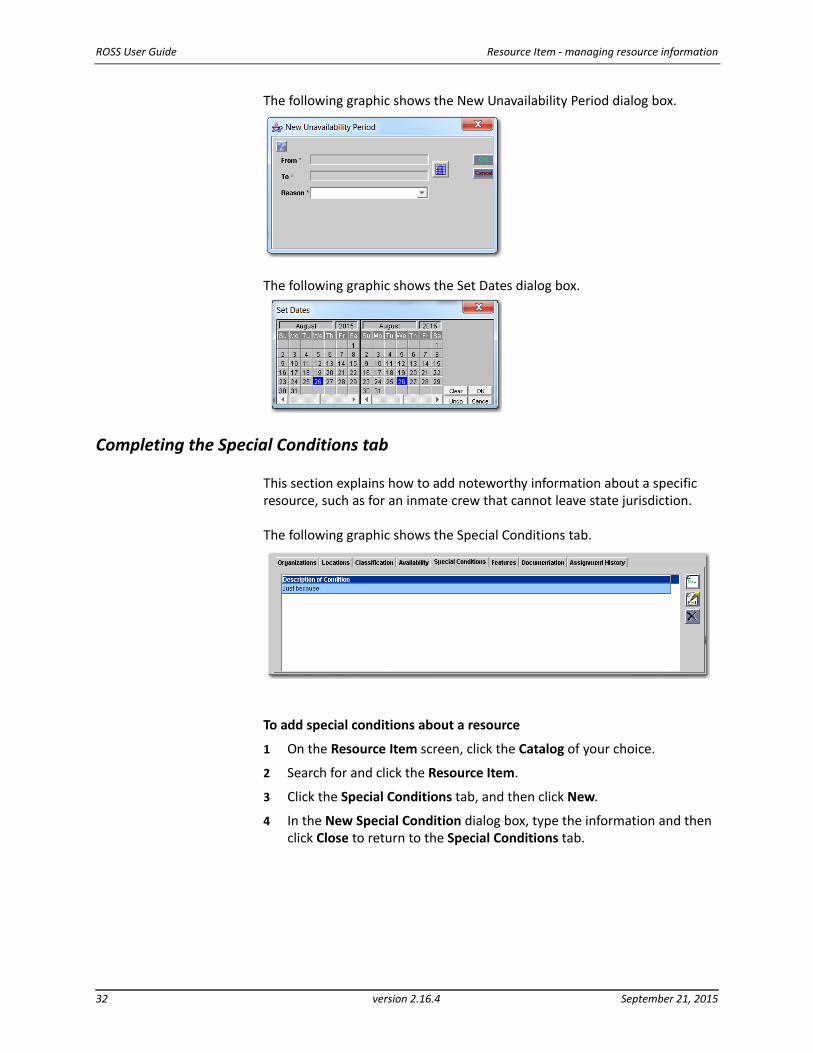
The following graphic shows the New Unavailability Period dialog box.
The following graphic shows the Set Dates dialog box.
Completing the Special Conditions tab
This section explains how to add noteworthy information about a specific resource, such as for an inmate crew that cannot leave state jurisdiction.
The following graphic shows the Special Conditions tab.
To add special conditions about a resource
1 On the Resource Item screen, click the Catalog of your choice.
2 Search for and click the Resource Item.
3 Click the Special Conditions tab, and then click New.
4 In the New Special Condition dialog box, type the information and then click Close to return to the Special Conditions tab.
32 version 2.16.4 September 21, 2015
Resource Item ‐ managing resource information ROSS User Guide
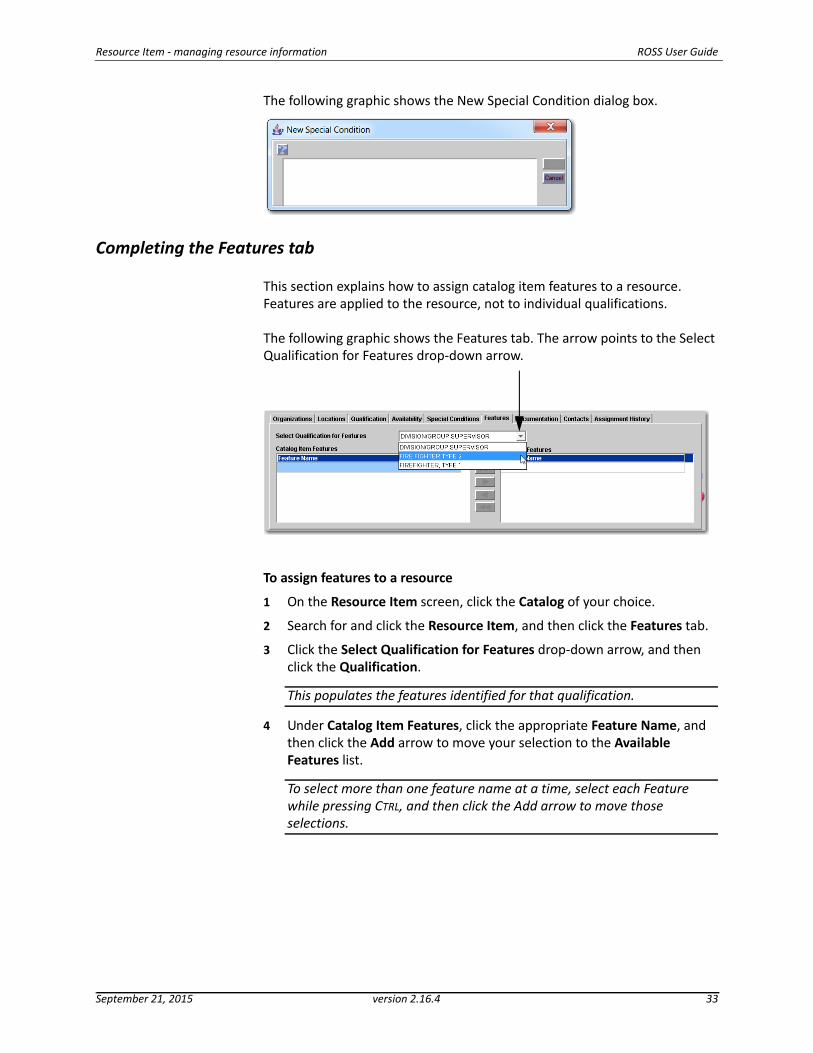
The following graphic shows the New Special Condition dialog box.
Completing the Features tab
This section explains how to assign catalog item features to a resource. Features are applied to the resource, not to individual qualifications.
The following graphic shows the Features tab. The arrow points to the Select Qualification for Features drop‐down arrow.
To assign features to a resource
1 On the Resource Item screen, click the Catalog of your choice.
2 Search for and click the Resource Item, and then click the Features tab.
3 Click the Select Qualification for Features drop‐down arrow, and then click the Qualification.
This populates the features identified for that qualification.
4 Under Catalog Item Features, click the appropriate Feature Name, and then click the Add arrow to move your selection to the Available Features list.
To select more than one feature name at a time, select each Feature while pressing CTRL, and then click the Add arrow to move those selections.
September 21, 2015 version 2.16.4 33

ROSS User Guide Resource Item ‐ managing resource information
Completing the Documentation tab
This section explains how to add documentation to a resource. Documentation is part of the permanent information for a resource and is auto‐stamped with the time of entry and logon ID. You cannot edit nor delete documentation.
The following graphic shows the Documentation tab.
To add documentation to a resource
1 On the Resource Item screen, click the Catalog of your choice.
2 Search for and click the Resource, and then click the Documentation tab.
3 In the lower left text box, type the documentation, and then click the Append Documentation button.
Completing the Contacts tab
This section explains how to add contact information for overhead resources. The Resource Item and User Account screens share contact information for every overhead resource that has ROSS user account, including a ROSS user, web status user, supervisor, and government representative.
The following graphic shows the Contacts tab that displays for overhead resources only.
To add new contact information for an overhead resource
1 On the Resource Item screen, click Overhead, and then search for and click the Overhead Resource Item.
2 Click the Contacts tab, and then click New.
34 version 2.16.4 September 21, 2015
Resource Item ‐ managing resource information ROSS User Guide
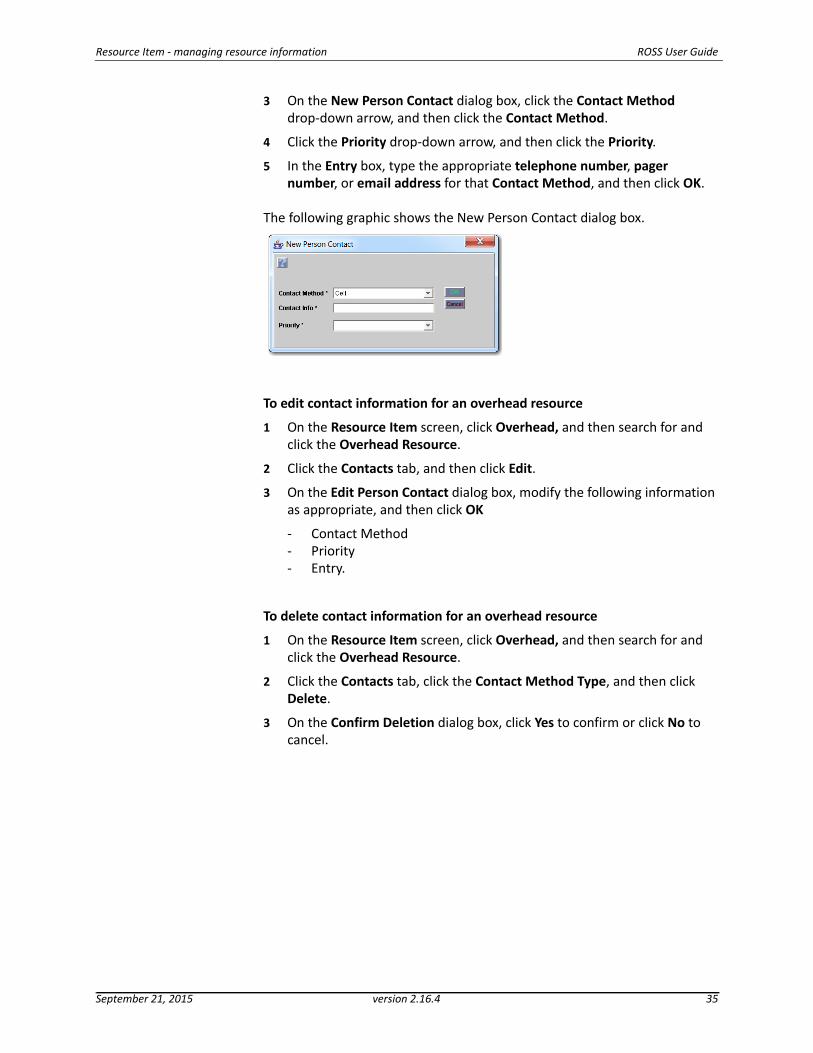
3 On the New Person Contact dialog box, click the Contact Method drop‐down arrow, and then click the Contact Method.
4 Click the Priority drop‐down arrow, and then click the Priority.
5 In the Entry box, type the appropriate telephone number, pager number, or email address for that Contact Method, and then click OK.
The following graphic shows the New Person Contact dialog box.
To edit contact information for an overhead resource
1 On the Resource Item screen, click Overhead, and then search for and click the Overhead Resource.
2 Click the Contacts tab, and then click Edit.
3 On the Edit Person Contact dialog box, modify the following information as appropriate, and then click OK:
‐ Contact Method;‐ Priority;‐ Entry.
To delete contact information for an overhead resource
1 On the Resource Item screen, click Overhead, and then search for and click the Overhead Resource.
2 Click the Contacts tab, click the Contact Method Type, and then click Delete.
3 On the Confirm Deletion dialog box, click Yes to confirm or click No to cancel.
September 21, 2015 version 2.16.4 35
ROSS User Guide Resource Item ‐ managing resource information
Completing the Assignment History tab
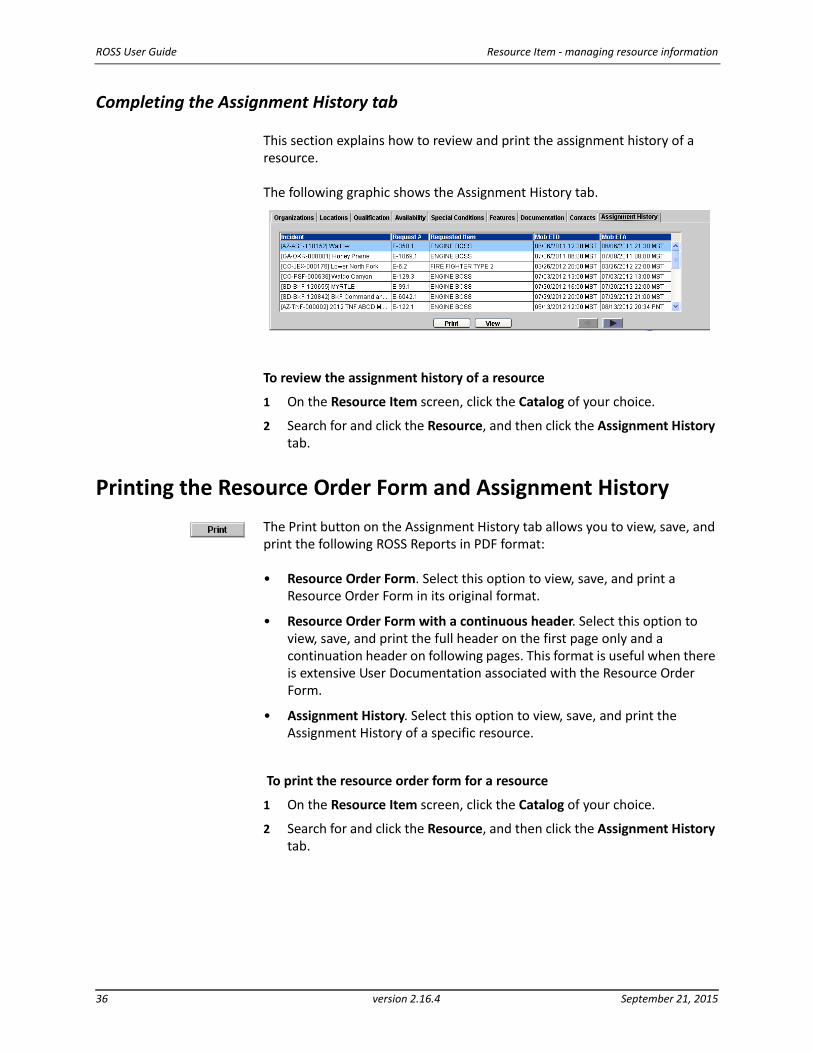
This section explains how to review and print the assignment history of a resource.
The following graphic shows the Assignment History tab.
To review the assignment history of a resource
1 On the Resource Item screen, click the Catalog of your choice.
2 Search for and click the Resource, and then click the Assignment History tab.
Printing the Resource Order Form and Assignment History
The Print button on the Assignment History tab allows you to view, save, and print the following ROSS Reports in PDF format:
• Resource Order Form. Select this option to view, save, and print a Resource Order Form in its original format.
• Resource Order Form with a continuous header. Select this option to view, save, and print the full header on the first page only and a continuation header on following pages. This format is useful when there is extensive User Documentation associated with the Resource Order Form.
• Assignment History. Select this option to view, save, and print the Assignment History of a specific resource.
To print the resource order form for a resource
1 On the Resource Item screen, click the Catalog of your choice.
2 Search for and click the Resource, and then click the Assignment History tab.
36 version 2.16.4 September 21, 2015
Resource Item ‐ managing resource information ROSS User Guide
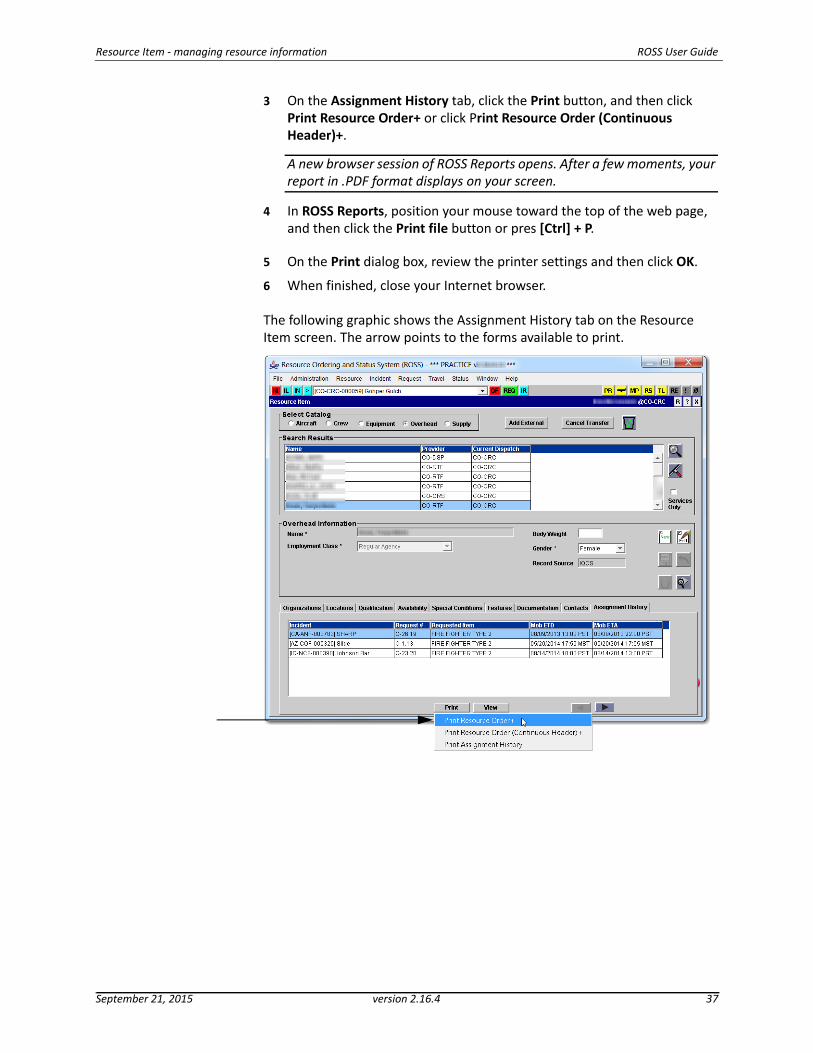
3 On the Assignment History tab, click the Print button, and then click Print Resource Order+ or click Print Resource Order (Continuous Header)+.
A new browser session of ROSS Reports opens. After a few moments, your report in .PDF format displays on your screen.
4 In ROSS Reports, position your mouse toward the top of the web page, and then click the Print file button or pres [Ctrl] + P.
5 On the Print dialog box, review the printer settings and then click OK.
6 When finished, close your Internet browser.
The following graphic shows the Assignment History tab on the Resource Item screen. The arrow points to the forms available to print.
September 21, 2015 version 2.16.4 37
ROSS User Guide Resource Item ‐ managing resource information
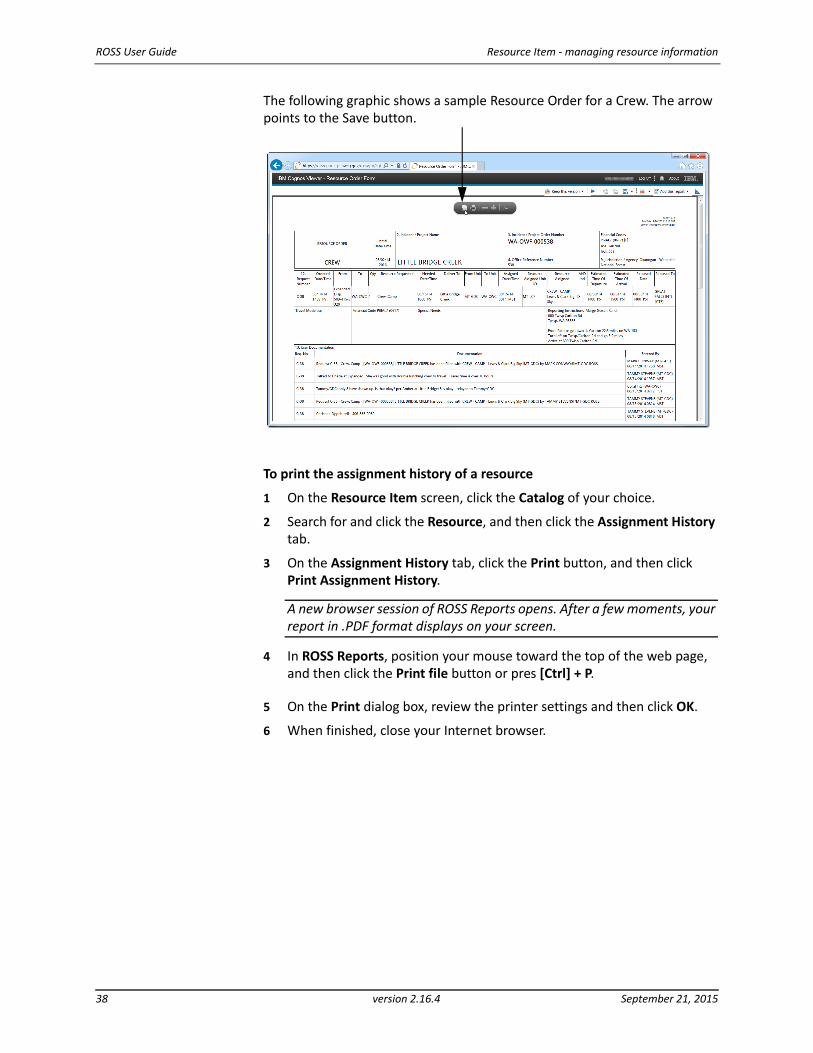
The following graphic shows a sample Resource Order for a Crew. The arrow points to the Save button.
To print the assignment history of a resource
1 On the Resource Item screen, click the Catalog of your choice.
2 Search for and click the Resource, and then click the Assignment History tab.
3 On the Assignment History tab, click the Print button, and then click Print Assignment History.
A new browser session of ROSS Reports opens. After a few moments, your report in .PDF format displays on your screen.
4 In ROSS Reports, position your mouse toward the top of the web page, and then click the Print file button or pres [Ctrl] + P.
5 On the Print dialog box, review the printer settings and then click OK.
6 When finished, close your Internet browser.
38 version 2.16.4 September 21, 2015
Resource Item ‐ managing resource information ROSS User Guide
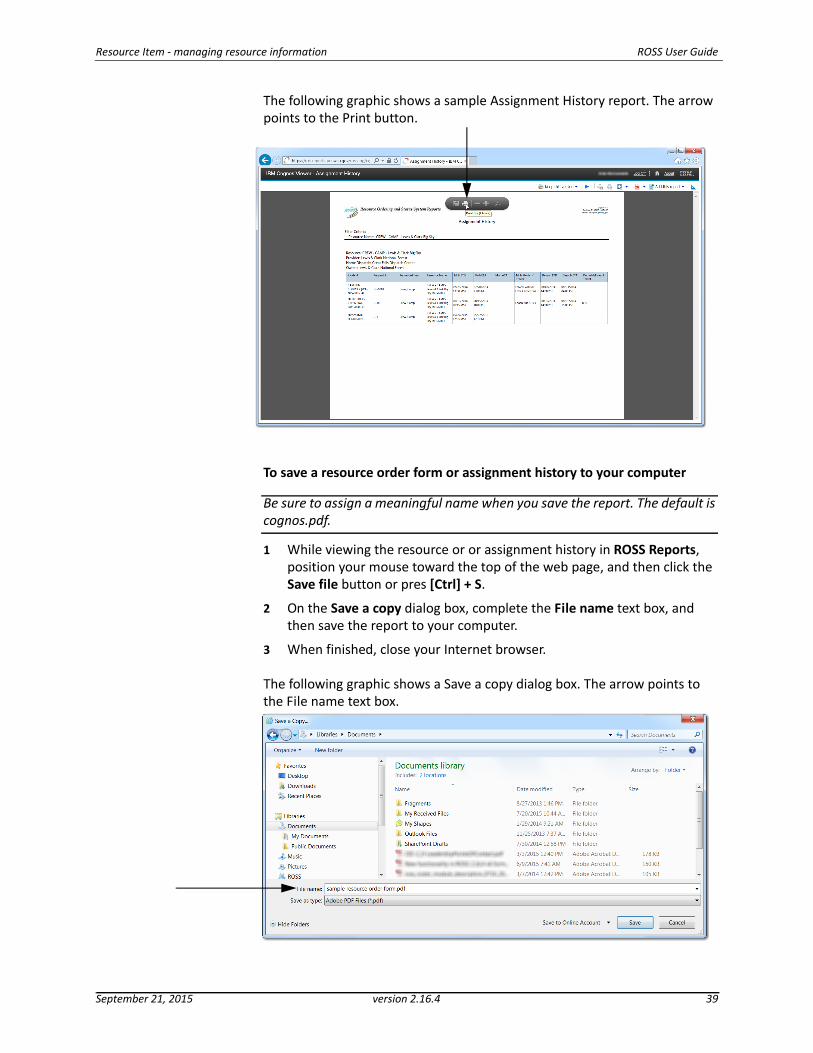
The following graphic shows a sample Assignment History report. The arrow points to the Print button.
To save a resource order form or assignment history to your computer
Be sure to assign a meaningful name when you save the report. The default is cognos.pdf.
1 While viewing the resource or or assignment history in ROSS Reports, position your mouse toward the top of the web page, and then click the Save file button or pres [Ctrl] + S.
2 On the Save a copy dialog box, complete the File name text box, and then save the report to your computer.
3 When finished, close your Internet browser.
The following graphic shows a Save a copy dialog box. The arrow points to the File name text box.
September 21, 2015 version 2.16.4 39
ROSS User Guide Resource Item ‐ managing resource information
Identifying National Resources
National Resources are those resources that have national utilization, high demand, limited availability, and unique status reporting requirements identified by the NICC. These include Type 1 Incident Management Teams (IMTs), Type 1 Crews, Airtankers on a NICC contract, most Type 1 and 2 helicopters and lead planes, and smoke jumpers.
For a complete list of national resources, refer to the current National Mobilization Guide.
When you check the National Resource check box on the Resource Item screen, you allow “No Action” notifications to be generated whenever a dispatcher assigns, reassigns, diverts, or releases that resource.
For more information about notifications for dispatch offices and selection areas, please refer to the section, “Setting your dispatch notification preferences,” in the ROSS User Guide, “Personal Settings ‐ setting request filters.”
To identify a resource as a nationally shared resource
1 On the Resource Item screen, search for and then click the Resource.
2 Click the National Resource check box, and then click the Save button.
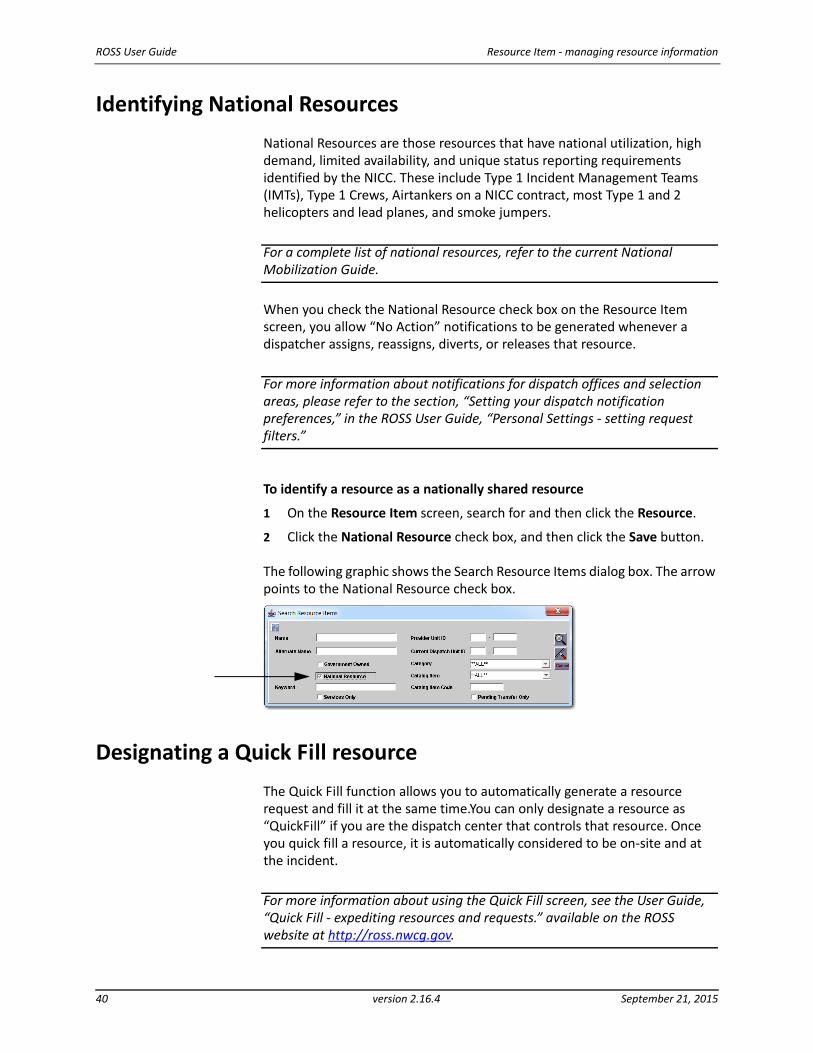
The following graphic shows the Search Resource Items dialog box. The arrow points to the National Resource check box.
Designating a Quick Fill resource
The Quick Fill function allows you to automatically generate a resource request and fill it at the same time.You can only designate a resource as “QuickFill” if you are the dispatch center that controls that resource. Once you quick fill a resource, it is automatically considered to be on‐site and at the incident.
For more information about using the Quick Fill screen, see the User Guide, “Quick Fill ‐ expediting resources and requests.” available on the ROSS website at http://ross.nwcg.gov.
40 version 2.16.4 September 21, 2015
Resource Item ‐ managing resource information ROSS User Guide
To designate a resource as Quick Fill
You can only designate a resource as QuickFill if you are the dispatch center that controls the resource.
1 On the Resource Item screen, click the Aircraft, Crew, or Equipment resource.
2 Click the Classification or Equipment Type tab.
3 Under the Quick Fill column, click the current Quick Fill designation.
This will be either a Yes or No value.
4 Click the Quick Fill drop‐down arrow, click the QuickFill designation, and then click the Save button.
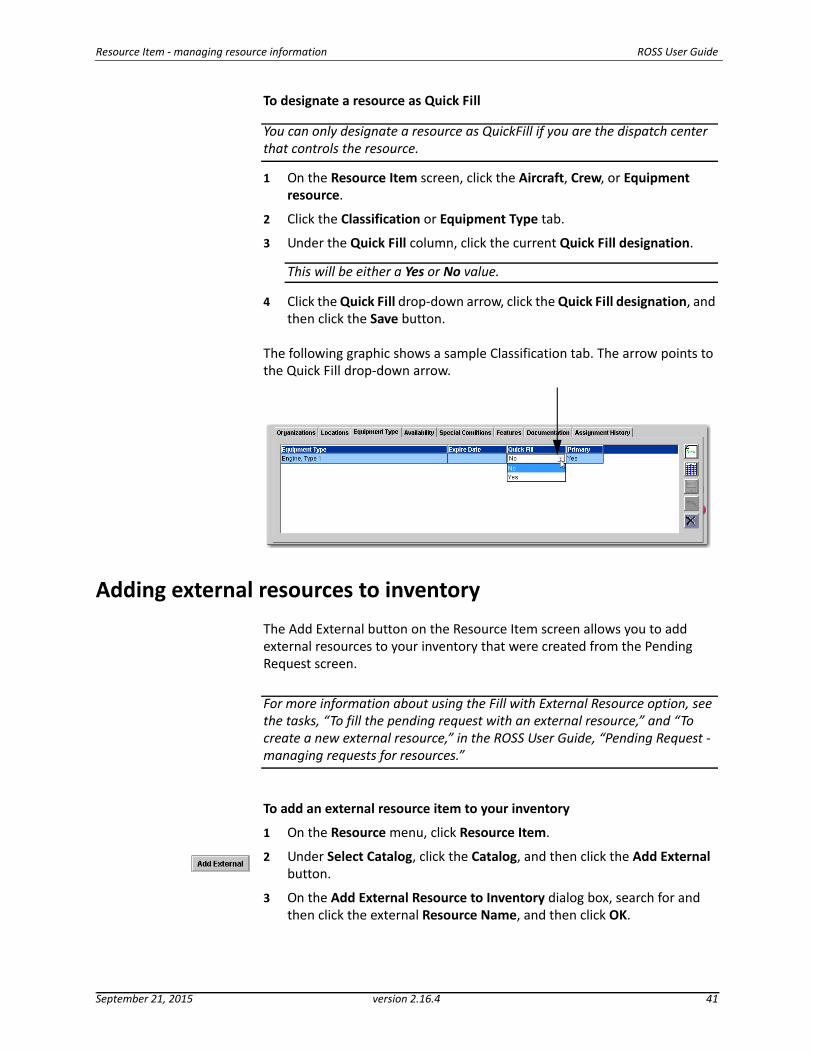
The following graphic shows a sample Classification tab. The arrow points to the Quick Fill drop‐down arrow.
Adding external resources to inventory
The Add External button on the Resource Item screen allows you to add external resources to your inventory that were created from the Pending Request screen.
For more information about using the Fill with External Resource option, see the tasks, “To fill the pending request with an external resource,” and “To create a new external resource,” in the ROSS User Guide, “Pending Request ‐ managing requests for resources.”
To add an external resource item to your inventory
1 On the Resource menu, click Resource Item.
2 Under Select Catalog, click the Catalog, and then click the Add External button.
3 On the Add External Resource to Inventory dialog box, search for and then click the external Resource Name, and then click OK.
September 21, 2015 version 2.16.4 41
ROSS User Guide Resource Item ‐ managing resource information
4 Under Overhead Resource Details, click the Pick Provider button, and then perform one of the following on the Select Organization dialog box.
‐ To designate that the resource has multiple providers, click the Resource has multiple Providers option.
‐ To designate that the resource has a single provider, click the Resource has a single Provider option, and then search for and click the Provider Name.
5 For overhead, click the Employment Status drop‐down arrow, and then click the Employment Status.
6 For crews and overhead, click the Pick Preferred Jetport button, search for and then click the Preferred Jetport.
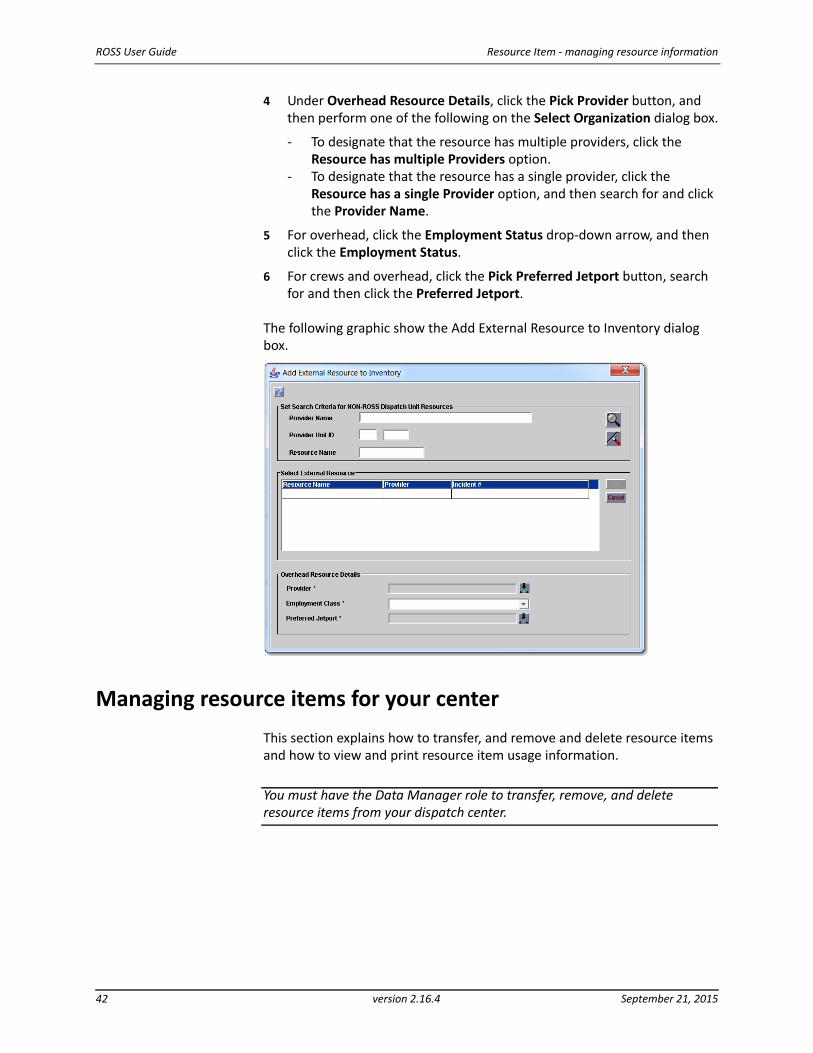
The following graphic show the Add External Resource to Inventory dialog box.
Managing resource items for your center
This section explains how to transfer, and remove and delete resource items and how to view and print resource item usage information.
You must have the Data Manager role to transfer, remove, and delete resource items from your dispatch center.
42 version 2.16.4 September 21, 2015
Resource Item ‐ managing resource information ROSS User Guide
Transferring resources to another dispatch center
This section explains how to transfer resources to another dispatch center, how to review incomplete resource transfers, and how to cancel the transfer of a resource.
You must have the Data Manager role to transfer a resource.
Remember these key points when transferring resources:
• You can transfer a resource managed by your dispatch center to another center. These resources must be at home (available or unavailable).
This is done if the resource goes on a temporary reassignment or moves to another office. Do not transfer a resource that is being assigned to a request or preposition.
• You can not transfer resources assigned to a parent request of an open assignment roster.
• You can not transfer a person who is not a resource, that is, a person who doesn’t have qualifications. You must physically delete that person at one dispatch center, and then add the person back into the other dispatch center.
• Using the “Search Resources” button on the Resource Item screen you can review all incomplete transfers of resources in a given catalog.
• Once transferred, the “old” home dispatch center may no longer status the resource nor use it to fill requests. Until the “new” home dispatch center completes the transfer process, the resource’s status is set to “Unavailable (Transferred),” it cannot be updated, nor cannot be used to to fill or quick fill a request.
• Transfers are completed by assigning a Provider organization.
• The resources with incomplete transfers are not included on the counts displayed on the Other Resources tab on the Pending Request screen.
• You can choose to be notified when a resource is transferred to your dispatch center by selecting “Transfer Resource” on the “Admin Notification Settings” tab on the “Personal Settings” screen.
For more information please refer to, “Creating Notification Settings,” in the ROSS User Guide, “Personal Settings ‐ setting request filters.”
• Transferring a resource that has a master roster also transfers the roster.
• You cannot transfer resources to a “removed” dispatch center.
• You can add incomplete transfer resources to contracts, master roster positions, and assignment roster positions. However, when assigning an “Unavailable (Transferred)” resource, subordinate requests are not created for assignment roster positions. To generate the subordinate
September 21, 2015 version 2.16.4 43

ROSS User Guide Resource Item ‐ managing resource information
request, the “new” dispatch center must complete the transfer and set its status to “Available.”
• Status‐only dispatch centers can not authorize another dispatch center to fill requests with their resource if the transfer is incomplete.
• You can not select transport resources for a travel plan if the transfer is incomplete.
• You can request an overhead resource by name whose transfer is incomplete. The request will not be filled until the transfer is complete.
• The Search for Resources screen displays resources with incomplete transfers for any filter criteria you supply.
Since incomplete resource transfers do not have a provider, you can not filter on that criteria.
• When transferring overhead resources, existing ROSS user accounts and web status access are physically deleted.
• Contract resources may only be transferred to dispatch centers that manage resources on the contract.
Removing and deleting resources managed by your dispatch center
You can remove and then delete resources managed by your dispatch center. Remember these key points when removing and deleting resources:
• You can only remove and delete resources that are managed by your dispatch center.
• Removing a resource prevents anyone from viewing and using it, but it does not physically delete it from the ROSS database.
• Once the resource is removed, you can immediately delete those resources not associated to existing open or closed incident(s).
• You cannot delete resources associated to open incident(s) until year‐end, when the incident(s) are closed and removed from ROSS.
To transfer a resource item to another dispatch center
1 On the Resource Item screen, click the Catalog of your choice.
2 On the Organizations tab, click the Home Dispatch Role, and then click the Pick Organization button.
3 On the Select Organization dialog box, search for and then click the Organization Name, and then click OK.
44 version 2.16.4 September 21, 2015
Resource Item ‐ managing resource information ROSS User Guide
To complete the transfer of a resource item to your dispatch center
You must complete the Provider box to complete the transfer!
1 On the Resource Item screen, click the Catalog, and then click the Provider column to sort by Provider.
Resources that have no Provider have been transferred to you.
2 Click the Transferred Resource.
3 Click the Pick Provider button, and then perform one of the following on the Select Organization dialog box.
‐ To designate that the resource has multiple providers, click the Resource has multiple Providers option.
‐ To designate that the resource has a single provider, click the Resource has a single Provider option, and then search for and click the Provider Name.
4 Click the Save button.
To cancel a transfer of a resource item
You may only cancel the transfer of a resource item from your dispatch center before the “new” dispatch center selects the provider. Once canceled, the status of the resource item is reinstated to its status prior to the transfer.
1 On the Resource Item screen, click the Cancel Transfer button.
You do not need to specify the catalog before clicking the Cancel Transfer button.
2 On the Cancel Transfer dialog box, search for and then click the Name of the transferred resource, and then click Apply.
3 On the ROSS Confirmation Message dialog box, click Yes to confirm or click No to cancel, and then click Close to return to the Resource Item screen.
September 21, 2015 version 2.16.4 45
ROSS User Guide Resource Item ‐ managing resource information
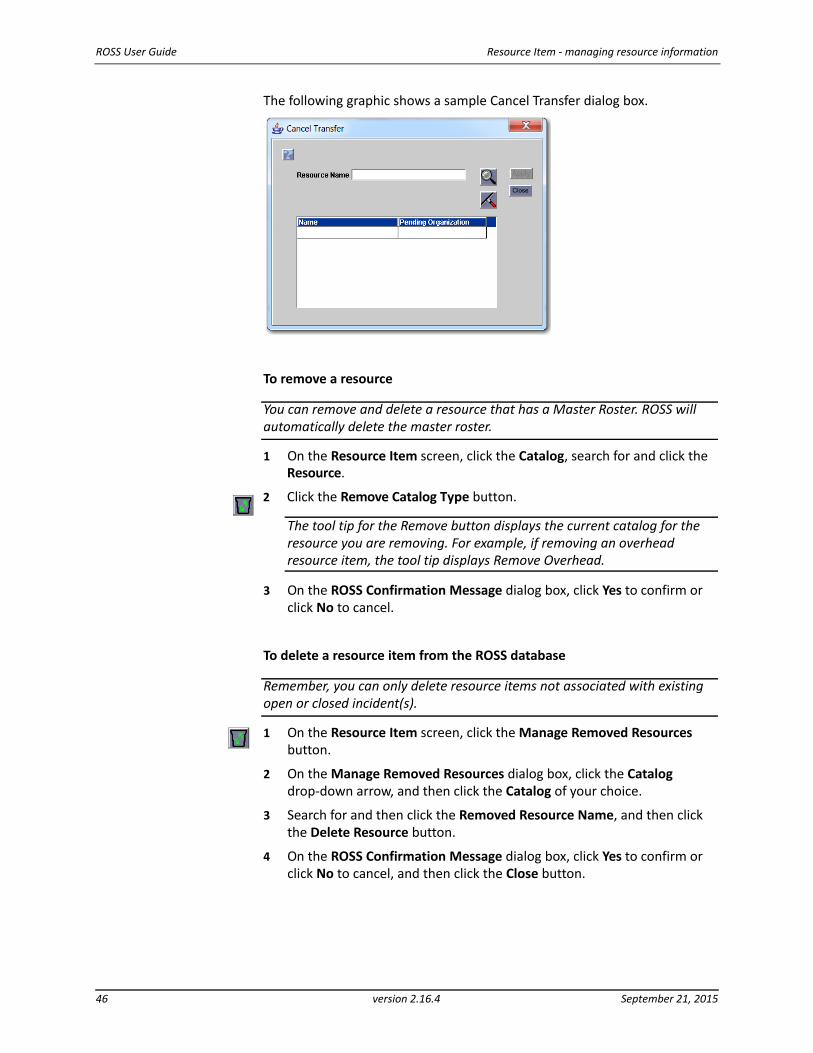
The following graphic shows a sample Cancel Transfer dialog box.
To remove a resource
You can remove and delete a resource that has a Master Roster. ROSS will automatically delete the master roster.
1 On the Resource Item screen, click the Catalog, search for and click the Resource.
2 Click the Remove Catalog Type button.
The tool tip for the Remove button displays the current catalog for the resource you are removing. For example, if removing an overhead resource item, the tool tip displays Remove Overhead.
3 On the ROSS Confirmation Message dialog box, click Yes to confirm or click No to cancel.
To delete a resource item from the ROSS database
Remember, you can only delete resource items not associated with existing open or closed incident(s).
1 On the Resource Item screen, click the Manage Removed Resources button.
2 On the Manage Removed Resources dialog box, click the Catalog drop‐down arrow, and then click the Catalog of your choice.
3 Search for and then click the Removed Resource Name, and then click the Delete Resource button.
4 On the ROSS Confirmation Message dialog box, click Yes to confirm or click No to cancel, and then click the Close button.
46 version 2.16.4 September 21, 2015
Resource Item ‐ managing resource information ROSS User Guide
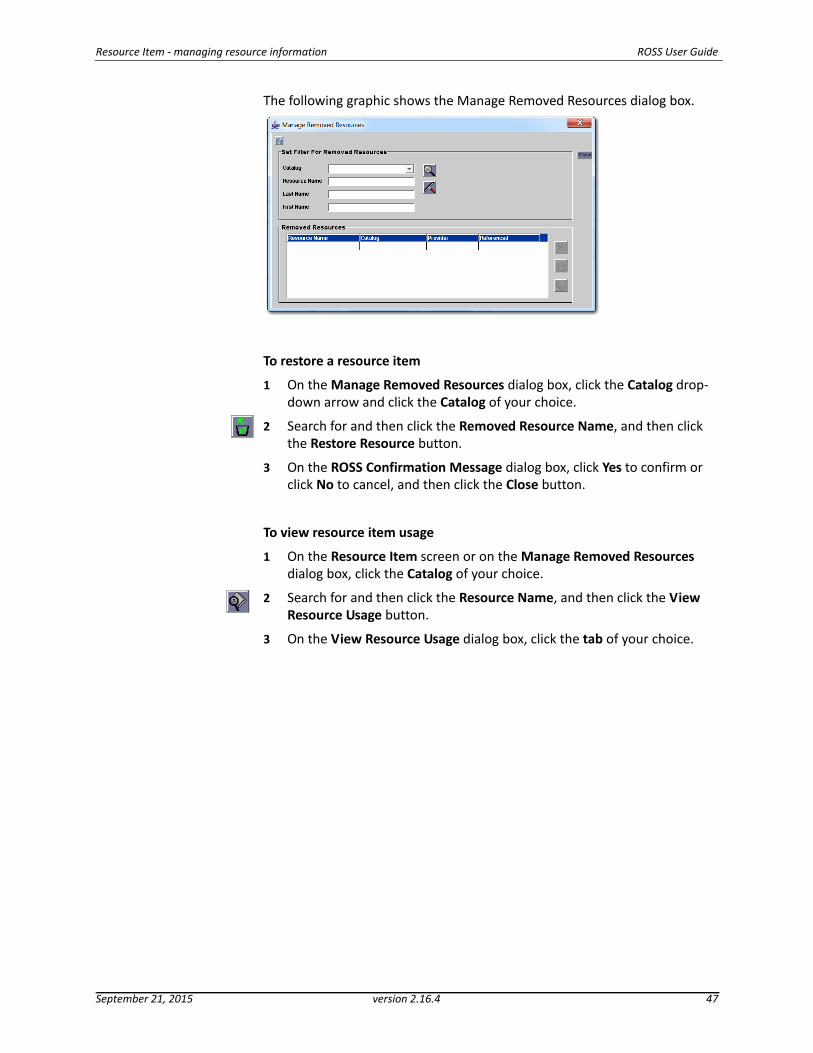
The following graphic shows the Manage Removed Resources dialog box.
To restore a resource item
1 On the Manage Removed Resources dialog box, click the Catalog drop‐down arrow and click the Catalog of your choice.
2 Search for and then click the Removed Resource Name, and then click the Restore Resource button.
3 On the ROSS Confirmation Message dialog box, click Yes to confirm or click No to cancel, and then click the Close button.
To view resource item usage
1 On the Resource Item screen or on the Manage Removed Resources dialog box, click the Catalog of your choice.
2 Search for and then click the Resource Name, and then click the View Resource Usage button.
3 On the View Resource Usage dialog box, click the tab of your choice.
September 21, 2015 version 2.16.4 47
ROSS User Guide Resource Item ‐ managing resource information
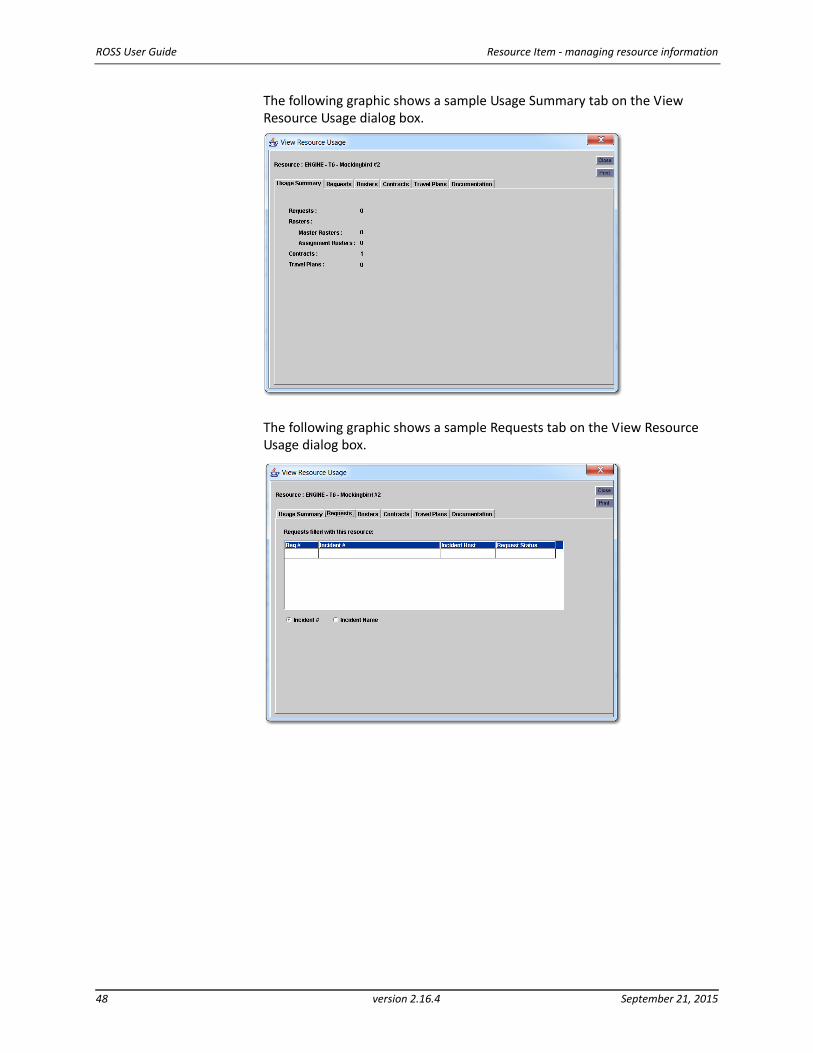
The following graphic shows a sample Usage Summary tab on the View Resource Usage dialog box.
The following graphic shows a sample Requests tab on the View Resource Usage dialog box.
48 version 2.16.4 September 21, 2015
Resource Item ‐ managing resource information ROSS User Guide
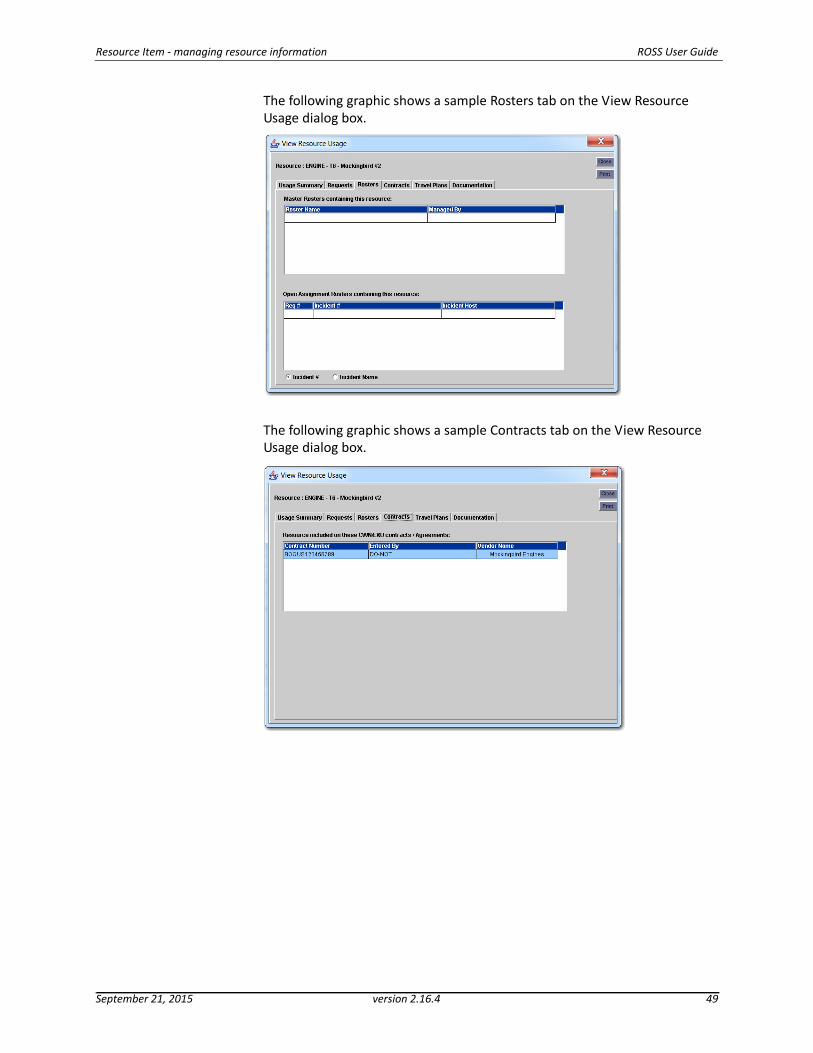
The following graphic shows a sample Rosters tab on the View Resource Usage dialog box.
The following graphic shows a sample Contracts tab on the View Resource Usage dialog box.
September 21, 2015 version 2.16.4 49
ROSS User Guide Resource Item ‐ managing resource information
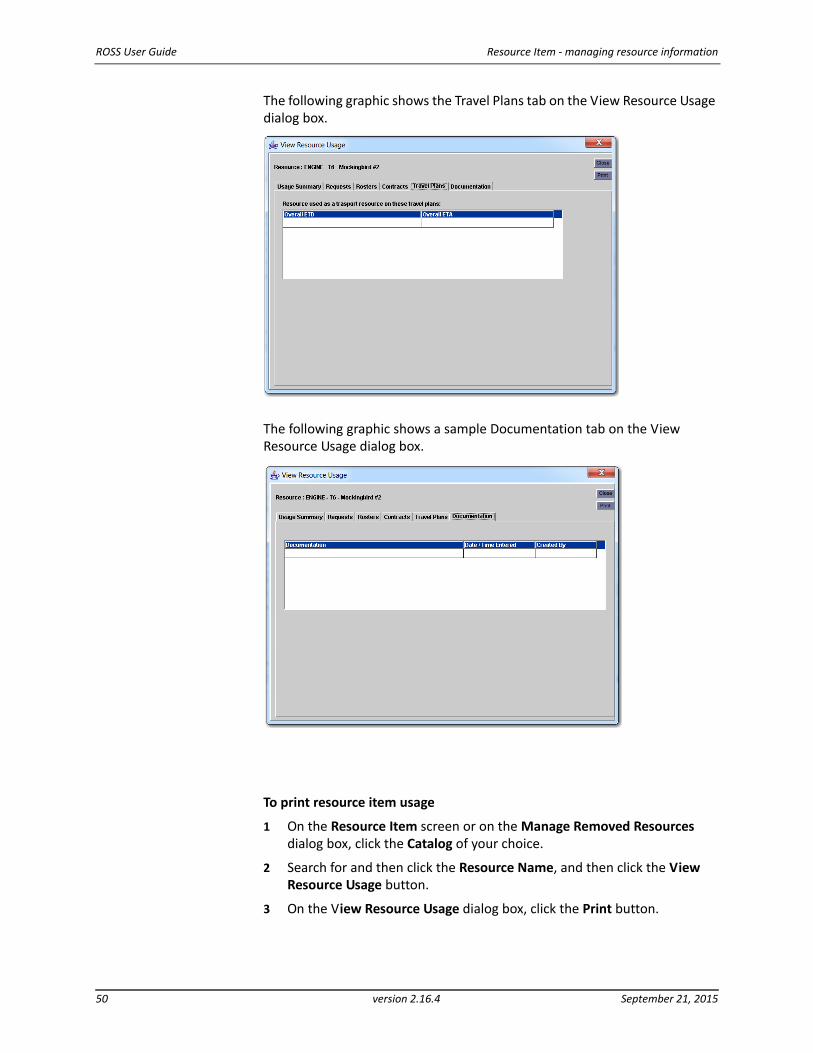
The following graphic shows the Travel Plans tab on the View Resource Usage dialog box.
The following graphic shows a sample Documentation tab on the View Resource Usage dialog box.
To print resource item usage
1 On the Resource Item screen or on the Manage Removed Resources dialog box, click the Catalog of your choice.
2 Search for and then click the Resource Name, and then click the View Resource Usage button.
3 On the View Resource Usage dialog box, click the Print button.
50 version 2.16.4 September 21, 2015
Resource Item ‐ managing resource information ROSS User Guide
4 On the toolbar, click the Print button.In ROSS Reports, position your mouse toward the top of the web page, and then click the Print file button or pres [Ctrl] + P.
5 On the Print dialog box, review the printer settings and then click OK.
6 When finished, close your Internet browser.
September 21, 2015 version 2.16.4 51