rhub user manual - gomeetno€¦ · web viewthe user manual is organized as ... voip computer...
TRANSCRIPT

GoMeetNow User Manual For PC Users
Version 5.0 SP1
RHUB Communications, Inc.4340 Stevens Creek Blvd.
Suite 282San Jose, CA [email protected]
http://www.rhubcom.com

Contents
Preface........................................................................................................................................... 4Organization.......................................................................................................................... 4Terminology.......................................................................................................................... 4Constraints............................................................................................................................ 5GoMeetNow Control Panel and Key Functions for Presenter...............................................5
1. Setting up GoMeetNow.......................................................................................................61.1. GoMeetNow Automatically Upgrades After the Server Is Upgraded.........................8
2. Hosting an Interactive Meeting..........................................................................................93. Joining a Meeting..............................................................................................................134. Common Features.............................................................................................................15
4.1. Audio Conferencing Using Telephone and Computer Audio...................................154.2. Pausing and Starting Screen Sharing.....................................................................184.3. Changing Application Sharing.................................................................................184.4. Changing Presenter................................................................................................184.5. Changing Controller................................................................................................194.6. Chatting...................................................................................................................194.7. Sending Files...........................................................................................................214.8. Recording................................................................................................................234.9. Using Webcam........................................................................................................234.10. Using Whiteboard....................................................................................................244.11. Using Annotation.....................................................................................................244.12. Floating toolbar........................................................................................................254.13. Hide the Attendee List.............................................................................................254.14. Disable Recording Function....................................................................................254.15. Report for Each User’s Meetings.............................................................................254.16. Image Quality..........................................................................................................254.17. Stop Additional Attendees.......................................................................................264.18. Remove Attendees..................................................................................................264.19. Make an Attendee a Panelist...................................................................................264.20. Change Language for GoMeetNow UI....................................................................274.21. Show all GoMeetNow Windows..............................................................................274.22. Auto-Uninstall GoMeetNow from Attendee Computers...........................................284.23. Show Presenter’s Desktop When Meeting Starts....................................................284.24. Enable GoMeetNow Outlook toolbar.......................................................................284.25. Remote Printing.......................................................................................................294.26. Emails and Calendar Events Generated for Invites.................................................304.27. Multiple Monitors for Presenter................................................................................314.28. Multiple Webcam Video...........................................................................................314.29. Large HD View Via Webcam...................................................................................334.30. Polling...................................................................................................................... 334.31. Push URL to Attendees...........................................................................................364.32. Send Q&A to All Attendees.....................................................................................364.34. Transfer Scheduled Meeting to a New Host............................................................37
5. Webinars............................................................................................................................ 385.1. Starting a Webinar...................................................................................................385.2. Inviting Attendees....................................................................................................395.3. Joining a Webinar....................................................................................................39
2

5.4. Inviting Meeting Panelists........................................................................................39
6. Scheduling Meetings........................................................................................................406.1. Scheduling a Meeting..............................................................................................406.2. Editing a Scheduled Meeting...................................................................................416.3. Starting a Scheduled Meeting.................................................................................416.4. Starting a Scheduled Meeting.................................................................................41
7. Managing your Profile.......................................................................................................42
3

PrefaceGoMeetNow is a multi-function web collaboration system. The client-server architecture requires Internet connectivity for its operation. GoMeetNow has four distinct functions based on these meeting types:
1. Interactive Meetings – This refers to conventional web conferencing including sales presentations, product demos, and interactive collaboration.
2. Webinars – This function ensures webinars that are easy, fast and reliable to join. You can join without any downloads.
OrganizationThis manual provides the steps to use the GoMeetNow web collaboration system. The User Manual is organized as follows:
Section 1 Setting up GoMeetNowSection 2 Hosting an Interactive MeetingSection 3 Joining a MeetingSection 4 Common FeaturesSection 5 WebinarsSection 6 Scheduling MeetingsSection 7 Managing your Profile
TerminologyThe following terms are used throughout this manual. In a meeting, a participant can be either the Host or an Attendee:
The Host is the person who initiates the meeting. The Host must have a user account in GoMeetNow system.
The Attendee is the person invited by the Host to join a meeting. Attendee does not need an account in GoMeetNow system.
The Host or an attendee can either be: The presenter showing their computer to all participants A controller controlling the Presenter's keyboard and mouse
4

ConstraintsHere are a couple of constraints:
There is only one host and one presenter at any moment in a meeting. The host or the current presenter can assign any participant to be the
presenter.
GoMeetNow Control Panel and Key Functions for Presenter
GoMeetNow Control Panel for Presenter
5

1. Setting up GoMeetNow To host any type of meeting, you need to download and run the GoMeetNow client.
1. In a web browser, go to the GoMeetNow web site:
Home Page
2. Click the Host Meeting button in the upper right hand corner of the web page.3. Login using your GoMeetNow account’s Email Id and Password.4. If the download does not begin, click the “restart the download” link.5. In Firefox, click “Save File” and go to Downloads.6. If Downloads appears, double click “GoMeetNowStarter”7. Click “Run” or “Open”. GoMeetNow downloads, installs and runs on your
computer.
Automatic download
If GoMeetNow does not install and run, click the “use the compressed download” link.1. Extract (or unizip) the files from the resulting zip file.2. Execute the extracted “GoMeetNowStarter” file. GoMeetNow is downloaded,
installs and runs on your computer.
6

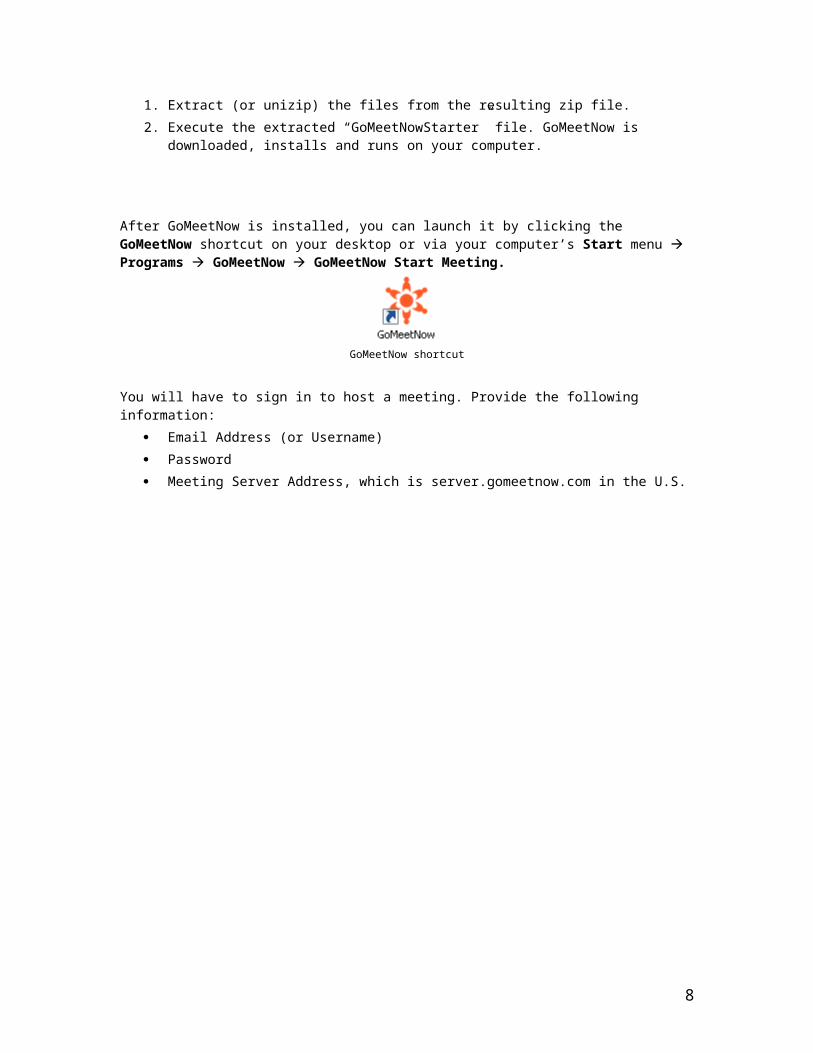
After GoMeetNow is installed, you can launch it by clicking the GoMeetNow shortcut on your desktop or via your computer’s Start menu Programs GoMeetNow GoMeetNow Start Meeting.
GoMeetNow shortcut
You will have to sign in to host a meeting. Provide the following information: Email Address (or Username) Password Meeting Server Address, which is server.gomeetnow.com in the U.S.
Signing in to host a meeting
7
1.1. GoMeetNow Automatically Upgrades After the Server Is Upgraded
After the GoMeetNow server is upgraded to a new version, a user’s GoMeetNow client will automatically upgrade the next time that user tries to start GoMeetNow. These are the dialogs that the user will see while automatically upgrading, which should take less than one minute:
Automatic upgrade dialogs
8

2. Hosting an Interactive Meeting Using the GoMeetNow product, you can host four types of meetings. This section discusses the steps to host an interactive meeting. This meeting type is the conventional method of web conferencing. Each attendee (using either a PC or Mac) can interact in the meeting and can become the Presenter or a Controller.
1. Launch GoMeetNow by clicking the GoMeetNow shortcut from the desktop.
GoMeetNow shortcut
2. Enter the login credentials and Sign In.3. In the meeting control panel, click the Host icon to host an unscheduled
impromptu meeting.
9

Meeting control panel
4. Select the Interactive Meeting type5. Optionally, enter a Password for the meeting. If you enter a password, the
invitees also need to enter the same password.6. Do not choose the Only attendees from my network option.7. Selecting Attendee Emails Required forces every attendee in this meeting
to specify an email id when joining the meeting in addition to their name.8. Click Continue.
This screen displays the Attendees, the Meeting Server Address, and the Meeting ID.
10

Meeting screen
You can now invite attendees to join the meeting. To invite attendees:9. Click the Invite button10. Click the Email button to email the steps to the invitees or click Copy and
paste the details to the attendees via online messaging tools or web-based email clients.
11

Invite attendees
12

3. Joining a MeetingWhen you receive an invitation from the host, click the link to join the meeting or open your browser and:
1. In the browser’s address bar, go to the GoMeetNow web site2. Click the Join Meeting button.3. Fill in the Meeting ID, Meeting Password (if any) and Your Name.4. Click the Join Meeting button.
Joining a meeting
5. If the meeting is a webinar, which does not require any download, you join the meeting.
6. If the meeting is not a webinar, the file GoMeetNowStarter.exe or MACStarter downloads.
7. If the download does not begin, click the “restart the download” link.8. In Firefox, click “Save File” and go to Downloads.9. If Downloads appears, double click “GoMeetNowStarter” or “MACStarter”.10. Click “Run” or “Open”. GoMeetNow downloads, installs and runs on your
computer and you will automatically join the meeting.
If you have already installed the GoMeetNow client, follow these steps to join a meeting:
1. Launch GoMeetNow by clicking the GoMeetNow shortcut from the desktop.
2. Click the Join button.
13

Option to join a meeting
14

3. Enter the Meeting ID, Meeting Password (if required), Your Name, and the Meeting Server Address.
Details required while joining a meeting
4. Click Join Meeting.
15

4. Common Features There are many features that are common to all four types of meetings. This section discusses the common features.
4.1. Audio Conferencing Using Telephone and Computer AudioNew in the 5.0 release, the conference call telephone and computer audio are integrated together. Thus, each attendee can choose whether they listen and talk on the phone or by using a headset on their computer.
The host of the meeting must start the meeting in GoMeetNow before the conference call can begin.
An attendee can choose “Use Telephone” then call in with the provided phone number and Access Code. Or an attendee can choose “Use Mic & Speakers” VoIP computer audio. When using computer audio, a headset is strongly recommended since built-in speaker sound used by any one participant can generate echo for the other participants:
Audio Modes, Volume meters, Speaking indicator
If “Use Mic & Speakers” is chosen, a participant can click Setup to change the volume of their speakers or microphone or to change which device should be used as their speakers or microphone. It is best to setup and test new headsets before joining a meeting.
16

VoIP Computer Audio Setup dialog
If an echo is heard in the meeting, the person causing the echo probably will not hear it; the host should advise this person that they can fix the echo problem by clicking their Refine Echo Cancellation button.
The Push & Hold to Talk function is activated when more than five possible talkers appear in a meeting (five is the default setting that can be changed by the administrator). When the Push & Hold to Talk button is present, the attendee must click and hold the Push & Hold to Talk icon to be heard.
Push & Hold to Talk button
An attendee can also have the Push & Hold to Talk icon if the host pushes the right mouse button on the attendee’s name in the Attendees list and chooses Change to push-to-talk for that attendee. Then, the host can undo this setting by pushing the right mouse button on the attendee’s name and choosing Change to free-to-talk.
Host’s right mouse Mute and Push-to-talk control over attendees
The host can also mute individual attendee’s by pushing the right mouse button on an attendee’s name in the Attendees list and choosing Mute. The host can mute all attendees, both on the telephone and on the computer, by clicking the Mute All button.
Host’s ‘Mute All’ attendees button
The host can minimize background noise and echo by selectively choosing any or all attendees and muting them or by individually forcing attendee’s into Push-to-Talk mode.
Each attendee (and host) can mute themselves by clicking the Mute Me button or by pushing the right mouse button on their name in the Attendee list and choosing Mute Me.
Attendee’s ‘Mute Me’ button
The host can right mouse on each attendee’s name in the Attendees list and change their mode of communication by choosing Change to Use Phone or Change to Use Mic .
17

There is a telephone tab which shows everybody who has dialed into the Conference Call number. A PIN number is provided to all attendee’s who join the online meeting. If an attendee enters this optional PIN number, then their name will appear in the telephone tab instead of a telephone number; and their name will also appear in the Speaking list, thus making it easier to determine who is talking during a meeting. In the telephone tab, the host can right mouse on a caller’s name or phone number and Mute or Unmute them.
Telephone tab and Speaking list
People who use the Conference Call number have two commands they can enter on their telephone’s keypad:
*2 - Raise Hand*6 - Mute yourself (toggle on and off)
18

4.2. Pausing and Starting Screen Sharing When you start a meeting, by default, your desktop will be shown to meeting attendees. The green icon indicates that your screen is being shown.
Icon indicating active application sharing
To pause showing your screen, click the pause button. The pause button becomes a play button and the word Paused indicates that the meeting has been paused.
Icon indicating that application sharing is paused
To start showing your screen, click the start button.
4.3. Changing Application Sharing By default, your desktop is shown to the other attendees. The Showing My drop-down list displays all the applications open in your system. To show another application, click the Show Mying drop-down and choose a running application or monitor from the list.
Option to change application sharing
4.4. Changing PresenterThe attendees who have joined the interactive meeting can also be the presenter to show his or her computer screen to meeting participants. By default, the host will be the presenter. However, during a meeting the host and the current presenter can assign any participant to be the presenter. To change the presenter, click Change Presenter and choose the presenter from the list, or right mouse on the participant’s name in the Attendees list and choose Make Presenter.
19

Change Presenter options: Change Presenter button or right mouse “Make Presenter” option
4.5. Changing ControllerDuring the meeting, you as the presenter can assign a participant as the controller. A controller is the person who can control your mouse and keyboard. To change the controller, click Give Control and choose the participant you want to control from the list, or right mouse on the participant’s name in the Attendees list and choose Give Control.
Give Control option
Click Change Controller then Reclaim Controller to reclaim control from the specified controller.
4.6. ChattingWhile convening a meeting you can also chat with attendees. To chat with individuals, click the drop-down arrow and choose their name, or you can chat with All attendees. Enter your chat message where it says [type message here] then hit the Enter key or the Send button.
20

Chat section of GoMeetNow control panel
Your entire chat dialogue for this meeting is shown in the GoMeetNow control panel:
Chat dialogue for this meeting
You can expand the Chat dialogue into a separate, resizable window by clicking the button just above the Chat dialogue:
21

Chat dialogue for this meeting
22

The View chat history feature shows your entire chat dialogues for all of your meetings:
Chat dialogue for this meeting
4.7. Sending FilesDuring a meeting, there may be a need to send files between meeting participants. Instead of opening an e-mail client and sending files, a participant can send files using GoMeetNow. To send files:
Click the File Transfer button to open the File Transfer dialog box.
File Transfer button
23

Click Add Files/Folders.
File Transfer dialog
Select a particular file or folder from the drop-down list. The file or all the folders and files in that directory are displayed.
Folder Selection dialog
24

Select the files, folders, or both and click OK. They are added to the list of files/folders to be sent.
In the File Transfer dialog, click the drop down-arrow next to the To label, and then select the participants to whom the files should be sent. By default, the files are sent to all other participants.
Click Send Files.
4.8. RecordingDuring a meeting, you can record the actions on the presenter’s screen. All audio heard in the meeting will be recorded, whether participants join on the telephone or using the computer’s microphone and speakers.
Click the record button to start recording and click it again to stop recording. When stopping the recording, the system prompts to ask you where to save the recording file. The file is an executable. Just run the file and it will replay the entire recording session.
A recording converter tool is available that allows you to convert GoMeetNow recordings from their proprietary format into one of these standard formats: AVI, Flash FLV, or WMV. You will need to host them yourself. Also note that webcams are not included in the converted recording.http://sources.rhubcom.com/v4/web_conferencing/download_converter.html If you have a Mac recording, you will need to convert the recording on a Windows system.
4.9. Using WebcamDuring a meeting, up to four participants can start their web cameras, or Webcams. Each participant’s Webcam video will be visible to all attendees.
WebCam option
If the web camera is not visible to attendees, the presenter can try to turn off or slow down hardware acceleration for the graphics card. On Windows, this setting is available via Display Settings, then by clicking the Advanced settings button, then by clicking the Troubleshoot tab.
25

Windows graphics card Hardware acceleration setting
4.10. Using WhiteboardWhile making the presentation you might have to illustrate some points. The Whiteboard option in GoMeetNow is used for this purpose. Click Whiteboard and the Paint application opens, where you can illustrate certain points or draw diagrams.
Whiteboard option
4.11. Using AnnotationUsing the Annotation feature you can highlight topics in your presentation. Click the Annotation button and choose the type of annotation from Pen, Highlighter, Spot and Arrow. Then, emphasize the interesting area using the mouse pointer.
Annotation option
When the annotation option is active, normal keyboard and mouse input ceases and essentially your computer screen freezes. To unfreeze your computer screen, hit the “Esc” key or click the Annotation button and select “Stop Annotation”.
Emphasis using Annotation feature
You can change the size of the annotation pen. Click the menu item “Tools” then “Preferences”. Then choose “Annotation Pen” and select a new size and color and click Save.
26

4.12. Floating toolbarThe floating toolbar has the advantage of using very little of the presenter’s screen space during a presentation while still providing buttons for the most common features including pausing/showing your screen, changing presenter, changing controller, annotation, and chat that changes color when a chat message is received.
Floating toolbar
4.13. Hide the Attendee ListAs the meeting host, you can hide the attendee list from your attendees. Click the menu item “Tools” then “Preferences”. Under General, uncheck “Attendees can view attendee list” and click Save.
4.14. Disable Recording FunctionAs the meeting host, you can disable recording functions so that none of the attendees can record the meeting session. Click the menu item “Tools” then “Preferences”. Under General, uncheck “Attendees can Record” and click Save.
4.15. Report for Each User’s MeetingsEach meeting host can get a list of their past meetings by clicking the menu item “Tools” then “Report”.
4.16. Image QualityThere are three image quality options available in GoMeetNow that let you choose between speed and image precision:
Low Quality (fastest) High Quality Truecolor (24-bit slowest)
To change the color, choose the menu item “Tools” then “Preferences” and choose the relevant option. The High Quality color setting is recommended for its combination of speed and image quality.
27

4.17. Stop Additional AttendeesAs the meeting presenter, you can stop any further attendees from joining the meeting. Click the menu item “Tools” then select “Stop new attendees from joining”.
4.18. Remove AttendeesAs the meeting presenter, you can remove attendees from the meeting. In the Attendees list, right click the attendee’s name and choose “Remove this attendee”.
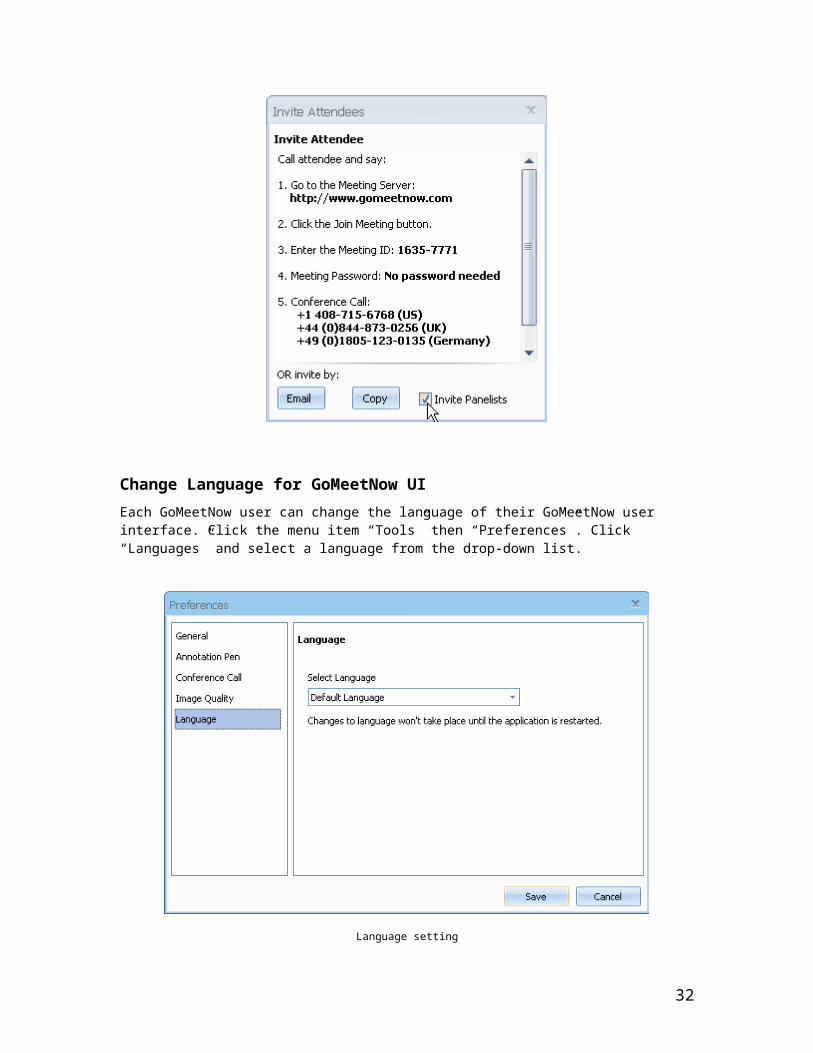
4.19. Make an Attendee a PanelistA “panelist” in a meeting can aid the presenter by receiving and responding to chats.
The host can make an attendee a participant by right mousing on the attendee’s name in the Attendees list and choosing “Make Panelist”. Or the host can invite panelists before the meeting starts by selecting the “Invite Panelists” check box in the Invite Attendees dialog.
28

4.20. Change Language for GoMeetNow UIEach GoMeetNow user can change the language of their GoMeetNow user interface. Click the menu item “Tools” then “Preferences”. Click “Languages” and select a language from the drop-down list.
Language setting
4.21. Show all GoMeetNow WindowsAs the meeting presenter, you can display all transparent windows on your screen. By default, attendees cannot see the host’s GoMeetNow and its associated windows since these windows are treated as transparent. To expose the GoMeetNow control panel and associated windows, click the menu item “Tools” then “Preferences” and under “General” check “Show all GoMeetNow windows” and click Save.
29

General settings
4.22. Auto-Uninstall GoMeetNow from Attendee ComputersAs the meeting host, you can tell the system to automatically uninstall the GoMeetNow client on the attendee computers at the end of a meeting session. Click the menu item “Tools” then “Preferences” and check “Remove GoMeetNow from attendee computers at the end of sessions” and click Save.
4.23. Show Presenter’s Desktop When Meeting StartsAs the meeting presenter, you can display all transparent windows on your screen when a meeting starts. Click the menu item “Tools” then “Preferences” and check “Show my desktop when a meeting starts” and click Save.
4.24. Enable GoMeetNow Outlook toolbarUsers can add a GoMeetNow toolbar to Microsoft Outlook. Click the menu item “Tools” then “Preferences”, check “Integrate with Outlook” and click Save. The Outlook toolbar looks like this:
GoMeetNow Outlook toolbar
30

4.25. Remote PrintingRemote printing is the ability to print directly from the host computer to a printer of the attendee’s choice on the attendee’s network. This is useful if the host is printing from an application that is not installed on the attendee’s computer. To enable printing to an attendee’s printer, click the menu item “Tools” then “Preferences”, check “Install Remote Printer” and click Save. Then, open the file to print and select Print. Choose the GoMeetNow Printer and click OK.
Choose GoMeetNow Printer to send output to attendee’s printer
31
4.26. Emails and Calendar Events Generated for InvitesCalendar events for Outlook, Mac Mail, etc. are automatically generated when a GoMeetNow user schedules a meeting. An email is automatically generated when a user chooses to invite attendees to an active meeting.
Outlook message with calendar information is automatically generated for a scheduled meeting
32

4.27. Multiple Monitors for PresenterIf a meeting presenter has multiple monitors, the presenter can choose to display a specific monitor or the entire desktop, which is composed of more than one monitor.
Multiple Monitor selection in GoMeetNow
Below is the view that attendees would see for a presenter that has multiple monitors when the entire Desktop is displayed:
Multiple Monitor view if entire Desktop shown
4.28. Multiple Webcam VideoDuring a meeting, up to 15 GoMeetNow attendees can display the video from their webcams by clicking the “Start Webcam” button.
33

Multi-Party video conference with 15 attendees webams The presenter controls the location of where the video appears in the viewer window. The presenter can change the size of the of Webcam window by clicking the Maximize/Minimize button.
34

4.29. Large HD View Via WebcamThe presenter in a meeting can start a full-screen view of their webcam by clicking the “Tools” menu item then the “Start Large HD view via webcam” option. The resulting Webcam window is completely resizable and is a separate window from the multi-party Webcam window.
This large view of a webcam can be used to project a physical white board that the presenter is writing on. Or the webcam could project a large image of the presenter while hosting a webinar.
Large HD full-screen view of webcam
4.30. PollingThe host of a meeting can create a poll with questions and multiple choice answers for the attendees. Poll questions can be created ahead of time by clicking the Poll link in the user’s list of scheduled meetings. Or the host can create a poll question during the meeting by clicking the “Tools” menu item then the “Poll” option.
Each poll question can have up to five pre-determined answers. The poll can limit the attendees to voting for just one response or allow the attendees to vote for multiple responses.
35

Interface for creating a new Poll After the poll question is created, the host can begin polling the GoMeetNow attendees for responses. The attendees will see a window similar to this:
Attendees voting window
The poll stays open until the host decides to close polling. Once the poll is closed, the results are tabulated for each answer. The poll is blind: there is no way to determine how each attendee voted.
36

The host’s “Manage Poll” window provides a Close Polling link. (A Start Polling link initially appears where Close Polling appears below).
The host’s “Manage Poll” Interface
After the host closes the polling, the host sees a Share link where the Close Polling link used to be. When the host clicks the Share link, the attendees see a window with the polling results. Finally, the host can click the Share link to close each attendee’s “Polling result” window.
37

The attendee’s “Polling result” window
4.31. Push URL to Attendees
“Send Q&A to All” and “Push URL” options
The presenter can push an URL or web page that opens up in a browser on each of the attendee’s computers providing that the attendees have joined interactively. The circular button on the bottom right of the control panel contains the “Push URL” feature.
4.32. Send Q&A to All AttendeesThe presenter can send a question and answer to their attendees. The attendees see the question and answer in their chat window. The circular button on the bottom right of the control panel contains the “Send Q&A to All” feature.
“Send Q&A to All” and attendees view of Question and Answer in their chat window
38

4.34. Transfer Scheduled Meeting to a New HostBefore a meeting starts, the host of a scheduled meeting can transfer the meeting to another host. This is helpful if the original host will not be available to the host the meeting.
Transfer scheduled meeting to a new host
39

5. WebinarsThe Webinar meeting type allows you (as the host) to conduct easy and reliable webinars. Attendees can join the webinar without downloading the GoMeetNow client and view the presenter’s screen using “view-only-mode”. Meanwhile, you can invite a few panelists who must join the webinar interactively. Meeting panelists can show their computer screens to all the meeting participants, which is different from view-only attendees.
Webinar registration and management pages are provided for you. See our Administration Manual for details on these pages.
5.1. Starting a Webinar 1. Launch GoMeetNow by clicking the GoMeetNow shortcut from the desktop2. Click the Host icon 3. Enter your Email Address, Password and Meeting Server Address and click
Sign In.4. Click the Host icon to host an impromptu meeting. 5. In the next step, choose the Webinar meeting type. 6. Optionally, enter a Password. If you enter a password, the invitees also need
to enter the same password.7. Click Continue. This control panel displays the Attendees and the Meeting
ID.
40

5.2. Inviting AttendeesTo invite attendees:
8. Click the Invite button. 9. Click Email to mail the URL to the invitee or click Copy and paste the URL to
the attendees via online messaging tools.
Invite attendees for a webinar
5.3. Joining a Webinar The meeting invite you receive from the host will contain a clickable URL embedded with the meeting ID. Go to the specified URL to join the webinar.Alternatively, you can go to the meeting server website, click the Join Meeting button and then fill in the Meeting ID, Meeting Password and Your Name to join the webinar.
5.4. Inviting Meeting PanelistsIn the webinar mode, the host send the URL details of the meeting to the attendee via email. The attendee who joins the webinar - by clicking the above URL - can also become an interactive attendee by clicking the Switch to Interactive Meeting button.
Switching to interactive meeting
If GoMeetNow is not previously installed, it will be downloaded automatically.
41

The host can assign an interactive attendee to be the presenter as a meeting panelist. All attendees including the host will be able to see the new presenter’s screen.
42

6. Scheduling Meetings There might be instances when you have planned a meeting earlier and want to inform the invitees in advance. In such cases, you can schedule the meeting using the Schedule Meeting option.
6.1. Scheduling a MeetingTo schedule a meeting:
1. Log into GoMeetNow.2. Click the Schedule icon.
Scheduling meetings
3. Select the Meeting Type.
43

4. Optionally, mention the Subject of the meeting.5. Enter the Password, which is optional for all meeting types except Remote
Access to this Computer.6. Select the Date.7. Select the Start and End time.8. Select Recurring Meeting to schedule a recurring meeting. If this option is
selected, the Date and Time options are disabled.9. Click Submit.
When you login to GoMeetNow next time, the scheduled meetings and the details are displayed.
6.2. Editing a Scheduled MeetingTo edit a scheduled meeting:
1. Click the Edit link of the respective meeting.2. Make the necessary modifications.3. Click Submit.
6.3. Starting a Scheduled MeetingTo start a scheduled meeting, click the Start link for the respective meeting.
6.4. Starting a Scheduled MeetingTo delete a scheduled meeting, click the Delete trash can icon of the respective meeting. Click Yes to the dialog asking if you want to delete the meeting.
Dialog asking if you want to delete the scheduled meeting
44

7. Managing your Profile Follow these steps to manage your profile:
1. Log into GoMeetNow.2. Click the menu item Tools then Edit Profile.
Managing profile
3. Edit your First Name, Last Name, and E-Mail.4. Provide a Password and Retype your password to confirm it.5. Specify your Phone Number.6. Click Submit.
45