s9 using phone resources
TRANSCRIPT

M9: Using Phone Resources
Andy Wigley | Microsoft Technical Evangelist
Rob Tiffany | Microsoft Enterprise Mobility Strategist

Target Agenda | Day 1
Module and Topic | 10-minute breaks after each session / 60-minute “meal break” Planned
Duration
1a - Introducing Windows Phone 8 Application Development | Part 1 50:00
1b - Introducing Windows Phone 8 Application Development | Part 2 50:00
2 - Designing Windows Phone Apps 50:00
3 - Building Windows Phone Apps 50:00
4 - Files and Storage on Windows Phone 8 50:00
Meal Break | 60-minutes 60:00
5 - Windows Phone 8 Application Lifecycle 50:00
6 - Background Agents 25:00
7 - Tiles and Lock Screen Notifications 25:00
8 - Push Notifications 30:00
9 - Using Phone Resources on Windows Phone 8 50:00

Target Agenda | Day 2
Module and Topic | 10-minute breaks after each session / 60-minute “meal break” Planned
Duration
10 - App to App Communication 35:00
11 - Network Communication on Windows Phone 8 50:00
12 - Proximity Sensors and Bluetooth 35:00
13 - Speech Input on Windows Phone 8 35:00
14 - Maps and Location on Windows Phone 8 35:00
15 - Wallet Support 25:00
16 - In App Purchasing 25:00
Meal Break | 60-minutes 60:00
17 - The Windows Phone Store 50:00
18 - Enterprise Applications in Windows Phone 8: Architecture and Publishing 50:00
19 - Windows 8 and Windows Phone 8 Cross Platform Development 50:00
20 – Mobile Web 50:00

Module Agenda
• Using the Contacts and Calendars in Windows Phone
• Launchers and Choosers
• The Windows Phone Camera
• Taking still images
• Manipulating the video stream
• The Windows Phone Microphone
• The Windows Phone Sensors
• The Motion sensor
• Video Content

Reading Contacts
and Calendars

Your Obligations
• Before an application uses contact data in an application you must inform the user and
request their permission
• You must also ensure that your application manages contact data in a secure way
• It would be completely unacceptable for your application to make a copy of the contact
list and upload this or use it for spamming

Application Capabilities
• Before an application can use the Contacts
and Appointments data on a phone the user
has to authorise this capability
• Applications identify their capabilities in the
WMAppManifest.xml file which is part of the
application project
• Visual Studio 2012 provides a GUI which can
be used to manage these capabilities
• Not all the capabilities are enabled when
you make a new application
Contacts and Calendar Providers
• A Windows Phone application can read contact and calendar information from the
different accounts
• Windows Live
• Exchange (Outlook, Google)
• Aggregated accounts (Twitter, LinkedIn etc)
• The precise abilities depend on the source of the information being used

Data Sources
Data provider Contact name Contact picture Other contact data Calendar
appointments
Microsoft Account Yes Yes Yes Yes
Exchange Accounts (Contacts are from
the local address book only, not the
global address list.)
Yes Yes Yes Yes
Mobile Operator Address Book Yes Yes Yes No
Facebook Yes Yes No No
Windows Live Aggregated Networks
(Twitter, LinkedIn, and so on) No No No No
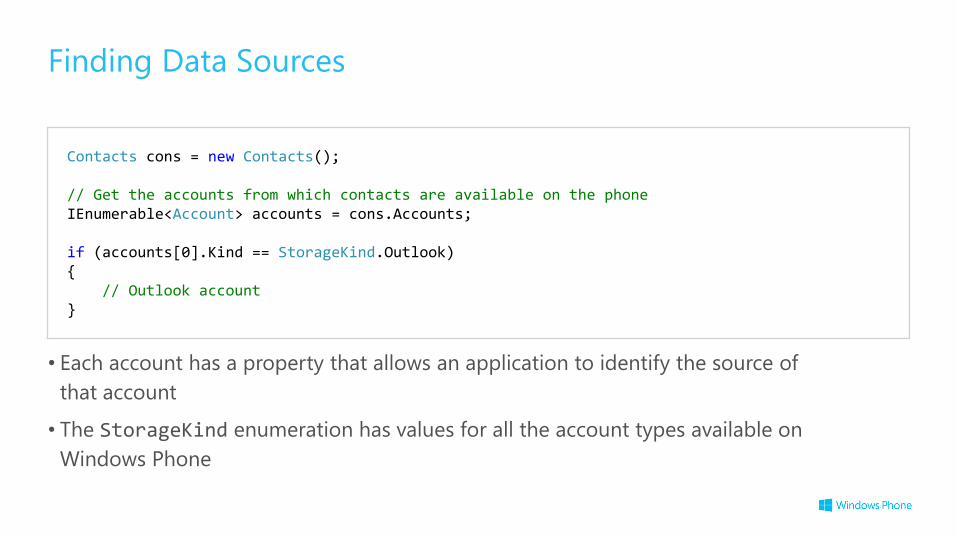
Finding Data Sources
• Each account has a property that allows an application to identify the source of
that account
• The StorageKind enumeration has values for all the account types available on
Windows Phone
Contacts cons = new Contacts(); // Get the accounts from which contacts are available on the phone IEnumerable<Account> accounts = cons.Accounts; if (accounts[0].Kind == StorageKind.Outlook) { // Outlook account }

Reading Contacts
• This starts off a contacts load request
• This is not a filtered search, all contacts are returned
using Microsoft.Phone.UserData; ... private void loadButton_Click(object sender, RoutedEventArgs e) { Contacts cons = new Contacts(); cons.SearchCompleted += new EventHandler <ContactsSearchEventArgs>(cons_SearchCompleted); cons.SearchAsync(String.Empty,FilterKind.None, null); }

Displaying Contacts
• This runs when the search returns
• It uses data binding to display the results on the screen in a ListBox
void cons_SearchCompleted(object sender, ContactsSearchEventArgs e) { try{ //Bind the results to the user interface. ContactResultsData.DataContext = e.Results; } catch (System.Exception){ } }

Data Binding
• This is the XAML that databinds the DisplayName property of the contact to a series of
items in a list
<ListBox Name="ContactResultsData" ItemsSource="{Binding}" Height="347" Margin="24,0,0,0" > <ListBox.ItemTemplate> <DataTemplate> <TextBlock Name="ContactResults" Text="{Binding Path=DisplayName, Mode=OneWay}" /> </DataTemplate> </ListBox.ItemTemplate> </ListBox>

Demo 1:
Contact Display

Filtering Searches
• By setting the FilterKind value on the search an application can apply a filter to the results
• There are a number of filters available
• Display Name, Pinned to start, Email address, Phone number
• For advanced filtering a LINQ query could be used on the result enumeration
• Although this might be a slow operation
cons.SearchAsync("Ro", FilterKind.DisplayName, null); // Find all the contacts with names beginning "Ro"

Displaying Appointments
• There is an analogous set of methods for finding appointments
• An application can search in a particular account type, for appointments in a particular time
range
• There is also a search method to search a particular account
• The reply is provided as a call back
• There are no appointments built into the emulator
apps.SearchAsync( new DateTime(2000, 1, 1), new DateTime(2013, 1, 1), null);
Creating a Contact

Creating a Contact
• An application cannot create a contact without the user being aware this action is being
performed
• This ensures that the user is always aware of what is going on when they are using the
program
• Applications can create their own custom contact store to store contact details for use in
that application
• This appears on the People Hub and in contact searches on that phone
• To create a contact we use a “Chooser” which will display a confirmation dialog and give
the user the option to create the contact or not
• The chooser is called asynchronously and will generate an event that tells the application
whether the action succeeded or not

Launchers and Choosers
• A Chooser is used when an application wants to perform a task and get a response from
the user
• Select a contact or image
• On completion of the choice the application is resumed
• A Launcher called when application wants to perform a task
• Visit a web page or place a phone call
• The user can return to the application via the navigation stack
• In either case the application is made dormant/tombstoned while the task completes

Creating a Chooser
• This creates a chooser to display the save contact dialog
using Microsoft.Phone.Tasks; ... SaveContactTask saveContact; //Declare with page scope public MainPage() { saveContact = new SaveContactTask(); saveContact.Completed += new EventHandler <SaveContactResult>(saveContact_Completed); } private void MakeContactButton_Click(object sender, RoutedEventArgs e) { saveContact.FirstName = FirstNameTextBox.Text; saveContact.LastName = LastNameTextBox.Text; saveContact.Show(); }

Chooser Completion
• This method is called when the chooser returns
• Some choosers return the result of selection the user has made
• This chooser returns whether the user saved the contact or not
void saveContact_Completed(object sender, SaveContactResult e) { if (e.TaskResult == TaskResult.OK) { MessageBox.Show("Saved OK"); } }

Custom Contacts Store
• It is only possible for an application to add contacts to any of the users’ configured
accounts by using the SaveContactTask
• An application can create a Custom Contacts store to which it can add contacts directly
without user confirmation
• Contacts added in this way will show up in the People Hub on the phone and also in
searches for contacts
• These contacts can also be linked with other contacts on the phone
• Your application can also add custom properties (for example passwords or additional user
data) to entries in the custom contacts store

Creating a Custom Contact
• This method creates a custom contact with a custom password property
• This will not cause a Chooser to be displayed, the contact is stored directly
async private void MakeContactButton_Click(object sender, RoutedEventArgs e) { ContactStore store = await ContactStore.CreateOrOpenAsync(); StoredContact contact = new StoredContact(store); contact.RemoteId = Guid.NewGuid().ToString(); contact.GivenName = FirstNameTextBox.Text; contact.FamilyName = LastNameTextBox.Text; IDictionary<string, object> props = await contact.GetExtendedPropertiesAsync(); props.Add("Password", PasswordEntry.Text); await contact.SaveAsync(); }
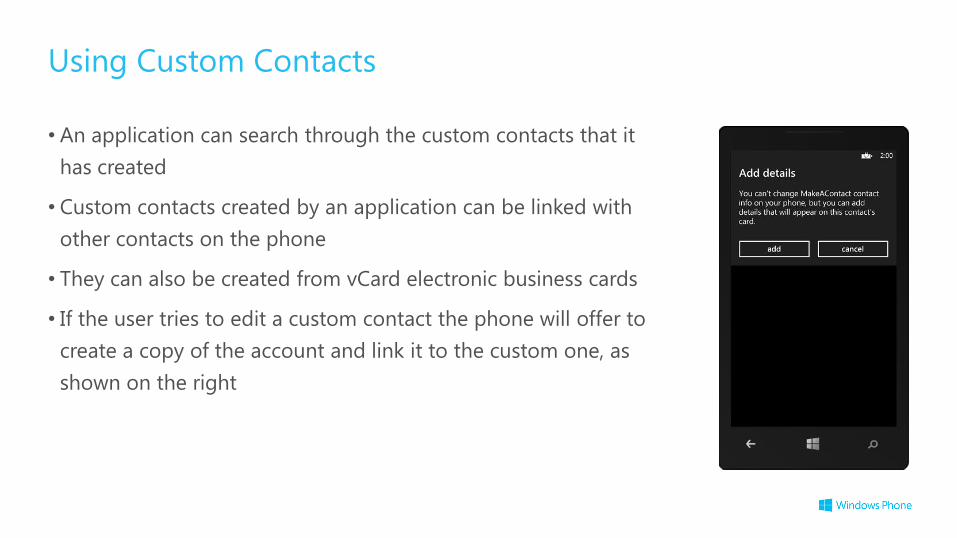
Using Custom Contacts
• An application can search through the custom contacts that it
has created
• Custom contacts created by an application can be linked with
other contacts on the phone
• They can also be created from vCard electronic business cards
• If the user tries to edit a custom contact the phone will offer to
create a copy of the account and link it to the custom one, as
shown on the right
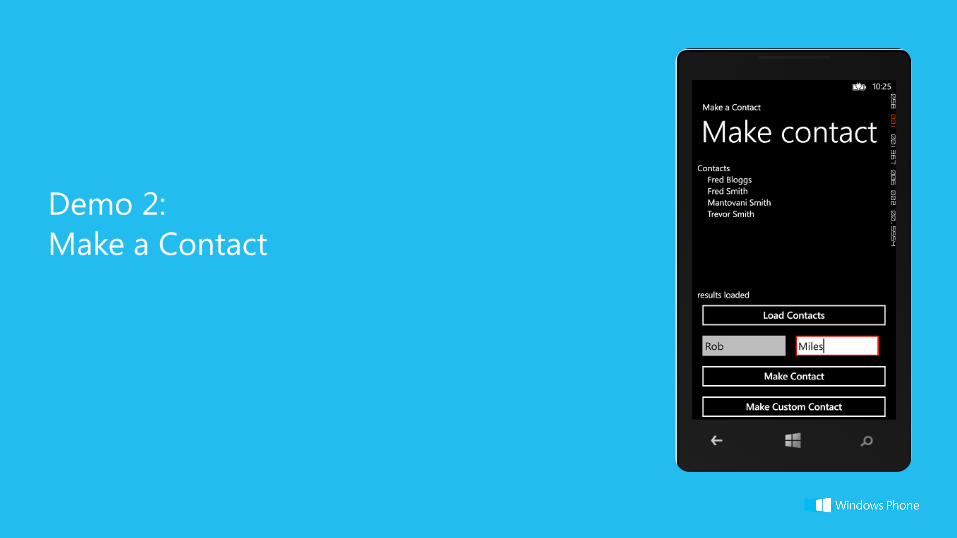
Demo 2:
Make a Contact

Other Save Tasks
• There are a number of other ‘save’ Choosers available
• SaveEmailAddressTask
• Save an email address
• The address can be added to a contact
• SavePhoneNumberTask
• Save a phone number
• SaveRingtoneTask
• Save a sound file as a ringtone

Launchers vs Choosers
• A Chooser allows the given action to return a result
• Often the result is an item that has been chosen
• Sometimes the result is a status report from an action that may succeed or fail
• The application can bind to an event which will be fired once the choice has been made
or the action performed
• The action may never be completed if the user goes off and does something else
• A Launcher causes a change of context into the target of the launch
• The current application is made dormant or tombstoned
• If the user returns to the application it will be Activated or Launched at that point

Chooser Tasks
Action Chooser Task
Launch the Wallet application and add an item *NEW* AddWalletItemTask
Search contacts to return addresses, phone numbers and
email addresses
AddressChooserTask, PhoneNumberChooserTask,
EmailAddressChooserTask
Select a picture from the media store PhotoChooserTask
Capture a picture using the camera CameraCaptureTask
Invite players to a multi-game session GameInviteTask
Save a new contact SaveContactTask
Save email addresses or phone numbers SaveEmailAddressTask, SavePhoneNumberTask
Save ringtones SaveRingtoneTask
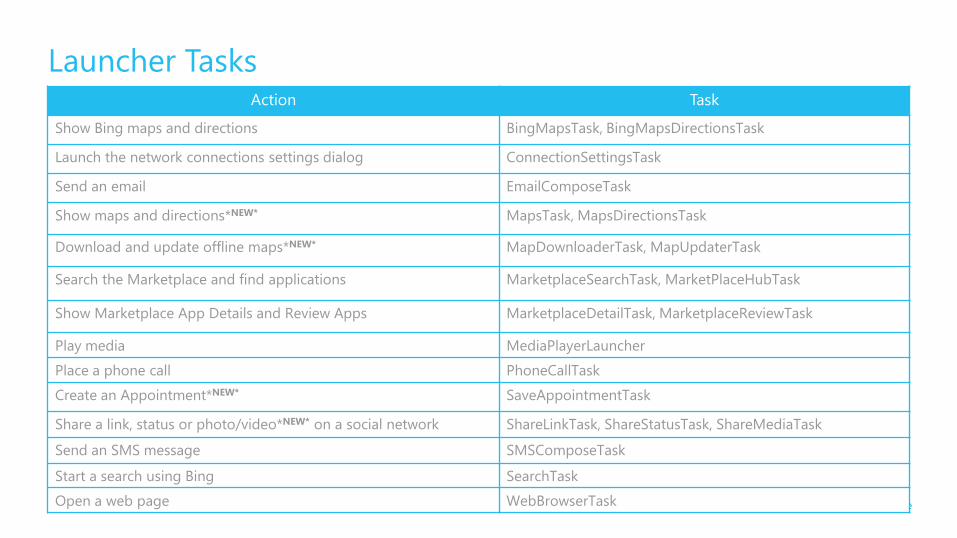
Launcher Tasks Action Task
Show Bing maps and directions BingMapsTask, BingMapsDirectionsTask
Launch the network connections settings dialog ConnectionSettingsTask
Send an email EmailComposeTask
Show maps and directions*NEW* MapsTask, MapsDirectionsTask
Download and update offline maps*NEW* MapDownloaderTask, MapUpdaterTask
Search the Marketplace and find applications MarketplaceSearchTask, MarketPlaceHubTask
Show Marketplace App Details and Review Apps MarketplaceDetailTask, MarketplaceReviewTask
Play media MediaPlayerLauncher
Place a phone call PhoneCallTask
Create an Appointment*NEW* SaveAppointmentTask
Share a link, status or photo/video*NEW* on a social network ShareLinkTask, ShareStatusTask, ShareMediaTask
Send an SMS message SMSComposeTask
Start a search using Bing SearchTask
Open a web page WebBrowserTask

Creating an Appointment with a Launcher (New in WP8)
• This code creates a 1 hour appointment 2 hours into the future
• It will have a reminder set for 15 minutes before the event
SaveAppointmentTask saveAppointmentTask = new SaveAppointmentTask(); saveAppointmentTask.StartTime = DateTime.Now.AddHours(2); saveAppointmentTask.EndTime = DateTime.Now.AddHours(3); saveAppointmentTask.Subject = "Meet with Rob"; saveAppointmentTask.Location = "Somewhere nice in Hull"; saveAppointmentTask.Details = "Discuss important stuff."; saveAppointmentTask.IsAllDayEvent = false; saveAppointmentTask.Reminder = Reminder.FifteenMinutes; saveAppointmentTask.AppointmentStatus = Microsoft.Phone.UserData.AppointmentStatus.Busy; saveAppointmentTask.Show();

Creating an Appointment
• When the appointment is created the launcher runs in the
same way as for an address book entry
• The user can assign the appointment to a particular calendar
and save it
• Note that this is a launcher event
• There is no data returned from the task
• If your application wants to see if the appointment was
created it will have to go and look for it
• When the launcher completes the application is Activated
from Dormant or Tombstoned

• As an alternative to the Launcher APIs, you can use the LaunchUriAsync method to launch
system applications
• Some built-in applications are *only* available by this technique
Launching a Built-in App Using LaunchUriAsync (New in WP8)
private void LockSettingsButton_Click(object sender, RoutedEventArgs e) { // Launch the lock screen settings dialog Windows.System.Launcher.LaunchUriAsync(new Uri("ms-settings-lock:")); }

URI scheme Description
http:[URL] Launches the web browser and navigates to the specified URL.
mailto:[email address]
Launches the email app and creates a new message with the specified
email address on the To line.
Note that the email is not sent until the user taps send.
ms-settings-accounts: Launches the Account Settings app.
ms-settings-airplanemode: Launches the Airplane Mode Settings app.
ms-settings-bluetooth: Launches the Bluetooth Settings app.
ms-settings-cellular: Launches the Cellular Settings app.
ms-settings-emailandaccounts: Launches the email and accounts settings app.
ms-settings-location: Launches the Location Settings app.
ms-settings-lock: Launches the Lock Screen settings app.
ms-settings-wifi: Launches the Wi-Fi Settings app.
Launching Built-in Apps Use LaunchUriAsync to launch many of the built-in apps

Launching Built-in Apps (cont)
URI scheme Description
zune:navigate?appid=[app ID] Launches the Windows Phone Store and shows the details
page for the specified app.
zune:reviewapp Launches the Store and shows the review page for the
calling app.
zune:reviewapp?appid=[app ID] Launches the Store and shows the review page for the
specified app.
zune:search?[search parameter]=[value] Launches the Store and searches for the specified content.
zune:search?keyword=[search keyword]
&contenttype=app Launches the Store and searches for apps by keyword.
zune:search?publisher=[publisher name] Launches the Store and searches for items by publisher name.
12/4/2012
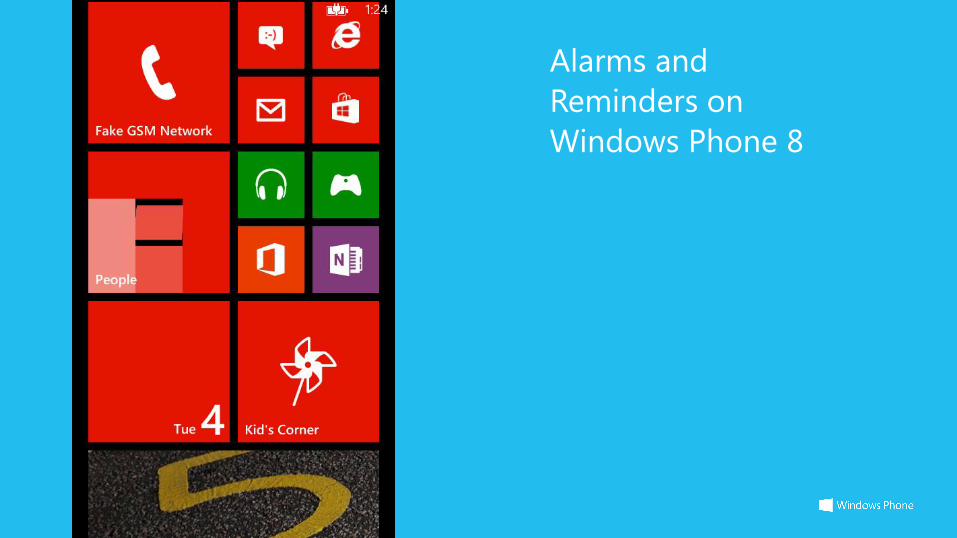
Alarms and
Reminders on
Windows Phone 8

Alarms and Reminders
• Time-based, on-phone notifications
• Persist across reboots
• Adheres to user settings
• Consistent with phone UX
• These are displayed whether the application is running or not
• Reminder notifications can be deep linked to an application page
• Notifications can fire once, or repeatedly at configurable intervals
• Limit of 50 Alarms and Reminders at a time per application

Alarms vs Reminders?
Alarms
• Title always “Alarm”
• Sound customization
• Snooze and Dismiss
• If tapped, launches
app at main page
• No stacking
Reminders
• Can set Title
• Uses user’s selected
Alarm sound
• Snooze and Dismiss
• If tapped, launch app at
page you specify
• Integrates with other
Reminders

The “Egg Timer” Application
• This is a simple two page Silverlight application
• The user sets the time using the slider and then presses the
Start Timer button to create a notification
• When the notification fires the “Egg Ready” page is
displayed if the user clicks through to the application

Creating a Reminder
• This code creates a reminder and adds it as a scheduled service
• The value eggTime holds the length of the delay
• This code also sets the url of the page in the application
using Microsoft.Phone.Scheduler; ... eggReminder = new Reminder("Egg Timer"); eggReminder.BeginTime = DateTime.Now + new TimeSpan(0, eggTime, 0); eggReminder.Content = "Egg Ready"; eggReminder.RecurrenceType = RecurrenceInterval.None; eggReminder.NavigationUri = new Uri("/EggReadyPage.xaml", UriKind.Relative); ScheduledActionService.Add(eggReminder);

Reminder Housekeeping
• Reminders are identified by name
• This code finds the “Egg Timer” reminder and then removes it from the scheduler
Reminder eggReminder = ScheduledActionService.Find("Egg Timer") as Reminder; if ( eggReminder != null ) { ScheduledActionService.Remove("Egg Timer"); }
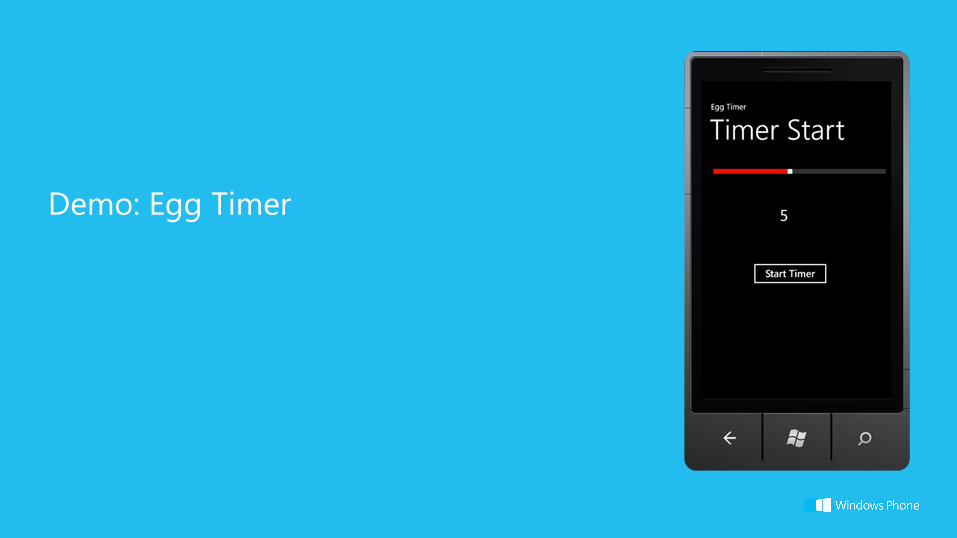
Demo: Egg Timer

Using the Camera

The Windows Phone Camera
• There are a number of ways the camera can be used by an application
• The application can launch the CameraCaptureTask chooser to capture a photograph
• The application can use the PhotoCamera class to capture photos or stream video data
from the camera
• Can use this for product recognition or augmented reality
• Use the PhotoCaptureDevice class for advanced photo capture and
AudioVideoCaptureDevice for advanced video capture
• A real-time video processing application can be registered as a “Lens”
• It can be selected by the user from a menu of available lens types
• The Lens application will provides a viewfinder display and performs video processing on the signal
from the camera

cameraTask = new CameraCaptureTask(); cameraTask.Completed += new EventHandler<PhotoResult> (cameraTask_Completed); cameraTask.Show();
Capturing a photo
• This task launches the camera so that the user can take a picture
• The cameraTask_Completed event fires when the picture is taken
• The emulator will return an image containing a small block

void cameraCapture_Completed(object sender, PhotoResult e) { if (e.TaskResult == TaskResult.OK) { photoImage.Source = new BitmapImage( new Uri(e.OriginalFileName)); } }
Capture complete
• When capture has been made, completed method is executed
• This version just displays the image on the screen
• You can access the photo stream data to save it
In application capture
• It is also possible to capture an image from within your application
• An application can also display a viewfinder
• The application can also access the video data directly and use this for augmented reality
or to create a customised viewfinder
• eg. Barcode scanners
• The PhotoCamera class provides camera control and access to the camera video screen

The PhotoCamera class
• This creates a camera and binds a handler to the captured event
• The viewfinderBrush source is set to the camera
using Microsoft.Devices; ... PhotoCamera camera; ... camera = new PhotoCamera(); //Set the VideoBrush source to the camera viewfinderBrush.SetSource(camera); camera.CaptureImageAvailable += new EventHandler<ContentReadyEventArgs> (camera_CaptureImageAvailable);

Displaying the Viewfinder
• This is the rectangle in the xaml for the camera viewfinder page
• This will display the viewfinder on the screen
• The source for the viewfinder brush is set to the camera
<Rectangle Width="320" Height="240" HorizontalAlignment="Left" > <Rectangle.Fill> <VideoBrush x:Name="viewfinderBrush" /> </Rectangle.Fill> </Rectangle>

Initiating the Capture
• This is the event handler for the photo button
• It asks the camera to take a picture
• The current camera settings are used for this
• You can override these (for example turn the flash on or off) by setting properties on the
camera instance
private void PhotoButton_Click(object sender, RoutedEventArgs e) { camera.CaptureImage(); }

Saving the image
• This saves the image in the camera roll
using Microsoft.Xna.Framework.Media; ... void camera_CaptureImageAvailable(object sender, ContentReadyEventArgs e) { Deployment.Current.Dispatcher.BeginInvoke(delegate() { string fileName = DateTime.Now.Ticks.ToString() + ".jpg"; MediaLibrary library = new MediaLibrary(); library.SavePictureToCameraRoll(fileName e.ImageStream); }); }
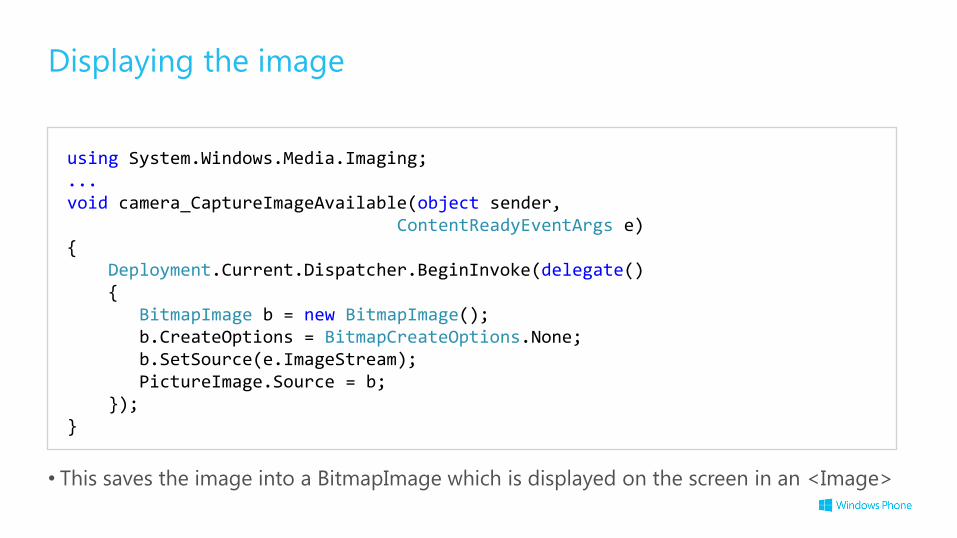
Displaying the image
• This saves the image into a BitmapImage which is displayed on the screen in an <Image>
using System.Windows.Media.Imaging; ... void camera_CaptureImageAvailable(object sender, ContentReadyEventArgs e) { Deployment.Current.Dispatcher.BeginInvoke(delegate() { BitmapImage b = new BitmapImage(); b.CreateOptions = BitmapCreateOptions.None; b.SetSource(e.ImageStream); PictureImage.Source = b; }); }

Saving to the Local Folder
• This saves the image in the local folder
using System.IO; using System.IO.IsolatedStorage; ... using (IsolatedStorageFile isStore = IsolatedStorageFile.GetUserStoreForApplication()) { using (IsolatedStorageFileStream targetStream = isStore.OpenFile(fileName, FileMode.Create, FileAccess.Write)) { WriteableBitmap bitmap = new WriteableBitmap(b); bitmap.SaveJpeg(targetStream, bitmap.PixelWidth, bitmap.PixelHeight, 0, 100); } }

Demo 3:
In application camera

Creating a Lens
• A Lens is a custom camera application which can be accessed
from within the camera application
• An application is flagged as a Lens application by setting a flag in
the manifest and providing icons that can be used to browse for
the Lens when the camera is in use
• I’ve created a FunkyCamera lens application which I have
registered in this way
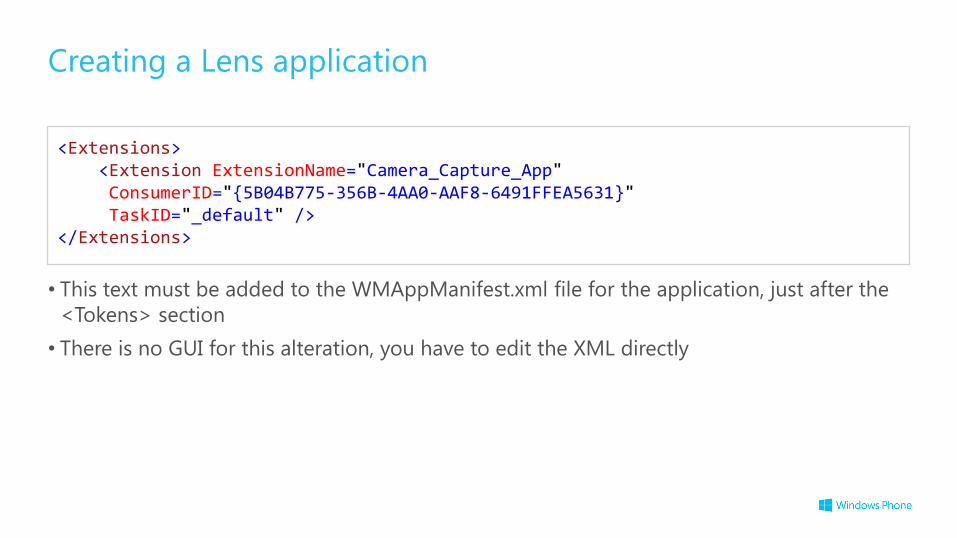
Creating a Lens application
• This text must be added to the WMAppManifest.xml file for the application, just after the
<Tokens> section
• There is no GUI for this alteration, you have to edit the XML directly
<Extensions> <Extension ExtensionName="Camera_Capture_App" ConsumerID="{5B04B775-356B-4AA0-AAF8-6491FFEA5631}" TaskID="_default" /> </Extensions>

Adding the Lens Icons
• Three Icons are required, one for each Windows Phone screen size
• WVGA 173 × 173 Assets\Lens.Screen-WVGA.png
• 720p 259 × 259 Assets\Lens.Screen-720p.png
• WXGA 277 × 277 Assets\Lens.Screen-WXGA.png
• They are all placed in the Assets folder of the application
• Use a transparent background to match the Windows Phone color scheme

Lens Startup
• You can create a URI Mapper to direct the application to the page that implements the
viewfinder for the Lens
• This can use the string “Viewfinderlaunch” in the destination uri that is activated when
the user selects the lens application
• Alternatively, if the program only contains a single page this page is displayed
• If the user “backs out” of the lens application they will be returned to the camera

Image Processing in a Lens
• The PhotoCamera class is used to provide access to the video stream
• This can be used by applications to perform image processing on the live data
• Augmented reality
• Scanning applications
• We are going to use it to make the funky camera display a funky image

Funky Image Processing
• This separates out the primaries and adds an offset to each
• It is called for each pixel in the image
internal int FunkyColor(int color) { int a = color >> 24; int r = (color & 0x00ff0000) >> 16; int g = (color & 0x0000ff00) >> 8; int b = (color & 0x000000ff); r += redOffset; g += greenOffset; b += blueOffset; return ((a & 0xFF) << 24) | ((r & 0xFF) << 16) | ((g & 0xFF) << 8) | (b & 0xFF); }

Starting the Camera
• This creates the camera and the bitmap that will contain the image processed output
• It binds to the event fired when the camera is ready
camera = new Microsoft.Devices.PhotoCamera(); // Create the destination for the processed image wb = new WriteableBitmap(640, 480); this.ProcessedImage.Source = wb; // Start the image pump when the camera is ready camera.Initialized += new EventHandler<CameraOperationCompletedEventArgs> (camera_Initialized);

Starting the Camera
• When the camera is ready we start the thread that will pump frames into our
image processor
• This will run alongside our application
void camera_Initialized(object sender, CameraOperationCompletedEventArgs e) { pumpARGBFrames = true; ARGBFramesThread = new System.Threading.Thread(PumpARGBFrames); ARGBFramesThread.Start(); }

Getting the Image Data
• This code grabs the preview buffer from the camera and processes it
int[] ARGBPx = new int[640 * 480]; ... captureEvent.WaitOne(); pauseFramesEvent.WaitOne(); //Thread sync with camera //Copies the current viewfinder frame into a buffer camera.GetPreviewBufferArgb32(ARGBPx); //Conversion to funky colours for (int i = 0; i < ARGBPx.Length; i++) { ARGBPx[i] = FunkyColor(ARGBPx[i]); }

Drawing the Image Data
• This code writes the processed pixels back to a writeable bitmap that is displayed on
the screen
private WriteableBitmap wb; ... pauseFramesEvent.Reset(); Deployment.Current.Dispatcher.BeginInvoke(delegate() { //Copy to WriteableBitmap ARGBPx.CopyTo(wb.Pixels, 0); wb.Invalidate(); pauseFramesEvent.Set(); });

Demo 4:
Funky camera
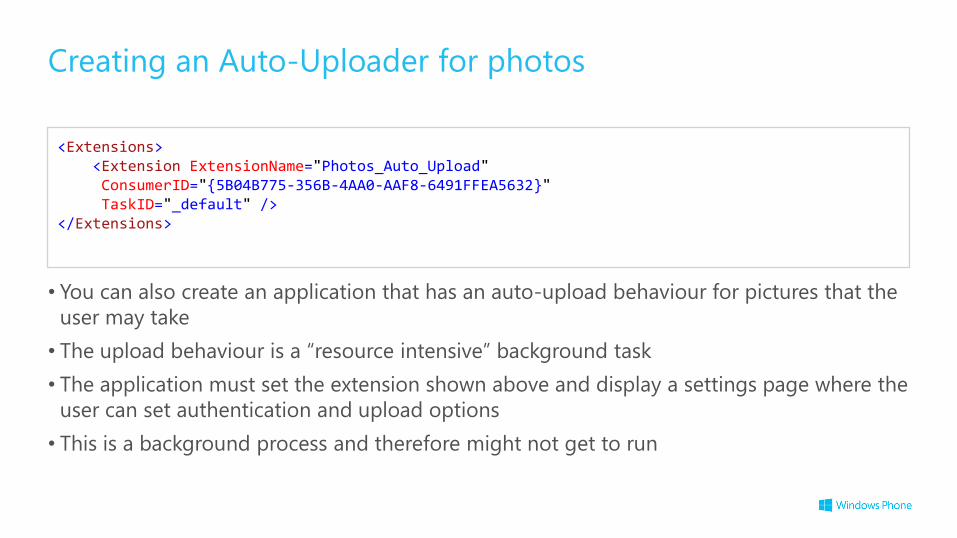
• You can also create an application that has an auto-upload behaviour for pictures that the
user may take
• The upload behaviour is a “resource intensive” background task
• The application must set the extension shown above and display a settings page where the
user can set authentication and upload options
• This is a background process and therefore might not get to run
Creating an Auto-Uploader for photos
<Extensions> <Extension ExtensionName="Photos_Auto_Upload" ConsumerID="{5B04B775-356B-4AA0-AAF8-6491FFEA5632}" TaskID="_default" /> </Extensions>

Using the Microphone
The Windows Phone Microphone
• The Windows Phone microphone can capture 16 bit audio
• Microphone input is managed as part of the XNA framework
• It is possible to record sound, process the audio and either store or replay it
• There is a complete example of how to do this on MSDN

Windows Phone 8 Sensors
12/4/2012 68

Sensors Available
• There are a number of different sensors:
• Accelerometer
• Compass
• Gyroscope
• Inclinometer
• Orientation
• All the sensors are used in the same way:
• They will fire an event when they have a reading
• Two APIs for managed code developers:
• Microsoft.Devices.Sensors (Windows Phone OS 7.1 API set)
• Windows.Devices.Sensors (Windows Phone Runtime)

The Windows Runtime Sensors Library
• The Windows Phone Runtime sensors APIs are compatible with sensor usage in WinRT on
Windows 8
• Accelerometer – returns G-force values with respect to the x, y, and z axes
• All phones have an accelerometer
• Inclinometer - returns pitch, roll, and yaw values that correspond to rotation angles around
the x, y, and z axes, respectively
• The inclinometer readings are derived from multiple sensors
• Gyrometer - returns angular velocity values with respect to the x, y, and z axes
• Compass - returns a heading with respect to True North and, possibly, Magnetic North
• OrientationSensor - returns a rotation matrix and a Quaternion that can be used to adjust
the user's perspective in a game application
• Combines the data from the accelerometer, compass, and gyrometer – known as “Sensor
Fusion”
using Windows.Devices.Sensors;

Determining Sensor Availability
• All the sensor classes have a GetDefault() method
• This method only returns values for hardware that has been integrated into the computer by the
manufacturer
• Returns null if the sensor is not available on that device
• All phones will have an accelerometer
// Determine whether we have a gyro on the phone _gyrometer = Gyrometer.GetDefault(); if (_gyrometer != null) { // Establish the report interval (units are milliseconds) _gyrometer.ReportInterval = 100; _gyrometer.ReadingChanged += _gyrometer_ReadingChanged; } else { MessageBox.Show("No gyrometer found"); }

Starting and Stopping a Sensor
• Application must set the report interval to a non-zero value prior to registering an event handler or
calling GetCurrentReading to activate it
• When finished with the sensor, set it to zero
• Check the MinimumReportInterval property
• Setting a value below the minimum supported interval will either trigger an exception or have
undefined results.
• Sensor driver will determine the actual report interval
// Establish the report interval (units are milliseconds) uint reportInterval = 100; if (_gyrometer.MinimumReportInterval > reportInterval) { reportInterval = _gyrometer.MinimumReportInterval; } _gyrometer.ReportInterval = reportInterval;
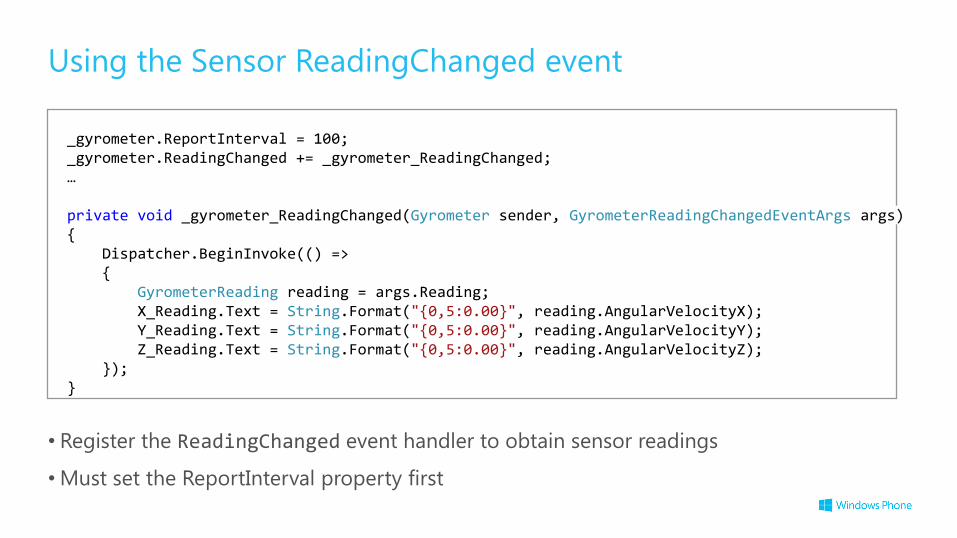
Using the Sensor ReadingChanged event
• Register the ReadingChanged event handler to obtain sensor readings
• Must set the ReportInterval property first
_gyrometer.ReportInterval = 100; _gyrometer.ReadingChanged += _gyrometer_ReadingChanged; … private void _gyrometer_ReadingChanged(Gyrometer sender, GyrometerReadingChangedEventArgs args) { Dispatcher.BeginInvoke(() => { GyrometerReading reading = args.Reading; X_Reading.Text = String.Format("{0,5:0.00}", reading.AngularVelocityX); Y_Reading.Text = String.Format("{0,5:0.00}", reading.AngularVelocityY); Z_Reading.Text = String.Format("{0,5:0.00}", reading.AngularVelocityZ); }); }

Getting Readings By Polling a Sensor
• An application can poll the sensor for the current reading as an alternative to registering a
ReadingChanged event handler
• The preferred alternative for an application that updates its user interface at a specific frame rate
• Must still establish a desired ReportInterval before polling in order to activate the sensor
// Alternative to ReadingChanged event, call GetCurrentReading() to poll the sensor GyrometerReading reading = _gyrometer.GetCurrentReading(); if (reading != null) { X_Reading.Text = String.Format("{0,5:0.00}", reading.AngularVelocityX); Y_Reading.Text = String.Format("{0,5:0.00}", reading.AngularVelocityY); Z_Reading.Text = String.Format("{0,5:0.00}", reading.AngularVelocityZ); }

Video Content

Video on the Phone
• An application can contain a single MediaElement that can play video
• The sample above plays a resource file that is part of the project containing the application
• You can find a list of supported codecs here:
http://msdn.microsoft.com/en-us/library/ff462087.aspx
<MediaElement Name= "MediaPlayback" Source= "myvideo.wmv" AutoPlay="True"/>

Streaming Video on the Phone
• If you want to stream from the internet, just replace the source file with a url
• This implementation has the location hard coded into the XAML
• You can also do this under program control
<MediaElement Name= "MediaPlayback" Source="http://mschannel9.vo.msecnd.net/o9/mix/09/wmv/key01.wmv" AutoPlay="True"/>

Controlling Playback
• The MediaElement exposes methods that can be used to control the media playback
• An application can also determine the properties of the media stream
• To determine if it can be paused for example
private void pauseButton_Click(object sender, RoutedEventArgs e) { MediaPlayback.Pause(); }

Smooth Streaming
• Windows Phone also supports Smooth Streaming
• This is an adaptive streaming that manages the quality of the video signal in response to
the abilities of the network connection
• Playback quality is managed in real time to handle changes in network performance
during viewing
• It uses a server side plugin and client code on the viewing device
• You can download the viewing software here: http://smf.codeplex.com

Review
• Applications can use phone resources by means of Launchers and Choosers
• Launchers start a behaviour, choosers can return a result
• Launchers and Choosers interrupt the running of the application
• There are two types of scheduled notifications, Alarm and Reminder
• An Alarm allows you to specify a sound file to play when the notification is launched
• When you create a Reminder, you can specify a deep link URI
• Applications can capture images and video feeds from the camera
• Applications can create “Lens” behaviours that are accessed from the in-phone camera
• Applications can provide upload behaviors to upload photographs
• Applications can use sensors and determine which of them are present
• The MediaContent element provides for video playback

The information herein is for informational
purposes only an represents the current view of
Microsoft Corporation as of the date of this
presentation. Because Microsoft must respond
to changing market conditions, it should not be
interpreted to be a commitment on the part of
Microsoft, and Microsoft cannot guarantee the
accuracy of any information provided after the
date of this presentation.
© 2012 Microsoft Corporation.
All rights reserved. Microsoft, Windows, Windows Vista and other product names are or may be registered trademarks and/or trademarks in the U.S. and/or other countries.
MICROSOFT MAKES NO WARRANTIES, EXPRESS, IMPLIED OR STATUTORY, AS TO THE INFORMATION
IN THIS PRESENTATION.