serif webplus 7.0 companion
TRANSCRIPT

Serif WebPlus 7.0 Companion For Windows

©2001 Serif, Inc. All rights reserved. No part of this publication may be reproduced in any formwithout the express written permission of Serif, Inc.
All Serif product names are trademarks of Serif, Inc. Microsoft, Windows and the Windows logo areregistered trademarks of Microsoft Corporation. All other trademarks acknowledged.
Serif WebPlus 7.0 © 2001 Serif, Inc.
Companies and names used in samples are fictitious.
Clipart samples from Serif ArtPacks © Serif, Inc. & Paul Harris
Portions clipart and graphic content ©1999 Nova Development Corporation and its licensors. Allrights reserved.
TrueType font samples from Serif FontPacks © Serif, Inc.
Portions graphics import/export technology © AccuSoft Corp. & Eastman Kodak Company & INSOCorporation & LEAD Technologies, Inc.
ImageStream® Graphics and Presentation Filters, Copyright © 1991-1999 INSO Corporation. AllRights Reserved.
International ProofReader™ English text proofing system © 1994 by INSO Corporation. All rightsreserved. Reproduction or disassembly of embodied computer programs or algorithms prohibited.
Enhanced Roget’s US and UK Electronic Thesaurus © 1994 by INSO Corporation. Adapted fromthe Oxford Thesaurus © 1991 by Oxford University Press and from Roget’s II: The New Thesaurus© 1980 by Houghton Mifflin Company. All rights reserved. Reproduction or disassembly ofembodied computer programs or algorithms prohibited.

Software License AgreementThis Software License Agreement (“License Agreement”) is a legal agreement between you (eitheran individual or a single entity) and Serif, Inc. (“Serif”) for the accompanying software product,which includes computer software and may include associated media, printed materials, and “online”or electronic documentation (the “Software Product”). By installing, copying, or otherwise using theSoftware Product, you agree to be bound by the terms of this License Agreement. If you do not agreeto the terms and conditions of this License Agreement, do not install or use the Software Product;you may, however, return it to your place of purchase for a full refund.
THANK YOU FOR LICENSING THE USE OF THE SOFTWARE PRODUCT. IT IS IMPORTANT THAT YOU (THE"LICENSEE") READ THIS NOTICE CAREFULLY. THESE ARE THE ONLY TERMS AND CONDITIONS APPLICABLE TOYOUR RIGHTS WITH RESPECT TO THE SOFTWARE PRODUCT. THE SOFTWARE PRODUCT IS PROTECTED BYCOPYRIGHT LAWS AND INTERNATIONAL COPYRIGHT TREATIES, AS WELL AS OTHER INTELLECTUAL PROPERTYLAWS AND TREATIES. THE SOFTWARE PRODUCT IS LICENSED, NOT SOLD.
1. GRANT OF LICENSESerif hereby grants to Licensee a personal, non-exclusive, non-transferable license (a "License") to use one (1) copy of theSoftware Product, including any updates thereto, andaccompanying documentation, if any, provided by Serif,according to the terms set forth below. If the Software Productis being provided to Licensee as an update or upgrade tosoftware which Licensee has previously licensed (such softwarereferred to as the "Prior Software"), then Licensee agrees todestroy all copies of the Prior Software within thirty (30) daysafter opening this package except for one backup copy of thePrior Software.
2. SCOPE OF USEYou may install and use one copy of the Software Product, on asingle computer. The primary user of the computer on which theSoftware Product is installed may make a second copy for his orher exclusive use on a portable computer. Licensee may alsostore or install a copy of the Software Product on a storagedevice, such as a network server, used only to install or run theSoftware Product on other computers over an internal network;however, you must acquire and dedicate a license for eachseparate computer on which the Software Product is installed orrun from the storage device. A license for the Software Productmay not be shared or used concurrently on different computers.
3. LICENSE PAKIf you have acquired this LICENSE AGREEMENT in a SerifLicense Pak, you may make the number of additional copies ofthe computer software portion of the Software Product asauthorized in the Serif License Pak, and you may use each copyin the manner specified above. You are also entitled to make acorresponding number of secondary copies for portablecomputer use as specified above.
4. PROHIBITIONSYou may not: modify, prepare derivative works from, translate,reverse engineer, decompile, disassemble or otherwise derivesource code from the Software Product (except to the extent thatsuch acts are expressly permitted by applicable lawnotwithstanding this limitation); copy the Software Product(except as provided above) or the accompanyingdocumentation; rent, transfer, disclose, make available or grantany rights in the Software Product (including anyaccompanying documentation) in any form to any personwithout the prior written consent of Serif; remove anyproprietary notices, labels, or marks on the Software Product(including any accompanying documentation); use the SoftwareProduct in any manner that infringes the intellectual property orother rights of another party; or use the Software Product toprovide on-line or other database services to any other person.
5. RETENTION OF RIGHTS; TERMINATIONThis License Agreement does not constitute a sale. All title,trade secrets, copyrights, patents and other intellectual rights to
the Software Product, its accompanying documentation and anycopy made by Licensee remain with Serif, and Licensee herebyagrees to preserve and acknowledges the foregoing. Licenseefurther agrees and acknowledges that the Software Product andall copies thereof are Serif’s exclusive property and constitute avaluable trade secret of Serif. Licensee further agrees andacknowledges that unauthorized copying of the SoftwareProduct or the accompanying documentation, or failure tocomply with any of the provisions hereof (each, a "TerminableEvent"), will result in automatic termination of this License. Inthe event of a violation of this License by Licensee, Serifreserves and shall have available all legal remedies.
6. TERM OF LICENSE FOR TRIAL VERSIONSOFTWAREThe License pertaining to a trial version of the Software Product(a "Trial Version") shall expire in accordance with the terms asset forth in the installation process for the Trial Version alongwith the designated trial period as set forth in the trial program.
7. LIMITED WARRANTY AND DISCLAIMERSerif warrants that, for a period of ninety (90) days afterdelivery, the diskettes or CD-ROMs on which the softwareincluded in the Software Product is furnished will, under normaluse, be free from defects that prevent Licensee from loading theSoftware Product on a computer. Serif’s entire liability andLicensee’s exclusive remedy under this warranty will be, atSerif’s option, to (a) use reasonable commercial efforts toattempt to correct or work around errors, or (b) to replace theSoftware Product with functionally equivalent SoftwareProduct, on diskettes or CD-ROM, as applicable or (c) returnthe price paid for the Software Product, in each case upon returnof the Software Product to Serif together with a copy of yourreceipt for the purchase thereof. This Limited Warranty is voidif failure of the Software Product or hardware has resulted fromaccident, abuse, or misapplication. Any replacement SoftwareProduct will be warranted for the remainder of the originalwarranty period or thirty (30) days, whichever is longer.Outside the United States, neither these remedies nor anyproduct support services offered by Serif are available withoutproof of purchase from an authorized non-U.S. source. TheSoftware Product is licensed to you on an "as is" basis withoutany warranty of any nature.
8. NO OTHER WARRANTIESExcept for the above express limited warranties, Serif and itssuppliers make and licensee receives no warranties orconditions, or terms, express, implied, statutory, or in anycommunication with licensee. To the maximum extentpermitted by applicable law, Serif and its suppliers disclaim allother warranties and conditions, either express or implied,including, but not limited to, implied warranties ofmerchantability, fitness for a particular purpose, title and non-infringement, with regard to the software product and theprovision of or failure to provide support services. Licensee
shall be solely responsible for the selection, use, efficiency andsuitability of the software product and serif shall have noliability therefor. Serif shall have no liability for, nor obligationto indemnify licensee regarding actions alleging theinfringement of proprietary rights by the software product. Serifdoes not warrant that the operation of the software product willbe uninterrupted or error free or that the software product willmeet licensee’s specific requirements. The Limited Warrantygives you specific legal rights. You may have others, whichvary from state/jurisdiction to state/jurisdiction.
9. LIMITATION OF LIABILITYIn no event will Serif or its suppliers be liable for loss of data,corruption, lost profits, cost of cover, or other special,incidental, punitive, consequential, or indirect damages arisingfrom the use of the software product (including anyaccompanying documentation), however caused and on anytheory of liability. This limitation will apply even if Serif or anauthorized distributor has been advised of the possibility ofsuch damage. In no event will Serif’s liability exceed theamount paid for the software product. Licensee acknowledgesthat the amounts paid by licensee for the software productreflect this allocation of risk. Some states or other jurisdictionsdo not allow the exclusion or limitation of liability forincidental or consequential damages, so the above limitationsand exclusions may not be applicable in certain instances. Noneof the above affects the statutory rights of licensees residing inthe United Kingdom.
10. NOT FOR RESALE SOFTWAREIf the Software Product is labeled “Not for Resale” or “NFR,”then, notwithstanding section 1 of this License, your use of theSoftware Product is limited to use for demonstration, test, orevaluation purposes.
11. NO RENTAL; OTHER TRANSFERSYou may transfer this License to another computer orworkstation only on a permanent basis (that is, with no intent totransfer again) provided the computer, workstation, or otherdigital electronic device from which you have transferred thisLicense no longer accesses or otherwise utilizes the SoftwareProduct, and the Software Product is used in accordance withthe terms of this License Agreement.
12. TERMINATIONYou may terminate this License Agreement at any time. Serifmay terminate this License Agreement if you fail to complywith the terms and conditions of this License Agreement. Ineither event, you must destroy all copies of the SoftwareProduct.
13. UPGRADEIf this License is an “Upgrade,” you must have a valid licensefor the Prior Software for this License Agreement to be valid,and this License Agreement must be used to replace suchlicense for the Prior Software. The total number of license“Upgrades” you may acquire may not exceed the total numberof computers, workstations, or other digital electronic devicesthat were licensed to access or otherwise utilize the SoftwareProduct at the time you upgraded the Software Product.
14. GUIDELINES FOR THE USE OF DIGITALCONTENT IMAGESThis product contains numerous clipart and photo images(collectively referred to as the “Images”) which are eitherowned by SERIF or licensed from a third party. As a user ofthis product you are free to use, modify, and publish the Imagesas you wish subject to the restrictions set out below. If you areuncertain as to whether your intended use complies with theguidelines set out below, we recommend that you seek theadvice of your own attorney or legal counsel.
A. YOU MAY, subject to any restrictions set out below:1. Incorporate any Image(s) into your own original work andpublish, display, and distribute your work in any media. Youmay not, however, resell, sublicense, or otherwise makeavailable the Image(s) for use or distribution separately ordetached from a product or Web page. For example, theImage(s) may be used as part of a Web page design, but maynot be made available for downloading separately or in a formatdesigned or intended for permanent storage or reuse by others.Similarly, clients may be provided with copies of the Image(s)(including digital files) as an integral part of a work product, butmay not be provided with the Image(s) or permitted to use theImage(s) separately or as part of any other product;2. Make one (1) copy of the Image(s) for backup or archivalpurposes.
B. YOU MAY NOT:1. Create scandalous, obscene, defamatory, or immoral worksusing the Image(s) nor use the Image(s) for any other purposeprohibited by law;2. Use or permit the use of the Image(s) or any part thereof as atrademark or service mark, or claim any proprietary rights ofany sort in the Image(s) or any part thereof;3. Use the Image(s) in electronic format, on-line, or inmultimedia applications unless (a) the Image(s) are incorporatedfor viewing purposes only and (b) no permission is given todownload and/or save the Image(s) for any reason;4. Rent, lease, sublicense, or lend the Image(s), or a copythereof, to another person or legal entity. You may, however,transfer all your license to use the Image(s) to another person orlegal entity, provided that (a) you transfer the Image(s) and thisLicense, including all copies (except copies incorporated intoyour work product as permitted under this License), to suchperson or entity, (b) that you retain no copies, including copiesstored on a computer or other storage device, and (c) thereceiving party agrees to be bound by the terms and conditionsof this License;5. Use any Image(s) except as expressly permitted by thisLicense.
15. MISCELLANEOUSThis Agreement shall not be governed by the 1980 U. N.Convention on Contracts for the International Sale of Goods;rather, this Agreement shall be governed by the laws of theState of New Jersey, of the United States of America, includingthe Uniform Commercial Code of the State of New Jersey,without reference to conflicts of law principles. This Agreementis the entire Agreement between Serif and Licensee andsupersedes any other communications or advertising withrespect to the Software Product. If any provision of thisAgreement is held invalid or unenforceable, such provisionshall be revised to the extent necessary to cure the invalidity ornon-enforceability, and the remainder of this Agreement shallcontinue in full force and effect. If the Software Product isacquired by the United States Government or on its behalf, theSoftware is furnished with restricted rights. The use,duplication, or disclosure by the United States Government andparties acting on its behalf is governed by, and subject torestrictions as set forth in subdivision (c) (1) (ii) of the Rights inTechnical Data and Computer Software clause at DFARS252.227-7013, the subparagraphs (c)(1) and (2) of theCommercial Computer Software - Restricted Rights at 48 CFR52.227-19, or other comparable regulations of other governmentagencies, as applicable. Licensee agrees not to allow theSoftware Product to be sent to or used in any other countryexcept in compliance with applicable United States laws andregulations. This Agreement shall constitute the entireagreement between Serif and Licensee and supersedes all prioragreements, understandings, communications, proposals orrepresentations, oral or written, by either party. This Agreementshall be amended only by an executed writing by authorizedrepresentatives of both parties.

How to contact us
Our main office (USA, Canada):The Software CenterPO Box 803, Nashua NH 03061 USA
Main (603) 889-8650Registration (800) 794-6876Single Unit Sales (800) 55-SERIF or 557-3743Technical Support (603) 886-6642Customer Service (800) 489-6720General Fax (603) 889-1127
Technical Support E-mail [email protected]
European office (UK, Europe):The Software CentrePO Box 2000, Nottingham, NG11 7GW, UK
Main (0115) 914 2000Registration (0500) 454 645Sales (0800) 376 4848Technical Support (0115) 914 9090Customer Service (0115) 914 9090General Fax (0115) 914 2020
Technical Support E-mail [email protected]
OnlineVisit us on the Web at http://www.serif.com
InternationalPlease contact your local distributor/dealer. For further details pleasecontact us at one of our phone numbers above.
Comments or other feedbackWe want to hear from you! E-Mail [email protected] with yourideas and comments!
Contents
1 ♦ Welcome
About the Companion...............................................................................3Linking to additional help..........................................................................3What’s new in Serif WebPlus 7.0... ..........................................................4...on top of these established features......................................................5Registration and support ..........................................................................6System requirements ...............................................................................7Installing WebPlus 7.0..............................................................................7
2 ♦ Overview
What is a Web site? ...............................................................................11How does WebPlus work? .....................................................................11How do I publish my Web site? ..............................................................12How should I get started?.......................................................................12
3 ♦ Getting Started
WebPlus Startup Wizard ........................................................................15Using a Web Wizard… ...........................................................................16Take a look around.................................................................................19For more help on the basics... ................................................................22
4 ♦ Working with Text
About text frames ...................................................................................25Objects on the master page ...................................................................26Working with text frames ........................................................................27Editing text..............................................................................................27Changing the ‘Web colors’ .....................................................................29Importing text..........................................................................................30For more help on working with text... .....................................................31

5 ♦ Working with Graphics and Animation
Graphics in WebPlus.............................................................................. 35Importing a picture or animation............................................................. 36Drawing basic lines and shapes............................................................. 37Other tools and techniques .................................................................... 38Adding animations.................................................................................. 39LogoPlus and more ................................................................................ 40For more help on working with graphics and animation... ...................... 41
6 ♦ Working with Hyperlinks and Interactivity
Hyperlinking text..................................................................................... 45Hyperlinking graphics............................................................................. 46Using hotspots ....................................................................................... 46About HTML and Java ........................................................................... 47For more help on hyperlinks and interactivity......................................... 48
7 ♦ Previewing and Publishing
Optimizing the publication ...................................................................... 51Previewing the site ................................................................................. 51Publishing to a local folder ..................................................................... 53Publishing to the World Wide Web......................................................... 54For more help on previewing and publishing.......................................... 55
8 ♦ Starting from Scratch
Step 1: Design........................................................................................ 59Step 2: Content ...................................................................................... 60Step 3: Finishing touches....................................................................... 61Design tips and rules of thumb............................................................... 61Where should I go from here?................................................................ 63

Welcome
1

Welcome 3
About the CompanionThe WebPlus 7.0 Companion provides everything you need to get up tospeed, from the basics to tips and tricks for advanced users. Here’s abrief chapter summary:
1 Welcome. Reviews the program’s main features, requirements,and installation sequence.
2 Overview. Offers a simple introduction to Web sites—and howWebPlus helps you create and publish your own.
3 Getting Started. Introduces Web Wizards—our built-in designassistants—and the WebPlus environment.
4 Working with Text. Describes how to edit the Web Wizard’splaceholder text, customize the text layout, and import text.
5 Working with Graphics and Animation. Examines how toinsert or create your own pictures and animations.
6 Working with Hyperlinks and Interactivity. Shows you howto link text or graphics to Web pages, e-mail, or files, andenhance pages with Java or HTML effects.
7 Previewing and Publishing. Covers “finishing touches” andthe simple steps that will get your publication onto the Web.
8 Starting from Scratch. Provides detailed, step-by-stepsuggestions on designing, adding content, and proofing—plus aspecial section with proven tips to improve your site.
Linking to additional helpThroughout the Companion, use this symbol as your key to furtherinformation that’s available in WebPlus online Help. You’ll find acomplete Visual Reference to the WebPlus interface, plus acomprehensive “How To” section covering goals and procedures.
Press �� or choose ���������� from the Help menu.
?

4 Welcome
What’s new in Serif WebPlus 7.0... Welcome to Serif WebPlus 7.0—the easiest way ever to get yourbusiness, organization, or household on the World Wide Web!
Among new WebPlus 7.0 features, you’ll find...
♦ Streamlined Text HandlingRe-engineered from the ground up, the ultra-fast text engine meansediting text is simpler and more like word processing than ever.You’ll no longer need to switch to a separate Text tool... or copewith artificial “text blocks.” And more logical paragraph andcharacter text styles will help you keep formats under control.
♦ Multiple Document ViewsNow you can use WritePlus, the built-in story text editor, side byside with the page editor. Instantaneous updating of each windowallows simultaneous draft and layout views of Web page text!
♦ QuickShapesLong an exclusive feature of other Serif solutions, QuickShapeswork like intelligent clipart... or the most powerful set of drawingtools you can imagine. Just choose a template shape, drag on thepage... then adjust handles to customize each angle and dimension.
♦ Powerful Drawing OptionsAn arsenal of new drawing tools are at your command... Sketchfreehand lines and curves. Extend existing lines with ease. Applyline styles to all kinds of shapes—even add line endings likearrowheads and diamonds.
♦ Gradient FillsFor sophisticated illustrations and impressive text effects, selectfrom a wide variety of Linear, Radial, and Conical fills. Use theinteractive fill tool for drag-and-drop updating of fill nodes andcolors.
♦ Transparency EffectsBoth solid and variable transparency let you add new depth to yourWeb creations using both .GIF and .PNG formats. Applytransparency directly from the Studio, then edit nodes and opacitywith the interactive tool.

Welcome 5
♦ Fastest on the DrawFor sheer speed, our new drawing engine reigns supreme! Not onlythat, automatic anti-aliasing of lines, text, and polygons results insuperb visuals, both on-screen and on the printed page.
♦ Other EnhancementsAlways easy to use, WebPlus 7.0 now lets you employAutoCorrect and AutoSpell proofing options. You can rotate orreshape text frames and still edit their text. Select multiple Undoand Redo actions from a handy list. Customize toolbars by addingyour own, or using drag-and-drop to relocate buttons. HTMLexport is optimized for Netscape. And so much more!
♦ WebPlus 7.0 Design CD-ROMExtend your creative capacity with dozens of new Web Wizards,extra TrueType fonts, and a solid collection of 20,000 Web-readygraphics, including animations, pictures, and page elements!
...on top of these established features:
♦ Web Wizards for Instant Web SitesJust pick the type of publication you want to produce and answer afew simple questions. WebPlus does the rest! Revisit your colorscheme and text selections at any time as you continue to workwith a publication. You can customize the scheme colors, createbrand new schemes, and apply any scheme to a “from-scratch”Web site. Basic user details are stored for automatic reuse.
♦ Easy Editing and Special EffectsWith WebPlus, it’s a snap to import your own text and graphics toreplace the Wizard samples. You’ll find built-in modules likeWritePlus, for integrated word processing, plus tools for creatingtext hyperlinks and hotspot graphics. Choose the color scheme thatlooks best... The Snapping feature and Dot Grid help you achieve acrisp layout. Everything’s wrapped into a friendly DTPenvironment with onscreen Tooltips, HintLine, and context-sensitive help!
♦ Versatile Web Feature SupportWebPlus supports HTML 4.0 for better WYSIWYG page design.Add animated GIFs, marquee effects, sound, and video—even Javaand HTML code—to spice up your pages! The Layout Checkerhelps you fine-tune your site before it’s published. Then previewyour site in your own Web browser and publish it to a local folderor a remote server.
6 Welcome
♦ On-screen Studio Combines Convenience with FunctionalityThe Studio’s tabs provide rapid drag-and-drop access tocommonly-used controls such as fonts, line settings, and the colortable. Use the Portfolio to store your favorite designs for use in anyWeb site... and tap the Gallery, with built-in mastheads, logos, andlots of other page elements you can customize to suit your needs!
♦ Amazing Logo/Graphic ModuleProduce attention-grabbing headlines, unique text effects, andpowerful logos instantly using our exclusive LogoPlus creationtool...
♦ Professional Layout and Text ToolsIntelligent text fitting. Movable rulers and guides. Precisionplacement, rotation, flipping, and cropping. Text formatting withnamed styles. Master page for repeating background elements. Notto mention word count, search and replace, spell-checking,thesaurus, and proof reader to ensure your site’s readability.
♦ Animated GIFs and MarqueesAdd life to your Web pages! Choose from over 600 animatedAnimals, Cartoons, Dingbats, Logos, Objects, and more... Use aWizard to custom-design your own varied and colorful multi-linetext messages that scroll across the screen...
♦ Integrated Table Editor and Calendar WizardUse TablePlus to create colorful, sophisticated cell-basedpublication elements. Include formatted text and spreadsheetformulas; vary color and table style with a few mouse clicks!Choose from a wide variety of sizes and design options, then justclick and drag to fit your calendar to a column or a whole page!
♦ Total Ease-of-UseRight-click menus. Illustrated QuickTours to smooth the learningcurve. Plus HintLine, Wizards, and context-sensitive cursors tomake WebPlus as friendly as a puppy!
Registration and support If you see the Registration Wizard when you launch WebPlus, pleasetake a moment to complete the registration process. Just call Serif toll-free and provide the installation number and code shown. We’ll giveyou a personalized registration number in return. Remember, if youneed technical support please contact us. We aim to provide fast,friendly service and knowledgeable help.
Welcome 7
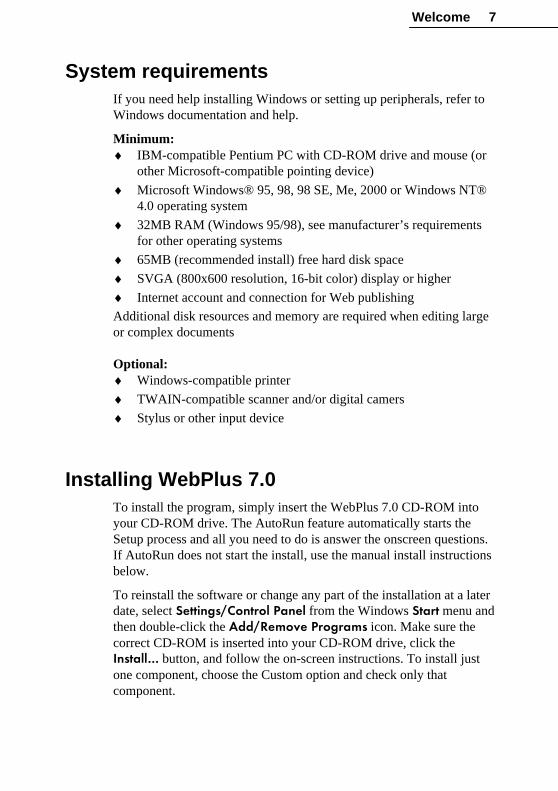
System requirementsIf you need help installing Windows or setting up peripherals, refer toWindows documentation and help.
Minimum:♦ IBM-compatible Pentium PC with CD-ROM drive and mouse (or
other Microsoft-compatible pointing device)
♦ Microsoft Windows® 95, 98, 98 SE, Me, 2000 or Windows NT®4.0 operating system
♦ 32MB RAM (Windows 95/98), see manufacturer’s requirementsfor other operating systems
♦ 65MB (recommended install) free hard disk space
♦ SVGA (800x600 resolution, 16-bit color) display or higher
♦ Internet account and connection for Web publishing
Additional disk resources and memory are required when editing largeor complex documents
Optional:♦ Windows-compatible printer
♦ TWAIN-compatible scanner and/or digital camers
♦ Stylus or other input device
Installing WebPlus 7.0 To install the program, simply insert the WebPlus 7.0 CD-ROM intoyour CD-ROM drive. The AutoRun feature automatically starts theSetup process and all you need to do is answer the onscreen questions.If AutoRun does not start the install, use the manual install instructionsbelow.
To reinstall the software or change any part of the installation at a laterdate, select �������������������� from the Windows ����� menu andthen double-click the ����������������� icon. Make sure thecorrect CD-ROM is inserted into your CD-ROM drive, click the������� button, and follow the on-screen instructions. To install justone component, choose the Custom option and check only thatcomponent.

Overview
2

Overview 11
What is a Web site?A Web site is a collection of files stored on a computer where userswith special programs called Web browsers can view the files aspages. Browsers can read the common file format known as HTMLthat describes how the various elements of text, pictures, hyperlinks,and other elements are arranged on each Web page. Each Web site hasa single Home Page—the first page a visitor sees—usually containinghyperlinks to other pages on the site, which in turn have links to others.To the person using a browser to access the Web site, the contentappears seamlessly linked. You just click on a link to display relatedinformation.
The World Wide Web was conceived as a way of using the Internet—the global network that interconnects computers around the world—toshare information stored as Web pages. But Web sites don’t depend onthe Internet—they can be (and often are) accessed just as well over alocal area network or private intranet. Remember, a Web site is just acollection of files.
How does WebPlus work?You’ll first compose your pages as a publication in WebPlus, thenpublish the pages as a Web site.
Whether you’re looking for a business, organization, or personal Website, you’ll probably want to begin by exploring the Web WebWizards that come with WebPlus. Click through the Wizard screens,make a few selections, and enter some basic information—and theWizard gets you started with a set of ready-to-publish Web pages. Ifyou prefer, you can start a new publication from scratch. Either way,the next step is to spend some time customizing the pages with yourown text, graphics, and other content. The Companion will cover whatyou need to know.
For editing your publication, WebPlus offers a set of intuitive tools anda straightforward workspace that resembles a desktop publishing (DTP)environment. You can easily import text or pictures, use the built-inword processor, create colorful graphic shapes, and add hyperlinks andhotspots that users can click to access other Web pages or send e-mail.Once your content is in place, you can use a variety of proofing toolsand the Layout Checker Wizard to optimize the site before publishingit.
12 Overview
WebPlus gives you the option of previewing the site in your own Webbrowser before publishing it to the Web.
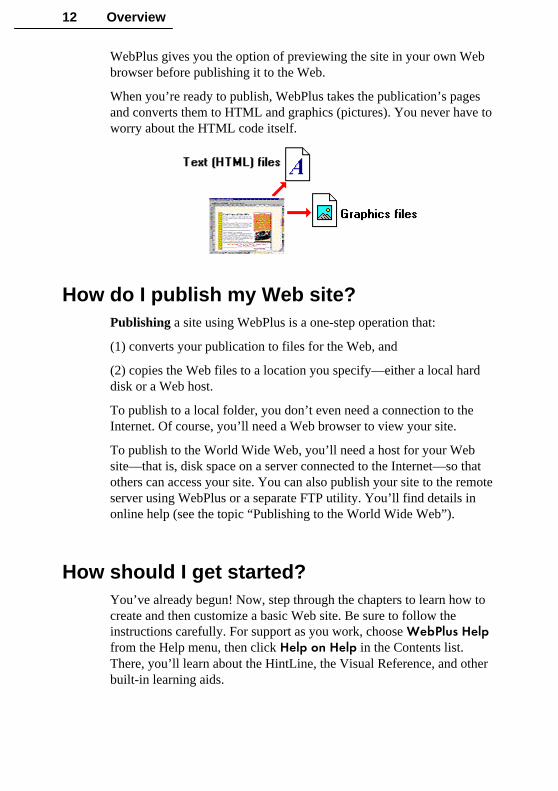
When you’re ready to publish, WebPlus takes the publication’s pagesand converts them to HTML and graphics (pictures). You never have toworry about the HTML code itself.
How do I publish my Web site?Publishing a site using WebPlus is a one-step operation that:
(1) converts your publication to files for the Web, and
(2) copies the Web files to a location you specify—either a local harddisk or a Web host.
To publish to a local folder, you don’t even need a connection to theInternet. Of course, you’ll need a Web browser to view your site.
To publish to the World Wide Web, you’ll need a host for your Website—that is, disk space on a server connected to the Internet—so thatothers can access your site. You can also publish your site to the remoteserver using WebPlus or a separate FTP utility. You’ll find details inonline help (see the topic “Publishing to the World Wide Web”).
How should I get started?You’ve already begun! Now, step through the chapters to learn how tocreate and then customize a basic Web site. Be sure to follow theinstructions carefully. For support as you work, choose ��������� from the Help menu, then click ��� ����� in the Contents list.There, you’ll learn about the HintLine, the Visual Reference, and otherbuilt-in learning aids.

Getting Started
3

Getting Started 15
Once WebPlus has been installed, you’ll be ready to start. Setup adds a������������ ! item to the ������� submenu of the Windows����� menu.
� Use the Windows ����� button to start WebPlus (or if WebPlus isalready running, choose "�#�from the ���� menu) to display theStartup Wizard (menu screen).
WebPlus launches, and you’ll see the Startup Wizard.
WebPlus Startup WizardNow you can see the normal starting screen. The Startup Wizardpresents five choices:
♦ $�������%���, to create an instant publication
♦ ����������&���&', to get a blank page to work on
♦ ( ��������&�����, to edit your own WebPlus files
♦ )��#�*��&+,���, to see an introductory overview
♦ (����������&�, to access the Serif and WebPlus Web sites
16 Getting Started
Whether you’re an old hand, or just getting started with WebPlus 7.0,here’s a recommended sequence:
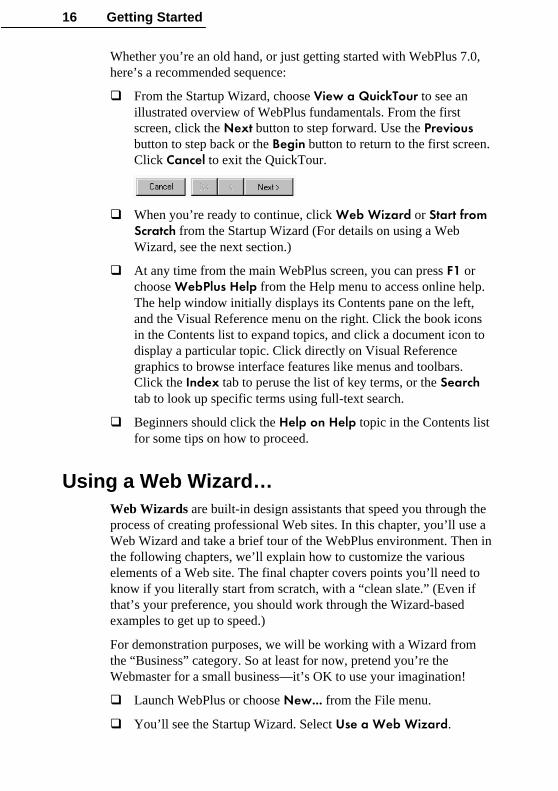
� From the Startup Wizard, choose )��#�*��&+,��� to see anillustrated overview of WebPlus fundamentals. From the firstscreen, click the "�-� button to step forward. Use the �������button to step back or the .���� button to return to the first screen.Click ���&�� to exit the QuickTour.
� When you’re ready to continue, click�����%��� or ����������&���&' from the Startup Wizard (For details on using a WebWizard, see the next section.)
� At any time from the main WebPlus screen, you can press �� orchoose ��������� from the Help menu to access online help.The help window initially displays its Contents pane on the left,and the Visual Reference menu on the right. Click the book iconsin the Contents list to expand topics, and click a document icon todisplay a particular topic. Click directly on Visual Referencegraphics to browse interface features like menus and toolbars.Click the ����- tab to peruse the list of key terms, or the ����&'tab to look up specific terms using full-text search.
� Beginners should click the ��� ����� topic in the Contents listfor some tips on how to proceed.
Using a Web Wizard…Web Wizards are built-in design assistants that speed you through theprocess of creating professional Web sites. In this chapter, you’ll use aWeb Wizard and take a brief tour of the WebPlus environment. Then inthe following chapters, we’ll explain how to customize the variouselements of a Web site. The final chapter covers points you’ll need toknow if you literally start from scratch, with a “clean slate.” (Even ifthat’s your preference, you should work through the Wizard-basedexamples to get up to speed.)
For demonstration purposes, we will be working with a Wizard fromthe “Business” category. So at least for now, pretend you’re theWebmaster for a small business—it’s OK to use your imagination!
� Launch WebPlus or choose "�# from the File menu.
� You’ll see the Startup Wizard. Select $�������%���.

Getting Started 17
� Notice that the .���� category is initially selected, withthumbnails for the available Wizards displayed on the right. We’regoing to use the first one (��&'), so make sure it’s selected andthen click ����'.
WebPlus retrieves the Wizard and displays it in Wizard Preview mode.Here’s where you can initially add your own information to the design.
� The upper section of the Wizard lists several categories that youcan customize, with “Business Details” selected.
� Further down are boxes where you can review and/or re-enter thesample “answer text” in the category. Type into the fields toreplace the sample text with your own: in this case, enter afictitious (or real) company name, address, etc.
� When you’re done, click the "�-���%���*������ buttonto jump to the next information category. (To review a priorcategory, click the ���������%���*������ button.) Hereyou can alter Web page titles shown in the Wizard if you wish.
Each time you click elsewhere after entering information, you’ll see thepublication update to reflect your choices. You can change as much oras little as you like at this point—it’s always possible to revisit thechoices later!
� Go on to the third category, ������&'���. Here you can clickvarious thumbnails to sample different color schemes for the site.
In WebPlus, each publication has one color scheme assigned to it.Color schemes are great time-savers and help to ensure consistent,coordinated results. They work like a paint-by-numbers system usingfive numbers. Instead of assigning a specific color to an element, youcan mark it with a scheme color number. Let’s experiment.
18 Getting Started
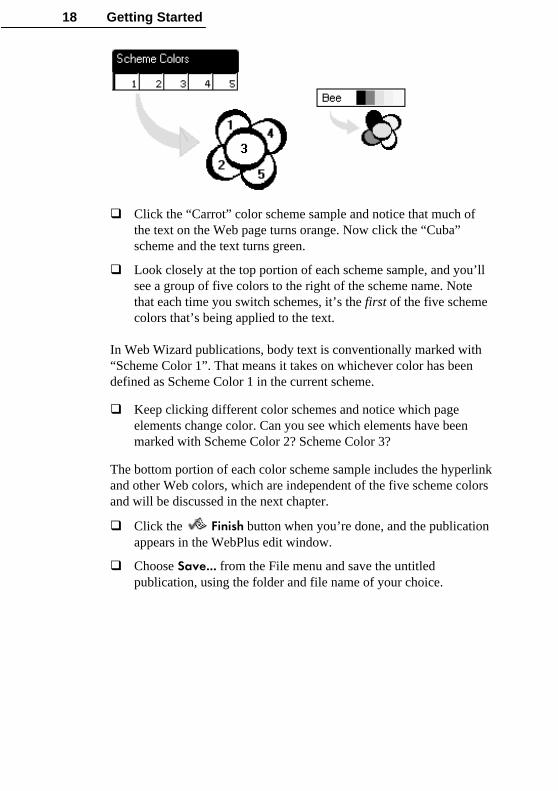
� Click the “Carrot” color scheme sample and notice that much ofthe text on the Web page turns orange. Now click the “Cuba”scheme and the text turns green.
� Look closely at the top portion of each scheme sample, and you’llsee a group of five colors to the right of the scheme name. Notethat each time you switch schemes, it’s the first of the five schemecolors that’s being applied to the text.
In Web Wizard publications, body text is conventionally marked with“Scheme Color 1”. That means it takes on whichever color has beendefined as Scheme Color 1 in the current scheme.
� Keep clicking different color schemes and notice which pageelements change color. Can you see which elements have beenmarked with Scheme Color 2? Scheme Color 3?
The bottom portion of each color scheme sample includes the hyperlinkand other Web colors, which are independent of the five scheme colorsand will be discussed in the next chapter.
� Click the ����' button when you’re done, and the publicationappears in the WebPlus edit window.
� Choose ���� from the File menu and save the untitledpublication, using the folder and file name of your choice.

Getting Started 19
Take a look aroundLet’s take a few moments to examine the publication that the Wizardhas created. In the process, you’ll become familiar with some of thebasic features of the WebPlus environment.
� Move the mouse pointer around the screen and you’ll see popuptooltips that identify many items. Watch the HintLine window atthe lower right for capsule descriptions of each feature.
� To access online help and resources, choose ��������� fromthe Help menu.
� Right-clicking any toolbar, object, or page region brings up acontext menu of functions.
The controls to the left of the HintLine let you set the page view andother display options, and navigate through the publication.
� Move the mouse pointer over the buttons on the HintLine toolbar,noting the various controls for zooming, panning, and display.
� Use these buttons to adjust the display until you can read the pagetext. The workspace will appear approximately as shown above.
Note that WebPlus displays one page of the six-page publication at atime.
On the right side of the WebPlus window, you’ll see the Studio—actually a cluster of seven special-purpose panels. Let’s preview themin sequence. Click each panel’s name to display it...
Standard toolbar
HintLine toolbar
Page Area
Studio(Wizard panelshown)
ChangeBar
Pasteboard Area
Tools toolbar
Text & Frame toolbars

20 Getting Started
� The ������������ (see illustration) includes five separate panelsthat let you customize properties of on-screen elements. Thesepanels include:
— The �����panel, for applying solid color and/or shading
— The ���� panel, for applying a gradient fill
— The ,��� ����&/ panel, for applying a transparency effect
— The ���� panel, for changing the font of existing text objects
— The 0��� panel, for setting the weight and type of lines andshapes
Panels on the Studio’s Attributes tab
� The �&'��� tab displays a list of the available color schemes that(as you’ve seen) let you instantly revise colors in a Web Wizardpublication. Using this tab, you can customize scheme colors orcreate entirely new schemes. Right-click any sample to see variouscontext menu options.
� The 1�����/ includes a wide variety of predesigned elements—graphics that you can drag and drop, then customize or use as astarting point for your own designs.
� The ��������� is a container for storing design objects (pictures,text blocks, and even unlinked text frames) you’d like to reuse indifferent publications.
� The ��%��� panel lets you revisit choices you made when creatinga publication using a Web Wizard. It’s simply a matter of retypingyour information or selecting a different color scheme.

Getting Started 21
� Click the "�-����� button several times to view thefollowing pages. You can use the scrollbar at the right to viewmore of a page. Note that the Wizard has inserted the informationyou provided, and the rest of the text serves as a “placeholder,”awaiting further changes.
� Double-click the ����������� box at thelower left. Up pops the Page Manager, with several more basiccontrols—for inserting one or more blank pages, deleting one ormore pages, or displaying a particular page in the publication.
Tip: You can double-click the ����������� button todisplay your first (Home) page, or the "�-����� button todisplay the last page.
When the time comes to build your actual Web site, you can use thesecontrols if you want more (or fewer) pages than the Wizard provided.For now, leave the page count at six. However, if you want toexperiment with the Pages dialog—or if you accidentally make anychanges that you don’t want to keep—here are some “emergency”options:
� To revert to the previously saved copy of your publication, choose������ from the File menu. It’s a good idea to save your workoften!
� You can also reload any saved WebPlus publication by choosing"�# from the File menu and selecting the ( ��������&�����option. You can open multiple publications and switch betweenedit windows if you like.
To undo the most recent change, press ����23. (But you can’t undo apage addition or deletion, so use ������ to do that.)
Now that you’ve had a good look around the WebPlus interface, andhave successfully created and customized a Web Wizard publication,you’re ready to proceed to the kinds of projects you have in mind.
22 Getting Started
For more help on the basics...You’ve seen how easy it is to create the basic structure of a Web siteusing a WebPlus Wizard. And you know how to find your way aroundthe workspace.
When you’re ready to construct your actual Web site, you’ll no doubtwant to learn about other options. See online help for additional details.
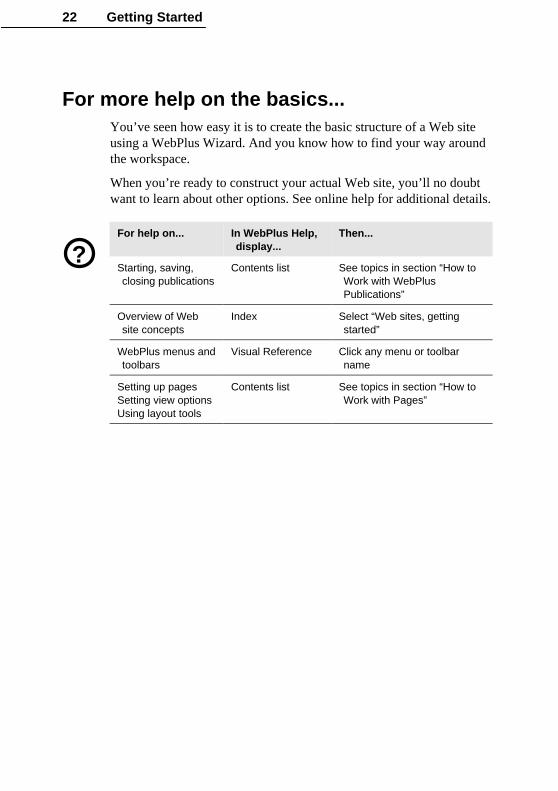
For help on... In WebPlus Help,display...
Then...
Starting, saving,closing publications
Contents list See topics in section “How toWork with WebPlusPublications”
Overview of Website concepts
Index Select “Web sites, gettingstarted”
WebPlus menus andtoolbars
Visual Reference Click any menu or toolbarname
Setting up pagesSetting view optionsUsing layout tools
Contents list See topics in section “How toWork with Pages”
?

Working with Text
4

Working with Text 25
Now that you’ve reviewed the pages the Web Wizard provided, andhad a chance to revise Wizard “answer text” using the Studio, it’s timeto look at how to add standard text and change the layout of text on thepage. It’s really not complicated at all.
About text framesAll ordinary text in WebPlus fits into text frames. Frames workequally well as containers for single words or standalone paragraphs.Two or more frames can be linked together so the enclosed text flowsfrom the first frame to the second, and soon—like a newspaper article with multiplecolumns. Whether there’s a single frame ormore than one in series, the enclosed frametext is called a story.
Let’s begin by seeing how the Web Wizard has utilized frame text inthe “Grid” example you created in the previous chapter.
� Display your Home page (double-click the �����������button if necessary), and adjust the screen view so you can read thepage text.
� Click the button at the top of the left toolbar.
You’ve just selected the Pointer tool—the basic tool for selecting,moving, and resizing objects, including the boxes that contain text.
� Using the Pointer tool, click the “Home Page” text at the right.
� Now click the paragraph starting with “Here’s the place...” justbelow the page title.
In each case, clicking selects a text frame, displayed as a rectangle witha blue outline and small black “handles.”

26 Working with Text
Notice the gray Link button on the selected frame’s bottom edge. Thebutton’s icon tells you about the frame and the story text it contains:
A square (as on the name/address frame) indicates aframe with all its text displayed—either a standaloneframe or the last frame in a linked sequence.
A plus sign (as on the “Here’s the place” frame) showsthere’s more text in the story than the frame can display.Extra text is stored in an invisible overflow area. Youcan either make the frame larger or shorten the story.
A down arrow shows that the frame’s text continues intoa following linked frame.
Objects on the master pageLet’s take a brief detour to review a key WebPlus concept...
� Click the company name heading text at the top of the page.
Nothing happens! Why not?
� Click (once) on the ����������� box atthe lower left. The screen display changes and the box nowindicates you’re working on the master page.
You can think of the master page as a background that’s sharedbetween all the pages of your site. When you switch to the master page,objects on the page vanish, leaving only background objects. In thiscase, that includes the header and footer, address information, variousgraphic elements, and text links to other sections of the site. These arethe common elements the designer of this particular Wizard hasdetermined should appear on each page of the site.
� Now click the ����������� box again (once only) to return to thepage layer.
Working with Text 27
Working with text framesIt’s easy to move or resize a text frame. The appearance of the cursorover the selected frame tells you what will happen if you click and dragat that point.
� Using the Pointer tool, select the “Here’s the place” text frame.
Notice the blinking insertion point in the frame’s text. In this mode,you can type directly into the frame, and edit the text with the Pointertool.
� Now position the pointer over the frame’s gray bounding boxand notice the “Move” cursor appear. Click and drag to move theframe a short distance, then press ����23 to undo the move.
� Click one of the frame’s corner or edge handles and drag to resizethe frame. If you drag the bottom edge down, you’ll see thatthere’s more text visible in the frame. Again, undo the changes.
Here’s how easy it is to create a new frame.
� Click the button on the left toolbar to select the Frame tool.Now locate some empty space on the pasteboard (outside the pagearea), then click and drag out a marquee where you want the newframe to go. When you release the mouse button, an empty frameappears.
� Note that the ����������� was automatically selected afteryou created the new frame. Type a few words into the frame.
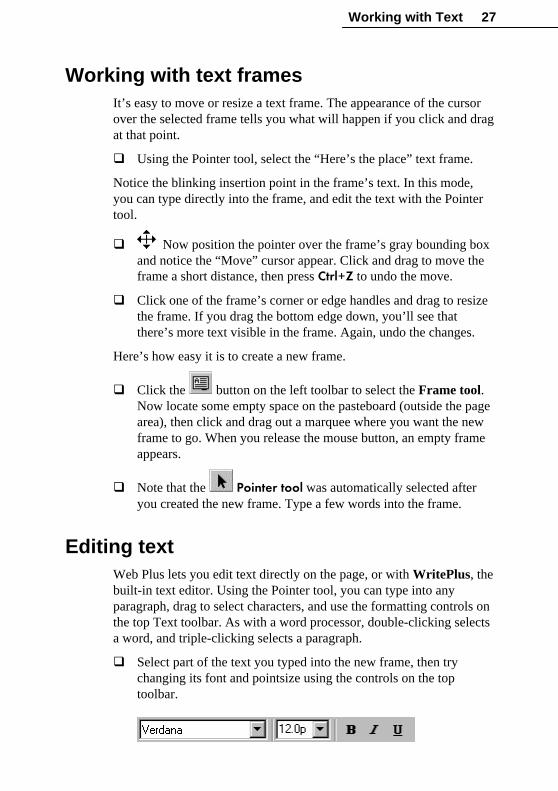
Editing textWeb Plus lets you edit text directly on the page, or with WritePlus, thebuilt-in text editor. Using the Pointer tool, you can type into anyparagraph, drag to select characters, and use the formatting controls onthe top Text toolbar. As with a word processor, double-clicking selectsa word, and triple-clicking selects a paragraph.
� Select part of the text you typed into the new frame, then trychanging its font and pointsize using the controls on the toptoolbar.

28 Working with Text
� To work with a more substantial amount of text, let’s switch to the“Here’s the place” body text frame on the page. Right-click thisframe and choose 4�������/ from the context menu to launchWritePlus.
WritePlus opens in a separate window that shares many of the standardWebPlus menus and toolbars. You can move the mouse pointer aroundto view tooltips and hint text for the various buttons. BecauseWritePlus displays the full text of a given story, it’s ideal for viewingand editing the full text of a story that may span several frames orpages. You can view the text in draft mode (without formatting), exportstory text, and employ the Word Count function.
Obviously, the original text in this story is simply a placeholder for thetext you’ll be adding to your Home page. You can type over the sampletext, or select it all, delete, and begin with an empty frame, as you wish.
� To update WebPlus with any changes, click the �&&� �
button. To abandon changes, click ���&��.
By the way, you may be wondering about the difference betweenediting standard text and Web Wizard “answer” text. The key point isthat if you want to preserve answer fields, you should use the ��%���tab to edit their text, as explained in the previous chapter.
� Click the ����������� box at the lower left to switch to theMaster Page level. Now try to select just part of the company nametext. You can’t! Only the entire block of text can be highlighted.
Answer text is stored in fields, and when you select one of them (thecompany name in this case) the whole field highlights—a sure sign thatyou’re not dealing with standard text! You cannot select only part of ananswer text field. However, you can use the usual text editing functionsto change the field’s character or paragraph properties, orcut/copy/paste answer text fields within the document if necessary.
Again, a reminder: If you retype over answer text, you’ll effectivelydestroy the field. The new text you enter at that location will beordinary text and can no longer be updated via the ��%��� panel.

Working with Text 29
Changing the ‘Web colors’When you stepped through the Wizard to create the sample site we’vebeen working with, you chose one of several alternate color schemes.In the previous chapter, we used a paint-by-numbers analogy to explainabout the five numbers you can use to mark elements in WebPlus, andhow each scheme includes five colors, which get applied to elementswith the corresponding number.
By convention, body text in Web Wizard publications is marked with“Scheme Color 1.” That means it takes on whichever color has beendefined as Scheme Color 1 in the current scheme (the first of the fivecolors shown at the top of the sample). In addition, each publication’scolor scheme also includes these special Web color settings:
♦ The Hyperlink color applies to hyperlinked text before it’s beenclicked on, while the same text after a Web visitor has clicked to“follow” the link takes on the Followed Hyperlink color. (TheWebPlus sample displays these colors, but you’ll need to view thepublished site in a browser to preview the actual effect.)
♦ A Web site’s Background, which is applied to every page, can beeither a solid color or a tiled (repeated) picture, usually a bitmappattern. The tiled picture option works just like desktop“wallpaper”—so a small bitmap can go a long way. The color
scheme sample shows if the scheme uses a tiled bitmap.
You can modify the basic colors(and Web colors) in a scheme, orset a different background bitmap,using the Scheme Manager, in thesame way that you’d modify thescheme’s five basic colors. Todisplay it, right-click the schemename (or click the Tools menu)and choose �&'���5������ .

30 Working with Text
Importing textBesides typing text into a frame or creating a story using WritePlus,you can use your current word processor (such as Microsoft Word) tocreate source files for your publication. Then you can cut-and-pasteusing the Windows Clipboard or import the text directly. It’s easy toimport text from a file into an existing frame. Let’s try it!
� Using the Pointer tool, right-click the “Here’s the place” frame.
� Choose ����&���� from the Edit menu (shortcut ����2�) and press6����� to clear the frame.
� Right-click the frame choose ,�-����� . Using the file selectiondialog, open SAMPLE.DOC in the SERIF/WP70/SAMPLES/ folder,either in your main Program Files folder or on your WebPlus CD.WebPlus imports the file and places it in the frame.Note: In this instance, click "� to decline both the AutoFlow andAutoFit options, which would create additional text frames andadjust the text size to fit the story precisely in the visible framearea.
� Press ����24 as a shortcut to launch WritePlus, and briefly inspectthe new sample text. (Items in red are unfamiliar words identifiedby the AutoCorrect function.) You might try applying some font,size, or style changes.
� Before continuing to the next chapter, you may wish to save yourwork.

Working with Text 31
For more help on working with text...In this chapter, you’ve examined the placeholder text provided by theWeb Wizard and learned how to create, edit, and import standard text.You know enough now to begin replacing the placeholder text withyour own content. In addition, you should now have a grasp of how theWeb color components of color schemes apply to text.
As you work on your actual Web site, you’ll benefit from learning howto link frames together, set defaults for new text, use shortcuts, insertreturns and special characters, and work with the various proofingtools. For details on these and other text options, see online help.
For help on... In WebPlus Help,display...
Then...
Overview ofWebPlus text
Index Select “text, overview”
Import textWork with framesand free text
Contents list See topics in section “How toWork with Text”
Set text propertiesUse templates andnamed styles
Contents list See topics in section “How toFormat Characters andParagraphs”
Set defaults Index Select “default properties”
Use proofing tools Index Select from “proofing tools”
Color schemes Index Select “color: using colorschemes”
If you’re interested in presenting text or numeric data on your Webpages, you’ll want to learn about TablePlus, the sophisticated tableeditor that’s built into WebPlus. For an overview, see the QuickTour$���,�������
?

Working with Graphicsand Animation
5

Working with Graphics and Animation 35
In this chapter, we’ll continue exploring the pages the Web Wizardprovided—this time looking at pictures and graphic objects. The focuswill be on how to replace the placeholder images the Wizard installedwith your own pictures, and how to create new graphic elements.
Graphics in WebPlusWeb Wizards may incorporate several different types of graphic objectsinto your publication. You can use the Pointer tool to select, move, andresize them, just as with text objects.
� On the Home page, click with the Pointer tool on the photo. Tryresizing it by dragging from one corner. Press ����73 to undo. Nowclick in the center and drag it off to one side. Press ����73 again.
TIP: Watch the HintLine as you drag an object, and it will tell you theobject’s properties.
� Drag the photo to the right so it partially overlaps the “HomePage” frame. Now click on the photo where it overlaps the frame,and a blinking cursor appears in the frame. Click again in the sameplace—the text edit cursor remains. Now hold down the ��� keyand click. This time, you’ve selected the photo again.
As a general rule, when two or more objects overlap at a particularpoint, your first click at that point selects the uppermost object—typically the one most recently created. Your second click selects theobject below the first, and so on. If one of the objects happens to be atext frame, use ���-click to override the text edit cursor.
TIP: You can also employ ���-click anytime to drag a text frame fromits center.

36 Working with Graphics and Animation
Importing a picture or animationYou’ll have no difficulty importing such items as metafile clipart,bitmap photos, or animated GIFs. WebPlus can handle all the standardformats. After being imported, each image is stored in the WebPluspublication until you publish the site, at which time it’s exported usingone of the standard bitmap formats (GIF or JPG) that Web browsersrecognize. Let’s try importing.
� Click the �� �����&���� button on the left toolbar.
� Using the file selection dialog, open PHOTO1.BMP in theSERIF/WP70/SAMPLES/ folder.
� Now you have two choices. You can either drag out a box regionon the page to set the size of the imported picture, or simply clickto insert the picture at a default size. Pick either one. The samplepicture (of a lion) will appear, and you can always resize it later bydragging its handles.
By the way, the WebPlus 7.0 Design CD-ROM includes a bonuscollection of 20,000 WebArt images, including arrows, bullets/buttons,icons, lines, and animations as well as pictorial Web graphics. You canperuse the collection using your Web browser, then drag and dropimages directly into WebPlus. To choose animations, use ���������(�8�&����������1�� . For details, search for “WebArt” in theonline help index.

Working with Graphics and Animation 37
Note that the time it takes a visitor to load one of your Web pages isdirectly related to the size of the page’s HTML file plus anyaccompanying graphic files. Graphics require larger file sizes, andhence slow down loading time. And even in compressed form, bitmapfiles like the photo we’ve just imported tend to be much larger thansimple line or shape graphics (see below)—so use them sparingly!Keep picture dimensions to the minimum needed to convey your point.It’s always wise to plan your layouts so as to avoid large graphic areas.
Drawing basic lines and shapesWebPlus provides three easy-to-use drawing tools. You’ll find them onthe left toolbar:
Straight Line Freehand Line QuickShape
With them, you can add both functional and decorative layoutelements—for example, clickable buttons or page dividers. To draw aline, click either line tool, then click and drag. To extend an existingline, begin drawing from one of the line’s end nodes.
QuickShapes are pre-designed objects that you can instantly add toyour page, then adjust and vary using control handles. The QuickShapeflyout contains a wide variety of commonly used shapes, includingboxes, ovals, arrows, polygons and stars.
� Click the *��&+�'� �button, then select a box shape from theflyout. Click and drag out a small box on the screen.
The new box displays a sliding adjustment handle, used to controlcorner shape. Most QuickShapes have multiple adjustment sliders.
� Drag the slider up for concave corners, down for convex. Note thatthe tool has reverted to the Pointer, and you can also use it to moveor resize the box.
Initially, the box will have a black line border and a clear fill. Theeasiest way to change the object’s line and fill properties is to use theStudio.
� Display the 0��� panel of the Studio’s Attributes tab. Try applyinga higher Weight value to give the box a thicker border, and clickvarious Type samples for a different line.
38 Working with Graphics and Animation
� Now display the Attributes tab’s ����� panel. You can easilychange the box’s line or fill color and/or shade by first right-clicking a solid color sample, then choosing either � �/��0���or � �/������. (Left-clicking a sample applies the solid color orshade to the selected object’s fill.). For each base color you select,you can pick from multiple shades of that color displayed in theShades group.
Note: You can achieve great results using just solid colors, but for evenmore impressive effects in conjunction with the .PNG graphic format,explore the Transparency panel on the Attributes tab. Using thesamples in conjunction with the Transparency tool, you can createhighlights, shading and shadows, and simulate “rendered” realism.You’ll find full details in online help, as noted at the end of the chapter.
� Now click to display the ����panel. Here you’ll find an array ofpredefined color fills in several categories: Linear, Radial, andConical. Try applying some of the thumbnails to get a feel for thewide range of possibilities. If you want to switch back to a clearfill, click "��� in the drop-down list.
� In passing, right-click on the box object itself and note theavailable 0��� , ���� , and ,��� ����&/ options that let youadjust all these properties.
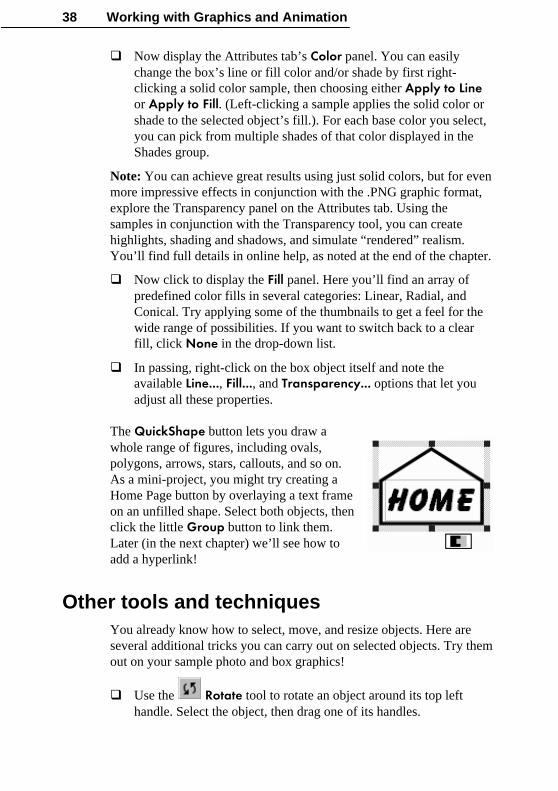
The *��&+�'� � button lets you draw awhole range of figures, including ovals,polygons, arrows, stars, callouts, and so on.As a mini-project, you might try creating aHome Page button by overlaying a text frameon an unfilled shape. Select both objects, thenclick the little 1��� button to link them.Later (in the next chapter) we’ll see how toadd a hyperlink!
Other tools and techniquesYou already know how to select, move, and resize objects. Here areseveral additional tricks you can carry out on selected objects. Try themout on your sample photo and box graphics!
� Use the ������ tool to rotate an object around its top lefthandle. Select the object, then drag one of its handles.

Working with Graphics and Animation 39
� Use the ��� tool to crop (or trim) objects. Select the object,then drag one of its handles inward.
� To draw a shape with constrained dimensions—for example, asquare or circle—hold down the �'��� key while drawing orresizing it.
� To add more than one object to a selection, hold down the �'���key while selecting additional objects. This is handy for moving acluster of objects while keeping them aligned with each other.
� You can click the 1��� button that appears next to amultiple selection to lock the objects together temporarily. Thissaves you the trouble of having to select them all individually thenext time you want to do something to the whole group. Toseparate (ungroup) the objects, click the button again.
� To duplicate an object, select it, then press and hold the ���� keyand drag out a copy.
� To constrain the movement of an object to horizontal or vertical,use the keyboard arrow keys to nudge the selection up, down, left,or right. Alternatively, hold down the �'��� key after you begindragging the object.
� Use the WebPlus layout tools—including rulers, guides, the dotgrid, and the ��� ��� button—to position and align items withprecision for a professional appearance.
Adding animationsWebPlus lets you add two varieties of eye-catching animation effects toany Web page: animated marquees (scrolling text banners) and GIFanimations. Using Wizards, you can preview the animation and/orcustomize the effect. Once placed into your Web publication, theanimations appear static, but they will spring to life once the site hasbeen exported and a visitor views your page in a Web browser. Let’ssee how easy it is to add an animated GIF.
� Click the �������������1�� button on the left toolbar. TheAnimated GIF Wizard appears.
� Click "�-� and select an animation category. We’ll leave you onyour own to browse through the collection. Just click a title on thelist, and watch the animation in the window.

40 Working with Graphics and Animation
� As when importing pictures, either drag out a size region on thepage or simply click once to insert the GIF. Keep in mind thatlarger animations will take longer to display.
The animation won’t move on the WebPlus page, which only displaysthe first of the GIF’s multiple frames. But keep it on your page so it’savailable when it’s time to preview the Web site in your browser.
You may wish to try the animated marquee effect, too—click the �������������5��9���button on the left toolbar.
� Before continuing to the next chapter, remember to save yourwork.
LogoPlus and moreIn preparing your Web site, you may want to take advantage of otherWebPlus design features, such as straight lines and shapes, rotation andcropping, layering, and Web image texttags. You’ll find hundreds of animatedGIFs and thousands of WebArt images,and you can create eye-catching designswith the LogoPlus module (someexamples are shown at right)—plus youcan work directly with scanned orPhotoCD images.
For an illustrated introduction to LogoPlus,see the QuickTour $���0������.

Working with Graphics and Animation 41
For more help on working with graphics
and animation...
For help on... Choose from theHelp menu...
Then...
AligningGroupingExportingCroppingLayeringOther object actions
Contents list See topics in section “How toEdit Objects on the Page”
Lines and shapesGallery and Portfolio
Contents list See topics in section “How toWork with Graphics,Animation, and Multimedia”
Importing images Index Select “importing”
Setting image tags Index Select “Web sites, settingpicture display options”
Animation Index Select “animation effects”
Sound and video Index Select “sound” or “video”
Working with colors,fills, andtransparency
Contents list See topics in section “How toWork with Colors, Fills, andTransparency”
?

Working withHyperlinks andInteractivity
6
Working with Hyperlinks and Interactivity 45
In this chapter we’ll look at several ways you can enhance yourWebPlus pages to improve the quality and variety of the visitor’sexperience. If your site has more than one page, hyperlinking isessential—it’s what enables visitors to navigate through your site—andit’s easily accomplished. Adding Java and HTML is somewhat morechallenging, but if you’re technically inclined, WebPlus stands ready tosupport your efforts.
Hyperlinking an object such as a shape, a word, or a picture means thata visitor to your Web site can click on the object to trigger an event.The event might be:
♦ A jump to a Web page (either on your site or somewhere else onthe Web);
♦ The appearance of an E-mail composition window; or
♦ The display of a graphic or text file.
You can also place hyperlinked hotspots over parts of the page. Let’sbegin by taking a look at hyperlinks in your Wizard-based publication.
Hyperlinking textAs a visual cue, hyperlinked words on Web pages are underlined.
� Open the “Arch” sample file again and zoom in on the upper halfof the page.
� Click the ����������� box to switch tothe Master Page layer.
� Click on the words “About Us.” Because this is an “answer text”field, you’ll see an insertion point just before or after the words.
� Click the ������/ �����+ button on the Tools toolbar.
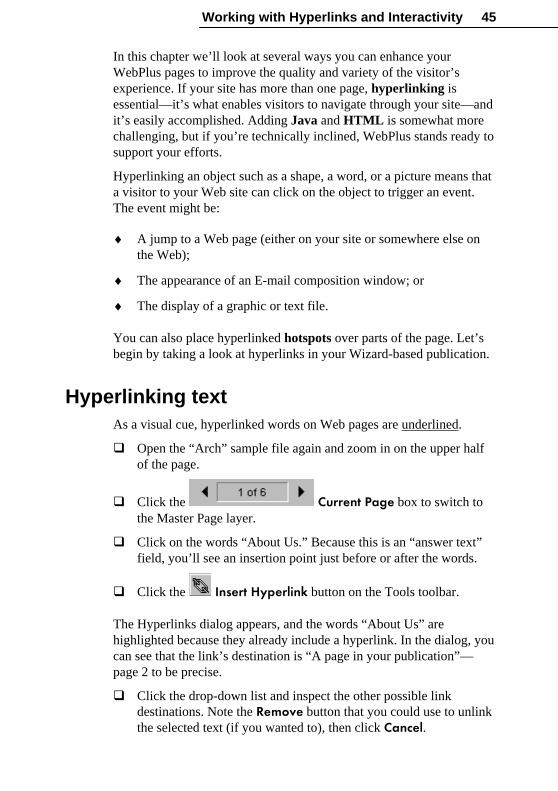
The Hyperlinks dialog appears, and the words “About Us” arehighlighted because they already include a hyperlink. In the dialog, youcan see that the link’s destination is “A page in your publication”—page 2 to be precise.
� Click the drop-down list and inspect the other possible linkdestinations. Note the ������ button that you could use to unlinkthe selected text (if you wanted to), then click ���&��.

46 Working with Hyperlinks and Interactivity
To create a new hyperlink in existing text, you would first select therange of text you wanted to link, then click the�/ �����+ button. Thesame dialog would appear, and then linking would be simply a matterof choosing the destination and clicking (:.
From a design standpoint, it makes sense to include a navigationbar—a cluster of links to the various key pages on your site. Put it onthe Master Page, so the same links will appear on each page. Instead ofusing separate text frames, as in this Web Wizard, you might use asingle frame across the top of your page, with the links centered—forexample:
However you design it, consider your navigation bar an essentialelement. Users will expect it to be there to help them get around yoursite. Again, it makes sense to plan your basic layouts ahead of time.
Hyperlinking graphicsOnly a few additional words are required here, because the procedurefor linking graphic objects is the same as that for linking text. You justselect the object to be linked and click the �/ �����+ button.
� Click the ����������� box to switch back to the page layer.
� With the Pointer tool, click on a photo to select it, then click the�/ �����+ button.
Again, you’ll see the Hyperlinks dialog. This is the technique you’d useto hyperlink an entire object. Compare this with the hotspot method,explained below.
Using hotspotsA hotspot is a transparent hyperlink region on a Web page. Usuallyplaced on top of bitmap pictures, hotspots act like buttons that respondwhen clicked in a Web browser. They are especially useful if you wantthe visitor to be able to click on different parts of a picture (such as agraphic “menu” or map of your site). To give you an idea of how theywork, we’ll need to create one.
� Click the �������� ��button on the left toolbar. Thecursor changes to a cross.
Let’s place a hotspot over the butterfly in the photo.

Working with Hyperlinks and Interactivity 47
� Click slightly to the upper left of the butterfly, then drag down andright to draw a box. (You canadjust it later.)
When you release the mousebutton, the familiar Hyperlinksdialog appears. This time, it’swaiting for you to provide adestination.
� Select “A page in your publication” and designate page 2 in thedrop-down list. Click (:.
If necessary, you can use the Pointer tool to move or resize a hotspot,like any graphic. There’s no limit to the number of hotspots you canuse. You can also add extra nodes to a hotspot, allowing it to be fit intoany irregular region; there’s more on this in online help.
About HTML and JavaHTML, of course, is the language “behind” basic Web pages—theactual descriptive code that tells a browser what to display and where todisplay it. While WebPlus doesn’t support full-fledged HTML editing,it does allow you to add extra HTML code to a page. Using thisapproach, you can include HTML fragments generated by anotherapplication, copied from another Web page, or perhaps that you’vewritten yourself.
Clicking the ������,50 button brings up a dialog that lets youenter the HTML code. WebPlus inserts a marker into your publicationat the site where the code will run. Since you won’t be able to see theeffect of the HTML until you preview the exported site, be careful toposition the marker correctly. You’ll definitely want to check your Webpage in a browser!
Java is a cross-platform, object-oriented programming language usedto create mini-applications called applets that can be attached to Webpages and that run when the page is viewed in a Web browser.WebPlus lets you add Java applets to your Web publications. You don’thave to write your own! Plenty of applets are available online—forexample animation, interface components, live information updating,two-way interaction, graphics rendering, live updating, streaming audioand video, games, and many more.

48 Working with Hyperlinks and Interactivity
Clicking the �����;���� ��� button displays a dialog whereyou list the applet’s component files as well as any necessaryparameters (as described in the applet’s documentation) that specifyexactly how the applet should run. You don’t necessarily need tounderstand the underlying code, but it’s essential to make sense of any“Read Me” documentation that comes with the applet.
As with HTML, WebPlus inserts a marker into your publication at thesite where the code will run. The marker’s dimensions probably won’tcorrespond exactly to those of the applet when it’s running, so planyour page layout accordingly, and the more preview tests you can run(using various versions of different browsers), the better.
For more help on hyperlinks and interactivityThe fact is, you now know almost all there is to know abouthyperlinking and hotspots! When you’re building your Web site,however, you may wish to use ,�����/ �����+5������ to get aoverview of all the links in your publication. You can see thedestinations at a glance, check URLs, and display any hyperlink forcloser inspection. For additional details, see online help.
For help on... Choose from theHelp menu...
Then...
Creating hyperlinks Index Select “hyperlinks, adding toWeb page”
Setting hyperlink color Index Select “hyperlinks, settingcolor of”
Creating and editinghotspots
Index Select “hotspots”
Hyperlink Manager Index Select “hyperlinks, using theHyperlink Manager”
Adding Java Index Select “Java applets”
Adding HTML Index Select “HTML, adding code toWeb pages”
?
Previewing andPublishing
7

Previewing and Publishing 51
It’s time to rehearse the final phase of preparing your Web site! In thispreviewing and publishing phase, as we’ve mentioned, WebPlus takesthe publication’s pages and converts them to HTML and graphics(pictures) so that a Web browser can display them. You can publisheither to a local folder or to an Internet-based Web host. Previewing issimilar to publishing locally, except that the exported files aretemporary, intended for immediate viewing in your own Web browser.
Optimizing the publicationBefore you preview or publish, it’s wise totake advantage of built-in WebPlus toolsfor checking your publication’s contentand structure. You can run the SpellingChecker Wizard, Proof Reader Wizard,and Thesaurus to inspect and improveyour text. The Text Manager displays alist of all the text stories and free text usedin your publication, and the LayoutChecker Wizard can locate (and oftencorrect) problems like objects off the page,empty frames, or overlapping objects.You’ll find full details on these features inonline help (see the note at the end of the chapter).
Previewing the sitePreviewing the site at least once before actually publishing it isessential. Only by viewing the pages in a Web browser can you makesure that headlines and body text appear the way you intended, pageelements fit properly, animations play at the right speed, and linksbetween pages make sense.
Although your Wizard-based publication probably still has a lot of itsoriginal placeholder text and graphics, let’s try previewing it. (We’llassume you have a Web browser installed.)
� Click the ������#������.��#�� button on the top toolbar.
� In the dialog, check “All” as the page range, and click (:.
52 Previewing and Publishing
The WebPlus publication is exported to a temporary folder, and yourWeb browser launches, displaying the site’s Home page. (If yoursystem tries to connect to the Internet as the browser launches, you candismiss the connection dialog. No Web connection is required forpreviewing.)
If you saved the animated GIF on the Home page, you’ll see it comealive now!
� As you move the mouse pointer over hyperlinks or hotspots, you’llsee the cursor change to the familiar “hand.” Click the hotspot youplaced over the butterfly in the photo (notice that its border line isnow invisible), and you’ll jump to page 2.
Previewing gives you a chance to see the site the way your visitors willexperience it. Keep track of how fast your pages display in the browser,and remember that the Web will certainly slow them down! Check outeach page and take notes on any problems, then go back to WebPlusand make any necessary corrections.
You can preview just one page (or a range of pages) instead of all thepages, by changing the setting in the Preview dialog. All previoustemporary files are deleted each time you preview. This means, forexample, that if you’ve already previewed the whole site, and thenchoose to preview just one page (say, to check revisions), thepreviously exported pages will no longer be available. If this isinconvenient, you may wish to use the Publish to Folder method,described next.

Previewing and Publishing 53
Publishing to a local folderThis option, like previewing, exports your publication pages to HTMLand graphics files. The key differences are:
♦ You designate where the files should go, instead of having themwritten out to temporary files, which are not really under yourcontrol. As noted above, each time you run Preview Web Site,even if you’re only previewing one page, your previous set oftemporary files disappears. When publishing to a folder, you havethe option of overwriting existing HTML files with the same name(recommended); graphics are assigned new file names. Your site asa whole remains intact.
♦ Your Web browser doesn’t launch automatically. Instead, you’regiven the option of launching it. If it’s already open, simplydecline the option, then switch to your browser’s window and useits Reload or Refresh command to display the updated page.
Publishing to a local folder is another way of previewing your Website, and is also the way to share your site with others on a local areanetwork. You don’t need to try it right now, but here are the stepsinvolved in publishing to a local folder:
� Click the �����'�������� button on the top toolbar. In thedialog, locate the folder where you wish to store the output files, orclick "�#������ to create a new folder.
� As for previewing, you can publish just one page or a range ofpages.
� Accept or decline the option to launch your Web browser.

54 Previewing and Publishing
Publishing to the World Wide WebWebPlus makes publishing to the World Wide Web almost as simple aspublishing to a local folder! Before publishing for the first time, you’llneed to gather some basic information from the service provider (asdetailed in online help—see the note at the end of the chapter).
When you’re ready to publish your Web site, here are the steps to take:
� Click the �����'����� button on the top toolbar to displaythe Web Publishing Options dialog.
� Specify the number of pages to publish and click (:. WebPlusexports the page(s) to temporary files, and then the AccountDetails dialog appears.
� Enter the FTP address of your Web host and your pre-assignedUsername and Password. Be sure to enter the password exactly asgiven to you, using correct upper- andlower-case spelling, or the host serverwill not recognize it. For most Webservers you can leave the Folder boxblank, otherwise enter the name ofpublishing folder. Click (:.
� WebPlus seeks an Internet connection or establishes a new one,and connects to the remote server. Sometimes (for example withonline services such as AOL) you’ll need to use the service’sproprietary log-on software to establish a connection. You’ll see amessage when all files have been successfully copied.
� Now you’ll be able to see your page(s) “live” on the Web. Pointyour Web browser to the URL that includes the path to the hostserver plus the folder to which you published.
� Congratulate yourself!

Previewing and Publishing 55
For more help on previewing and
publishing...Before publishing your actual Web site, you’ll probably want to reviewthe WebPlus proofing options mentioned above, and learn about addingsearch engine descriptors. Or you may want details on publishing to analternate Web server.
For help on... Choose from theHelp menu...
Then...
Printing, previewing,and publishing theWeb site
Contents list See topics in section “How toPrint, Preview, and Publish tothe Web”
Using proofing tools Index Select from “proofing tools”
Adding search enginedescriptors
Index Select “search engines”
Gathering WWWserver information
Index Select “publishing Web sites,to World Wide Web” andconsult note on “Gatheringserver information”
?

Starting from Scratch
8

Starting from Scratch 59
We’ll assume that by now, you’ve worked through the Wizard-basedexamples in the preceding chapters and have a preliminary knowledgeof WebPlus tools and techniques—although probably not too muchhands-on experience. You’ve seen that there are lots of ways tocustomize the Wizard-based publications, and that approach may suityour needs perfectly.
But don’t forget that besides offering a variety of Web Wizards,WebPlus gives you the option of starting from scratch and composingeach page just as you want it. You may decide to take a hybridapproach: study the Wizard layouts, learn from them, and then applywhat you’ve learned to a brand-new site of your own design.
If you’d like to start from scratch, here are the steps:
� From the Startup Wizard, select the ����������&���&' option.From within the program, choose "�# from the File menu or
click the "�# button on the top toolbar. The new publicationwill open with a blank page, and you’ll see the Page Setup dialog.
� Select a page size (either Standard or Wide), or define a customsize by entering new values for Width and/or Height. Then click(:.
Obviously, there’s no single formula for coming up with a successfulWeb site. It may help to have a plan of attack, however, so thefollowing sections provide a brief outline of the process, along withsome suggestions to guide your efforts.
Step 1: DesignIt probably goes without saying (but we’ll say it anyway) that beforestarting a site from scratch, you should have mapped out on paperexactly how many pages you’ll need, what the basic composition willlook like, and how the pages will be linked together.
Unlike a magazine or newsletter, a Web site doesn’t depend on a linearpage sequence. It makes more sense to think of your site in spatialterms, like a house that people will explore. You can generally assumethat visitors will come in through the front door (the Home page)—butwhere they go after that depends on the links you’ve provided. Theseare the corridors that connect the various rooms (sections) of the site.Each room might have a few side doors, but don’t let the visitors getlost! Graphic aids like a navigation bar, or clear labeling and/or color-coding for the various sections of the site, can help immeasurably, butonly if you include them in your design scheme.

60 Starting from Scratch
You should ask yourself these basic questions:
♦ How many pages will you need?
♦ What basic composition will you use?
♦ Where will the navigation bar go, and what will it look like? Doyou want to use a text-based navigation “header” or “footer”?
♦ What font will you use for headlines, body text, and captions?
♦ Which color scheme will you use, and will you customize its basiccolors or Web colors? (In Web Wizards, body text is marked withScheme Color 1, but you can depart from that convention.)
Step 2: ContentThe success of your site probably depends more on high-qualitycontent than on any other single factor. As a rule, people will bevisiting your Web site because they’re interested in what you can tellthem or offer them. Your job is to make that reward as accessible aspossible, and make the site’s design quality integral to the experience.You don’t want any elements that throw up barriers to access, or standout like sore thumbs to detract from the visitors’ positive response.
Make sure you’ve reviewed the mechanics of working with text,graphics, sound and video (if applicable), and hyperlinks beforefocusing on these questions:
♦ Given your basic page composition, how will you vary the layoutof each page?
♦ Where will your graphics come from? Will you be using anyphotographs? Do you need to create line or QuickShape graphicsin WebPlus?
♦ In addition to hyperlinks for your navigation bar and/or footer,where else could you place links for users’ convenience? (Gothrough your content once it’s on pages and place links to relatedcontent.)
♦ How might you use animated GIFs and marquees to add interest(especially on the Home page)?

Starting from Scratch 61
Step 3: Finishing touchesBefore publishing your site to the Web—in effect, throwing open thefront door and inviting the world—you’ll want to brush the cobwebsfrom every corner. Review the advice in the preceding chapter, andconsider this checklist:
♦ Have you used the WebPlus proofing tools to enhance the qualityof your text?
♦ Have you run the Layout Checker to inspect for possibleproblems?
♦ Have you specified a Web site title and added search enginedescriptors (in ��������������� ����� )?
♦ Have you previewed your site in a Web browser—preferably inseveral different browsers?
♦ Have you reduced graphic file sizes to a minimum to improve loadtime?
Design tips and rules of thumb
♦ The “performance” of your page is how long it takes for the wholepage, including text and graphics, to display completely in a Webbrowser. Basically, it’s proportional to the total file size of itsgraphics. As a rule of thumb, use 60K bytes per page as amaximum. You can stretch the rule a bit for the Home page.
♦ You can determine the actual size of your files by publishing onepage at a time to a local folder (using the �����'��������button), then using Windows Explorer to examine the contents ofthe folder. View the files by date and �'���-select the most recentbatch, then right-click and choose ��� ����� to see the aggregatebyte count. Obviously, the lower the better.
♦ To reduce the total size of your graphics, aside from using fewergraphics, make them no larger than they need to be to get yourpoint across. Since file size increases as the square of eachdimension, shrinking both height and width by 50% reduces thefile size by 75%.

62 Starting from Scratch
♦ Consider setting your monitor to use 256 colors (rather thanthousands or millions) for testing purposes. By working at thissetting you’ll be able to preview how your page will look to userswith monitors that only support 256 colors (or are using thatsetting). Note that the GIF image format, a standard for Webgraphics, supports a maximum of 256 colors.
♦ Reduce the number of colors in each image, and (except forphotos) save as GIF files using the lowest acceptable bit depthyour paint program will allow. Use a “Web-safe palette” whenpossible; you’ll find one in the WebPlus Samples folder. You maywish to explore the Web for details on this and other Web designstrategies.
♦ You’ll need to maintain the pages on your Web site, which isn’tdifficult with WebPlus—all the originals are right there in yourpublication! As a reference, keep a list showing the page numbersand the contents of each page. You can store the list on thePasteboard, or (for printing out) on the last page of yourpublication, which is easy to access by double-clicking the "�-�(right-arrow) button. (You can still publish the whole site; userswon’t be able to access the last page as long as there are no links toit.)
♦ As you’re developing Web pages, you’ll probably need to carryout some housekeeping tasks on your local hard drive. Note thateach time you publish one or more pages to a folder, a new set ofimage files is generated (although duplicate .HTML file names areoverwritten). If you’re previewing pages this way, rather thanusing ������#������.��#�� (which overwrites old files), thoseGIF and JPG files can proliferate. It’s a good idea to weed out theold ones periodically. You can sort your Explorer or My Computerwindow contents by date, then use the “Modified” attribute todetermine which files to keep (i.e., the set most recentlypublished). For thorough cleanup, periodically publish the wholesite to a new folder and delete the old one.

Starting from Scratch 63
♦ If your site is intended for clients or customers, think of it as morethan an electronic business card—think of it as a newsletter withpublication deadlines. Don’t let more than two weeks go bywithout making visible changes. The changes don’t have to bedramatic; the main thing is to reinforce the perception that yoursite is dynamic, not static. The Home page should change mostoften: add new links, or replace old graphics with new ones. Add anew page or two, expanding the original sections. (Be sure to postnotice of the new features on the Home page.) Revise the design ofany pages that aren’t working the way you expected.
♦ Visitors’ feedback is important. Be direct about asking forcomments, and make sure you’ve included an e-mail return link.Challenge your users to respond! Give them some specific choicesto make (“Would you rather see A, B, or C on this page?”). Letthem feel they’re contributing.
♦ As a rule, keep the background and section organization intact soas not to confuse repeat visitors. Sections that began as a singlepage will require a section menu as soon as a few new pages havebeen added. If you’ve got a navigation bar with a button alreadylinked to the original page, turn that target page into the menu pageto keep the link intact. From a site management standpoint, it’susually easier to switch content to a new page than to rewireexisting links. (You can see the content, but you can’t easily seethe links.)
Where should I go from here?The answer should be self-evident: Get straight back to work withWebPlus! Your own experience will be your best teacher. We’re proudof WebPlus, and hope you enjoy using it to develop a Web site you canbe proud of, too.
Thanks for joining the Serif product family... and here’s hoping we seeyou online soon!