shedd worm brochure
TRANSCRIPT

1 WelcomeHome,Worms!
3 WhichWormsAretheRightWorms?
4 Bedding:MakingYourWormsComfy
5 WhattoFeedYourWorms
6 HarvestingYourGold:a.k.a.WormPoop
8 WormWorries:Troubleshooting
9 Worm-CareLog
The Care&KeepingofWorms
S H E D D A Q U A R I U M ’ S H O W - T O G U I D E F O R T H E N O V I C E V E R M I C U LT U R I S T

Whycompost?Andwhywithworms?
Composting food scraps and what we call yard “waste” helps our local
environment in two ways: First, composting helps stop the loss of valuable
nutrients that would otherwise wind up as “garbage” in a landfill or incinerator.
Second, the rich humus that results from composting can be used in your yard
or garden to help restore the health and vitality of your soil without the use of
expensive, polluting chemical fertilizers. By returning those nutrients to your soil,
along with the good microbes they pick up in the
composting process, you’re feeding your plants,
completing the cycle of soil building and preventing air
and water pollution from conventional waste disposal.
As for the worms, they are nature’s best little composters.
This guide shows you how to build a simple, inexpensive
worm compost bin. If you think of the bin as a compact
ecosystem, you’ll begin to understand the balanced
relationship of the worms, their neighbors, the food you
add and the rich compost produced.

1
The Bin
You can build or buy just about anything that will provide
darkness, warmth and shelter for your worms, but the
best option is a wood or plastic container. Wood is more
absorbent and a better insulator for the worms. Wood
is also heavier and can be expensive. Plastic bins are
affordable and can be reused. People successfully create
bins from old drawers, trunks and wooden barrels, so use
your imagination! At Shedd Aquarium, we use plastic
containers, but we have to make sure the compost doesn’t
get soggy (more info under “Worm Worries”). Experiment
and find out what works best for you and your worms.
How Big?
In Worms Eat My Garbage, Mary Appelhof suggests
weighing your household food waste for one week. Based
on that total amount, provide one square foot of bin per
pound of food.
The container should be about 10 inches deep. Short, wide
containers create better environments than tall, narrow
bins. Instead of using one large heavy box, consider using
several smaller containers for easier lifting and moving.
Appelhof’s book illustrates a variety of containers.
The bin needs a cover to conserve moisture and provide
darkness for the worms. If the bin is kept indoors, a sheet
of dark plastic or burlap fabric placed loosely on top of the
bedding is sufficient cover.
Drill ventilation holes in the sides and top of your bin.
Like people, worms need air to live so be sure to have
your bin sufficiently ventilated. Some people also prefer
to drill about 10 holes (1/4- to 1/2-inch each) in the
bottom for aeration and drainage. A plastic bin may need
more drainage — if contents get too wet, drill more holes.
If you do have holes in the bottom, raise the bin on bricks
or wooden blocks and place a tray underneath to capture
excess liquid, which can be used to fertilize your house or
garden plants. The bins at Shedd do not have holes in the
bottom and work just fine.
With all these holes you may worry that the worms
will crawl out. Worms prefer a dark, moist environment
and will only leave in times of extreme stress. Keeping
a balanced bin is easier than you think!
WelcomeHome,Worms!
�
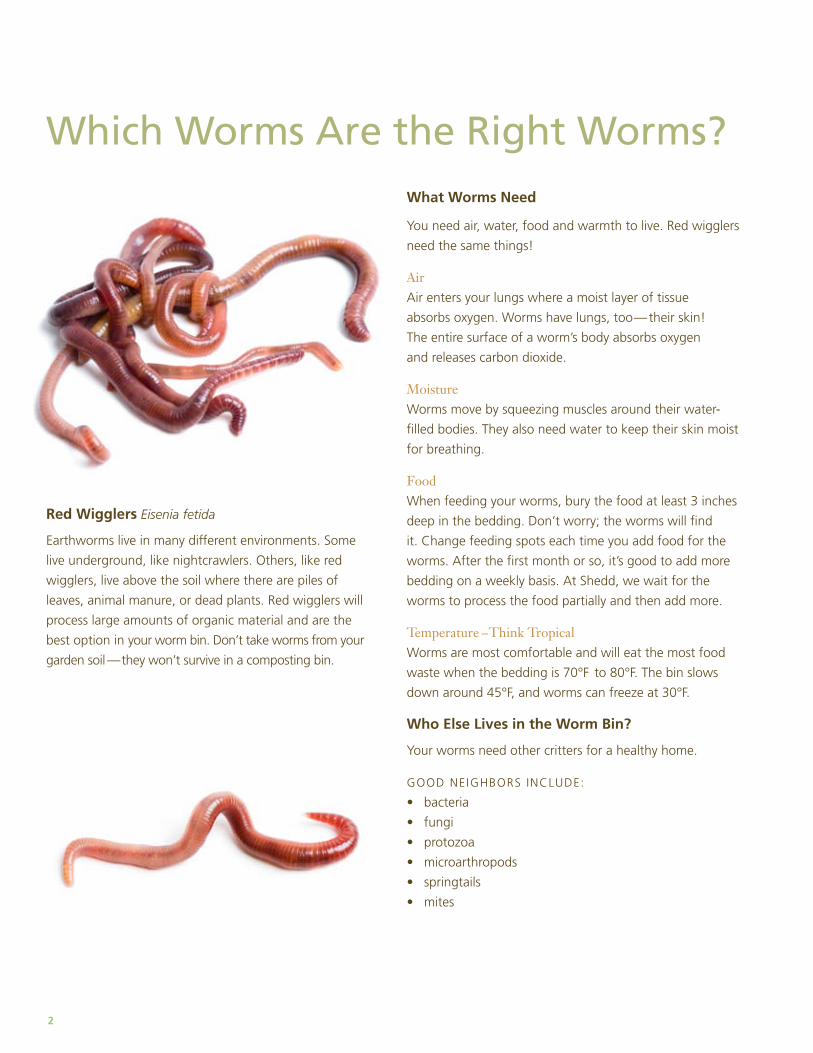
Red Wigglers Eisenia fetida
Earthworms live in many different environments. Some
live underground, like nightcrawlers. Others, like red
wigglers, live above the soil where there are piles of
leaves, animal manure, or dead plants. Red wigglers will
process large amounts of organic material and are the
best option in your worm bin. Don’t take worms from your
garden soil — they won’t survive in a composting bin.
What Worms Need
You need air, water, food and warmth to live. Red wigglers
need the same things!
Air Air enters your lungs where a moist layer of tissue
absorbs oxygen. Worms have lungs, too — their skin!
The entire surface of a worm’s body absorbs oxygen
and releases carbon dioxide.
Moisture Worms move by squeezing muscles around their water-
filled bodies. They also need water to keep their skin moist
for breathing.
Food When feeding your worms, bury the food at least 3 inches
deep in the bedding. Don’t worry; the worms will find
it. Change feeding spots each time you add food for the
worms. After the first month or so, it’s good to add more
bedding on a weekly basis. At Shedd, we wait for the
worms to process the food partially and then add more.
Temperature –Think Tropical Worms are most comfortable and will eat the most food
waste when the bedding is 70°F to 80°F. The bin slows
down around 45°F, and worms can freeze at 30°F.
Who Else Lives in the Worm Bin?
Your worms need other critters for a healthy home.
GOOD NEIGHBORS INCLUDE:
• bacteria
• fungi
• protozoa
• microarthropods
• springtails
• mites
WhichWormsAretheRightWorms?

3
You might also see small numbers of fruit flies and sow
bugs in your bin. They might be annoying, but they’re
harmless, and they’ll come and go depending on the
conditions in your bin. When conditions are good,
the worms and their neighbors will be hard at work
decomposing what you add. In our northern temperate
climate, unfriendly neighbors are rare. Keeping a small
worm bin in your home is safe and sanitary. If you suspect
the worms are crowded, check out the troubleshooting
tips included later. Balance will make your bin a success!
Tips • Check for and remove excess moisture that may collect
in the bottom of your bin. Excess moisture is especially
common in plastic bins. Standing liquid may promote
the growth of anaerobes (organisms that do not need
oxygen). Their by-products can smell and are not good
for plants.
• Wooden bins “breathe” and will experience more
drying than plastic bins, especially in drier climates, and
may require occasional rewetting.
• “Stink” is a sign that not enough oxygen is reaching
part or all of the worm bin system. Very wet or
compacted food waste and/or bedding will create bad
odors. To solve “stink,” stir the bin contents, add more
dry bedding, and reduce the amount and frequency
of feedings.
BalancingAct:MoistureandAir

4
Red wigglers may not sleep in beds, but we set up their bin
with lots of bedding for them to live in and snack on, too!
What Kind of Bedding?
GOOD BEDDING INCLUDES:
• white paper
• newspaper (no glossy or colored ink pages)
• cardboard (without adhesives)
• toilet paper tubes
• brown leaves
• straw
• coconut husk fiber (coir)
Shred all paper and cardboard into small pieces before
using. Mixing types of bedding is great. Dampen the
bedding and add it to the bin. The bedding should have
the dampness of a wrung-out sponge.
How Much Bedding?
Formulas exist to calculate the amount of bedding needed
based on how many worms you have and the size of your
bin. Generally, the more bedding the better.
• Fill your container one-half to two-thirds full of bedding
when you first begin your bin.
• Add a handful of dirt or sand as well as some crushed
eggshells. Worms don’t have teeth to grind their
food, so they need to eat this grit to help their gizzard
grind. The eggshells also help keep the bedding from
becoming too acidic. Add new crushed eggshells
each week.
• Add your red wigglers and watch them get comfortable
in their new home. They will burrow into the bedding
in search of the dark, moist places.
• Don’t feed your worms right away! Let them settle
in for a few days. Add small amounts of bland food
scraps the first few weeks. Lettuce, apples, eggshells
and banana peels are good choices. Wait a few weeks
to add stronger-smelling food like broccoli and onions.
You’ll know they’re eating when the scraps begin to
disappear and you see the first signs of worm poop! In
the beginning, the poop, or castings, will resemble light
brown coffee grounds. In a few months, the castings
will turn darker shades of brown.
Bedding:MakingYourWormsComfy

5
A Balanced Diet
Collect food scraps in a reusable pail or other container;
worms like tea bags, coffee grounds and filters, vegetable
and fruit scraps, and bread. Discard meat scraps, bones,
dairy products and garlic or potato peelings, as these will
attract insects and may cause “stink.”
When the pail is full, chop the food waste and bury it in
the bin. Pull aside the bedding and bury the food waste
deeply, covering it with bedding again. Start at one end of
the bin and add food waste systematically to a new section
each time, until you work back to the original site.
If there is still a lot of uneaten food in the first location,
the worms need time to catch up. Wait a few days to add
more scraps.
Your red wigglers will be a cinch to look after; they
don’t need to be fed on a regular schedule, they’re quiet,
and you don’t need to look for a worm-sitter if you go
on vacation!
WhattoFeedYourWorms
Worms Like: • coffee grounds and tea bags
• fruit
• vegetable peelings
• cereals (oats, barley and corn)
• annual weeds (not seed heads)
• bread
• green leaves
• cow/horse manure
Worms Don’t Like: • meat and fish
• cheese
• baked beans
• rice or pasta
• cooked potatoes
• grass in any quantity
• weed seeds
• diseased plant material
• cat or dog poop

6
There is no wrong way to harvest your bin; many methods
and techniques exist. The technique to use is best chosen
by what you want after harvesting the bin. Do you want
the worms for fishing? Is your goal to have as much
compost for your plants as possible?
Ifyouwanttobeveryhands-onwithyourbinand
keepyourwormsforcomposting,theDump and Sort
Methodisagoodoption.
Ifyoudon’tmindwaitingforyourrewards,theSplit
Harvesting Methodmightberightforyou.
It is important to remember that removing castings (poop)
from the box will be necessary for the health of your
ecosystem. Excess castings can create a toxic environment
for the worms. Worms prefer bedding to poop.
Dump and Sort Method
MATERIALS NEEDED:
Onesmallplasticsheet
Lightsource(sunlightorbrightoverheadfluorescent)
1. Prepare fresh bedding for your worms.
2. Empty the contents of your container onto the
plastic sheet in one large pile or a series of smaller
cone-shaped piles.
3. Add fresh bedding to the container. This is a great time
to wash out your bin, but stay away from harsh
chemicals. Vinegar and warm water work very well.
4. Position the light source over the casting pile.
The worms will move down into the castings.
5. Carefully pick the castings from the pile(s) in layers,
working toward the bottom center of the each pile.
Place castings in a separate container. Keep on the
lookout for cocoons (worm eggs) and very young,
small worms. Make sure to add these back to the
freshly bedded bin.
6. Continue sorting until there is only a small pile of
castings with worms beneath it.
7. Add this pile and worms to the fresh bedding
in the bin.
8. Use the harvested castings for a horticulture project.
HarvestingYourGold…
* Believe it or not, all native worm species were removed from
our local soil (in the Great Lakes region) during the last glacial
period. None of the earthworms you might be familiar with
are native to our local ecosystems, which have evolved for over
11,000 years without the presence of worms. Do not release
your worms into any forested or other natural area, as they may
disrupt or damage the ecosystem.
* Worms are okay in your garden, unless you live next to a forest
or river. Worms don’t move very quickly on their own, but
humans have helped them spread to areas where they are
rapidly altering and creating imbalances in forest ecosystems.

�
Split Harvesting Method
OPTION 1: Ifyoudon’twanttobehands-onwithharvesting
1. Simply “split” your bin by adding two-thirds of the
castings (worms and all) directly to your garden.
2. Add the remaining one-third to your fresh bedding.
This will inoculate the bedding with the microscopic
neighbors from your existing bin and provide some
worms to get you going again, but it depletes your
worm population for awhile.
OPTION 2:
Ifyoudon’twanttorisklosinganyofyour
redwigglers
1. Don’t feed the worms for a few days.
2. Move all the castings and worms to one side of the bin.
3. Add fresh bedding to the empty area, moisten the
bedding, add eggshells and then bury food in the new
bedding. The worms will start to move to the new
bedding to feed.
4. In about a month, you can remove the worm castings
from the older bedding and use them in your garden.
When you remove them, you may need to add some
more bedding.
…a.k.a.WormPoop
A wise person once said,
“The best way to fertilize
is do it weakly weekly.”
Using Your Castings in a Horticulture Project: Worm Poop to Feed Your Plants
OPTION 1
Sprinkle fresh castings directly on the soil or add pinches of poop when potting plants.
A small amount near your newly planted seeds will help them grow.
OPTION 2
Add 1 tablespoon of fresh castings to 2 cups of warm unchlorinated water.
Shake or stir mixture for one minute. Pour directly on soil to feed your plants.

8
When you have: What may be happening: What you can do:
ODOR exposed food cover food scraps with bedding
too much moisture add dry bedding; reduce the amount of food
placed in the bin; avoid adding food with a high
percentage of water (such as melons)
not enough oxygen add dry bedding; mix bin contents daily; be sure
bin is adequately ventilated with holes
food in bin is naturally
odorous; onion, broccoli
avoid foods that smell unpleasant when they
decompose; don’t add meat, bones, dairy, or oil
products to the bin because these become rancid
when decomposing
DISAPPEARINGWORMS bin is too wet;
worms are drowning
don’t panic; add dry bedding; avoid adding foods
with high water content
dead worms decompose rather quickly; if you don’t monitor these
bin is too dry;
worms are drying out
lightly moisten bedding; add moist foods
conditions, you can have a bin with no worms before you realize it not enough air;
worms are suffocating
mix bin contents to aerate; be sure bin is
adequately ventilated with holes
not enough food add food
bin is too hot or too cold keep bin in a location where it will be between
50°F and 80°F
an overabundance of mites remove any food that has a congregation
of mites
FRUITFLIES exposed food bury food under bedding material; cover the
contents with a dry sheet of newspaper
if fruit flies become a problem, you can try using flypaper traps or make your own fruit fly trap*;
too much moisture avoid overfeeding; add dry bedding
houseflies should not be attracted to your worm bin if you cover the food scraps with bedding material
fruit fly eggs in food scraps wash all fruits and peels — even those you
remove before eating, such as bananas and
citrus — to remove any fruit fly eggs
WormWorries:Troubleshooting
* Make your own fruit fly trap by leaving out a cup of wine or beer. This will attract and drown these unwanted houseguests. Flypaper can also be used on or near your bin.

9
Date Food Added to Bin Action Taken Observations
01/01 1 banana peel cover food scraps with bedding lots of babies and eggpods
Worm-CareLog

ResourcesWhere to Get Worms
Find a friend with extra worms.
Order Locally (if you can) Soil Exchange Inc.
2307 Colby Dr.
McHenry, IL 60050
Dean Allen 815-483-6046
$15 a pound for red wigglers, plus shipping
Order On Line www.composters.com
They order from the grower closest to you.
About Worms
Recommended Book Worms Eat My Garbage by Mary Appelhof
www.wormwoman.com
Posters and Other Materials The Illinois Sustainable Education Project (ISTEP)
Shedd Contact [email protected]
John G. Shedd Aquarium Conservation Department1200 South Lake Shore Drive Chicago, Illinois 60605