shot put
TRANSCRIPT
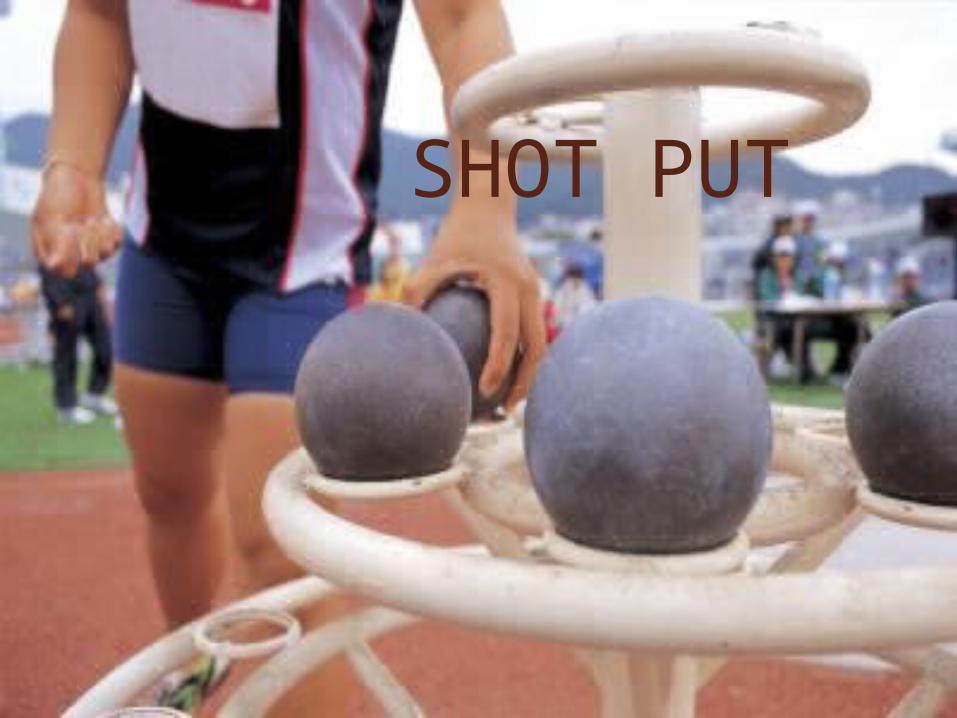
SHOT PUT
Definitionan athletic contest in which a
very heavy round ball is thrown as far as possible.
a sport that requires technique as well as strength.
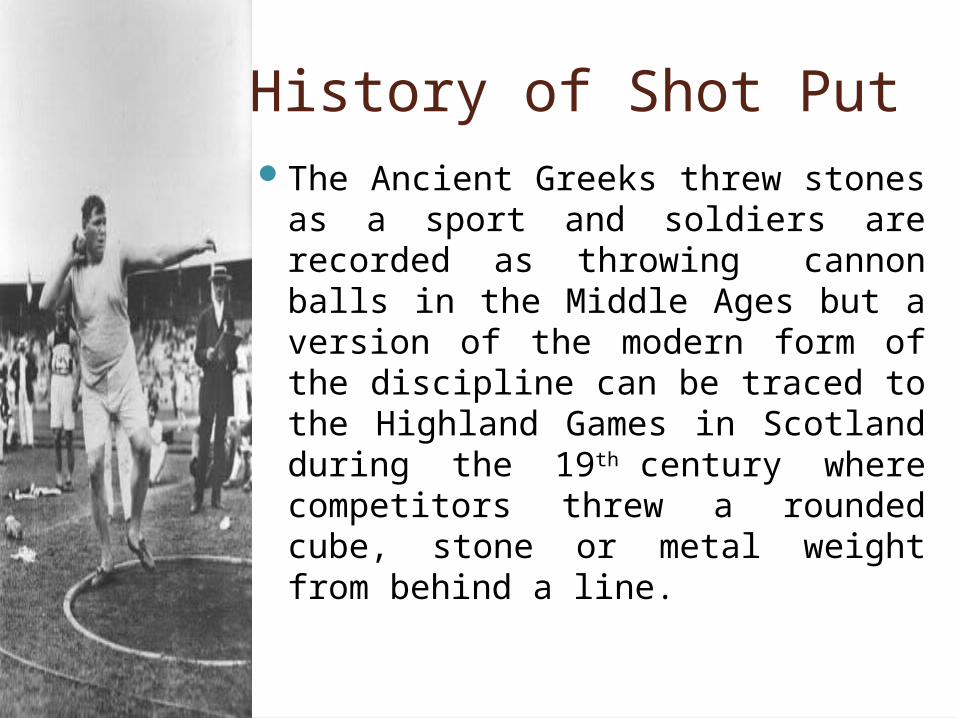
History of Shot PutThe Ancient Greeks threw stones
as a sport and soldiers are recorded as throwing cannon balls in the Middle Ages but a version of the modern form of the discipline can be traced to the Highland Games in Scotland during the 19th century where competitors threw a rounded cube, stone or metal weight from behind a line.
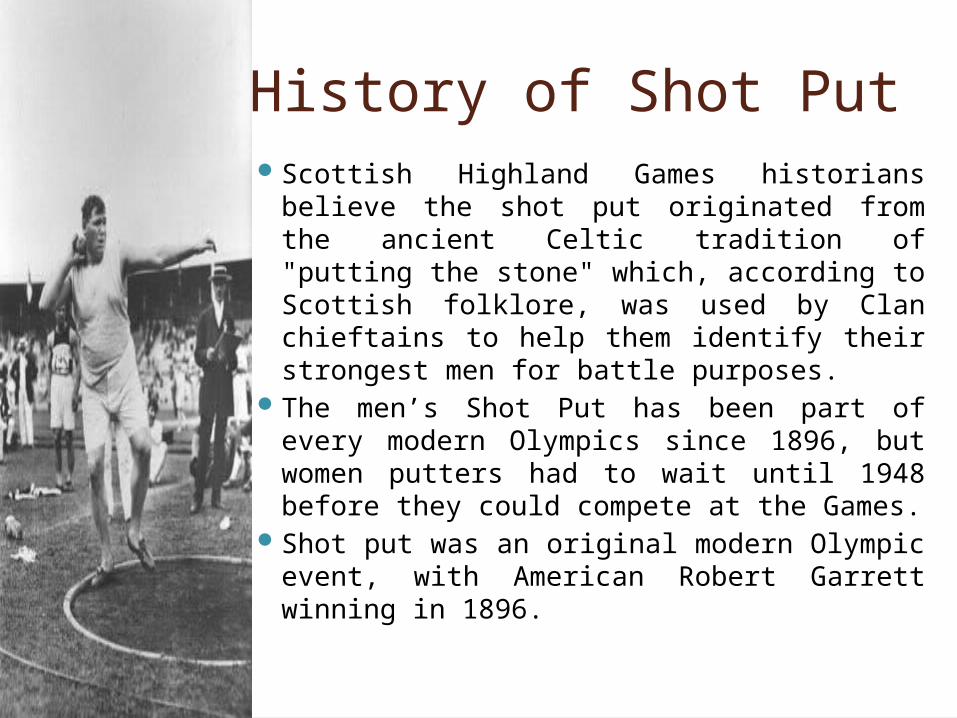
History of Shot Put Scottish Highland Games historians
believe the shot put originated from the ancient Celtic tradition of "putting the stone" which, according to Scottish folklore, was used by Clan chieftains to help them identify their strongest men for battle purposes.
The men’s Shot Put has been part of every modern Olympics since 1896, but women putters had to wait until 1948 before they could compete at the Games.
Shot put was an original modern Olympic event, with American Robert Garrett winning in 1896.
RULES IN PLAYING SHOT PUT
Uniform Shot put participants are required to wear a
clean school or team uniform unless they are participating in an amateur competition that does not specify uniform requirements.
No visible jewelry is allowed in most cases, though exceptions may be made for religious jewelry provided it is taped to the body to prevent movement.
Gloves cannot be worn, and the hands cannot be taped or bandaged unless there is a cut or other wound that needs to be covered.
Supporting the wrists with tape is allowed.
Preparation Once the competition has begun,
participants can no longer take practice throws or engage in other warmup activities. An exception to this is made if the participant's coach or other official is present to actively monitor the warmup, though practice throws are still prohibited once competitors actively begin throwing shots.
The Shot Shots may vary in size, weight and material as
long as minimum requirements for their construction are met.
The shot must be smooth and round, solid and made of metal no softer than brass.
The shot can be a solid metal ball or can have a shell of iron, brass or other acceptable materials filled with lead or other heavier metals.
Shots are available in 6-, 12- and 16-pound varieties, as well as 2-, 3-, 4-, 5- and 6-kilogram varieties.
Shots must conform to minimum and maximum diameters based on their weight to be allowed for use in official USA Track and Field competitions.
Playing Area When throwing a shot, competitors stand
inside of a circle 7 feet in diameter. A sector extending from the circle is used
to determine valid throws; the two radius lines of the sector originate from the center of the circle and are measured at 34.92 degrees apart.
A curved white stop board is placed within the circle between the sector lines, serving as an indicator of the valid throwing sector and as a warning of where the thrower cannot cross.
Putting the Shot The act of throwing a shot is known as a put and
must be performed in a certain way to be valid. The elbow must bend to draw the shot back, holding it near or touching the neck and chin but not farther back than the shoulder.
The put itself is performed by extending the arm straight to launch the shot into the air; throws that bring the shot back or give it an overhand or underhand circular momentum will be disqualified.
The put must be performed within 60 seconds of being called to enter the circle.
The thrower cannot leave the circle until the shot has landed and the judge has called for it to be marked.

Measurement Measurement is made with a measuring
tape from the inside edge of the stop board to the closest side of the shot once it has landed.
If the shot lands on one of the sector lines, a foul is called and no measurement is made.
If the shot lands outside the sector lines, it is out of bounds and no measurement is made.
Measurements are to the nearest 1/4 inch or nearest 1/4 centimeter, though individual competitions may alter this as needed.
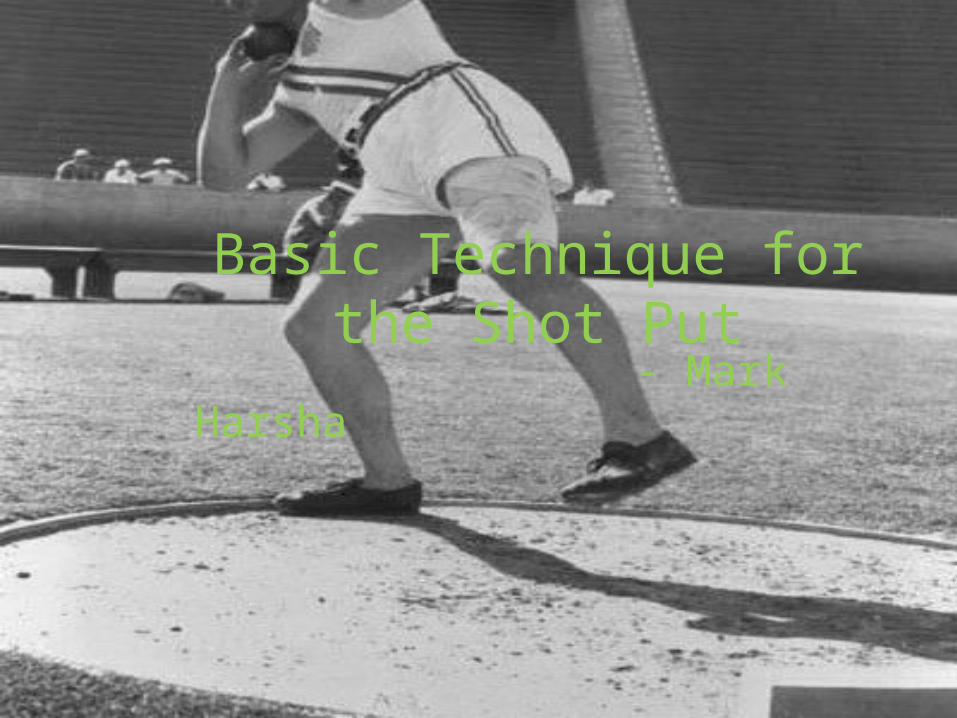
Basic Technique for the Shot Put
- Mark Harsha
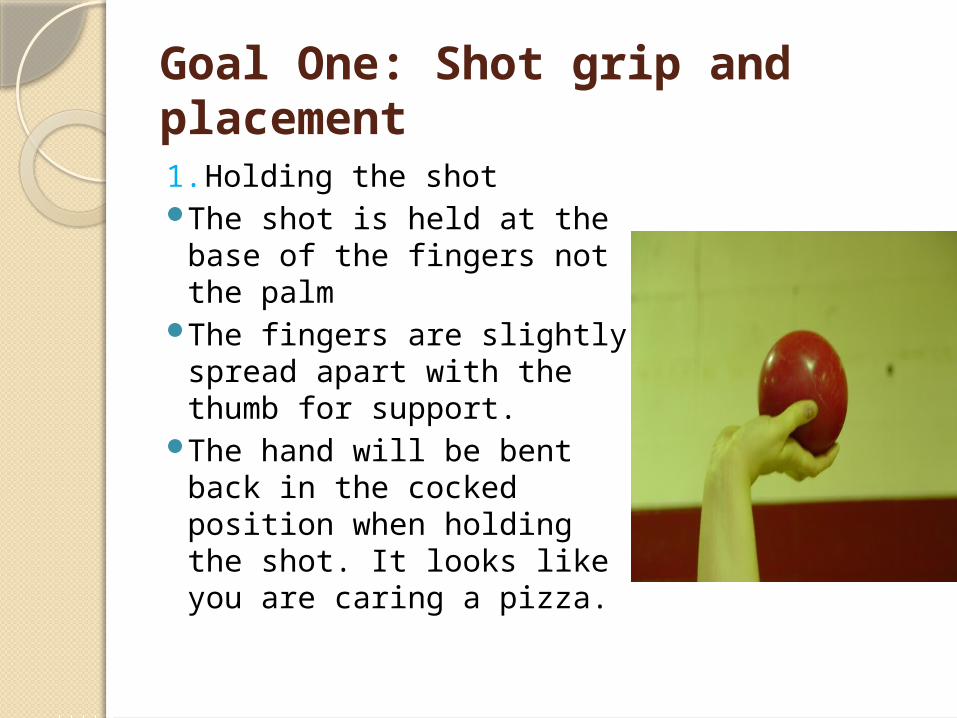
Goal One: Shot grip and placement1. Holding the shotThe shot is held at the
base of the fingers not the palm
The fingers are slightly spread apart with the thumb for support.
The hand will be bent back in the cocked position when holding the shot. It looks like you are caring a pizza.
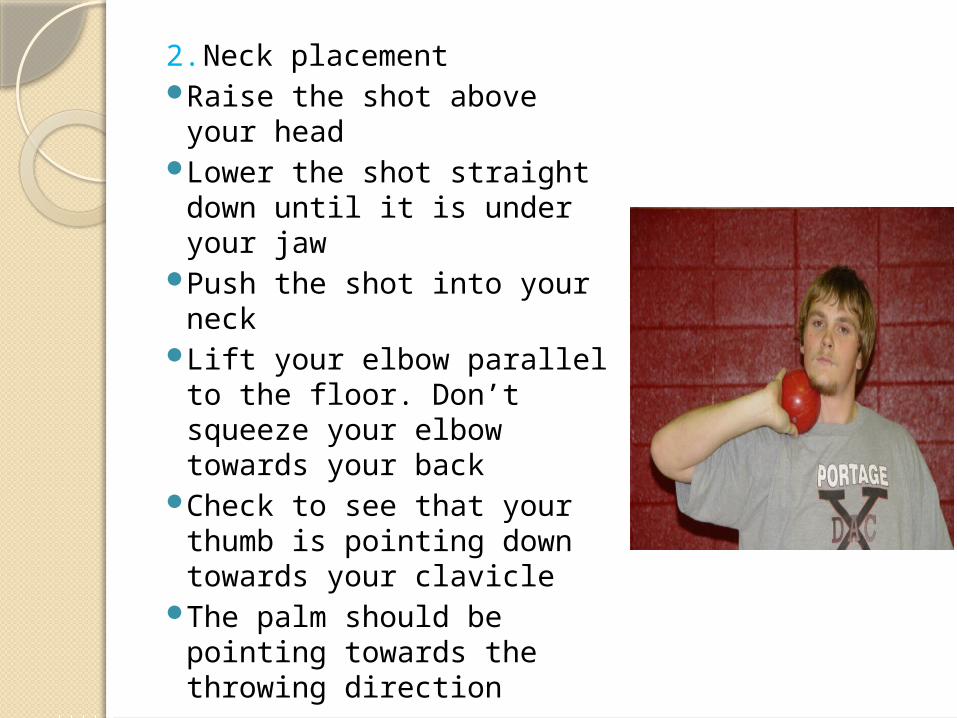
2. Neck placementRaise the shot above your
headLower the shot straight
down until it is under your jaw
Push the shot into your neck
Lift your elbow parallel to the floor. Don’t squeeze your elbow towards your back
Check to see that your thumb is pointing down towards your clavicle
The palm should be pointing towards the throwing direction
Goal Two: Delivery of the shot
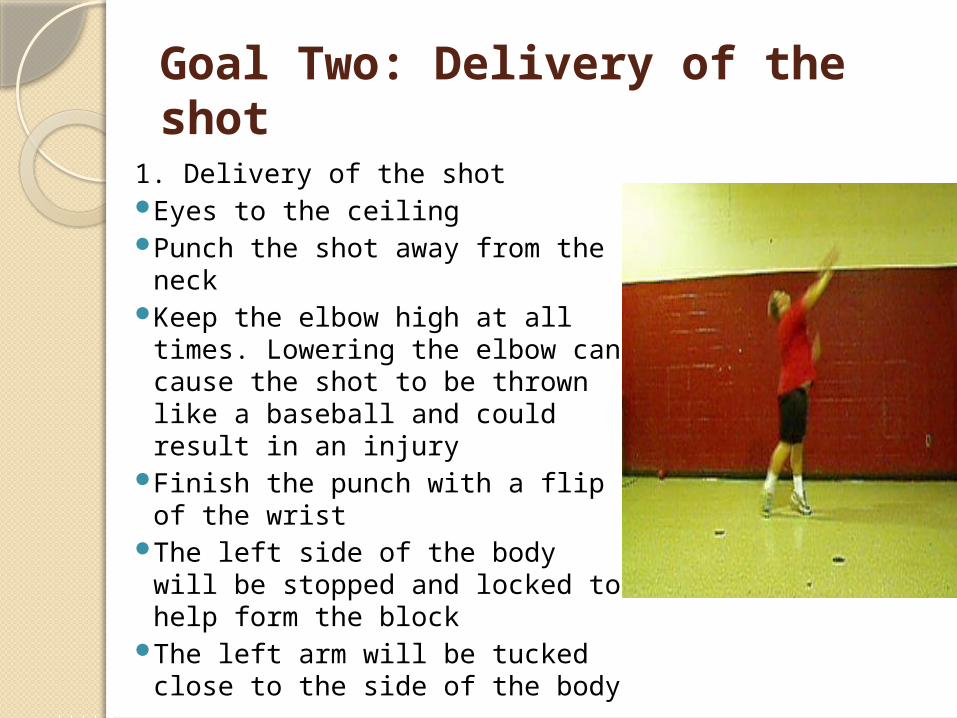
1. Delivery of the shotEyes to the ceilingPunch the shot away from the
neckKeep the elbow high at all
times. Lowering the elbow can cause the shot to be thrown like a baseball and could result in an injury
Finish the punch with a flip of the wrist
The left side of the body will be stopped and locked to help form the block
The left arm will be tucked close to the side of the body
2. Drills used to teach the delivery
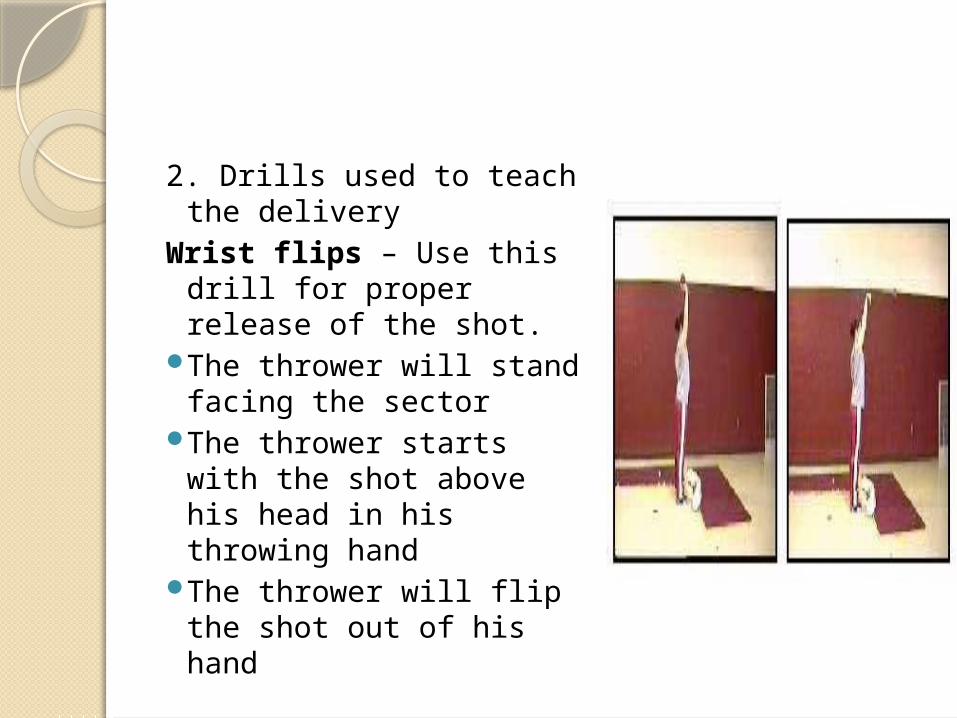
Wrist flips – Use this drill for proper release of the shot.
The thrower will stand facing the sector
The thrower starts with the shot above his head in his throwing hand
The thrower will flip the shot out of his hand
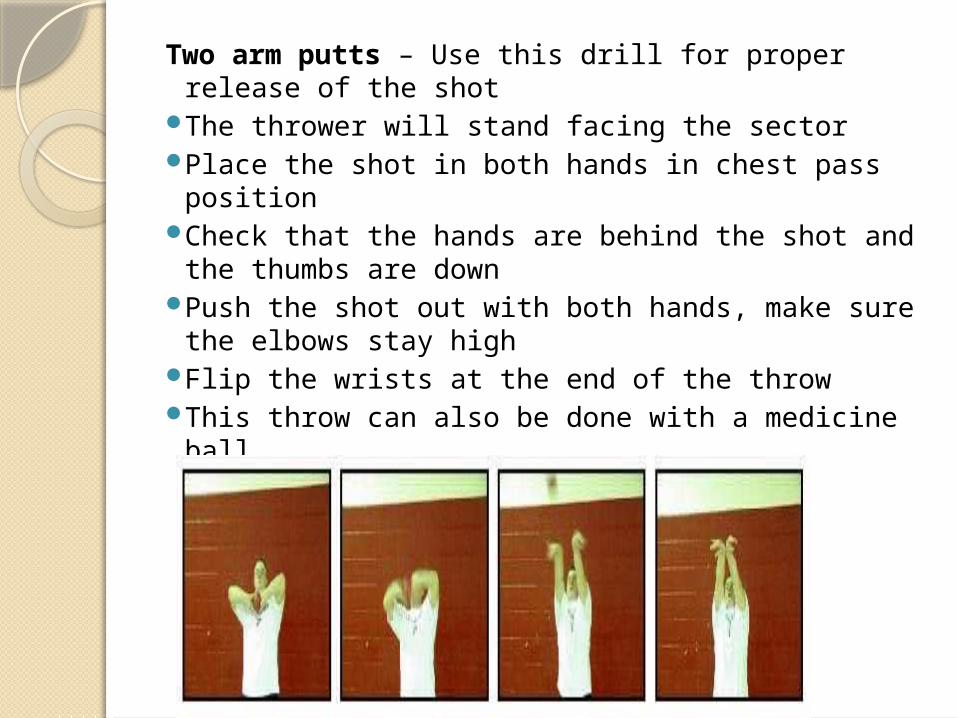
Two arm putts – Use this drill for proper release of the shot
The thrower will stand facing the sectorPlace the shot in both hands in chest pass
positionCheck that the hands are behind the shot and
the thumbs are downPush the shot out with both hands, make sure
the elbows stay highFlip the wrists at the end of the throwThis throw can also be done with a medicine ball
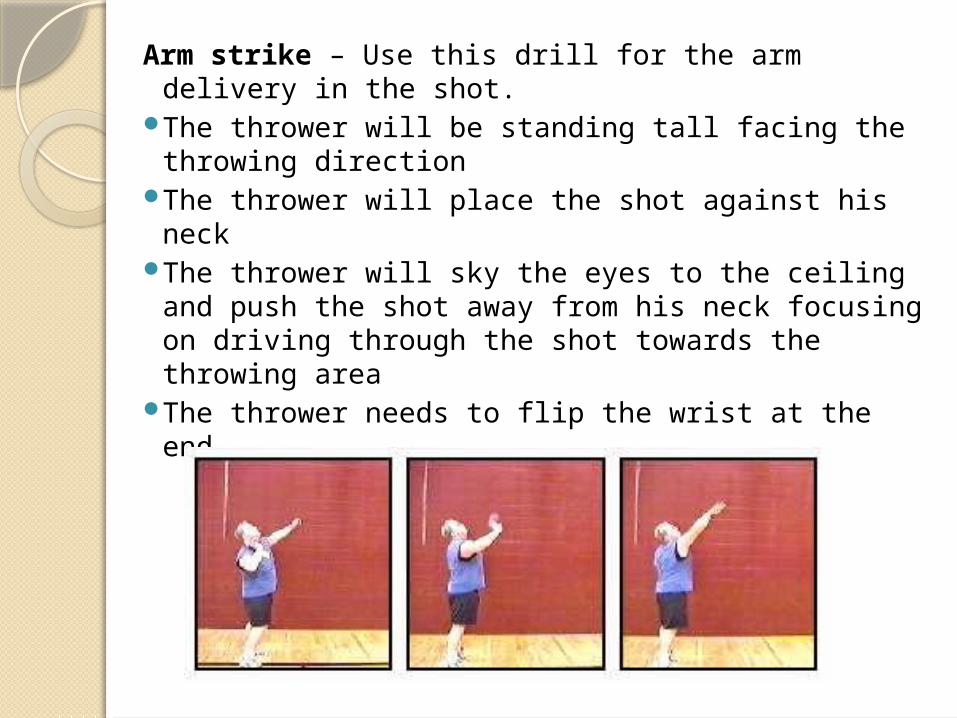
Arm strike – Use this drill for the arm delivery in the shot.
The thrower will be standing tall facing the throwing direction
The thrower will place the shot against his neck
The thrower will sky the eyes to the ceiling and push the shot away from his neck focusing on driving through the shot towards the throwing area
The thrower needs to flip the wrist at the end
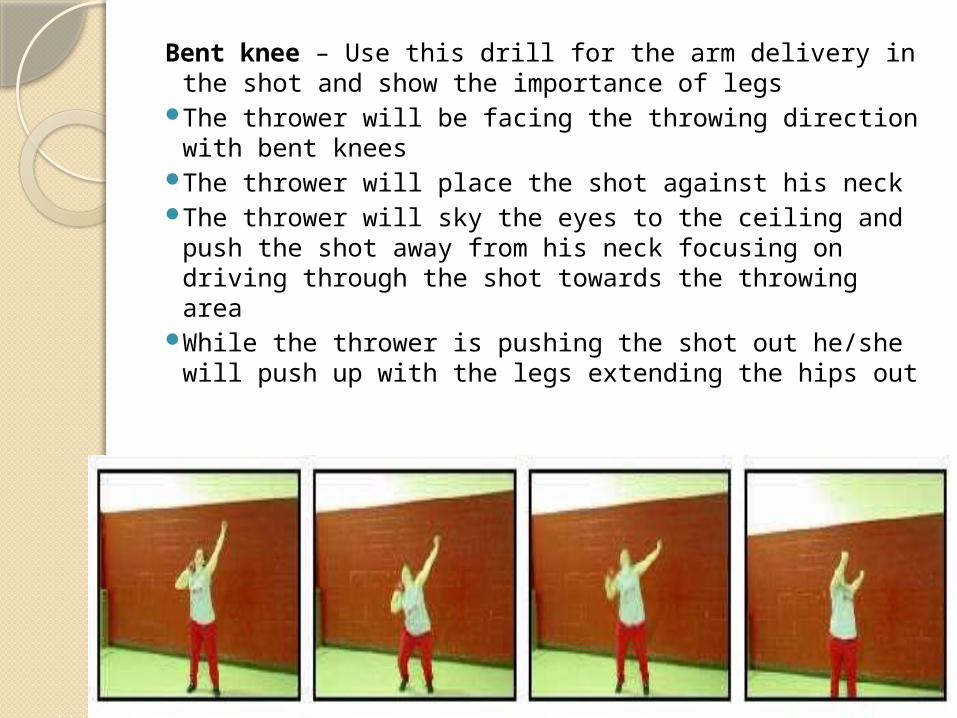
Bent knee – Use this drill for the arm delivery in the shot and show the importance of legs
The thrower will be facing the throwing direction with bent knees
The thrower will place the shot against his neckThe thrower will sky the eyes to the ceiling and
push the shot away from his neck focusing on driving through the shot towards the throwing area
While the thrower is pushing the shot out he/she will push up with the legs extending the hips out
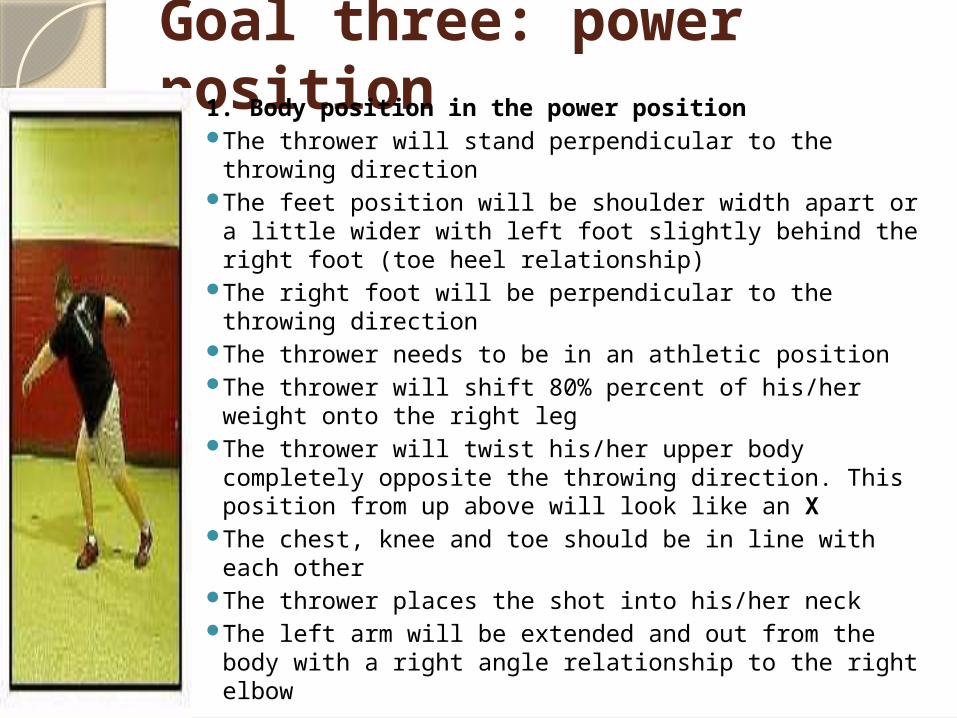
Goal three: power position1. Body position in the power position
The thrower will stand perpendicular to the throwing direction
The feet position will be shoulder width apart or a little wider with left foot slightly behind the right foot (toe heel relationship)
The right foot will be perpendicular to the throwing direction
The thrower needs to be in an athletic position The thrower will shift 80% percent of his/her weight
onto the right leg The thrower will twist his/her upper body completely
opposite the throwing direction. This position from up above will look like an X
The chest, knee and toe should be in line with each other
The thrower places the shot into his/her neck The left arm will be extended and out from the body
with a right angle relationship to the right elbow
2. Throwing from the power positionOver exaggerate the use of the legs in the throw
especially the hipsSequence of the throw will be legs - hips - back –
armPush the weight from right leg to the left leg in an
upwards directionWhen driving up with your legs your right heel
(hips) needs to be turned outThere will be a stretch reflex reaction between
your upper body and lower bodyThe upper body will start coming aroundAs your upper body comes around sweep the left
arm around and then bring it tight to your bodyStop the left side of your body to aid in
accelerating the shotDeliver the shot as mentioned above
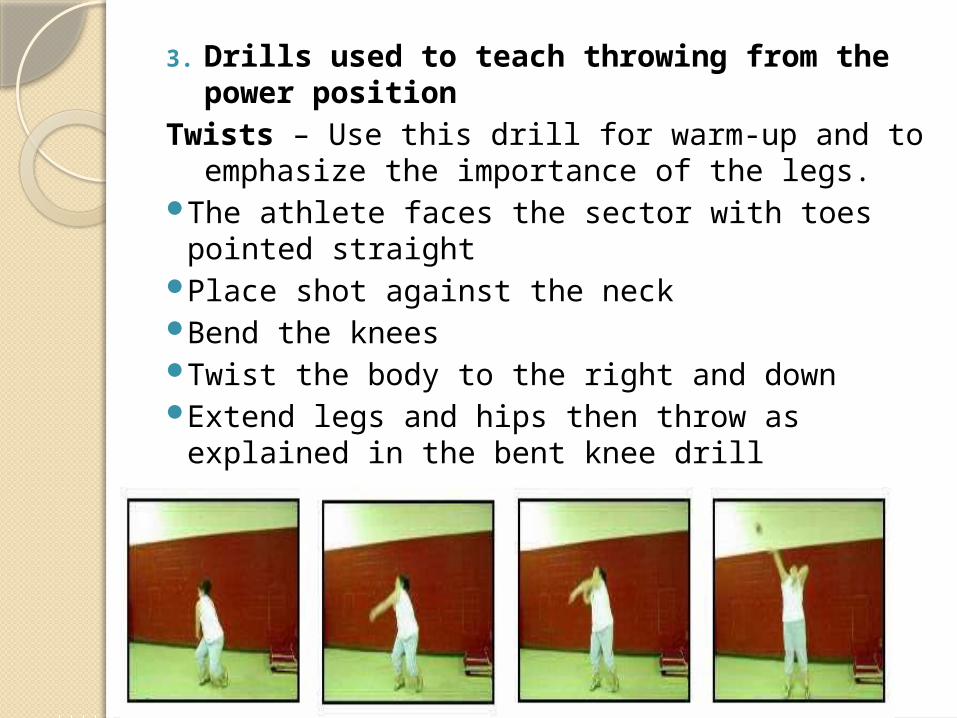
3. Drills used to teach throwing from the power position
Twists – Use this drill for warm-up and to emphasize the importance of the legs.
The athlete faces the sector with toes pointed straight
Place shot against the neckBend the kneesTwist the body to the right and downExtend legs and hips then throw as explained
in the bent knee drill

1-2 drill – Use this drill to teach the thrower to keep the shot back on the hip.
The thrower gets into the power position with a shot against the neck
On the command of "one" he opens his left arm to the throwing direction and turns his heel out. Check to see if the shot has stayed in place at the back of the ring
On the command of "two" the thrower completes the throw – sling shot effect
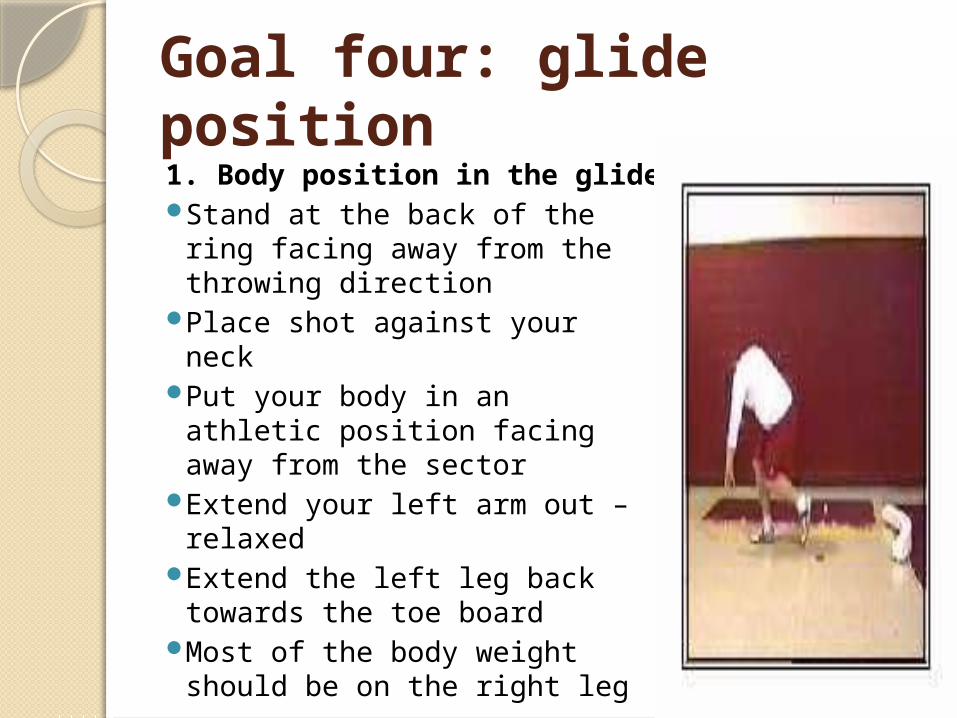
Goal four: glide position1. Body position in the glideStand at the back of the ring
facing away from the throwing direction
Place shot against your neckPut your body in an athletic
position facing away from the sector
Extend your left arm out – relaxed
Extend the left leg back towards the toe board
Most of the body weight should be on the right leg
2. Gliding into the power positionTap your left leg for balanceDraw up the left knee even with the right
knee, remember to keep the left leg straight
Do not allow your left leg to curl behind the right leg
Allow your hips to start to fallViolently extend your left leg towards the
toe board, do not lift up with your backPush and then pull your right leg
underneath you, it will look like the last part of your body leaving the circle is your right heel
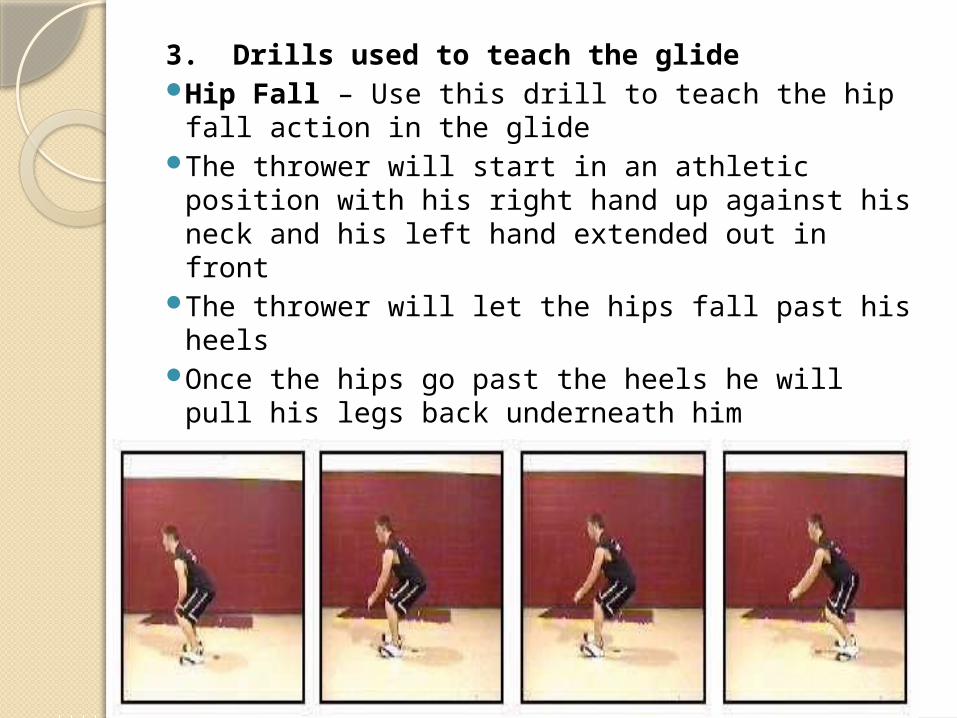
3. Drills used to teach the glideHip Fall – Use this drill to teach the hip fall
action in the glideThe thrower will start in an athletic position
with his right hand up against his neck and his left hand extended out in front
The thrower will let the hips fall past his heels
Once the hips go past the heels he will pull his legs back underneath him
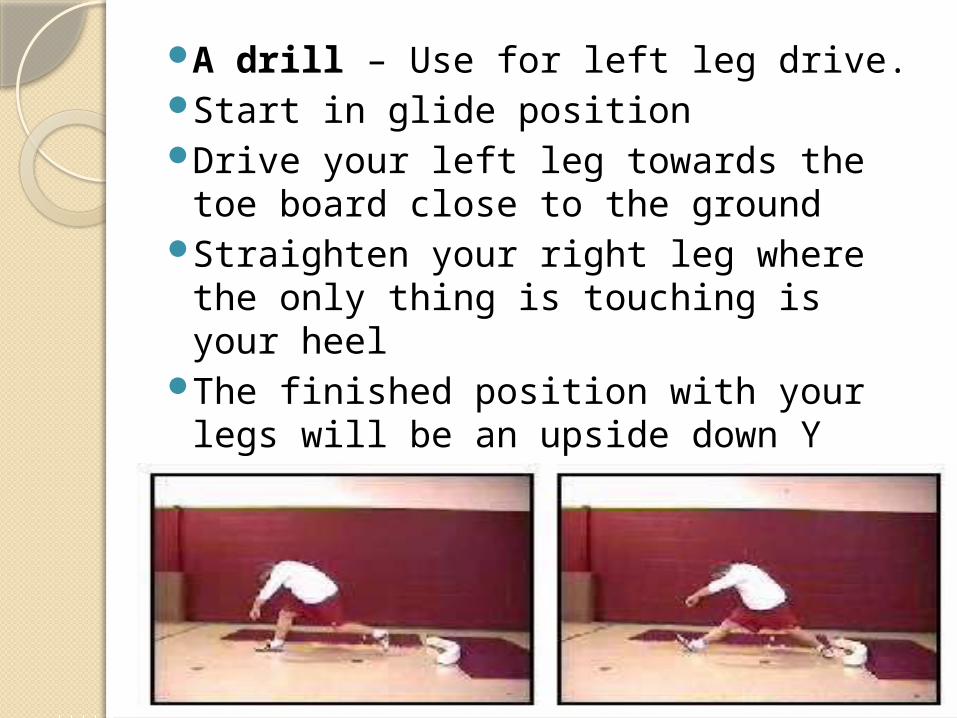
A drill – Use for left leg drive.Start in glide positionDrive your left leg towards the toe
board close to the groundStraighten your right leg where the
only thing is touching is your heelThe finished position with your legs
will be an upside down Y
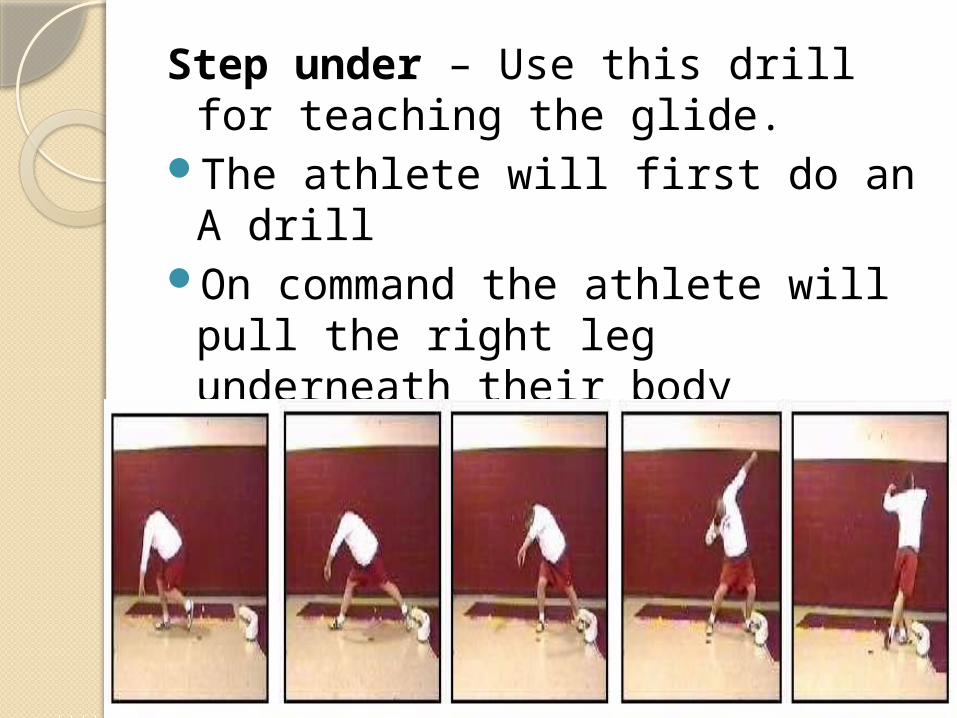
Step under – Use this drill for teaching the glide.
The athlete will first do an A drillOn command the athlete will pull
the right leg underneath their body turning the right foot at the same time
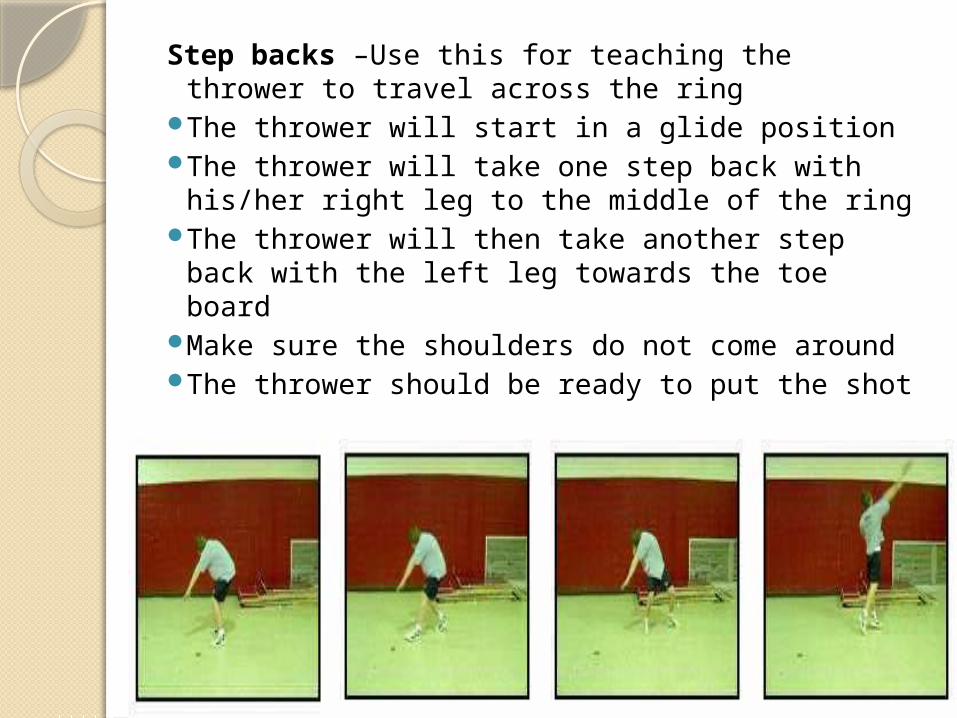
Step backs –Use this for teaching the thrower to travel across the ring
The thrower will start in a glide positionThe thrower will take one step back with
his/her right leg to the middle of the ringThe thrower will then take another step back
with the left leg towards the toe boardMake sure the shoulders do not come aroundThe thrower should be ready to put the shot
GREAT SHOT PUTTERS OF THE OLYMPICS
Robert Garrett was the first modern Olympic shot put champion, in 1896, with a throw measuring 11.22 meters.
American Ralph Rose won gold medals in 1904 and 1908.
Leo Sexton IN 1932 reached the 16-meter mark to take the gold during the first Games held in Los Angeles.
American Randy Barnes set a world record with a toss measuring 23.12 meters in 1990. He's shown here celebrating his gold medal-winning attempt during the 1996 Olympics.
World Indoor gold medalist Christian Cantwell

Womens CategoryModern Olympic champs include
2000 gold medalist Yanina Korolchik of Belarus.
Things to be consideredShots are only to be put on
command of the teacher. “Ready throw”
Shots may only be collected on command of the teacher. “Collect shots”