soft chalk lesson builder users guide
DESCRIPTION
Soft Chalk Lesson Builder Users GuideTRANSCRIPT

Softchalk Lesson Builder
User Manual
Created by:
C.J. Bracken
Rev. 2
March 13, 2006
I. Lesson Builder
� Lesson builder allows the instructor to quickly and easily build interactive
web-based courses as simply as using a word processor (Microsoft Word).
II. Installation
To install Lesson Builder complete the following steps:
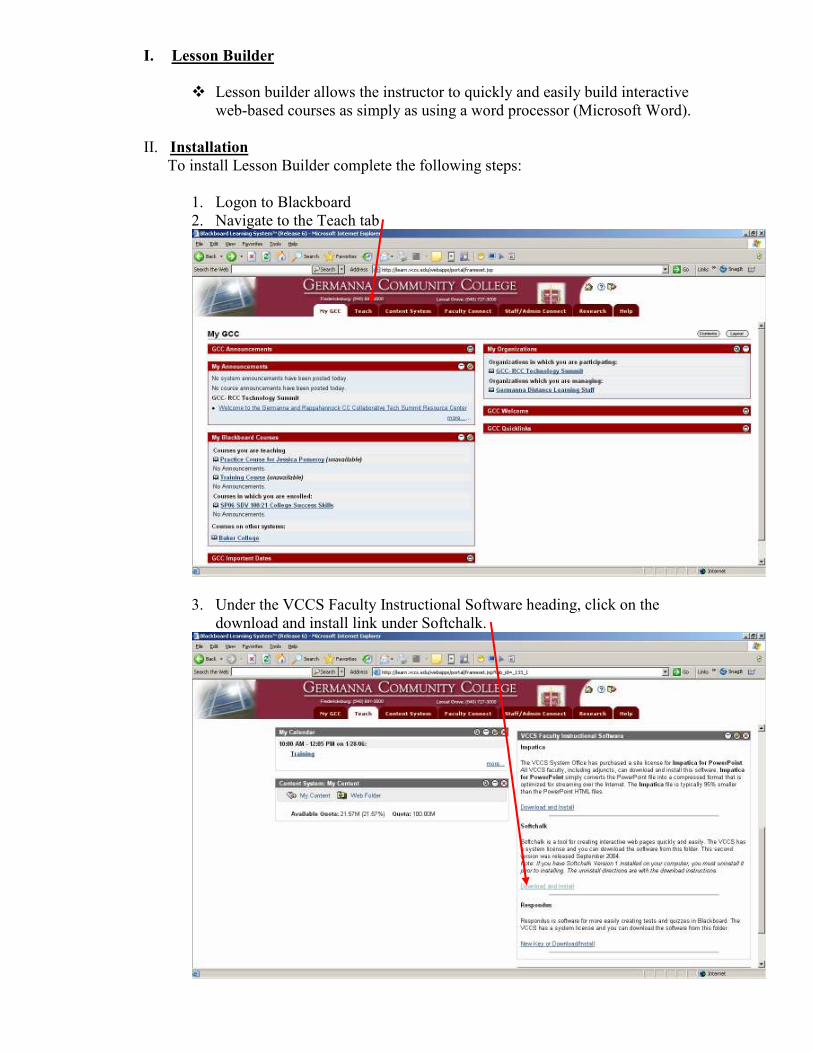
1. Logon to Blackboard
2. Navigate to the Teach tab
3. Under the VCCS Faculty Instructional Software heading, click on the
download and install link under Softchalk.
4. Select either Windows or Mac, depending on the type of computer you
have.
5. Follow the onscreen installation instructions.
III. Text
1. To insert text, just type anywhere on the screen you wish text to appear,
just like Microsoft Word.
2. The following are several text formatting options available. Please
highlight the text before you apply any of these options.
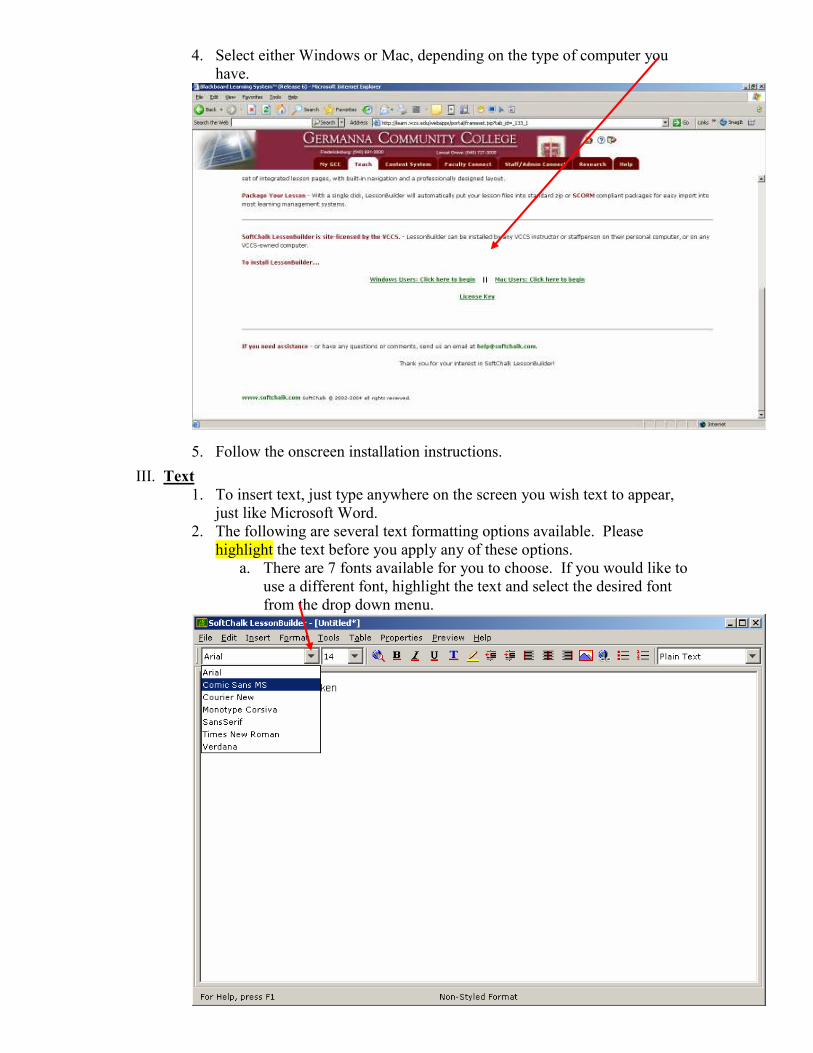
a. There are 7 fonts available for you to choose. If you would like to
use a different font, highlight the text and select the desired font
from the drop down menu.
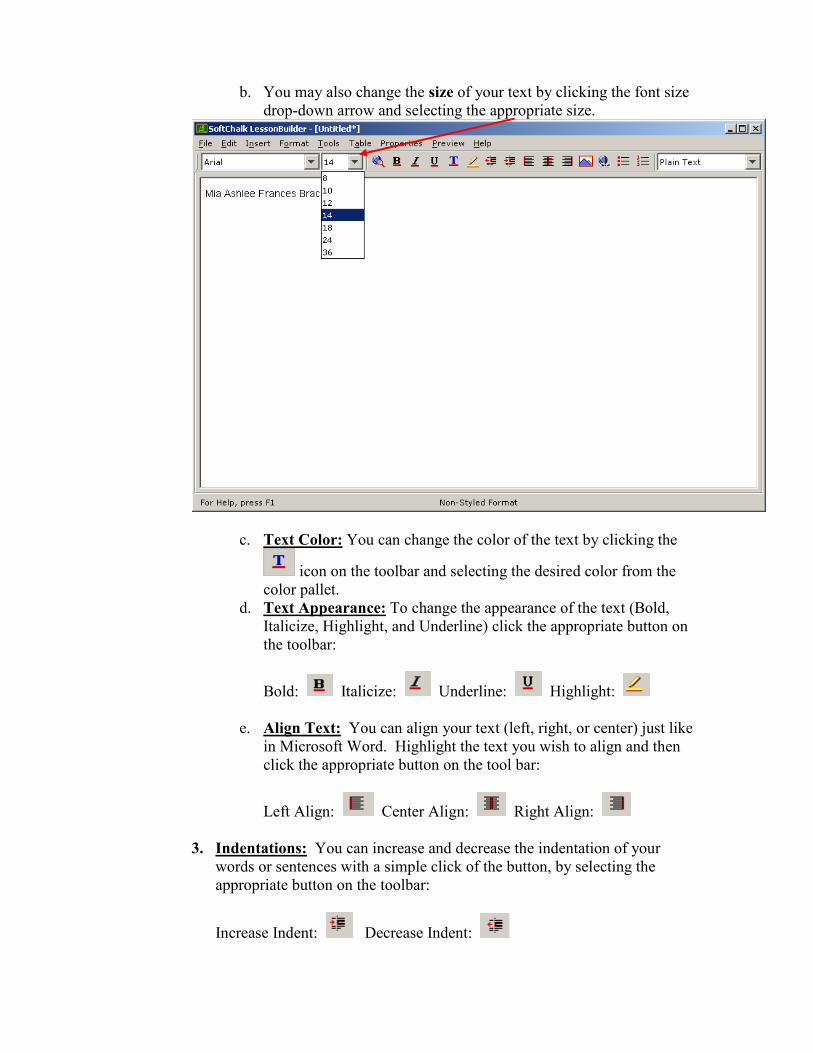
b. You may also change the size of your text by clicking the font size
drop-down arrow and selecting the appropriate size.
c. Text Color: You can change the color of the text by clicking the
icon on the toolbar and selecting the desired color from the
color pallet.
d. Text Appearance: To change the appearance of the text (Bold,
Italicize, Highlight, and Underline) click the appropriate button on
the toolbar:
Bold: Italicize: Underline: Highlight:
e. Align Text: You can align your text (left, right, or center) just like
in Microsoft Word. Highlight the text you wish to align and then
click the appropriate button on the tool bar:
Left Align: Center Align: Right Align:
3. Indentations: You can increase and decrease the indentation of your
words or sentences with a simple click of the button, by selecting the
appropriate button on the toolbar:
Increase Indent: Decrease Indent:

4. Bullets and Numeric Lists: To create a bulleted or numeric list, click on
the appropriate button on the toolbar:
Bulleted List: Numeric List:
IV. Images (Pictures and Graphics)
1) Inserting an Image: To insert a picture follow the steps below:
a) Click on the insert image button on the toolbar.
b) Click on the Select Image button
c) Browse for your file and double click the image you would like to
insert.
d) You should be back at the Insert Image window and you should
see a preview of the picture you are inserting. From here you have
several options.

i. Align Image: You can choose to left or right align the
image by clicking the align image drop down arrow and
selecting your choice.
ii. Border: To add a border to your image click the border
drop down arrow and select the appropriate setting.
Note: The borders are 0 – 5, zero being no border
and five being the thickest border available.
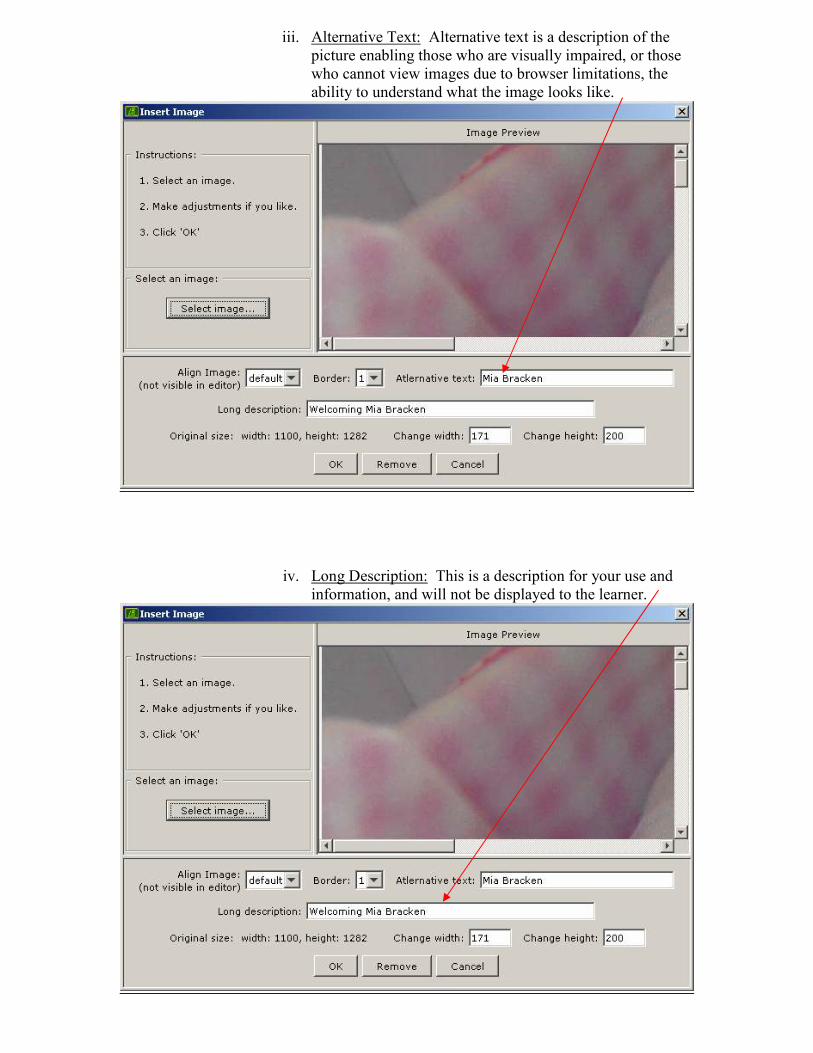
iii. Alternative Text: Alternative text is a description of the
picture enabling those who are visually impaired, or those
who cannot view images due to browser limitations, the
ability to understand what the image looks like.
iv. Long Description: This is a description for your use and
information, and will not be displayed to the learner.
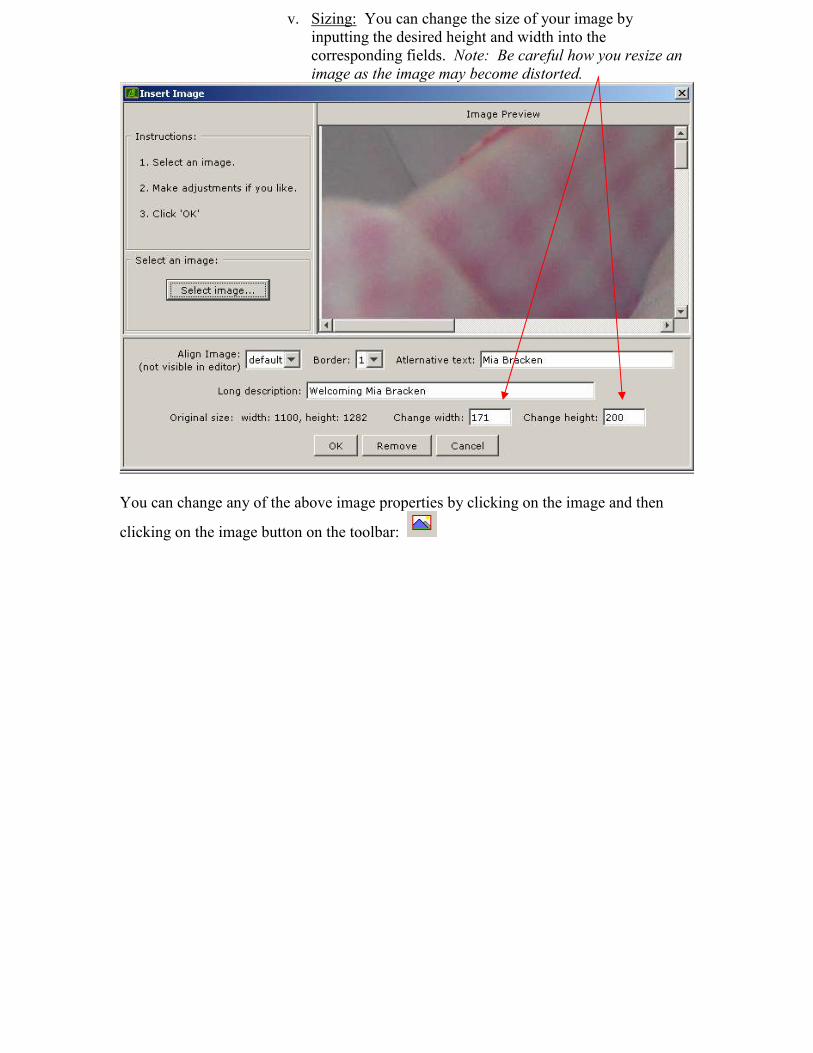
v. Sizing: You can change the size of your image by
inputting the desired height and width into the
corresponding fields. Note: Be careful how you resize an
image as the image may become distorted.
You can change any of the above image properties by clicking on the image and then
clicking on the image button on the toolbar:
V. Inserting a Hyperlink
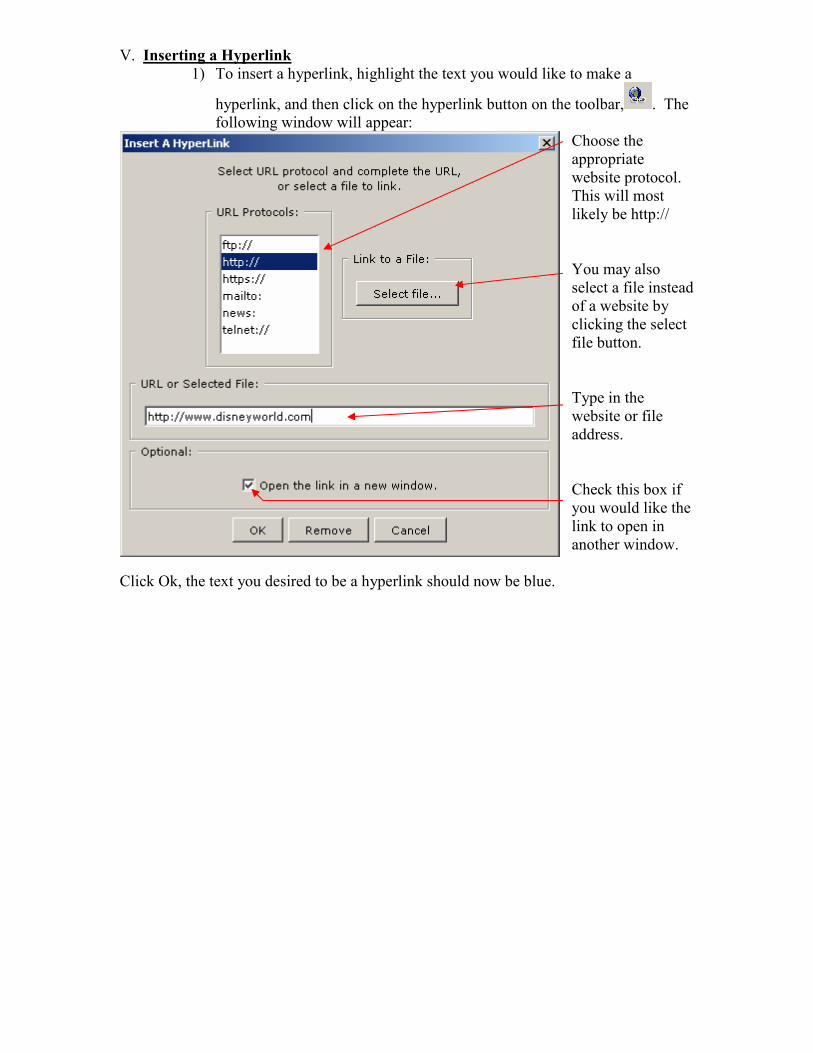
1) To insert a hyperlink, highlight the text you would like to make a
hyperlink, and then click on the hyperlink button on the toolbar, . The
following window will appear:
Choose the
appropriate
website protocol.
This will most
likely be http://
You may also
select a file instead
of a website by
clicking the select
file button.
Type in the
website or file
address.
Check this box if
you would like the
link to open in
another window.
Click Ok, the text you desired to be a hyperlink should now be blue.
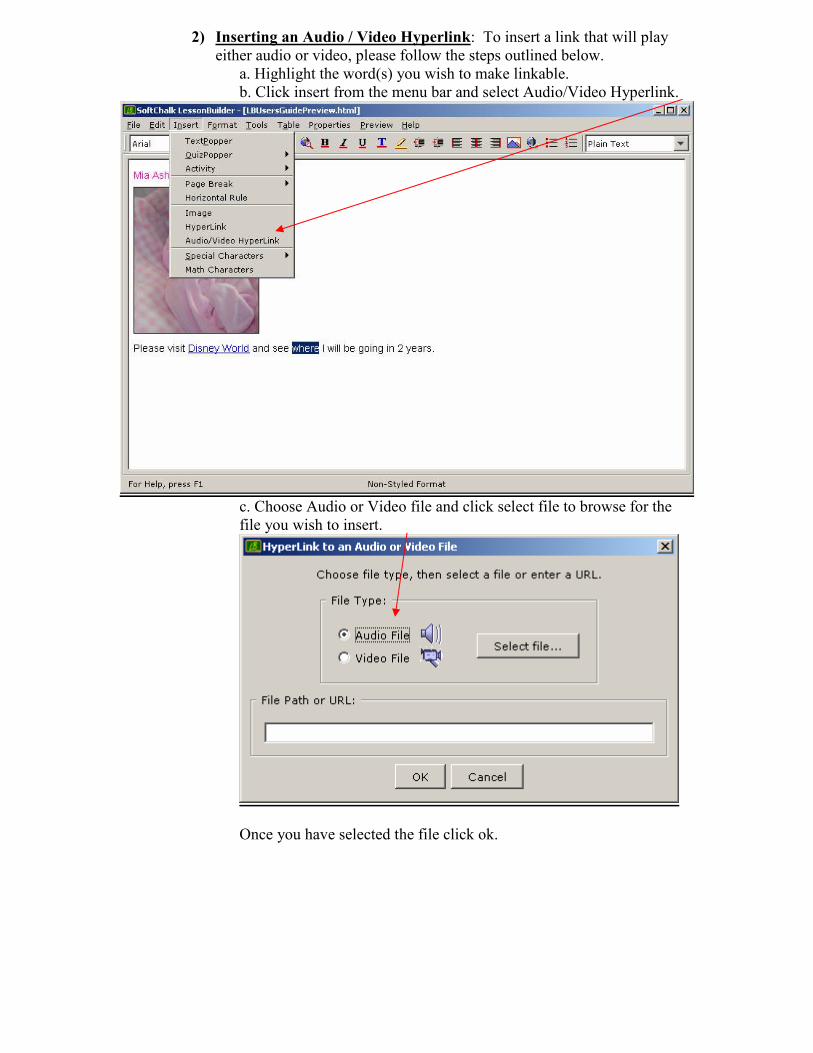
2) Inserting an Audio / Video Hyperlink: To insert a link that will play
either audio or video, please follow the steps outlined below.
a. Highlight the word(s) you wish to make linkable.
b. Click insert from the menu bar and select Audio/Video Hyperlink.
c. Choose Audio or Video file and click select file to browse for the
file you wish to insert.
Once you have selected the file click ok.
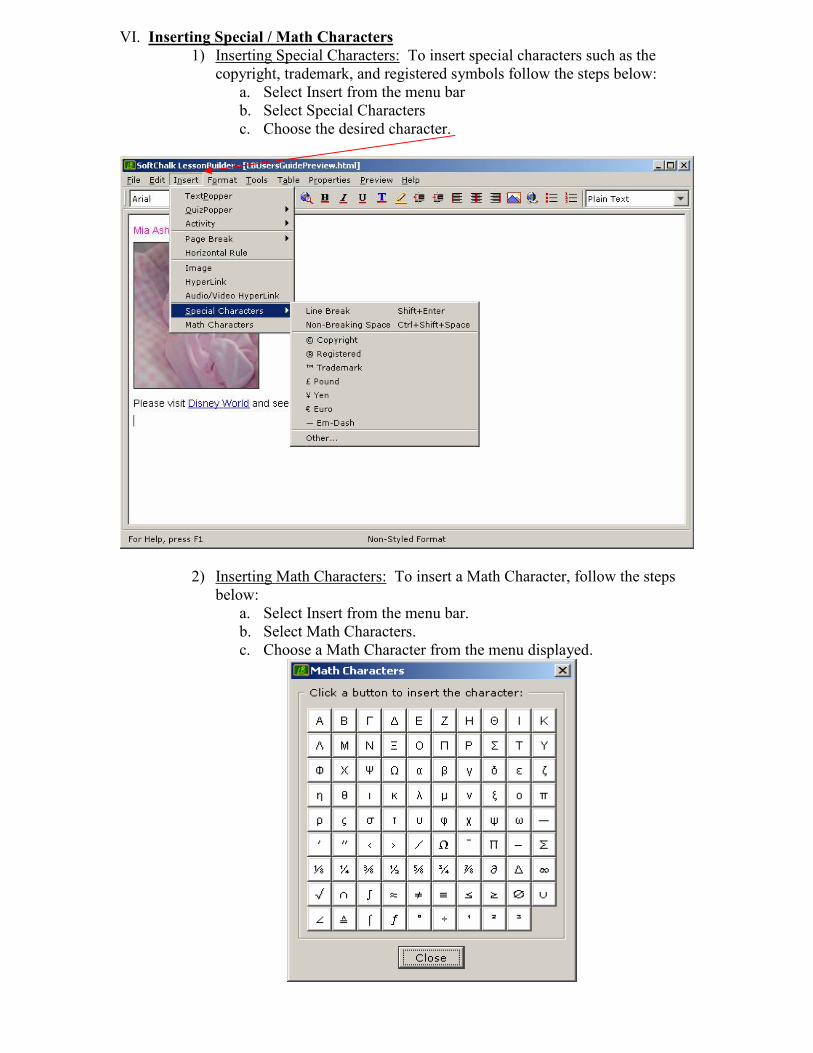
VI. Inserting Special / Math Characters
1) Inserting Special Characters: To insert special characters such as the
copyright, trademark, and registered symbols follow the steps below:
a. Select Insert from the menu bar
b. Select Special Characters
c. Choose the desired character.
2) Inserting Math Characters: To insert a Math Character, follow the steps
below:
a. Select Insert from the menu bar.
b. Select Math Characters.
c. Choose a Math Character from the menu displayed.

VII. Inserting Text Poppers: Text poppers allow you to add a popup window to your
lesson to add additional descriptions of information. They can be attached to a section of
text and they display on mouse over. To add a text popper follow the steps outlined
below:
1) Highlight the text you wish to add a popper to.
2) Select Insert from the menu bar.
3) Select Text Popper, and the window below should appear
You can also change the color and appearance of your text popper window
4) Click Ok.
VIII. Inserting Quiz Poppers: Quiz poppers allow the instructor to add a variety of quiz
questions, and assign points, to the lesson. They can be used to review key concepts or
insert comprehension questions into the lesson. To insert a quiz popper follow the steps
outlined below:
1) Select Insert from the menu bar.
2) Select Quiz Popper.
3) Choose the question type you desire (True/False, Multiple Choice, etc.)
4) Depending on the type of question you selected you will be brought to a
window to input the question and the correct answer. You can also click on
the feedback tab to give feedback, and the hint tab to display hints.
5) You may also change the color and caption of the quiz popper as well as set
the points per question by going to the options tab.

IX. Inserting an Activity: Activities are interactive units that are built into your lessons
to reinforce the key learning objectives. To insert an activity (Flash Cards, Drag and
Drop, Ordering, Labeling, Crosswords, and Word Search) follow the steps outlined
below:
1) Select Insert form the menu bar.
2) Select Activity
3) Choose the Activity you would like to insert into your lesson.
4) Depending on the type of activity you have selected, you will be brought to a
window to enter the data for your activity. You can also click on the options
tab in order to change the color of your activity window (from the student’s
perspective).
X. Inserting a Page Break: (creating multiple page lessons). You can create lessons
that are multiple pages by inserting page breaks; navigational links, for the student’s
perspective, will automatically appear in your lesson. To insert a page break, follow the
steps outlined below:
1) Place your cursor where you want the page break to appear.
2) Select Insert from the menu bar
3) Select Page Break
XI. Tools:
1) Spell Check: You can spell check your document by following the steps
outlined below:
a. Select Tools from the menu bar and click Spell Check
2) HTML Source : You can view the HTML source code by utilizing this
tool; you may also change the source code directly, if you desire. To view
and/or change the HTML source code, follow the steps outlined below:
a) Select Tools from the menu bar.
b) Click HTML source code, you will then be brought to a window to
view/modify the HTML source code.
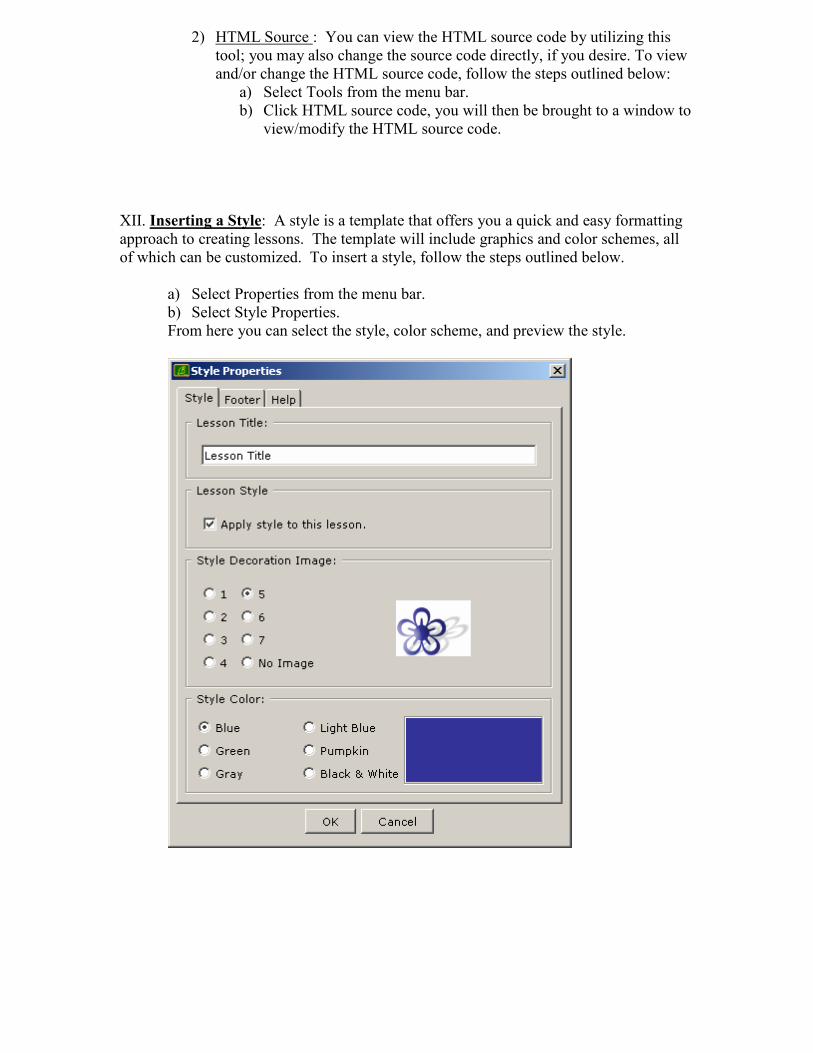
XII. Inserting a Style: A style is a template that offers you a quick and easy formatting
approach to creating lessons. The template will include graphics and color schemes, all
of which can be customized. To insert a style, follow the steps outlined below.
a) Select Properties from the menu bar.
b) Select Style Properties.
From here you can select the style, color scheme, and preview the style.
XIII. Inserting a Background Color: To insert a background color, follow the steps
outlined below.
a) Select Format from the menu bar.
b) Select Page Background Color.
c) Choose the color you wish to have as your background.
d) Click Ok.
Note: If you have a style applied to your lesson you cannot have a separate
background color.
XIV. Previewing your Work: If at anytime you would like to preview your lesson, just
click the Preview Icon on the toolbar: .
XV. Saving your Lesson: To save your lesson follow the steps outlined below:
a) Select File from the menu bar.
b) Select Save As
c) Browse to the location to save your work.
d) Name your lesson, in the file name box.
e) Click Save.

You can package your file as either a Zip or SCORM format. The primary difference is
that SCORM (Sharable Content Object Reference Model) is a set of technical standards
that have been developed with the specific purpose of enabling the reuse of web-based
learning content across multiple platforms. If your lesson is SCORM compliant then you
can use the content in any learning management system (like Blackboard) that supports
SCORM without having to make any modifications to the content. Additionally, the
SCORM standards allow your content to interface with specific components of the
learning management system, such as the grade book.
XVI. Packaging your Files to Upload to Blackboard
Without grading feature (Zip File Format): a) Create and Save the lesson.
b) Select File from the Menu bar
c) Select Package Lesson
d) Select Zip Format
Note: The file will be saved with a .zip extension
e) Browse to the location to save your file.
f) Name your lesson in the file name box.
g) Click Save.
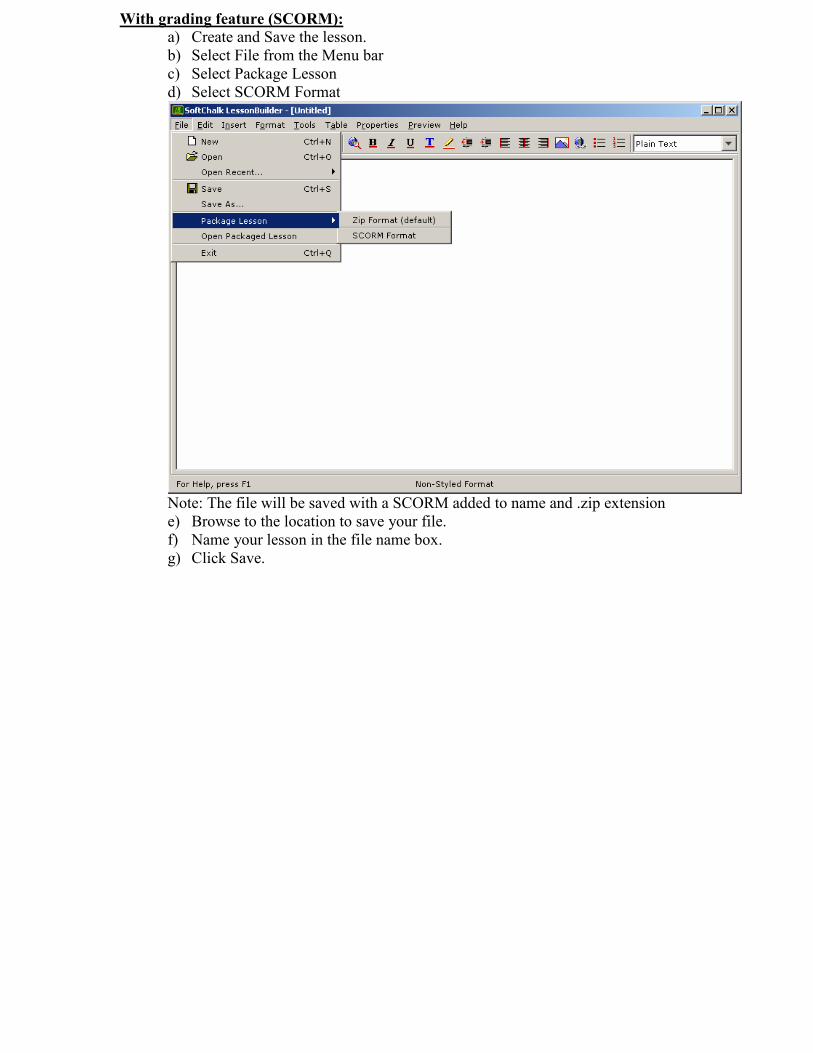
With grading feature (SCORM): a) Create and Save the lesson.
b) Select File from the Menu bar
c) Select Package Lesson
d) Select SCORM Format
Note: The file will be saved with a SCORM added to name and .zip extension
e) Browse to the location to save your file.
f) Name your lesson in the file name box.
g) Click Save.

XVII. Uploading your Lesson to Blackboard:
1) Login to Blackboard
2) Navigate to your course
3) Navigate to the control panel
4) Select the content area you wish to place the lesson in
5) Click Add Item
6) Add a Title and Description
7) Scroll to Section 2 (Content)
8) Click Browse and browse to your lesson builder .zip file you have previously
packaged and saved
9) Click Open
10) At “Name of Link to File:” Enter text that will become the link to the lesson
11) At Special Action, use the drop-down arrow and select “Unpackage this File”
12) Scroll to Section 3 (options): Choose any options you desire.
13) Scroll down and click Submit
14) At the Package Entry Point prompt:
a. From the listed files select the file with your original file name with
the .html extension.
b. Select Open in New Window, so that the lesson will open outside of
the Blackboard frameset.
c. Click Submit
15) Click OK
XVIII. Uploading your Lesson to Blackboard as SCORM Content (This allows any quiz poppers to be graded by Blackboard and creates a column in the grade book.)
a) Login to Blackboard
b) Navigate to your course
c) Navigate to the control panel
d) Select the content area you wish to place the lesson in
e) Use the Select dropdown menu on the upper right to select “SCORM Content”
and click Go.
f) Add a Title
g) Click Browse and browse to your Lesson Builder SCORM- compliant .zip file
you have previously packaged and saved (this file will have your file name
with _scorm.zip added to the end).
h) Click Open in the dialogue box.
i) Scroll to Section 2 (Options): Choose any options you desire. Choose Add to
grade book to add the gradebook column.
j) Scroll down and click Submit
k) At the Package Entry Point prompt:
a. From the listed files, select the file with your original file name with
the .html extension.
b. Select Open in New Window, so that the lesson will open outside of
the Blackboard frameset (this option is more user friendly from the
student’s perspective).
c. Click Submit
l) Click OK