state-approved curriculum nurse aide i training …• #1i application of body mechanics: duplicate...
TRANSCRIPT

State-approved Curriculum NURSE AIDE I TRAINING PROGRAM
July 2019 Module I
North Carolina Department of Health and Human Services Division of Health Service Regulation
Health Care Personnel Education and Credentialing Section NCDHHS is an equal opportunity provider and employer.
DN.C. Division
Hof Health S
Service R
Regulation

Module I
NCDHHS/DHSR/HCPEC|NAT I Curriculum – July 2019
1-I
Module I – Body Mechanics Teaching Guide
Objectives • Describe principles of body mechanics that help prevent injury • Identify measures to safely assist a falling person to the floor • Describe correct positioning of residents Supplies • 10-pound object to lift, such as a bag of potatoes (Teaching Tip #3I & Activity
#1I) • Computer paper and scissors (Teaching Tip #6I) • Mannequin in a bed (Activity #1I) • Fun activity supplies for station #4 – yoga position sheet, Hokey Pokey song,
hula hoop, aerobics exercise DVD, stretches resource sheet (Activity #1I) Advance Preparation – In General • Review curriculum and presentation materials • Add examples or comments to Notes Section • Set up computer/projector Advance Preparation – Teaching Tips • Teaching Tip #6I Measuring Bed Angles Using a Protractor: Duplicate a
paper protractor for each student. Cut the protractors out beforehand. Encourage the students to locate a variety of angles (0o, 45o, 60o, and 90o) on their protractors after you state which way the head of the bed is located for each angle.
Advance Preparation – Activities • #1I Application of Body Mechanics: Duplicate puzzles for each student.
Print instruction cards using card stock paper or computer paper that you will laminate. Decide how to pair up students and think about special situations (odd number of students, whether you want to set up additional stations beyond the 5 specified). Think about and plan Station #4 of Activity #1I. Set up 5 stations, in the lab, as directed in the instructor guide. Think about how you are going to notify students that it is time to move on to the next station.

Module I
NCDHHS/DHSR/HCPEC|NAT I Curriculum – July 2019
2-I
Module I – Body Mechanics Definition List
Alignment (posture) – how the head, trunk, arms, and legs are aligned with one another, when the back is straight Angle – when two lines meet Base of Support – foundation that supports an object Body Mechanics – efficient and safe use of the body by the coordination of body alignment, balance, and movement Center of Gravity – point where most weight is concentrated for an object or body Fowler’s Position – resident reclined in a sitting position, at 45 to 60 degrees Full-sling Mechanical Lift – mechanical device that uses a sling and used to transfer residents who cannot assist or are too heavy for the staff to transfer themselves High Fowler’s Position – resident sitting up almost straight, at 60 to 90 degrees Lateral Position – resident positioned on right or left Logrolling – turning the resident as a unit, while maintaining the head, back, and legs in a straight line Mechanical Lift – mechanical devices used to transfer residents from one area to another, such as to and from bed, to and from chairs Prone Position – resident positioned on abdomen Protractor – a measurement device used to measure angles Sims Position – resident positioned in left side lying position Stand-assist lift – mechanical device used to transfer residents, who can bear some weight, follow directions, can sit on the side of the bed, and can bend hips, knees, and ankles Supine Position – resident positioned flat on back

Module I
NCDHHS/DHSR/HCPEC|NAT I Curriculum – July 2019
3-I
Module I – Body Mechanics
(S-1) Title Slide (S-2) Objectives 1. Describe principles of body mechanics that help prevent injury. 2. Identify measures to safely assist a falling person to the floor. 3. Describe correct positioning of residents.
Content Notes (S-3) Body Mechanics • Efficient and safe use of the body by the coordination of
body alignment, balance, and movement
(S-4) Body Mechanics – Importance • Due to nature of their duties, nurse aides are subject to
back and other injuries to the body so practicing correct body mechanics is critically important
(S-5) Body Mechanics – Importance • Maximizes strength, minimizes fatigue, avoids muscle
strain and injury, and assures personal and resident safety
• Job requirements for nurse aide include lifting, moving and carrying objects
• Reduces costs to resident and facility • Reduces employee absences due to back injuries • Reduces liability for the facility due to workman’s
compensation • By not using proper body mechanics, even picking up
piece of paper from the floor can cause back injury
(S-6) Body Mechanics – ABC’s • Follow the ABC’s of correct body mechanics
o Alignment o Base of Support o Coordination
(S-7) ABC’s of Correct Body Mechanics – Alignment • Also known as posture • How the head, trunk, arms, and legs are aligned with one
another, when the back is straight
(S-8) ABC’s of Correct Body Mechanics – Alignment • Correct body alignment allows the body to move and
function efficiently and with strength • When you stand up straight, a line can be drawn straight
down through the center of your body and the two sides of body are mirror images of each other, with body parts lined up naturally, arms at the side, palms directed forward, and feet pointed forward and slightly apart (also called anatomic position)

Module I
NCDHHS/DHSR/HCPEC|NAT I Curriculum – July 2019
4-I
Module I – Body Mechanics • Important to maintain correct body alignment when sitting
and lying down (S-9) ABC’s of Correct Body Mechanics – Alignment • Maintain correct body alignment when lifting/carrying an
object o Keep object close to the body o Point feet and body in direction you are moving o Do not twist at waist
(S-10) ABC’s of Correct Body Mechanics – Base of Support • Foundation that supports an object • Good base of support needed for balance • Wide base of support more stable than narrow base of
support • For a person, the feet are the base of support (legs
shoulder-length apart is ideal)
TEACHING TIP #1I Base of Support Ask students to stand up at their desks: First, have students stand on one foot. Ask students: • How stable are you? Second, have students stand with both feet together. Ask students: • How stable do you feel? Third, have students stand with both feet shoulder length apart. Ask students: • How stable do you feel now? Reinforce the fact that for a person, the feet are the base of support and when feet and legs are shoulder-length apart, base of support is ideal
(S-11) ABC’s of Correct Body Mechanics – Center of Gravity • Point where most weight is concentrated for an object or
body • For a standing person, pelvis is center of gravity • A low center of gravity gives you a more stable base of
support and balance is increased
(S-12) ABC’s of Correct Body Mechanics – Center of Gravity • By bending knees to lift an object, instead of at the waist

Module I
NCDHHS/DHSR/HCPEC|NAT I Curriculum – July 2019
5-I
Module I – Body Mechanics o Center of gravity lowered o Stability increases o Less likely to strain muscles
• When moving or transferring resident, center of gravity includes the resident, so resident needs to be close to your body as possible
(S-13) Points to Remember When Lifting • When given a choice, push or slide objects rather than
lifting them • Use large muscles of upper arms and thighs to lift • Keep movements smooth when lifting and do not twist or
make jerky movements • Face object or person when moving • Use both arms and hands when lifting, pushing or
carrying objects
TEACHING TIP #2I Everyday Body Mechanics Ask students: • Think of ways you can use body mechanics concepts in
everyday life at home
(S-14) Body Mechanics – Changing Linen • Raise bed to about waist height when changing linen
(S-15) Lifting an Object off the Floor • Bend hips/knees and get close to object before lifting • Face object • Grip object firmly with both hands
S-16) Lifting an Object off the Floor • Move smoothly and not jerky • Lift by pushing up with strong leg muscles • Use wide base of support Get help when needed
(S-17) A Resident is About to Fall • Simply control direction of fall by easing resident to floor,
protecting head • Keep resident still until nurse can check for injuries • DO NOT try to hold the resident up because it can hurt
nurse aide and resident • DO NOT try to hold the resident up because the nurse
aide may lose balance and both land on floor
TEACHING TIP #3I Demonstrate Demonstrate how to lift a 10-pound object (for example, a

Module I
NCDHHS/DHSR/HCPEC|NAT I Curriculum – July 2019
6-I
Module I – Body Mechanics bag of potatoes) using good body mechanics. Demonstrate how to correctly handle a resident who is about to fall, using a student volunteer. TEACHING TIP #4I Ask students: • Provide examples of poor body mechanics that you have
observed. (S-18) Angles • An angle is formed when 2 lines meet • Angles are measured in degrees or abbreviated, o • The bed frame and head of bed are the 2 lines used to
determine the angle of the bed
(S-19) Measuring Bed Angles • Angles used to describe positions in a bed are measured
in degrees ranging from 0o – 90o o 0o = supine and prone positions (or a flat bed) o 45o – 60o = Fowler’s position o 60o – 90o = High Fowler’s position
• As the head of the bed is being raised, the angle area is the area between the bottom of the mattress at the head end of the bed and the bed frame
• As the head of the bed is raised, the angle increases
TEACHING TIP #5I Location of the Bed Angle After walking over to the bed, point out the area of the bed used to determine bed angle. As you raise the head of the bed, show the students how the bed angle is increasing; as you lower the head of the bed, show the students how the bed angle is decreasing.
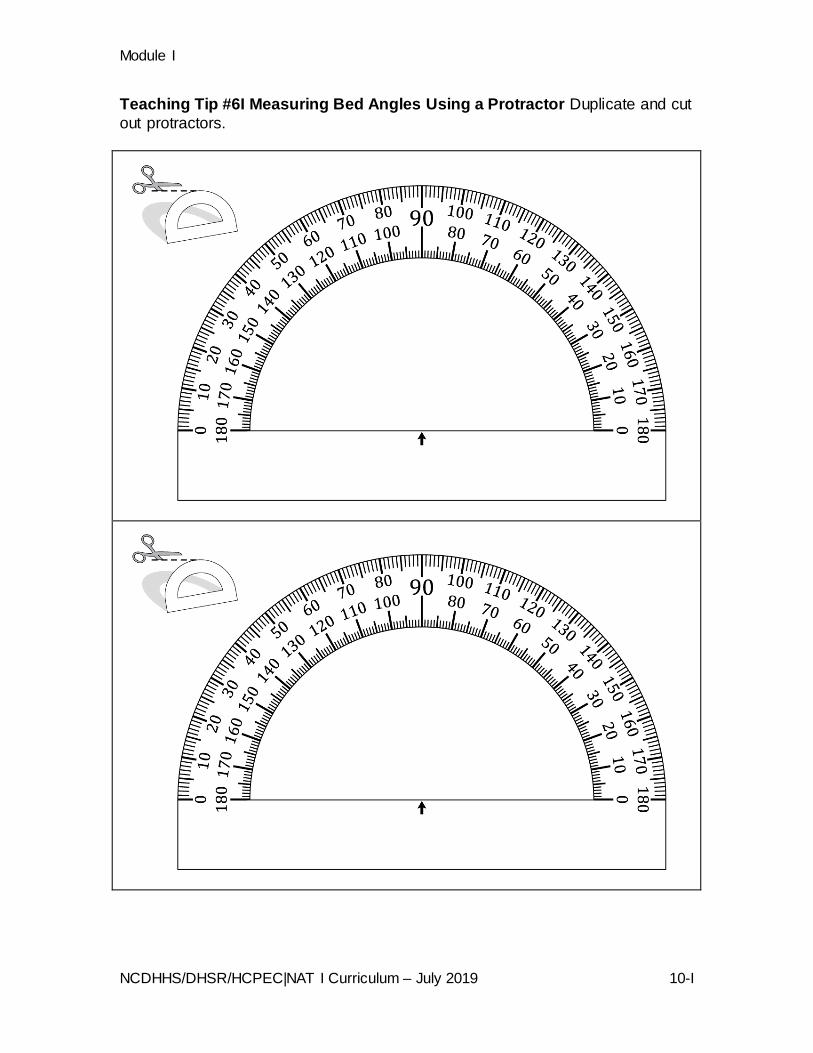
(S-20) Measuring Bed Angles • A protractor is a measurement device that is used to
measure angles o If the head of the bed is facing the right (you’re right),
use the bottom numbers to illustrate angles of bed positions
o If the head of the bed is facing the left (you’re left), use the top numbers to illustrate angles of bed positions
Teaching Tip #6I Measuring Bed Angles Using a Protractor

Module I
NCDHHS/DHSR/HCPEC|NAT I Curriculum – July 2019
7-I
Module I – Body Mechanics Duplicate a paper protractor for each student. Cut the protractors out beforehand. Encourage the students to locate a variety of angles (0o, 45o, 60o, and 90o) on their protractors after you state which way the head of the bed is located for each angle (S-21) Positioning the Resident • Resident must always be properly positioned and
correctly aligned
(S-22) Positioning the Resident – Importance • Regular position changes and correct alignment
o Promote well-being and comfort o Promote easier breathing o Promote circulation o Prevent pressure ulcers and contractures
(S-23) Positioning the Resident • Reposition in bed or chair at least every two hours (or
more frequently per care plan) • Use good body mechanics • Ask a co-worker for assistance as needed • Use pillows for support and correct alignment • Understand correct placement for variety of positions
while resident is in bed
(S-24) Positioning the Resident (Supine) • Lies flat on back with arms and hands at the side • Use pillows for support under the head and shoulders to
maintain correct body position • Use pillows, rolled towels or washcloths to support arms
or hands • To create floating (or elevated) heels, place pillow under
calves • Place pillows or a padded board (footboard) against the
feet to keep the feet positioned correctly • Remember – facing UP (sUPine)
(S-25) Positioning the Resident (Prone) • Lying on abdomen • Not a comfortable position for many people • Never leave resident in prone position very long
(S-26) Positioning the Resident (Fowler’s) • Reclined sitting position • 45 to 60 degrees
(S-27) Positioning the Resident (High Fowler’s) • Sitting up almost straight • 60 to 90 degrees
(S-28) Positioning the Resident (Lateral)
Module I
NCDHHS/DHSR/HCPEC|NAT I Curriculum – July 2019
8-I
Module I – Body Mechanics • Lying on right or left-side (S-29) Positioning the Resident (Sims) • Left side-lying position
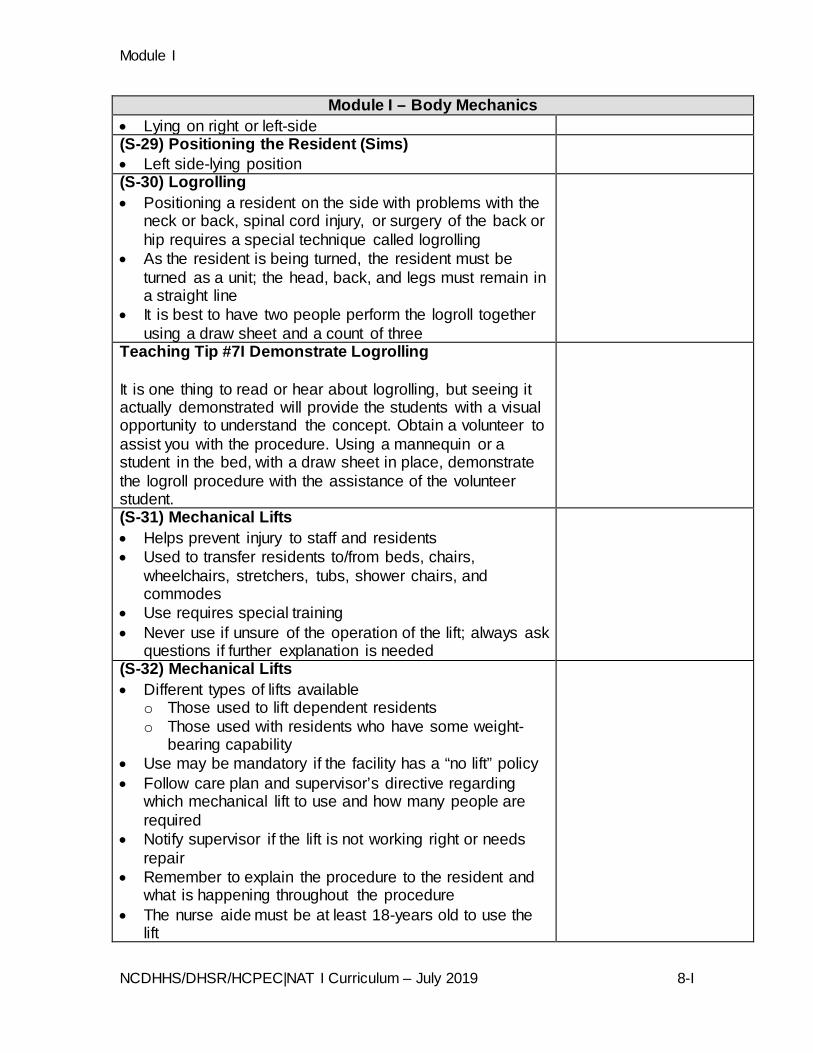
(S-30) Logrolling • Positioning a resident on the side with problems with the
neck or back, spinal cord injury, or surgery of the back or hip requires a special technique called logrolling
• As the resident is being turned, the resident must be turned as a unit; the head, back, and legs must remain in a straight line
• It is best to have two people perform the logroll together using a draw sheet and a count of three
Teaching Tip #7I Demonstrate Logrolling It is one thing to read or hear about logrolling, but seeing it actually demonstrated will provide the students with a visual opportunity to understand the concept. Obtain a volunteer to assist you with the procedure. Using a mannequin or a student in the bed, with a draw sheet in place, demonstrate the logroll procedure with the assistance of the volunteer student.
(S-31) Mechanical Lifts • Helps prevent injury to staff and residents • Used to transfer residents to/from beds, chairs,
wheelchairs, stretchers, tubs, shower chairs, and commodes
• Use requires special training • Never use if unsure of the operation of the lift; always ask
questions if further explanation is needed
(S-32) Mechanical Lifts • Different types of lifts available
o Those used to lift dependent residents o Those used with residents who have some weight-
bearing capability • Use may be mandatory if the facility has a “no lift” policy • Follow care plan and supervisor’s directive regarding
which mechanical lift to use and how many people are required
• Notify supervisor if the lift is not working right or needs repair
• Remember to explain the procedure to the resident and what is happening throughout the procedure
• The nurse aide must be at least 18-years old to use the lift

Module I
NCDHHS/DHSR/HCPEC|NAT I Curriculum – July 2019
9-I
Module I – Body Mechanics • Realize that just because the nurse aide knows how to
use one type of lift does not mean the nurse aide knows how to use all types of lifts
(S-33) Mechanical Lifts • Realize that just because the nurse aide knows how to
use one type of lift does not mean the nurse aide knows how to use all types of lifts
(S-34) Full-sling Mechanical Lift • Used for residents who
o Cannot assist during transfers o Are heavy o Have physical limits which do not allow for other
methods of transfer • Before use, nurse aide needs to know the following from
the care plan or supervisor o Resident’s level of function or dependency o What type and size of sling to use
(S-35) Stand-assist Lift • Used when resident can
o Bear some weight on legs, is able to stand, has some arm strength
o Can bend hips, knees, and ankles o Can sit on side of bed o Can follow directions
ACTIVITY #1I: Application of Body Mechanics (Group)
Refer to Instructor’s Guide.
Module I
NCDHHS/DHSR/HCPEC|NAT I Curriculum – July 2019
10-I
Teaching Tip #6I Measuring Bed Angles Using a Protractor Duplicate and cut out protractors.

Module I
NCDHHS/DHSR/HCPEC|NAT I Curriculum – July 2019
11-I
Instructor’s Guide to Activity #1I Application of Body Mechanics
Preparation Before class begins, create instruction cards using card stock paper or laminated computer paper. Set up 5 stations, in the lab, in the following manner: Station #1 – Lifting a 10-pound Object For station #1, have the following items available for student use: laminated/card stock instruction card #1; a 10-pound bag of potatoes or a 10-pound something that the student can lift. Station #2 – Positioning a Resident For station #2, have the following items available for student use: laminated/card stock instruction card #2; mannequin in a bed with side rails up. Station #3 – Assisting Resident to the Floor if the Resident Begins to Fall For station #3, have the following items available for student use: laminated/card stock instruction card #3. Station #4 – Your Choice of a Fun Station [Suggestions: Basic Yoga Positions, Basic Stretches, Hula Hoop, Hokey Pokey Song) For station #4, have the following items available for student use: laminated/card stock instruction card #4; possibly a hula hoop or resource card Station #5 – Body Mechanics Puzzle For station #5, have the following items available for student use: laminated/card stock instruction card #5 at a table with at least 3 pencils; and Body Mechanics Puzzles for each student to solve. This station is more about working as a team and how the students approach working out the puzzles than learning vocabulary. Instructions to the Students After putting students in groups of two’s or three’s (depending on numbers of students), point out the 5 stations that each pair will be rotating through. Explain that each group of students will go to a station, read the instruction card, and follow the instructions on the card. In each pair, the students will take turns being the observer and the performer, at each station. The students will rotate to the next station when the instructor rings a bell or yells out, “new station.”

Module I
NCDHHS/DHSR/HCPEC|NAT I Curriculum – July 2019
12-I
Special Situations If you have an odd number of students, you could place students in groups of two’s or three’s. If you have more than ten students, you can duplicate some of the easier stations in order to accommodate larger numbers of students. If you have multiple beds and mannequins, you can set up multiple positioning stations (Station #2). Activity Follow-up Discussion Questions After students have completed all stations, bring everyone together for discussion. Suggested questions are listed below. You may want to add additional questions to facilitate discussion. • How did it feel to do these situations in the different stations? • Which situation was the most difficult for you to do? • Which situation was the easiest for you to do? • Which situation was the most fun for you to do? • How did your group tackle Station #5 – the puzzles station? Did members of
your group do the two (2) puzzles together; or did the members split the work up, one do the first puzzle, while the other did the second puzzle and then share answers; did all members of the group work on each puzzle at the beginning together, or did members solve the same puzzle at the same time, but start at different ends of the puzzle, meet in the middle, and then share answers? Did you use the word bank as you were solving the puzzles or did you only use the word bank when you got stuck? Do you think you could finish solving the puzzles quicker by yourself or as part of a team? What does this station tell you about teamwork and working as a team?
• How important is good body mechanics for a nurse aide? • Do any of you routinely go to yoga class, do stretches, or exercise?

Module I
NCDHHS/DHSR/HCPEC|NAT I Curriculum – July 2019
13-I
Station #1 – Lifting a 10-pound Object For station #1: Student A: • Using correct body mechanics, lift the 10-pound object off the floor and carry it approximately 6 feet, placing it back on the floor.
Student B: • Observe Student A and determine how closely he/she followed correct principles of body mechanics.
SWITCH ROLES

Module I
NCDHHS/DHSR/HCPEC|NAT I Curriculum – July 2019
14-I
Station #2 – Positioning a Resident For station #2: Student A and Student B: As a team and using correct body mechanics and pillows, correctly position the mannequin in the prone, supine, Fowler’s, high Fowler’s, side-lying, and Sim’s positions.

Module I
NCDHHS/DHSR/HCPEC|NAT I Curriculum – July 2019
15-I
Station #3 – Assisting Resident to the Floor if the Resident Begins to Fall
For station #3: Resident: • Standing beside the nurse aide, state, “I feel dizzy,” and then begin to fall Nurse aide: • Standing beside the resident, assist resident to the floor when resident states, “I feel dizzy.”
SWITCH ROLES

Module I
NCDHHS/DHSR/HCPEC|NAT I Curriculum – July 2019
16-I
Station #4 – Fun Station
For station #4: Student A and Student B: • Follow directives of instructor. SWITCH ROLES, if directed

Module I
NCDHHS/DHSR/HCPEC|NAT I Curriculum – July 2019
17-I
Station #5 – Puzzle Time
For station #5: Student A and Student B: • Working together, complete the word search and word scramble puzzles.
Module I
NCDHHS/DHSR/HCPEC|NAT I Curriculum – July 2019
18-I
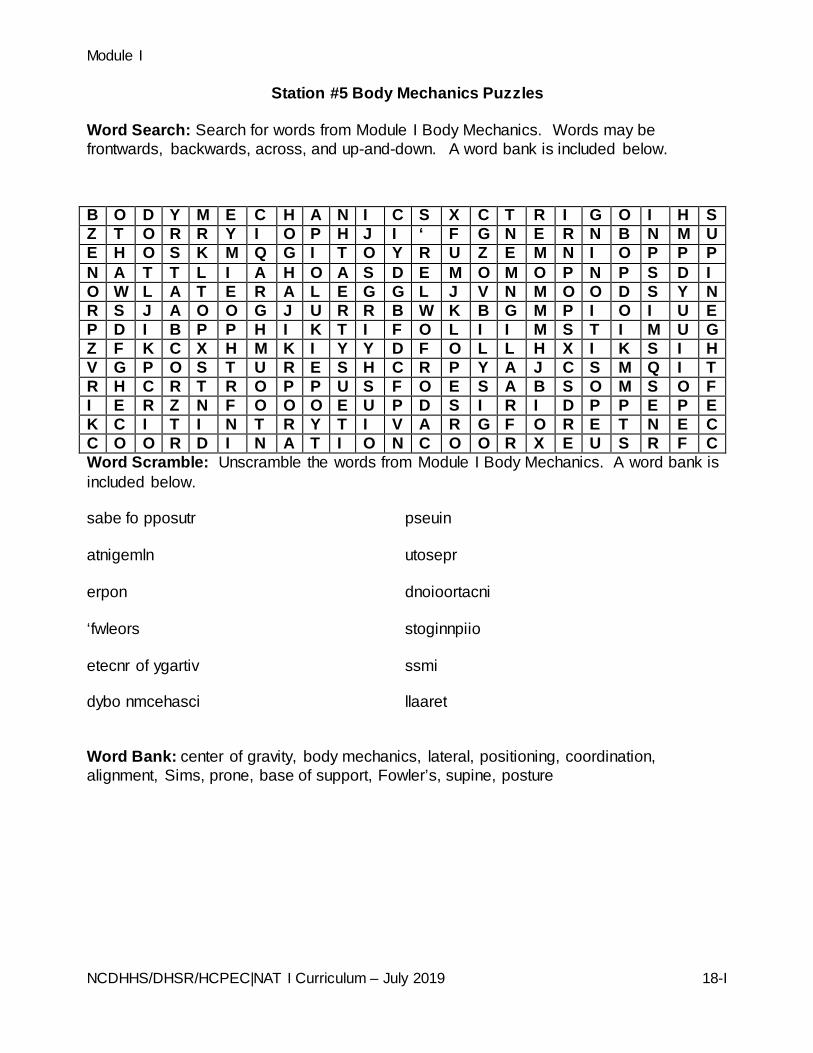
Station #5 Body Mechanics Puzzles
Word Search: Search for words from Module I Body Mechanics. Words may be frontwards, backwards, across, and up-and-down. A word bank is included below.
Word Scramble: Unscramble the words from Module I Body Mechanics. A word bank is included below. sabe fo pposutr pseuin
atnigemln utosepr
erpon
dnoioortacni
‘fwleors
stoginnpiio
etecnr of ygartiv
ssmi
dybo nmcehasci
llaaret
Word Bank: center of gravity, body mechanics, lateral, positioning, coordination, alignment, Sims, prone, base of support, Fowler’s, supine, posture
B O D Y M E C H A N I C S X C T R I G O I H S Z T O R R Y I O P H J I ‘ F G N E R N B N M U E H O S K M Q G I T O Y R U Z E M N I O P P P N A T T L I A H O A S D E M O M O P N P S D I O W L A T E R A L E G G L J V N M O O D S Y N R S J A O O G J U R R B W K B G M P I O I U E P D I B P P H I K T I F O L I I M S T I M U G Z F K C X H M K I Y Y D F O L L H X I K S I H V G P O S T U R E S H C R P Y A J C S M Q I T R H C R T R O P P U S F O E S A B S O M S O F I E R Z N F O O O E U P D S I R I D P P E P E K C I T I N T R Y T I V A R G F O R E T N E C C O O R D I N A T I O N C O O R X E U S R F C

Module I
NCDHHS/DHSR/HCPEC|NAT I Curriculum – July 2019
19-I
Station #5 Body Mechanics Puzzles Answers
Word Search: Search for words from Module I Body Mechanics. Words may be frontwards, backwards, across, and up-and-down. A word bank is included below. B O D Y M E C H A N I C S X C T R I G O I H S Z T O R R Y I O P H J I ‘ F G N E R N B N M U E H O S K M Q G I T O Y R U Z E M N I O P P P N A T T L I A H O A S D E M O M O P N P S D I O W L A T E R A L E G G L J V N M O O D S Y N R S J A O O G J U R R B W K B G M P I O I U E P D I B P P H I K T I F O L I I M S T I M U G Z F K C X H M K I Y Y D F O L L H X I K S I H V G P O S T U R E S H C R P Y A J C S M Q I T R H C R T R O P P U S F O E S A B S O M S O F I E R Z N F O O O E U P D S I R I D P P E P E K C I T I N T R Y T I V A R G F O R E T N E C Word Scramble: Unscramble the words from Module I Body Mechanics. A word bank is included below. sabe fo pposutr base of support
pseuin supine
atnigemln alignment
utosepr posture
erpon prone
dnoioortacni coordination
‘fwleors Fowler’s
stoginnpiio positioning
etecnr of ygartiv center of gravity
ssmi Sims
dybo nmcehasci body mechanics
llaaret lateral
Word Bank: center of gravity, body mechanics, lateral, positioning, coordination, alignment, Sims, prone, base of support, Fowler’s, supine, posture