steam distillation manual nc-13223 - the science …€¦ · supply to the graham condenser. ˛˛...
TRANSCRIPT
SAFETY FIRST
This apparatus uses a heat source (optionally
available) to heat the contents of the Boiling Flask.
Use caution when handling to prevent burns!
Protect eyes and skin from hot gasses and broken
or chipped glassware.
Be sure all components are properly set up
(Refer to Figure 1). This apparatus is an open
system so pressure is relieved at the drip end of
the condenser. (Make sure you leave a small gap
between the drip tip and the receiving flask.)
Material may crystallize in the condenser, which,
over time, could block steam causing a dangerous
build up of pressure and possible explosion. When
finished with distillation, allow system to cool, then
drain the condenser of cooling water. Always work
with clean glassware.
Use caution when handling glassware,
especially when cleaning. Pad your sink with a
towel or rubber mat to help prevent accidental
breakage.
Ground glass joints can sometimes become
stuck together. Use silicone vacuum grease
(optionally available) to prevent “frozen” joints.
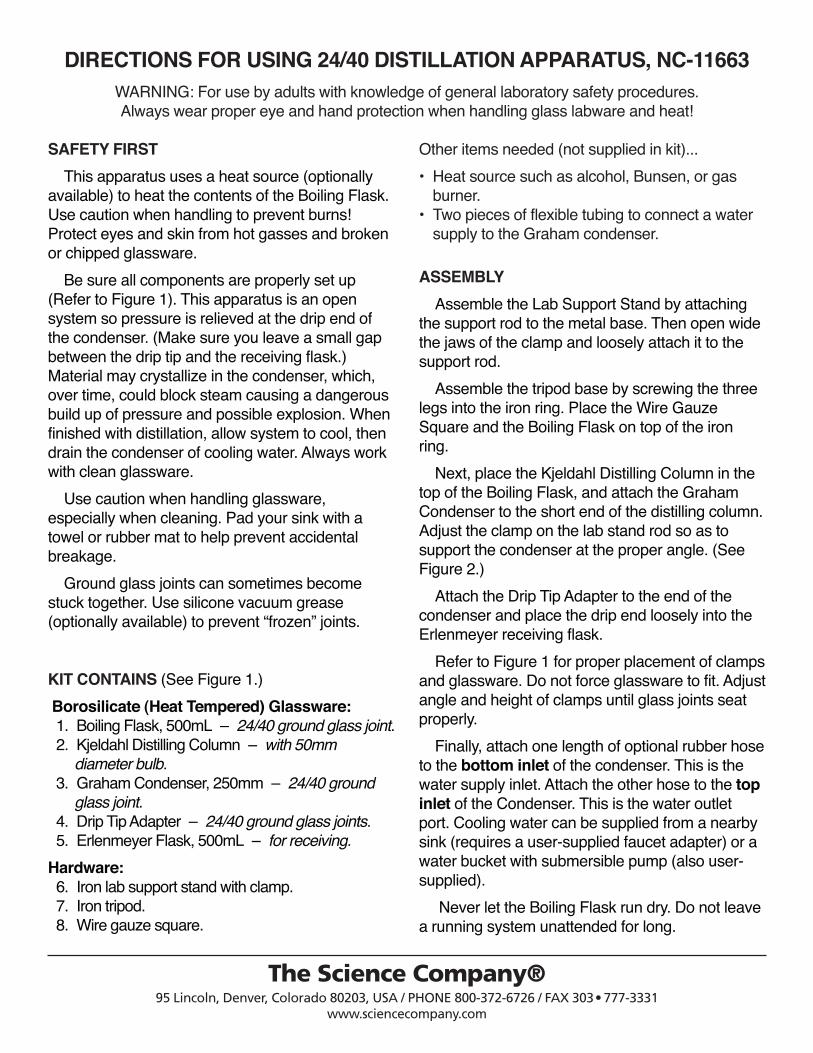
KIT CONTAINS (See Figure 1.)
Borosilicate (Heat Tempered) Glassware:
1. Boiling Flask, 500mL – 24/40 ground glass joint.
2. Kjeldahl Distilling Column – with 50mm
diameter bulb.
3. Graham Condenser, 250mm – 24/40 ground
glass joint.
4. Drip Tip Adapter – 24/40 ground glass joints.
5. Erlenmeyer Flask, 500mL – for receiving.
Hardware:
6. Iron lab support stand with clamp.
7. Iron tripod.
8. Wire gauze square.
Other items needed (not supplied in kit)...
• Heat source such as alcohol, Bunsen, or gas
burner.
• Two pieces of flexible tubing to connect a water
supply to the Graham condenser.
ASSEMBLY
Assemble the Lab Support Stand by attaching
the support rod to the metal base. Then open wide
the jaws of the clamp and loosely attach it to the
support rod.
Assemble the tripod base by screwing the three
legs into the iron ring. Place the Wire Gauze
Square and the Boiling Flask on top of the iron
ring.
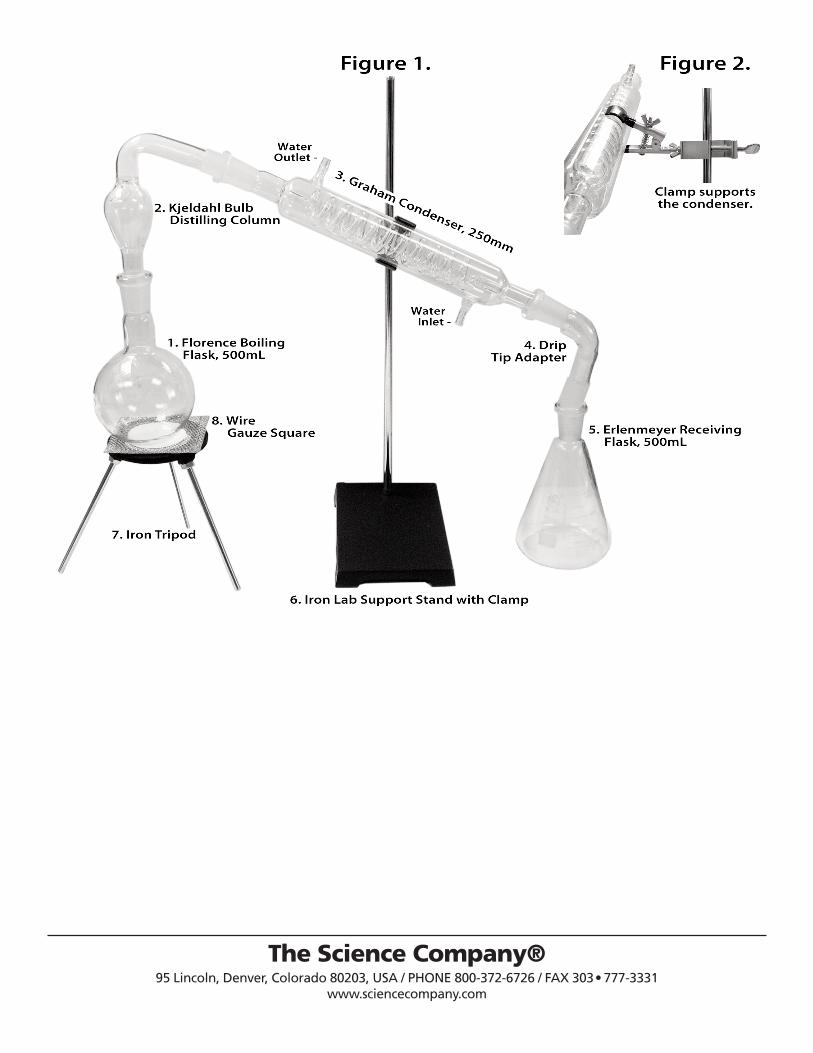
Next, place the Kjeldahl Distilling Column in the
top of the Boiling Flask, and attach the Graham
Condenser to the short end of the distilling column.
Adjust the clamp on the lab stand rod so as to
support the condenser at the proper angle. (See
Figure 2.)
Attach the Drip Tip Adapter to the end of the
condenser and place the drip end loosely into the
Erlenmeyer receiving flask.
Refer to Figure 1 for proper placement of clamps
and glassware. Do not force glassware to fit. Adjust
angle and height of clamps until glass joints seat
properly.
Finally, attach one length of optional rubber hose
to the bottom inlet of the condenser. This is the
water supply inlet. Attach the other hose to the top
inlet of the Condenser. This is the water outlet
port. Cooling water can be supplied from a nearby
sink (requires a user-supplied faucet adapter) or a
water bucket with submersible pump (also user-
supplied).
Never let the Boiling Flask run dry. Do not leave
a running system unattended for long.
The Science Company®95 Lincoln, Denver, Colorado 80203, USA / PHONE 800-372-6726 / FAX 303•777-3331
www.sciencecompany.com
DIRECTIONS FOR USING 24/40 DISTILLATION APPARATUS, NC-11663
WARNING: For use by adults with knowledge of general laboratory safety procedures.
Always wear proper eye and hand protection when handling glass labware and heat!
The Science Company®95 Lincoln, Denver, Colorado 80203, USA / PHONE 800-372-6726 / FAX 303•777-3331
www.sciencecompany.com