tebco carrier assembly instructions - electric bicycle
TRANSCRIPT

TEBCO Carrier Assembly InstructionsWhilst this is not the only way to assemble the Carrier Tricycle,
we find this method mitigates any problems during the assembly process. We recommend assembly is carried out by a qualified bicycle mechanic.
If you encounter any problems or have any questions DO NOT HESITATE to call us on 1300 767 134.
Your Carrier Tricycle will have arrived in two boxes. These contain the front and rear sections. Check you have all the required parts from the photos above. The front section should contain those items pictured above.
The rear section will contain everything else. Remove all the bubble wrap from your new tricycle.
First, place the motorised front wheel into the forks. Ensure that the washer is placed on the outside of the fork, and that the cable comes out the right side of the wheel.
Take special care to ensure the anti-rotational washer is correctly seated in the cut-out in the forks. This is critically important as the torsional force of themotor is borne by the forks.

This shows the correct anti-rotational and washer arrangement. If you are unsure have a qualified bicycle technician look at your tricycle. Fork Failure from improper installation is NOT a warrantable claim.
Connect the motor plug to the motor cable present inthe frame. Ensure that this plug is seated correctly and pushed all the way home. There are alignment arrows and the plug must be pushed into the socket until it reaches the indicator line on the plug.
We like to attach the wheels to the rear section before connecting the two halves of the tricycle. One of the wheels has a keyway that matches the driven side of the axle. Ensure this is lined up and the tread direction of the tyre is correct. Make sure to leave thespacers in place.
Then add the washer, spring washer and nut and tighten. This can be repeated for the freewheeling side. Ensure that both wheels still spin freely once the nuts are tight.
Now we can attach the two halves of the tricycle. There are 4 bolts provided. Ensure that you use
The front half of the tricycle sits on the outside of the connection. Use a 17mm spanner to tighten these
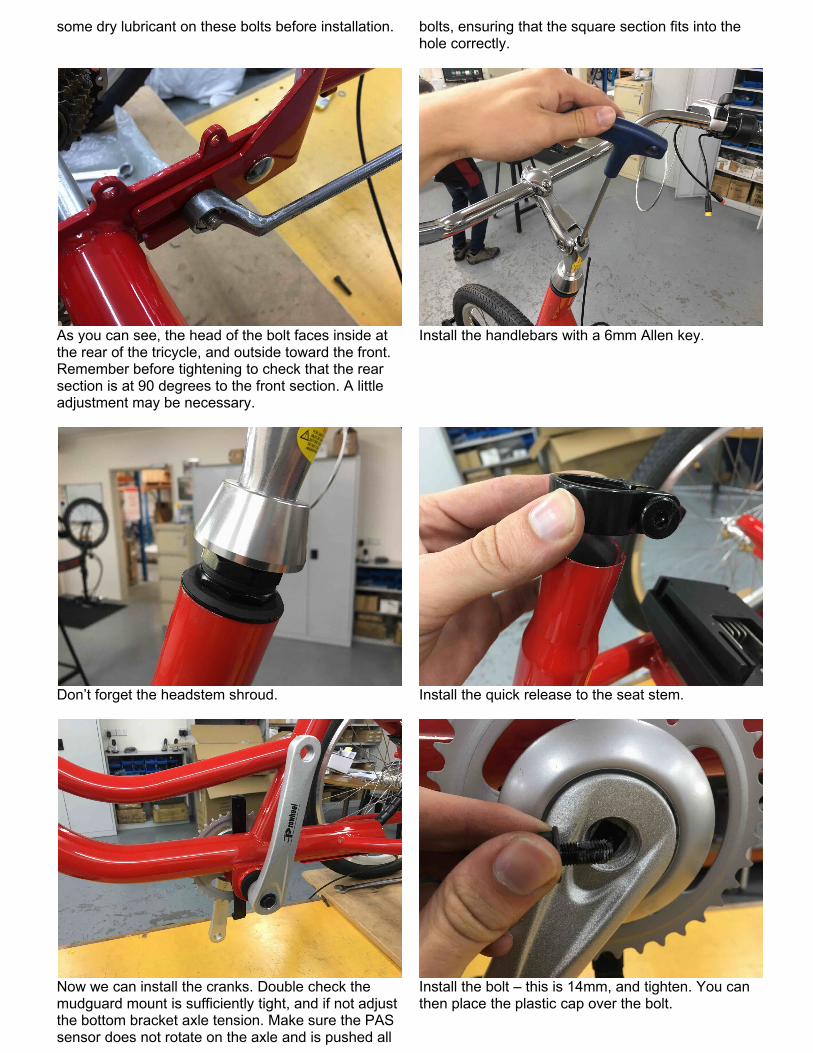
some dry lubricant on these bolts before installation. bolts, ensuring that the square section fits into the hole correctly.
As you can see, the head of the bolt faces inside at the rear of the tricycle, and outside toward the front. Remember before tightening to check that the rear section is at 90 degrees to the front section. A little adjustment may be necessary.
Install the handlebars with a 6mm Allen key.
Don’t forget the headstem shroud. Install the quick release to the seat stem.
Now we can install the cranks. Double check the mudguard mount is sufficiently tight, and if not adjust the bottom bracket axle tension. Make sure the PAS sensor does not rotate on the axle and is pushed all
Install the bolt – this is 14mm, and tighten. You can then place the plastic cap over the bolt.

the way home.
Now install the chain.
Mount the chain guard.
Mount the front mudguard holder to the front mudguard.
Add the long bolt at the top and tighten ensuring the mudguard is straight in the forks.
Install the two shorter 10mm hex head bolts into their locations on the forks and tighten.
Attach the front brake cable to the right brake lever and tighten and adjust the front brake.

Run the rear brake cable in its sheath and install to the left brake lever and tighten to the desired tightness. Take this opportunity to check alignment and tightness of the rotor.
Install the gear cable and tighten. Remember to adjust the high and low maximum/minimum positions.
Use a 15mm spanner to install the pedals. These come in a left right pair – make sure to get these around the right way. R/L is written on the end of bolt thread.
Mount the rear reflectors to the rear mudguards.
Mount the mudguard mounts to the rear mudguards. Use the 8 remaining 10mm hex head bolts to mount the rear mudguards.
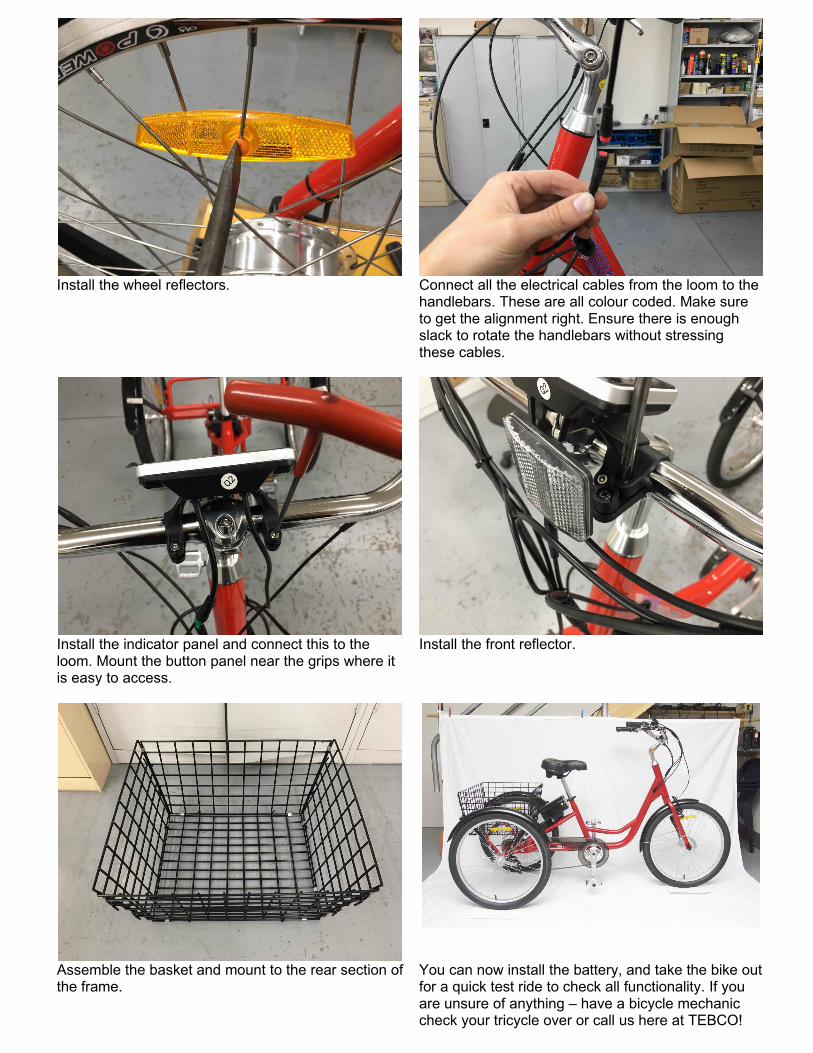
Install the wheel reflectors. Connect all the electrical cables from the loom to the handlebars. These are all colour coded. Make sure to get the alignment right. Ensure there is enough slack to rotate the handlebars without stressing these cables.
Install the indicator panel and connect this to the loom. Mount the button panel near the grips where it is easy to access.
Install the front reflector.
Assemble the basket and mount to the rear section ofthe frame.
You can now install the battery, and take the bike outfor a quick test ride to check all functionality. If you are unsure of anything – have a bicycle mechanic check your tricycle over or call us here at TEBCO!