tire and wheel service chapter 55 page 796. tire info placard *located on the door pillar or the...
TRANSCRIPT

Tire and Wheel Tire and Wheel ServiceService
Chapter 55Chapter 55
Page 796Page 796
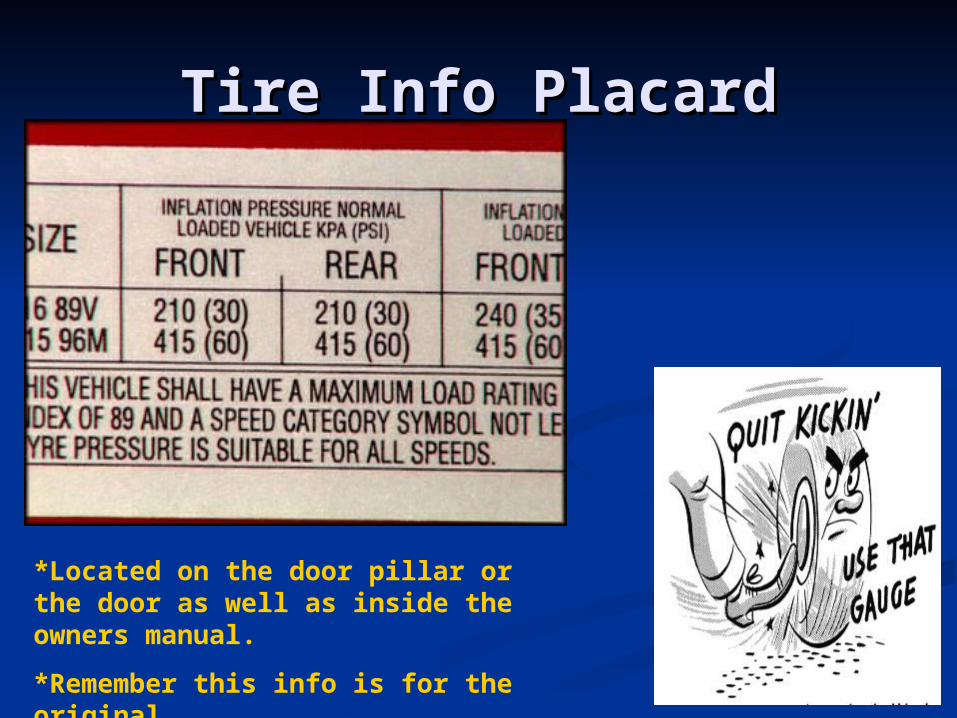
Tire Info PlacardTire Info Placard
*Located on the door pillar or the door as well as inside the owners manual.
*Remember this info is for the original
tire that came on the vehicle.
Proper Inflation of Tires
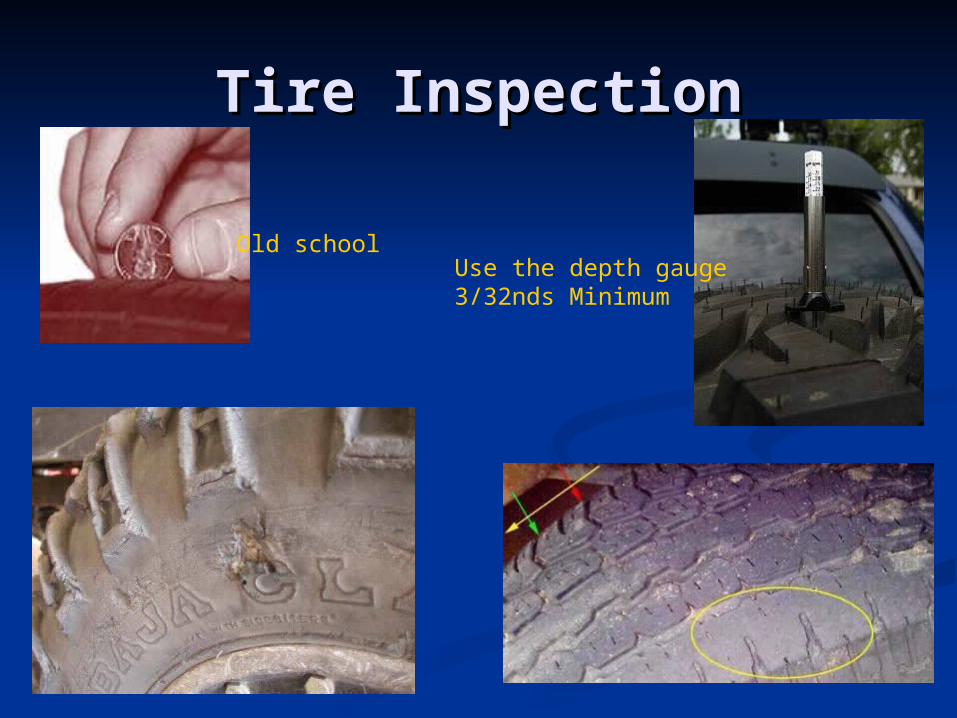
Tire InspectionTire Inspection
Old schoolUse the depth gauge3/32nds Minimum
Inspecting Tires for Wear

Tire WearTire Wear
Unbalanced tiresUnbalanced tiresOne-sided wear
Under inflation Over inflation Normal tire

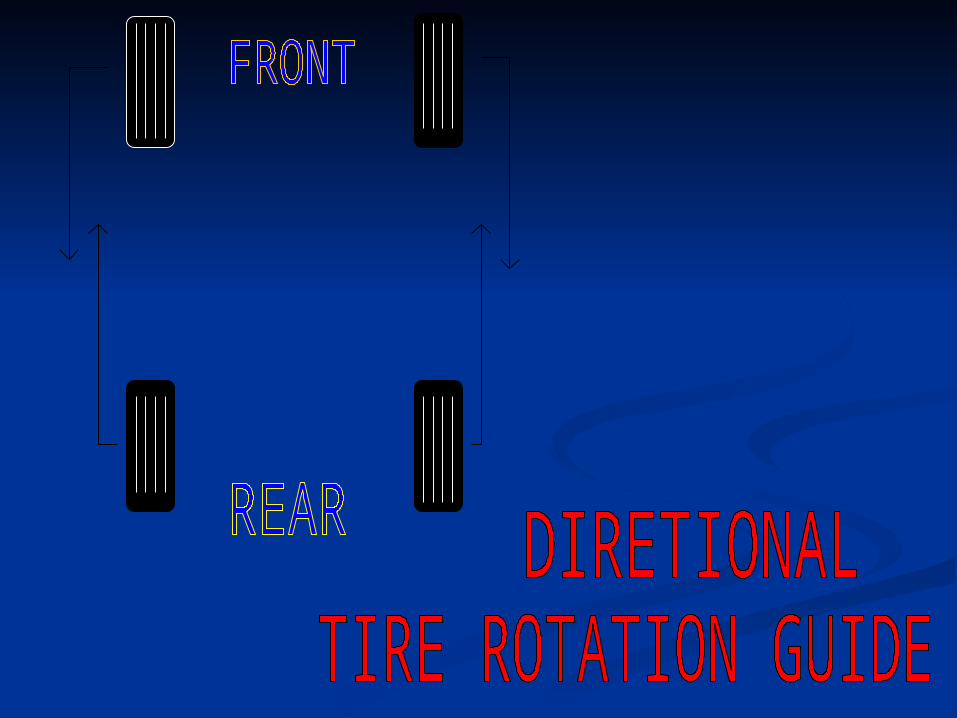
Tire RotationTire Rotation Some tires are directional; they are Some tires are directional; they are
designed to turn in one direction only. designed to turn in one direction only. They cannot be moved from one side of the They cannot be moved from one side of the vehicle to the other, otherwise they will vehicle to the other, otherwise they will rotate against the direction of their design. rotate against the direction of their design.
Other tires are asymmetric; the tread Other tires are asymmetric; the tread differs from inside to outside. Asymmetric differs from inside to outside. Asymmetric tires must be mounted on the rim tires must be mounted on the rim correctly. correctly.
The majority of tires can be mounted and The majority of tires can be mounted and run in either direction. run in either direction.
Remember to adjust air pressure on each Remember to adjust air pressure on each tire to recommended levels. tire to recommended levels.
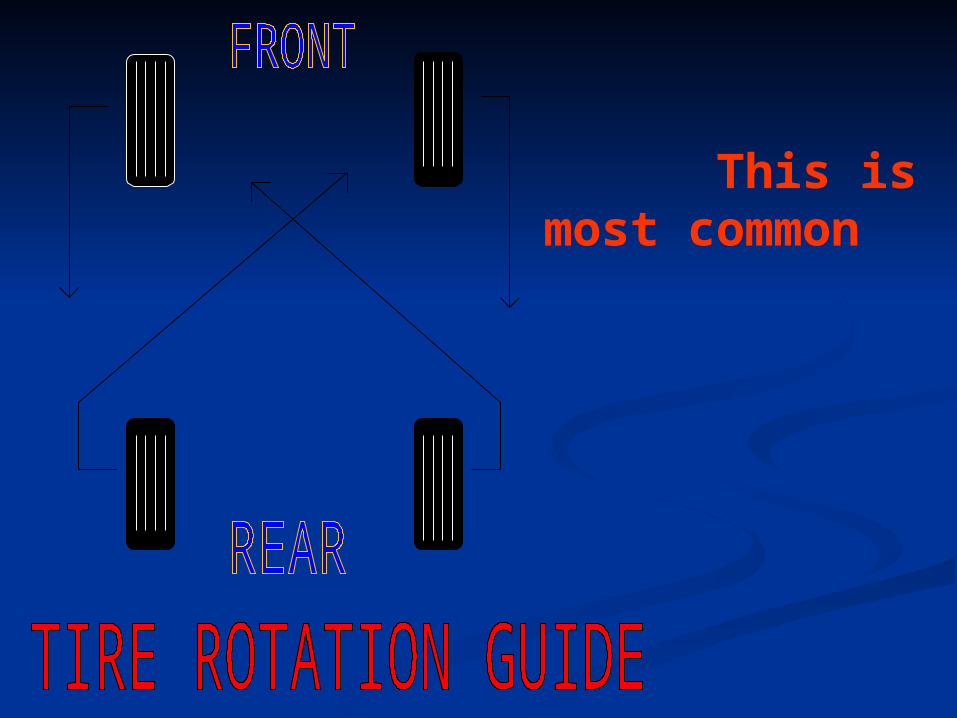
This ismost common
Rotating Tires
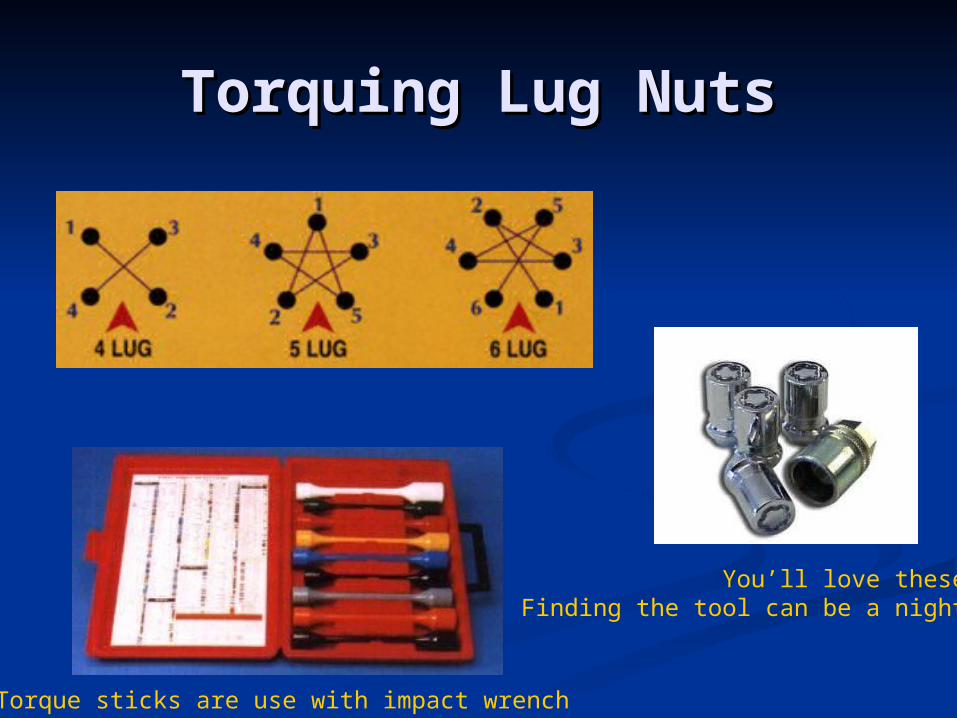
Torquing Lug NutsTorquing Lug Nuts
Torque sticks are use with impact wrench
You’ll love theseFinding the tool can be a nightmare
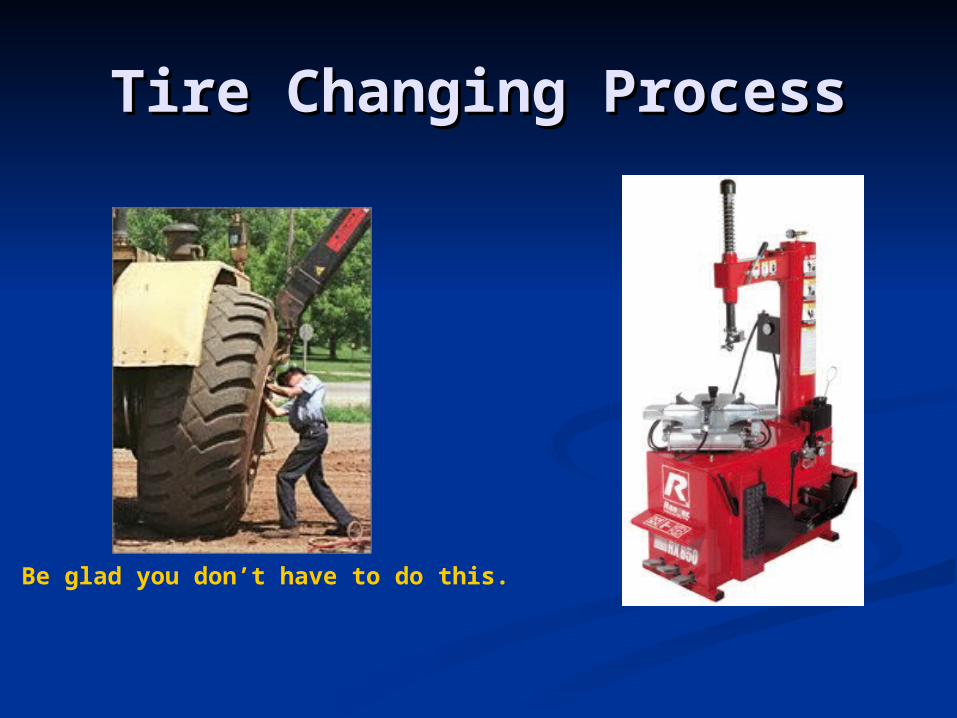
Tire Changing ProcessTire Changing Process
Be glad you don’t have to do this.
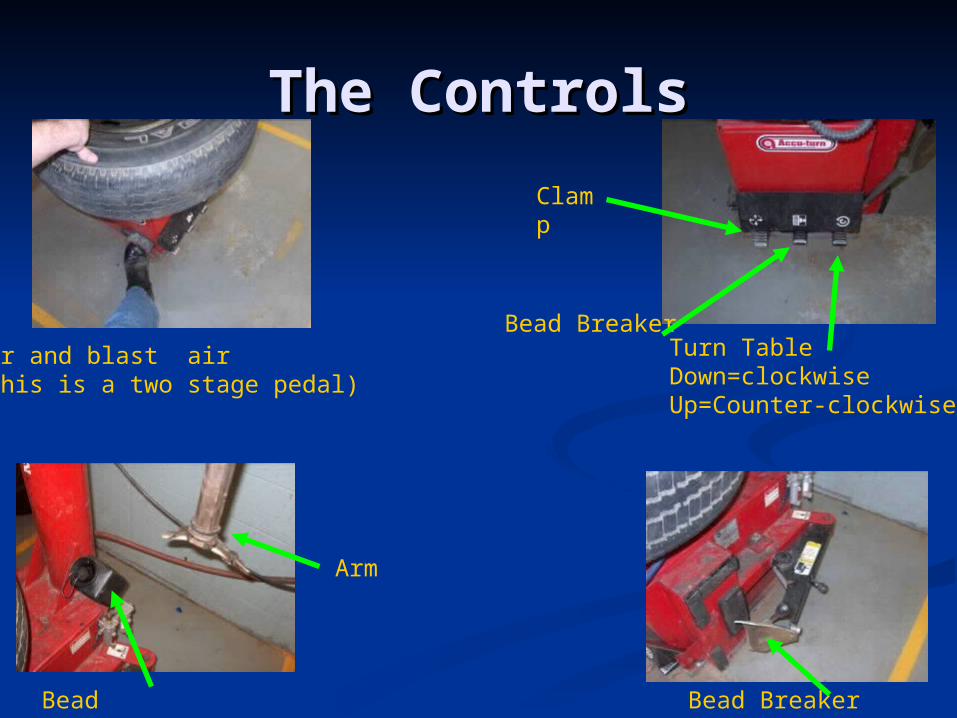
The ControlsThe Controls
Air and blast air(this is a two stage pedal)
Clamp
Bead BreakerTurn TableDown=clockwiseUp=Counter-clockwise
Bead Lube
Arm
Bead Breaker

Mark the Offending SpotMark the Offending Spot

Remove Old Weights and Remove Old Weights and Mark Rim-to-Tire LocationMark Rim-to-Tire Location
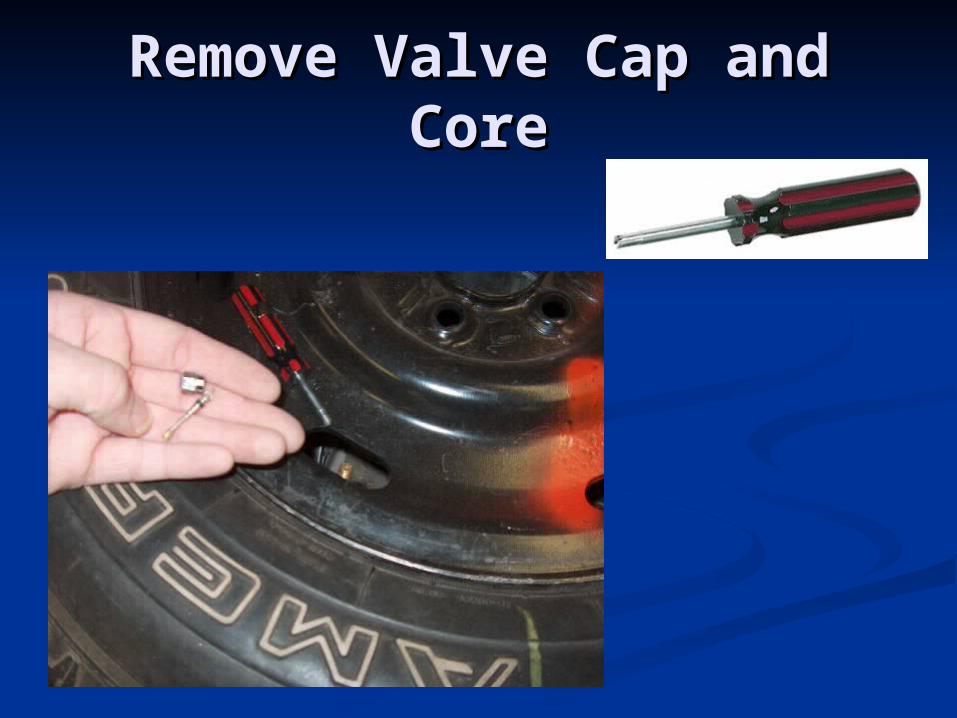
Remove Valve Cap and Remove Valve Cap and CoreCore
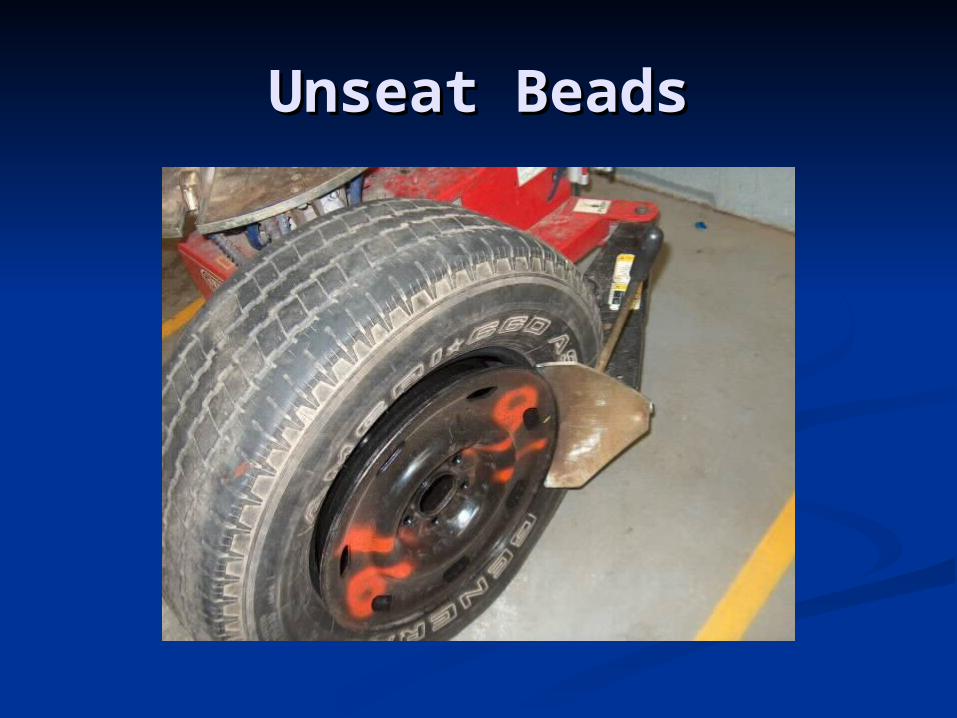
Unseat BeadsUnseat Beads

Clamp Wheel and Set Clamp Wheel and Set Arm AdjustmentsArm Adjustments

Lube the Upper Bead Lube the Upper Bead AreaArea

Remove Upper Bead Remove Upper Bead from Wheelfrom Wheel
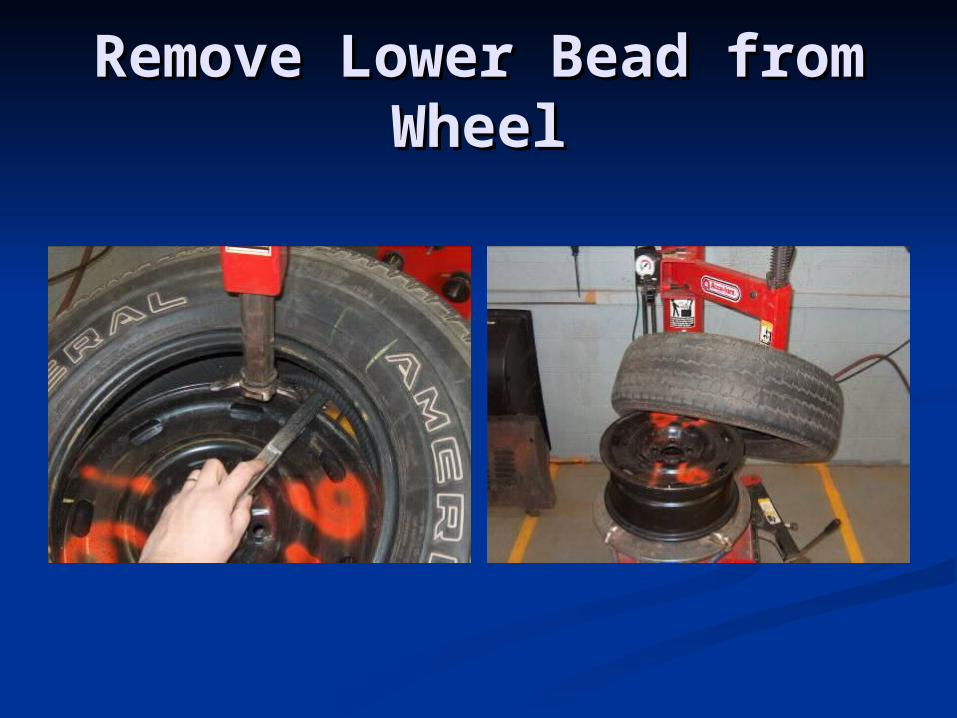
Remove Lower Bead from Remove Lower Bead from WheelWheel

Clean Rim and TireClean Rim and Tire

Valve Stem R&RValve Stem R&R

Repair TireRepair Tire Mark the offending object or hole (you can Mark the offending object or hole (you can
submerge the wheel in the tire tank to find submerge the wheel in the tire tank to find small leaks).small leaks).
Remove tire from rimRemove tire from rim Oversize the hole with the auger bit in the drillOversize the hole with the auger bit in the drill Smooth out interior near holeSmooth out interior near hole Prep plug with siliconePrep plug with silicone Gently pull plug up through the hole until it Gently pull plug up through the hole until it
dimplesdimples Remount tireRemount tire Check for leaksCheck for leaks Trim the plugTrim the plug

Oversize the Hole for the Oversize the Hole for the PlugPlug
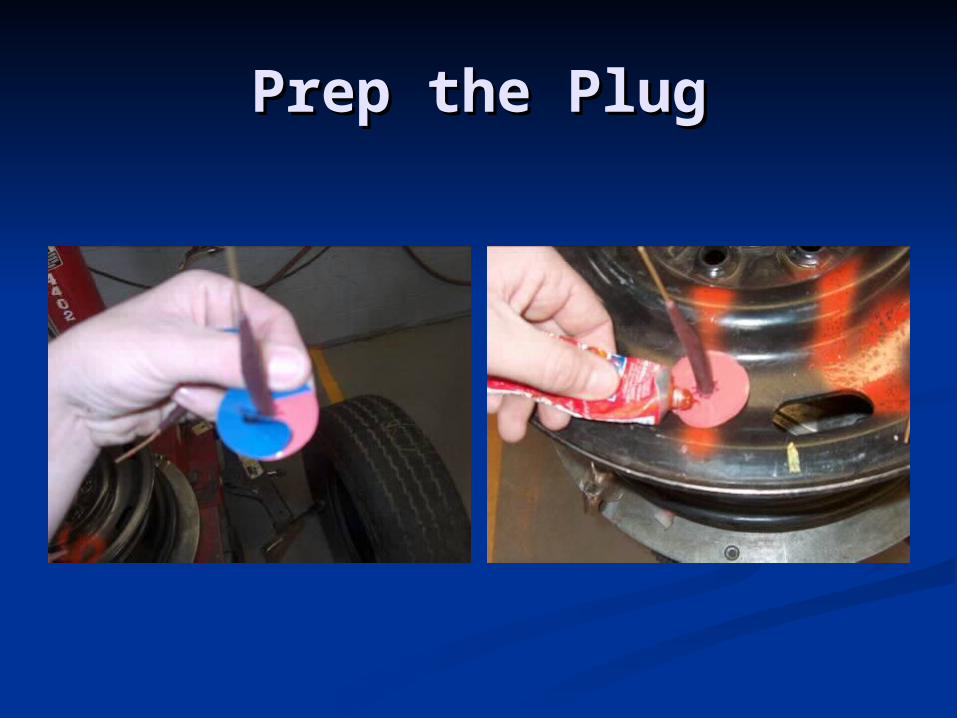
Prep the PlugPrep the Plug

Push Plug from Inside and Push Plug from Inside and Pull Through with Pliers Pull Through with Pliers
(smoothly)(smoothly)
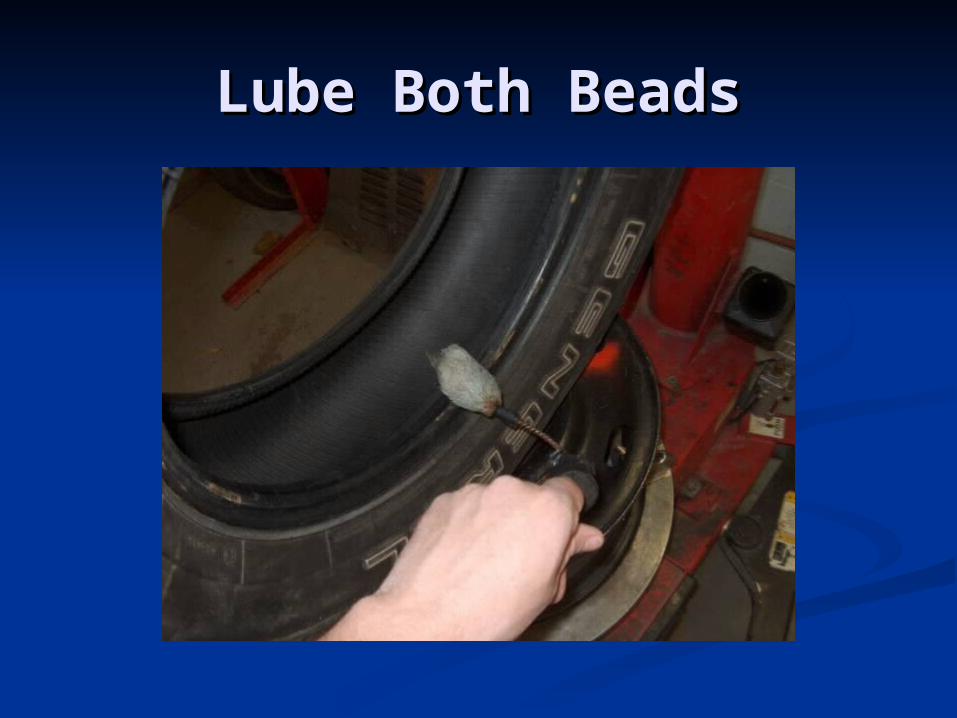
Lube Both BeadsLube Both Beads

Remount Tire to Original Remount Tire to Original Position Position (Take care to use the (Take care to use the
“valley” of the rim)“valley” of the rim)

Line Up Tire Spot Indicator Line Up Tire Spot Indicator (new) or Replace it to its (new) or Replace it to its
Original PositionOriginal Position

Inflate Tire Over Inflate Tire Over Recommended PSI to Seat Recommended PSI to Seat
the Beads (50psi)the Beads (50psi)
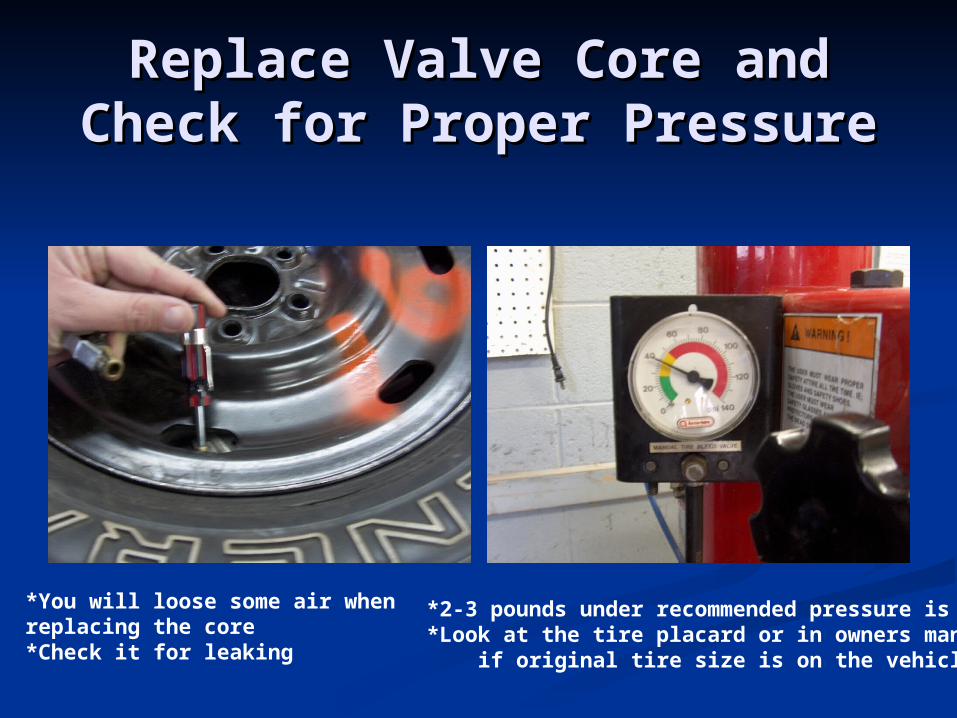
Replace Valve Core and Replace Valve Core and Check for Proper PressureCheck for Proper Pressure
*2-3 pounds under recommended pressure is good*Look at the tire placard or in owners manual if original tire size is on the vehicle
*You will loose some air whenreplacing the core *Check it for leaking
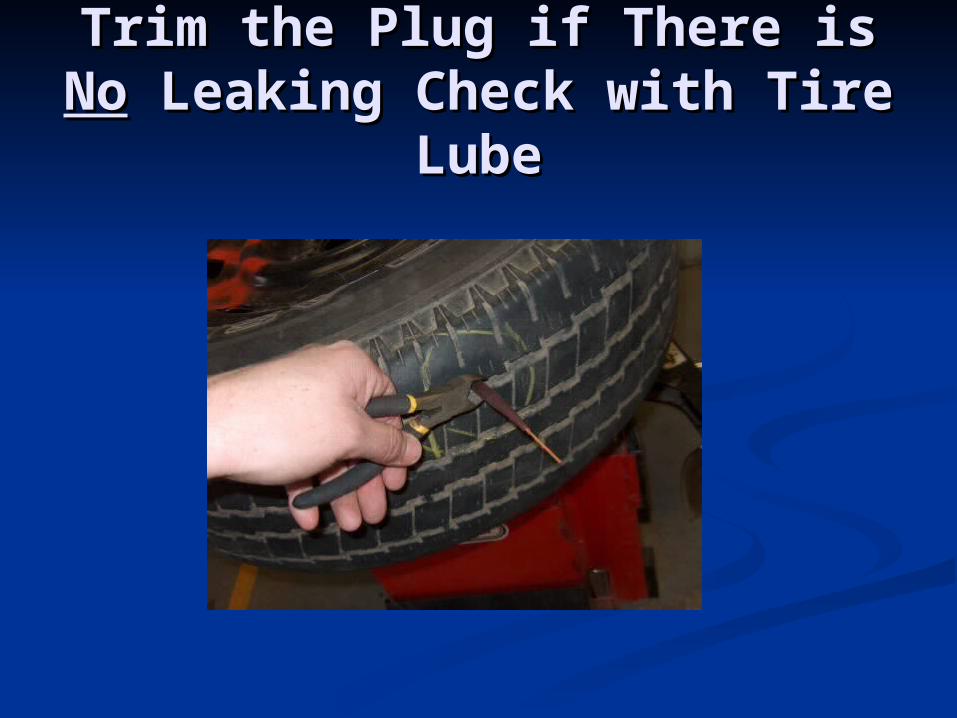
Trim the Plug if There is Trim the Plug if There is NoNo Leaking Check with Tire Leaking Check with Tire
LubeLube

Replace Valve Cap and Replace Valve Cap and Remove Wheel form Remove Wheel form
MachineMachine
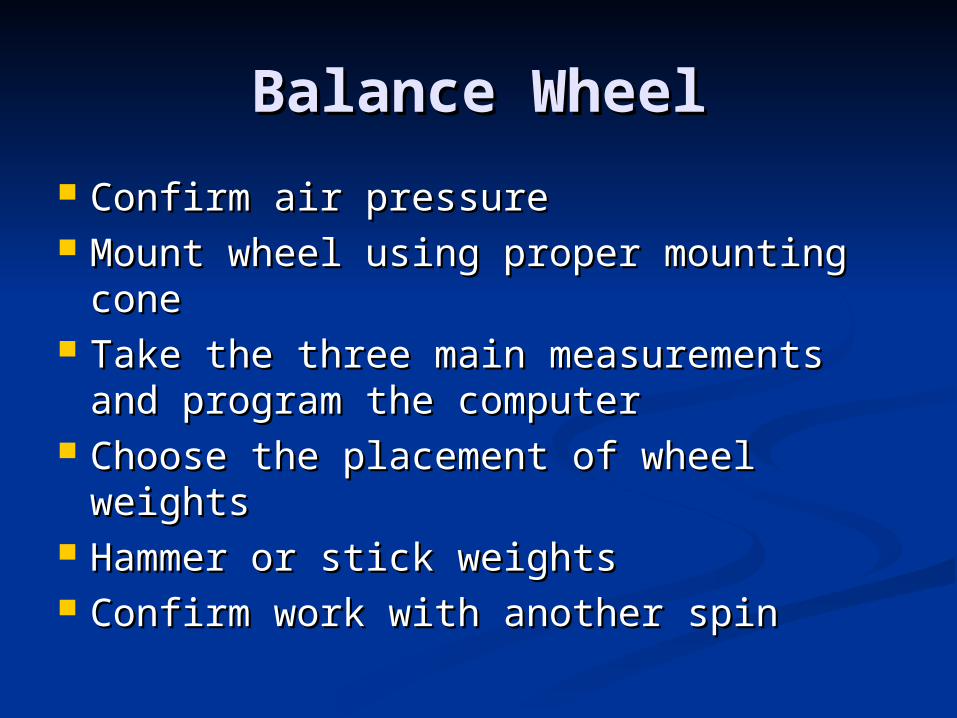
Balance WheelBalance Wheel
Confirm air pressureConfirm air pressure Mount wheel using proper mounting Mount wheel using proper mounting
conecone Take the three main measurements and Take the three main measurements and
program the computerprogram the computer Choose the placement of wheel weightsChoose the placement of wheel weights Hammer or stick weights Hammer or stick weights Confirm work with another spinConfirm work with another spin
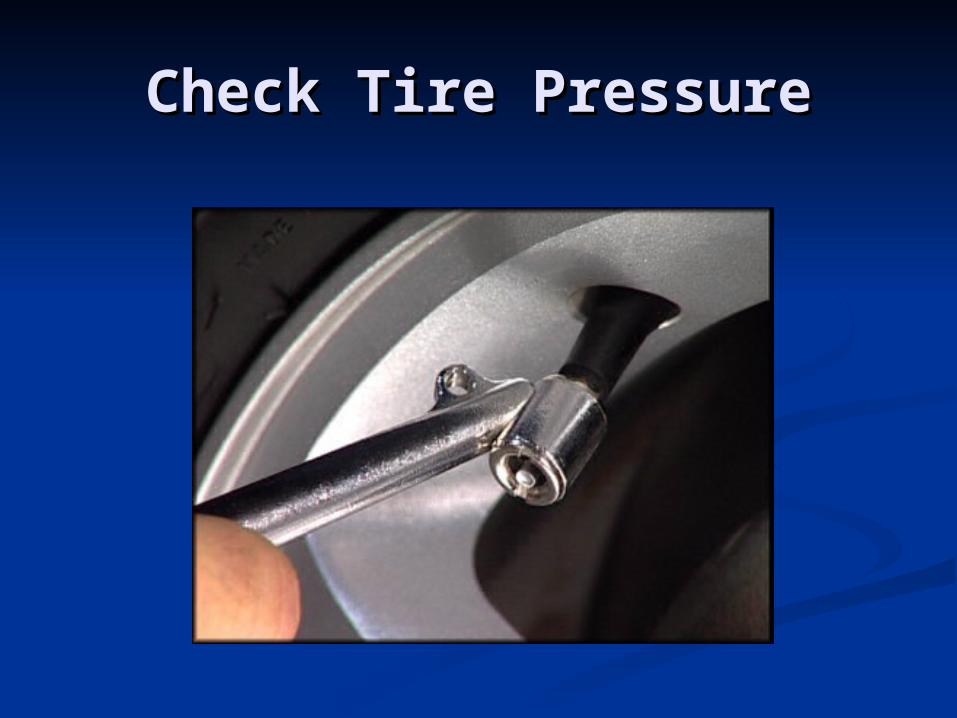
Check Tire PressureCheck Tire Pressure

Carefully Mount Tire Carefully Mount Tire

Balancing Wheels

Your Job.Your Job. Complete chapter Questions 1-10 Complete chapter Questions 1-10
(review) and 1-10 (ASE-style). Page (review) and 1-10 (ASE-style). Page 816-817816-817
Write on a separate paper and write out Write on a separate paper and write out the complete question and your answer. the complete question and your answer. ( do not write the other answer options). ( do not write the other answer options).
Complete the chapter worksheet (I will Complete the chapter worksheet (I will give it out). You may write on it. give it out). You may write on it.
File all items in your note book.File all items in your note book. Notebooks will be graded in the future.Notebooks will be graded in the future.