titling step by step
TRANSCRIPT
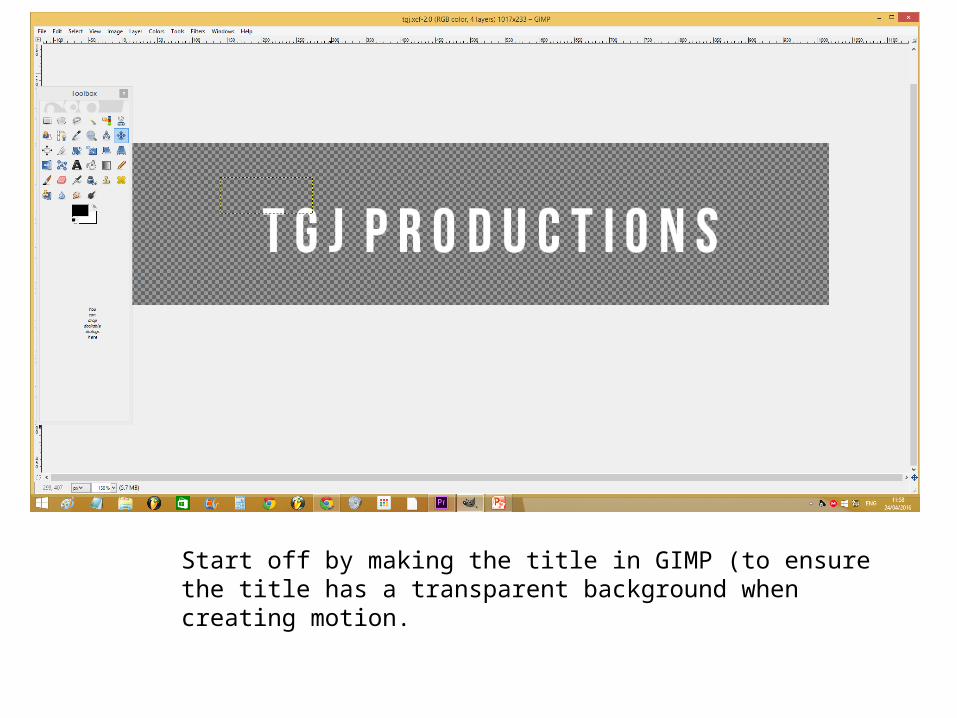
Start off by making the title in GIMP (to ensure the title has a transparent background when creating motion.

Open Sony Vegas Pro 11 and split text to for animation, revealing only the bottom half (do the same for the top half).

Open the Video Media Generator and select animation for the bottom half of the text. This side of the text will slide in from the right.

Do the same for the top half, this time ensuring you select the animation ‘Slide left’.

Once you have done this, right click on both the bottom and top half of the text and select ‘Insert/ Remove Envelope’ and proceed to click on the Velocity option hat comes up.

Set the velocity to 0% so that the animation pauses.

Create the ‘capture frame’ effect for the titling by adding the ‘L’ text to the two corners of the text.
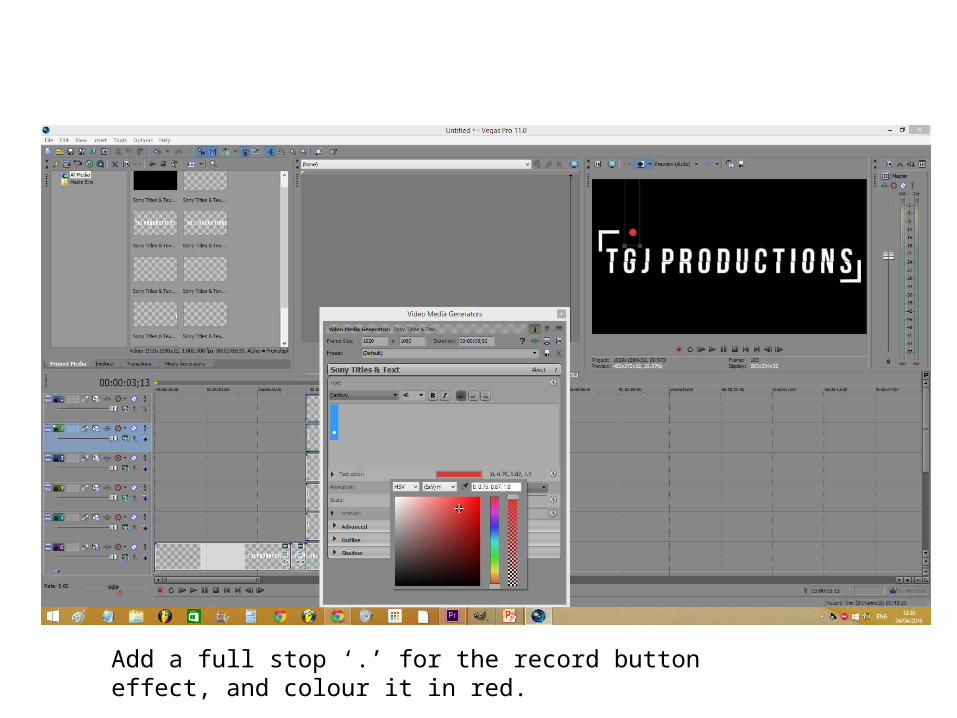
Add a full stop ‘.’ for the record button effect, and colour it in red.
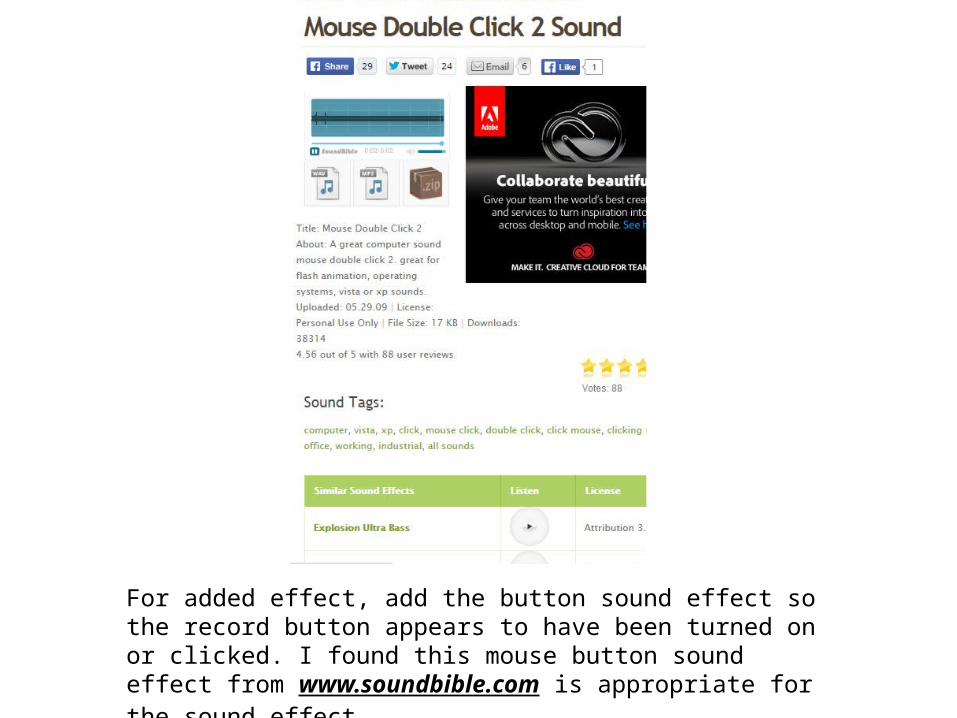
For added effect, add the button sound effect so the record button appears to have been turned on or clicked. I found this mouse button sound effect from www.soundbible.com is appropriate for the sound effect.

Open and audio track in order to insert this sound effect as audio media.
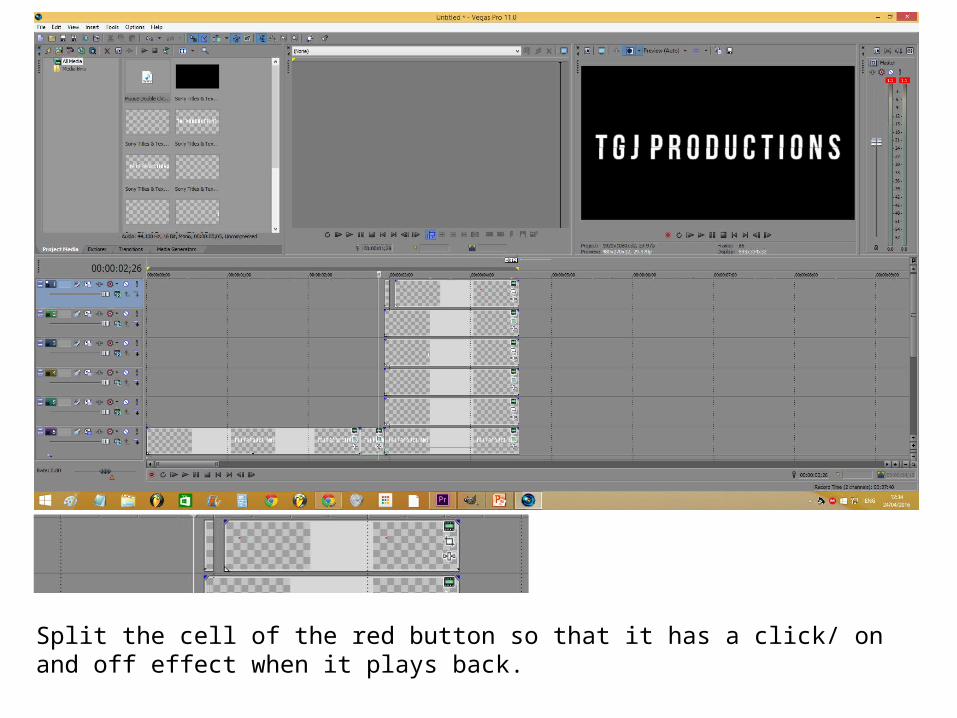
Split the cell of the red button so that it has a click/ on and off effect when it plays back.
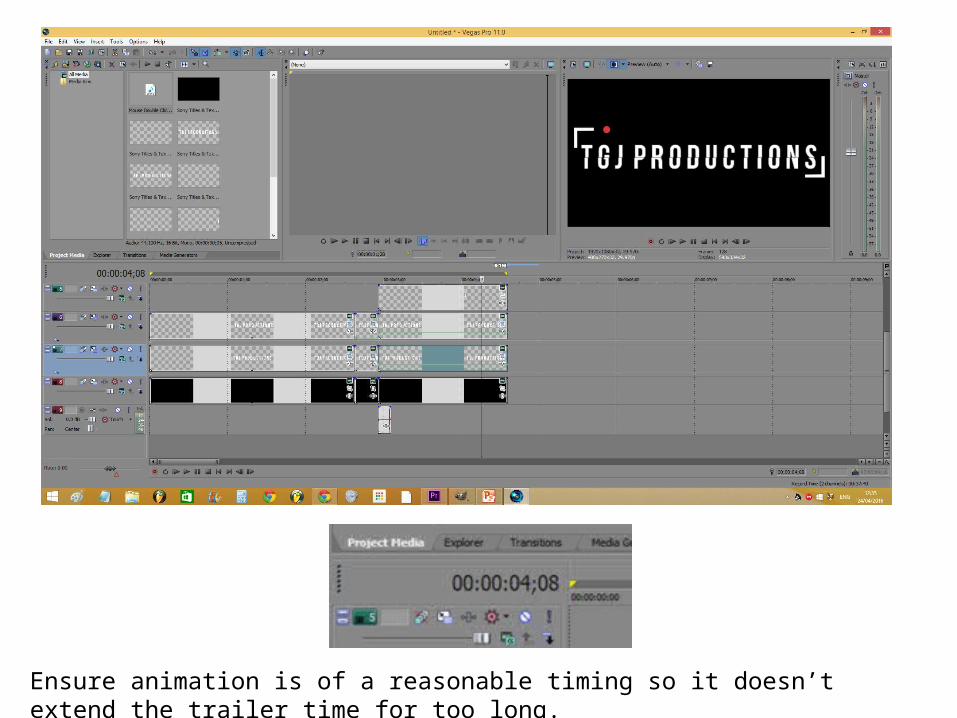
Ensure animation is of a reasonable timing so it doesn’t extend the trailer time for too long.