top-open view - gericom support & downloaddownload.gericom.com/notebook/ego-serie/ms1003/... ·...
TRANSCRIPT
1 - 1
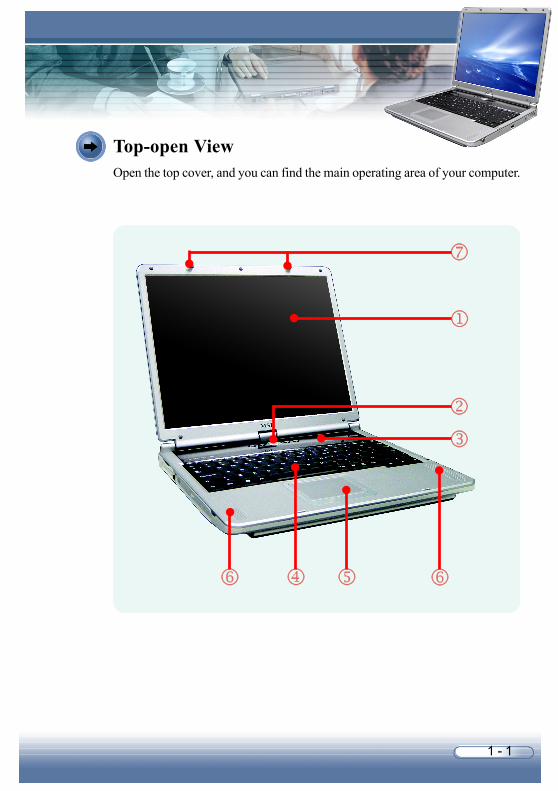
Top-open ViewOpen the top cover, and you can find the main operating area of your computer.
1 - 2
Display PanelThe 15-inch SXGA+/14.1-inch XGA TFT color LCD screen displays the output of thecomputer.
Function Buttons and Power/Resume Button- Email: to launch the E-mail application (such as Outlook Express) to receive/send your E-mail.- Internet: to launch the web browser (such as Internet Explorer) to surf the Internet.- Power/Resume: to turn the computer power ON and OFF.- Wireless LAN: to enable/disable the wireless LAN function of your computer.- User-defined: allows you to define an application to launch.
Status LEDs- Num Lock: glows Green to indicate the Num Lock function is activated.- Caps Lock: glows Green to indicate the Caps Lock function is activated.- Scroll Lock: glows Green to indicate the Scroll Lock function is activated.- Hard Disk In-use: blinks Green to indicate the computer is accessing the hard disk drive.- Wireless LAN: glows Green to indicate the wireless LAN function of the computer is enabled.
KeyboardThe built-in keyboard provides all the functions of a full-sized 101/102-key keyboard(see Using Keyboard in Chapter 2 for more information).
TouchpadThe pointing device of the computer (see Using Touchpad in Chapter 2 for moreinformation).
Stereo SpeakersThe next-generation high quality speakers send out the sound and voice from thecomputer.
Cover LatchThis Cover Latch is used to lock the top cover.
1 - 3
Right-side ViewRight-side ViewRight-side ViewRight-side ViewRight-side View
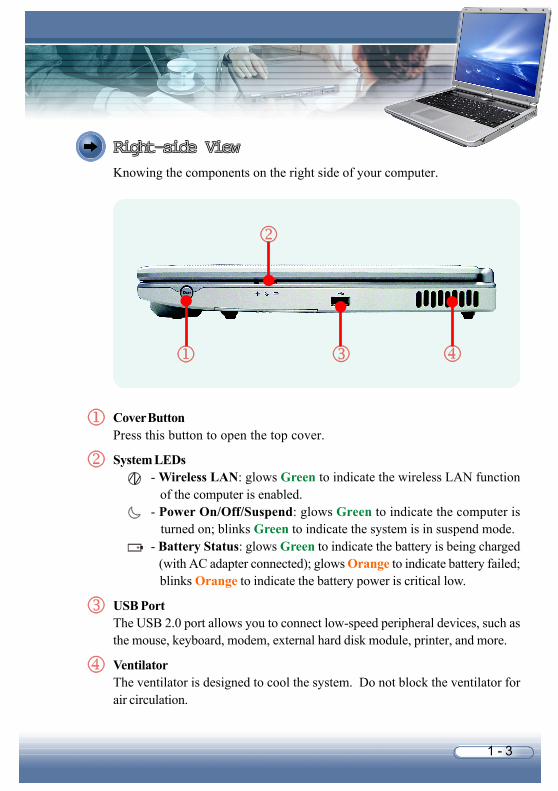
Cover ButtonPress this button to open the top cover.
System LEDs- Wireless LAN: glows Green to indicate the wireless LAN function of the computer is enabled.- Power On/Off/Suspend: glows Green to indicate the computer is turned on; blinks Green to indicate the system is in suspend mode.- Battery Status: glows Green to indicate the battery is being charged (with AC adapter connected); glows Orange to indicate battery failed; blinks Orange to indicate the battery power is critical low.
USB PortThe USB 2.0 port allows you to connect low-speed peripheral devices, such asthe mouse, keyboard, modem, external hard disk module, printer, and more.
VentilatorThe ventilator is designed to cool the system. Do not block the ventilator forair circulation.
Knowing the components on the right side of your computer.
1 - 4
Left-side ViewLeft-side ViewLeft-side ViewLeft-side ViewLeft-side View
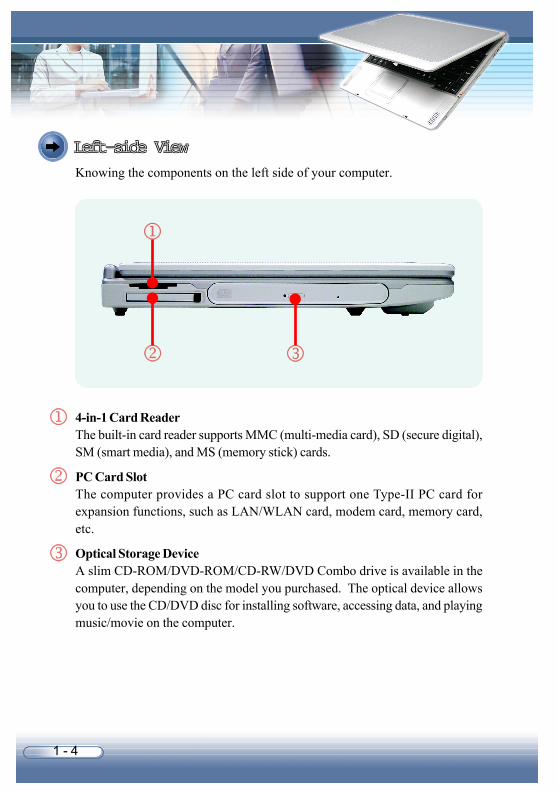
4-in-1 Card ReaderThe built-in card reader supports MMC (multi-media card), SD (secure digital),SM (smart media), and MS (memory stick) cards.
PC Card SlotThe computer provides a PC card slot to support one Type-II PC card forexpansion functions, such as LAN/WLAN card, modem card, memory card,etc.
Optical Storage DeviceA slim CD-ROM/DVD-ROM/CD-RW/DVD Combo drive is available in thecomputer, depending on the model you purchased. The optical device allowsyou to use the CD/DVD disc for installing software, accessing data, and playingmusic/movie on the computer.
Knowing the components on the left side of your computer.

1 - 5
Rear ViewRear ViewRear ViewRear ViewRear View
Kensington LockThis port is used to lock the computer to a location for security (see CaringYour Notebook PC in Chapter 7 for more information).
VentilatorThe ventilator is designed to cool the system. DO NOT block the ventilator forair circulation.
Power ConnectorTo connect the AC adapter and supply power for the computer.
S-Video ConnectorBy using a Super VHS (S-Video) cable, this connector allows you to connect atelevision (NTSC/PAL system) for a great view of the computer display.
VGA PortThe 15-pin D-sub VGA port allows you to connect an external monitor or otherstandard VGA-compatible device (such as a projector) for a great view of thecomputer display.
Your Notebook PC provides many I/O ports on the rear panel.

1 - 6
Parallel PortThe 25-pin D-sub parallel port allows you to connect a parallel device, such as theprinter and scanner.
USB PortsThe USB 2.0 ports allow you to connect low-speed peripheral devices, such as themouse, keyboard, modem, external hard disk module, printer, and more.
IEEE 1394 PortThe IEEE 1394 port is a high-speed bus that allows you to connect high-end digitaldevices such as the DV (digital video camera).
RJ-45 ConnectorThe 100/10 Ethernet connector is used to connect a LAN cable for network connection.
RJ-11 ConnectorThe computer provides a built-in modem that allows you to connect an RJ-11 telephoneline through this connector. With the 56K V.90 modem, you can make a dial-upconnection.
Microphone JackThis connector is used to connect an external microphone.
Audio-out JackThis connector is used to connect a headphone or external speakers.
1 - 7
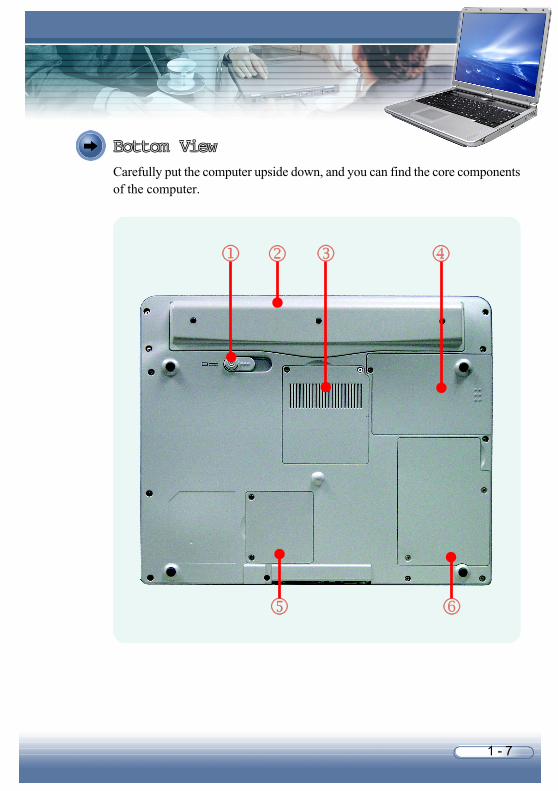
Bottom ViewBottom ViewBottom ViewBottom ViewBottom View
Carefully put the computer upside down, and you can find the core componentsof the computer.
1 - 8
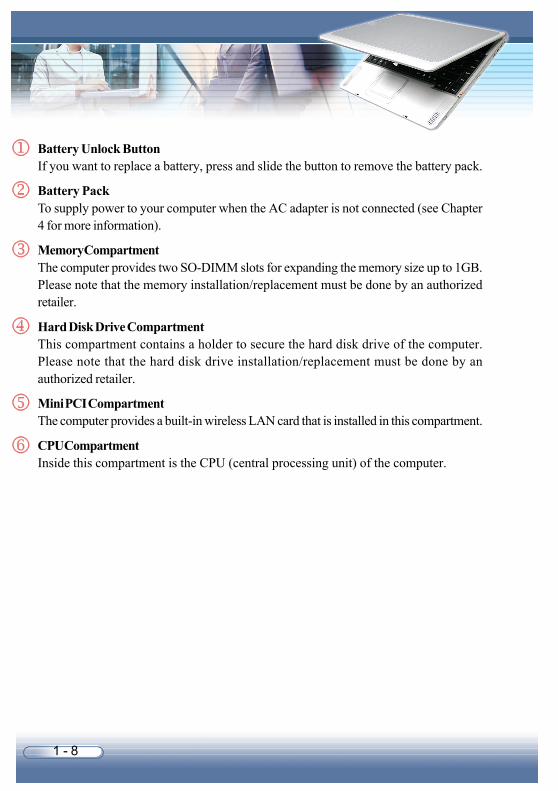
Battery Unlock ButtonIf you want to replace a battery, press and slide the button to remove the battery pack.
Battery PackTo supply power to your computer when the AC adapter is not connected (see Chapter4 for more information).
Memory CompartmentThe computer provides two SO-DIMM slots for expanding the memory size up to 1GB.Please note that the memory installation/replacement must be done by an authorizedretailer.
Hard Disk Drive CompartmentThis compartment contains a holder to secure the hard disk drive of the computer.Please note that the hard disk drive installation/replacement must be done by anauthorized retailer.
Mini PCI CompartmentThe computer provides a built-in wireless LAN card that is installed in this compartment.
CPU CompartmentInside this compartment is the CPU (central processing unit) of the computer.
1 - 9
Connecting the PowerConnecting the PowerConnecting the PowerConnecting the PowerConnecting the Power
Your Notebook PC is equipped with a high-performance 8-cell Li-ion batterypack, and it can operate either on the battery’s power or AC power. However,for the first time to use your Notebook PC, it is recommended to connect the ACadapter and use the AC power. When the AC adapter is connected, the batteryis charged immediately.
Connecting the AC Power
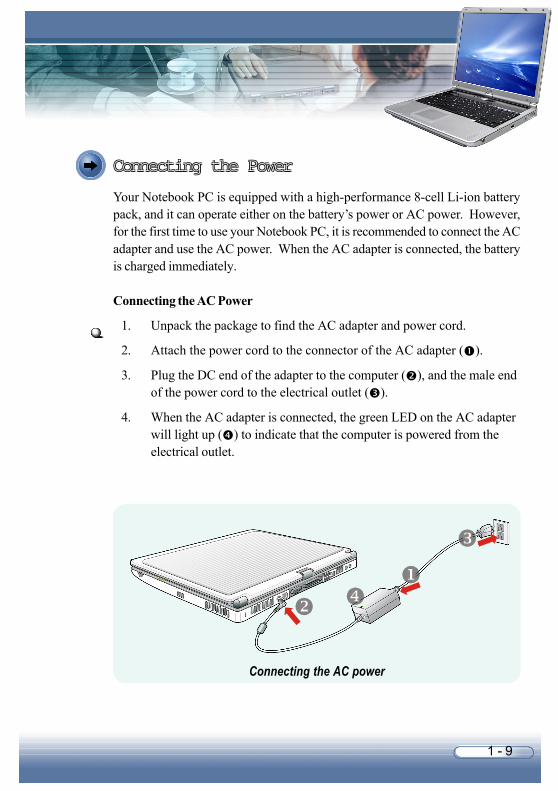
1. Unpack the package to find the AC adapter and power cord.
2. Attach the power cord to the connector of the AC adapter ( ).
3. Plug the DC end of the adapter to the computer ( ), and the male endof the power cord to the electrical outlet ( ).
4. When the AC adapter is connected, the green LED on the AC adapterwill light up ( ) to indicate that the computer is powered from theelectrical outlet.
Connecting the AC power
1 - 10
Open LCD PanelOpen LCD PanelOpen LCD PanelOpen LCD PanelOpen LCD Panel
Now, when the AC adapter is connected, you are ready to use your computer.
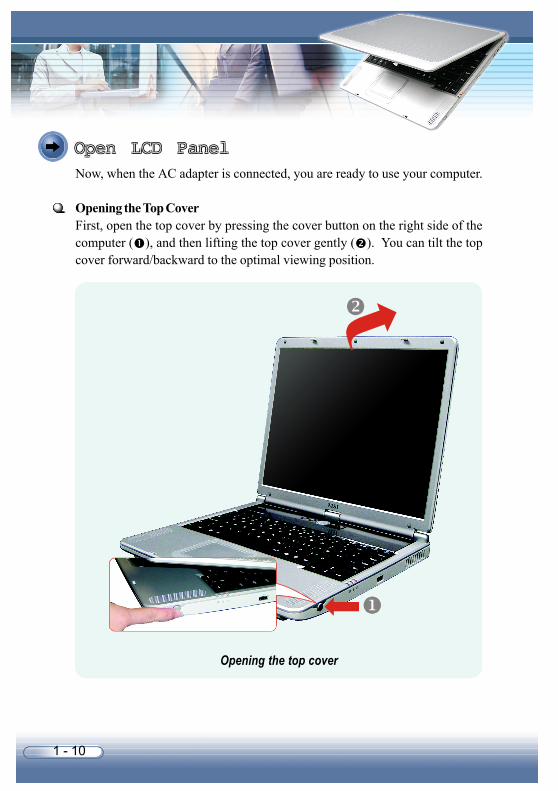
Opening the Top CoverFirst, open the top cover by pressing the cover button on the right side of thecomputer ( ), and then lifting the top cover gently ( ). You can tilt the topcover forward/backward to the optimal viewing position.
Opening the top cover