user manual - ecole de parapente les choucas manual please read this manual carefully before first...
TRANSCRIPT

Light harness with a footrest
User manual
Please read this manual carefully before first flight.
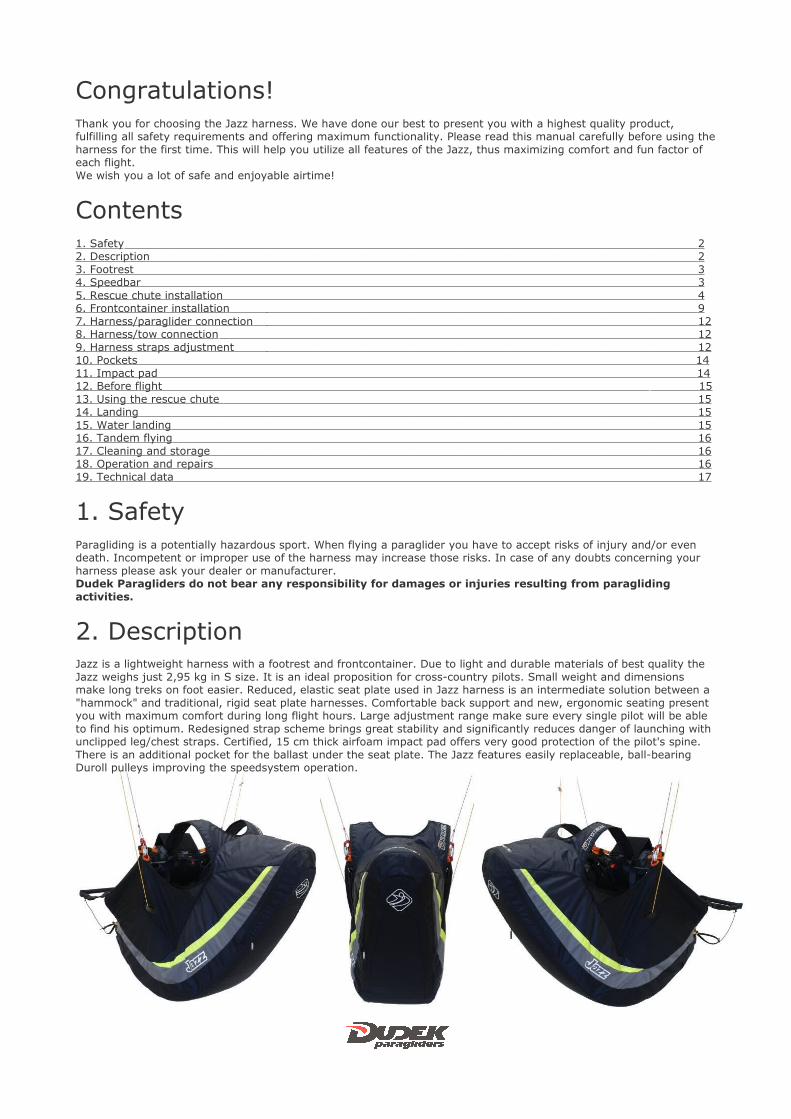
Congratulations!Thank you for choosing the Jazz harness. We have done our best to present you with a highest quality product, fulfilling all safety requirements and offering maximum functionality. Please read this manual carefully before using theharness for the first time. This will help you utilize all features of the Jazz, thus maximizing comfort and fun factor of each flight.We wish you a lot of safe and enjoyable airtime!
Contents1. Safety 22. Description 23. Footrest 34. Speedbar 35. Rescue chute installation 46. Frontcontainer installation 97. Harness/paraglider connection 128. Harness/tow connection 129. Harness straps adjustment 1210. Pockets 1411. Impact pad 1412. Before flight 1513. Using the rescue chute 1514. Landing 1515. Water landing 1516. Tandem flying 1617. Cleaning and storage 1618. Operation and repairs 1619. Technical data 17
1. SafetyParagliding is a potentially hazardous sport. When flying a paraglider you have to accept risks of injury and/or even death. Incompetent or improper use of the harness may increase those risks. In case of any doubts concerning your harness please ask your dealer or manufacturer.Dudek Paragliders do not bear any responsibility for damages or injuries resulting from paragliding activities.
2. Description
Jazz is a lightweight harness with a footrest and frontcontainer. Due to light and durable materials of best quality the Jazz weighs just 2,95 kg in S size. It is an ideal proposition for cross-country pilots. Small weight and dimensions make long treks on foot easier. Reduced, elastic seat plate used in Jazz harness is an intermediate solution between a "hammock" and traditional, rigid seat plate harnesses. Comfortable back support and new, ergonomic seating present you with maximum comfort during long flight hours. Large adjustment range make sure every single pilot will be able to find his optimum. Redesigned strap scheme brings great stability and significantly reduces danger of launching with unclipped leg/chest straps. Certified, 15 cm thick airfoam impact pad offers very good protection of the pilot's spine. There is an additional pocket for the ballast under the seat plate. The Jazz features easily replaceable, ball-bearing Duroll pulleys improving the speedsystem operation.

3. FootrestJazz harness was designed to fly with a footrest. It enhances comfort in long flights, help sitting into the harness after launch and positiviely influences steering. It is fixed to the harness in four points, and its length is adjustable. Its lower part is elastic, contracting when not in use. Designed in this way the footrest does not disturb you during launch and is easier to find in flight.
Length adjustment
Elastic part
Elastics between the footrest and speedbar
4. SpeedbarSpeedbar lines must be led through metal rings (in front part of the harness) and pulleys (under the seatplate and on the back support). Then put it through slits in the sides and fix a speedsystem clip (hook). Connect the speedbar to the footrest with an elastic band. Find the best length of the rubber so that speedbar will be easily accessible in flight. In order to adjust the whole system you have to sit in the harness while it is hanged by the paraglider’s risers. At full speedbar the pulleys on the risers should touch. When necessary, adjust the lines later according to your experience inflight.
!
Do not adjust the speedsystem lines while in flight.
Speedsystem lines
Elastics between the speedbar and the footrest.
Speedbar

5. Rescue chute installation
Jazz harness is equipped with a rescue chute frontcontainer, fixed to the breast strap, featuring centrally placed and well-visible release handle. A short v-strap isintegrated with the breast strap and clipped in the main carabiners with it.
Connect the rescue chute riser to the v-strap. Tighten up the connection and cover it with a neoprene part attached to the frontcontainer.
! !
If the rescue chute riser is finished with a big loop, make sure that the connection is placed exactly in the middle of the loop. After tightening the loop must be evenly loaded, and the connection with the v-strap cannot be moved.
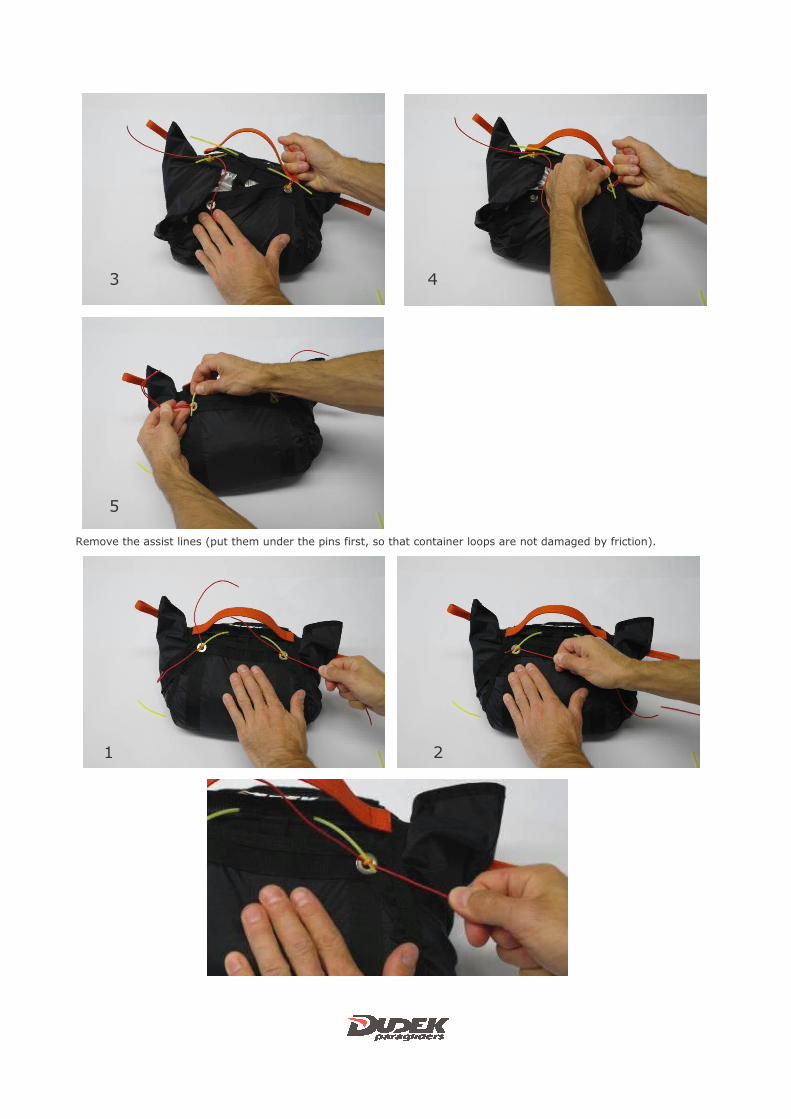
1 2
3 4

5
Fix the container release handle to a loop in the middle of the rescue chute bag.
!
Do not fix the release handle to the loops onthe sides of the bag.
Put the rescue chute in the container.
1 2

3
Partially close the container (flaps #1 and #2) with the assist lines and pins.
1 2
3
Fix the release handle, put in place the #3 flap and close the container with release handle pins (replacing the assist ones). Put the ends of the pins into caches on the #3 flap.
1 2
3 4
5
Remove the assist lines (put them under the pins first, so that container loops are not damaged by friction).
1 2

Place the ends of the release handle in dedicated caches on the #2 flap.
1 2
3
Push the remaining parts if the #1 flap inside.
1 2

6. Frontcontainer installation
The frontcontainer is installed on the breast strap. It is fixed in two points only, as shown below.
1 2
3 4
5 6
7
7

After fixing the frontcontainer connect both ends of the v-strap to the ends of the breast strap.
1 2
3 4
5
! !
If you are installing the rescue chute for the first time, it is necessary to run a test opening in order to make sure the container was correctly closed and to get familiar with required release force. In order to do that hang the harness, sit in it, grab the release handle and pull it vigorously away from the frontcontainer. When running this exercise it is not recommended to throw the rescue away, as it will result in opening the canopy bag. Pack the chute into the frontcontainer again.
The rescue chute must be periodically aired and repacked according to its manual. Recommended equipment for the Jazz harness is the Globe 120 or Globe 90 rescue chute, manufactured by Dudek Paragliders. Installation of many other parachutes (including steered reserves) is possible, as long as they fit in the container.

!
To avoid accidental opening of the rescue system, pins closing the container must be checked before each flight!
The frontcontainer has a Velcro strap on its top to hold the instruments. If the instruments are placed at an unconvenient angle, you can use an additional instrument panel (included). The panel has an elastic cache on the underside (you can place additional powerpack in it) and another pouch for a safety knife on the front.

7. Harness/paraglider connection The Jazz harness is equipped with aluminium Dudek carabiners of 20 kN strength. Use them to connect the harness to the risers. Another thing to connect before launch are the speedsystem lines of the harness to the speedsystem of the risers. It is recommended to replace the main carabiners with new ones each 300 hrs airtime.
!
Before launch check if the carabiners are closed and locked against accidental opening.
8. Harness/tow connectionThe only safe way of attaching the tow line is a dedicated tow release. The Jazz does not feature any additional points to fix the tow release, therefore it is to be mounted directly on the harness carabiners or the canopy risers.
9. Harness straps adjustment !
Before adjusting the straps please install rescue chute and fill the back pocket as for normal flight. Watch out for symmetry – left and right side should be adjusted the same. First, test flight should be done in easy weather conditions, with necessary corrections to be applied afterwards.Do not adjust the harness while flying.
9.1 Shoulder straps
Thanks to adjustable shoulder straps the Jazz can accommodate pilots of almost any height. The straps should stay onyour shoulders rather tight, with just a little play. Too short straps will make difficult comfortable seating after launch and can limit your movements in flight. A clip on the shoulder traps will make sure they stay in place during launch and flight. Additionally, there is an alarm whistle fixed to the clip.
9.2 Side straps
They determine the seat/backrest angle. Initial adjustment should be done before the first flight, with the harness hanged from a ceiling. All settings are to be verified during first flight and can be further modified at any time. Bear in mind that when the backrest is reclined too much, there is increased risk of getting a twist in case of a big deflation.

9.3 Leg straps
The leg straps are the most important safeguard against falling out of the harness. Their adjustment must allow for easy launching and proper seating in the air. Too short straps can make you uncomfortable and restrain your starting run. Too long straps can make seating into harness impossible without using your hands. In the Jazz harness both leg straps are connected to the chest strap, significantly reducing risk of launching without leg straps closed. Their length affects stability of the harness in flight as well. For increased comfort both of the leg straps are covered with soft neoprene.
Length adjustment buckles
!
!
In order to avoid falling out of the harness it is imperative to check before each launch if the chest and legs straps are closed. Not closing the straps is extremely dangerous and is a known reason of fatal accidents !
9.4 Chest strap
Chest strap controls the distance between carabiners. In the Jazz harness that distance is fixed at 43 cm. The chest strap does not have neither length adjustment nor buckles. It is to be clipped directly into main carabiners.

10. PocketsThe Jazz has a spacious back pocket and two little ones on each side of the pod. The back pocket can easily hold the paraglider’s backpack, camelback and much more. There are openings in the upper part of the pocket (on both sides) to lead the drink pipe, antennas etc. Side pockets can be easily reached in flight. Under the seat plate you can find a waterballast pocket. It can be used for other purposes as well.
Ballast pocket under the seat
11. Impact padThe Jazz is equipped with a certified, 15 cm thick airfoam impact pad. Fixing the protector is demonstrated below.

12. Before flightBefore each flight a thorough check of the harness is required. For your own safety make sure that:- the harness is not damaged in any way- - rescue chute container is correctly closed and locked with pins- - rescue chute release handle is correctly set up and has the right shape (quite often it happens to be malformed in transport, so it’s important to check if it’s not flattened and easy to grab)- all leg and chest straps are closed- shoulder and side straps remain correctly adjusted- all pockets are closed with their zips covered- main carabiners are closed and locked, without any damage- the speedbar is clipped to the paraglider.
13. Using the rescue chuteThe rescue chute should be used in case of emergency, when you can’t recover the paraglider from dangerous flight state in any other way. Throwing the chute while in a fast spin is risky. If there is still some altitude to spare, first you should try to slow down the spin or stop it altogether.To use the chute grab the release handle, with fast and resolute move rip it from its velcro and throw it together with the canopy bag as far as possible, to the outside of the spiral (if present). After opening deflate your paraglider with its rear risers. Prepare for landing in a parachute style, keeping your legs together with slightly bent knees.
14. LandingWhile on the final approach, assume upright position and prepare your legs. Touchdown when still sitting is unacceptable and very dangerous, as even despite the impact pad there is high risk of spine injury. Land always on your feet, with a few steps to bleed off the speed if necessary. Protector is NOT a landing aid and was not designed as such.
15. Water landingWater landing is potentially very dangerous, with imminent risk of drowning. Since the Jazz has no buckles on its chestand leg straps it is necessary to have a safety knife, capable of cutting the straps. Such knife is a standard equipment of the harness, to be found under the instrument panel. If you can’t avoid the waterlanding, when ca. 10m over the water cut the chest strap including the v-strap where it is connected to the carabiners. In the last moment get out of the harness to avoid getting tangled in suspension lines or other gear. The harness does not sink, so you can later grab it and use as a lifebuoy. Cut straps (chest and v-strap) are not serviceable anymore and have to be replaced.
!
If you are descending under opened rescue chute the only places to cut are the ends of the hest one, NOT the v-strap.

! !
Water landing while still in harness is extremely dangerous. Impact pad does not sink and will always float, forcing your head under water and rendering breathing very hard or impossible. There is very high risk of getting tangled in lines and drowning.
16. Tandem flyingThe Jazz harness was not designed - and remains unsuitable - for tandem operations.
17. Cleaning and storageAll materials for the harness have been carefully selected, keeping their quality and durability in mind. With help of your care they will keep your harness in good condition for a long time. The harness is best cleaned with a wet sponge, possibly a bit of soap. Do not use any detergents nor solvents. If there is a lot of mud, use the brush first before wet cleaning. In case of completely soaked harness (e.g. after water landing) dry it in a well aired place, away from direct sun operation.Soaked impact pad must be taken out of the harness and dried with opened zip. If this will be not enough, remove theairfoam and dry it separately.Soaked rescue chute always has to be completely removed from the harness, dried and packed again by a licensed person.In case of a long-time storage keep the harness either in the backpack or loose, in a well ventilated room, away from the sun. Unfortunately some discoloration of the harness’ parts is unavoidable over time and this is yet another reasonfor not exposing it to the sun more than necessary.
18. Operation and repairsPeriodic control of the harness condition will keep it in safe operation for a long time. After each hard landing check the impact pad too, as the seams or zip quite often get ripped on absorbing impact and damaged impact pad will be ineffective. If you notice damage to its cover, send it back to the producer for a repair or buy a new one.Correspondingly, after each use of rescue chute thoroughly check entire harness for damages, paying particular attention to the straps and seams.

Aluminium carabiners should be replaced each 5 years or 300 hours airtime. Scratched or damaged carabiners are not serviceable anymore and have to be replaced at once.
!
Using damaged harness is out of the question. In case of any doubts please contact your dealer or manufacturer and/or send it to an authorised workshop for closer inspection.
19. Technical data Size Suspension Seatplate Max. pilot Harness
height widht* weight weight ** (cm) (cm) (kg) (kg)
S 39 25/31 100 2,95 M 40 27/33 100 3,10 L 41 28/34 100 3,25 XL 42 29/35 100 3,40
* Seat width front/back** Weight (kg) including impact pad, footrest, carabiners and speedbar
Size Back support Seatplate height lenght
A B (cm) (cm) A
S 64 46 M 67 48 L 70 49 XL 74 51
BImpact pad Airfoam, 15 cm thickCarabiners Dudek 20 kNBuckles AustriAlpinTextiles 5012 Cordura Ripstop 160 g/m2
Delinova 100 200 g/m2Delinova 75 130g/m2Dominico 41 g/m2Lycra 210 g/m2
Straps Polyester 1780 daNPolyamide 1200 daN
i i
Since Dudek Paragliders products are subject to constant improvements, some minor differences are possible betweenthe manual and actual product. Dudek Paragliders withholds its rights to introduce such changes without individual notice.

Dudek Paraglidersul. Centralna 2 U86-031 OsielskoPolandtel. +48 52 324 17 40fax. +48 52 381 33 [email protected]