using image & text in photoshop
TRANSCRIPT
Image & Text Using Photoshop

Lesson ObjectivesIn this session you will learn:
• How to add text to an image.
• How to manipulate the text, changing its position, colour, angle and size.
• How to use other text effects using Photoshop.
Keep a record of your progress using the Image & text worksheet.

1. Open an image in Photoshop
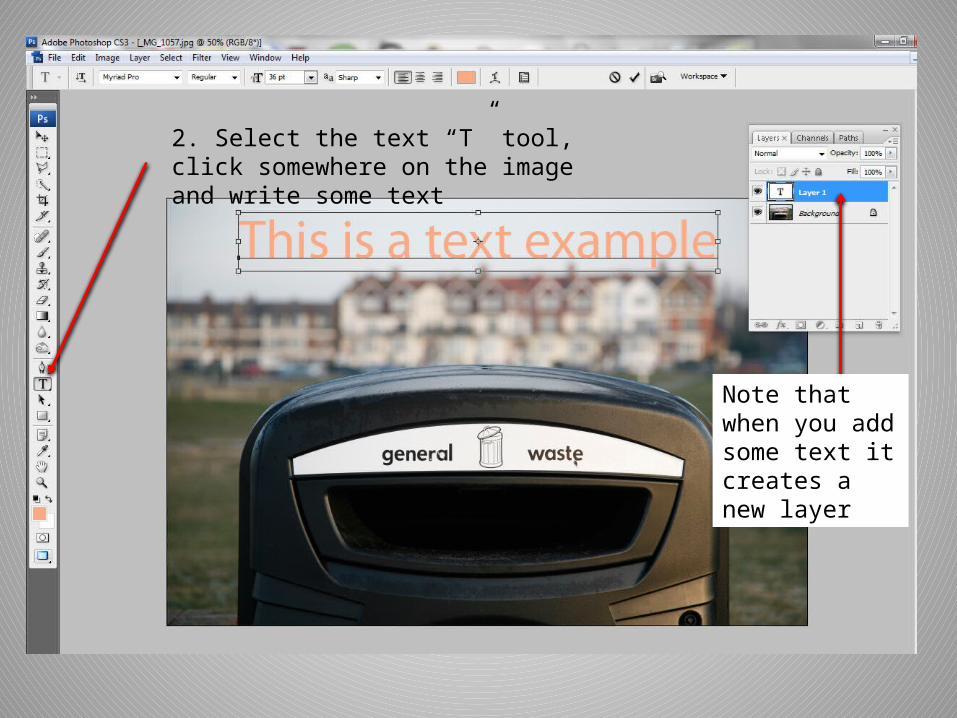
2. Select the text “T” tool, click somewhere on the image and write some text
Note that when you add some text it creates a new layer
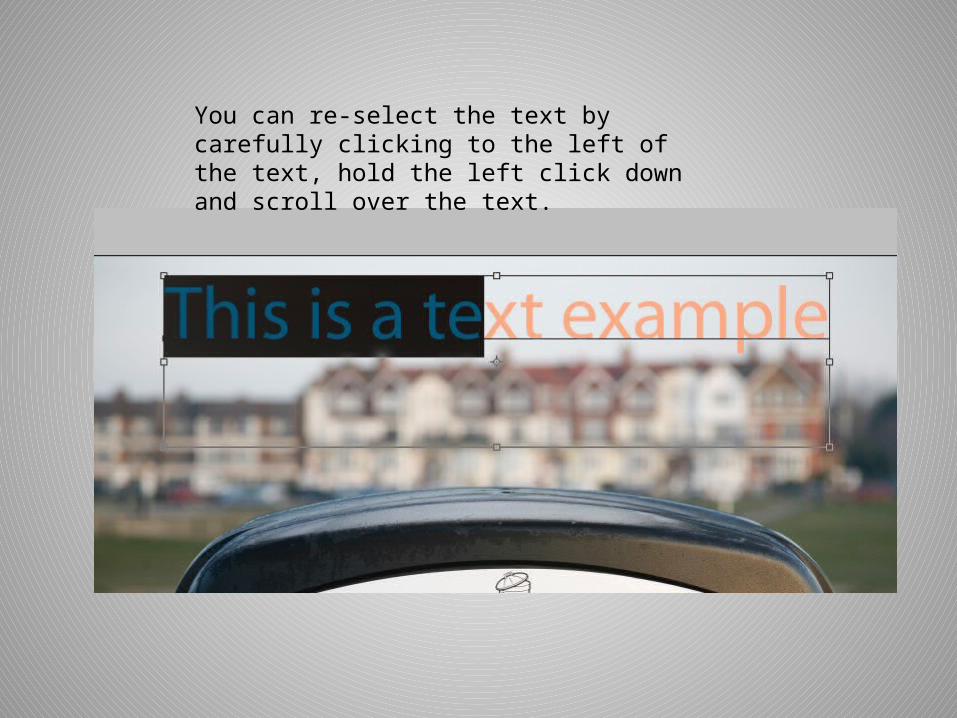
You can re-select the text by carefully clicking to the left of the text, hold the left click down and scroll over the text.
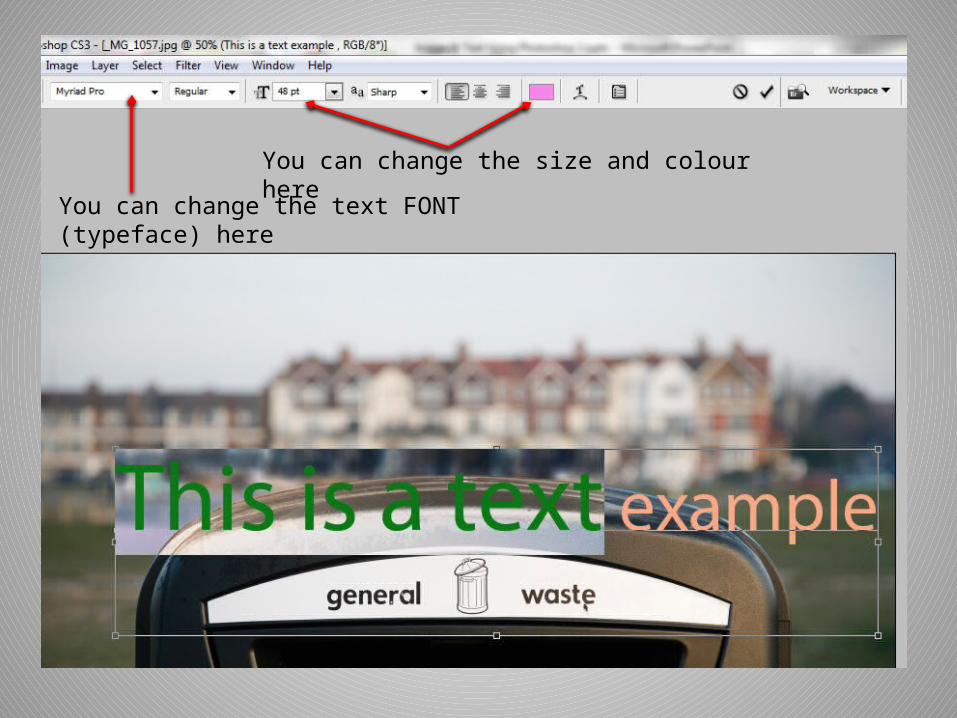
You can change the text FONT (typeface) here
You can change the size and colour here
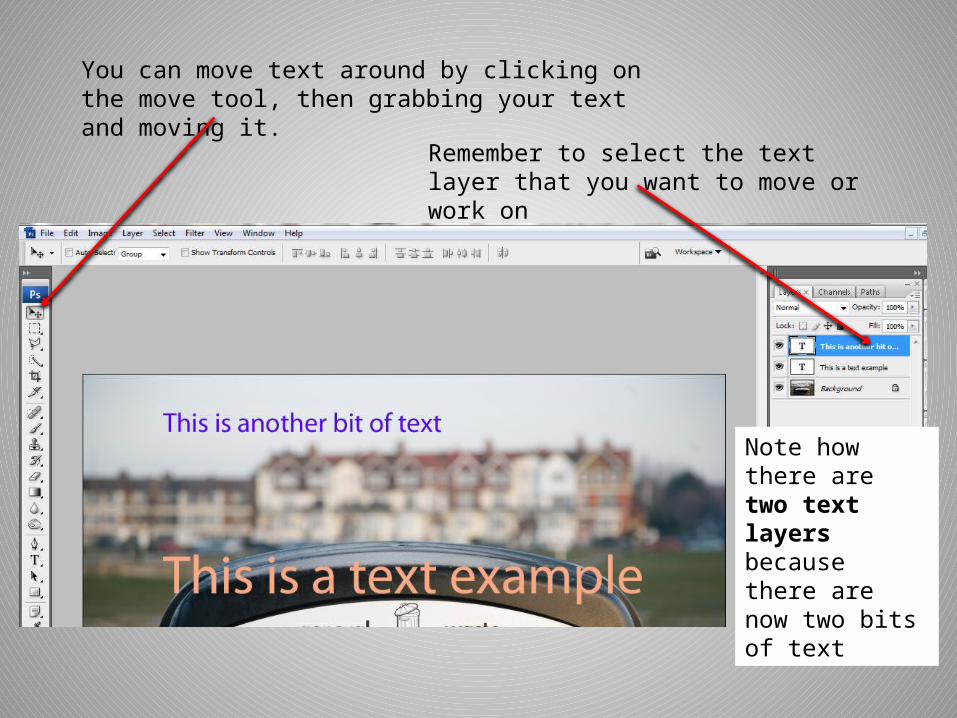
You can move text around by clicking on the move tool, then grabbing your text and moving it.
Remember to select the text layer that you want to move or work on
Note how there are two text layers because there are now two bits of text

To angle text first select the text layer. Then select:EDIT TRANSFORM ROTATE
Next, slowly move the pointer near one of the corners of the box around the text. When it shows a rotate symbol click and rotate.
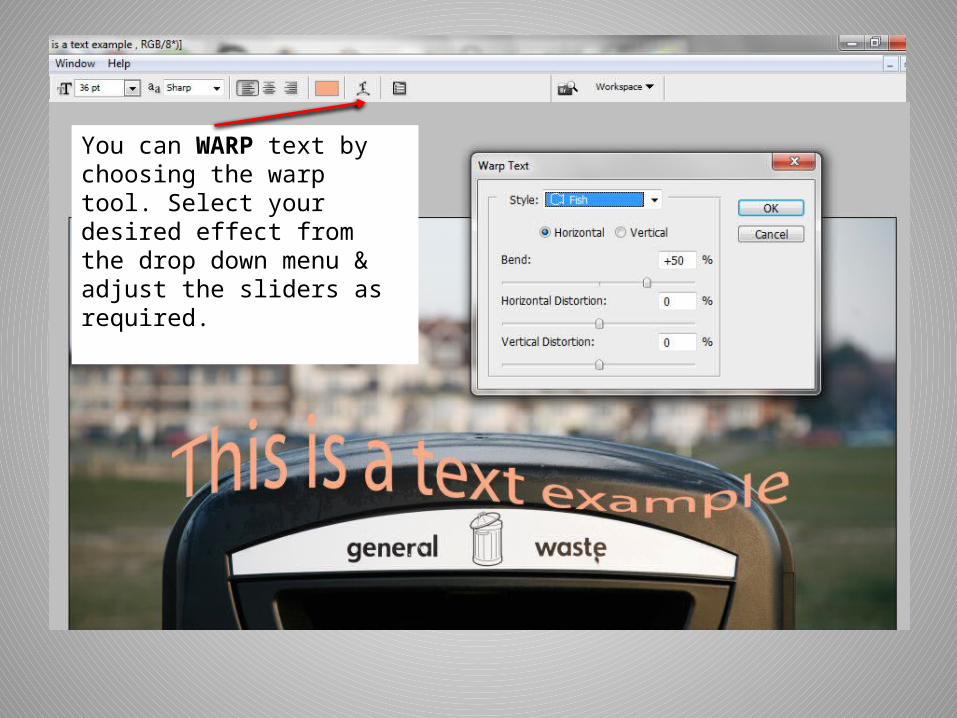
You can WARP text by choosing the warp tool. Select your desired effect from the drop down menu & adjust the sliders as required.

By double clicking on the text layer, the layer style box will open.You can choose from many photoshop effects to apply to your text.Experiment to find out what each effect does.
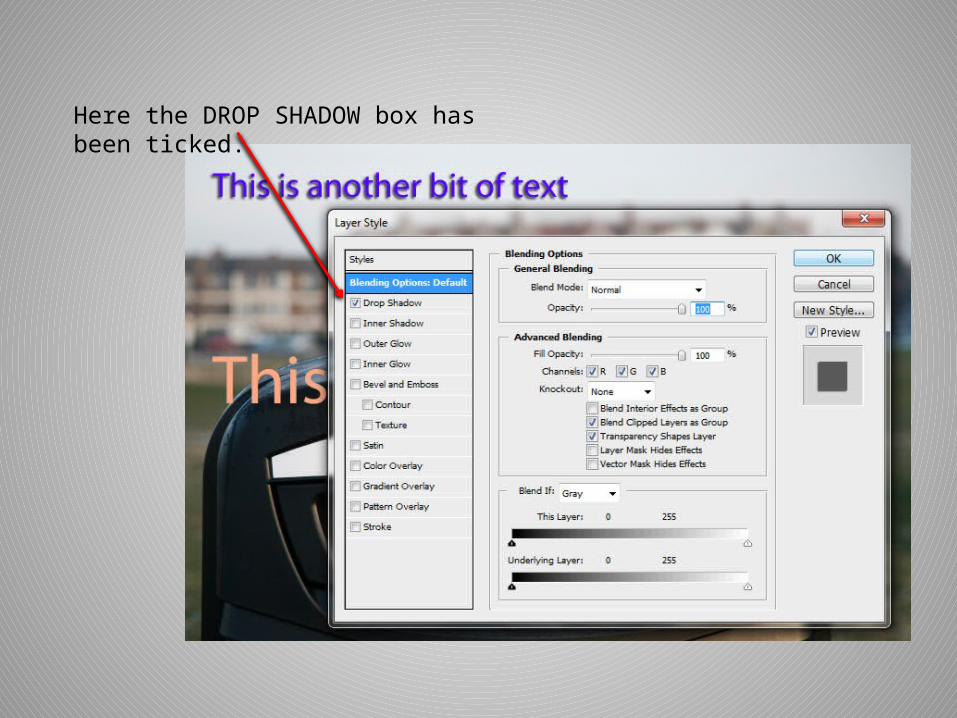
Here the DROP SHADOW box has been ticked.

The OPACITY of any layer can be adjusted here with the slider.Note how with opacity of 38% the text is a bit “see-through”

Tick When
Text Effect Completed Notes
Colour
Font
Size
Placement
Angle
Warp
Drop Shadow
Emboss/Bevel
Outer Glow
Inner Glow
Gradient Overlay
Opacity
Other?
Use your worksheet to discover all the different ways that you can alter text.See if you can discover any that are NOT on the list!
Remember to print out your A4 sheet with all the text examples when you have finished!