visionslive how to create your first idi
TRANSCRIPT

Document History: Version 1.0 – 3
rd October 2014
Version 1.1 – 25th November 2014
Version 1.2 – 27th August 2015
Prepared by – J. Ramsay VisionsLive Limited © VisionsLive Ltd 2009-2015
OOOOnnnnlllliiiinnnne Que Que Que Quaaaalllliiiittttaaaattttiiiivvvveeee RRRReseseseseeeeaaaarrrrch mach mach mach madddde se se se siiiimmmmpppplllleeee
Creating Your First IDI
Prepared for:
First time users of VisionsLive V+
Interviews
1. Creating your first in-depth interview
This is a short guide to setting up your first in-depth interview (IDI)
2. Getting started
Log in to the management portal at https://portal.visionslive.com (if you can't remember your
password, use the forgotten password link to be sent a password reset email – remember to
check junk/spam inboxes).
3. Creating a new project
Once you have a full account with us, nominated moderators can be given permission to
create new projects. If you still have a demo account, you may have to use the demo project
created by us; if this is the case, select that project and skip ahead to “Your project
dashboard”
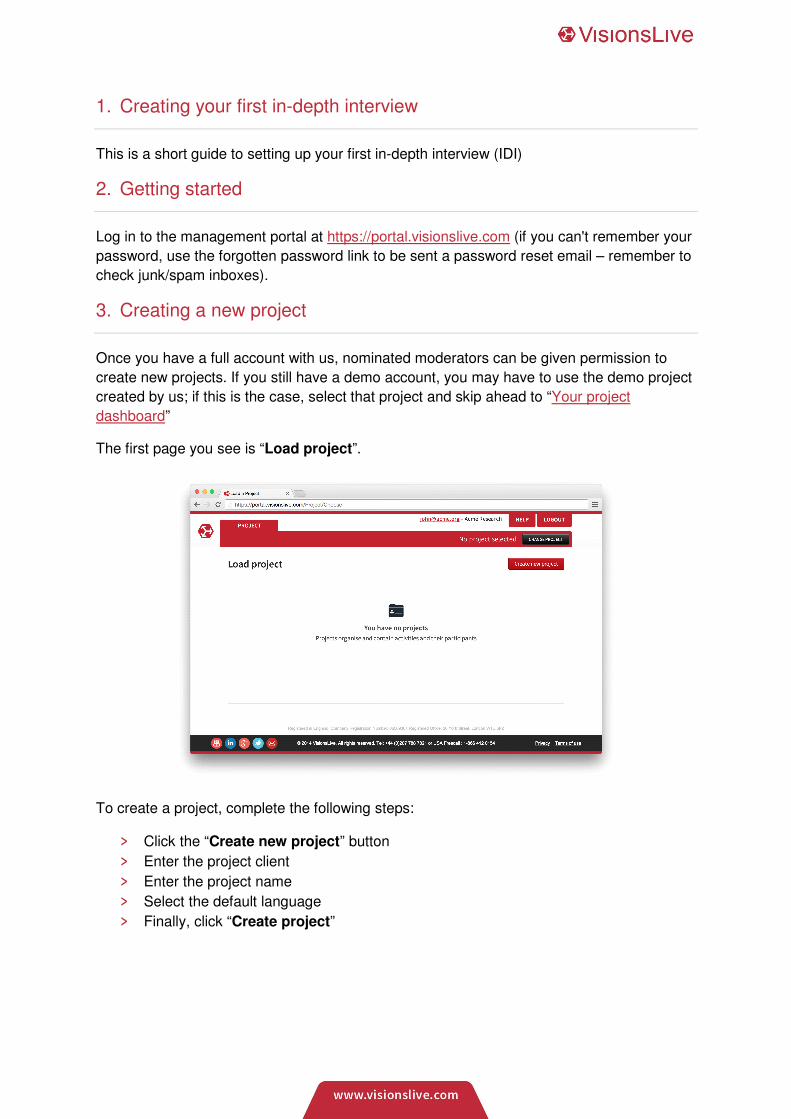
The first page you see is “Load project”.
To create a project, complete the following steps:
> Click the “Create new project” button
> Enter the project client
> Enter the project name
> Select the default language
> Finally, click “Create project”

4. Selecting your research project
Select the project that you want to run your activity in.
The moderator icon indicates that you are a moderator of a particular project
> External moderators can only see and select projects that have been assigned by an
administrator
> Company moderators can see all projects within a company and can join any project
5. Your project dashboard
The project dashboard summarises all the activities that have been run in a project. The
dashboard is the go to place for managing and running different activities.
On the dashboard, a moderator can:
> Create and edit the content of an IDI
> Reschedule an IDI
> Edit the participants for an upcoming IDI
> View participant status for an IDI
> Resend notifications to participants
> Retrieve a list of IDI access links
> Access reports for a completed IDI

6. Creating your in-depth interview
To create a new activity from the project dashboard, select the “New activity” button.
You can then choose between running an IDI or a focus group, upon making your selection,
you will be taken through the set-up wizard to finalise the creation of the in-depth interview.
After selecting the IDI option, you need to specify whether if the interview has audio-visual
(AV) features enabled.
Upon making your selection, you will be taken through the setup wizard to finalise the
creation of the in-depth interview.
I. IDI Details The first step is to specify the initial details of the IDI
> Activity title – This the title of the activity that is displayed to participants in
notifications and during the interview.
> Private description – This is description that moderators and administrators can see
on the dashboard and elsewhere in the management portal.
> Language – Select the language that the IDI is being run in.
> Server location – Select the appropriate server location depending on your
participant’s locations.
> Copy content from – Choose a previously created IDI to copy whiteboards and
discussion guides from.

II. IDI Scheduling Here, you can select the time, date and the planned duration of the IDI. The estimated
duration is a guideline only, interviews may over or under-run.
If the IDI is only for test purposes, the moderator should check the “Test activity” check box.
You will not be charged for test activities, pending staff confirmation.

III. Selecting participants Moderator will now be able to select the various participants for an IDI
Only one respondent can be selected for an IDI, if you do not wish you add your
respondents now, you can invite them to the session at a later time.
If your desired respondent is not listed, they will need adding to the project, you can do this
by clicking the “Add respondents” button.
IV. Moderators Moderators are the next to be added and this can be done on the following screen, by either
selecting the moderators that are already loaded into the project, or by assigning existing
company users through selecting the “Add moderators” option. As mentioned earlier, when
adding more moderators, ensure any desired participants are selected before proceeding.
If the moderator you need is not listed, the moderator may have to be added as a new user
to the company. You will need access to the “Account” tab to do this, if you don’t you’ll need
to contact your account administrator.
You will need to open the “Account” tab in a new window, visit the “Users” link in the menu
and click the “Add User” button. You can then return to the wizard and follow the steps for
adding a moderator to the project again.
Observers can be added in the same way as respondents.

V. Notifications Once all the participants have been selected, moderator will need to select which
notifications are required.
> Invitation emails are always sent to all participants, each with a unique IDI access
link.
> Availability email can be selected, which allows respondents to confirm their
attendance to an IDI. Respondents will be sent an invitation email after they have
confirmed their availability.
> SMS reminders can also be selected which will be sent to the respondent at a
designated time before the start of the IDI. Respondents must have a valid
mobile/cellular phone number on their profile to be sent SMS notifications.
Once the notifications have been selected, you will be shown the previews of each of the
notifications.
Please be aware that access links for each participant are unique, so the same link or
access to a particular session must only be used by one person at any time. If two people
attempt to access using the same link, one of them will be disconnected from the session.
While previewing, you have the opportunity to edit the text for various notification types.

VI. Editing invitation emails As the moderator, you will then be given the opportunity to construct your invitation emails.
There will already be a proposed email for you to send, however this can be edited by
selecting the “Edit email” option.
Tags can be inserted or removed to personalise the email, fonts, styles, sizes and layouts
can also be used to customise the appearance of the email.
Tags are placeholders used by the system, they are automatically substituted with the
relevant information for each respondent when the emails are sent. Tags such as
{ActivityStartTime} (based on the respondent’s time zone) and {ActivityAccessLink} can
be unique to each respondent and thus should not be manually entered.
Any edits made will be saved as the default for that notification type used by other activities
in the project.

VII. Confirmation Once all notifications have been previewed, the moderator is able to review the IDI before
any notifications are sent out.
Moderators can easily navigate between any of the steps and make modifications.
Moderators need to agree to the terms and conditions before the notifications are sent and
the new IDI is displayed on the dashboard

More Information
If you require more information or assistance, please
talk to your account administrator, or contact the
VisionsLive support team at [email protected]
UK: +44 (0)20 7788 7821 26 York Street, London W1U 6PZ
US: +1 (866) 412-0154 189 Main Street, Yarmouth, Maine 04096