who to contact: all about your - great green systems
TRANSCRIPT

Please read thisInstruction manual
before you assembleor
Install your Green Cone
Solarcone IncP.O. Box 67, Seward, Illinois 61077, USA Contact: Sarah Luna Tel: 001 (815) 713 4719Cell: 001 (815) 979 5499Email: [email protected]: www.solarcone.netPrimary Territories: Illinois, Indiana, Iowa, Kentucky, Michigan, Minnesota, Missouri, Wisconsin
Signature Marketing L.L.C.134, West Street, Simsbury, Connecticut 06070, U.S.A. Contact: Evelyn Golden, Jonas StrimaitisTel: 001 (860) 658 7172Email: [email protected] or [email protected] Web: www.signaturemarketing.com Primary Territories: Connecticut, Delaware, Maine, Maryland, Massachusetts, New Hampshire, New Jersey, New York, Pennsylvania, Rhode Island, Vermont
Durable Solutions200-1820 Fir Street, Vancouver, British Columbia, V6J 3B1 Contact: Jeff Malmgren Tel: 001 (604) 731 3481 Cell: 001 (604) 329 3481 Email: [email protected] Web: www.greencone.ca Primary Territories: Alberta, Alaska, British Columbia, Hawaii, Idaho, Manitoba, Oregon, Saskatchewan, Washington
Compostec10 de la Ferme Street, Gatineau, Quebec, Canada, J8L 3S5 Contact: Marcel HalleTel: 001 (819) 420 3488Email: [email protected] Web: www.compostec.ca Primary Territories: New Brunswick, Newfoundland, Ontario, Quebec
Who to contact:ALL ABOUT YOUR
GREEN CONE
A Unique Food Waste Digester SystemNOT a back yard composter
full-USA2012.indd 1 20/03/2012 11:12
Who to contact:
UK
Great Green Systems Limited
Postal Address: Suite 42, 235 Earls Court Road, London, SW5 9FE
Warehouse Address: Canute Group, Hopesyke Industrial Estate, Longtown, Carlisle, Cumbria, CA6 5SZ
Telephone: 0800 731 2572
Email: [email protected]
Website: www.greatgreensystems.com
Index Index
Introduction 1
How the Green Cone Works 2
Assembling your Green Cone 3
Installing your Green Cone 4
Using your Green Cone 5-6
Frequently asked questions 7-9
How to contact us Back page
9.
Frequently Asked Questions Cont'd Frequently Asked Questions Cont'd
Will the Green Cone attract flies?The Green Cone is a sealed unit and when properly installed emits no smells. It does not therefore attract flies. However, the eggs of fruit flies are already in the skins of many fruits and can hatch out in the Green Cone. Similarly, if food or food waste is not kept covered prior to going into the Green Cone, eggs may be laid by a house fly. These would also produce maggots and flies in the Green Cone. Good housekeeping is therefore important. Should flies become a nuisance they can be eradicated by using an air borne fly killer (given the enclosed space inside the Cone a little squirt kills the flies very quickly) which will not kill the bacteria.
Does the Green Cone attract vermin?If correctly installed, your Green Cone will not attract vermin. By ensuring that the top of the black basket and the bottom lip of the green outer cone are below ground level any smells will be filtered out by the surrounding soil. It is also important not to spill food near the Green Cone.
If your question is not covered in this section or you would like to discuss any other issues, please use the contact list for your areaon the back page of this booklet.
How do I get more accelerator powder?Additional accelerator powder can be purchased by contacting one of the suppliers on the back page of this booklet.
full-USA2012.indd 6 20/03/2012 11:12

Introduction Introduction
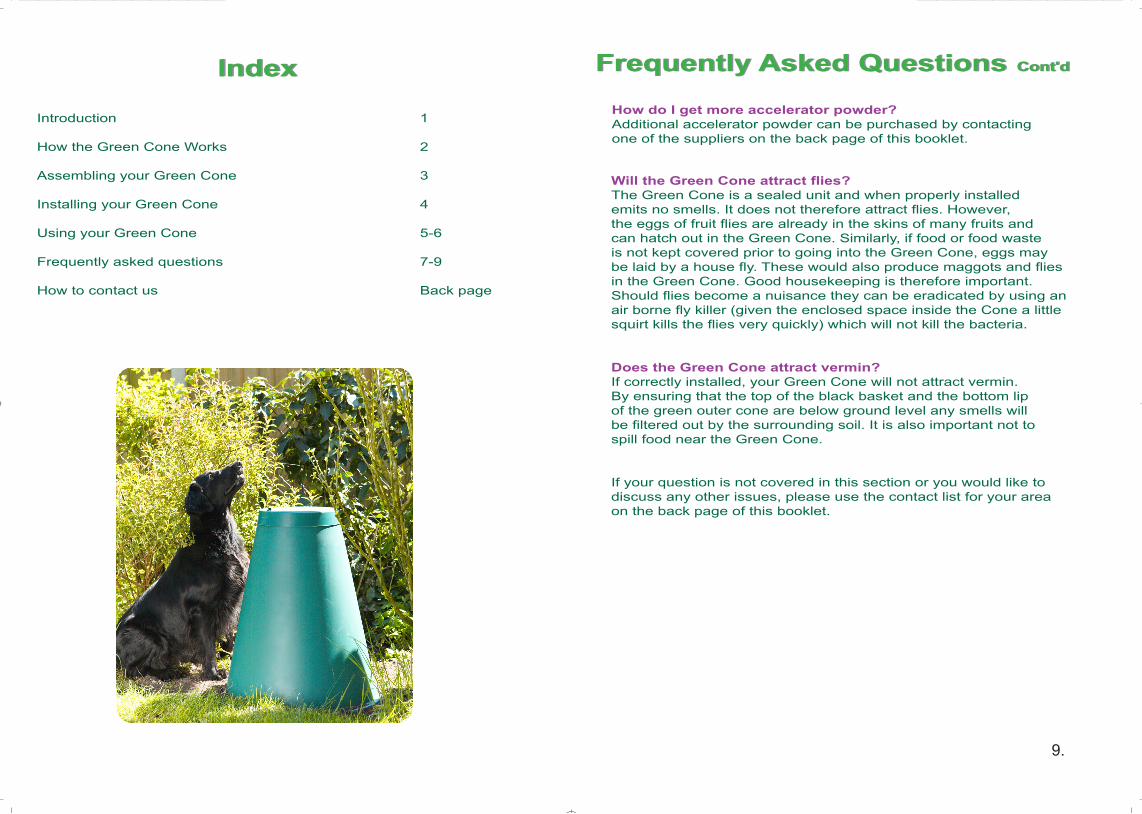
This guide is intended to help you set up and use the Green Cone System within your back yard. The Green Cone is a completely natural system that reduces your food waste to its natural components of water, carbon dioxide and a small residue. This solar-heated unit takes ALL cooked and uncooked food waste including meat, fish, bones, dairy products, vegetables and fruit. Put all your food waste into your Green Cone, situated in a sunny part of your yard, and forget about it - almost everything disappears!
The Benefits to You
Waste food can be disposed of cleanly and quickly, before it becomes smelly. With no food waste in your bins your other rubbish is dry and easy to recycle. Safe for you, your pets and your plants. It's easy to set up and maintain. Ten year guarantee.
Helping the Environment
Saves up to 20% of household waste having to be collected by your Municipality. Less rubbish means fewer lorries on the road. Makes recycling household waste much easier. Reduces the need for landfill and centralised composting/ incineration.
Differences Between a Green Cone and Traditional Composter.
Traditional home composting is an excellent way of recycling garden waste back into the soil. However, unlike a Green Cone, a garden composter is not suitable for recycling many types of food waste, including cooked vegetables, pasta, meat, bones, dairy products and also pet faeces. The Green Cone has been designed to break down these materials in a safe way. The waste is digested rather than composted and is primarily reduced to water. This nutrient rich water enters the soil under the base of the digestion unit. Very little waste residue is produced by a well operating Green Cone and, unlike traditional composters, there is no need to manually turn the waste.
1.
8.
When and how often should I empty my Green Cone?In a well operating Green Cone the waste residue will only need to be removed every few years and certainly no more than once a year. It requires emptying when the residue builds-up to about 10 cm (4") below ground level and shows no signs of reducing.
How do I clean the caddy?Hand wash the caddy in warm soapy water.
Why is there a bar across the top of the Green Cone?The bar across the mouth of the Green Cone provides some rigidity in storage and transit. Its original purpose was to prevent small children climbing into the Green Cone. Turning the new catch on the lid now serves the same purpose and the bar may safely be removed using a hacksaw to allow large scraps and carcasses to be put more easily into the Green Cone.
What about methane?Food decomposing in the presence of oxygen in your Green Cone produces very little methane.
Can my Green Cone stop working?Problems may occur if the advice on locating your Green Cone given in this booklet is not followed, namely: It must be in a sunny spot in your yard and not a shady area. The surrounding soil must be well drained and not heavy clay or chalk. The black basket must not be below the water table or in an area where water gathers.
If these instructions are not followed the digestion process could turn anaerobic (without oxygen) and the food waste will appear wet and slimy. The only solution is to reinstall your Green Cone in accordance with these instructions.
In periods of cold weather the digestion process may slow down due to lack of natural bacteria. This would be evident by the level of waste in the basket not decreasing. Under these circumstances the addition of the natural Green Cone accelerator powder should restore the bacteria population and restart the digestion process.
Frequently Asked Questions Cont'dFrequently Asked Questions Cont'd
How the Green Cone Works How the Green Cone Works
Sunlight Provides energy source for the digestion process.
Double-walled solar cone Creates a heat trap of circulating air to encourage bacteria growth.
Soil Filters out smells and prevents access by flies.
Nutrient Rich Water Enters surrounding ground
Natural Micro-organisms and Worms Migrate freely in and out of the basket and break down the waste.
Removable Lid For easy access to digestion chamber.
Digestion Chamber Aerobic conditions to reduce methane
production.
Over 90% of the waste material in your Green Cone will be absorbed as water by the soil.
2.
How easy is the Green Cone System to use?Very. In your kitchen fill the Green Cone caddy with all your organic kitchen waste. When convenient, empty the caddy into the Green Cone in your back yard.
Where should I put the Green Cone itself?In a sunny, close-to-hand spot like a flowerbed or vegetable plot. Do not put your Green Cone in a cold, dark, wet place as it will not work properly.
Can I use chemical activators as well?No. Chemcials can kill or disrupt the bacteria breaking down the food waste. If activator is required only use the natural Green Cone accelerator powder.
Can I use my Green Cone to dispose of animal excrement?Yes, in moderation if you are not using the residue on a vegetable patch. When you come to empty the Cone, take care to wear gloves and make sure you wash your hands.
How much food waste can I put in my Green Cone?Provided your Green Cone has been correctly installed, three-quarters to one kilogram of food waste can be disposed of in your Green Cone each day. This amount is typical of that produced by a family of four. The precise quantity of waste digested by your Green Cone each day will depend upon the ambient temperature, the population of bacteria and the mix of food waste you produce, where just like us the Green Cone responds to a balanced diet of vegetables, fruit, fish and meat!
Can I put garden waste in my Green Cone?It is better not to. A traditional compost bin or heap is better at handling garden waste such as grass cuttings.
Do I have to turn or mix the contents in my Green Cone?No, just put all your food waste into the Cone and forget it. Your Green Cone does all the hard work for you.
Will my Green Cone work all year round?Yes. Your Green Cone works 365 days a year. The level of food waste may rise during winter but should drop down when the weather gets warmer. If it slows during very cold periods use the natural Green Cone accelerator powder.
Frequently Asked Questions Frequently Asked Questions
7.
full-USA2012.indd 2-3 20/03/2012 11:12

Introduction Introduction
This guide is intended to help you set up and use the Green Cone System within your back yard. The Green Cone is a completely natural system that reduces your food waste to its natural components of water, carbon dioxide and a small residue. This solar-heated unit takes ALL cooked and uncooked food waste including meat, fish, bones, dairy products, vegetables and fruit. Put all your food waste into your Green Cone, situated in a sunny part of your yard, and forget about it - almost everything disappears!
The Benefits to You
Waste food can be disposed of cleanly and quickly, before it becomes smelly. With no food waste in your bins your other rubbish is dry and easy to recycle. Safe for you, your pets and your plants. It's easy to set up and maintain. Ten year guarantee.
Helping the Environment
Saves up to 20% of household waste having to be collected by your Municipality. Less rubbish means fewer lorries on the road. Makes recycling household waste much easier. Reduces the need for landfill and centralised composting/ incineration.
Differences Between a Green Cone and Traditional Composter.
Traditional home composting is an excellent way of recycling garden waste back into the soil. However, unlike a Green Cone, a garden composter is not suitable for recycling many types of food waste, including cooked vegetables, pasta, meat, bones, dairy products and also pet faeces. The Green Cone has been designed to break down these materials in a safe way. The waste is digested rather than composted and is primarily reduced to water. This nutrient rich water enters the soil under the base of the digestion unit. Very little waste residue is produced by a well operating Green Cone and, unlike traditional composters, there is no need to manually turn the waste.
1.
8.
When and how often should I empty my Green Cone?In a well operating Green Cone the waste residue will only need to be removed every few years and certainly no more than once a year. It requires emptying when the residue builds-up to about 10 cm (4") below ground level and shows no signs of reducing.
How do I clean the caddy?Hand wash the caddy in warm soapy water.
Why is there a bar across the top of the Green Cone?The bar across the mouth of the Green Cone provides some rigidity in storage and transit. Its original purpose was to prevent small children climbing into the Green Cone. Turning the new catch on the lid now serves the same purpose and the bar may safely be removed using a hacksaw to allow large scraps and carcasses to be put more easily into the Green Cone.
What about methane?Food decomposing in the presence of oxygen in your Green Cone produces very little methane.
Can my Green Cone stop working?Problems may occur if the advice on locating your Green Cone given in this booklet is not followed, namely: It must be in a sunny spot in your yard and not a shady area. The surrounding soil must be well drained and not heavy clay or chalk. The black basket must not be below the water table or in an area where water gathers.
If these instructions are not followed the digestion process could turn anaerobic (without oxygen) and the food waste will appear wet and slimy. The only solution is to reinstall your Green Cone in accordance with these instructions.
In periods of cold weather the digestion process may slow down due to lack of natural bacteria. This would be evident by the level of waste in the basket not decreasing. Under these circumstances the addition of the natural Green Cone accelerator powder should restore the bacteria population and restart the digestion process.
Frequently Asked Questions Cont'dFrequently Asked Questions Cont'd
How the Green Cone Works How the Green Cone Works
Sunlight Provides energy source for the digestion process.
Double-walled solar cone Creates a heat trap of circulating air to encourage bacteria growth.
Soil Filters out smells and prevents access by flies.
Nutrient Rich Water Enters surrounding ground
Natural Micro-organisms and Worms Migrate freely in and out of the basket and break down the waste.
Removable Lid For easy access to digestion chamber.
Digestion Chamber Aerobic conditions to reduce methane
production.
Over 90% of the waste material in your Green Cone will be absorbed as water by the soil.
2.
How easy is the Green Cone System to use?Very. In your kitchen fill the Green Cone caddy with all your organic kitchen waste. When convenient, empty the caddy into the Green Cone in your back yard.
Where should I put the Green Cone itself?In a sunny, close-to-hand spot like a flowerbed or vegetable plot. Do not put your Green Cone in a cold, dark, wet place as it will not work properly.
Can I use chemical activators as well?No. Chemcials can kill or disrupt the bacteria breaking down the food waste. If activator is required only use the natural Green Cone accelerator powder.
Can I use my Green Cone to dispose of animal excrement?Yes, in moderation if you are not using the residue on a vegetable patch. When you come to empty the Cone, take care to wear gloves and make sure you wash your hands.
How much food waste can I put in my Green Cone?Provided your Green Cone has been correctly installed, three-quarters to one kilogram of food waste can be disposed of in your Green Cone each day. This amount is typical of that produced by a family of four. The precise quantity of waste digested by your Green Cone each day will depend upon the ambient temperature, the population of bacteria and the mix of food waste you produce, where just like us the Green Cone responds to a balanced diet of vegetables, fruit, fish and meat!
Can I put garden waste in my Green Cone?It is better not to. A traditional compost bin or heap is better at handling garden waste such as grass cuttings.
Do I have to turn or mix the contents in my Green Cone?No, just put all your food waste into the Cone and forget it. Your Green Cone does all the hard work for you.
Will my Green Cone work all year round?Yes. Your Green Cone works 365 days a year. The level of food waste may rise during winter but should drop down when the weather gets warmer. If it slows during very cold periods use the natural Green Cone accelerator powder.
Frequently Asked Questions Frequently Asked Questions
7.
full-USA2012.indd 2-3 20/03/2012 11:12

3.
Assembling Your Green Cone Assembling Your Green Cone
Place the ribbed side of the hinge on the inside of the lid. Screw the hinge onto the lid through the pre-drilled holes using the two studs.
Attach the twistlock to the outer cone through the marked holes using the two 8x5/8 screws.
Place the lid on top of the green outer cone. Screw the hinge to the outer cone using three 10x5/8 self tapping screws and backplate as shown. When using these screws pre-drilled holes are not required.
Place the green outer cone over the black inner cone, making sure that the lid opens in a convenient direction. Line up the screw holes in the base of the green outer cone with the notches on the base of the black inner cone. Use six 10x5/8 self tapping screws to secure the cones to the basket.
The bar across the opening of the green outer cone can be removed using a hacksaw if desired (see Frequently Asked Questions)
Hardware Kit: Lid, Green Outer Cone, Black Inner Cone, Basket
Using Your Green Cone Cont'd Using Your Green Cone Cont'd
6.
Compost: straw and garden waste such as grass and hedge clippings.
Special treatment (see guidance provided at www.rethinkrubbish.com):
- Petroleum based liquids, solvents, paints, chemicals such as bleach, household cleaners, insecticides, etc. - Medical and pharmaceutical waste such as dressings, medicine and drugs. - Sanitary items such as disposable nappies.
In summary, your Green Cone should be used as follows: -
What can go in What can't go in Fish Metal Red Meat & Poultry Wood All Bones Plastic Bread Glass Fruit including peelings Paper Vegetables including peelings Straw Dairy produce Grass cuttings Cooked food scraps Hedge clippings Crushed egg shells Bulk oil Tea bags Disinfectant & bleaches Animal excrement "Special treatment items"
Maintenance
Your Green Cone needs very little maintenance. As noted in the section on "installing Your Green Cone", it is important to ensure that the top of the basket and the bottom lip of the outer green cone are below ground level and always fully covered with soil.
In a well operating Green Cone very little waste residue will be produced. Should the residue build-up to ground level and not decrease, the cones can be removed to access the basket. The residue can be dug into any suitable area of ground.
Studs Hinge Screws Backplate Screws Twistlock
x 2 x 1 x 9 x 1 x 2 x 1 (10x5/8) (8x5/8)
Tools required:
Step 1
Step 2
Step 3
Step 4
YOU MUST ASSEMBLE YOUR GREEN CONE BEFORE INSTALLATION
Crosshead Screwdriver Flathead Screwdriver
Installing Your Green Cone Installing Your Green Cone
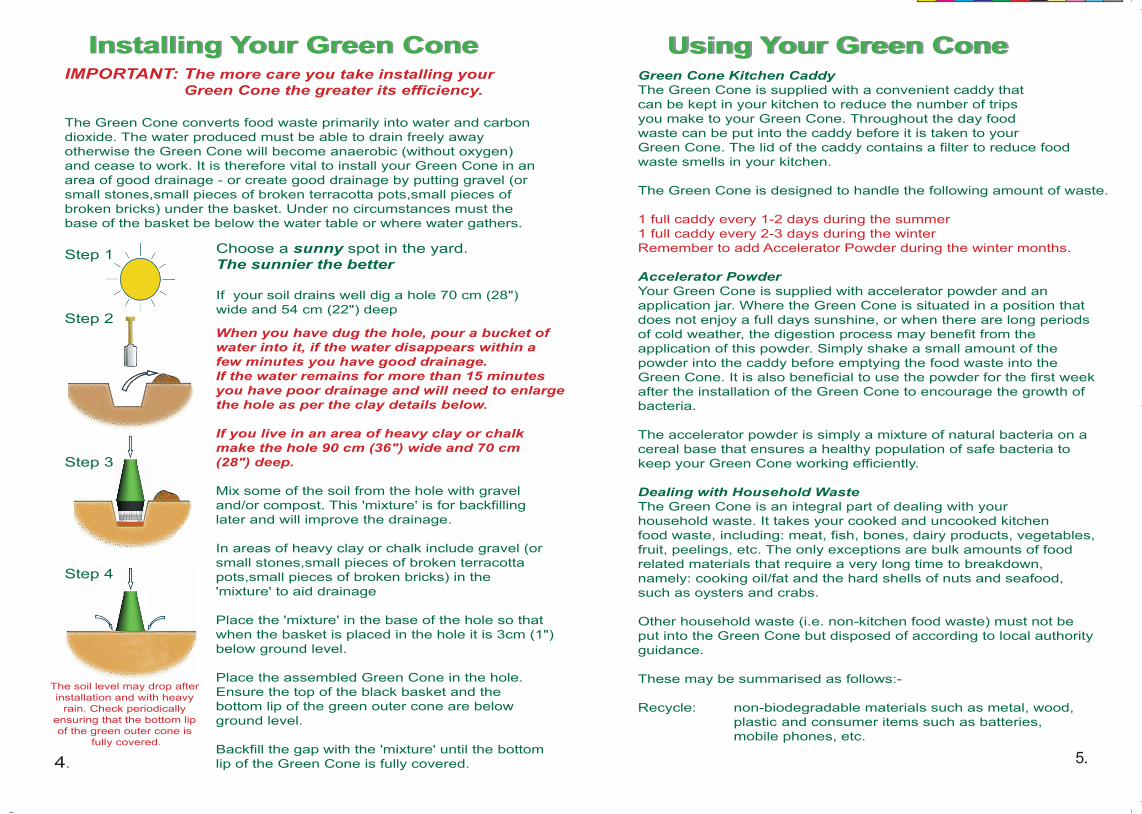
Choose a sunny spot in the yard.The sunnier the better
If your soil drains well dig a hole 70 cm (28") wide and 54 cm (22") deep
When you have dug the hole, pour a bucket of water into it, if the water disappears within a few minutes you have good drainage. If the water remains for more than 15 minutes you have poor drainage and will need to enlarge the hole as per the clay details below. If you live in an area of heavy clay or chalk make the hole 90 cm (36") wide and 70 cm (28") deep.
Mix some of the soil from the hole with gravel and/or compost. This 'mixture' is for backfillinglater and will improve the drainage.
In areas of heavy clay or chalk include gravel (or small stones,small pieces of broken terracotta pots,small pieces of broken bricks) in the 'mixture' to aid drainage
Place the 'mixture' in the base of the hole so thatwhen the basket is placed in the hole it is 3cm (1") below ground level.
Place the assembled Green Cone in the hole. Ensure the top of the black basket and the bottom lip of the green outer cone are below ground level.
Backfill the gap with the 'mixture' until the bottom lip of the Green Cone is fully covered.
IMPORTANT: The more care you take installing your Green Cone the greater its efficiency.
The Green Cone converts food waste primarily into water and carbon dioxide. The water produced must be able to drain freely away otherwise the Green Cone will become anaerobic (without oxygen) and cease to work. It is therefore vital to install your Green Cone in an area of good drainage - or create good drainage by putting gravel (or small stones,small pieces of broken terracotta pots,small pieces ofbroken bricks) under the basket. Under no circumstances must the base of the basket be below the water table or where water gathers.
Step 1
Step 2
Step 3
Step 4
4.
Using Your Green Cone Using Your Green Cone
5.
Green Cone Kitchen CaddyThe Green Cone is supplied with a convenient caddy that can be kept in your kitchen to reduce the number of trips you make to your Green Cone. Throughout the day food waste can be put into the caddy before it is taken to your Green Cone. The lid of the caddy contains a filter to reduce food waste smells in your kitchen.
The Green Cone is designed to handle the following amount of waste.
1 full caddy every 1-2 days during the summer 1 full caddy every 2-3 days during the winter Remember to add Accelerator Powder during the winter months.
Accelerator PowderYour Green Cone is supplied with accelerator powder and anapplication jar. Where the Green Cone is situated in a position that does not enjoy a full days sunshine, or when there are long periods of cold weather, the digestion process may benefit from the application of this powder. Simply shake a small amount of the powder into the caddy before emptying the food waste into the Green Cone. It is also beneficial to use the powder for the first week after the installation of the Green Cone to encourage the growth of bacteria.
The accelerator powder is simply a mixture of natural bacteria on a cereal base that ensures a healthy population of safe bacteria tokeep your Green Cone working efficiently.
Dealing with Household WasteThe Green Cone is an integral part of dealing with your household waste. It takes your cooked and uncooked kitchen food waste, including: meat, fish, bones, dairy products, vegetables, fruit, peelings, etc. The only exceptions are bulk amounts of food related materials that require a very long time to breakdown, namely: cooking oil/fat and the hard shells of nuts and seafood, such as oysters and crabs.
Other household waste (i.e. non-kitchen food waste) must not be put into the Green Cone but disposed of according to local authority guidance.
These may be summarised as follows:-
Recycle: non-biodegradable materials such as metal, wood, plastic and consumer items such as batteries, mobile phones, etc.
The soil level may drop after installation and with heavy
rain. Check periodically ensuring that the bottom lip of the green outer cone is
fully covered.
full-USA2012.indd 4-5 20/03/2012 11:12
3.
Assembling Your Green Cone Assembling Your Green Cone
Place the ribbed side of the hinge on the inside of the lid. Screw the hinge onto the lid through the pre-drilled holes using the two studs.
Attach the twistlock to the outer cone through the marked holes using the two 8x5/8 screws.
Place the lid on top of the green outer cone. Screw the hinge to the outer cone using three 10x5/8 self tapping screws and backplate as shown. When using these screws pre-drilled holes are not required.
Place the green outer cone over the black inner cone, making sure that the lid opens in a convenient direction. Line up the screw holes in the base of the green outer cone with the notches on the base of the black inner cone. Use six 10x5/8 self tapping screws to secure the cones to the basket.
The bar across the opening of the green outer cone can be removed using a hacksaw if desired (see Frequently Asked Questions)
Hardware Kit: Lid, Green Outer Cone, Black Inner Cone, Basket
Using Your Green Cone Cont'd Using Your Green Cone Cont'd
6.
Compost: straw and garden waste such as grass and hedge clippings.
Special treatment (see guidance provided at www.rethinkrubbish.com):
- Petroleum based liquids, solvents, paints, chemicals such as bleach, household cleaners, insecticides, etc. - Medical and pharmaceutical waste such as dressings, medicine and drugs. - Sanitary items such as disposable nappies.
In summary, your Green Cone should be used as follows: -
What can go in What can't go in Fish Metal Red Meat & Poultry Wood All Bones Plastic Bread Glass Fruit including peelings Paper Vegetables including peelings Straw Dairy produce Grass cuttings Cooked food scraps Hedge clippings Crushed egg shells Bulk oil Tea bags Disinfectant & bleaches Animal excrement "Special treatment items"
Maintenance
Your Green Cone needs very little maintenance. As noted in the section on "installing Your Green Cone", it is important to ensure that the top of the basket and the bottom lip of the outer green cone are below ground level and always fully covered with soil.
In a well operating Green Cone very little waste residue will be produced. Should the residue build-up to ground level and not decrease, the cones can be removed to access the basket. The residue can be dug into any suitable area of ground.
Studs Hinge Screws Backplate Screws Twistlock
x 2 x 1 x 9 x 1 x 2 x 1 (10x5/8) (8x5/8)
Tools required:
Step 1
Step 2
Step 3
Step 4
YOU MUST ASSEMBLE YOUR GREEN CONE BEFORE INSTALLATION
Crosshead Screwdriver Flathead Screwdriver
Installing Your Green Cone Installing Your Green Cone
Choose a sunny spot in the yard.The sunnier the better
If your soil drains well dig a hole 70 cm (28") wide and 54 cm (22") deep
When you have dug the hole, pour a bucket of water into it, if the water disappears within a few minutes you have good drainage. If the water remains for more than 15 minutes you have poor drainage and will need to enlarge the hole as per the clay details below. If you live in an area of heavy clay or chalk make the hole 90 cm (36") wide and 70 cm (28") deep.
Mix some of the soil from the hole with gravel and/or compost. This 'mixture' is for backfillinglater and will improve the drainage.
In areas of heavy clay or chalk include gravel (or small stones,small pieces of broken terracotta pots,small pieces of broken bricks) in the 'mixture' to aid drainage
Place the 'mixture' in the base of the hole so thatwhen the basket is placed in the hole it is 3cm (1") below ground level.
Place the assembled Green Cone in the hole. Ensure the top of the black basket and the bottom lip of the green outer cone are below ground level.
Backfill the gap with the 'mixture' until the bottom lip of the Green Cone is fully covered.
IMPORTANT: The more care you take installing your Green Cone the greater its efficiency.
The Green Cone converts food waste primarily into water and carbon dioxide. The water produced must be able to drain freely away otherwise the Green Cone will become anaerobic (without oxygen) and cease to work. It is therefore vital to install your Green Cone in an area of good drainage - or create good drainage by putting gravel (or small stones,small pieces of broken terracotta pots,small pieces ofbroken bricks) under the basket. Under no circumstances must the base of the basket be below the water table or where water gathers.
Step 1
Step 2
Step 3
Step 4
4.
Using Your Green Cone Using Your Green Cone
5.
Green Cone Kitchen CaddyThe Green Cone is supplied with a convenient caddy that can be kept in your kitchen to reduce the number of trips you make to your Green Cone. Throughout the day food waste can be put into the caddy before it is taken to your Green Cone. The lid of the caddy contains a filter to reduce food waste smells in your kitchen.
The Green Cone is designed to handle the following amount of waste.
1 full caddy every 1-2 days during the summer 1 full caddy every 2-3 days during the winter Remember to add Accelerator Powder during the winter months.
Accelerator PowderYour Green Cone is supplied with accelerator powder and anapplication jar. Where the Green Cone is situated in a position that does not enjoy a full days sunshine, or when there are long periods of cold weather, the digestion process may benefit from the application of this powder. Simply shake a small amount of the powder into the caddy before emptying the food waste into the Green Cone. It is also beneficial to use the powder for the first week after the installation of the Green Cone to encourage the growth of bacteria.
The accelerator powder is simply a mixture of natural bacteria on a cereal base that ensures a healthy population of safe bacteria tokeep your Green Cone working efficiently.
Dealing with Household WasteThe Green Cone is an integral part of dealing with your household waste. It takes your cooked and uncooked kitchen food waste, including: meat, fish, bones, dairy products, vegetables, fruit, peelings, etc. The only exceptions are bulk amounts of food related materials that require a very long time to breakdown, namely: cooking oil/fat and the hard shells of nuts and seafood, such as oysters and crabs.
Other household waste (i.e. non-kitchen food waste) must not be put into the Green Cone but disposed of according to local authority guidance.
These may be summarised as follows:-
Recycle: non-biodegradable materials such as metal, wood, plastic and consumer items such as batteries, mobile phones, etc.
The soil level may drop after installation and with heavy
rain. Check periodically ensuring that the bottom lip of the green outer cone is
fully covered.
full-USA2012.indd 4-5 20/03/2012 11:12