witsml server management
TRANSCRIPT

WITSML Server management
User Manual for data storage on the server

Оглавление Operational modalities ...................................................................................................................................... 3
General description of working with the system ............................................................................................... 3
Getting started with the system ................................................................................................................. 3
Connecting to the server WITSML ........................................................................................................... 3
Description of the general controls of the system ..................................................................................... 4
Section «Personal page» ................................................................................................................................... 5
Options of subsection « List of your wells » ............................................................................................. 6
Options of subsection « List of the available groups» ............................................................................ 11
Options of subsection « List of the available fields» .............................................................................. 14
Options of subsection «Information about politics» ............................................................................... 17
Options of subsection «Tests (new)» ...................................................................................................... 18

Assignment Server management WITSML need for accurate and generalized information about the data stored
on the server.
Operational modalities Workplace user must meet the following minimum requirements:
IBM-compatible PC with a processor Intel Pentium IV 2GHz
RAM – 512 MB;
HDD Volume – 100 GB;
Screen resolution of at least 1024x768 pixels;
Mouse;
LAN speed at least 2 Mbit/s.
For the system functioning on the PC user must have the following software installed:
OS Windows 7 and higher;
Browser Google Chrome, or another modern web-browser (recommended Google Chrome
for correct work of application);
General description of working with the system
Getting started with the system
Before working you must register. This can be done 2 ways:
1) Contact the server administrator;
2) Press button «Registration» on the top of the page.
Рис. 1. Button «Registration»
If self-registration must specify your login and password. After registration the user will be
available to the section "Personal page".
Change your password by clicking the link "Change Password" in your account. Will the transition
to the password change page, where you specify the old password, enter the new password and
confirm new password.
Connecting to the server WITSML
WITSML server supports two modes of operation:
1) Mode of data management through the web interface;
2) Mode by adding data through WITSML agent.
Service address: http://witsml.tpu.ru/service/wmls.asmx
To connect to the server WITSML mode of data management must have access to a web interface
in which specify the address of service, as well as personal login and password to access it.
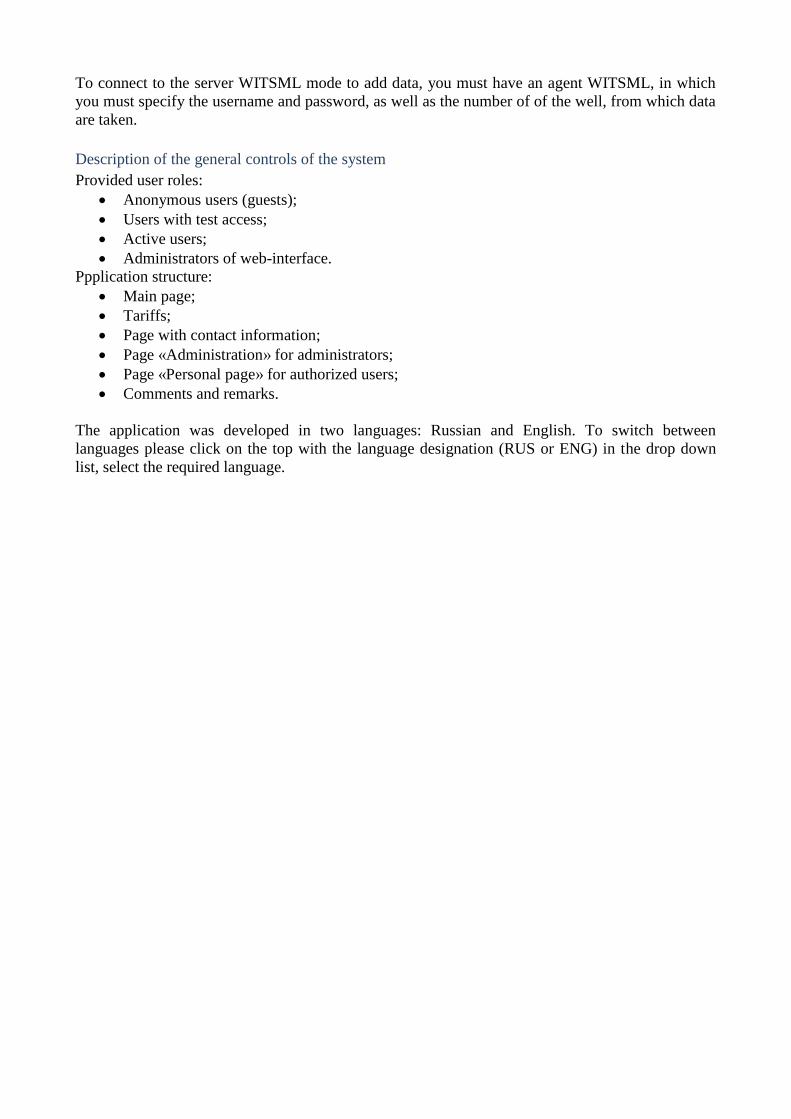
To connect to the server WITSML mode to add data, you must have an agent WITSML, in which
you must specify the username and password, as well as the number of of the well, from which data
are taken.
Description of the general controls of the system
Provided user roles:
Anonymous users (guests);
Users with test access;
Active users;
Administrators of web-interface.
Ppplication structure:
Main page;
Tariffs;
Page with contact information;
Page «Administration» for administrators;
Page «Personal page» for authorized users;
Comments and remarks.
The application was developed in two languages: Russian and English. To switch between
languages please click on the top with the language designation (RUS or ENG) in the drop down
list, select the required language.
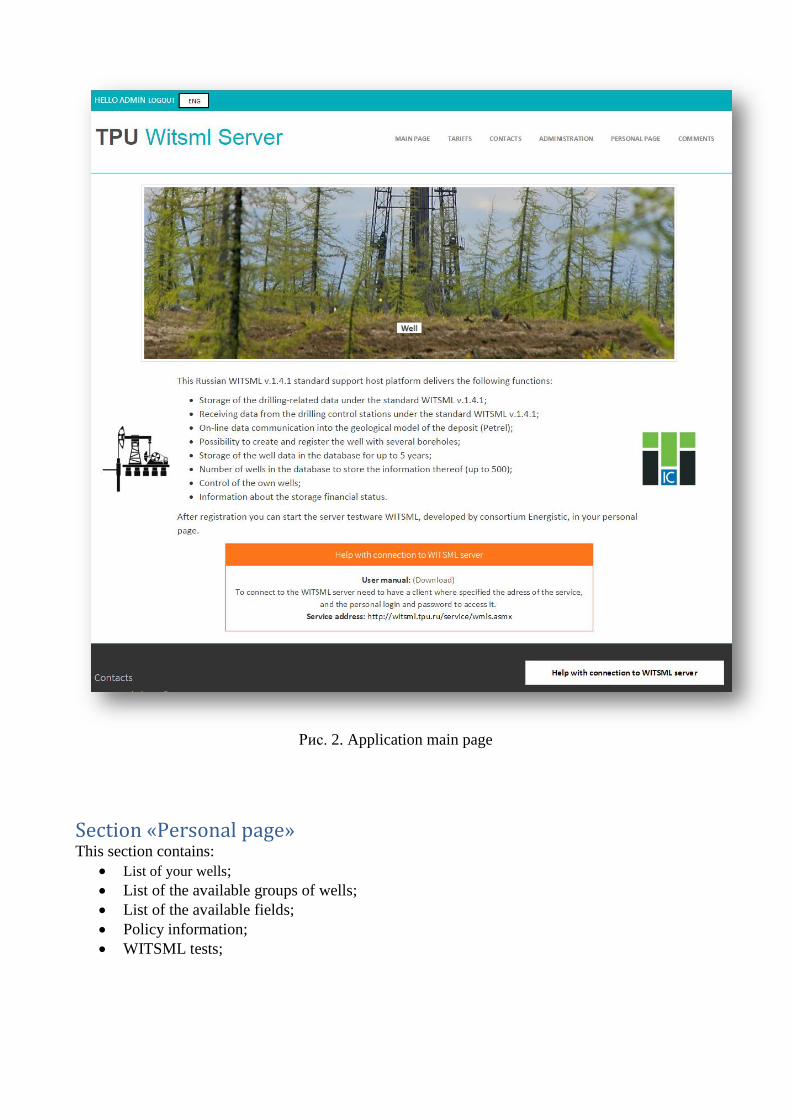
Рис. 2. Application main page
Section «Personal page» This section contains:
List of your wells;
List of the available groups of wells;
List of the available fields;
Policy information;
WITSML tests;

Рис. 3. General view of the section “Personal page”
Options of subsection « List of your wells »
At the opening of this tab, the user displays a list of wells assigned to him.
Create well
Go to the tab « List of your wells »;
Press the button «Create well»;
On the page creation of a well user to specify the required fields:
o Well name (character string number of not less than 6 and not more than 50);
o Active time of well in days (positive integer);
o In dropdown list select the field;
o In dropdown list select the group;
Press the button «Create well»;
There will be a transition to the page "List of your wells" where you can be sure that the well
is created.

Рис. 4. Creating a new well
Edit well
Go to the tab « List of your wells »;
Press on the name of required well (Underlined name is a link to the edit page well);
Input the required name of the well (character string number of not less than 6 and not more
than 50);
In dropdown list select the field;
In dropdown list select the group;
Press button «Save changes»;
There will be a transition to the page "List of your wells" where you can be sure that the well
is updated.
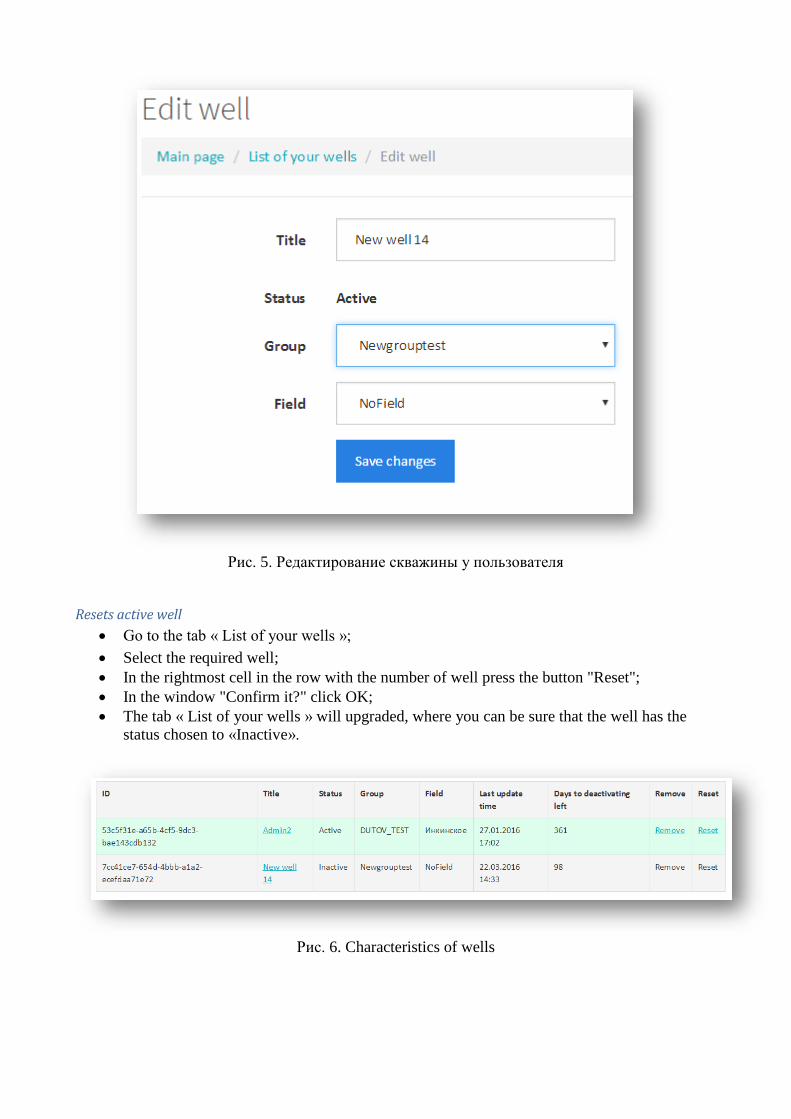
Рис. 5. Редактирование скважины у пользователя
Resets active well
Go to the tab « List of your wells »;
Select the required well;
In the rightmost cell in the row with the number of well press the button "Reset";
In the window "Confirm it?" click OK;
The tab « List of your wells » will upgraded, where you can be sure that the well has the
status chosen to «Inactive».
Рис. 6. Characteristics of wells
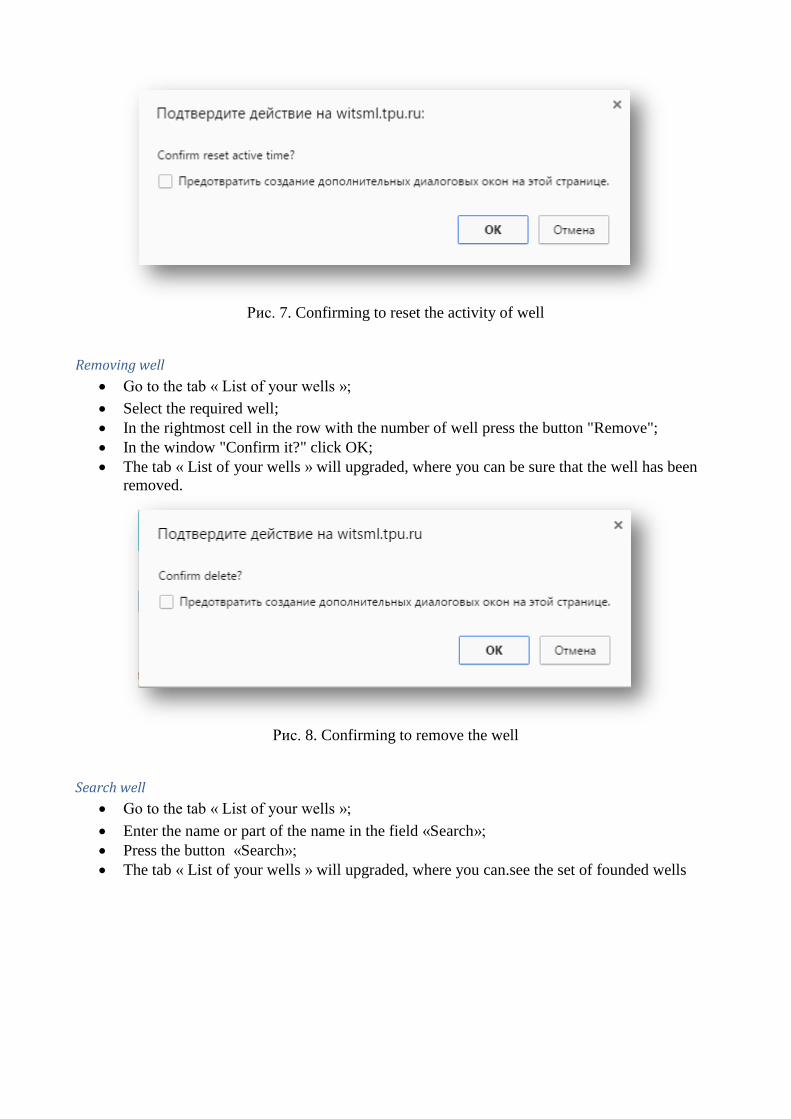
Рис. 7. Confirming to reset the activity of well
Removing well
Go to the tab « List of your wells »;
Select the required well;
In the rightmost cell in the row with the number of well press the button "Remove";
In the window "Confirm it?" click OK;
The tab « List of your wells » will upgraded, where you can be sure that the well has been
removed.
Рис. 8. Confirming to remove the well
Search well
Go to the tab « List of your wells »;
Enter the name or part of the name in the field «Search»;
Press the button «Search»;
The tab « List of your wells » will upgraded, where you can.see the set of founded wells

Рис. 9. Search well
Display a specified number of wells.
10 wells on the page displayed by default option.
To change the display of the number of wells is necessary:
Go to the tab « List of your wells »;
In the number field select or write a number from 1 to 100;
Press the button «Display»;
Tab " List of your wells " is updated and you will see a list of partition wells on the page
with a specified number of wells to one page.

Рис. 10. Display 1 well to the one page
Refresh a list of wels
Go to the tab « List of your wells »;
Press the button «Refresh»;
Tab " List of your wells " upgraded, and will be seen on the actual characteristics of each
well.
Options of subsection « List of the available groups»
Create a group of well
Go to the tab «List of the available groups»;
Press the button «Create a group of wells»;
On the page creation of a group of wells specify the name of the group (character string
number of not less than 6 and not more than 50);
Press the button «Create a group of wells»;
There will be a transition on the "List of available groups," where you can make sure that a
group of well has been created.

Рис. 11. Creating the group of well
Search a group
Go to the tab «List of the available groups»;
Enter the name or part of the name in the field «Search»;
Press the button «Search»;
The tab « List of available fields » will upgraded, where you can.see the set of founded
groups.

Рис. 12. Founded groups
Display a specified number of groups
In the tab "List of available groups" list of groups of wells displayed page.
Displayed by default 10 groups on the page.
To change the number of displayed groups should:
Go to the tab «List of the available groups»;
In the number field select or write a number from 1 to 100;
Press the button «Display»;
Tab "Llist of available groups" is updated and you will see the list of groups splitting wells
on the page with a specified number of groups on the page.
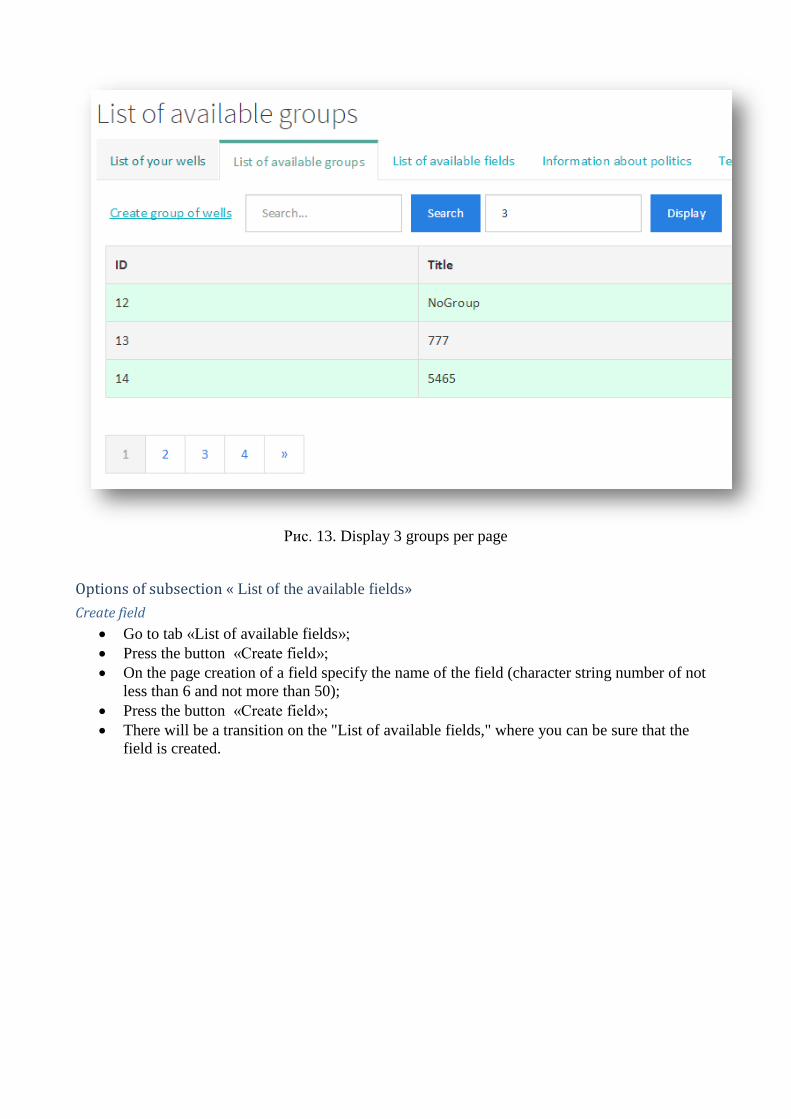
Рис. 13. Display 3 groups per page
Options of subsection « List of the available fields»
Create field
Go to tab «List of available fields»;
Press the button «Create field»;
On the page creation of a field specify the name of the field (character string number of not
less than 6 and not more than 50);
Press the button «Create field»;
There will be a transition on the "List of available fields," where you can be sure that the
field is created.

Рис. 14. Creation of filed
Search field
Go to tab «List of available fields»;
Enter the name or part of the name in the field «Search»;
Press the button «Search»;
Tab "List of available fields" is updated and displays only those fields that were found in the
database entered in the field «Search» line.

Рис. 15. Founded fields
Display a specified number of fields
In the tab "List of Available Fields" list of fields is displayed page by page.
Displayed by default 10 fields on the page.
To change the number of displayed fields is necessary:
Go to tab «List of available fields»;
In the number field select or write a number from 1 to 100;
Press the button «Display»;
Tab "List of available fields" is updated and you will see a list of fields in the partition of the
page with the specified number of fields on the page.
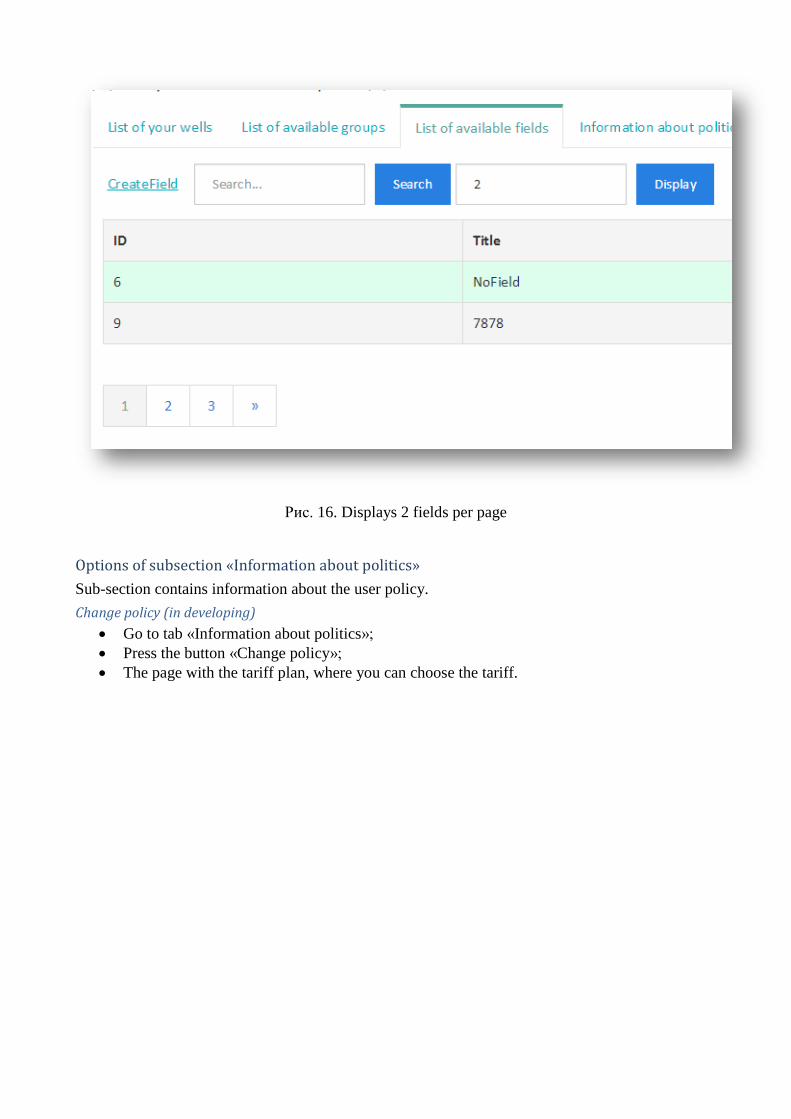
Рис. 16. Displays 2 fields per page
Options of subsection «Information about politics»
Sub-section contains information about the user policy.
Change policy (in developing)
Go to tab «Information about politics»;
Press the button «Change policy»;
The page with the tariff plan, where you can choose the tariff.

Рис. 17. Information about policy
Options of subsection «Tests (new)»
Passage WITSML test
Test page of WITSML server
Рис. 18. WITSML tests
Go to tab Tests(New);
If it is necessary to repeat the authorization (Fill in login and password and click "Enter");

To start the testing you need to download data - click on the "Load sample data";
Select test and press the button «Start»;
Wait until the execution of the test;
If necessary, you can see the test results by clicking on the "Results";
Button "Run all tests" runs all the tests in the order on the server;
"Reset" button clears the test results.