word 2013: beyond the basics - university of edinburgh 2013: beyond the basics 7. structuring the...
TRANSCRIPT

Word 2013: Beyond the Basics
Workbook
Edition 1.3 August 2015 Document Reference: 3813-2015


If you require this document in an alternative format, such as large print, please email [email protected] or phone 0131 650 4576
Copyright © IS 2015
Permission is granted to any individual or institution to use, copy or redistribute this document
whole or in part, so long as it is not sold for profit and provided that the above copyright notice
and this permission notice appear in all copies.
Where any part of this document is included in another document, due acknowledgement is
required.
Word 2013: Beyond the Basics
Contents
Introduction ......................................................................................................... 1 Using Word effectively .............................................................................................. 1 After the course ........................................................................................................ 1
1. Formatting text with styles ............................................................................. 2 What is a style? ........................................................................................................ 2 Style types ................................................................................................................ 2 Styles and navigation ............................................................................................... 2 Reusing styles .......................................................................................................... 2
Task 1.1 Applying a style using the Styles gallery .............................................. 4 Task 1.2 Applying a style using the Styles pane ................................................ 5 Task 1.3 Modifying a style ................................................................................. 7 Task 1.4 Creating a style with New Style ........................................................... 9 Task 1.5 Creating a style with Manage Styles ................................................. 11 Task 1.6 Using the navigation pane ................................................................. 13
2. Creating lists ................................................................................................. 14 Creating numbered headings ................................................................................. 14
Task 2.1 Creating numbered headings ............................................................ 15 Task 2.2 Modifying numbered headings .......................................................... 16
3. Working with tables ...................................................................................... 18 Formatting and structuring your table ..................................................................... 18 Inserting data from Excel ........................................................................................ 18
Task 3.1 Formatting a table ............................................................................. 19 Task 3.2 Creating a linked table with Paste Options ........................................ 20 Task 3.3 Creating a linked table with Paste Special ......................................... 22 Task 3.4 Breaking links .................................................................................... 23
4. Working with images .................................................................................... 24 Image sources ........................................................................................................ 24 Copyright issues ..................................................................................................... 24 Placing images: inline versus floating ..................................................................... 24 Editing an image ..................................................................................................... 25
Task 4.1 Inserting and repositioning an image ................................................. 26 5. Creating captions .......................................................................................... 28
Understanding captions .......................................................................................... 28 Task 5.1 Inserting a caption ............................................................................. 29
6. Creating charts and diagrams ...................................................................... 31 Using SmartArt ....................................................................................................... 31
Task 6.1 Creating an organisation chart .......................................................... 32 Task 6.2 Adding shapes to a chart................................................................... 33

Word 2013: Beyond the Basics
7. Structuring the document ............................................................................ 34 Using headers and footers ..................................................................................... 34 Understanding section breaks ................................................................................ 34
Task 7.1 Creating a header and footer ............................................................ 36 Task 7.2 Inserting a section break ................................................................... 37 Task 7.3 Formatting page numbers ................................................................. 39 Task 7.4 Creating different headers and footers .............................................. 40 Task 7.5 Creating a different first page ............................................................ 42 Task 7.6 Creating a landscape page ............................................................... 43 Task 7.7 Creating columns .............................................................................. 45
8. Creating tables of contents and figures ...................................................... 46 Styles and the table of contents.............................................................................. 46 Using the dialog box ............................................................................................... 46
Task 8.1 Using the Table of Contents dialog box ............................................. 47 Task 8.2 Formatting a table of contents ........................................................... 49 Task 8.3 Adding new styles to the table of contents ........................................ 51 Task 8.4 Creating a table of figures ................................................................. 52 Task 8.5 Updating tables of contents and figures ............................................ 53
9. Creating accessible documents .................................................................. 54 Using Word to create accessible documents .......................................................... 54 Office Accessibility Checker ................................................................................... 55 Commonly requested alternative formats ............................................................... 57 Creating accessible documents resources ............................................................. 57

Word 2013: Beyond the Basics 1
Introduction
Introduction
Using Word effectively
This workbook takes you beyond the basics and introduces you to the tools you can use to format and customise your documents.
The features covered include:
Formatting your document quickly with styles
Applying numbered headings
Formatting tables
Including data from Excel
Working with images and diagrams
Structuring your document with section breaks and headers and footers
Creating tables of contents and figures
After the course
If, after you have been on the course, you want to work through the exercises again, you can download the practice files from our Documents Catalogue at: www.ed.ac.uk/is/skills/documents-catalogue
For information on our other training courses, see our website at www.ed.ac.uk/is/skills
2 Word 2013: Beyond the Basics
1. Formatting text with styles
1. Formatting text with styles
Text formatting helps your readers make sense of content, particularly in longer documents. Headings, for example, give structure by showing the relative importance of sections.
Rather than selecting text and applying attributes – font type, size etc. – you can make use of Word’s styles to format text quickly and easily.
What is a style?
A style is a predefined set of formatting specifications. When you apply a style, Word will format the text according to how that style has been defined.
Using styles has several benefits:
Consistency – text is always formatted in the same way
Ease of modification – to change the appearance of text, simply modify the style and the text formatted with the style is updated to match
Access to other features – styles allow you to make use of Word’s powerful automatic functions, such as tables of contents and cross-references
Style types
Word includes a range of built-in styles. There are two main types:
Paragraph Applied to an entire paragraph. As well as text attributes such as font type, style and size, a paragraph style includes formatting such as spacing and alignment.
Character Applied to selected text. This style includes character formatting only.
Word also includes a linked style. A linked style can be applied to an entire paragraph or to selected text only. When you apply it to selected text, none of the paragraph formatting is used – it behaves like a character style.
Why use a linked style? It can be used to create ‘run-in’ headings, i.e. where only the first few words in a paragraph are formatted as a heading. You can also use it where you don’t want all of a heading to appear in a table of contents. Apply the linked style to the text to appear in the contents, and then manually format the rest of the text to match.
Styles and navigation
If you have applied styles, you can make use of the Navigation pane to move around a long document quickly. Clicking on a heading in the pane will take you directly to the location, and you can also reorganise your document easily by dragging and dropping entire sections.
Reusing styles
When you modify a style, or create a new style, the changes apply to the current document only.

Word 2013: Beyond the Basics 3
1 Formatting text with styles
If you want to use your styles in another document, the options are:
Copy and paste the text
Modify Word’s default template
Create a ‘master’ document
Create a template
For instructions on all of these options, see the note Formatting with styles in Word 2013 in our Documents Catalogue at www.ed.ac.uk/is/skills/documents-catalogue

4 Word 2013: Beyond the Basics
1. Formatting text with styles
Task 1.1 Applying a style using the Styles gallery
Word displays some of the most commonly used styles in the Styles gallery on the Home tab.
This is a fast and easy way to apply formatting as you work.
Try this…
1. Click on the File tab and select Open, click Computer and Browse, then navigate to the folder Word 2013 Beyond basics Practice files and open the file Report_1.docx.
2. Make sure your cursor is in the text Environmental impact report on page 1. Do not select the text.
3. On the Home tab, move to the Styles gallery in the Styles group and click on the style called Title to apply it.
Title is a paragraph style; therefore the formatting is applied to the whole paragraph without you having to select the text first. Note that a ‘paragraph’ can be any length, even a single word.
4. Move to page 3, click anywhere in the first paragraph – AGE – Making a Commitment to the Environment – and apply the style Heading 1.
5. In the paragraph below, select the text Alpheius Global Enterprises.
6. Click on the More button at the Styles gallery to display the full list and apply the style Strong.
Strong is a character rather than a paragraph style; therefore it is applied to the selected text only.

Word 2013: Beyond the Basics 5
1 Formatting text with styles
Task 1.2 Applying a style using the Styles pane
The Styles gallery is an easy way to apply styles. However, to see the full range of styles available, you need to use the Styles pane.
You can use Options to change what you see in the pane. You can choose a set of styles to display, and how to sort them.
Buttons at the bottom of the pane allow you to create new styles, inspect the formatting of a style and manage styles.
Try this…
1. On the Home tab, click on the dialog box launcher in the Styles group to open the Styles pane.
2. Click on Options at the bottom of the pane.
3. In the Style Pane Options dialog box, click on the down arrow at Select styles to show.
You have the following options:
Recommended Word’s predefined list of styles.
In use Lists only the styles actually applied in the current document.
In current document Lists the styles currently applied, as well as ones that have been used at some point.
All styles Full list of styles. 4. Select All styles and click OK.
5. Scroll through the pane to see the range of styles available.
The All styles setting is difficult to work with, so you can choose to display only some of the styles available.
6. Click on Options again, then at Select styles to show, select In current document. Leave the dialog box open.
7. In Select how list is sorted, choose Alphabetical.
This makes it easier to locate a specific style name.

6 Word 2013: Beyond the Basics
1. Formatting text with styles
8. In Select how built-in style names are shown, check that Show next heading when previous level is used is selected.
This setting means that when you apply a Heading style, the next level down appears in the Styles pane ready for use.
9. Click OK to finish.
10. On page 3, click in the paragraph Arachnids and then click on Heading 2 in the Styles pane.
11. Locate the three paragraphs Spiders, Scorpions and Ticks & mites and apply the style Heading 3 to each.
12. Save the file in the current folder and then close it.

Word 2013: Beyond the Basics 7
1 Formatting text with styles
Task 1.3 Modifying a style
If you do not like how a style looks, you can modify it through the Modify Style dialog box. All the text formatted with the style is updated automatically.
You can make basic changes in the Formatting section.
The Format button accesses the full range of formatting options.
Try this…
1. Click on the File tab and select Open, click Computer.
2. Under Current Folder, open the Practice files folder and open the file Report_2.docx.
This document has more formatting applied.
3. Move to page 3 and click in the heading AGE – Making a Commitment to the Environment.
4. Open the Styles pane if it is not already open and select Show Preview (if it is not already ticked).
This will show you how the style will look when it is applied.
5. Move your cursor to Heading 1 in the Styles pane, click on the down arrow and select Modify to display the Modify Style dialog box.
6. Under Formatting, change the font type to Arial and the size to 18.
7. Click on the Format button and choose Paragraph.
8. Under Spacing, use the spinner arrows to set Before to 0 pt and After to 12 pt.
9. Click on the down arrow at Line spacing and choose Single.
10. Click OK and OK again to finish.
11. Move your cursor to Heading 2 in the Styles pane, click on the down arrow and select Modify.
12. Under Formatting, change the font type to Arial and set the size to 16.

8 Word 2013: Beyond the Basics
1. Formatting text with styles
13. Click on the Format button and choose Paragraph.
14. Under Spacing, set Before to 0 pt and After to 6 pt.
15. Click on the down arrow at Line spacing and choose Single.
16. Click OK and OK again to finish.
17. Check how your headings have changed.
Note: By default, any changes you make to the styles apply to the current document only. If you want the changes to apply to every new document you create, click on New documents based on this template in the Modify Style dialog box. Use this option with caution – some formatting you may not want in every document.

Word 2013: Beyond the Basics 9
1 Formatting text with styles
Task 1.4 Creating a style with New Style
If you find you are repeatedly formatting text in the same way, and there isn’t a built-in style that suits, you can create a new style to do the formatting for you.
There are two ways to create a style: one which applies the style directly to the text, and another which simply makes the style available in the Styles pane. In this exercise, you will use the New Style option to apply the style directly.
Word uses the font attributes of the text your cursor is currently on as the basis for the new style.
You can then make whatever changes you want.
Try this…
1. Open the Styles pane if it is not already open.
2. Click in the paragraph beginning Arachnids are easily recognisable… on page 3
and click New Style at the bottom of the Styles pane to open the Create New Style from Formatting dialog box.
3. In Name, type IntroPara.
4. At Style for following paragraph, click on the down arrow and select Normal.
This setting controls what happens when you finish typing your paragraph and press the [Enter] key. When you use your new style, the paragraph immediately after will be automatically formatted with Word’s default paragraph style (called Normal).
5. In the Formatting section, click on the Italic button.
6. Click on Format and select Paragraph.
7. Under Indentation, set Left and Right to 1 cm.
8. Click OK and OK again.
The new style is applied to the paragraph, and appears in the Styles pane and in the Styles gallery.

10 Word 2013: Beyond the Basics
1. Formatting text with styles
9. Locate the first paragraphs after the headings Amphibians and Reptiles, and apply the style IntroPara from the Styles pane.
10. Save your document.

Word 2013: Beyond the Basics 11
1 Formatting text with styles
Task 1.5 Creating a style with Manage Styles
In this exercise, you will use the Manage Styles option to create a style that is not applied immediately to the text. This is useful when you need more than one set of heading styles, for example, one set with numbering and one without.
In the Manage Styles dialog box, the style to be used as the basis for the new style is selected. From here, you will use New Style to create an additional heading style.
Try this…
1. Navigate to page 3, click in the paragraph Arachnids and make sure it is formatted as Heading 2.
2. In the Styles pane, click Manage Styles at the bottom.
3. Make sure Heading 2 is highlighted and click New Style to display the Create New Style from Formatting dialog box.
4. In the Name box, type AppendixHeading.
5. At Style based on, select (no style).
Since you are going to modify your Heading styles later to apply numbering, selecting (no style) here will prevent the numbering being applied to the new AppendixHeading style as well.
6. At Style for following paragraph, select Normal.
7. Click the Format button and select Paragraph.
8. Under Spacing, set After to 6 pt.
9. Click on the down arrow at Line spacing and choose Single.
10. Click OK and OK again to finish.
11. Click OK to close the Manage Styles dialog box.
The style now appears in the Styles pane ready for use.

12 Word 2013: Beyond the Basics
1. Formatting text with styles
12. Hold down [Ctrl] and press [End] to move to the end of the document and scroll up till you see the text Groups and Societies.
13. Apply the style AppendixHeading to the paragraphs Groups and Societies, Organisation Chart and Further Information.

Word 2013: Beyond the Basics 13
1 Formatting text with styles
Task 1.6 Using the navigation pane
If you have applied Word’s built-in Heading styles, you can make use of the Navigation pane to help you move around a long document quickly.
In the pane, you can:
Click on a heading to jump directly to the location
Collapse and expand sections by clicking on the arrow symbol
Reorganise your document by dragging a heading to a different location – Word moves both the heading and its content
Try this…
1. Click on the View tab, and in the Show group, click the Navigation Pane checkbox to select it.
2. In the Navigation pane, click on Salamanders to jump to the location.
3. In the Navigation pane, hold down the mouse button on the heading Salamanders and drag it between Frogs and Toads.
A black line indicates where the text will be placed.
4. Release the mouse and check that the text has moved in the document.
5. Drag the Salamanders heading back to its original location after Toads.
6. Click on at the top of the list of headings in the pane to go to the beginning of the document.
7. Click on the Close button to close the Navigation pane.
Note: Only text formatted with the styles Heading 1 to Heading 9 is displayed in the navigation pane. Text formatted with other styles, such as your new style AppendixHeading does not appear.

14 Word 2013: Beyond the Basics
2. Creating lists
2. Creating lists
Word includes three list types:
Bulleted Bulleted list items have no significant order, and are preceded by a symbol.
Numbered Numbered list items have a sequence or priority, and are preceded by a number or a letter.
Multilevel Multilevel list items can have numbers, bullets, or a mixture of both, and follow a hierarchical structure.
Word includes libraries of predefined list layouts you can choose from.
Creating numbered headings
The most common use for a multilevel list is to apply numbering to headings. A typical layout is in the format:
1. Heading 1.1 Heading 1.1.1 Heading 1.1.2 Heading 1.2 Heading 2. Heading 2.1 Heading
For the most reliable numbering, use a multilevel list that is linked to the built-in Heading styles. In the List Library these will include the style name, for example:
To apply the numbering, apply the appropriate style to the text.
If the number format is not exactly what you want, you can customise it as you require.

Word 2013: Beyond the Basics 15
2 Creating lists
Task 2.1 Creating numbered headings
If you have applied the built-in Heading styles, then numbering is easy. To number your headings, select a predefined numbering layout from the Multilevel List Library.
Choose a layout that has already been set up to link to the built-in Heading styles, as in the example shown. You can customise it later if the number format is not exactly what you want.
Try this…
1. Move to page 3, click anywhere in the heading AGE – Making a Commitment to the Environment and make sure it is formatted as Heading 1.
2. Click on the Home tab, and in the Paragraph group, click on the down arrow at
Multilevel List .
3. In the List Library, select the numbering option 1, 1.1, 1.1.1 linked to the Heading styles (second row, as indicated in the image above).
4. Scroll through the document examining your headings.
Numbering has been applied automatically to all the headings formatted with the built-in Heading styles.
5. Open the Styles pane if it is not already open.
6. Move to page 6 and click in the paragraph Turtles & tortoises.
7. Apply the Heading 3 style from the Styles pane or the Styles gallery.
8. Apply the Heading 4 style to the two paragraphs Turtles and Tortoises.
9. Click in the paragraph Species projections and apply the Heading 1 style.
The headings are numbered automatically. To apply numbering to a heading, all you need to do is apply the appropriate style.

16 Word 2013: Beyond the Basics
2. Creating lists
Task 2.2 Modifying numbered headings
To change the format and position of the numbering in a multilevel list, you must use the Define new Multilevel list dialog box.
From here, you can modify the number format and style, and change indentation settings for both number and text.
The Link level to style option tells Word which style to use to format the text at each level. If you have selected a list that is already linked to the built-in heading styles, then level 1 is linked to Heading 1, level 2 to Heading 2 etc.
Try this…
1. Move to page 3 and click in the heading AGE – Making a Commitment to the Environment.
2. Click on the down arrow at Multilevel List and select Define New Multilevel List from the menu at the bottom to display the Define new Multilevel list dialog box.
3. Click on More>> to display all options.
4. In Click level to modify, ensure 1 is selected.
Note that Heading 1 is displayed in Link level to style on the right. Each of the nine levels of numbering is linked to its corresponding Heading style.
5. In Enter formatting for number, click in front of the grey highlighted field, type Section and press the space bar.
6. Click OK and check the heading.
The word ‘Section’ is now part of the number format. Note that the second line of the heading is indented. You can change this setting to make the heading wrap at a different position.
7. Make sure your cursor is in the heading AGE – Making a Commitment to the Environment.
8. Click on the down arrow at Multilevel List and select Define New Multilevel List again.
9. Click in Text indent at and type 3.5.
Word 2013: Beyond the Basics 17
2 Creating lists
10. Click OK.
The second line of the heading is now lined up with the text on the first line at the indentation setting you entered. (Note that if you don’t want the second line indented at all, you can set Text indent at to 0.)
11. Make sure your cursor is still in the heading AGE – Making a Commitment to the Environment.
Whenever you make a change, always make sure your cursor is in the top level (i.e. Heading 1), even if it’s another level you are editing. This helps ensure that changes are applied immediately, and that your numbering does not break.
12. Click on the down arrow at Multilevel List and select Define New Multilevel List again.
If you do not want every heading to be numbered, you can remove numbering for a specific level. You will now remove the numbering for level 4.
13. In Click level to modify, click on 4.
14. In Link level to style, click on the down arrow and select (no style).
15. Click OK to finish, scroll to page 6 and examine the formatting for your level 4 headings (Turtles and Tortoises).
The level 4 numbering is no longer associated with the Heading 4 style; therefore the headings are still formatted as Heading 4, but are no longer numbered.
16. Close the Styles pane and save your document.
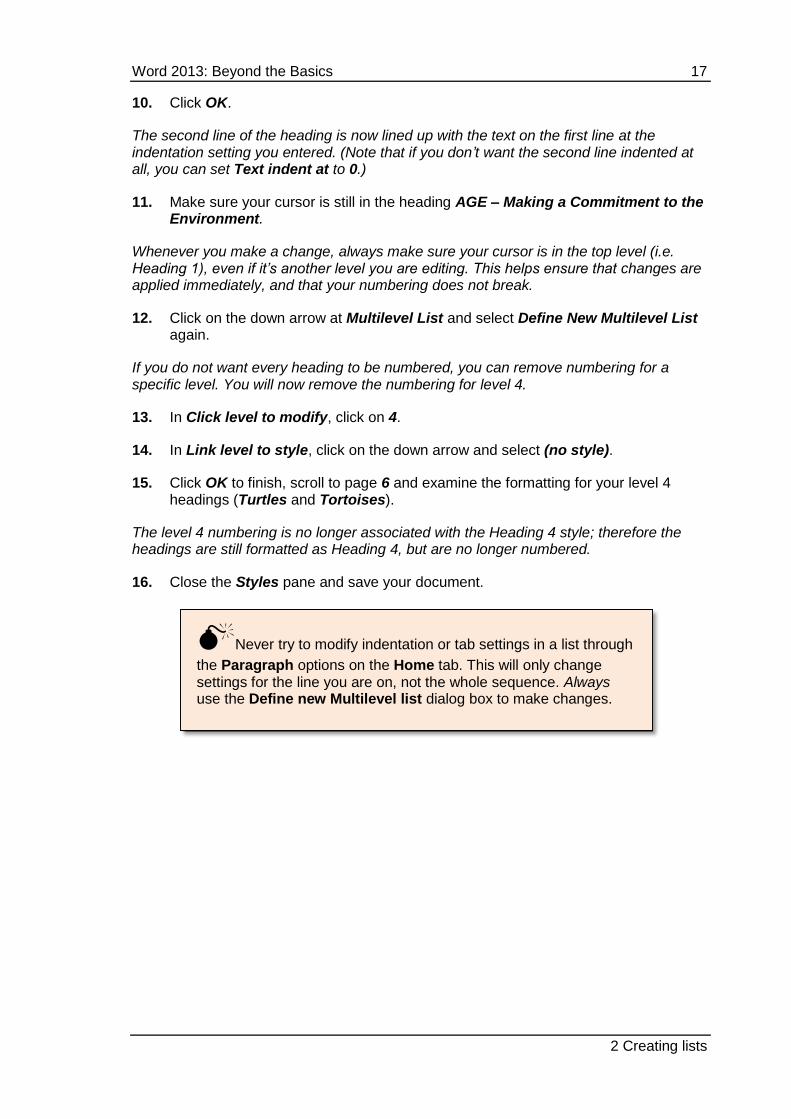
Never try to modify indentation or tab settings in a list through
the Paragraph options on the Home tab. This will only change settings for the line you are on, not the whole sequence. Always use the Define new Multilevel list dialog box to make changes.

18 Word 2013: Beyond the Basics
3. Working with tables
3. Working with tables
If you need to present information in rows and columns, the most effective method is to use a table. Even if you only need a few rows or columns, tables are easier to work with than tabs.
Word includes options for creating basic tables you can format yourself, or you can choose from a library of predefined styles.
Formatting and structuring your table
If you have created a basic table, you can use the Table Tools Design tab to change the formatting. You can apply a built-in format from the Table Styles gallery, or apply your own shading and borders.
You can change the structure of your table through the Table Tools Layout tab. There are tools to insert and delete rows and columns, merge and split cells and change the alignment of text.
Inserting data from Excel
Although Word does include an option to create formulas in a table, it is much easier to perform any calculations in Excel, and then copy and paste the cells into your document.
To insert the Excel data, you can use a simple copy and paste. However, you can also insert the content as a linked object. You can use Word’s Paste Options gallery or Paste Special. This allows you to continue to work with the content in the source application. If you edit the data in the source file (Excel), the destination file (Word) is updated as well.
If you use Paste Special, you can choose from a variety of formats, including Microsoft Excel Worksheet Object, Formatted Text (RTF) or Picture (Enhanced Metafile). Each format behaves differently when pasted. If you choose the worksheet object, you can double-click on the object in Word to open Excel directly; if you choose the formatted text or picture options, you have to launch Excel and open the file if you want to make changes.
The disadvantage of linking is that if you move or rename the source file, the link will break, generating an error message. When you have finished editing your Excel file, you can break the link yourself, which will avoid the messages. Once the link is broken, however, it cannot be reinstated.

Word 2013: Beyond the Basics 19
3 Working with tables
Task 3.1 Formatting a table
You can change the appearance of a table quickly by using the Table Tools Design tab.
Word includes a range of preformatted Table Styles to choose from. You can also add additional formatting, such as borders or shading.
Try this…
1. With Report_2.docx open, navigate to page 6 and click in the table at the bottom.
2. Click on the Table Tools Design tab.
3. In the Table Styles group, click on the More button to display the gallery.
4. Click on Grid Table 4 – Accent 1 (4th row, 2nd column) to select it.
5. In the Table Style Options group, click Banded Rows to deselect it.
The table formatting has now changed so that it no longer displays alternately shaded (banded) rows.
6. Click on the Table Tools Layout tab.
7. In the Cell Size group, click on AutoFit and select AutoFit Window.
The table resizes to fit the page (the page is the table’s ‘window’).
8. Click in the top row of the table.
9. In the Data group, click on Repeat Header Rows.
10. Scroll down so that you can see the rest of the table.
Note that the header row now repeats on each page. This makes the table data easier to read.
Tip: If you want to use more than one row as a header, select the rows first, and then click Repeat Header Rows.

20 Word 2013: Beyond the Basics
3. Working with tables
Task 3.2 Creating a linked table with Paste Options
If you want to include data from an Excel worksheet in your document, the simplest method is to copy and paste. However, if you are still working on your Excel figures, you can create a link between the worksheet and your Word document. If you update the worksheet (the source file), the Word document (the destination file) is updated as well.
The Paste Options gallery allows you to choose different paste methods. Choose Link & Keep Source Formatting or Link & Use Destination Styles to create a linked object.
Try this…
1. With the document Report_2.docx open, click on the File tab.
2. Click on Open File Location at the bottom right of the screen and double-click on the file species_data.xlsx to open it.
3. Hold down the mouse button and drag from cell A6 to cell F12.
4. On the Home tab, in the Clipboard group, click on Copy (or press [Ctrl] and [C]) to copy the data to the clipboard.
5. Use the Word icon on the taskbar at the bottom of the screen to open Report_2.docx.
6. Click on the left arrow at the top of the File menu to return to editing your document.
7. Click in the blank line after the text Table B on page 7.
8. On the Home tab, click on the down arrow at Paste in the Clipboard group to bring up the Paste Options gallery.
9. Move your cursor over the options to see how the pasted object will appear.
10. Click Link & Use Destination Styles.
This creates a linked table using your Word document’s default table style. You can format it like any other Word table.
11. Click in the table and on the Table Tools Design tab.
12. From the Table Styles gallery, under Grid Tables, select Grid Table 4 – Accent 1 (4th row, 2nd column).
13. In the Table Style Options group, click Banded Rows to deselect it.
14. Open the Excel file and enter data in the 2 Years column as follows: Arachnids – 102,500; Amphibians – 5,900; Reptiles – 8,100 then click in the Total cell.

Word 2013: Beyond the Basics 21
3 Working with tables
15. Return to your document in Word.
16. If the data has not updated automatically, right-click in the table and select Update Link.
The new figures should appear in the table.
17. Click anywhere in the table and on the Table Tools Layout tab.
18. In the Rows & Columns group, click on Delete and select Delete Table.
Note: In a linked table, only cells within the original copy range will be updated. If you insert rows or columns in the Excel file, you will have to repeat the copy and paste with the new range.
22 Word 2013: Beyond the Basics
3. Working with tables
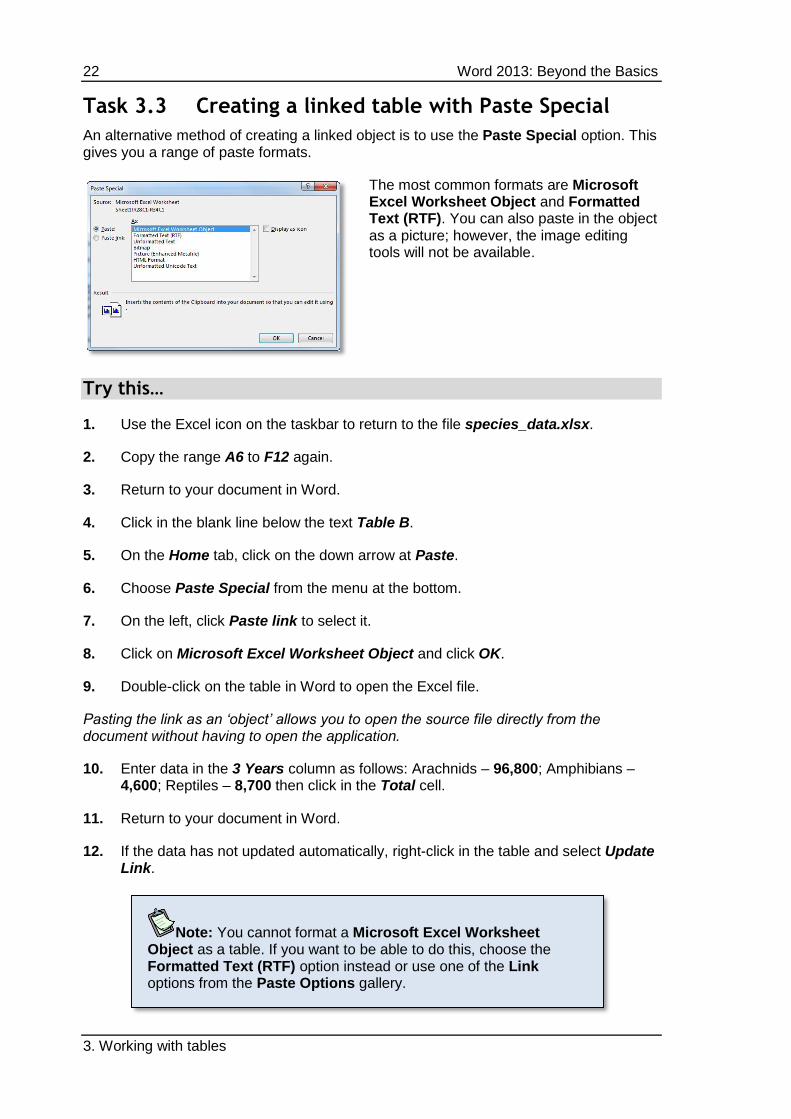
Task 3.3 Creating a linked table with Paste Special
An alternative method of creating a linked object is to use the Paste Special option. This gives you a range of paste formats.
The most common formats are Microsoft Excel Worksheet Object and Formatted Text (RTF). You can also paste in the object as a picture; however, the image editing tools will not be available.
Try this…
1. Use the Excel icon on the taskbar to return to the file species_data.xlsx.
2. Copy the range A6 to F12 again.
3. Return to your document in Word.
4. Click in the blank line below the text Table B.
5. On the Home tab, click on the down arrow at Paste.
6. Choose Paste Special from the menu at the bottom.
7. On the left, click Paste link to select it.
8. Click on Microsoft Excel Worksheet Object and click OK.
9. Double-click on the table in Word to open the Excel file.
Pasting the link as an ‘object’ allows you to open the source file directly from the document without having to open the application.
10. Enter data in the 3 Years column as follows: Arachnids – 96,800; Amphibians – 4,600; Reptiles – 8,700 then click in the Total cell.
11. Return to your document in Word.
12. If the data has not updated automatically, right-click in the table and select Update Link.
Note: You cannot format a Microsoft Excel Worksheet Object as a table. If you want to be able to do this, choose the Formatted Text (RTF) option instead or use one of the Link options from the Paste Options gallery.

Word 2013: Beyond the Basics 23
3 Working with tables
Task 3.4 Breaking links
If you send a file containing linked objects to others, the links will break. Although the recipients will still be able to read and edit the Word document, they will receive error messages when it is opened. To avoid this, you can break the links manually through the Links dialog box.
If you have several links, they are listed in the order they appear in the document.
Try this…
1. With your Word document open, click on the File tab.
2. On the Info screen, click on Edit Links to Files at the bottom right to display the Links dialog box.
If the Edit Links to Files option does not appear, you have not copied the object as a link.
3. Hold down [Shift] and click on both the link entries to select them.
4. Click on Break Link, then on Yes to confirm.
With the links broken, any changes you make to the Excel file will not be reflected in the Word document; however you can now send the document without recipients receiving error messages.
5. Click on the left arrow to continue editing your document.
Note: If you delete a linked object from your document, you need to break the link as well. Simply deleting the object does not remove the link, which is why you can see two links in the dialog box. If you don’t break the link, Word will display a prompt to update the object even though it is no longer there.

24 Word 2013: Beyond the Basics
4. Working with images
4. Working with images
You can insert images into your document from Microsoft’s Office.com gallery, or use files you have sourced yourself. Word supports a wide range of formats. Images are inserted from the Illustrations group on the Insert tab.
Use Pictures to insert a file and Online Pictures to search for clip art.
Once you have inserted a picture, you can make changes with Word’s image editing tools on the Picture Tools Format tab. Images can be cropped, rotated and re-coloured. Word also includes a range of effects and styles that you can apply.
Image sources
If you are looking for a specific image, there are a number of online libraries you can try:
Flickr Creative Commons
Free photography. You must include an attribution.
https://www.flickr.com/creativecommons/
Getty Images Images, video and music. There is a charge for the service.
http://www.gettyimages.co.uk/
iStockphoto Wide range of photographs, audio and video. Small charge required.
http://www.istockphoto.com/
JISC MediaHub Free images for use in learning, teaching and research only.
http://jiscmediahub.ac.uk/
IS image databases
Information Services Library resources – list of image databases.
http://edin.ac/11ToMU3
Copyright issues
If you are using an image other than one you have created yourself or have sourced from a library, make sure you are aware of the copyright restrictions. If you have seen a picture on a website that you like, using the browser’s Save Target As and Save Picture As options to make a copy is likely to be breaching copyright.
Placing images: inline versus floating
When positioning images, they can be either ‘inline’ or ‘floating’. An inline image becomes part of a paragraph and can’t easily be dragged around the page. All images inserted into a document are inline by default.
Word 2013: Beyond the Basics 25
4 Working with images
A floating image can be dragged anywhere on the page, and text will wrap around it. However, a floating image will still anchor itself to an object in the document, usually the nearest paragraph. An anchor icon displays next to the paragraph and alignment guides appear as you drag.
Inline images are more reliable to work with since they will stay with their paragraph and only move where it moves. Images with text wrapped around them may look nice, but are much harder to position.
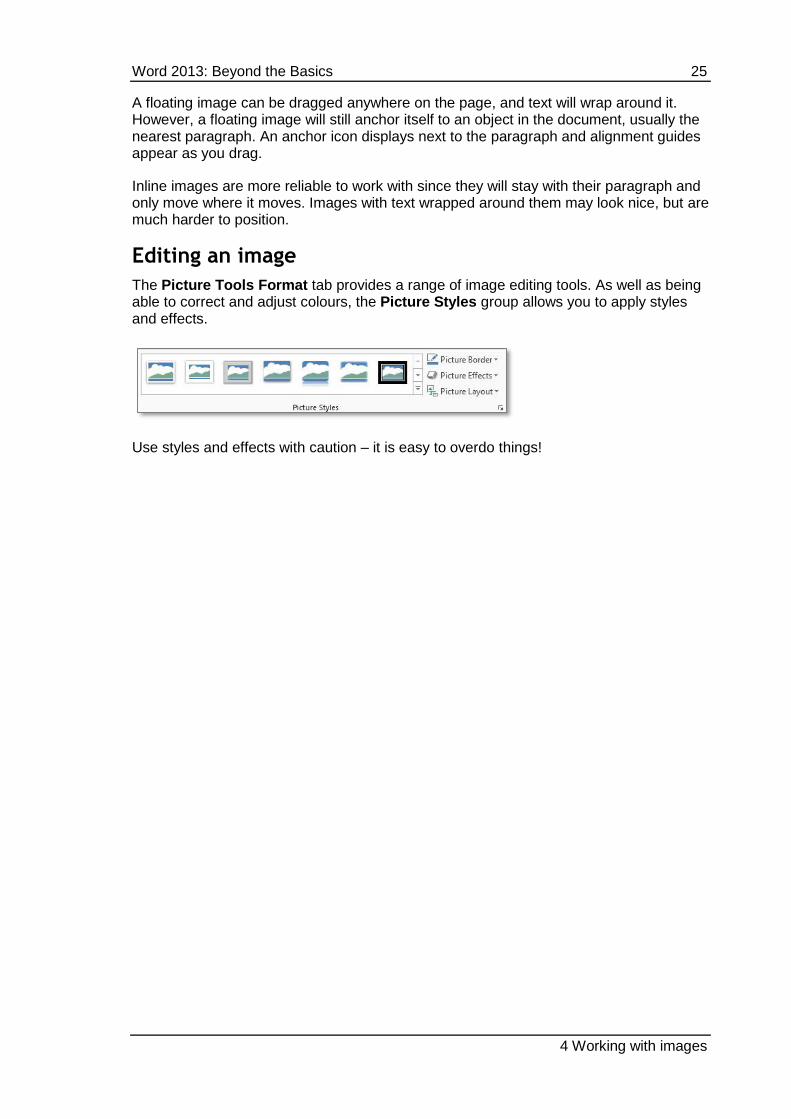
Editing an image
The Picture Tools Format tab provides a range of image editing tools. As well as being able to correct and adjust colours, the Picture Styles group allows you to apply styles and effects.
Use styles and effects with caution – it is easy to overdo things!

26 Word 2013: Beyond the Basics
4. Working with images
Task 4.1 Inserting and repositioning an image
An image that allows text to wrap around it is ‘floating’; one that does not allow wrapped text is ‘inline’. An inline image is treated as a character in a paragraph, and can only be dragged into another paragraph. A floating image can be dragged anywhere on the page; however, it will also anchor itself to the nearest paragraph and move with that paragraph.
You can control wrapping by clicking on the Layout Options button to display the most common settings. You can also use the Wrap Text option on the Picture Tools Format tab.
When you insert an image, by default it appears as In Line with Text. If you choose one of the other options, it becomes a floating image. To help you with positioning a floating image, Word displays an object anchor, and alignment guides appear as you drag it.
Try this…
1. With Report_2.docx open, navigate to page 3 and create a blank line after the heading 1.1.1 Spiders.
2. With your cursor in the blank line, click on the Insert tab, and in the Illustrations group, select Pictures.
3. In the panel on the left, click on Documents, under Libraries.
4. In the Documents library, navigate to the folder Word 2013 Beyond basics Practice files and insert the file spider.jpg.
5. Move your cursor to the handle at the bottom right corner of the image, and when it
becomes a diagonal double-headed arrow , hold down the mouse button and drag the image to make it smaller. (In the Size group, the Shape Height should be around 3.5 cm.)
6. With the image selected. click on the Layout Options button and note that In Line with Text is selected.
7. Select Square from the With Text Wrapping options.
The image is now ‘floating’ and you should see the anchor icon .
8. Close the Layout Options callout.

Word 2013: Beyond the Basics 27
4 Working with images
9. Drag the image and watch the anchor icon.
The text will wrap, and the anchor icon will move as the image moves. The image ‘anchors’ itself to the nearest paragraph.
10. Drag the image so that the anchor icon sits in front of the blank line under the heading 1.1.1 Spiders.
11. Click on the Layout Options button and choose In Line with Text.
The image should return to its original position and is again inline.
12. Close the Layout Options call-out window.
13. Click on the Home tab, and in the Paragraph group, click on Center.
Because the image is part of the paragraph, you can use the paragraph settings to position it.
14. Click on Align Left in the Paragraph group move the image back to the margin again.
Tip: Most problems with images are to do with positioning – they do not stay where you want them to! Unless you have a very good reason to wrap text, In Line with Text makes it easier to control where an image is. If you do want a more complex layout – images side-by-side, for example – consider using a table and inserting images in the cells.
28 Word 2013: Beyond the Basics
5. Creating captions
5. Creating captions
Understanding captions
A caption is a useful way to identify and refer to an object in your document, such as a table or an image.
Rather than type in captions manually, always use Word’s caption feature. This will update caption numbers automatically. It will also allow you to build a table of figures and insert cross-references.
A caption is made up of two parts:
Label This identifies the type of object. Word provides three default labels – table, figure and equation, but you can add labels of your own, such as fig, chart, image etc.
Number The number is applied automatically, and is updated as you add or delete captions. You can change the number format, and add chapter numbers if you have applied numbers to your Heading styles.
You can also add a short description of the object.

Word 2013: Beyond the Basics 29
5 Creating captions
Task 5.1 Inserting a caption
Captions should always be created using Word’s Insert Caption function, not simply typed in manually.
The drop-down Label list gives you a choice of label types – this describes the type of object.
Caption positioning can be above or below the object.
You can also add new label types and change the numbering format.
Try this…
1. On page 3, click on the image of the spider.
2. Click on the References tab, and then in the Captions group, click on Insert Caption.
3. Click on the down arrow at Label and select Figure if it is not already selected.
4. In Caption, click after Figure 1, press the space bar and type Tropical spider.
5. In Position, check that Below selected item is selected.
6. Click OK.
7. Navigate to page 5 and click on the image of the frog.
8. On the References tab, click on Insert Caption.
9. In Label, check that Figure is selected, and in Caption, click after Figure 2, press the space bar and type Tree frog.
10. Click OK.
11. Navigate to page 7 and click on the table below the text Table B.
12. On the References tab, click on Insert Caption.
13. At Label, click on the down arrow and select Table.
14. In Caption, click after Table 2, press the spacebar and type Projection figures from 2013 report.
Note that because there is a caption on the table above, the label number for this caption has been updated automatically.

30 Word 2013: Beyond the Basics
5. Creating captions
15. Click OK.
Tip: Caption text is formatted using the Caption style, which you can modify in the same way as any other style if you don’t like the way it looks. If you click in the caption text, the style will appear in the Styles pane.

Word 2013: Beyond the Basics 31
6 Creating charts and diagrams
6. Creating charts and diagrams
Using SmartArt
Word includes a SmartArt option that allows you to communicate an idea in a combination of shapes and text. It can be more interesting to present information visually rather than as a simple text list. For example, instead of:
Arachnids
Spiders
Ticks & mites
Scorpions
You could try:
The SmartArt gallery has seven main categories:
List List of items without a sequence.
Process Items or steps with a specific sequence.
Cycle Steps with a continuing sequence.
Hierarchy Relationship between items or people.
Relationship Non-hierarchical relationship between items or people.
Matrix Grid-like diagrams.
Pyramid Hierarchy of items.
The SmartArt Tools tabs allow you to change layouts, styles and colours as well as select fills and effects.
Arachnids
Spiders Ticks & mites Scorpions
32 Word 2013: Beyond the Basics
6. Creating charts and diagrams
Task 6.1 Creating an organisation chart
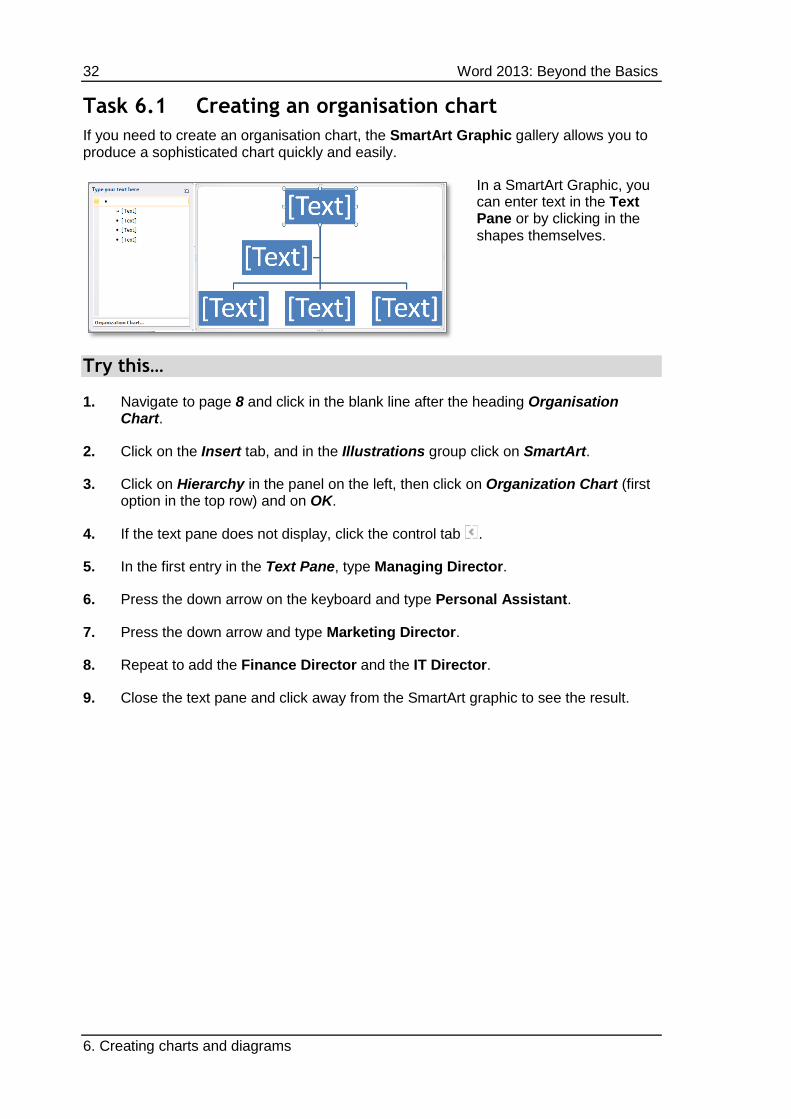
If you need to create an organisation chart, the SmartArt Graphic gallery allows you to produce a sophisticated chart quickly and easily.
In a SmartArt Graphic, you can enter text in the Text Pane or by clicking in the shapes themselves.
Try this…
1. Navigate to page 8 and click in the blank line after the heading Organisation Chart.
2. Click on the Insert tab, and in the Illustrations group click on SmartArt.
3. Click on Hierarchy in the panel on the left, then click on Organization Chart (first option in the top row) and on OK.
4. If the text pane does not display, click the control tab .
5. In the first entry in the Text Pane, type Managing Director.
6. Press the down arrow on the keyboard and type Personal Assistant.
7. Press the down arrow and type Marketing Director.
8. Repeat to add the Finance Director and the IT Director.
9. Close the text pane and click away from the SmartArt graphic to see the result.

Word 2013: Beyond the Basics 33
6 Creating charts and diagrams
Task 6.2 Adding shapes to a chart
You can add peers, subordinates and assistants to an organisation chart, and also apply styles through the SmartArt Tools Design tab.
Try this...Try this…
1. Click on the Finance Director shape in the SmartArt graphic to select it and on the SmartArt Tools Design tab if it is not already selected.
2. In the Create Graphic group, click on the down arrow at Add Shape (make sure you click on the down arrow) and select Add Shape After to add a shape on the same level.
3. Click in the shape and type PR Director.
4. Click on the Finance Director shape to select it again and click on the down arrow at Add Shape.
5. Select Add Shape Below to add a subordinate.
6. Click in the shape and type Accountant.
7. Click on the Finance Director shape again and on the down arrow at Add Shape.
8. Select Add Shape Below to add another subordinate.
9. Click in the shape and type Project Officer.
10. Click on the Personal Assistant shape and press [Delete] to remove it.
11. In the SmartArt Styles group, click on the More button to display the gallery.
12. Try out some of the styles, and then choose Intense Effect in the top row.
The colours and styles you see in the SmartArt Styles group depend on the theme used in the document (Design tab and Themes). The default theme for a new document is Office.
13. Click away from the chart to see how it looks.
14. Save your document.
Tip: You can add shapes directly from the Text Pane as well as using the Add Shape option. Press [Return] to add a shape at the same level. Press [Tab] or [Shift Tab] to promote or demote.

34 Word 2013: Beyond the Basics
7. Structuring the document
7. Structuring the document
Word includes features that allow you to change the structure of a document. For example, you can insert headers and footers, put text into columns, or include landscape pages.
Using headers and footers
Headers and footers are the areas in the margins at the top and bottom of the page. They are normally used for displaying information such as the document title, file name or page number, but can include images or tables.
Word includes built-in preformatted headers and footers, but you can also create your own layout.
By default, the content in a header or footer appears on every page. To change the content from one part of the document to the next, you need to use section breaks.
Understanding section breaks
When you are working with longer documents, you may need to apply different formatting and layouts to different parts of the document. For example, you might want to insert a landscape page to accommodate a large table or diagram, or change the content of the header or footer. This is done by using a section break to split your document into sections that you can format independently.
A section break contains information about the format and structure of the section, including:
Headers and footers – text, fields, page numbering
Page setup – margins, orientation
Column settings – number and width
There are different types of section break:
Next page The new section starts on the next page.
Continuous The new section starts on the same page. Use this where you want different formatting on the same page, such as a mixture of columns and margin-to-margin text.
Even or odd page The new section starts on the next odd (right) or even (left) page. You would normally only use this for double-sided printing.
If you are working in Print Layout view, it is a good idea to be able to see your section
breaks, so that you do not delete them accidentally. The Show/Hide button on the Home tab displays formatting marks. Section breaks appears as double dotted lines:

Word 2013: Beyond the Basics 35
7 Structuring the document
You can customise the status bar at the bottom of the screen to display the number of the section you are working in so that you can keep track of where you are. You can also display the page number as shown on the page itself (formatted page number), as well as the physical page number.

36 Word 2013: Beyond the Basics
7. Structuring the document
Task 7.1 Creating a header and footer
Although Word includes a range of built-in headers and footers, it is often easier to create your own using the Edit Header option.
The Header & Footer Tools Design tab includes tools for working with headers and footers.
Try this…
1. Press [Ctrl] and [Home] to move to the start of the document.
2. Click on the Insert tab and in the Header & Footer group, click on Header.
3. Click on Edit Header from the menu at the bottom.
4. At the left margin of the header, type Environmental Report.
5. In the Navigation group, click on Go to Footer.
6. On the Header & Footer Tools Design tab, in the Insert group, click on Document Info and select File Name.
7. Press [Tab] twice to move to the right margin.
8. In the Header & Footer group, click on Page Number.
9. Move to Current Position on the menu and select Plain Number.
10. Click on Close Header and Footer.
Note: Although the Page Number menu includes options for Top of Page or Bottom of Page, the alignment (left, centre and right) is applied to the entire header or footer, not just the number. This means that for right-aligned or centred page numbers, you will not be able to insert any other content on the same line.

Word 2013: Beyond the Basics 37
7 Structuring the document
Task 7.2 Inserting a section break
Section breaks allow you to create different formats and layouts within your document. You will find them on the Page Layout tab, along with other page setup tools.
The options for section breaks are: Next Page, Continuous, Even Page and Odd Page.
When working with section breaks, it is a good idea to be able to see the formatting marks so that you don’t delete them by mistake. Displaying section numbers on the status bar is also useful.
Try this…
1. Check that you are at the beginning of the document.
2. Right-click on the status bar at the bottom of the screen to display the Customize Status Bar menu.
3. Select Section and Formatted Page Number by clicking to the left and then click away from the menu to close it.
You will see Section: 1 at the left of the status bar. All documents contain one section by default, even if you have not inserted a section break. Page: 1 is the page number as it will appear on the page (as opposed to the physical page number Page: 1 of 10).
4. With your document open, click on the Home tab and, in the Paragraph group,
click on the Show/Hide button to display the formatting marks, if it is not already selected.
You will now be able to see the document’s formatting, including paragraph marks, and page and section breaks.
5. Scroll to page 2.
6. Move your cursor into the margin to the left of the page break until it becomes a
white arrow .
7. Click to select the break and the paragraph mark, and then press [Delete].
8. Make sure your cursor is at the beginning of the heading AGE – Making a Commitment to the Environment.

38 Word 2013: Beyond the Basics
7. Structuring the document
9. Click on the Page Layout tab, then in the Page Setup group, click on Breaks, and under Section Breaks select Next Page.
Note on the status bar that you are now in Section 2.

Word 2013: Beyond the Basics 39
7 Structuring the document
Task 7.3 Formatting page numbers
You can use section breaks to change the formatting of page numbers in different parts of your document. For example, you could have an introductory section with no page numbers, or where the page number is displayed as roman numerals, and a main body with the number displayed as Arabic.
In the Page Number Format dialog box, you can change the number format, include a chapter number if you have used numbered headings, and force numbering to start at a specific number.
Try this…
1. Make sure you are still in Section 2.
2. Click on the Insert tab.
3. In the Header & Footer group, click on Footer and select Edit Footer to open it for editing.
You will format the page number so that the numbering starts at page 1 from this point.
4. In the Header & Footer group, click on Page Number and select Format Page Numbers.
5. Click on Start at, check that the number is set at 1, and click OK.
The page number changes, and the Page entry at the far left of the Status bar now reads Page: 1.
6. In the Navigation group, click on Previous to return to the footer for section 1.
7. Click on Page Number and select Format Page Numbers.
8. Click on the down arrow at Number format, select i, ii, iii, … and click OK.
The numbering in section 1 changes to Roman numerals.
9. Double-click in the body of the document to close the footer.
10. Scroll through the document examining the page numbering.

40 Word 2013: Beyond the Basics
7. Structuring the document
Task 7.4 Creating different headers and footers
When you create a new section it is linked to the previous section by default, and the header and footer content is carried forward. To change the text or the layout in a section’s header or footer, you must unlink it from the section before.
To unlink a section, deselect the Link to Previous option on the Header & Footer Tools Design tab.
Try this…
1. Navigate to page 3 (now formatted in the footer as page 1) and click anywhere on the page.
2. Click on the Insert tab.
3. In the Header & Footer group, click on Footer and select Edit Footer to open it for editing.
You will see the label Same as Previous on the right, indicating that the footer in this section is linked to the footer in the previous section.
4. In the Navigation group, click on Link to Previous to deselect it.
5. Delete the filename field and type Section 1.
6. Click on Close Header and Footer (or double-click in the document body).
7. Navigate to page 7 (formatted as page 5) and click in front of the text Species projections.
8. Click on the Page Layout tab, click on Breaks and select Next Page.
You should now be in Section 3. Note that the page number in the footer appears as 1. The Start at setting that you used for the previous section has been carried forward into the new section.
9. Double-click in the footer to open it.
10. In the Navigation group, click on Link to Previous to deselect it.
11. Edit the footer text to read Section 2.
12. In the Header & Footer group, click on Page Number and select Format Page Numbers.
13. Select Continue from previous section and click OK.
14. Close the footer.
15. Delete the page break below Table B.

Word 2013: Beyond the Basics 41
7 Structuring the document
16. With your cursor in front of the text Appendix, click on the Page Layout tab and insert another Next Page section break.
17. Make sure you are in Section 4 and double-click on the footer to open it.
18. In the Navigation group, click on Link to Previous to deselect it.
19. With your cursor at the left margin, edit the footer text to read Appendix.
The Continue from previous section setting has been carried forward, therefore the page numbering carries on correctly.
20. Close the footer and check your formatting.

42 Word 2013: Beyond the Basics
7. Structuring the document
Task 7.5 Creating a different first page
If you have a document with a title page, it is unlikely that you will want it to have the same header and footer content as the main body. You can use the Header & Footer Tools Design tab to create a different first page.
The Options group allows you to create different headers and footers for the first page, and also create different layouts for odd and even pages if you wish.
Try this…
1. Press [Ctrl] and [Home] to make sure you are at the start of the document.
2. Double-click in the header to open it.
3. On the Header & Footer Tools Design tab, in the Options group, click Different First Page.
Note that the content of the header and footer on the first page has disappeared, and that the labels on the left now say First Page Header – Section 1 and First Page Footer – Section 1.
4. In the Navigation group, click Next.
Note that the header and footer still contain the content you entered, and the labels say Header – Section 1 and Footer – Section 1.
You now have two different headers and footers in this section – a first page one and a normal one.
5. In the Close group, click on Close Header and Footer.

Word 2013: Beyond the Basics 43
7 Structuring the document
Task 7.6 Creating a landscape page
If you need to include a large table, picture or diagram, use section breaks to format part of your document as landscape so that the content fits more easily.
If you have used tabs and the Current Position option to place a page number at the centre or on the right in the footer, it will not appear in the correct place on a landscape page. This is because the location of the tabs is determined by the Footer style, and not by the page orientation.
You will have to reposition the number using the Insert Alignment Tab command on the Header & Footer Tools Design tab.
Try this…
First, you’ll create a landscape section.
1. Press [Ctrl] and [End] to move to the end of the document.
2. Click on the Page Layout tab and insert a Next Page section break.
3. In the Page Setup group, click on Orientation and select Landscape.
Because Word applies Page Setup options to the current section only, the rest of the document remains as portrait.
4. Examine the footer. Note that the page number appears in the wrong position.
The Footer style (used by default to format footers) includes specific locations for the centre and right tabs, and these do not change even if you choose a different page orientation.
5. Double-click in the footer to edit it.
6. In the Navigation group, click on Link to Previous to deselect it.
7. Click just in front of the page number.
8. In the Position group, click on Insert Alignment Tab, select Right and click OK.
The page number moves out to the right margin.
9. Double-click in the body of the document to close the footer.
10. With your cursor in the landscape page, click on the Page Layout tab and insert another Next Page section break.
11. In the Page Setup group, click on Orientation and select Portrait.
12. Click on the Insert tab, click Footer and choose Edit Footer.
44 Word 2013: Beyond the Basics
7. Structuring the document
13. In the Navigation group, click on Link to Previous to deselect it.
14. Click at the end of the text Appendix and press [Delete] to remove the extra tab.
15. Double-click in the document body to close the footer and check your layout and page numbering.

Word 2013: Beyond the Basics 45
7 Structuring the document
Task 7.7 Creating columns
Some of the content in your document might look better presented in columns rather than full page width. The Page Layout tab includes an option to create columns.
You can choose from a range of column settings.
Try this…
1. Scroll up to the heading Further Information.
2. Click in front of the text and insert a page break. (You can either click on the Insert tab and in the Pages group, click on Page Break, or hold down [Ctrl] and press [Enter].)
3. Select the text from New York to the end of the London entry (make sure you don’t include the section break).
4. Click on the Page Layout tab.
5. Click on Columns and select Two.
Note that Word has automatically inserted Continuous section breaks before and after the selected text.
6. Click in front of the text Auckland.
7. Click on Breaks and select Column.
The text moves into the second column.

46 Word 2013: Beyond the Basics
8. Creating tables of contents and figures
8. Creating tables of contents and figures
If you have created a long or formal document, a table of contents makes it easier for your readers to navigate around it. You can also list items such as tables, diagrams or images in a table of figures.
Rather than typing in the contents page manually, use Word’s Table of Contents and Table of Figures functions on the References tab to do the hard work for you.
Styles and the table of contents
The most important thing to understand is that, to build a table of contents automatically, you need to format your headings with Word’s styles.
By default, Word will only use text formatted with the built-in Heading styles to create the tables of contents. You can, however, customise your contents by adding other styles, including ones you have created yourself.
Using the dialog box
Word includes a set of automatic built-in layouts to allow you to create your contents page quickly and easily.
However, for more control over the content and appearance, you can use the Table of Contents dialog box. You can choose the number of levels, select a different tab leader, and modify the table of contents (TOC) styles that Word uses to format the text.

Word 2013: Beyond the Basics 47
8 Creating tables of contents and figures
Task 8.1 Using the Table of Contents dialog box
The Table of Contents dialog box allows you to change the content and the appearance of your table of contents.
From here, you can choose the number of levels to display up to a maximum of nine.
You can also modify the table of contents styles to change how the table looks.
Try this…
1. If you have not completed the previous exercises, open the file Report_3.docx from the Practice files folder; otherwise continue with the file you are working on.
2. Press [Ctrl] and [Home] to move to the start of the document then scroll to page 2.
3. If you can’t see the formatting marks, click on the Home tab and on Show/Hide in the Paragraph group.
4. Click immediately after the text Report compiled by AGE on 01/12/13 (make sure
your cursor is in front of the paragraph mark ).
5. Insert a page break.
6. Make sure you are in the blank line before the section break and type Table of Contents then press [Enter].
7. Select the text Table of Contents and on the Home tab, apply the formatting: Font – Arial; Font Size – 16 and Bold.
Don’t apply a built-in Heading style to the table of contents heading. If you do, it will appear as an entry in the table of contents! Format the text manually, or create a new style to apply.
8. Click in the blank line below the contents heading.
9. Click on the References tab and then on Table of Contents.
10. Select Custom Table of Contents from the menu at the bottom to display the dialog box.

48 Word 2013: Beyond the Basics
8. Creating tables of contents and figures
By default, Word builds a table of contents using the text formatted as Heading 1, Heading 2 and Heading 3.
11. In the General section, click on the up spinner arrow at Show levels to change the value to 4.
12. Click OK.
Note: The Table of Contents option includes two automatic formats. These will add the heading for you. Note that the style used for the heading is TOC Heading, which you can edit if you wish. To modify the table, click on Table of Contents and Custom Table of Contents.

Word 2013: Beyond the Basics 49
8 Creating tables of contents and figures
Task 8.2 Formatting a table of contents
If you don’t like how the table of contents looks, you can change how it is formatted through the Modify option in the Table of Contents dialog box.
The styles TOC 1 to TOC 9 correspond to the nine levels you can have in a table of contents. They can be modified like any other style.
Try this…
1. Click on the Home tab, then click on Show/Hide to hide the formatting marks.
2. Click anywhere in the table of contents.
3. Click on the References tab, then click on Table of Contents and select Custom Table of Contents again.
4. Click on Modify to display the Style dialog.
5. Click on TOC 1 and on Modify to display the Modify Style dialog box.
6. In the Formatting section, click on Bold and click OK. Do not close the Style dialog box.
7. Click on TOC 2 and on Modify.
8. Click on Format and select Paragraph.
9. In Spacing, set After to 0 pt then click OK and OK again.
10. Click on TOC 3 and on Modify.
11. Click on Format and select Paragraph.
12. In Spacing, set After to 0 pt then click OK and OK again.
13. Click on TOC 4 and on Modify.
14. Click on Format and select Paragraph.
15. In Spacing, set After to 0 pt then click OK and OK again.
50 Word 2013: Beyond the Basics
8. Creating tables of contents and figures
16. Click OK to close the Style dialog box and OK again to close the Table of Contents dialog box.
17. Click OK at the prompt to replace the table of contents.
The top level is now bold, and the spacing between the entries for levels 2, 3 and 4 has been reduced.

Word 2013: Beyond the Basics 51
8 Creating tables of contents and figures
Task 8.3 Adding new styles to the table of contents
As well as setting the number of Heading levels in the Table of Contents dialog box, you can also control which styles are used to create your contents through the Table of Contents Options dialog box.
The styles used in your document appear in Available styles. In TOC level, enter the level the text formatted with the style is to appear at in the table of contents.
Try this…
1. Click anywhere in the table of contents.
2. On the References tab, click on Table of Contents, and select Custom Table of Contents.
3. In the Table of Contents dialog box, click Options to display the Table of Contents Options dialog box.
4. In Available styles, scroll down to the Heading 4 style, click in TOC level and delete the number.
You can use this dialog box as well as the Table of Contents dialog box to add and remove levels.
5. Scroll back up and locate the style AppendixHeading, and in TOC level, type 2.
AppendixHeading was the new style you created to format a set of headings differently from the built-in Heading styles. Text formatted with this style will appear at the same level as text formatted as Heading 2.
6. Click OK and OK again.
7. Click OK at the prompt to replace the table of contents.
8. Note the additional entries at the end of the table of contents.
52 Word 2013: Beyond the Basics
8. Creating tables of contents and figures
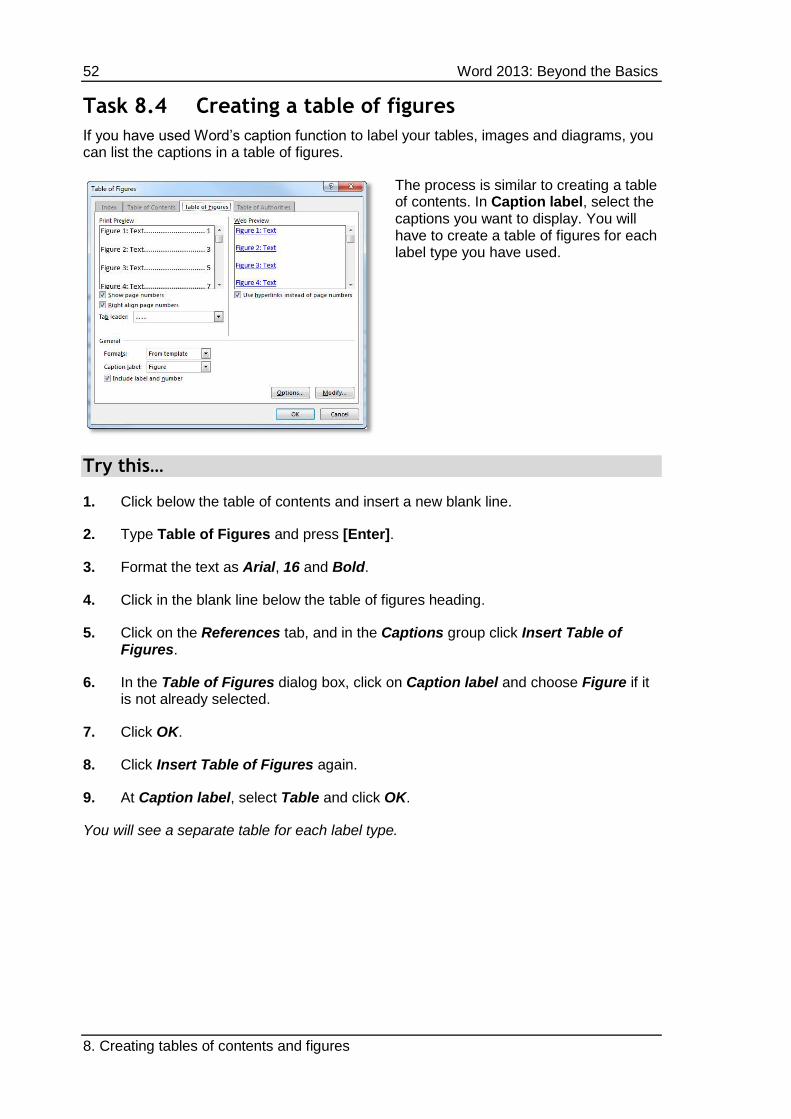
Task 8.4 Creating a table of figures
If you have used Word’s caption function to label your tables, images and diagrams, you can list the captions in a table of figures.
The process is similar to creating a table of contents. In Caption label, select the captions you want to display. You will have to create a table of figures for each label type you have used.
Try this…
1. Click below the table of contents and insert a new blank line.
2. Type Table of Figures and press [Enter].
3. Format the text as Arial, 16 and Bold.
4. Click in the blank line below the table of figures heading.
5. Click on the References tab, and in the Captions group click Insert Table of Figures.
6. In the Table of Figures dialog box, click on Caption label and choose Figure if it is not already selected.
7. Click OK.
8. Click Insert Table of Figures again.
9. At Caption label, select Table and click OK.
You will see a separate table for each label type.

Word 2013: Beyond the Basics 53
8 Creating tables of contents and figures
Task 8.5 Updating tables of contents and figures
It is important to remember that tables of contents and figures do not update dynamically. If you make changes to the content of your document, you must update the tables manually from the Update Table of Contents dialog box.
You can choose to update the page numbers only or the entire table. It is a good idea to always update the entire table.
Try this…
1. In your table of contents, hold down [Ctrl] and click on the entry for Salamanders to navigate to the section.
2. Click at the end of the last paragraph in the section on salamanders and press [Enter].
3. Click on the Home tab.
4. In the Styles gallery, click on Heading 3, then type Physical characteristics and press [Enter].
5. Press [Ctrl] and [Home] then scroll down and click anywhere in the table of contents.
6. Click on the References tab and in the Table of Contents group, click on Update Table to display the Update Table of Contents dialog box.
7. Select Update entire table and click OK.
The new heading appears in the table. Note that this only updates the table you are in, not the ones for the table of figures. To make sure all the tables are accurate, you should update everything.
8. Click on the Home tab, and in the Editing group, click Select, then choose Select All to select the entire document. (The shortcut key is [Ctrl] and [A].)
9. Press the shortcut key [F9].
If you have several tables for contents and figures, the dialog box will display for each.
10. Select Update entire table and click OK at each prompt.
The [F9] shortcut key doesn’t just update tables of contents. If you have selected the whole document, it will also update all fields, such as cross-references and caption numbers.
11. Save the completed document and relax!

54 Word 2013: Beyond the Basics
9. Creating accessible documents
9. Creating accessible documents
All documents and presentations you create should be accessible and inclusive, and good practice in this area can benefit all users regardless of ability.
The University has a legal and moral responsibility under the Equality Act 2010 to ensure that no-one is disadvantaged because of a disability, which includes providing any of its documents, leaflets, electronic resources etc. in an alternative format if requested by a disabled user. Examples of alternative formats include large print, printed on coloured paper, a paper copy of an electronic resource or vice versa, or an electronic resource in an alternative way, e.g. a Word document instead of a PDF.
Points to keep in mind are:
Documents do not need to be produced in alternative formats until a request has
been received.
However, you will save time when producing alternate formats if you create
documents with accessibility in mind.
All documents must carry a tagline informing readers of how they can request
another format.
The University bears the cost of providing an alternative format, not the person
requesting the information.
Using Word to create accessible documents
Document tagline
All documents including minutes, agendas, leaflets, etc., should include a tagline offering to provide the information in an alternative format upon request, and giving two methods of contacting an individual who can do this. The tagline can be at the beginning or end of the document as long as it is clearly visible, and should use Arial, bold, size 14 font.
It should read:
'If you require this document in an alternative format, such as large print or a coloured background, please contact [insert: name and contact details]'
In Word, you can simply type this at the top or bottom of your document then apply direct formatting. Optionally, select the text then apply an ‘Outside border’ from the Paragraph section of the Home tab.
Font
Use Word’s styles to format your text. This makes it easier for disabled users to adapt the document to meet their needs and to navigate the document using a screen reader.
Use a minimum font size of 12, ideally size 14, to assist readers with visual impairments – although no one font size will suit everyone.
Use sans-serif fonts, e.g. Arial, Verdana, or Calibri which is Office 2013’s default font. The more ornate the font, the fewer the number of individuals who will be able to read it. Word Art is not compatible with some screen readers.

Word 2013: Beyond the Basics 55
9 Creating accessible documents
Avoid the use of italics and underlining wherever possible and use bold to emphasise items or create headings.
Don’t use capitals for continuous text if possible, although a couple of words in capitals is acceptable.
Consider contrast and text colour. Using dark ink against a pale background is usually best for users with specific learning difficulties such as dyslexia. However, some users may find a pale font on a dark background easier. The key factor is that there is sufficient contrast between the font and background colours. Backgrounds should always be plain.
Paragraph settings
Use left alignment to ensure the spaces between words are equal. Avoid justified text as it makes the spaces between words uneven, which is difficult for some people to read.
Leave the equivalent of at least one line space between paragraphs. The correct way to do this is using the paragraph spacing options rather than pressing the return key.
Double or 1.5 spacing between lines can make a document more accessible.
Page numbering
Ensure all pages are numbered in the same place.
Using images
Resize and crop images to focus the reader and keep files to a manageable size. When adding images to your document, make sure you add meaningful alt text and captions that will be assist readers.
You can also use screen tips if you need extra information, but make sure your image is positioned in a way that doesn’t interfere with the text.
Using hyperlinks
You can use hyperlinks to send readers directly to information within the same document, to a different document or to a web page. Use Insert > Hyperlink to set these up, and include screen tips to provide further information about where the link takes the reader.
Office Accessibility Checker
There is an Accessibility Checker in Word, Excel, and PowerPoint that flags possible accessibility issues in your files and provides instructions for fixing them. Each issue is classified as an error, warning, or tip depending on how difficult the content may be for people with disabilities to understand.
For more information, press F1 to open Office Help and search for ‘Check for accessibility issues’.

56 Word 2013: Beyond the Basics
9. Creating accessible documents
To run the Accessibility Checker:
1. Click File > Info.
2. If the Accessibility Checker sees any potential issues, you will see a message next to the Check for Issues button.
3. To view and repair the issues in your file, click Check for Issues > Check Accessibility.
4. Your file reappears, and the Accessibility Checker task pane opens on the right of the screen, showing the inspection results.
5. Click a specific issue to see Additional Information and steps you can take to change the content.
Rules used by the Accessibility Checker
Issue type Rule name Accessibility Checker checks that
Error All objects have alternate text All objects use alternate text.
Alternate text doesn’t contain an image or file extension.
Error Tables specify column header information
Tables have a header row indicated, or are in Table Normal style.
Error Long documents use styles to provide structure
Headings and/or a Table of Contents have been used in file to help organise the content.
Warning Hyperlink text is meaningful Link text has a Screen Tip and matches the link target.
Warning Table has simple structure There are no issues that cause tables to be non-rectangular, such a split cells, merged cells or nested tables.
Warning Tables don’t use blank cells for formatting
There are no entirely blank rows or columns in a table.
Warning Avoid the use of repeated ‘blank’ characters
There are no runs of blank spaces, tabs and/or carriage returns.
Warning Headings don’t contain too much information
Headings aren’t too long
Warning The use of floating objects is avoided Objects have text wrapping set to ‘in line with text.’
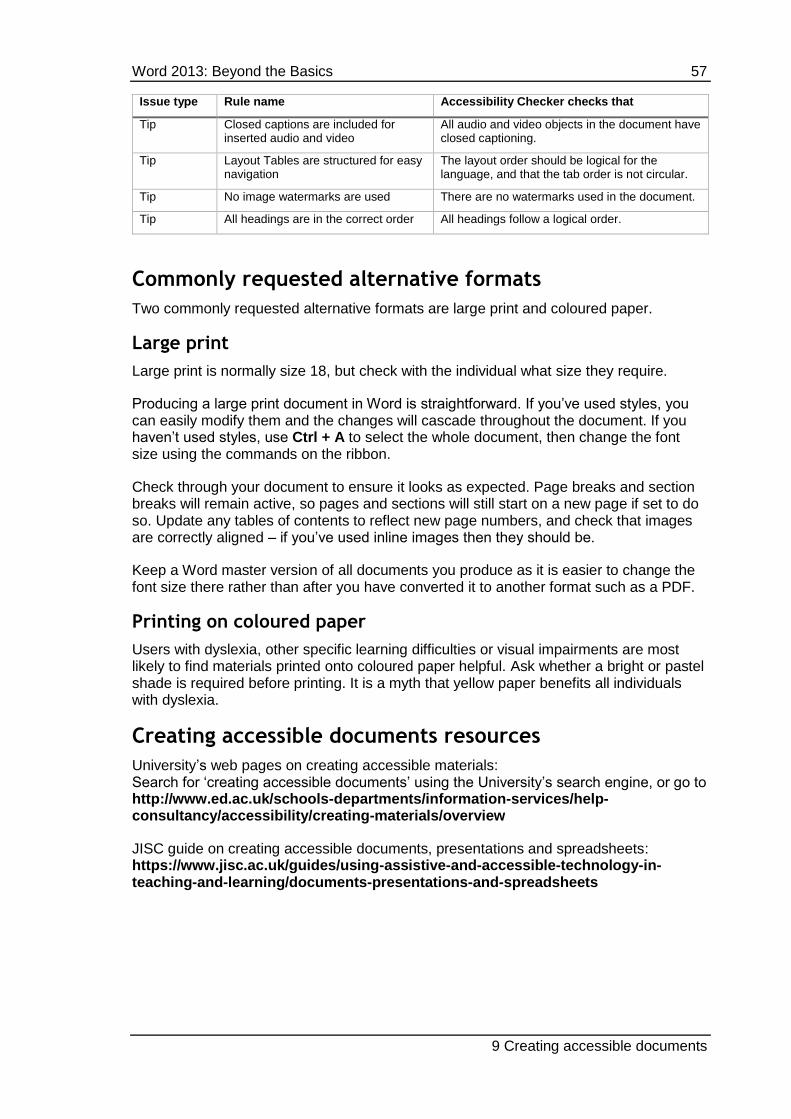
Word 2013: Beyond the Basics 57
9 Creating accessible documents
Issue type Rule name Accessibility Checker checks that
Tip Closed captions are included for inserted audio and video
All audio and video objects in the document have closed captioning.
Tip Layout Tables are structured for easy navigation
The layout order should be logical for the language, and that the tab order is not circular.
Tip No image watermarks are used There are no watermarks used in the document.
Tip All headings are in the correct order All headings follow a logical order.
Commonly requested alternative formats
Two commonly requested alternative formats are large print and coloured paper.
Large print
Large print is normally size 18, but check with the individual what size they require.
Producing a large print document in Word is straightforward. If you’ve used styles, you can easily modify them and the changes will cascade throughout the document. If you haven’t used styles, use Ctrl + A to select the whole document, then change the font size using the commands on the ribbon.
Check through your document to ensure it looks as expected. Page breaks and section breaks will remain active, so pages and sections will still start on a new page if set to do so. Update any tables of contents to reflect new page numbers, and check that images are correctly aligned – if you’ve used inline images then they should be.
Keep a Word master version of all documents you produce as it is easier to change the font size there rather than after you have converted it to another format such as a PDF.
Printing on coloured paper
Users with dyslexia, other specific learning difficulties or visual impairments are most likely to find materials printed onto coloured paper helpful. Ask whether a bright or pastel shade is required before printing. It is a myth that yellow paper benefits all individuals with dyslexia.
Creating accessible documents resources
University’s web pages on creating accessible materials: Search for ‘creating accessible documents’ using the University’s search engine, or go to http://www.ed.ac.uk/schools-departments/information-services/help-consultancy/accessibility/creating-materials/overview
JISC guide on creating accessible documents, presentations and spreadsheets: https://www.jisc.ac.uk/guides/using-assistive-and-accessible-technology-in-teaching-and-learning/documents-presentations-and-spreadsheets