workbench overview - the department of human · web viewworkbench overview 1 workbench...
TRANSCRIPT
WORKBENCHReference Manual
Version 2.0
10/10/2013
Workbench Reference Manual Table of Contents
WORKBENCH OVERVIEW..........................................................................................1
WORKBENCH DESCRIPTION..............................................................................................1WORKBENCH USERS........................................................................................................1WORKBENCH SECTIONS...................................................................................................1SCREEN FUNCTIONALITY:................................................................................................1VERSION CONTROL..........................................................................................................2
Overview......................................................................................................................2Check-Out....................................................................................................................2Check-In.......................................................................................................................2Change Control Number (CCN)..................................................................................2Migration.....................................................................................................................3Locating the Source.....................................................................................................3
ADMINISTRATION.........................................................................................................4
ENTERING WBADMIN....................................................................................................4WORKBENCH ADMINISTRATION MENU............................................................................4
Administration Menu Dialog Fields............................................................................5DEVELOPER MAINTENANCE.............................................................................................6
Developer Add/Change/Delete/Inquiry.......................................................................6Developer Maintenance Dialog Fields........................................................................6Developer Environment Access...................................................................................7Environment Access Dialog Fields..............................................................................7
ENVIRONMENT MAINTENANCE........................................................................................8Environment Add/Change/Delete/Inquiry...................................................................8Environment Selection Screen.....................................................................................9Environment (Application) Edits...............................................................................10Environment Compile Edits Dialog Fields................................................................10
DEVELOPER’S MAIN MENU......................................................................................11
ENTERING WBMAIN.....................................................................................................11WORKBENCH MAIN MENU.............................................................................................11
Main Menu Dialog Fields..........................................................................................12PROGRAM MAINTENANCE..............................................................................................14
Program Maintenance Dialog Fields........................................................................14What is registering, and its purpose..........................................................................15Using Key Words.......................................................................................................15Using Includes...........................................................................................................16Program Transaction Mapping.................................................................................16Program Transaction Mapping Dialog Fields..........................................................17Program/Proc Check Out..........................................................................................18Program/Proc Check-Out Dialog Fields...................................................................18Program/Proc Check In.............................................................................................19Program/Proc Check-In Dialog Fields.....................................................................19Program/Proc Version Control History....................................................................19
I
Workbench Reference Manual Table of Contents
Program/Proc VC History Dialog Fields..................................................................20PROC MAINTENANCE.....................................................................................................20
Proc Add/Change/Inquiry..........................................................................................20Proc Maintenance Dialog Fields...............................................................................21
PROGRAM/PROC CHANGE HISTORY...............................................................................22Program/Proc Change History Dialog Fields..........................................................22
DEVELOPER’S SCREENS MENU..............................................................................24
OVERVIEW......................................................................................................................24ENTERING WBSCRNS...................................................................................................24WORKBENCH SCREENS MENU.......................................................................................25
Screens Menu Dialog Fields......................................................................................25SCREEN MAINTENANCE.................................................................................................26
Screens Maintenance Dialog Fields..........................................................................27SCREEN CHANGE HISTORY............................................................................................27
Screens Change History Dialog Fields.....................................................................28Screen Check Out......................................................................................................29Screens Check-Out Dialog Fields.............................................................................29Screen Check In.........................................................................................................30Screens Check-In Dialog Fields................................................................................30Screen Version Control History.................................................................................31Screens VC History Dialog Fields.............................................................................31
COMPILING...................................................................................................................32
OVERVIEW......................................................................................................................32WORKBENCH COMPILE MENU.......................................................................................32
Entering WBCOMP...................................................................................................32Compile Menu Dialog Fields.....................................................................................34Multiple Program Entry/Review................................................................................35Search........................................................................................................................35Pre-Compile...............................................................................................................36ACOB Compile Options.............................................................................................37UCOB Compile Options............................................................................................37
REPORTS........................................................................................................................40
WORKBENCH REPORTS MAIN MENU.............................................................................40Reports Menu Dialog Fields......................................................................................40All Programs/Procs Checked Out.............................................................................41All Programs/Procs Checked Out on Certain Date..................................................42All Programs/Procs Checked In on a Certain Date..................................................42All Registered Users..................................................................................................43All Workbench Administrators..................................................................................43All Workbench VC Administrators............................................................................44All Workbench Screen Administrators.......................................................................44Environment Summary Report...................................................................................45Program Summary Report........................................................................................46
II
Workbench Reference Manual Table of Contents
ATMS................................................................................................................................47
MAINFRAME AUTOMATED TRACKING MIGRATION SYSTEM.........................................47WORKBENCH REPORTS MAIN MENU.............................................................................47
Overview....................................................................................................................47Entering WBATMS.....................................................................................................48ATMS Summary Report.............................................................................................49ATMS File Breakdown and description.....................................................................50
Utility................................................................................................................................52
III
Workbench Reference Manual Workbench Overview
Workbench Overview
Workbench Description
The workbench was designed to provide an integrated set of processes to support software development efforts. The definition of environments, programs, COBOL copy procedures and screens provide the necessary background to control and to transfer software through the development phases.
Workbench UsersThe following types of users are set up to utilize the Workbench:
Administrators
Managers responsible for development
Developers
Workbench Sections The Workbench users guide is set structured into following sections:
Overview
Administration
Screens
Main Menu
Version Control
Registration
Migration
Compiling
ATMS
Reports
Screen Functionality:
Screens will be displayed with a black background and white characters. Fields that allows input will have a blue background. Transmit positions will have a green background; these are used to execute a specific process.
Other than the transmit positions on menus or for menu selection, the operator can transmit from any position on the screen. The entire screen is read when a transmit is executed.
1
Workbench Reference Manual Workbench Overview
The program function key 1 will display help for the field that the cursor is positioned on.
The program function key 3 will display a brief description of the screen and it’s use.
The program function key 8 will terminate any active screen.
At the bottom of each menu screen, there is a menu to the other main screens. Tabbing to the transmit field and transmitting will initiate that menu.
Version Control
Overview
The workbench implements version control by:
Provides a central repository for Source and Screens Providing a Check-Out Feature Providing a Check-In Feature Assigning a unique number to each change Previous software versions are retained.
Check-OutThe check-out process copies the source or screen from the workbench repository into the developer’s work-file. The registration for the source or screen is flagged as checked-out. An entry is made to the version control history file reflecting the date and time that the source or screen was checked out.
Check-InThe check-in process copies the source or screen from the developer’s work-file into the workbench repository. The check-out flag in the registration for the source or screen is cleared. The version control history file reflecting the date and time that the source or screen was checked out is updated to reflect the date/time of check-in. *NOTE: The Check-In process does not update any environments.
Change Control Number (CCN)Each time your source is checked in, the Change Number is automatically incremented. The purpose of the change number is to control and maintain it in a life-cycle trail of the program source.
2
Workbench Reference Manual Workbench Overview
MigrationMigration is the process of taking an object from the Workbench repository and depositing it in a requested environment.
COBOL source code is compiled and linked (if a main program). The source and associated end binary object are copied into the respective files.
PROC source code is copied into the respective file
Screens are loaded into the respective screen file, the working-storage generated and copied into the respective screen proc file.
Locating the SourceWhen a program or proc is migrated, the source is taken from the workbench repository and copied into that environments respective file. The CCN is written in the second line of the source code with the RUNID of the migratory. >WBCCN********* Change Control Number 00005 BY xxxxx ************
This line will provide a means of reconciling the environment with the Work Bench.
3

Workbench Reference Manual Administration Menu
Administration
The Administration process maintains information about environments/applications and the developer. Accessed primarily by authorized administrators with clearance to WBADMIN, administrators have full rights to all utilities. Contrarily developers can access this process, but are limited to adding or changing their own information. Once an environment is created, it will appear on all screens that list environments as an option.
Entering WBADMIN @{qualifier*filename.}WBADMIN
At the SOE character, enter an @ sign followed by
qualifier* filename. WBADMIN Administration program name
To cancel any action, in any screen use F8. The qualifier and asterisk are optional.
Workbench Administration Menu Use the Workbench Administration menu screen to perform one of the following administration functions.
Workbench Reference Manual Administration Menu
Administration Menu Dialog FieldsDeveloper Maintenance Add – Enter the developer’s user ID | Tab to the transmit location and press
enter Add From – To duplicate a profile from another developer, Enter the new user ID
and then the existing developer’s user ID | Tab to the transmit location and press enter
Change – Enter the developer’s user ID | Tab to the transmit location and press enter
Delete – Enter the developer’s user ID | Tab to the transmit location and press enter
Inquiry – Enter the developer’s user ID | Tab to the transmit location and press enter
Environment Access – Enter the developer’s user ID | Tab to the transmit location and press enter
Program Maintenance Delete - Enter the program name | Tab to the transmit location and press enter
Proc Maintenance Proc Delete - Tab to the transmit location and press enter
Environments Maintenance Add - Tab to the transmit location and press enter Add From - Tab to the transmit location and press enter Change - Tab to the transmit location and press enter Edit - Tab to the transmit location and press enter Delete - Tab to the transmit location and press enter Inquiry - Tab to the transmit location and press enterElement Transfer Maintenance Element Transfer - Tab to the transmit location and press enter
Workbench Reference Manual Administration Menu
Developer Maintenance
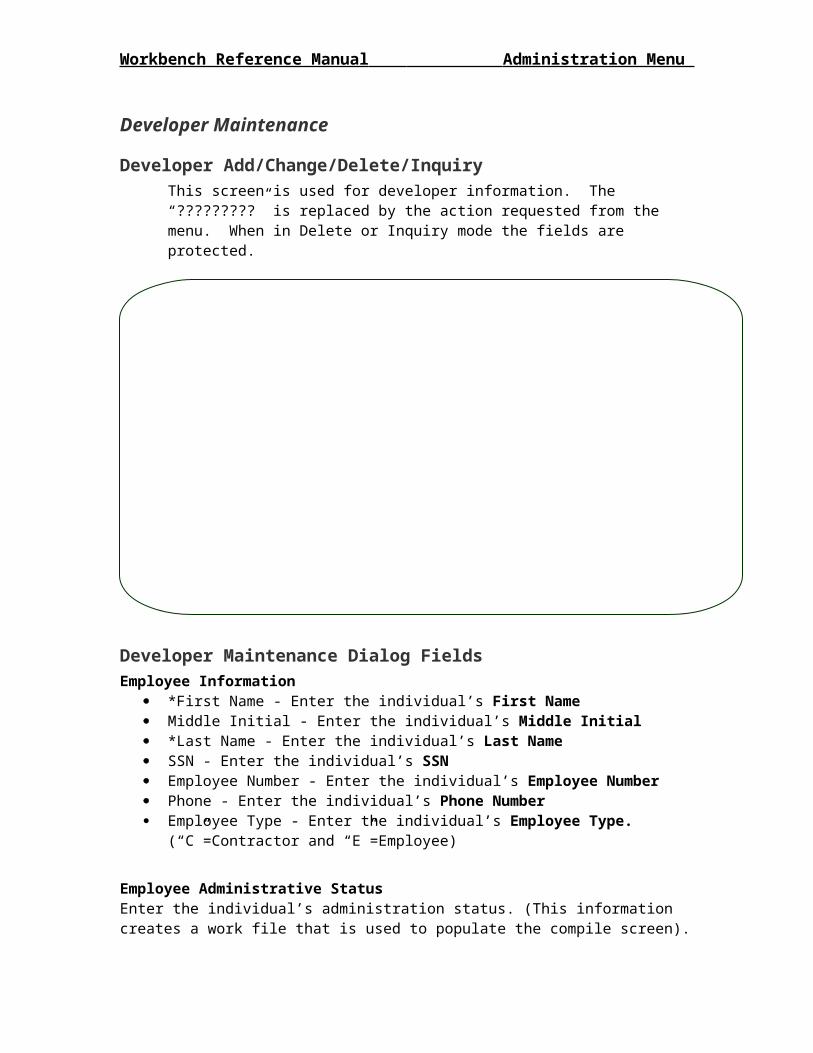
Developer Add/Change/Delete/InquiryThis screen is used for developer information. The “?????????” is replaced by the action requested from the menu. When in Delete or Inquiry mode the fields are protected.
Developer Maintenance Dialog FieldsEmployee Information
*First Name - Enter the individual’s First Name Middle Initial - Enter the individual’s Middle Initial *Last Name - Enter the individual’s Last Name SSN - Enter the individual’s SSN Employee Number - Enter the individual’s Employee Number Phone - Enter the individual’s Phone Number Employee Type - Enter the individual’s Employee Type. (“C”=Contractor and
“E”=Employee)
Employee Administrative StatusEnter the individual’s administration status. (This information creates a work file that is used to populate the compile screen).
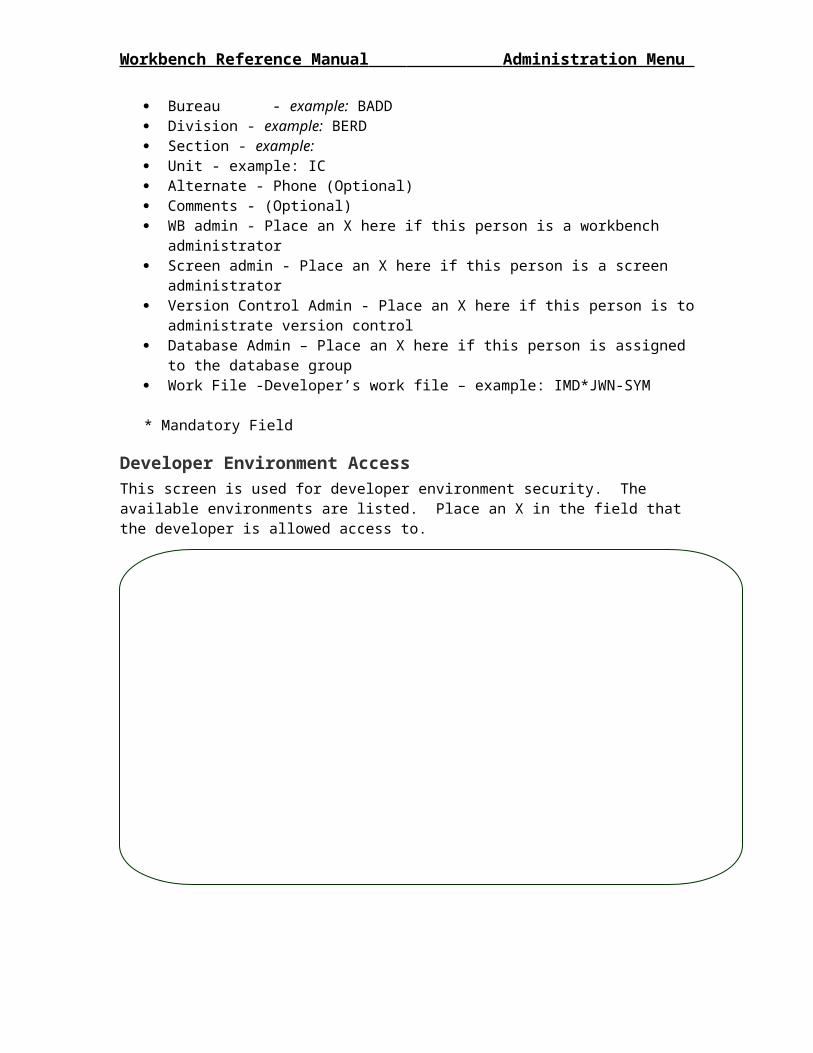
Bureau - example: BADD Division - example: BERD Section - example: Unit - example: IC Alternate - Phone (Optional)
Workbench Reference Manual Administration Menu
Comments - (Optional) WB admin - Place an X here if this person is a workbench administrator Screen admin - Place an X here if this person is a screen administrator Version Control Admin - Place an X here if this person is to administrate version
control Database Admin – Place an X here if this person is assigned to the database
group Work File -Developer’s work file – example: IMD*JWN-SYM
* Mandatory Field
Developer Environment AccessThis screen is used for developer environment security. The available environments are listed. Place an X in the field that the developer is allowed access to.
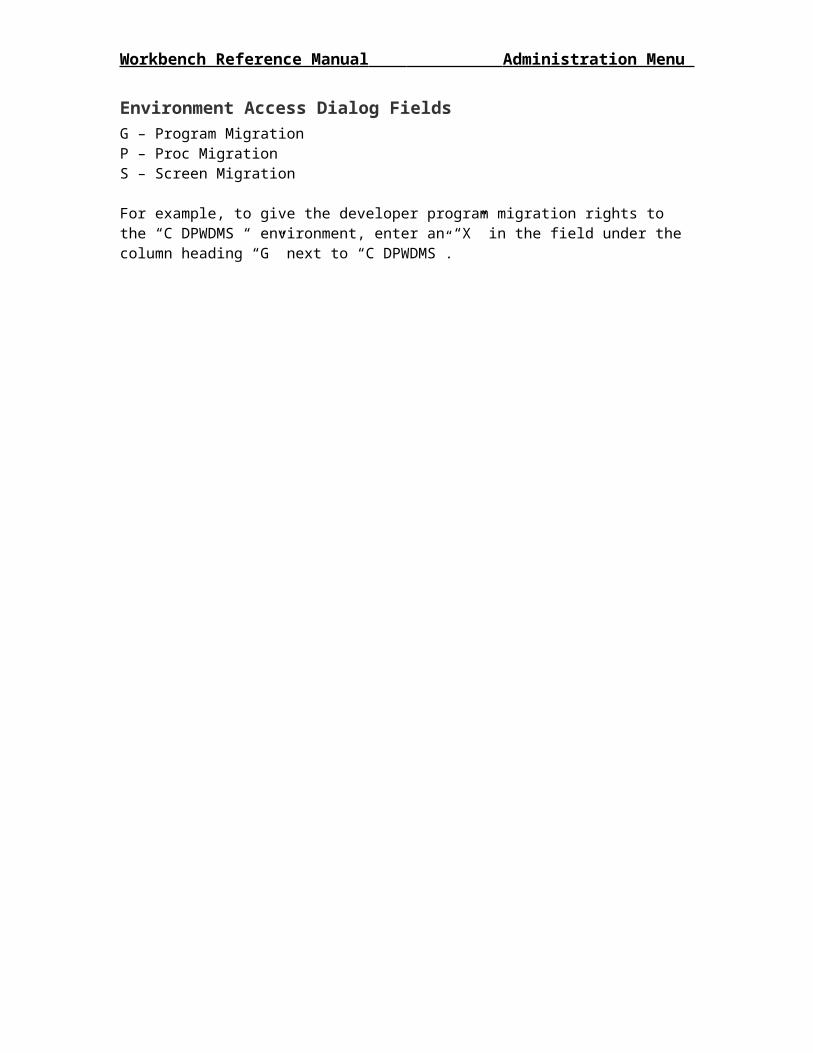
Environment Access Dialog FieldsG – Program MigrationP – Proc MigrationS – Screen Migration
For example, to give the developer program migration rights to the “C DPWDMS “ environment, enter an “X” in the field under the column heading “G” next to “C DPWDMS”.
Workbench Reference Manual Administration Menu
Environment Maintenance
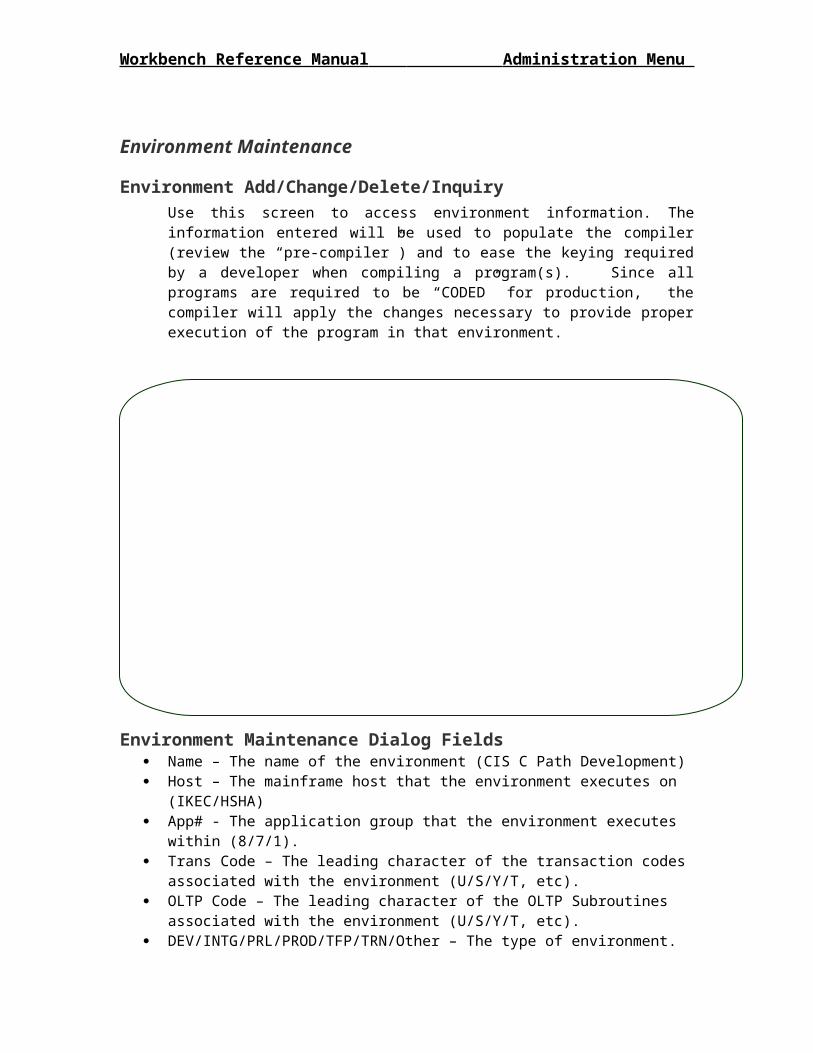
Environment Add/Change/Delete/InquiryUse this screen to access environment information. The information entered will be used to populate the compiler (review the “pre-compiler”) and to ease the keying required by a developer when compiling a program(s). Since all programs are required to be “CODED” for production, the compiler will apply the changes necessary to provide proper execution of the program in that environment.
Environment Maintenance Dialog Fields Name – The name of the environment (CIS C Path Development) Host – The mainframe host that the environment executes on (IKEC/HSHA) App# - The application group that the environment executes within (8/7/1). Trans Code – The leading character of the transaction codes associated with the
environment (U/S/Y/T, etc). OLTP Code – The leading character of the OLTP Subroutines associated with
the environment (U/S/Y/T, etc). DEV/INTG/PRL/PROD/TFP/TRN/Other – The type of environment. Turned Off – Indicates whether the environment is available to users. Short name – Used on application selection and reports (C DEVDMS) Screen File – Screen file used (S03, S15) Schema - Schema file for the environment (DEVDMS*SCHEMA$S20) Symbolics - The source file depository (IMD*CIS-DEV-SYM) Absolutes - The absolute depository (IMD*CIS-DEV-ABS) Screen file - The screen definition depository (IMD*ESS-PROC-S15).
Workbench Reference Manual Administration Menu
Copy file - The primary copy proc depository (IMD*CIS-DEV-PROC) Copy Vers – Environment specific procs version (UTTT/PRL,etc). Rel - The relocatable depository (IMD*CIS-DEV-REL) OM -The object module depository (IMD*CIS-DEV-OM) DB Rel - The environment specific relocatable depository (IMD*CIS-DEV-REL) DB OM - The environment specific OM depository (IMD*CIS-DEV-OM) Rel2, OM2 and Copy2 allow for second files. Carefully use COPY2 with ACOB Down – Enter “Y” to force an @DOWN -N – Enter “Y” to force use of –N schema files Trans – Enter “N” to not allow @TRANS Report File – This file will contain a summary report for each program when
compiled for that environment. Contact – Name and phone of the primary contact for the environment.
Environment Selection Screen
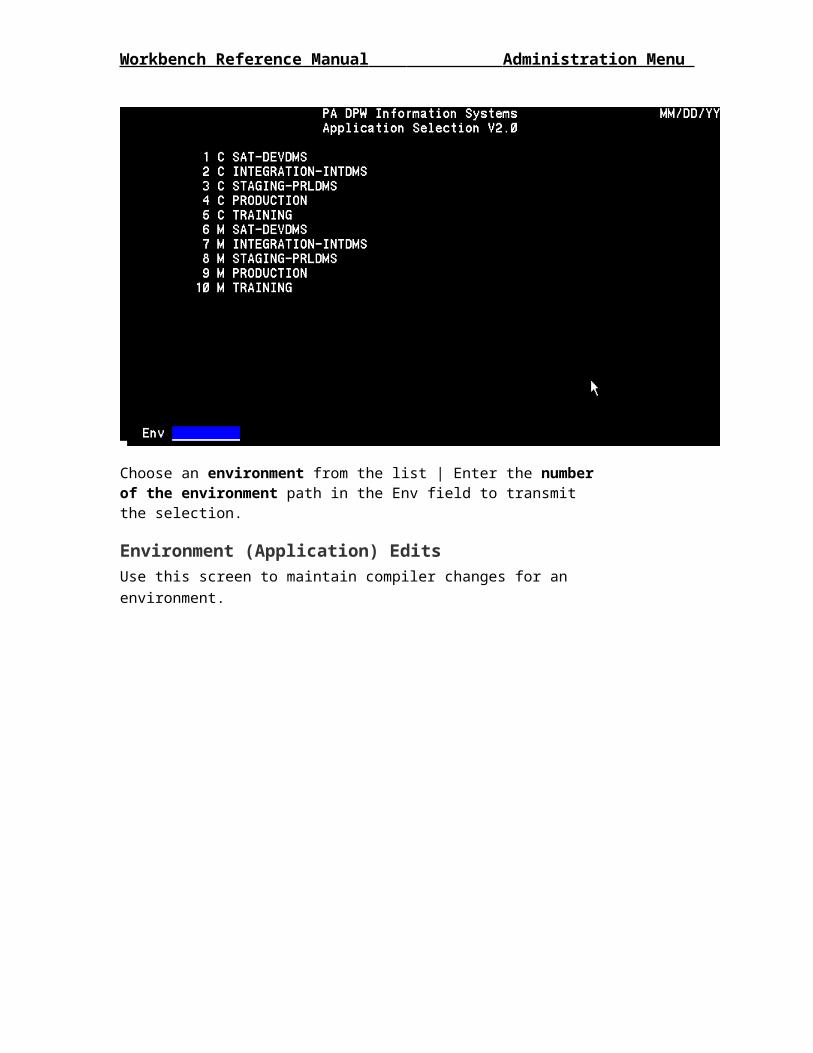
The Environment Selection screen below will appear to allow the selection of environments when required. This will happen for the environment Maintenance, migration and compiling activities. The Application Selection screen populates the Environment Change screen with the current environment information based on the number (path) entered.
Choose an environment from the list | Enter the number of the environment path in the Env field to transmit the selection.
Environment (Application) EditsUse this screen to maintain compiler changes for an environment.
Workbench Reference Manual Administration Menu
Environment Compile Edits Dialog FieldsThe from value is data to change from and the To field is the value to change to. The use of a tilde(~) serves as a mask character, regardless of what is in that position, it will be changed.
The Start and End values are used to limit the change view. An entry of 01/07 would limit the change to columns 1-7.
Multiple pages are allowed. You can select an exact page by entering the number in the Go To field and transmitting. You can go to the next page by entering an “X” in the Next Page field and transmitting. You can get a blank page by entering an “X” in the Blank field and transmitting.
Workbench Reference Manual Main Menu
Developer’s Main Menu
The Main Menu is used by the developers and migration staff. The screen provides access for version control, program/proc registration and proc migration.
Entering WBMAIN@{qualifier*filename.}WBMAIN{,opts} {qq*qf.,type,target}
At the SOE character, enter an @ sign followed by
qualifier* example: IMD* this is optional filename. example: DEVDMS. WBMAIN Administration program name opts Q – Input Quick File, Run Silent qq*qf Quick File name type C- Procs, G-Progs target Environment Target
The combination of EVW options along or in conjunction with other options allows access to all environments. The operator is temporarily changed to a Version Control Administrator. The use of this feature is recorded and reported to management daily. It is intended for use during time outside of normal business hours when migration staff is not available.
An example of the most common starting entry is @WBMAINTo cancel any action, in any screen use F8
The qualifier and asterisk are optional.
Workbench Main Menu
Use this main-menu screen to perform one of the following registration functions.
Workbench Reference Manual Main Menu
Main Menu Dialog Fields
Name/CCN – For doing a single source file, enter the program/proc name/version that requires action. Enter the CCN if other than the most recently checked in.Quick File – To use a quick file to do multiple program/proc CO/CI/MI. An error message is displayed if other than an CO/CI/MI action is requested.
Multiple – Place an “X” in this screen to be able to enter multiple programs/procs for CO/CI/MI actions. An error message is displayed if other than an CO/CI/MI action is requested.
You may enter name/version or quick file or an X in multiple only.
Version Control
Tab to the appropriate transmit field for program or proc and transmit.
Check-out – Displays the Check-out dialog registration screen. Check-out – Displays the Check-out dialog. Check-in – Displays the Check-in dialog. History – Displays the history of check-out/check-in activity. View – View the requested proc or program from the workbench repository
Program/Proc Registration Add – Displays a blank registration screen. Add From – Displays the registration screen with information from a previous
program.
Workbench Reference Manual Main Menu
Change – Displays the registration screen for change. Transaction Mappings – Displays the transaction mappings or program pass-offs
for a program. Query – Displays the registration screen for review. History – Displays the change history for a Program/Proc. View – Displays the viewer with the requested program/proc/ccn.
Program/Proc Migration Transfer – Begins the process to migrate source from the workbench to defined
environments. History – Displays the migration history screen.
Workbench Reference Manual Main Menu
Program Maintenance
This screen is used for add/change/inquiry of program registrations.
Program Maintenance Dialog Fields Name - Name of the program Project Mass Group - The group number associated with the program Ucob - Place an ‘X’ here if the program is UCOB Acob - Place an ‘X’ here if the program is ACOB Sub Program - Place an ‘X’ here if the program is a Sub-Program DPS - Place an ‘X’ here if the program is online-DPS TIP/Non-DPS - Place an ‘X’ here if the program utilizes TIP MC22/URTS Overide - Place an number here to override the map command or
LINK Command. Use this if you need to increase the size. Example: entering a 50 will override and change C$MC22 to C$MC50 for ACOB programs. Entering 30 will change 0250000 for URTS tables to 0300000 for URTS Tables.
Environment Specific – This is not a database program, but is environment specific.
DMS - Place an ‘X’ here if the program is DMS. RDMS - Place an ‘X’ here if the program is RDMS (relational.) IMPART - Place an ‘X’ here if the program is a sub-program performing an
IMPART. This causes the compiler to copy the D$Work into the source program. Subschema - Enter the subschema being used by this program. Example:
S20MRGPRDM79
Workbench Reference Manual Main Menu
OLTP - Place an ‘X’ here if your program uses Open Language Transport Protocol (web-based).
Segmented - Place an ‘X’ here if you want to break the relocatable into pieces. Soundex - Place an ‘X’ here to access the soundex subroutine. This is for
programs that drill data using a “sounds like” approach. Example: security clearance for passwords.
SelfDest - Place an ‘X’ here if you want the program to self-destruct after termination. Forces TIP to delete all data associated with the program, and remove it from resident memory.
No Common - Place an ‘X’ here if the program is not using common storage. Memory Resident – Place an ‘X’ here if this program is going to be a memory
resident transaction. MSM – Place an ‘X’ here if this program has a OM for called programs. OLTP Service Type - Keywords -Use this to identify your program by keywords. See – Using key
words. Includes – List all programs that need to be specifically included during the LINK
process for UCOB programs.
What is registering, and its purposeRegistering supplies the definition of a program or proc to the workbench by entering the information describing the program or proc (example: UCOB or ACOB). This information is then utilized by the workbench for a myriad of processes and is an essential segment of the compilation process. Make note: registering does NOT store the source code. It informs the workbench the program/proc subsists.
Using Key WordsKey words are part of the registration method and maintained by an Administrator.
Key words provide a method to describe the program, its functionality, search criterion, and to trigger compiler action – but NOT for personal information such as your name. For instance, the key word “MEMTXNZ$” instructs the compiler to load an executable into resident memory.
Key words provide a snapshot of the program’s functionality. Thus, a question is asked “What are the functions of this program?” Reviewing the keywords provides an answer.
Also, when the need arises to search for a specific program or programs, the Workbench search engine will call upon the defined key words and produce a list matching the search criteria. For instance, you may want to search for all Inquiry programs. The search engine will scan the key words of all programs, and return a list of all having “Inquiry” defined.
Here are some valid compiler key words:
Keyword Description/ActionSFU Inserts @IPF routine to enhance the COPY REPLACING
CLAUSE
Workbench Reference Manual Main Menu
Keyword Description/ActionEDBC Inserts @IPF routine to enhance the COPY REPLACING
CLAUSEMEMTXN%$ Causes the executable to be loaded to memory.
% = Environment transaction ID (Z, D, etc)MSMxxxxxxxxx Forces an include of the MSMxxxxxxxxx Object ModuleOLTP Servers If this is an OLTP Server, enter the servers supportedOLTP Subschemas
If this is an OLTP Server and itself is not DMS, enter the name of the subschema used by the subprogram(s).
MERGEOFF Do not merge banks in @LINK
Using Includes
OLTP programs, other than servers, must enter the client service names used. It is not necessary to list subprograms to IN/INCLUDE if they have unique entry points in the REL/OM Files.
Program Transaction MappingUse this screen to change or update program mappings (pass-off). Here is where you define what programs will be scheduled from your program. The programs are to be created using the production names. This process is used to change the names of these transactions for environments other than production.
Workbench Reference Manual Main Menu
Program Transaction Mapping Dialog Fields
Enter the production transaction names that the program will perform a DPS pass off to.
Workbench Reference Manual Main Menu
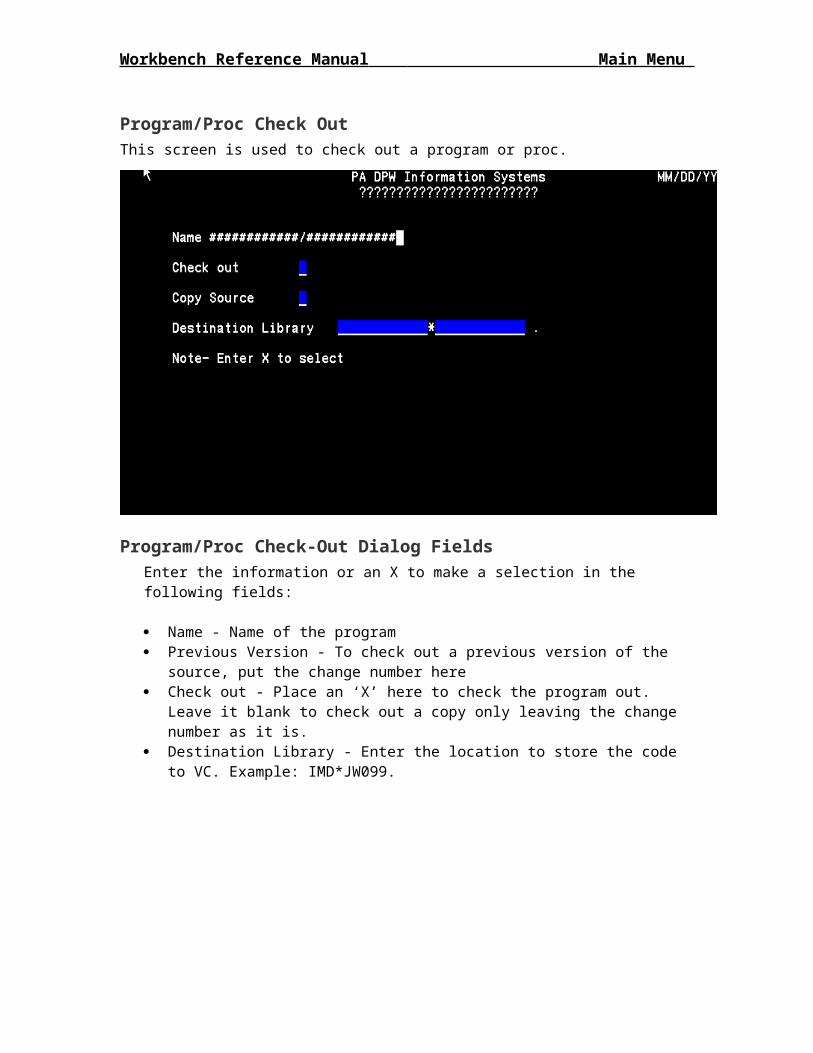
Program/Proc Check OutThis screen is used to check out a program or proc.
Program/Proc Check-Out Dialog FieldsEnter the information or an X to make a selection in the following fields:
Name - Name of the program Previous Version - To check out a previous version of the source, put the change
number here Check out - Place an ‘X’ here to check the program out. Leave it blank to check
out a copy only leaving the change number as it is. Destination Library - Enter the location to store the code to VC. Example:
IMD*JW099.
Workbench Reference Manual Main Menu
Program/Proc Check InUse this screen to check in a program or proc.
Program/Proc Check-In Dialog Fields
Name - Name of the program From Library - Enter the location to store the code from VC. Example: IMD*JW099.
Program/Proc Version Control History Use this screen to review the version control history.

Workbench Reference Manual Main Menu
Program/Proc VC History Dialog Fields Name - Name of the program CkOutDt/ChkInDat - The date the source was checked out/in CkOutTim/ChkInTim - The system time the source was checked out/in OutID/InId - The User ID of the individual that checked out/in the source OutVer - The checked out Version Number. This number will always begin with
Zero. InVer - The checked in Version Number. This number will always begin with
ONE. This is the KEY number to use for research and compiles. Comments - notes
Proc Maintenance
Proc Add/Change/InquiryThis screen to add, change, or inquiry COBOL Copy Procedures.
Workbench Reference Manual Main Menu
Proc Maintenance Dialog Fields Name - Name of the program Definition - Does this proc provide a definition? Place an “X” here. Procedure - Does this proc provide a procedure? Place an “X” here. UCOB - Place an x here if the proc is UCOB coded ACOB - Place an x here if the proc is ACOB coded Indentification Division Environment Division Data Division Procedure Division Environment Specific
Workbench Reference Manual Main Menu
Program/Proc Change History
This screen displays the changes made to the registration of programs and procs.
Program/Proc Change History Dialog Fields Date of Change Time Of Change RUNID of operator who made change Type of change (A)dd (C)hange (D)elete Change Summary Codes (Identifies what changed):
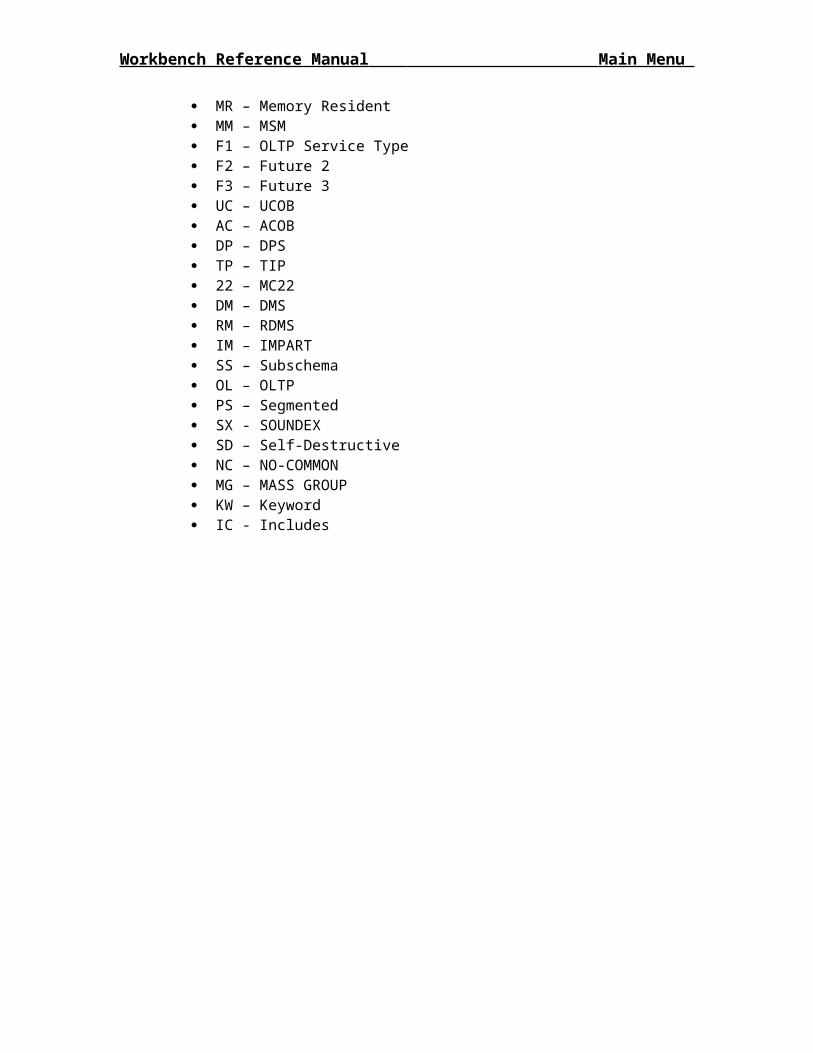
Procs: PO – Proc Owner UC – UCOB AC – ACOB ID – Identification Division ED – Environment Division DD – Data Division PD – Procedure Division
Programs: SP – Sub Program ES – Environment Specific MR – Memory Resident MM – MSM F1 – OLTP Service Type F2 – Future 2 F3 – Future 3 UC – UCOB
Workbench Reference Manual Main Menu
AC – ACOB DP – DPS TP – TIP 22 – MC22 DM – DMS RM – RDMS IM – IMPART SS – Subschema OL – OLTP PS – Segmented SX - SOUNDEX SD – Self-Destructive NC – NO-COMMON MG – MASS GROUP KW – Keyword IC - Includes
Workbench Reference Manual Screens Menu
Developer’s Screens Menu
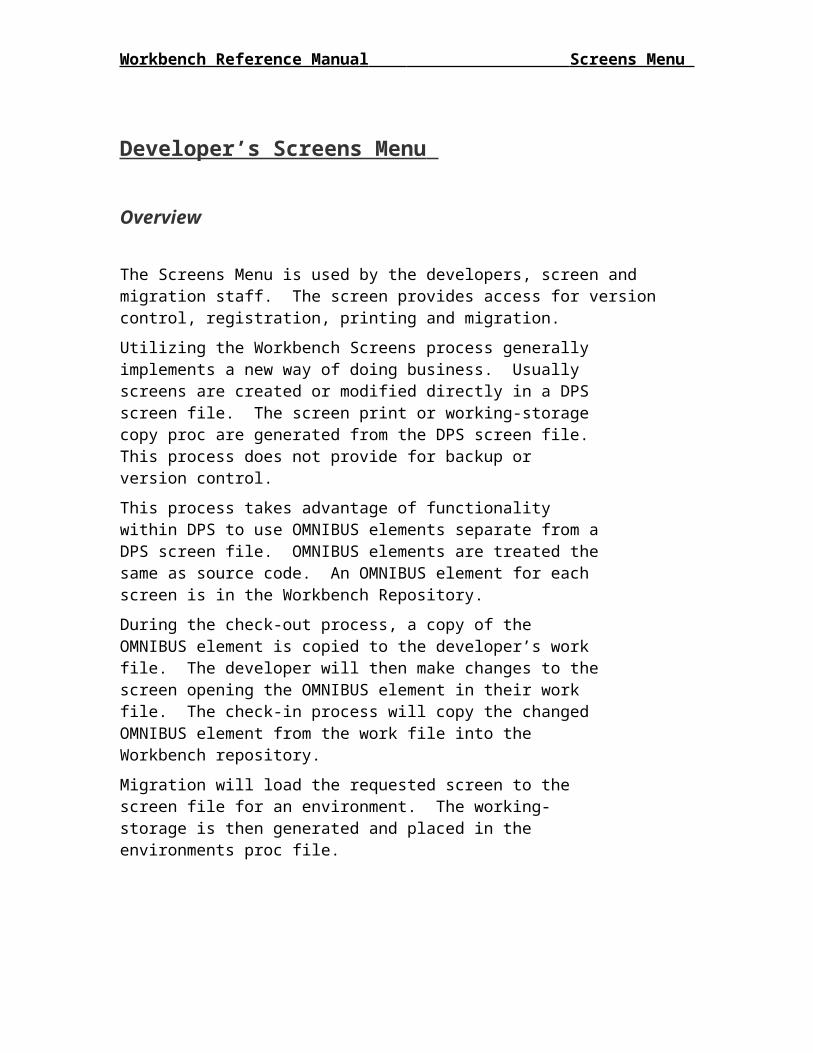
Overview
The Screens Menu is used by the developers, screen and migration staff. The screen provides access for version control, registration, printing and migration.
Utilizing the Workbench Screens process generally implements a new way of doing business. Usually screens are created or modified directly in a DPS screen file. The screen print or working-storage copy proc are generated from the DPS screen file. This process does not provide for backup or version control.
This process takes advantage of functionality within DPS to use OMNIBUS elements separate from a DPS screen file. OMNIBUS elements are treated the same as source code. An OMNIBUS element for each screen is in the Workbench Repository.
During the check-out process, a copy of the OMNIBUS element is copied to the developer’s work file. The developer will then make changes to the screen opening the OMNIBUS element in their work file. The check-in process will copy the changed OMNIBUS element from the work file into the Workbench repository.
Migration will load the requested screen to the screen file for an environment. The working-storage is then generated and placed in the environments proc file.
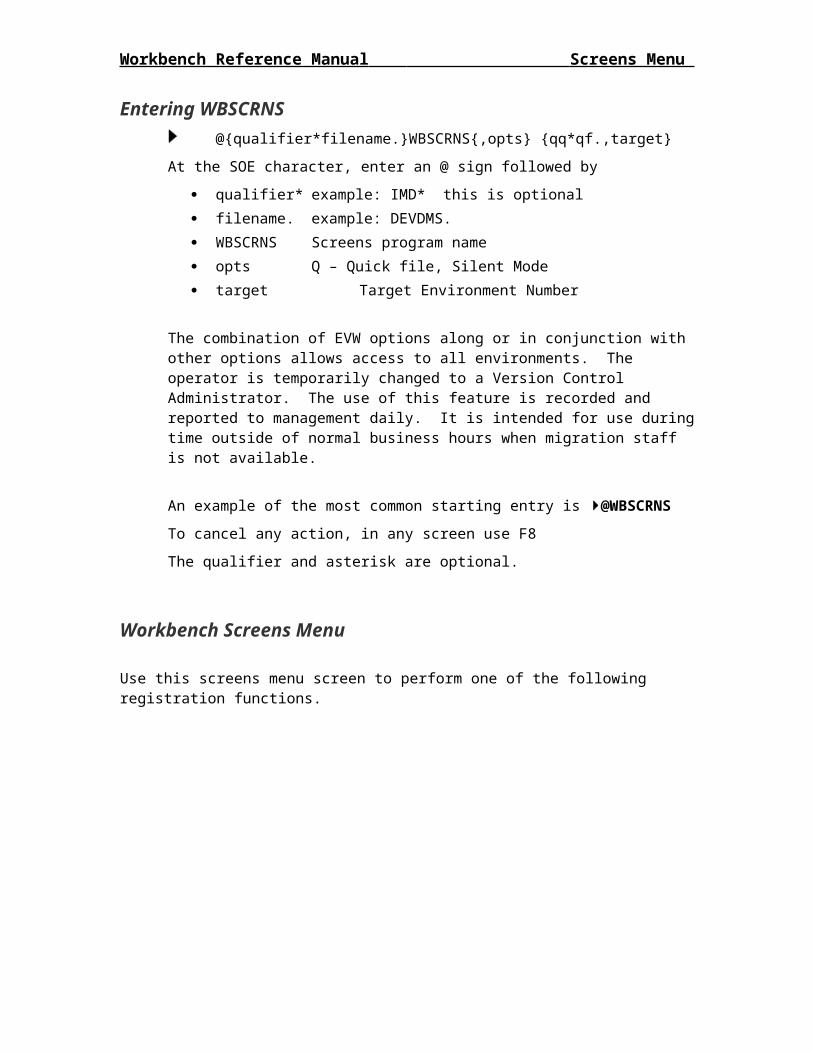
Entering WBSCRNS@{qualifier*filename.}WBSCRNS{,opts} {qq*qf.,target}
At the SOE character, enter an @ sign followed by
qualifier* example: IMD* this is optional filename. example: DEVDMS. WBSCRNS Screens program name opts Q – Quick file, Silent Mode target Target Environment Number
The combination of EVW options along or in conjunction with other options allows access to all environments. The operator is temporarily changed to a Version Control Administrator. The use of this feature is recorded and reported
Workbench Reference Manual Screens Menu
to management daily. It is intended for use during time outside of normal business hours when migration staff is not available.
An example of the most common starting entry is @WBSCRNSTo cancel any action, in any screen use F8
The qualifier and asterisk are optional.
Workbench Screens Menu
Use this screens menu screen to perform one of the following registration functions.
Screens Menu Dialog Fields
Number/CCN – For doing a single screen, enter the screen number. Enter the CCN if other than the most recently checked in.Quick File – To use a quick file to do multiple screen CO/CI/MI. An error message is displayed if other than an CO/CI/MI action is requested.
Multiple – Place an “X” in this screen to be able to enter multiple screens CO/CI/MI actions. An error message is displayed if other than an CO/CI/MI action is requested.
Version Control
Workbench Reference Manual Screens Menu
Tab to the appropriate transmit field for the screen and transmit.
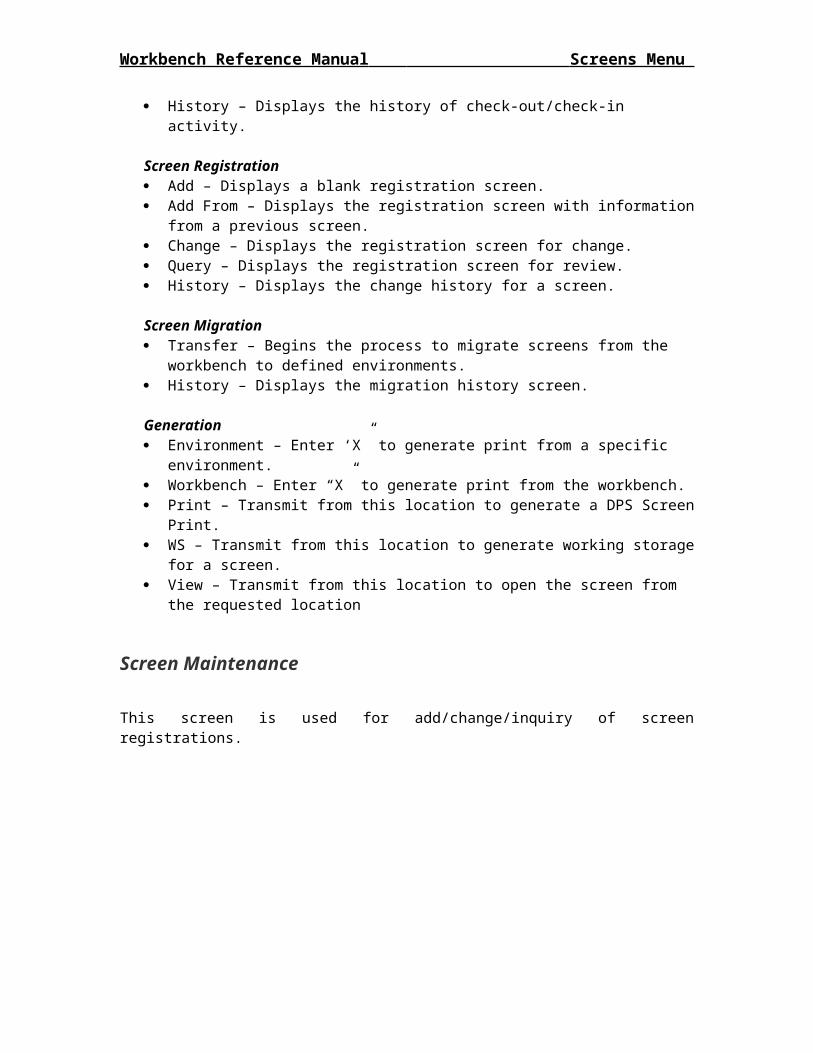
Check-out – Displays the Check-out dialog. Check-out – Displays the Check-out dialog. Check-in – Displays the Check-in dialog. History – Displays the history of check-out/check-in activity.
Screen Registration Add – Displays a blank registration screen. Add From – Displays the registration screen with information from a previous
screen. Change – Displays the registration screen for change. Query – Displays the registration screen for review. History – Displays the change history for a screen.
Screen Migration Transfer – Begins the process to migrate screens from the workbench to defined
environments. History – Displays the migration history screen.
Generation Environment – Enter ‘X” to generate print from a specific environment. Workbench – Enter “X” to generate print from the workbench. Print – Transmit from this location to generate a DPS Screen Print. WS – Transmit from this location to generate working storage for a screen. View – Transmit from this location to open the screen from the requested location
Screen Maintenance
This screen is used for add/change/inquiry of screen registrations.
Workbench Reference Manual Screens Menu
Screens Maintenance Dialog Fields Number: Screen Number CCN: Last CCN Assigned Checked Out: Contains a “Y” if checked out Subsystem: A code for the subsystem that is using this screen Description: Brief description of the screen Program(s): Program names that use this screen.
Screen Change History
This screen displays the changes made to the registration of screens.
Workbench Reference Manual Screens Menu
Screens Change History Dialog Fields Date of Change Time Of Change RUNID of operator who made change Type of change (A)dd (C)hange (D)elete
Workbench Reference Manual Screens Menu
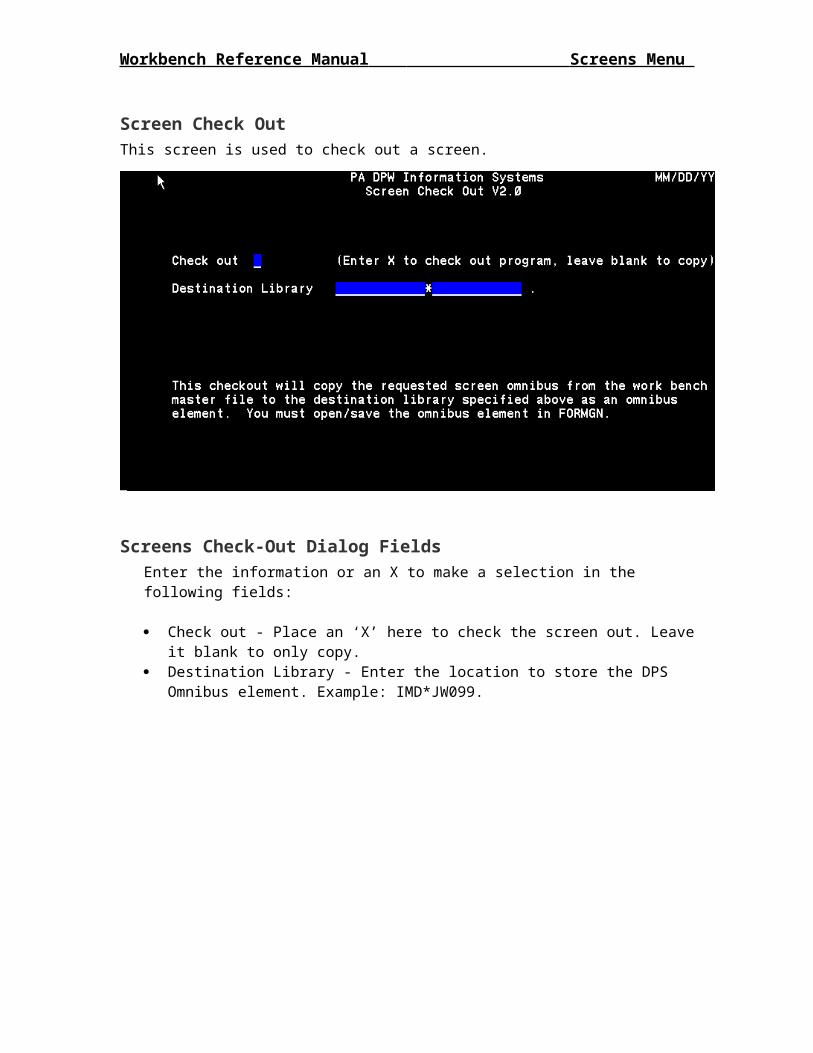
Screen Check OutThis screen is used to check out a screen.
Screens Check-Out Dialog FieldsEnter the information or an X to make a selection in the following fields:
Check out - Place an ‘X’ here to check the screen out. Leave it blank to only copy.
Destination Library - Enter the location to store the DPS Omnibus element. Example: IMD*JW099.

Workbench Reference Manual Screens Menu
Screen Check InUse this screen to check in a screen.
Screens Check-In Dialog Fields Undo checkout – Use “X” to just undo the checkout From Library - Enter the location to retrieve the new omnibus element from.
Workbench Reference Manual Screens Menu
Screen Version Control History Use this screen to review the version control history.
Screens VC History Dialog Fields Screen Number CkOutDt/ChkInDat - The date the source was checked out/in CkOutTim/ChkInTim - The system time the source was checked out/in OutID/InId - The User ID of the individual that checked out/in the screen. OutVer - The checked out Version Number. This number will always begin with
Zero. InVer - The checked in Version Number. This number will always begin with
ONE. This is the KEY number to use for research and compiles. Comments - notes
Workbench Reference Manual Compile Menu
Compiling
OverviewThe compile utility provides a dynamic method of compiling programs. The Compile Utility is designed to integrate with the version control utility, and install both the source and absolute into the targeted environment.
Functionality provided by this utility includes the ability to:
Compile a single program from your work file, environment, or version control repository
Compiling multiple programs in the same request via several selection methods including quick file list, search or user entry of a program list
Workbench Compile Menu
Entering WBCOMP@{qualifier*filename.}WBCOMP{opts} {q1*q2.e1/v1}{,qq*qf.,target}At the SOE character, enter an @ sign followed by
qualifier* example: IMD* this is optional filename. example: DEVDMS. WBMAIN Administration program name opts A @ADD compile
B No breakpoints, Generate Report C Create Runstream D Monitor On M Mass Compile of q1*f1 N -N on P Pads On Q Quick File q2*f2, if q1*f1 present, use as source R Restore compile from previous single program compileS Silent mode, no screens T Do @TRANS X Use last single program options for operator and start in silent mode Y Recompile (q1*f1 ignored)
q1*f1.e1 filename only for changing source fileinclude element to compile a specific element
qq*qf Quick File target Target Environment
Workbench Reference Manual Compile Menu
The combination of EVW options along or in conjunction with other options allows access to all environments. The operator is temporarily changed to a Version Control Administrator. The use of this feature is recorded and reported to management daily. It is intended for use during time outside of normal business hours when migration staff is not available.
F8 is used to cancel any screen.
An example of the most common starting entry is @WBCOMP
Other common start options:
Repeat last compile:
@WBCOMP,X
Silent Compile (No screens) for Environment #1 from a work file:
@WBCOMP,S Q*F.E,,1
Silent Compile (No screens) for Environment #6 from the workbench repository:
@WBCOMP,S E,,6
Silent Compile (No screens) for Environment #1 from a work file, do @TRANS, PADS and Monitor All:
@WBCOMP,STDP Q*F.E,,1
Go directly to Environment screen from a work file:
@WBCOMP Q*F.E
Go directly to Pre-Compile screen from a work file for Environment #2:
@WBCOMP Q*F.E,,2
Workbench Reference Manual Compile Menu
Compile Menu Dialog Fields Source file: This field is used to designate the library of the source code. This
file can be a developer’s work file or a designated environment.
Recompile: This field if filled by a “Y” will instruct the compiler to compile the source code from the specified environment. Use this option to compile a program with the purpose of creating a new absolute. For example: A new proc is developed and the current absolute must now have these changes incorporated. Therefore, a re-compile only function will create a new absolute but NOT write over (install) a new version of the source code.
Change Number: This field is used to select a specific version of programs. Left blank, the workbench will instinctively compile the most recent version of the program.
Compile: This option is used to designate a single program (the program entered) for compilation.
Multiple Program Compile: This option will provide a blank input whereby multiple programs can be entered for complementation.
Mass Compile (Search): This option will display a search screen to collect the criteria to select the programs.
Mass Compile: This option performs a mass compile of the programs specified in a file. This option is used in concert with the Source File field.
Quick File Compile: This option is used to specify a quick file of programs for compilation.
Workbench Reference Manual Compile Menu
Multiple Program Entry/ReviewThe Multiple Program Compile Screen is displayed when “Multiple Elements” are selected from the WBCOMP Menu.
Enter Programs: A blank screen is displayed.
Search: A screen is displayed containing the results from the search
All in a File: A screen is displayed with all registered programs that are in the specified file.
Quick File: A screen is displayed with all registered programs that are in the quick file.
Modify the programs list to compile and then transmit.
SearchThis screen is displayed when search is requested from the WBCOMP Menu.
Workbench Reference Manual Compile Menu
Pre-Compile
The Pre-compile screen is the final screen in the compile process. This screen is for verification and provides the ability to change compile options and locations to store and retrieve programs. (Compile option)
Workbench Reference Manual Compile Menu
ACOB Compile Options
The following options are for ACOB:
ADMLP - This feature provides a listing of DML processing. Leave it blank if the program you are compiling does not use DML
ACOB - This feature provides a location for compile options. See Appendix A for the options.
ACOBX - This feature provides an ACOB cross reference listing. The type of listing depends upon the options selected. See Appendix A for the options.
MAP - This feature provides a location for mapping options. See Appendix A for the options.
UCOB Compile Options
The Following options are for UCOB:
SOURCE - This feature provides a listing of DML processing. Leave it blank if the program you are compiling does not use DML
XREF - This feature provides a location for compile options. See Appendix A for the options.
TRACECOPY - This feature provides an ACOB cross reference listing. The type of listing depends upon the options selected. See Appendix A for the options.
RUNCHECK - Determines whether various run-time error conditions are tested for, and terminates program execution if such conditions occur.
ERRCHECK - This feature determines whether an object module is produced if there are errors
NO-REMARK - Remark causes the compiler to generate RDMS explain reports. No-Remark suppresses the reports.
CACHE/D7 - Use this option to Improve compiling time. The purpose of CACHE is to improve compilation wall time and total SUPS by using the available real memory on the system to reduce the number of I/O requests. (Real memory is much faster than issuing I/O requests to peripheral devices.) You may want to use this option if you have a large program to compile.
NO-DEBUG - Use this option to eliminate the Debug option. SEGCODE - Determines whether multiple code banks are generated, with the
total size allowed to exceed 262,143 words. This keyword is useful for large programs.
NO-UREP-XREF - If you specify NO-UREP-XREF, cross-reference information is not stored into UREP. UREP-XREF causes cross-reference information to be stored into UREP. This information includes the relationship between the source program and the file names and data names that the program introduces with INVOKE or COPY statements. The values in the UREP entity UCS OPTIONS determine the type of cross-reference information that is stored. Use the UREP option with programs that use the following:. INVOKE statements, COPY statements, Embedded SQL statements.
WARNING - Displays Warning Messages. NO-OPTIM - Causes optimization to be bypassed, producing code that is less
efficient but easier to debug. Therefore, it is preferable during program development when debugging takes precedence over efficiency.
Workbench Reference Manual Compile Menu
COMPAT/FULL - makes the following features compatible with ASCII COBOL: HIGH-VALUE is octal 0177 (all bits set for a 7-bit machine).
MULTI-PF - Determines whether you can have multiple special program files of copied source text.
The following are input-output program locations:This part of the Pre-compile menu designates the target locations. These fields or targets are automatically populated by the compiler, from the information previously entered and stored. The targets are editable; therefore you may override to targets you specify. To do this, tab to the target location and enter the target.
The last part of the compiler provides options, these are:
Breakpoint - Use this option to have a breakpoint file created. This breakpoint included the compiled listing and is extremely useful for debugging. Place a “Y” in the Breakpoint location.
Down - This feature provides a cross-reference listing of changes to source code. Use this feature to compare versions of software for changes. Place a “Y” in the Down location.
Monitor - Use this feature for debugging purposes, and to track the program’s trail as it executes. A listing is created in a TIPPERS file that can be reviewed. Place a “Y” in the Monitor location.
DMON - Create - -N - Use this feature to compile the program using an alternate schema. Place a
“Y” in the -N location. @TRANS - This feature provides an automatic Supur of the program absolute.
Using this option will eliminate the need to manually perform an @TRANS once the program has compiled cleanly. Place a “Y” in the @TRANS location.
PADS
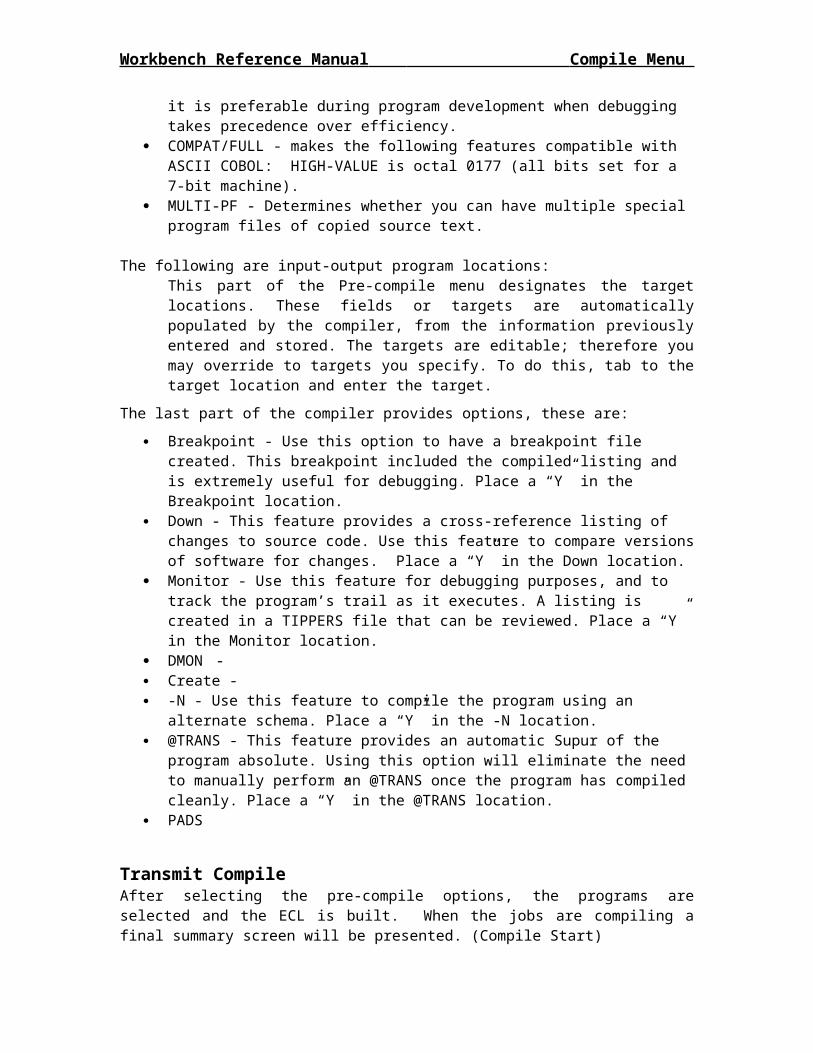
Transmit CompileAfter selecting the pre-compile options, the programs are selected and the ECL is built. When the jobs are compiling a final summary screen will be presented. (Compile Start)
Workbench Reference Manual Compile Menu
>************************************************* >- Compiling a single program >- Compiling from IMD*MYWORK >- Compiling to DEV*ABS >- Breakpoint is IMD*BK-NEW01A >- RUNID is NEW01A >************************************************* >I:002333 FREE complete. > >@@CONS RC NEW01A >@ED,R IMD*BK-NEW01A.
Workbench Reference Manual Reports
Reports
Workbench Reports Main Menu
All reports are opened into the Workbench Viewer. Enter ? in the command field and transmit for help with the Viewer.
Reports Menu Dialog Fields Date Range: Used with the Checked In or Checked Out Options. Entering the
date range limits the report to within those dates. It is not necessary to enter the end date, today is assumed by the software.
Runid: Used with the Checked In or Checked Out options to limit the report to a single Runid
Program: Enter “X” to request Checked In or Checked Out for programs. Procs: Enter “X” to request Checked In or Checked Out for procs. Screens: Enter “X” to request Checked In or Checked Out for screens. Screen: Used with the Environment Summary report to get environment
information for a particular screen number. Source: Used with the Environment Summary or Program Summary to get
information for a particular program or proc. Environment Summary: This report lists all registered environments that have the
screen or source. CCN, Date and Times are displayed. Program Summary: This reports lists all information for a program. This includes
environment summary, procs with environment summary, sub-programs with environment summary and screens with environment summary.
Workbench Reference Manual Reports
Workbench Administrators: Reports all operators that have workbench administration capability.
VC Administrators: Reports all operators with VC privileges. Screen Administrators: Reports all operators with Screen Privileges. All Users: Lists all registered Users All Environments: Lists all registered Environments All Programs: Lists all registered Programs All Procs: Lists all registered Copy Procedures All Screens: Lists all registered screens
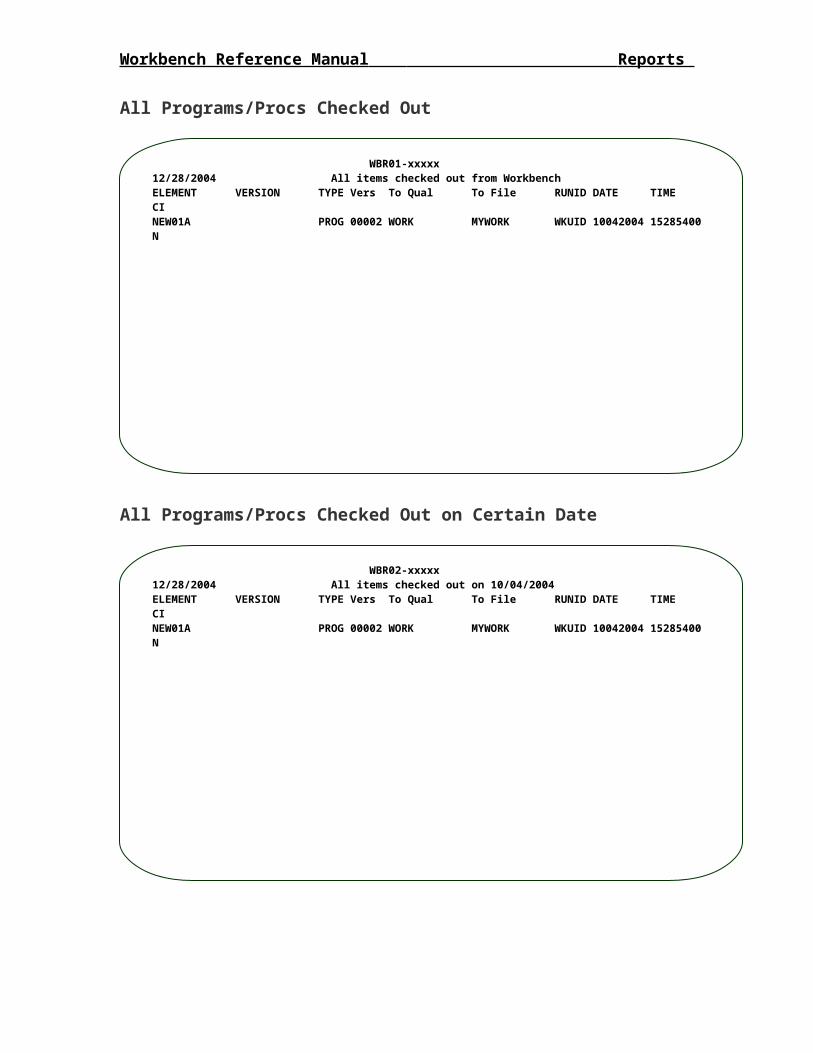
All Programs/Procs Checked Out
WBR01-xxxxx12/28/2004 All items checked out from WorkbenchELEMENT VERSION TYPE Vers To Qual To File RUNID DATE TIME CINEW01A PROG 00002 WORK MYWORK WKUID 10042004 15285400 N
Workbench Reference Manual Reports
All Programs/Procs Checked Out on Certain Date
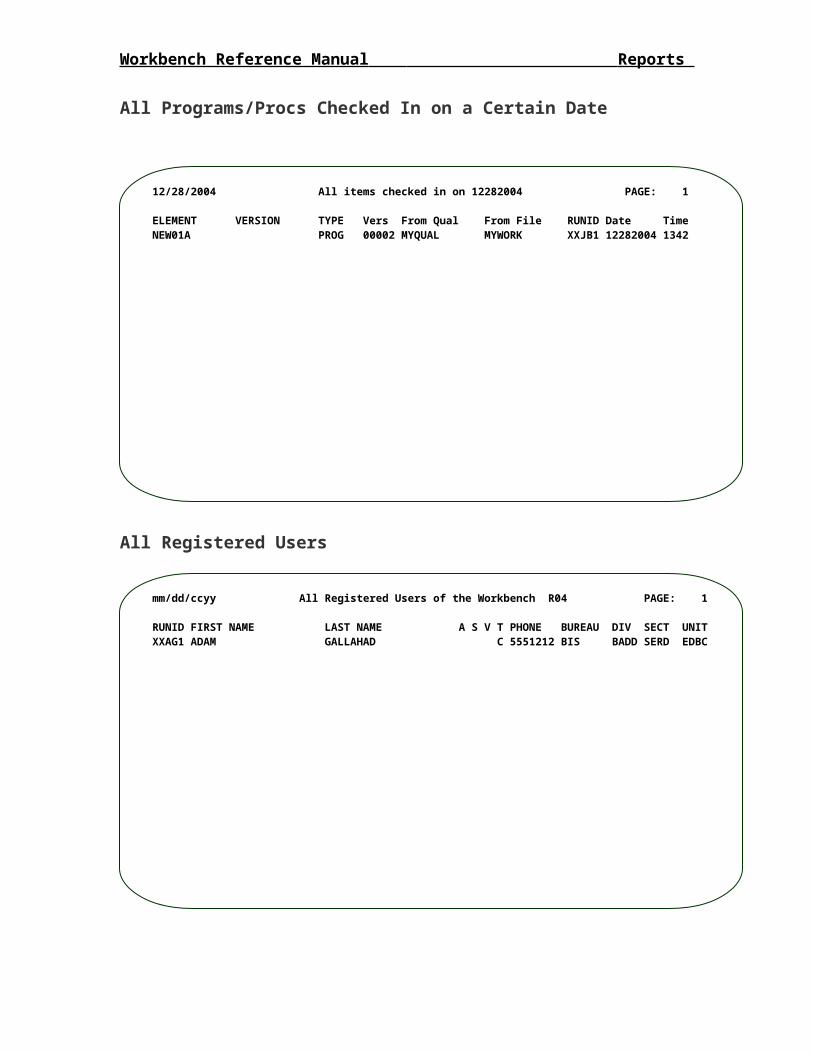
All Programs/Procs Checked In on a Certain Date
WBR02-xxxxx12/28/2004 All items checked out on 10/04/2004 ELEMENT VERSION TYPE Vers To Qual To File RUNID DATE TIME CINEW01A PROG 00002 WORK MYWORK WKUID 10042004 15285400 N
12/28/2004 All items checked in on 12282004 PAGE: 1 ELEMENT VERSION TYPE Vers From Qual From File RUNID Date TimeNEW01A PROG 00002 MYQUAL MYWORK XXJB1 12282004 1342
Workbench Reference Manual Reports
All Registered Users
All Workbench Administrators
mm/dd/ccyy All Registered Users of the Workbench R04 PAGE: 1 RUNID FIRST NAME LAST NAME A S V T PHONE BUREAU DIV SECT UNITXXAG1 ADAM GALLAHAD C 5551212 BIS BADD SERD EDBC
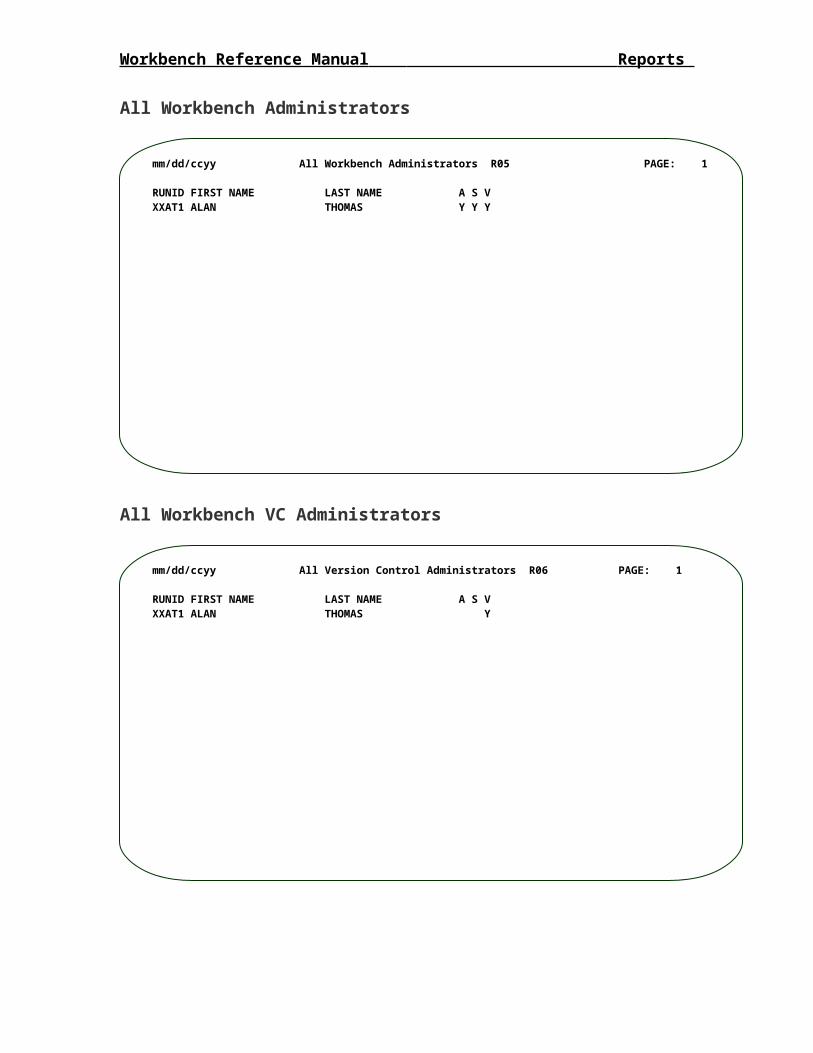
mm/dd/ccyy All Workbench Administrators R05 PAGE: 1 RUNID FIRST NAME LAST NAME A S V XXAT1 ALAN THOMAS Y Y Y
Workbench Reference Manual Reports
All Workbench VC Administrators
All Workbench Screen Administrators
mm/dd/ccyy All Version Control Administrators R06 PAGE: 1 RUNID FIRST NAME LAST NAME A S V XXAT1 ALAN THOMAS Y
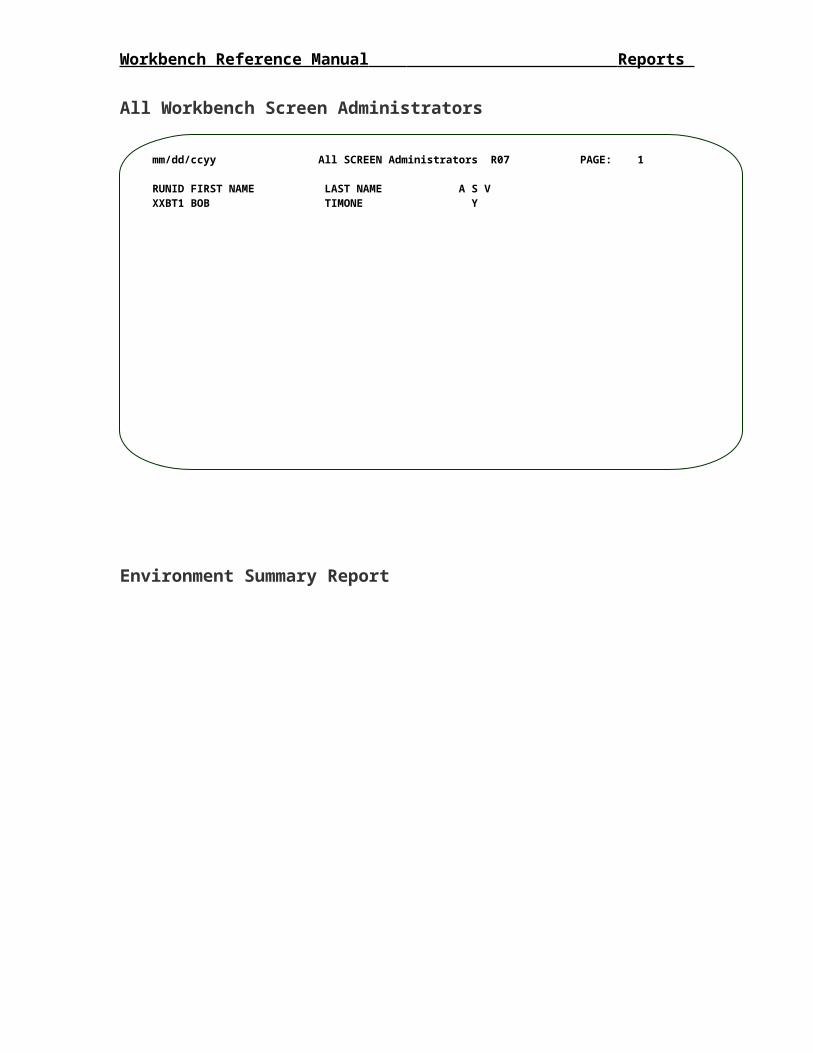
mm/dd/ccyy All SCREEN Administrators R07 PAGE: 1 RUNID FIRST NAME LAST NAME A S V XXBT1 BOB TIMONE Y
Workbench Reference Manual Reports
Environment Summary Report
06/23/2005 Environment Summary Report (WBR08-ESJF1) PAGE: 1 M S U A R O C G P C C D T D D L K R G O O P I M M T O Name Version P M B B S P S S P SUBSCHEMA ID CCN T MP CF095R X X X X S20MRGPRDM76 09959 00009 N Name: CF095R C DEVDMS C INTDMS C PRLDMS C DPWDMS C TRNDMS C MEDDEV Vers: CCN: 00009 00009 00009 00009 00009 00009 MIGR: 08/05/04 08/05/04 07/20/04 07/20/04 02/08/05 01/06/05 13:20:42 13:20:42 10:59:05 10:59:05 09:17:35 08:21:42 COMP: 02/09/05 02/09/05 02/09/05 02/18/05 02/08/05 01/06/05 11:52:35 10:41:22 15:22:12 12:13:17 09:18:13 08:23:03
Workbench Reference Manual Reports
Program Summary Report
06/23/2005 Complete Program Information (WBR10-ESJF1) PAGE: 1 M S U A R O C G P C C D T D D L K R G O O P I M M T O Name Version P M B B S P S S P SUBSCHEMA ID CCN T MP CF095R X X X X S20MRGPRDM76 09959 00009 N SC SCREEN S246 00000 SP AE0010 X X 06443 00000 N SP MIL010 X X 08855 00000 N SP CSRT76 X X X S20MRGPRDM76 07728 00000 N PR AE0010P X 00746 00000 N PR AE0033P X 00395 00000 N PR AE0072P X 00203 00000 N
Name: CF095R C DEVDMS C INTDMS C PRLDMS C DPWDMS C TRNDMS C MEDDEV Vers: CCN: 00009 00009 00009 00009 00009 00009 MIGR: 08/05/04 08/05/04 07/20/04 07/20/04 02/08/05 01/06/05 13:20:42 13:20:42 10:59:05 10:59:05 09:17:35 08:21:42 COMP: 02/09/05 02/09/05 02/09/05 02/18/05 02/08/05 01/06/05 11:52:35 10:41:22 15:22:12 12:13:17 09:18:13 08:23:03 SCRN 246 C INTDMS C PRLDMS C DPWDMS C TRNDMS C MEDDEV SF S02 S03 S03 S13 S14 WSCK# 128780 128780 128780 128780 128780 SFCK# 128780 128780 128780 128780 128780 Name: AE0010 C INTDMS C PRLDMS C DPWDMS C TRNDMS C MEDDEV Vers: CCN: 00000 00000 00000 00000 00000 MIGR: 00/00/00 00/00/00 00/00/00 00/00/00 00/00/00 00:00:00 00:00:00 00:00:00 00:00:00 00:00:00 COMP: 06/27/89 06/27/89 06/27/89 06/10/96 06/27/89 14:19:13 14:19:13 14:19:13 11:26:38 14:19:13 Name: AE0072P C INTDMS C PRLDMS C DPWDMS C TRNDMS C MEDDEV Vers: CCN: 00000 00000 00000 00000 00000 MIGR: 05/27/99 05/27/99 05/27/99 05/27/99 05/27/99 10:52:15 10:52:15 10:52:15 10:52:15 10:52:15 Name: AE0073P C INTDMS C PRLDMS C DPWDMS C TRNDMS C MEDDEV Vers: CCN: 00000 00000 00000 00000 00000 MIGR: 05/27/99 05/27/99 05/27/99 05/27/99 05/27/99 10:52:16 10:52:16 10:52:16 10:52:16 10:52:16
Workbench Reference Manual ATMS
ATMS
Mainframe Automated Tracking Migration System
Workbench Reports Main Menu
OverviewThis process is used to complete the ATMS process. This processor organizes the input from WEB ATMS and creates quick files for processing through workbench processes. The WEB based application available through ATS is used to create a file with release related components. These components consist of screens, PROCS, sub-programs and main programs.
This processor organizes the input from WEB ATMS and creates quick files for processing through workbench processes.
The components are sorted as follows:
Screens: Screen number sequence.
PROCS: PROC name sequence.
Sub-Programs: Mass Group, Recompile, Name
Main-Programs: Mass Group, Recompile, Name
A separate element is created for each sort component. Screens will be in one, PROCS in another. No more than 48 elements are in each program element. Separate elements are created for recompiles and mass groups.
Workbench Reference Manual ATMS
A separate quick file is created for the components that are input to each element.
These elements are to @ADD in sequence. The appropriate quick file and options will be set within each run.
If the ATMS process is started with the PS options, the complete migration will process to completion unless there is an error.
During the automatic process, if a compile is found in error and it is a subprogram and the next subprogram for the group.
The file generated by this process contains all elements to execute, plus some additional ones.
STARTIT – What is executed first. If you chose not to start the ATMS automatically, do an @ADD of this element to begin.
STARTEM – This contains a list of all elements, what element to start next and the status in column 35. When a process completes successfully, the status is changed from an N to Y. You can do a @PRT,S of this element at any time to check the status.
Once an compile element is completed, a SUMMARY version of the element contains the result of the element.
Once all elements have completed, a FINALREPORT element is created for all compiles. This is a compilation of the SUMMARY versions.
For production compiles, the respective REL/OM/ABS/ZM/SYM are also copied to a QA Turn Over File (IMD*PRDxx-???., where xx equals the mass group and ??? equals the type.)
If there are errors, the ATMS process can be re-started by entering: >@{qualifier*filename.}WBATNX,R ATMSQ*ATMSFF.
Entering WBATMS@{qualifier*filename.}WBATMS{opts} q1*q2.,cpath,mpathAt the SOE character, enter an @ sign followed by
qualifier* example: IMD* this is optional filename. example: DEVDMS. WBATMS ATMS program name Opts
L – Turn off compile/map listings (i.e, ACOB,WE)
Workbench Reference Manual ATMS
N – Use –N schemaT – Do @TRANS
q1*q2 ATMS File Name cpath C-PATH Target Number mpath M-Path Target Number
An example of the most common starting entry is:
@WBATMS,BT MYATMS*GODEV.,1,6 :
ATMS Summary ReportThe following report is generated as a result of the processing. The first part of the report is the elements and components within each element. The second part is a convenient checklist to be used when processing the migration.
14/00/2005 ATMS Migration to C DEVELOPMENT DEVDMS PAGE: 1FILE: AMSESJF1545 ELT: SCRQUICK001 MIGRATE SCREENS 0001 00001 ELT: PRCQUICK001 MIGRATE PROCS MPED11P 00009 ELT: SUBQUICK001 RE-COMPILE CPATH SUBPROGRAMS 01 CSRT70 00000 ELT: SUBQUICK002 RE-COMPILE MPATH SUBPROGRAMS 28 MFR10R 00061 28 MGR10R 00045 28 MTR10R 00052 ELT: SUBQUICK003 COMPILE CPATH SUBPROGRAMS 01 CSRD89 00001 ELT: SUBQUICK004 COMPILE MPATH SUBPROGRAMS 28 MLR10R 00085 28 MMR10R 00085 ELT: PGMQUICK001 COMPILE CPATH PROGRAMS 12 CF095R 00010 ELT: PGMQUICK002 COMPILE MPATH PROGRAMS 28 MAEDBC 00124 14/00/2005 ATMS Migration to C DEVELOPMENT DEVDMS PAGE: 2 ADD OK ( )@ADD AMSESJF1545.SCRQUICK001 ( ) ( )@ADD AMSESJF1545.PRCQUICK001 ( ) ( )@ADD AMSESJF1545.SUBQUICK001 ( ) ( )@ADD AMSESJF1545.SUBQUICK002 ( ) ( )@ADD AMSESJF1545.SUBQUICK003 ( ) ( )@ADD AMSESJF1545.SUBQUICK004 ( ) ( )@ADD AMSESJF1545.PGMQUICK001 ( ) ( )@ADD AMSESJF1545.PGMQUICK002 ( ) ___________________________________ Signature that all actions verified
Workbench Reference Manual ATMS
ATMS File Breakdown and description
The entire process revolves around a file with a name of projid*AMSXXXXXX999.- Projid is your signon project ID (IMD, etc)- xxxxxx is the demand RUNID of the person executing WBATMS- 999 is an attempt to make it unique
Quick files are generated with: ###Q$$%^+++*AMSXXXXXX999. ### - SCR, SUB, PRC OR PGM Q – Constant$$ - Mass Group for programs (01 for procs and screens)% - Target Path for programs (X for procs and screens)^ - Recompile indicator for programs (always N for procs and screens)+++ - Counter for this type (only 40 programs in a compile)
An element is created for each quick file to process:
projid*AMSXXXXXX999.###Q$$%^+++
This element will call one of three processors; WBCOMP, WBMAIN or WBSCRNS.
The file REPORT*AMSXXXXXX999 has the breakdown of the quick files and the elements that will be started.
Screens and PROCS are processed first. If either of these fail, the process will NOT continue.
An element called projid*AMSXXXXXX999.STARTIT is built to start the ATMS process.
Program Compiles:
projid*AMSXXXXXX999.STARTEM is created to keep track of program compiles.
STARTEM ###Q$$%^+++ ###Q$$%^+++ &
STARTEM is a constant.
The first ###Q$$%^+++ is the compile element to start. The second ###Q$$%^+++ is started when the first ###Q$$%^+++ completes SUCCESSFULLY.
The & is an indicator for status.N – The run did not complete
Workbench Reference Manual ATMS
E – The run had compile errorsY – The run completed successfully
When the compile group completes, an element is created called projid*AMSXXXXXX999.###Q$$%^+++/SUMMARY. This the result for this compile group.
When all elements in the STARTEM element are set to “Y”, another element is created to combine all of the projid*AMSXXXXXX999.###Q$$%^+++/SUMMARY elements.
This is called projid*AMSXXXXXX999.FINALREPORT.
Always free projid*AMSXXXXXX999. when reviewing in demand.
Workbench Reference Manual ATMS
Revision Log:
Change Date
Version Change Description Author and Organization
10/10/2013 2.0 Reviewed – No changes required Jeff Fisher, Deloitte
Workbench Reference Manual Utility
Utility