xna development: tutorial 4 -...
TRANSCRIPT
XNA Development: Tutorial 4
By Matthew Christian ([email protected])
Code and Other Tutorials Found at http://www.insidegamer.org/xnatutorials.aspx
In the last tutorial you created a GameModel class that allowed you to easily import and display game models and objects onto the screen. The next step is to create a camera so you can move around those objects (and currently through the objects since we haven’t talked about collision detection). We’ll go through the design, creation, and implementation of a very basic first-person camera class that will allow strafing (left and right side-stepping), forward and backward movement, and turning left and right (we’ll add up and down movement later).
Note: This series is built in a way so each tutorial builds off the previous. We will be modifying the GameModel class and sending information from our GameCamera to our GameModel. It’s recommended you have the previous tutorial (on the GameModel class) finished, coded, and working before you go on. If you understand the basic techniques presented in the following GameCamera class, you could easily implement this all without the class (although it would be messy!)
Before You Start
Following the first three tutorials you should be able to use the same project, otherwise make sure you start a new project and create it with the Windows Game (2.0) template. Then, follow XNA Development: Tutorial 3 on the GameModel class. The GameModel and GameCamera class are flexible enough that with a little push or pull they should work under both the Windows and Xbox 360 architechtures. As normal, files will be named Game1.cs, GameModel.cs, and Program.cs. You can change the names of the files but for ease of reference this tutorial uses default names such as Game1.cs and Program.cs.
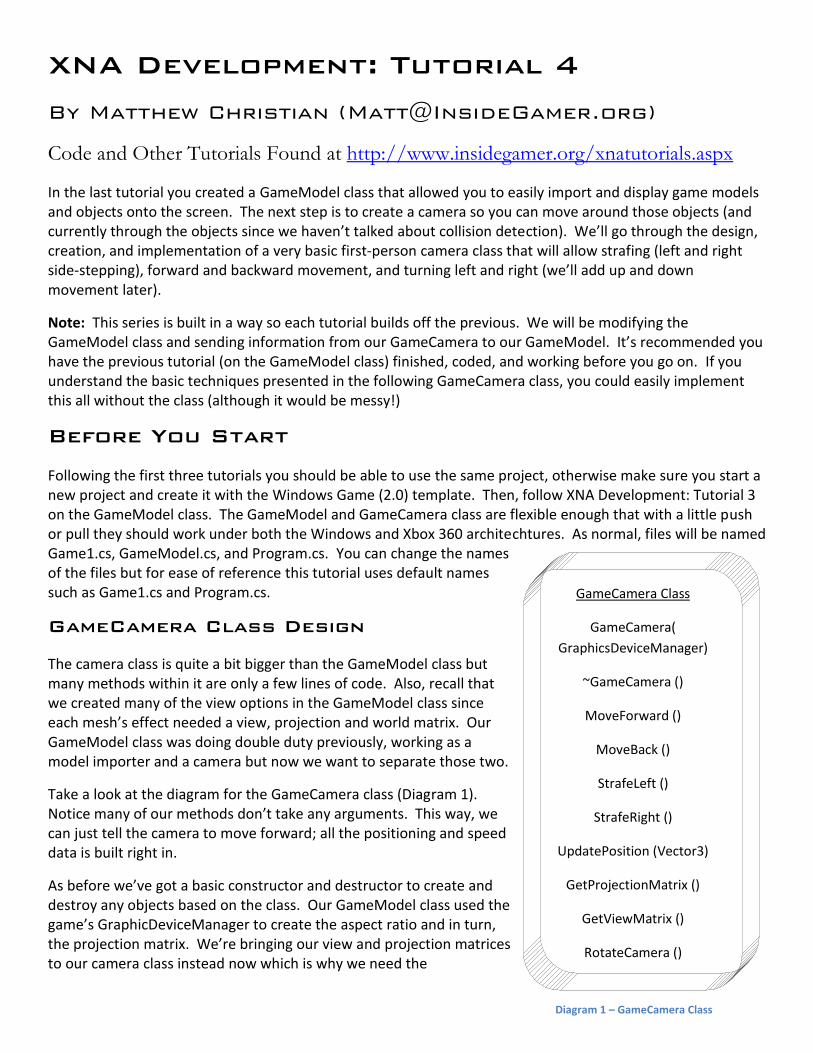
GameCamera Class Design
The camera class is quite a bit bigger than the GameModel class but many methods within it are only a few lines of code. Also, recall that we created many of the view options in the GameModel class since each mesh’s effect needed a view, projection and world matrix. Our GameModel class was doing double duty previously, working as a model importer and a camera but now we want to separate those two.
Take a look at the diagram for the GameCamera class (Diagram 1). Notice many of our methods don’t take any arguments. This way, we can just tell the camera to move forward; all the positioning and speed data is built right in.
As before we’ve got a basic constructor and destructor to create and destroy any objects based on the class. Our GameModel class used the game’s GraphicDeviceManager to create the aspect ratio and in turn, the projection matrix. We’re bringing our view and projection matrices to our camera class instead now which is why we need the
GameCamera Class
GameCamera(
GraphicsDeviceManager)
~GameCamera ()
MoveForward ()
MoveBack ()
StrafeLeft ()
StrafeRight ()
UpdatePosition (Vector3)
GetProjectionMatrix ()
GetViewMatrix ()
RotateCamera ()
Diagram 1 – GameCamera Class
GraphicsDeviceManager in the constructor.
The next four methods listed in the diagram are our basic movements, moving forward, back, and sidestepping left and right. Skipping the next three, a RotateCamera() method fills out the basic movement needed for now. Notice none of these require any additional inputs. There are two methods above the RotateCamera() method called GetProjectionMatrix() and GetViewMatrix(). These methods return the matrix we’re using, you’ll see the reason for that later.
Finally, the GameCamera class contains the UpdatePosition() method which takes a single vector. This method will be called each time we move the position of the camera (in MoveForward(), MoveBack(), StrafeLeft(), and StrafeRight()). This and the RotateCamera() methods will be the two most potentially confusing but we’ll go over them in detail.
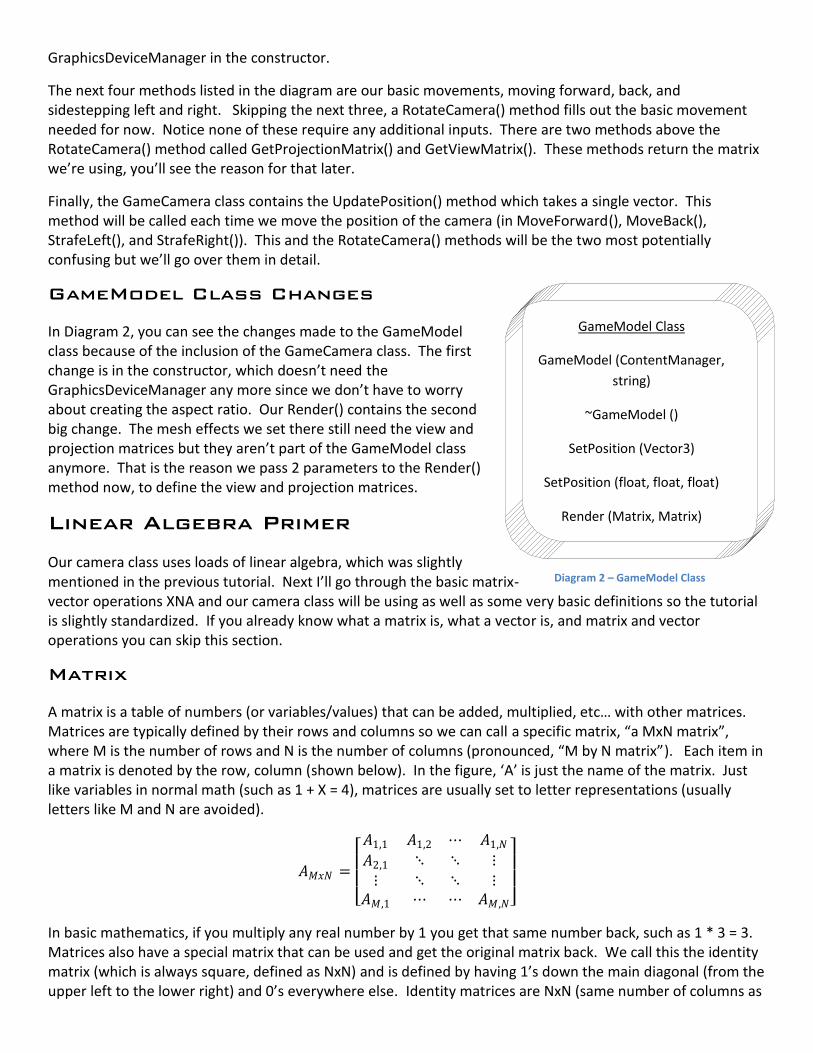
GameModel Class Changes
In Diagram 2, you can see the changes made to the GameModel class because of the inclusion of the GameCamera class. The first change is in the constructor, which doesn’t need the GraphicsDeviceManager any more since we don’t have to worry about creating the aspect ratio. Our Render() contains the second big change. The mesh effects we set there still need the view and projection matrices but they aren’t part of the GameModel class anymore. That is the reason we pass 2 parameters to the Render() method now, to define the view and projection matrices.
Linear Algebra Primer
Our camera class uses loads of linear algebra, which was slightly mentioned in the previous tutorial. Next I’ll go through the basic matrix- vector operations XNA and our camera class will be using as well as some very basic definitions so the tutorial is slightly standardized. If you already know what a matrix is, what a vector is, and matrix and vector operations you can skip this section.
Matrix
A matrix is a table of numbers (or variables/values) that can be added, multiplied, etc… with other matrices. Matrices are typically defined by their rows and columns so we can call a specific matrix, “a MxN matrix”, where M is the number of rows and N is the number of columns (pronounced, “M by N matrix”). Each item in a matrix is denoted by the row, column (shown below). In the figure, ‘A’ is just the name of the matrix. Just like variables in normal math (such as 1 + X = 4), matrices are usually set to letter representations (usually letters like M and N are avoided).
𝐴𝑀𝑥𝑁 =
𝐴1,1 𝐴1,2 ⋯ 𝐴1,𝑁
𝐴2,1 ⋱ ⋱ ⋮
⋮ ⋱ ⋱ ⋮𝐴𝑀,1 ⋯ ⋯ 𝐴𝑀 ,𝑁
In basic mathematics, if you multiply any real number by 1 you get that same number back, such as 1 * 3 = 3. Matrices also have a special matrix that can be used and get the original matrix back. We call this the identity matrix (which is always square, defined as NxN) and is defined by having 1’s down the main diagonal (from the upper left to the lower right) and 0’s everywhere else. Identity matrices are NxN (same number of columns as
GameModel Class
GameModel (ContentManager,
string)
~GameModel ()
SetPosition (Vector3)
SetPosition (float, float, float)
Render (Matrix, Matrix)
Diagram 2 – GameModel Class
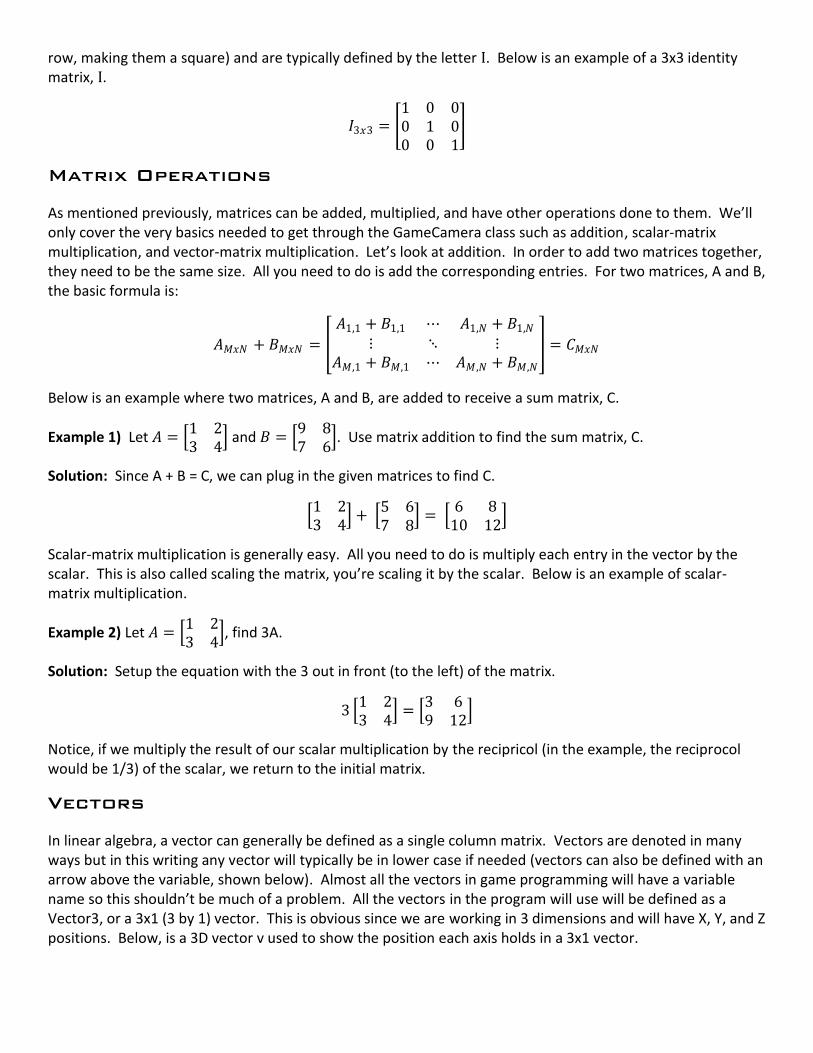
row, making them a square) and are typically defined by the letter I. Below is an example of a 3x3 identity matrix, I.
𝐼3𝑥3 = 1 0 00 1 00 0 1
Matrix Operations
As mentioned previously, matrices can be added, multiplied, and have other operations done to them. We’ll only cover the very basics needed to get through the GameCamera class such as addition, scalar-matrix multiplication, and vector-matrix multiplication. Let’s look at addition. In order to add two matrices together, they need to be the same size. All you need to do is add the corresponding entries. For two matrices, A and B, the basic formula is:
𝐴𝑀𝑥𝑁 + 𝐵𝑀𝑥𝑁 =
𝐴1,1 + 𝐵1,1 ⋯ 𝐴1,𝑁 + 𝐵1,𝑁
⋮ ⋱ ⋮𝐴𝑀,1 + 𝐵𝑀,1 ⋯ 𝐴𝑀 ,𝑁 + 𝐵𝑀,𝑁
= 𝐶𝑀𝑥𝑁
Below is an example where two matrices, A and B, are added to receive a sum matrix, C.
Example 1) Let 𝐴 = 1 23 4
and 𝐵 = 9 87 6
. Use matrix addition to find the sum matrix, C.
Solution: Since A + B = C, we can plug in the given matrices to find C.
1 23 4
+ 5 67 8
= 6 8
10 12
Scalar-matrix multiplication is generally easy. All you need to do is multiply each entry in the vector by the scalar. This is also called scaling the matrix, you’re scaling it by the scalar. Below is an example of scalar-matrix multiplication.
Example 2) Let 𝐴 = 1 23 4
, find 3A.
Solution: Setup the equation with the 3 out in front (to the left) of the matrix.
3 1 23 4
= 3 69 12
Notice, if we multiply the result of our scalar multiplication by the recipricol (in the example, the reciprocol would be 1/3) of the scalar, we return to the initial matrix.
Vectors
In linear algebra, a vector can generally be defined as a single column matrix. Vectors are denoted in many ways but in this writing any vector will typically be in lower case if needed (vectors can also be defined with an arrow above the variable, shown below). Almost all the vectors in game programming will have a variable name so this shouldn’t be much of a problem. All the vectors in the program will use will be defined as a Vector3, or a 3x1 (3 by 1) vector. This is obvious since we are working in 3 dimensions and will have X, Y, and Z positions. Below, is a 3D vector v used to show the position each axis holds in a 3x1 vector.
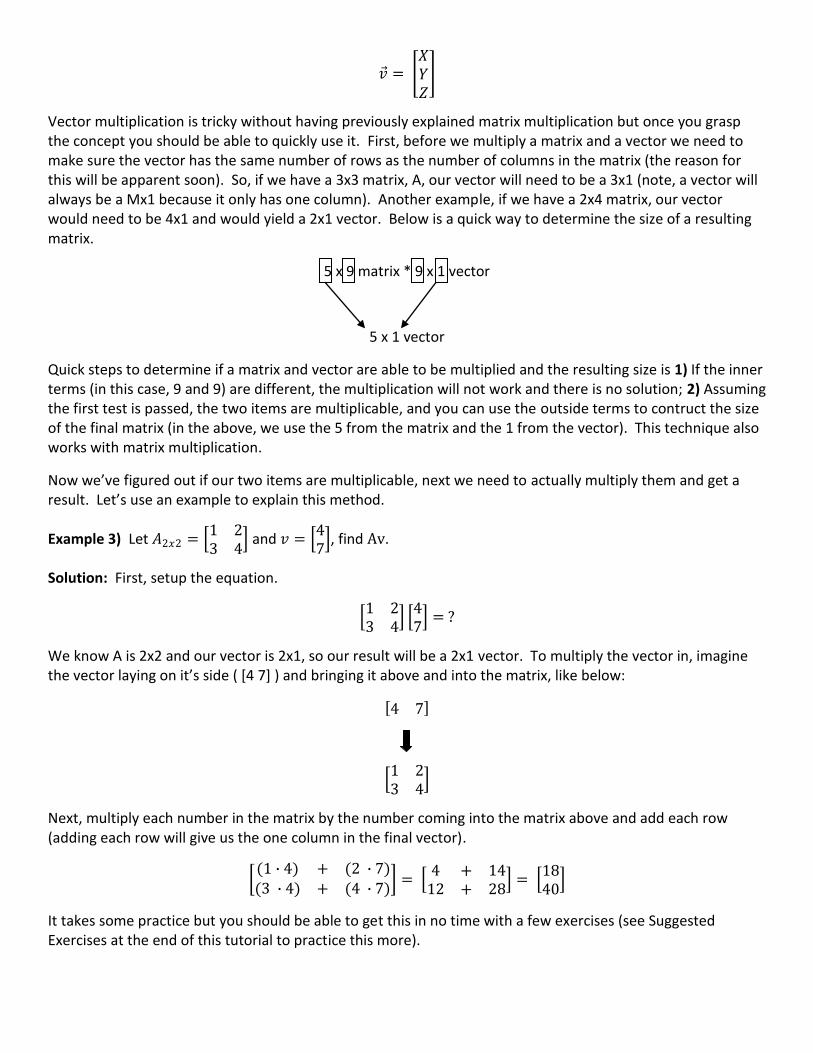
𝑣 = 𝑋𝑌𝑍
Vector multiplication is tricky without having previously explained matrix multiplication but once you grasp the concept you should be able to quickly use it. First, before we multiply a matrix and a vector we need to make sure the vector has the same number of rows as the number of columns in the matrix (the reason for this will be apparent soon). So, if we have a 3x3 matrix, A, our vector will need to be a 3x1 (note, a vector will always be a Mx1 because it only has one column). Another example, if we have a 2x4 matrix, our vector would need to be 4x1 and would yield a 2x1 vector. Below is a quick way to determine the size of a resulting matrix.
5 x 9 matrix * 9 x 1 vector
5 x 1 vector
Quick steps to determine if a matrix and vector are able to be multiplied and the resulting size is 1) If the inner terms (in this case, 9 and 9) are different, the multiplication will not work and there is no solution; 2) Assuming the first test is passed, the two items are multiplicable, and you can use the outside terms to contruct the size of the final matrix (in the above, we use the 5 from the matrix and the 1 from the vector). This technique also works with matrix multiplication.
Now we’ve figured out if our two items are multiplicable, next we need to actually multiply them and get a result. Let’s use an example to explain this method.
Example 3) Let 𝐴2𝑥2 = 1 23 4
and 𝑣 = 47 , find Av.
Solution: First, setup the equation.
1 23 4
47 = ?
We know A is 2x2 and our vector is 2x1, so our result will be a 2x1 vector. To multiply the vector in, imagine the vector laying on it’s side ( *4 7+ ) and bringing it above and into the matrix, like below:
4 7
1 23 4
Next, multiply each number in the matrix by the number coming into the matrix above and add each row (adding each row will give us the one column in the final vector).
(1 ∙ 4) + (2 ∙ 7)(3 ∙ 4) + (4 ∙ 7)
= 4 + 14
12 + 28 =
1840
It takes some practice but you should be able to get this in no time with a few exercises (see Suggested Exercises at the end of this tutorial to practice this more).
GameCamera and Linear Algebra
The GameCamera class uses a lot of matrices and vectors and you need to understand what each type is and the operations included with each. Only the extreme basics are given here in order to understand what XNA and your camera class will be doing. Linear algebra is an essential for video game development. You can definitely get started without any background in linear algebra (that’s how I started!) but the deeper you get into game development mathematics will be more and more present in what you program. If you already have a background in linear algebra it’s encouraged that you sit down with a pencil and paper and test an example to get a final vector and see how that applies to the final code; doing this really helps your understanding of the GameCamera class. There is tons more on linear algebra (matrix reduction, transformations, etc) and this type of programming almost requires a class on the subject, or at the least, a good text book.
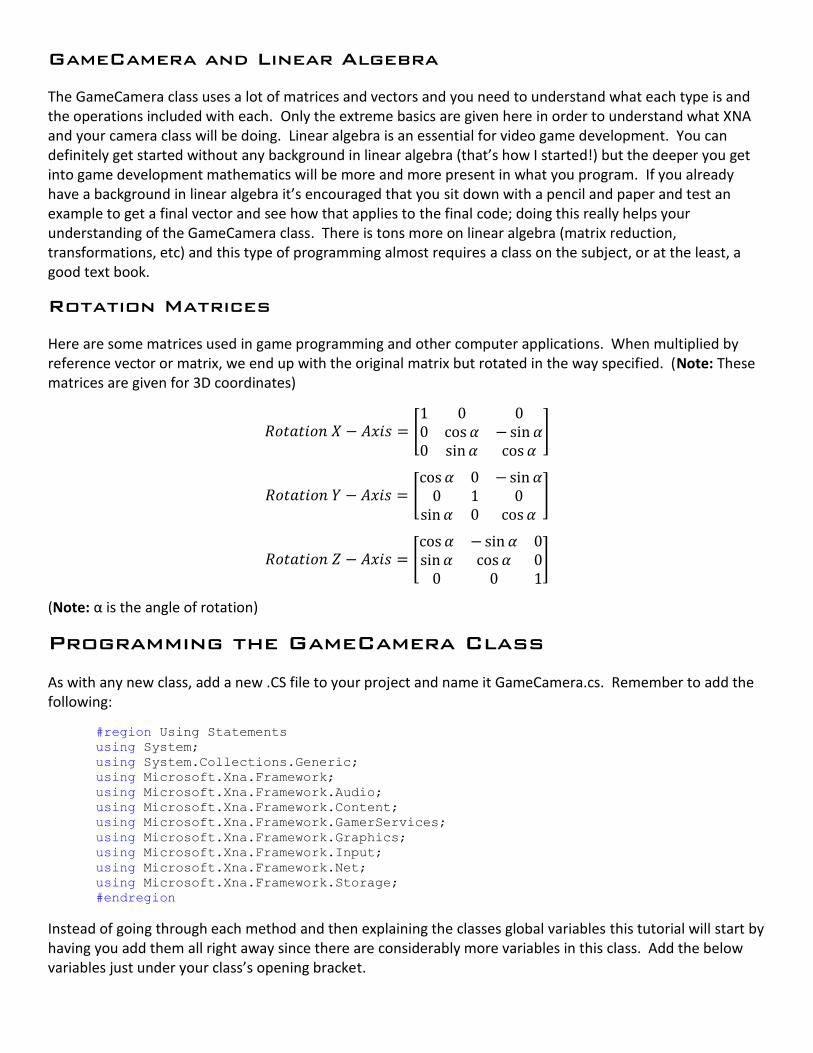
Rotation Matrices
Here are some matrices used in game programming and other computer applications. When multiplied by reference vector or matrix, we end up with the original matrix but rotated in the way specified. (Note: These matrices are given for 3D coordinates)
𝑅𝑜𝑡𝑎𝑡𝑖𝑜𝑛 𝑋 − 𝐴𝑥𝑖𝑠 = 1 0 00 cos 𝛼 − sin 𝛼0 sin 𝛼 cos 𝛼
𝑅𝑜𝑡𝑎𝑡𝑖𝑜𝑛 𝑌 − 𝐴𝑥𝑖𝑠 = cos 𝛼 0 − sin 𝛼
0 1 0sin 𝛼 0 cos 𝛼
𝑅𝑜𝑡𝑎𝑡𝑖𝑜𝑛 𝑍 − 𝐴𝑥𝑖𝑠 = cos 𝛼 − sin 𝛼 0sin 𝛼 cos 𝛼 0
0 0 1
(Note: α is the angle of rotation)
Programming the GameCamera Class
As with any new class, add a new .CS file to your project and name it GameCamera.cs. Remember to add the following:
#region Using Statements
using System;
using System.Collections.Generic;
using Microsoft.Xna.Framework;
using Microsoft.Xna.Framework.Audio;
using Microsoft.Xna.Framework.Content;
using Microsoft.Xna.Framework.GamerServices;
using Microsoft.Xna.Framework.Graphics;
using Microsoft.Xna.Framework.Input;
using Microsoft.Xna.Framework.Net;
using Microsoft.Xna.Framework.Storage;
#endregion
Instead of going through each method and then explaining the classes global variables this tutorial will start by having you add them all right away since there are considerably more variables in this class. Add the below variables just under your class’s opening bracket.

//Camera movement and rotation speeds
public float rotationSpeed = 0.05f;
private float forwardSpeed = 0.05f;
//Amount to turn as a float
public float turnAmt;
//Position and reference vectors
private Vector3 position;
private Vector3 transRef;
private Vector3 cameraRef;
private Vector3 lookAt;
//Screen ratio
private float aspectRatio = 0.0f;
//Any camera rotations
private Matrix cameraRotation;
//Projection and view matrix
private Matrix projection;
private Matrix view;
You’ll probably recognize the projection matrix, view matrix, and aspectRatio variables from the GameModel class. RotationSpeed and forwardSpeed are default values that are going to be used to move the camera at constant speeds. We’ll need to constantly reference how much the camera is turned, that is what is stored in turnAmt. Next, a block of vectors helps describe the camera’s positioning. Position is the camera position, transRef is the transformation between a reference point (stored in cameraRef) and the rotation, and the lookAt vector specifies what it is the camera is looking at direction wise. Skipping aspectRatio (which was covered in Tutorial 3), cameraRotation is the rotation of the camera stored in matrix form. Finally, the variables end with the projection and view matrices, both of which are moved out of the GameModel class and into the GameCamera class.
GameCamera()
GameCamera() is the GameCamera class constructor and is the largest method in the GameCamera class. The constructor is used to set default values to our variables in this class. Below is the GameCamera() method:
public GameCamera(GraphicsDeviceManager graphics)
{
//Start aiming forward (no turn)
turnAmt = 0;
//Look off into the distance, set a reference vector
lookAt = transRef = new Vector3(0.0f, 0.0f, 1.0f);
//Starting position of the camera
position = new Vector3(0.0f, 0.0f, 0.0f);
//Direction camera points without rotations applied
cameraRef = new Vector3(0.0f, 0.0f, 1.0f);
//Aspect ratio of screen
aspectRatio = graphics.GraphicsDevice.Viewport.Width /
graphics.GraphicsDevice.Viewport.Height;
//Initialize our camera rotation to identity
cameraRotation = Matrix.Identity;
//Create a general view matrix from start position and original lookat
view = Matrix.CreateLookAt(position, lookAt, Vector3.Up);
//Create general projection matrix for the screen
projection = Matrix.CreatePerspectiveFieldOfView(MathHelper.ToRadians(45.0f),
aspectRatio, 0.01f, 10000.0f);
}
GameCamera() takes one parameter, a GraphicsDeviceManager called graphics. Graphics is passed to this class to set the aspectRatio variable and, in turn, the projection matrix. Since the GameModel class isn’t handling the projection matrix anymore, it needs to be passed here. Within the method, we initialize our variables. First off, we don’t want the camera to be created turned in any direction so the turn amount is set to 0. Next, both the lookAt and transRef vectors are set to a new vector with (X, Y, Z) = (0, 0, 1.0). This has the camera look forward 1.0 on the Z-axis because we don’t want to look up/down or left/right currently. Following this, the camera is positioned at the origin by setting position to (X, Y, Z) = (0, 0, 0). CameraRef is set to the same as the lookAt and transRef vectors because that’s the way we want the camera aimed (notice this is different than where the camera is looking). CameraRef is seperated also because it can be tested with lookAt and transRef by changing their values. You might want to split all 3 up into three instantiations if you plan on having each set to different initial values.
AspectRatio is set in the same fashion as it was in the GameModel class and so is the projection matrix 3 lines down. Next, the cameraRotation matrix is set to the identity because we don’t want the camera turned at all (same as the turnAmt variable). Using the matrix for Y-Axis rotations given in the Linear Algebra Primer with some basic triginometry (cos 0 = 1 , sin 0 = 0), we’re given the identity matrix, which is exactly what cameraRotation is set to.
UpdatePosition()
Each of the basic movement functions will call a method called UpdatePosition(), we’ll create that before working on the actual MoveForward(), MoveBack(), etc… Each of the basic movements will pass a modified vector to UpdatePosition(), making a new position as the only parameter for UpdatePosition(). Take a look at the UpdatePosition() method in full.
private void UpdatePosition(Vector3 newPos)
{
//Create a new rotation matrix about the Y-Axis
Matrix yRotation = Matrix.CreateRotationY(turnAmt);
Vector3 currPos = Vector3.Transform(newPos, yRotation);
//Set position of our camera to the v vector's new values
position.X += currPos.X;
position.Y += currPos.Y;
position.Z += currPos.Z;
//Update our lookAt Matrix
lookAt = position + transRef;
view = Matrix.CreateLookAt(position, lookAt, Vector3.Up);
}
First notice the parameter mentioned above, a Vector3 named newPos. We want to take the new position and modify it by multiplying it by the way the camera is turned. For example, if you looked forward and walked forward that would be fine, but what if you looked 90° to the left and pressed forward? You would want to move in that direction, not the previous forward. The first line of this method finds the amount of rotation by creating a new matrix, yRotation, and setting it equal to a matrix created using a method in the Matrix helper class provided by Visual Studio. Call CreateRotationY() and pass the amount of rotation stored
in the class to it. Now that we have the turn amount in matrix form, we’ll want to multiply it by the new positioning passed into UpdatePosition. CurrPos is a new vector created from calling Transform() of the Vector3 helper class. Transform simply multiplies a matrix by a vector and returns the results. Doing this creates an updated vector of where the camera should move to. Notice, we haven’t calculated where the camera is going to be or where we are, we have calculated how much we want to move and in what direction. Think of it as an ‘offset’ vector. We want to move from our current position, stored in position, to wherever the offset takes us. So, we add each piece of the offset to each piece of the position vector, respectively.
position.X += currPos.X;
position.Y += currPos.Y;
position.Z += currPos.Z;
Finally (as if that wasn’t enough), the view matrix needs to be updated. LookAt is calculated using the new current position and transRef which will change as the camera is turned (thus moving the camera in the direction specified and solving the previous problem of moving in the wrong direction).
lookAt = position + transRef;
view = Matrix.CreateLookAt(position, lookAt, Vector3.Up);
Then, the view matrix is updated by creating a new look at matrix using the position, lookAt, and up direction (provided by Vector3).
MoveForward() and MoveBack()
The method to start out the class and the method to update it is finished, now we need the methods to provide the correct information for each update. First up is the MoveForward() method, listed below:
public void MoveForward()
{
//Create a new vector to calculate speeds in certain directions
Vector3 v = new Vector3(0.0f, 0.0f, forwardSpeed);
UpdatePosition(v);
}
The method is simple, create a new vector and pass it to UpdatePosition() to work on. There already is a variable, forwardSpeed, to define how much the camera should move and is used only on the Z-axis. Remember, forward on the Z means ‘into’ the screen. Similarily, the MoveBack() method is basically the exact same but the direction, instead of into the screen, should be back or ‘out’ of the screen (move your head forward and you’re going ‘into’ the screen, move it back and you’re going ‘out’ of the screen).
public void MoveBack()
{
//Create a new vector to calculate speeds in certain directions
Vector3 v = new Vector3(0.0f, 0.0f, -forwardSpeed);
UpdatePosition(v);
}
Make sure to get that negative sign in front of forwardSpeed to move the camera correctly backward.
StrafeLeft() and StrafeRight()
StrafeLeft() and StrafeRight() really don’t need any explanation after the description of MoveForward() and MoveBack(). It’s the same as above but we need to move on the X-axis.
public void StrafeLeft()

{
//Create a new vector to calculate speeds in certain directions
Vector3 v = new Vector3(forwardSpeed, 0.0f, 0.0f);
UpdatePosition(v);
}
public void StrafeRight()
{
//Create a new vector to calculate speeds in certain directions
Vector3 v = new Vector3(-forwardSpeed, 0.0f, 0.0f);
UpdatePosition(v);
}
Returning Matrices
Since the projection and view matrices have been removed from the GameModel class, we need to provide access to both those matrices. This is done by using simple methods that return each matrix. In order to be right with the view matrix, we create the latest view matrix before returning it.
public Matrix GetProjectionMatrix()
{
return projection;
}
public Matrix GetViewMatrix()
{
//Get the newest view
view = Matrix.CreateLookAt(position, lookAt, Vector3.Up);
return view;
}
RotateCamera()
RotateCamera() is quite simple considering the power of what it does and the number of lines it takes to do it in. Let’s look at it first:
public void RotateCamera()
{
//Figure out rotation about Y
cameraRotation = Matrix.CreateRotationY(turnAmt);
//Calculate transform between constant reference position and our rotation
transRef = Vector3.Transform(cameraRef, cameraRotation);
//Look at the angle reference + position offset
lookAt = transRef + position;
//Create view matrix for update
view = Matrix.CreateLookAt(position, lookAt, Vector3.Up);
}
Initially, the method sets cameraRotation to a matrix of our turnAmt. This is the only place cameraRotation is set because update only needs to be called whenever the camera is rotated. (TurnAmt will be changed in the Game1 page, shown later). Then a transformation reference vector is created using the basic camera reference and the rotation matrix just created which is then used to create the camera’s lookAt offset. Finally, it’s used to create a new look at matrix and update the view.

Updating the GameModel Class
The GameCamera is finished but overlaps some of the functionality currently built in the GameModel class. First of all, according to the new GameModel class definition, the Render() method accepts two matrices. This is pretty obvious since the camera contains the new projection and view matrices previously calculated in the GameModel class. Update your Render() method within the GameModel class to look like the following:
public void Render(Matrix view, Matrix projection)
{
//Copy bone transformations
Matrix[] transforms = new Matrix[gModel.Bones.Count];
gModel.CopyAbsoluteBoneTransformsTo(transforms);
//Render each mesh in the model
foreach (ModelMesh mesh in gModel.Meshes)
{
//Determine shader information for each mesh
foreach (BasicEffect effect in mesh.Effects)
{
//Use default lighting
effect.EnableDefaultLighting();
//Set effect matrices to camera matrices
effect.View = view;
effect.Projection = projection;
effect.World = transforms[mesh.ParentBone.Index] *
Matrix.CreateTranslation(positionVector);
}
//Draw mesh
mesh.Draw();
}
}
Other than new arguments, two lines have disappeared. Previously, the projection and view matrices were calculated with the following:
projection = Matrix.CreatePerspectiveFieldOfView(MathHelper.ToRadians(45.0f),
aspectRatio, 1.0f, 10000.0f);
view = Matrix.CreateLookAt(Vector3.Zero, positionVector, Vector3.Up);
Now, these values are passed into GameCamera. Since the new arguments being passed in are the same as the previous variables, the lines in the second for loop don’t need to be changed. After removing these lines, make sure to go up to the top of the GameModel class and delete the class global variable matrices named projection and view. Finally, within the constructor remove these lines:
//Calculate and set aspect ratio
aspectRatio = graphics.GraphicsDevice.Viewport.Width /
graphics.GraphicsDevice.Viewport.Height;
The aspect ratio is used with the projection matrix and now is calculated in the GameCamera class. Don’t forget to delete the GameModel class global variable aspectRatio.
In total, you should have removed about 6-8 lines of code and added new arguments to the Render() method of the GameModel class.
Implementing the GameCamera Class
Head over to Game1.cs and create a new global GameCamera object just below any GameModel objects you may have with the following:
GameCamera camera;
The GameCamera constructor builds the projection matrix which requires the GraphicsDeviceManager XNA automatically creates for a new project. Within your Initialize() method in the Game1 class (found in Game1.cs), pass the GraphicsDeviceManager to the new GameCamera object’s contructor.
camera = new GameCamera(graphics);
Skip to the Draw() method and update any object Render() methods, pass the GameCamera projection and view matrices to them.
//Render Object
myHouse.Render(camera.GetViewMatrix(), camera.GetProjectionMatrix());
Moving The Camera
The final piece to the GameCamera class is using the MoveForward(), MoveBack(), StrafeLeft(), StrafeRight(), and RotateCamera() methods to move the camera. This is done in the Update() method of the Game1 class. XNA defaults a button press in this section for exiting the game. Using a similar style to detect keyboard presses and calling the appropriate methods, the camera will be updated.
protected override void Update(GameTime gameTime)
{
//Exit game
if (Keyboard.GetState().IsKeyDown(Keys.Escape))
this.Exit();
//Move forward
if (Keyboard.GetState().IsKeyDown(Keys.W))
camera.MoveForward();
//Move Back
if (Keyboard.GetState().IsKeyDown(Keys.S))
camera.MoveBack();
//Strafe Left
if (Keyboard.GetState().IsKeyDown(Keys.A))
camera.StrafeLeft();
//Strafe Right
if (Keyboard.GetState().IsKeyDown(Keys.D))
camera.StrafeRight();
//Turn left
if (Keyboard.GetState().IsKeyDown(Keys.Left))
{
camera.turnAmt += camera.rotationSpeed;
camera.RotateCamera();
}
//Turn right
if (Keyboard.GetState().IsKeyDown(Keys.Right))
{
camera.turnAmt -= camera.rotationSpeed;
camera.RotateCamera();
}
base.Update(gameTime);
}
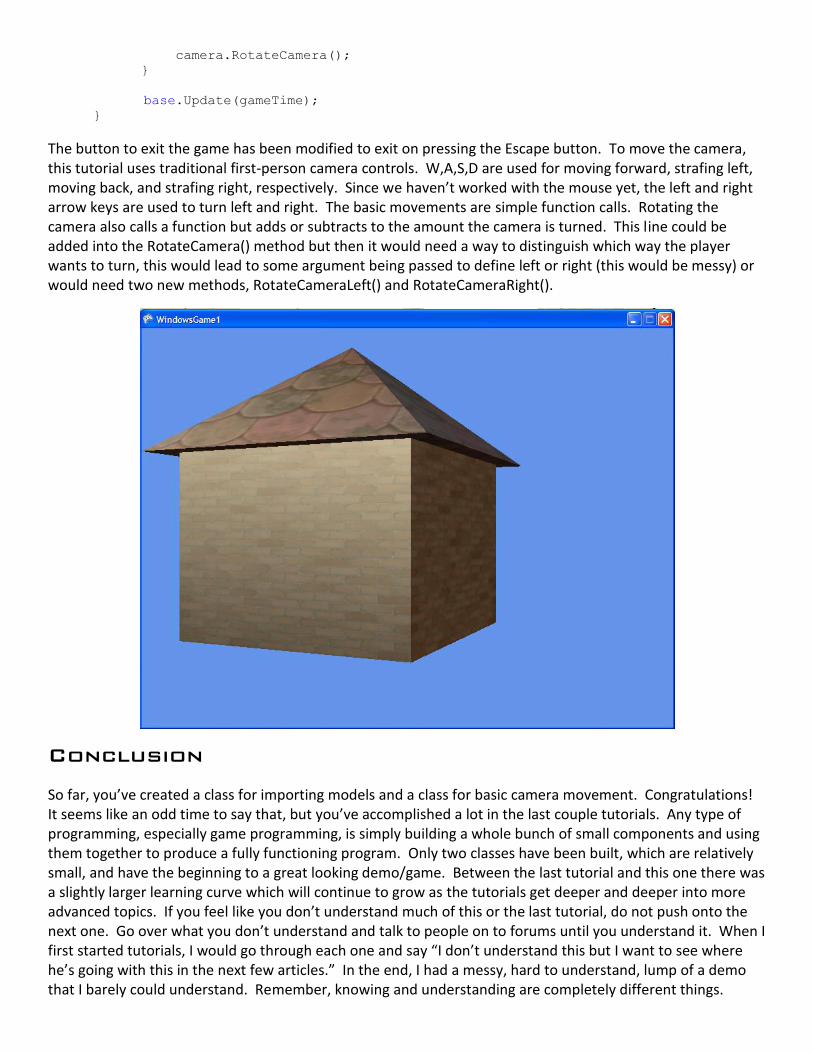
The button to exit the game has been modified to exit on pressing the Escape button. To move the camera, this tutorial uses traditional first-person camera controls. W,A,S,D are used for moving forward, strafing left, moving back, and strafing right, respectively. Since we haven’t worked with the mouse yet, the left and right arrow keys are used to turn left and right. The basic movements are simple function calls. Rotating the camera also calls a function but adds or subtracts to the amount the camera is turned. This line could be added into the RotateCamera() method but then it would need a way to distinguish which way the player wants to turn, this would lead to some argument being passed to define left or right (this would be messy) or would need two new methods, RotateCameraLeft() and RotateCameraRight().
Conclusion
So far, you’ve created a class for importing models and a class for basic camera movement. Congratulations! It seems like an odd time to say that, but you’ve accomplished a lot in the last couple tutorials. Any type of programming, especially game programming, is simply building a whole bunch of small components and using them together to produce a fully functioning program. Only two classes have been built, which are relatively small, and have the beginning to a great looking demo/game. Between the last tutorial and this one there was a slightly larger learning curve which will continue to grow as the tutorials get deeper and deeper into more advanced topics. If you feel like you don’t understand much of this or the last tutorial, do not push onto the next one. Go over what you don’t understand and talk to people on to forums until you understand it. When I first started tutorials, I would go through each one and say “I don’t understand this but I want to see where he’s going with this in the next few articles.” In the end, I had a messy, hard to understand, lump of a demo that I barely could understand. Remember, knowing and understanding are completely different things.
Suggested Exercises
1) Update the movement speed to move a) faster; b) slower.
2) Create a ‘run’ button by checking if a button is pressed and using a faster movement speed.
3) Create a ‘slow-mo’ button in the same manner as Exercise 2 but using a slower speed.
4) Modify the camera to use a shorter or longer view frustum. [HINT: Frustums are discussed in Tutorial 3]
5) After pressing a certain number of keys on the keyboard, the actions for those key presses aren’t registered (for example, if I press W, A, D, and left arrow, all my camera does is move forward). Why is this? Use internet resources for help.