zpl emulation command reference - citizen systems · 6 zpl® command reference zpl® basic ^xa...
TRANSCRIPT
1
Revision 2.02
Date 2008/08/04
ZPL® Emulation
Command Reference
2
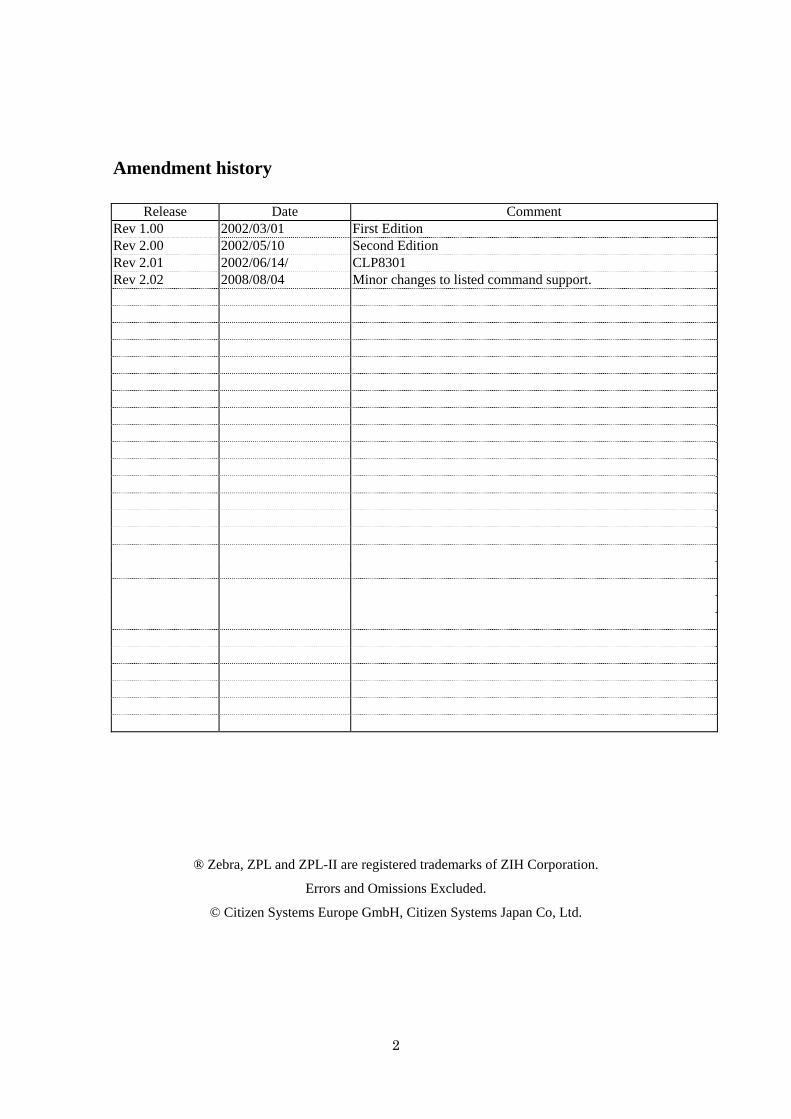
Amendment history
Release Date Comment Rev 1.00 2002/03/01 First Edition Rev 2.00 2002/05/10 Second Edition Rev 2.01 2002/06/14/ CLP8301 Rev 2.02 2008/08/04 Minor changes to listed command support.
® Zebra, ZPL and ZPL-II are registered trademarks of ZIH Corporation.
Errors and Omissions Excluded.
© Citizen Systems Europe GmbH, Citizen Systems Japan Co, Ltd.
3
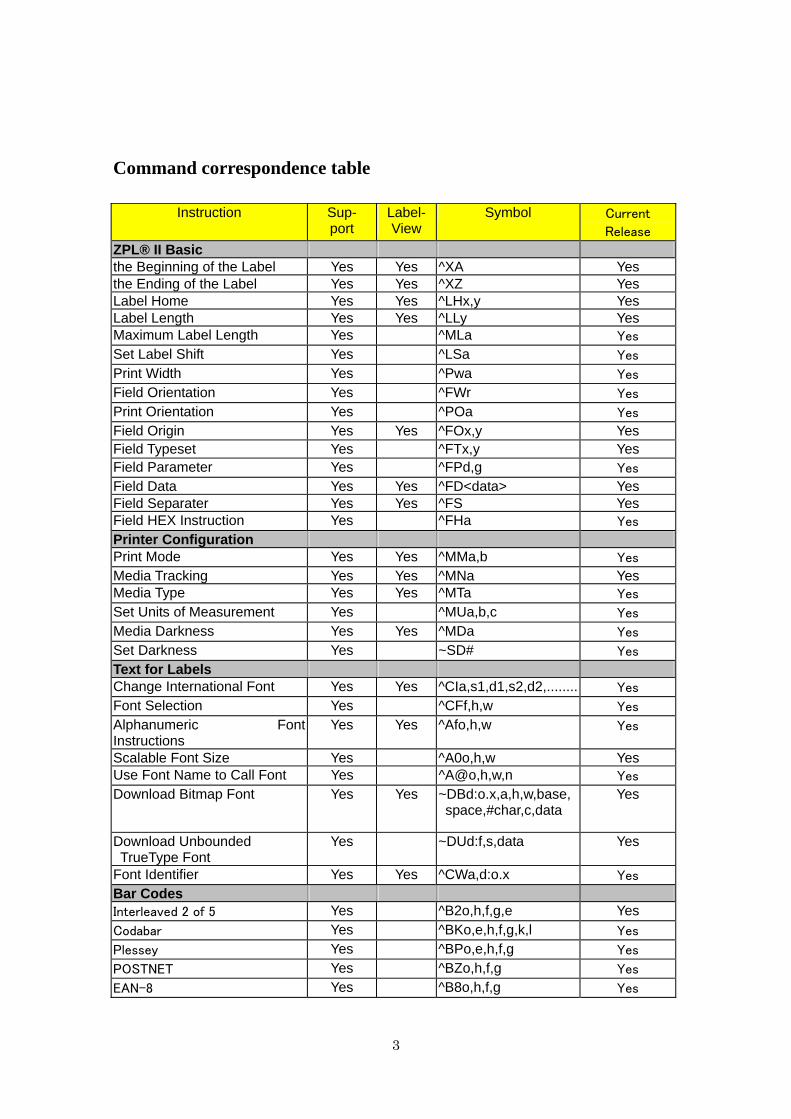
Command correspondence table
Instruction Sup- port
Label- View
Symbol Current
Release
ZPL® II Basic the Beginning of the Label Yes Yes ^XA Yes the Ending of the Label Yes Yes ^XZ Yes Label Home Yes Yes ^LHx,y Yes Label Length Yes Yes ^LLy Yes Maximum Label Length Yes ^MLa Yes
Set Label Shift Yes ^LSa Yes
Print Width Yes ^Pwa Yes
Field Orientation Yes ^FWr Yes
Print Orientation Yes ^POa Yes
Field Origin Yes Yes ^FOx,y Yes Field Typeset Yes ^FTx,y Yes Field Parameter Yes ^FPd,g Yes
Field Data Yes Yes ^FD<data> Yes Field Separater Yes Yes ^FS Yes Field HEX Instruction Yes ^FHa Yes
Printer Configuration Print Mode Yes Yes ^MMa,b Yes
Media Tracking Yes Yes ^MNa Yes Media Type Yes Yes ^MTa Yes
Set Units of Measurement Yes ^MUa,b,c Yes
Media Darkness Yes Yes ^MDa Yes
Set Darkness Yes ~SD# Yes
Text for Labels Change International Font Yes Yes ^CIa,s1,d1,s2,d2,........ Yes
Font Selection Yes ^CFf,h,w Yes
Alphanumeric Font Instructions
Yes Yes ^Afo,h,w Yes
Scalable Font Size Yes ^A0o,h,w Yes Use Font Name to Call Font Yes ^A@o,h,w,n Yes
Download Bitmap Font Yes Yes ~DBd:o.x,a,h,w,base, space,#char,c,data
Yes
Download Unbounded TrueType Font
Yes ~DUd:f,s,data Yes
Font Identifier Yes Yes ^CWa,d:o.x Yes
Bar Codes Interleaved 2 of 5 Yes ^B2o,h,f,g,e Yes Codabar Yes ^BKo,e,h,f,g,k,l Yes
Plessey Yes ^BPo,e,h,f,g Yes
POSTNET Yes ^BZo,h,f,g Yes
EAN-8 Yes ^B8o,h,f,g Yes
4
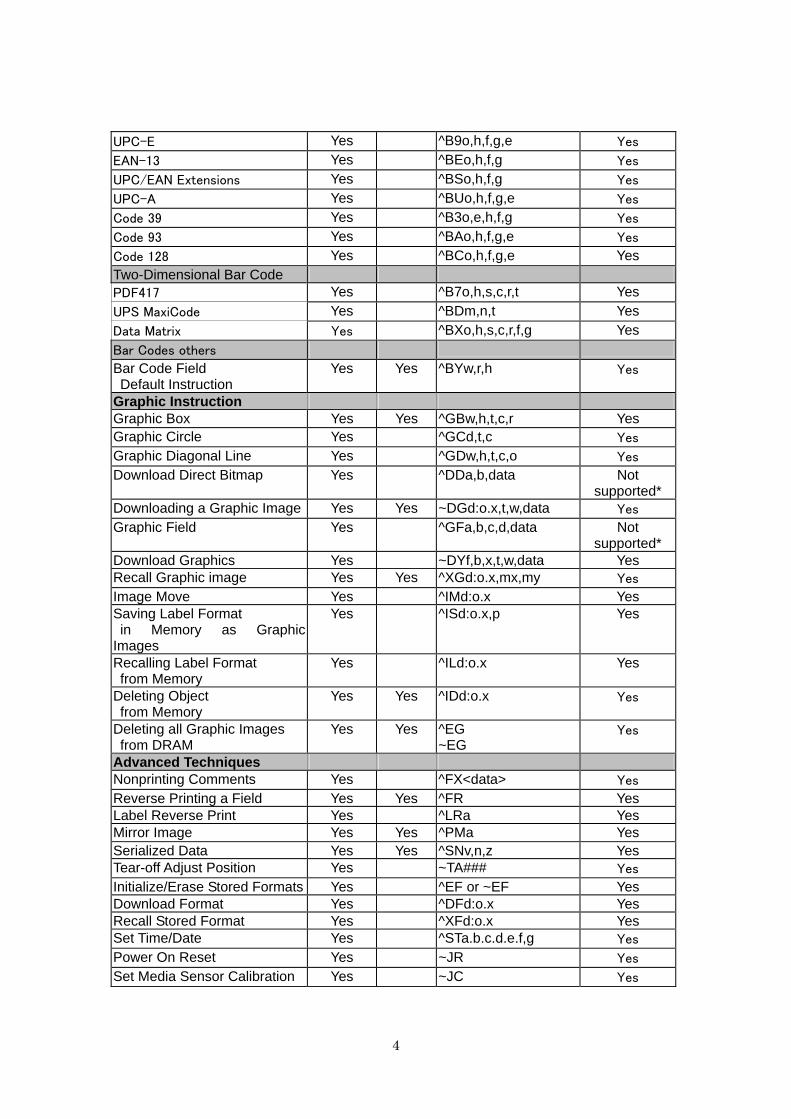
UPC-E Yes ^B9o,h,f,g,e Yes
EAN-13 Yes ^BEo,h,f,g Yes
UPC/EAN Extensions Yes ^BSo,h,f,g Yes
UPC-A Yes ^BUo,h,f,g,e Yes
Code 39 Yes ^B3o,e,h,f,g Yes
Code 93 Yes ^BAo,h,f,g,e Yes
Code 128 Yes ^BCo,h,f,g,e Yes Two-Dimensional Bar Code PDF417 Yes ^B7o,h,s,c,r,t Yes UPS MaxiCode Yes ^BDm,n,t Yes Data Matrix Yes ^BXo,h,s,c,r,f,g Yes Bar Codes others Bar Code Field Default Instruction
Yes Yes ^BYw,r,h Yes
Graphic Instruction Graphic Box Yes Yes ^GBw,h,t,c,r Yes Graphic Circle Yes ^GCd,t,c Yes
Graphic Diagonal Line Yes ^GDw,h,t,c,o Yes
Download Direct Bitmap Yes ^DDa,b,data Not supported*
Downloading a Graphic Image Yes Yes ~DGd:o.x,t,w,data Yes
Graphic Field Yes ^GFa,b,c,d,data Not supported*
Download Graphics Yes ~DYf,b,x,t,w,data Yes Recall Graphic image Yes Yes ^XGd:o.x,mx,my Yes
Image Move Yes ^IMd:o.x Yes Saving Label Format in Memory as Graphic Images
Yes ^ISd:o.x,p Yes
Recalling Label Format from Memory
Yes ^ILd:o.x Yes
Deleting Object from Memory
Yes Yes ^IDd:o.x Yes
Deleting all Graphic Images from DRAM
Yes Yes ^EG ~EG
Yes
Advanced Techniques Nonprinting Comments Yes ^FX<data> Yes
Reverse Printing a Field Yes Yes ^FR Yes Label Reverse Print Yes ^LRa Yes Mirror Image Yes Yes ^PMa Yes Serialized Data Yes Yes ^SNv,n,z Yes Tear-off Adjust Position Yes ~TA### Yes
Initialize/Erase Stored Formats Yes ^EF or ~EF Yes Download Format Yes ^DFd:o.x Yes Recall Stored Format Yes ^XFd:o.x Yes Set Time/Date Yes ^STa.b.c.d.e.f,g Yes
Power On Reset Yes ~JR Yes
Set Media Sensor Calibration Yes ~JC Yes
5
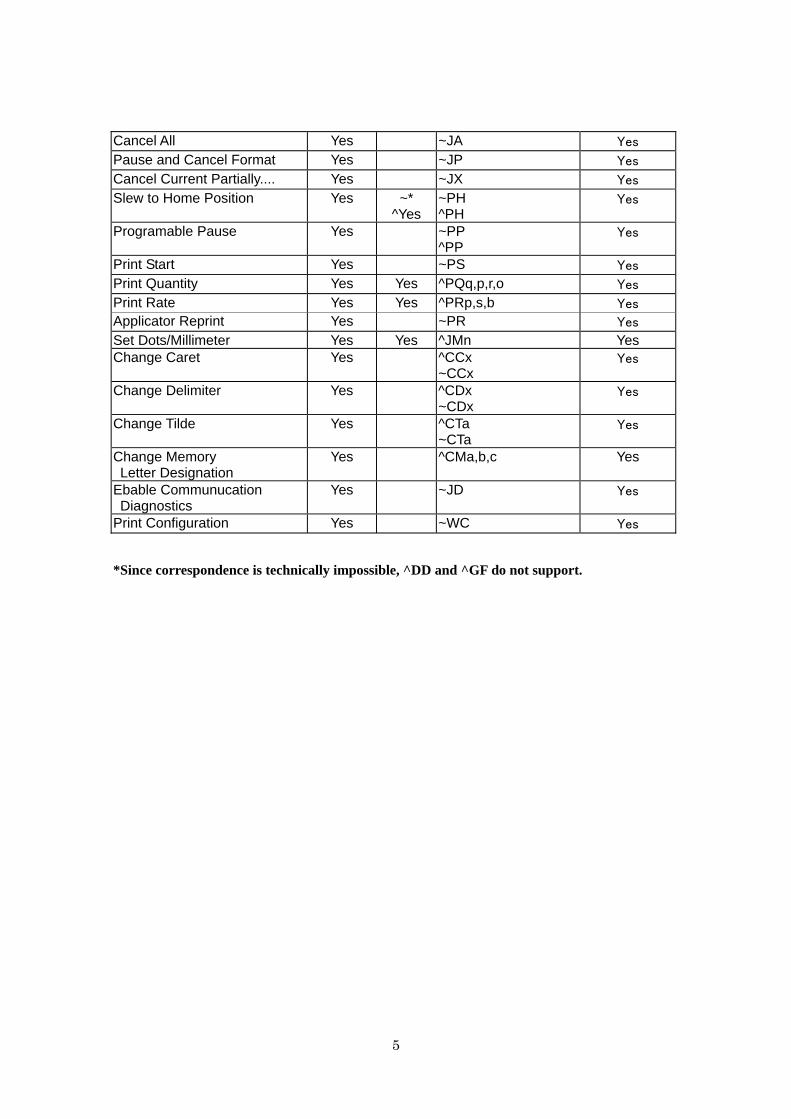
Cancel All Yes ~JA Yes
Pause and Cancel Format Yes ~JP Yes
Cancel Current Partially.... Yes ~JX Yes
Slew to Home Position Yes ~* ^Yes
~PH ^PH
Yes
Programable Pause Yes ~PP ^PP
Yes
Print Start Yes ~PS Yes
Print Quantity Yes Yes ^PQq,p,r,o Yes
Print Rate Yes Yes ^PRp,s,b Yes
Applicator Reprint Yes ~PR Yes
Set Dots/Millimeter Yes Yes ^JMn Yes Change Caret Yes ^CCx
~CCx Yes
Change Delimiter Yes ^CDx ~CDx
Yes
Change Tilde Yes ^CTa ~CTa
Yes
Change Memory Letter Designation
Yes ^CMa,b,c Yes
Ebable Communucation Diagnostics
Yes ~JD Yes
Print Configuration Yes ~WC Yes
*Since correspondence is technically impossible, ^DD and ^GF do not support.
6
ZPL® Command Reference ZPL® Basic
^XA Start Format Description:
The ^XA command is used at the beginning of ZPL® code, It is the opening bracket and indicates
the start of a new label format.
Format: ^XA
Comments:
Label formats should start with the ^XA command and end with the ^XZ command to be in valid
^ZPL® format.
^XZ End Format Description:
The ^XZ command is the ending(closing)bracket. It indicates the end of a label format. When this
command is received, a label will be printed.
Format: ^XZ
Comments:
Label formats must start with the ^XA command and end with the ^XZ command to be in valid
ZPL® format.
^LH Label Home Description:
The ^LH command sets the label home position.
The default home position of a label is the upper-left corner (position 0,0 along the x-axis and
y-axis).This is the axis reference point for labels. Any area below and to the right of this point is
available for printing. The ^LH command changes this reference point. For instance, when working
7
with preprinted labels, use this command to move the reference point below the preprinted area.
This command will only affect fields that come after it. It is suggested that this be one of the first
commands in the label format.
Format: ^LHx,y
Parameters:
x = x-axis position(in dots)
Accepted Values: 0 to 7999(200dpi) / 0 to 11998(300dpi)
Initial Value at Power-up:0 or last permanent saved value
y = y-axis position(in dots)
Accepted Values: 0 to 7999(200dpi) / 0 to 11998(300dpi)
Initial Value at Power-up:0 or last permanent saved value
Depending on the printhead used in your printer, use one of the following when figuring the values
for x and y:
8 dots=1 mm(millimeter),200 dots=1 inch.
12 dots=1 mm(millimeter),300 dots=1 inch.
To be compatible with existing printers, this command must come before the first ^FS(Field
Separator)command. Once you have issued an ^LH command, the setting is retained until you turn
off the printer or send a new ^LH command to the printer.
^LL Label Length Description:
The ^LL command defines the length of the label. This command is necessary when using
continuous media(i.e. media not divided into separate labels by gaps, spaces, notches, slots or holes).
To affect the current label and be compatible with existing printers, this command must come before
the first ^FS command. Once you have issued an ^LL command, the setting is retained until you turn
off the printer or send a new ^LL command to the printer.
This command changes “Contitu.MediaLen”(operation panel).
Format: ^LLy
Parameters:
y = y-axis position(in dots)
Accepted Values: 1 to 7999(200dpi) / 1 to 11998(300dpi),not to exceed the maximum
label size.
While the printer will accept any value for this parameter, the amount of memory
8
installed will determine the maximum length of the label.
Default Values:
A value must be entered or the command is ignored
101.6mm(4.00inch) using 8 dot/mm printhead
Comments:
If multiple ^LL commands are issued in the same label format, the last ^LL command will also
affect the next label unless it is prior to the first ^FS.
^ML Maximum Label Length
Description:
The ^ML command lets you adjust the maximum label length.
Format: ^MLa
Parameters:
a = maximum label length(in dot rows)
Accepted Values: 0 to maximum length of label
Default Value: last permanently saved value
Comments:
In order for calibration to work properly, you must set the maximum label length equal to or greater
than your actual label length.
^LS Label Shift Description:
The ^LS command is used to shift all field positions to the left.
If the print position is less than 0,set ^LS to 0.
This command must come before the first ^FS command. Once you have issued an ^LS command,
the setting is retained until you turn off the printer or send a new ^LS command to the printer.
But if you execute “Save Setting” on operation-panel, the setting isn’t saved.
Format: ^LSa
Parameters:
a = shift left value(in dots)
9
Accepted Values:-9999 to 9999
Initial Value at Power-up:0
Comments:
When entering positive values, it is not necessary to use the + sign, The value is assumed to be
positive unless preceded by a negative sign.
^PW Print Width Description:
The ^PW command allows you set the print width.
This command changes “Label Width”(operation panel).
Format: ^PWa
Parameters:
a = label width in dots
Default Values:
A value must be entered or the command is ignored
103.9mm(4.09) inches using 8 dot/mm printhead
Comments:
^FW Field Orientation Description:
The ^FW command sets the default orientation for all command fields that have an orientation
(rotation) parameter. Fields can be rotated 0,90,180,270 degrees clockwise by using this command.
The ^FW command only affects fields that follow it. Once you have issued a ~FW commands, the
setting is retained until you turn off the printer or send a new ^FW command to the printer.
Format: ^FWr
Parameters:
r = rotate field
Accepted Value:
N = normal
R = rotated 90 degrees
I = inverted 180 degrees
10
B = bottom-up 270 degrees, read from bottom up
Initial Value at Power-up: N
Comments:
If the ^FW command is entered with the r parameter missing, the command is ignored.
^FW only affects the orientation in commands where the rotation parameter has not been specifically
set. If an command has a specific rotation parameter, that is the once that is used.
^PO Print Orientation Description:
The ^PO command inverts the label format 180 degrees. In essence, the label is printed upside-down.
If the original label contains commands such as ^LL,^LS the inverted label output will be effected
differently.
Format: ^POa
Parameters:
a = invert label 180 degrees
Accepted Values: N(normal) or I(invert)
Default Value: N
Comments:
If multiple ^PO commands are issued in the same label format, only the last command send to the
printer is used.
Once you issue a ^PO command, the setting is retained until another ^PO command is received or
the printer is powered down.
^FO Field Origin Description:
The ^FO command sets a field origin, relative to the label home(^LH) position. ^FO sets the
upper-left corner of the field area by defining points along the x-axis and y-axis independent of the
rotation.
Format: ^FOx,y
Parameters:
x = x-axis location(in dots)
11
Accepted Values: 0 to 7999(200dpi) / 0 to 11998(300dpi)
Default Value:0
y = y-axis location(in dots)
Accepted Values: 0 to 7999(200dpi) / 0 to 11998(300dpi)
Default Value:0
Comments:
If the value entered for the x or y parameter is too high, it could position the field origin completely
off the label.
^FT Field Typeset Description:
The ^FT command also sets the field position, relative to the home position of the label designated
by the ^LH command. The typesetting origin of the field is fixed with respect to the contents of the
field and does not change with rotation.
Format: ^FTx,y
Parameters:
x = x-axis location(in dots)
Accepted Values: 0 to 7999(200dpi) / 0 to 11998(300dpi)
Default Value: position after last formatted text field
y = y-axis location(in dots)
Accepted Values: 0 to 7999(200dpi) / 0 to 11998(300dpi)
Default Value: position after last formatted text field
Text-Origin is the start of the character string, at the baseline of the font. Normally the baseline is
the bottom of most characters except for those with descenders such as ‘g’, ’y’, etc.
Bar Codes-The origin is the base of the bar code, even when an interpretation is present below the
bar code, or if the bar code has guard bars.
Graphic Boxes-Origin is at the bottom-left corner of the box.
Images-Origin is at the bottom-left corner of the rectangular image area.
^FP
12
Field Parameter Description:
The ^FP command sets the inter-character gap.
Format: ^FPd,g
Parameters:
d = not care
g: = additional inter-character gap(in dots)
Accepted Values:0 to 9999
^FD ^Field Data Description:
The ^FD command defines the data string for the field. The field data can be any printable character
except those used as command prefixes(^ and ~).
Format: ^FDa
Parameters:
a = data to be printed
Accepted Values: any ASCII string up to 3072 characters.
Default Value: none – a string of characters must be entered.
Comments:
The ^ and ~ characters can be printed by changing the prefix characters – refer to the ~CC and ~CT
commands. The new prefix characters cannot be printed.
Characters with codes above 127,or the ^ and ~ characters can be printed using the ^FH and ^FD
commands.
^FS Field Separator Description:
The ^FS command denotes the end of the field definition.
Format: ^FS
Parameters:
^FS = field separator
13
^FH Field Hexadecimal Indicator Description:
The ^FH command allows you to enter the hexadecimal value for any character directly into the ^FD
statement. The ^FH command must precede each ^FD command in which it will be used.
Within the ^FD statement, the HEX indicator must precede each hexadecimal value. The default
hexadecimal indicator is _(underscore).There must be a minimum of two characters designated to
follow the underscore. The a parameter can be added when a different hexadecimal indicator is
needed.
This command can be used with any of the commands that have field data(i.e. ^FD, ^SN(Serialized
Data)).
Valid hexadecimal characters are;
0123456789ABCDEFabcdef
Format: ^FHa
Parameters:
a = hexadecimal indicator
Accepted Values: any character except current format and control prefix(^and ~ by
default).
Default Value:_(underscore)
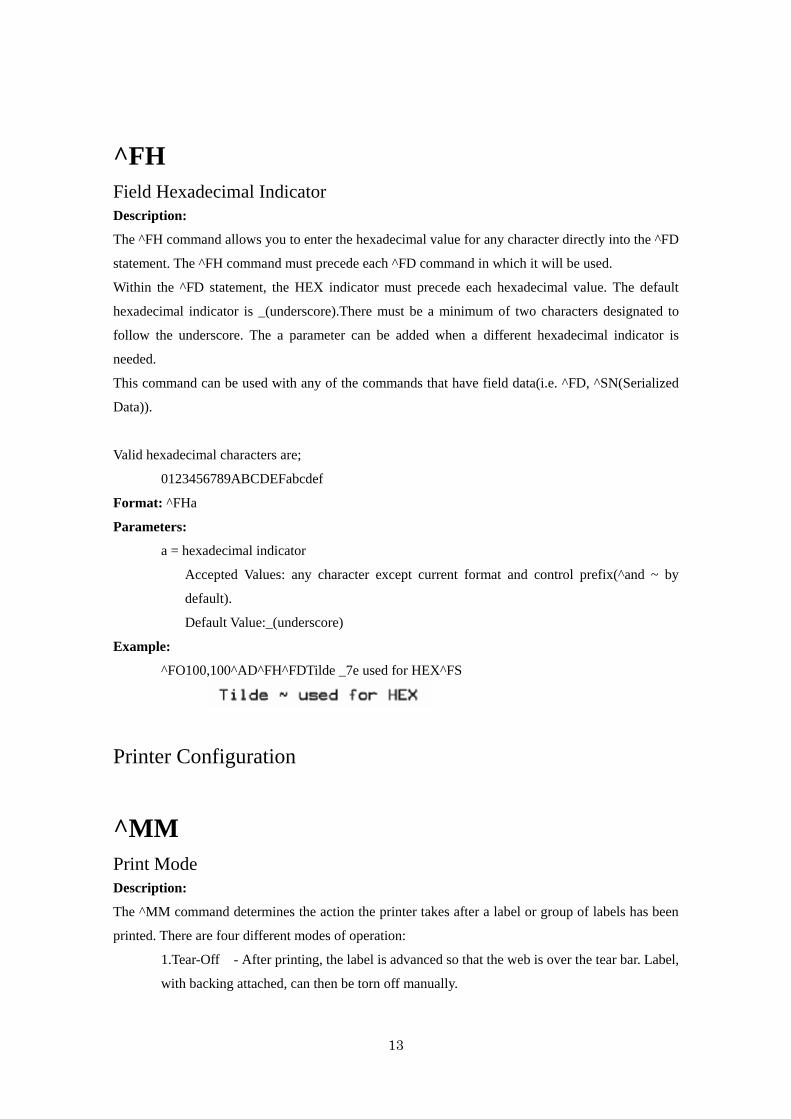
Example:
^FO100,100^AD^FH^FDTilde _7e used for HEX^FS
Printer Configuration
^MM Print Mode Description:
The ^MM command determines the action the printer takes after a label or group of labels has been
printed. There are four different modes of operation:
1.Tear-Off - After printing, the label is advanced so that the web is over the tear bar. Label,
with backing attached, can then be torn off manually.
14
2.Tear-On - After printing, the next label is positioned under the printhead (no backfeed
motion).
3.Peel-Off - After printing, the label is moved forward and activated a label Available
Sensor. Printing stops until the label is manually removed from the printer.
Power peel-backing material is automatically rewound using an optional internal rewind
spindle.
4.Cutter - After printing, the media feeds forward and is automatically cut into
predetermined lengths.
Format: ^MMa,b
Parameters:
a = desired mode
Accepted Values:
T = tear off
P = peel off
R = tear on
C = cutter
Default Value: T
b = not care
The command will be ignored if parameters are missing or invalid. The current value of the
command will remain unchanged.
^MN Media Tracking Description:
The ^MN command relays to the printer what type of media is being used(continuous or
non-continuous) for purposes of tracking. There are two choices for this command:
1.Continous Media – This media has no physical characteristic(web, notch, perforation,
mark, etc,)to separate labels. Label Length is determined by the ^LL command.
2.Non-continuous Media – This media has some type of physical characteristic(web, notch,
perforation, mark, etc,)to separate the labels.
Format: ^MNa
Parameters:
a = media being used
15
Accepted Values:
N = continuous media
Y = non-continuous media
W = non-continuous media web sensing
M = non-continuous media mark sensing
Comments:
If the parameter is missing or invalid, the command will be ignored.
^MT Media Type Description:
The ^MT command selects the type of media being used in the printer. There are two choices for this
command;
1.Thermal Transfer Media-This media uses a high carbon black or colored ribbon. The ink
on the ribbon is bonded to the media.
2.Direct Thermal Media-The media is heat sensitive and requires no ribbon.
Format: ^MTa
Parameters:
a = media type used
Accepted Values:
T = thermal transfer media
D = direct thermal media
Comments:
If the parameter is missing or invalid, the command will be ignored.
^MU Set Units of Measurement Description:
This command sets the printer units of measurement. The ^MU command works on a field-by-field
basis. Once the mode units is set, it carries over from field to field until a new mode units is entered.
Format: ^MUa,b,c
16
Parameters:
a = units
Accepted Values:
D = dots
I = inches
M = millimeters
Default Value: D
b = not care
c = not care
Comments:
This command should appear at the beginning of the label format to be in proper ZPL® format.
^MD Media Darkness Description:
This ^MD command adjusts the darkness relative to the current darkness setting. The minimum
value is –30 and the maximum value is 30.
Format: ^MDa
Parameters:
a = media darkness level
Accepted Values:-30 to 30,depending on current value.
Initial Value at Power-up:0
If no value is entered, this command is ignored.
Examples:
・If the current value(value on configuration label)is 16,entering the command^MD-9 would
decrease the value to 7.
・If the current value(value on configuration label)is 1,entering the command ^MD15 would increase
the value to 16.
・If the current value(value on configuration label)is 25,entering the command ^MD10 would only
increase the value to 30 since that is the maximum value allowed.
Each ^MD command is treated separately in relation to the current value as printed on the
configuration label.
For example, this is what would happen if two ^MD commands were received.
17
Assume the current value is 15.An ^MD-6 command is received that changes the current value to
9.Another command,^MD2,is received. The current value is changed 17.The two ^MD commands
were treated individually with respect to the current value of 15.
~SD Set Darkness Description:
The ~SD command lets you set the darkness of printing via ZPL®. It is equivalent to the darkness
setting parameter on the front panel display.
This command changes “Print Darkness”(operation panel).
Format: ~SD#
Parameters:
#=desired darkness setting(2-digit number)
Accepted Values:00 to 30
Default Value: last permanently saved value
Comments:
The ^MD command value, if applicable, is added to the ~SD command.
Text for Labels
^CI Change International Font Description:
The printers can print TrueType fonts using various international character sets; USA, UK,
Denmark/Norway, Sweden/Finland, Germany, France, Italy, and Spain.
ZPL® follows the ISO standards for international characters.
The ^CI command enables you to call up the international character set you want to use for printing.
You can mix character sets on a label. The following page shows the international character sets
available.
This command allows character remapping. Any character within a font can be remapped to a
different numerical position.
18
It depends on the font at that time for the character printed by the actual code page. Format:^CIa,s1,d1,s2,d2,… Parameters:
a = desired character set
Accepted Values:
0=U.S.A.
1=Reserved (U.S.A.)
2=UK
3= Reserved
4=Denmark/Norway
5=Sweden/Finland
6=Germany
7=France
8= Reserved (France)
9=Italy
10=Spain
11=Reserved (U.S.A.)
12=Reserved (U.S.A.)
13=IBM Code Page 850
Initial Value at Power-up: last permanent value saved.
s1=source 1(character position to be remapped)
Accepted Values: decimals 0 to 255
d1=destination 1(new position for the character referred to in s1)
Accepted Values: decimals 0 to 255
s2=source 2(character position to be remapped)
Accepted Values: decimals 0 to 255
d2=destination 2(new position for the character referred to in s2)
Accepted Values: decimals 0 to 255
… = continuation of pattern
Up to 256 source and destination pairs can be entered in this command.
Example:
This example re-maps the Euro symbol(21) to the Dollar sign value(36).In this way, when the dollar
sign character is sent to the printer, the Euro symbol will print. The Euro symbol value,15 Hex,
equals 21 decimal, and the Dollar sign value,24 Hex, equals 36 decimal.
19
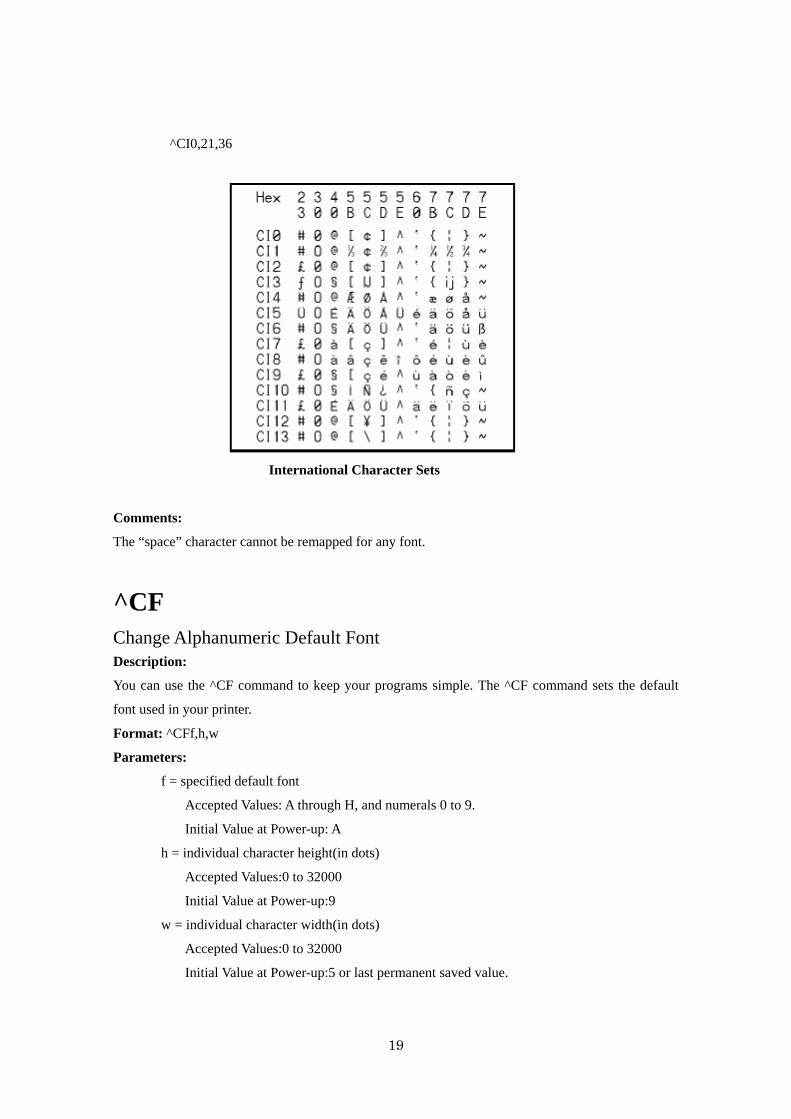
^CI0,21,36
International Character Sets
Comments:
The “space” character cannot be remapped for any font.
^CF Change Alphanumeric Default Font Description:
You can use the ^CF command to keep your programs simple. The ^CF command sets the default
font used in your printer.
Format: ^CFf,h,w
Parameters:
f = specified default font
Accepted Values: A through H, and numerals 0 to 9.
Initial Value at Power-up: A
h = individual character height(in dots)
Accepted Values:0 to 32000
Initial Value at Power-up:9
w = individual character width(in dots)
Accepted Values:0 to 32000
Initial Value at Power-up:5 or last permanent saved value.
20
Parameter f specifies the default font for every alphanumeric field. Parameter h is default height for
every alpha field, parameter w is default width value for every alpha field.
The default alphanumeric font is A. If you do not change the alphanumeric default font(^CF
command) and do not use any alphanumeric field command(^Af) or enter an invalid font value, any
data you specify will print in font A.
Defining only the height or width forces the magnification to be proportional to the parameter
defined. If neither value is defined, the ^CF values given or the default ^CF values for height and
width are used.
^A Scalable/Bitmapped Font Description:
The ^A command is used with build-in or TrueType® fonts. ^A designates the font for the current
^FD statement or field. The font specified in ^A will be used only once for that ^FD entry. If ^A is
not specified again, the default ^CF font will be used for the next ^FD entry.
Format: ^Af,o,h,w
Parameters:
f = font name
Accepted Values: letters A through Z, and numbers 1 to 9.
Default Value: A
Any font in the printer(downloaded, EPROM, stored fonts, font A through Z and 1 to
9)can also be selected with the ^CW command. If the value is incorrect or unspecified,
it will revert to the default or the current ^CF value.
o = font orientation
Accepted Values:
N = normal
R = rotated90 degrees(clockwise)
I = inverted180 degrees
B = read from bottom up,270 degrees
Default Value: the last accepted ^FW value or the ^FW default.
h = character height(in dots)
Scalable:
Accepted Values:10 to 1500
Default Value: last accepted value for ^CF.
Bitmapped:

21
Accepted Values: Multiples of height from 1 to 24 times the standard height,in
increments of 1.
Default Value: The standard matrix height for a specified font.
w = width(in dots)
Scalable:
Accepted Values:10 to 1500
Default Value: last accepted value for ^CF.
Bitmapped:
Accepted Values: Multiples of width from 1 to 24 times the standard width, in
increments of 1.
Default Value: The standard matrix width for a specified font.
Comments:
Fonts are built using a matrix that defines standard height-to-width ratios. If you specify only the
height or width value, the standard matrix for that font will automatically determine the other value.
If the value is blank or a 0(zero) is entered, the height or width will be determined by the standard
font matrix.
^A@ Use Font Name to Call Font Description:
The ^A@ command uses the complete name of a font, rather than the character designation used in
^A. Once ^A@ is defined, it will represent that font until a new font name is specified by ^A@.
Format: ^[email protected],w,n
Parameters:
o = font orientation
Accepted Values:
N = normal
R = rotated90 degrees(clockwise)
I = inverted180 degrees
B = read from bottom up,270 degrees
Default Value: Last ^FW value or N if an orientation is not specified.
h = character height(in dots)
Default Value: Magnification specified by w(character width)or the last accepted ^CF
22
value. The base height is used if none is specified.
Scalable:
The value is the height in dots of the entire character block. Magnification
factors are unnecessary, since characters are scaled.
Bitmapped:
The value is rounded to nearest integer multiple of the font’s base height, then
divided by the font’s base height to give a magnification nearest limit.
w = character width(in dots)
Default Value: Magnification specified by h(height)or the last accepted ^CF value. The
base width is used if none is specified.
Scalable:
The value is the width in dots of the entire character block. Magnification
factors are unnecessary, since characters are scaled.
Bitmapped:
The value is rounded to nearest integer multiple of the font’s base width, then
divided by the font’s base width to give a magnification nearest limit.
n = font name(.FNT extension)
Accepted Values: any valid font(with the extension .FNT)
Default Value: If no letter designates the device location, the default device is RAM or
R:. The font named will carry over on all subsequent ^A@ commands without a font
name.
Example:
^XA^A@N,25,25,B:Cyrillic.FNT^FO100,20^FS
^FDThis is a test^FS
^A@N,50,50^FO200,40^FS
^FDThis string uses the B:Cyrillic.FNT^FS^XZ
The first line will search the non-volatile memory of the printer(e.g. B:) looking for the
“Cyrillic.FNT” font name. When the font is found, the command will set the character size, the field
origin, and print the field data “This is a test” on a label(line2).
In the third command line, the character size is increased and a new field origin is set. Line 4 prints
the field data “This string uses the B: Cyrillic.FNT” in the same font.
23
~DB Download Bitmap Font Description:
The ~DB command sets the printer to receive a download bitmap font, defines native cell size,
baseline, space size, and copyright.
This command consists of two portions, a ZPL® command which defines the font and a structured
data segment which defines each character of the font.
Format: ~DBd:o,x,a,h,w,base,space,”char,©,data
Parameters:
d = destination drive to store font
o = name of font
Accepted Values: 1 to 8 alphanumeric characters
Default Value: UNKNOWN.FNT
x = extension
Fixed:. FNT
a = orientation of native font
Fixed: Normal
h = maximum height of cell(in dots)
w = maximum width of cell(in dots)
base = dots from top of cell to character baseline
space = width of space or non-existent characters
#char = number of characters in font
Maximum characters allowed is 256,This must match the number of characters being
downloaded.
©=copyright holder
Maximum length of text string is 63 characters.
¥data = structured ASCII data that defines each character in the font
The # symbol signifies character code parameters which are separated with periods. The
character code is from 1 to 4 characters to allow for large international character sets
to be downloaded to the printer.
The data structure is:
#xxxx,h,w,x,y,i,data
#xxxx = character code
24
h = bitmap height(in dot rows)
w = bitmap width(in dot rows)
x = x-offset(in dots)
y = y-offset(in dots)
i = typesetting motion displacement(width including inter-character gap
of a particular character in the font)
data = hexadecimal bitmap description
~DU Download Unbounded TrueType Font
Description:
Some international fonts have more than 256 printable characters. These fonts are supported as
“LARGE TrueType Fonts” such as Asian fonts, and are downloaded to the printer with the ~DU
command.
A ZPL® downloadable format must be converted from original True Type Fonts file.
Format: ~DUf,s,data
Parameters:
f = font name
Accepted Values: A destination indicator(any non-volatile RAM device; default device
is R:) followed by the TrueType name, up to 8 characters.
Default Value: If no name is entered, UNKNOWN is used.
s = font size
Accepted Values: The number of memory bytes required to hold the ZPL®
downloadable format of the font.
Default Value: If no data is entered, the command is ignored.
data = data string
Accepted Values: a string of ASCII hexadecimal values(2 hex digits/byte).The total
number of 2-digit values must match s.
Default Value: If no data is entered, the command is ignored.
Example:
~DUR:KANJI,896753,60CA017B0CE7…
25
^CW Font Identifier Description:
All built-in fonts have a one-character identifier. The ^CW command assigns a single alphanumeric
character(A through Z and 0 to 9)to a font stored in DRAM, memory card, EPROM or Flash.
IF the assigned character is the same as that of a built-in font, the downloaded font is used in place
of the built-in font. The new font will be printed on the label wherever the format calls for the
built-in font. If used in place of a built-in font, the change is only in effect until power is turned off.
If the assigned character is different, the downloaded font is used as an additional font. The
assignment will remain in effect until a new command is issued or the printer turned off.
Format:^CWa,d:o,x
Parameters:
a = letter of existing font to be substituted, or new font to be added
Required is a one-character entry.
d = destination of device to store font in(optional)
Accepted Values: E:, B:, R:, Z:
Default :R:
o = name of the downloaded font to be substituted for the built-in, or as an additional font(1
to 8 alphanumeric characters)
Accepted Values: any name up to 8 characters
Default: If no name is entered, UNKNOWN is used.
x = 3-character extension
Fixed: .FNT
Example:
To use MYFONT.FNT stored in DRAM whenever a format calls for Font A:
^XA^CWA,R:MYFONT.FNT^XZ
To use MYFONT.FNT stored in DRAM as additional Font Q:
^XA^XWQ,R:MYFONT.FNT^XZ
To use NEWFONT.FNT stored in DRAM whenever a format calls for font F:
^XA^CWF,R:NEWFONT.FNT^XZ
26
Bar Codes
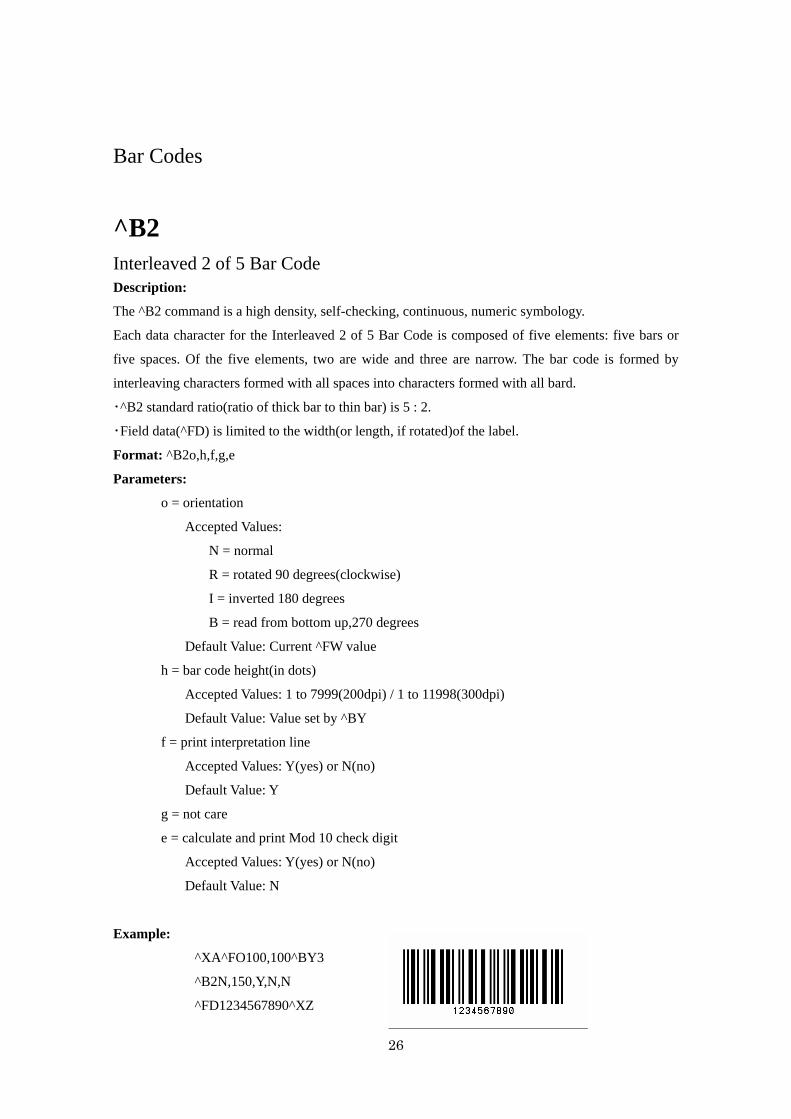
^B2 Interleaved 2 of 5 Bar Code Description:
The ^B2 command is a high density, self-checking, continuous, numeric symbology.
Each data character for the Interleaved 2 of 5 Bar Code is composed of five elements: five bars or
five spaces. Of the five elements, two are wide and three are narrow. The bar code is formed by
interleaving characters formed with all spaces into characters formed with all bard.
・^B2 standard ratio(ratio of thick bar to thin bar) is 5 : 2.
・Field data(^FD) is limited to the width(or length, if rotated)of the label.
Format: ^B2o,h,f,g,e
Parameters:
o = orientation
Accepted Values:
N = normal
R = rotated 90 degrees(clockwise)
I = inverted 180 degrees
B = read from bottom up,270 degrees
Default Value: Current ^FW value
h = bar code height(in dots)
Accepted Values: 1 to 7999(200dpi) / 1 to 11998(300dpi)
Default Value: Value set by ^BY
f = print interpretation line
Accepted Values: Y(yes) or N(no)
Default Value: Y
g = not care
e = calculate and print Mod 10 check digit
Accepted Values: Y(yes) or N(no)
Default Value: N
Example:
^XA^FO100,100^BY3
^B2N,150,Y,N,N
^FD1234567890^XZ
27
Comments:
The total number of digits in an Interleaved Bar Code must be even.
The printer automatically adds a leading 0(zero)if an odd number of digits is received.
The Interleaved 2 of 5 bar code uses the Mod 10 check-digit scheme for error checking.
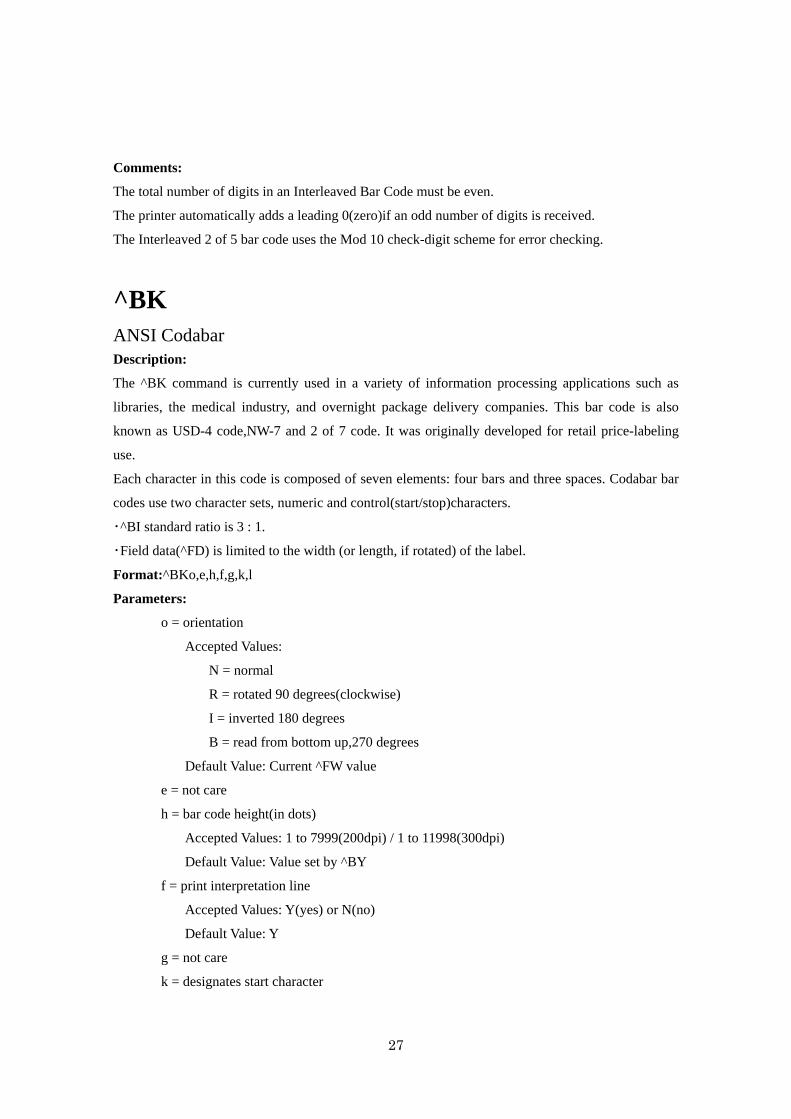
^BK ANSI Codabar Description:
The ^BK command is currently used in a variety of information processing applications such as
libraries, the medical industry, and overnight package delivery companies. This bar code is also
known as USD-4 code,NW-7 and 2 of 7 code. It was originally developed for retail price-labeling
use.
Each character in this code is composed of seven elements: four bars and three spaces. Codabar bar
codes use two character sets, numeric and control(start/stop)characters.
・^BI standard ratio is 3 : 1.
・Field data(^FD) is limited to the width (or length, if rotated) of the label.
Format:^BKo,e,h,f,g,k,l
Parameters:
o = orientation
Accepted Values:
N = normal
R = rotated 90 degrees(clockwise)
I = inverted 180 degrees
B = read from bottom up,270 degrees
Default Value: Current ^FW value
e = not care
h = bar code height(in dots)
Accepted Values: 1 to 7999(200dpi) / 1 to 11998(300dpi)
Default Value: Value set by ^BY
f = print interpretation line
Accepted Values: Y(yes) or N(no)
Default Value: Y
g = not care
k = designates start character
28
Accepted Values: b, c, d
Default Value: a
l = designates stop character
Accepted Values: b, c, d,
Default Value: a
Example:
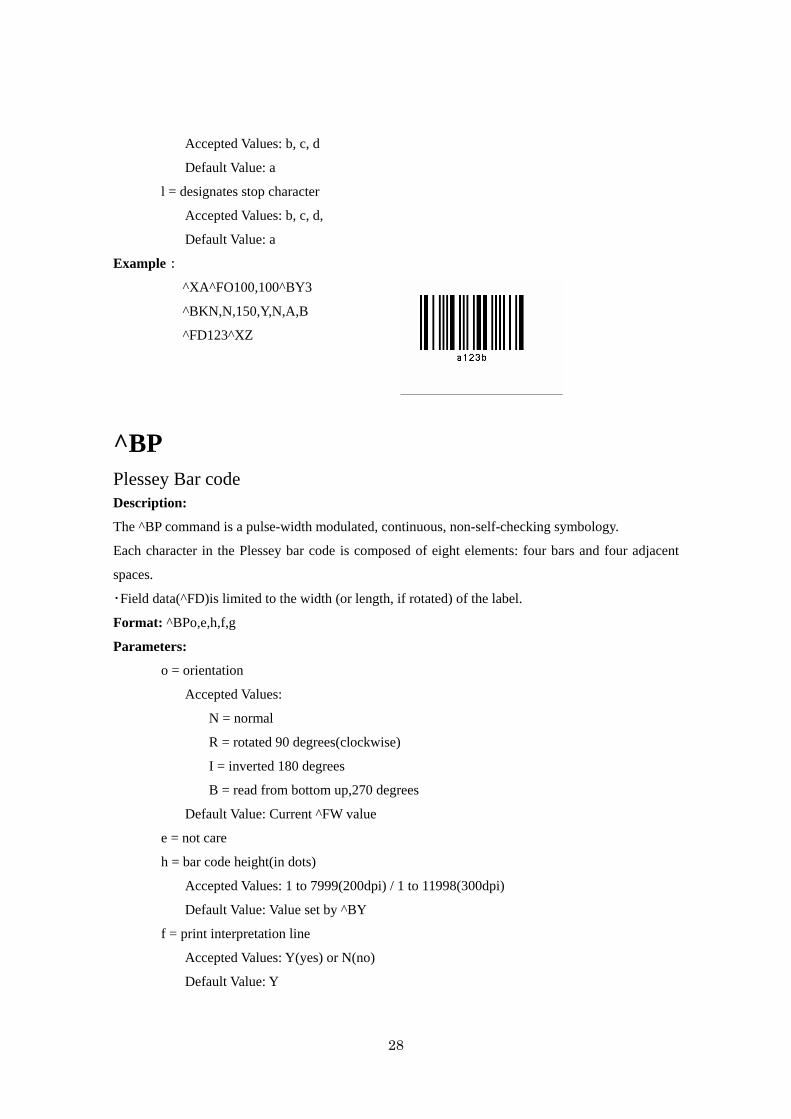
^BP Plessey Bar code Description:
The ^BP command is a pulse-width modulated, continuous, non-self-checking symbology.
Each character in the Plessey bar code is composed of eight elements: four bars and four adjacent
spaces.
・Field data(^FD)is limited to the width (or length, if rotated) of the label.
Format: ^BPo,e,h,f,g
Parameters:
o = orientation
Accepted Values:
N = normal
R = rotated 90 degrees(clockwise)
I = inverted 180 degrees
B = read from bottom up,270 degrees
Default Value: Current ^FW value
e = not care
h = bar code height(in dots)
Accepted Values: 1 to 7999(200dpi) / 1 to 11998(300dpi)
Default Value: Value set by ^BY
f = print interpretation line
Accepted Values: Y(yes) or N(no)
Default Value: Y
^XA^FO100,100^BY3
^BKN,N,150,Y,N,A,B
^FD123^XZ
29
g = not care
Example:
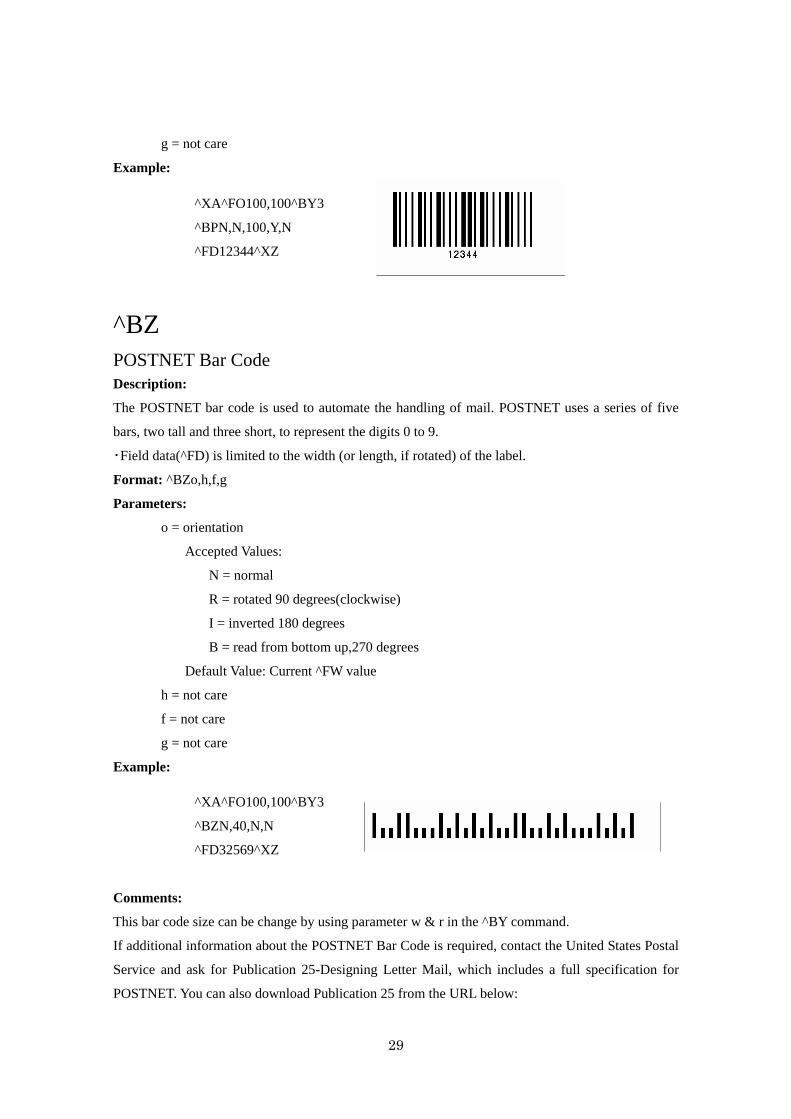
^BZ POSTNET Bar Code Description:
The POSTNET bar code is used to automate the handling of mail. POSTNET uses a series of five
bars, two tall and three short, to represent the digits 0 to 9.
・Field data(^FD) is limited to the width (or length, if rotated) of the label.
Format: ^BZo,h,f,g
Parameters:
o = orientation
Accepted Values:
N = normal
R = rotated 90 degrees(clockwise)
I = inverted 180 degrees
B = read from bottom up,270 degrees
Default Value: Current ^FW value
h = not care
f = not care
g = not care
Example:
Comments:
This bar code size can be change by using parameter w & r in the ^BY command.
If additional information about the POSTNET Bar Code is required, contact the United States Postal
Service and ask for Publication 25-Designing Letter Mail, which includes a full specification for
POSTNET. You can also download Publication 25 from the URL below:
^XA^FO100,100^BY3
^BPN,N,100,Y,N
^FD12344^XZ
^XA^FO100,100^BY3
^BZN,40,N,N
^FD32569^XZ
30
http://pe.usps.gov/cpim/ftp/pubs/pub25/pub25.pdf
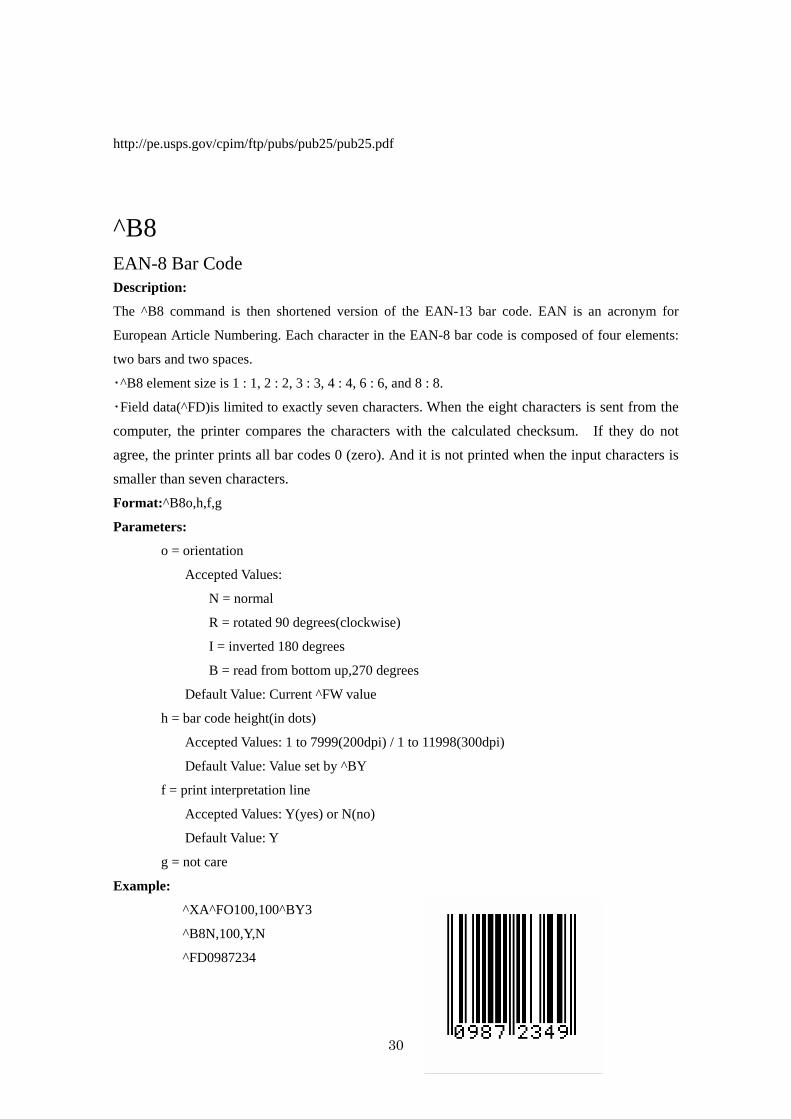
^B8 EAN-8 Bar Code Description:
The ^B8 command is then shortened version of the EAN-13 bar code. EAN is an acronym for
European Article Numbering. Each character in the EAN-8 bar code is composed of four elements:
two bars and two spaces.
・^B8 element size is 1 : 1, 2 : 2, 3 : 3, 4 : 4, 6 : 6, and 8 : 8.
・Field data(^FD)is limited to exactly seven characters. When the eight characters is sent from the
computer, the printer compares the characters with the calculated checksum. If they do not agree, the printer prints all bar codes 0 (zero). And it is not printed when the input characters is smaller than seven characters. Format:^B8o,h,f,g
Parameters:
o = orientation
Accepted Values:
N = normal
R = rotated 90 degrees(clockwise)
I = inverted 180 degrees
B = read from bottom up,270 degrees
Default Value: Current ^FW value
h = bar code height(in dots)
Accepted Values: 1 to 7999(200dpi) / 1 to 11998(300dpi)
Default Value: Value set by ^BY
f = print interpretation line
Accepted Values: Y(yes) or N(no)
Default Value: Y
g = not care
Example:
^XA^FO100,100^BY3
^B8N,100,Y,N
^FD0987234
31
^B9 UPC-E Bar Code Description:
The ^B9 command is a variation of the UPC symbology used for number system 0. It is a shortened
version of the UPC-A bar code in which zeros are suppressed, resulting in codes that require less
printing space.
Each character in a UPC-E bar code is composed of four elements: two bars and two spaces. The
^BY command must be used to specify the width of the narrow bar.
・^B9 element size is 1 : 1, 2 : 2, 3 : 3, 4 : 4, 6 : 6, and 8 : 8. ・Field data(^FD)is limited to exactly 6 characters.
・The first digit numbering system character is "0" fixed so it is not transmitted. ・When the six characters is sent from computer, the printer automatically calculates the checksum
at the end of digit ・When the seven characters is sent from the computer, the printer compares the characters with
the calculated checksum. If they do not agree, the printer prints all bar codes 0 (zero). And it is not printed when the input characters is smaller than 6 characters. ・If supplementary code is to be added, refer to item of bar code ^BS.
Format:^B9o,h,f,g,e
Parameters:
o = orientation
Accepted Values:
N = normal
R = rotated 90 degrees(clockwise)
I = inverted 180 degrees
B = read from bottom up,270 degrees
Default Value: Current ^FW value
h = bar code height(in dots)
Accepted Values: 1 to 7999(200dpi) / 1 to 11998(300dpi)
Default Value: Value set by ^BY
f = print interpretation line
Accepted Values: Y(yes) N(no)
Default Value: Y
g = not care
32
e = not care
Example:
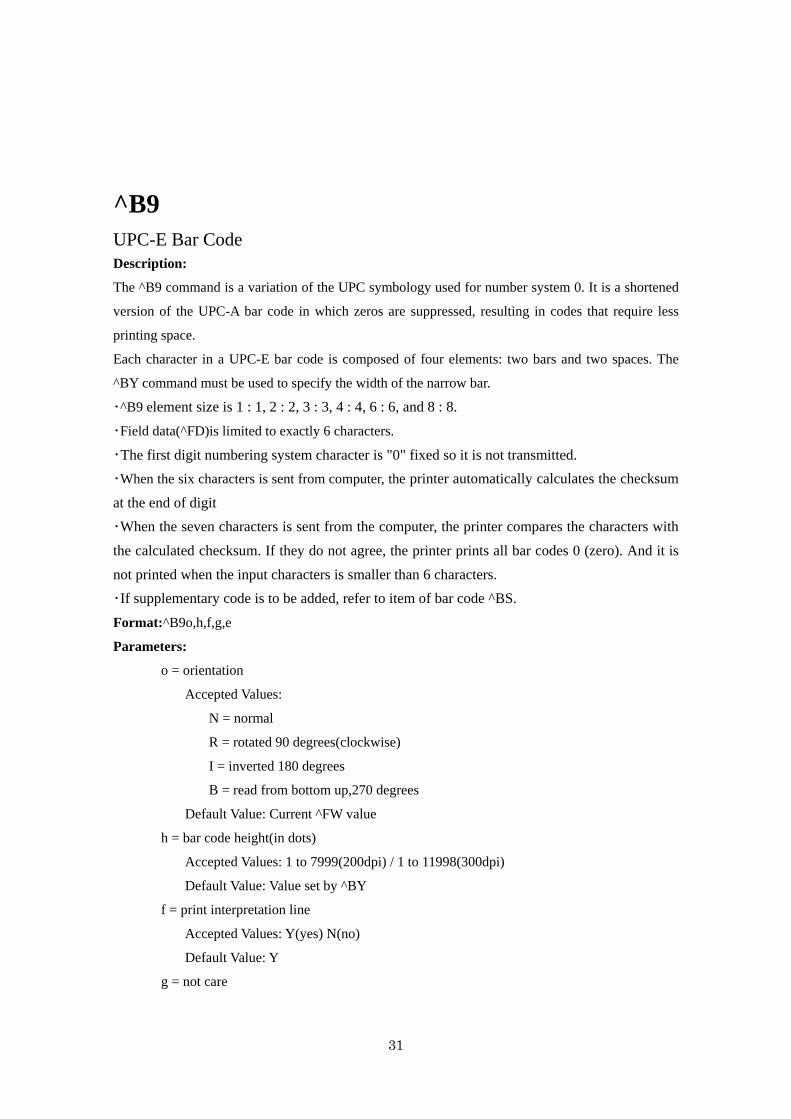
^BE EAN-13 Bar Code Description:
The ^BE command is similar to the UPC-A bar code. It is widely used throughout Europe and Japan
in the retail marketplace.
The EAN-13 bar code has 12 data characters, one more data character than the UPC-A code. An
EAN-13 symbol contains the same number of bars as the UPC-A, but encodes a 13th digit into a
parity pattern of the left-hand six digits. This 13th digit, in combination with the 12th digit,
represents a country code.
・^BE Element size is 1 : 1, 2 : 2, 3 : 3, 4 : 4, 6 : 6, and 8 : 8. ・Field data(^FD) is limited to exactly 12 characters.
・When the 12 characters is sent from computer, the printer automatically calculates the checksum
at the end of digit ・When the 13 characters is sent from the computer, the printer compares the characters with the
calculated checksum. If they do not agree, the printer prints all bar codes 0 (zero). And it is not printed when the input characters is smaller than 12 characters.
Format: ^BEo,h,f,g
Parameters:
o = orientation
Accepted Values:
N = normal
R = rotated 90 degrees(clockwise)
I = inverted 180 degrees
^XA^FO150,100^BY3
^BSN,100,Y,N,Y
^FD098723^XZ
33
B = read from bottom up,270 degrees
Default Value: Current ^FW value
h = bar code height(in dots)
Accepted Values: 1 to 7999(200dpi) / 1 to 11998(300dpi)
Default Value: Value set by ^BY
f = print interpretation line
Accepted Values: Y(yes) or N(no)
Default Value: Y
g = not care
e = not care
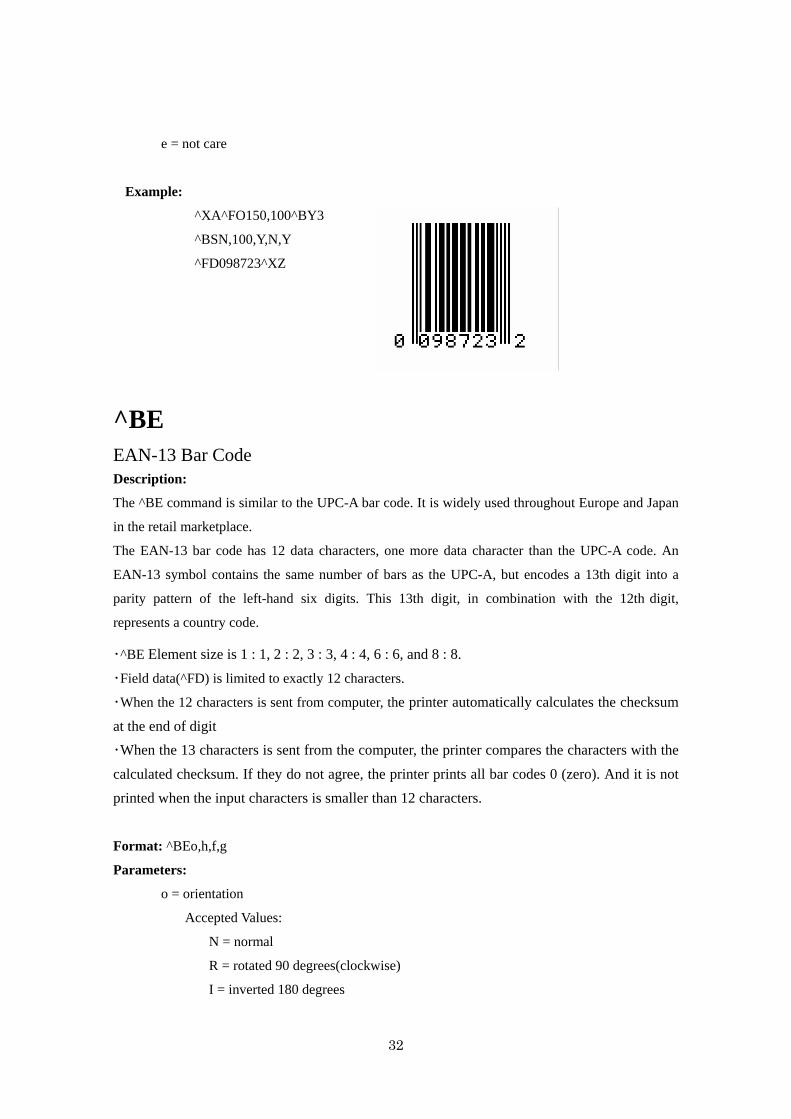
Example:
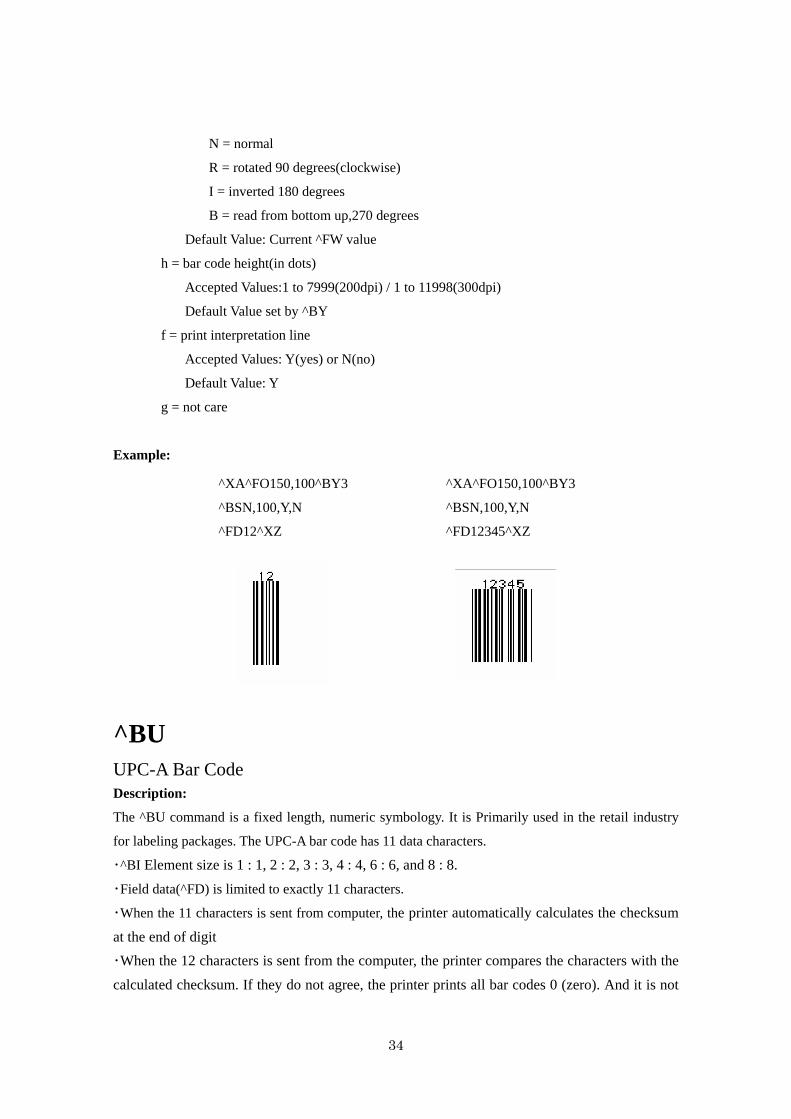
^BS UPC/EAN Extensions Description:
The ^BS(UPC/EAN extensions)command is the 2-and 5-digit add-on used primarily by publishers to
create bar codes for ISBN’s(International Standard Book Numbers).These extensions are handled as
separate bar codes.
The ^BS command is designed to be used with ^BU(UPC-A Bar Code)and ^B9(UPC-E Bar Code)
・Field data(^FD) is limited to exactly 2 or 5 characters.
・When the 3 or 6 characters is sent from the computer, the printer compares the characters with
the calculated checksum. If they do not agree, the printer prints all bar codes 0 (zero). And it is not printed when the input characters is smaller than 2 or 5 characters. Format:^BSo,h,f,g
Parameters:
o = orientation
Accepted Values:
^XA^FO150,100^BY3
^BEN,100,Y,N
^FD098723497823^XZ
34
N = normal
R = rotated 90 degrees(clockwise)
I = inverted 180 degrees
B = read from bottom up,270 degrees
Default Value: Current ^FW value
h = bar code height(in dots)
Accepted Values:1 to 7999(200dpi) / 1 to 11998(300dpi)
Default Value set by ^BY
f = print interpretation line
Accepted Values: Y(yes) or N(no)
Default Value: Y
g = not care
Example:
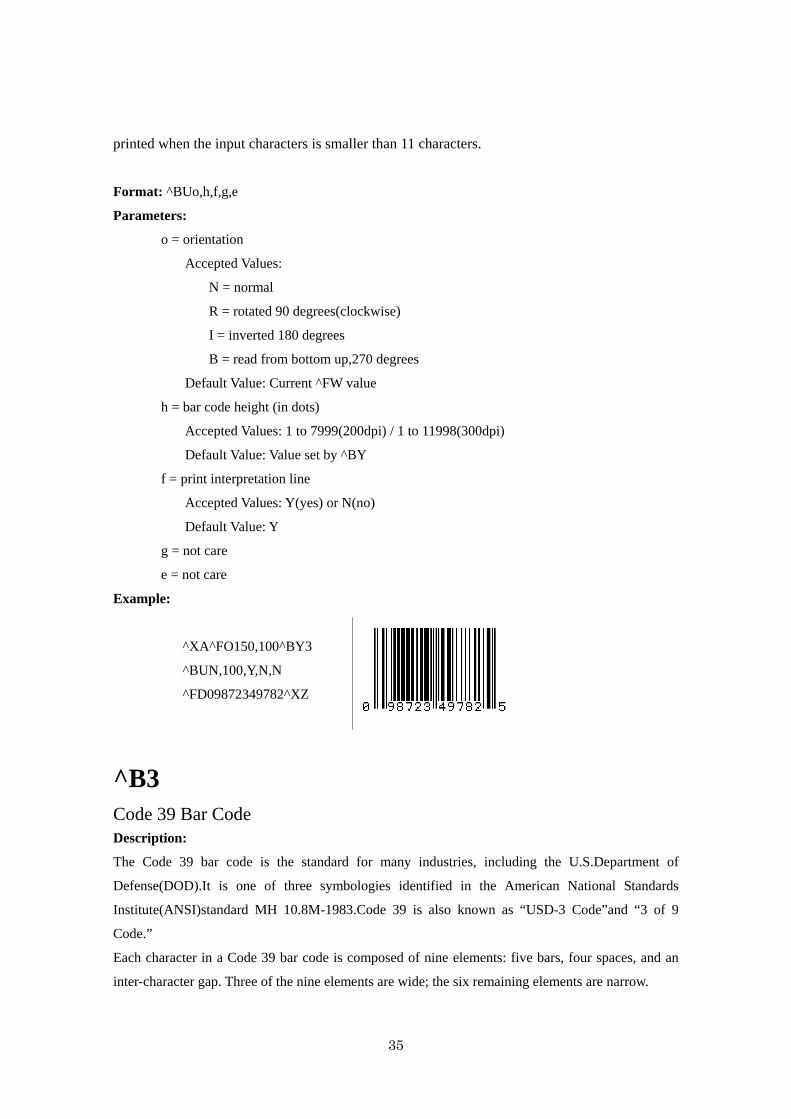
^BU UPC-A Bar Code Description:
The ^BU command is a fixed length, numeric symbology. It is Primarily used in the retail industry
for labeling packages. The UPC-A bar code has 11 data characters.
・^BI Element size is 1 : 1, 2 : 2, 3 : 3, 4 : 4, 6 : 6, and 8 : 8. ・Field data(^FD) is limited to exactly 11 characters.
・When the 11 characters is sent from computer, the printer automatically calculates the checksum
at the end of digit ・When the 12 characters is sent from the computer, the printer compares the characters with the
calculated checksum. If they do not agree, the printer prints all bar codes 0 (zero). And it is not
^XA^FO150,100^BY3
^BSN,100,Y,N
^FD12^XZ
^XA^FO150,100^BY3
^BSN,100,Y,N
^FD12345^XZ
35
printed when the input characters is smaller than 11 characters.
Format: ^BUo,h,f,g,e
Parameters:
o = orientation
Accepted Values:
N = normal
R = rotated 90 degrees(clockwise)
I = inverted 180 degrees
B = read from bottom up,270 degrees
Default Value: Current ^FW value
h = bar code height (in dots)
Accepted Values: 1 to 7999(200dpi) / 1 to 11998(300dpi)
Default Value: Value set by ^BY
f = print interpretation line
Accepted Values: Y(yes) or N(no)
Default Value: Y
g = not care
e = not care
Example:
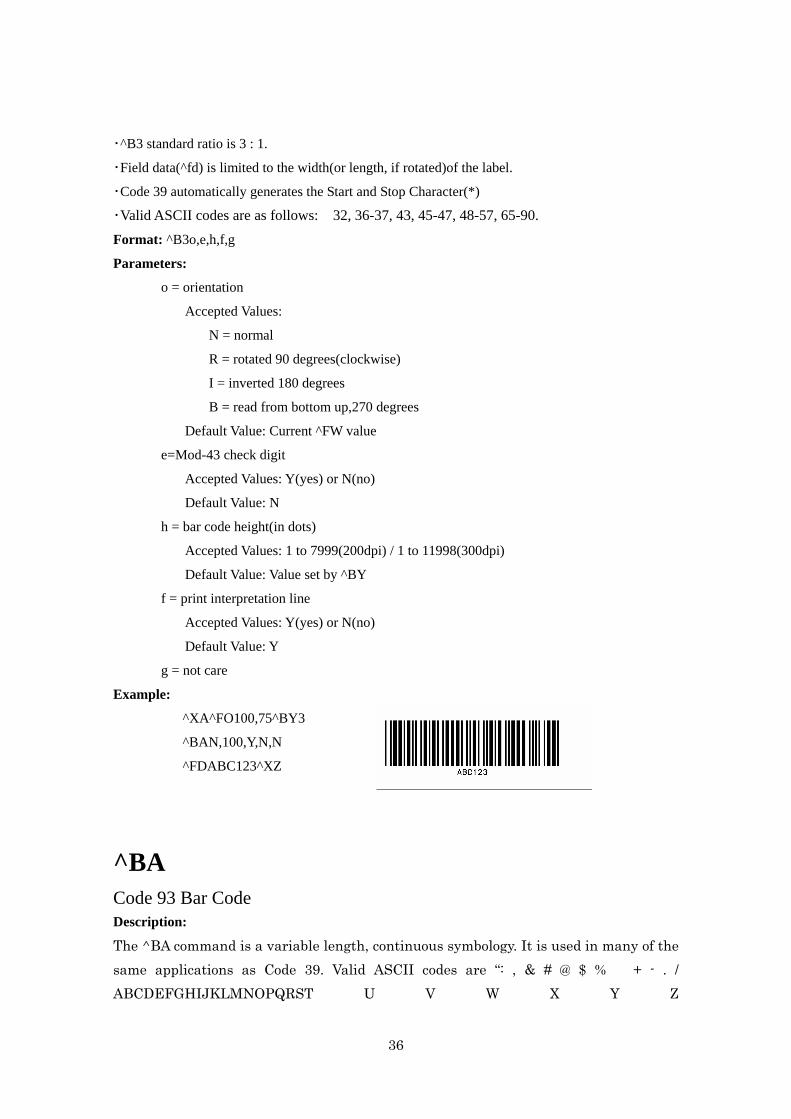
^B3 Code 39 Bar Code Description:
The Code 39 bar code is the standard for many industries, including the U.S.Department of
Defense(DOD).It is one of three symbologies identified in the American National Standards
Institute(ANSI)standard MH 10.8M-1983.Code 39 is also known as “USD-3 Code”and “3 of 9
Code.”
Each character in a Code 39 bar code is composed of nine elements: five bars, four spaces, and an
inter-character gap. Three of the nine elements are wide; the six remaining elements are narrow.
^XA^FO150,100^BY3
^BUN,100,Y,N,N
^FD09872349782^XZ
36
・^B3 standard ratio is 3 : 1.
・Field data(^fd) is limited to the width(or length, if rotated)of the label.
・Code 39 automatically generates the Start and Stop Character(*)
・Valid ASCII codes are as follows: 32, 36-37, 43, 45-47, 48-57, 65-90.
Format: ^B3o,e,h,f,g
Parameters:
o = orientation
Accepted Values:
N = normal
R = rotated 90 degrees(clockwise)
I = inverted 180 degrees
B = read from bottom up,270 degrees
Default Value: Current ^FW value
e=Mod-43 check digit
Accepted Values: Y(yes) or N(no)
Default Value: N
h = bar code height(in dots)
Accepted Values: 1 to 7999(200dpi) / 1 to 11998(300dpi)
Default Value: Value set by ^BY
f = print interpretation line
Accepted Values: Y(yes) or N(no)
Default Value: Y
g = not care
Example:
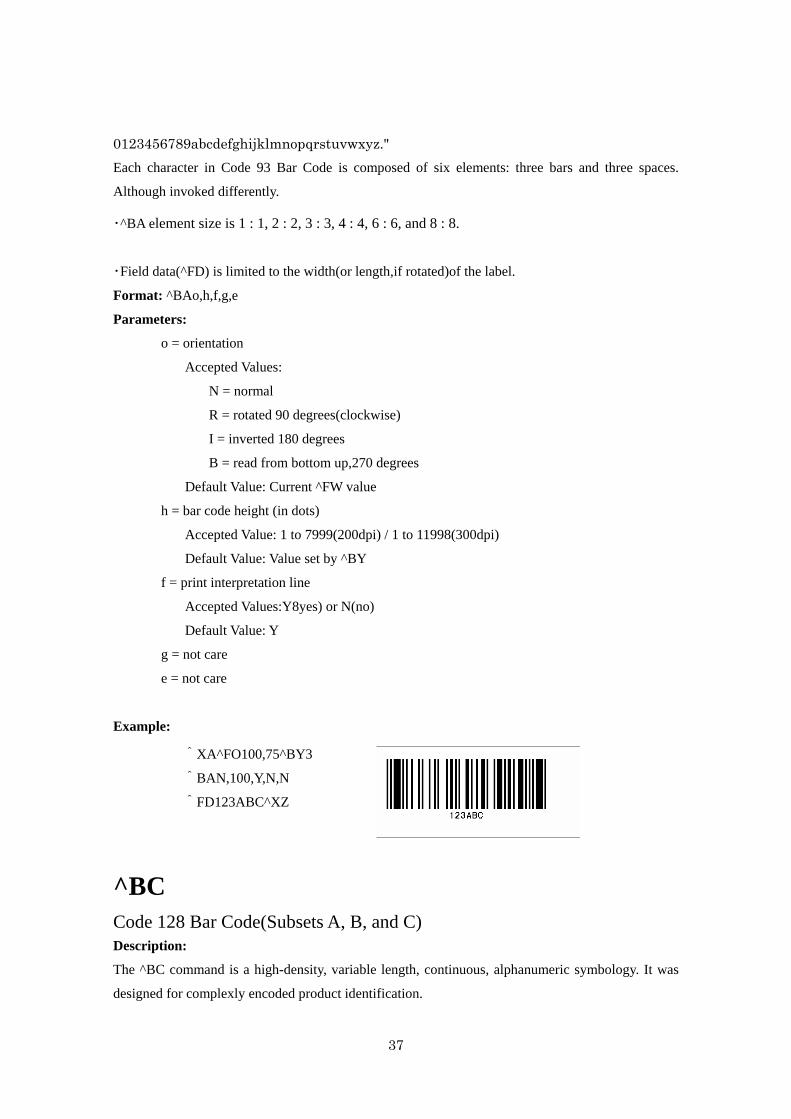
^BA Code 93 Bar Code Description:
The ^BA command is a variable length, continuous symbology. It is used in many of the same applications as Code 39. Valid ASCII codes are “: , & # @ $ % � + - . / ABCDEFGHIJKLMNOPQRST U V W X Y Z
^XA^FO100,75^BY3
^BAN,100,Y,N,N
^FDABC123^XZ
37
0123456789abcdefghijklmnopqrstuvwxyz." Each character in Code 93 Bar Code is composed of six elements: three bars and three spaces.
Although invoked differently.
・^BA element size is 1 : 1, 2 : 2, 3 : 3, 4 : 4, 6 : 6, and 8 : 8.
・Field data(^FD) is limited to the width(or length,if rotated)of the label.
Format: ^BAo,h,f,g,e
Parameters:
o = orientation
Accepted Values:
N = normal
R = rotated 90 degrees(clockwise)
I = inverted 180 degrees
B = read from bottom up,270 degrees
Default Value: Current ^FW value
h = bar code height (in dots)
Accepted Value: 1 to 7999(200dpi) / 1 to 11998(300dpi)
Default Value: Value set by ^BY
f = print interpretation line
Accepted Values:Y8yes) or N(no)
Default Value: Y
g = not care
e = not care
Example:
^BC Code 128 Bar Code(Subsets A, B, and C) Description:
The ^BC command is a high-density, variable length, continuous, alphanumeric symbology. It was
designed for complexly encoded product identification.
^XA^FO100,75^BY3
^BAN,100,Y,N,N
^FD123ABC^XZ
38
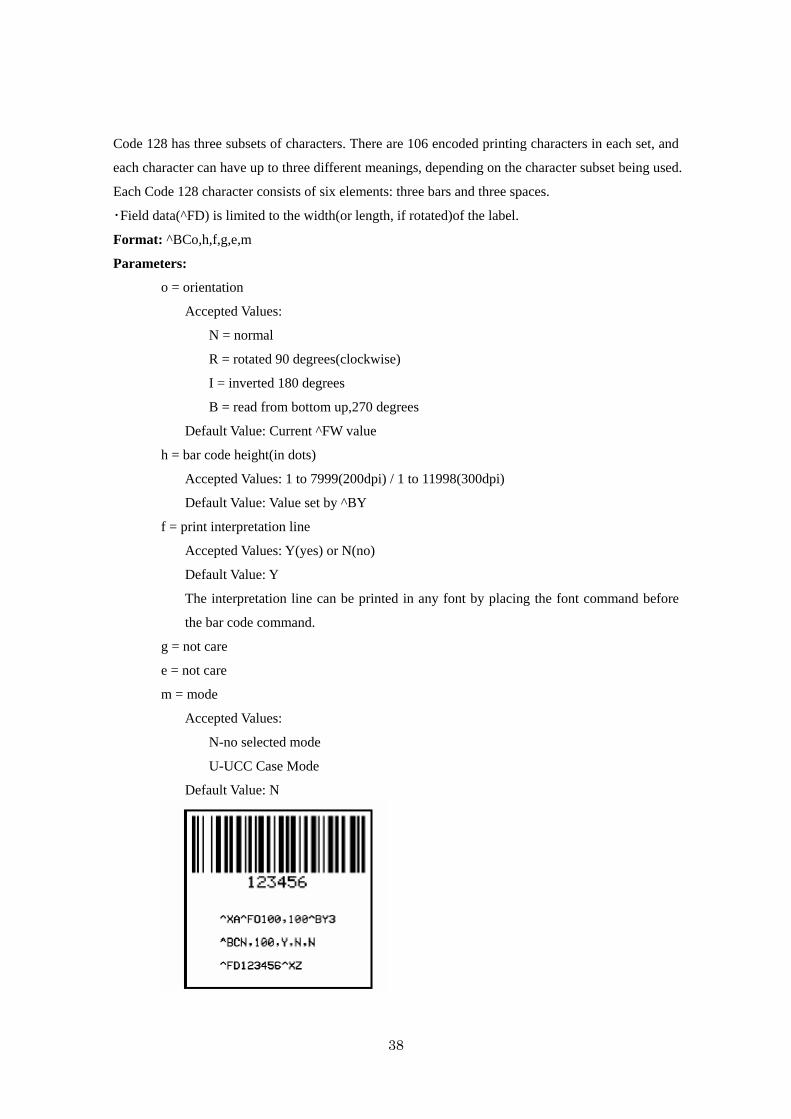
Code 128 has three subsets of characters. There are 106 encoded printing characters in each set, and
each character can have up to three different meanings, depending on the character subset being used.
Each Code 128 character consists of six elements: three bars and three spaces.
・Field data(^FD) is limited to the width(or length, if rotated)of the label.
Format: ^BCo,h,f,g,e,m
Parameters:
o = orientation
Accepted Values:
N = normal
R = rotated 90 degrees(clockwise)
I = inverted 180 degrees
B = read from bottom up,270 degrees
Default Value: Current ^FW value
h = bar code height(in dots)
Accepted Values: 1 to 7999(200dpi) / 1 to 11998(300dpi)
Default Value: Value set by ^BY
f = print interpretation line
Accepted Values: Y(yes) or N(no)
Default Value: Y
The interpretation line can be printed in any font by placing the font command before
the bar code command.
g = not care
e = not care
m = mode
Accepted Values:
N-no selected mode
U-UCC Case Mode
Default Value: N

39
Special Conditions if UCC Case Mode is Selected ・Field data(^FD) is limited to exactly 19 characters.
・It is not printed when the input characters is not 19 characters.
Code 128 Subsets The three Code 128 character subsets are referred to as Subset A, Subset B, and Subset C. A
subset may be selected in one of two ways.
1. A special Invocation Code can be included in the field data (^FD) string associated
with that bar code.
2. Place the desired Start Code at the beginning of the field data. If no Start Code is
entered, Subset B will be used.
To change subsets within a bar code, place the appropriate Invocation Code at the
40
appropriate points within the field data string. The new subset will stay in effect until
changed with appropriate Invocation Code. For example, in Subset C, “ >7 “ in the field
data changes the Subset to A.
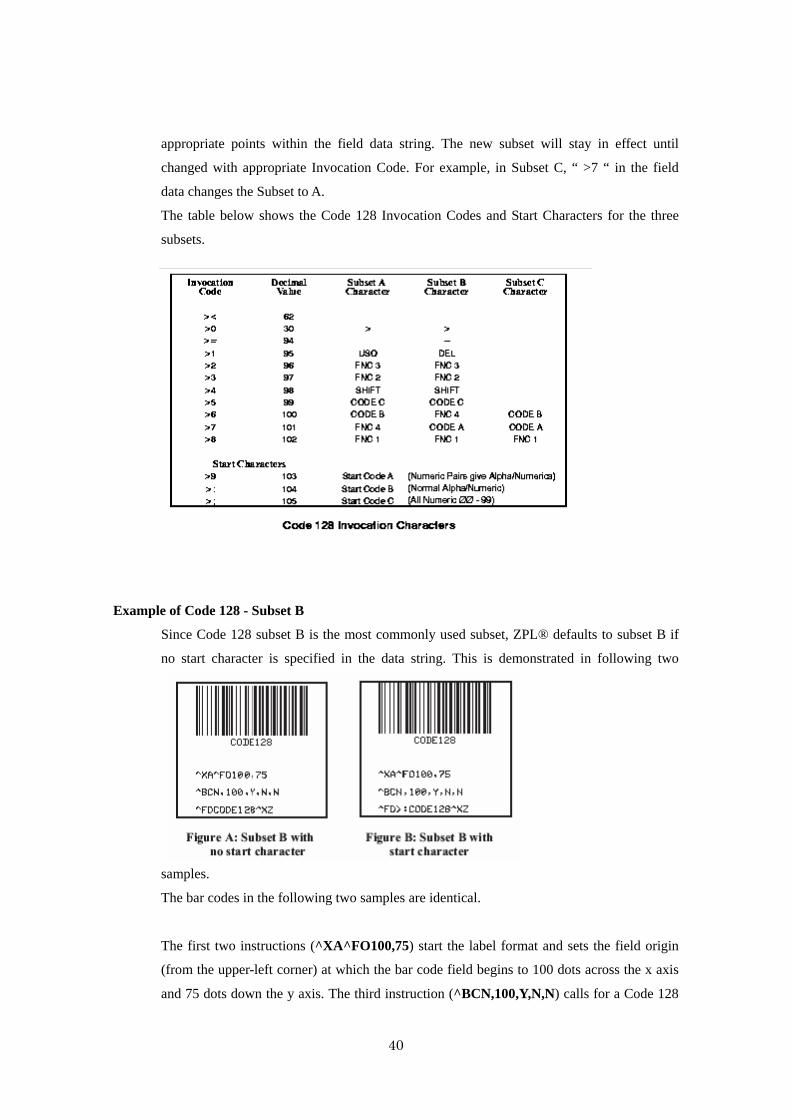
The table below shows the Code 128 Invocation Codes and Start Characters for the three
subsets.
A N Example of Code 128 - Subset B
Since Code 128 subset B is the most commonly used subset, ZPL® defaults to subset B if
no start character is specified in the data string. This is demonstrated in following two
samples.
The bar codes in the following two samples are identical.
The first two instructions (^XA^FO100,75) start the label format and sets the field origin
(from the upper-left corner) at which the bar code field begins to 100 dots across the x axis
and 75 dots down the y axis. The third instruction (^BCN,100,Y,N,N) calls for a Code 128

41
style bar code to be printed with no rotation and a height of 100 dots.
Instruction four (^FDCODE128 in Fig. A) and (^FD>:CODE128 in Fig. B) specify the
content of the bar code. Command five (^XZ) indicates the end of the print field and the
end of the label format.
The interpretation line will print below the code with the UCC check digit turned off.
The ^FD command for Fig. A does not specify any subset so the B subset is used. In Fig.
B , the ^FD instruction specifically calls subset B Although ZPL® defaults to Code B, it
is very good practice to include the invocation codes in the command.
Code 128 - subset B is programmed directly as ASCII text, except for values greater than 94
decimal and a few special characters:
^ > ~ These characters must be programmed by using the invocation codes.
Example of Code 128 - Subsets A and C
Code 128 subsets A and C are programmed as pairs of digits, 00-99, in the field data string.
(Refer to the Code 128 characters chart.)
In subset A, each pair of digits results in a single character being encoded in the barcode; in
subset C, they are printed as entered. Fig E below is an example of Subset A. (The “>9" is
the Start Code for Subset A.)
Non-integers programmed as the first character of a digit pair (D2) are ignored. However,
non-integers programmed as the second character of a digit pair (2D) invalidate the
entire digit pair, and the pair is ignored. An extra, unpaired digit in the field data
string just before a code shift is also ignored.
Fig. C and Fig. D below are examples of subset C. Notice that the bar codes in the figures
are identical. In the program code for Fig. D, the “D” is ignored and the 2 is paired with the
4.
42
FR E ^B7 PDF417 Bar Code Description:
The ^B7 command is a two-dimensional, multi-row, continuous stacked symbology. PDF417 is
capable of encoding over 1,000 characters per bar code. It is ideally suited for applications where
large amounts of information are required at the time the bar code is read.
The code consists of 3 to 90 stacked rows. Each row consists of start and stop patterns and symbol
characters called “code-words.” A “code-word” consists of four bars and four spaces. A three
code-word minimum is required per row.
Format:^B7o,h,s,c,r,t
Parameters:
o= orientation
Accepted Values:
N = normal
R = rotated 90 degrees(clockwise)
I = invented 180 degrees
B = read from bottom up,270 degrees
Default Value: Current ^FW value
h = bar code height for individual rows
Accepted Values: 1 to height of label
Default Value: Value set by ^BY
This number multiplied by the module equals the height of the individual rows in dots.1
is not a recommended value.
s = security level
Accepted Values: 1 to 8(error detection and correction)
Default value: 0(error detection only)
This determines the number of error detection and correction code-words to be
generated for the symbol. The default level provides only error detection without
correction. Increasing the security level adds increasing levels of error correction and
increases the symbol size.
43
c = number of data columns to encode
Accepted Values: 1 to 30
Default Value:1:2 (row-to-column aspect ratio)
The user can specify number of code-word columns given control over the width of the
symbol.
r = number of rows to encode
Accepted Values: 3 to 90
Default value:1:2 row-to-column aspect ratio.
The user can specify the number of symbol rows giving control over the height of the
symbol.
For example, with no row or column values enterd,72 code-word would be encoded
into a symbol of 6 columns and 12 rows. Depending on code-words, the aspect ratio
will not always be exact.
t = truncate right row indicators and stop pattern
Accepted Values: Y(perform truncation)and N(no truncation).
Default Value: N
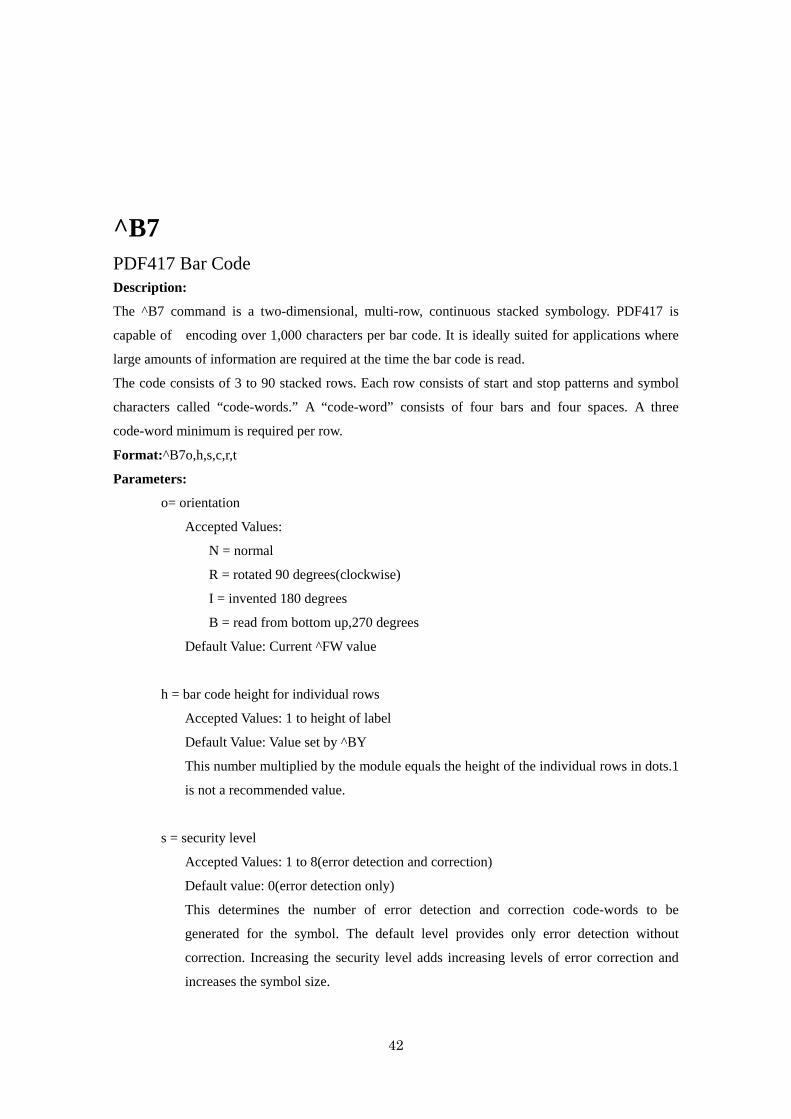
Example1:
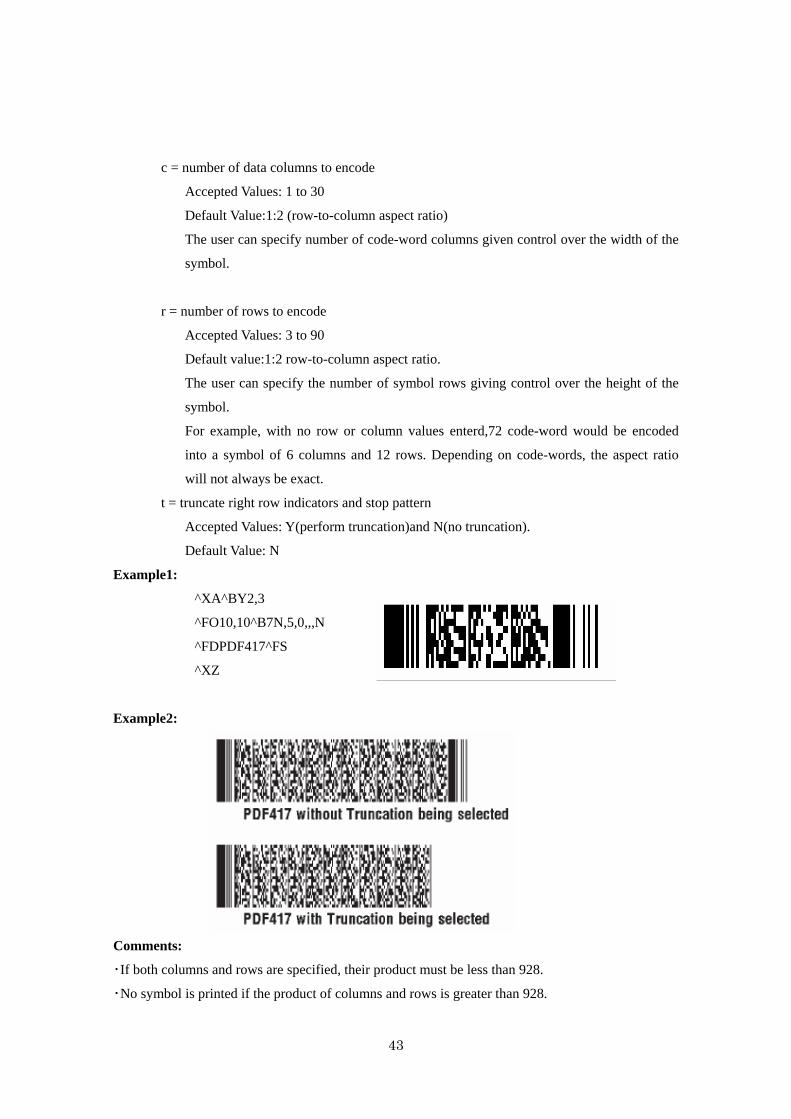
Example2:
Comments:
・If both columns and rows are specified, their product must be less than 928.
・No symbol is printed if the product of columns and rows is greater than 928.
^XA^BY2,3
^FO10,10^B7N,5,0,,,N
^FDPDF417^FS
^XZ
44
・No symbol is printed if total code-words is greater than the product of columns and rows.
・Serialization is not allowed with this bar code.
・The truncation feature can be used in situations where label damage is not likely. The right row
indicators and stop pattern will be reduced to a single module bar width. The difference between a
non-truncated and a truncated bar code is shown in Example2.
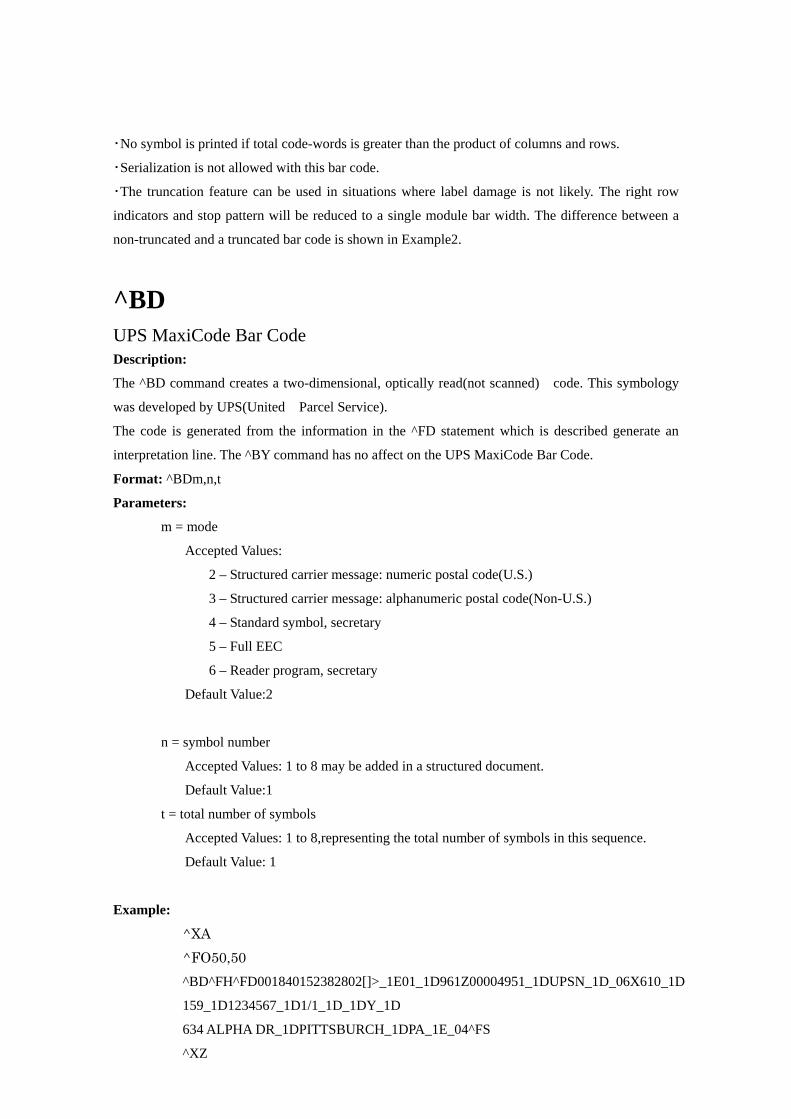
^BD UPS MaxiCode Bar Code Description:
The ^BD command creates a two-dimensional, optically read(not scanned) code. This symbology
was developed by UPS(United Parcel Service).
The code is generated from the information in the ^FD statement which is described generate an
interpretation line. The ^BY command has no affect on the UPS MaxiCode Bar Code.
Format: ^BDm,n,t
Parameters:
m = mode
Accepted Values:
2 – Structured carrier message: numeric postal code(U.S.)
3 – Structured carrier message: alphanumeric postal code(Non-U.S.)
4 – Standard symbol, secretary
5 – Full EEC
6 – Reader program, secretary
Default Value:2
n = symbol number
Accepted Values: 1 to 8 may be added in a structured document.
Default Value:1
t = total number of symbols
Accepted Values: 1 to 8,representing the total number of symbols in this sequence.
Default Value: 1
Example:
^XA ^FO50,50 ^BD^FH^FD001840152382802[]>_1E01_1D961Z00004951_1DUPSN_1D_06X610_1D
159_1D1234567_1D1/1_1D_1DY_1D
634 ALPHA DR_1DPITTSBURCH_1DPA_1E_04^FS
^XZ
45
Special Consideration for ^FD when Using ^BD
The ^FD statement is divided into two parts: a High Priority Message(hpm) and a Low
Priority Message(lpm). There are two types of High Priority Messages. One is for a
U.S.Stype Postal Code; the other is for a Non-U.S.Style Postal Code. The syntax for either
or these High Priority Messages must be exactly as shown or an error message will be
generated.
Format:^FD<hpm><lpm>
Parameters:
<hpm> = high priority message(only applicable in Modes 2 and 3)
Accepted Values: 0 through 9,excepte where noted.
U.S.Style Postal Code(Mode2)
<hpm> = aaabbbcccccddd
aaa = three-digit class of service
bbb = three-digit zip code
ccccc = five-digit zip code extension. If none exists,four zeros must be
entered(0000).
Non-U.S.Style Postal Code(Mode 3)
<hpm> = aaabbbcccccc
aaa = three-digit class of service
bbb = three-digit country zip code
cccccc = six-digit zip code(0-9 or A-Z)
<lpm> = low priority message (only applicable in Modes 2 and 3)
Gs is used to separate fields in a message(0x1D). Rs is used to separate format
types(0x1E).Eot is the end of trunsmission character.
MessageHeader []>Rs
46
Transportation Data
FormatHeader 01Gs96
Tracking Number* <tracking number>
SCAC* Gs<SCAC>
UPS Shipper Number Gs<shipper number>
Julian Day of Pickup Gs<day of pickup>
Shipment ID Number Gs<shipment ID number>
Package n/x Gs<n/x>
Package Weight Gs<weight>
Address Validation Gs<validation>
Ship to Street Address Gs<street address>
Ship to City Gs<city>
Ship to State Gs<state>
Rs Rs
End of Message Eot
(*Mandatory Data for UPS)
Comments:
・The formatting of <hpm>and <lpm> only apply when using Modes 2 and 3.Mode4,for example,
will take whatever data is defined in the ^FD command and place it in the symbol.
・UPS requires that certain data be present in a defined manner. When formatting MaxiCode data for
UPS,always use uppercase characters. When filling in the “fields” in the <lpm> for UPS, follow the
data size and types as specified in Guid to Bar Coding with UPS.
・If you do not choose a mode, the default mode will be Mode 2. If you use non-U.S.postal codes,
you will probably get an error message (invalid character or message too short). When using
non-U.S.codes,use mode 3.
・ZPL® doesn’t automatically change your mode based on the zip code format.
・When using special characters,such as Gs,Rs,or Eot,use the ^FH command to tell ZPL® to use the
hexadecimal value following the underscore character(_).
^BX Data Matrix Bar Code Description:
The ^BX command is a two-dimensional matrix symbology which is made up of square modules
arranged within a perimeter finder pattern.
47
Format:^BXo,h,s,c,r,f,g
Parameters:
o = orientation
Accepted Values:
N = normal
R = rotated 90 degrees(clockwise)
I = inverted 180 degrees
B = read from bottom up,270 degrees
Default Value: Current ^FW value
h = dimensional height of individual symbol elements
(one to width of label)
The individual elements are square – this parameter specifies both module and row
height. If this parameter is zero(or not given),the h parameter(bar height) in ^BY will be
used as the approximate symbol height.
s = quality level
Accepted Values:0,50,80,100,140,200
Default Value:0
“Quality” refers to the amount of data that is added to the symbol for error correction.
The AIM specification refers to it as the ECC value. ECC 50,ECC 80,ECC 100,and
ECC 140 use convolution encoding; ECC 200 uses Reed-Solomon encoding. For new
applications, ECC 200 is recommended. ECC 000-140 should only be used in closed
applications where a single party controls both the production and reading of the
symbols and is responsible for overall system performance.
c = columns to encode
When ECC 0-140 is specified, the number of these values must be odd(9 - 49). And,
when ECC 200 is specified, the number of these values must be even(10, 12…, 26, 32,
36, 40, 44, 48, 52, 64, 72, 80, 88, 96, 104, 120, 132, 144).
Moreover, when this value is set as 0, columns is calculated automatically. The symbol will be sized to a square if the rows and columns do not match.
r = rows to encode(9 to 49)
When ECC 0-140 is specified, the number of these values must be odd(9 - 49). And,
when ECC 200 is specified, the number of these values must be even(10, 12…, 26, 32,
48
36, 40, 44, 48, 52, 64, 72, 80, 88, 96, 104, 120, 132, 144).
Moreover, when this value is set as 0, columns is calculated automatically. The symbol will be sized to a square if the rows and columns do not match. If the rows and columns value less than 9 but not 0, or if the data is too large for the
forced size, no symbol will print.
f = format ID(0 to 6) – not used with quality set at 200
Accepted Values:
0 = Automatically choose the encodation scheme based on the characters to be
encoded.
1 = Field data is numeric + space(0..9,’ ‘)
2 = Field data is upper-case alphanumeric + space(A..Z,’ ‘)
3 = Field data is uppercase alphanumeric + space, period, comma, dash, and
slash(0..9,A..Z,”.-/”)
4 = Field data is upper-case alphanumeric + space(0..9,A..Z,’ ’)
5 = Field data is full 128 ASCII 7-bit set
6 = Field data is full 256 ISO 8-bit set
Default Values: 6
g = not care
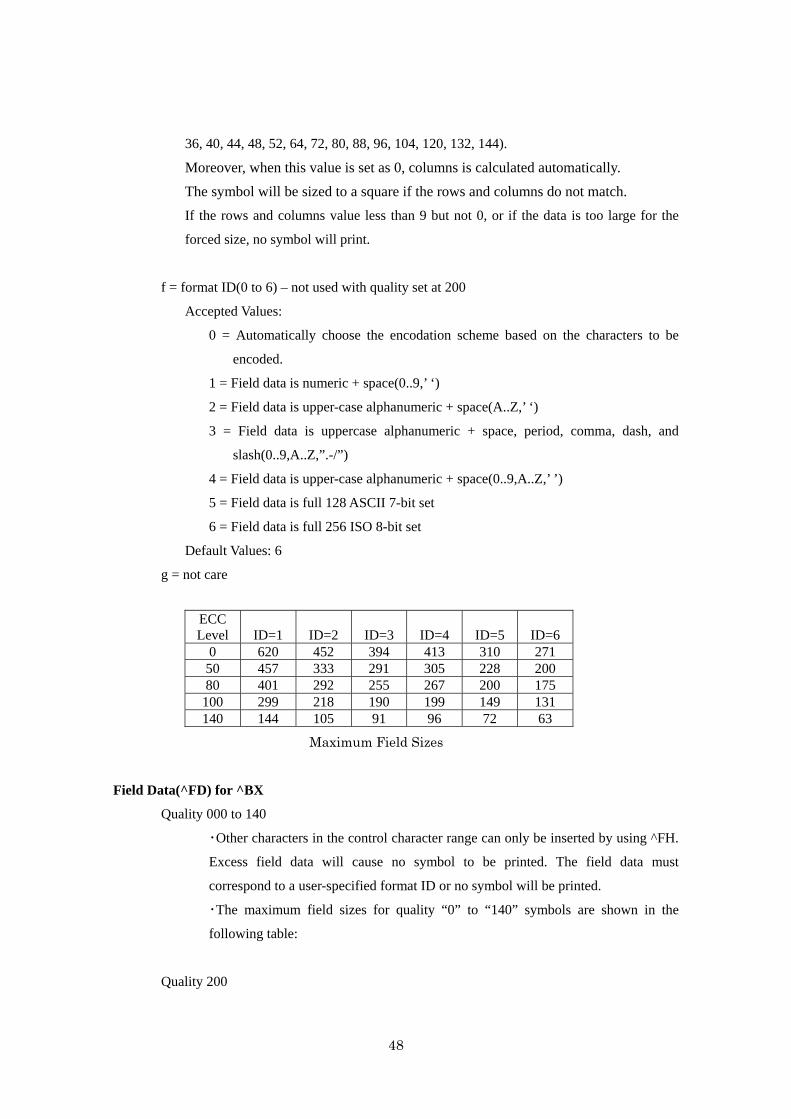
ECC Level
ID=1
ID=2
ID=3
ID=4
ID=5
ID=6
0 620 452 394 413 310 271 50 457 333 291 305 228 200 80 401 292 255 267 200 175 100 299 218 190 199 149 131 140 144 105 91 96 72 63
Field Data(^FD) for ^BX
Quality 000 to 140
・Other characters in the control character range can only be inserted by using ^FH.
Excess field data will cause no symbol to be printed. The field data must
correspond to a user-specified format ID or no symbol will be printed.
・The maximum field sizes for quality “0” to “140” symbols are shown in the
following table:
Quality 200
Maximum Field Sizes
49
・ The maximum size of numeric characters is 3116. And the maximum
alphanumeric capability is 2335. Excess field data will cause no symbol to be
printed.
^BY Bar Code Field Default Description:
The ^BY command is used to change the default values for the Narrow Element Module(Narrow Bar
or Space)Width, the Wide Bar to Narrow Bar Width Ratio and the Bar Height. It can be used as often
as necessary within a label format.
Format: ^BYw,r,h
Parameters:
w = module(narrow bar) width (in dots)
Accepted Values: 1 to 10
Initial Value at Power-up:2
r = wide bar to narrow bar width ratio
Accepted Values:1.0 to 24.0 (not to exceed w*r =24)
h = height of bars (in dots)
Accepted Values: 1 to 7999(200dpi) / 1 to 11998(300dpi)
Initial Value at Power-up: 10
Module width and height (w and h)may be changed at anytime with the ^BY command regardless of
the symbology selected.
Comments:
Once a ^BY command is entered into a label format, it stays in effect until another ^BY command is
encountered.
Graphic Instruction
^GB
50
Graphic Box Description:
The ^GB command is used to draw boxes and/or lines as part of a label format. Boxes and lines are
use to highlight important information, divide labels into distinct areas, or just dress up the way the
label looks. The same format command is used for drawing either boxes or lines.
Format: ^GBw,h,t,c,r
Parameters:
w = box width(in dots)
Accepted Values: value of t to 7999(200dpi) / t to 11998(300dpi)
Default Value: value used for thickness(t) or 1
h = box height (in dots)
Accepted Values: 1 to 7999(200dpi) / 1 to 11998(300dpi)
Default Value: value used for thickness(t) or 1
t = border thickness(in dots)
Accepted Values: 1 to 7999(200dpi) / 1 to 11998(300dpi)
Default Value: value used for thickness (t) or 1
c = not care
r = not care
For the w and h parameters, keep in mind that printers will have a default of 8,12 dots/millimeter.
This comes out to 200,300 dots per inch. To determine the values for w and h, calculate the
dimensions in millimeters and multiply by 8,12.
If the width and height are not specified, you will get a solid box with its width and height as
specified by value t.
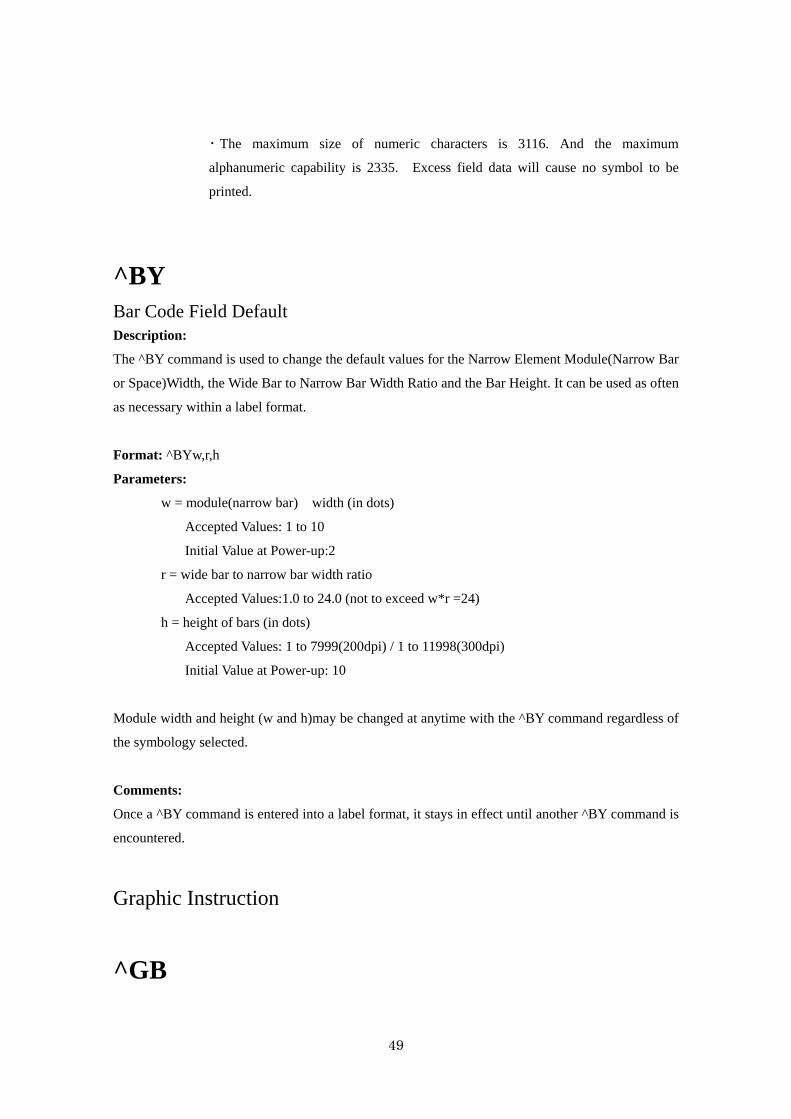
Examples:
Width:1.5 inch; Height:1 inch; Thickness:10
^XA^FO150,100
^GB305,203,10^XZ
51
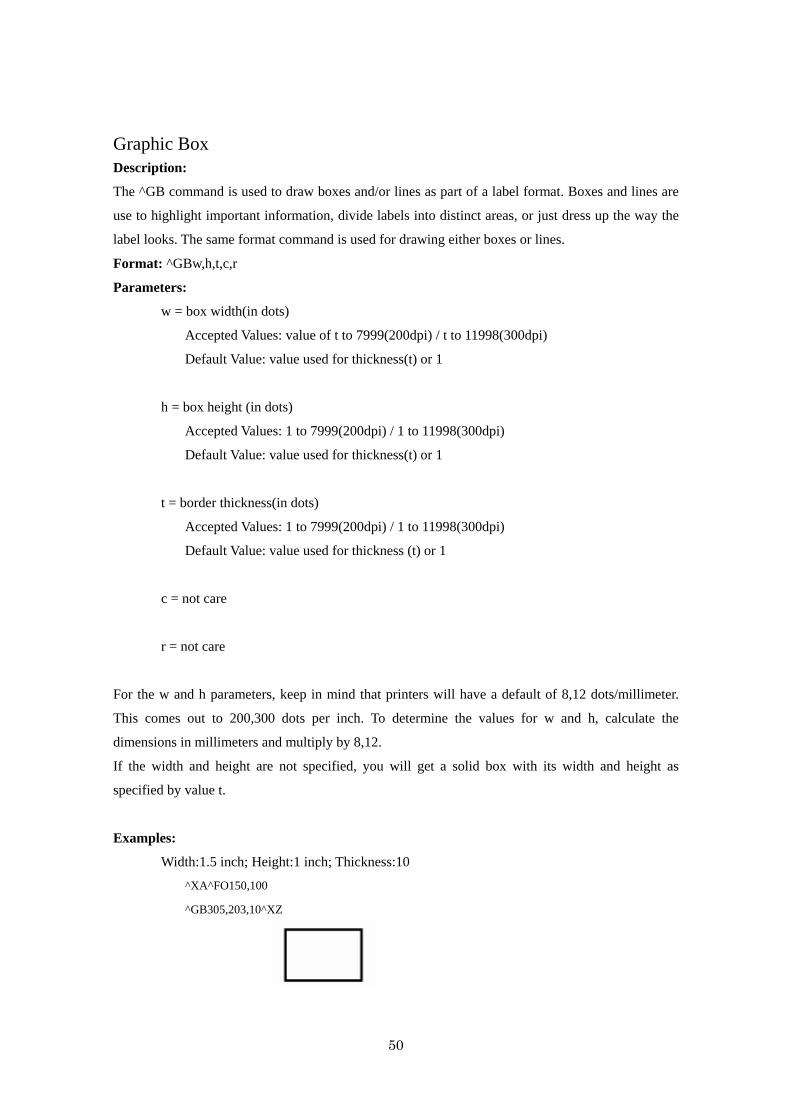
Width: 0 inch; Height: 1 inch; Thickness:20
^XA^FO150,100
^GB0,203,20^XZ
Width: 1 inch; Height: 0 inch; Thickness:30
^XA^FO150,100
^GB203,0,30^XZ
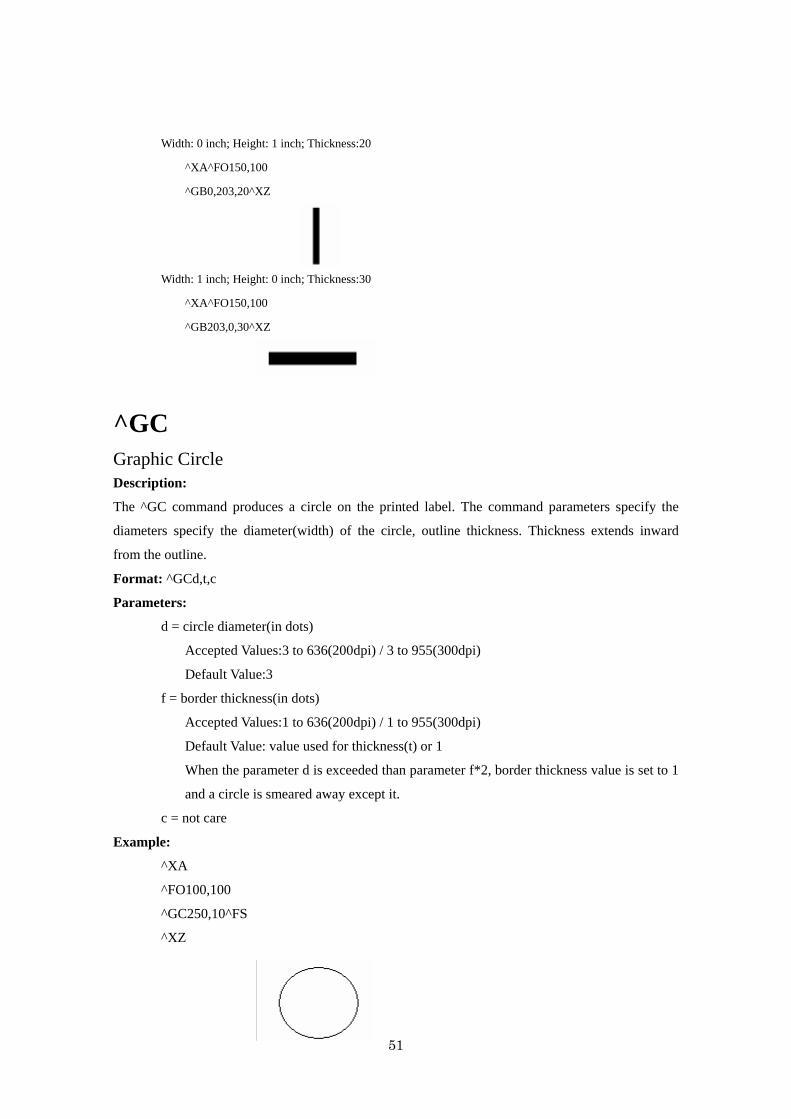
^GC Graphic Circle Description:
The ^GC command produces a circle on the printed label. The command parameters specify the
diameters specify the diameter(width) of the circle, outline thickness. Thickness extends inward
from the outline.
Format: ^GCd,t,c
Parameters:
d = circle diameter(in dots)
Accepted Values:3 to 636(200dpi) / 3 to 955(300dpi)
Default Value:3
f = border thickness(in dots)
Accepted Values:1 to 636(200dpi) / 1 to 955(300dpi)
Default Value: value used for thickness(t) or 1
When the parameter d is exceeded than parameter f*2, border thickness value is set to 1
and a circle is smeared away except it.
c = not care
Example:
^XA
^FO100,100
^GC250,10^FS
^XZ
52
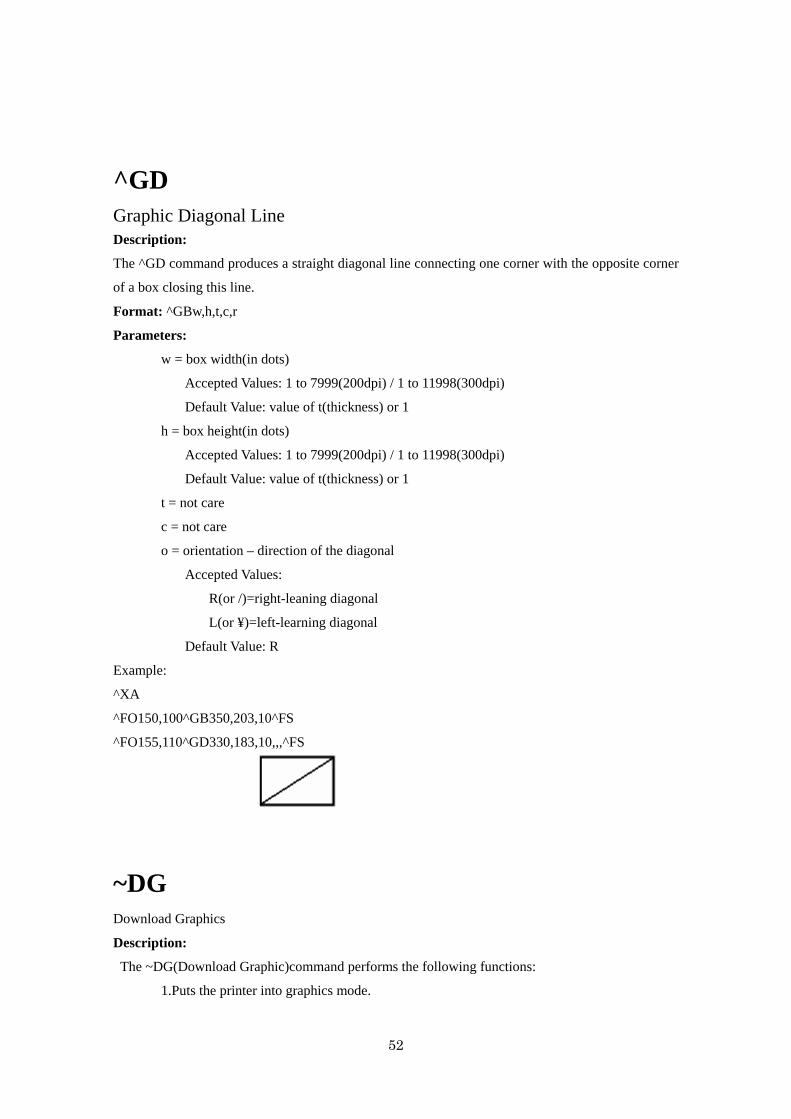
^GD Graphic Diagonal Line Description:
The ^GD command produces a straight diagonal line connecting one corner with the opposite corner
of a box closing this line.
Format: ^GBw,h,t,c,r
Parameters:
w = box width(in dots)
Accepted Values: 1 to 7999(200dpi) / 1 to 11998(300dpi)
Default Value: value of t(thickness) or 1
h = box height(in dots)
Accepted Values: 1 to 7999(200dpi) / 1 to 11998(300dpi)
Default Value: value of t(thickness) or 1
t = not care
c = not care
o = orientation – direction of the diagonal
Accepted Values:
R(or /)=right-leaning diagonal
L(or ¥)=left-learning diagonal
Default Value: R
Example:
^XA
^FO150,100^GB350,203,10^FS
^FO155,110^GD330,183,10,,,^FS
~DG Download Graphics
Description:
The ~DG(Download Graphic)command performs the following functions:
1.Puts the printer into graphics mode.
53
2.Names the graphic(this name is used to recall it into a label).
3.Defines the size of the graphic.
4.Downloads the hexadecimal string to the printer.
Format: ~DGd:o,x,t,w,data
Parameters:
d = destination device to store image
Accepted Values: a non-volatile RAM device
Default Value: R: (DRAM)
o = image name
Accepted Values: 1 to 8 alphanumeric characters
Default Value: If no name is entered, UNKNOWN is used.
x = filename extension
Fixed:. GRF
f = total number of bytes in graphic
Refer to the formula on the following page.
w = number of bytes per row
Refer to the formula on the following page.
data = ASCII hexadecimal string defining image
The data string defines the image and is an ASCII hexadecimal representation of the
image. Each character represents a horizontal nibble of four dots.
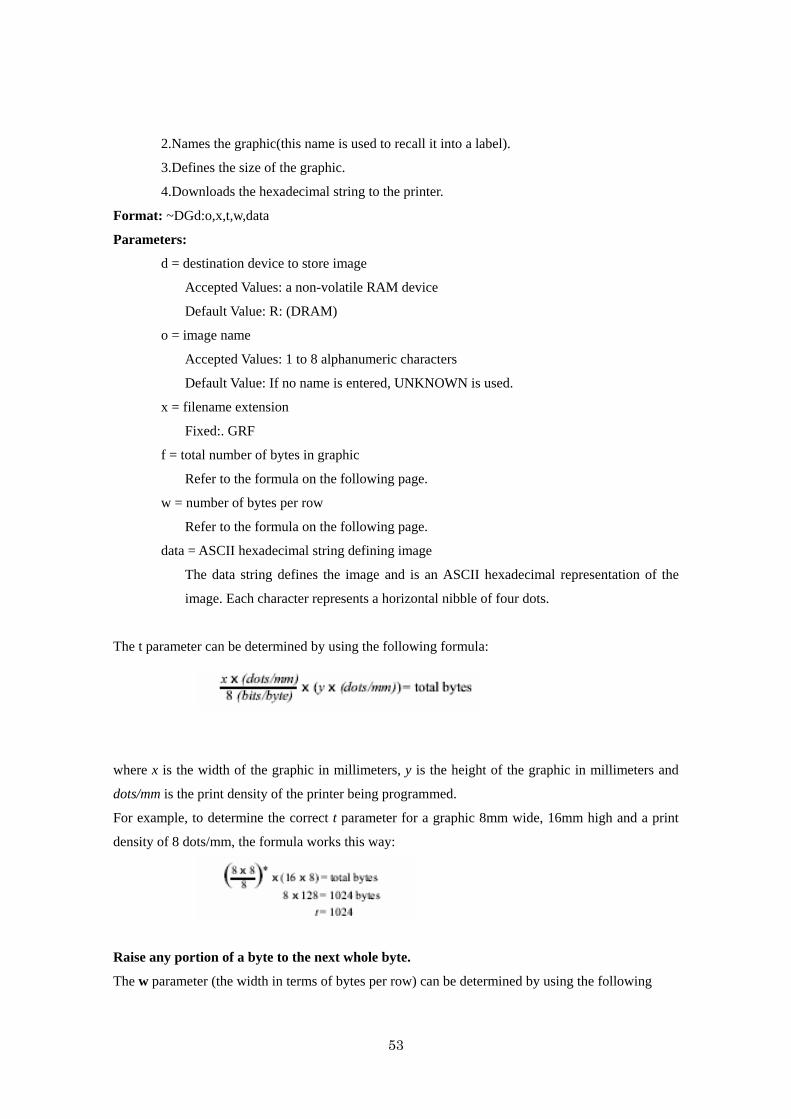
The t parameter can be determined by using the following formula:
where x is the width of the graphic in millimeters, y is the height of the graphic in millimeters and
dots/mm is the print density of the printer being programmed.
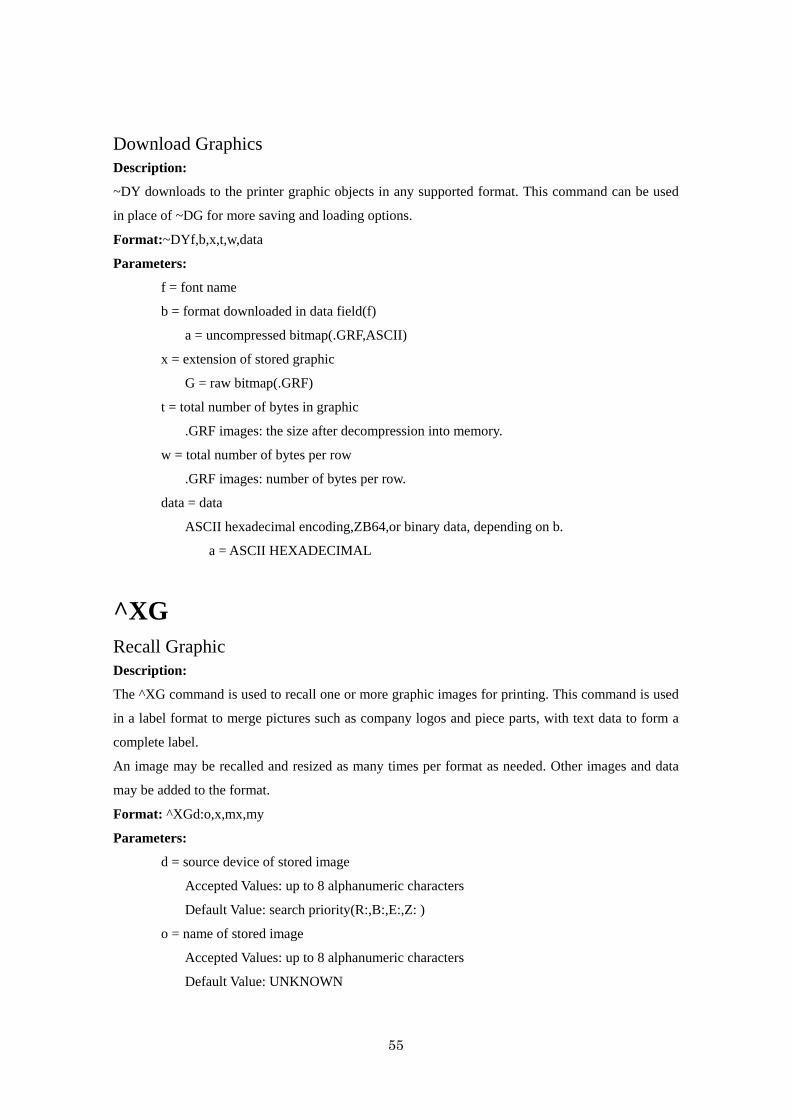
For example, to determine the correct t parameter for a graphic 8mm wide, 16mm high and a print
density of 8 dots/mm, the formula works this way:
Raise any portion of a byte to the next whole byte.
The w parameter (the width in terms of bytes per row) can be determined by using the following

54
formula:
where x is the width of the graphic in millimeters and dots/mm is the print density of the printer
being programmed.
For example, to determine the correct w parameter for a graphic 8mm wide and a print density of 8
dots/mm, the formula works this way:
Raise any portion of a byte to the next whole byte.
Parameter w is the first value in the t calculation.
Parameter data is a string of Hexadecimal numbers sent as a representation of the graphic image.
Each Hexadecimal character represents a horizontal nibble of four dots. For example, if the first four
dots of the graphic image to be created should be white and the next four black, the dot by dot
Binary code would be 00001111. The Hexadecimal representation of this Binary value would be 0F.
The entire graphic image is coded in this way. The complete graphic image is sent as one long
continuous string of Hexadecimal values.
Example:
The following is an example of using the ~DG command to load a checkerboard pattern into DRAM.
The name used to store the graphic is SAMPLE.GRF.
~DY
55
Download Graphics Description:
~DY downloads to the printer graphic objects in any supported format. This command can be used
in place of ~DG for more saving and loading options.
Format:~DYf,b,x,t,w,data
Parameters:
f = font name
b = format downloaded in data field(f)
a = uncompressed bitmap(.GRF,ASCII)
x = extension of stored graphic
G = raw bitmap(.GRF)
t = total number of bytes in graphic
.GRF images: the size after decompression into memory.
w = total number of bytes per row
.GRF images: number of bytes per row.
data = data
ASCII hexadecimal encoding,ZB64,or binary data, depending on b.
a = ASCII HEXADECIMAL
^XG Recall Graphic Description:
The ^XG command is used to recall one or more graphic images for printing. This command is used
in a label format to merge pictures such as company logos and piece parts, with text data to form a
complete label.
An image may be recalled and resized as many times per format as needed. Other images and data
may be added to the format.
Format: ^XGd:o,x,mx,my
Parameters:
d = source device of stored image
Accepted Values: up to 8 alphanumeric characters
Default Value: search priority(R:,B:,E:,Z: )
o = name of stored image
Accepted Values: up to 8 alphanumeric characters
Default Value: UNKNOWN
56
x = image extension
Fixed Value: .GRF
mx = magnification factory on the x-axis
Accepted Values: 1 to 10
Default Value:1
my = magnification factor on the y-axis
Accepted Values:1 to 10
Default Value:1
Example:
The following is an example of using the ^XG command to recall the image SAMPLE.GRF from
DRAM and print it in 5 different locations and 5 different sizes on the same label:
^XA
^FO100,100^XGR:SAMPLE.GRF,1,1^FS
^FO100,200^XGR:SAMPLE.GRF,2,2^FS
^FO100,300^XGR:SAMPLE.GRF,3,3^FS
^FO100,400^XGR:SAMPLE.GRF,4,4^FS
^FO100,500^XGR:SAMPLE.GRF,5,5^FS
^XZ
^IM Image Move Description:
The ^IM command performs a direct move of an image from storage area into the bitmap. The
command is identical to the Recall Graphic command except there are no sizing parameters.
Format: ^IMd:o,x
Parameters:
d = device location of stored object
Accepted Values: E:, B:, R:
Default Value: Search priority
o = object name
Accepted Values: any 1 to 8 character name
Default Value: if no name is entered, UNKNOWN is used
x = extension
Fixed: .GRF
57
Example:
The following example moves the image SAMPLE.GRF from DRAM and prints it in 5 locations in
its original size.
^XA
^FO100,100^IMR:SAMPLE.GRF^FS
^FO100,200^IMR:SAMPLE.GRF^FS
^FO100,300^IMR:SAMPLE.GRF^FS
^FO100,400^IMR:SAMPLE.GRF^FS
^FO100,500^IMR:SAMPLE.GRF^FS
^XZ
Comments:
By using the ^FO command, the graphic image can be positioned anywhere on the label.
The difference between ^IM and ^XG: ^IM does not have magnification, and therefor may require
less formatting time.
^IS Image Save Description:
The ^IS command is used to save a ZPL® label format. This command is used within a label format,
typically at the end. It instructs the printer to save that label format rather than a ZPL® script file.
The format can later be recalled with the ^IL command. If the object name is omitted, the default
name “UNKNOWN.GRF” is used.
Format: ^ISd:o,x,p
Parameters:
d = device location of stored object
Accepted Values: E:, B:, R:
Default Value: R
o = object name
Accepted Values: any 1 to 8 character name
Default Value: if no name is entered, UNKNOWN is used
x = extension
Accepted Values: .GRF
58
Default Value: .GRF
p = print image after storing
Accepted Values: Y(yes) or N(no)
Default Value: Y
Example:
The following is an example of using the ^IS command to save a label format to DRAM. The name
used to store the graphic is SAMPLE2.GRF
^XA
^LH10,15^FWN^BY3,3,85^CFD,36
^GB430,750,4^FS
^FO10,170^GB200,144,2^FS
^FO10,318^GB410,174,2^FS
^FO212,170^GB206,144,2^FS
^FO10,498^GB200,120,2^FSR^FO212,498^GB209,120,2^FS
^FO135,20^A0,70,60^FDZEBRA^FS
^FO80,100^A0,40,30^FDTECHNOLOGIES CORP^FS
^CFD,18,10^FS^FO15,180^FDARTICLE#^FS
^FO218,180^FDLOCATION^FS^FO15,328^FDDESCRIPTION^FS
^FO15,508^FDREQ.NO.^FS
^FO220,508^FDWORK NUMBER^FS
^FO15,630^AD,36,20^FDCOMMENTS:^FS
^ISR:SAMPLE2.GRF,Y
^XZ
^IL Image Load Description:
The ^IL command is used at the beginning of a label format to load a stored a format and merge it
with additional data. The image is always positioned at ^FO0,0.
Format: ^ILd:o,x
Parameters:
d = device location of stored object
Accepted Valkues:E:,B:,R:
59
Default Value:R:
o = object name
Accepted Values:any 1 to 8 character name
Default Value:If no name is entered,UNKNOWN is used.
x = extension
Fixed:.GRF
Example:
The following example recalls the stored image SAMPLE2.GRF from DRAM and overlays it with
the additional data. The graphic was stored using the ^IS command. Refer to the ^IS command for
the stored label format.
^XA
^ILR:SAMPLE2.GRF^FS
^CFD,36,20
^FO15,210^FD900123^FS
^FO218,210^FDLINE 12^FS
^FO15,360^AD^FDTHERMAL^FS
^FO15,400^AD^FDTRANSFER PRINTER^FS
^FO15,540^FD54321^FS
^FO220,530^FD58643^FS
^FO15,670^AD,27,18^FDTesting Stored Graphic^FS
^FO15,700^AD,27,18^FDLabel Formats!!
^XZ
^ID Object Delete Description:
The ^ID command deletes objects, graphics, fonts, and stored formats from storage areas selectively
or in groups. This command can be used within a printing format to delete objects prior to saving
new ones, or it can be used in a stand-alone format to delete objects.
The image name and extension support the use of the asterisk(*) as a wildcard. This allows for easy
deletion of selected groups of objects.
Format: ^IDd:o.x
Parameters:
d = device location of stored object
Accepted Values: E:,B:,R:
60
Default Value: R:
o = object name
Accepted Values: any 1 to 8 character name
Default Value: If no name is entered, UNKNOWN is used.
x = extension
Accepted Values: any valid 3-letter extension
Default Value: .GRF
Example:
To delete the image SAMPLE1.GRF from DRAM:
^XA^IDR:SAMPLE1.GRF^XZ
~EG Erase Download Graphics Description:
The ~EG command is used to delete all graphic images(hexadecimal images)from DRAM. This
command will erase everything in R:, E:, and B: memory
Format: ~EG
Comments:
The ~EG command is no longer recommended for use! It is recommended that the ~ID(Object
Delete)command is used to selectively delete stored graphics.
Advanced Techniques
^FX Comment Description:
The ^FX command is useful when you want to add a “non-printing” informational comment or
statement within a label format. Any data after the ^FX the label format. Therefore, you should avoid
using the caret(^)or tilde(~) commands within the ^FX statement.
Format: ^FXc
Parameters:
c = non-printing comment
61
^FR Field Reverse Print Description:
The ^FR command allows a field to appear as white over black or black over white. When printing a
field and the ^FR command has been used, the color of the output is the reverse of its background.
Format: ^FR
Parameters:
^FR = field reverse print
Comments:
The ^FR command applies to only one field and has to be specified each time. When multiple ^FR
commands are going to be used, it may be more convenient to use the ^LR command.
^LR Label Reverse Print Description:
The ^LR command reverses the printing of all fields in the label format. It allows a field to appear as
white over black or black over white.
Using the ^LR is identical to placing a ^FR in all current and subsequent fields.
Format: ^LRa
Parameters:
a = reverse print all fields
Accepted Values: Y(yes) or N(no)
Initial Value Power-up: N or last permanently saved value
Comments:
The ^LR setting will remain active unless turned off by ^LRN command or the printer is powered
down.
Only fields that come after this command will be affected.
^PM

62
Printing Mirror Image of Label Description:
The ^PM command prints the entire printable area of the label as a mirror image. This command
flips the image from left to right.
Format: ^PMa
Parameters:
a = print mirror image of entire label
Accepted Values: Y(yes) or N(no)
Default Value: N
Comments:
If the parameter is missing or invalid, the command will be ignored. Once entered, the ^PM
command will remain active until ^PMN is received or the printer is powered down.
^SN Serialization Data Description:
The ^SN command allows the printer to index data fields by a selected increment or decrement
value(i.e., make the data fields increase or decrease by a specified value)each time a label is printed.
This can be performed on up to 100 to 150 fields in a given format and can be performed on both
alphanumeric and bar code fields. A maximum of 12 of the rightmost integers are subject to indexing.
The first integer found when scanning from right to left starts the indexing portion of the data field.
If the alphanumeric field to be indexed ends with an alpha character, the data will be scanned,
character-by character, from right to left until a numeric character is encountered. Serialization will
take place using the value of the first number found.
Format: ^SNv,n,z
Parameters:
v = starting value
Accepted Values: up to 12 digits for the portion to be indexed.
Default Value:1
n = increment/decrement value
Accepted Values:12-digit maximum
Default Value:1
63
To indicate a decrement value, precede the value with a minus sign(-).
z = add leading zeros(if needed)
Accepted Values: Y(yes) or N(no)
Default Value: N
Comments:
Incrementing and decrementing takes place for each serial-numbered field when all replicates for
each serial number have been printed, as specified in parameter r of the ^PQ(print quality)command.
If, during the course of printing serialized labels the printer runs out of either paper or ribbon, the
first label printed(after the media or ribbon has been replaced and calibration completed)will have
the same serial number as the “partial” label printed before the “out” condition occurred. This is
done in case the last label before the “out” condition did not fully print.
~TA Tear-off Adjust Position Description:
The ~TA command lets you adjust the rest position of the media after a label is printed, which
changes the position at which the label is torn or cut.
Format: ~TA###
Parameters:
### = change in media rest position(3-digit value in dot rows)
Accepted Values:-120 to 120
Default Value: last permanent value saved
Comments:
If the parameter is missing or invalid, the command is ignored.
~EF Erase Stored Formats Description:
The ~EF command erases all stored formats.
Format:~EF
Comments:
64
The ~EF command is no longer recommended for use! It is recommended that the ^ID(Object
Delete)command is used to selectively delete stored formats.
^DF Download Format Description:
The ^DF command saves ZPL® format commands as text strings to be later merged using ^XF with
variable data.
While use of stored formats will reduce transmission time, no formatting time is saved – this
command saves ZPL® as text strings formatted at print time.
If the image name is omitted, the name and extension UNKNOWN.ZPL® will be used. Enter the
^DF stored format command immediately after the ^XA command, then enter the format commands
to be saved.
Format: ^DFd:o,x
Parameters:
d = destination device to store image
Fixed: always a non-volatile RAM device
o = image name
Accepted Values: 1 to 8 alphanumeric characters
Default Value: If a name is not entered, UNKNOWN is used.
x = filename extension
Fixed:. ZPL®
Comments:
A format containing a ^DF will not print. Results are undefined for any commands that appear prior
to the ^DF in a format.
^XF Recall Format Description:
The ^XF command recalls a stored format to be merged with variable data. One ^XF command
65
can be used within one label format. It can be set as the arbitrary positions of a label format.
While use of stored formats will reduce transmission time, no formatting time is saved since the
ZPL® format being recalled was saved as text strings which need to be formatted at print time.
Format: ^XFd:o,x
Parameters:
d = source device of stored image
Accepted Values: up to 8 alphanumeric characters
Default Value: search priority(R:,B:,E:,Z: ) o = name of stored image
Accepted Values: up to 8 alphanumeric characters
Default Value: UNKNOWN
x = image extension
Fixed Value:.ZPL®
^ST Set Time/Date(for Real Time Clock) Description:
The ^ST command sets the time and date of the Real Time Clock.
Format:^STa,b,c,d,e,f,g
Parameters:
a = month
Accepted Values:01 to 12
Default Value:current month
b = day
Accepted Values:01 to 31
Default Value:current day
c = year
Accepted Values:1998 to 2097
Default Value:current year
d = hour
Accepted Values:00 to 23
Default Value:current hour
e = minute
Accepted Values:00 to 59
66
Default Value:current minute
f = second
Accepted Values:00 to 59
Default Value:current second
g = format
Accepted Values:
A = a.m.
P = p.m.
M = 24-hour military
Default Value:M
~JR Power On Reset Description:
The ~JR command resets all of the printer’s internal software,performs a power-on
self-test(POST),clears the buffer and DRAM,and resets communication parameters and default
values.~JR performs the same function as a manual power-on reset.
Format: ~JR
~JC Label length measurement Description: The ~JC command is used to force a label length measurement.
Format: ~JC
Comments:
In continuous mode, this command does not operate..
~JL Set Label Length Description:
67
The ~JL command is used to set the label length. Depending on size of label, the printer will feed
one or more blank labels.
Format: ~JL
~JA , ~JP , ~JX Pause and Cancel format Description:
The ~JA , ~JP and ~JX command clears the format currently being processed and places the printer
in the Pause mode.
Format: ~JP
^PH ~PH Slew to Home Position Description:
The ~PH or ^PH(Slew to Home Position)command causes the printer to feed one blank label.
・The ~PH command feeds one label after the format currently being printing is donw or when the
printer is placed in pause.
・The ^PH command feeds one blank label after the format it is in prints.
Format: ^PH or ~PH
^PP ~PP Programmable Pause Description:
The ~PP command stops printing after the current label is printed(if one is printing) and places the
printer in the Pause mode.
The ^PP command is not immediate. Therefore,severallables may be printed before a pause is
performed. This command will pause the printer after the current format prints.
The operation is identical to pressing the PAUSE button on the front panel of the printer. The printer
will remain paused until the PAUSE button is pressed or a ~PS command is sent to the printer.
68
Format: ^PP or ~PP
~PS Print Start Description:
The ~PS command causes a printer in the Pause mode to resume printing. The operation is identical
to pressing the PAUSE button on the front panel of the printer when the printer is already in the
Pause mode.
Format: ~PS
^PQ Print Quantity Description:
The ^PQ command gives control over several printing operations. It controls the number of labels to
print, the number of labels printed before printer cuts, and the number of replications of each serial
number.
Format: ^PQq,p,r,o
Parameters:
q = total quantity of labels to print
Accepted Value:1 to 9,999
Default Value:1
p = Cut value
Accepted Value:1 to 9,999 labels between cuts
Default Value:0-no cut
r = replicates of each serial number
Accepted Value: 0 to 9,999
Default Value: 0 – no replicates
o = not care
^PR Print Rate Description:
69
The ^PR command determines the midia speed during printing and the slew speed(feeding a blank
label).
The printer will operate with the selected speeds until the setting is reissued or the printer is turned
off.
The print speed is application-specific. Since print quality is affected by media and ribbon, printing
speeds and printer operatin g modes, it is very imorttant to run tests for your applications.
Format: ^PRp,s,b
Parameters:
p = print speed
Accepted Values:
A or 2 50.8 mm/sec. (2 inches/sec.)
B or 3 76.2 mm/sec. (3 inches/sec.)
C or 4 101.6 mm/sec. (4 inches/sec.)
5 127 mm/sec. (5 inches/sec.)
D or 6 152.4 mm/sec. (6 inches/sec.)
E or 8 203.2 mm/sec. (8 inches/sec.)
9 220.5 mm/sec.(9 inches/sec.)
10 245 mm/sec. (10 inches/sec.)
11 269.5 mm/sec. (11 inches/sec.)
12 304.8 mm/sec. (12 inches/sec.)
Default Value: A
s = slew speed
Accepted Values:
A or 2 50.8 mm/sec. (2 inches/sec.)
B or 3 76.2 mm/sec. (3 inches/sec.)
C or 4 101.6 mm/sec. (4 inches/sec.)
5 127 mm/sec. (5 inches/sec.)
D or 6 152.4 mm/sec. (6 inches/sec.)
E or 8 203.2 mm/sec. (8 inches/sec.)
9 220.5 mm/sec.(9 inches/sec.)
10 245 mm/sec. (10 inches/sec.)
11 269.5 mm/sec. (11 inches/sec.)
12 304.8 mm/sec. (12 inches/sec.)
Default Value:D
b = backfeed speed
70
Accepted Values:
A or 2 50.8 mm/sec. (2 inches/sec.)
B or 3 76.2 mm/sec. (3 inches/sec.)
C or 4 101.6 mm/sec. (4 inches/sec.)
5 127 mm/sec. (5 inches/sec.)
D or 6 152.4 mm/sec. (6 inches/sec.)
E or 8 203.2 mm/sec. (8 inches/sec.)
9 220.5 mm/sec.(9 inches/sec.)
10 245 mm/sec. (10 inches/sec.)
11 269.5 mm/sec. (11 inches/sec.)
12 304.8 mm/sec. (12 inches/sec.)
Default Value: A
Comments:
The speed setting for p,s,and b is dependent on the limitations of the printer. If a paricular printer is
limited to 6 inches per second,a value of 12 can be entered, but it will only perform at a 6 ips rate.
Refer to your printer’s user’s guide for specifics on performance.
~PR Applicator Reprint Description:
The ~PR command will be reprinted the last label printed.
Format: ~PR
Comments:
Pressing the REPEAT button on the front panel will also cause the last label to be reprinted.
^JM Set Dots per Millimeter Description:
Use the ^JM(Set Dots/Millimeter) command to double the format size of the label. Depending on the
print head, normal dots per millimeter on a Printer are
12-dots/mm(300-dots/inch),8-dots/mm(200-dots/inch) .
71
This command lowers the density of the print – ,12 dots/mm would become 6 dots/mm,8 dots/mm
would become 4.
This command must be entered before the first ^FS command. The effects of ^JM are persistent.
Format: ^JMn
Parameters:
n = set dots per millimeter
Accepted Values:
A = 12 dots/mm,8 dots/mm
B = 6 dots/mm, 4 dots/mm
Default Value: A
Comments:
If ^JMB is used, the UPS Maxicode bar code becomes out of specification.
^CC ~CC Change Caret Description:
The ^CC and ~CC commands are used to change the format command prefix. The default prefix is
the caret(^)
Format: ^CCx or ~CCx
Parameters:
x = caret character change
Accepted Values: any ASCII character
Default Value: a parameter is required. If no parameter is entered, the next character
received will be the new prefix character.
Example:
^XA
^CC/
/XZ
Comments:
In the above example, the forward slash(/) is set at the new prefix. Note the /XZ ending tag uses the
new designated prefix character(/).
72
^CD ~CD Change Delimiter Description:
The ^CD and ~CD commands are used to change the ZPL® delimiter character. This character is
used to separate parameter values associated with several ZPL® commands. The default delimiter is
a comma(,).
Format: ^CDa or ~CDa
Parameters:
a = delimiter character change
Accepted Values: any ASCII character
Default Value: a parameter is required. If no parameter is entered, the next character
received will be the new prefix character.
Example:
^XA
^CD.
^XZ
Comments:
In the above example, the delimiter character is changed to a period(.).
^CT ~CT Change Tilde Description:
The ^CT and ~CT commands are used to change the control command prefix. The default prefix is
the tilde(~).
Format: ^CTa or ~CTa
Parameters:
a = change control command character
Accepted Values: any ASCII character
Default Value: Parameter is required. If no value is entered, the next character received
will be the new prefix character.
Example:
73
^XA
^CT+
+DGR:GRAPHIC.GRF,04412,010
^XZ
^CM Change Memory Letter Designation Description:
The ^CM command allows the user to reassign a letter designation to the printer’s memory devices.
If a format already exists, you can reassign the memory device to the corresponding letter without
being forced to alter or recreate the format itself.
Using this command will impact every subsequent command that refers to specific memory
locations.
Format: ^CMa,b,c
Parameters:
a= memory alias letter designation
Accepted Values: B: ,E: ,R: ,none
Default Value: B:
b = memory alias letter designation
Accepted Values: B:, E:, R:, none
Default Value: E:
c = memory alias letter designation
Accepted Values: B:, E:, R:, none
Default Value: R:
Comments:
If two or more parameters specify the same letter designator, all letter designators will be set to their
default values.
If any of the parameters are out of specification, the command will be ignored.
~JD Enable Communications Diagnostics Description:
The ~JD command initiates a diagnostic mode that produces an ASCII printout(using current label
74
length and full width of printer) of all characters received by the printer. This printout includes the
ASCII Characters, the hexadecimal value and any communication errors.
Format: ~JD
~WC Print Configuration Label Description:
The ~WC command is used to generate a printer configuration label. The printer configuration label
contains information about the printer set up, such as sensor type, network ID, mode, firmware
version.
Format: ~WC
Comments:
This command only works when the printer is idle.