© copyright ibm corporation 2012, 2017. product …€¦ · establishing secur e communication...
TRANSCRIPT

IBM Security QRadar Risk ManagerVersion 7.3.1
User Guide
IBM

NoteBefore you use this information and the product that it supports, read the information in “Notices” on page 137.
Product information
This document applies to IBM QRadar Security Intelligence Platform V7.3.1 and subsequent releases unlesssuperseded by an updated version of this document.
© Copyright IBM Corporation 2012, 2017.US Government Users Restricted Rights – Use, duplication or disclosure restricted by GSA ADP Schedule Contractwith IBM Corp.

Contents
Introduction to IBM Security QRadar Risk Manager . . . . . . . . . . . . . . . . vii
1 What's new for users in QRadar Risk Manager V7.3.1 . . . . . . . . . . . . . . . 1
2 IBM Security QRadar Risk Manager . . . . . . . . . . . . . . . . . . . . . . . 3Supported web browsers . . . . . . . . . . . . . . . . . . . . . . . . . . . . . . . 3
Enabling document mode and browser mode in Internet Explorer . . . . . . . . . . . . . . . . 3Access the IBM Security QRadar Risk Manager user interface . . . . . . . . . . . . . . . . . . . 4Unsupported features in IBM Security QRadar Risk Manager . . . . . . . . . . . . . . . . . . . 4
3 Overview of QRadar Risk Manager features . . . . . . . . . . . . . . . . . . . 5
4 Configure access to QRadar Risk Manager . . . . . . . . . . . . . . . . . . . . 9Configuring system settings . . . . . . . . . . . . . . . . . . . . . . . . . . . . . . 9Updating the system time . . . . . . . . . . . . . . . . . . . . . . . . . . . . . . 10
5 Configuration Source Management. . . . . . . . . . . . . . . . . . . . . . . 13Credentials . . . . . . . . . . . . . . . . . . . . . . . . . . . . . . . . . . . 13
Configuring credentials for IBM Security QRadar Risk Manager . . . . . . . . . . . . . . . . . 14Device discovery . . . . . . . . . . . . . . . . . . . . . . . . . . . . . . . . . 15
Discovering devices . . . . . . . . . . . . . . . . . . . . . . . . . . . . . . . 15Import devices into QRadar Risk Manager . . . . . . . . . . . . . . . . . . . . . . . . . 16
Importing a CSV file . . . . . . . . . . . . . . . . . . . . . . . . . . . . . . . 17Manage devices . . . . . . . . . . . . . . . . . . . . . . . . . . . . . . . . . . 17Viewing devices . . . . . . . . . . . . . . . . . . . . . . . . . . . . . . . . . . 18Adding a device . . . . . . . . . . . . . . . . . . . . . . . . . . . . . . . . . . 18Editing devices . . . . . . . . . . . . . . . . . . . . . . . . . . . . . . . . . . 18Deleting a device . . . . . . . . . . . . . . . . . . . . . . . . . . . . . . . . . 19Filtering the device list . . . . . . . . . . . . . . . . . . . . . . . . . . . . . . . 19Obtaining device configuration . . . . . . . . . . . . . . . . . . . . . . . . . . . . . 21Collecting neighbor data . . . . . . . . . . . . . . . . . . . . . . . . . . . . . . . 21Manage backup jobs . . . . . . . . . . . . . . . . . . . . . . . . . . . . . . . . 22View backup jobs . . . . . . . . . . . . . . . . . . . . . . . . . . . . . . . . . 22Viewing backup job status and logs . . . . . . . . . . . . . . . . . . . . . . . . . . . 22Adding a backup job . . . . . . . . . . . . . . . . . . . . . . . . . . . . . . . . 23Editing a backup job . . . . . . . . . . . . . . . . . . . . . . . . . . . . . . . . 24Rename a backup job . . . . . . . . . . . . . . . . . . . . . . . . . . . . . . . . 25Deleting a backup job . . . . . . . . . . . . . . . . . . . . . . . . . . . . . . . . 26Configure protocols. . . . . . . . . . . . . . . . . . . . . . . . . . . . . . . . . 26
Configuring protocols . . . . . . . . . . . . . . . . . . . . . . . . . . . . . . . 27Configuring the discovery schedule . . . . . . . . . . . . . . . . . . . . . . . . . . . 29
6 Connections . . . . . . . . . . . . . . . . . . . . . . . . . . . . . . . . 31Viewing connections . . . . . . . . . . . . . . . . . . . . . . . . . . . . . . . . 31Use graphs to view connection data . . . . . . . . . . . . . . . . . . . . . . . . . . . 33
Using the time series graph . . . . . . . . . . . . . . . . . . . . . . . . . . . . . 33Use connection graph to view network connections . . . . . . . . . . . . . . . . . . . . . 35Using pie, bar, and table charts . . . . . . . . . . . . . . . . . . . . . . . . . . . . 36
Search for connections . . . . . . . . . . . . . . . . . . . . . . . . . . . . . . . . 37Saving search criteria . . . . . . . . . . . . . . . . . . . . . . . . . . . . . . . 38Performing a sub-search . . . . . . . . . . . . . . . . . . . . . . . . . . . . . . 40Manage search results . . . . . . . . . . . . . . . . . . . . . . . . . . . . . . . 41
Saving Search Results . . . . . . . . . . . . . . . . . . . . . . . . . . . . . . 42Canceling a search . . . . . . . . . . . . . . . . . . . . . . . . . . . . . . . . 42
© Copyright IBM Corp. 2012, 2017 iii

Deleting a search . . . . . . . . . . . . . . . . . . . . . . . . . . . . . . . . 42Exporting connections . . . . . . . . . . . . . . . . . . . . . . . . . . . . . . . . 42
7 Configuration monitor . . . . . . . . . . . . . . . . . . . . . . . . . . . . 43Searching device rules . . . . . . . . . . . . . . . . . . . . . . . . . . . . . . . . 43Comparing the configuration of your network devices . . . . . . . . . . . . . . . . . . . . . 44Device Management . . . . . . . . . . . . . . . . . . . . . . . . . . . . . . . . 45
Adding a device . . . . . . . . . . . . . . . . . . . . . . . . . . . . . . . . . 45Backing up a device . . . . . . . . . . . . . . . . . . . . . . . . . . . . . . . 45Deleting a device . . . . . . . . . . . . . . . . . . . . . . . . . . . . . . . . 46
Discovering devices . . . . . . . . . . . . . . . . . . . . . . . . . . . . . . . . 46Recent Activity . . . . . . . . . . . . . . . . . . . . . . . . . . . . . . . . . . 47Log source mapping . . . . . . . . . . . . . . . . . . . . . . . . . . . . . . . . 48
Creating or editing a log source mapping . . . . . . . . . . . . . . . . . . . . . . . . 48
8 Filtering device rules by user or group . . . . . . . . . . . . . . . . . . . . . 49
9 Network topology graph . . . . . . . . . . . . . . . . . . . . . . . . . . . 51Topology graph searches . . . . . . . . . . . . . . . . . . . . . . . . . . . . . . . 51
NAT indicators in search results . . . . . . . . . . . . . . . . . . . . . . . . . . . 52Adding an intrusion prevention system (IPS) . . . . . . . . . . . . . . . . . . . . . . . . 52
Removing an Intrusion Prevention System (IPS) . . . . . . . . . . . . . . . . . . . . . . 53Topology device groups . . . . . . . . . . . . . . . . . . . . . . . . . . . . . . . 53Use case: Visualize the attack path of an offense . . . . . . . . . . . . . . . . . . . . . . . 53
Viewing the attack path of an offense. . . . . . . . . . . . . . . . . . . . . . . . . . 54
10 Configuring color coding of subnets to indicate vulnerability status . . . . . . . . 55
11 Policy Monitor . . . . . . . . . . . . . . . . . . . . . . . . . . . . . . . 57Policy Monitor questions . . . . . . . . . . . . . . . . . . . . . . . . . . . . . . . 57Policy Monitor question parameters . . . . . . . . . . . . . . . . . . . . . . . . . . . 58
Contributing questions for actual communication tests . . . . . . . . . . . . . . . . . . . . 59Deprecated contributing test questions . . . . . . . . . . . . . . . . . . . . . . . . 62Restrictive questions for actual communication tests . . . . . . . . . . . . . . . . . . . . 62
Contributing questions for possible communication tests . . . . . . . . . . . . . . . . . . . 64Deprecated contributing test questions . . . . . . . . . . . . . . . . . . . . . . . . 66
Restrictive question parameters for possible communication tests . . . . . . . . . . . . . . . . 66Device/rules test questions . . . . . . . . . . . . . . . . . . . . . . . . . . . . . 67Importance factor . . . . . . . . . . . . . . . . . . . . . . . . . . . . . . . . 68
Creating an asset question . . . . . . . . . . . . . . . . . . . . . . . . . . . . . . 68Investigating external communications that use untrusted protocols . . . . . . . . . . . . . . . 69Finding assets that allow communication from the internet . . . . . . . . . . . . . . . . . . 70Assessing devices that allow risky protocols . . . . . . . . . . . . . . . . . . . . . . . 70Investigating possible communication with protected assets . . . . . . . . . . . . . . . . . . 71View question information . . . . . . . . . . . . . . . . . . . . . . . . . . . . . 72
Creating a question that tests for rule violations . . . . . . . . . . . . . . . . . . . . . . . 72Investigating devices/rules that allow communication to the Internet . . . . . . . . . . . . . . . 72
Submitting a question . . . . . . . . . . . . . . . . . . . . . . . . . . . . . . . . 73Asset question results . . . . . . . . . . . . . . . . . . . . . . . . . . . . . . . 73Device/Rule question results . . . . . . . . . . . . . . . . . . . . . . . . . . . . 76
Evaluation of results from policy monitor questions . . . . . . . . . . . . . . . . . . . . . . 78Approving results . . . . . . . . . . . . . . . . . . . . . . . . . . . . . . . . 79
Policy question monitoring . . . . . . . . . . . . . . . . . . . . . . . . . . . . . . 79Monitoring a policy monitor question and generating events . . . . . . . . . . . . . . . . . . 80
Group questions . . . . . . . . . . . . . . . . . . . . . . . . . . . . . . . . . . 81Export and import policy monitor questions . . . . . . . . . . . . . . . . . . . . . . . . 81
Exporting policy monitor questions . . . . . . . . . . . . . . . . . . . . . . . . . . 82Importing policy monitor questions . . . . . . . . . . . . . . . . . . . . . . . . . . 82
Integration with QRadar Vulnerability Manager . . . . . . . . . . . . . . . . . . . . . . . 83Monitoring firewall rule event counts of Check Point devices. . . . . . . . . . . . . . . . . . . 83
iv QRadar Risk Manager User Guide

Configuring OPSEC applications in the SmartDashboard . . . . . . . . . . . . . . . . . . . 85Configuring the log source . . . . . . . . . . . . . . . . . . . . . . . . . . . . . 86Establishing secure communication between Check Point and IBM Security QRadar . . . . . . . . . . 88Initializing rule counting for Check Point . . . . . . . . . . . . . . . . . . . . . . . . 89
Policy Monitor use cases . . . . . . . . . . . . . . . . . . . . . . . . . . . . . . . 89Prioritizing high risk vulnerabilities by applying risk policies. . . . . . . . . . . . . . . . . . 89
CIS benchmark scans . . . . . . . . . . . . . . . . . . . . . . . . . . . . . . . . 90Adding or editing an asset profile . . . . . . . . . . . . . . . . . . . . . . . . . . . 91Configuring a credential set . . . . . . . . . . . . . . . . . . . . . . . . . . . . . 94Saving asset search criteria . . . . . . . . . . . . . . . . . . . . . . . . . . . . . 95Editing a compliance benchmark . . . . . . . . . . . . . . . . . . . . . . . . . . . 95Creating a benchmark profile . . . . . . . . . . . . . . . . . . . . . . . . . . . . 96Creating an asset compliance question . . . . . . . . . . . . . . . . . . . . . . . . . 96Monitoring asset compliance questions . . . . . . . . . . . . . . . . . . . . . . . . . 97Viewing scan results . . . . . . . . . . . . . . . . . . . . . . . . . . . . . . . 97
12 Policy Management . . . . . . . . . . . . . . . . . . . . . . . . . . . . . 99
13 Network simulations in IBM Security QRadar Risk Manager . . . . . . . . . . . 101Simulations . . . . . . . . . . . . . . . . . . . . . . . . . . . . . . . . . . . 101
Creating a simulation. . . . . . . . . . . . . . . . . . . . . . . . . . . . . . . 102Editing a simulation . . . . . . . . . . . . . . . . . . . . . . . . . . . . . . . 104Duplicating a simulation . . . . . . . . . . . . . . . . . . . . . . . . . . . . . 105Deleting a simulation. . . . . . . . . . . . . . . . . . . . . . . . . . . . . . . 105Manually running a simulation . . . . . . . . . . . . . . . . . . . . . . . . . . . 105
Simulation of a network configuration change . . . . . . . . . . . . . . . . . . . . . . . 105Creating a topology model . . . . . . . . . . . . . . . . . . . . . . . . . . . . . 106Simulating an attack . . . . . . . . . . . . . . . . . . . . . . . . . . . . . . . 106
Simulating an attack on an SSH protocol . . . . . . . . . . . . . . . . . . . . . . . . . 107Managing simulation results . . . . . . . . . . . . . . . . . . . . . . . . . . . . . 107
Viewing simulation results . . . . . . . . . . . . . . . . . . . . . . . . . . . . . 107Approving simulation results . . . . . . . . . . . . . . . . . . . . . . . . . . . . 109Revoking a simulation approval . . . . . . . . . . . . . . . . . . . . . . . . . . . 109
Monitoring simulations . . . . . . . . . . . . . . . . . . . . . . . . . . . . . . . 110Grouping simulations. . . . . . . . . . . . . . . . . . . . . . . . . . . . . . . . 111
14 Topology models . . . . . . . . . . . . . . . . . . . . . . . . . . . . . 113Creating a topology model . . . . . . . . . . . . . . . . . . . . . . . . . . . . . . 113Editing a topology model . . . . . . . . . . . . . . . . . . . . . . . . . . . . . . 116Duplicating a topology model . . . . . . . . . . . . . . . . . . . . . . . . . . . . . 116Deleting a topology model . . . . . . . . . . . . . . . . . . . . . . . . . . . . . . 116Group topology models . . . . . . . . . . . . . . . . . . . . . . . . . . . . . . . 116
Viewing groups. . . . . . . . . . . . . . . . . . . . . . . . . . . . . . . . . 117Creating a group . . . . . . . . . . . . . . . . . . . . . . . . . . . . . . . . 117Editing a group. . . . . . . . . . . . . . . . . . . . . . . . . . . . . . . . . 117Copying an item to another group . . . . . . . . . . . . . . . . . . . . . . . . . . 117Assign a topology to a group . . . . . . . . . . . . . . . . . . . . . . . . . . . . 118Deleting an item from a group . . . . . . . . . . . . . . . . . . . . . . . . . . . 118
15 Managing IBM Security QRadar Risk Manager reports . . . . . . . . . . . . . 119Manually generating a report . . . . . . . . . . . . . . . . . . . . . . . . . . . . . 119Use the report wizard . . . . . . . . . . . . . . . . . . . . . . . . . . . . . . . 120Creating a report . . . . . . . . . . . . . . . . . . . . . . . . . . . . . . . . . 120Editing a report . . . . . . . . . . . . . . . . . . . . . . . . . . . . . . . . . 122Duplicating a report . . . . . . . . . . . . . . . . . . . . . . . . . . . . . . . . 123Sharing a report . . . . . . . . . . . . . . . . . . . . . . . . . . . . . . . . . 123Configuring charts . . . . . . . . . . . . . . . . . . . . . . . . . . . . . . . . 124
Connection charts . . . . . . . . . . . . . . . . . . . . . . . . . . . . . . . . 124Device Rules charts . . . . . . . . . . . . . . . . . . . . . . . . . . . . . . . 126Device Unused Objects charts . . . . . . . . . . . . . . . . . . . . . . . . . . . . 131
Contents v

16 Audit log data . . . . . . . . . . . . . . . . . . . . . . . . . . . . . . . 133Logged actions . . . . . . . . . . . . . . . . . . . . . . . . . . . . . . . . . . 133Viewing user activity . . . . . . . . . . . . . . . . . . . . . . . . . . . . . . . . 134Viewing the log file . . . . . . . . . . . . . . . . . . . . . . . . . . . . . . . . 135Log file details . . . . . . . . . . . . . . . . . . . . . . . . . . . . . . . . . . 136
Notices . . . . . . . . . . . . . . . . . . . . . . . . . . . . . . . . . . . 137Trademarks . . . . . . . . . . . . . . . . . . . . . . . . . . . . . . . . . . . 138Terms and conditions for product documentation . . . . . . . . . . . . . . . . . . . . . . 138IBM Online Privacy Statement. . . . . . . . . . . . . . . . . . . . . . . . . . . . . 139
Glossary . . . . . . . . . . . . . . . . . . . . . . . . . . . . . . . . . . 141A . . . . . . . . . . . . . . . . . . . . . . . . . . . . . . . . . . . . . . 141C . . . . . . . . . . . . . . . . . . . . . . . . . . . . . . . . . . . . . . 141M . . . . . . . . . . . . . . . . . . . . . . . . . . . . . . . . . . . . . . 141N . . . . . . . . . . . . . . . . . . . . . . . . . . . . . . . . . . . . . . 141R . . . . . . . . . . . . . . . . . . . . . . . . . . . . . . . . . . . . . . 142S . . . . . . . . . . . . . . . . . . . . . . . . . . . . . . . . . . . . . . 142T . . . . . . . . . . . . . . . . . . . . . . . . . . . . . . . . . . . . . . 142V . . . . . . . . . . . . . . . . . . . . . . . . . . . . . . . . . . . . . . 142
Index . . . . . . . . . . . . . . . . . . . . . . . . . . . . . . . . . . . . 143
vi QRadar Risk Manager User Guide

Introduction to IBM Security QRadar Risk Manager
This information is intended for use with IBM® QRadar® Risk Manager. QRadar Risk Manager is anappliance that is used to monitor device configurations, simulate network changes, and prioritize therisks and vulnerabilities in your network.
This guide contains instructions for configuring and using IBM Security QRadar Risk Manager on a IBMSecurity QRadar SIEM console.
Intended audience
System administrators responsible for configuring and using QRadar Risk Manager must haveadministrative access to IBM Security QRadar SIEM and to your network devices and firewalls. Thesystem administrator must have knowledge of your corporate network and networking technologies.
Technical documentation
For information about how to access more technical documentation, technical notes, and release notes, seeAccessing IBM Security Documentation Technical Note (http://www.ibm.com/support/docview.wss?rs=0&uid=swg21612861).
Contacting customer support
For information about contacting customer support, see the Support and Download Technical Note(http://www.ibm.com/support/docview.wss?rs=0&uid=swg21612861).
Statement of good security practices
IT system security involves protecting systems and information through prevention, detection andresponse to improper access from within and outside your enterprise. Improper access can result ininformation being altered, destroyed, misappropriated or misused or can result in damage to or misuse ofyour systems, including for use in attacks on others. No IT system or product should be consideredcompletely secure and no single product, service or security measure can be completely effective inpreventing improper use or access. IBM systems, products and services are designed to be part of acomprehensive security approach, which will necessarily involve additional operational procedures, andmay require other systems, products or services to be most effective. IBM DOES NOT WARRANT THATANY SYSTEMS, PRODUCTS OR SERVICES ARE IMMUNE FROM, OR WILL MAKE YOURENTERPRISE IMMUNE FROM, THE MALICIOUS OR ILLEGAL CONDUCT OF ANY PARTY.
© Copyright IBM Corp. 2012, 2017 vii

viii QRadar Risk Manager User Guide

1 What's new for users in QRadar Risk Manager V7.3.1
IBM Security QRadar Risk Manager V7.3.1 migrates features from Configuration Source Management tothe Configuration Monitor and improves topology searches and views.
QRadar Risk Manager migration from Configuration Source Management toConfiguration Monitor
Several features are migrated from Configuration Source Management to Configuration Monitor: add anew device, delete a device, back up a device, and discover devices in the Configuration Monitor. Thismigration is in preparation for when Google Chrome removes full support for Adobe Flash, and is thefirst stage in the removal of Flash dependency from QRadar Risk Manager.
Learn more about QRadar Vulnerability Manager features in Configuration Monitor...
Learn more about discovering devices in QRadar Vulnerability Manager...
Learn more about recent activity in QRadar Vulnerability Manager...
For more information, see the IBM Security QRadar Risk Manager User Guide.
Improved QRadar Risk Manager topology searches and views
Each topology search opens a tabbed view, and results are cached for improved topology retrieval,resulting in faster processing time.
Learn more about QRadar Risk Manager topology searches...
For more information, see the IBM Security QRadar Risk Manager User Guide.
© Copyright IBM Corp. 2012, 2017 1

2 QRadar Risk Manager User Guide

2 IBM Security QRadar Risk Manager
IBM Security QRadar Risk Manager is a separately installed appliance for monitoring deviceconfigurations, simulating changes to your network environment, and prioritizing risks andvulnerabilities in your network.
QRadar Risk Manager is accessed by using the Risks tab on your IBM Security QRadar SIEM Console.
QRadar Risk Manager uses data that is collected by QRadar. For example, configuration data fromfirewalls, routers, switches, or intrusion prevention systems (IPSs), vulnerability feeds, and third-partysecurity sources. Data sources enable QRadar Risk Manager to identify security, policy, and compliancerisks in your network and estimate the probability of risk exploitation.
QRadar Risk Manager alerts you to discovered risks by displaying offenses on the Offenses tab. Riskdata is analyzed and reported in the context of all other data that QRadar processes. In QRadar RiskManager you can evaluate and manage risk at an acceptable level that is based on the risk tolerance inyour company.
You can also use QRadar Risk Manager to query all network connections, compare device configurations,filter your network topology, and simulate the possible effects of updating device configurations.
You can use QRadar Risk Manager to define a set of policies (or questions) about your network andmonitor the policies for changes. For example, if you want to deny unencrypted protocols in your DMZfrom the Internet, you can define a policy monitor question to detect unencrypted protocols. Submittingthe question returns a list of unencrypted protocols that are communicating from the internet to yourDMZ and you can determine which unencrypted protocols are security risks.
Supported web browsersFor the features in IBM Security QRadar products to work properly, you must use a supported webbrowser.
The following table lists the supported versions of web browsers.
Table 1. Supported web browsers for QRadar products
Web browser Supported versions
Mozilla Firefox 45.8 Extended Support Release
64-bit Microsoft Internet Explorer with Microsoft Edgemode enabled.
11.0, Edge 38.14393
Google Chrome Latest
Enabling document mode and browser mode in Internet ExplorerIf you use Microsoft Internet Explorer to access IBM Security QRadar products, you must enable browsermode and document mode.
Procedure1. In your Internet Explorer web browser, press F12 to open the Developer Tools window.2. Click Browser Mode and select the version of your web browser.
© Copyright IBM Corp. 2012, 2017 3

3. Click Document Mode, and select the Internet Explorer standards for your Internet Explorer release.
Access the IBM Security QRadar Risk Manager user interfaceIBM Security QRadar Risk Manager uses default login information for the URL, user name, andpassword.
You access QRadar Risk Manager through the IBM Security QRadar SIEM Console. Use the informationin the following table when you log in to your QRadar Console.
Table 2. Default login information for QRadar Risk Manager
Login information Default
URL https://<IP address>, where <IP address> is the IP address of the QRadar Console.
User name admin
Password The password that is assigned to QRadar Risk Manager during the installationprocess.
License key A default license key provides access to the system for 5 weeks.
Unsupported features in IBM Security QRadar Risk ManagerIt is important to be aware of the features that are not supported by QRadar Risk Manager.
The following features are not supported in QRadar Risk Manager:v High availability (HA)v Dynamic Routing for Border Gateway Protocol (BGP)v IPv6v Non-contiguous network masksv Load-balanced routes
4 QRadar Risk Manager User Guide

3 Overview of QRadar Risk Manager features
Use QRadar Risk Manager features to manage risk in your network, monitor device configurations, viewtopologies, simulate changes to your network environment, and prioritize risks and vulnerabilities inyour network.
The following list is an overview of the features that are provided by QRadar Risk Manager to monitorand manage risk in your network.
Connections
Use the Connections feature to monitor the network connections of your local hosts.
The connection graph provides a visual representation of the connections in your network.
Use the time-series charts to access, navigate, and investigate connections from various views andperspectives.
Run queries and reports on the network connections of your local hosts that are based on applications,ports, protocols, and websites that the local hosts can communicate with.
Configuration Monitor
Use configuration monitor to review and compare device configurations, to manage security policies andto monitor device modifications within your network. Device configurations might include switches,routers, firewalls, and IPS devices in your network. For each device, you can view device configurationhistory, interfaces, and rules.
You can also compare configurations within a device and across devices, which you can use to identifyinconsistencies and configuration changes that introduce risk in your network.
Topology
The topology is a graphical representation that depicts the physical infrastructure and connectivity ofyour layer 3 network topology. The topology is drawn form configuration information that is importedfrom devices in your network by using configuration source management.
The graph is created from detailed configuration information that is obtained from network devices, suchas firewalls, routers, switches, and intrusion prevention systems (IPS).
Use the interactive graph in the topology to view connections between devices.
A topology path search can determine how your network devices are communicating and the networkpath that they use to communicate. Path searching allows QRadar Risk Manager to display the pathbetween a source and destination, along with the ports, protocols, and rules.
Policy Monitor
Use the policy monitor to define specific questions about risk in your network and then submit thequestion to IBM Security QRadar Risk Manager.
QRadar Risk Manager evaluates the parameters that you define in your question and returns assets inyour network to help you assess risk. The questions are based on a series of tests that can be combined
© Copyright IBM Corp. 2012, 2017 5

and configured as required. QRadar Risk Manager provides many predefined policy monitor questions,and you can create your own custom questions. Policy monitor questions can be created for the followingsituations:v Communications that occurv Possible communications based on the configuration of firewalls and routersv Actual firewall rules (device tests)
The policy monitor uses data that is obtained from configuration data, network activity data, networkand security events, and vulnerability scan data to determine the appropriate response. QRadar RiskManager provides policy templates to assist you in determining risk across multiple regulatory mandatesand information security best practices, such as PCI, HIPPA, and ISO 27001. You can update thetemplates to align with your corporate defined information security policies. When the response iscomplete, you can accept the response to the question and define how you want the system to respond tounaccepted results.
You can actively monitor an unlimited number of questions in policy monitor. When a question ismonitored, QRadar Risk Manager continuously evaluates the question for unapproved results. Whenunapproved results are discovered, QRadar Risk Manager can be configured to send email notifications,display notifications, generate a syslog event or create an offense in IBM Security QRadar SIEM.
Policy Management
You use the QRadar Risk Manager policy management pages to view details about policy compliance andpolicy risk changes for assets, policies, and policy checks.
The QRadar Risk Manager policy management pages display data from the last run policy. You can filterthe data by asset, by policy or by policy check.
Simulation
Use simulations to create network simulations.
You can create a simulated attack on your topology based on a series of parameters that are configured ina similar manner to the policy monitor. You can create a simulated attack on your current networktopology, or create a topology model.
Simulate an attack by using a topology model where you can make network changes without impacting alive network.
You can simulate how changes to network rules, ports, protocols, or allowed or denied connections canaffect your network. Use the simulation feature to determine the risk impact of proposed changes to yournetwork configuration before you implement these changes.
You can review the results when a simulation is complete.
IBM Security QRadar Risk Manager allows up to 10 simulations to be actively monitored. When asimulation is monitored, QRadar Risk Manager continuously analyzes the topology for unapprovedresults. As unapproved results are discovered, QRadar Risk Manager can send email, displaynotifications, generate a syslog event or create an offense in QRadar SIEM.
Configuration Source Management
Configure Configuration Source Management to get device configuration information from the devicesin your network, which give QRadar Risk Manager the data it needs to manage risk in your network.
6 QRadar Risk Manager User Guide

You use the configuration information that is collected from your network devices to generate thetopology for your network configuration.
Reports
Use the Reports tab to create specific reports, based on data available in QRadar Risk Manager, such asconnections, device rules, and device unused objects.
The following detailed reports are also available:v Connections between devicesv Firewall rules on a devicev Unused objects on a device
3 Overview of QRadar Risk Manager features 7

8 QRadar Risk Manager User Guide

4 Configure access to QRadar Risk Manager
You can configure access settings for QRadar Risk Manager from the Admin tab of IBM Security QRadarSIEM. When you add QRadar Risk Manager to your deployment, you must configure settings, such asthe local firewall, network interfaces, email server, and add the appropriate license.
If you have administrator permissions, you can configure several appliance settings for QRadar RiskManager.
Administrators can do the following tasks:v From the System and License Management window, you can manage licenses, configure the local
firewall, add an email server, and configure network interfaces for QRadar Risk Manager.v Change the password for a host.v Update the system time.
Configuring system settingsTo get your QRadar security system up and running or to maintain your system, you need to configureyour QRadar Console and managed hosts system settings from the System Information window.
About this task
You can assign roles for network interfaces, bond interfaces, manage licenses, configure the email serverthat you want QRadar to use, and use the local firewall to manage access from external devices toQRadar.
If you need to make network configuration changes, such as an IP address change to your QRadarConsole and managed host systems after you install your QRadar deployment, use the qchange_netsetuputility. For more information about network settings, see the IBM Security QRadar Risk Manager InstallationGuide.
If you change the External Flow Source Monitoring Port parameter in the QFlow configuration, youmust also update your firewall access configuration.
Procedure
1. On the navigation menu (
), click Admin to open the admin tab.2. Click System Configuration.3. Click the System and License Management icon.4. From the Display menu, select Systems.5. Select the host for which you want to configure firewall access settings.6. From the Actions menu, click View and Manage System.
Note: You can right-click the selected host to access this menu option, or you can double-click thehost to open the Systems Information window.
7. To configure your local firewall to allow access to this host from specified devices outside of yourQRadar deployment, click the Firewall tab.a. Configure access for devices that are outside of your deployment and need to connect to this
host.b. Add this access rule by clicking the arrow.
© Copyright IBM Corp. 2012, 2017 9

8. To configure network interfaces on your QRadar system, click the Network Interfaces tab.a. Select a network interface from the Device column.b. To edit your network interfaces, click Edit, and then configure the parameters.c. To bond network interfaces, click Bond, and then configure the parameters.For more information about configuring network interfaces, see the IBM Security QRadarAdministration Guide.You can't edit a network interface with a management, HA crossover, or slave role.
9. To configure an email server to distribute alerts, reports, notifications, and event messages, click theEmail Server tab.a. In the Email Server Address field, type the host name or IP address of the email server that you
want to use.If you don't have an email server and you want to use the email server that QRadar provides,type localhost to provide local email processing. If you configure the mail server setting aslocalhost, then the mail messages do not leave the QRadar box. If you want external maildelivery, use a valid mail relay server.
Note: It is a good practice to use port 25 for the email server connection.10. Click Save.
Updating the system timeConfigure system time on your QRadar Console user interface by setting the time manually, or by usingNTP servers. The QRadar Console synchronizes QRadar Console system time with the managed hosts inyour deployment.
About this task
Configure the time setting on the QRadar Console.
Procedure
1. On the navigation menu (
), click Admin to open the admin tab.2. Click System Configuration.3. Click the System and License Management icon.4. From the Display menu, select Systems.5. Select the host for which you want to configure system time settings.6. From the Actions menu, select View and Manage System.7. Click the System Time tab.8. Select a time zone from the Time Zone menu.
You can configure only the time zone on a managed host. The system time is synchronized with theQRadar Console but if the managed host is in a different time zone, then you can change to thattime zone.
9. To configure system time manually, click the Set time manually: radio button, and then set a dateand a time.
Exceptions:
If you set the system time to a future date that is affected by Daylight Saving Time (DST) changes,the time you set is adjusted by one hour. For example, on 4 July, 2016, in the US, you set the timeand date to 20:00, December 16, 2016. The time that you set ignores the DST change and is adjustedto 19:00.
10 QRadar Risk Manager User Guide

When you set the system time on VMware systems and then restart the system, the changes mightbe lost. To prevent the time changes from being lost you can edit the .vmx file on the virtual deviceto disable time synchronization, by adding the following lines to the synchronization properties:tools.syncTime = "FALSE"time.synchronize.continue = "FALSE"time.synchronize.restore = "FALSE"time.synchronize.resume.disk = "FALSE"time.synchronize.shrink = "FALSE"time.synchronize.tools.startup = "FALSE"
10. To configure time by using NTP servers, click the NTP Time Servers radio button.a. Type an IP address or a host name for the NTP server in the Server 1 Address field.
Host names are resolved by a DNS server.b. To add NTP servers, click the plus icon next to Add More.
11. Click Save.12. Click OK to accept that services are restarted, or Cancel to cancel the changes.
The services that are restarted include hostcontext and tomcat.
4 Configure access to QRadar Risk Manager 11

12 QRadar Risk Manager User Guide

5 Configuration Source Management
You use Configuration Source Management to configure credentials, add or discover devices, view deviceconfigurations, and back up device configurations in IBM Security QRadar Risk Manager.
The data that is obtained from devices in your network is used to populate the topology. You must haveadministrative privileges to access Configuration Source Management functions from the Admin tab inIBM Security QRadar SIEM.
To set up your configuration sources, you must:1. Configure your device credentials.2. Discover or import devices. There are two ways to add network devices to QRadar Risk Manager;
discover devices using Configuration Source Management or import a list of devices from a CSV fileusing Device Import.
3. Obtain device configuration from each of your devices.4. Manage backup jobs to ensure that all updates to device configurations are captured.5. Set up the discovery schedule to ensure that new devices are automatically discovered.
You use Configuration Source Management to:v Add, edit, search, and delete configuration sources. For more information, see Manage devices.v Configure or manage communication protocols for your devices. For more information, see Configure
protocols.
If you are using the Juniper NSM device, you must also obtain configuration information.
For detailed information about adapters used to communicate with devices from specific manufacturers,see IBM Security QRadar Risk Manager Adapter Configuration Guide .
CredentialsIn IBM Security QRadar Risk Manager, credentials are used to access and download the configuration ofdevices such as firewalls, routers, switches, or IPSs.
Administrators use Configuration Source Management to input device credentials, which give QRadarRisk Manager access to specific devices. Individual device credentials can be saved for a specific networkdevice. If multiple network devices use the same credentials, you can assign credentials to a group.
You can assign different devices in your network to network groups, to group credential sets and addresssets for your devices.
A credentials set contains information such as user name, and password values for a set of devices.
An address set is a list of IP addresses that define a group of devices that share a set of credentials.
For example, if all the firewalls in your organization have the same user name and password, then thecredentials that are associated with the address sets for all the firewalls are used to back up deviceconfigurations for all firewalls in your organization.
If a network credential is not required for a specific device, the parameter can be left blank inConfiguration Source Management. For a list of required adapter credentials, see the IBM Security QRadarRisk Manager Adapter Configuration Guide.
© Copyright IBM Corp. 2012, 2017 13

You can configure your QRadar Risk Manager to prioritize how each networkgroup is evaluated.
The network group at the top of the list has the highest priority. The first network group thatmatches the configured IP address are included as candidates when backing up a device. A maximumof three credential sets from a network group are considered.
For example, if your network groups have the following composition:v Network group 1 contains two credential setsv Network group 2 contains two credential sets
QRadar Risk Manager compiles a maximum of three credential sets, so the following credential sets areused:v Both credential sets in network group 1 are used because network group 1 is higher in the list.v Only the first credential set in the network group 2 is used because only three credential sets are
required.
When a credential set is used to successfully access a device, QRadar Risk Manager uses that samecredential set for subsequent attempts to access the device. If the credentials on that device change, theauthentication fails and for the next authentication attempt, QRadar Risk Manager compiles thecredentials again to ensure success.
Configuring credentials for IBM Security QRadar Risk ManagerAdministrators must configure credentials to allow IBM Security QRadar Risk Manager to connect todevices in the network.
About this task
You can type an IP address range using a dash or wildcard (*) to indicate a range, such as10.100.20.0-10.100.20.240 or 1.1.1*. If you type 1.1.1.*, all IP addresses meeting that requirement areincluded.
Procedure
1. On the navigation menu (
), click Admin to open the admin tab.2. Click Apps.3. In the Risk Manager pane, click Configuration Source Management.4. On the navigation menu, click Credentials.5. On the Network Groups pane, click the Add (+) icon.6. Type a name for a network group, and then click OK.7. Move the network group that you want to have first priority to the top of the list. You can use the
Move Up and Move Down arrow icons to prioritize a network group.8. In the Add Address field, type the IP address or CIDR range that you want to apply to the network
group, then click the Add (+) icon.Repeat for all IP addresses you want to add to the address set for this network group.
9. In the Credentials pane, click the Add (+) icon.10. Type a name for the new credential set, and then click OK.11. Type values for the parameters:
Option Description
Username Type the user name for the credential set.
14 QRadar Risk Manager User Guide

Option Description
Password Type the password for the credential set.
Enable Username Type the user name for second-level authentication forthe credential set.
Enable Password Type the password for second-level authentication for thecredential set.
SNMP Get Community Type the SNMP Get community.
SNMPv3 Authentication Username Type the user name you want to use to authenticateSNMPv3.
SNMPv3 Authentication Password Type the password you want to use to authenticateSNMPv3.
SNMPv3 Privacy Password Type the protocol you want to use to decrypt SNMPv3traps.
12. Move the credential set you want to make first priority to the top of the list. Use the Move Up andMove Down arrow icons to prioritize a credential set.
13. Repeat for each credential set that you want to add.14. Click OK.
Device discovery
The discovery process uses the Simple Networks Management Protocol (SNMP) and command line (CLI)to discover network devices.
After you configure an IP address or CIDR range, the discovery engine performs a TCP scan against theIP address to determine if port 22, 23, or 443 are monitoring for connections. If the TCP scan is successful,and SNMP query is configured to determine the type of device, the SNMP Get Community String is usedbased on the IP address.
This information is used to determine which adapter the device should be mapped to when added. IBMSecurity QRadar Risk Manager connects to the device and collects a list of interfaces and neighborinformation, such as CDP, NDP, or ARP tables. The device is then added to the inventory.
The configured IP address used to initiate the discovery process might not be the assigned IP address forthe new device. QRadar Risk Manager adds a device using the IP address for the lowest numberedinterface on the device (or lowest loopback address, if any).
If you use the Crawl the network from the addresses defined above check box, the IP address of theneighbors collected from the device are re-introduced into the discovery process and the process repeatsfor each IP address.
Discovering devicesAdministrators use Discover Devices to determine the type of device.
About this task
When performing a device discovery, any device that is not supported but responds to SNMP is addedwith the Generic SNMP adapter. If you want to perform a path filter through the device with simulatedroutes, you must manually remove the device.
5 Configuration Source Management 15

Procedure
1. On the navigation menu (
), click Admin to open the admin tab.2. Click Apps.3. In the Risk Manager pane, click Configuration Source Management.4. Configure the SNMP protocol, and add the IP address or CIDR range of the devices that you want to
discover.a. On the navigation menu, click Protocols.b. From the Network Groups pane, click the (+) symbol.c. Type a name for the network group.d. Click OK.e. In the Add address (IP, CIDR, Wildcard, or Range) field, type the IP address or CIDR range.f. Click (+) to add the IP address or CIDR range.g. Select the SNMP protocol.h. Click OK.
5. On the navigation menu, click Discover Devices.6. Type an IP address or CIDR range.
This IP address or CIDR range indicates the location of devices you want to discover.7. Click the Add (+) icon.8. If you want to also search for devices in the network from the defined IP address or CIDR range,
select the Crawl the network from the addresses defined above check box.9. Click Run.
Import devices into QRadar Risk ManagerUse Device Import to add a list of adapters and their network IP addresses to the Configuration SourceManager in QRadar Risk Manager by using a comma-separated value file (.CSV).
The device import list can contain up to 5000 devices, but the list must contain one line for each adapterand its associated IP address in the import file.
For example,<Adapter::Name 1>,<IP Address><Adapter::Name 2>,<IP Address><Adapter::Name 3>,<IP Address>
Where:
<Adapter::Name> contains the manufacturer and device name, such as Cisco::IOS.
<IP Address> contains the IP address of the device, such as 191.168.1.1.
The following table lists the devices that you can import:
Table 3. Device import examples
Manufacturer Name Example <Adapter::Name>,<IP Address>
Brocade vRouter Brocade::vRouter,<IP Address>
Check Point Secure Platform CheckPoint::SecurePlatform,<IP Address>
Nokia CheckPoint Nokia::Checkpoint,<IP Address>
Cisco CatOS Cisco::CatOS,<IP Address>
16 QRadar Risk Manager User Guide

Table 3. Device import examples (continued)
Manufacturer Name Example <Adapter::Name>,<IP Address>
Cisco IOS Cisco::IOS,<IP Address>
Cisco Nexus Cisco::Nexus,<IP Address>
Cisco Security Appliance Cisco::SecurityAppliance,<IP Address>
Generic SNMP Generic::SNMP,<IP Address>
HP Provision HP:Provision,<IP Address>
F5 BigIP F5::BigIP,<IP Address>
Fortinet FortiOS Fortinet::FortiOS,<IP Address>
Juniper JUNOS Juniper::JUNOS,<IP Address>
Juniper ScreenOS Juniper::ScreenOS,<IP Address>
McAfee Sidewinder McAfee::Sidewinder,<IP Address>
PaloAlto PANOS PaloAlto::PANOS,<IP Address>
Sourcefire 3D Sourcefire::3D,<IP Address>
Importing a CSV fileYou can import a master device list to Configuration Source Management using a comma-separated value(CSV) file.
Before you begin
If you import a list of devices and then make a change to an IP address in the CSV file, then you mightaccidentally duplicate a device in the Configuration Source Management list. For this reason, delete adevice from Configuration Source Management before re-importing your master device list.
Procedure
1. On the navigation menu (
), click Admin to open the admin tab.2. Click Apps.3. In the Apps pane, click Device Import.4. Click Browse.5. Locate your CSV file, click Open.6. Click Import Devices.
Results
If an error displays, then you need to review your CSV file to correct errors, and re-import the file. Animport of the CSV file might fail if the device list is structured incorrectly or if the device list containsincorrect information. For example, your CSV file might be missing colons or a command, there could bemultiple devices on a single line, or an adapter name might have a typo.
If the device import aborts, then no devices from the CSV file are added to Configuration SourceManagement.
Manage devicesUsing the Devices tab in the Configuration Source Management window, you can manage the devices inyour network.
5 Configuration Source Management 17

From the devices tab, you can view, add, edit, and delete devices. You can also filter the device list,obtain device configuration information, collect neighbor data and discover devices that are in yourdeployment.
Viewing devicesYou can view all the devices in your deployment on the Devices tab.
Procedure
1. On the navigation menu (
), click Admin to open the admin tab.2. Click Apps.3. In the Risk Manager pane, click Configuration Source Management.4. Click the Devices tab.5. To view detailed information for a device configuration, select the device you want to view and click
Open.
Adding a deviceYou can add individual network devices and adapters using Configuration Source Management.
About this task
You can add an individual device to the device list in Configuration Source Management or you can addmultiple devices using a CSV file.
For information about adding multiple devices, see Import devices.
Procedure
1. On the navigation menu (
), click Admin to open the admin tab.2. Click Apps.3. In the Risk Manager pane, click Configuration Source Management.4. On the navigation pane, click Add Device.5. Configure values for the following parameters:
Option Description
IP Address Type the management IP address of the device.
Adapter From the Adapter drop-down list, select the adapter youwant to assign to this device.
6. Click Add.If necessary, click Go to refresh the adapter list.
Editing devicesYou can edit a device to correct the IP address or adapter type if there is an error or if your networkchanged and you need to re-assigned an IP address.
Procedure
1. On the navigation menu (
), click Admin to open the admin tab.2. Click Apps.
18 QRadar Risk Manager User Guide

3. In the Risk Manager pane, click Configuration Source Management.4. Select the device you want to edit.5. Click Edit.6. Configure values for the following parameters:
Option Description
IP Address Type the management IP address of the device.
Adapter From the Adapter drop-down list, select the adapter youwant to assign to this device.
7. Click Save.
Deleting a deviceYou can delete a device from IBM Security QRadar Risk Manager. A deleted device is removed fromConfiguration Source Management, Configuration Monitor, and the topology.
Procedure
1. On the navigation menu (
), click Admin to open the admin tab.2. Click Apps.3. In the Risk Manager pane, click Configuration Source Management.4. Click the Devices tab.5. Select the device that you want to delete.6. Click Remove.7. Click Yes to delete the device.
Results
After you delete a device, the process to remove the device from the topology might require severalminutes.
Filtering the device listYou can use filters to quickly find devices in the device list.
About this task
IBM Security QRadar Risk Manager can handle up to 5000 network devices in Configuration SourceManagement. Large numbers of network devices can make scrolling through the device list tedious.
The following table describes the types of filters that can be applied to the device list to help you finddevices faster.
5 Configuration Source Management 19

Table 4. Filter types for the device list
Search Option Description
Interface IP Address Filters for devices that have an interface matching eitheran IP address or CIDR range.
Type the IP address or CIDR range on which you wantto search in the IP/CIDR field.
For example, if you type a search criteria of 10.100.22.6,the search results return a device with an IP address of10.100.22.6. If you type a CIDR range of 10.100.22.0/24,all devices in the 10.100.22.* are returned.
Admin IP Address Filters the device list based on the administrativeInterface IP address. An administrative IP address is theIP address that uniquely identifies a device.
Type the IP address or CIDR range on which you wantto search in the IP/CIDR field.
OS VersionFilters the device list based on the operating systemversion devices are running.
Select values for the following parameters:
Adapter - Using the drop-down list, select the type ofadapter you want to search.
Version - Using the drop-down list, select the searchcriteria for the version. For example, greater than, lessthan, or equal to the specified value. Type the versionnumber in the field on which you want to search. If youdo not select a search option for Version, the resultsinclude all devices that are configured with the selectedadapter, regardless of version.
ModelFilters the device list based on the vendor and modelnumber.
Configure values for the following parameters:
Vendor - Using the drop-down list, select the vendor youwant to search.
Model - Type the model you want to search.
HostnameFilters the device list based on the hostname.
Type the host name on which you want to search in theHostname field.
Procedure
1. On the navigation menu (
), click Admin to open the admin tab.2. Click Apps.3. In the Risk Manager pane, click Configuration Source Management.4. Click the Devices tab.5. Using the drop-down list to the left side of the device list, select a filter.6. Click Go.
20 QRadar Risk Manager User Guide

Results
All search results matching your criteria are displayed in the table.
What to do next
To reset a filter, select Interface IP Address, clear the IP/CIDR address, then click Go.
Obtaining device configurationThe process of backing up a device to obtain a device configuration can be completed for a single devicein the device list, or you can backup all devices from the Devices tab.
About this task
After you configure credential sets and address sets to access network devices, you must backup yourdevices to download the device configuration so the device information is included in the topology.
For more information about scheduling automated backups of device configurations from the Jobs tab,see Manage backup jobs.
Procedure
1. On the navigation menu (
), click Admin to open the admin tab.2. Click Apps.3. In the Risk Manager pane, click Configuration Source Management.4. Click the Devices tab.5. To obtain the configuration for all devices, click Backup All in the navigation pane, and then click Yes
to continue.6. To obtain the configuration for one device, select the device. To select multiple devices, hold down the
CTRL key and select all necessary devices. Click Backup.7. If necessary, click View Error to view the details of an error. After correcting the error, click Backup
All in the navigation pane.
Collecting neighbor dataUse the discovery process to obtain neighbor data from a device using SNMP and a command lineinterface (CLI).
About this task
Neighbor data is used in the topology to draw the connection lines to display the graphical topologymap of your network devices. The discover button allows you to select single or multiple devices andupdate the neighbor data for a device. This information is used to update the connection lines for one ormany devices in the topology.
Procedure
1. On the navigation menu (
), click Admin to open the admin tab.2. Click Apps.3. In the Risk Manager pane, click Configuration Source Management.4. Click the Devices tab.5. Select the device for which you want to obtain data. To select multiple devices, hold down the CTRL
key and select all necessary devices.
5 Configuration Source Management 21

6. Click Discover.7. Click Yes to continue.
Results
If you select multiple devices, then the discover process can take several minutes to complete.
What to do next
Select Run in Background to work on other tasks.
Manage backup jobsA job refers to a backup job, which enables you to automatically backup configuration information for alldevices in the Devices tab on a schedule.
Using the Jobs tab from Configuration Source Management, you can create backup jobs for all devices, orindividual groups of devices in Configuration Source Management.
Any backup job that you define in the Configuration Source Management page does not affect your IBMSecurity QRadar SIEM backup configuration using the Backup and Recovery icon in the Admin tab. Thebackup and recovery functionality obtains configuration information and data for QRadar SIEM. Thebackup job only obtains information for external devices.
View backup jobsJobs and job details are displayed on the Jobs tab.
Procedure
1. On the navigation menu (
), click Admin to open the admin tab.2. Click Apps.3. In the Risk Manager pane, click Configuration Source Management.4. Click the Jobs tab.5. Double-click any job you want to view in greater detail.
Viewing backup job status and logsYou can troubleshoot backup job issues by using the backup status and log file information that isprovided on the Configuration Monitor page.
About this task
To view backup job status and progress, use the Configuration Monitor page. To view the backup job logfile, use the Backup Log Viewer.
Procedure
Go to Risks > Configuration Monitor. The following columns in the Device List table provideinformation on backup job status:
22 QRadar Risk Manager User Guide

Column Description
Backup Status Indicates the completion status of the backup job:
COLLECTED. The backup job is waiting to be processed.
RUNNING. The backup job is in progress.
SUCCESS. The backup job completed successfully.
FAILURE. The backup job did not complete.
Progress Displays a progress bar that tracks the completion rate of the backup job.
To update the progress bar, click the Refresh icon on the Configuration Monitor page.
Backup Log To open the Backup Log Viewer window for the backup job, click the See Log link inthis column.
To update the progress bar, click Refresh on the Backup Log Viewer window.
Adding a backup jobYou can create backup jobs for all devices, or individual groups of devices in Configuration SourceManagement.
About this task
After you define the search criteria, you define the job schedule. The schedule configuration displays inthe Triggers column. The triggers for a job represent the job schedule. You can have multiple schedulesthat are configured. For example, you can configure two schedule options so a job runs every Mondayand the first of every month.
Procedure
1. On the navigation menu (
), click Admin to open the admin tab.2. Click Apps.3. In the Risk Manager pane, click Configuration Source Management.4. Click the Jobs tab.5. Select New Job > Backup.6. Configure values for the following parameters:
Option Description
Job Name Type the name you want to apply to this job.
Group From the Group list, select the group to which you wantto assign this job.
If there no groups are listed, you can type a group name.You can sort jobs after they are assigned to a group.
Comment Type any comment you want to associate with thisbackup job. You can type up to 255 characters in yourdescription of the backup job.
7. Click OK.8. Select one of the following search methods:
5 Configuration Source Management 23

Option Description
Static list You can use a static list to search for devices by usingseveral options. Using the static list option, you candefine the specific devices on which you want to run thejob.
Search Type an IP address or CIDR range that you want toinclude in the job. When you define the search criteria,the search for devices is performed after the job is run.This ensures that any new devices are included in thejob.
9. If you chose Static list, define the search criteria:a. Click the Devices tab.b. From the list on the Devices tab, select the search criteria. For more information, see Search
criteria for a static list or search.c. Click Go.d. In the Devices tab, select the devices that you want to include in the job.e. In the Job Details pane, click Add selected from device view search.
10. If you chose Search, define the search criteria:a. Click the Devices tab.b. Using the list in the Devices tab, select the search criteria. For more information, see the Search
criteria for a static list or search.c. Click Go.d. In the Job Details pane, click Use search from devices view. This search criteria is used to
determine devices that are associated with this job.11. Click Schedule, and configure values for the following parameters:
Option Description
Name Type a name for the schedule configuration.
Start time Select a time and date you want to start the backupprocess. The time must be specified in military time.
Frequency Select the frequency that you want to associate with thisschedule.
Cron Type a cron expression, which is interpreted inGreenwich Mean Time (GMT). For assistance, contactyour administrator.
Specify End Date Optional. Select a date to end the job schedule.
12. Click Save in the Trigger pane.13. Repeat steps 11 and 12 to create multiple schedules.14. If you want to run the job immediately, click Run Now.15. Click Yes to continue.
Editing a backup jobYou can edit backup jobs.
Procedure
1. On the navigation menu (
), click Admin to open the admin tab.2. Click Apps.
24 QRadar Risk Manager User Guide

3. In the Risk Manager pane, click Configuration Source Management.4. Click the Jobs tab.5. Double-click the job that you want to edit.6. Choose one of the following search options from the Selection Type parameter:
Option Description
Static list A static list enables you to search for devices by usingseveral options. Using the static list option, you candefine the specific devices on which you want to run thejob.
Search Type an IP address or CIDR range that you want toinclude in the job. When you define the search criteria,the search for devices happens after the job is run. Thisensures that any new devices are included in the job.
7. If you chose Static List, define the search criteria:a. Click the Devices tab.b. From the list on the Devices tab, select the search criteria.c. Click Go.d. From the Devices tab, select the devices that you want to include in the job.e. On the Job Details pane, click Add selected from device view search.
8. If you chose Search, define the criteria:a. Click the Devices tab.b. Using the list in the Devices tab, select the search criteria.c. Click Go.d. On the Job Details pane, click Use search from devices view. This search criteria is used to
determine devices that are associated with this job.9. Click Schedule, and configure values for the following parameters:
Option Description
Name Type a name for the schedule configuration.
Start time Select a time and date you want to start the backupprocess. The time must be specified in military time.
Frequency Select the frequency that you want to associate with thisschedule.
Cron Type a cron expression, which is interpreted inGreenwich Mean Time (GMT). For assistance, contactyour administrator.
Specify End Date Optional. Select a date to end the job schedule.
10. Click Save.11. Click Run Now.12. Repeat steps 9 and 10, as required.13. Click Yes to continue.
Rename a backup jobYou can rename a backup job
5 Configuration Source Management 25

Procedure
1. On the navigation menu (
), click Admin to open the admin tab.2. Click Apps.3. In the Risk Manager pane, click Configuration Source Management.4. Click the Jobs tab.5. Select the backup job you want to rename.6. Click Rename.7. Configure values for the following parameters:
Option Description
Job Name Type the name you want to apply to this job.
Group From the Group list, select the group to which you wantto assign this job. You can also specify a new groupname.
Comment Optional. Type any comment you want to associate withthis backup job. You can type up to 255 characters inyour description of the backup job.
8. Click OK.
Deleting a backup jobYou can delete a backup job.
Procedure
1. On the navigation menu (
), click Admin to open the admin tab.2. Click Apps.3. In the Risk Manager pane, click Configuration Source Management.4. Click the Jobs tab.5. Select the backup job that you want to delete.6. Click Delete.
Configure protocolsFor IBM Security QRadar Risk Manager to communicate with devices, you must define thecommunication method (protocol) required for communication to your network devices.
QRadar Risk Manager provides default protocol configuration for your system. If you need to defineprotocols, you can define protocols to allow QRadar Risk Manager to obtain and update deviceconfiguration. Many network environments have different communication protocols of different types orfunctions of the device. For example, a router might use a different protocol than the firewalls in thenetwork. For a list of supported protocols by device manufacturer, see the IBM Security QRadar RiskManager Adapter Configuration Guide.
QRadar Risk Manager uses protocol sets to define groups of protocols for a set of devices that require aspecific communication protocol. You can assign devices to network groups, which allows you to grouptogether protocol sets and address sets for your devices.
Protocol sets are a named set of protocols for a set of devices that require specific protocol credentials.
Address sets are IP addresses that define the network group.
26 QRadar Risk Manager User Guide

Configuring protocolsYou define protocols to obtain and update device configuration.
About this task
You can configure the following values for the protocol parameters.
Table 5. Protocol parameters
Protocol Parameter
SSH Configure the following parameters:
Port - Type the port on which you want the SSH protocolto use when communicating with and backing upnetwork devices.
The default SSH protocol port is 22.
Version - Select the version of SSH that you want thisnetwork group to use when communicating withnetwork devices. The available options are as follows:
Auto - This option automatically detects the SSH versionto use when communicating with network devices.
1 - Use SSH-1 when communicating with networkdevices.
2 - Use SSH-2 when communicating with networkdevices.
Telnet Type the port number you want the Telnet protocol touse when communicating with and backing up networkdevices.
The default Telnet protocol port is 23.
HTTPS Type the port number you want the HTTPS protocol touse when communicating with and backing up networkdevices.
The default HTTPS protocol port is 443.
HTTP Type the port number you want the HTTP protocol touse when communicating with and backing up networkdevices.
The default HTTP protocol port is 80.
SCP Type the port number you want the SCP protocol to usewhen communicating with and backing up networkdevices.
The default SCP protocol port is 22.
SFTP Type the port number you want the SFTP protocol to usewhen communicating with and backing up networkdevices.
The default SFTP protocol port is 22.
5 Configuration Source Management 27

Table 5. Protocol parameters (continued)
Protocol Parameter
FTP Type the port number you want the FTP protocol to usewhen communicating with and backing up networkdevices.
The default SFTP protocol port is 22.
TFTP The TFTP protocol does not have any configurableoptions.
SNMP Configure the following parameters:
Port - Type the port number you want the SNMPprotocol to use when communicate with and backing upnetwork devices.
Timeout(ms) - Select the amount of time, in milliseconds,that you want to use to determine a communicationtimeout.
Retries - Select the number of times you want to attemptto retry communications to a device.
Version - Select the version of SNMP you want to usefor communications. The options are v1, v2, or v3.
V3 Authentication - Select the algorithm you want touse to authenticate SNMP traps.
V3 Encryption - Select the protocol you want to use todecrypt SNMP traps.
Procedure
1. On the navigation menu (
), click Admin to open the admin tab.2. Click Apps.3. In the Risk Manager pane, click Configuration Source Management.4. On the navigation menu, click Protocols.5. Configure a new network group:
a. In the Network Groups pane, click the Add (+) icon.b. Type a name for a network group.c. Click OK.d. Use the Move Up and Move Down icons to prioritize the network groups. Move the network
group you want to have first priority to the top of the list.6. Configure the address set:
a. In the Add Address field, type the IP address or CIDR range that you want to apply to thenetwork group, then click the Add (+) icon. For example, type an IP address range using a dash orwildcard ( * ) to indicate a range, such as 10.100.20.0-10.100.20.240 or 1.1.1*. If you type 1.1.1.*, allIP addresses meeting that requirement are included.
b. Repeat for all IP addresses you want to add to the address set for this network group.7. Configure the protocol set:
a. In the Network Groups pane, ensure the network group you want to configure protocols for isselected.
28 QRadar Risk Manager User Guide

b. Select check boxes to apply a protocol to the range of IP addresses assigned to the network groupyou created. Clearing the check box turns off the communication option for the protocol whenattempting to back up a network device.
c. For each protocol that you selected, configure values for the parameters.d. Use the Move Up and Move Down icons to prioritize the protocols. Move the protocol that you
want to have first priority to the top of the list.8. Click OK.
Configuring the discovery scheduleYou can configure a discovery schedule to populate ARP, MAC tables, and neighbor information for yourdevices. The discovery schedule also allows new devices to be automatically added to the inventory.
Procedure
1. On the navigation menu (
), click Admin to open the admin tab.2. Click Apps.3. In the Risk Manager pane, click Configuration Source Management.4. On the navigation menu, click Schedule Discovery.5. Select the Enable periodic discovery check box to enable schedule discovery.6. Configure values for the following parameters:
Option Description
Name Type a name for the schedule configuration.
Start time Select a time and date you want to start the backupprocess. The time must be specified in military time.
Frequency Select the frequency you want to associate with thisschedule.
Cron Type a cron expression, which is interpreted inGreenwich Mean Time (GMT). For assistance, contactyour administrator.
Specify End Date Optional. Select a date to end the job schedule.
Crawl and discover new devices Select the check box if you want the discovery process todiscover new devices. Clear the check box if you do notwant to add new devices to the inventory.
7. Click OK.
5 Configuration Source Management 29

30 QRadar Risk Manager User Guide

6 Connections
A connection is a recording of a communication, including denied communications, between two uniqueIP addresses to a specific destination port, as detected over a specific time interval.
If two IP addresses communicate on a port many times within a specific time interval, only onecommunication is recorded. The total number of bytes that are communicated and the number of flowsare included in the connection information. The connection information is stored in the database for eachtime interval.
Bidirectional flow traffic
Connections data from unidirectional flows is not recorded. Connections from bidirectional flow trafficthat is from a flow source and from firewall or router deny events is recorded in these situations:v The destination is remote, which means that it is outside of your network hierarchy, the connection is
local to remote, the connection is not remote to remote.v The destination is local, which means that it is inside your network hierarchy, and the destination IP
address and port that are contained in the flow record are in the asset database and the destinationport is open.
Investigating network connections
You can monitor and investigate network device connections or do advanced searches. Do the followingtasks on the Connections page.v Search connections.v Search a subset of connections.v Mark search results as false positives to prevent false positive events from creating offenses.v View connection information grouped by various options.v Export connections in XML or CSV format.v Use the interactive graph to view connections in your network.
Viewing connectionsView connection information that is grouped by various options.
About this task
By default, the Connections window displays the following graphs:v Records Matched Over Time graph provides time-series information that shows the number of
connections based on time.v Connection Graph that provides a visual representation of the connections retrieved.
Note: If a saved search is the default, the results for that saved search are displayed.
Procedure1. Click the Risks tab.2. On the navigation menu, click Connections.3. Select a time frame by selecting the Start Time and End Time parameters, or use the View list.
In the table, right-click any cell (except cells from the Last Packet Time column) for a menu, to applymore filtering or to View Connection Events.
© Copyright IBM Corp. 2012, 2017 31

Example
The Connections window displays the following information:
Table 6. Connections window - default
Parameter Description
Current Filters This parameter displays only after you apply a filter.
Details of the filter that is applied to the search result aredisplayed on top. To clear these filter values, click ClearFilter.
View From the list, select the time range that you want tofilter. Use the Expand option to adjust the time range.
Current Statistics Current statistics include the following parameters:
Total Results - The total number of results that matchedyour search criteria.
Data Files Searched - The total number of data filessearched during the specified time span.
Compressed Data Files Searched - The total number ofcompressed data files searched within the specified timespan.
Index File Count - The total number of index filessearched during the specified time span.
Duration - The duration of search.
Current Statistics are helpful for troubleshooting. Whenyou contact Customer Support to troubleshoot an issue,you might be asked to provide current statisticalinformation. Click the arrow next to Current Statistics todisplay or hide the statistics.
Charts Displays charts that represent the records that arematched by the time interval and/or grouping option.Click (Hide Charts) if you want to remove the graphfrom your display.
Note: Remove Firefox Adblock Plus if it prevents chartsfrom displaying in Firefox.
Last Packet Time The date and time of the last processed packet for thisconnection.
Source Type The Source Type for this connection, which can be: Hostor Remote.
Source The following are options for the Source:
IP address - The IP address for the source of thisconnection. If the Source Type is Host, the IP address isdisplayed.
Country - The source country (with the country flag) forthis connection. The country flag is only displayed if theSource Type is remote.
Destination Type The options for Destination Type are: Host or Remote.
32 QRadar Risk Manager User Guide

Table 6. Connections window - default (continued)
Parameter Description
Destination The options for Destination are:
IP address - If the Destination Type is host, the IPaddress is displayed.
Country - The destination country (with the country flag)for this connection. The country flag is only displayed ifthe Destination Type is remote.
Protocol The protocol that is used for this connection.
Destination Port The destination port for this connection.
Flow Application The flow application that generated the connection.
Flow Source The source of flows that are associated with thisconnection. This parameter applies only to acceptedconnections.
Flow Count The total number of flows that are associated with thisconnection.
Flow Source Bytes The total number of flow source bytes associated withthis connection.
Flow Destination Bytes The total number of destination bytes associated withthis connection.
Log Source The source of events that contribute to this connection.
Event Count The total number of events that are detected for theconnection.
Connection Type The options for connection type are: Allow or Deny.
Use graphs to view connection dataYou can view connection data by using various chart options. By default, you can view data by usingrecords matched over time and connection graph.
The Records Matched Over Time graph displays the number of connections based on time.
The Connection Graph provides a visual representation of the connection retrieved.
Graph options available for grouped connections are table, bar, and pie.
If you use an Adblock Plus browser extension with a Mozilla Firefox web browser, the charts might notdisplay properly. For the charts to display, you must remove the Adblock Plus browser extension. Formore information about removing add-ons, see your web browser documentation.
Using the time series graphTime series charts are graphical representations of your connections over time; peaks and valleys thatdisplay, depict high and low connection activity.
Before you begin
If you previously saved a search to be the default, the results for that saved search display on theConnections page. If that search included Group By options selected in the Advanced View Definitionsbox, the Time Series chart is not available. You must clear the search criteria before continuing.
6 Connections 33

About this task
Time series charts are useful for short-term and long-term trending of data. Using time series charts, youcan access, navigate, and investigate connections from various views and perspectives.
The following table provides functions you can use to view time series charts.
Table 7. Time series chart functions
If you want to Then
View connections in greater detail Magnifying the data in a time series chart allows you toinvestigate smaller time segments of the connections. Youcan magnify the time series chart using one of thefollowing options:
Press the Shift key and click on the chart at the time youwant to investigate.
Press the Ctrl and Shift keys while you click and dragthe mouse pointer over the range of time you want toview.
Move your mouse pointer over the chart and press theUp arrow on your keyboard.
Move your mouse pointer over the chart and then useyour mouse wheel to zoom in (roll the mouse wheel up).
After you magnify a time series chart, the chart refreshesto display a smaller time segment.
View a larger time span of connections Including additional time ranges in the time series chartallows you to investigate larger time segments or returnto the maximum time range. You can view a time rangeusing one of the following options:
Click Max at the top left corner of the chart or press theHome key to return to the maximum time range.
Move your mouse pointer over the chart and press thedown arrow on your keyboard.
Move your mouse pointer over the plot chart and thenuse your mouse wheel to zoom out (roll the mousewheel down).
Scan the chart To view the chart to determine information at each datapoint:
Click and drag the chart to scan the time line.
Press the Page Up key to move the time line a full pageto the left.
Press the left arrow key to move the time line one halfpage to the left.
Press the Page Down key to move the time line a fullpage to the right.
Press the right arrow key to move the time line one halfpage to the right
34 QRadar Risk Manager User Guide

Procedure
Procedure1. Click the Risks tab.2. On the navigation menu, click Connections.3. In the charts pane, click the Configure icon.4. Using the Chart Type drop-down list, select Time Series.5. Using the interactive time series charts, you can navigate through a time line to investigate
connections.6. To refresh the information in the graph, click Update Details.
Use connection graph to view network connectionsThe connection graph provides a visual representation of the connections in your network.
The graph that is displayed in the Connections window is not interactive. If you click the graph, theRadial Data Viewer window is displayed. The Radial Data Viewer window allows you to manipulate thegraph, as required.
By default, the graph displays your network connections as follows:v Only allowed connections are displayed.v All local IP addresses are collapsed to show only leaf networks.v All country nodes are collapsed to a node named Remote Countries.v All remote network nodes are collapsed to one node named Remote Networks.v Preview thumbnail view of the graph displays a portion of the main graph. This is useful for large
graphs.
The Radial Data Viewer includes several menu options, including:
Table 8. Radial Data Viewer menu options
Menu Option Description
Connection Type By default, the radial graph displays acceptedconnections. If you want to view denied connections,select Deny from the Connection Type drop-down list.
Undo Collapses the last node expansion. If you want to undomultiple expansions, click the Undo button for eachexpansion.
Download Click Download to save the current topology as a JPEGimage file or a Visio drawing file (VDX).
To download and save the current topology as a Visiodrawing file (VDX), the minimum software version yourequire is Microsoft Visio Standard 2010.
The following table provides additional functions to view connections including:
Table 9. Radial Data Viewer functions
If you want to Then
Zoom in or zoom out Use the slider on the top-right side of the graph tochange the scale.
Distribute nodes on the graph to view additional details Drag the node to the preferred location to distributenodes on the graph.
6 Connections 35

Table 9. Radial Data Viewer functions (continued)
If you want to Then
Expand a network node Double-click the node to expand and view assets for thatnode. The node expands to include the specific assets towhich that node was communicating. By default, thisexpansion is limited to the first 100 assets of thenetwork.
View additional details regarding a connection Point your mouse over the connection line to viewadditional details.
If the connection is between a network node to a remotenetwork or remote country, right-click to display thefollowing Source and View Flows menus:
If the connection is between two IP addresses, the source,destination, and port information is displayed when youclick the connection line.
Determine the amount of data involved in the connection The thickness of the line in the graph indicates theamount of data involved in the connection. A thicker lineindicates a greater amount of data. This information isbased on the amount of bytes involved in thecommunication
Highlight a connection path Point your mouse over the connection line. If theconnection is allowed, the path highlights green. If theconnection is denied, the path highlights red.
Determine the connection path for a particular node Pointer your mouse over the node. If the node isallowed, the path to the node and the node highlight ingreen. If the node is denied, the path to the node and thenode highlights in red.
Change graph view Using the preview thumbnail, move the thumbnail to theportion of the graph you want to display.
Using pie, bar, and table chartsYou can view connections data using a pie, bar, or table chart.
About this task
The pie, bar, and table chart options only display if the search includes Group By options selected in theAdvanced View Definition options.
Procedure1. Click the Risks tab.2. On the navigation menu, click Connections.
Note: The default saved search results display.3. Perform a search.4. In the charts pane, click the Configuration icon.5. Configure the parameters:
36 QRadar Risk Manager User Guide
Option Description
Value to Graph Using the Value to Graph list, select the object type towhich you want to graph on the chart. Options includeall normalized and custom flow parameters included inyour search parameters.
Chart Type Using the Chart Type list, select the chart type you wantto view. Options include:
Table - Displays data in a table.
Bar - Displays data in a bar chart.
Pie - Displays data in a pie chart.
6. Click Save.The data does not refresh automatically, unless your search criteria is displayed to automaticallydisplay details.
7. To refresh the data, click Update Details.
Search for connectionsYou can search connections using specific criteria and display connections that match the search criteriain a results list. You can create a new search or load a previously saved set of search criteria.
Procedure1. Click the Risks tab.2. On the navigation menu, click Connections.
If applicable, the default saved search results display.3. Using the Search list, select New Search.4. If you want to load a previously saved search, use one of the following options:
a. From the Group list, select the group to which the saved search is associated.b. From the Available Saved Searches list, select the saved search you want to load.c. In the Type Saved Search or Select from List field, type the name of the search you want to
load. From the Available Saved Searches list, select the saved search you want to load.d. Click Load.e. In the Edit Search pane, select the options you want for this search.
Option Description
Include in my Quick Searches Include this search in your Quick Search items.
Include in my Dashboard Include the data from your saved search in yourdashboard. This parameter is only available if the searchis grouped.
Set as Default Set this search as your default search.
Share with Everyone Share these search requirements with all other IBMSecurity QRadar Risk Manager users.
5. In the Time Range pane, select an option for the time range you want to capture for this search.
Option Description
Recent Using the list, specify the time range you want to filter.
6 Connections 37

Option Description
Specific Interval Using the calendar, specify the date and time range youwant to filter.
6. If you are finished configuring the search and want to view the results, click Search.7. In the Search Parameters pane, define your specific search criteria:
a. Using the first list, select an attribute on which you want to search. For example, ConnectionType, Source Network, or Direction.
b. Using the second list, select the modifier you want to use for the search. The list of modifiers thatdisplay depends on the attribute selected in the first list.
c. In the text field, type specific information related to your search.d. Click Add Filter.e. Repeat steps a through d for each filter you want to add to the search criteria.f. If you are finished configuring the search and want to view the results, click Search. Otherwise,
proceed to the next step.8. If you want to automatically save the search results when the search is completed, select the Save
results when search is complete check box and specify a name.9. If you are finished configuring the search and want to view the results, click Search. Otherwise,
proceed to next step.10. Using the Column Definition pane, define the columns and column layout you want to use to view
the results:a. Using the Display list, select the view you want to associate with this search.b. Click the arrow next to Advanced View Definition to display advanced search parameters. Click
the arrow again to hide the parameters.11. Click Search.
Saving search criteriaYou can create a search by specifying search criteria, and you can save the search for future use.
About this task
You can customize the columns that display in the search results. These options are available in theColumn Definition section and are called Advanced View Definition options.
Table 10. Advanced View Definition options
Parameter Description
Type Column or Select from List Filters the columns in the Available Columns list.
Type the name of the column you want to locate or typea keyword to display a list of column names that includethat keyword.
For example, type Source to display a list of columnsthat include Source in the column name.
Available Columns Lists available columns associated with the selected view.Columns that are currently in use for this saved searchare highlighted and displayed in the Columns list.
38 QRadar Risk Manager User Guide

Table 10. Advanced View Definition options (continued)
Parameter Description
Add and remove column buttons (top set) The top set of buttons allows you to customize theGroup By list.
Add Column - Select one or more columns from theAvailable Columns list and click the Add Columnbutton.
Remove Column - Select one or more columns from theGroup By list and click the Remove Column button.
Add and remove column buttons (bottom set) The bottom set of buttons allows you to customize theColumns list.
Add Column - Select one or more columns from theAvailable Columns list and click the Add Columnbutton.
Remove Column - Select one or more columns from theColumns list and click the Remove Column button.
Group By Specifies the columns from which the saved searchgroups the results. You can further customize the GroupBy list using the following options:
Move Up - Select a column and move it up through thepriority list using the Move Up icon.
Move Down - Select a column and move it downthrough the priority list using the Move Down icon.
The priority list specifies in which order the results aregrouped. The search results will group by the firstcolumn in the Group By list and then group by the nextcolumn on the list.
Columns Specifies columns chosen for the search. The columns areloaded from a saved search. You can customize theColumns list by selecting columns from the AvailableColumns list. You can further customize the Columnslist by using the following options:
Move Up - Select a column and move it up through thepriority list using the move up button.
Move Down - Select a column and move it downthrough the priority list using the move down button.
If the column type is numeric or time and there is anentry in the Group By list, the column includes adrop-down list to allow you to choose how you want togroup the column.
Order By Using the first list, specify the column by which youwant to sort the search results. Then, using the secondlist, specify the order you want to display for the searchresults: Descending or Ascending.
Procedure1. Click the Risks tab.2. On the navigation menu, click Connections.
6 Connections 39

3. Perform a search.4. Click Save Criteria.5. Configure values for the following parameters:
Option Description
Search Name Type a name you want to assign to this search criteria.
Assign Search to Group(s) The group you want to assign to this saved search. Ifyou do not select a group, this saved search is assignedto the Other group by default.
Timespan options Choose one of the following options:
Recent - Using the drop-down list, specify the time rangeyou want to filter.
Specific Interval - Using the calendar, specify the dateand time range you want to filter.
Include in my Quick Searches Select the check box if you want to include this search inyour Quick Search items, which is available from theSearch drop-down list.
Include in my Dashboard Select the check box if you want to include the data fromyour saved search in your Dashboard.
This parameter is only displayed if the search isgrouped.
Set as Default Select the check box if you want to set this search asyour default search.
Share with Everyone Select the check box if you want to share these searchrequirements with all other IBM Security QRadar RiskManager users.
6. Click OK.
Performing a sub-searchEach time you perform a search, the entire database is queried for connections that match your criteria.This process might take an extended period of time, depending on the size of your database.
About this task
A sub-search allows you to search within a set of completed search results. You can refine your searchresults without searching the database again. A sub-search is not available for grouped searches orsearches in progress.
Procedure1. Click the Risks tab.2. On the navigation menu, click Connections.3. Perform a search. The search results are displayed. Additional searches use the dataset from the
previous search when sub-searches are performed.4. To add a filter, perform the following steps:
a. Click Add Filter.b. Using the first list, select an attribute on which you want to search.c. Using the second list, select the modifier you want to use for the search. The list of modifiers that
display depends on the attribute selected in the first list.d. In the text field, type specific information related to your search.
40 QRadar Risk Manager User Guide

e. Click Add Filter.
Note: If the search remains in progress, partial results are displayed. The Original Filter paneindicates the filter from which the original search was based. The Current Filter pane indicates thefilter applied to the sub-search.
Tip: You can clear sub-search filters without restarting the original search. Click the Clear Filterlink next to the filter you want to clear. If you clear a filter from the Original Filter pane, theoriginal search is relaunched.
5. Click Save Criteria to save the sub-search.
Results
If you delete the original search, you can access the saved sub-search. If you add a filter, the sub-searchsearches the entire database since the search function no longer bases the search on a previously searcheddataset.
Manage search resultsYou can perform multiple connection searches while navigating to other interfaces.
About this task
You can configure the search feature to send you an email notification when a search is complete. At anytime while a search is in progress, you can view partial results of a search in progress.
The search results toolbar provides the following options:
Parameter Description
New Search Click New Search to create a new search. When youclick this button, the search window is displayed.
Save Results Click Save Results to save search results.
This option is only enabled when you have selected arow in the Manage Search Results list.
CancelClick Cancel to cancel searches that are in progress orare queued to start.
Delete Click Delete to delete a search result.
Notify Select the search(es) for which you want to receivenotification, and then click Notify to enable emailnotification when the search is complete.
View From the drop-down list, specify which search resultsyou want to list in the search results window. Theoptions are:
Saved Search Results
All Search Results
Canceled/Erroneous Searches
Searches in Progress
6 Connections 41

Procedure1. Click the Risks tab.2. On the navigation menu, click Connections.3. From the menu, select Search > Manage Search Results.
Saving Search ResultsYou can save your search results.
Procedure1. Click the Risks tab.2. On the navigation menu, click Connections.3. Perform a connection search or sub-search.4. From the Search Results window, select Search > Manage Search Results and select a search result.5. Click Save Results.6. Type a name for the search results.7. Click OK.
Canceling a searchYou can cancel one or more searches.
About this task
If a search is in progress when canceled, the accumulated results, up until the cancellation of the search,are maintained.
Procedure1. From the Manage Search Results window, select the queued or in progress search result you want to
cancel. You can select multiple searches to cancel.2. Click Cancel Search.3. Click Yes.
Deleting a searchYou can delete a search.
Procedure1. From the Manage Search Results window, select the search result you want to delete.2. Click Delete.3. Click Yes.
Exporting connectionsYou can export connections in Extensible Markup Language (XML) or Comma Separated Values (CSV)format.
Procedure1. Click the Risks tab.2. On the navigation menu, click Connections.3. If you want to export the connection in XML format, select Actions > Export to XML.4. If you want to export the connection in CSV format, select Actions > Export to CSV.5. If you want to resume your activities, click Notify When Done.
42 QRadar Risk Manager User Guide

7 Configuration monitor
In IBM Security QRadar Risk Manager, you can manage the efficiency of your network devices,investigate your network device configuration, investigate firewall rules, and identify security risks thatare created by invalid firewall rules.
Procedure1. Click the Risks tab.2. In the navigation pane, click Configuration Monitor.3. To search your network devices, enter an IP address or Host Name in the Device IP or Name field.4. Double-click the device that you want to investigate.
The rule Event Count column displays the firewall rule trigger frequency. A zero event count rule isdisplayed for one of the following reasons:v A rule is not triggered and might cause a security risk. You can investigate your firewall device and
remove any rules that are not triggered.v A QRadar log source mapping is not configured.
5. To search the rules, on the Rules toolbar, click Search > New Search.If an icon is displayed in the Status column, you can hover your mouse over the status icon todisplay more information.
6. To investigate the device interfaces, on the toolbar, click Interfaces.7. To investigate access control list (ACL) device rules, on the toolbar, click ACLs.
Each access control list defines the interfaces over which the devices on your network arecommunicating. When the conditions of an ACL are met, the rules that are associated with an ACLare triggered. Each rule is tested to allow or deny communication between devices.
8. To investigate network address translation (NAT) device rules, on the toolbar, click NAT.The Phase column specifies when to trigger the NAT rule, for example, before or after routing.
9. To investigate the history or compare device configurations, on the toolbar, click History.You can view device rules in a normalized comparison view or the raw device configuration. Thenormalized device configuration is a graphical comparison that shows added, deleted, or modifiedrules between devices. The raw device configuration is an XML or plain text view of the device file.
Searching device rulesIn IBM Security QRadar Risk Manager, you can search for rules that changed on the devices in yourtopology. You can also discover rule changes that occur between device configuration backups.
The results that are returned for a rule search are based on the configuration source management backupof your device. To ensure that rule searches provide up-to-date information, you can schedule devicebackups in your firewall policy update page.
Procedure1. Click the Risks tab.2. In the navigation pane, click Configuration Monitor.3. Double-click a device from the Configuration Monitor page.4. On the Rules pane toolbar, click Search > New Search.5. In the Search Criteria area, click a time range.6. To search your device rules, choose from the following options:
© Copyright IBM Corp. 2012, 2017 43

v To search for Shadowed, Deleted or Other rules, click a status option.By default all status options are enabled. To search for shadow rules only, clear the Deleted andOther options.
v To search for an access control list (ACL), type in the List field.v To search on the order number of the rule entry, type a numeric value in the Entry field.v To search for a source or destination, type an IP address, CIDR address, host name, or object group
reference.v To search for ports or object group references, type in the Service field.
The service can include port ranges, such as 100-200, or port expressions, such as 80(TCP). If theport is negated, the port information also includes an exclamation mark and might be surroundedby parenthesis, for example, !(100-200) or !80(TCP).
v To search for vulnerability rule information as defined by the IPS device, type in the Signaturefield.
v To search for applications by adapter, click Select Applications, then type an adapter or applicationname.
7. Click Search.
Comparing the configuration of your network devicesIn IBM Security QRadar Risk Manager, device configurations can be compared to each other bycomparing multiple backups on a single device or by comparing one network device backup to another.
Common configuration types can include the following items:v Standard Element Document - Standard Element Document (SED) files are XML data files that contain
information about your network device. Individual SED (standard element document) files are viewedin their raw XML format. If a SED (standard element document) file is compared to another SED(standard element document) file, then the view is normalized to display the rule differences.
v Config - Configuration files are provided by certain network devices, depending on the devicemanufacturer. You can view a configuration file by double-clicking it.
Depending on the information that the adapter collects for your device, several other configuration typesmight be displayed. These files are displayed in plain text view when double-clicked.
Procedure1. Click the Risks tab.2. On the navigation menu, click Configuration Monitor.3. Double-click any device to view the detailed configuration information.4. Click History to view the history for this device.5. To compare two configurations on a single device:
a. Select a primary configuration.b. Press the Ctrl key and select a second configuration for comparison.c. In the History pane, click Compare Selected.
If the comparison files are standard element documents (SEDs), then the Normalized DeviceConfiguration Comparison window shows rule differences between the backups.When you compare normalized configurations, the color of the text shows the following deviceupdates:v A green dotted outline shows a rule or configuration that was added to the device.v A red dashed outline shows a rule or configuration that was deleted from the device.v A yellow solid outline shows a rule or configuration that was modified on the device.
d. To view the raw configuration differences, click View Raw Comparison.
44 QRadar Risk Manager User Guide

If the comparison is a configuration file or another backup type, then the raw comparison isdisplayed.
6. To compare two configurations on different devices:a. Select a primary configuration from a device.b. Click Mark for Comparison.c. From the navigation menu, select All Devices to return to the device list.d. Double-click the device to compare and click History.e. Select a configuration that you want to compare with the marked configuration.f. Click Compare with Marked.g. To view the raw configuration differences, click View Raw Comparison.
Device ManagementIn IBM Security QRadar Risk Manager, use the Configuration Monitor to add or delete network devices,and to back up device configurations.
Adding a deviceYou can add individual network devices and adapters using Configuration Monitor.
Procedure1. Click the Risks tab.2. On the navigation menu, click Configuration Monitor.3. On the toolbar, click Add Device. Alternatively, access the Actions menu, click Device Management >
Add Device.4. Configure values for the following parameters:
Option Description
IP Address Type the management IP address of the device.
Adapter Select the adapter you want to assign to this device.
Back up now Retrieves device information from adapters and adds thedevice to the backup job. Includes the device in thetopology.
5. Click OK.
Backing up a deviceThe process of backing up a device to obtain a device configuration can be completed for a single devicein the device list, or you can back up all devices at one time. After you configure credential sets andaddress sets to access network devices, you must back up your devices to download the deviceconfiguration so that the device information is included in the topology.
Procedure1. Click the Risks tab.2. On the navigation menu, click Configuration Monitor.3. Select the device that you want to back up.4. On the toolbar, click Backup Device to back up the selected device. Alternatively, go to the Actions
menu click Device Management > Backup Device. To select multiple devices, hold down the CTRLkey and select all necessary devices.
5. To obtain the configuration for all devices, click Backup All in the navigation pane. Alternatively, goto the Actions menu and then click Device Management > Backup All Devices.
7 Configuration monitor 45

6. Click Yes.7. If necessary, click View Error to view the details of an error. After correcting the error, click Backup
All in the navigation pane.Related tasks:Viewing backup job status and logsYou can troubleshoot backup job issues by using the backup status and log file information that isprovided on the Configuration Monitor page.
Deleting a deviceYou can delete individual or multiple devices from IBM Security QRadar Risk Manager to clean up theview in the Device List. The deleted device is removed from the Configuration Monitor, ConfigurationSource Management, and the topology.
Procedure1. Click the Risks tab.2. On the navigation menu, click Configuration Monitor.3. Go to the Actions menu, and click Device Management to delete a single or multiple devices.v To delete one device, select the device and click Delete Device.v To delete multiple devices, hold down the CTRL key and select all necessary devices. Click Delete
Device.v To delete all devices in the Device List, click Delete All Devices.
4. Click Yes.
Results
The process to remove the device from the topology might take several minutes.
Discovering devicesIn IBM Security QRadar Risk Manager, use the Device Discovery screen in the Configuration Monitor toadd, edit, and run a defined discovery.
About this task
When you run a Discover with SNMP device discovery, any device that is not supported but responds toSNMP is added through the Generic SNMP adapter.
Procedure1. Access the Device Discovery screen by using the following steps:
a. Click the Risks tab.b. Click Configuration Monitor > Device Discovery in the Risk Manager pane.
2. Add a device to QRadar Risk Manager by using the following steps:a. On the navigation pane, click Add.
b. Select a Discovery Type on the Discovery Profile Configuration screen. The following lists themethods that you can use to add a network device:v Discover with SNMP
v Discover from Check Point OPSEC
v Discover from Defense Center
v Discover from NSM
v Discover from SiteProtector™
46 QRadar Risk Manager User Guide

v Discover from Check Point HTTPS
c. Enter the Device IP, Username, and Password for the device.d. You can also search for devices in the network from the defined IP address with the Discover
with SNMP option. Select the Crawl the network from the addresses defined above check box.e. To run the discovery immediately, click Run Discovery Now. Alternatively, you can save the
profile configuration and run the discovery another time.f. Click Save.
3. Edit a device that is listed in the Discovery list by using the following steps:a. Select a device on the Discovery list, and click Edit on the navigation pane.b. Edit the discovery details, and select Run Discovery Now to run the discovery immediately.
Alternatively, you can save the profile configuration and run the discovery another time.4. To search for a device, enter the IP address/name in the Device IP field and click the Search icon.5. You can delete a device discovery job, by selecting a device on the Discovery List and click Delete on
the navigation pane.
Recent ActivityIn IBM Security QRadar Risk Manager, use the Recent Activity screen in QRadar Risk Manager to helpyou monitor device activities and troubleshoot device management.
You can view all information that is related to the activity, including the Type, State, and an indicator ofProgress. You can also view and investigate the Log.
All discoveries log an entry in the Recent Activity screen. The types of activity that display in the RecentActivity screen are:v Adapter Backup
v Add Device
v Delete Device
v Device Backup
v Run Discovery
The following table lists all of the states that are displayed in the Recent Activity screen:
Table 11. States in Recent Activity.
State Description
Collected Device configuration is collected, but the configuration is not yet merged intoQRadar Risk Manager.
Failure Device failed to backup, and has never been successfully backed up in QRadarRisk Manager.
Processing Device is being processed.
Staged QRadar Risk Manager discovered the device, and is extracting the configuration.
Success Device is successfully backed up in QRadar Risk Manager.
Warning The most recent attempt to process this device failed. QRadar Risk Manager isusing a previously successful configuration.
7 Configuration monitor 47

Log source mappingTo monitor the trigger frequency of firewall rules and enable topology event searches, IBM SecurityQRadar Risk Manager identifies QRadar log sources.
By understanding firewall rules you can maintain firewall efficiency and prevent security risks.
A maximum of 255 devices can be mapped to a log source in QRadar Risk Manager, but devices can havemultiple log sources.
Log source mapping display options
If you configured your network device as a QRadar log source, the Configuration Monitor page displaysone of the following entries in the Log Source column:v Auto-Mapped - If QRadar Risk Manager identifies and maps the log source to the device
automatically.v Username - If an administrator manually added or edited a log source.v Blank - If QRadar Risk Manager is unable to identify a log source for the device, the Log Source
column shows no value. You can manually create a log source mapping.
For more information about configuring log sources, see the IBM Security QRadar Log Sources User Guide.
Creating or editing a log source mappingIf IBM Security QRadar Risk Manager cannot identify a log source in QRadar, you can configure a logsource mapping.
Procedure1. Click the Risks tab.2. In the navigation pane, click Configuration Monitor.3. Click the device without a log source mapping.4. On the toolbar, click Action > Log Source Mapping > Create/Edit Log Source Mapping.5. In the Log Source Groups list, select a group.6. In the Log Sources list, select a log source and click (>).7. Click OK.
48 QRadar Risk Manager User Guide

8 Filtering device rules by user or group
In QRadar Risk Manager, you can view and filter your device rules by user or group.
About this task
Search by user or group rule interaction, and get a sense of how the typical user or group interacts inyour network. Knowing your users' rule interactions in your network is helpful in discovering any errantbehavior, and helps you in formulating efficient rule policies in your network.
Procedure1. Click the Risks tab.2. On the navigation menu, click Configuration Monitor.3. From the Device List table, double-click the table row for your device.
From the User(s)/Group(s) column in the rules table, you can view your users and groups.Group results are displayed with hyperlinks, which you can click, to view the users in the selectedgroup.
4. From the Rules pane, click Search > New Search.5. Click Select Users/Groups.6. Type a partial or full search term or leave the User/Group Name field empty, and then click Search.7. Select the user or group name in the Search Results field, and then click Add, to add your selections
to the Selected Items box.8. Click OK, and then click Search.
Use the rule information to establish benchmarks or profiles for user rule interaction, which can beused to optimize rule policies in your network.
© Copyright IBM Corp. 2012, 2017 49

50 QRadar Risk Manager User Guide

9 Network topology graph
In IBM Security QRadar Risk Manager, you can use the topology model graph to view, filter, andinvestigate the physical connectivity of your network.
The network topology graph is generated from configuration information that is obtained from devicessuch as firewalls, routers, switches, and Intrusion Prevention System (IPS) systems. You can hover overconnection lines to display network connection information. You can filter the topology by searching forpotential attack paths on allowed protocols, ports, or vulnerabilities. You can view the traffic flowbetween devices or subnets, and you can view device rules.
You can use the topology graph to complete the following tasks:v Visualize specific network paths and traffic direction for advanced threat analysis.v Incorporate passive IPS security maps into the topology graph.v Group devices to organize and simplify the view.v Add devices to groups, and remove devices from groups.v Reposition icons in the graph by using your mouse.v Save topology graph layouts.v Rename devices and groups.v Create and save search filters for your network topology that is based on protocols, ports, or
vulnerabilities.v View detailed connection information between devices and subnets.v View device rules on topology node connections with the allowed ports and protocols.v View Network Address Translation (NAT) devices, NAT indicators, and information about NAT
mappings.v View virtual Network security devices that have multiple-contexts.v Configure subnet color coding to indicate vulnerability status of assets in the subnets on your topology
graph.
When you search and view the allowed ports and protocols between devices, you can see onlyconnections that use TCP, UDP, and ICMP protocols in the topology graph.
Topology graph searchesUse the topology search feature to view and investigate various elements of your network infrastructure.
Topology searches appear in a tabbed view, and each topology search opens it's own tab. The topologysearch results are cached for improved topology retrieval, resulting in faster processing time. The searchesremain running in the background, so you can use other features of QRadar Risk Manager.
You can use the search feature to filter your topology view, and zone in on network paths, hosts, subnets,and other network elements. You can refine your search down to the port or protocol level, for exampleyou can search for potential attack paths on allowed protocols or ports.
You can search events by right-clicking devices and subnets, or search flows by right-clicking subnets.
Click Actions to access the Search menu. Enter your search criteria in the Search Criteria pane. Thefollowing are some of the search options that you can use:
© Copyright IBM Corp. 2012, 2017 51

Searching Hosts
If you search for a host, all devices that communicate with that host are displayed. If the host does notmatch an interface on a device, but is included in the subnet, then that subnet and all connected devicesare displayed.
Searching Networks
Search for a single CIDR, for example, 10.3.51.200/24.
If you're searching for multiple CIDRs, ensure that the CIDRs are valid and are separated by a comma,for example, 10.51.0.0/24,10.51.01/24.
Searching Paths
A path search displays the traffic direction, fully or partially allowed protocols, and device rules. A pathsummary is displayed if you select any path search criteria other than the mandatory source anddestination IP addresses.
Refine your path search by searching for applications, vulnerabilities, and users/groups.
NAT indicators in search resultsA NAT indicator, which is a solid green dot, displays in the topology graph if your search finds a paththat contains source or destination translations.
About this task
A NAT indicator indicates that the destination IP address that was specified in the path filter might notbe the final destination. Hover over the indicator to view the following information about thetranslations.
Table 12. Information available from the NAT indicator
Parameter Description
Source The translated source IP or CIDR.
Source Port(s) The translated source ports, if applicable.
Translated Source The result of the translation that was applied to thesource.
Translated Source Port(s) The result of the translation that was applied to thesource port(s), if applicable.
Destination The translated destination IP or CIDR.
Destination Port(s) The translated destination ports, if applicable.
Translated Destination The result of the translation that was applied to thedestination.
Translated Destination Port(s) The result of the translation that was applied to thedestination port(s), if applicable.
Phase The routing phase when the translation was applied.Translations are applied either pre- or post-routing.
Adding an intrusion prevention system (IPS)If your Configuration Source Management list includes an intrusion prevention system (IPS) device, youcan add an IPS to connections between a device-to-subnet nodes, and between device-to-device nodes.
52 QRadar Risk Manager User Guide

About this task
Adding an IPS connection is useful to determine the location of the IPS if the device is passive.
Procedure1. Click the Risks tab.2. On the navigation menu, click Topology.3. Move your mouse pointer over the connection line that links a device node and a subnet node.4. Right-click the connection line, select Add IPS.5. Select the device and interfaces to add from the following lists:
Option Description
Place IPS Select a placement from the list.
Connect IPS interface Select an interface to connect to the device. If there aremultiple choices devices, then you need to select a device(see next option).
to device Select the device that you want to connect to the IPS.This option is available if there are multiple devices.
Connect IPS interface Select an interface to connect to the subnet.
6. Using the lists, select the device and interfaces to add the IPS connection to your topology.7. Click OK. If you want to add an IPS to a device that is in a group, expand the group to add the IPS.
Removing an Intrusion Prevention System (IPS)You can remove an IPS connection.
Procedure1. Click the Risks tab.2. On the navigation menu, click Topology.3. Move your mouse pointer over the connection line that links a device node and a subnet node.4. Right-click the connection line, select the Remove IPS idp option.5. Click OK.
Topology device groupsGroup devices in the Current Topology tab to organize and simplify complicated topology graphs.
Select a device in the Current Topology window and click the Actions menu on the toolbar, or use theright-click menu to access the device Groups feature. You cannot currently use the Groups feature withinthe Topology Search tabs.
Use case: Visualize the attack path of an offenseOffenses in IBM Security QRadar Risk Manager are events that are generated by the system to alert youabout a network condition or event.
Attack path visualization ties offenses with topology searches. This visualization allows security operatorsto view the offense detail and the path the offense took through your network. The attack path providesyou with a visual representation. The visual representation shows you the assets in your network that arecommunicating to allow an offense to travel through the network. This data is critical during auditing toprove that you monitor for offenses, but also proves the offense does not have an alternate path in yournetwork to a critical asset.
9 Network topology graph 53

The key features for visualization are:v Leverages the existing rule and offense system from IBM Security QRadar SIEM.v Displays a visual path for all devices between the source and destination of the offense.v Quick access to the device configurations and rules that allow the offense.
Viewing the attack path of an offenseYou can view the attack path of an offense. The attack path shows the source, destination, and associateddevices.
Procedure1. Click the Offenses tab.2. On the navigation menu, click All Offenses. The All Offenses page displays a list of offenses that are
on your network. Offenses are listed with the highest magnitude first.3. Double-click an offense to open the offense summary.4. On the Offenses toolbar, click View Attack Path.
54 QRadar Risk Manager User Guide

10 Configuring color coding of subnets to indicatevulnerability status
Use colors to show the vulnerability status of subnets that are displayed on your topology graph.
About this task
Use subnet color coding to highlight vulnerability-related information about assets in the subnets on yourtopology graph.
Procedure1. Click the Risks tab.2. On the navigation menu, click Topology.3. Click Actions > Properties > Edit to configure subnet color coding.4. Select one of the following color-coding options:v No color coding of subnets
If you don’t want to use color coding, click No color coding of subnets. All of the subnet icons area gray color when you choose this option.
v Highest Aggregated CVSS score (Risk score) for any asset in a subnet
Type a value for each color. When the risk score of any asset in a subnet exceeds the highestmatching Greater than value, the color of the subnet icon changes to that color.For example, if you configure a value of 14 for the red color, the subnet icon changes to red whenany asset in that subnet has a risk score that is greater than 14.The color for the highest matching value displays only. The risk score is calculated by using theCommon Vulnerability Scoring System (CVSS) and includes any risk adjustments that are made byQRadar Risk Manager. You can view the Aggregated CVSS score for an asset on the Assets tab.
v Number of vulnerabilities for any asset in a subnet
Type a value for each color. When the total number of vulnerabilities for any asset in a subnetexceeds the highest matching Greater than value, the color of the subnet icon changes to the colorthat represents that value.
v Impact of vulnerabilities for any asset in a subnet
Select a vulnerability impact for each color. When any asset in a subnet matches the highest listedimpact, the color of the subnet icon changes to that color.For example, if you select red to represent system loss, the color of the subnet icon changes to redwhen any asset in the subnet is impacted by system loss because of a vulnerability.If you select the same vulnerability impact for two different colors, the color in the highest positionis applied to the subnet icon when an asset is affected by the vulnerability impact.
To update the vulnerability status of assets in your topology when a scan finishes or othervulnerability-related changes occur, you can take one of the following steps:v Reset your topology by clicking Actions > Layout > Reset Layout.v Clear your browser cache, and then refresh your browser.
Note: The subnet color in the topology graph appears in a lighter shade.
© Copyright IBM Corp. 2012, 2017 55

56 QRadar Risk Manager User Guide

11 Policy Monitor
Use policy monitor questions to assess and manage risk in your network. Create and define specific riskquestions about your network to assess or monitor risk that is based on the analysis of risk indicators.
In policy monitor, you can define policies, assess adherence to a policy, evaluate results of questions, andmonitor new risks.
Default question templates are available help you to assess and monitor the risk on your network. Youcan use one of the default question templates as a basis for your own questions or you can create a newquestion. You can find the default question templates in the Group menu on the Policy Monitor page.
You can choose from the following list of risk indicators:v Network activity measures risk based on network communications that occurred in the past.v Configuration and topology measure risk that is based on possible communication and network
connections.v Vulnerabilities measure risk that is based on your network configuration and vulnerability scan data
that is collected from network assets.v Firewall rules measures risk based on the enforcement or absence of firewall rules that are applied
across the network.
You can define tests that are based on the risk indicators, and then restrict the test results to filter thequery for specific results or violations.
Security professionals create questions for assets or devices/rules to flag risks in their networks. The risklevel for an asset or a device/rule is reported when a question is submitted to the policy monitor. Youcan approve results that are returned from assets or define how you want the system to respond tounapproved results.
Use policy monitor question results to assess risk for many security-risk scenarios such as the followingscenarios:v Use of forbidden protocols to communicate.v Communication with forbidden networks or assets.v Firewall rules don't comply with corporate policy.v Systems prone to high-risk vulnerabilities because of their network configuration.
Policy Monitor questionsYou can define questions in Policy Monitor to assess and monitor risk based on network activity,vulnerabilities, and firewall rules.
When you submit a question, the topology search is based on the data type that you selected:v For questions based on assets, then the search is based on the network assets that violated a defined
policy or assets that introduced risk into the network.v For questions based on devices/rules, then the search either identifies the rules in a device that
violated a defined policy or introduced risk into the network.v If a question is based on asset compliance, then the search identifies if an asset is compliant with a CIS
benchmark.
© Copyright IBM Corp. 2012, 2017 57

Note: If you configured IBM Security QRadar for multiple domains, asset questions only monitor assetsin your default domain. Asset compliance questions monitor assets in your default domain unless youconfigured another domain in the Admin > Domain Management window. For more information aboutdomain management, see the IBM Security QRadar Administration Guide.
Devices/rules questions look for violations in rules and policy and do not have restrictive testcomponents. You can also ask devices/rules questions for applications.
Asset tests are divided into these categories:v A contributing test uses the question parameters to examine the risk indicators that are specified in the
question. Risk data results are generated, which can be further filtered using a restrictive test.Contributing tests are shown in the Which tests do you want to include in your question area.Contributing tests return data based on assets detected that match the test question.
v A restrictive test narrows the results that are returned by a contributing test question. Restrictive testsdisplay only in the Which tests do you want to include in your question area after a contributing testis added. You can add restrictive tests only after you include a contributing test in the question. If youremove or delete a contributing test question, the restrictive test question cannot be saved.
Asset compliance questions look for assets that are not in compliance with CIS benchmarks. The tests thatare included in the CIS benchmark are configured with the Compliance Benchmark Editor.
Policy Monitor question parametersYou can define test questions to identify risk in network devices or rules on network devices.
Generic and test-specific parameters for Policy Monitor tests
You configure parameters for each Policy Monitor test. Configurable parameters are bolded andunderlined. You click a parameter to view the available options for your question.
Policy Monitor tests use two types of parameters; generic and test-specific. Generic parameters provide 2or more options to customize a test. Clicking a generic parameter toggles the choices that are available.Test-specific parameters require user-input. You click test-specific parameters to specify information.
For example, the asset test called have accepted communication to destination remote network locationscontains two generic parameters and one test-specific parameter. Click the generic parameter, haveaccepted, to select either have accepted or have rejected. Click the generic parameter, to destination, toselect either to destination or from source. Click the test-specific parameter, remote network locations, toadd a remote location for the asset test.
Asset test questions
Asset questions are used to identify assets on the network that violate a defined policy or introduce riskinto the environment.
Asset test questions are categorized by communication type; actual or possible. Both communicationtypes use contributing and restrictive tests.
Actual communication includes any assets on which communications have been detected usingconnections. Possible communication questions allow you to review if specific communications arepossible on assets, regardless of whether or not a communication has been detected.
A contributing test question is the base test question that defines what type of actual communication youare trying to test.
58 QRadar Risk Manager User Guide

A restrictive test question restricts the test results from the contributing test to further filter the actualcommunication for specific violations.
When you use a restrictive test, the direction of the restrictive test should follow the same direction as thecontributing test. Restrictive tests that use a mix of inbound and outbound directions can be used insituations where you are trying to locate assets in between two points, such as two networks or IPaddresses.
Inbound refers to a test that is filtering the connections for which the asset in question is a destination.Outbound refers to a test that is filtering connections for which the asset in question is a source.
Devices/Rules test questions
Devices and rules are used to identify rules in a device that violate a defined policy that can introducerisk into the environment.
For a detailed list of device rule questions, see Device/rules test questions.
Contributing questions for actual communication testsThe actual communication tests for assets include contributing questions and parameters that you choosewhen you create a policy monitor test.
When you apply the have not condition to a test, the not condition is associated with the parameter thatyou are testing.
For example, if you configure a test as have not accepted communication to destination networks, thenthe test detects assets that have accepted communications to networks other than the configured network.Another example is if you configure a test as have not accepted communication to the Internet, then thetest detects assets that have accepted communications from or to areas other than the Internet.
The following table lists and describes the contributing question parameters for actual communicationtests.
Table 13. Contributing question parameters for actual communication tests
Test Name Description
have accepted communication to any destination Detects assets that have communications to any or fromany configured network.
This test allows you to define a start or end point toyour question.
For example, to identify the assets that have acceptedcommunication from the DMZ, configure the test asfollows:
have accepted communication from any source
You can use this test to detect out-of-policycommunications.
11 Policy Monitor 59

Table 13. Contributing question parameters for actual communication tests (continued)
Test Name Description
have accepted communication to destination networks Detects assets that have communications to or from thenetworks that you specify.
This test allows you to define a start or end point toyour question.
For example, to identify the assets that communicated tothe DMZ, configure the test as follows:
have accepted communication from source <networks>
You can use this test to detect out-of-policycommunications.
have accepted communication to destination IP addresses Detects assets that have communications to or from theIP address that you specify.
This test allows you to specify IP or CIDR address.
For example, if you want to identify all assets thatcommunicated to a specific compliance server, configurethe test as follows:
have accepted communications to destination<compliance server IP address>
have accepted communication to destination assetbuilding blocks
Detects assets that have communications to or from theasset building blocks that you specify. This test allowsyou to re-use building blocks defined in the QRadarRules Wizard in your query.
For more information about rules, assets, and buildingblocks, see the IBM Security QRadar Administration Guide.
have accepted communication to destination asset savedsearches
Detects assets that have communications to or from theassets that are returned by the saved search that youspecify.
For information about creating and saving an assetsearch, see the IBM Security QRadar User Guide
have accepted communication to destination referencesets
Detects assets that have communicated to or from thedefined reference sets.
have accepted communication to destination remotenetwork locations
Detects assets that have communicated with networksdefined as a remote network.
For example, this test can identify hosts that havecommunicated to botnets or other suspicious Internetaddress space.
have accepted communication to destination geographicnetwork locations
Detects assets that have communicated with networksdefined as geographic networks.
For example, this test can detect assets that haveattempted communications with countries in which youdo not have business operations.
have accepted communication to the Internet Detects source or destination communications to or fromthe Internet.
60 QRadar Risk Manager User Guide

Table 13. Contributing question parameters for actual communication tests (continued)
Test Name Description
are susceptible to one of the following vulnerabilities Detects specific vulnerabilities.
If you want to detect vulnerabilities of a particular type,use the test, are susceptible to vulnerabilities with oneof the following classifications.
You can search for vulnerabilities by using the OSVDBID, CVE ID, Bugtraq ID, or title.
are susceptible to vulnerabilities with one of thefollowing classifications
A vulnerability can be associated with one or morevulnerability classifications. This test filters all assets thatinclude vulnerabilities with the specified classifications.
Configure the classifications parameter to identify thevulnerability classifications that you want this test toapply.
For example, a vulnerability classification might be InputManipulation or Denial of Service.
are susceptible to vulnerabilities with CVSS score greaterthan 5
A Common Vulnerability Scoring System (CVSS) value isan industry standard for assessing the severity ofvulnerabilities. CVSS is composed of 3 metric groups:Base, Temporal, and Environmental. These metrics allowCVSS to define and communicate the fundamentalcharacteristics of a vulnerability.
This test filters assets in your network that includevulnerabilities with the CVSS score that you specify.
are susceptible to vulnerabilities disclosed after specifieddate
Detects assets in your network with a vulnerability thatis disclosed after, before, or on the configured date.
are susceptible to vulnerabilities on one of the followingports
Detects assets in your network with a vulnerability thatis associated with the configured ports.
Configure the ports parameter to identify ports you wantthis test to consider.
are susceptible to vulnerabilities where the name, vendor,version or service contains one of the following textentries
Detects assets in your network with a vulnerability thatmatches the asset name, vendor, version or service basedone or more text entry.
Configure the text entries parameter to identify the assetname, vendor, version or service you want this test toconsider.
are susceptible to vulnerabilities where the name, vendor,version or service contains one of the following regularexpressions
Detects assets in your network with a vulnerability thatmatches the asset name, vendor, version or service basedone or more regular expression.
Configure the regular expressions parameter to identifythe asset name, vendor, version or service you want thistest to consider.
are susceptible to vulnerabilities contained invulnerability saved searches
Detects risks that are associated with saved searches thatare created in IBM Security QRadar VulnerabilityManager.
11 Policy Monitor 61

Deprecated contributing test questionsContributing questions that are replaced by another test are hidden in policy monitor.
The following tests are hidden in the Policy Monitor:v assets that are susceptible to vulnerabilitiesv assets that are susceptible to vulnerabilities from the following services
These contributing tests have been replaced by other tests.
Restrictive questions for actual communication testsThe actual communication tests for assets include restrictive questions and parameters that you canchoose when you create a policy monitor test.
When you apply the exclude condition to a test, the exclude condition applies to the protocols parameter.
For example, if you configure this test to exclude the following protocols, the test will return only assetsthat do not use the excluded protocols.
The following table lists and describes the restrictive question parameters for actual communication tests.
Table 14. Restrictive question parameters for actual communication tests
Test Name Description
include only the following protocols Filters assets from the contributing test that include orexclude the specified protocols.
This test is only selectable when a contributing asset testis added to this question.
include only the following inbound ports Filters assets from the contributing test that include onlyor exclude the specified ports.
This test is only selectable when a contributing asset testis added to this question.
include only the following inbound applications Filters assets from the contributing test question thatinclude only or exclude any inbound or outboundapplications.
This test filters connections that only include flow data.
include only if the source inbound and destinationoutbound bytes have a percentage difference less than10
Filters assets from the contributing test question that isbased on communications with a specific ratio of inboundto outbound (or outbound to inbound) bytes.
This test is useful for detecting hosts that might beexhibiting proxy type behavior (inbound equalsoutbound).
62 QRadar Risk Manager User Guide

Table 14. Restrictive question parameters for actual communication tests (continued)
Test Name Description
include only if the inbound and outbound flow counthas a percentage difference less than 10
Filters assets from the contributing test question that isbased on communications with a specific ratio of inboundto outbound (or outbound to inbound) flows.
This test filters connections that include flow data whenflow count is selected.
This restrictive test requires two contributing tests thatspecify a source and destination. The following testoutlines a set of questions trying to determine what assetsbetween two points have an inbound and outboundpercentage difference greater than 40%. For example,
Contributing test - have accepted communication to theinternet.
Contributing test - and have accepted communicationfrom the internet.
Restrictive test - and include only if the inbound andoutbound flow count has a percentage difference greaterthan 40.
include only if the time is between start time and endtime inclusive
Filters communications within your network thatoccurred within a specific time range. This allows you todetect out-of-policy communications. For example, if yourcorporate policy allows FTP communications between 1and 3 am, this test can detect any attempt to use FTP tocommunicate outside of that time range.
include only if the day of week is between start day andend day inclusive
Filters assets from the contributing test question based onnetwork communications that occurred within a specifictime range. This allows you to detect out-of-policycommunications.
include only if susceptible to vulnerabilities that areexploitable.
Filters assets from a contributing test question searchingfor specific vulnerabilities and restricts results toexploitable assets.
This restrictive test does not contain configurableparameters, but is used in conjunction with thecontributing test, are susceptible to one of the followingvulnerabilities. This contributing rule containing avulnerabilities parameter is required.
include only the following networks Filters assets from a contributing test question thatincludes or excludes the configured networks.
include only the following asset building blocks Filters assets from a contributing test question that are orare not associated with the configured asset buildingblocks.
include only the following asset saved searches Filters assets from a contributing test question that are orare not associated with the asset saved search.
include only the following reference sets Filters assets that are from a contributing test questionthat includes or excludes the configured reference sets.
include only the following IP addresses Filters assets that are or are not associated with theconfigured IP addresses.
include only if the Microsoft Windows service pack foroperating systems is below 0
Filters assets to determine if a Microsoft Windows servicepack level for an operating system is below the level yourcompany policy specifies.
11 Policy Monitor 63

Table 14. Restrictive question parameters for actual communication tests (continued)
Test Name Description
include only if the Microsoft Windows security setting isless than 0
Filters assets to determine if a Microsoft Windowssecurity setting is below the level your company policyspecifies.
include only if the Microsoft Windows service equalsstatus
Filters assets to determine if a Microsoft Windows serviceis unknown, boot, kernel, auto, demand, or disabled.
include only if the Microsoft Windows setting equalsregular expressions
Filters assets to determine if a Microsoft Windows Settingis the specified regular expression.
Contributing questions for possible communication testsThe possible communication tests for assets include contributing questions and parameters that you canchoose when you create a policy monitor test.
The following table lists and describes the contributing question parameters for possible communicationtests.
Table 15. Possible communication question parameters for contributing tests
Test Name Description
have accepted communication to any destination Detects assets that have possible communications to orfrom any specified source or destination. For example, todetermine if a critical server can possibly receivecommunications from any source, configure the test asfollows:
have accepted communication from any source.
You can then apply a restrictive test to return if thatcritical server has received any communications on port21. This allows you to detect out-of-policycommunications for that critical server.
have accepted communication to destination networks Detects assets that have possible communications to orfrom the configured network.
This test allows you to define a start or end point toyour question.
For example, to identify the assets that have thepossibility of communicating to the DMZ, configure thetest as follows:
have accepted communication from source <networks>
You can use this test to detect out-of-policycommunications.
have accepted communication to destination IP addresses Detects assets that have possible communications to orfrom the configured IP address. This test allows you tospecify a single IP address as a focus for possiblecommunications. For example, if you want to identify allassets that can communicate to a specific complianceserver, configure the test as follows:
have accepted communications to destination<compliance server IP address>
64 QRadar Risk Manager User Guide

Table 15. Possible communication question parameters for contributing tests (continued)
Test Name Description
have accepted communication to destination assetbuilding blocks
Detects assets that have possible communications to orfrom the configured asset using building blocks. This testallows you to re-use building blocks defined in theQRadar Rules Wizard in your query. For example, if youwant to identify all assets that can communicate to aProtected Assets, configure the test as follows:
have accepted communications to destination<BB:HostDefinition:Protected Assets>
For more information about rules and building blocks,see the IBM Security QRadar Administration Guide.
have accepted communication to destination asset savedsearches
Detects assets that have accepted communications to orfrom the assets that are returned by the saved search thatyou specify.
A saved asset search must exist before you use this test.For information about creating and saving an assetsearch, see the IBM Security QRadar User Guide
have accepted communication to destination referencesets
Detects if source or destination communication arepossible to or from reference sets.
have accepted communication to the Internet Detects if source or destination communications arepossible to or from the Internet.
Specify the to or from parameter, to considercommunication traffic to the Internet or from theInternet.
are susceptible to one of the following vulnerabilities Detects possible specific vulnerabilities.
If you want to detect vulnerabilities of a particular type,use the test, are susceptible to vulnerabilities with oneof the following classifications.
Specify the vulnerabilities to which you want this test toapply. You can search for vulnerabilities using theOSVDB ID, CVE ID, Bugtraq ID, or title
are susceptible to vulnerabilities with one of thefollowing classifications
A vulnerability can be associated with one or morevulnerability classification. This test filters all assets thathave possible vulnerabilities with a CommonVulnerability Scoring System (CVSS) score, as specified.
Configure the classifications parameter to identify thevulnerability classifications that you want this test toapply.
are susceptible to vulnerabilities with CVSS score greaterthan 5
A Common Vulnerability Scoring System (CVSS) value isan industry standard for assessing the severity ofpossible vulnerabilities. CVSS is composed of threemetric groups: Base, Temporal, and Environmental. Thesemetrics allow CVSS to define and communicate thefundamental characteristics of a vulnerability.
This test filters assets in your network that include theconfigured CVSS value.
are susceptible to vulnerabilities disclosed after specifieddate
Filters assets in your network with a possiblevulnerability that is disclosed after, before, or on theconfigured date.
11 Policy Monitor 65

Table 15. Possible communication question parameters for contributing tests (continued)
Test Name Description
are susceptible to vulnerabilities on one of the followingports
Filters assets in your network with a possiblevulnerability that is associated with the configured ports.
Configure the ports parameter to identify assets thathave possible vulnerabilities based on the specified portnumber.
are susceptible to vulnerabilities where the name, vendor,version or service contains one of the following textentries
Detects assets in your network with a vulnerability thatmatches the asset name, vendor, version or service basedone or more text entry.
Configure the text entries parameter to identify the assetname, vendor, version or service you want this test toconsider.
are susceptible to vulnerabilities where the name, vendor,version or service contains one of the following regularexpressions
Detects assets in your network with a vulnerability thatmatches the asset name, vendor, version or service basedone or more regular expression.
Configure the regular expressions parameter to identifythe asset name, vendor, version or service you want thistest to consider.
are susceptible to vulnerabilities contained invulnerability saved searches
Detects risks that are associated with saved searches thatare created in IBM Security QRadar VulnerabilityManager.
Deprecated contributing test questionsIf a test is replaced with another test, it is hidden in policy monitor.
The following tests are hidden in the Policy Monitor:v assets that are susceptible to vulnerabilities from the following vendorsv assets that are susceptible to vulnerabilities from the following services
These contributing tests have been replaced by other tests.
Restrictive question parameters for possible communication testsPossible communication tests for assets include restrictive question parameters.
The following table lists and describes the restrictive question parameters for possible communicationtests.
Table 16. Restrictive tests for possible communication tests
Test Name Description
include only the following protocols Filters assets that have or have not possiblycommunicated with the configured protocols, inconjunction with the other tests added to this question.
include only the following inbound ports Filters assets that have or have not possiblycommunicated with the configured ports, in conjunctionwith the other tests added to this question.
include only ports other than the following inboundports
Filters assets from a contributing test question that haveor have not possibly communicated with ports otherthan the configured ports, in conjunction with the othertests added to this question.
66 QRadar Risk Manager User Guide

Table 16. Restrictive tests for possible communication tests (continued)
Test Name Description
include only if susceptible to vulnerabilities that areexploitable. Filters assets from a contributing test question searching
for possible specific vulnerabilities and restricts results toexploitable assets.
This restrictive test does not contain configurableparameters, but is used in conjunction with thecontributing test, are susceptible to one of the followingvulnerabilities. This contributing rule containing avulnerabilities parameter is required.
include only the following networks Filters assets from a contributing test question thatinclude only or exclude the configured networks.
include only the following asset building blocks Filters assets from a contributing test question thatinclude only or exclude the configured asset buildingblocks.
include only the following asset saved searches Filters assets from a contributing test question thatinclude only or exclude the associated asset saved search.
include only the following reference sets Filters assets from a contributing test question thatinclude only or exclude the configured
include only the following IP addresses Filters assets Filters assets from a contributing testquestion that include only or exclude the configured IPaddresses.
include only if the Microsoft Windows service pack foroperating systems is below 0
Filters assets to determine if a Microsoft Windowsservice pack level for an operating system is below thelevel your company policy specifies.
include only if the Microsoft Windows security setting isless than 0
Filters assets to determine if a Microsoft Windowssecurity setting is below the level your company policyspecifies.
include only if the Microsoft Windows service equalsstatus
Filters assets to determine if a Microsoft Windowsservice is unknown, boot, kernel, auto, demand, ordisabled.
include only if the Microsoft Windows setting equalsregular expressions
Filters assets to determine if a Microsoft WindowsSetting is the specified regular expression.
Device/rules test questionsDevices/rules test questions are used to identify rules in a device that violate a defined policy that canintroduce risk into the environment.
The device/rules test questions are described in the following table.
Table 17. Device/rules tests
Test Name Description
allow connections to the following networks Filters device rules and connections to or from theconfigured networks. For example, if you configure thetest to allow communications to a network, the test filtersall rules and connections that allow connections to theconfigured network.
11 Policy Monitor 67

Table 17. Device/rules tests (continued)
Test Name Description
allow connections to the following IP addresses Filters device rules and connections to or from theconfigured IP addresses. For example, if you configurethe test to allow communications to an IP address, thetest filters all rules and connections that allowconnections to the configured IP address.
allow connections to the following asset building blocks Filters device rules and connections to or from theconfigured asset building block.
allow connections to the following reference sets Filters device rules and connections to or from theconfigured reference sets.
allow connections using the following destination portsand protocols
Filters device rules and connections to or from theconfigured ports and protocols
allow connections using the following protocols Filters device rules and connections to or from theconfigured protocols.
allow connections to the Internet Filters device rules and connections to and from theInternet.
are one of the following devices Filters all network devices to the configured devices. Thistest can filter based on devices that are or are not in theconfigured list.
are one of the following reference sets Filters device rule based on the reference sets that youspecify.
are one of the following networks Filters device rules based on the networks that youspecify.
are using one of the following adapters Filters device rules based on the adapters that youspecify.
Importance factorThe Importance Factor is used to calculate the Risk Score and define the number of results returned for aquestion.
The range is 1 (low importance) to 10 (high importance). The default is 5.
Table 18. Importance factor results matrix
Importance Factor Returned Results for Asset TestsReturned Results for Device/RuleTests
1 (low importance) 10,000 1,000
10 (high importance) 1 1
For example, a policy question that states have accepted communication from the internet and includeonly the following networks (DMZ) would require a high importance factor of 10 since any results tothe question is unacceptable due to the high risk nature of the question. However, a policy question thatstates have accepted communication from the internet and include only the following inboundapplications (P2P) might require a lower importance factor since the results of the question does notindicate high risk but you might monitor this communication for informational purposes.
Creating an asset questionSearch for assets in the network that violate a defined policy or assets that introduced risk.
68 QRadar Risk Manager User Guide

About this task
Policy Monitor questions are evaluated in a top-down manner. The order of Policy Monitor questionsimpacts the results.
Procedure1. Click the Risks tab.2. On the navigation menu, click Policy Monitor.3. From the Actions menu, select New Asset Question.4. In the What do you want to name this question field, type a name for the question.5. From the Evaluate On list, select one of the following options:
Option Description
Actual Communication Includes any assets on which communications weredetected that use connections.
Possible Communication Includes any assets on which communications areallowed through your network topology, such asfirewalls. You use these questions to investigate whetherspecific communications are possible, regardless ofwhether a communication was detected.
6. From the Importance Factor list, select the level of importance you want to associate with thisquestion. The Importance Factor is used to calculate the Risk Score and define the number of resultsreturned for a question.
7. Specify the time range for the question.8. From the Which tests do you want to include in your question field, select the add (+) icon beside
the tests you want to include.9. Configure the parameters for your tests in the Find Assets that field.
Configurable parameters are bold and underlined. Click each parameter to view the availableoptions for your question.
10. In the groups area, click the relevant check boxes to assign group membership to this question.11. Click Save Question.
Investigating external communications that use untrusted protocolsYou can use a policy monitor question that is based on the known list of trusted protocols to monitortraffic in your DMZ. In most organizations, network traffic that crosses the DMZ is restricted to knownand trusted protocols, such as HTTP or HTTPS on specified ports.
About this task
From a risk perspective, it is important to continuously monitor traffic in the DMZ to ensure that onlytrusted protocols are present. Use IBM Security QRadar Risk Manager to accomplish this task by creatinga policy monitor question based on an asset test for actual communications.
Select an option to create a policy monitor question based on the known list of trusted protocols for theDMZ.
Procedure1. Click the Risks tab.2. On the navigation menu, click Policy Monitor.3. From the Actions menu, select New Asset Question.4. In the What do you want to name this question field, type a name for the question.
11 Policy Monitor 69

5. In the What type of data do you want to return drop-down list, select Assets.6. In the Evaluate On menu, select Actual Communication.7. From the Importance Factor menu, specify a level of importance to associate with your question.8. In the Time Range section, specify a time range for the question.9. In the Which tests do you want to include in your question panel, select have accepted
communication to destination networks.10. In the Find Assets that... panel, click destination networks to further configure this test and specify
your DMZ as the destination network.11. Select the and include the following inbound ports.12. In the Find Assets that... panel, click include only so that it changes to exclude.13. Click ports.14. Add port 80 and 443, and then click OK.15. Click Save Question.16. Select the policy monitor DMZ question that you created.17. Click Submit Question.18. Review the results to see whether any protocols other than port 80 and port 443 are communicating
on the network.19. Optional: Monitor your DMZ question by putting the question into monitoring mode when the
results are tuned.
Finding assets that allow communication from the internetUse IBM Security QRadar Risk Manager policy monitor questions to find assets that allowcommunication from the Internet. IBM Security QRadar Risk Manager evaluates the question anddisplays the results of any internal assets that allow inbound connections from the Internet.
Procedure1. Click the Risks tab.2. On the navigation menu, click Policy Monitor.3. From the Group list, select PCI 10.4. Select the test question Assess any inbound connections from the internet to anywhere on the
internal network.5. Click Submit Question.
Assessing devices that allow risky protocolsUse IBM Security QRadar Risk Manager policy monitor questions to assess devices that allow riskyprotocols.
About this task
IBM Security QRadar Risk Manager evaluates a question and displays the results of any assets, in yourtopology, that match the test question. Security professionals, administrators, or auditors in your networkcan approve communications that are not risky to specific assets. They can also create an offense for thebehavior.
Procedure1. Click the Risks tab.2. On the navigation menu, click Policy Monitor.3. From the Group list, select PCI 1.
70 QRadar Risk Manager User Guide

4. Select the test question Assess any devices (i.e. firewalls) that allow risky protocols (i.e. telnet andFTP traffic - port 21 & 23 respectively) from the internet to the DMZ.
5. Click Submit Question.
Investigating possible communication with protected assetsYou can create a policy monitor question based on IP addresses that detects possible communication withprotected assets. From a risk perspective, it is important to know which users within your organizationcan communicate with critical network assets.
About this task
IBM Security QRadar Risk Manager accomplishes this task by creating a policy monitor question basedon an asset test for possible communications.
You might look at all the connections to the critical server over time, but you might be more concernedthat regional employees are not accessing these critical servers. To accomplish this objective, you cancreate a policy monitor question that looks at the topology of the network by IP address.
Procedure1. Click the Risks tab.2. On the navigation menu, click Policy Monitor.3. From the Actions menu, select New.4. In the What do you want to name this question field, type a name for the question.5. In the What type of data do you want to return drop-down list, select Assets.6. From the Evaluate On drop-down list, select Possible Communication.7. From the Importance Factor drop-down list, specify a level of importance to associate with your
question.8. In the Time Range section, specify a time range for the question.9. In the Which tests do you want to include in your question section, double-click to select have
accepted communication to destination asset building blocks.10. In the Find Assets that... section, click asset building blocks to further configure this test and
specify Protected Assets.
Note: To define your network remote assets, your remote assets building block must be defined.11. In the Which tests do you want to include in your question section, double-click to select the
restrictive test and include only the following IP addresses.12. In the Find Assets that... section, click IP Addresses.13. Specify the IP address range or CIDR address of your remote network.14. Click Save Question.15. Select the policy monitor question that you created for protected assets.16. Click Submit Question.17. Review the results to see whether any protected asset accepts communication from an unknown IP
address or CIDR range.18. Optional: Monitor your protected assets by putting the question into monitoring mode. If an
unrecognized IP address connects to a protected asset, then QRadar Risk Manager can generate analert.
11 Policy Monitor 71

View question informationYou can view information about policy monitor questions and parameters on the Policy Monitor page.
If you want to view more information about any question, select the question to view the description.
If a question is in monitor mode when you select it, then you can view any events and offenses that aregenerated from the selected question.
Creating a question that tests for rule violationsCreate a device/rules question in policy monitor to identify the rules in a device that violated a definedpolicy, or introduced risk into the network.
About this task
policy monitor questions are evaluated in a top down manner. The order of policy monitor questionsimpacts the results.
Procedure1. Click the Risks tab.2. On the navigation menu, click Policy Monitor.3. From the Actions menu, click New Device/Rules Question.4. In the What do you want to name this question field, type a name for the question.5. From the Importance Factor list, select the level of importance that you want to associate with this
question.6. From the Which tests do you want to include in your question field, click the + icon beside the tests
you want to include.7. In the Find Devices/Rules that field, configure the parameters for your tests.
Configurable parameters are bold and underlined. Click each parameter to view the available optionsfor your question.
8. In the groups area, click the relevant check boxes to assign group membership to this question.9. Click Save Question.
Investigating devices/rules that allow communication to the InternetIn policy monitor, device tests are used to identify, rules on a device that violate a defined policy, orchanges that introduce risk into the environment.
About this task
Device tests are used to identify rules in a device that violate a defined policy or changes that introducerisk into the environment. From a network security perspective, it is important to know about changes todevice rules. A common occurrence is when servers get unintentional access to the internet because offirewall change on the network. IBM Security QRadar Risk Manager can monitor for rule changes onnetwork devices by creating a policy monitor question based on the device rules.
Create a policy monitor question that checks what devices have access to the internet.
Procedure1. Click the Risks tab.2. On the navigation menu, click Policy Monitor.3. From the Actions menu, select New Devices/Rules Question.
72 QRadar Risk Manager User Guide

4. In the What type of data do you want to return?, click Devices/Rules.5. From the Importance Factor list, select the level of importance that you want to associate with your
question.6. In the Which tests do you want to include in your question section, click the plus icon beside the
test, allow connections to the internet to add the test to your question.7. Click Save Question.8. Select the policy monitor question that you created for monitoring device rules.9. Click Submit Question.
10. Review the results to see whether any rules allow access to the internet.11. Optional: Monitor your protected assets by putting the policy monitor question into monitoring
mode.
Submitting a questionYou submit a question to determine the associated risk. You can also determine the time that is requiredto run a question and the amount of data that is queried.
About this task
When you submit a question, the resulting information depends on the data that is queried; assets ordevices and rules.
After a Policy Monitor question is submitted, you can view how long the question takes to run. The timethat is required to run the policy also indicates how much data is queried. For example, if the executiontime is 3 hours then there is 3 hours of data. You can view the time in the Policy Execution Time columnto determine an efficient interval frequency to set for the questions that you want to monitor. Forexample, if the policy execution time is 3 hours, then the policy evaluation interval must be greater than3 hours.
Note: When you edit a question after it is submitted, and the edit affects associated tests, then it mighttake up to an hour to view those changes.
Procedure1. Click the Risks tab.2. On the navigation menu, click Policy Monitor.3. Select the question that you want to submit.4. Click Submit Question.
Asset question resultsAsset results display after you submit a policy monitor question.
The Risk Score indicates the level of risk that is associated with the question. The Risk Score calculationis based on the importance factor assigned to the question, and the number of results returned for thequestion.
The parameters for asset results are described in the following table.
Table 19. Asset results
Parameter Description
IP The IP address of the asset.
11 Policy Monitor 73

Table 19. Asset results (continued)
Parameter Description
Name The name of the asset, as obtained from the asset profile.
For more information about asset profiles, see the IBMSecurity QRadar User Guide
Vlan The name of the VLAN associated with the asset.
Weight The weight of the asset, as obtained from the assetprofile.
Destination Port(s) The list of destination ports associated with this asset, incontext of the question tests. If there are multiple portsassociated with this asset and question, this fieldindicates Multiple and the number of multiple ports. Thelist of ports is obtained by filtering the connectionsassociated with this question to obtain all unique portswhere the asset has either been the source, destination,or the connection.
Click Multiple (N) to view the connections. This displayprovides the aggregated connections by port, filtered bythe asset IP address, and based on the time intervalspecified in the question.
Protocol(s) The list of protocols associated with this asset, in contextof the question tests. If there are multiple protocolsassociated with this asset and question, this fieldindicates Multiple and the number of protocols. The listof protocols is obtained by filtering the connectionsassociated with this question to obtain all uniqueprotocols where the asset has either been the source,destination, or the connection.
Click Multiple (N) to view the Connections. This displayprovides the aggregated connections by protocol, filteredby the asset IP address, and based on the time intervalspecified in the question.
Flow App(s) The list of applications associated with this asset, incontext of the question tests. If there are multipleapplications associated with this asset and question, thisfield indicates Multiple and the number of applications.The list of applications is obtained by filtering theconnections associated with this question to obtain allunique applications where the asset has either been thesource, destination, or the connection.
Click Multiple (N) to view the Connections. This displayprovides the aggregated connections by application,filtered by the asset IP address, and based on the timeinterval specified in the question.
74 QRadar Risk Manager User Guide

Table 19. Asset results (continued)
Parameter Description
Vuln(s) The list of vulnerabilities associated with this asset, incontext of the question tests. If there are multiplevulnerabilities associated with this asset and question,this field indicates Multiple and the number ofvulnerabilities.
The list of vulnerabilities is obtained using a list of allvulnerabilities compiled from relevant tests and usingthis list to filter the vulnerabilities detected on this asset.If no vulnerabilities are specified for this question, thenall vulnerabilities on the asset are used to compile thislist.
Click Multiple (N) to view the Assets. This displayprovides the aggregated connections by vulnerability,filtered by the asset IP address, and based on the timeinterval specified in the question.
Flow Count The total flow count associated with this asset, in contextof the question tests.
The flow count is determined by filtering the connectionsassociated with this question to obtain the flow counttotal, where asset has either been the source, destination,or the connection.
Source(s) The list of source IP addresses associated with this asset,in context of the question tests. If there are multiplesource IP addresses associated with this asset andquestion, this field indicates Multiple and the number ofsource IP addresses. The list of source IP addresses isobtained by filtering the connections associated with thisquestion to obtain all unique source IP addresses wherethe asset is the destination of the connection.
Click Multiple (N) to view the Connections. This displayprovides the aggregated connections by source IPaddress filtered by the asset IP address based on the timeinterval specified in the question.
Destination(s) The list of destination IP addresses associated with thisasset, in context of the question tests. If there aremultiple destination IP addresses associated with thisasset and question, this field indicates Multiple and thenumber of destination IP addresses. The list ofdestination IP addresses is obtained by filtering theconnections associated with this question to obtain allunique destination IP addresses where the asset is thesource of the connection.
Click Multiple (N) to view the Connections. This displayprovides the aggregated connections by destination IPaddress filtered by the asset IP address based on the timeinterval specified in the question.
11 Policy Monitor 75

Table 19. Asset results (continued)
Parameter Description
Flow Source Bytes The total source bytes associated with this asset, incontext of the question test.
The source bytes is determined by filtering theconnections associated with this question to obtain thesource byte total where asset is the source of theconnection.
Flow Destination Bytes The total destination bytes associated with this asset, incontext of the question test.
The destination bytes is determined by filtering theconnections associated with this question to obtain thedestination byte total where asset is the destination ofthe connection.
Device/Rule question resultsDevice/Rule results display after you submit a policy monitor question.
The Risk Score displayed indicates the level of risk that is associated with the question. The Risk Scorecalculation is based on the importance factor assigned to the question, and the number of results returnedfor the question.
The parameters for devices and rules results are described in the following table.
Table 20. Devices and rules results
Parameter Description
Device IP The IP address of the device.
Device Name The name of the device, as obtained from the configurationmonitor.
Device Type The type of device, as obtained from the asset profile.
For more information about asset profiles, see the IBM SecurityQRadar User Guide.
List The name of the rule from the device.
Entry The entry number of the rule.
Action The action associated with the relevant rule from the device.The options are: permit, deny, or NA.
Source(s) The source network associated with this asset.
Sources with a hyperlink indicate an object group reference.Click the link to view detailed information about the objectgroup reference(s).
76 QRadar Risk Manager User Guide

Table 20. Devices and rules results (continued)
Parameter Description
Source Service(s) The source ports and the comparison associated with therelevant rule from the device in the following format:
<comparison>:<port>
Where
<comparison>
could include one of the following options:
eq - Equal
ne - Not equal
lt - Less than
gt - Greater than
For example, if the parameter indicates ne:80, any port otherthan 80 applies to this source service. If the parameterindicates lt:80, the range of applicable ports is 0 to 79.
This parameter displays the source port for the device rule. Ifno port exists for this device rule, the term NA is displayed.
Source services with a hyperlink indicate an object groupreference. Click the link to view detailed information aboutthe object group reference(s).
Destination(s) The destination network associated with the relevant rulefrom the device.
Destinations with a hyperlink indicate an object groupreference. Click the link to view detailed information aboutthe object group reference(s).
11 Policy Monitor 77

Table 20. Devices and rules results (continued)
Parameter Description
Destination Service(s) The destination ports and the comparison associated with therelevant rule from the device is displayed in the followingformat:
<comparison>:<port>
Where
<comparison>
might include one of the following options:
eq - Equal
ne - Not equal
lt - Less than
gt - Greater than
For example, if the parameter indicates ne:80, any port otherthan 80 applies to this destination service. If the parameterindicates lt:80, the range of applicable ports is 0 to 79.
This parameter displays the destination port for the devicerule. If no port exists for this device rule, the term NA isdisplayed.
Destination services with a hyperlink indicate an object groupreference. Click the link to view detailed information aboutthe object group reference(s).
User(s)Group(s) The users or groups associated with the relevant rule from thedevice.
Protocol(s) The protocol or group of protocols associated with therelevant rule from the device.
Signature(s) The signature for this device, which is only displayed for adevice rule on an IP device.
Applications The applications that are associated with the relevant rulefrom the device.
Evaluation of results from policy monitor questionsYou can evaluate the results that are returned from a policy monitor question in IBM Security QRadarRisk Manager.
Approving a result of a question is similar to tuning your system to inform IBM Security QRadar RiskManager that the asset that is associated with the question result is safe or can be ignored in the future.
When a user approves an asset result, the policy monitor sees that asset result as approved, and when thepolicy monitor question is submitted or monitored in the future, the asset is not listed in the questionresults. The approved asset does not display in the results list for the question unless the approval isrevoked. The policy monitor records the user, IP address of the device, reason for approval, the applicableDevice/Rule, and the date and time.
78 QRadar Risk Manager User Guide
Approving resultsPolicy monitor results that are approved are not returned from policy monitor questions. Approve resultsto policy monitor questions that don't represent risk in your network.
Procedure1. In the results table, select the check box next to the results you want to accept.2. Choose one of the following options:
Option Description
Approve All Select this option to approve all the results.
Approve Selected Select the check box next to the results that you want toapprove, and then click Approve Selected.
3. Type the reason for approval.4. Click OK.5. Click OK.6. To view the approved results for the question, click View Approved.
Results
The Approved Question Results window provides the following information:
Table 21. Approved question results parameters
Parameter Description
Device/Rule The device that is associated with this result inDevice/Rule Results.
IP The IP address that is associated with the asset in AssetResults.
Approved By The user that approved the results.
Approved On The date and time the results were approved.
Notes Displays the text of the notes that are associated withthis result and the reason why the question wasapproved.
If you want to remove approvals for any result, select the check box for each result for which you wantto remove approval and click Revoke Selected. To remove all approvals, click Revoke All.
Policy question monitoringIBM Security QRadar Risk Manager can monitor any predefined or user-generated question in PolicyMonitor. You can use monitor mode to generate events in QRadar Risk Manager.
When you monitor a policy question, QRadar Risk Manager analyzes the question against your topologyevery hour to determine if an asset or rule change generates an unapproved result. If QRadar RiskManager detects an unapproved result, an offense can be generated to alert you about a deviation in yourdefined policy. In monitor mode, QRadar Risk Manager can simultaneously monitor the results of 10questions.
Question monitoring provides the following key features:v Monitor for rule or asset changes hourly for unapproved results.v Use your high and low-level event categories to categorize unapproved results.
11 Policy Monitor 79

v Generating offenses, emails, syslog messages, or dashboard notifications on unapproved results.v Use event viewing, correlation, event reporting, custom rules, and dashboards in QRadar SIEM.
Monitoring a policy monitor question and generating eventsMonitor the results of policy monitor questions and configure the generation of events when the resultsof the monitored policy monitor questions change. You can set the policy evaluation interval, andconfigure events to send notifications.
Procedure1. Click the Risks tab.2. On the navigation menu, click Policy Monitor.3. Select the question that you want to monitor.4. Click Monitor.5. Configure values for the parameters.6. Click Save Monitor.
The parameters that you configure for an event are described in the following table.
Table 22. Question event parameters
Parameter Description
Policy evaluation interval The frequency for the event to run.
Event Name The name of the event you want to display in the Log Activity and Offensestabs.
Event Description The description for the event. The description is displayed in the Annotationsof the event details.
High-Level Category The high-level event category that you want this rule to use when processingevents.
Low-Level Category The low-level event category that you want this rule to use when processingevents.
Ensure the dispatched event is partof an offense
Forwards the events to the Magistrate component. If no offense is generated, anew offense is created. If an offense exists, the event is added.
If you correlate by question or simulation, then all events from a question areassociated to a single offense.
If you correlate by asset, then a unique offense is created or updated for eachunique asset.
Dispatch question passed events Forwards events that pass the policy monitor question to the Magistratecomponent.
Vulnerability Score Adjustments Adjusts the vulnerability risk score of an asset, depending if the question failsor passes. The vulnerability risk scores are adjusted in IBM Security QRadarVulnerability Manager.
80 QRadar Risk Manager User Guide

Table 22. Question event parameters (continued)
Parameter Description
Additional Actions The additional actions to be taken when an event is received.
Separate multiple email addresses by using a comma.
Select Notify if you want events that generate as a result of this monitoredquestion to display events in the System Notifications item in the dashboard.
The syslog output might resemble the following code:
Sep 28 12:39:01 localhost.localdomain ECS:Rule ’Name of Rule’Fired: 172.16.60.219:12642 -> 172.16.210.126:6666 6,Event Name:SCAN SYN FIN, QID: 1000398, Category: 1011,Notes: Event description
Enable Monitor Monitor the question.
Group questionsYou can group and view your questions based on your chosen criteria
Use groups to efficiently view and track your questions. For example, you can view all questions relatedto compliance. Do the following tasks with groups:v Create a group for questions.v Assign a question to a group.v Edit or delete questions in a group.v Copy a question to one or many groups.
Export and import policy monitor questionsUsers with administrative privileges can export and import Policy Monitor questions.
Exporting and importing questions provides a method to back up questions and share questions withother IBM Security QRadar Risk Manager users.
Restrictions for sensitive information
Sensitive company or policy information might be included in dependencies. When you export or importPolicy Monitor questions, the sensitive data contained in the dependencies is not included.
Policy monitor questions might contain the following types of dependencies:v Asset building blocksv Asset saved searchesv Networksv Remote network locationsv Geographic network locationsv Reference sets
Before you export questions that have dependencies, you might choose to provide more context about thetype of information that is contained in the dependency. Providing this information allows other users tounderstand what type of information to reference when they import the question in their Policy Monitor.
11 Policy Monitor 81

Exporting policy monitor questionsYou can export one or more of your policy monitor questions to an XML file. Exporting policy monitorquestions is useful for backing up your questions or for sharing questions with other users.
About this task
If any policy monitor questions contain dependencies, then you can provide more context about the typeof information that is contained in the dependency.
The default XML file name for the exported questions is policy_monitor_questions_export.xml.
Procedure1. On the Risks tab, click Policy Monitor.2. Choose one of the following options:v To export all questions, from the Actions menu, select Export All.v To export specific questions, press the Ctrl key to select each question that you want to export, and
then from the Actions menu, select Export Selected.3. Optional: If any questions contain dependencies, click the parameter link to type more specific
information. The maximum character length for this field is 255.4. Click Export Questions.
Results
A default file, called policy_monitor_questions_export.xml, is exported to your download directory.
Importing policy monitor questionsImport one or more policy monitor questions to IBM Security QRadar Risk Manager.
About this task
The import process does not update existing questions. Each question that is imported becomes a newquestion in policy monitor. A time stamp is added to all imported questions.
If an imported question contains a dependency, a warning is displayed in the Status column . Importedquestions with dependencies contain parameters with no values. To ensure that imported policy monitorquestions work as expected, you must enter values for the parameters.
Procedure1. On the Risks tab, click Policy Monitor.2. From the Actions menu, select Import.3. Click Choose File, and then browse to select the XML file that you want to import.4. Click Open.5. Select one or more groups to assign the question to a group.6. Click Import Question.7. Check the Status column for warnings. If a question contains a warning, open the question and edit
the dependent parameters. Save the question when you update parameters.
What to do next
Monitoring is not enabled on imported questions. You can create an event to monitor results of questionsthat were imported.
82 QRadar Risk Manager User Guide

Integration with QRadar Vulnerability ManagerIBM Security QRadar Vulnerability Manager integrates with IBM Security QRadar Risk Manager to helpyou prioritize the risks and vulnerabilities in your network.
Risk policies and vulnerability prioritization
You can integrate QRadar Vulnerability Manager with QRadar Risk Manager by defining and monitoringasset or vulnerability risk policies.
When the risk policies that you define in QRadar Risk Manager either pass or fail, vulnerability riskscores in QRadar Vulnerability Manager are adjusted. The adjustment levels depend on the risk policiesin your organization.
When the vulnerability risk scores are adjusted in QRadar Vulnerability Manager, administrators can dothe following tasks:v Gain immediate visibility of the vulnerabilities that failed a risk policy.
For example, new information might be displayed on the QRadar dashboard or sent by email.v Re-prioritize the vulnerabilities that require immediate attention.
For example, an administrator can use the Risk Score to quickly identify high-risk vulnerabilities.
If you apply risk policies at an asset level in QRadar Risk Manager, then all the vulnerabilities on thatasset have their risk scores adjusted.
Monitoring firewall rule event counts of Check Point devicesIn IBM Security QRadar Risk Manager, you can monitor the firewall rule event counts of your CheckPoint devices by integrating with the Check Point SMS. You can view these rule interactions in QRadarRisk Manager, and use rule reports to manage the rule policy effectiveness of your network.
In the following image, QRadar receives and processes rule event logs from Check Point firewall devicesthrough the SMS.
11 Policy Monitor 83

Scenario - Implementing Check Point firewall rule monitoring in QRadar
You are a network systems administrator with responsibility for Network security in an organization thatuses Check Point to implement its Network security policies. The network includes several Check Pointfirewalls that are managed from a Check Point Security Management Server (SMS).
You want to view reports on rule usage daily, so that you have more visibility on your ruleimplementation.
You need to configure a connection between your Check Point SMS and QRadar, so that QRadar receivesrule event logs from Check Point firewall devices. QRadar processes this rule event log information anddisplays rule event information for all devices that are managed by Check Point firewalls. From theQRadar rules table, you can analyze the usage and effectiveness of the firewall rules by monitoring eventcounts, and fine-tune your rules for optimal performance.
Use the rule information to do the following tasks:v View most and least used rules.v Assess the practicality of rules that are triggered infrequently.v View rules that might be blocking network access unnecessarily.v View rules that are triggered excessively, and place a load on your network bandwidth.v View detailed events.v Schedule reports.
Before you begin, download the most recent adapter bundle from FixCentral, and install it on yourQRadar managed host.
Complete the following steps to set up rule counting:1. Configure OPSEC applications in the Check Point SmartDashboard.
Check Point �rewalls
Check Point SMS
Rule Counting
QRadar Console
Figure 1. Check Point rule counting
84 QRadar Risk Manager User Guide

2. Create a log source in QRadar.3. Configure Configuration Source Management (CSM) in QRadar Risk Manager. Discover and backup
devices in Configuration Source Management.4. Complete the configurations to view rule counting.
Configuring OPSEC applications in the SmartDashboardCreate and configure 2 OPSEC applications in your Check Point SmartDashboard. This facilitates thetransfer of log files between Check Point and IBM Security QRadar.
About this task
Create 2 OPSEC (Open Platform for Security) applications, one with a client entity property of CPMI(Check Point Management Interface) for QRadar Risk Manager, and the other with a client entityproperty of LEA (Log Export API) for the QRadar Risk Manager log source.
Procedure1. From the Manage menu on the toolbar, click Servers and OPSEC Applications.2. Click New > OPSEC Application.3. In the Name field, type a name for the application.4. From the Host list, select a host, or click New to add a host.5. Under Client Entities, select the CPMI check box.
This option is required for QRadar Risk Manager Configuration Source Management (CSM).6. Click Communication.7. In the One-time password field, type a password and then confirm it.
The password is used several times during setup, and you need to reuse it so that QRadar can use asecurity certificate from Check Point.
8. Click Initalize.The Trust state changes to: Initialized but trust not established.
9. Click Close.10. To populate the DN field in the Secure Internal Communication section, click OK.11. To view the populated DN field, select your OPSEC Application, and click Edit
The DN field is now populated. This information is used for the Application Object SIC Attribute(SIC Name) and the SIC Attribute (SIC Name) when you set up the log source and ConfigurationSource Management in QRadar
12. Create the second OPSEC application to use with the log source.Follow steps 1-11 for creating the first OPSEC Application, with two exceptions:v For the Name field in step 3, use a different name from the first OPSEC application.v For Client Entities in step 5, select the LEA check box.Make sure that the Trust state displays Initialized but trust not established.
Tip: Use the same one-time password for this OPSEC application to avoid any confusion withpasswords.
13. In SmartDashboard, close all windows until you get back to the main SmartDashboard window.14. From the Policy menu on the toolbar, click Install.15. Click Install on all selected gateways, if it fails do not install on gateways of the same version.
What to do next
The next step is to configure the log source in QRadar.
11 Policy Monitor 85

Configuring the log sourceConfigure the log source in IBM Security QRadar to get a certificate from Check Point and to receive loginformation.
Procedure1. Log on to QRadar.
2. On the navigation menu (
), click Admin to open the admin tab.3. Click Data Sources.
The Data Sources pane is displayed.4. Click the Log Sources icon.5. Click Add.6. Configure the following values:
Table 23. Check Point log source parameters
Parameter Description
Log Source Name The identifier for the log source.
Log Source Description The description is optional.
Log Source Type Select Check Point FireWall-1.
Protocol Configuration Select OPSEC/LEA.
Log Source Identifier IP address of your SMS
Server IP Type the IP address of your SMS
Server Port Use port 18184.
Use Server IP for Log Source Do not select this check box.
Statistics Report Interval Default of 600.
Authentication Type From the list, select sslca.
OPSEC Application ObjectSIC Attribute (SIC Name)
From the Check Point SmartDashboard, click Manage > Servers and OPSECApplications and select the OPSEC application that has the client entity property ofLEA.
Click Edit, and copy the entry from the DN field, and paste into the OPSECApplication Object SIC Attribute (SIC Name) field.
86 QRadar Risk Manager User Guide

Table 23. Check Point log source parameters (continued)
Parameter Description
Log Source SIC Attribute(Entity SIC Name)
Use the entry that you pasted into the OPSEC Application Object SIC Attribute(SIC Name) field, remove the text from the CN= property value, and make thefollowing edits:
For the CN= property value, use cp_mgmt_ <hostname >
where <hostname> is the Host name from the OPSEC Application Propertieswindow.
See the following examples of an OPSEC Application DN and OPSEC ApplicationHost, which is used to create the Entity SIC Name:
OPSEC Application DN: CN=cpsmsxxx,O=svxxx-CPSMS..bsaobx
OPSEC Application Host: Srvxxx-SMS
Use text from the OPSEC Application DN and the OPSEC Application Host to formthe Entity SIC Name:
CN=cp_mgmt_Srvxxx-SMS,O=svxxx-CPSMS..bsaobx
The Entity SIC Name in this configuration is based on a Gateway to ManagementServer setup. If your SMS address is not used as a gateway, use the ManagementServer configuration for the Entity SIC Name, which is represented by the followingtext:
CN=cp_mgmt,O=<take_O_value_from_DN_field>
Specify Certificate Don't select this check box.
Certificate Authority IP Type the IP address of the SMS.
Pull Certificate Password The password that you specified for the OPSEC Applications Properties in theOne-time password field of the Communication window.
OPSEC Application The name that you specified in the Name field from the OPSEC ApplicationsProperties.
Enabled Select this check box to enable the log source. By default, the check box is selected.
Credibility The range is 0 - 10. The credibility indicates the integrity of an event or offense asdetermined by the credibility rating from the source devices. Credibility increaseswhen multiple sources report the same event. The default is 5.
Target Event Collector From the list, select the Target Event Collector to use as the target for the logsource.
Coalescing Events Enables the log source to coalesce (bundle) events. By default, automaticallydiscovered log sources inherit the value of the Coalescing Events list from theSystem Settings properties in QRadar. When you create a log source or edit anexisting configuration, you can override the default value by configuring this optionfor each log source.
Store Event Payload Enables the log source to store event payload information. By default, automaticallydiscovered log sources inherit the value of the Store Event Payload list from theSystem Settings properties in QRadar. When you create a log source or edit anexisting configuration, you can override the default value by configuring this optionfor each log source.
7. Click Save.8. On the Admin tab, click Deploy Changes.
If you find that changes are implemented automatically, it's still good practice to click DeployChanges.
11 Policy Monitor 87

Check that trust is established for the OPSEC application that has the client entity property of LEA,by viewing the Trust State in the Communication window of OPSEC Application Properties.The configuration of the log source is complete.For more information about configuring log sources, see the IBM Security QRadar Managing LogSources Guide.
Establishing secure communication between Check Point and IBMSecurity QRadarConfigure Configuration Source Management in IBM Security QRadar to connect to the Check Point SMS.Add the OPSEC Application details from the SmartDashboard, and request a security certificate fromCheck Point.
About this task
Configure the OPSEC application details in Configuration Source Management and set up the certificateexchange. After the configuration is complete, use Configuration Source Management to discover the newentry.
Procedure1. Log in to QRadar as an administrator.
2. On the navigation menu (
), click Admin to open the admin tab.3. Click Apps or scroll down to find the Configuration Source Management icon.4. Click the Configuration Source Management icon.5. On the navigation menu, click Credentials.6. From the Network Groups pane, click the (+) symbol.7. Type a name for the network group.8. In the Add address (IP, CIDR, Wildcard, or Range) field, type the IP address of your SMS.9. Click (+) to add the IP address.
10. Type your SMS SmartDashboard user name and password.To configure the OPSEC fields, use the information from the OPSEC Application Properties windowof the SmartDashboard, where you selected the CPMI check box for the client entity.
11. From the DN field, copy and paste this information into the OPSEC Entity SIC Name field.12. Edit the entry that you pasted into the OPSEC Entity SIC Name by replacing the CN= property
value with: cp_mgmt_<hostname>where <hostname> is the Host name that is used for the OPSEC application Host field.See the following examples of an OPSEC Application DN and OPSEC Application Host, which isused to create the Entity SIC Name:v OPSEC Application DN: CN=cpsmsxxx,O=svxxx-CPSMS..bsaobxv OPSEC Application Host: Srvxxx-SMSUse text from the OPSEC Application DN and the OPSEC Application Host to form the Entity SICName:The Entity SIC Name is CN=cp_mgmt_Srvxxx-SMS,O=svxxx-CPSMS..bsaobxThe Entity SIC Name in this configuration is based on a Gateway to Management Server setup. Ifyour SMS IP address in not used as a gateway, use the Management Server configuration from thetable:
Table 24. Entity SIC Name formats
Type Name
Management Server CN=cp_mgmt,O=<take_O_value_from_DN_field>
88 QRadar Risk Manager User Guide

Table 24. Entity SIC Name formats (continued)
Type Name
Gateway to Management Server CN=cp_mgmt_<gateway_hostname>,O=<take_O_value from_DN_field>
13. From the DN field, copy the entry, and paste this information into the OPSEC Application ObjectSIC Name field.
14. Click Get Certificate.15. Enter the SMS IP address in the Certificate Authority IP field.16. Enter the one-time password in the Pull Certificate Password field. The one-time password is from
the Communication window in the OPSEC Application Properties of the SmartDashboard, whereyou selected the CPMI check box for the client entity.
17. Click OK
If successful, the OPSEC SSL Certificate field is populated and grayed out.Verify that the Trust State property in the Communication window of the OPSEC ApplicationProperties changes to Trust established.The credentials are set up, and now you can run a discovery.
18. On the navigation menu, click Discover From Check Point SMS.19. In the CPSMS IP Address field, type the IP address of the SMS.
Initializing rule counting for Check PointComplete the final configurations in IBM Security QRadar and Check Point to tie the configurationstogether so that you can use rule counting in QRadar.
About this task
When trust is established and the policies are updated, you can view rule counting in QRadar. QRadarRisk Manager needs approximately 1 hour to process counts.
Procedure1. In QRadar, click Risks > Configuration Monitor
2. Double-click a Check Point device to view the rule counting.v Verify that the log source is auto mapping by looking in the Log Sources column.v Look for the Event Count column of the rules table.
Policy Monitor use casesMany options are available when you create questions to analyze your network for risk.
The following Policy Monitor examples outline common use cases that you can use in your networkenvironment.
Prioritizing high risk vulnerabilities by applying risk policiesIn IBM Security QRadar Vulnerability Manager, you can alert administrators to high-risk vulnerabilitiesby applying risk policies to your vulnerabilities.
When you apply a risk policy, the risk score of a vulnerability is adjusted, which allows administrators toprioritize more accurately the vulnerabilities that require immediate attention.
In the following example, the vulnerability risk score is automatically increased by a percentage factor forany vulnerability that remains active on your network after 40 days.
11 Policy Monitor 89

Procedure1. Click the Vulnerabilities tab.2. In the navigation pane, click Manage Vulnerabilities.3. On the toolbar, click Search > New Search.4. In the Search Parameters pane, configure the following filters:
a. Risk Equals High
b. Days since vulnerabilities discovered Greater than or equal to 40
5. Click Search and then on the toolbar click Save Search Criteria.Type a saved search name that is identifiable in QRadar Risk Manager.
6. Click the Risks tab.7. In the navigation pane, click Policy Monitor.8. On the toolbar, click Actions > New.9. In the What do you want to name this question field, type a name.
10. In the Which tests do you want to include in your question field, click are susceptible tovulnerabilities contained in vulnerability saved searches.
11. In the Find Assets that field, click the underlined parameter on the are susceptible tovulnerabilities contained in vulnerability saved searches.
12. Identify your QRadar Vulnerability Manager high risk vulnerability saved search, click Add, thenclick OK.
13. Click Save Question.14. In the Questions pane, select your question from the list and on the toolbar click Monitor.
Restriction: The Event Description field is mandatory.15. Click Dispatch question passed events.16. In the Vulnerability Score Adjustments field, type a risk adjustment percentage value in the
Percentage vulnerability score adjustment on question fail field.17. Click Apply adjustment to all vulnerabilities on an asset then click Save Monitor.
What to do next
On the Vulnerabilities tab, you can search your high risk vulnerabilities and prioritize yourvulnerabilities.
CIS benchmark scansTo set up a CIS benchmark scan, you must carry out a range of configuration tasks on the Admin, Assets,Vulnerabilities, and Risks tabs in QRadar.
In order to set up CIS benchmark scan, the following prerequisites are needed:
Valid IBM Security QRadar Vulnerability Manager and IBM Security QRadar Risk Manager licenses
If you patched from an earlier version of IBM Security QRadar, you must do an automatic update beforeyou do a CIS benchmark scan.
There are 8 steps involved in setting up a CIS benchmark scan:1. Adding assets.2. Configuring a credential set.
It is easiest to add centralized credentials on the IBM Security QRadar Admin tab but you can alsoadd credentials when you create a benchmark profile.
90 QRadar Risk Manager User Guide
3. Creating an asset saved search.You use the asset saved searches when you configure the asset compliance questions.
4. Modifying CIS benchmark checks in QRadar Vulnerability Manager.You can create a custom CIS benchmark checklist by using the Compliance Benchmark Editor.
5. Configuring a CIS benchmark scan profile in QRadar Vulnerability Manager.6. Creating an asset compliance question in IBM Security QRadar Risk Manager.7. Monitoring the asset compliance question that you created.8. Viewing the CIS benchmark scan results.
Adding or editing an asset profileBefore you can do a CIS benchmark scan you must add the network assets you intend to scan to IBMSecurity QRadar. Asset profiles are automatically discovered and added; however, you might be requiredto manually add a profile.
About this task
You can enter information on each asset manually by creating an Asset Profile on the Assets tab.Alternatively, you can configure a scan profile on the Vulnerabilities tab to run a discovery scan. Thediscovery scan allows QRadar® to identify key asset characteristics such as operating system, device type,and services.
When assets are discovered using the Server Discovery option, some asset profile details areautomatically populated. You can manually add information to the asset profile and you can edit certainparameters.
You can only edit the parameters that were manually entered. Parameters that were system generated aredisplayed in italics and are not editable. You can delete system generated parameters, if required.
Procedure1. Click the Assets tab.2. On the navigation menu, click Asset Profiles.3. Choose one of the following options:
To add an asset, click Add Asset and type the IP address or CIDR range of the asset in the New IPAddress field.To edit an asset, double-click the asset that you want to view and click Edit Asset .
4. Configure the parameters in the MAC & IP Address pane. Configure one or more of the followingoptions:Click the New MAC Address icon and type a MAC Address in the dialog box.Click the New IP Address icon and type an IP address in the dialog box.If Unknown NIC is listed, you can select this item, click the Edit icon, and type a new MAC addressin the dialog box.Select a MAC or IP address from the list, click the Edit icon, and type a new MAC address in thedialog box.Select a MAC or IP address from the list and click the Remove icon.
5. Configure the parameters in the Names & Description pane. Configure one or more of the followingoptions:
11 Policy Monitor 91

Parameter Description
DNS Choose one of the following options:
Type a DNS name and click Add.
Select a DNS name from the list and click Edit.
Select a DNS name from the list and click Remove.
NetBIOS Choose one of the following options:
Type a NetBIOS name and click Add.
Select a NetBIOS name from the list and click Edit.
Select a NetBIOS name from the list and click Remove.
Given Name Type a name for this asset profile.
Location Type a location for this asset profile.
Description Type a description for the asset profile.
Wireless AP Type the wireless Access Point (AP) for this asset profile.
Wireless SSID Type the wireless Service Set Identifier (SSID) for thisasset profile.
Switch ID Type the switch ID for this asset profile.
Switch Port ID Type the switch port ID for this asset profile.
6. Configure the parameters in the Operating System pane:a. From the Vendor list box, select an operating system vendor.b. From the Product list box, select the operating system for the asset profile.c. From the Version list box, select the version for the selected operating system.d. Click the Add icon.e. From the Override list box, select one of the following options:v Until Next Scan - Select this option to specify that the scanner provides operating system
information and the information can be temporarily edited. If you edit the operating systemparameters, the scanner restores the information at its next scan.
v Forever - Select this option to specify that you want to manually enter operating systeminformation and disable the scanner from updating the information.
f. Select an operating system from the list.g. Select an operating system and click the Toggle Override icon.
7. Configure the parameters in the CVSS & Weight pane. Configure one or more of the followingoptions:
92 QRadar Risk Manager User Guide

Parameter Description
Collateral Damage Potential Configure this parameter to indicate the potential for lossof life or physical assets through damage or theft of thisasset. You can also use this parameter to indicatepotential for economic loss of productivity or revenue.Increased collateral damage potential increases thecalculated value in the CVSS Score parameter.
From the Collateral Damage Potential list box, select oneof the following options:
None
Low
Low-medium
Medium-high
High
Not defined
When you configure the Collateral Damage Potentialparameter, the Weight parameter is automaticallyupdated.
Confidentiality Requirement Configure this parameter to indicate the impact onconfidentiality of a successfully exploited vulnerabilityon this asset. Increased confidentiality impact increasesthe calculated value in the CVSS Score parameter.
From the Confidentiality Requirement list box, selectone of the following options:
Low
Medium
High
Not defined
Availability Requirement Configure this parameter to indicate the impact to theasset's availability when a vulnerability is successfullyexploited. Attacks that consume network bandwidth,processor cycles, or disk space impact the availability ofan asset. Increased availability impact increases thecalculated value in the CVSS Score parameter.
From the Availability Requirement list box, select one ofthe following options:
Low
Medium
High
Not defined
11 Policy Monitor 93

Parameter Description
Integrity Requirement Configure this parameter to indicate the impact to theasset's integrity when a vulnerability is successfullyexploited. Integrity refers to the trustworthiness andguaranteed veracity of information. Increased integrityimpact increases the calculated value in the CVSS Scoreparameter.
From the Integrity Requirement list box, select one ofthe following options:
Low
Medium
High
Not defined
Weight From the Weight list box, select a weight for this assetprofile. The range is 0 - 10.
When you configure the Weight parameter, theCollateral Damage Potential parameter is automaticallyupdated.
8. Configure the parameters in the Owner pane. Choose one or more of the following options:
Parameter Description
Business Owner Type the name of the business owner of the asset. Anexample of a business owner is a department manager.The maximum length is 255 characters.
Business Owner Contact Type the contact information for the business owner. Themaximum length is 255 characters.
Technical Owner Type the technical owner of the asset. An example of abusiness owner is the IT manager or director. Themaximum length is 255 characters.
Technical Owner Contact Type the contact information for the technical owner. Themaximum length is 255 characters.
Technical User From the list box, select the username that you want toassociate with this asset profile.
You can also use this parameter to enable automaticvulnerability remediation for IBM Security QRadarVulnerability Manager. For more information aboutautomatic remediation, see the IBM Security QRadarVulnerability Manager User Guide.
9. Click Save.
Configuring a credential setIn IBM Security QRadar Vulnerability Manager, you can create a credential set for the assets in yournetwork. During a scan, if a scan tool requires the credentials for a Linux, UNIX, or Windows operatingsystem, the credentials are automatically passed to the scan tool from the credential set.
94 QRadar Risk Manager User Guide

Procedure
1. On the navigation menu (
), click Admin to open the admin tab.2. In the System Configuration pane, click Centralized Credentials.3. In the Centralized Credentials window, on the toolbar, click Add.
To configure a credential set, the only mandatory field in the Credential Set window is the Namefield.
4. In the Credential Set window, click the Assets tab.5. Type a CIDR range for the assets that you want to specify credentials for and click Add.
Users must have network access permissions that are granted in their security profile for an IPaddress or CIDR address range that they use or create credentials for in Centralized Credentials.
6. Optional: Click the Linux/Unix, Windows, or Network Devices (SNMP) tabs, then type yourcredentials.
7. Click Save.
Saving asset search criteriaOn the Asset tab, you can save configured search criteria so that you can reuse the criteria. Saved searchcriteria does not expire.
Procedure1. Click the Assets tab.2. On the navigation menu, click Asset Profiles.3. Perform a search.4. Click Save Criteria .5. Enter values for the parameters:
Parameter Description
Enter the name of this search Type the unique name that you want to assign to thissearch criteria.
Manage Groups Click Manage Groups to manage search groups. Thisoption is only displayed if you have administrativepermissions.
Assign Search to Group(s) Select the check box for the group you want to assignthis saved search. If you do not select a group, this savedsearch is assigned to the Other group by default.
Include in my Quick Searches Select this check box to include this search in your QuickSearch list box, which is on the Assets tab toolbar.
Set as Default Select this check box to set this search as your defaultsearch when you access the Assets tab.
Share with Everyone Select this check box to share these search requirementswith all users.
Editing a compliance benchmarkUse the Compliance Benchmark Editor in IBM Security QRadar Risk Manager to add or remove testsfrom the default CIS benchmarks.
Procedure1. Click the Risks tab.2. Click Policy Monitor.
11 Policy Monitor 95

3. Click Compliance to open the Compliance Benchmark Editor window.4. On the navigation menu, click the default CIS benchmark that you want to edit.5. In the Compliance pane, click the Enabled check box in the row that is assigned to the test that you
want to include.Click anywhere on a row to see a description of the benchmark test, a deployment rationale, andinformation on things to check before you enable the test.When you are building a custom CIS checklist, be aware that some benchmark tests that are notincluded by default can take a long time to run. For more information, please refer to the CISdocumentation.
What to do next
Create an asset compliance question to test assets against the benchmark you edited.
Creating a benchmark profileTo create Center for Internet Security compliance scans, you must configure benchmark profiles. You useCIS compliance scans to test for Windows and Red Hat Enterprise Linux CIS benchmark compliance.
Procedure1. Click the Vulnerabilities tab.2. In the navigation pane, click Administrative > Scan Profiles.3. On the toolbar, click Add Benchmark.4. If you want to use pre-defined centralized credentials, select the Use Centralized Credentials check
box.Credentials that are used to scan Linux operating systems must have root privileges. Credentials thatare used to scan Windows operating systems must have administrator privileges.
5. If you are not using dynamic scanning, select a QRadar Vulnerability Manager scanner from theScan Server list.
6. To enable dynamic scanning, click the Dynamic server selection check box.If you configured domains in the Admin > Domain Management window, you can select a domainfrom the Domain list. Only assets within the CIDR ranges and domains that are configured for yourscanners are scanned.
7. In the When To Scan tab, set the run schedule, scan start time, and any pre-defined operationalwindows.
8. In the Email tab, define what information to send about this scan and to whom to send it.9. If you are not using centralized credentials, add the credentials that the scan requires in the
Additional Credentials tab.Credentials that are used to scan Linux operating systems must have root privileges. Credentials thatare used to scan Windows operating systems must have administrator privileges.
10. Click Save.
Creating an asset compliance questionCreate an asset compliance question in Policy Monitor to search for assets in the network that fail CISbenchmark tests.
Before you begin
Policy Monitor questions are evaluated in a top down manner. The order of Policy Monitor questionsimpacts the results.
96 QRadar Risk Manager User Guide

Procedure1. Click the Risks tab.2. On the navigation menu, click Policy Monitor.3. From the Actions menu, select New Asset Compliance Question.4. In the What do you want to name this question field, type a name for the question.5. Select the level of importance you want to associate with this question from the Importance Factor
list.6. From the Which tests do you want to include in your question field, select the add (+) icon beside
the test compliance of assets in asset saved searches with CIS benchmarks test.Select this test multiple times, if necessary.
7. Configure the parameters for your tests in the Find Assets that field.Click each parameter to view the available options for your question. Specify multiple assets savedsearches and multiple checklists in this test, if necessary.
8. In the group area, click the relevant check boxes to assign group membership to this question.Asset compliance questions must be assigned to a group for inclusion in compliance dashboards orreports.
9. Click Save Question.
What to do next
Associate a benchmark profile with, and monitor the results of, the question you created.
Monitoring asset compliance questionsMonitor asset compliance questions by selecting CIS scan profiles. CIS benchmark scans run against theassets.
Procedure1. Click the Risks tab.2. On the navigation menu, click Policy Monitor.3. In the Questions pane, select the asset compliance question that you want to monitor.4. Click Monitor to open the Monitor Results window.5. Select a benchmark profile from the Which benchmark profile to associate with this question? list.
The selected benchmark scan profile uses a QRadar Vulnerability Manager scanner that is associatedwith a domain. The domain name is displayed in the Benchmark Profile Details area. For moreinformation about domain management, see the IBM Security QRadar Administration Guide.
6. Select the Enable the monitor results function for this question/simulation check box.7. Click Save Monitor.
Monitoring begins at the scan start time that you set on the When To Scan tab when you created thebenchmark scan profile.
Viewing scan resultsThe Scan Results page displays a summary list of the results generated by running a scan profile.
11 Policy Monitor 97

About this task
The Scan Results page provides the following information:
Table 25. Scan results list parameters
Parameter Description
Profile The name of the scan profile. Hover your mouse over the Profile todisplay information about the scan profile and the status of the scan.
Schedule The run schedule that is applied to the scan profile. If you initiated amanual scan then Manual is displayed.
Score The average Common Vulnerability Scoring System (CVSS) score forthe scan. This score helps you prioritize vulnerabilities.
Hosts The number of hosts found and scanned when the scan profile ran.
Click the Host column link to display vulnerability data for thescanned hosts.
Vulnerabilities The number of different types of vulnerabilities found by a scan.
Click the Vulnerabilities column link to view all uniquevulnerabilities.
Vulnerability Instances The number of vulnerabilities found by the scan.
Open Services The number of unique open services found by the scan. A uniqueopen service is counted as a single open service.
Click the Open Services column link to view vulnerabilitiescategorized by open service.
Status The status of the Scan Profile, options include:
Stopped - This status is displayed if the scan completed successfullyor the scan was canceled.
Running - The scan is running
Paused - The scan is paused.
Not Started - The scan is not initiated.
Progress Specifies the progress of the scan.
Hover your mouse over the progress bar, while the scan is running, todisplay information about the status of a scan.
Start Date/Time The date and time when the scan profile started running.
Duration Displays the time taken for the scan to complete.
Procedure1. Click the Vulnerabilities tab.2. In the navigation pane, click Scan Results.
98 QRadar Risk Manager User Guide

12 Policy Management
You use the IBM Security QRadar Risk Manager Policy Management pages to view details about policycompliance and policy risk changes for assets, policies, and policy checks.
The QRadar Risk Manager Policy Management pages display data from the last run policy. You can filterthe data by asset, by policy or by policy check.
Policy management use cases
Use the Policy Management pages with Risk dashboard items to find out more information about assetsand policies that failed compliance.v The By Asset page includes information and links to the policies that the assets failed.v The By Policy page includes information about the number and percentage of assets that passed or
failed and, if relevant, a link to the policy checks the policy uses.v The By Policy Check page includes information about the number and percentages of assets that pass
or fail individual policy checks.
Use the Policy Management pages with Risk Change dashboard items to investigate policies and policychecks that display increases in risk. The Risk Change dashboard item contains links to the By Policyand By Policy Checks pages. For more information about configuring dashboards for policy monitoringand monitoring risk change, see the IBM Security QRadar SIEM guide.
© Copyright IBM Corp. 2012, 2017 99

100 QRadar Risk Manager User Guide

13 Network simulations in IBM Security QRadar Risk Manager
Use simulations to define, schedule, and run exploit simulations on your network. You can create, view,edit, duplicate, and delete simulations.
You can create simulations that are based on a series of rules that can be combined and configured. Thesimulation can be scheduled to run on a periodic basis or run manually. After a simulation is complete,you can review the results of the simulation and approve any acceptable or low risk result that is basedon your network policy. When you review results you can approve acceptable actions or traffic from yourresults. After you tune your simulation, you can configure the simulation to monitor the results.
When you monitor a simulation, you can define how you want the system to respond when unapprovedresults are returned. A system response can be an email, the creation of an event, or to send the responseto syslog.
Simulations can be modeled off of a current topology or a topology model.
The Simulation page summarizes information about simulations and simulation results.
Simulation results display only after a simulation is complete. After a simulation is complete, the Resultscolumn lists the dates and the corresponding results of your simulation.
SimulationsView the simulations that are created by users and the simulation results on the simulations page.
The Simulations window provides the following information:
Table 26. Simulation definitions parameters
Parameter Description
Simulation Name The name of the simulation, as defined by the creator ofthe simulation.
Model The model type. Simulations can be modeled from thecurrent topology or another topology model. The optionsare:
v Current Topology
v The name of the topology model
Groups The groups that the simulation is associated with.
Created By The user who created the simulation.
Creation Date The date and time that the simulation was created.
Last Modified The date and time that the simulation was last modified.
© Copyright IBM Corp. 2012, 2017 101

Table 26. Simulation definitions parameters (continued)
Parameter Description
Schedule The frequency the simulation is scheduled to run. Theoptions include:
Manual - The simulation runs when it is manuallyexecuted.
Once - Specify the date and time the simulation isscheduled to run.
Daily - Specify the time of day the simulation isscheduled to run.
Weekly - Specify the day of the week and the time thesimulation is scheduled to run.
Monthly - Specify the day of the month and time thesimulation is scheduled to run.
Last Run The last date and time that the simulation was run.
Next Run The date and time that the next simulation will be run.
Results If the simulation is run, this parameter includes a list ofdates for the results of your simulations. You can select adate and view the results.
Creating a simulationYou can create simulations that are based on a series of rules that can be combined and configured.
About this task
Parameters that can be configured for simulation tests are underlined. The following table describes thesimulation tests that you can configure.
Table 27. Simulation tests
Test Name Description Parameters
Attack targets one of the followingIP addresses
Simulates attacks against specific IPaddresses or CIDR ranges.
Configure the IP addresses parameterto specify the IP address or CIDRranges to which you want thissimulation to apply.
Attack targets one of the followingnetworks
Simulates attacks targeting networksthat are a member of one or moredefined network locations.
Configure the networks parameter tospecify the networks to which youwant this simulation to apply.
Attack targets one of the followingasset building blocks
Simulates attacks that target one ormore defined asset building blocks.
Configure the asset building blocksparameters to specify the assetbuilding blocks to which you wantthis simulation to apply.
Attack targets one of the followingreference sets
Simulates attacks that target one ordefined reference sets.
Configure the reference setsparameters to specify the referencesets to which you want thissimulation to apply.
102 QRadar Risk Manager User Guide

Table 27. Simulation tests (continued)
Test Name Description Parameters
Attack targets a vulnerability on oneof the following ports usingprotocols
Simulates attacks that target avulnerability on one or more definedports.
Configure the following parameters:
Open Ports - Specify the ports thatyou want this simulation to consider.
Protocols - Specify the protocol thatyou want this simulation to consider.
Attack targets assets susceptible toone of the following vulnerabilities
Simulates attacks that target assetsthat are susceptible to one or moredefined vulnerabilities.
Configure the vulnerabilitiesparameter to identify thevulnerabilities that want this test toapply. You can search forvulnerabilities in OSVDB ID, BugtraqID, CVE ID, or title.
Attack targets assets susceptible tovulnerabilities with one of thefollowing classifications
Allows you to simulate attackstargeting an asset that is susceptibleto vulnerabilities for one or moredefined classifications.
Configure the classificationsparameter to identify thevulnerability classifications. Forexample, a vulnerability classificationmight be Input Manipulation orDenial of Service.
Attack targets assets susceptible tovulnerabilities with CVSS scoregreater than 5
A Common Vulnerability ScoringSystem (CVSS) value is an industrystandard for assessing the severity ofvulnerabilities. This simulation filtersassets in your network that includethe configured CVSS value.
Allows you to simulate attackstargeting an asset that is susceptibleto vulnerabilities with a CVSS scoregreater than 5.
Click Greater Than 5, and then selectan operator. The default operator isgreater than 5
Attack targets assets susceptible tovulnerabilities disclosed after thisdate
Allows you to simulate attackstargeting an asset that is susceptibleto vulnerabilities discovered before,after, or on the configured date.
Configure the following parameters:
before | after | on - Specify whetheryou want the simulation to considerthe disclosed vulnerabilities to beafter, before, or on the configureddate on assets. The default is before.
this date - Specify the date that youwant this simulation to consider.
Attack targets assets susceptible tovulnerabilities where the name,vendor, version or service containsone of the following text entries
Allows you to simulate attackstargeting an asset that is susceptibleto vulnerabilities matching the assetname, vendor, version or servicebased one or more text entry.
Configure the text entries parameterto identify the asset name, vendor,version, or service you want thissimulation to consider.
Attack targets assets susceptible tovulnerabilities where the name,vendor, version or service containsone of the following regularexpressions
Allows you to simulate attackstargeting an asset that is susceptibleto vulnerabilities matching the assetname, vendor, version or servicebased one or more regularexpression.
Configure the regular expressionsparameter to identify the asset name,vendor, version, or service you wantthis simulation to consider.
The following contributing tests are deprecated and hidden in the Policy Monitor:v attack targets a vulnerability on one of the following operating systems
13 Simulations 103

v attack targets assets susceptible to vulnerabilities from one of the following vendors
v attack targets assets susceptible to vulnerabilities from one of the following products
The deprecated contributing tests are replaced by other tests.
Procedure1. Click the Risks tab.2. On the navigation menu, select Simulation > Simulations.3. From the Actions menu, select New.4. Type a name for the simulation in the What do you want to name this simulation parameter.5. From the Which model do you want to base this on drop-down list, select the type of data you
want to return. All existing topology models are listed. If you select Current Topology, then thesimulation uses the current topology model.
6. Choose one of the following options:
Option Description
Select Use Connection Data The simulation is based on connection and topologydata.
Clear Use Connection Data The simulation is only based on topology data.
If your topology model does not include any data andyou clear the Use Connection Data check box, thesimulation does not return any results.
7. From the Importance Factor list, select the level of importance you want to associate with thissimulation.The Importance Factor is used to calculate the Risk Score. The range is 1 (low importance) to 10(high importance). The default is 5.
8. From the Where do you want the simulation to begin list, select an origin for the simulation.The chosen value determines the start point of the simulation. For example, the attack originates at aspecific network. The selected simulation parameters are displayed in the Generate a simulationwhere window.
9. Add simulation attack targets to the simulation test.10. Using the Which simulations do you want to include in the attack field, select the + sign beside
the simulation you want to include.The simulation options are displayed in the Generate a simulation where window.
11. From the Generate a simulation where window, click any underlined parameters to furtherconfigure simulation parameters.
12. In the Run this simulation for menu, select the number of steps you want to run this simulation (1 -5).
13. In the steps menu, choose the schedule for running the simulation.14. In the groups area, select a check box for any group you want to assign this simulation.15. Click Save Simulation.
Editing a simulationYou can edit simulations.
Procedure1. Click the Risks tab.2. On the navigation menu, select Simulation > Simulations.
104 QRadar Risk Manager User Guide

3. Select the simulation definition you want to edit.4. From the Actions menu, select Edit.5. Update parameters, as necessary.
For more information about the Simulation parameters, see Simulation tests.6. Click Save Simulation.
Duplicating a simulationYou can duplicate simulations.
Procedure1. Click the Risks tab.2. On the navigation menu, select Simulation > Simulations.3. Select the simulation you want to duplicate.4. From the Actions menu, select Duplicate.5. Type the name for the simulation.6. Click OK.
Deleting a simulationYou can delete simulations.
Procedure1. Click the Risks tab.2. On the navigation menu, select Simulation > Simulations.3. Select the simulation you want to delete.4. From the Actions menu, select Delete.5. Click OK.
Manually running a simulationUse the Simulation Editor to manually run a simulation.
Procedure1. Click the Risks tab.2. From the Actions menu, select Run Simulation.3. Click OK.
Results
The simulation process can take an extended period of time. While the simulation is running, the NextRun column indicates the percentage complete. When complete, the Results column displays thesimulation date and time.
If you run a simulation and then perform changes that affect the tests associated with the simulation,these changes might take up to an hour to display.
Simulation of a network configuration changeYou can use a topology model to define virtual network models based on your existing network. You cancreate a network model that is based on a series of modifications that can be combined and configured.
13 Simulations 105

You can use a topology model to determine the effect of configuration changes on your network using asimulation.
Topology models provide the following key functionality:v Create virtual topologies for testing network changes.v Simulate attacks against virtual networks.v Lower risk and exposure to protected assets through testing.v Virtual network segments allow you to confine and test sensitive portions of your network or assets.
To simulate a network configuration change, do the following tasks:1. Create a topology model.2. Simulate an attack against the topology model.
Creating a topology modelCreate a topology model to simulate the impact of network changes and simulate attacks.
Procedure1. Click the Risks tab.2. On the navigation menu, select Simulations > Topology Models.3. From the Actions list, select New.4. Type a name for the model.5. Select any modifications that you want to apply to the topology.6. Configure the tests added to the Configure model as follows pane.7. Click Save Model.
What to do next
Create a simulation for your new topology model.
Simulating an attackUse the simulation feature to simulate an attack on open ports by using protocols such as TCP.
Procedure1. Click the Risks tab.2. On the navigation menu, select Simulation > Simulations.3. From the Actions list, select New.4. Type a name for the simulation.5. Select a topology model that you created.6. From the Where do you want the simulation to begin list, select an origin for the simulation.7. Add the simulation attack, Attack targets one of the following open ports using protocols.8. For this simulation, click open ports, and then add port 22.9. Click protocols, and then select TCP. SSH uses TCP.
10. Click Add + to add the protocol, and then OK.11. Click Save Simulation.12. From the Actions list, select Run Simulation. The results column contains a list that shows the run
date of the simulation, and a link to view the results.13. Click View Results.
106 QRadar Risk Manager User Guide

Simulating an attack on an SSH protocolSimulate attacks on your network such as a network attack on an SSH protocol.
Procedure1. Click the Risks tab.2. On the navigation menu, click Simulation > Simulations.3. From the Actions list, select New.4. Type a name for the simulation.5. Select Current Topology.6. Select the Use Connection Data check box.7. From the Where do you want the simulation to begin list, select an origin for the simulation.8. Add the simulation attack, Attack targets one of the following open ports using protocols.9. For this simulation, click open ports, and then add port 22.
10. Click protocols, and then select TCP. SSH uses TCP.11. Click Add + to add the protocol, and then click OK.12. Click Save Simulation.13. From the Actions list, select Run Simulation. The results column contains a list with the date the
simulation was run and a link to view the results.14. Click View Results.
Results
A list of assets that have SSH vulnerabilities is displayed in the results, which allows networkadministrators to approve SSH connections that are allowed or expected in your network. Thecommunications that are not approved can be monitored for events or offenses.
The results that are displayed provide your network administrators or security professionals with a visualrepresentation of the attack path. For example, the first step provides a list of the directly connectedassets affected by the simulation. The second step lists assets in your network that can communicate tofirst-level assets in your simulation.
The information that is provided in the attack helps you to strengthen and test your network againstthousands of possible attack scenarios.
Managing simulation resultsAfter a simulation runs, the Results column displays a drop-down list containing a list of the dates whenthe simulation was generated.
Simulation results are retained for 30 days. Results only display in the Results column after a simulationruns.
Viewing simulation resultsYou can view simulation results in the Results column of the Simulations page.
About this task
Results only display in the Results column after a simulation runs. Simulation results provide informationon each step of the simulation.
13 Simulations 107

For example, the first step of a simulation provides a list of the directly connected assets that are affectedby the simulation. The second step lists assets in your network that can communicate to first-level assetsin your simulation.
When you click View Result, the following information is provided:
Table 28. Simulation result information
Parameter Description
Simulation Definition The description of the simulation.
Using Model The name of the model against which the simulation wasrun.
Simulation Result The date on which the simulation was run.
Step Results The number of steps for the result that includes the stepthat is being displayed.
Assets CompromisedThe total number of assets that are compromised in thisstep and across all simulation steps.
If the topology model includes data from an IP range of/32 defined as reachable, then IBM Security QRadar RiskManager does not validate those assets against thedatabase. Therefore, those assets are not considered inthe Asset Compromised total. QRadar Risk Manager onlyvalidates assets in broader IP ranges, such as /24 todetermine which assets exist.
Risk Score Risk score is a calculated value based on the number ofresults, steps, the number of compromised assets, andthe importance factor that is assigned to the simulation.This value indicates the severity level that is associatedwith the simulation for the displayed step.
You can move your mouse pointer over a connection to determine the list of assets that are affected bythis simulation.
The top 10 assets display when you move your mouse over the connection.
Move your mouse pointer over the connection to highlight the path through the network, as defined bythe subnet.
The simulation result page provides a table called, Results for this step. This table provides the followinginformation:
Table 29. Results for this step information
Parameter Description
Approve Allows you to approve simulation results. See Approvingsimulation results.
Parent The originating IP address for the displayed step of thesimulation.
IP The IP address of the affected asset.
Network The network of the target IP addresses, as defined in thenetwork hierarchy.
Asset Name The name of the affected asset, as defined by the assetprofile.
108 QRadar Risk Manager User Guide

Table 29. Results for this step information (continued)
Parameter Description
Asset Weight The weight of the affected asset, as defined in the assetprofile.
Procedure1. Click the Risks tab.2. On the navigation menu, select Simulation > Simulations.3. In the Results column, select the date and time of the simulation you want to view using the list.4. Click View Result. You can view the simulation result information, starting at step 1 of the
simulation.5. View the Results for this Step table to determine the assets that are affected.6. To view the next step of the simulation results, click Next Step.
Approving simulation resultsIn simulations, you can approve network traffic that is deemed low risk or normal communication on theasset. When you approve results, you filter the result list so that future simulations ignore these approvedcommunications.
About this task
You can approve simulation results.
Results are only displayed in the Results column after a simulation runs.
Procedure1. Click the Risks tab.2. On the navigation menu, select Simulation > Simulations.3. In the Results column, select the date and time of the simulation that you want to view by using the
list.4. Click View Result.5. In the Results for this step table, use one of the following methods to approve assets:
Option Description
Approve Selected Click the check box for each asset that you want toapprove, and then click Approve Selected.
Approve All Click Approve All to approve all assets that are listed.
6. Optional: Click View Approved to view all approved assets.
Revoking a simulation approvalYou can revoke an approved connection or communication from a simulation approved list. When anapproved simulation result is revoked, any future simulations display non-approved communications inthe simulation results.
Procedure1. Click the Risks tab.2. On the navigation menu, select Simulation > Simulations.3. In the Results column, select the date and time of the simulation you want to view using the list.
13 Simulations 109

4. View Result.5. Click View Approved to view all approved assets.6. Choose one of the following options:
Option Description
Revoke Selected Click the check box for each asset that you want torevoke, and then click Revoke Selected.
Revoke All Click Revoke All to revoke all the assets that are listed.
Monitoring simulationsYou can monitor a simulation to determine if the results of the simulation changed. If a change occurs,then an event is generated. A maximum of 10 simulations can be in monitor mode.
About this task
When a simulation is in monitor mode, the defaults time range is 1 hour. This value overrides theconfigured time value when the simulation was created.
For information about event categories, see the IBM Security QRadar User Guide.
Procedure1. Click the Risks tab.2. On the navigation menu, select Simulation > Simulations.3. Select the simulation that you want to monitor.4. Click Monitor.5. In the Event Name field, type the name of the event you want to display on the Log Activity and
Offenses tab.6. In the Event Description field, type a description for the event. The description is displayed in the
Annotations of the event details.7. From the High-Level Category list, select the high-level event category that you want this simulation
to use when processing events.8. From the Low-Level Category list, select the low-level event category that you want this simulation
to use when processing events.9. Select the Ensure the dispatched event is part of an offense check box if you want, as a result of
this monitored simulation, the events that are forwarded to the Magistrate component. If no offensewas generated, then a new offense is created. If an offense exists, this event is added to the existingoffense. If you select the check box, then choose one of the following options:
Option Description
Question/Simulation All events from a question are associated with a single offense.
Asset A unique offense is created (or updated) for each unique asset.
10. In the Additional Actions section, select one or more of the following options:
Option Description
Email Select this check box and specify the email address to send notifications if theevent is generated. Use a comma to separate multiple email addresses.
110 QRadar Risk Manager User Guide
Option Description
Send to SyslogSelect this check box if you want to log the event.
For example, the syslog output might resemble:
Sep 28 12:39:01 localhost.localdomain ECS:Rule ’Name of Rule’Fired: 172.16.60.219:12642 ->172.16.210.126:6666 6, Event Name:SCAN SYN FIN,QID: 1000398, Category: 1011, Notes: Eventdescription
Notify Select this check box if you want events that generate as a result of thismonitored question to display in the System Notifications item in theDashboard.
11. In the Enable Monitor section, select the check box to monitor the simulation.12. Click Save Monitor.
Grouping simulationsAssigning simulations to groups is an efficient way to view and track all simulations. For example, youcan view all simulations that are related to compliance.
About this task
As you create new simulations, you can assign the simulations to an existing group.
After you create a group, you can drag groups in the menu tree to change the organization.
Procedure1. Click the Risks tab.2. On the navigation menu, select Simulation > Simulations.3. Click Groups.4. From the menu tree, select the group under which you want to create a new group.5. Click New.6. In the Name field, type a name for the new group. The group name can be up to 255 characters in
length.7. In the Description field, type a description for the group. The description can be up to 255 characters
in length.8. Click OK.
13 Simulations 111

112 QRadar Risk Manager User Guide

14 Topology models
You can use a topology model to define virtual network models based on your existing network.
You can create a network model based on a series of modifications that can be combined and configured.This allows you to determine the effect of configuration changes on your network using a simulation. Formore information about simulations, see Using simulations.
You can view topology models on the Simulations page. Topology models provides the followinginformation:
Table 30. Model definitions parameters
Parameter Description
Model Name The name of the topology model, as defined by the userwhen created.
Group(s) The groups to which this topology is associated.
Created By The user who created the model definition.
Created On The date and time that the model definition was created.
Last Modified The number of days since the model definition wascreated.
Creating a topology modelYou can create one or more topology models.
© Copyright IBM Corp. 2012, 2017 113

About this task
The following table describes the test names and parameters that you can configure.
Table 31. Topology tests
Test Name Parameters
A rule is added to the selected devices that allowsconnections from source CIDRs to destination CIDRson protocols, ports
Configure the following parameters:
devices - Specify the devices that you want to add to thisrule. In the Customize Parameter window, select the Allcheck box to include all devices or you can searchdevices by using one of the following search criteria:
IP/CIDR - Select the IP/CIDR option and specify the IPaddress or CIDR that you want to add this rule to.
Hostname - Select the Hostname option and specify thehost name that you want to filter. To search for multiplehost names, use a wildcard character (*) at the beginningor end of the string.
Adapter - Select the Adapter option and use the menu tofilter the device list by adapter.
Vendor - Select the Vendor option and use the menu tofilter the device list by vendor. You can also specify amodel for the vendor. To search for multiple models, usea wildcard character (*) at the beginning or end of thestring.
allows | denies - Select the condition (accept or denied)for connections that you want this test to apply.
CIDRs - Select any source IP addresses or CIDR rangesthat you want to add to this rule.
CIDRs - Select any destination IP addresses or CIDRranges that you want to add to this rule.
protocols - Specify the protocols that you want to add tothis rule. To include all protocols, select the All checkbox.
ports - Specify the ports that you want to add to thisrule. To include all ports, select the All check box.
114 QRadar Risk Manager User Guide

Table 31. Topology tests (continued)
Test Name Parameters
A rule is added to the selected IPS devices that allowsconnections from source CIDRs to destination CIDRswith vulnerabilities
Configure the following parameters:
IPS devices - Specify the IPS devices that you want thistopology model to include. To include all IPS devices,select the All check box.
allows | denies - Specify the condition (accept or denied)for connections that you want this test to apply.
CIDRs - Specify any source IP addresses or CIDR rangesthat you want this topology model to include.
CIDRs - Specify any destination IP addresses or CIDRranges that you want this topology model to include.
vulnerabilities - Specify the vulnerabilities that you wantto apply to the topology model. You can search forvulnerabilities by using the Bugtraq ID, OSVDB ID, CVEID, or title.
The following assets allow connections to the selectedports Configure the following parameters:
Assets - Specify the assets that you want this topologymodel to include.
allow | deny - Specify the condition (allow or deny) forconnections that you want this topology model to apply.The default is allow.
ports - Specify the ports that you want this topologymodel to include. To include all ports, select the Allcheck box.
Assets in the following asset building blocks allowconnections to ports Configure the following parameters:
Assets building blocks - Specify the building blocks thatyou want this topology model to include.
allow | deny - Specify the condition (allow or deny) thatyou want this topology model to apply. The default isallow.
ports - Specify the ports that you want this topologymodel to include. To include all ports, select the Allcheck box.
Procedure1. Click the Risks tab.2. On the navigation menu, click Simulation > Topology Models
3. From the Actions menu, select New.4. In the What do you want to name this model field, type a name for the model definition.5. In the Which modifications do you want to apply to your model pane, select the modifications that
you want to apply to the topology to create your model.6. Configure the tests added to the Configure model as follows pane.
14 Topology models 115

7. When the test is displayed in the pane, the configurable parameters are underlined. Click eachparameter to further configure this modification for your model. In the groups area, select the checkbox to assign groups to this question.
8. Click Save Model.
Editing a topology modelYou can edit a topology model.
Procedure1. Click the Risks tab.2. On the navigation menu, select Simulation > Topology Models.3. Select the model definition you want to edit.4. From the Actions menu, select Edit.5. Update parameters, as necessary.
For more information about the Model Editor parameters, see Creating a topology model.6. Click Save Model.
Duplicating a topology modelYou can duplicate a topology model.
Procedure1. Click the Risks tab.2. On the navigation menu, select Simulation > Topology Models.3. Select the model definition you want to duplicate.4. From the Actions menu, select Duplicate.5. Type a name that you want to assign to the copied topology model.6. Click OK.7. Edit the model.
Deleting a topology modelYou can delete a topology model.
Procedure1. Click the Risks tab.2. On the navigation menu, select Simulation > Topology Models.3. Select the model definition you want to delete.4. From the Actions menu, select Delete.5. Click OK.
Group topology modelsYou can group and view your topology models based on your chosen criteria.
Categorizing your topology model is an efficient way to view and track your models. For example, youcan view all topology models related to compliance.
As you create new topology models, you can assign the topology models to an existing group. Forinformation on assigning a group, see Creating a topology model.
116 QRadar Risk Manager User Guide

Viewing groupsYou can view topology models using groups.
Procedure1. Click the Risks tab.2. On the navigation menu, select Simulation > Topology Models.3. Using the Group list, select the group you want to view.
Creating a groupYou can create a group to efficiently view and track topology models.
Procedure1. Click the Risks tab.2. On the navigation menu, select Simulation > Topology Models.3. Click Groups.4. From the menu tree, select the group under which you want to create a new group.
After you create the group, you can drag and drop groups in the menu tree items to change theorganization.
5. Click New.6. Type the name that you want to assign to the new group. The name can be up to 255 characters in
length.7. Type a description for the group. The description can be up to 255 characters in length.8. Click OK.9. If you want to change the location of the new group, click the new group and drag the folder to
location in your menu tree.
Editing a groupYou can edit a group.
Procedure1. Click the Risks tab.2. On the navigation menu, select Simulation > Topology Models.3. Click Groups.4. From the menu tree, select the group you want to edit.5. Click Edit.6. Update values for the parameters7. Click OK.8. If you want to change the location of the group, click the new group and drag the folder to location
in your menu tree.
Copying an item to another groupUsing the groups functionality, you can copy a topology model to one or many groups.
Procedure1. Click the Risks tab.2. On the navigation menu, select Simulations > Topology Models.3. Click Groups.4. From the menu tree, select the question you want to copy to another group.
14 Topology models 117

5. Click Copy.6. Select the check box for the group to which you want to copy the simulation.7. Click Copy.
Assign a topology to a groupYou can assign a topology model to a group.
Procedure1. Click the Risks tab.2. On the navigation menu, select Simulation > Simulations.3. Select the topology model you want to assign to a group.4. From the Actions menu, select Assign Group.5. Select the group to which you want the question assigned.6. Click Assign Groups.
Deleting an item from a groupYou can delete an item from a group.
Procedure1. Click the Risks tab.2. On the navigation menu, select Simulation > Simulations.3. Click Groups.4. From the menu tree, select the top level group.5. From the list of groups, select the item or group you want to delete.6. Click Remove.7. Click OK.
118 QRadar Risk Manager User Guide

15 Managing IBM Security QRadar Risk Manager reports
You can create, edit, distribute, and manage reports for your network devices. Detailed reports on firewallrules and connections between devices are often required to satisfy various regulatory standards, such asPCI compliance.
The following report options are specific to QRadar Risk Manager:
Table 32. Report options for QRadar Risk Manager
Report option Description
Connections The connection diagrams for your network devices thatoccurred during your specified time frame.
Device rulesThe rules configured on your network device duringyour specified time frame. You can view the followingrule types for one or many network devices using thisreport option:
Most used accept rules
Most used deny rules
Least used accept
Least used deny rules
Shadowed rules
Unused object rules
Device unused objects Produces a table with the name, configuration date/time,and a definition for any object reference groups that arenot in use on the device. An object reference group is ageneric term used to describe a collection of IPaddresses, CIDR addresses, host names, ports, or otherdevice parameters which are grouped together andassigned to rules on the device.
Manually generating a reportReports can be started manually. If you start multiple reports manually, the reports are added to a queueand labeled with their queue position.
About this task
Manually generating a report does not reset the existing report schedule. For example, if you generate aweekly report for most active firewall denies, then manually generate the report, the weekly report stillgenerates on the schedule you initially configured.
When a report generates, the Next Run Time column displays one of the three following messages:v Generating - The report is generating.v Queued (position in the queue)- The report is queued for generation. The message indicates the
position the report is in the queue. For example, 1 of 3.v (x hour(s) x min(s )y sec(s)) - The report is scheduled to run. The message is a count-down timer that
specifies when the report will run next.
© Copyright IBM Corp. 2012, 2017 119

Procedure1. Click the Reports tab.2. Select the report that you want to generate.3. Click Run Report.4. Optional. Click Refresh to refresh the view, including the information in the Next Run Time column.
What to do next
After the report generates, you can view the generated report from the Generated Reports column.
Use the report wizardYou can use the Report Wizard to create a new report. The Report Wizard provides a step-by-step guideon how to design, schedule, and generate reports.
The wizard uses the following key elements to help you create a report:v Layout - Position and size of each containerv Container - Placeholder and location for content in your reportv Content - Defines the report data IBM Security QRadar Risk Manager includes in chart for the
container
When you select the layout of a report, consider the type of report you want to create. For example, donot choose a small chart container for graph content that displays a large number of objects. Each graphincludes a legend and a list of networks from which the content is derived; choose a large enoughcontainer to hold the data.
The scheduled time must elapse for reports that generate weekly or monthly before the generated reportreturns results. For a scheduled report, you must wait the scheduled time period for the results to build.For example, a weekly search requires 7 days to build the data. This search returns results after 7 dayselapse.
Creating a reportYou can create reports for a specific interval and can choose a chart type.
About this task
A report can consist of several data elements and can represent network and security data in a variety ofstyles, such as tables, line charts, pie charts, and bar charts.
You can specify Report Console or email for report distribution options. The following table describes theparameters on for these distribution options.
Table 33. Generated report distribution options
Option Description
Report Console Select this check box to send the generated report to theReports tab. This is the default distribution channel.
120 QRadar Risk Manager User Guide

Table 33. Generated report distribution options (continued)
Option Description
Select the users that should be able to view the generatedreport. This option is only displayed after you select the Report
Console check box.
From the list of users, select the IBM Security QRadarRisk Manager users you want to grant permission toview the generated reports.
You must have appropriate network permissions to sharethe generated report with other users. For moreinformation about permissions, see the IBM SecurityQRadar Administration Guide.
Select all usersThis option is only displayed after you select the ReportConsole check box.
Select this check box if you want to grant permission toall QRadar Risk Manager users to view the generatedreports.
You must have appropriate network permissions to sharethe generated report with other users. For moreinformation about permissions, see the IBM SecurityQRadar Administration Guide.
Email Select this check box if you want to distribute thegenerated report using email.
Enter the report distribution email address(es)This option is only displayed after you select the Emailcheck box.
Type the email address for each generated reportrecipient; separate a list of email addresses with commas.The maximum characters for this parameter is 255.
Email recipients receive this email fromno_reply_reports@qradar.
Include Report as attachment (non-HTML only)This option is only displayed after you select the Emailcheck box.
Select this check box to send the generated report as anattachment.
Include link to Report ConsoleThis option is only displayed after you select the Emailcheck box.
Select this check box to include a link the Report Consolein the email.
Procedure1. Click the Reports tab.2. From the Actions list, select Create.3. Click Next to move to the next page of the Report Wizard.4. Select the frequency for the reporting schedule.
15 Managing QRadar Risk Manager reports 121

5. In the Allow this report to generate manually pane, select Yes to enable or No to disable manualgeneration of this report. This option is not available for manually generated reports.
6. Click Next.7. Choose a layout of your report, and then click Next.8. Enter a report title. The title can be up to 100 characters in length. Do not use special characters.9. Choose a logo. The QRadar logo is the default logo. For more information about branding your
report, see the IBM Security QRadar Administration Guide.10. From the Chart Type list, select one of the QRadar Risk Manager specific reports.11. Configure the report data for your chart.12. Click Save Container Details.13. Click Next.14. Select report formats. You can select multiple options.
Note: Device Rules and Unused Object Rules reports only support the PDF, HTML, and RTF reportformats.
15. Click Next.16. Select the distribution channels that you want for your report.17. Click Next.18. Type a description for this report. The description is displayed on the Report Summary page and in
the generated report distribution email.19. Select the groups to which you want to assign this report. For more information about groups, see
Managing Reports in the IBM Security QRadar Administration Guide.20. Optional. Select yes to run this report when the wizard setup is complete. Click Next to view the
report summary. You can select the tabs available on the summary report to preview the reportselections.
21. Click Finish.
Results
The report immediately generates. If you cleared the Would you like to run the report now check box onthe final page of the wizard, the report is saved and generates as scheduled.
The report title is the default title for the generated report. If you reconfigure a report to enter a newreport title, the report is saved as a new report with the new name; however, the original report remainsthe same.
Editing a reportYou can edit a report to adjust a report schedule, layout, configuration, title, format, and deliverymethod. You can either edit existing reports or edit a default report.
Procedure1. Click the Reports tab.2. Select the report that you want to edit.3. From the Actions list, select Edit.4. Select the frequency for the new reporting schedule.5. In the Allow this report to generate manually pane, select one of the following options:v Yes - Enables manual generation of this report.v No - Disables manual generation of this report.
6. Click Next to move to the next page of the Report Wizard.
122 QRadar Risk Manager User Guide

7. Configure the layout of your report:a. From the Orientation list, select the page orientation.b. Select a layout option for your IBM Security QRadar Risk Manager report.c. Click Next.
8. Specify values for the following parameters:v Report Title - Type a report title. The title can be up to 100 characters in length. Do not use
special characters.v Logo - From the list, select a logo. The QRadar logo is the default logo. For more information
about branding your report, see the IBM Security QRadar Administration Guide.9. Configure the container for your report data:
a. Click Define.b. Configure the report data for your chart.c. Click Save Container Details.d. If required, repeat steps these steps to edit additional containers.e. Click Next to move to the next page of the Report Wizard.
10. Click Next to move to the next step of the Report Wizard.11. Select the check boxes for the report formats. You can select more than one option.
Note: QRadar Risk Manager-specific reports, such as Device Rule and Device Unused Object reportsonly support PDF, HTML, and RTF formats.
12. Click Next to move to the next page of the Report Wizard.13. Select the distribution channels for your report.14. Click Next to go to the final step of the Report Wizard.15. Type a description for this report. The description is displayed on the Report Summary page and in
the generated report distribution email.16. Select the groups to which you want to assign this report. For more information about groups, see
Managing Reports in the IBM Security QRadar Administration Guide.17. Optional. Select yes to run this report when the wizard setup is complete.18. Click Next to view the report summary. The Report Summary page is displayed, providing the
details for the report. You can select the tabs available on the summary report to preview the reportselections.
19. Click Finish.
Duplicating a reportYou can duplicate any report.
Procedure1. Click the Reports tab.2. Select the report you want to duplicate.3. From the Actions list, click Duplicate.4. Type a new name, without spaces, for the report.
Sharing a reportYou can share reports with other users. When you share a report, you provide a copy of the selectedreport to another user to edit or schedule.
15 Managing QRadar Risk Manager reports 123

Before you begin
You must have administrative privileges to share reports. Also, for a new user to view and access reports,an administrative user must share all the necessary reports with the new user
About this task
Any updates that the user makes to a shared report does not affect the original version of the report.
Procedure1. Click the Reports tab.2. Select the reports that you want to share.3. From the Actions list, click Share.4. From the list of users, select the users with whom you want to share this report.
If no users with appropriate access are available, a message is displayed.5. Click Share.
For more information about reports, see the IBM Security QRadar User Guide.
Configuring chartsThe chart type determines the data configured and displayed in the chart. You can create several chartsfor specific to data collected by devices in IBM Security QRadar Risk Manager.
The following chart types are specific to QRadar Risk Manager:v Connectionv Device rulesv Device Unused Objects
Connection chartsYou can use the Connections chart to view network connection information. You can base your charts ondata from saved connection searches from the Risks tab.
You can customize the data that you want to display in the generated report. You can configure the chartto plot data over a configurable time period. This functionality helps you to detect connection trends.
The following table provides configuration information for the Connections Chart container.
Table 34. Connections chart parameters
Parameter Description
Container Details - Connections
Chart Title Type a chart title to a maximum of 100 characters.
Chart Sub-Title Clear the check box to change the automatically createdsubtitle. Type a title to a maximum of 100 characters.
124 QRadar Risk Manager User Guide

Table 34. Connections chart parameters (continued)
Parameter Description
Graph Type From the list, select the type of graph to display on thegenerated report. Options include:
Bar - Displays the data in a bar chart. This is the defaultgraph type. This graph type requires the saved search tobe a grouped search.
Line - Displays the data in a line chart.
Pie - Displays the data in a pie chart. This graph typerequires the saved search to be a grouped search.
Stacked Bar - Displays the data in a stacked bar chart.
Stacked Line - Displays the data in a stacked line chart.
Table - Displays the data in table format. The Tableoption is only available for the full page width containeronly.
Graph From the list, select the number of connections to bedisplayed in the generated report.
Manual Scheduling The Manual Scheduling pane is displayed only if youselected the Manually scheduling option in the ReportWizard.
To create a manual schedule:
1. From the From list box, type the start date that youwant for the report, or select the date by using theCalender icon. The default is the current date.
2. From the list boxes, select the start time that youwant for the report. Time is available in half-hourincrements. The default is 1:00 am.
3. From the To list, type the end date that you want forthe report, or select the date by using the Calendericon. The default is the current date.
4. From the lists, select the end time that you want forthe report. Time is available in half-hour increments.The default is 1:00 am.
Hourly Scheduling The Hourly Scheduling pane is displayed only if youselected the Hourly scheduling option in the ReportWizard.
Hourly Scheduling automatically graphs all data fromthe previous hour.
Daily Scheduling The Daily Scheduling pane is displayed only if youselected the Daily scheduling option in the ReportWizard.
Choose one of the following options:
All data from previous day (24 hours)
Data of previous day from - From the lists, select thetime period that you want for the generated report. Timeis available in half-hour increments. The default is 1:00am.
15 Managing QRadar Risk Manager reports 125

Table 34. Connections chart parameters (continued)
Parameter Description
Weekly Scheduling The Weekly Scheduling pane is displayed only if youselected the Weekly scheduling option in the ReportWizard.
Choose one of the following options:
All data from previous week
All Data from previous week from - From the lists,select the time period that you want for the generatedreport. The default is Sunday.
Monthly Scheduling The Monthly Scheduling pane is displayed only if youselected the Monthly scheduling option in the ReportWizard.
Choose one of the following options:
All data from previous month
Data from previous month from the - From the lists,select the time period that you want for the generatedreport. The default is 1st to 31st.
Graph Content
Group From the list, select a saved search group to display thesaved searches that belong to that group in the AvailableSaved Searches list.
Type Saved Search or Select from List To refine the Available Saved Searches list, type thename of the search you want to locate in the Type SavedSearch or Select from List field. You can also type akeyword to display a list of searches that include thatkeyword. For example, type DMZ to display a list of allsearches that include DMZ in the search name.
Available Saved Searches Provides a list of available saved searches. By default, allavailable saved searches are displayed. However, youcan filter the list by selecting a group from the Group listor typing the name of a known saved search in the TypeSaved Search or Select from List field.
Create New Connection Search Click Create New Connection Search to create a newsearch.
Device Rules chartsYou can use the Device Rules chart to view firewall rules and the event count of firewall rules triggeredin your network.
Device Rule reports allows you to create a report for the following firewall rules:v Most active accept device rulesv Most active deny device rulesv Least active accept device rulesv Least active deny device rulesv Unused device rulesv Shadowed device rules
126 QRadar Risk Manager User Guide

The reports that you generate allow you to understand what rules are accepted, denied, unused, oruntriggered across a single device, a specific adapter, or multiple devices. Reports allow IBM SecurityQRadar Risk Manager to automate reporting about the status of your device rules and display the reportson the IBM Security QRadar SIEM Console.
This functionality helps you identify how rules are used on your network devices.
To create a Device Rules Chart container, configure values for the following parameters:
Table 35. Device Rules Chart parameters
Parameter Description
Container Details - Device Rules
Limit Rules to Top From the list, select the number of rules to be displayedin the generated report.
For example, if you limit your report to the top 10 rules,then create a report for most used accept rules across alldevices, the report returns 10 results. The results containa list of the 10 most used accept rules based on the eventcount across all devices that are visible to QRadar RiskManager.
15 Managing QRadar Risk Manager reports 127

Table 35. Device Rules Chart parameters (continued)
Parameter Description
Type Select the type of device rules to display in the report.Options include:
Most Used Accept Rules - Displays the most used acceptrules by event count for a single device or a group ofdevices. This report lists the rules with highest acceptedevent counts, in descending order, for the time frame youspecified in the report.
Most Used Deny Rules - Displays the most used denyrules by event count for a single device or a group ofdevices. This report lists the rules with the highest denyevent counts, in descending order, for the time frame youspecified in the report.
Unused Rules - Displays any rules for a single device ora group of devices that are unused. Unused rules havezero event counts for the time frame you specified forthe report.
Least Used Accept Rules - Displays the least used acceptrules for a single device or a group of devices. Thisreport lists rules with the lowest accept event counts, inascending order, for the time frame you specified in thereport.
Least Used Deny Rules - Displays the least used denyrules for a single device or a group of devices. Thisreport lists rules with the lowest denied event counts, inascending order, for the time frame you specified in thereport.
Shadowed Rules - Displays any rules for a single devicethat can never trigger because the rule is blocked by aproceeding rule. The results display a table of the rulecreating the shadow and any the rules that can nevertrigger on your device because they are shadowed by aproceeding rule on the device.Note: Shadowed rule reports can only be run against asingle device. These rules have zero event counts for thetime frame you specified for the report and are identifiedwith an icon in the Status column.
128 QRadar Risk Manager User Guide

Table 35. Device Rules Chart parameters (continued)
Parameter Description
Date/Time Range Select the time frame for your report. The optionsinclude:
Current Configuration - The results of the Device Rulesreport is based on the rules that exist in the currentdevice configuration. This report displays rules andevent counts for the existing device configuration.
The current configuration for a device is based on thelast time Configuration Source Management backed upyour network device.
Interval - The results of the Device Rules report is basedon the rules that existed during the time frame of theinterval. This report displays rules and event counts forthe specified interval from the last hour to 30 days.
Specific Range - The results of the Device Rules report isbased on the rules that existed between the start timeand end time of the time range. This report displaysrules and event counts for the specified time frame.
Timezone Select the timezone you want to use as a basis for yourreport. The default timezone is based on theconfiguration of your QRadar SIEM Console.
When configuring the Timezone parameter for yourreport, consider the location of the devices associatedwith the reported data. If the report uses data spanningmultiple time zones, the data used for the report is basedon the specific time range of the time zone.
For example, if your QRadar SIEM Console is configuredfor Eastern Standard Time (EST) and you schedule adaily report between 1pm and 3pm and set the timezoneas Central Standard Time (CST), the results in the reportcontains information from 2pm and 4pm EST.
Targeted Data Selection Targeted Data Selection is used to filter the Date/TimeRange to a specific value. Using the Targeted DataSelection options, you can create a report to view yourdevice rules over a custom defined period of time, withthe option to only include data from the hours and daysthat you select.
For example, you can schedule a report to run fromOctober 1 to October 31 and view your most active, leastactive or unused rules and their rule counts that occurduring your business hours, such as Monday to Friday, 8AM to 9 PM.Note: The filter details only display when you select theTargeted Data Selection check box in the Report Wizard.
15 Managing QRadar Risk Manager reports 129

Table 35. Device Rules Chart parameters (continued)
Parameter Description
Format Select the format for your device rules report. Theoptions include:
One aggregate report for specified devices - This reportformat aggregates the report data across multipledevices.
For example, if you create a report to display the top tenmost denied rules, then an aggregate report displays thetop ten most denied rules across all of the devices youhave selected for the report. This report returns 10 resultsin total for the report.
One report per device - This report format displays thereport data for one device.
For example, if you create a report to display the top tenmost denied rules, then an aggregate report displays thetop ten most denied rules for each device you haveselected for the report. This report returns the top 10results for every device selected for the report. If youselected 5 devices, the report returns 50 results.Note: Shadowed rule reports are only capable ofdisplaying one report per device.
Devices Select the devices included in the report. The optionsinclude:
All Devices - Select this option to include all devices inQRadar Risk Manager in your report.
Adapter - From the list, select an adapter type to includein your report. Only one adapter type can be selectedfrom the list for a report.
Specific Devices - Select this option to only includespecific devices in your report. The Device Selectionwindow allows you to select and add devices to yourreport.
To add individual devices to your report:
1. Click Browse to display the Device Selection window.
2. Select any devices and click Add Selected.
To add all devices to your report:
1. Click Browse to display the Device Selection window.
2. Click Add All.
To search for devices to include in your report:
1. Click Browse to display the Device Selection window.
2. Click Search.
3. Select the search options to filter the full device listby configuration obtained, IP or CIDR address,hostname, type, adapter, vendor, or model.
4. Click Search.
5. Select any devices and click Add Selected.
130 QRadar Risk Manager User Guide

Device Unused Objects chartsA Device Unused Objects report displays object reference groups that are not being used by your networkdevice.
This report displays object references, such as a collection of IP address, CIDR address ranges, or hostnames that are unused by your network device.
When you configure a device unused objects container, you configure values for the followingparameters:
Table 36. Device Unused Objects report parameters
Parameter Description
Container Details - Device Unused Objects
Limit Objects to Top From the list, select the number of rules to be displayedin the generated report.
DevicesSelect the devices included in the report. The optionsinclude:
All Devices - Select this option to include all devices inIBM Security QRadar Risk Manager in your report.
Adapter - From the list, select an adapter type to includein your report. Only one adapter type can be selectedfrom the list for a report.
Specific Devices - Select this option to only includespecific devices in your report. The Device Selectionwindow allows you to select and add devices to yourreport.
To add individual devices to your report:
1. Click Browse to display the Device Selection window.
2. Select any devices and click Add Selected.
To add all devices to your report:
1. Click Browse to display the Device Selection window.
2. Click Add All.
To search for devices to include in your report:
1. Click Browse to display the Device Selection window.
2. Click Search.
3. Select the search options to filter the full device listby configuration obtained, IP or CIDR address,hostname, type, adapter, vendor, or model.
4. Click Search.
5. Select any devices and click Add Selected.
15 Managing QRadar Risk Manager reports 131

132 QRadar Risk Manager User Guide

16 Audit log data
Changes made by IBM Security QRadar Risk Manager users are recorded in the Log Activity tab of IBMSecurity QRadar SIEM.
All logs display in the Risk Manager Audit category. For more information about using the Log Activitytab in QRadar SIEM, see the IBM Security QRadar User Guide.
Logged actionsActions are logged for components.
The following table lists the categories and corresponding actions that are logged.
Table 37. Logged actions
Category Action
Policy Monitor Create a question.
Edit a question.
Delete a question.
Submit a question manually.
Submit a question automatically.
Approve results.
Revoke results approval.
Topology Model Create a topology model.
Edit a topology model.
Delete a topology model.
Topology Save layout.
Create a topology saved search.
Edit a topology saved search
Delete a topology saved search
Placing an IPS.
Configuration Monitor Create a log source mapping
Edit a log source mapping
Delete a log source mapping
Simulations Create a simulation.
Edit a simulation.
Delete a simulation.
Manually run a simulation.
Automatically run a simulation.
Approve simulation results.
Revoke simulation results.
© Copyright IBM Corp. 2012, 2017 133

Table 37. Logged actions (continued)
Category Action
Configuration Source Management Successfully authenticate for the first time on a session.
Add a device.
Remove a device.
Edit the IP address or adapter for a device.
Save a credential configuration.
Delete a credential configuration.
Save a protocol configuration.
Remove a protocol configuration.
Create a schedule for a backup job.
Delete a schedule for a backup job.
Edit a backup job.
Add a backup job.
Delete a backup job.
Run a scheduled backup job.
Complete a scheduled job whether the job is successfulor has failed.
After a backup job has completed processing and theconfiguration was persisted, no changes discovered.
After a backup job has completed processing and theconfiguration was persisted, changes were discovered.
After a backup job has completed processing and theconfiguration was persisted, unpersisted changes werediscovered.
After a backup job has completed processing and theconfiguration that was previously persisted no longerresides on the device.
Adapter operation attempt has begun, which includesprotocols and credentials.
Adapter operation attempt has been successful, includingthe protocols and credentials.
Viewing user activityYou can view user activity for IBM Security QRadar Risk Manager users.
Procedure1. Click the Log Activity tab. If you previously saved a search as the default, the results for that saved
search is displayed.2. Click Search > New Search to create a search.3. In the Time Range pane, select an option for the time range you want to capture for this search.4. In the Search Parameters pane, define your search criteria:
a. From the first list, select Category.b. From the High Level Category drop-down list, select Risk Manager Audit.c. Optional. From the Low Level Category drop-down list, select a category to refine your search.
134 QRadar Risk Manager User Guide

5. Click Add Filter.6. Click Filter to search for QRadar Risk Manager events.
Viewing the log fileAudit logs, which are stored in plain text, are archived and compressed when the audit log file reaches asize of 200 MB.
About this task
The current log file is named audit.log. If the audit log file reaches a size of 200 MB a second time, thefile is compressed and the old audit log is renamed as audit.1.gz. The file number increments each time alog file is archived. IBM Security QRadar Risk Manager can store up to 50 archived log files.
The maximum size of any audit message (not including date, time, and host name) is 1024 characters.
Each entry in the log file displays using the following format:<date_time> <host name> <user>@<IP address>(thread ID) [<category>] [<sub-category>][<action>] <payload>
The following table describes the parameters used in the log file.
Table 38. Audit log file information
Parameter Description
<date_time> The date and time of the activity in the format: MonthDate HH:MM:SS.
<host name> The host name of the Console where this activity waslogged.
<user> The name of the user that performed the action.
<IP address> The IP address of the user that performed the action.
(thread ID) The identifier of the Java™ thread that logged thisactivity.
<category> The high-level category of this activity.
<sub-category> The low-level category of this activity.
<action> The activity that occurred.
<payload> The complete record that has changed, if any.
Procedure1. Using SSH, log in to your IBM Security QRadar SIEM Console as the root user.2. Using SSH from the IBM Security QRadar SIEM Console, log in to the QRadar Risk Manager
appliance as a root user.3. Go to the following directory: /var/log/audit4. Open your audit log file.
16 Audit log data 135

Log file detailsAdministrators use IBM Security QRadar Risk Manager log files to view user activity and to troubleshootsystem issues.
The following table describes the location and content of QRadar Risk Manager log files.
Table 39. QRadar Risk Manager log files
Log file name Location Description
audit.log /var/log/audit/ Contains the current audit information.
audit.<1-50>.gz /var/log/audit/ Contains archived audit information. When the audit.log filereaches 200 MB in size, it is compressed and renamed toaudit.1.gz. The file number increments each time a log file isarchived. QRadar Risk Manager can store up to 50 archived logfiles.
qradar.log /var/log/ Contains all process information that is logged by the QRadarRisk Manager server.
qradar.error /var/log/ All exceptions and System.out and System.err messages that aregenerated by the QRadar Risk Manager server are logged in thisfile.
136 QRadar Risk Manager User Guide

Notices
This information was developed for products and services offered in the U.S.A.
IBM may not offer the products, services, or features discussed in this document in other countries.Consult your local IBM representative for information on the products and services currently available inyour area. Any reference to an IBM product, program, or service is not intended to state or imply thatonly that IBM product, program, or service may be used. Any functionally equivalent product, program,or service that does not infringe any IBM intellectual property right may be used instead. However, it isthe user's responsibility to evaluate and verify the operation of any non-IBM product, program, orservice.
IBM may have patents or pending patent applications covering subject matter described in thisdocument. The furnishing of this document does not grant you any license to these patents. You can sendlicense inquiries, in writing, to:
IBM Director of LicensingIBM CorporationNorth Castle DriveArmonk, NY 10504-1785 U.S.A.
For license inquiries regarding double-byte character set (DBCS) information, contact the IBM IntellectualProperty Department in your country or send inquiries, in writing, to:
Intellectual Property LicensingLegal and Intellectual Property LawIBM Japan Ltd.19-21, Nihonbashi-Hakozakicho, Chuo-kuTokyo 103-8510, Japan
INTERNATIONAL BUSINESS MACHINES CORPORATION PROVIDES THIS PUBLICATION "AS IS"WITHOUT WARRANTY OF ANY KIND, EITHER EXPRESS OR IMPLIED, INCLUDING, BUT NOTLIMITED TO, THE IMPLIED WARRANTIES OF NON-INFRINGEMENT, MERCHANTABILITY ORFITNESS FOR A PARTICULAR PURPOSE. Some jurisdictions do not allow disclaimer of express orimplied warranties in certain transactions, therefore, this statement may not apply to you.
This information could include technical inaccuracies or typographical errors. Changes are periodicallymade to the information herein; these changes will be incorporated in new editions of the publication.IBM may make improvements and/or changes in the product(s) and/or the program(s) described in thispublication at any time without notice.
Any references in this information to non-IBM websites are provided for convenience only and do not inany manner serve as an endorsement of those websites. The materials at those websites are not part ofthe materials for this IBM product and use of those websites is at your own risk.
IBM may use or distribute any of the information you provide in any way it believes appropriate withoutincurring any obligation to you.
Licensees of this program who wish to have information about it for the purpose of enabling: (i) theexchange of information between independently created programs and other programs (including thisone) and (ii) the mutual use of the information which has been exchanged, should contact:
© Copyright IBM Corp. 2012, 2017 137

IBM Director of LicensingIBM CorporationNorth Castle Drive, MD-NC119Armonk, NY 10504-1785US
Such information may be available, subject to appropriate terms and conditions, including in some cases,payment of a fee.
The licensed program described in this document and all licensed material available for it are providedby IBM under terms of the IBM Customer Agreement, IBM International Program License Agreement orany equivalent agreement between us.
The performance data and client examples cited are presented for illustrative purposes only. Actualperformance results may vary depending on specific configurations and operating conditions..
Information concerning non-IBM products was obtained from the suppliers of those products, theirpublished announcements or other publicly available sources. IBM has not tested those products andcannot confirm the accuracy of performance, compatibility or any other claims related to non-IBMproducts. Questions on the capabilities of non-IBM products should be addressed to the suppliers ofthose products.
Statements regarding IBM's future direction or intent are subject to change or withdrawal without notice,and represent goals and objectives only.
All IBM prices shown are IBM's suggested retail prices, are current and are subject to change withoutnotice. Dealer prices may vary.
This information contains examples of data and reports used in daily business operations. To illustratethem as completely as possible, the examples include the names of individuals, companies, brands, andproducts. All of these names are fictitious and any similarity to actual people or business enterprises isentirely coincidental.
TrademarksIBM, the IBM logo, and ibm.com® are trademarks or registered trademarks of International BusinessMachines Corp., registered in many jurisdictions worldwide. Other product and service names might betrademarks of IBM or other companies. A current list of IBM trademarks is available on the Web at"Copyright and trademark information" at www.ibm.com/legal/copytrade.shtml.
Linux is a registered trademark of Linus Torvalds in the United States, other countries, or both.
UNIX is a registered trademark of The Open Group in the United States and other countries.
Microsoft, Windows, Windows NT, and the Windows logo are trademarks of Microsoft Corporation in theUnited States, other countries, or both.
Terms and conditions for product documentationPermissions for the use of these publications are granted subject to the following terms and conditions.
Applicability
These terms and conditions are in addition to any terms of use for the IBM website.
138 QRadar Risk Manager User Guide

Personal use
You may reproduce these publications for your personal, noncommercial use provided that allproprietary notices are preserved. You may not distribute, display or make derivative work of thesepublications, or any portion thereof, without the express consent of IBM.
Commercial use
You may reproduce, distribute and display these publications solely within your enterprise provided thatall proprietary notices are preserved. You may not make derivative works of these publications, orreproduce, distribute or display these publications or any portion thereof outside your enterprise, withoutthe express consent of IBM.
Rights
Except as expressly granted in this permission, no other permissions, licenses or rights are granted, eitherexpress or implied, to the publications or any information, data, software or other intellectual propertycontained therein.
IBM reserves the right to withdraw the permissions granted herein whenever, in its discretion, the use ofthe publications is detrimental to its interest or, as determined by IBM, the above instructions are notbeing properly followed.
You may not download, export or re-export this information except in full compliance with all applicablelaws and regulations, including all United States export laws and regulations.
IBM MAKES NO GUARANTEE ABOUT THE CONTENT OF THESE PUBLICATIONS. THEPUBLICATIONS ARE PROVIDED "AS-IS" AND WITHOUT WARRANTY OF ANY KIND, EITHEREXPRESSED OR IMPLIED, INCLUDING BUT NOT LIMITED TO IMPLIED WARRANTIES OFMERCHANTABILITY, NON-INFRINGEMENT, AND FITNESS FOR A PARTICULAR PURPOSE.
IBM Online Privacy StatementIBM Software products, including software as a service solutions, (“Software Offerings”) may use cookiesor other technologies to collect product usage information, to help improve the end user experience, totailor interactions with the end user or for other purposes. In many cases no personally identifiableinformation is collected by the Software Offerings. Some of our Software Offerings can help enable you tocollect personally identifiable information. If this Software Offering uses cookies to collect personallyidentifiable information, specific information about this offering’s use of cookies is set forth below.
Depending upon the configurations deployed, this Software Offering may use session cookies that collecteach user’s session id for purposes of session management and authentication. These cookies can bedisabled, but disabling them will also eliminate the functionality they enable.
If the configurations deployed for this Software Offering provide you as customer the ability to collectpersonally identifiable information from end users via cookies and other technologies, you should seekyour own legal advice about any laws applicable to such data collection, including any requirements fornotice and consent.
For more information about the use of various technologies, including cookies, for these purposes, SeeIBM’s Privacy Policy at http://www.ibm.com/privacy and IBM’s Online Privacy Statement athttp://www.ibm.com/privacy/details the section entitled “Cookies, Web Beacons and OtherTechnologies” and the “IBM Software Products and Software-as-a-Service Privacy Statement” athttp://www.ibm.com/software/info/product-privacy.
Notices 139

140 QRadar Risk Manager User Guide
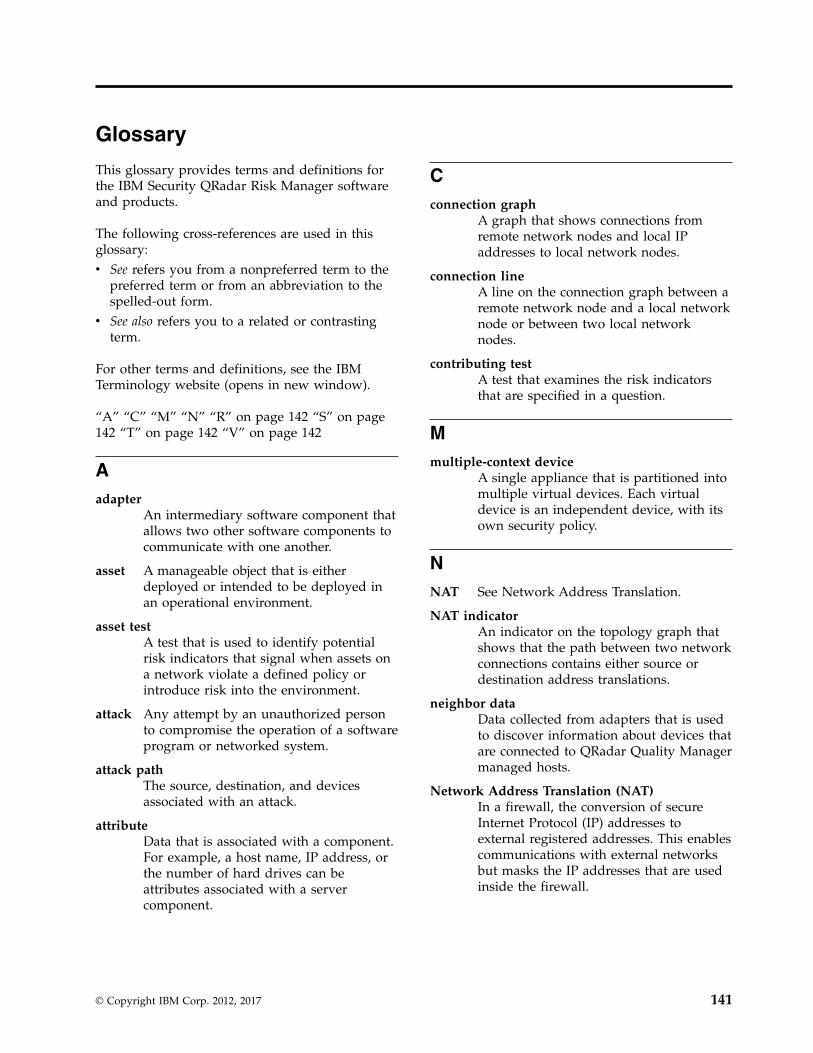
Glossary
This glossary provides terms and definitions forthe IBM Security QRadar Risk Manager softwareand products.
The following cross-references are used in thisglossary:v See refers you from a nonpreferred term to the
preferred term or from an abbreviation to thespelled-out form.
v See also refers you to a related or contrastingterm.
For other terms and definitions, see the IBMTerminology website (opens in new window).
“A” “C” “M” “N” “R” on page 142 “S” on page142 “T” on page 142 “V” on page 142
Aadapter
An intermediary software component thatallows two other software components tocommunicate with one another.
asset A manageable object that is eitherdeployed or intended to be deployed inan operational environment.
asset testA test that is used to identify potentialrisk indicators that signal when assets ona network violate a defined policy orintroduce risk into the environment.
attack Any attempt by an unauthorized personto compromise the operation of a softwareprogram or networked system.
attack pathThe source, destination, and devicesassociated with an attack.
attributeData that is associated with a component.For example, a host name, IP address, orthe number of hard drives can beattributes associated with a servercomponent.
Cconnection graph
A graph that shows connections fromremote network nodes and local IPaddresses to local network nodes.
connection lineA line on the connection graph between aremote network node and a local networknode or between two local networknodes.
contributing testA test that examines the risk indicatorsthat are specified in a question.
Mmultiple-context device
A single appliance that is partitioned intomultiple virtual devices. Each virtualdevice is an independent device, with itsown security policy.
NNAT See Network Address Translation.
NAT indicatorAn indicator on the topology graph thatshows that the path between two networkconnections contains either source ordestination address translations.
neighbor dataData collected from adapters that is usedto discover information about devices thatare connected to QRadar Quality Managermanaged hosts.
Network Address Translation (NAT)In a firewall, the conversion of secureInternet Protocol (IP) addresses toexternal registered addresses. This enablescommunications with external networksbut masks the IP addresses that are usedinside the firewall.
© Copyright IBM Corp. 2012, 2017 141

Rrestrictive test
A test that filters the results returned by acontributing test question.
risk indicatorA measure of the potential exposure of asystem to a security breach.
risky protocolA protocol that is associated with servicesthat run on an open port in inboundcommunications from the internet to theDMZ.
rule A set of conditional statements thatenable computer systems to identifyrelationships and run automatedresponses accordingly.
Ssub-search
A function that allows a search query tobe performed within a set of completedsearch results.
Ttime series chart
A graphical representation of networkconnections over time.
topology graphA graph that describes subnets, devices,and firewalls.
topology modelA virtual representation of thearrangement of network assets that isused to simulate an attack.
Vviolation
An act that bypasses or contravenescorporate policy.
vulnerabilityA security exposure in an operatingsystem, system software, or applicationsoftware component.
142 QRadar Risk Manager User Guide

Index
Aactual communication 62
contributing questions 59add asset 91Apps 29assess devices 70asset compliance question 96, 97asset profile 91asset profiles 95asset question 69Asset results 73assets 70assets tab 91attack path 53audit log
actions 133audit log data 133
Bback up information 22backup configuration information 22backup job 23, 24, 26backup job renaming 26backup log 22Backup Log Viewer 22backup status 22browser mode
Internet Explorer web browser 3
Ccharts
configuring 124connections 124Device Rules 126Device Unused Objects 131
CheckPoint SmartConsolerule counting 83
compliance 95compliance benchmarks 95configuration 9configuration source management 13connection graph 35connections 5, 31, 42
searching 37CPSMS 86creating
benchmark scan profiles 96credentials 13
configuring 14
Ddefault log in information 4deprecated contributing questions 62Deprecated contributing test
questions 66
deviceadding 18, 45deleting 19, 46device management 45, 47importing 16
device configuration 21, 45comparing 44
device discovery 15, 46device groups
grouping devices 53device import, CSV file 17device list
filtering 19device results 76device rules filtering 49Device/rules test questions 67devices 18
adding 18devices/rules question 72discovery schedule 29document mode
Internet Explorer web browser 3dynamic routing 4
Eedit asset 91export 81exporting 42
Gglossary 141graph 33, 35, 36graphs 33
Hhigh availability (HA) 4
Iimport 81importance factor 68introduction viiIntrusion Prevention System 53
removing 53IPS 53IPv6 4
Llog data 133log file 135, 136log in information 4log locations 136log source mapping 48
creating 48
Mmonitor mode 79, 80, 97monitor questions 80, 97
NNAT indicators 52neighbor data
collecting 21network administrator viinetwork configuration 106network connections
monitor 5network device configuration
investigating 43non-contiguous network masks 4
Ooffense 53open port 106
Ppassword 4PCI section 1 70PCI section 10 70policy monitor 57
delete item from question group 118managing questions 57use cases 89
policy monitor questions 58, 81evaluating results 78exporting 82grouping 81importing 82
policy monitor use caseactual communication for DMZ 69device test communication for Internet
access 72possible communication on protected
assets 71possible communication tests
contributing questions 64restrictive tests 66
protocol 107protocols 26, 27, 106protocols:risky 70
QQRadar Risk Manager
integration 83QRadar Risk Manager overview 3question 69, 72, 96
submitting 73
© Copyright IBM Corp. 2012, 2017 143

Rreport 120
duplicating 123editing 122sharing 124
report wizard 120reports
managing 119manually generating 119
restrictive questions 62results
approving 79risks for networks 106
Ssave asset search criteria 95save criteria 95saving 42scan results
viewing 98search
canceling 42CSM 88rule counting configuration 89SmartDashboard 85
search criteria 38search results 41, 42searching 40security integrations
QRadar Risk Manager 83simulation 106
deleting 105duplicating 105manual simulation 105
simulation approvalrevoking 109
simulation creation 107simulation results 107
approving 109managing 107
simulation tests 102simulations 101
editing 104grouping 111monitoring 110
Simulations 101SSH simulation 107sub-search 40system information 9system time 10
Ttime series graph 33, 36topolgoy models
group 116topology graph 51topology model 106, 113
assign to a group 118copy models to groups 117creating 114creating a group 117deleting 116duplicating 116editing 116
topology model (continued)editing a group 117viewing groups 117
Uunsupported features 4user activity
audit log 134user name 4
Vviewing
scan results 98violations 79
144 QRadar Risk Manager User Guide


IBM®
Printed in USA