21 e week four july 4th wall hanging with - janome
TRANSCRIPT

www.janome.com/summercampPage 1
se2018
with
#janomecamp18
I’m so excited to bring you a Fourth of July project for Janome Kids Camp! I sat down with my 8 year old and we brainstormed what sort of project we could make. I asked her what she thought of when she thought of America and Independence Day. We had a few ideas, but what is more recognized, more patriotic than our flag? We decided on this wall hanging. It pays tribute to Old Glory- red for hardiness and valor, white for purity and innocence, and blue for perseverance, vigilance, and justice. We also included a likeness of the United States as a focal point- after all, its the land of the free and the home of the brave.
week FOUR July 4th Wall Hanging
designed by: MEREDITH DANIEL of
Olivia Jane Handcrafted OliviaJaneHandcrafted.com
IG: @thefooshe
estimated sewing time:1-2 hours
finished size:
approx. 18 1/2” x 13”
www.janome.com/summercampPage 2
#janomecamp18
week FOUR
JULY 4TH WALL HANGING
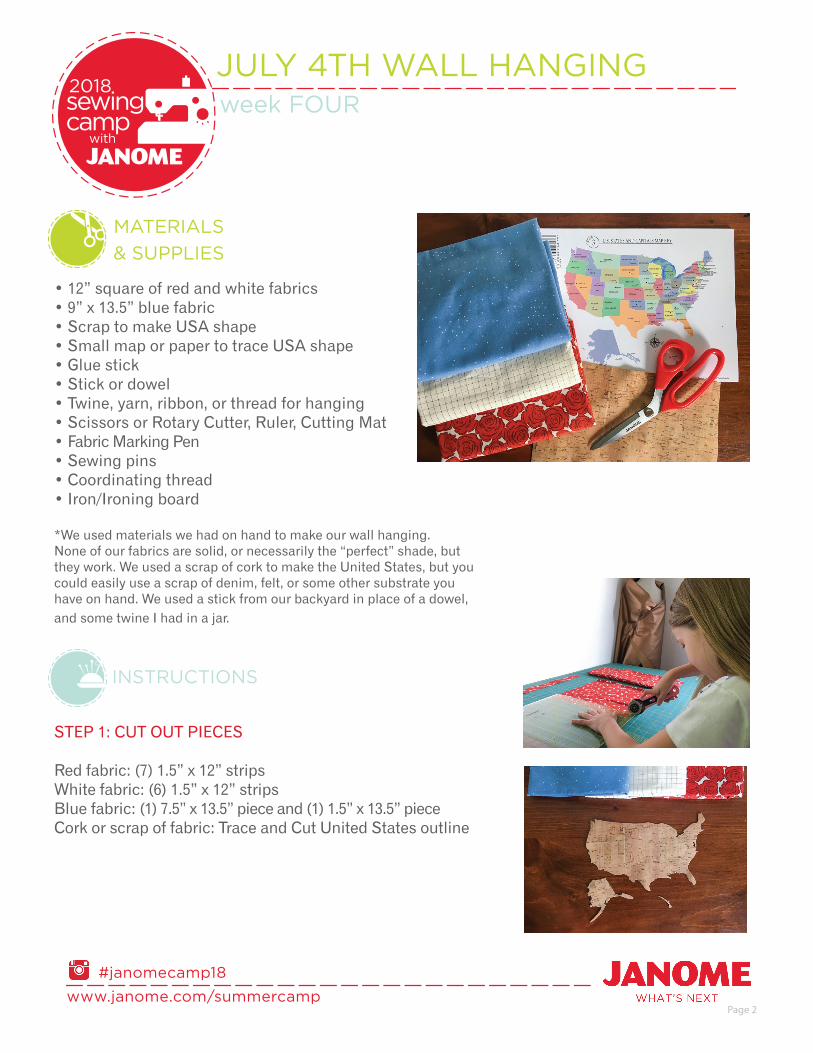
• 12” square of red and white fabrics • 9” x 13.5” blue fabric• Scrap to make USA shape• Small map or paper to trace USA shape • Glue stick• Stick or dowel• Twine, yarn, ribbon, or thread for hanging• Scissors or Rotary Cutter, Ruler, Cutting Mat• Fabric Marking Pen • Sewing pins • Coordinating thread • Iron/Ironing board *We used materials we had on hand to make our wall hanging. None of our fabrics are solid, or necessarily the “perfect” shade, but they work. We used a scrap of cork to make the United States, but you could easily use a scrap of denim, felt, or some other substrate you have on hand. We used a stick from our backyard in place of a dowel, and some twine I had in a jar.
STEP 1: CUT OUT PIECES Red fabric: (7) 1.5” x 12” stripsWhite fabric: (6) 1.5” x 12” stripsBlue fabric: (1) 7.5” x 13.5” piece and (1) 1.5” x 13.5” pieceCork or scrap of fabric: Trace and Cut United States outline
INSTRUCTIONS
MATERIALS
& SUPPLIES

www.janome.com/summercampPage 3
#janomecamp18
STEP 2: MAKE WALL HANGINGUsing a 1/4” seam, sew the red and white strips together beginning with the red. Chain piece (keep feeding the sets through your machine without cutting until you have gone through all the sets) in sets of two, and use an iron to press all seams toward the red fabrics. Next, sew the two piece sets into sets of four and again press seams toward the red fabrics. Keep doing this until you have completed your red and white section. Now use a scant 1/4” seam and top stitch the red fabrics on either edge. This will keep the seams in the back secure and give it a more finished look.
Sew the red and white portion to the larger blue piece with a 1/4” seam, then press the seam upward toward the blue. Using another scant 1/4” seam, top stitch the blue along the bottom seam to secure it.
week FOUR
JULY 4TH WALL HANGING

www.janome.com/summercampPage 4
#janomecamp18
STEP 3: ATTACH UNITED STATES SHAPE Use your glue stick to paste your United States down onto the blue portion of the flag. Once it is in place, secure it by stitching around the edge of the United States shape. Note: This is a great place to talk about small pivoting or help out younger kiddos since you’ll likely be sewing a couple stitches, then rotating lightly, then sewing again. STEP 4: MAKE HANGING SLEEVE Using a 1/4” seam allowance, sew your remaining blue strip to the top of the blue section, right sides together. Press the seam up toward the smaller strip and top stitch along the seam again.
Sew a line of stitches 1/4” in all the way around your flag, including the top strip. Now use that as a folding guide, and use your iron to press the edges to the wrong side all the way around. Starting at the top right side, use a scant 1/4” and sew all the way to the top left side (not along the top strip) to secure the edge.
week FOUR
JULY 4TH WALL HANGING

www.janome.com/summercampPage 5
#janomecamp18
Finally, fold the top strip down along the seam line at the top, and then using a scant 1/4” again, sew along the bottom fold of that strip. Sew from the wrong side of the flag so you can see what you are doing. Now you are ready to insert your stick or dowel into the sleeve, and tie some twine to either end. Hang up your flag and enjoy your beautiful handiwork! Don’t forget to tag us (and @thefooshe) on Instagram with #janomecamp18 so we can see your wall-hanging!
week FOUR
JULY 4TH WALL HANGING