3080 vco v1.2 assembly guide - personal circuits
TRANSCRIPT

Page 1 of 13
3080 VCO v1.2 – Assembly Guide
Thank you for purchasing this module! This is a complicated build with tightly packed components
and precision integrated circuits. It is not recommended for the beginner.
The module is designed and sized for Eurorack systems. You will need a 16 pin eurorack power
ribbon connector with –12/0/+12 which is connected to a synth power supply.
Follow the parts lists, these instructions and the PCB silkscreen text to build the module.
The module consists of 1 PCB board and a front panel.
There are components installed on BOTH sides of the boards. Please ensure that you place the
components on the correct side. When referring to the TOP of a board we mean the side with the
pmF logo. The BOTTOM has no logo.
You may need to clean up the board edges with wire cutters and/or a file to remove the remains of
the tabs from the fabrication process. This is particularly important for the edges containing the
jacks. These edges will need to mate flush with the front panel.
You must follow the order of assembly as described below since some components will be soldered
underneath other components.
Constructing the board 1. Clean board edges with wire cutters and/or file to remove the manufacturing tabs.

Page 2 of 13
2. Resistors
Install the flat resistors on the TOP of the board. The resistors between IC sockets for IC1 and
IC3 are a tight squeeze! Please ensure you can get the sockets in before you solder these three
resistors. Solder and clip the leads.
3. Diode (not LED)
Install the diode (but not the LED) on the TOP of the board. These are polarized components.
Align the stripe on the diode with the stripe marked on the board. Solder and clip the leads.

Page 3 of 13
4. IC Sockets
Install the sockets on the TOP of the board. This module uses either a CA3080 (IC2) OR a
LM13700 (IC5). If you will only use one or the other, you do not need to install the IC socket for
the alternate part. Observe the notch or mark on the sockets and align with the notch or mark
on the board. The sockets for IC1 and IC3 are a tight squeeze next to three resistors! Solder.

Page 4 of 13
5. Power socket
Install the 16 pin power socket on the TOP of the board. Some boards have a straight socket
and some a right angle socket. The straight socket should be installed with the notch facing
outwards. The opening in the right angle socket should face OUT from the board as shown in
the photo. Solder.
6. Ceramic/film/polystyrene capacitors
Install the ceramic/film capacitors on the TOP of the board. The 1000 pf polystyrene is C4.
Solder and clip the leads.
7. Electrolytic capacitors
Install these on the TOP. Make sure you orient these capacitors correctly. The longer lead
and/or the lead marked with a + needs to be inserted into the hole that has the “+” marking
near it. Leads marked with “-“ go in the board hole WITHOUT the “+”. Solder and clip the leads.

Page 5 of 13
8. Transistors
Install the transistors on the TOP of the board. These are polarized components. Align the
outline with the outline on the board. They should be raised off the board surface slightly and
at the same height. Solder and clip the leads.

Page 6 of 13
9. NTC thermistor
Install the thermistor on the TOP of the board. It should be raised off the board surface slightly
and at the same height as the adjacent transistors. Try and move the two transistors and the
thermistor close together and tie them together with a small zip tie or with epoxy. Solder and
clip the leads.
10. Trimmer resistors
Now populate the trimmer pots on the PCB. Make sure they are oriented so that the screw is
above the circle on the silk screen.

Page 7 of 13
11. Potentiometers
If the pots have positioning lugs on the front, cut these off with a sharp pair of flush cutting
pliers. The front of the pot (where the shaft prtrudes) needs to be flat.
Install SOME pots on the top and SOME on the BOTTOM. Tack one pin only with solder. These
will be finalized later. Please ensure they are on the CORRECT SIDE OF THE BOARD. See Photo.

Page 8 of 13
12. 3.5mm Jack Sockets
Install SOME jacks on the top and SOME on the BOTTOM. Tack one pin only with solder. These
will be finalized later. Please ensure they are on the CORRECT SIDE OF THE BOARD. See Photo.
13. Alignment
1. Place a washer over each pot shaft.
2. Place the front panel over the board so that the pots and 3.5mm jacks align with the holes in
the panel.
3. Put nuts on the jacks and pots and FULLY TIGTEN all of them. Do not overtighten!
4. Now fully solder as many pins as you can reach of each jack and pot.
Page 9 of 13
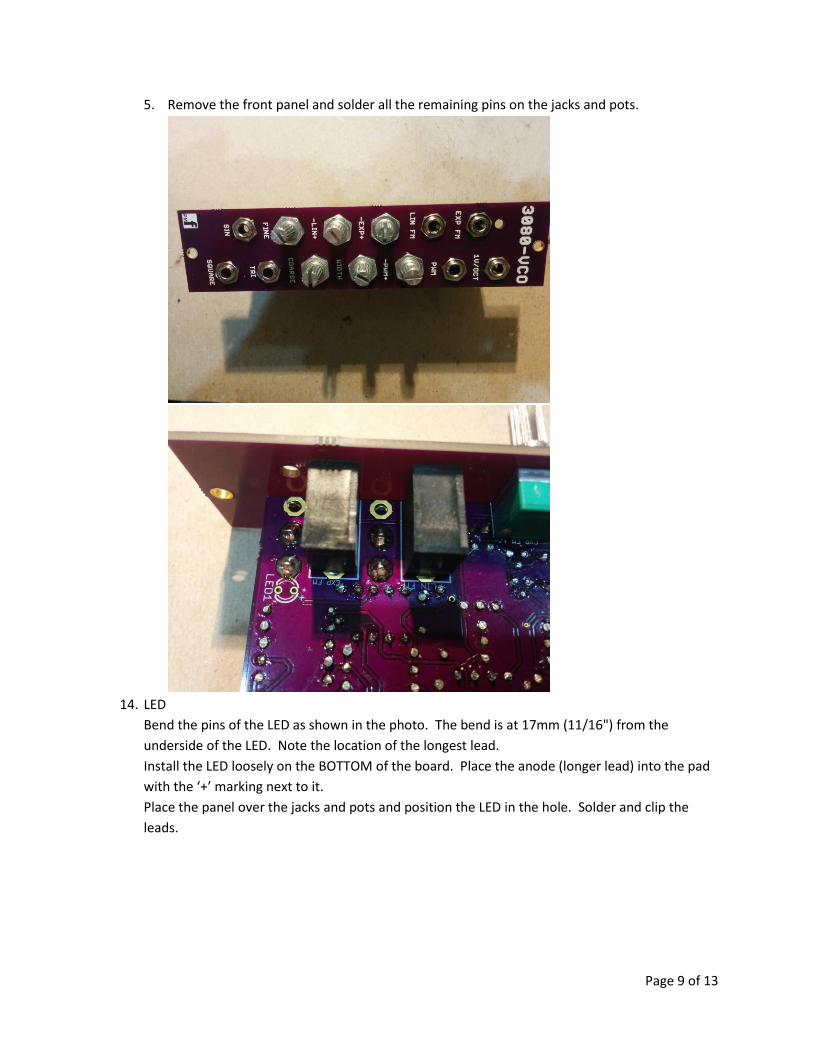
5. Remove the front panel and solder all the remaining pins on the jacks and pots.
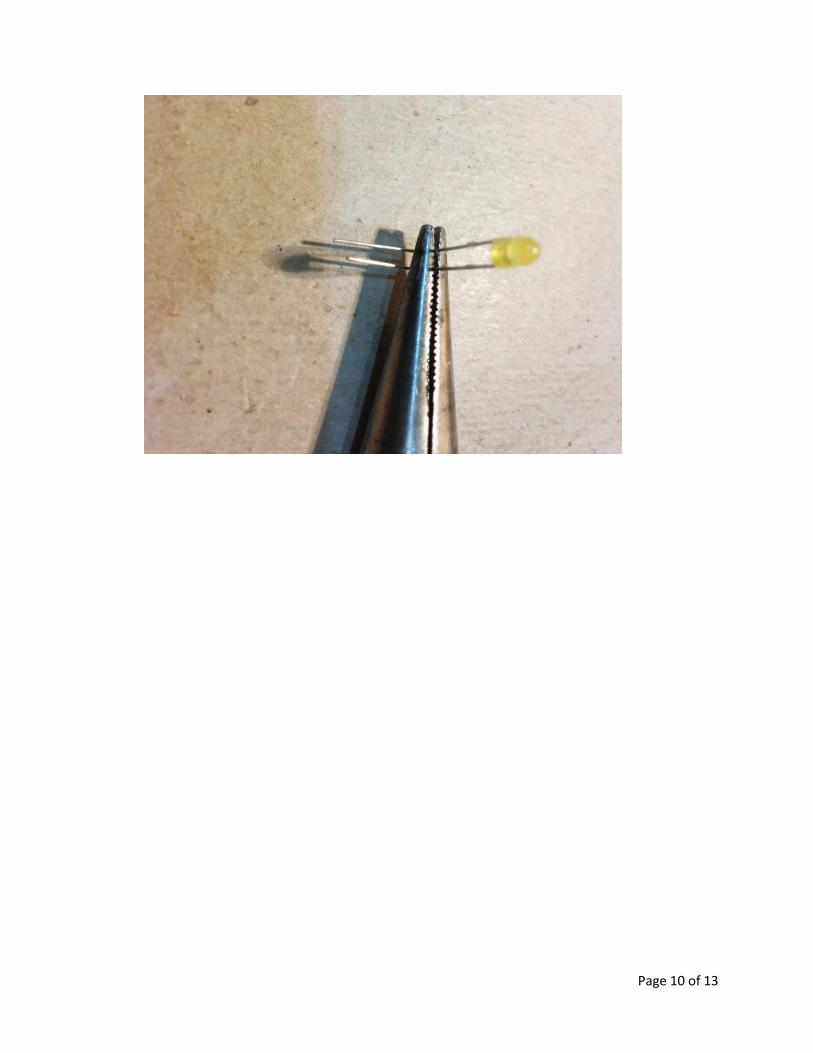
14. LED
Bend the pins of the LED as shown in the photo. The bend is at 17mm (11/16") from the
underside of the LED. Note the location of the longest lead.
Install the LED loosely on the BOTTOM of the board. Place the anode (longer lead) into the pad
with the ‘+’ marking next to it.
Place the panel over the jacks and pots and position the LED in the hole. Solder and clip the
leads.
Page 10 of 13

Page 11 of 13
15. Do not install the ICs until the voltage tests are complete.
16. If you do not trust all your soldering and connections, carry out the voltage tests below before
installing the ICs

Page 12 of 13
Voltage tests
1. You do not have to do these tests if you are completely happy with your soldering and are sure
there are no bridges or incorrectly placed components. However, these tests will ensure that
the correct power supplies are sent to the IC pins to ensure they will not be damaged on power
up.
2. Plug in the power supply and connect the –VE probe of a multimeter (set to the 20V DC range)
to one of the GROUND pins of the jacks. The GROUND pin is nearest to the edge of the board.
3. Check the voltage at the following points on the board:
a. At IC1 pin 8 approx = +12V
b. At IC1 pin 4 approx = -12V
c. At IC2 pin 7 approx = +12V
d. At IC2 pin 4 approx = -12V
e. At IC2 pin 3 = 0V
f. At IC3 pin 7 approx = +12V
g. At IC3 pin 4 approx = -12V
h. At IC4 pin 4 approx = +12V
i. At IC4 pin 11 approx = -12V
j. At IC4 pin 3 = 0V
k. At IC5 pin 6 approx = -12V
l. At IC5 pin 11 approx = +12V
4. If any of these tests fail to match the readings given, you should check the components and
soldering before progressing
Final Assembly 1. This module uses either a CA3080 (IC2) OR a LM13700 (IC5). These are ALTERNATIVE devices. If
you are using IC2, DO NOT INSTALL IC5. If you are using IC5, DO NOT INSTALL IC2. Place the ICs
in place by aligning the notch with the notch graphic on the PCB Silk Screen and notch on the
sockets. DO NOT INSTALL BOTH IC2 AND IC5.
2. Place a washer over each pot shaft.
3. Place the front panel over the board so that the LED, pots and 3.5mm jacks align with the holes
in the panel.
4. Put nuts on the pots and jacks and fully tighten.
Page 13 of 13
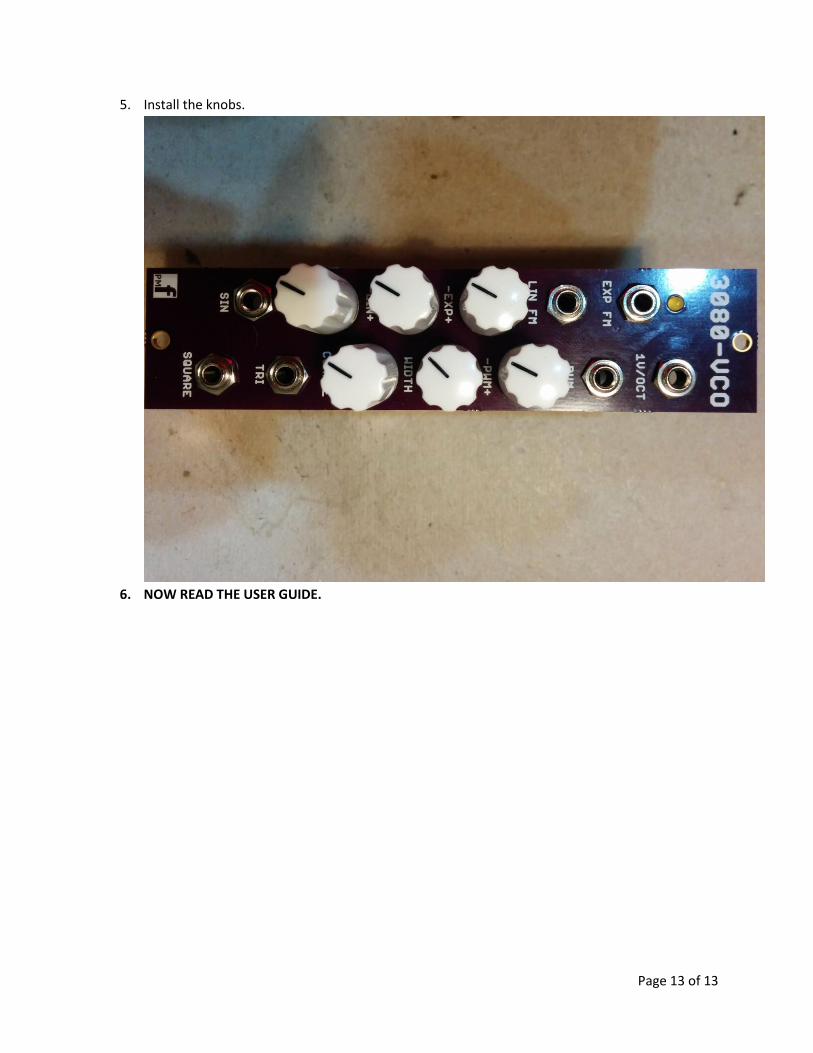
5. Install the knobs.
6. NOW READ THE USER GUIDE.