airstylist trio 600 - philips · this new philips beauty airstyler trio 600 has been specially...
TRANSCRIPT
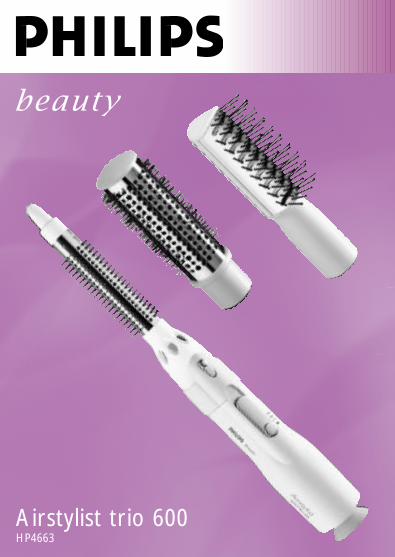
Airstylist trio 600HP4663

2

ENGLISH 4
BAHASA MELAYU 13
TIìNG VIóT 21
28
37
43
50
HP
4663
3
Introduction
Please read this instructions carefully before usingthe appliance
This new Philips beauty Airstyler Trio 600 hasbeen specially designed to give beautiful stylingresults in a quick and easy way. In order to get thebest results, please read the instructions carefullybefore use.
Important
◗ Before you connect the appliance, check if thevoltage indicated on the appliancecorresponds to your local mains voltage.
◗ Keep this appliance away from water! Do notuse this product near or over watercontained in baths, washbasins, sinks etc. If youuse it in a bathroom, unplug the applianceafter use, since the proximity of waterpresents a risk, even when the styler isswitched off.
◗ For additional protection we advise you toinstall a residual current device (RCD) with arated residual operating current notexceeding 30mA in the electrical circuitsupplying the bathroom.Ask your installer foradvice.
◗ If the appliance overheats, it will switch offautomatically. Unplug the appliance and let itcool down for a few minutes. Before youswitch the appliance on again, check the grillesto make sure they are not blocked by fluff,hair, etc.
ENGLISH4
◗ Check the condition of the mains cordregularly. Do not wind the mains cord roundthe appliance.
◗ If the mains cord is damaged, the appliancemust be discarded.
◗ Always make sure that the attachments arecompletely dry (on the inside as well as at theoutside!) before fitting them onto the styler.
◗ The barrel will become hot during use.Prevent contact with the skin.
◗ Never block the air grilles.◗ Keep the appliance away from children.◗ Always unplug the appliance after use.◗ Wait until the appliance is cool before storing
it.
Before using the appliance
◗ Before you start using the Airstyler, comb orbrush the hair so that it is untangled andsmooth.
◗ The Airstyler is most effective when the hairis slightly damp.When your hair is dry, slightlydampen it. Never use the appliance on wethair!
Do not insert the mains plug into the wall socketuntil after you have connected the attachments.
ENGLISH 5
Using the appliance
Making curls in short and medium-lengthhair
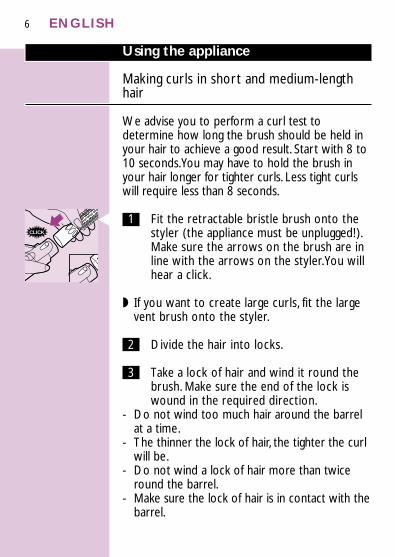
We advise you to perform a curl test todetermine how long the brush should be held inyour hair to achieve a good result. Start with 8 to10 seconds.You may have to hold the brush inyour hair longer for tighter curls. Less tight curlswill require less than 8 seconds.
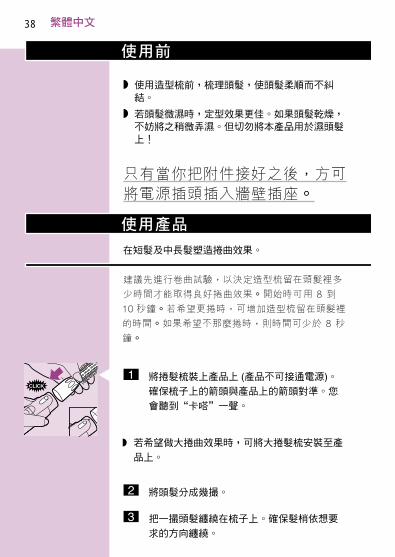
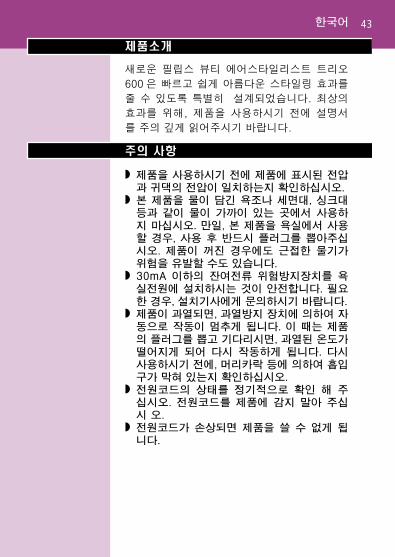
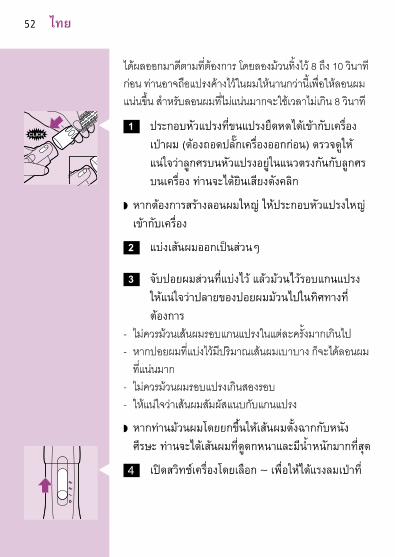
C 1 Fit the retractable bristle brush onto thestyler (the appliance must be unplugged!).Make sure the arrows on the brush are inline with the arrows on the styler.You willhear a click.
◗ If you want to create large curls, fit the largevent brush onto the styler.
2 Divide the hair into locks.
3 Take a lock of hair and wind it round thebrush. Make sure the end of the lock iswound in the required direction.
- Do not wind too much hair around the barrelat a time.
- The thinner the lock of hair, the tighter the curlwill be.
- Do not wind a lock of hair more than twiceround the barrel.
- Make sure the lock of hair is in contact with thebarrel.
ENGLISH6
CLICK
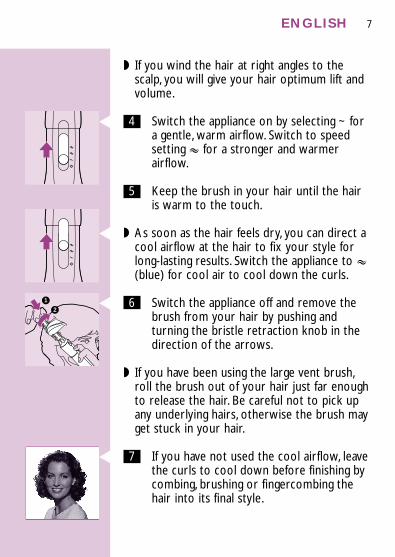
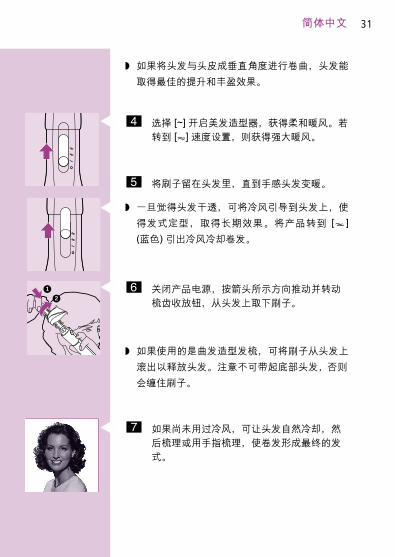
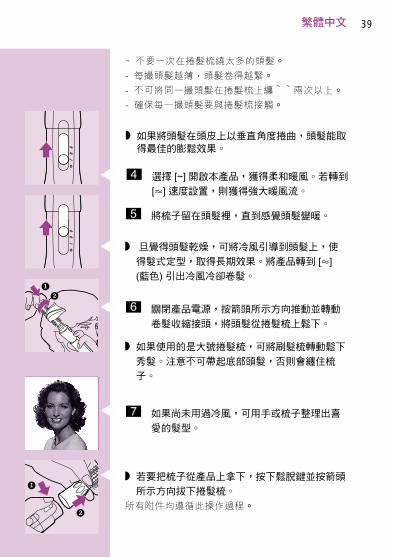
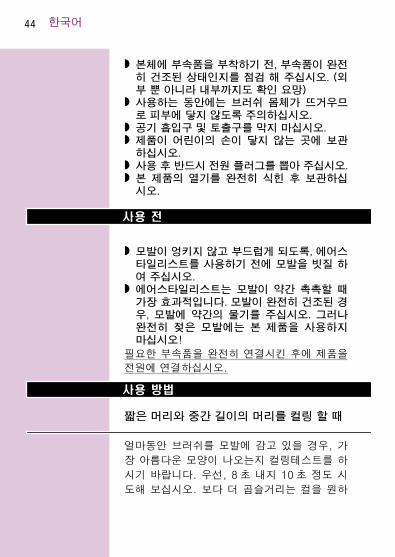
◗ If you wind the hair at right angles to thescalp, you will give your hair optimum lift andvolume.
C 4 Switch the appliance on by selecting ~ fora gentle, warm airflow. Switch to speedsetting 6 for a stronger and warmerairflow.
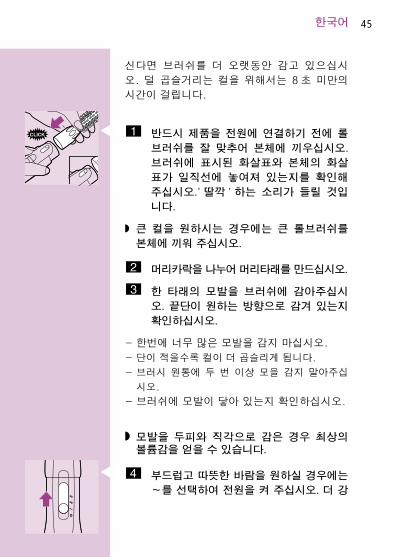
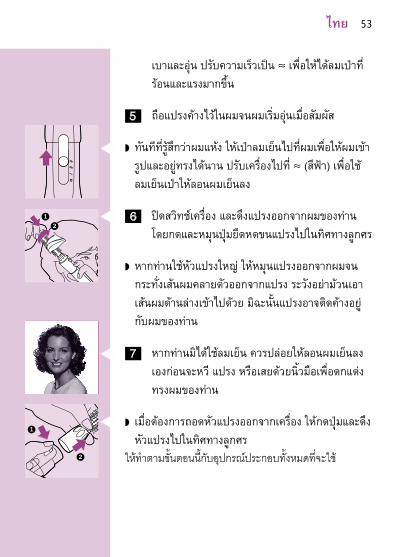
5 Keep the brush in your hair until the hairis warm to the touch.
C ◗ As soon as the hair feels dry, you can direct acool airflow at the hair to fix your style forlong-lasting results. Switch the appliance to 6(blue) for cool air to cool down the curls.
C 6 Switch the appliance off and remove thebrush from your hair by pushing andturning the bristle retraction knob in thedirection of the arrows.
◗ If you have been using the large vent brush,roll the brush out of your hair just far enoughto release the hair. Be careful not to pick upany underlying hairs, otherwise the brush mayget stuck in your hair.
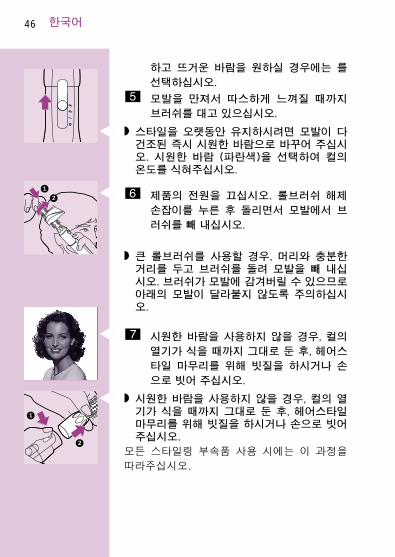
C 7 If you have not used the cool airflow, leavethe curls to cool down before finishing bycombing, brushing or fingercombing thehair into its final style.
ENGLISH 7
1
2
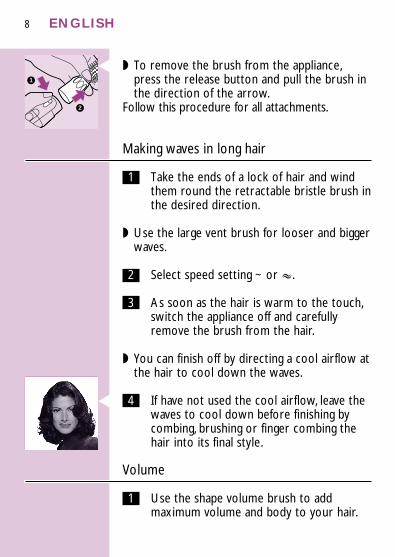
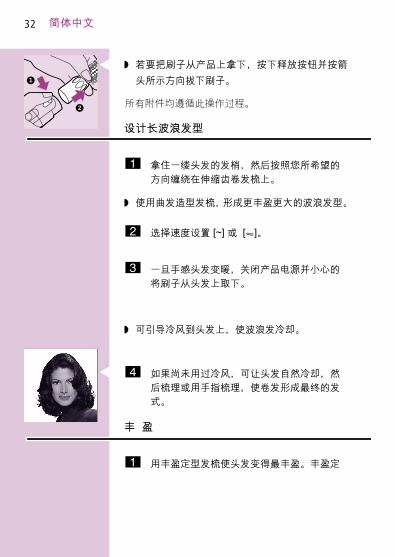
C ◗ To remove the brush from the appliance,press the release button and pull the brush inthe direction of the arrow.
Follow this procedure for all attachments.
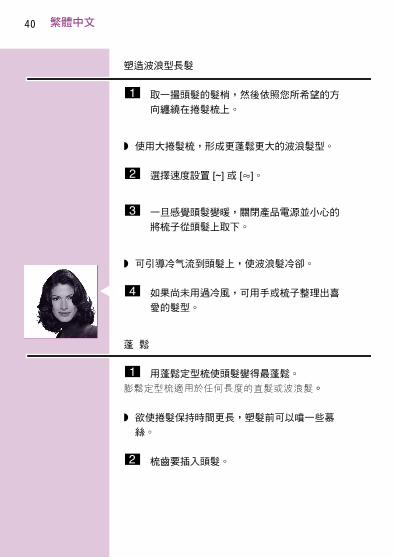
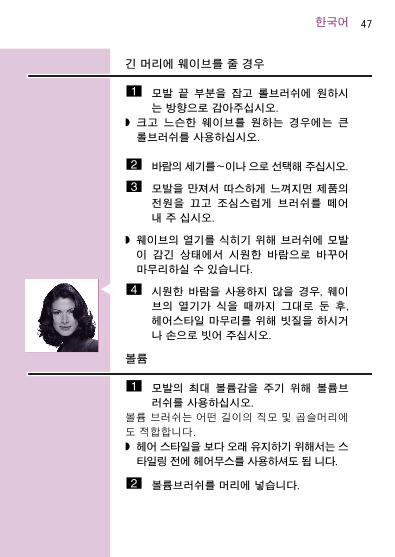
Making waves in long hair
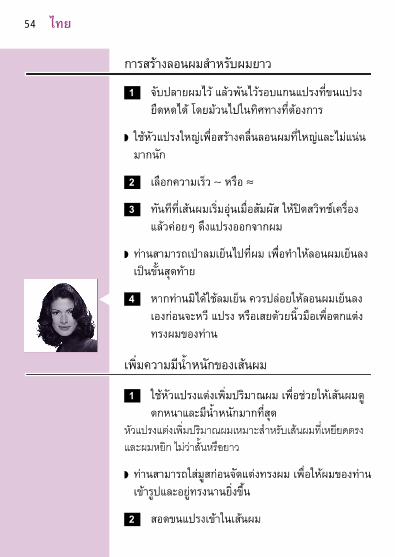
1 Take the ends of a lock of hair and windthem round the retractable bristle brush inthe desired direction.
◗ Use the large vent brush for looser and biggerwaves.
2 Select speed setting ~ or 6.
3 As soon as the hair is warm to the touch,switch the appliance off and carefullyremove the brush from the hair.
◗ You can finish off by directing a cool airflow atthe hair to cool down the waves.
C 4 If have not used the cool airflow, leave thewaves to cool down before finishing bycombing, brushing or finger combing thehair into its final style.
Volume
1 Use the shape volume brush to addmaximum volume and body to your hair.
ENGLISH8
1
2
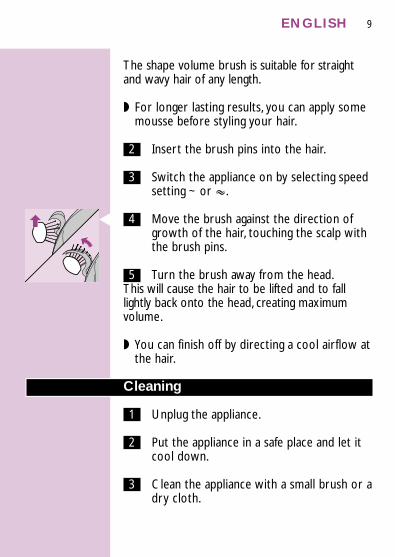
The shape volume brush is suitable for straightand wavy hair of any length.
◗ For longer lasting results, you can apply somemousse before styling your hair.
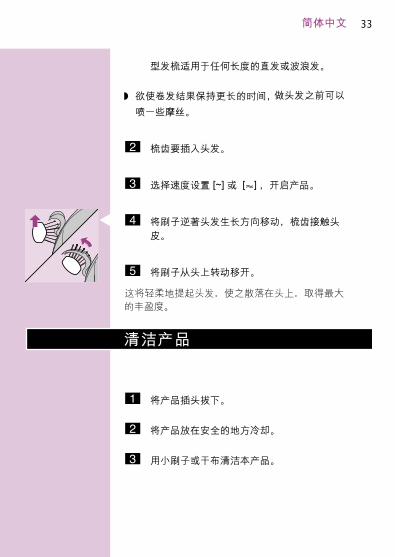
2 Insert the brush pins into the hair.
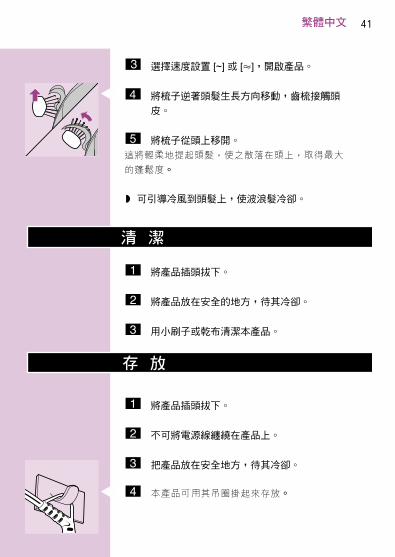
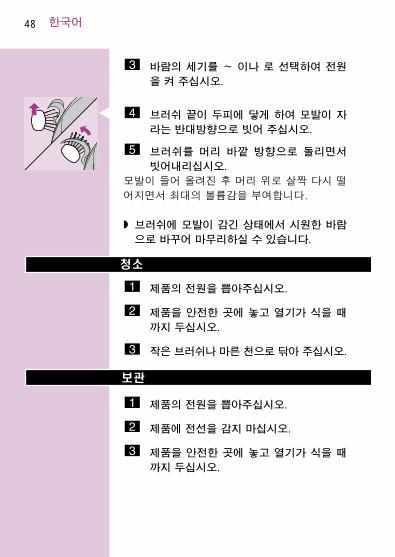
3 Switch the appliance on by selecting speedsetting ~ or 6.
C 4 Move the brush against the direction ofgrowth of the hair, touching the scalp withthe brush pins.
5 Turn the brush away from the head.This will cause the hair to be lifted and to falllightly back onto the head, creating maximumvolume.
◗ You can finish off by directing a cool airflow atthe hair.
Cleaning
1 Unplug the appliance.
2 Put the appliance in a safe place and let itcool down.
3 Clean the appliance with a small brush or adry cloth.
ENGLISH 9
Storage
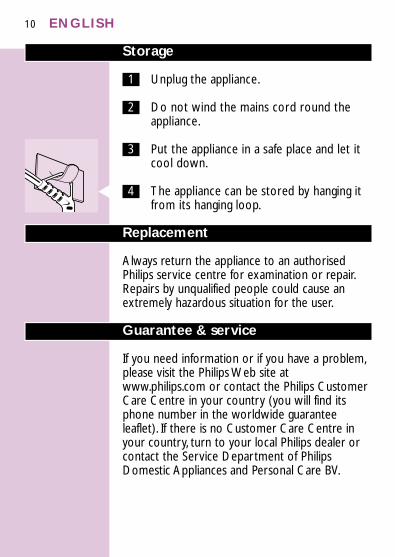
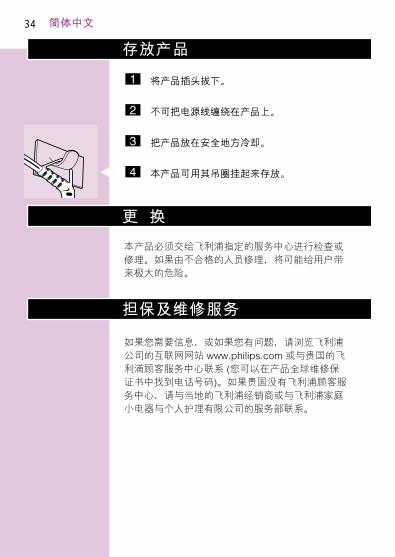
1 Unplug the appliance.
2 Do not wind the mains cord round theappliance.
3 Put the appliance in a safe place and let itcool down.
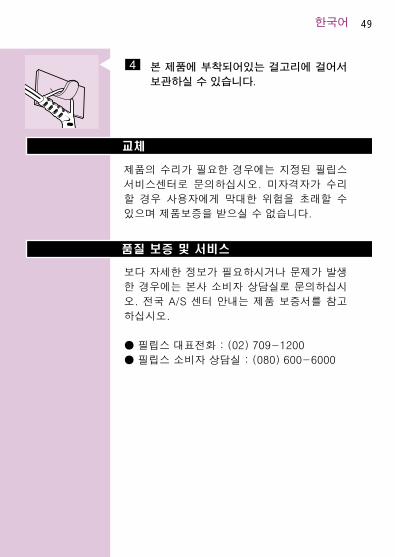
C 4 The appliance can be stored by hanging itfrom its hanging loop.
Replacement
Always return the appliance to an authorisedPhilips service centre for examination or repair.Repairs by unqualified people could cause anextremely hazardous situation for the user.
Guarantee & service
If you need information or if you have a problem,please visit the Philips Web site atwww.philips.com or contact the Philips CustomerCare Centre in your country (you will find itsphone number in the worldwide guaranteeleaflet). If there is no Customer Care Centre inyour country, turn to your local Philips dealer orcontact the Service Department of PhilipsDomestic Appliances and Personal Care BV.
ENGLISH10
Trouble Shooting Guide
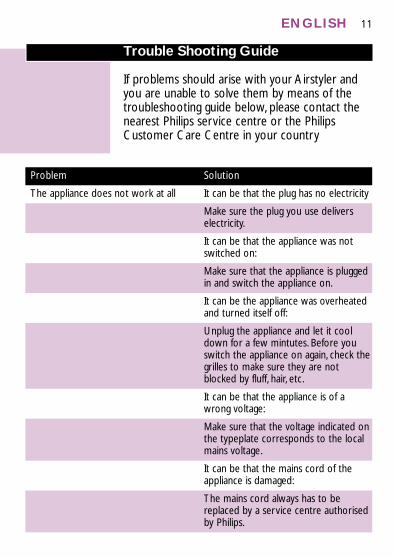
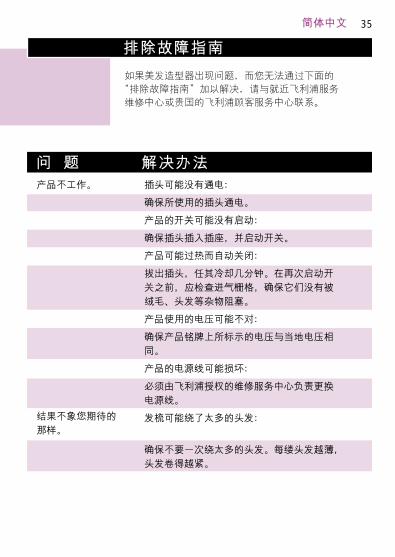
If problems should arise with your Airstyler andyou are unable to solve them by means of thetroubleshooting guide below, please contact thenearest Philips service centre or the PhilipsCustomer Care Centre in your country
ENGLISH 11
Solution
It can be that the plug has no electricity
Make sure the plug you use deliverselectricity.
It can be that the appliance was notswitched on:
Make sure that the appliance is pluggedin and switch the appliance on.
It can be the appliance was overheatedand turned itself off:
Unplug the appliance and let it cooldown for a few mintutes. Before youswitch the appliance on again, check thegrilles to make sure they are notblocked by fluff, hair, etc.
It can be that the appliance is of awrong voltage:
Make sure that the voltage indicated onthe typeplate corresponds to the localmains voltage.
It can be that the mains cord of theappliance is damaged:
The mains cord always has to bereplaced by a service centre authorisedby Philips.
Problem
The appliance does not work at all
ENGLISH12
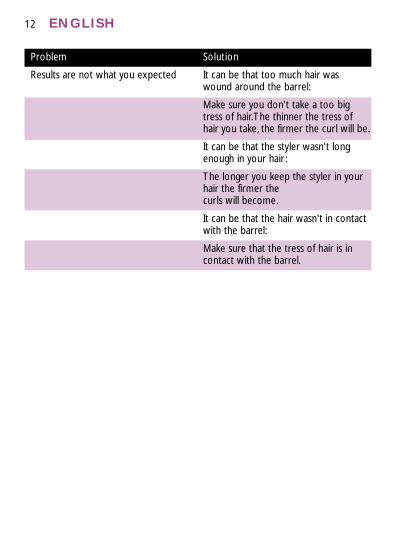
Solution
It can be that too much hair waswound around the barrel:
Make sure you don't take a too bigtress of hair.The thinner the tress ofhair you take, the firmer the curl will be.
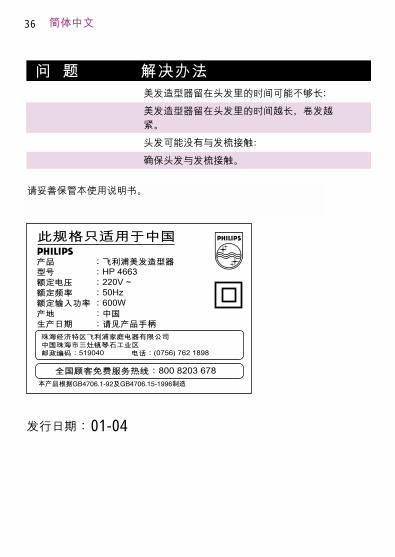
It can be that the styler wasn't longenough in your hair :
The longer you keep the styler in yourhair the firmer the curls will become.
It can be that the hair wasn't in contactwith the barrel:
Make sure that the tress of hair is incontact with the barrel.
Problem
Results are not what you expected
Pendahuluan
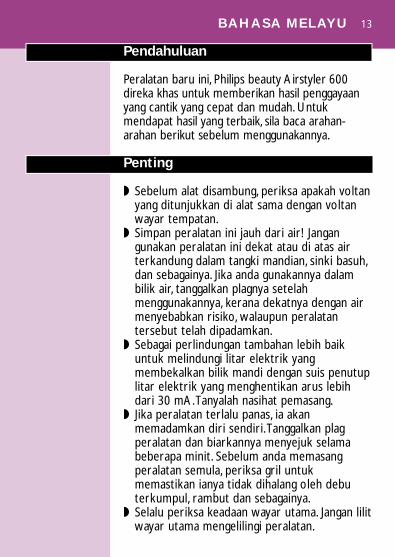
Peralatan baru ini, Philips beauty Airstyler 600direka khas untuk memberikan hasil penggayaanyang cantik yang cepat dan mudah. Untukmendapat hasil yang terbaik, sila baca arahan-arahan berikut sebelum menggunakannya.
Penting
◗ Sebelum alat disambung, periksa apakah voltanyang ditunjukkan di alat sama dengan voltanwayar tempatan.
◗ Simpan peralatan ini jauh dari air! Jangangunakan peralatan ini dekat atau di atas airterkandung dalam tangki mandian, sinki basuh,dan sebagainya. Jika anda gunakannya dalambilik air, tanggalkan plagnya setelahmenggunakannya, kerana dekatnya dengan airmenyebabkan risiko, walaupun peralatantersebut telah dipadamkan.
◗ Sebagai perlindungan tambahan lebih baikuntuk melindungi litar elektrik yangmembekalkan bilik mandi dengan suis penutuplitar elektrik yang menghentikan arus lebihdari 30 mA.Tanyalah nasihat pemasang.
◗ Jika peralatan terlalu panas, ia akanmemadamkan diri sendiri.Tanggalkan plagperalatan dan biarkannya menyejuk selamabeberapa minit. Sebelum anda memasangperalatan semula, periksa gril untukmemastikan ianya tidak dihalang oleh debuterkumpul, rambut dan sebagainya.
◗ Selalu periksa keadaan wayar utama. Jangan lilitwayar utama mengelilingi peralatan.
BAHASA MELAYU 13
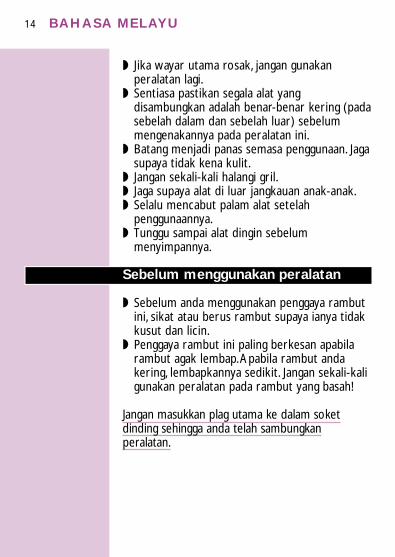
◗ Jika wayar utama rosak, jangan gunakanperalatan lagi.
◗ Sentiasa pastikan segala alat yangdisambungkan adalah benar-benar kering (padasebelah dalam dan sebelah luar) sebelummengenakannya pada peralatan ini.
◗ Batang menjadi panas semasa penggunaan. Jagasupaya tidak kena kulit.
◗ Jangan sekali-kali halangi gril.◗ Jaga supaya alat di luar jangkauan anak-anak.◗ Selalu mencabut palam alat setelah
penggunaannya.◗ Tunggu sampai alat dingin sebelum
menyimpannya.
Sebelum menggunakan peralatan
◗ Sebelum anda menggunakan penggaya rambutini, sikat atau berus rambut supaya ianya tidakkusut dan licin.
◗ Penggaya rambut ini paling berkesan apabilarambut agak lembap.Apabila rambut andakering, lembapkannya sedikit. Jangan sekali-kaligunakan peralatan pada rambut yang basah!
Jangan masukkan plag utama ke dalam soketdinding sehingga anda telah sambungkanperalatan.
BAHASA MELAYU14
Menggunakan peralatan
Membuat kerinting dan rambut sederhanapendek.
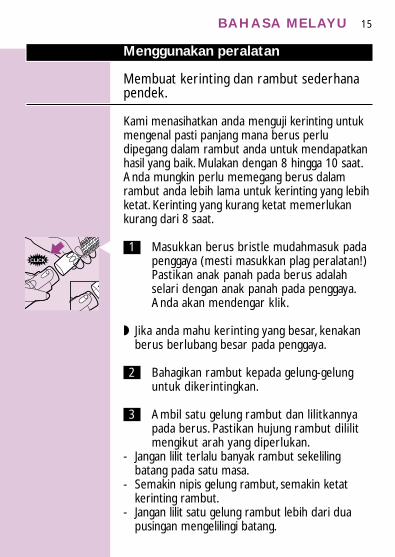
Kami menasihatkan anda menguji kerinting untukmengenal pasti panjang mana berus perludipegang dalam rambut anda untuk mendapatkanhasil yang baik. Mulakan dengan 8 hingga 10 saat.Anda mungkin perlu memegang berus dalamrambut anda lebih lama untuk kerinting yang lebihketat. Kerinting yang kurang ketat memerlukankurang dari 8 saat.
C 1 Masukkan berus bristle mudahmasuk padapenggaya (mesti masukkan plag peralatan!)Pastikan anak panah pada berus adalahselari dengan anak panah pada penggaya.Anda akan mendengar klik.
◗ Jika anda mahu kerinting yang besar, kenakanberus berlubang besar pada penggaya.
2 Bahagikan rambut kepada gelung-gelunguntuk dikerintingkan.
3 Ambil satu gelung rambut dan lilitkannyapada berus. Pastikan hujung rambut dililitmengikut arah yang diperlukan.
- Jangan lilit terlalu banyak rambut sekelilingbatang pada satu masa.
- Semakin nipis gelung rambut, semakin ketatkerinting rambut.
- Jangan lilit satu gelung rambut lebih dari duapusingan mengelilingi batang.
BAHASA MELAYU 15
CLICK
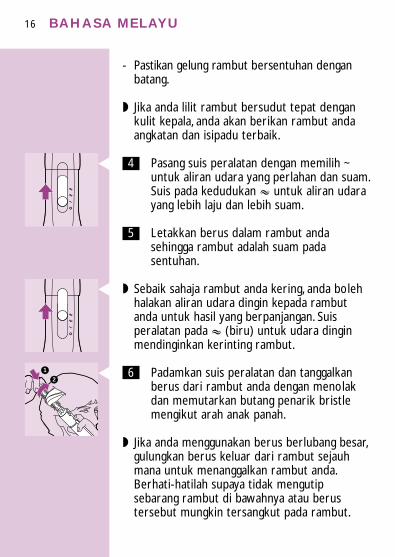
- Pastikan gelung rambut bersentuhan denganbatang.
◗ Jika anda lilit rambut bersudut tepat dengankulit kepala, anda akan berikan rambut andaangkatan dan isipadu terbaik.
C 4 Pasang suis peralatan dengan memilih ~untuk aliran udara yang perlahan dan suam.Suis pada kedudukan 6 untuk aliran udarayang lebih laju dan lebih suam.
5 Letakkan berus dalam rambut andasehingga rambut adalah suam padasentuhan.
C ◗ Sebaik sahaja rambut anda kering, anda bolehhalakan aliran udara dingin kepada rambutanda untuk hasil yang berpanjangan. Suisperalatan pada 6 (biru) untuk udara dinginmendinginkan kerinting rambut.
C 6 Padamkan suis peralatan dan tanggalkanberus dari rambut anda dengan menolakdan memutarkan butang penarik bristlemengikut arah anak panah.
◗ Jika anda menggunakan berus berlubang besar,gulungkan berus keluar dari rambut sejauhmana untuk menanggalkan rambut anda.Berhati-hatilah supaya tidak mengutipsebarang rambut di bawahnya atau berustersebut mungkin tersangkut pada rambut.
BAHASA MELAYU16
1
2
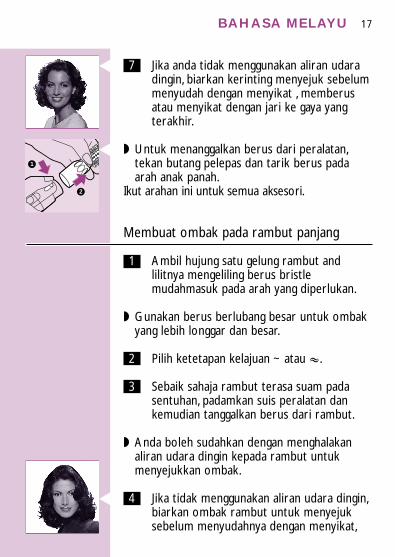
C 7 Jika anda tidak menggunakan aliran udaradingin, biarkan kerinting menyejuk sebelummenyudah dengan menyikat , memberusatau menyikat dengan jari ke gaya yangterakhir.
C ◗ Untuk menanggalkan berus dari peralatan,tekan butang pelepas dan tarik berus padaarah anak panah.
Ikut arahan ini untuk semua aksesori.
Membuat ombak pada rambut panjang
1 Ambil hujung satu gelung rambut andlilitnya mengeliling berus bristlemudahmasuk pada arah yang diperlukan.
◗ Gunakan berus berlubang besar untuk ombakyang lebih longgar dan besar.
2 Pilih ketetapan kelajuan ~ atau 6.
3 Sebaik sahaja rambut terasa suam padasentuhan, padamkan suis peralatan dankemudian tanggalkan berus dari rambut.
◗ Anda boleh sudahkan dengan menghalakanaliran udara dingin kepada rambut untukmenyejukkan ombak.
C 4 Jika tidak menggunakan aliran udara dingin,biarkan ombak rambut untuk menyejuksebelum menyudahnya dengan menyikat,
BAHASA MELAYU 17
1
2
memberus atau menyikat dengan jarikepada gayanya yang terakhir.
Isipadu
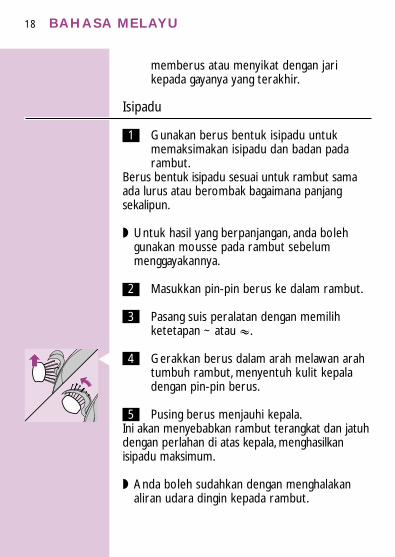
1 Gunakan berus bentuk isipadu untukmemaksimakan isipadu dan badan padarambut.
Berus bentuk isipadu sesuai untuk rambut samaada lurus atau berombak bagaimana panjangsekalipun.
◗ Untuk hasil yang berpanjangan, anda bolehgunakan mousse pada rambut sebelummenggayakannya.
2 Masukkan pin-pin berus ke dalam rambut.
3 Pasang suis peralatan dengan memilihketetapan ~ atau 6.
C 4 Gerakkan berus dalam arah melawan arahtumbuh rambut, menyentuh kulit kepaladengan pin-pin berus.
5 Pusing berus menjauhi kepala.Ini akan menyebabkan rambut terangkat dan jatuhdengan perlahan di atas kepala, menghasilkanisipadu maksimum.
◗ Anda boleh sudahkan dengan menghalakanaliran udara dingin kepada rambut.
BAHASA MELAYU18
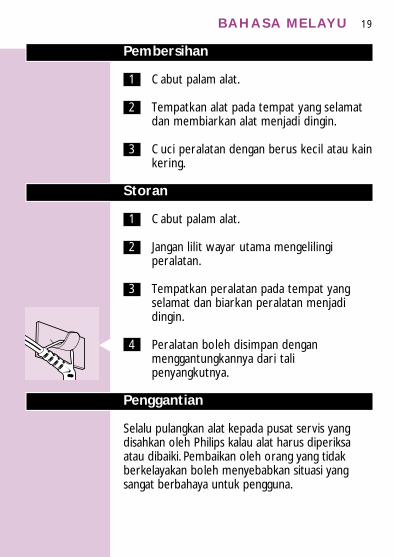
Pembersihan
1 Cabut palam alat.
2 Tempatkan alat pada tempat yang selamatdan membiarkan alat menjadi dingin.
3 Cuci peralatan dengan berus kecil atau kainkering.
Storan
1 Cabut palam alat.
2 Jangan lilit wayar utama mengelilingiperalatan.
3 Tempatkan peralatan pada tempat yangselamat dan biarkan peralatan menjadidingin.
C 4 Peralatan boleh disimpan denganmenggantungkannya dari talipenyangkutnya.
Penggantian
Selalu pulangkan alat kepada pusat servis yangdisahkan oleh Philips kalau alat harus diperiksaatau dibaiki. Pembaikan oleh orang yang tidakberkelayakan boleh menyebabkan situasi yangsangat berbahaya untuk pengguna.
BAHASA MELAYU 19
Jaminan & perkhidmatan
Jika anda memerlukan maklumat atau jika andamempunyai masalah, sila lawati Laman JaringanPhilips pada www.philips.com atau hubungi PusatPerkhidmatan Pelanggan Philips di negara anda(anda akan dapati nombor telifonnya dalam risalahjaminan antarabangsa). Jika tiada pusatperkhidmatan pelanggan di negara anda, rujukkepada pengurus tempatan Philips atau hubungiJabatan Perkhidmatan Peralatan Domestik Philipsdan Perkhidmatan Peribadi BV.
BAHASA MELAYU20
TIìNG VIóT 21
GiÎi thiŸu
LıÔc uÂn tflc mÎi cÚa Philps Airstylist Trio600 {¡ {ıÔc thi’t k’ {»c biŸt {◊ cho k’tqu¿ uÂn tflc tuyŸt {”p mÈt cæch nhanhchflng vø dÿ døng. [◊ {¬t {ıÔc k’t qu¿ tÂtnh`t, h¡y {„c k˛ phÀn hıÎng dÕn trıÎc khis¯ dÙng.
CÀn bi’t
◗ TrıÎc khi b¬n nÂi {iŸn vøo mæy, ki◊m traxem {iŸn æp ghi tr‘n mæy cfl cÒng vÎi{iŸn æp nguÊn {iŸn t¬i {fia phıÍng b¬nkh‰ng.
◗ Gi˘ mæy nøy cæch xa nıÎc! Kh‰ng {ıÔcdÒng s¿n phÃm nøy gÀn ho»c ph⁄a tr‘nnh˘ng chË cfl nıÎc nhı bÊn tƒm, bÊnr¯a tay, bÊn r¯a chœn bæt v.v... N’u b¬ndÒng nfl trong ph‡ng tƒm, rt chÂt cƒmmæy sau khi dÒng, v¤ gÀn nıÎc cfl th◊ g…yn‘n nguy hi◊m, ngay c¿ khi lıÔc {iŸn {¡khfla c‰ng tƒc.
◗ [◊ an toøn hÍn, chng t‰i khuy‘n b¬n lƒphŸ thÂng chÂng r‡ {iŸn (RCD) cfl d‡ngph…n {iŸn ho¬t {Èng kh‰ng quæ 30 mA Ìb¿ng {iŸn c`p {iŸn cho ph‡ng tƒm. H¡yh·i ngıÏi lƒp {iŸn cÚa b¬n {◊ khuy‘nb¿o.
◗ N’u mæy nflng quæ, nfl s“ t˙ {Èng tƒtc‰ng tƒc. Rt chÂt cƒm mæy ra vø {◊ nflnguÈi {i vøi pht. TrıÎc khi b¬n bŒt c‰ngtƒc mæy trÌ l¬i, ki◊m tra lıÎi chƒn {◊ {¿mb¿o nfl kh‰ng bfi chƒn bÌi nh˘ng sÔib‰ng, tflc, v.v...
TIìNG VIóT22
◗ ThıÏng xuy‘n ki◊m tra t¤nh tr¬ng cÚa d…y{iŸn. Kh‰ng {ıÔc cuÂn d…y {iŸn v‡ngquanh mæy.
◗ N’u d…y {iŸn bfi h·ng, kh‰ng {ıÔc ti’ptÙc s¯ dÙng n˘a.
◗ Lu‰n lu‰n {¿m b¿o r≈ng cæc lıÔc phÙph¿i {ıÔc kh‰ h∆n (b‘n trong vø b‘nngoøi) trıÎc khi lƒp chng vøo phÀn lıÔc{iŸn.
◗ Th…n lıÔc s“ trÌ n‘n nflng trong lcdÒng. Trænh ti’p xc vøo da.
◗ Kh‰ng bao giÏ bfit ch»n lıÎi chƒn chËkh‰ng kh⁄ vøo.
◗ [◊ mæy cæch xa tÀm vÎi cÚa tr— em.◗ Lu‰n lu‰n rt ph⁄ch cƒm ra sau khi dÒng.◗ ChÏ tÎi khi mæy nguÈi trıÎc khi c`t nfl {i.
TrıÎc khi dÒng mæy
◗ TrıÎc khi b¬n bƒt {Àu dÒng lıÔc uÂn tflcAirstylist, ch¿i tflc b≈ng lıÔc thıÏng ho»clıÔc bøn ch¿i {◊ tflc kh·i rÂi vø th∆ngmıÔt.
◗ LıÔc uÂn tflc Airstylist cfl hiŸu su`t nh`tkhi tflc hÍi Ãm. Khi tflc b¬n kh‰, h¡y lømÃm tflc b¬n mÈt cht. Kh‰ng bao giÏdÒng mæy tr‘n tflc ıÎt!
Kh‰ng {ıÔc cƒm chÂt cƒm vøo Á {iŸn cho tÎi khi b¬n {¡ lƒp xong cæc phÙ tÒng.
TIìNG VIóT 23
DÒng mæy
T¬o cæc l„n qu√n Ì tflc trung b¤nh vøtflc ngƒn
Chng t‰i khuy‘n b¬n løm th¯ mÈt l„n qu√n{◊ xæc {finh xem lıÔc n‘n gi˘ bao l…u trongtflc b¬n {◊ {¬t {ıÔc k’t qu¿ tÂt. Bƒt {Àu t˜8 tÎi 10 gi…y. B¬n cfl th◊ ph¿i gi˘ lıÔc l…uhÍn trong tflc b¬n {◊ cfl nh˘ng l„n qu√nnhi÷u. Nh˘ng l„n qu√n ⁄t hÍn s“ y‘u cÀu ⁄thÍn 8 gi…y.
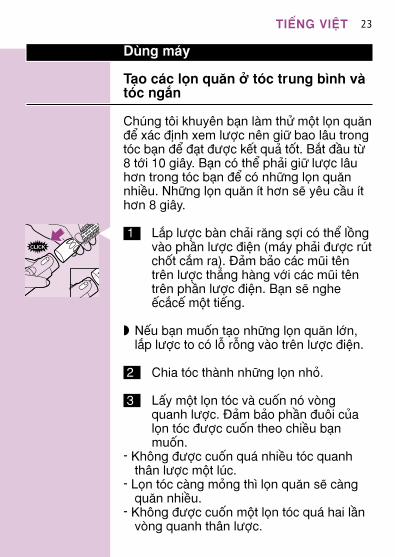
C 1. Lƒp lıÔc bøn ch¿i r√ng sÔi cfl th◊ lÊngvøo phÀn lıÔc {iŸn (mæy ph¿i {ıÔc rtchÂt cƒm ra). [¿m b¿o cæc mÛi t‘ntr‘n lıÔc th∆ng høng vÎi cæc mÛi t‘ntr‘n phÀn lıÔc {iŸn. B¬n s“ nghe’cƒc’ mÈt ti’ng.
◗ N’u b¬n muÂn t¬o nh˘ng l„n qu√n lÎn,lƒp lıÔc to cfl lË rËng vøo tr‘n lıÔc {iŸn.
2. Chia tflc thønh nh˘ng l„n nh·.
3. L`y mÈt l„n tflc vø cuÂn nfl v‡ngquanh lıÔc. [¿m b¿o phÀn {u‰i cÚal„n tflc {ıÔc cuÂn theo chi÷u b¬nmuÂn.
- Kh‰ng {ıÔc cuÂn quæ nhi÷u tflc quanhth…n lıÔc mÈt lc.
- L„n tflc cøng m·ng th¤ l„n qu√n s“ cøngqu√n nhi÷u.
- Kh‰ng {ıÔc cuÂn mÈt l„n tflc quæ hai lÀnv‡ng quanh th…n lıÔc.
CLICK
TIìNG VIóT24
- [¿m b¿o l„n tflc ti’p xc vÎi th…n lıÔc
◗N’u b¬n cuÂn tflc Ì {È vu‰ng gflc vÎi da{Àu, b¬n s“ t¬o cho tflc b¬n n…ng cao vøbÊng nhi÷u nh`t.
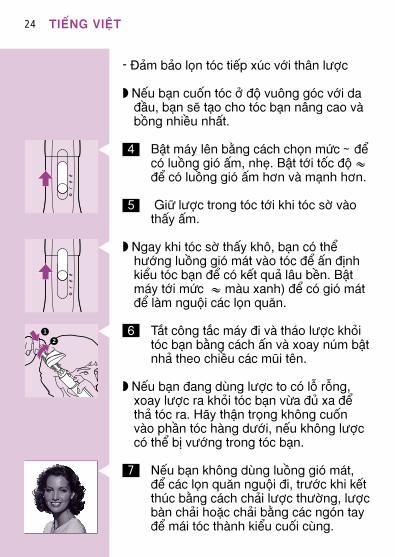
C 4 BŒt mæy l‘n b≈ng cæch ch„n mˆc ~ {◊cfl luÊng gifl `m, nh”. BŒt tÎi tÂc {È 6{◊ cfl luÊng gifl `m hÍn vø m¬nh hÍn.
5 Gi˘ lıÔc trong tflc tÎi khi tflc sÏ vøoth`y `m.
C ◗Ngay khi tflc sÏ th`y kh‰, b¬n cfl th◊hıÎng luÊng gifl mæt vøo tflc {◊ `n {finhki◊u tflc b¬n {◊ cfl k’t qu¿ l…u b÷n. BŒtmæy tÎi mˆc 6 møu xanh) {◊ cfl gifl mæt{◊ løm nguÈi cæc l„n qu√n.
C 6 Tƒt c‰ng tƒc mæy {i vø thæo lıÔc kh·itflc b¬n b≈ng cæch `n vø xoay nm bŒtnh¿ theo chi÷u cæc mÛi t‘n.
◗N’u b¬n {ang dÒng lıÔc to cfl lË rËng,xoay lıÔc ra kh·i tflc b¬n v˜a {Ú xa {◊th¿ tflc ra. H¡y thŒn tr„ng kh‰ng cuÂnvøo phÀn tflc høng dıÎi, n’u kh‰ng lıÔccfl th◊ bfi vıÎng trong tflc b¬n.
C 7 N’u b¬n kh‰ng dÒng luÊng gifl mæt,{◊ cæc l„n qu√n nguÈi {i, trıÎc khi k’tthc b≈ng cæch ch¿i lıÔc thıÏng, lıÔcbøn ch¿i ho»c ch¿i b≈ng cæc ngfln tay{◊ mæi tflc thønh ki◊u cuÂi cÒng.
1
2
TIìNG VIóT 25
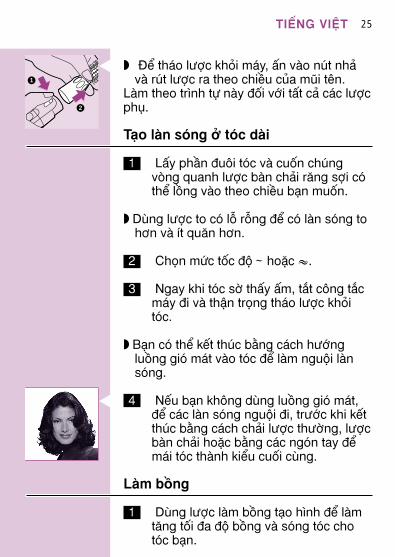
C ◗ [◊ thæo lıÔc kh·i mæy, `n vøo nt nh¿vø rt lıÔc ra theo chi÷u cÚa mÛi t‘n.
Løm theo tr¤nh t˙ nøy {Âi vÎi t`t c¿ cæc lıÔcphÙ.
T¬o løn sflng Ì tflc døi
1 L`y phÀn {u‰i tflc vø cuÂn chngv‡ng quanh lıÔc bøn ch¿i r√ng sÔi cflth◊ lÊng vøo theo chi÷u b¬n muÂn.
◗DÒng lıÔc to cfl lË rËng {◊ cfl løn sflng tohÍn vø ⁄t qu√n hÍn.
2 Ch„n mˆc tÂc {È ~ ho»c 6.
3 Ngay khi tflc sÏ th`y `m, tƒt c‰ng tƒcmæy {i vø thŒn tr„ng thæo lıÔc kh·itflc.
◗B¬n cfl th◊ k’t thc b≈ng cæch hıÎngluÊng gifl mæt vøo tflc {◊ løm nguÈi lønsflng.
C 4 N’u b¬n kh‰ng dÒng luÊng gifl mæt,{◊ cæc løn sflng nguÈi {i, trıÎc khi k’tthc b≈ng cæch ch¿i lıÔc thıÏng, lıÔcbøn ch¿i ho»c b≈ng cæc ngfln tay {◊mæi tflc thønh ki◊u cuÂi cÒng.
Løm bÊng
1 DÒng lıÔc løm bÊng t¬o h¤nh {◊ lømt√ng tÂi {a {È bÊng vø sflng tflc chotflc b¬n.
1
2
TIìNG VIóT26
LıÔc løm bÊng t¬o h¤nh phÒ hÔp cho tflcth∆ng vø tflc løn sflng Ì b`t k¸ {È døi nøo.
* [◊ cfl k’t qu¿ b÷n l…u hÍn, b¬n cfl th◊thoa mÈt cht kem xfit tflc (mousse) trıÎckhi t¬o ki◊u tflc b¬n.
2 Cho cæc r√ng lıÔc vøo trong tflc b¬n.
3 BŒt cong tƒc mæy l‘n b≈ng cæch ch„nmˆc tÂc {È ~ ho»c 6.
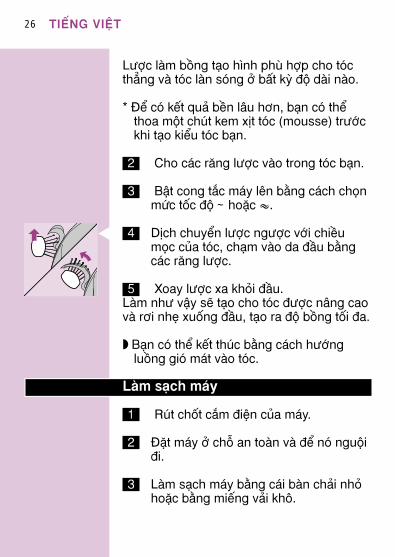
C 4 Dfich chuy◊n lıÔc ngıÔc vÎi chi÷um„c cÚa tflc, ch¬m vøo da {Àu b≈ngcæc r√ng lıÔc.
5 Xoay lıÔc xa kh·i {Àu.Løm nhı vŒy s“ t¬o cho tflc {ıÔc n…ng caovø rÍi nh” xuÂng {Àu, t¬o ra {È bÊng tÂi {a.
◗B¬n cfl th◊ k’t thc b≈ng cæch hıÎngluÊng gifl mæt vøo tflc.
Løm s¬ch mæy
1 Rt chÂt cƒm {iŸn cÚa mæy.
2 [»t mæy Ì chË an toøn vø {◊ nfl nguÈi{i.
3 Løm s¬ch mæy b≈ng cæi bøn ch¿i nh·ho»c b≈ng mi’ng v¿i kh‰.
TIìNG VIóT 27
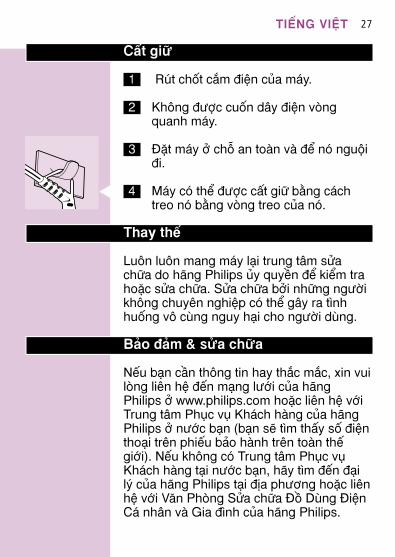
C`t gi˘
1 Rt chÂt cƒm {iŸn cÚa mæy.
2 Kh‰ng {ıÔc cuÂn d…y {iŸn v‡ngquanh mæy.
3 [»t mæy Ì chË an toøn vø {◊ nfl nguÈi{i.
C 4 Mæy cfl th◊ {ıÔc c`t gi˘ b≈ng cæchtreo nfl b≈ng v‡ng treo cÚa nfl.
Thay th’
Lu‰n lu‰n mang mæy l¬i trung t…m s¯ach˘a do h¡ng Philips Úy quy÷n {◊ ki◊m traho»c s¯a ch˘a. S¯a ch˘a bÌi nh˘ng ngıÏikh‰ng chuy‘n nghiŸp cfl th◊ g…y ra t¤nhhuÂng v‰ cÒng nguy h¬i cho ngıÏi dÒng.
B¿o {¿m & s¯a ch˘a
N’u b¬n cÀn th‰ng tin hay thƒc mƒc, xin vuil‡ng li‘n hŸ {’n m¬ng lıÎi cÚa h¡ngPhilips Ì www.philips.com ho»c li‘n hŸ vÎiTrung t…m PhÙc vÙ Khæch høng cÚa h¡ngPhilips Ì nıÎc b¬n (b¬n s“ t¤m th`y s {iŸntho¬i tr‘n phi’u b¿o hønh tr‘n toøn th’giÎi). N’u kh‰ng cfl Trung t…m PhÙc vÙKhæch høng t¬i nıÎc b¬n, h¡y t¤m {’n {¬il˚ cÚa h¡ng Philips t¬i {fia phıÍng ho»c li‘nhŸ vÎi V√n Ph‡ng S¯a ch˘a [Ê DÒng [iŸnCæ nh…n vø Gia {¤nh cÚa h¡ng Philips.
28
29
30
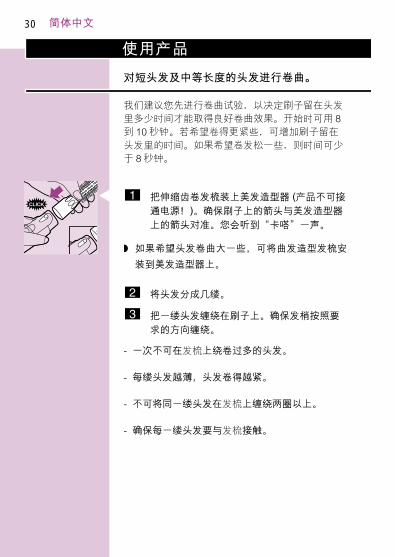
CLICK
31
1
2
32
1
2
33
34
35
36
01-04
37
◗
◗
◗
◗
◗
◗
◗
◗
◗
◗
◗
◗
38
◗
◗
◗
CLICK
39
◗
◗
◗
◗
1
2
1
2
40
◗
◗
◗
41
◗
42
43
◗
◗
◗
◗
◗
◗
44
◗
◗
◗◗
◗◗
◗
◗
45
◗
◗
CLICK
46
◗
◗
◗
1
2
1
2
47
◗
◗
◗
48
◗
49
50
51
52
CLICK
53
1
2
1
2
54
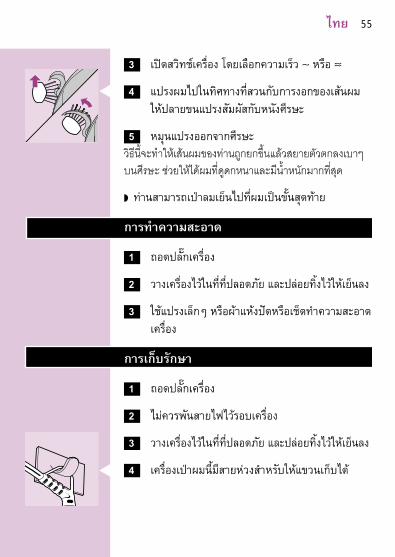
55
56

57

58

59

www.philips.com 4222 002 24921u