caution this is a conceptual presentation, not step-by-step instruction for technical processes …...
TRANSCRIPT


CAUTIONThis is a conceptual presentation, not step-by-step instruction for technical processes … you will need to try these processes out and fill in some details in order to use the techniques shown here.

photo - - > sketchStart with a photograph that has an element you need …

… and cut out the part you want. (If you don’t, you may find your sketch full of extra and distracting lines.)

… Apply the Photocopy filter from the Effects menu … set it to low detail and high contrast.

By manipulating the settings in the Photocopy filter, you can adjust the level of “noise”in the image and show more detail than you might think.

By manipulating the settings in the Photocopy filter, you can adjust the level of “noise”in the image and show more detail than you might think.
Images created with this technique probably need additional treatment so that the viewers’ eyes will focus on the most important part and so that the parts of the image do not “run together” visually.
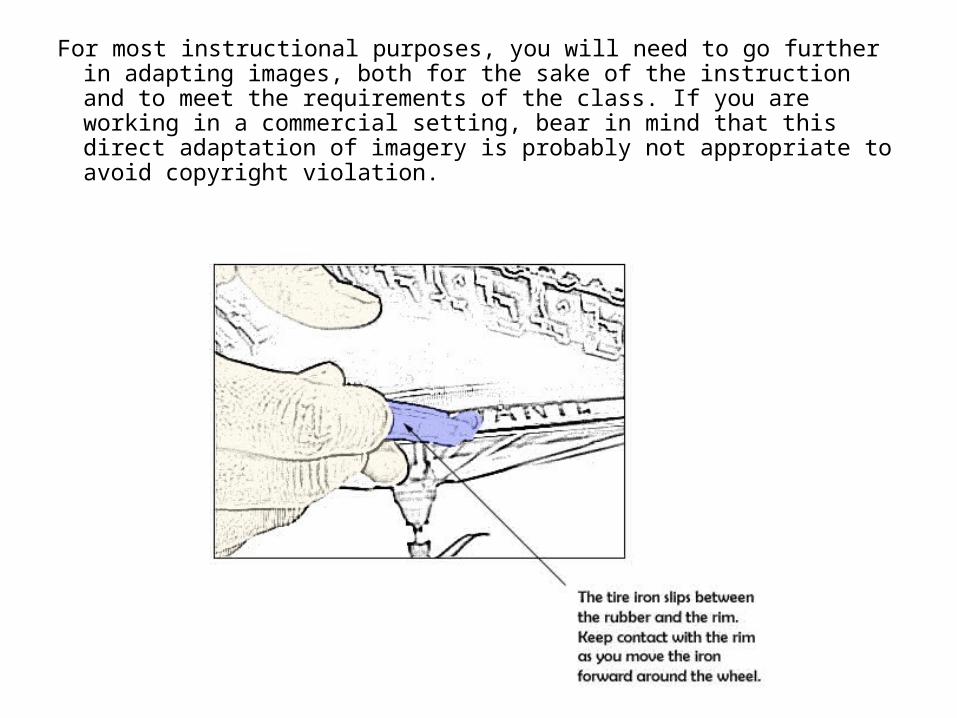
For most instructional purposes, you will need to go further in adapting images, both for the sake of the instruction and to meet the requirements of the class. If you are working in a commercial setting, bear in mind that this direct adaptation of imagery is probably not appropriate to avoid copyright violation.

And here is your “sketch.” Use this technique when:
• You do not need fine detail
• Your photographic models don’t wish to be identified
• You want to convert a series of photos in different styles to one, integrated set of sketches
• You want to give an informal feeling to your presentation of information

photo - - > line drawing
Start with a photograph …

Create a new layer …

Set the opacity of the background layer to about 70% (or 50% if you’re young and have good eyesight).

Trace the major components of the image with the brush tool. This technique will work best if you use a graphics tablet, or …
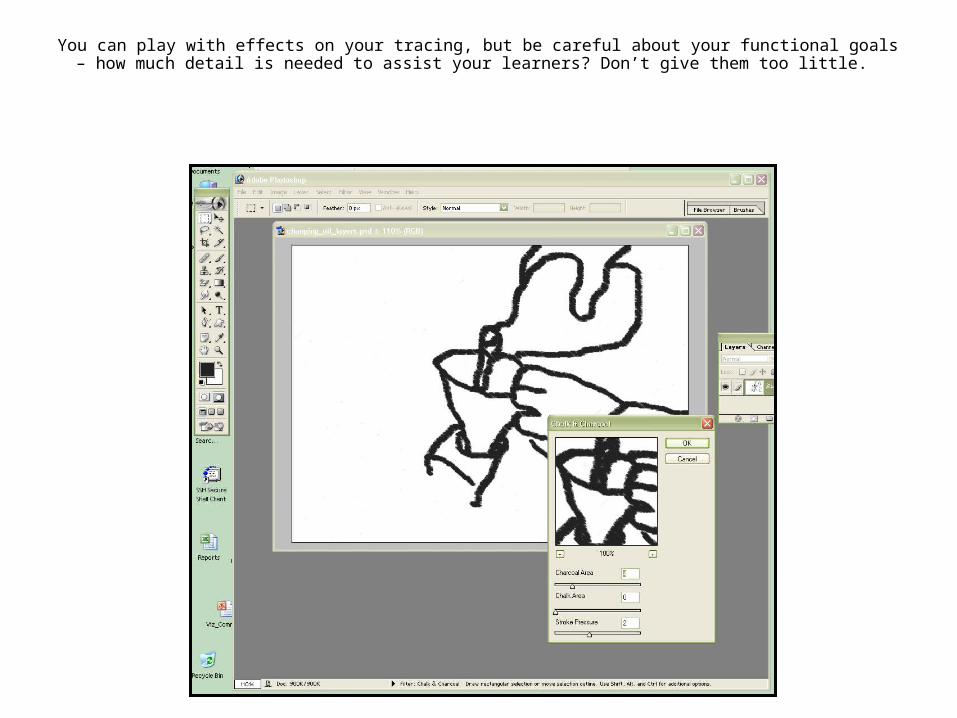
You can play with effects on your tracing, but be careful about your functional goals – how much detail is needed to assist your learners? Don’t give them too little.
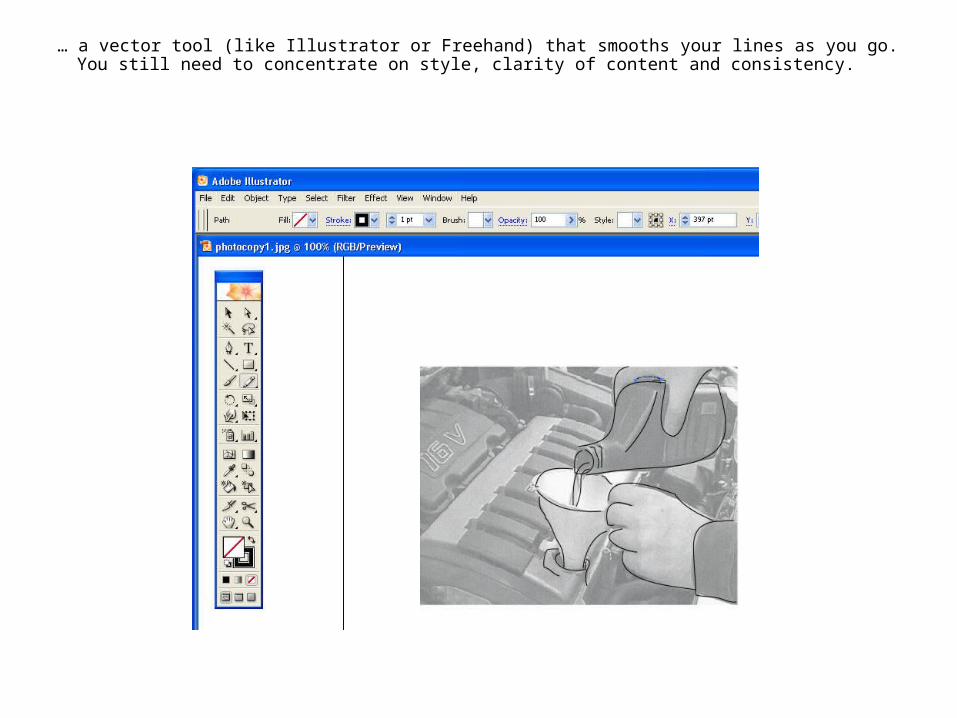
… a vector tool (like Illustrator or Freehand) that smooths your lines as you go. You still need to concentrate on style, clarity of content and consistency.
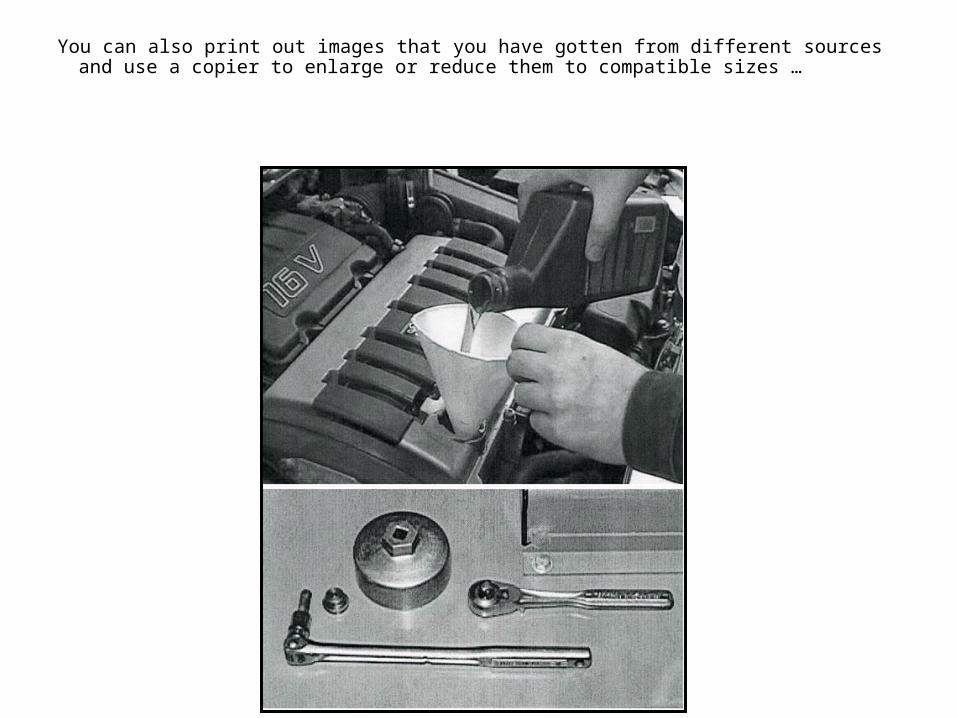
You can also print out images that you have gotten from different sources and use a copier to enlarge or reduce them to compatible sizes …
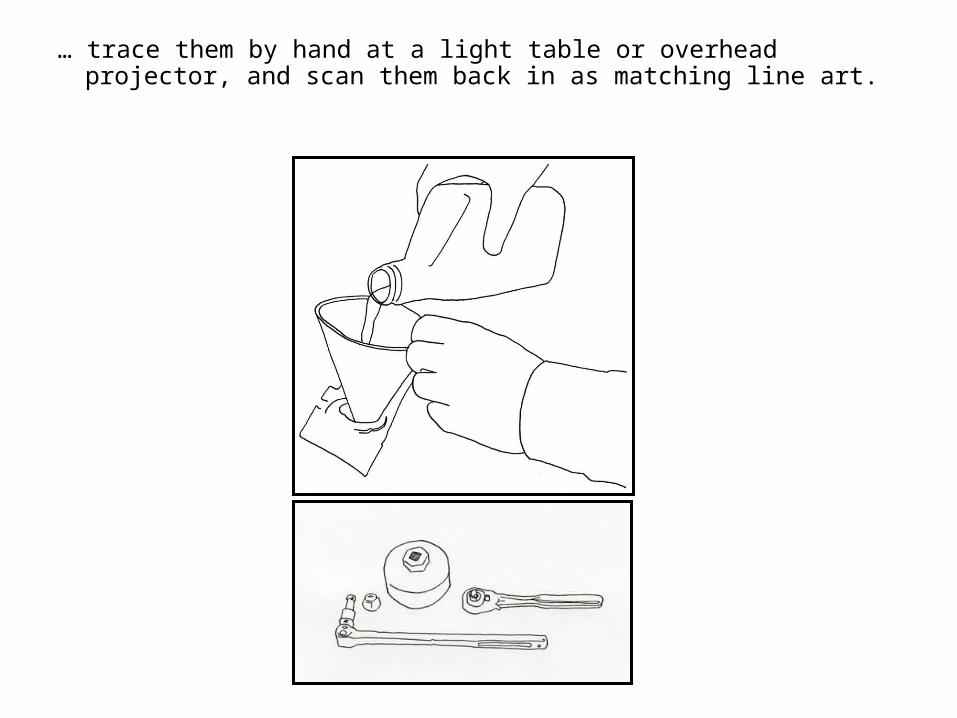
… trace them by hand at a light table or overhead projector, and scan them back in as matching line art.

Use photo - - > line art techniques when:
• You need extra detail• You have mismatched
images that need to fit together as a group
• You have a hand from one image and a tool from another and need to “blend” them together
• You need some control over the techniques you are going to use to focus attention