civet 2.0 (marching cubes), an automated pipeline for
TRANSCRIPT

CIVET 2.0 (marching cubes), An Automated Pipeline
For Structural Human MRI
Lindsay B. Lewis, Ph.D.
OMM
March 17, 2014
SurfStat

Who is behind CIVET?
What is CIVET?
What’s new in CIVET 2.0?
Preparing your files for CIVET
Running CIVET using the CBRAIN web-interface
How do I make sense of my output? (Quality Control)
Important Links
Outline

Development, validation, advanced user support:
Claude Lepage ([email protected])
Validation, standard user support:
Lindsay Lewis ([email protected])
CBRAIN web-based implementation of CIVET:
Marc-Étienne Rousseau, Natacha Beck (https://cbrain.mcgill.ca/contact)
Who is behind CIVET?Alan Evans’ lab (“ACElab”)
Who is behind CIVET?
What is CIVET?
What’s new in CIVET 2.0?
Preparing your files for CIVET
Running CIVET using the CBRAIN web-interface
How do I make sense of my output? (Quality Control)
Important Links
Outline

What is CIVET? CIVET is a structural human MRI cortical surface segmentation tool,
developed (and supported) here at the BIC
It performs the extraction and analysis of cortical surfaces from MR images (T1), including corticometric, morphometric and volumetric functions, e.g.:
• cortical thickness, asymmetry at each vertex• cortical surface area• cortical volume• gyrification index (folding magnitude)
The CIVET pipeline is fully-automated, ideal for large datasets / population studies, cortical network analyses, etc.
User-friendly QC (quality control) tools

Extraction of Cortical Surfaces
T1 image *.mnc
TissueClassification
White Surface*.obj
Gray Surface*.obj
Cortical Thickness*.txt Marching cubes
tesselation

Who is behind CIVET?
What is CIVET?
What’s new in CIVET 2.0?
Preparing your files for CIVET
Running CIVET using the CBRAIN web-interface
How do I make sense of my output? (Quality Control)
Important Links
Outline

What’s new in CIVET 2.0: Marching cubes:
• A marching-cubes algorithm has been implemented for the extraction of the white surface
• Yields higher quality surfaces with fewer extraction defects (i.e., sulcalbridges, surface misregistration, self-intersections)
• Replaces deformable ellipsoid model• New average surface - vertex projection is slightly different from
previous versions of CIVET!
Gradient calibration:
• The white surface is adjusted locally to the maximum gradient position of the T1 image at the border between white and gray matter - yields improvements beyond basic global inhomogeneity correction
• Mostly affects the pre-central gyrus and occipital lobe, where previouslythe placement of the white surface had often led to artificially thinthickness values
High resolution surfaces (163848 vs. 40962 vertices per hemi)

Who is behind CIVET?
What is CIVET?
What’s new in CIVET 2.0?
Preparing your files for CIVET
Running CIVET using the CBRAIN web-interface
How do I make sense of my output? (Quality Control)
Important Links
Outline

Preparing your files for CIVET:
CIVET requires the image files to follow a strict naming convention:
• <prefix>_<id>_t1.mnc (T1)
• Examples:example_001_t1.mncexample_002_t1.mnc
Optional files:
• <prefix>_<id>_t2.mnc (T2)• <prefix>_<id>_pd.mnc (Proton-density)• <prefix>_<id>_mask.mnc (Native brain mask)

What if my files aren’t MINC?
CIVET requires image files to be in MINC format (*.mnc)
If your files are not in MINC format, you have several options forconversion on the BIC server or CBRAIN:
DICOM: dcm2mncNIfTI or Analyze: nii2mnc
For detailed instructions + sample perl scripts:
http://www.bic.mni.mcgill.ca/ServicesSoftware/ConvertingOtherFileTypesToMINC

Who is behind CIVET?
What is CIVET?
What’s new in CIVET 2.0?
Preparing your files for CIVET
Running CIVET using the CBRAIN web-interface
How do I make sense of my output? (Quality Control)
Important Links
Outline

What is CBRAIN?https://portal.cbrain.mcgill.ca
The CBRAIN web-interface platform, developed by Alan Evans’ lab (“ACElab”), allows registered users free access to the high-performance computing grid of Compute Canada.
Useful for handling large datasets: • CIVET via CBRAIN: ~ 4 hrs processing time per subject, 1000+ subjects in ~24 hours, depending on CPU availability.
Compute Canada cores: • Mammouth-parallel II: 39,168 cores • Guillimin: 20,176 cores • Colosse: 7680 cores • Mammouth-serial II: 1936 cores • Westgrid: 7032 cores
Convenience: reduced need for you to install specialized software locally; all you need is a web browser.
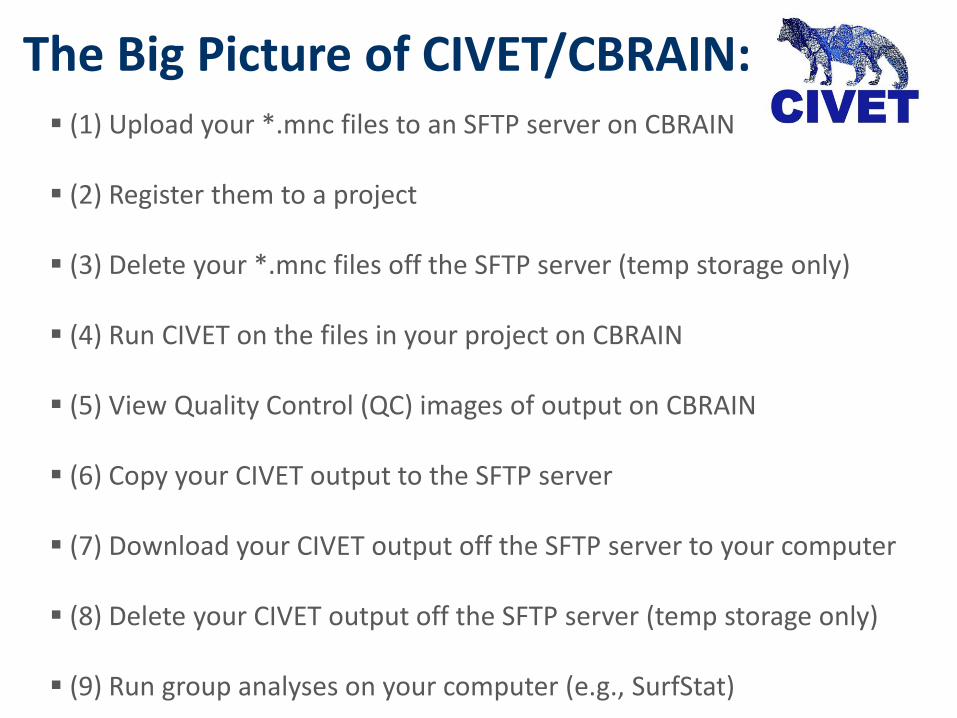
The Big Picture of CIVET/CBRAIN: (1) Upload your *.mnc files to an SFTP server on CBRAIN
(2) Register them to a project
(3) Delete your *.mnc files off the SFTP server (temp storage only)
(4) Run CIVET on the files in your project on CBRAIN
(5) View Quality Control (QC) images of output on CBRAIN
(6) Copy your CIVET output to the SFTP server
(7) Download your CIVET output off the SFTP server to your computer
(8) Delete your CIVET output off the SFTP server (temp storage only)
(9) Run group analyses on your computer (e.g., SurfStat)
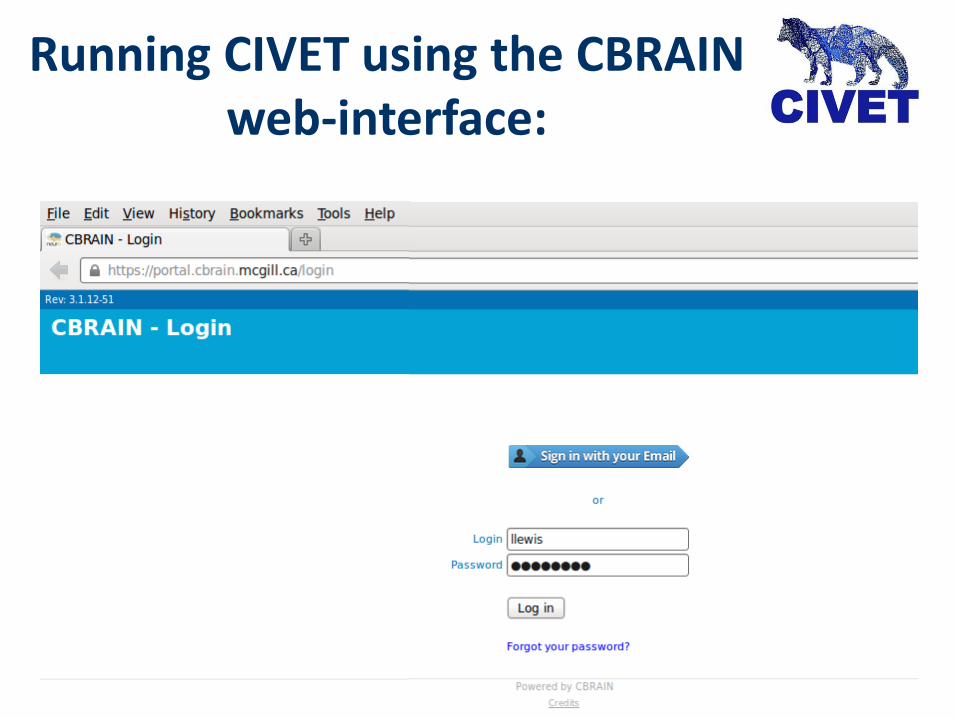
Running CIVET using the CBRAIN web-interface:
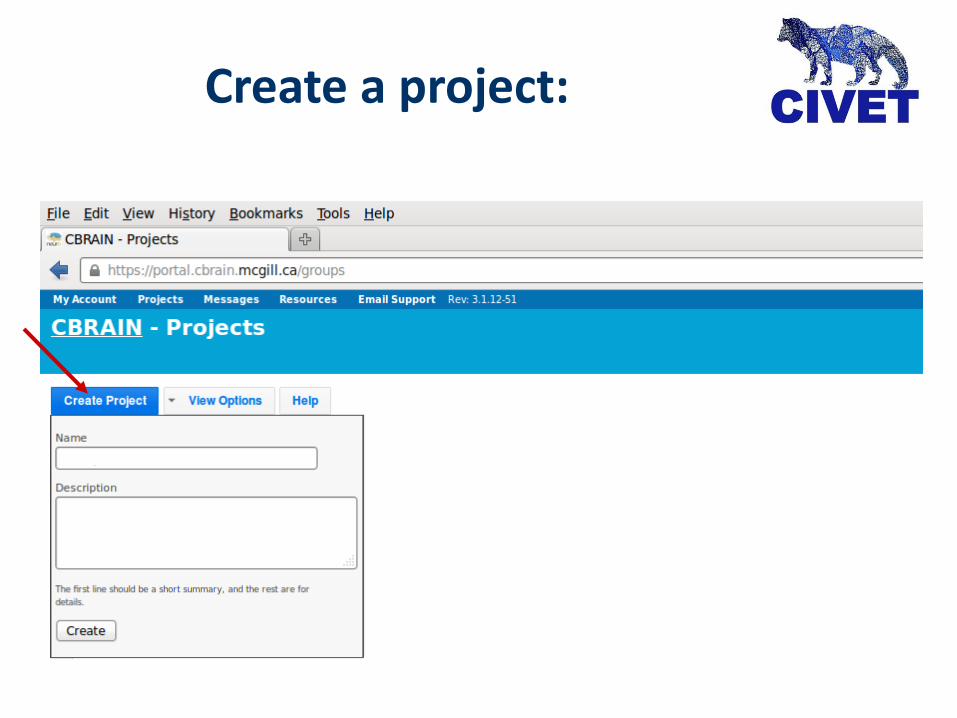
Create a project:

Create a project:

Click on the project box:

Click on “Upload File” (if you only have a few*):

Select *.mnc files for upload:
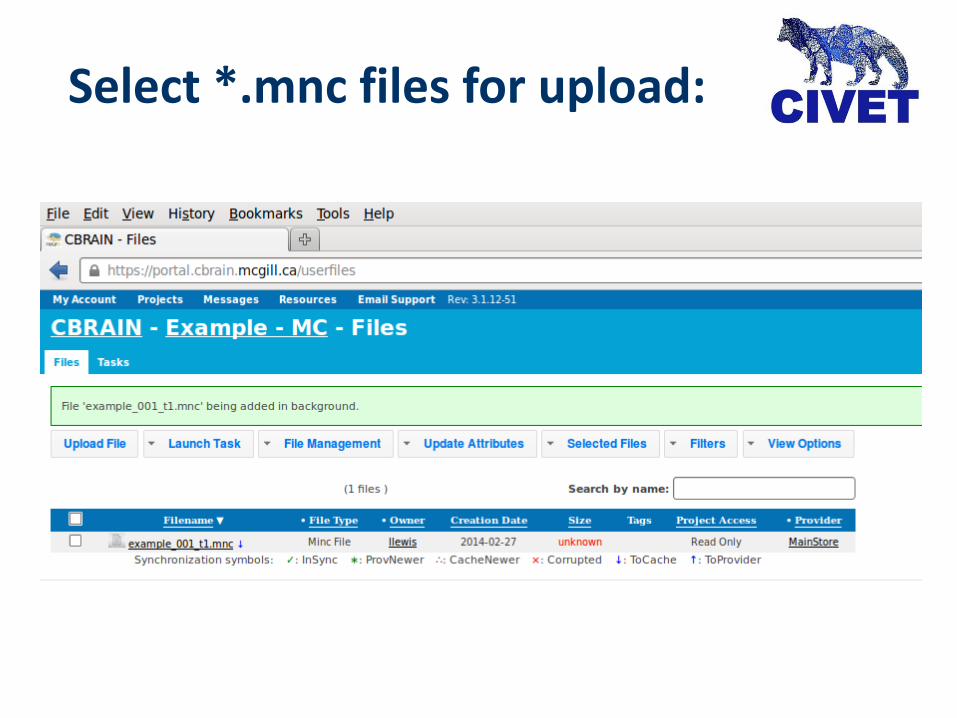
Select *.mnc files for upload:
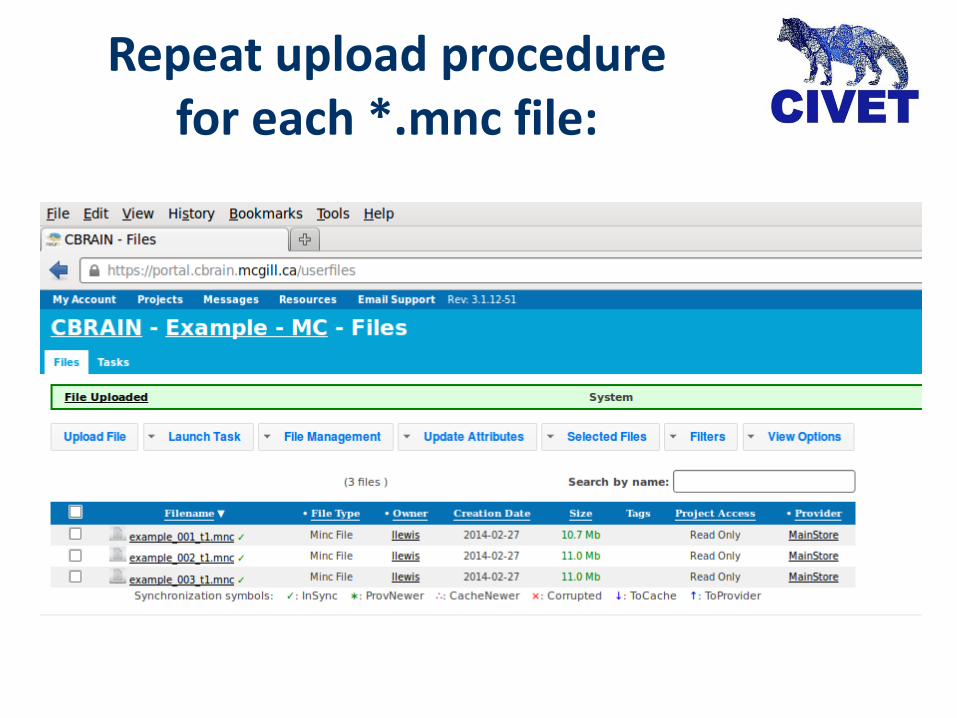
Repeat upload procedure for each *.mnc file:

Or, to upload many files at once:
You can use a GUI drag / drop SFTP client with port 7500, e.g. Filezilla
OR
You can use command-line SFTP:
cd <dir_name_containing_mnc_files> sftp –oPort=7500 <username>@brainstorm.cbrain.mcgill.ca put *.mnc

Click on “Resources,” drop-down menu to “Data Providers”:

Click on “Browse” to the right of your Data Provider:
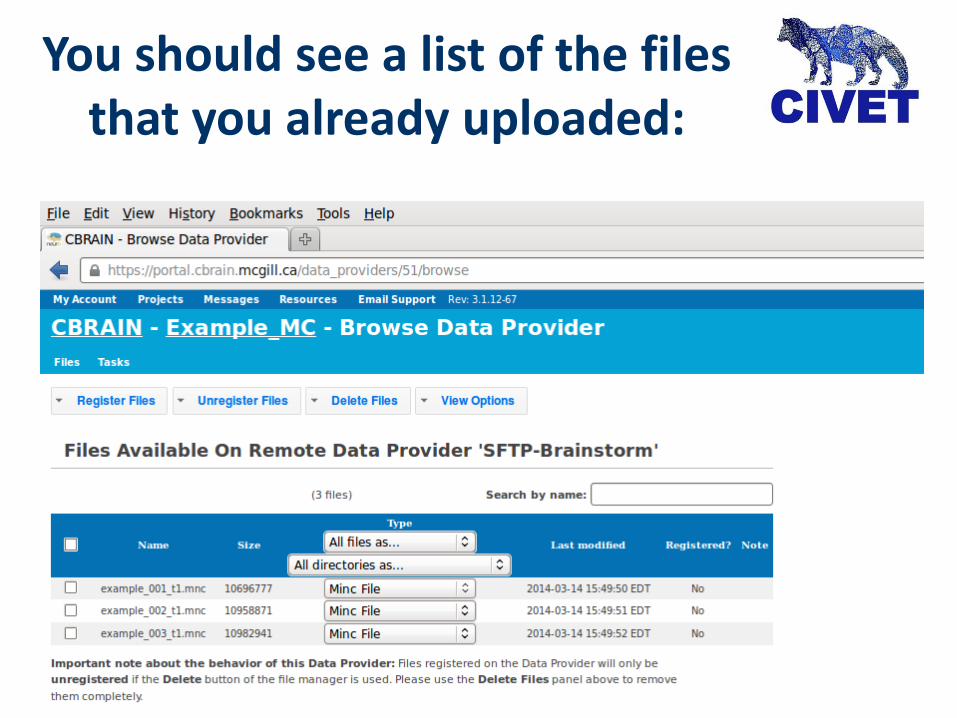
You should see a list of the files that you already uploaded:
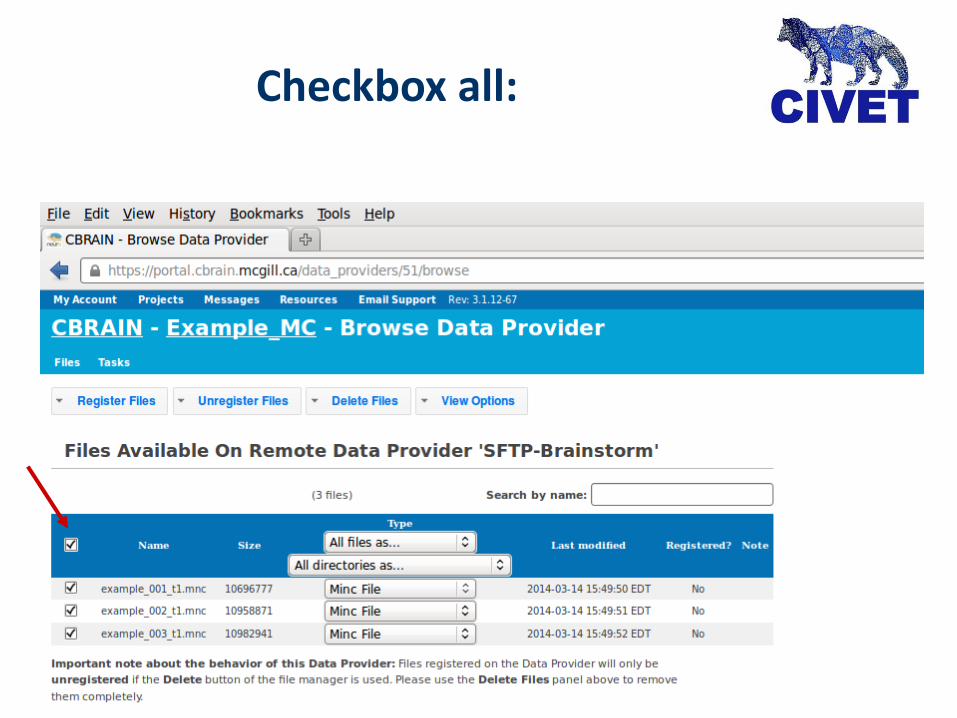
Checkbox all:

Move your files from the temporary SFTP server to “Mainstore”:
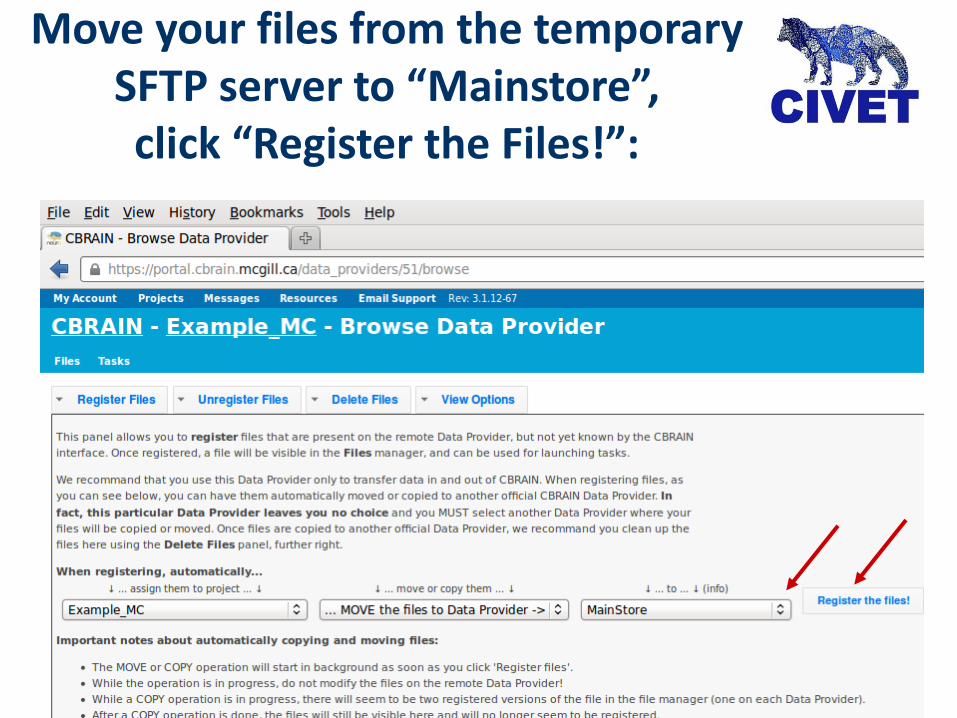
Move your files from the temporary SFTP server to “Mainstore”, click “Register the Files!”:

Checkbox all files and delete them off the temporary SFTP server:

Click on Files:

Checkbox each *.mnc file:
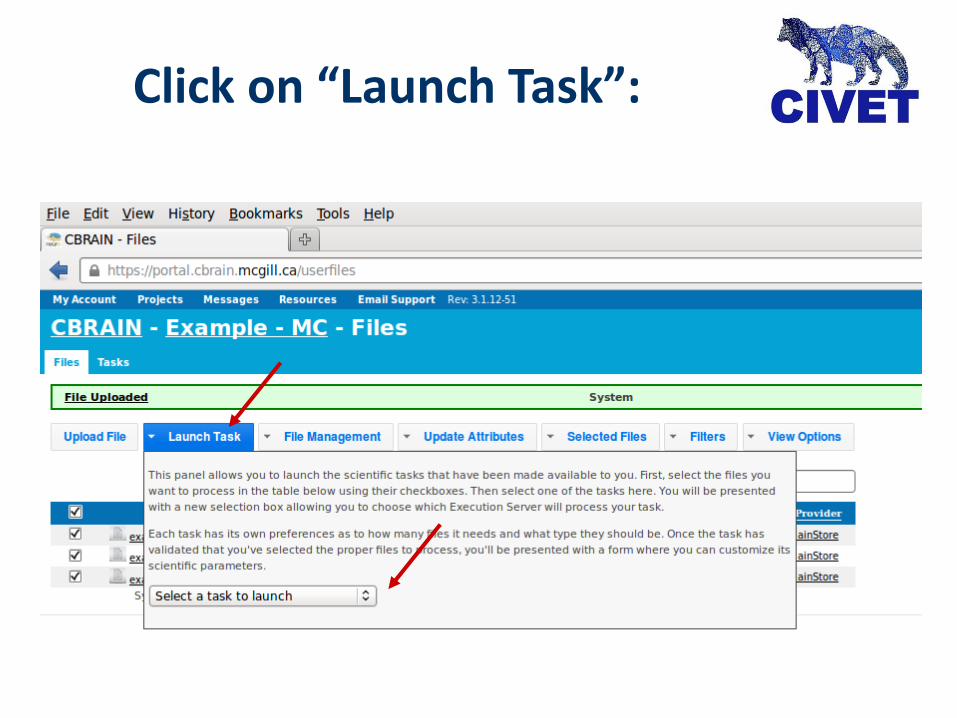
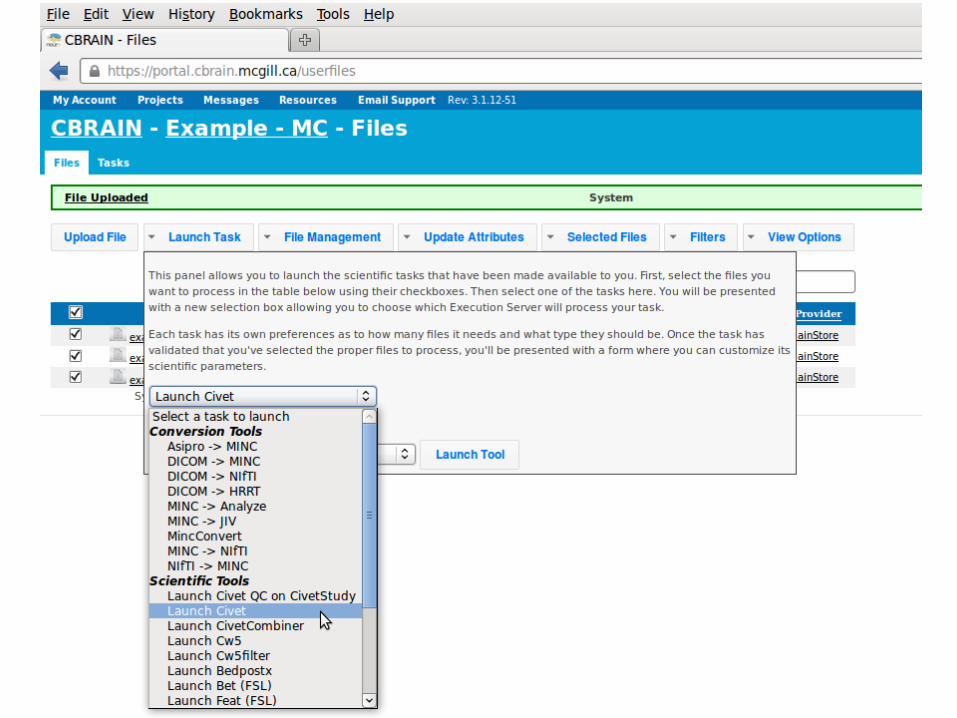
Click on “Launch Task”:
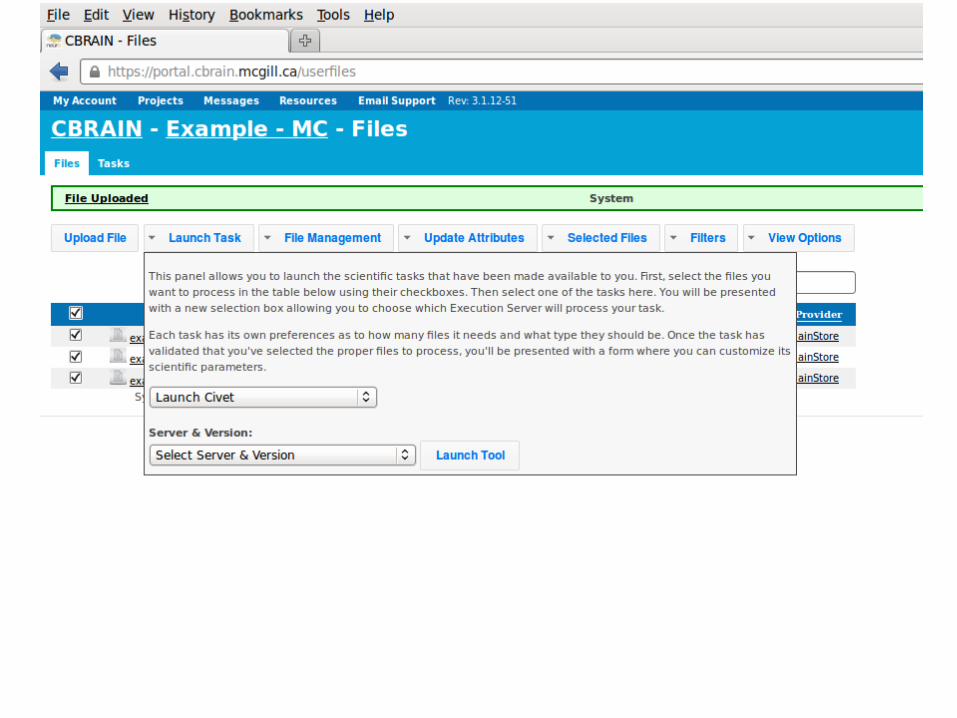
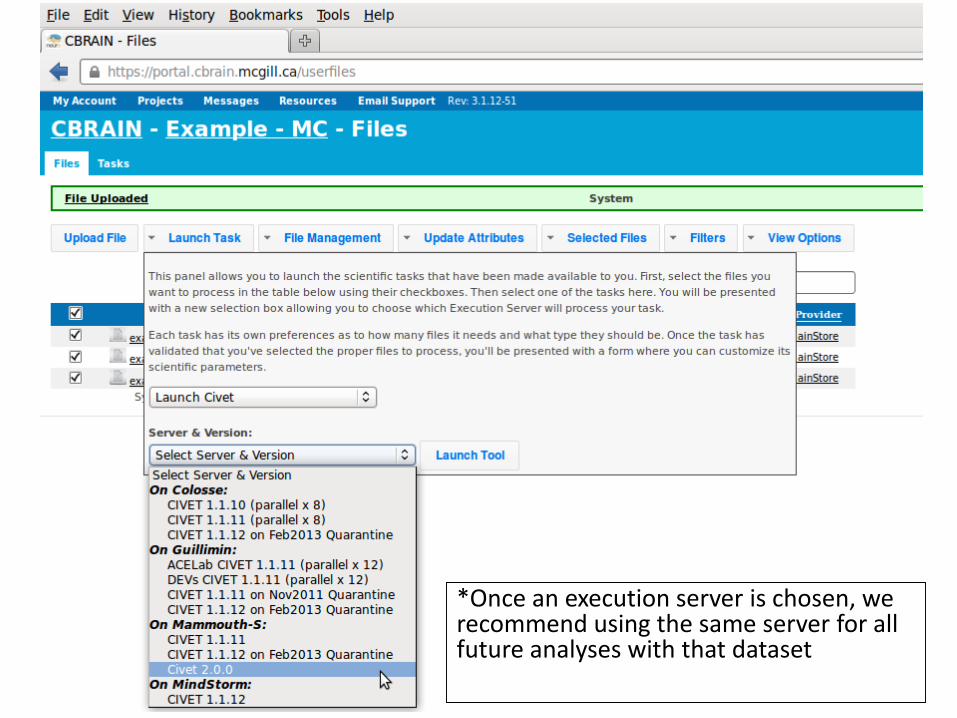
*Once an execution server is chosen, we recommend using the same server for all future analyses with that dataset


Model for stereotaxic registration:
Default: “icbm152nl” (MNI ICBM152 non-linear 6th generation)
Also available: “icbm152nl_09s” (MNI ICBM152 non-linear
symmetric (2009))“icbm152nl_09a” (MNI ICBM152 non-linear
asymmetric (2009))“icbm152lin” (MNI ICBM152 linear)“ADNIhires” (MNI ADNI non-linear and hires)
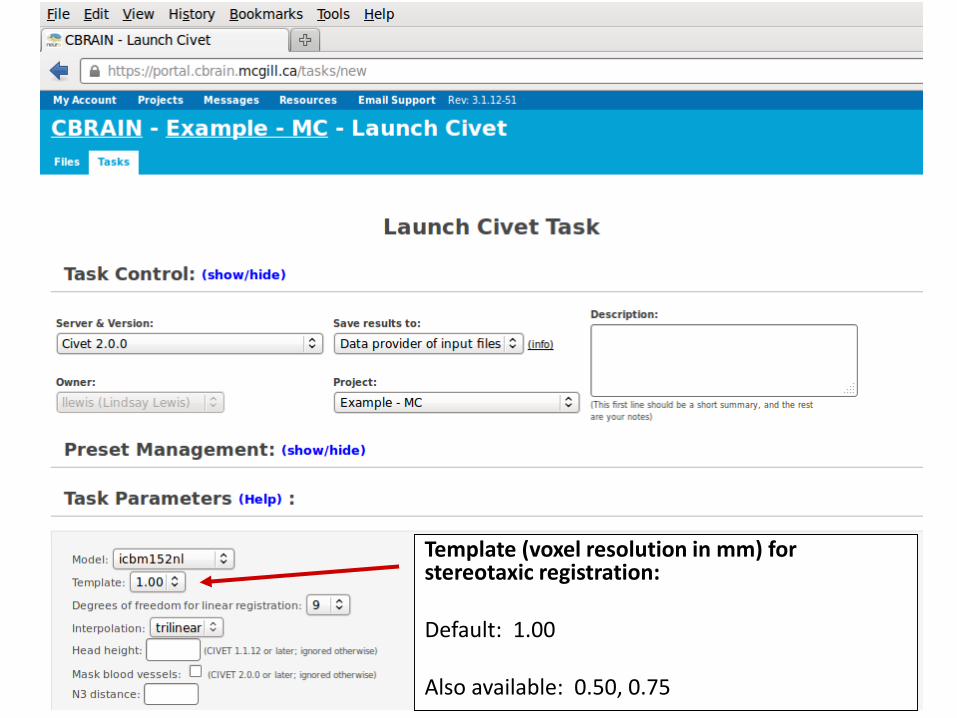
Template (voxel resolution in mm) for stereotaxic registration:
Default: 1.00
Also available: 0.50, 0.75

# of parameters / DOF to be used in transformation for linear registration:
Default: 9
Also available: 6, 12
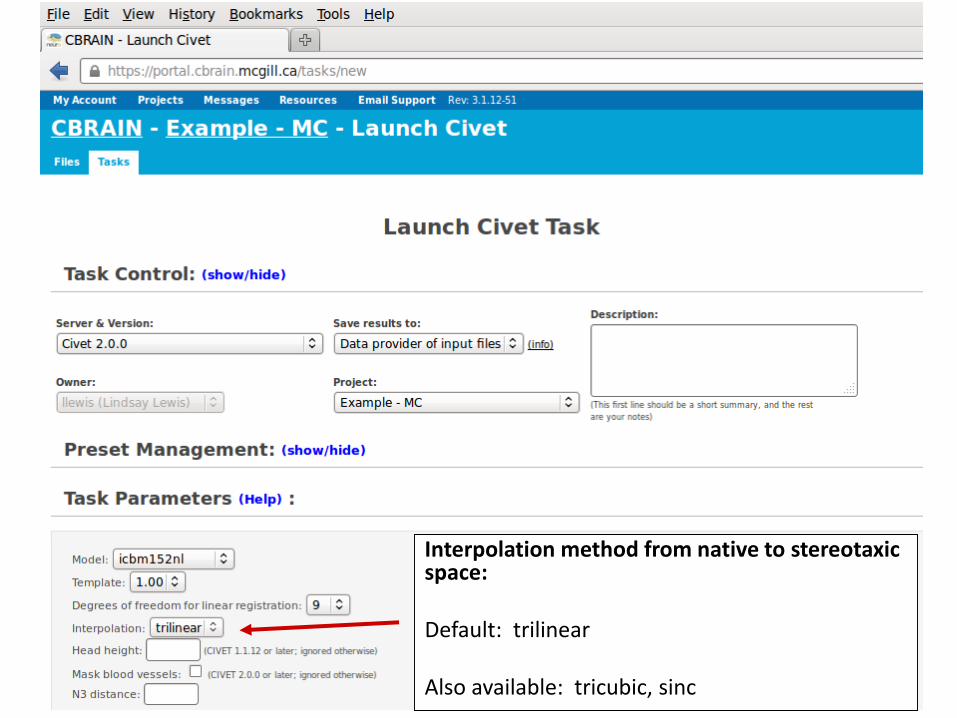
Interpolation method from native to stereotaxicspace:
Default: trilinear
Also available: tricubic, sinc

Head height in mm for neck cropping:
Default: 0
Suggested value, if used: 170

Mask blood vessels prior to white surface extraction:
Default: off

N3 spline distance in mm (REQUIRED):
3T: suggested value is 50-125 (CIVET 2.0 is lesssensitive to the particular value chosen)
1.5T: suggested value is 200MP2RAGE: suggested value is 0

100
N3 spline distance in mm (REQUIRED):
3T: suggested value is 50-125 (CIVET 2.0 is lesssensitive to the particular value chosen)
1.5T: suggested value is 200MP2RAGE: suggested value is 0
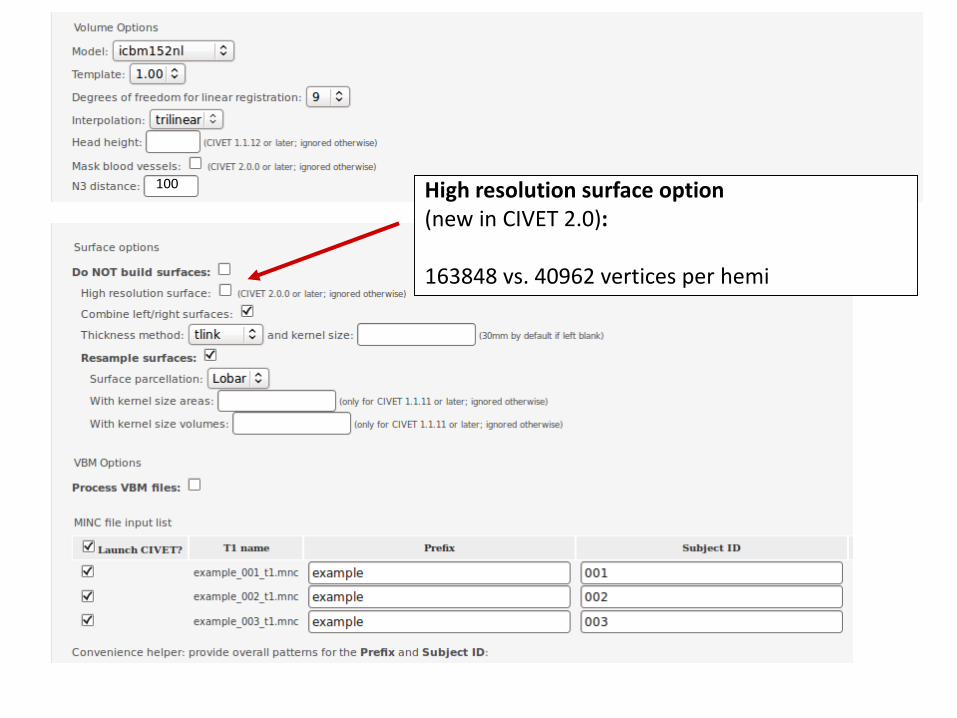
High resolution surface option(new in CIVET 2.0):
163848 vs. 40962 vertices per hemi
100

100 Cortical thickness metric:
Default: tlink
Also available: tlaplace, tnear, “tfs” (Freesurfer-like)
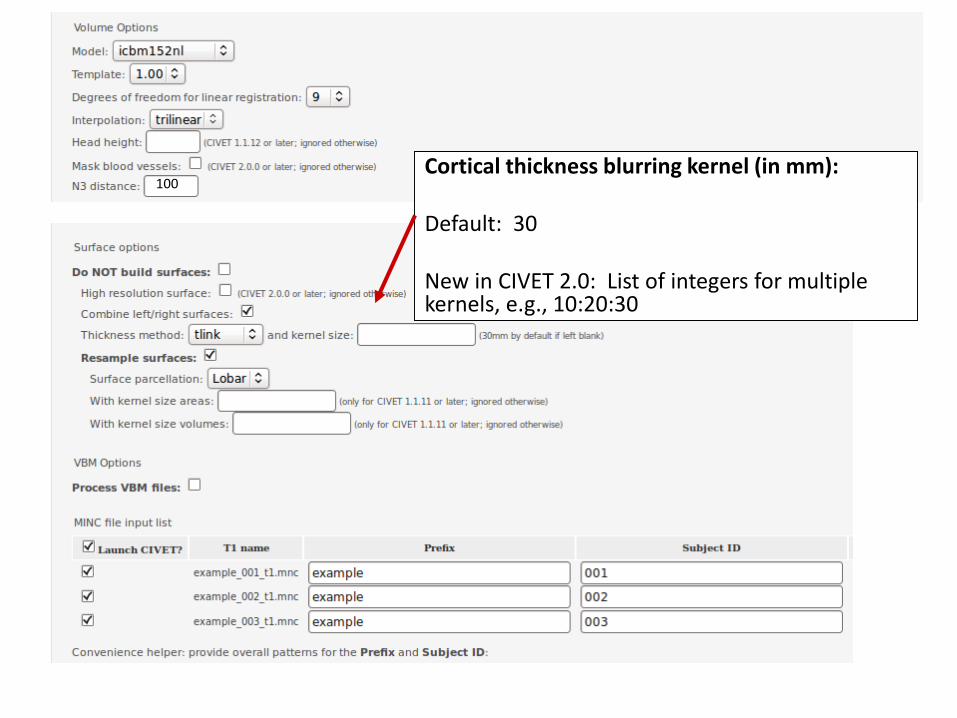
100Cortical thickness blurring kernel (in mm):
Default: 30
New in CIVET 2.0: List of integers for multiple kernels, e.g., 10:20:30
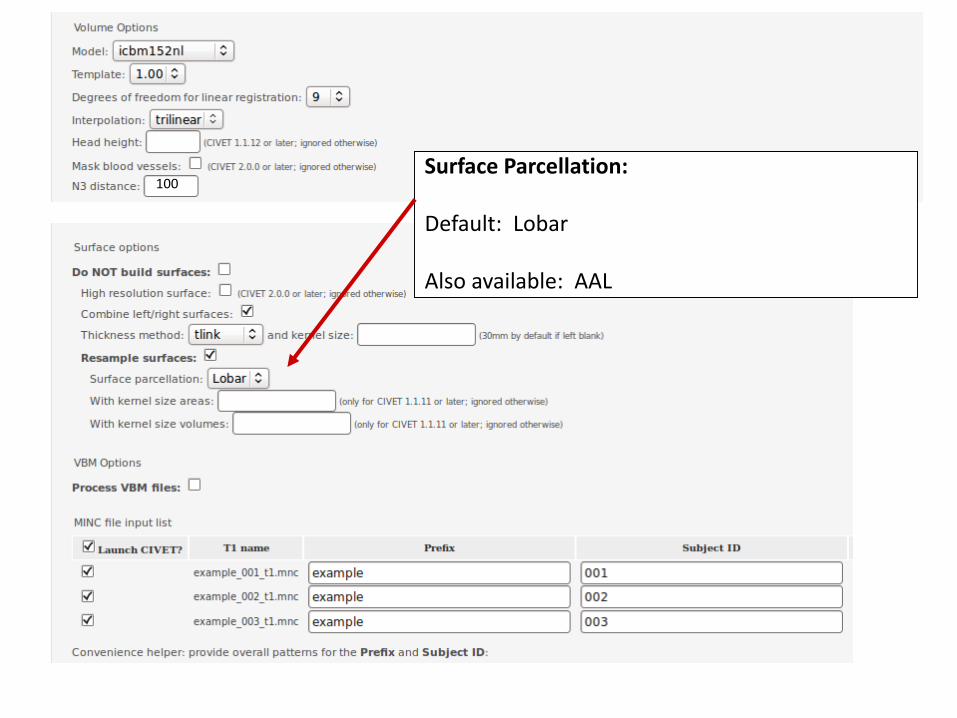
100Surface Parcellation:
Default: Lobar
Also available: AAL
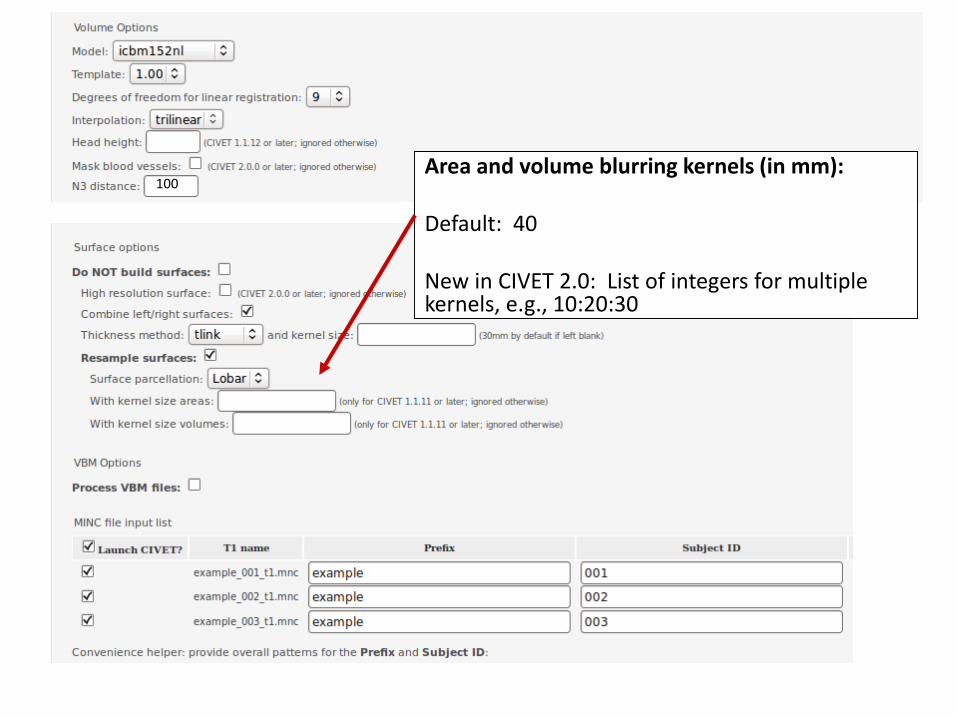
100Area and volume blurring kernels (in mm):
Default: 40
New in CIVET 2.0: List of integers for multiple kernels, e.g., 10:20:30

VBM:
Default: off
100

Required for QC: click on Show “Optional post-CIVET operations”!

Give your QC folder a name

Choose the latest CBRAIN version on the same execution server as you already chose
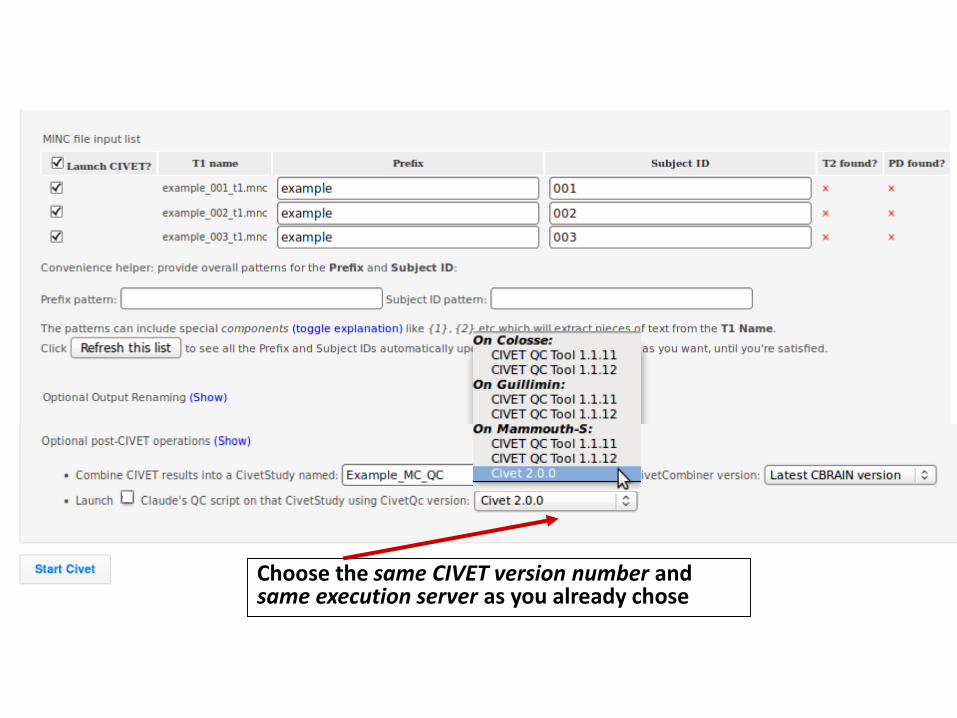
Choose the same CIVET version number and same execution server as you already chose

Check “Launch Claude’s QC script,”
and then “Start Civet”

“New” tasks appear:

A few hours later:
*Be attentive to any RED messages under “Current Status” that indicate any errors or incompletion

Click back to “Files” tab:

Click on any individual output file collection to see contents:

Click on “Show Displayable Contents” to see QC images

Who is behind CIVET?
What is CIVET?
What’s new in CIVET 2.0?
Preparing your files for CIVET
Running CIVET using the CBRAIN web-interface
How do I make sense of my output? (Quality Control)
Important Links
Outline

“Verify” QC Image:
Check mask, classified WM/GM, WM/GM surfs Tip: attention to temporal pole & meninges near central gyri

“Clasp” QC Image:
Check white surface quality for:
masking errors (pieces of skull attached to white surf) motion artifacts (white surf looks jagged with many bridges across gyri)
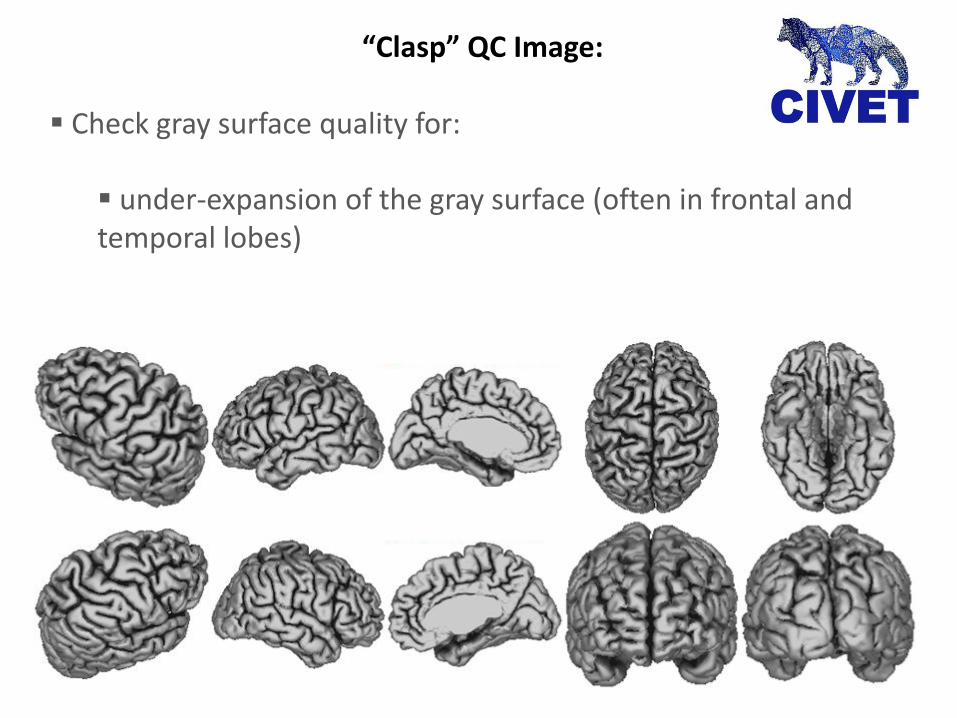
“Clasp” QC Image:
Check gray surface quality for:
under-expansion of the gray surface (often in frontal and temporal lobes)

“Clasp” QC Image:
Check cortical thickness maps for:
poor N3 correction of non-uniformities (atypical pattern of cortical thickness) (spectral range, 0.5-5.5; hot colors = thicker values)

“Atlas” QC Image:
Check surface registration quality:
Tip: pay special attention to the border of the frontal and parietal lobes at the central sulcus

Gray-White “Surf Surf Intersections” QC Image:
Indicated by spots in pink, which may due to: abnormally thin cortex (poor N3 correction of non-uniformities) defects in white surface extraction (erroneous bridge across a sulcus cutting through cortex) masking errors tissue classification errors (often, broken thin strips of WM in temporal lobes)
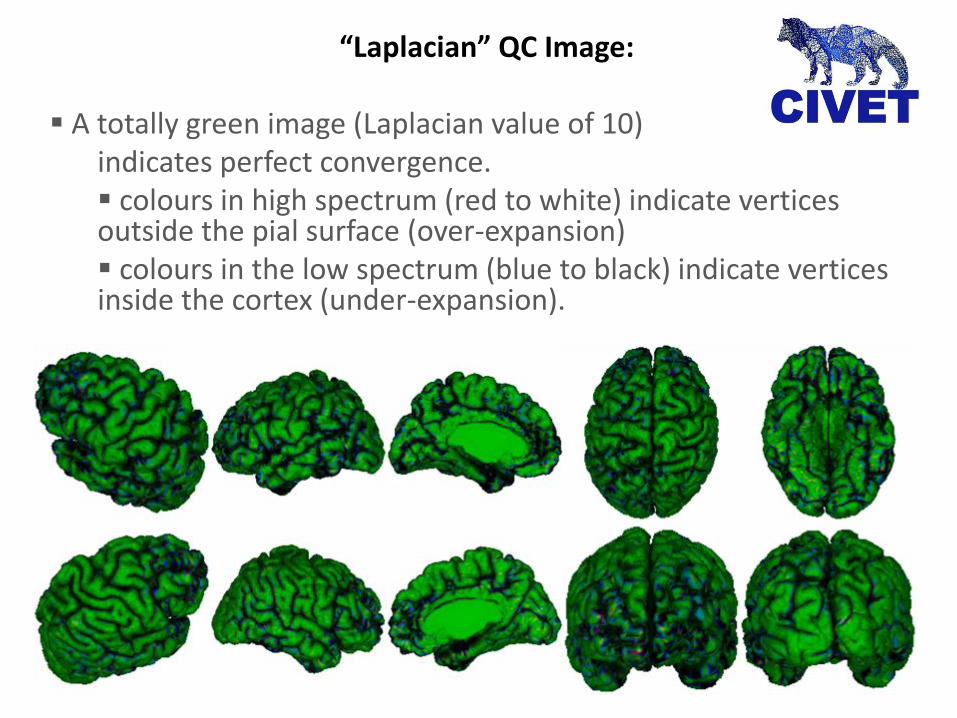
“Laplacian” QC Image:
A totally green image (Laplacian value of 10) indicates perfect convergence. colours in high spectrum (red to white) indicate vertices outside the pial surface (over-expansion) colours in the low spectrum (blue to black) indicate vertices inside the cortex (under-expansion).

Examples of QC FAILURE: Motion Artifacts
T1 images: Ripples or curved lines, often most evident in the coronal or horizontal views

Examples of QC FAILURE: Motion Artifacts
Clasp images: White surfaces may be jagged, thick, and/or include skull or meninges

Examples of QC FAILURE: Motion Artifacts
Clasp images: Gray surfaces may appear “puffy”
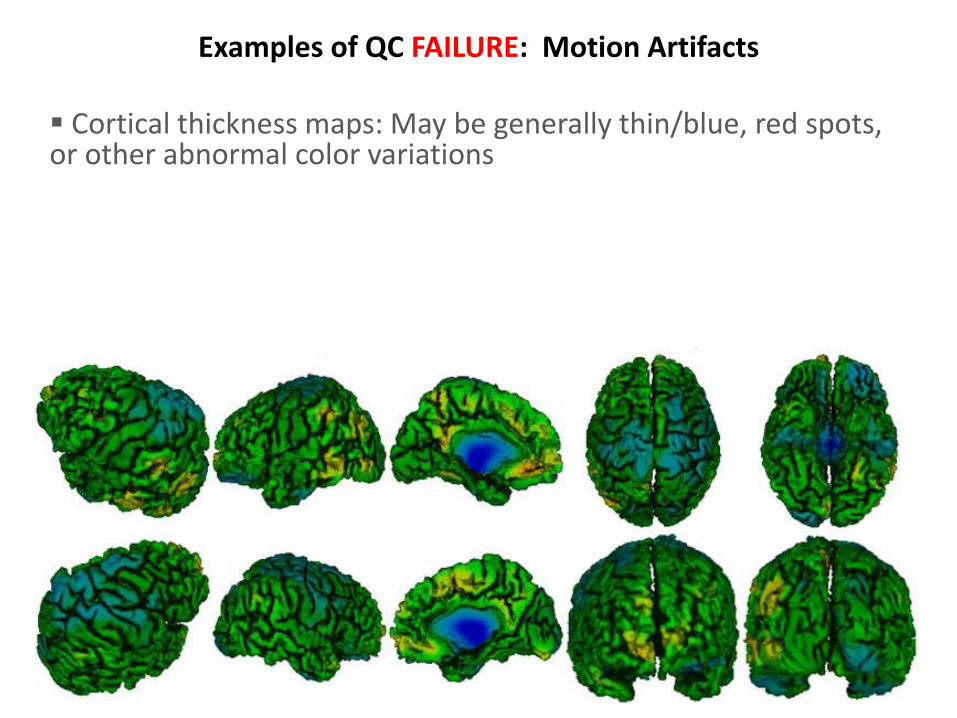
Examples of QC FAILURE: Motion Artifacts
Cortical thickness maps: May be generally thin/blue, red spots, or other abnormal color variations

Examples of QC FAILURE: Motion Artifacts
Surface registration: Check for errors, especially in the division between frontal and parietal lobes along the central sulcus

Examples of QC FAILURE: Motion Artifacts
Surface surface intersections: There will likely generally be a high number (and high visibility) of surf-surf intersections, in pink

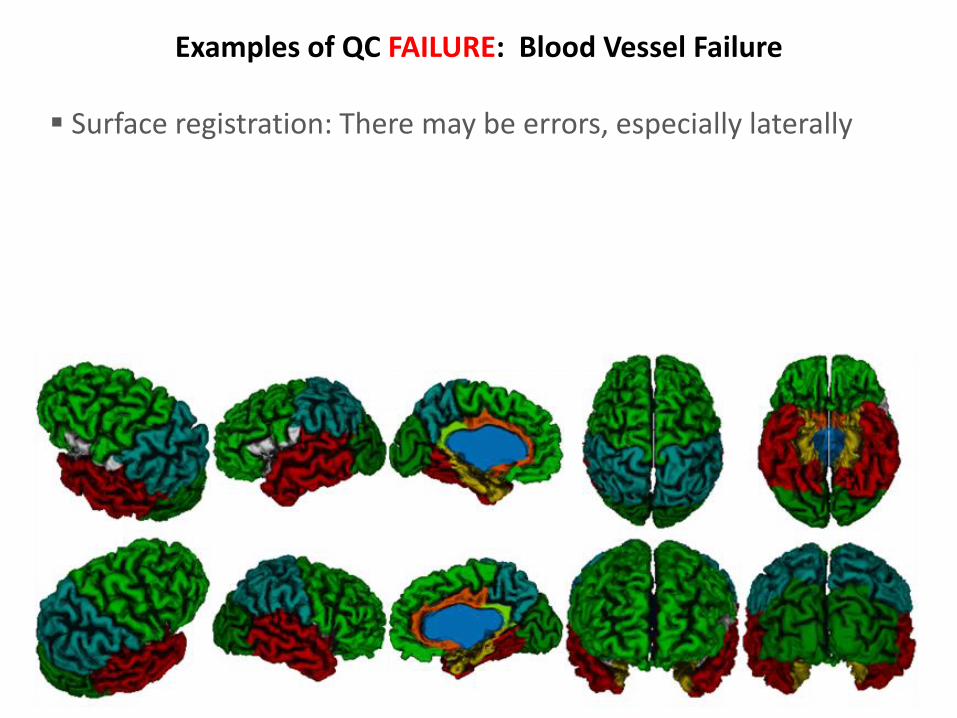
Examples of QC FAILURE: Blood Vessel Failure
T1 images: Blood vessels appear as bright white spots
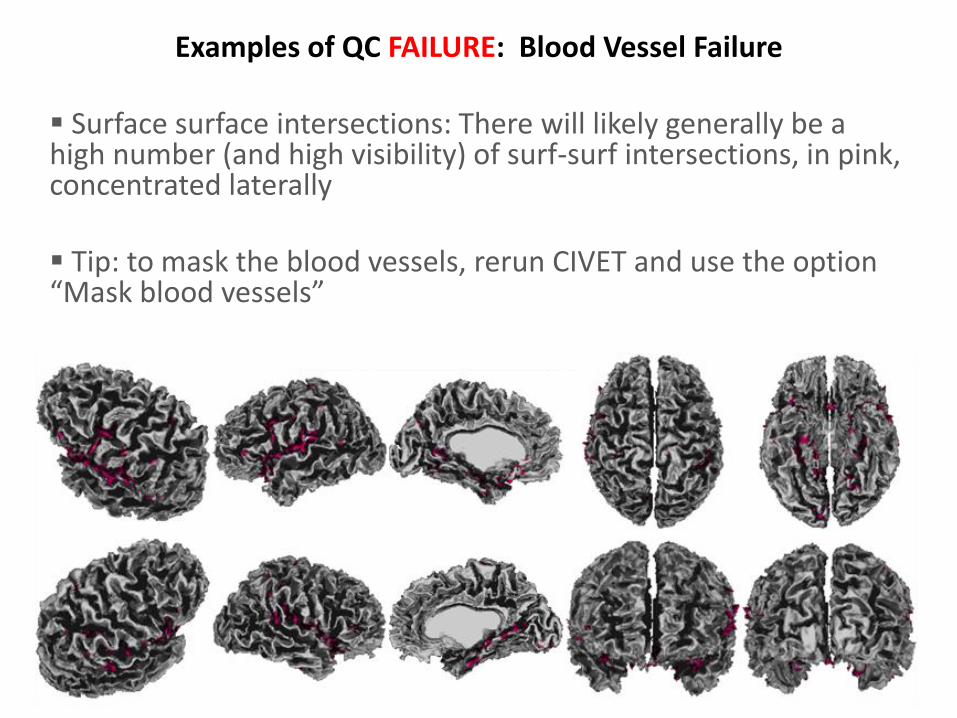
Examples of QC FAILURE: Blood Vessel Failure
Surface surface intersections: There will likely generally be a high number (and high visibility) of surf-surf intersections, in pink, concentrated laterally
Tip: to mask the blood vessels, rerun CIVET and use the option “Mask blood vessels”
Examples of QC FAILURE: Blood Vessel Failure
Surface registration: There may be errors, especially laterally
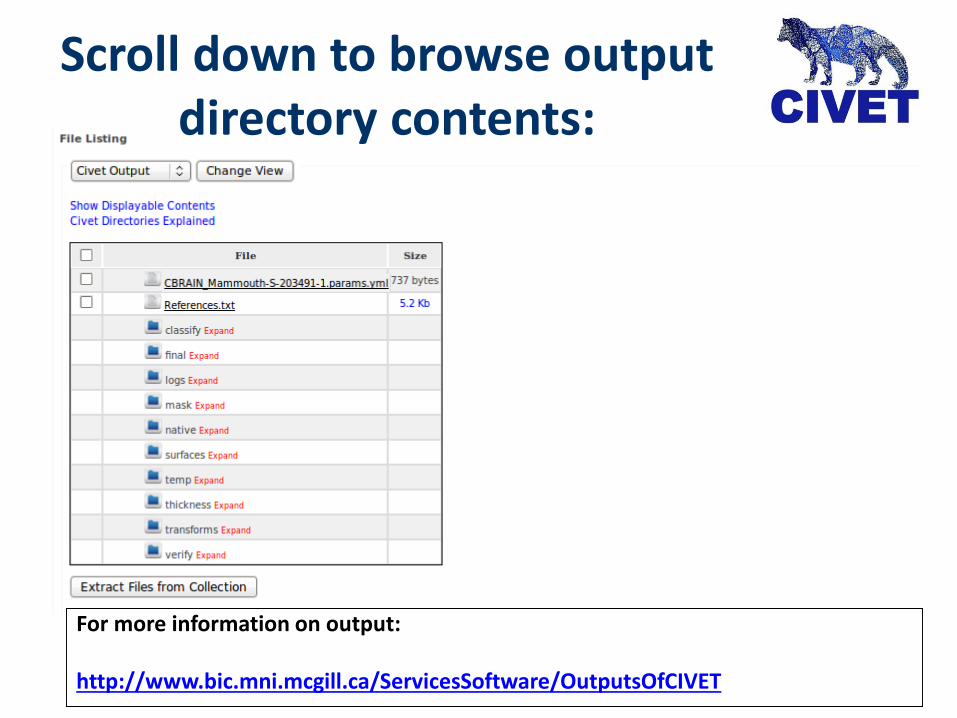
Scroll down to browse output directory contents:
For more information on output:
http://www.bic.mni.mcgill.ca/ServicesSoftware/OutputsOfCIVET

Or view individual subjects’ surfaces + maps:
Drop down to “Surface Viewer” to examine surfaces in BrainBrowser
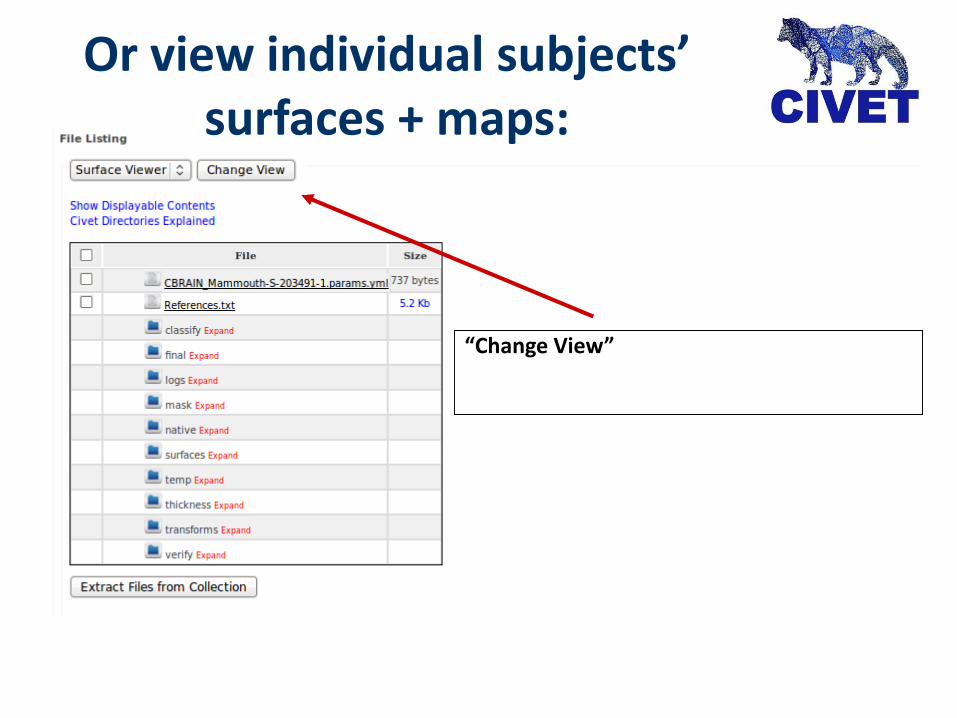
“Change View”
Or view individual subjects’ surfaces + maps:

Surface + thickness overlay can be rotated and inspected with your mouse, in the browser!

Or view entire QC collection:
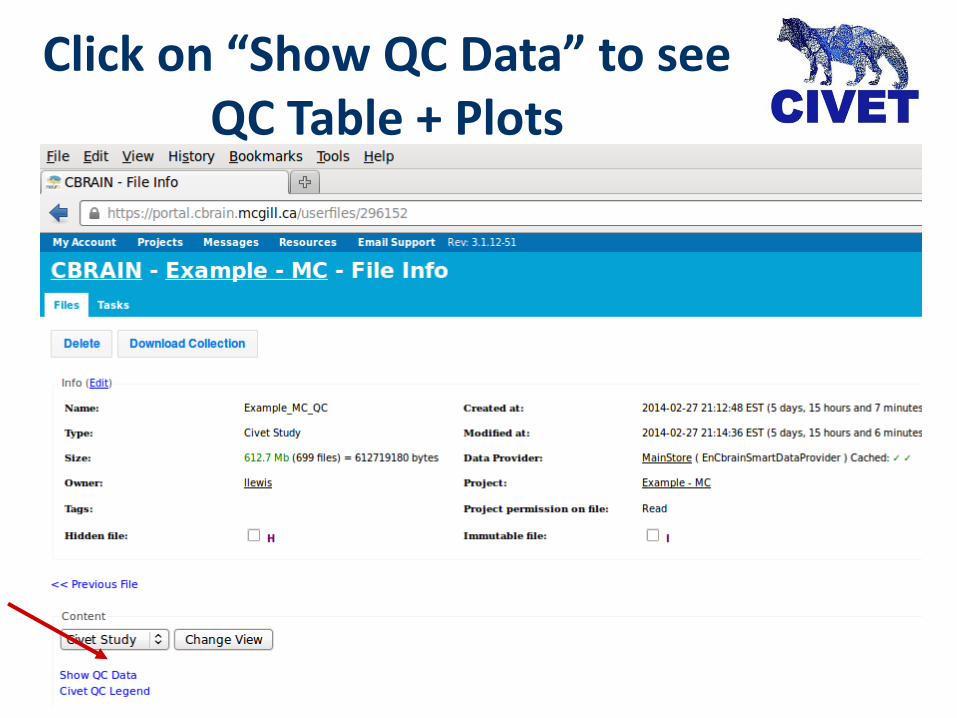
Click on “Show QC Data” to see QC Table + Plots

Scroll down for more plots
Click on subject # for QC images

Download your data via SFTP:
Checkbox all output, click “File Management”

Download your data via SFTP:
Select “SFTP-Brainstorm” from drop-down menu Click “Move Files”

Download your data via SFTP:
We use SFTP options as before, but in the opposite direction:
You can use an SFTP client (e.g., Filezilla) to drag / drog files from Brainstorm to your computer
OR
You can use command-line SFTP
cd <dir_name_containing_mnc_files> sftp –oPort=7500 <username>@brainstorm.cbrain.mcgill.ca get *.mnc
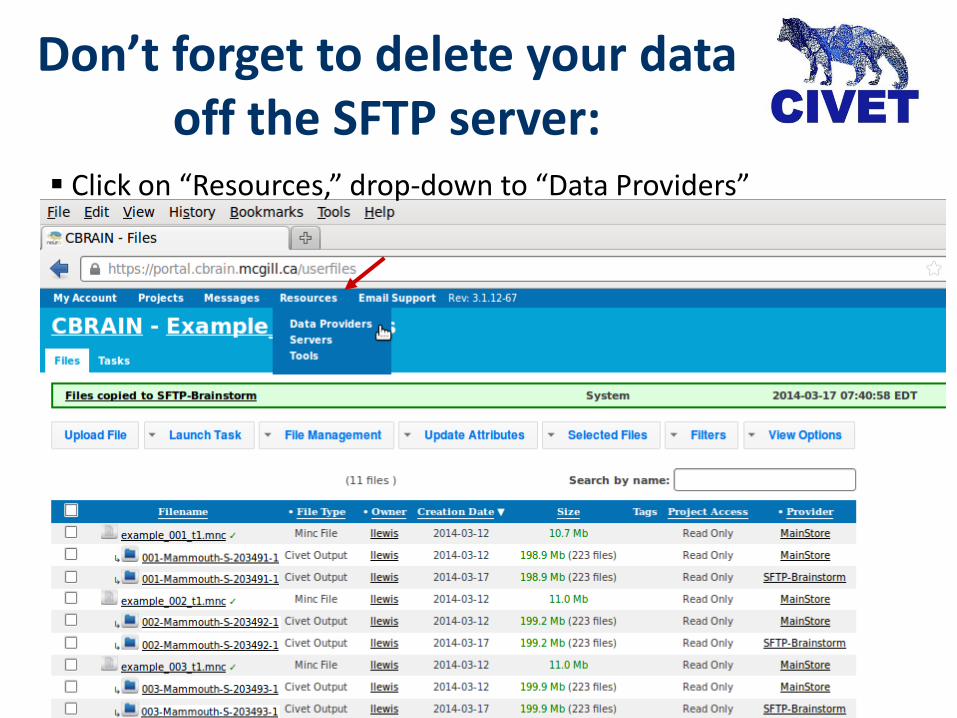
Don’t forget to delete your data off the SFTP server:
Click on “Resources,” drop-down to “Data Providers”

Don’t forget to delete your data off the SFTP server:
Click “Browse” to the right of your Data Provider

Don’t forget to delete your data off the SFTP server:
Checkbox all, click “Delete”

Once downloaded, use Display to view surfaces overlaid on T1’s cd <dir_name_containing_CIVET_output>
cd <prefix>_<id>
Display <T1> <list of surface overlays>
Display final/<prefix>_<id>_t1_final.mnc …surfaces/<prefix>_<id>_white_surface_left_81920.obj …surfaces/<prefix>_<id>_white_surface_right_81920.obj …surfaces/<prefix>_<id>_gray_surface_left_81920.obj …surfaces/<prefix>_<id>_gray_surface_right_81920.obj

Once downloaded, use Display to view surfaces overlaid on T1’s Press “Up” key to select white left surf Click “Objects”

Once downloaded, use Display to view surfaces overlaid on T1’s Secondary menu appears, click“Scan Obj to Vol”

Once downloaded, use Display to view surfaces overlaid on T1’s “space / Pop Menu” to get back to main menu Press “Down” key and repeat for white right surf

Once downloaded, use Display to view surfaces overlaid on T1’s “space / Pop Menu” to get back to main menu Press “Down” key and repeat for white right surf

Once downloaded, use Display to view surfaces overlaid on T1’s “space / Pop Menu” to get back to main menu Press “Down” key to gray left surf, then click “Segmentation”

Once downloaded, use Display to view surfaces overlaid on T1’s Secondary menu appears, click “Set Paint Lbl: 1” Navigate back to terminal window, and where it says “Enter current paint
label:” enter “2

Once downloaded, use Display to view surfaces overlaid on T1’s Click “Objects,” secondary menu appears, click“Scan Obj to Vol” “space / Pop Menu” to get back to main menu, press “Down” arrow and
repeat for gray right surf
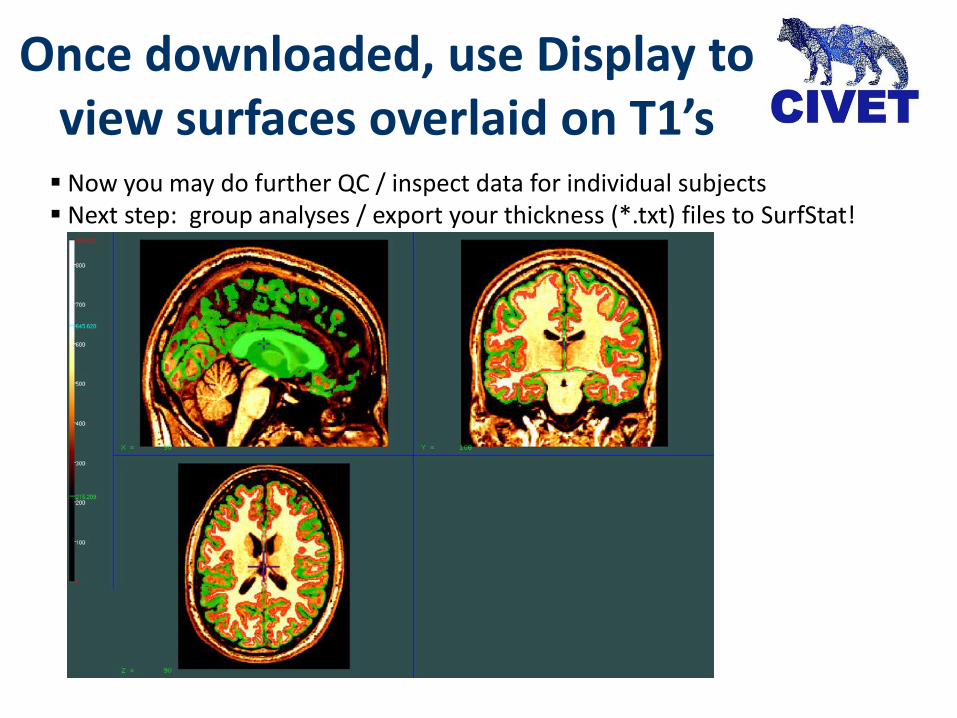
Once downloaded, use Display to view surfaces overlaid on T1’s Now you may do further QC / inspect data for individual subjects Next step: group analyses / export your thickness (*.txt) files to SurfStat!

Who is behind CIVET?
What is CIVET?
What’s new in CIVET 2.0?
Preparing your files for CIVET
Running CIVET using the CBRAIN web-interface
How do I make sense of my output? (Quality Control)
Important Links
Outline
Important links:
CBRAIN account requests: https://cbrain.mcgill.ca/contact
CBRAIN login page: https://portal.cbrain.mcgill.ca
CIVET documentation:
http://www.bic.mni.mcgill.ca/ServicesSoftware/CIVET
Help converting your files to MINC:
http://www.bic.mni.mcgill.ca/ServicesSoftware/ConvertingOtherFileTypesToMINC
SurfStat: http://www.math.mcgill.ca/keith/surfstat/
http://www.bic.mni.mcgill.ca/ServicesSoftware/StatisticalAnalysesUsingSurfstatMatlab