cloud connect guide - siica.sharpusa.com...cloud connect guide cloud connect the cloud connect...
TRANSCRIPT
Cloud Connect Guide
2
Cloud Connect Guide
TABLE OF CONTENTS
ABOUT THIS GUIDEThis guide details methods to link the cloud services and exchange data by using the connector applications installed in the machine.This guide also details, methods to use the machine with "Google Cloud Print" which is a printing service provided by Google LLC.Please note• This guide assumes that the persons who install and use this product have a working knowledge of their computer
and web browser.• For information on your operating system or web browser, please refer to your operating system guide or web browser
guide, or the online Help function.• The explanations of screens and procedures are primarily for Internet Explorer®. The screens may vary depending on
the version of the operating system or the software application.• Wherever "MX-xxxx" appears in this guide, please substitute your model name for "xxxx".• Considerable care has been taken in preparing this manual. If you have any comments or concerns about the manual,
please contact your dealer or nearest authorized service representative.• This product has undergone strict quality control and inspection procedures. In the unlikely event that a defect or other
problem is discovered, please contact your dealer or nearest authorized service representative.• Aside from instances provided for by law, SHARP is not responsible for failures occurring during the use of the
product or its options, or failures due to incorrect operation of the product and its options, or other failures, or for any damage that occurs due to use of the product.
Warning• Reproduction, adaptation or translation of the contents of the manual without prior written permission is prohibited,
except as allowed under copyright laws.• All information in this manual is subject to change without notice.
Illustrations, operation panel, touch panel, and Web pages in this guideThe peripheral devices are generally optional, however, some models include certain peripheral devices as standard equipment.For some functions and procedures, the explanations assume that devices other than the above are installed.Depending on the content, and depending on the model and what peripheral devices are installed, this may not be usable. For details, refer to the User’s Manual.The explanations in this manual are based on American English and the North American version of the software.Software for other countries and regions may vary slightly from the North American version.
ABOUT THIS GUIDE . . . . . . . . . . . . . . . . . . . . . . . . . . . . . . . . . . . . . . . . . . . . . . . . . . . . . . . . . . . . . . . . . . . . . . . . . . . . . . . . . . . 2
CLOUD CONNECT. . . . . . . . . . . . . . . . . . . . . . . . . . . . . . . . . . . . . . . . . . . . . . . . . . . . . . . . . . . . . . . . . . . . . . . . . . . . . . . . . . . . . 4• USE CLOUD CONNECT . . . . . . . . . . . . . . . . . . . . . . . . . . . . . . . . . . . . . . . . . . . . . . . . . . . . . . . . . . . . . . . . . . . . . . . . . . . .. . . . . . 4
SENDING A SCANNED DOCUMENT BY GMAIL OR EXCHANGE . . . . . . . . . . . . . . . . . . . . . . . . . . . . . . . . . . . . . . . . . . . . . . . 7• GMAIL CONNECT FUNCTION . . . . . . . . . . . . . . . . . . . . . . . . . . . . . . . . . . . . . . . . . . . . . . . . . . . . . . . . . . . . . . . . . . . . . . .. . . . . . 7• EXCHANGE CONNECT FUNCTION. . . . . . . . . . . . . . . . . . . . . . . . . . . . . . . . . . . . . . . . . . . . . . . . . . . . . . . . . . . . . . . . . . .. . . . . . 8• SETTINGS SCREEN . . . . . . . . . . . . . . . . . . . . . . . . . . . . . . . . . . . . . . . . . . . . . . . . . . . . . . . . . . . . . . . . . . . . . . . . . . . . . . .. . . . . . 9
CONFIGURING CLOUD CONNECT AND E-MAIL CONNECT SETTINGS . . . . . . . . . . . . . . . . . . . . . . . . . . . . . . . . . . . . . . . . 11• ENABLE CLOUD CONNECT AND E-MAIL CONNECT . . . . . . . . . . . . . . . . . . . . . . . . . . . . . . . . . . . . . . . . . . . . . . . . . . . .. . . . . 11• CONNECT CLOUD CONNECT AND E-MAIL CONNECT TO THE NETWORK . . . . . . . . . . . . . . . . . . . . . . . . . . . . . . . . . .. . . . . 11
PRINTING BY GOOGLE CLOUD PRINT. . . . . . . . . . . . . . . . . . . . . . . . . . . . . . . . . . . . . . . . . . . . . . . . . . . . . . . . . . . . . . . . . . . 13• ABOUT GOOGLE CLOUD PRINT SETTINGS . . . . . . . . . . . . . . . . . . . . . . . . . . . . . . . . . . . . . . . . . . . . . . . . . . . . . . . . . . .. . . . . 14
• The display screens, messages, and key names shown in the manual may differ from those on the actual machine due to product improvements and modifications.
• The touch panel, illustrations, and setting screens in this manual are for reference only, and may vary by model, installed options, settings changed from the default state, and country or region.
• This manual assumes that a full-color machine is being used. Some of the explanations may not apply to a monochrome machine.
3
Cloud Connect Guide
Cautions when using the Cloud Connect function• Print results using the Cloud Connect function may not have the same quality as print results using other print
methods (printer driver, etc.).The contents of some files may cause incorrect printing or prevent printing.
• It may not be possible to use some or all Cloud Connect functions in some countries or regions where the machine is used.
• It may not be possible to use the Cloud Connect function in some network environments. Even when the Cloud Connect function can be used, processing may require a longer time or may be interrupted.
• We do not extend any guarantees regarding the continuity or connection stability of the Cloud Connect function.With the exception of instances provided for by law, we bear absolutely no responsibility for any damages or loss suffered by the customer due to the above.
Cautions when using the Google Cloud Print• In some cases the print quality using Google Cloud Print may not be the same as the print quality using other print
methods (printer driver, etc.). The content of some files may not print correctly or may not be printable.
• In some countries and regions, the machine may not be able to use some or all of the Google Cloud Print connection functions.
• In some network environments, the machine may not be able to use the Google Cloud Print connection functions, or printing may be slow or may stop before the job is completed.
• Sharp Corporation does not in any way guarantee the continuity or stability of Google Cloud Print connection functions. With the exception of instances provided for by law, Sharp Corporation bears no responsibility for any damages or loss due to the customer’s use of these functions.
4
Cloud Connect Guide
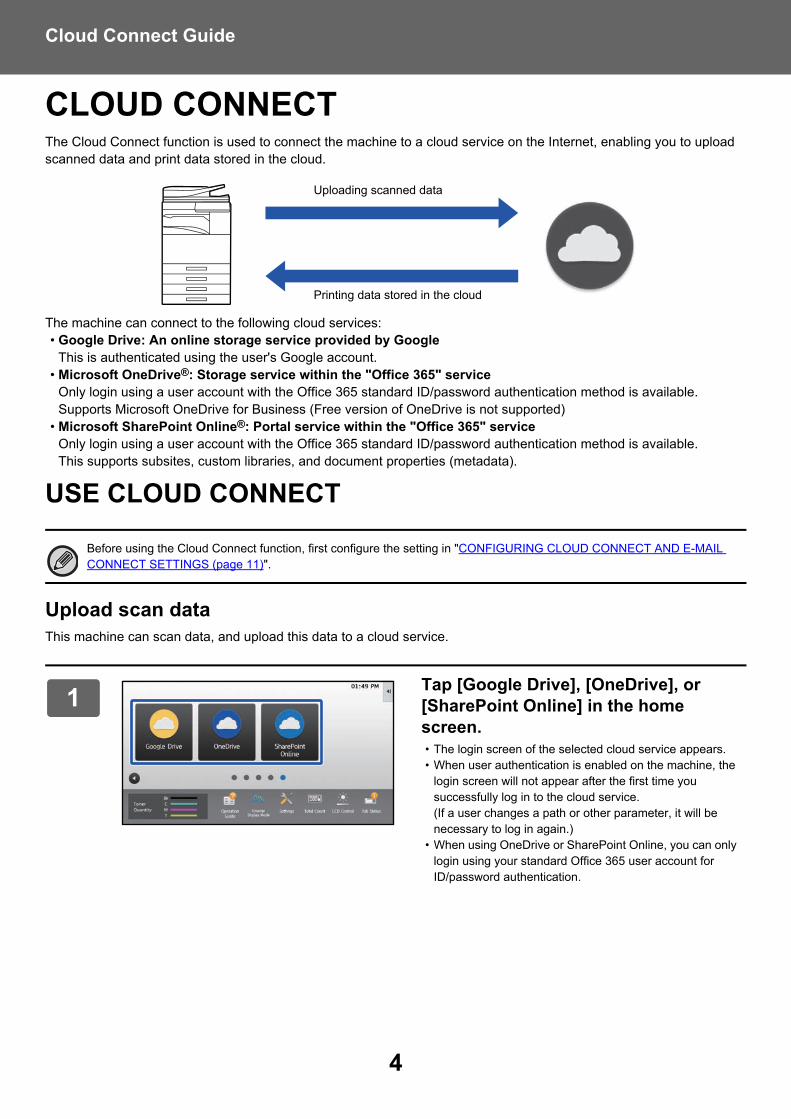
CLOUD CONNECTThe Cloud Connect function is used to connect the machine to a cloud service on the Internet, enabling you to upload scanned data and print data stored in the cloud.
The machine can connect to the following cloud services:• Google Drive: An online storage service provided by Google
This is authenticated using the user's Google account.• Microsoft OneDrive®: Storage service within the "Office 365" service
Only login using a user account with the Office 365 standard ID/password authentication method is available.Supports Microsoft OneDrive for Business (Free version of OneDrive is not supported)
• Microsoft SharePoint Online®: Portal service within the "Office 365" serviceOnly login using a user account with the Office 365 standard ID/password authentication method is available.This supports subsites, custom libraries, and document properties (metadata).
USE CLOUD CONNECT
Upload scan dataThis machine can scan data, and upload this data to a cloud service.
Before using the Cloud Connect function, first configure the setting in "CONFIGURING CLOUD CONNECT AND E-MAIL CONNECT SETTINGS (page 11)".
1Tap [Google Drive], [OneDrive], or [SharePoint Online] in the home screen.• The login screen of the selected cloud service appears.• When user authentication is enabled on the machine, the
login screen will not appear after the first time you successfully log in to the cloud service.(If a user changes a path or other parameter, it will be necessary to log in again.)
• When using OneDrive or SharePoint Online, you can only login using your standard Office 365 user account for ID/password authentication.
Printing data stored in the cloud
Uploading scanned data
5
Cloud Connect Guide
Print dataYou can print data from cloud services on the machine.
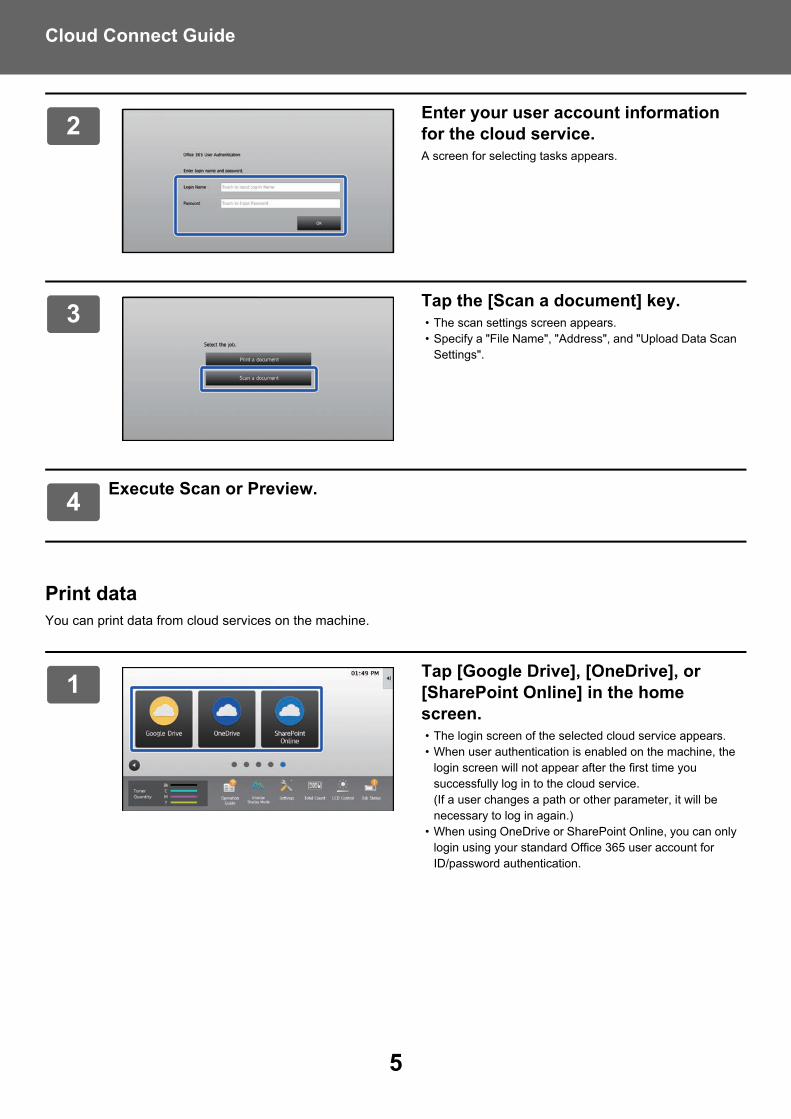
2Enter your user account information for the cloud service.A screen for selecting tasks appears.
3Tap the [Scan a document] key.• The scan settings screen appears.• Specify a "File Name", "Address", and "Upload Data Scan
Settings".
4Execute Scan or Preview.
1Tap [Google Drive], [OneDrive], or [SharePoint Online] in the home screen.• The login screen of the selected cloud service appears.• When user authentication is enabled on the machine, the
login screen will not appear after the first time you successfully log in to the cloud service.(If a user changes a path or other parameter, it will be necessary to log in again.)
• When using OneDrive or SharePoint Online, you can only login using your standard Office 365 user account for ID/password authentication.
6
Cloud Connect Guide
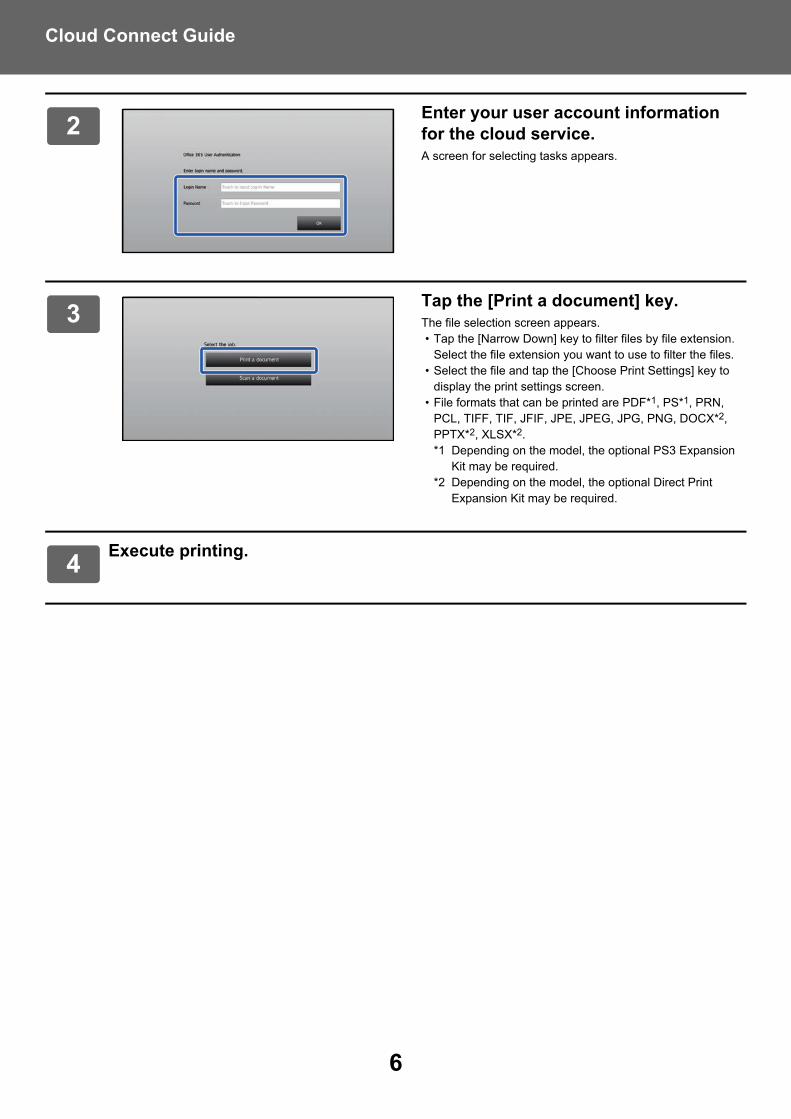
2Enter your user account information for the cloud service.A screen for selecting tasks appears.
3Tap the [Print a document] key.The file selection screen appears.• Tap the [Narrow Down] key to filter files by file extension.
Select the file extension you want to use to filter the files.• Select the file and tap the [Choose Print Settings] key to
display the print settings screen.• File formats that can be printed are PDF*1, PS*1, PRN,
PCL, TIFF, TIF, JFIF, JPE, JPEG, JPG, PNG, DOCX*2, PPTX*2, XLSX*2.*1 Depending on the model, the optional PS3 Expansion
Kit may be required.*2 Depending on the model, the optional Direct Print
Expansion Kit may be required.
4Execute printing.
7
Cloud Connect Guide
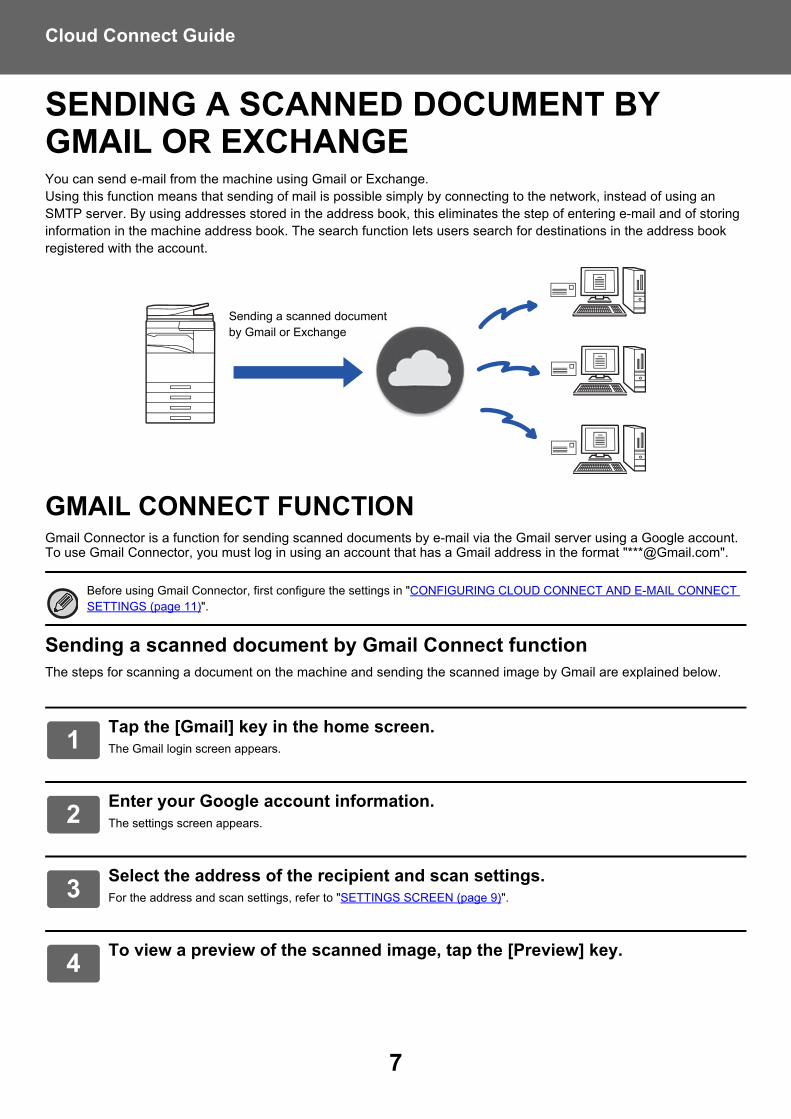
SENDING A SCANNED DOCUMENT BY GMAIL OR EXCHANGEYou can send e-mail from the machine using Gmail or Exchange.Using this function means that sending of mail is possible simply by connecting to the network, instead of using an SMTP server. By using addresses stored in the address book, this eliminates the step of entering e-mail and of storing information in the machine address book. The search function lets users search for destinations in the address book registered with the account.
GMAIL CONNECT FUNCTIONGmail Connector is a function for sending scanned documents by e-mail via the Gmail server using a Google account.To use Gmail Connector, you must log in using an account that has a Gmail address in the format "***@Gmail.com".
Sending a scanned document by Gmail Connect functionThe steps for scanning a document on the machine and sending the scanned image by Gmail are explained below.
Before using Gmail Connector, first configure the settings in "CONFIGURING CLOUD CONNECT AND E-MAIL CONNECT SETTINGS (page 11)".
1Tap the [Gmail] key in the home screen.The Gmail login screen appears.
2Enter your Google account information.The settings screen appears.
3Select the address of the recipient and scan settings.For the address and scan settings, refer to "SETTINGS SCREEN (page 9)".
4To view a preview of the scanned image, tap the [Preview] key.
Sending a scanned document by Gmail or Exchange
8
Cloud Connect Guide
EXCHANGE CONNECT FUNCTIONThe Exchange Connect function uses Exchange Server and Exchange Online provided by Microsoft to send scanned files by e-mail.You can connect to "Microsoft Exchange Server 2010/2013" or "Exchange Online (Cloud Service)".
Sending a scanned document by ExchangeThe steps for scanning a document on the machine and sending the scanned image by Exchange are explained below.
5Tap the [Start] key.The sent e-mail is managed in “Sent Mail” of Gmail.
Before using Exchange Connect function, first configure the settings in "CONFIGURING CLOUD CONNECT AND E-MAIL CONNECT SETTINGS (page 11)".
1Tap the [Exchange (E-Mail)] key in the home screen.The Exchange login screen appears.
2Enter the user name and password used to connect to the Exchange server or the Exchange Online.The settings screen appears.
3Select the address of the recipient and scan settings.For the address and scan settings, refer to "SETTINGS SCREEN (page 9)".
4To view a preview of the scanned image, tap the [Preview] key.
5Tap the [Start] key.The sent e-mail is managed in “Sent Mail” of Exchange.
9
Cloud Connect Guide
SETTINGS SCREENThis section explains the settings screen of Gmail Connect function and Exchange Connect function.You can use this screen to enter recipient settings, the e-mail subject, a message, and the name of the file to be attached. You can also change the account used to log in and select advanced scan settings.
Recipient settings• Enter the desired recipient addresses in the To, Cc, and Bcc text boxes.
To enter multiple addresses, separate the addresses by commas. You can also search for addresses in the address book.
• If set [Default Address Setting] in "Settings (administrator)" → [System Settings] → [Image Send Settings] → [Default Address Setting] and the recipient address is an E-mail address, the address is selected when the connector is activated.
• You can search and select your address from the address book of login user by tapping [Find My Address] button.
Search screenYou can tap next to the To, Cc, and Bcc text boxes to search for a saved address.Enter the text you want to find in the text box and tap [Search Start]. A list of the addresses that begin with the entered text will appear. You can select multiple addresses from the list.When searching for an address, you can switch between the regular address book and a global address book.To search again, enter the text you want to find in the text box and tap [Search Again].
Checking an addressYou can tap the [Address List] key to show the list of addresses to be used.You can check the addresses in To, Cc, and Bcc.You can also remove addresses from the list. To remove an address, select the address and tap the [Delete] key.
Subject, message, and file name settingsEnter a subject for the e-mail, a message, and the file name of the scanned image to be attached. When [Send Destination Link] is checked, the scanned data is not sent, it is saved on the hard disk of the machine and the URL of that file is sent to an address.
Changing the login accountYou can change the account currently used for login to a different account.Tap the [Switch Accounts] key to open the Gmail or Exchange login screen, and enter the user name and password of the account that you want to use.
When a contact is selected in the list, no additional contacts can be directly entered.
When an address is entered in To, Cc, or Bcc, appears. To cancel all addresses that are displayed, tap .
10
Cloud Connect Guide
Scan settingsTo select advanced scan settings, tap the [Detail] key.
Details screenThe scan settings below can be selected.
*1 Depending on the model, the Enhanced Compression Kit may be required.*2 Depending on the model, the OCR Expansion Kit may be required.*3 On models that have OCR function as standard or that have the OCR Expansion Kit mounted, this item will not be displayed.*4 Depending on the model, installation of the Enhanced Compression Kit or OCR Expansion Kit may be required.
Gmail is a trademark of Google LLC.
Setting Description
Color Mode Auto, Mono2, Grayscale, Full Color
Resolution 100x100dpi, 150x150dpi, 200x200dpi, 300x300dpi, 400x400dpi, 600x600dpi
Format
[Color/Grayscale] tabFormat
PDF, Compact PDF*1, Compact PDF (Ultra Fine)*1, PDF/A-1a*2, PDF/A-1b*2, PDF/A*3, Compact PDF/A-1a*4, Compact PDF/A-1b*4, Compact PDF/A*1, 3, Compact PDF/A-1a (Ultra Fine)*4, Compact PDF/A-1b (Ultra Fine)*4, Compact PDF/A (Ultra Fine)*1, 3, Encrypt PDF, Encrypt/Compact PDF*1, Encrypt/Compact PDF (Ultra Fine)*1, TIFF, JPEG, XPS, TXT(UTF-8)*2, RTF*2, DOCX*2, XLSX*2, PPTX*2
OCR Settings*2
Language Setting, Font, Detect Image Direction, File Name Auto Extraction, OCR AccuracyCompression Ratio
Low, Middle, High, Bk Letter Emphasis[B/W] tabFormat
PDF, PDF/A-1a*2, PDF/A-1b*2, PDF/A*3, Encrypt PDF, TIFF, XPS, TXT(UTF-8)*2, RTF*2, DOCX*2, XLSX*2, PPTX*2
OCR Settings*2
Language Setting, Font, Detect Image Direction, File Name Auto Extraction, OCR AccuracyCompression Mode
None, MH (G3), MMR (G4)
Original
Scan SizeAuto[AB] tab
A5, A5R, B5, B5R, A4, A4R, B4, A3, 216 x 340, 216 x 343, Long Size[Inch] tab
5-1/2" x 8-1/2", 8-1/2" x 11"R, 11" x 17", 5-1/2" x 8-1/2"R, 8-1/2" x 13", 8-1/2" x 13-1/2", 8-1/2" x 11", 8-1/2" x 14", Long Size
Image OrientationPortrait, LandscapeDuplex Setup1-Sided, Book, Tablet
Job Build Enabled, Disabled
Blank Page Skip Off, Skip Blank Page, Skip Blank and Back Shadow
• E-mail that is sent may be limited by the settings and specifications of the Gmail or Exchange server.
• In some network environments, the machine may not be able to use the Gmail or Exchange connection functions, or sending may be slow or may stop before the job is completed.
• Sharp Corporation does not in any way guarantee the continuity or stability of Gmail or Exchange connection functions.With the exception of instances provided for by law, Sharp Corporation bears no responsibility for any damages or loss due to the customer’s use of these functions.
11
Cloud Connect Guide
CONFIGURING CLOUD CONNECT AND E-MAIL CONNECT SETTINGSThis section explains the settings that must be configured before using the Cloud Connect function and E-mail Connect function.
ENABLE CLOUD CONNECT AND E-MAIL CONNECTEnable the Cloud Connect or Email Connect that you want to use.
(1) In "Settings (administrator)", select [System Settings] → [Sharp OSA Settings] → [External Service Connect]."External Service Connect" page appears.
(2) Select the connector that you want to use, and tap [Enable] key.Selected connector is shown on the home screen.Additionally, the Cloud Connect and E-mail Connect functions enabled in system settings [Sharp OSA Settings] → [Standard Application Settings] and [Embedded Application Settings] are stored.
CONNECT CLOUD CONNECT AND E-MAIL CONNECT TO THE NETWORKSet the settings for connecting to the cloud service and the initial value of the connector.
(1) In "Settings (administrator)", select [System Settings] → [Sharp OSA Settings] → [Embedded Application Settings]."Embedded Application Settings" page appears to show the installed connector.
(2) Tap the connector that you want to configure."Embedded Application information" page appears.
(3) Tap the [Detail] button.The detailed setting screen appears.Set the required items and tap [Submit].
Embedded Application Settings
Google DriveFile NameEnter File Name.
Include Date in File NameSpecify whether or not to add a save date after the file name.
OneDriveFile NameEnter File Name.
Include Date in File NameSpecify whether or not to add a save date after the file name.
Models with the application communication function as standard and that have a Application Communication Module installed will have SharePoint Online, OneDrive, and Google Drive items displayed.
Using [Export/Import] is possible to save the settings of the current embedded application and import its settings.
12
Cloud Connect Guide
SharePoint OnlineDomain NameSet this when using the SharePoint Online Connect function.Enter your Office 365 domain name (the ***** part of ******.onmicrosoft.com).
Site URLTo connect to a subsite or site collection of the SharePoint Online server, enter the URL.
File NameEnter File Name.
Include Date in File NameSpecify whether or not to add a save date after the file name.
GmailSubjectYou can save a preset subject for transmitted files.
Body TextYou can save a preset e-mail subject and body message (fixed text).
File NameEnter File Name.
Include Date in File NameSpecify whether or not to add a save date after the file name.
ExchangeHostnameEnter the host name (FQDN) of the Exchange server.
Use Exchange OnlineTo connect to Exchange Online, set this to .
SubjectYou can save a preset subject for transmitted files.
Body TextYou can save a preset e-mail subject and body message (fixed text).
File NameEnter File Name.
Include Date in File NameSpecify whether or not to add a save date after the file name.
Cache Authentication Information for External Service ConnectThis setting is available if user authentication is set, and [Store User Information] is enabled.In "Settings (administrator)", select [System Settings] → [Authentication Settings] → [Default Settings] → [Cache Authentication Information for External Service Connect].Set whether or not authentication information for connection to the cloud is retained as cache information.When this setting is enabled, the authentication information of a successfully authenticated user is retained to enable smooth authentication when the user subsequently logs in.When this setting is disabled, the previously retained cloud connection authentication information of all users is deleted and authentication information is no longer retained.
To delete cloud connect cache information:In "Settings (administrator)", select [User Control] → [User Settings] → [User List] → [Delete Your Information for External Service Connect] to delete the external service connect cache used by the logged in user.In "Settings (administrator)", select [User Control] → [User Settings] → [User List] → [Delete All Information for External Service Connect] to delete all external service connect cache information.
13
Cloud Connect Guide
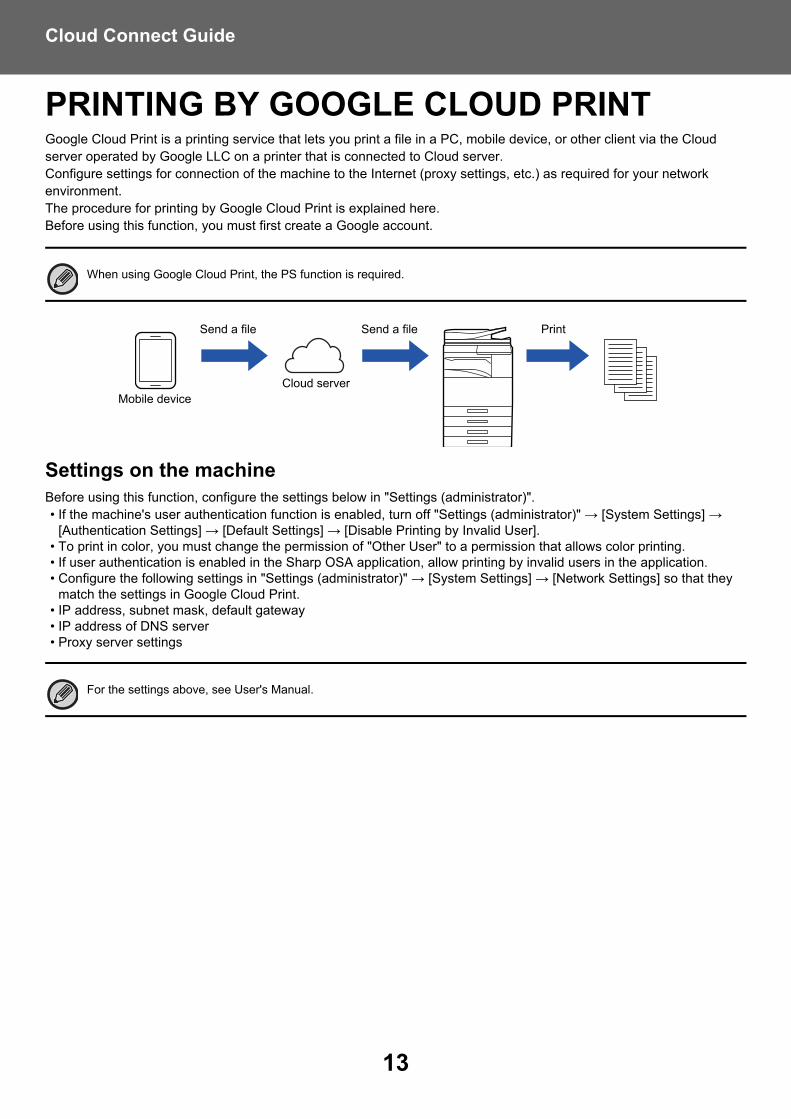
PRINTING BY GOOGLE CLOUD PRINTGoogle Cloud Print is a printing service that lets you print a file in a PC, mobile device, or other client via the Cloud server operated by Google LLC on a printer that is connected to Cloud server.Configure settings for connection of the machine to the Internet (proxy settings, etc.) as required for your network environment.The procedure for printing by Google Cloud Print is explained here.Before using this function, you must first create a Google account.
Settings on the machineBefore using this function, configure the settings below in "Settings (administrator)".• If the machine's user authentication function is enabled, turn off "Settings (administrator)" → [System Settings] →
[Authentication Settings] → [Default Settings] → [Disable Printing by Invalid User].• To print in color, you must change the permission of "Other User" to a permission that allows color printing.• If user authentication is enabled in the Sharp OSA application, allow printing by invalid users in the application.• Configure the following settings in "Settings (administrator)" → [System Settings] → [Network Settings] so that they
match the settings in Google Cloud Print.• IP address, subnet mask, default gateway• IP address of DNS server• Proxy server settings
When using Google Cloud Print, the PS function is required.
For the settings above, see User's Manual.
Cloud server
Send a file
Mobile device
Send a file Print
14
Cloud Connect Guide
ABOUT GOOGLE CLOUD PRINT SETTINGSTo use the machine with Google Cloud Print, the machine must be registered with Google Cloud Print Server.Set the required items in "Google Cloud Print Settings" in "Settings (administrator)".
Google Cloud Print Settings
Google Cloud Print
Status"Not Set", "Registering", "Registered", or "Offline" will appear.Specify whether or not Google Cloud Print is used.Always Retain PrintsThe retention print function can be enabled in Google Cloud Print.When this setting is enabled, Google Cloud Print jobs are saved in the "Main Folder" of the document filing function of the machine.When this setting is disabled, the machine starts printing immediately after it receives a Google Cloud Print job.
E-mailThis shows the e-mail address of the Google account of the administrator who registered the machine in Google Cloud Print.
Device NameSet the device name that appears on the client device.This setting is the same as the device name on the machine information page of the status.
Register with Google Cloud PrintThis appears when the "Status" is "Not Set".Tap this key to show the registration information on the operation panel.Open the Web browser on your device and go to the URL that is displayed.When the Google account login page appears in your Web browser, enter the Google account information of the administrator of the machine.Follow the instructions that appear after you log in to complete the registration procedure for the machine.When you have successfully completed registration, the “Status” changes to “Registered”.
Delete from Google Cloud PrintThis appears when the "Status" is "Registered".Tap this key to delete the machine's information from the Cloud server, and the Google Cloud Print settings from the machine.
Registration URL/QR codeThis appears when the "Status" is "Registering".Directly enter the URL for registration in the client device, or scan the QR code and access the registration page.When you complete final registration on the registration page, you will be able to use Google Cloud Print.
Complete the registration procedure within 10 minutes after the registration information is shown. If you fail to complete registration within this time, the status will change from “Registering” back to “Not Set”.
15
Cloud Connect Guide
Print settingsYou can print from an application that supports Google Cloud Print.Functions that can be enabled from the application are as follows.
*1Depending on the model, this item may not be available.*2Can be used when an inner finisher, finisher, or saddle stitch finisher is installed.
Set address without using proxyIn "Settings (administrator)", select [System Settings] → [Network Settings] → [Proxy Setting] → [Address without Using Proxy].Specify exception addresses for a proxy that is used in the external service connect function and Google Cloud Print.[Entry method]1) Can be set using a host name or an IP address.2) When using a host name, you can use a wildcard (*) at the beginning of the domain name.
(Example: "*example.□□□" (equivalent to "example.□□□", "sub.example.□□□", "subexample.□□□", etc.)3) When using an IP address, you can use a wildcard (*) at the end of the address.
(Example: "10*" (equivalent to 100.nnn.nnn.nnn to 109.nnn.nnn.nnn)If the Sharp OSA application using "HTML Browser 3.5" is set to an exception address, rule (3) cannot be used.
4) You can use a separator (semicolon (;)) to enter multiple addresses.(Example: "99.99.99.99;example.□□□")
Item Description
Print Color Auto, Black & White, Color
2-Sided Print None, Book, Tablet
Orientation Portrait, Landscape
Copies 1-999
Resolution 600x600, 1200x1200*1
Fit Page On, Off
Page Select -
Paper SizeA4, A3, A5, B4, B5, A3W, Ledger, Legal, Letter, Invoice, Executive, Foolscap, 8 1/2 x 13 2/5, 216 x 343, 8K, 16K
Paper Tray Varies depending on the machine configuration
Output Tray Center Tray, Right Tray, Upper Tray, Middle Tray, Lower Tray
Print per Unit On, Off
Staple*2 On, Off
Google Cloud Print uses the XMPP (5222) port or HTTPS (443) port for communication.Check the settings for restriction of access from the Internet, the machine administrator password, and mDNS as needed.

2018H-EN1