contact: fei gao ([email protected]) office of information technology montclair state...
Post on 21-Dec-2015
216 views
TRANSCRIPT

Contact: Fei Gao ([email protected])
Office of Information Technology
Montclair State University
Creating Professional ePortfolios with
Google Sites

Overview
This tutorial will show you how to create your ePortfolio with Google Sites (http://sites.google.com/).
Google Sites allow users to create and edit websites online in a quick, easy and efficient way. Google Sites also allow users to embed multimedia files such as .swf, .mov and .pdf.
Before you start creating your own portfolio, please check out the sample portfolio created with Google Sites at
http://sites.google.com/site/sampleprofportfolio/

If you don’t have a gmail account yet, you need to create one at https://www.google.com/accounts/NewAccount . Then, go to http://sites.google.com/ and sign into your account.
Create an Account

When you are logged in at http://sites.google.com/, click “create site”.
Create a Site

Choosing your site name will also auto-populate your site URL. You do have the option to change the site URL to something else if you wish.
Please make your site public here.
Customize a Site

Edit Home Page
Then, you can edit the Home page you just created by adding image and welcome info.

Create a New Page
IMPORTANT: The pages you created will automatically show up on the Navigation bar, but probably NOT in a desired order.
Please DON’T change the order until you have added all the pages. I will show you how to modify page order in the Navigation bar at the end of this tutorial.
Now you can start creating new pages.
You are suggested to create all the pages first, and then fill in the content after all pages are created.

This list suggests pages to be included in your ePortfolio.
Create a New Page
Home/Introduction
Resume
Art Teaching Philosophy Statement
Teaching Strategies Statement
Unit Plan Lesson Plan 1 (subpage) Lesson Plan 2 (subpage)
Multicultural Mini-Activities
Mini-Activity 1 (subpage)
Mini-Activity 2 (subpage)
Artist’s Statement
Artist’s Portfolio
Diplomas, Awards and Certificates
Letters of Recommendation
Additional Content

When you click on the “create new page” button, the above page will show up. You can either put the current page at the top level or under a particular page as a subpage.
For example, when you create a “teaching philosophy” or “resume” page, it is usually at the top level. But when you create “lesson plan 1” or “lesson plan 2” page, it should be put as subpages under the “lesson plan” page. Please refer to the sample portfolio for an example.
Create a New Page

If a page is created accidently by mistake, you can go to that page, hit ‘More Actions‘ on the top right corner, and then click ‘Delete Page' to delete it. Then you can create a new page.
If a page is created under the wrong subpage, you can go to that page, hit ‘More Actions‘ on the top right corner, and then click ‘Move Page' to place it as a subpage under a different page.
Create a New Page

If you want to change a subpage back to top level, you can go to that page, hit 'more actions‘ on the top right corner
- Select "Move" from the "More Actions" menu.- In the "Move Page" screen, select the "Site Map" option (link is just below the Search box).- Highlight the first line in the list of pages (this will be the name of your site, and represents the top level).- Click the "Move" button.
Create a New Page

Create Picture Galleries: Prepare Pictures
Please adjust all your pictures in your portfolio to make sure that they are of the same size.
Please add a caption describing the picture at the bottom of each picture. This site - http://wigflip.com/roflbot/ allows you to add a caption to your picture with ease.
You will see a sentence -- “Want no watermark? Use this link ” on that website. Click on the link, and you will be able to add a caption to your picture without the site’s watermark.

Insert a table, and adjust the size of the table based on the number of pictures you have for the gallery.
Create Picture Galleries: Insert a Table

Put your mouse at one cell of the table, and select “Insert-Image”.
Then select “choose file” to upload an image from your local computer.
Finally, click “add image”.
Create Picture Galleries: Insert a Image I

Adjust the “Align” to “C” (center)
Adjust the “Size” to “M” (Medium)
Then, insert another image.
Create Picture Galleries: Insert a Image II
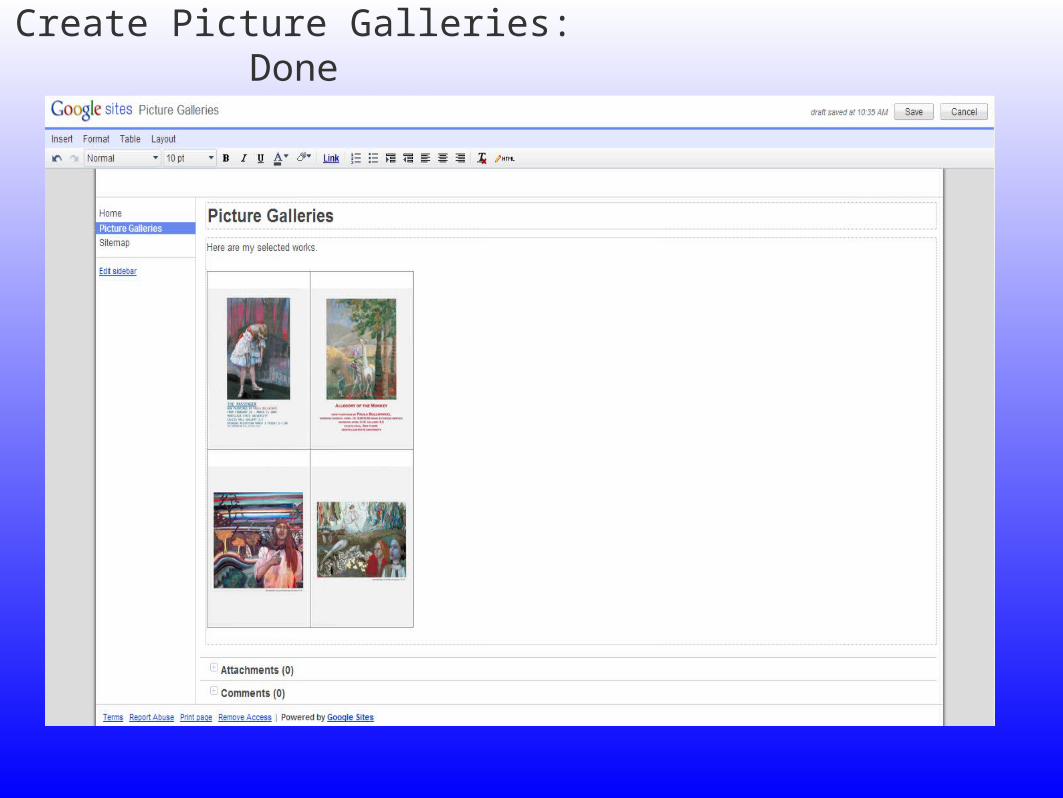
Create Picture Galleries: Done

Attach a Document
First, you can convert a word document to a PDF document at the site:
http://www.texttopdfconverter.com/
To attach it on a webpage, click “Attachments” – “Choose file”, and upload the PDF document from your computer.

Manage Site
Go to “More actions”- “Manage site” to change the appearance, layout and navigation.

A. Change Site Name
Go to “General”.
Change the name and save the changes.

B. Delete Extra attachments
Go to “Attachment”
You can delete the images andattachments that you are not using.

C. Modify Navigation: Change the Width
Go to “Change site layout”,
Change the width from 150 to 250.
Click “ok”

C. Modify Navigation: Change the Order I
Go to “Site layout” – “Edit”, and uncheck the “”Automatically organize my navigation” box.

C. Modify Navigation: Change the Order III
Go to “Site layout” – “Edit”, and uncheck the “”Automatically organize my navigation” box.
Use the arrows to reorder the pages created.
IMPORTANT: Please don’t uncheck the automatic function before you finish adding all the subpages.
Otherwise, if you add a new subpage (e.g. Lesson plan 3), it won’t show up on the navigation bar without the automatically organizing function.

C. Modify Navigation: Done
IMPORTANT:
Don’t forget to “save changes” when you finish editing the navigation.
After you save the changes, you can manage pages, attachments, colors and fonts, and themes on this “manage site” page.
You can also share the editing right of this site with others by using the “Sharing” function.

Help Desk
If you have questions about creating your own site, you can probably find the answers in Google’s user powered community at http://www.google.com/support/forum/p/sites?hl=en .
You can either “post a question” or look for answers under “Discussion Categories”.

Help Desk
If you have any additional questions about this tutorial or about creating your own ePortfolio with Google Sites, please contact Fei Gao, the Instructional Designer at Montclair State University at [email protected].
Thank You!