customizing greenstone user interfac
TRANSCRIPT

Customizing Greenstone User Interface
By Allison B. ZhangWashington Research Library Consortium
October 2008(Last updated November 25, 2008)
IntroductionGreenstone User Interface OverviewFinding the Files You Need to Work OnChanging Text Header
Collection TitleNavigation LinksBanner TitleNavigation Bar
Modifying Graphic HeaderCollection Title ImageNavigation Link ImagesBanner Title ImagesNavigation Bar Images
Modifying Document DisplayBrowse ListsDocument DisplayHyperlinks in Document DisplaySearch Options and Search Results
Adding a Footer
Introduction
This document explains how to customize your Greenstone collection user interface. This is an updatedversion of the document I wrote in August 2003, which was based on Greenstone version 2.38. Thisupdated version is based on Greenstone versions 2.74 and 2.80. You can still access the old documentfor comparison, especially if you want to upgrade your Greenstone from older version to version 2.74 or2.80.
Before you read this document, you should read the Greenstone Digital Library Developer's Guide. Youshould install the system and build a collection. You should be familiar with the Greenstone's structure,terminology, the default user interface, and have basic knowledge and skills in web site design, HTML,and CSS stylesheet.
Greenstone's configuration system is very flexible. There are many ways to customize the user interfacefor your needs. There are many helpful information, guides, and tutorials on how to customize the userinterface on the Greenstone web site. This document will explain the ways we used to customize about40 collections on our web site. I will try not to repeat what the other documents have explained.
Although customizing Greenstone user interface is based on many factors such as contents of acollection, formats of the digital objects, and very important, the metadata design, this document willfocus on how to change the look and feel of Greenstone user interface. For more information about howto design a user interface for digital collections, you can read a new book Creating Digital Collections: APractical Guide by Allison B. Zhang and Don Gourley, available at Amazon.com.
Greenstone User Interface Overview
The Greenstone user interface is not made in a complete HTML file or in one configuration file. We candivide the Greenstone user interface into 6 parts as illustrated in Figure 1. To make changes in differentpart, you need to work on different files.
Customizing Greenstone User Interfac http://www.wrlc.org/dcpc/UserInterface/interface.htm
1 of 24 08/06/2011 16:56

Figure 1: Greenstone User Interface Overview
-- Header. The header can be text or graphics,which requires different configuration in different files.
-- navigation bar that displays search and browse options.The navigation bar can also be displayed as text or as graphicswhich requires different configurations.
-- document display area where you can display anybrowse list or document metadata record.
-- footer that you can put on every page.
Finding the Files You Need to Work On
In order to change the look and feel of the Greenstone user interface, you need to work onthe following files:
Collect.cfg
This is the collection configuration file. You can find this file in the /gsdl/collect/yourcollection name/etc/ directory. Details about how to create this file can be found in the"Developer's Guide, 1.5 Collection configuration file" and "2.3 Formatting Greenstoneoutput". If you use Greenstone Librarian Interface (GLI), the changes in the collect.cfg filecan be made by clicking the Format button and the Design button.
Macro files
A macro file has an extension dm. All macro files are stored in the /gsdl/macros/ directory.Details about how to create macros and macro files can be found in the "Developer'sGuide 2.4 Controlling the Greenstone user interface".
Each macro file contains one or more packages. Each package contains a number ofmacros. A macro starts and ends with a underscore _ and the actions and statements areincluded in curly brackets. It is very important to put the macros under correct packagename. For example,
package Global
_httpiconchalk_ {_httpimg_/chalk.gif}
Customizing Greenstone User Interfac http://www.wrlc.org/dcpc/UserInterface/interface.htm
2 of 24 08/06/2011 16:56

This macro name is httpiconchalk. It is in package Global. The action is to display thechalk.gif image in the directory defined by another macro named httpimg.
You can edit macro files in any text editor and save it as a text file. You can create yourown macros following the format above. Macros will work within the Greenstone system.
In older versions of Greenstone, a macro can be specified for a particular collection with[c=collection name], which will overwrite the default macro. In newer versions ofGreenstone, collection specified macros can be put in a macro file extra.dm that is placedin the collection's /macros/ directory. For example,
/gsdl/collect/your_collection_name/macros/extra.dm
You can edit the extra.dm file in GLI, under Format, by clicking the Collection SpecificMacros link. The macros in the extra.dm file will overwrite the default macros.
If you want to make changes in a default macro, find the macro in a macro file, then findthe package name that contains this macro. Copy the macro and the package name to theCollection Specified Macros (the extra.dm file) in GLI under Format and make changes inthe copied macro. It is wise not to make changes in the original macros unless you wantthe changes affect all your collections. If you want to create a new macro, create it in theextra.dm file because macros in the extra.dm file can only affect one collection. You willalways have the original macro file as reference if you need them.
In the /macros/ directory, you will find over 100 macro files. The most used macro files,package names, and their rolls are listed below. (Package names may be case sensitive.)
Package Name File Name Roles
package Global base.dmenglish.dm
macros that work for all displayscreens.
Package Style style.dm controls the display style for allpages.
Packagedocument
english.dmdocument.dm
macros for the document display.
Package query query.dmenglish.dm
macros for the Search pagedisplay.
Packagepreferences
pref.dmenglish.dm
macros for the Preferences pagedisplay.
Package help help.dmenglish.dm
macros for the Help page display.
Package about about.dmenglish.dm
macros for the About pagedisplay.
Package browse browse.dmenglish.dm
macros for the dynamic browsinginterface.
nav_css.dm macros for using with CSSstylesheet style.css
nav_ns4.dm macros providing a backwardscompatibility for GSDL versions2.62 and earlier that use graphicheaders and none CSS styles.Required to downloadGreenstone Interface Pack (gcip-2.63.zip)
style.css
This is a stylesheet for all Greenstone collections. You can find this file in /gsdl/images/directory. You can also create your own stylesheet.
Image files
All images files can be found in the /gsdl/images directory. You can store the collection
Customizing Greenstone User Interfac http://www.wrlc.org/dcpc/UserInterface/interface.htm
3 of 24 08/06/2011 16:56

specific images files in /gsdl/collect/your collection name/images/ directory.
Changing Text Header
Figure 2: Text Header (click a number to see how to make changes in that part)
Since version 2.63, the default Greenstone header display has been changed to text. Thebiggest advantage for a text based header is the convenience of changing languages asuser's preference. When a user selects a display language from the Preferences page, thetext on the navigation bar will change to the preferred language with the font, color andbackground color you specified in the configuration.
Changing collection title
In GLI, select Format - General and type your collection title in the Collection title field.You can also edit the collect.cfg file and put the title in:
collectionmeta collectionname "Federal TheaterProject Scripts"
The default display of the collection title is lower case for all words. To change this, in the style.css file,find the following style:
p.collectiontitle {font-family: sans-serif, arial, helvetica;font-size: 24px;font-weight: bold;text-transform: lowercase;white-space: nowrap;padding: 8px 0px 12px 2px;background-repeat: repeat-y;background-position: top left;margin:0;}
change text-transform: lowercase to text-transform: none; The collection title will bedisplayed exactly as you typed in the Collection title field. Other values you can use fortext-transform are:
capitalizeThe first character of each word isconverted to uppercase
uppercaseAll characters are converted touppercase
lowercaseAll characters are converted tolowercase
You can also change font, font size, etc. in the p.collectiontitle style.
To change the color of the title, find the following style in style.css and change the color:
a.collectiontitle {color: black;text-decoration: none;}
Customizing Greenstone User Interfac http://www.wrlc.org/dcpc/UserInterface/interface.htm
4 of 24 08/06/2011 16:56
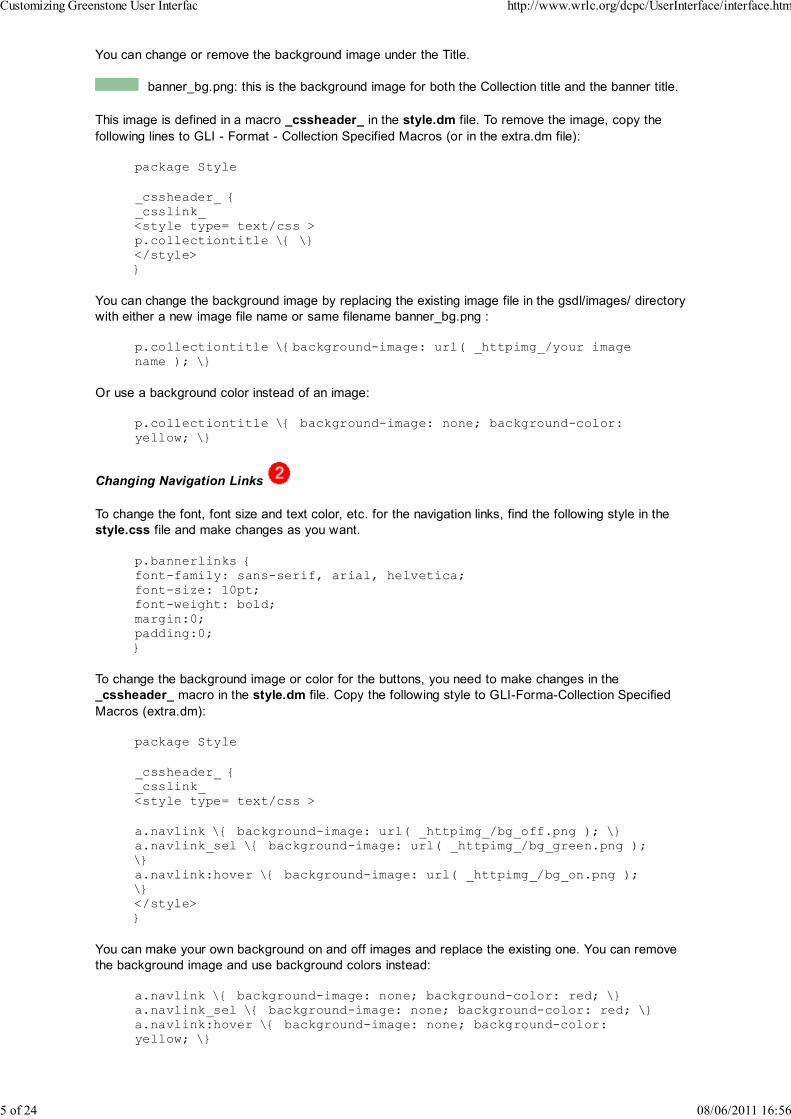
You can change or remove the background image under the Title.
banner_bg.png: this is the background image for both the Collection title and the banner title.
This image is defined in a macro _cssheader_ in the style.dm file. To remove the image, copy thefollowing lines to GLI - Format - Collection Specified Macros (or in the extra.dm file):
package Style
_cssheader_ {_csslink_<style type= text/css >p.collectiontitle \{ \}</style>}
You can change the background image by replacing the existing image file in the gsdl/images/ directorywith either a new image file name or same filename banner_bg.png :
p.collectiontitle \{background-image: url( _httpimg_/your imagename ); \}
Or use a background color instead of an image:
p.collectiontitle \{ background-image: none; background-color:yellow; \}
Changing Navigation Links
To change the font, font size and text color, etc. for the navigation links, find the following style in thestyle.css file and make changes as you want.
p.bannerlinks {font-family: sans-serif, arial, helvetica;font-size: 10pt;font-weight: bold;margin:0;padding:0;}
To change the background image or color for the buttons, you need to make changes in the_cssheader_ macro in the style.dm file. Copy the following style to GLI-Forma-Collection SpecifiedMacros (extra.dm):
package Style
_cssheader_ {_csslink_<style type= text/css >
a.navlink \{ background-image: url( _httpimg_/bg_off.png ); \}a.navlink_sel \{ background-image: url( _httpimg_/bg_green.png );\}a.navlink:hover \{ background-image: url( _httpimg_/bg_on.png );\}</style>}
You can make your own background on and off images and replace the existing one. You can removethe background image and use background colors instead:
a.navlink \{ background-image: none; background-color: red; \}a.navlink_sel \{ background-image: none; background-color: red; \}a.navlink:hover \{ background-image: none; background-color:yellow; \}
Customizing Greenstone User Interfac http://www.wrlc.org/dcpc/UserInterface/interface.htm
5 of 24 08/06/2011 16:56

Note, these styles will affect all buttons on the navigation bar as well.
The wording on the buttons is defined in macros in the english.dm file. To change the text on the buttons,copy following macros to GLI - Format - Collection Specified Macro (extra.dm) and make change as youpreferred.
package Global_linktextHOME_ {HOME}_linktextHELP_ {HELP}_linktextPREFERENCES_ {PREFERENCES}
For example, if you want to change HOME to title case:
_linktextHOME_ {Home}
If you want to change HELP to Online Help:
_linktextHELP_ {Online Help}
Layout of the three buttons is defined in a macro _globallinks_ in the nav_css.dm file. If you want toremove any of the buttons, copy the following macros in the nav_css.dm file to Collection SpecifiedMacro (extra.dm) under package Global and make changes as you desire.
_globallinks_ {_If_( _cgiargu_ ne 1 ,_homelink_) _helplink__preflink_}_homelink_{_navtaborig_(_httppagehome_,_linktextHOME_,_textdescrhome_)}_helplink_{_navtaborig_(_httppagehelp_,_linktextHELP_,_textdescrhelp_)}_preflink_{_navtaborig_(_httppagepref_,_linktextPREFERENCES_,_textdescrpref_)}
For example, to remove the Preference button:
package Global
_preflink_ { }
If you want to remove all three buttons on all pages, make the macro empty:
package Global
_globallinks_ { }
Changing Banner Title
The font, font size, and position, etc. of the banner title is controlled by a style in the style.css file.
p.bannertitle {font-family: sans-serif, arial, helvetica;font-size: 24px;font-weight: bold;margin: 10px 0 0 0;text-transform: lowercase;white-space: nowrap;padding: 6px 2px 10px 0px;background-repeat: repeat-y;background-position: top right; }
The default display is lower case. To change the case to title case, change the following line:
text-transform: lowercase; to text-transform: none;
You can also change other values in this style.
Customizing Greenstone User Interfac http://www.wrlc.org/dcpc/UserInterface/interface.htm
6 of 24 08/06/2011 16:56
The default background image is the same as for the Collection title: banner_bg.png. You can edit the_cssheader_ macro in the extra.dm file by adding and changing the following line:
p.bannertitle \{background-image: url( _httpimg_/banner_bg.png );\}
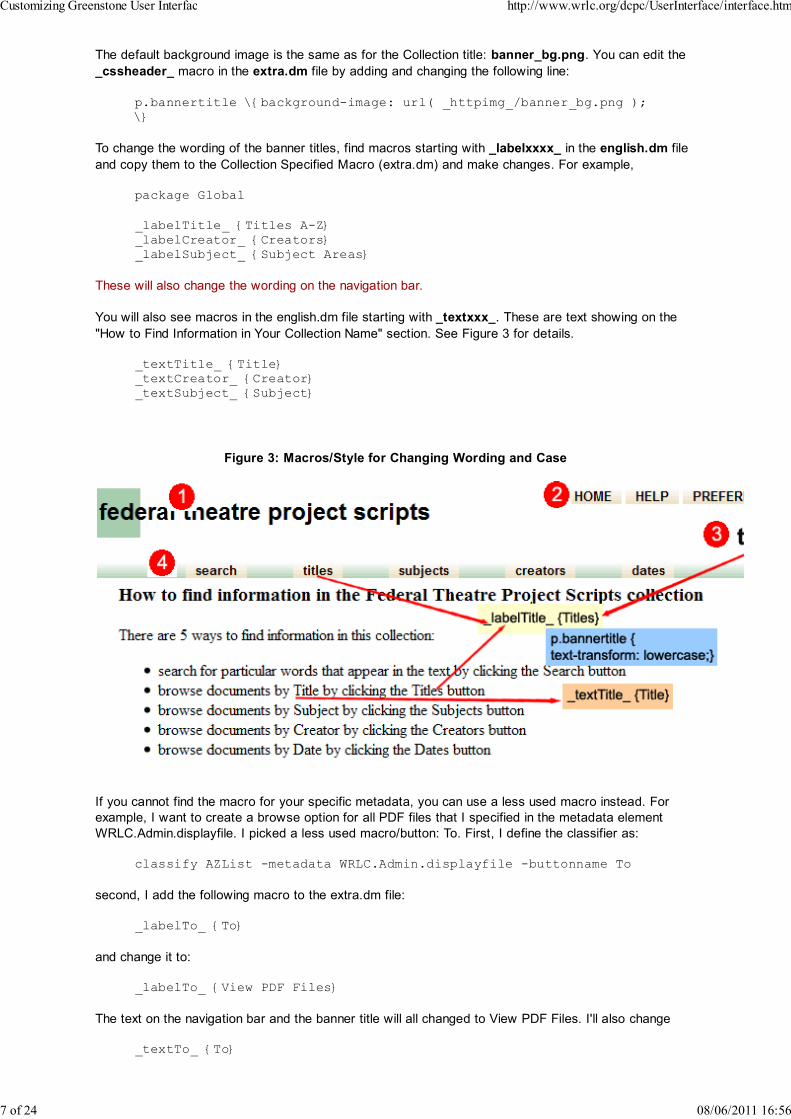
To change the wording of the banner titles, find macros starting with _labelxxxx_ in the english.dm fileand copy them to the Collection Specified Macro (extra.dm) and make changes. For example,
package Global
_labelTitle_ {Titles A-Z}_labelCreator_ {Creators}_labelSubject_ {Subject Areas}
These will also change the wording on the navigation bar.
You will also see macros in the english.dm file starting with _textxxx_. These are text showing on the"How to Find Information in Your Collection Name" section. See Figure 3 for details.
_textTitle_ {Title}_textCreator_ {Creator}_textSubject_ {Subject}
Figure 3: Macros/Style for Changing Wording and Case
If you cannot find the macro for your specific metadata, you can use a less used macro instead. Forexample, I want to create a browse option for all PDF files that I specified in the metadata elementWRLC.Admin.displayfile. I picked a less used macro/button: To. First, I define the classifier as:
classify AZList -metadata WRLC.Admin.displayfile -buttonname To
second, I add the following macro to the extra.dm file:
_labelTo_ {To}
and change it to:
_labelTo_ {View PDF Files}
The text on the navigation bar and the banner title will all changed to View PDF Files. I'll also change
_textTo_ {To}
Customizing Greenstone User Interfac http://www.wrlc.org/dcpc/UserInterface/interface.htm
7 of 24 08/06/2011 16:56

to
_textTo_ {PDF}
The How to Find Information... section will show the following line:
Browse documents by PDF by clicking the View PDF Files button.
Changing Navigation Bar
The font, font size, and color, etc. on the navigation bar is controlled by styles in the style.css file.
div.navbar {min-width: 500px;white-space: nowrap;font-family: sans-serif, arial, helvetica;font-size: 10pt;font-weight: bold;text-transform: lowercase;border: 0;width: 100%; /* for ns4 */}
The default case is lower case as you can see. To change to title case, change the line:
text-transform: lowercase; to text-transform: none;
You can also change font family, size, and so on in this style.
To change text color, find the following style in the style.css file and make changes.
/* bg image set in style macro */a.navlink {vertical-align: top;padding: 0 10px;color: black;text-decoration: none;}
/* bg image set in style macro */a.navlink_sel {vertical-align: top;padding: 0 10px;color: black;text-decoration: none;}
/* bg image set in style macro */a.navlink:visited {color: black;}
Changing the background color or image of the buttons on the navigation bar is the same as changingthe background color or image for the navigation links (#2) in the macro:
_cssheader_ {_csslink_<style type= text/css >a.navlink \{ background-image: url( _httpimg_/your backgroundimage for link ); \}a.navlink_sel \{ background-image: url( _httpimg_/your backgroundimage for selected link ); \}a.navlink:hover \{ background-image: url( _httpimg_/yourbackground image for on link ); \}p.collectiontitle \{ \}p.bannertitle \{background-image: url( _httpimg_/your backgroundimage ); \}
Customizing Greenstone User Interfac http://www.wrlc.org/dcpc/UserInterface/interface.htm
8 of 24 08/06/2011 16:56

</style>}
If you don't want to use any image for the button background, you can use solid colors instead:
a.navlink \{ background-image: none; background-color: red; \}a.navlink_sel \{ background-image: none; background-color: red; \}a.navlink:hover \{ background-image: none; background-color:yellow; \}
The default navigation bar image is controlled by a style under _cssheader_:
div.navbar \{ background-image: url( _httpimg_/bg_green.png ); \}
You can make changes in this style to use your image. If you don't want an image but use a backgroundcolor instead to match the button color on the navigation bar:
div.navbar \{ background-image: none; background-color: red; \}
Changing the wording on the navigation bar is the same as changing wording for the banner title.
_labelTitle_ {Titles AZ}_labelCreator_ {Creators}_labelSubject_ {Subject Areas}
To add a new browse option and a button on the navigation bar, you need to define a new classifier. Forexample,
classify AZCompactList -metadata DC.Creator -buttonname Creator
After you build the collection, you will see a Creator on the navigation bar.
Note, there are two more styles under _cssheader_ macro that I have not mentioned:
body.bgimage \{ background-image: url( _httpimg_/chalk.gif ); \}
is the style for the background image on the left side of each page. You can remove it or use your ownimage instead.
div.divbar \{ background-image: url( _httpimg_/bg_green.png ); \}
is the image for the divider. You can create your own divider line image and replace the bg_green.pngwith your file name. If you don't want to use an image, you can create any style you want. For example:
div.divbar \{ background-image: none; background-color: red;height:1px; \}
creates a thin red line as the divider.
The following table summarizes the files you will need to edit in order to make changes in the textheader.
PartPart
NameGLI OR collect.cfg macro style.css
Collectiontitle
Format --General --Collectiontitle
collectionmetacollectionname
p.collectiontitlea.collectiontitle
Navigationlinks
_cssheader__linktextHOME__linktextHELP__linktextPREFERENCES_globallinks__homelink__helplink_
p.bannerlinksa.navlinka.navlink_sela.navlink:hovera.navlink:visited
Customizing Greenstone User Interfac http://www.wrlc.org/dcpc/UserInterface/interface.htm
9 of 24 08/06/2011 16:56

_preflink_
Bannertitle
Design --BrowsingClassifiers
classify _labelTitle__labelxxxx_
p.bannertitle
Navigationbar
Design --BrowsingClassifiers
classify _cssheader__labelTitle__labelxxxx_
div.navbara.navlinka.navlink_sela.navlink:hovera.navlink:visited
Modifying Graphic Header
Starting from Greenstone 2.63 release, there have been extensive modifications to support HTML2 andCSS. Previously graphic based collection title, banner titles, and navigation buttons, etc. are replaced bytext that is controlled by CSS stylesheet. If you used graphic headers for your collections built onGreenstone 2.62 or earlier versions, after you upgraded to version 2.74 or later, your graphic header willlook messy. You will need to make some changes if you want to keep the graphic header.
replace nav_css.dm with nav_ns4.dm in the /etc/main.cfg file:1.
# The list of display macro files used by this receptionist
macrofiles tip.dm style.dm base.dm query.dm help.dm pref.dmabout.dm \document.dm browse.dm status.dm authen.dm users.dm html.dm \extlink.dm gsdl.dm extra.dm home.dm collect.dm deposit.dmdocs.dm \bsummary.dm gti.dm gli.dm nav_ns4.dm languages.dm \
download the new 'classic interface' pack (Greenstone Interface Pack gcip-2.63.zip), whichcontains most of the old text images. Unzip the file in the gsdl/images/ folder.
2.
The following section explains how to create and make changes in the graphic header.
Figure 4: Graphic Header (click on a number to see how to change in that part)
Collection Title Image
You define the title image in the collect.cfg file, iconcollection using the following format:
iconcollection _httpprefix_/path to your image/image file name
For example:
iconcollection _httpprefix_/collect/auhist/images/auhist.gif
_httpprefix_ is the web address of the directory that Greenstone is installed in. You can use any imageformats that can be displayed on the web, such as.gif, jpg, etc.
Customizing Greenstone User Interfac http://www.wrlc.org/dcpc/UserInterface/interface.htm
10 of 24 08/06/2011 16:56

In GLI, select Format -- General and put the line in URL to 'about page' image:
_httpprefix_/path to your image/image file name
Or click the Browse button to locate the image in your computer.
Navigation Link Images
Layout
The layout of the top navigation buttons/links is controlled by a macro called _globallinks_, which isdefined in the package Global in the nav_ns4.dm file.
Package Global
_globallinks_ {_If_( _cgiargu_ NE 1 ,_homelink_) _helplink__preflink_}
This macro displays three buttons HOME, HELP, and PREFERENCE horizontally on the top as showedin Figure 3. If you want to display the buttons vertically, copy this macro to the extra.dm file and changethe macro to:
package Global
_globallinks_ {_If_( _cgiargu_ NE 1 ,_homelink_)<p> _helplink_<p>_preflink_}
The position of the buttons is controlled by the page layout macro _pagebanner_ under Package Stylein the macro file style.dm.
_pagebanner_{<!-- page banner (\_style:pagebanner\_) --><div id= banner ><div class= pageinfo ><p class= bannerlinks >_globallinks_</p>_bannertitle_</div><div class= collectimage >_imagecollection_</div></div><div class= bannerextra >_pagebannerextra_</div><!-- end of page banner -->}
To change the position of the buttons, you need to make changes in the _pagebanner_ macro. Forexample, the following macros displays the navigation buttons vertically on the right of the header asillustrated in Figure 4.
package Global
_globallinks_ {_If_( _cgiargu_ NE 1 ,_homelink_)<p> _helplink_<p>_preflink_}
package Style
_pagebanner_{<!-- page banner (\_style:pagebanner\_) --><center><table width=_pagewidth_ cellspacing=0 cellpadding=0 border=0><tr><td colspan=3 height=6></td></tr><tr><td width=373 valign=top height=106 align=rightborder=0>_imagecollection_</td><td width=132 valign=top height=106 align=leftborder=0>_bannertitle_</td><td width=90 valign=top height=106 align=rightborder=0>_globallinks_</td>
Customizing Greenstone User Interfac http://www.wrlc.org/dcpc/UserInterface/interface.htm
11 of 24 08/06/2011 16:56

</tr><tr><td colspan=3>_pagebannerextra_</td></tr></table></center><!-- end of page banner -->}
This part of navigation buttons is very flexible. You can change the position of the buttons, add newbuttons, delete buttons, or do not display them at all.
To add a new button, do the following:
1) create a new set of images (cxxxxof.gif and cxxxxon.gif) and save them in the gsdl/images/xx/directory, where /xx/ is the language code for the language you put on the button image. You can savethe images in other directory that you will need to define next.
2) create a set of macros for the image location following the format of the other navigation links (e.g.Help, Preferences). The default macros are in the nav_ns4.dm file. For example, I want to create a newlink to our digital collections page:
package Global
## COLLECT ## top_nav_button ## ccollect ##_httpiconccollectof_ {_httpimg_/en/ccollectof.gif}_httpiconccollecton_ {_httpimg_/en/ccollecton.gif}
3) create a new httppage macro in the package Global in the extra.dm file. This is the URL to openwhen the button is clicked. For example,
_httppagecollect_ {http://www.aladin.wrlc.org/dl/}
4) create a new text macro for the button. This is for the alt text in the <img> tag. For example,
_textdescrcollect_ {WRLC Special Collections}
5) create a link macro
_collectlink_{_gsimage_(_httppagecollect_,_httpiconccollectof_,_httpiconccollecton_,collect,_text
6) add the link macro to the _globallinks_ macro, for example,
_globallinks_ {_If_( _cgiargu_ NE 1 ,_homelink_) _helplink__preflink__collectlink_}
Image Locations
The location macros for the images of the top navigation buttons are defined in the package Global inthe nav_ns4.dm file. All these macros start with _httpicon followed by a c and the button name. I callthe buttons as C buttons. Each button is made of a pair of images, on image and off image, which canbe different colors. When you point your cursor on the button, you will see the color change effect. Tochange the look of the buttons, you need to make two images.
## HOME ## top_nav_button ## chome ##_httpiconchomeof_ {_httpimg_/en/chomeof.gif}_httpiconchomeon_ {_httpimg_/en/chomeon.gif}
## HELP ## top_nav_button ## chelp ##_httpiconchelpof_ {_httpimg_/en/chelpof.gif}_httpiconchelpon_ {_httpimg_/en/chelpon.gif}
To put the images in a directory other than the default directory in /gsdl/images/xx/, you need to put thepath in the curly brackets.
# Collections
Customizing Greenstone User Interfac http://www.wrlc.org/dcpc/UserInterface/interface.htm
12 of 24 08/06/2011 16:56

_httpiconccollectof_ {_httpprefix_/collect/auhist/images/ccollectof.gif}_httpiconccollecton_ {_httpprefix_/collect/auhist/images/ccollecton.gif}
Banner Title Images
Image macros of the banner titles are defined in the nav_ns4.dm file, which all start with _titleimage andthe banner title. For example,
_titleimageabout_ {<img src= _httpiconhabout_ width= _widthhabout_height= _heighthabout_ >}_titleimageTitle_ {<img src= _httpiconhtitle_ width= _widthhtitle_height= _heighthtitle_ >}_titleimageCreator_ {<img src= _httpiconhcreat_ width=_widthhcreat_ height= _heighthcreat_ >}
If you have downloaded the Greenstone Interface Pack (gcip-2.63.zip) and replaced nav_css.dm withnav_ns4.dm in the main.cfg file, you have all image macros you may need, unless you want to create anew banner title. The image filenames all start with an "h_". All you need to do is to:
create the banner images and save them as the original file names located in /images/xx/h_xxxx.gif (jpg, png)change the width (_widthhxxxx_)and the height (_heighthxxxx_)in the relevant macros.
The banner titles for browse options will automatically show up after you set up a classifier. For pagesother than the browse options, such as Search, Help, Preferences, etc. you will need to place a macro_imagethispage_ in the relavent package. For example, you want to display a banner title for theSearch page, copy the following line to your extra.dm file:
package query
_imagethispage_ {<img src= _httpiconhsearch_ width= _widthhsearch_height= _heighthsearch_ >}
There is no default banner title image for the document display pages. I created a new macro andmodified the _imagethispage_ macro in the document package to display a Description banner title inthe content page.
document package
_imagethispage_ {_If_( _iconthispage_ NE , <img src=_httpprefix_/collect/auhist/images/\h_desc.gif >,_iconthispage_)
The locations of the banner title images are defined in package Global in the nav_ns4.dm file. All thesemacros start with _httpicon followed by an h and the banner name. I call them the "H image". You nameyour H images as h_imagename. For example, h_title.gif, h_subj.gif, etc.
## titles AZ ## green_title ## h_title ##
_httpiconhtitle_ {_httpimg_/en/h\_title.gif}
_widthhtitle_ {200}_heighthtitle_ {57}
The width and the height are the number of pixels. You can change them if you changed the width andheight of the image.
To change the location of an image, copy the macro to your extra.dm file and change the path to theimage in the curly brackets.
## titles AZ ## green_title ## h_title ##
_httpiconhtitle_ {_httpprefix_/collect/your path/h\_title.gif}_widthhtitle_ {132}
Customizing Greenstone User Interfac http://www.wrlc.org/dcpc/UserInterface/interface.htm
13 of 24 08/06/2011 16:56

_heighthtitle_ {106}
To change the look of the banner images, you create an image in PhotoShop or a graphic editor andsave it with the same file name.
Navigation Bar Images
The buttons on the navigation bar, except the Search button, are controlled by the classifiers defined inthe collect.cfg file. When you define a classifier in the collect.cfg file (or in GLI, Design -- Browsingclassifiers, then select classifier to add), the corresponding button will appear on the navigation bar. Forexample, the following classifiers will turn on the Title and the Subject buttons.
classify AZList -metadata Titleclassify AZCompactList -mingroup 1 -metadata DC.Subject-buttonname Subject
The buttons are defined in the package Global, in the nav_ns4.dm file, which all start with _imagefollowed by the button name. For example,
_imageTitle_{_gsimage_(_1_,_httpiconttitleof_,_httpiconttitleon_,titles,_navlinkalt_(Title))}
The locations of the images are defined in the macros in the package Global in the nav_ns4.dm file. Allthese macros start with _httpicon and followed by a t and the button name. I call them the "T button".
A button on the navigation bar is made of three images, the off image, the on image, and the gr image.If you want to change the look of the buttons, you need to make three images.
## Titles AZ ## nav_bar_button ## ttitl ##
_httpiconttitlegr_ {_httpimg_/en/ttitlgr.gif}_httpiconttitleof_ {_httpimg_/en/ttitlof.gif}_httpiconttitleon_ {_httpimg_/en/ttitlon.gif}
You also need to change the look of the space image put between the buttons. This space image iscalled bg_green.png and is defined in the package Global in the base.dm file
_httpicontspace_ {_httpimg_/bg_green.png}_heighttspace_ {17}
You can make your own space image and define it in the _httpicontspace_ macro:
_httpicontspace_ {_httpimg_/tspace.gif}_heighttspace_ {17}
The width of the button images is defined as number of pixels. If you have a long text, say "PlaceNames", and the button is wider than the other buttons, you put the width pixels in the curly brackets.When you build the collection, Greenstone will automatically calculate the spaces between the buttonsand the tspace.gif will fill up the spaces.
There are two ways to add a new button: 1) use an existing button name and change the text on theimages; OR 2) create new button images and create new macros for the new button.
1) Use an existing button name for a new button
For example, you need a button called Places and you decided to use an existing button called From forthis new button. Here is what you need to do:
define a classifier in the collect.cfg file or in GLI:
Classify AZCompactList -mingroup 1 -metadata DC.Coverage.spatial-buttonname From
in PhotoShop or a graphic editor, change the text From to Places on all three tfrom images, may
be in different colors, and put them in the /images/xx/ directory.
Customizing Greenstone User Interfac http://www.wrlc.org/dcpc/UserInterface/interface.htm
14 of 24 08/06/2011 16:56

tfromgr.giftfromof.giftfromon.gif
2) Created new images and new macros for a new button
For example, you want to create a new button called Museums. Here is what you need to do:
create three images and save them in the collect/collection name/images directory.create a classifier in the collect.cfg file
classify AZCompactList -mingroup 1 -metadata DC.Corpname-buttonname Museums
create a set of new image macros in the package Global in your extra.dm file using the sameformat as the other image macros:
_imageMuseum_{_gsimage_(_1_,_httpicontmuseumof_,_httpicontmuseumon_,museums,_navlinkalt_(Museum))_imageMuseumgreen_ {<img src= _httpicontmuseumgr_ width=_widthtmuseumx_ border= 0 >}
define the locations of the images and the width of the images
# Museum_httpicontmuseumgr_ {_httpprefix_/collect/auhist/images/tmuseumgr.gif}_httpicontmuseumof_ {_httpprefix_/collect/auhist/images/tmuseumof.gif}_httpicontmuseumon_ {_httpprefix_/collect/auhist/images/tmuseumon.gif}_widthtmuseumsx_ {110}
The following table summarizes the files and macros you will need to edit in order to create a graphicheader using the old style.
PartPart
nameGLI OR Collec.cfg Macro
Collectiontitle
Format --General -- URLto about pageimage
iconcollection
Navigationlinks
_globallinks__pagebanner__httpiconcxxxxof__httpiconcxxxxon_
Bannertitle
Design --BrowsingClassifiers
classify _imagethispage__httpiconhxxxx__widthhxxxx__heighthxxxx__labelXxxx__textXxxx_
Navigationbar
Design --BrowsingClassifiers
classify _imageXxxx__imageXxxxgreen__httpicontxxxxgr__httpicontxxxxof__httpicontxxxxon__httpicontspace__labelXxxx__textXxxx_
Modifying Document Display
The document display area is the place to display browse list, search options and search results,metadata records, and so on.
Customizing Greenstone User Interfac http://www.wrlc.org/dcpc/UserInterface/interface.htm
15 of 24 08/06/2011 16:56

Browse Lists
The browse list display is controlled by the classifier and the Format string in the collect.cfg file. If youwant to setup a classifier in GLI --Design --Browse Classifiers, you can select a type of classifier from alist. The most used classifiers and their roles are as following.
AZList displays a list of documents in alphabetical order regardless of their metadata value. It isgood for displaying a Title list.AZCompactList groups the digital objects that have the same metadata value. For example,Subject, Creator, etc. If you use the AZCompactList, a bookshelf icon will appear indicating thereare more items under this group. The default is 1 document in one group (bookshelf). If you don'tdefine "-mingroup" number, it will display all documents with a bookshelf icon no matter if itcontains a single document or multiple documents.DateList displays date and is good for date metadata in numeric format, e.g. 1987-09-20.
Hierarchy displays a hierarchical list based on the separator you defined for separating the levelsof hierarchy.GenericList displays a list of documents. It groups the documents if they have the same metadatavalue and displays the single document if the metadata value is unique.
The order of the classifiers you put in the collect.cfg file (or GLI --Design --Browse Classifiers)determines the classifier's number. For example,
classify AZList -metadata Titleclassify AZCompactList -mingroup 1 -metadata DC.Subject-buttonname Subjectclassify AZCompactList -mingroup 1 -metadata DC.Coverage.spatial-buttonname Fromclassify DateList -metadata Date
This list defines:
CL1: is the Title list.
CL2: is the Subject list.CL3: is the From list.CL4: is the Date list.
You can format the display list accordingly. In most cases, the following simple format will work for mostAZCompact lists.
Format CL2VList '<td>[link][icon][/link] </td> <td>[link][Title][/link] {If}{[numleafdocs], ([numleafdocs])}'
This displays the subject list as
The simple Date format
Format CL4DateList '<td>[link][icon][/link] </td> <td>[link][Title][/link]</td>'
will display Date as
Customizing Greenstone User Interfac http://www.wrlc.org/dcpc/UserInterface/interface.htm
16 of 24 08/06/2011 16:56

In the format string, you can include any HTML tags, CSS styles and Greenstone macros, just as youdesign a web page. For example, the following format string displays the Title list, which is the firstclassifier, with a thumbnail and brief description, as illustrated in Figure 5.
Format CL1VList‘<td valign=top align=center width=150>[ImageHTML]</td><td width=10> </td><td align=left valign=top><table border=0 width=435 cellpadding=2 cellspacing=0><tr><td width=100 align=left valign=top><b>Title:</b></td><td width=335 align=left valign=top>[link]<b>[Title]</b>[/link]</td></tr><tr><td width=100 align=left valign=top><b>Date:</b></td>{If}{[DC.Date.text], <td width=335 align=left valign=top>[DC.Date.text]</td>,<td valigh=top>[DC.Date.created]</td>}</tr></table></td></tr><tr><td colspan=3><hr align=center size=1 noshade></td></tr>’
Figure 5: Title List
Document Display
When you click on a title on the Title list, you see either a full-text page or a metadata record describingthe digital object. The display of this page is controlled by "Format DocumentHeading" and "FormatDocumentText" in the collect.cfg file. The following format strings (partial) display the record in theformat illustrated in Figure 6.
format DocumentHeading '[Title]'
format DocumentText
'<center>
<table width="_pagewidth_" border="0">
Customizing Greenstone User Interfac http://www.wrlc.org/dcpc/UserInterface/interface.htm
17 of 24 08/06/2011 16:56

<tr> {If}{[DC.Description], <td align="right" valign="top"width="90" class="displaylabel">Description:</td><td align="left"valign="top" >[DC.Description]</td>,<td align="right" valign="top"width="90" class="displaylabel"></td><td align="left"valign="top"></td>} <td valign="top" width="150" rowspan="16"align="center"><span class="font_thumbnail">Click to see largeimage</span><br> <a href="[WRLC.Admin.imgviewer]"target="imgviewer"> <img src="[WRLC.Admin.thumbnail]" border="1"alt="thumbnail"></a> </td> </tr>
{If}{[DC.Subject],<tr><td align="right" valign="top" width="90"class="displaylabel">Subject:</td><td align="left" valign="top"class="displaytext">[sibling(All'<Br> '):DC.Subject]</td></tr>}
{If}{[DC.Subject.persname],<tr><td align="right" valign="top"class="displaylabel">Person:</td><td align="left" valign="top"class="displaytext">[sibling(All'<Br> '):DC.Subject.persname]</td></tr>}
{If}{[DC.Date.text],<tr><td align="right" valign="top"class="displaylabel">Date:</td><td align="left" valign="top"class="displaytext">[DC.Date.text]</td></tr>}
{If}{[DC.Type],<tr><td align="right" valign="top"class="displaylabel">Resource type:</td><td align="left"valign="top" class="displaytext">[sibling(All'<Br> '):DC.Type]</td></tr>}
</font></table>'
Figure 6: Document Display
The font size and color, etc. for the Title is set in style.css by a style:
div.heading_title {font-family: Arial, Helvetica, sans-serif;font-size: 11pt;font-weight: bold;color: #000066;text-align: center;margin-top: 20px;
Customizing Greenstone User Interfac http://www.wrlc.org/dcpc/UserInterface/interface.htm
18 of 24 08/06/2011 16:56

margin-bottom: 0px;}
Hyperlinks in Document Display
You can create links within the document display. For example, in Figure 6, the "Collection" field displaysa link to "American University History Photograph and Print Collection". This is achieved by the followingformatting:
<tr><td align="right" valign="top"class="displaylabel">Collection:</td><tdalign="left" valign="top"class="displaytext"><ahref="http://www.aladin.wrlc.org/gsdl/collect/auhist.shtml">American University HistoryPhotograph and Print Collection</a></td></tr>
You can also link relevant objects within a collection. For example, you want to make the Creator alinked field so that when you click the link you will see all objects created by the same creator. This isachieved by creating a hidden search under the link:
<a href="_httpquery_&q=[cgisafe:DC.Creator]&qt=0&fqf=CR">[DC.Creator]</a>
If there are multiple values for the metadata item, for example, there are more than one subjectheadings and you want to link to each individual subject, you can try the following:
{If}{[DC.Subject],<tr><td align="right" valign="top"width="90" class="displaylabel">Subject:</td><td align="left" valign="top" class="displaytext">{If}{[sibling(1):DC.Subject],<a href="_httpquery_&q=[cgisafe:sibling(1):DC.Subject]&qt=0&fqf=SU">[sibling(1):DC.Subject]</a><Br>}{If}{[sibling(2):DC.Subject],<a href="_httpquery_&q=[cgisafe:sibling(2):DC.Subject]&qt=0&fqf=SU">[sibling(2):DC.Subject]</a><Br>}{If}{[sibling(3):DC.Subject],<a href="_httpquery_&q=[cgisafe:sibling(3):DC.Subject]&qt=0&fqf=SU">[sibling(3):DC.Subject]</a><Br>}</td></tr>}
If you know your metadata well, this is the simple way to do it as you can just copy each IF statementand change the number. Another way is to use a Javascript introduced in "How can I hyperlink individualmetadata elements?" at http://wiki.greenstone.org/wiki/index.php/Customizing_collections.
This hidden search link works for using MGPP search engine."fqf=CR (or SU)" is the index you want tosearch, where CR or SU is the index for Creator or Subject. You can find the indexes in the "build.cfg"file in your collection folder /gsdl/collect/yourcollection/index/. You can also change the metadata andindex short name in /gsdl/perllib/mgppbuilder.pm file as seen below.
our %static_indexfield_map = ('Title'=>'TI','TI'=>1,'Subject'=>'SU','SU'=>1,'Creator'=>'CR','CR'=>1,'Organization'=>'ORG','ORG'=>1,'Source'=>'SO',
Customizing Greenstone User Interfac http://www.wrlc.org/dcpc/UserInterface/interface.htm
19 of 24 08/06/2011 16:56
'SO'=>1,
You can make changes or add your own indexes in this file. For example, I added a new index to this filefor our collections:
'DC.Relation.ispartofseries'=>'SER','SER'=>1,
I created a classifier for Series using the metadata "DC.Relation.ispartofseries" and indexed thismetadata field. In the format DocumentText, I created the following format:
{If}{[DC.Relation.ispartofseries],<tr><td align="right" valign="top" class="displaylabel">Series:</td><td align="left" valign="top" class="displaytext"><a href="_httpquery_&q=[cgisafe:DC.Relation.ispartofseries]&qt=0&fqf=SER">[DC.Relation.ispartofseries]</a></td></tr>}
Figure 7 shows the Series link in the document display and the display after you clicked this link, which isa search result list.
Figure 7: Hyperlink in the Document Display
Customizing Greenstone User Interfac http://www.wrlc.org/dcpc/UserInterface/interface.htm
20 of 24 08/06/2011 16:56

Another way to create links in the document display is to link to the classifier display. This is especiallyuseful for linking digital items in the same series. For example, in one of WRLC collections, there are 3series. I created a classifier for the metadata element "DC.Relation.ispartofseries", which is classifier 8.In the "format DocumentText", I created the following conditional statement:
{If} {[DC.Relation.ispartofseries] eq 'Costume and Set Design Slides', <ahref="_httpprefix_/cgi-bin/library?c=ftpp&a=d&cl=CL8.1">[DC.Relation.ispartofseries]</a> }
{If}{[DC.Relation.ispartofseries] eq 'Federal Theatre Project Scripts',<a href="_httpprefix_/cgi-bin/library?c=ftpp&a=d&CL=CL8.2">[DC.Relation.ispartofseries]</a> }
{If}{[DC.Relation.ispartofseries] eq 'Poster Slides',
Customizing Greenstone User Interfac http://www.wrlc.org/dcpc/UserInterface/interface.htm
21 of 24 08/06/2011 16:56

<a href="_httpprefix_/cgi-bin/library?c=ftpp&a=d&CL=CL8.3">[DC.Relation.ispartofseries]</a> }
Figure 8 shows the link in the document display and the display after you clicked the link, which is adisplay from the classifier, not the search results.
Figure 8: Hyperlink in the Document Display (2)
Search Options and Search Results
The default search page displays a single search box as below.
If you want to display advanced search with multiple search options, you need to use the indexer MGPP.You can set it up in the collect.cfg file or in GLI -- Format, in the string SearchTypes:
SearchTypes "form, plain"
the default search page will display the formed search as seen below:
Customizing Greenstone User Interfac http://www.wrlc.org/dcpc/UserInterface/interface.htm
22 of 24 08/06/2011 16:56

In both plain and form search pages there is a drop-down list "Search for...". This is a list of searchindexes you can set up in collect.cfg file:
collectionmeta.Keywords "keyword in titles, subjects, names, etc."collectionmeta.DC.Subject "subject"collectionmeta.DC.Title "title"collectionmeta.DC.Coverage.spatial "place"
You can do the same in GLI -- Design -- Search Indexes to select and add the search indexes and inGLI -- Format -- Search to define your display text for the drop-down list.
Search results display is controlled by a format string "SearchVList" in collect.cfg file or GLI -- Format --Format Features, then select "Search" from "Choose feature" and "VList" from "Affected Component". Ifyou put the same format as listed above for Format CL1VList, the search results will display asillustrated in Figure 5.
Adding a Footer
Adding a footer to every page is very easy. Find the _footer_ macro in style.dm file, copy it to yourextra.dm file and placed it under package Style, and add the footer content as you want. For example,
package Style
_footer_ {<!--page footer-->_pagefooterextra_
<p class="footer">| <a href="_httpprefix_/cgi-bin/library?c=auhist&a=p&p=help">Help</a>| <a href="_httpprefix_/cgi-bin/library?c=auhist&a=p&p=preferences">Preferences</a>
_AUfooter_
_endspacer__htmlfooter_}
This displays a footer as the following:
The macro _AUfooter_ is defined in another macro file wrlc.dm as the following.
Customizing Greenstone User Interfac http://www.wrlc.org/dcpc/UserInterface/interface.htm
23 of 24 08/06/2011 16:56

_AUfooter_ {
| <a href="/dl/">WRLC Digital & Special Collections</a>| <a href="mailto:[email protected]">Contact a Librarian</a>| <a href="_httppagehome_">Main</a> | <Br>| <a href="http://bender.library.american.edu:8083/php/directory.php?dept_id=arc">American University Archives andSpecial Collections</a> | </p><div class="divbar"> </div>}
In this way, if the URL changed for this institution, the change can be made in one place -the wrlc.dm file which will affect all collections from that institution.
(Last updated November 25, 2008)
NoeSocket
Customizing Greenstone User Interfac http://www.wrlc.org/dcpc/UserInterface/interface.htm
24 of 24 08/06/2011 16:56