digital design lab csce2114
TRANSCRIPT
Digital Design Lab CSCE2114
Lab1 Part A
Pre-Lab
This is an introduction lab to lab (hardware) equipment. Read the PB505 trainer board manual on
the course website and get familiar with the content. You do not need to get into details or
understand everything, but know where to look up for information:
https://e3da.csce.uark.edu/teaching/CSCE2114-21FA//man/PB-505%20Manual.pdf
Introduction
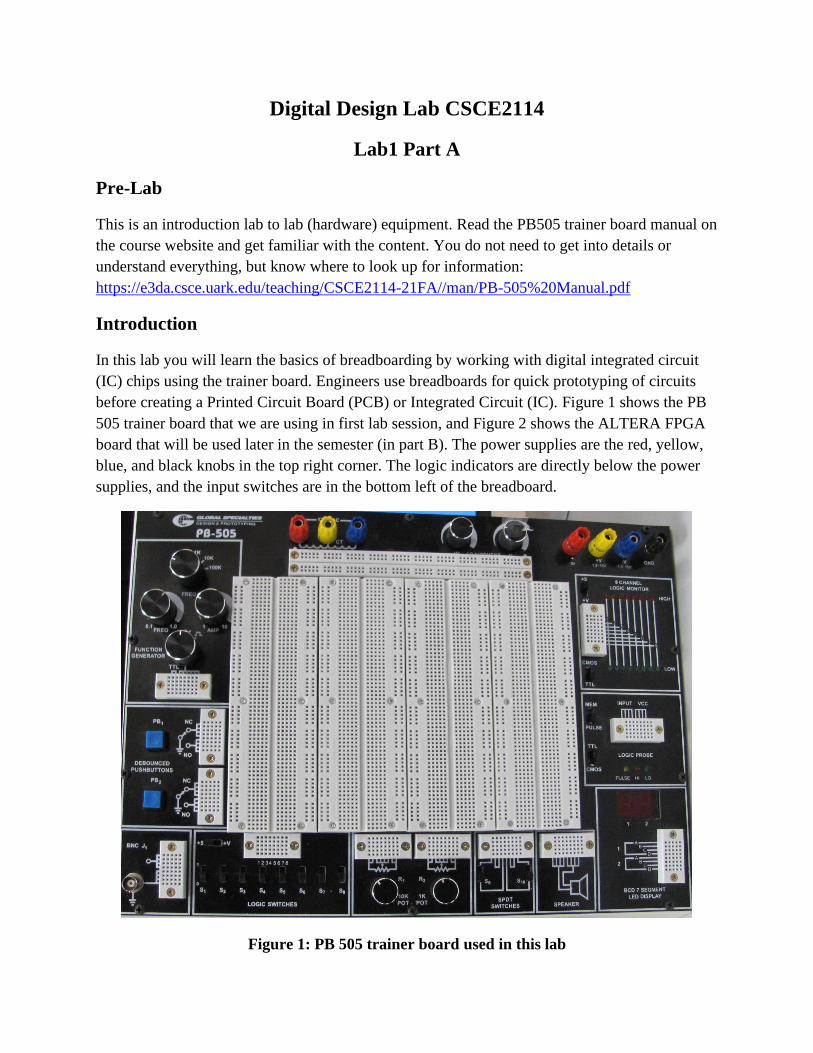
In this lab you will learn the basics of breadboarding by working with digital integrated circuit
(IC) chips using the trainer board. Engineers use breadboards for quick prototyping of circuits
before creating a Printed Circuit Board (PCB) or Integrated Circuit (IC). Figure 1 shows the PB
505 trainer board that we are using in first lab session, and Figure 2 shows the ALTERA FPGA
board that will be used later in the semester (in part B). The power supplies are the red, yellow,
blue, and black knobs in the top right corner. The logic indicators are directly below the power
supplies, and the input switches are in the bottom left of the breadboard.
Figure 1: PB 505 trainer board used in this lab
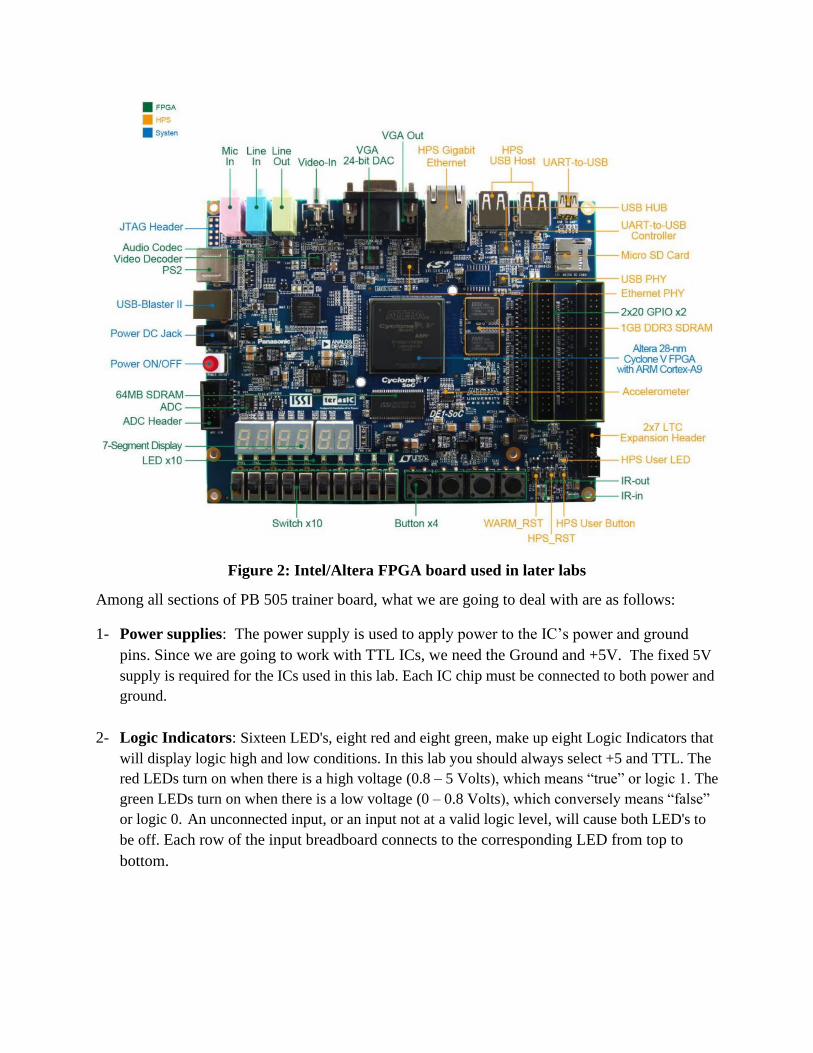
Figure 2: Intel/Altera FPGA board used in later labs
Among all sections of PB 505 trainer board, what we are going to deal with are as follows:
1- Power supplies: The power supply is used to apply power to the IC’s power and ground
pins. Since we are going to work with TTL ICs, we need the Ground and +5V. The fixed 5V
supply is required for the ICs used in this lab. Each IC chip must be connected to both power and
ground.
2- Logic Indicators: Sixteen LED's, eight red and eight green, make up eight Logic Indicators that
will display logic high and low conditions. In this lab you should always select +5 and TTL. The
red LEDs turn on when there is a high voltage (0.8 – 5 Volts), which means “true” or logic 1. The
green LEDs turn on when there is a low voltage (0 – 0.8 Volts), which conversely means “false”
or logic 0. An unconnected input, or an input not at a valid logic level, will cause both LED's to
be off. Each row of the input breadboard connects to the corresponding LED from top to
bottom.

3- Logic Switches: By using these switches you can apply logic 1 or logic 0 to the input
pins of an IC. The selector must be on +5. Each column of the input breadboard connects
to the corresponding switch from left to right.
4- The Breadboards: The breadboard allows you to connect components and wire your
circuits very easily and quickly. The breadboard consists of many holes for you to
connect wires and IC chips. Also, the leads or terminals of most of the components like
resistors, diodes, transistors, etc. can be pushed straight into the holes.
As you see in Figures 3-5, all of the holes are already connected together in groups. This
way, you can connect two wires together (or connect a wire to an IC pin) simply by plugging
the two wires into two holes that are already connected together internally. It is also
important to note that there is a disconnect in the vertical power rails halfway down the
board. This is illustrated in Figure 6.
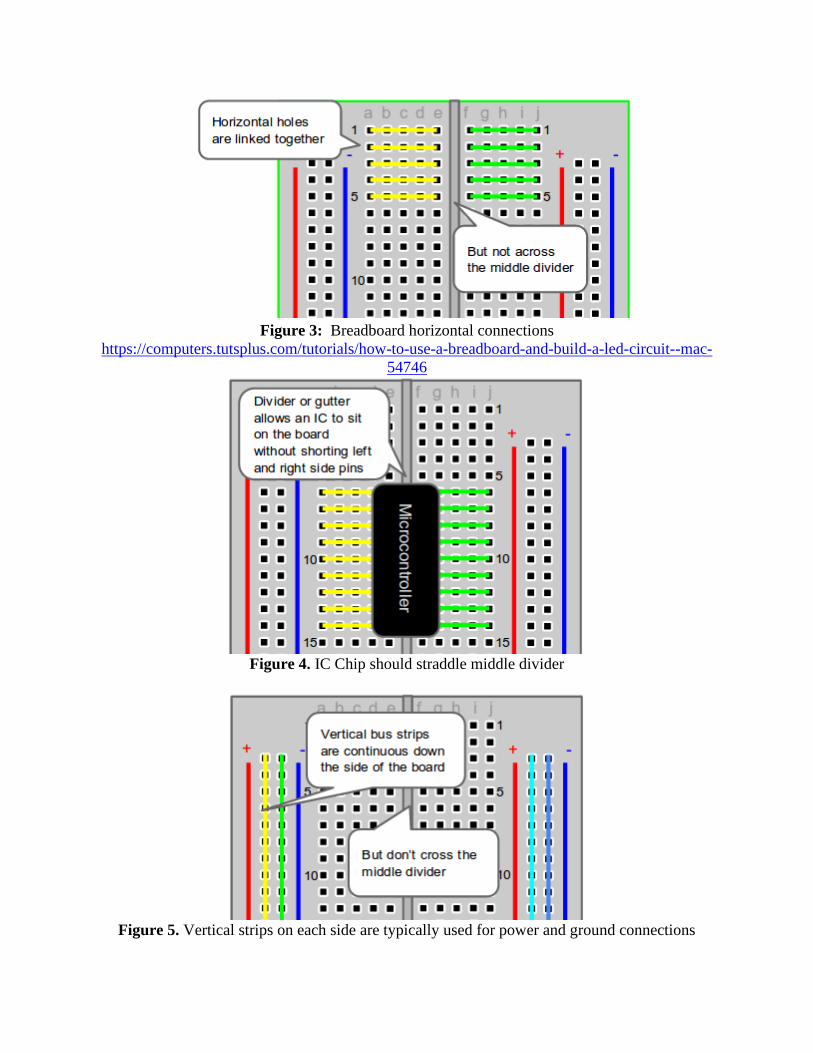
Figure 3: Breadboard horizontal connections
https://computers.tutsplus.com/tutorials/how-to-use-a-breadboard-and-build-a-led-circuit--mac-
54746
Figure 4. IC Chip should straddle middle divider
Figure 5. Vertical strips on each side are typically used for power and ground connections

Figure 6. Gap in vertical power and ground rails.
The 74XX family of TTL ICs includes basic gates such as AND, OR, NAND, NOR, and XOR.
They vary in number of gates as well as the input numbers for each gate within them. Table 1
shows some of the part numbers and their contents.
Table 1: Some of 74 series ICs.( http://en.wikipedia.org/wiki/7400_series)
Part number Description
7400 quad 2-input NAND gate
7402 quad 2-input NOR gate
7404 hex inverter
7405 hex inverter with open collector outputs
7408 quad 2-input AND gate
7410 triple 3-input NAND gate
7411 triple 3-input AND gate
Figure 7-8 shows a 7404 TTL integrated circuit. The IC has a marker on one end so you can
determine the correct orientation. Every IC needs to be supplied with appropriate voltage in
order to work properly.
There is another type of chip 7414 which has exactly the same logic functionality and pin out as
7404. Some students may receive 7414 and can use it to finish the lab.

There are also different sub families, such as LS/HC/HCT. They can interoperate most of the
time without issue, but HCT is the most compatible type and is recommended over others.
Figure 7. 7404 IC
As you see in Figure 8, pin 7 should be connected to GND and pin 14 should be connected to
+5V. The other pins serve as inputs or outputs of the 6 invert gates.
Figure 8: 7404/7414 IC pin out
Some general rules of circuit construction are provided here to help you efficiently
complete laboratory assignments.
1. Be careful when inserting ICs into the breadboard sockets. If you do not put it in straight, it is
very easy to crush the pin into a zigzag shape or fold the pins underneath the body of the IC. This
will lead to a bad connection or no connection at all, and possibly destroy the chip.
2. Every once in a while try to touch some metal objects to discharge yourself of static electricity
before handing ICs. The extremely high voltage of a static shock (about 10,000 Volts!) can
damage the IC.
3. Pay attention to the power and ground connections on the IC. Reversing these connections will

destroy the IC. Shorting power and ground may damage the power supply by overheating it.
Never apply a voltage above 5.5 volts to a TTL IC, it may damage the IC.
4. Always turn off the power when making connections, and turn it on only after you have
finished making all of the connections.
5. ICs might feel slightly warm when working. However, if it is hot to the touch, turn off the
power immediately and try to figure out what is wrong. If after inspecting your circuit you still
cannot find the problem, notify the lab TA.
6. If a circuit fails to function, first check the power pins. Then use a multimeter to find the
problem. You can start by checking the wires and then checking the voltages of IC pins.
Sometimes this can be tedious, but it is worth it! If you construct your circuit neatly from the
very beginning, it will help you a lot if debugging is needed.
7. If you are certain the connection is correct but the chip either does not function correctly or
feels hot, throw away the damaged chip and replace it with a new one. Do not put back damaged
chips into the chip box. Students after you may still assume they are good ones.
8. After you are done, please put every piece in its place; remember your friend may use this lab
right after you, and of course they do not want to waste their time searching through your mess
to find what they need.
9. Lab reports are due one week after the lab session unless otherwise instructed.
Lab Problems
1. Connect a wire between input switch 1 (SW1) and output LED 1 (L1), SW2 and L2, and
SW3 and L3. That’s 3 switches to 3 LEDs. Record the state of the LED for each data switch
in the 1 position and 0 position.
2. Important: When connecting the power and ground wires to the IC chip make sure you are
connecting them to the right pins! You can search on Google pin connections of a chip.
Find and place ONE 7404/7414 IC (hex inverter) in the breadboard as instructed. The hex
inverter has 6 (hex) NOT gates. Use the existing inputs from problem 1 (SW1, SW2, SW3)
to connect to the inputs of 3 NOT gates inside the hex inverter. Their outputs should go to 3
LEDs (same as Problem #1).
Again, Record the state of the LED for each data switch in the 1 position and 0 position.

Figure 9: Truth table of an inverter (NOT) gate
3. Remove the wiring for SW2, SW3, and the corresponding LED wiring they were hooked up
to. This leaves you with SW1->hex inverter->LED1. Using the same IC chip (hex inverter),
build a circuit that connects 3 inverters in series. That is, SW1->NOT gate->NOT gate-
>NOT gate->LED. Write the truth table for this circuit by applying logic 0 and then logic 1.
Also, draw this circuit in your lab report. Why is the output the same as step 2? Include
your answer on your report.
Lab Report
There is no lab report due for this part. Combine the following content with Part B later:
• Photos showing 3 different states (all on, all off, a random state of your choice) for each
lab problem.
• Your explanation on the observed output from inverters.
Appendix
In addition to your PC and trainer boards, you will see some other devices for each station. These
are instruments that can be either input or output for our boards. Although we will not use these
in this lab, it is good to know what their function is in case you ever need them.
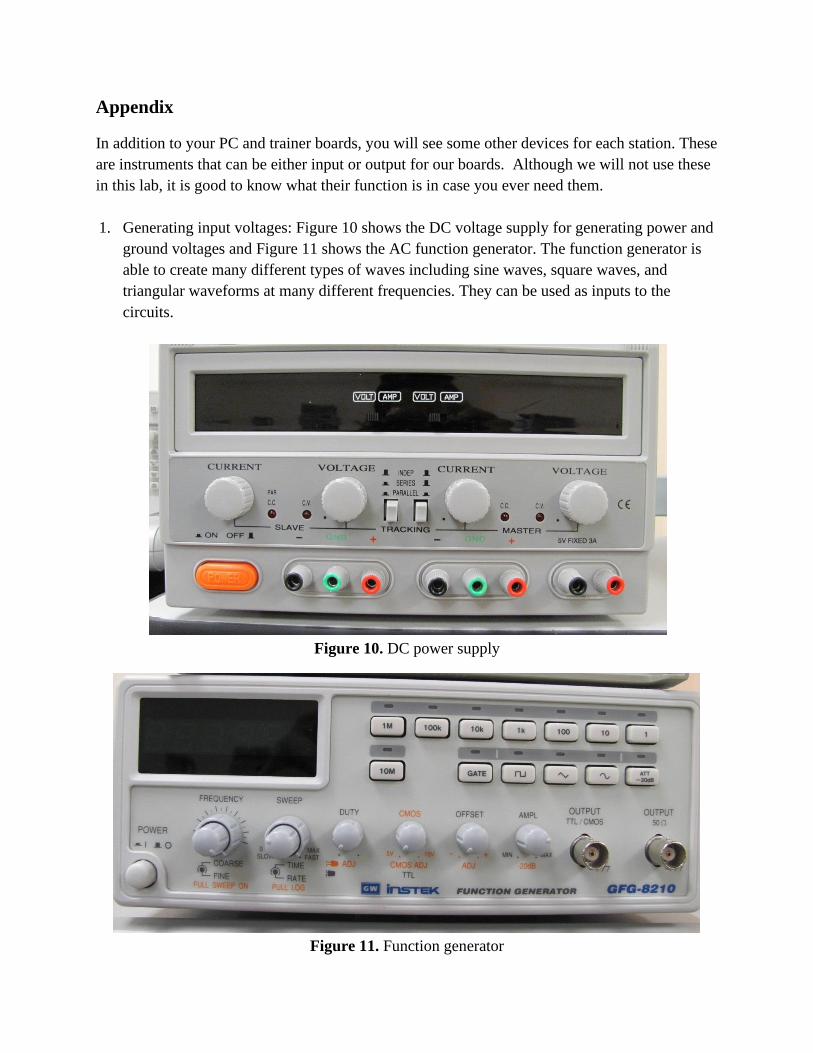
1. Generating input voltages: Figure 10 shows the DC voltage supply for generating power and
ground voltages and Figure 11 shows the AC function generator. The function generator is
able to create many different types of waves including sine waves, square waves, and
triangular waveforms at many different frequencies. They can be used as inputs to the
circuits.
Figure 10. DC power supply
Figure 11. Function generator

2. Watching output voltages: Figure 12 shows a Multimeter used to determine the voltage or
current of DC signals or effective value of AC signals. A Mutimeter allows you to measure
the voltage of a signal. However, if we are interested in observing the timing details of a
signal, we should use an oscilloscope, as seen in Figure 13. An oscilloscope can display a
signal voltage as a function of time.
Figure 12. Multimeter
Figure 13. Oscilloscope