ibm · 5.2.6 dynamic parse initialization ... install the racf kanji ispf panels (optional) ......
TRANSCRIPT
IBMProgram Directory for
Resource Access Control Facility (RACF) Feature for z/VM
Version 1 Release 10.0
Program Number 5741-A05
for Use withz/VM Version 5
Document Date: September 2004
GI11-4803-00
Attention
Before using this information and the product it supports, be sure to read the general information under “Notices” on page 148.
This program directory, dated September 2004, applies to Resource Access Control Facility Feature for z/VM Version 1 Release 10.0(RACF), Program Number 5741-A05.
A form for reader's comments appears at the back of this publication. When you send information to IBM, you grant IBM anonexclusive right to use or distribute the information in any way it believes appropriate without incurring any obligation to you.
Copyright International Business Machines Corporation 1988, 2004. All rights reserved.Note to U.S. Government Users — Documentation related to restricted rights — Use, duplication or disclosure is subject torestrictions set forth in GSA ADP Schedule Contract with IBM Corp.
Contents
1.0 Introduction . . . . . . . . . . . . . . . . . . . . . . . . . . . . . . . . . . . . . . . . . . . . . . . . . . . 11.1 Program Description . . . . . . . . . . . . . . . . . . . . . . . . . . . . . . . . . . . . . . . . . . . . . . . 2
2.0 Program Materials . . . . . . . . . . . . . . . . . . . . . . . . . . . . . . . . . . . . . . . . . . . . . . . 32.1 Basic Machine-Readable Material . . . . . . . . . . . . . . . . . . . . . . . . . . . . . . . . . . . . . . . 32.2 Optional Machine-Readable Material . . . . . . . . . . . . . . . . . . . . . . . . . . . . . . . . . . . . . 32.3 Program Publications . . . . . . . . . . . . . . . . . . . . . . . . . . . . . . . . . . . . . . . . . . . . . . 3
2.3.1 Program Publications . . . . . . . . . . . . . . . . . . . . . . . . . . . . . . . . . . . . . . . . . . . 42.4 Microfiche Support . . . . . . . . . . . . . . . . . . . . . . . . . . . . . . . . . . . . . . . . . . . . . . . . 52.5 View Program Listings (VPL) Support . . . . . . . . . . . . . . . . . . . . . . . . . . . . . . . . . . . . . 52.6 Publications Useful During Installation and Service . . . . . . . . . . . . . . . . . . . . . . . . . . . . . 6
3.0 Program Support . . . . . . . . . . . . . . . . . . . . . . . . . . . . . . . . . . . . . . . . . . . . . . . . 73.1 Preventive Service Planning . . . . . . . . . . . . . . . . . . . . . . . . . . . . . . . . . . . . . . . . . . 73.2 Statement of Support Procedures . . . . . . . . . . . . . . . . . . . . . . . . . . . . . . . . . . . . . . . 7
4.0 Program and Service Level Information . . . . . . . . . . . . . . . . . . . . . . . . . . . . . . . . . . 94.1 Program Level Information . . . . . . . . . . . . . . . . . . . . . . . . . . . . . . . . . . . . . . . . . . . 9
4.1.1 VM APAR fixes . . . . . . . . . . . . . . . . . . . . . . . . . . . . . . . . . . . . . . . . . . . . . . . 94.1.2 MVS APAR fixes . . . . . . . . . . . . . . . . . . . . . . . . . . . . . . . . . . . . . . . . . . . . . 104.1.3 APARS Incorporated Since the GA of RACF 1.10 . . . . . . . . . . . . . . . . . . . . . . . . . . 13
4.2 Service Level Information . . . . . . . . . . . . . . . . . . . . . . . . . . . . . . . . . . . . . . . . . . . 144.3 Cumulative Service . . . . . . . . . . . . . . . . . . . . . . . . . . . . . . . . . . . . . . . . . . . . . . 144.4 How to Determine Your RSU Service Level . . . . . . . . . . . . . . . . . . . . . . . . . . . . . . . . 14
5.0 Installation Requirements and Considerations . . . . . . . . . . . . . . . . . . . . . . . . . . . . . 165.1 Hardware Requirements . . . . . . . . . . . . . . . . . . . . . . . . . . . . . . . . . . . . . . . . . . . 165.2 Program Considerations . . . . . . . . . . . . . . . . . . . . . . . . . . . . . . . . . . . . . . . . . . . 16
5.2.1 Operating System Requirements . . . . . . . . . . . . . . . . . . . . . . . . . . . . . . . . . . . . 165.2.2 Other Program Product Requirements . . . . . . . . . . . . . . . . . . . . . . . . . . . . . . . . . 16
5.2.2.1 General . . . . . . . . . . . . . . . . . . . . . . . . . . . . . . . . . . . . . . . . . . . . . . . . 165.2.2.2 Dual Registration . . . . . . . . . . . . . . . . . . . . . . . . . . . . . . . . . . . . . . . . . . 175.2.2.3 Trusted Computing Base (TCB) . . . . . . . . . . . . . . . . . . . . . . . . . . . . . . . . . . 17
5.2.3 Understanding RACF Interaction with CP . . . . . . . . . . . . . . . . . . . . . . . . . . . . . . . 175.2.4 RACF Database Format . . . . . . . . . . . . . . . . . . . . . . . . . . . . . . . . . . . . . . . . . 175.2.5 Sharing a RACF Database . . . . . . . . . . . . . . . . . . . . . . . . . . . . . . . . . . . . . . . 18
5.2.5.1 Sharing RACF Databases with Another VM System . . . . . . . . . . . . . . . . . . . . . . 195.2.5.1.1 Shared DASD Considerations . . . . . . . . . . . . . . . . . . . . . . . . . . . . . . . . 19
5.2.5.2 Sharing RACF Databases with an MVS System . . . . . . . . . . . . . . . . . . . . . . . . 195.2.6 Dynamic Parse Initialization . . . . . . . . . . . . . . . . . . . . . . . . . . . . . . . . . . . . . . . 205.2.7 Restrictions When Using FBA Devices . . . . . . . . . . . . . . . . . . . . . . . . . . . . . . . . 205.2.8 VMSES/E Program Installation and Service Considerations . . . . . . . . . . . . . . . . . . . . 20
Copyright IBM Corp. 1988, 2004 iii
5.3 DASD Storage and User ID Requirements . . . . . . . . . . . . . . . . . . . . . . . . . . . . . . . . . 21
6.0 Installation Instructions . . . . . . . . . . . . . . . . . . . . . . . . . . . . . . . . . . . . . . . . . . . 266.1 Overview of the VMSES/E Installation Process . . . . . . . . . . . . . . . . . . . . . . . . . . . . . . 266.2 Overview of the RACF Installation Steps . . . . . . . . . . . . . . . . . . . . . . . . . . . . . . . . . . 27
| 6.2.1 Installing RACF on a System for the First Time . . . . . . . . . . . . . . . . . . . . . . . . . . . 276.2.2 Migrating from a Previous RACF Release . . . . . . . . . . . . . . . . . . . . . . . . . . . . . . 29
6.3 Task 1. Plan Your Installation for RACF . . . . . . . . . . . . . . . . . . . . . . . . . . . . . . . . . . 316.4 Task 2. Allocate Resources for Installing RACF . . . . . . . . . . . . . . . . . . . . . . . . . . . . . 34
6.4.1 General RACF User ID Information . . . . . . . . . . . . . . . . . . . . . . . . . . . . . . . . . . 34| 6.4.2 Sharing a RACF Database Information . . . . . . . . . . . . . . . . . . . . . . . . . . . . . . . . 36
6.4.3 Installing RACF on Minidisk or in SFS Directories . . . . . . . . . . . . . . . . . . . . . . . . . . 366.5 Task 3. Install RACF . . . . . . . . . . . . . . . . . . . . . . . . . . . . . . . . . . . . . . . . . . . . . 406.6 Task 4. Install the RACF Kanji ISPF Panels (Optional) . . . . . . . . . . . . . . . . . . . . . . . . . 436.7 Task 5. Load the Recommended Service Upgrade (RSU) . . . . . . . . . . . . . . . . . . . . . . . 44
| 6.8 Task 6. Update to Force Build of RACF CP Parts . . . . . . . . . . . . . . . . . . . . . . . . . . . . 466.9 Task 7. Create PROFILE EXEC and SMF CONTROL Files for the RACF Service Machines . . . 466.10 Task 8. Generate a RACF-Modified CMS Nucleus . . . . . . . . . . . . . . . . . . . . . . . . . . . 476.11 Task 9. Convert the Database Templates . . . . . . . . . . . . . . . . . . . . . . . . . . . . . . . . 496.12 Task 10. Set Up the RACF Databases . . . . . . . . . . . . . . . . . . . . . . . . . . . . . . . . . . 52
6.12.1 Format the RACF Database Minidisks . . . . . . . . . . . . . . . . . . . . . . . . . . . . . . . . 526.12.2 Allocate the RACF Database Space . . . . . . . . . . . . . . . . . . . . . . . . . . . . . . . . . 536.12.3 Initialize the RACF Databases . . . . . . . . . . . . . . . . . . . . . . . . . . . . . . . . . . . . 53
6.13 Task 11. Prepare to Update RACF with Existing CP Directory Data . . . . . . . . . . . . . . . . 546.13.1 General CP Directory Requirements . . . . . . . . . . . . . . . . . . . . . . . . . . . . . . . . . 55
6.13.1.1 The RPIDIRCT SYSUT1 File . . . . . . . . . . . . . . . . . . . . . . . . . . . . . . . . . . . 566.13.2 Run RPIDIRCT to Create the RPIDIRCT SYSUT1 File . . . . . . . . . . . . . . . . . . . . . . 58
6.14 Task 12. Customize the Processing of SMF Records (Optional) . . . . . . . . . . . . . . . . . . . 596.14.1 Setting Up the RACFSMF PROFILE EXEC (Optional) . . . . . . . . . . . . . . . . . . . . . . . 606.14.2 Setting Up the SMF CONTROL File (Optional) . . . . . . . . . . . . . . . . . . . . . . . . . . . 61
6.15 Task 13. Change the Message Routing Table (Optional) . . . . . . . . . . . . . . . . . . . . . . . 636.15.1 Updating the Message Routing Table . . . . . . . . . . . . . . . . . . . . . . . . . . . . . . . . 65
6.16 Task 14. Delete or Replace the ICHDEX01 and ICHRCX02 Exits (Optional) . . . . . . . . . . . . 656.16.1 The ICHDEX01 Exit . . . . . . . . . . . . . . . . . . . . . . . . . . . . . . . . . . . . . . . . . . . 66
6.16.1.1 Modifying ICHDEX01 . . . . . . . . . . . . . . . . . . . . . . . . . . . . . . . . . . . . . . . 666.16.1.2 Deleting ICHDEX01 . . . . . . . . . . . . . . . . . . . . . . . . . . . . . . . . . . . . . . . . 66
6.16.2 The ICHRCX02 Exit . . . . . . . . . . . . . . . . . . . . . . . . . . . . . . . . . . . . . . . . . . 676.16.2.1 Modifying ICHRCX02 . . . . . . . . . . . . . . . . . . . . . . . . . . . . . . . . . . . . . . . 676.16.2.2 Deleting ICHRCX02 . . . . . . . . . . . . . . . . . . . . . . . . . . . . . . . . . . . . . . . . 67
6.17 Task 15. Customize RACF Within CP (Optional) . . . . . . . . . . . . . . . . . . . . . . . . . . . . 686.17.1 Setting the CP Disposition for Access Requests (Optional) . . . . . . . . . . . . . . . . . . . . 686.17.2 Suppressing Issuance of RACF Messages (Optional) . . . . . . . . . . . . . . . . . . . . . . . 696.17.3 Defining Public Minidisks (Optional) . . . . . . . . . . . . . . . . . . . . . . . . . . . . . . . . . 696.17.4 Requiring Passwords for RACF Command Sessions (Optional) . . . . . . . . . . . . . . . . . 696.17.5 Changing User IDs for RACF Service Machines (Optional) . . . . . . . . . . . . . . . . . . . . 706.17.6 Defining Multiple RACF Service Machines (Optional) . . . . . . . . . . . . . . . . . . . . . . . 70
iv RACF Program Directory
6.17.7 Specifying the Value of the POSIX Constant NGROUPS_MAX (Optional) . . . . . . . . . . . 716.17.8 Performing a Local Modification to HCPxxx . . . . . . . . . . . . . . . . . . . . . . . . . . . . . 71
6.18 Task 16. Install the CP Part of RACF . . . . . . . . . . . . . . . . . . . . . . . . . . . . . . . . . . . 736.19 Task 17. Change RACF Database Names If Sharing with MVS System . . . . . . . . . . . . . . 746.20 Task 18. IPL the CP System with RACF . . . . . . . . . . . . . . . . . . . . . . . . . . . . . . . . . 756.21 Task 19. Update the RACF Database with Existing CP Directory Information . . . . . . . . . . . 77
6.21.1 Initialize the RACF Database (If You Are Not Sharing an Existing Database) . . . . . . . . . 786.21.1.1 Logging On to the IBMUSER User ID . . . . . . . . . . . . . . . . . . . . . . . . . . . . . 786.21.1.2 Building the RACF Database . . . . . . . . . . . . . . . . . . . . . . . . . . . . . . . . . . . 79
| 6.21.1.3 Defining the Security Administrator and Maintenance User IDs. . . . . . . . . . . . . . . 796.21.2 Update the RACF Database (If You Are Sharing an Existing Database) . . . . . . . . . . . . 81
6.22 Task 20. Create the Global Access Table (Optional) . . . . . . . . . . . . . . . . . . . . . . . . . . 826.23 Task 21. Set RACF Options (Optional) . . . . . . . . . . . . . . . . . . . . . . . . . . . . . . . . . . 826.24 Task 22. Determine Audit and Control Options for VM Events (Optional) . . . . . . . . . . . . . . 836.25 Task 23. Split the RACF Database (Optional, Performance-Related) . . . . . . . . . . . . . . . . 846.26 Task 24. Set Up Dual Registration If DirMaint Is Installed (Optional) . . . . . . . . . . . . . . . . . 846.27 Task 25. Set Up the RACF ISPF Panels (Optional) . . . . . . . . . . . . . . . . . . . . . . . . . . 85
6.27.1 Modify the ISPF EXECs . . . . . . . . . . . . . . . . . . . . . . . . . . . . . . . . . . . . . . . . 856.27.1.1 Step 1 - Modify the Filedefs . . . . . . . . . . . . . . . . . . . . . . . . . . . . . . . . . . . 856.27.1.2 Step 2 - Modify the ISPDCS Line . . . . . . . . . . . . . . . . . . . . . . . . . . . . . . . . 88
6.27.2 Modify the ISPF Primary Option Panel . . . . . . . . . . . . . . . . . . . . . . . . . . . . . . . . 886.27.3 PDF Users: Modify ISPF-Supplied Files . . . . . . . . . . . . . . . . . . . . . . . . . . . . . . 89
6.27.3.1 Use the ISPF/PDF Browse Facility . . . . . . . . . . . . . . . . . . . . . . . . . . . . . . . 896.27.4 Non-PDF Users: Modify ISPF-Supplied Files . . . . . . . . . . . . . . . . . . . . . . . . . . . . 89
6.27.4.1 Update ICHSFSIN EXEC . . . . . . . . . . . . . . . . . . . . . . . . . . . . . . . . . . . . . 906.27.4.2 Update RACF EXEC . . . . . . . . . . . . . . . . . . . . . . . . . . . . . . . . . . . . . . . 90
6.27.5 Dual Registration Users Only . . . . . . . . . . . . . . . . . . . . . . . . . . . . . . . . . . . . . 916.27.5.1 Set Defaults in PROFILE . . . . . . . . . . . . . . . . . . . . . . . . . . . . . . . . . . . . . 926.27.5.2 Verify directory entries . . . . . . . . . . . . . . . . . . . . . . . . . . . . . . . . . . . . . . 92
6.27.6 Invoke the RACF ISPF Panels . . . . . . . . . . . . . . . . . . . . . . . . . . . . . . . . . . . . 936.28 Task 26. Place RACF Into Production . . . . . . . . . . . . . . . . . . . . . . . . . . . . . . . . . . 93
6.28.1 Copy RACF Files Into Production . . . . . . . . . . . . . . . . . . . . . . . . . . . . . . . . . . . 93
7.0 Service Instructions . . . . . . . . . . . . . . . . . . . . . . . . . . . . . . . . . . . . . . . . . . . . . 977.1 VMSES/E Service Process Overview . . . . . . . . . . . . . . . . . . . . . . . . . . . . . . . . . . . . 977.2 Servicing RACF . . . . . . . . . . . . . . . . . . . . . . . . . . . . . . . . . . . . . . . . . . . . . . . . 98
7.2.1 Task 1. Prepare to Receive Service . . . . . . . . . . . . . . . . . . . . . . . . . . . . . . . . . 987.2.2 Task 2. Receive the Service . . . . . . . . . . . . . . . . . . . . . . . . . . . . . . . . . . . . . 1007.2.3 Task 3. Apply the Service . . . . . . . . . . . . . . . . . . . . . . . . . . . . . . . . . . . . . . 1017.2.4 Task 4. Update the Build Status Table . . . . . . . . . . . . . . . . . . . . . . . . . . . . . . . 1037.2.5 Task 5. Build Serviced Objects . . . . . . . . . . . . . . . . . . . . . . . . . . . . . . . . . . . 1057.2.6 Task 6. IPL the CP System and Test RACF Service . . . . . . . . . . . . . . . . . . . . . . . 1117.2.7 Task 7. Copy the New RACF Serviced Files Into Production . . . . . . . . . . . . . . . . . . 112
7.3 Servicing the RACF Kanji ISPF Panels . . . . . . . . . . . . . . . . . . . . . . . . . . . . . . . . . . 1157.3.1 Task 1. Prepare to Receive Service . . . . . . . . . . . . . . . . . . . . . . . . . . . . . . . . 1157.3.2 Task 2. Receive the Service . . . . . . . . . . . . . . . . . . . . . . . . . . . . . . . . . . . . . 118
Contents v
7.3.3 Task 3. Apply the Service . . . . . . . . . . . . . . . . . . . . . . . . . . . . . . . . . . . . . . 1197.3.4 Task 4. Update the Build Status Table . . . . . . . . . . . . . . . . . . . . . . . . . . . . . . . 1207.3.5 Task 5. Build Serviced Objects . . . . . . . . . . . . . . . . . . . . . . . . . . . . . . . . . . . 1227.3.6 Task 6. Copy the New RACF Serviced Files Into Production . . . . . . . . . . . . . . . . . . 122
Appendix A. Applying an RSU for RACF . . . . . . . . . . . . . . . . . . . . . . . . . . . . . . . . . . 124A.1.1 Prepare Your System for Service Refresh . . . . . . . . . . . . . . . . . . . . . . . . . . . . . 125A.1.2 Receive the Preapplied, Prebuilt Service . . . . . . . . . . . . . . . . . . . . . . . . . . . . . . 128A.1.3 Process Additional Service . . . . . . . . . . . . . . . . . . . . . . . . . . . . . . . . . . . . . . 130A.1.4 Build the RACF Base New Service Level and Place Into Production . . . . . . . . . . . . . . 131A.1.5 Service the RACF Kanji Code . . . . . . . . . . . . . . . . . . . . . . . . . . . . . . . . . . . . 132A.1.6 Build the New Kanji Service Level and Place into Production . . . . . . . . . . . . . . . . . . 132
Appendix B. RACF Local Modifications - Examples . . . . . . . . . . . . . . . . . . . . . . . . . . . 133B.1 Assemble Full Part Replacement - Example . . . . . . . . . . . . . . . . . . . . . . . . . . . . . . . 133B.2 Full Part Replacement (Not Assemble) - Example . . . . . . . . . . . . . . . . . . . . . . . . . . . 135B.3 Local Modification to Full Part Replacement Text Files . . . . . . . . . . . . . . . . . . . . . . . . 136B.4 Local Modification to Full Part Assemble and Text Files and Possible Build List Update . . . . . 139
Appendix C. Starting, Stopping, and Removing RACF . . . . . . . . . . . . . . . . . . . . . . . . . 144C.1 Starting and Restarting RACF . . . . . . . . . . . . . . . . . . . . . . . . . . . . . . . . . . . . . . . 144C.2 Temporarily Suspending and Reactivating RACF . . . . . . . . . . . . . . . . . . . . . . . . . . . . 144
C.2.1 Temporarily Suspending RACF . . . . . . . . . . . . . . . . . . . . . . . . . . . . . . . . . . . 145C.2.2 Reactivating RACF . . . . . . . . . . . . . . . . . . . . . . . . . . . . . . . . . . . . . . . . . . . 146
C.3 Removing RACF From Your VM System . . . . . . . . . . . . . . . . . . . . . . . . . . . . . . . . . 146
Notices . . . . . . . . . . . . . . . . . . . . . . . . . . . . . . . . . . . . . . . . . . . . . . . . . . . . . . . 148Trademarks and Service Marks . . . . . . . . . . . . . . . . . . . . . . . . . . . . . . . . . . . . . . . . . 148
Glossary . . . . . . . . . . . . . . . . . . . . . . . . . . . . . . . . . . . . . . . . . . . . . . . . . . . . . . 149
Index . . . . . . . . . . . . . . . . . . . . . . . . . . . . . . . . . . . . . . . . . . . . . . . . . . . . . . . . 154
Reader's Comments . . . . . . . . . . . . . . . . . . . . . . . . . . . . . . . . . . . . . . . . . . . . . . . 155
Figures
1 1. Optional: Unlicensed Publications - New Editions . . . . . . . . . . . . . . . . . . . . . . . . . . . . 41 2. Material: Unlicensed Publications - Not new editions . . . . . . . . . . . . . . . . . . . . . . . . . . 4
3. Basic Material: Licensed Publications . . . . . . . . . . . . . . . . . . . . . . . . . . . . . . . . . . . 54. Previous Editions of RACF Publications . . . . . . . . . . . . . . . . . . . . . . . . . . . . . . . . . 5
1 5. Publications Useful During Installation / Service on z/VM Version 5 . . . . . . . . . . . . . . . . . 6
vi RACF Program Directory
6. PSP Upgrade and Subset ID . . . . . . . . . . . . . . . . . . . . . . . . . . . . . . . . . . . . . . . . 77. Component IDs . . . . . . . . . . . . . . . . . . . . . . . . . . . . . . . . . . . . . . . . . . . . . . . 88. DASD Storage Requirements for Target Minidisks . . . . . . . . . . . . . . . . . . . . . . . . . . . 22
| 9. CMS Recomp Amounts . . . . . . . . . . . . . . . . . . . . . . . . . . . . . . . . . . . . . . . . . . . 3810. Example of CSTCONS Routing Table. . . . . . . . . . . . . . . . . . . . . . . . . . . . . . . . . . . 6411. Initial Relationships between Access Decisions Made by RACF and Final Disposition by CP . . 6812. Sample Filedefs for the ISPF EXEC for Systems with PDF . . . . . . . . . . . . . . . . . . . . . . 8613. Sample Filedefs for the ISPSTART EXEC for Systems without PDF . . . . . . . . . . . . . . . . . 8714. RACF Modules and Sizes . . . . . . . . . . . . . . . . . . . . . . . . . . . . . . . . . . . . . . . . 107
Figures vii

viii RACF Program Directory
1.0 Introduction
This program directory is intended for the system programmer responsible forprogram installation and maintenance of the Resource Access Control Facility(RACF) Feature for z/VM. It contains information concerning the material and
| procedures associated with the installation of RACF Version 1 Release 10 on1 z/VM Version 5. (Note that the Resource Access Control Facility (RACF) Feature| for z/VM is equivalent to the standalone RACF V1R10M0, product number| 5740-XXH, base plus RSU service.) You should read all of this program directory
before installing the program and then keep it for future reference.
The program directory contains the following sections:
� 2.0, “Program Materials” on page 3 identifies the basic and optional programmaterials and documentation for RACF.
� 3.0, “Program Support” on page 7 describes the IBM support available forRACF.
� 4.0, “Program and Service Level Information” on page 9 lists the APARs(program level) and PTFs (service level) incorporated into RACF.
� 5.0, “Installation Requirements and Considerations” on page 16 identifies theresources and considerations for installing and using RACF.
� 6.0, “Installation Instructions” on page 26 provides detailed installationinstructions for RACF.
� 7.0, “Service Instructions” on page 97 provides detailed servicing instructionsfor RACF.
� Appendix A, “Applying an RSU for RACF” on page 124 provides detailedRecommended Service Upgrade instructions for RACF.
� Appendix B, “RACF Local Modifications - Examples” on page 133 providesexamples for putting on local modifications to RACF.
� Appendix C, “Starting, Stopping, and Removing RACF” on page 144 providesinformation on starting, stopping and removing RACF.
Before installing RACF, read 3.1, “Preventive Service Planning” on page 7. Thissection tells you how to find any updates to the information and procedures in thisprogram directory.
Copyright IBM Corp. 1988, 2004 1
1.1 Program DescriptionRACF Version 1 Release 10 is a product that works together with the existingsystem features of VM to provide improved data security for an installation. Tohelp an installation meet its unique security objectives, RACF provides:
� Protection of installation-defined resources� Flexible control of access to protected resources� The ability to store information for other products� A choice of centralized or decentralized control profiles� An ISPF panel interface and a command interface� Transparency to end users� Exits for installation-written routines
For a more detailed description of RACF see RACF: General Information. For a listof the books in the RACF library see 2.3.1, “Program Publications” on page 4.
2 RACF Program Directory
2.0 Program Materials
An IBM program is identified by a program number. The program number forResource Access Control Facility Feature for z/VM Version 1 Release 10.0 is5741-A05.
The program announcement material describes the features supported by RACF.Ask your IBM marketing representative for this information if you have not alreadyreceived a copy.
The following sections identify:
� Basic and optional program materials available with this program
� Publications useful during installation
2.1 Basic Machine-Readable Material1 With z/VM Version 5 Resource Access Control Facility (RACF) Release 10.0 and| its Kanji Feature, as delivered with program number 5740-XXH, are pre-installed on| the z/VM System deliverable. It is referred to as the Resource Access Control| Facility Feature for z/VM. Therefore, there are no basic machine readable| materials.
| The RACF Feature for z/VM is a priced feature, so it is installed disabled. You| MUST order, and obtain a license for, the RACF Feature to enable and use it.1 Refer to the appropriate z/VM Version 5 announcement letter for information on1 ordering z/VM Version 5 and its features; including RACF.
2.2 Optional Machine-Readable MaterialThere are no optional machine-readable materials for RACF.
2.3 Program Publications1 The following sections identify the basic and optional publications for RACF as a1 feature for z/VM Version 5.
Copyright IBM Corp. 1988, 2004 3
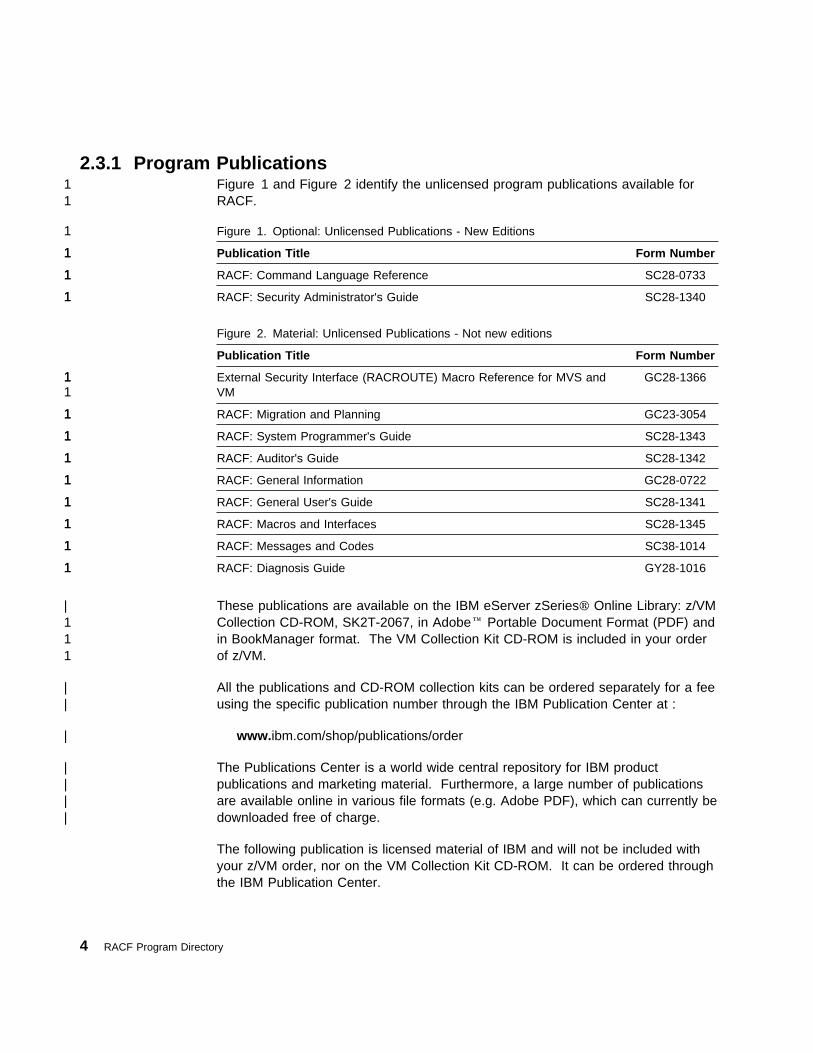
2.3.1 Program Publications1 Figure 1 and Figure 2 identify the unlicensed program publications available for1 RACF.
| These publications are available on the IBM eServer zSeries Online Library: z/VM1 Collection CD-ROM, SK2T-2067, in Adobe Portable Document Format (PDF) and1 in BookManager format. The VM Collection Kit CD-ROM is included in your order1 of z/VM.
| All the publications and CD-ROM collection kits can be ordered separately for a fee| using the specific publication number through the IBM Publication Center at :
| www.ibm.com/shop/publications/order
| The Publications Center is a world wide central repository for IBM product| publications and marketing material. Furthermore, a large number of publications| are available online in various file formats (e.g. Adobe PDF), which can currently be| downloaded free of charge.
The following publication is licensed material of IBM and will not be included withyour z/VM order, nor on the VM Collection Kit CD-ROM. It can be ordered throughthe IBM Publication Center.
1 Figure 1. Optional: Unlicensed Publications - New Editions
1 Publication Title1 Form Number
1 RACF: Command Language Reference1 SC28-0733
1 RACF: Security Administrator's Guide1 SC28-1340
Figure 2. Material: Unlicensed Publications - Not new editions
Publication Title Form Number
1 External Security Interface (RACROUTE) Macro Reference for MVS and1 VM1 GC28-1366
1 RACF: Migration and Planning1 GC23-3054
1 RACF: System Programmer's Guide1 SC28-1343
1 RACF: Auditor's Guide1 SC28-1342
1 RACF: General Information1 GC28-0722
1 RACF: General User's Guide1 SC28-1341
1 RACF: Macros and Interfaces1 SC28-1345
1 RACF: Messages and Codes1 SC38-1014
1 RACF: Diagnosis Guide1 GY28-1016
4 RACF Program Directory
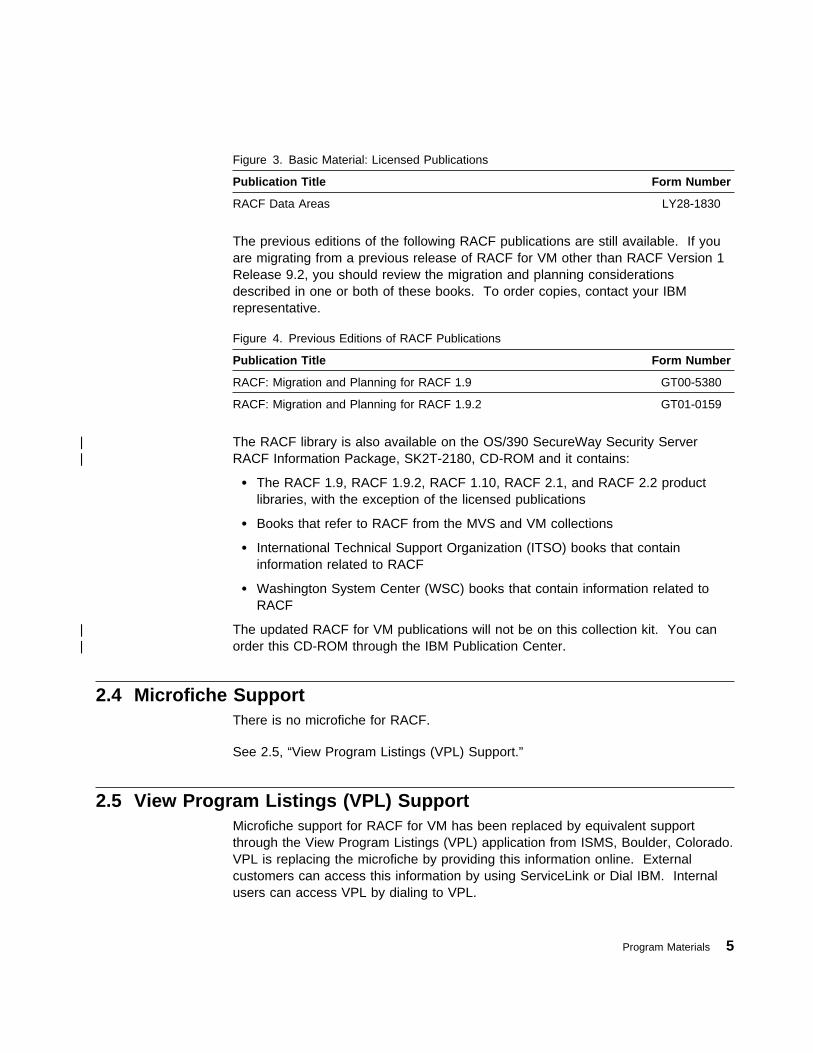
The previous editions of the following RACF publications are still available. If youare migrating from a previous release of RACF for VM other than RACF Version 1Release 9.2, you should review the migration and planning considerationsdescribed in one or both of these books. To order copies, contact your IBMrepresentative.
| The RACF library is also available on the OS/390 SecureWay Security Server| RACF Information Package, SK2T-2180, CD-ROM and it contains:
� The RACF 1.9, RACF 1.9.2, RACF 1.10, RACF 2.1, and RACF 2.2 productlibraries, with the exception of the licensed publications
� Books that refer to RACF from the MVS and VM collections
� International Technical Support Organization (ITSO) books that containinformation related to RACF
� Washington System Center (WSC) books that contain information related toRACF
| The updated RACF for VM publications will not be on this collection kit. You can| order this CD-ROM through the IBM Publication Center.
Figure 3. Basic Material: Licensed Publications
Publication Title Form Number
RACF Data Areas LY28-1830
Figure 4. Previous Editions of RACF Publications
Publication Title Form Number
RACF: Migration and Planning for RACF 1.9 GT00-5380
RACF: Migration and Planning for RACF 1.9.2 GT01-0159
2.4 Microfiche SupportThere is no microfiche for RACF.
See 2.5, “View Program Listings (VPL) Support.”
2.5 View Program Listings (VPL) SupportMicrofiche support for RACF for VM has been replaced by equivalent supportthrough the View Program Listings (VPL) application from ISMS, Boulder, Colorado.VPL is replacing the microfiche by providing this information online. Externalcustomers can access this information by using ServiceLink or Dial IBM. Internalusers can access VPL by dialing to VPL.
Program Materials 5
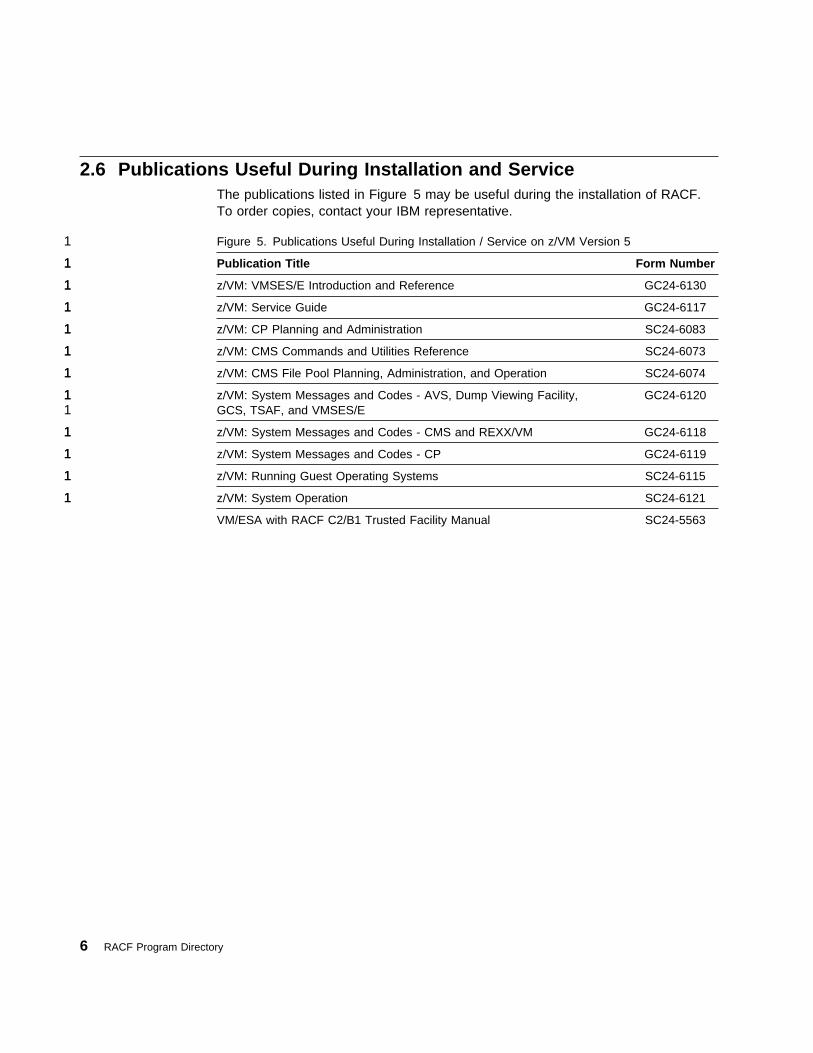
2.6 Publications Useful During Installation and ServiceThe publications listed in Figure 5 may be useful during the installation of RACF.To order copies, contact your IBM representative.
1 Figure 5. Publications Useful During Installation / Service on z/VM Version 5
1 Publication Title1 Form Number
1 z/VM: VMSES/E Introduction and Reference1 GC24-6130
1 z/VM: Service Guide1 GC24-6117
1 z/VM: CP Planning and Administration1 SC24-6083
1 z/VM: CMS Commands and Utilities Reference1 SC24-6073
1 z/VM: CMS File Pool Planning, Administration, and Operation1 SC24-6074
1 z/VM: System Messages and Codes - AVS, Dump Viewing Facility,1 GCS, TSAF, and VMSES/E1 GC24-6120
1 z/VM: System Messages and Codes - CMS and REXX/VM1 GC24-6118
1 z/VM: System Messages and Codes - CP1 GC24-6119
1 z/VM: Running Guest Operating Systems1 SC24-6115
1 z/VM: System Operation1 SC24-6121
VM/ESA with RACF C2/B1 Trusted Facility Manual SC24-5563
6 RACF Program Directory
3.0 Program Support
This section describes the IBM support available for RACF.
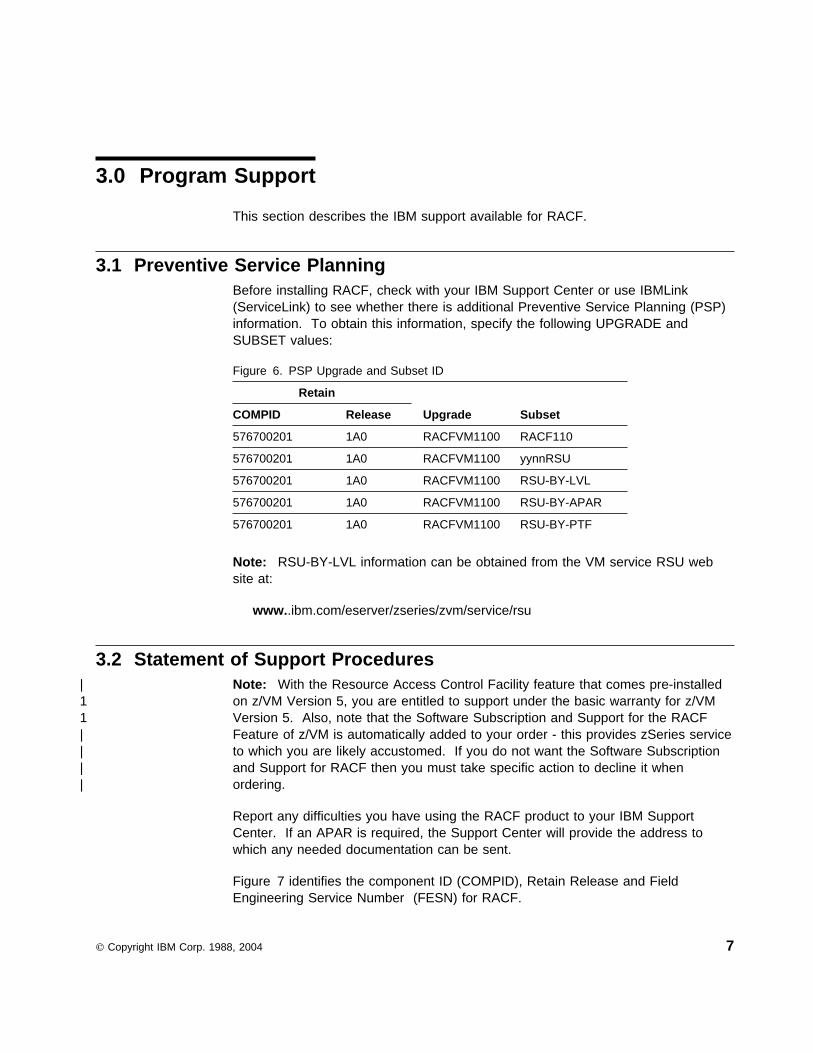
3.1 Preventive Service PlanningBefore installing RACF, check with your IBM Support Center or use IBMLink(ServiceLink) to see whether there is additional Preventive Service Planning (PSP)information. To obtain this information, specify the following UPGRADE andSUBSET values:
Note: RSU-BY-LVL information can be obtained from the VM service RSU website at:
www..ibm.com/eserver/zseries/zvm/service/rsu
Figure 6. PSP Upgrade and Subset ID
Retain
Upgrade SubsetCOMPID Release
576700201 1A0 RACFVM1100 RACF110
576700201 1A0 RACFVM1100 yynnRSU
576700201 1A0 RACFVM1100 RSU-BY-LVL
576700201 1A0 RACFVM1100 RSU-BY-APAR
576700201 1A0 RACFVM1100 RSU-BY-PTF
3.2 Statement of Support Procedures| Note: With the Resource Access Control Facility feature that comes pre-installed1 on z/VM Version 5, you are entitled to support under the basic warranty for z/VM1 Version 5. Also, note that the Software Subscription and Support for the RACF| Feature of z/VM is automatically added to your order - this provides zSeries service| to which you are likely accustomed. If you do not want the Software Subscription| and Support for RACF then you must take specific action to decline it when| ordering.
Report any difficulties you have using the RACF product to your IBM SupportCenter. If an APAR is required, the Support Center will provide the address towhich any needed documentation can be sent.
Figure 7 identifies the component ID (COMPID), Retain Release and FieldEngineering Service Number (FESN) for RACF.
Copyright IBM Corp. 1988, 2004 7
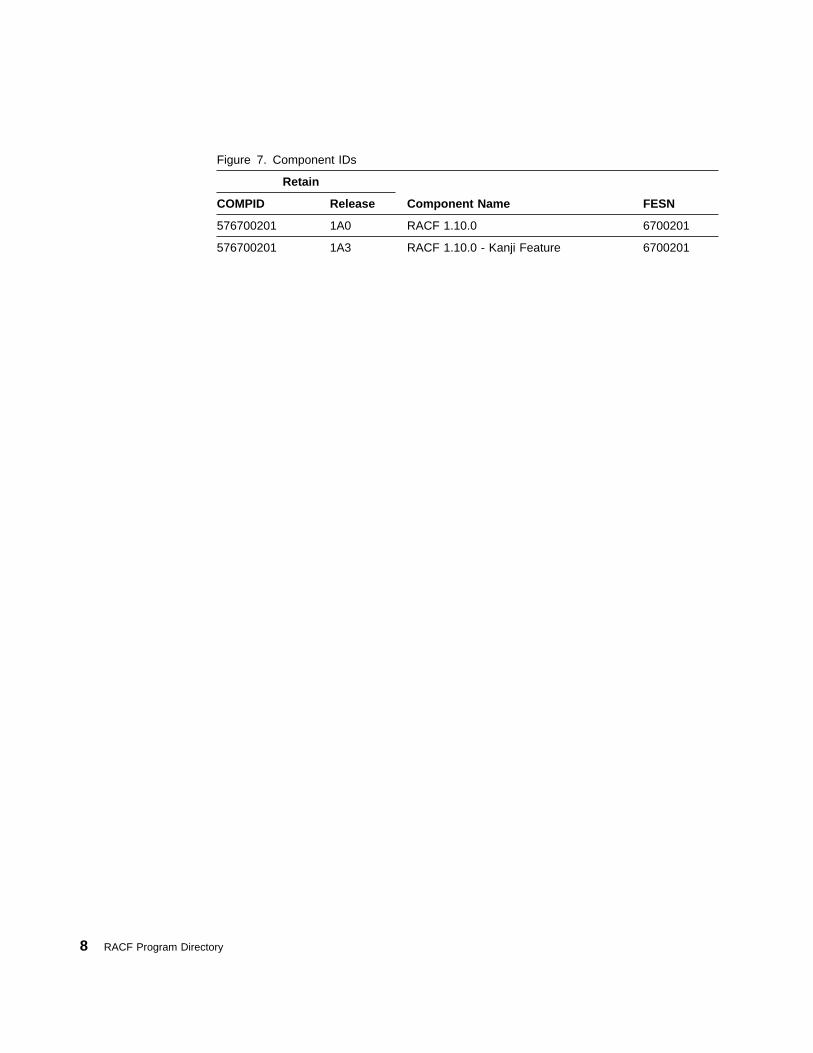
Figure 7. Component IDs
Retain
Component Name FESNCOMPID Release
576700201 1A0 RACF 1.10.0 6700201
576700201 1A3 RACF 1.10.0 - Kanji Feature 6700201
8 RACF Program Directory
4.0 Program and Service Level Information
This section identifies the program and any relevant service levels of RACF. Theprogram level refers to the APAR fixes incorporated into the program. The servicelevel refers to the PTFs shipped with this product. Information about the cumulativeservice tape is also provided.
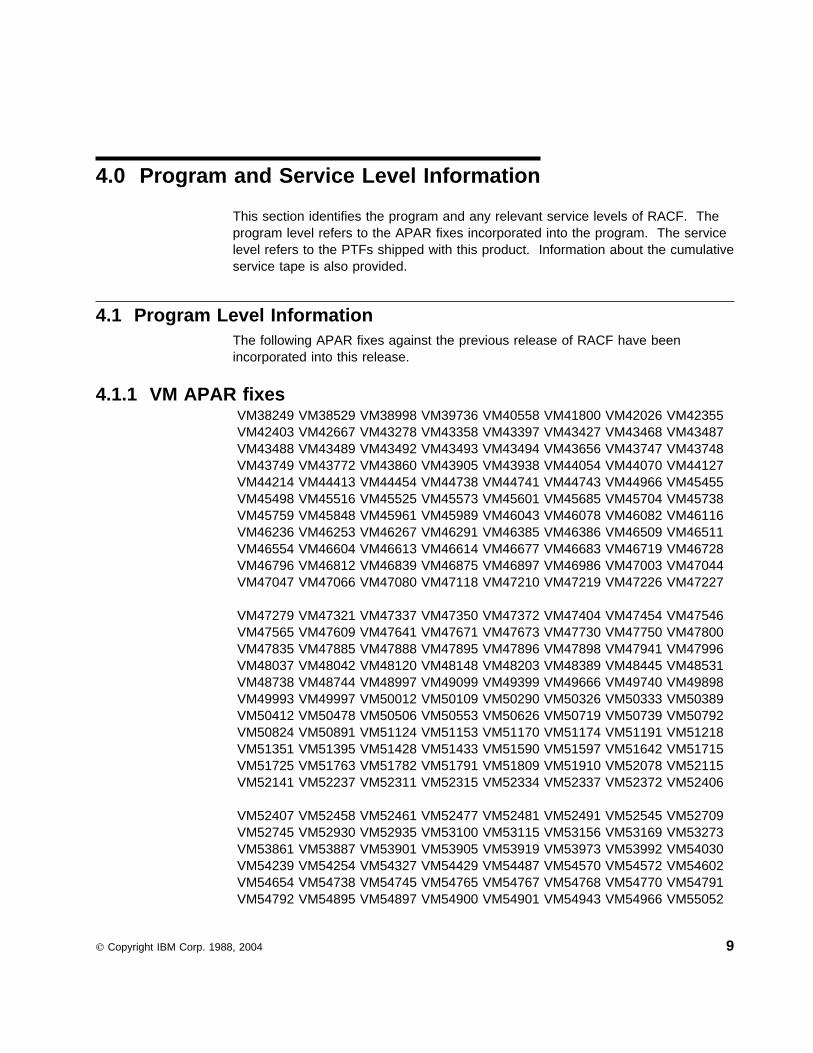
4.1 Program Level InformationThe following APAR fixes against the previous release of RACF have beenincorporated into this release.
4.1.1 VM APAR fixes VM38249 VM38529 VM38998 VM39736 VM40558 VM41800 VM42026 VM42355 VM42403 VM42667 VM43278 VM43358 VM43397 VM43427 VM43468 VM43487 VM43488 VM43489 VM43492 VM43493 VM43494 VM43656 VM43747 VM43748 VM43749 VM43772 VM43860 VM43905 VM43938 VM44054 VM44070 VM44127 VM44214 VM44413 VM44454 VM44738 VM44741 VM44743 VM44966 VM45455 VM45498 VM45516 VM45525 VM45573 VM45601 VM45685 VM45704 VM45738 VM45759 VM45848 VM45961 VM45989 VM46043 VM46078 VM46082 VM46116 VM46236 VM46253 VM46267 VM46291 VM46385 VM46386 VM46509 VM46511 VM46554 VM46604 VM46613 VM46614 VM46677 VM46683 VM46719 VM46728 VM46796 VM46812 VM46839 VM46875 VM46897 VM46986 VM47003 VM47044 VM47047 VM47066 VM47080 VM47118 VM47210 VM47219 VM47226 VM47227
VM47279 VM47321 VM47337 VM47350 VM47372 VM47404 VM47454 VM47546 VM47565 VM47609 VM47641 VM47671 VM47673 VM47730 VM47750 VM47800 VM47835 VM47885 VM47888 VM47895 VM47896 VM47898 VM47941 VM47996 VM48037 VM48042 VM48120 VM48148 VM48203 VM48389 VM48445 VM48531 VM48738 VM48744 VM48997 VM49099 VM49399 VM49666 VM49740 VM49898 VM49993 VM49997 VM50012 VM50109 VM50290 VM50326 VM50333 VM50389 VM50412 VM50478 VM50506 VM50553 VM50626 VM50719 VM50739 VM50792 VM50824 VM50891 VM51124 VM51153 VM51170 VM51174 VM51191 VM51218 VM51351 VM51395 VM51428 VM51433 VM51590 VM51597 VM51642 VM51715 VM51725 VM51763 VM51782 VM51791 VM51809 VM51910 VM52078 VM52115 VM52141 VM52237 VM52311 VM52315 VM52334 VM52337 VM52372 VM52406
VM52407 VM52458 VM52461 VM52477 VM52481 VM52491 VM52545 VM52709 VM52745 VM52930 VM52935 VM53100 VM53115 VM53156 VM53169 VM53273 VM53861 VM53887 VM53901 VM53905 VM53919 VM53973 VM53992 VM54030 VM54239 VM54254 VM54327 VM54429 VM54487 VM54570 VM54572 VM54602 VM54654 VM54738 VM54745 VM54765 VM54767 VM54768 VM54770 VM54791 VM54792 VM54895 VM54897 VM54900 VM54901 VM54943 VM54966 VM55052
Copyright IBM Corp. 1988, 2004 9
VM55060 VM55102 VM55108 VM55185 VM55186 VM55321 VM55375 VM55408 VM55471 VM55518 VM55520 VM55554 VM55610 VM55619 VM55731 VM55739 VM55744 VM55798 VM55857 VM55924 VM55956 VM55968 VM55989 VM56005 VM56099 VM56119 VM56192 VM56272 VM56281 VM56332 VM56432 VM56478 VM56482 VM56486 VM56589 VM56590 VM56621 VM56628 VM56667 VM56690
VM56733 VM56786 VM57094 VM57116 VM57143 VM57172 VM57183 VM57270 VM57305 VM57308 VM57361 VM57381 VM57383 VM57386 VM57459 VM57479 VM57568 VM57578 VM57600 VM57736 VM57745 VM57774 VM57806 VM57866 VM57868 VM57873 VM57954 VM57956 VM57966 VM57983 VM58037 VM58229 VM58310 VM58321 VM58399 VM58411 VM58431 VM58448 VM58500 VM58519 VM58541 VM58542 VM58570 VM58655 VM58672 VM58830 VM59221 VM59232 VM59245 VM59359 VM59421 VM59708 VM59710 VM59731 VM59754 VM59761 VM59796 VM59924 VM60078 VM60079 VM60091 VM60146
4.1.2 MVS APAR fixes OW00022 OW00112 OW00113 OW00217 OW00230 OW00233 OW00278 OW00283 OW00332 OW00359 OW00409 OW00585 OW00719 OW00722 OW00990 OW01206 OW01241 OW01443 OW01469 OW01696 OW01916 OW02010 OW02152 OW02238 OW02311 OW02709 OW02974 OW02992 OW03024 OW03128 OW03314 OW03368 OW03482 OW03552 OW03598 OW03826 OW03833 OW03945 OW03949 OW04107 OW04190 OW04268 OW04283 OW04320 OW04350 OW04461 OW04746 OW04882 OW04917 OW04920 OW04935 OW04994 OW05307 OW05381 OW05390 OW05429 OW05513 OW05551 OW05566 OW05572 OW05640 OW05931 OW06134 OW06164 OW06215 OW06312 OW06530 OW07105 OW07215 OW07438 OW07518 OW07519 OW07542 OW07753 OW07799 OW07890 OW07914 OW08036 OW08107 OW08117 OW08152 OW08238 OW08369 OW08457 OW08534 OW08761 OW08823 OW08842
OW08940 OW09011 OW09134 OW09150 OW09182 OW09299 OW09330 OW09339 OW09348 OW09454 OW09690 OW09738 OW09838 OW09929 OW09976 OW09981 OW10005 OW10092 OW10180 OW10232 OW10250 OW10348 OW10524 OW10526 OW10544 OW10625 OW10664 OW10909 OW10966 OW11056 OW11133 OW11186 OW11251 OW11416 OW11500 OW11665 OW11926 OW12027 OW12271 OW12279 OW12494 OW12676 OW12879 OW13069 OW13074 OW13078 OW13105 OW13653 OW13914 OW13967 OW14035 OW14106 OW14157 OW14182 OW14255 OW14440 OW14451 OW14615 OW14773 OW14929 OW14930 OW15408 OW15790 OW15990 OW15997 OW16054 OW16094 OW16301 OW16752 OW17114 OW17568 OW17969 OW18197 OY04178 OY22594 OY23588 OY24917 OY25157 OY25492 OY25594 OY25934 OY26497 OY27000 OY27166 OY27258 OY27960 OY28033 OY28408
OY29073 OY29223 OY29446 OY29500 OY29866 OY29977 OY29997 OY30469 OY31045 OY31051 OY31052 OY31053 OY31054 OY31055 OY31056 OY31058 OY31060 OY31061 OY31064 OY31065 OY31067 OY31068 OY31069 OY31072 OY31073 OY31075 OY31081 OY31082 OY31083 OY31084 OY31085 OY31086 OY31088 OY31089 OY31090 OY31091 OY31092 OY31093 OY31094 OY31096
10 RACF Program Directory
OY31099 OY31100 OY31101 OY31102 OY31104 OY31110 OY31111 OY31113 OY31138 OY31139 OY31163 OY31392 OY31423 OY31486 OY31513 OY31536 OY31748 OY31792 OY31849 OY31870 OY31871 OY31944 OY31949 OY31953 OY31963 OY32008 OY32009 OY32118 OY32129 OY32147 OY32149 OY32150 OY32183 OY32186 OY32227 OY32315 OY32327 OY32350 OY32428 OY32475 OY32489 OY32531 OY32606 OY32743 OY32816 OY32834 OY32860 OY32874
OY32881 OY32883 OY32887 OY32896 OY32898 OY32901 OY32903 OY32907 OY32908 OY32915 OY32944 OY32947 OY32949 OY32960 OY33002 OY33019 OY33020 OY33023 OY33028 OY33040 OY33103 OY33122 OY33156 OY33180 OY33185 OY33212 OY33213 OY33246 OY33296 OY33316 OY33336 OY33412 OY33417 OY33454 OY33481 OY33546 OY33624 OY33629 OY33636 OY33650 OY33659 OY33670 OY33673 OY33734 OY33753 OY33754 OY33757 OY33765 OY33767 OY33801 OY33815 OY33853 OY33859 OY33882 OY33893 OY33991 OY33994 OY34015 OY34017 OY34039 OY34087 OY34089 OY34130 OY34137 OY34138 OY34139 OY34301 OY34431 OY34472 OY34490 OY34529 OY34536 OY34557 OY34701 OY34710 OY34736 OY34782 OY34783 OY34786 OY34813 OY34814 OY34816 OY34822 OY34824 OY34826 OY34827 OY34830 OY34835
OY34839 OY34840 OY34841 OY34892 OY34981 OY35043 OY35120 OY35121 OY35191 OY35417 OY35451 OY35463 OY35528 OY35622 OY35623 OY35695 OY35698 OY35701 OY35708 OY35711 OY35730 OY35737 OY35753 OY35764 OY35768 OY35933 OY35958 OY35991 OY35993 OY36084 OY36145 OY36156 OY36185 OY36191 OY36226 OY36238 OY36241 OY36286 OY36310 OY36329 OY36343 OY36372 OY36375 OY36472 OY36476 OY36520 OY36644 OY36645 OY36732 OY36735 OY36765 OY36794 OY36856 OY36966 OY36978 OY36994 OY37151 OY37159 OY37306 OY37513 OY37551 OY37587 OY37596 OY37605 OY37682 OY37695 OY37837 OY37863 OY37886 OY37888 OY37910 OY37915 OY37939 OY37949 OY38005 OY38014 OY38039 OY38040 OY38091 OY38116 OY38161 OY38175 OY38222 OY38253 OY38290 OY38313 OY38344 OY38381
OY38433 OY38440 OY38462 OY38463 OY38489 OY38628 OY38642 OY38674 OY38711 OY38717 OY38749 OY38802 OY38805 OY38807 OY38812 OY38842 OY38954 OY38982 OY39069 OY39083 OY39293 OY39369 OY39381 OY39443 OY39492 OY39511 OY39535 OY39606 OY39647 OY39687 OY39692 OY39725 OY39765 OY39794 OY39801 OY39803 OY39841 OY39926 OY39947 OY39983 OY40037 OY40147 OY40154 OY40166 OY40175 OY40217 OY40278 OY40351 OY40362 OY40404 OY40495 OY40595 OY40646 OY40650 OY40740 OY40753 OY40830 OY40860 OY40909 OY40917 OY41031 OY41033 OY41061 OY41157 OY41163 OY41189 OY41231 OY41238 OY41244 OY41294 OY41311 OY41330 OY41332 OY41362 OY41405 OY41437 OY41545 OY41547 OY41576 OY41581 OY41609 OY41637 OY41674 OY41808 OY41851 OY42020 OY42023 OY42039
OY42190 OY42249 OY42253 OY42268 OY42276 OY42312 OY42322 OY42345 OY42422 OY42434 OY42438 OY42486 OY42538 OY42576 OY42635 OY42716 OY42752 OY42774 OY42914 OY42971 OY43022 OY43118 OY43156 OY43211
Program and Service Level Information 11
OY43330 OY43341 OY43392 OY43412 OY43451 OY43473 OY43490 OY43491 OY43494 OY43601 OY43613 OY43619 OY43747 OY43764 OY43859 OY43903 OY43913 OY43938 OY43939 OY43971 OY43981 OY44016 OY44071 OY44089 OY44140 OY44251 OY44263 OY44331 OY44359 OY44437 OY44443 OY44445 OY44460 OY44493 OY44567 OY44574 OY44592 OY44605 OY44646 OY44653 OY44678 OY44709 OY44750 OY44785 OY44825 OY44856 OY44874 OY44889 OY44894 OY44910 OY44935 OY44998 OY45049 OY45070 OY45085 OY45120 OY45257 OY45279 OY45358 OY45390 OY45430 OY45487 OY45513 OY45526
OY45535 OY45537 OY45651 OY45694 OY45718 OY45747 OY45774 OY45784 OY45810 OY45873 OY45920 OY45922 OY45962 OY46017 OY46062 OY46076 OY46153 OY46267 OY46271 OY46344 OY46392 OY46393 OY46411 OY46457 OY46516 OY46549 OY46558 OY46562 OY46590 OY46649 OY46654 OY46699 OY46703 OY46733 OY46772 OY46785 OY46860 OY46880 OY46897 OY46973 OY47001 OY47005 OY47031 OY47051 OY47060 OY47087 OY47152 OY47162 OY47198 OY47200 OY47278 OY47290 OY47324 OY47465 OY47476 OY47539 OY47585 OY47628 OY47676 OY47679 OY47682 OY47701 OY47730 OY47747 OY47790 OY47854 OY47909 OY47939 OY48032 OY48195 OY48233 OY48273 OY48278 OY48349 OY48364 OY48423 OY48426 OY48443 OY48586 OY48595 OY48700 OY48718 OY48819 OY48950 OY49134 OY49145 OY49166 OY49251
OY49426 OY49452 OY49539 OY49620 OY49621 OY49628 OY49644 OY49704 OY49707 OY49736 OY49750 OY49764 OY49856 OY49868 OY49871 OY49995 OY50013 OY50034 OY50044 OY50045 OY50054 OY50064 OY50172 OY50189 OY50228 OY50244 OY50247 OY50251 OY50340 OY50394 OY50474 OY50491 OY50513 OY50542 OY50543 OY50555 OY50596 OY50600 OY50608 OY50666 OY50681 OY50686 OY50846 OY50851 OY50873 OY51014 OY51019 OY51037 OY51083 OY51107 OY51112 OY51113 OY51226 OY51318 OY51461 OY51595 OY51616 OY51634 OY51654 OY51711 OY51732 OY51752 OY51759 OY51762 OY51791 OY51797 OY51799 OY51819 OY51830 OY51832 OY51977 OY52022 OY52063 OY52110 OY52123 OY52165 OY52190 OY52214 OY52353 OY52365 OY52372 OY52374 OY52410 OY52416 OY52417 OY52449 OY52482 OY52489
OY52493 OY52498 OY52555 OY52575 OY52584 OY52619 OY52707 OY52725 OY52763 OY52777 OY52807 OY52808 OY52828 OY52920 OY52931 OY52957 OY52983 OY52993 OY53027 OY53038 OY53054 OY53111 OY53157 OY53266 OY53267 OY53272 OY53297 OY53300 OY53324 OY53372 OY53394 OY53415 OY53434 OY53465 OY53495 OY53527 OY53560 OY53601 OY53646 OY53727 OY53733 OY53774 OY53815 OY53887 OY53997 OY54022 OY54039 OY54076 OY54077 OY54098 OY54122 OY54149 OY54169 OY54177 OY54228 OY54229 OY54231 OY54281 OY54292 OY54300 OY54310 OY54425 OY54490 OY54500 OY54507 OY54527 OY54528 OY54676 OY54707 OY54733 OY54841 OY54844 OY54948 OY54955 OY54968 OY54971 OY54995 OY55020 OY55070 OY55136 OY55139 OY55158 OY55220 OY55238 OY55244 OY55254 OY55289 OY55292
OY55314 OY55317 OY55406 OY55419 OY55423 OY55521 OY55527 OY55532
12 RACF Program Directory
OY55582 OY55585 OY55612 OY55726 OY55871 OY55881 OY55905 OY55913 OY55927 OY55940 OY55967 OY55975 OY56050 OY56087 OY56154 OY56405 OY56438 OY56456 OY56477 OY56507 OY56525 OY56573 OY56601 OY56738 OY56743 OY56771 OY56895 OY56913 OY56972 OY56990 OY57051 OY57287 OY57303 OY57336 OY57394 OY57411 OY57413 OY57456 OY57519 OY57549 OY57632 OY57648 OY57685 OY57706 OY57774 OY57860 OY57943 OY57994 OY58017 OY58030 OY58184 OY58193 OY58199 OY58212 OY58238 OY58374 OY58432 OY58470 OY58508 OY58520 OY58545 OY58563 OY58739 OY58766 OY58795 OY58797 OY58813 OY58871 OY58894 OY58899 OY58957 OY59033 OY59046 OY59079 OY59137 OY59138 OY59148 OY59161 OY59322 OY59439
OY59441 OY59507 OY59511 OY59532 OY59553 OY59571 OY59591 OY59759 OY59798 OY59841 OY59890 OY59984 OY60010 OY60011 OY60078 OY60111 OY60196 OY60197 OY60233 OY60234 OY60258 OY60274 OY60298 OY60299 OY60371 OY60461 OY60473 OY60556 OY60624 OY60641 OY60785 OY60846 OY60854 OY60934 OY60951 OY60972 OY61080 OY61153 OY61197 OY61338 OY61444 OY61500 OY61556 OY61667 OY61839 OY62006 OY62057 OY62062 OY62090 OY62174 OY62214 OY62259 OY62331 OY62395 OY62575 OY62638 OY62650 OY62695 OY62725 OY62756 OY62796 OY62800 OY63059 OY63328 OY63329 OY63336 OY63646 OY63702 OY63797 OY63860 OY63863 OY63869 OY63958 OY64053 OY64068 OY64075 OY64328 OY64388 OY64533 OY64635 OY64713 OY64720 OY64745 OY64801 OY64807 OY64812 OY64884 OY64887
OY64888 OY65009 OY65022 OY65084 OY65107 OY65138 OY65181 OY65239 OY65242 OY65281 OY65304 OY65351 OY65390 OY65418 OY65425 OY65463 OY65486 OY65499 OY65699 OY65728 OY65756 OY65975 OY66023 OY66100 OY66104 OY66152 OY66175 OY66190 OY66334 OY66446 OY66468 OY66606 OY66639 OY66683 OY66826 OY66959 OY66997 OY67020 OY67084 OY67186 OY67364 OY67383 OY67391 OY67618 OY67630 OY67883 OY68003
4.1.3 APARS Incorporated Since the GA of RACF 1.10The code shipped for RACF 1.10 has been updated. The following APAR fixesagainst RACF 1.10 have been incorporated into the product as shipped on z/VMVersion 5 z/VM System deliverable.
RSU9701: VM60210 VM60436 VM60657 VM60719 VM60739 VM60824
RSU9702: VM60497 VM60674 VM60690 VM60741 VM60792 VM61048 VM61062 VM61070 VM61105 VM61137 VM61143 VM61182
RSU9901: VM61034 VM61069 VM61200 VM61290 VM61291 VM61311 VM61390 VM61542 VM61559 VM61653 VM61712 VM61950
Program and Service Level Information 13
VM62073 VM62079 VM62095 VM62204
RSU0101: VM61397 VM61803 VM62274 VM62074 VM62314 VM62362 VM62381 VM62405 VM62421 VM62481 VM62570 VM62572 VM62591 VM62598 VM62628 VM62709 VM62761 VM62831
1 RSU0401:1 VM63076 VM63156
1 Additional APARs1 VM63452
4.2 Service Level InformationCheck the RACFVM1100 PSP bucket for any additional PTFs that should beinstalled or any additional install information.
4.3 Cumulative ServiceCumulative service for RACF Version 1 Release 10.0 is available through aperiodic Recommended Service Upgrade (RSU). See upgrade bucketRACFVM1100 subset yynnRSU (where yynn is the RSU service level) for the latestRSU available. For the list of PTF's included on the RSU, the PSP subsets sortedby PTF, APAR or RSU level (LVL), or the VM service RSU web site.
! The RSU that should be ordered if you are running RACF on z/VM Version 5, is the! z/VM V5 Stacked RSU applicable to the release of z/VM you are running. The PTF! number will be in the format of UM975nn, where nn is the release and modification! number of your system. For example if you are running z/VM 5.1.0 then the PTF to! order would be UM97510. It will contain service for all of the components, features,! or products, in VMSES/E format, that are pre-installed on the z/VM System! deliverable.
4.4 How to Determine Your RSU Service LevelThe service contained on each RSU constitutes a new service level. Use thisservice level when ordering corrective service. The service level is updated in thesystem inventory when the RSU is installed.
1 If you use the automated service procedures to install service then use the1 following command to query the current RSU service level of RACF.
14 RACF Program Directory
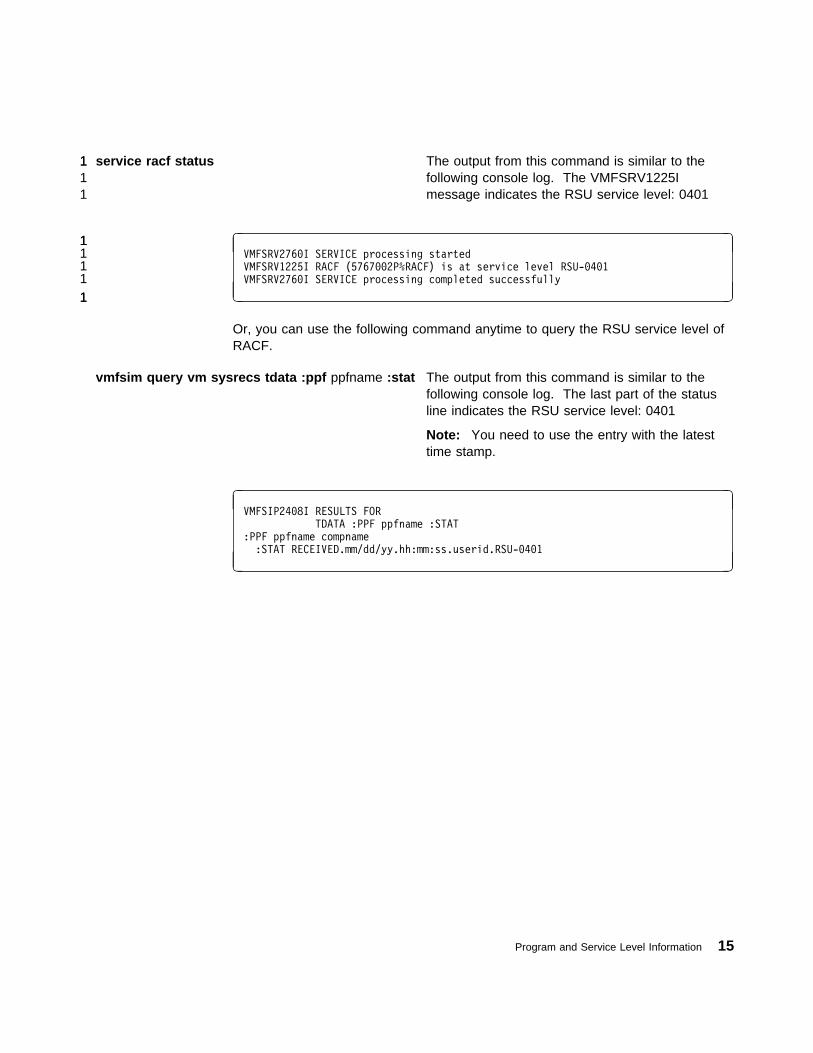
1 service racf status1 The output from this command is similar to the1 following console log. The VMFSRV1225I1 message indicates the RSU service level: 0401
1 �1 �1 VMFSRV276�I SERVICE processing started
1 VMFSRV1225I RACF (5767��2P%RACF) is at service level RSU-�4�1
1 VMFSRV276�I SERVICE processing completed successfully
1 -1 .
Or, you can use the following command anytime to query the RSU service level ofRACF.
vmfsim query vm sysrecs tdata :ppf ppfname :stat The output from this command is similar to thefollowing console log. The last part of the statusline indicates the RSU service level: 0401
Note: You need to use the entry with the latesttime stamp.
� �VMFSIP24�8I RESULTS FOR
TDATA :PPF ppfname :STAT
:PPF ppfname compname
:STAT RECEIVED.mm/dd/yy.hh:mm:ss.userid.RSU-�4�1
- .
Program and Service Level Information 15
5.0 Installation Requirements and Considerations
The following sections identify the system requirements for installing and activatingRACF. These requirements apply whether you are installing RACF for the firsttime, or updating an existing system.
5.1 Hardware RequirementsRACF Version 1 Release 10.0 for VM will operate on any processor supported by:
1 � z/VM Version 5
! On z/VM Version 5 the minidisks for the RACF database (defined at virtual! addresses 200 and 300) can reside on all DASD supported by z/VM Version 5.
! For the most current information on devices supported by z/VM Version 5, refer to! z/VM General Information manual. For more information on using FBA DASD
devices, see 5.2.7, “Restrictions When Using FBA Devices” on page 20.
5.2 Program ConsiderationsThe following sections list the programming considerations for installing RACF andactivating its functions.
5.2.1 Operating System RequirementsRACF supports the following VM operating systems:
1 � z/VM Version 5
| � RACF APAR VM63028 for enablement support.
| This APAR is installed on RACF as it comes on the z/VM System deliverable.
5.2.2 Other Program Product Requirements
5.2.2.1 General! ISPF Version 3 Release 2 or later or ISPF/PDF is needed if you are planning on! using the RACF ISPF code.
Ensure that the ICKDSF level supports the DASD that you intend to use for the| RACF databases. At least ICKDSF level 14 is required. ICKDSF level 17 or higher| comes with VM.
! HLASM Version 1.4.0 or higher is required if you intend to make changes to the! RACF CP Parts or other RACF customization assemble files.
16 Copyright IBM Corp. 1988, 2004
5.2.2.2 Dual RegistrationIf you have DirMaint installed, RACF provides dual registration panels so that youcan add, change or delete information in the RACF database and the CP directoryat the same time.
To use dual registration, you must have:
� ISPF Version 3.2 or later� DirMaint Version 1 Release 5 or higher
5.2.2.3 Trusted Computing Base (TCB)For information on the VM/ESA TCB requirements, refer to VM/ESA with RACFC2/B1 Trusted Facility Manual, SC24-5563.
5.2.3 Understanding RACF Interaction with CPThe RACF modules residing in the VM control program provide the interactionbetween RACF and VM. By convention, the module names begin with the prefixHCP. RACF modules residing in VM CP are:
HCPRPD HCPRPF HCPRPG HCPRPI HCPRPW HCPRWA
The RACF tape includes UPDATE files for HCPRWA, HCPRPD, HCPRPF,HCPRPG, HCPRPI, and HCPRPW with a filetype of RPIBASE0. Duringinstallation, the contents of these RACF UPDATE files replace the contents of thecorresponding VM/CP ASSEMBLE files.
For information on steps you need to perform to ensure that the CP part of RACFis installed properly, refer to 6.18, “Task 16. Install the CP Part of RACF” onpage 73.
5.2.4 RACF Database FormatRACF 1.10 requires that the database be in the restructured format introduced inRACF 1.9.0. If you are migrating from an earlier release of RACF, and yourdatabase is not in the restructured format, you must restructure it before you installRACF 1.10.
� If you are migrating from RACF 1.9.2, your database is already restructured.
� If you are migrating from RACF 1.9.0, your database might not be restructured.RACF 1.9.0 supports both the restructured and nonrestructured formats. Ifyour database is not restructured, before you install RACF 1.10 follow theinstructions in the RACF 1.9.0 program directory to restructure your database.
Installation Requirements and Considerations 17

� If you are migrating from RACF 1.8.2, your database is not restructured.Before you can install RACF 1.10 you must install either RACF 1.9.0 or 1.9.2and follow the instructions in the program directory for that release torestructure your database.
5.2.5 Sharing a RACF DatabaseA RACF database can be shared with another operating system, either MVS orVM. In general a RACF database can be shared with a system that has anotherlevel of RACF installed. Note, however, that because RACF 1.10 requires arestructured database, it cannot share a database with a previous release of RACFthat does not support the restructured format. A RACF database residing on FBADASD cannot be shared. See RACF: System Programmer's Guide for moreinformation on sharing a RACF database.
During installation, RACF assumes that the database is being shared. If thedatabase is not being shared, RACF issues a warning message:
CSTERP��1W - Warning: Device xxx was configured as shared;
now configured as non-shared.
If you are not sharing a database you can ignore the message. If you are sharinga database and receive the message, you have not set up your database correctly.You must correct the situation to prevent database damage. Refer to theinformation in the following sections about sharing RACF databases.
When sharing databases, consider the following options when defining DASD:
� If sharing between real systems (for example, two separate processors):
– Use the DEDICATE directory statement
� If sharing between virtual systems (for example, virtual and second-level guestsystems):
– The MDISK directory statement must use the V statement (for example,MWV)
� If sharing between real and virtual systems (for example, two separateprocessors with at least one second-level guest):
– Use the full-pack minidisk| – The System Configuration file requires RDEVICE statement with SHARED| YES specified (new way). (Or for the older way, HCPRIO requires
SHR=YES)– The MDISK directory statement must use the V statement (for example,
MWV)
� If sharing with another system, ensure that the full pack minidisk on which theRACF database resides is not on a CSE formatted volume.
18 RACF Program Directory
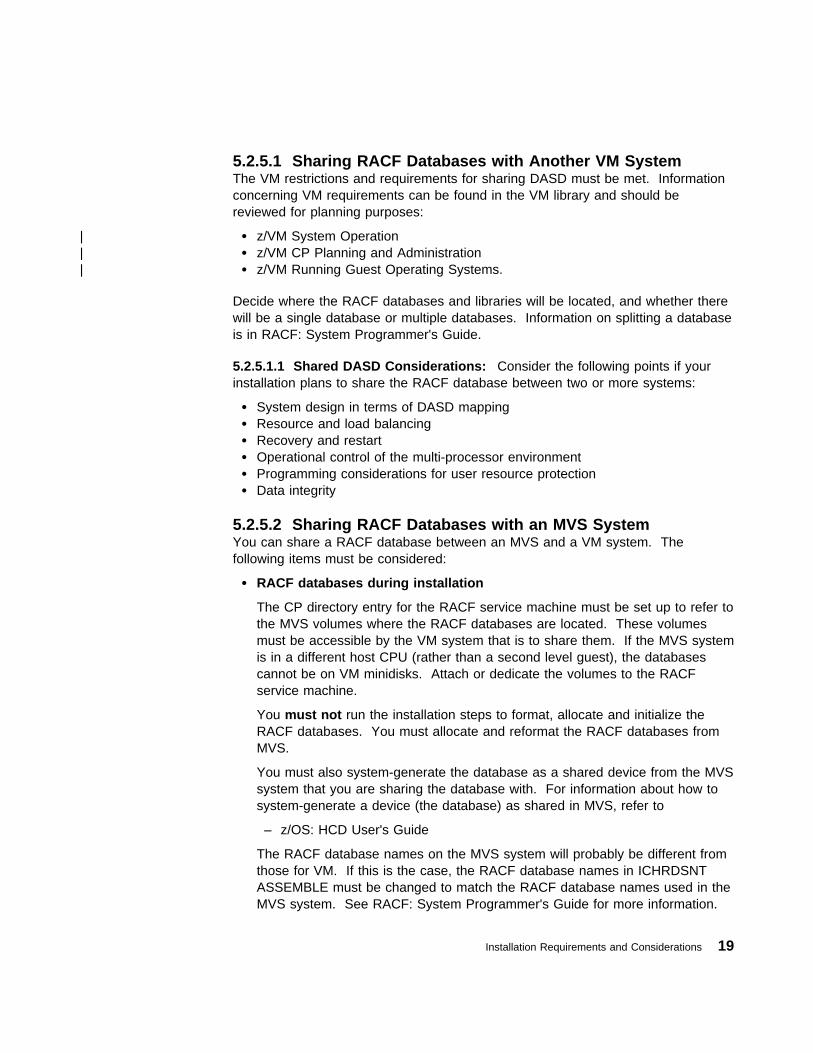
5.2.5.1 Sharing RACF Databases with Another VM SystemThe VM restrictions and requirements for sharing DASD must be met. Informationconcerning VM requirements can be found in the VM library and should bereviewed for planning purposes:
| � z/VM System Operation| � z/VM CP Planning and Administration| � z/VM Running Guest Operating Systems.
Decide where the RACF databases and libraries will be located, and whether therewill be a single database or multiple databases. Information on splitting a databaseis in RACF: System Programmer's Guide.
5.2.5.1.1 Shared DASD Considerations: Consider the following points if yourinstallation plans to share the RACF database between two or more systems:
� System design in terms of DASD mapping� Resource and load balancing� Recovery and restart� Operational control of the multi-processor environment� Programming considerations for user resource protection
� Data integrity
5.2.5.2 Sharing RACF Databases with an MVS SystemYou can share a RACF database between an MVS and a VM system. Thefollowing items must be considered:
� RACF databases during installation
The CP directory entry for the RACF service machine must be set up to refer tothe MVS volumes where the RACF databases are located. These volumesmust be accessible by the VM system that is to share them. If the MVS systemis in a different host CPU (rather than a second level guest), the databasescannot be on VM minidisks. Attach or dedicate the volumes to the RACFservice machine.
You must not run the installation steps to format, allocate and initialize theRACF databases. You must allocate and reformat the RACF databases fromMVS.
You must also system-generate the database as a shared device from the MVSsystem that you are sharing the database with. For information about how tosystem-generate a device (the database) as shared in MVS, refer to
– z/OS: HCD User's Guide
The RACF database names on the MVS system will probably be different fromthose for VM. If this is the case, the RACF database names in ICHRDSNTASSEMBLE must be changed to match the RACF database names used in theMVS system. See RACF: System Programmer's Guide for more information.
Installation Requirements and Considerations 19

The templates must be at the same level on the sharing systems. Running theRACFCONV EXEC or running IRRMIN00 from MVS with PARM=UPDATEensures that the templates are at the same level. See RACF: SystemProgrammer's Guide for more information. If the MVS system has RACFVersion 2 installed, you must install APAR OW18980 before you update thetemplates.
� RACF utilities
If you are running comparable levels of RACF on your VM and MVS systems, itis recommended that you run the utilities from the MVS system. However, ifyou are not running the same level of RACF on your VM and MVS systems,you must run the RACF utilities from the system with the higher level of RACF.(Note that RACF Version 2 for MVS is a higher level of RACF than RACF 1.10for VM, even though RACF Version 2 was available before RACF 1.10.)
5.2.6 Dynamic Parse InitializationOn VM, dynamic parse is started automatically by the RACF service machineduring its initialization sequence. Refer to RACF: System Programmer's Guide formore information about dynamic parse.
5.2.7 Restrictions When Using FBA DevicesRACF supports the use of FBA devices, with the following restrictions:
� The minidisks defined at virtual addresses 200 and 300 for the RACF servicemachine must be 3370, 9332, 9335, 9336 or SCSI disks (which appear as9336-20 DASD or SCSI FCP LUNs).
For the most current information on FBA DASD devices supported by z/VM,refer to z/VM: General Information manual.
� RACF databases cannot be shared on FBA device types.
� The primary RACF database must have SYSRACF as the DDNAME in its1 FILEDEF statement. The backup RACF database must have RACFBKUP as
the DDNAME in its FILEDEF statement.
� The number of RACF databases is limited to one primary and one backup.
� If the RACF database resides on an FBA DASD device, the multiple RACFservice machines capability cannot be used.
5.2.8 VMSES/E Program Installation and Service ConsiderationsThis section describes items that should be considered before you install or serviceRACF.
� VMSES/E is required to install and service this product.
� If multiple users install and maintain licensed products on your system, theremay be a problem getting the necessary access to MAINT's 51D disk. If you
20 RACF Program Directory
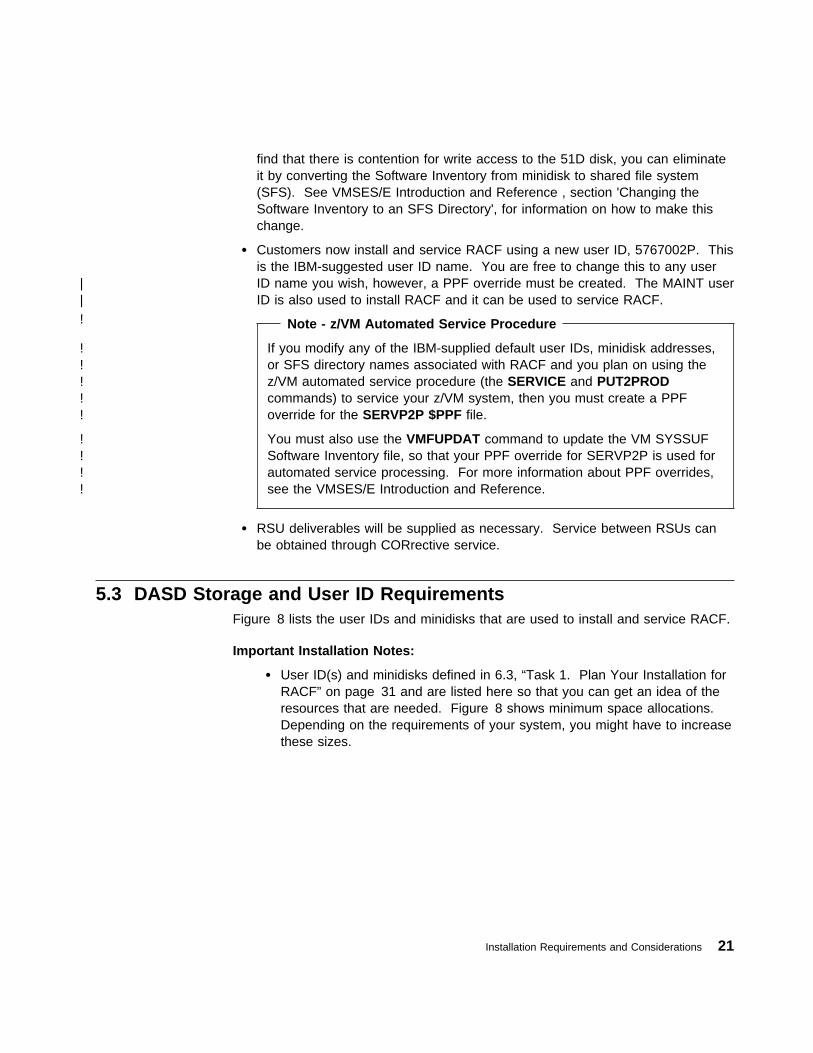
find that there is contention for write access to the 51D disk, you can eliminateit by converting the Software Inventory from minidisk to shared file system(SFS). See VMSES/E Introduction and Reference , section 'Changing theSoftware Inventory to an SFS Directory', for information on how to make thischange.
� Customers now install and service RACF using a new user ID, 5767002P. Thisis the IBM-suggested user ID name. You are free to change this to any user
| ID name you wish, however, a PPF override must be created. The MAINT user| ID is also used to install RACF and it can be used to service RACF.! Note - z/VM Automated Service Procedure
! If you modify any of the IBM-supplied default user IDs, minidisk addresses,! or SFS directory names associated with RACF and you plan on using the! z/VM automated service procedure (the SERVICE and PUT2PROD! commands) to service your z/VM system, then you must create a PPF! override for the SERVP2P $PPF file.
! You must also use the VMFUPDAT command to update the VM SYSSUF! Software Inventory file, so that your PPF override for SERVP2P is used for! automated service processing. For more information about PPF overrides,! see the VMSES/E Introduction and Reference.
� RSU deliverables will be supplied as necessary. Service between RSUs canbe obtained through CORrective service.
5.3 DASD Storage and User ID RequirementsFigure 8 lists the user IDs and minidisks that are used to install and service RACF.
Important Installation Notes:
� User ID(s) and minidisks defined in 6.3, “Task 1. Plan Your Installation forRACF” on page 31 and are listed here so that you can get an idea of theresources that are needed. Figure 8 shows minimum space allocations.Depending on the requirements of your system, you might have to increasethese sizes.
Installation Requirements and Considerations 21

Figure 8 (Page 1 of 3). DASD Storage Requirements for Target Minidisks
MinidiskOwner(user ID)
DefaultAddress
Storage inCylinders FB-512
BlocksSFS 4KBlocks
Usage
DASD CYLS Default SFS Directory Name
5767002P 2B2 339033809345
85102102
122 400 15 300 Contains all the base code shipped withRACF VMSYS:5767002P.RACF.OBJECT
5767002P 2C2 339033809345
91010
12 000 1500 Contains customization files. This diskcan also be used for local modifications. VMSYS:5767002P.RACF.SAMPLE
1 5767002P1 2D21 33901 33801 9345
1 701 841 84
1 12 6001 100 8001 Contains serviced files1 1 1 VMSYS:5767002P.RACF.DELTA
5767002P 2A6 339033809345
91010
12 000 1500 Contains AUX files and softwareinventory tables that represent thetest service level of RACFVMSYS:5767002P.RACF.APPLYALT
5767002P 2A2 339033809345
91010
12 000 1500 Contains AUX files and softwareinventory tables that represent theservice level of RACFthat is currently in production.VMSYS:5767002P.RACF.APPLYPROD
5767002P 29E 339033809345
233
3600 NOSFS Test general user disk. Code on thisdisk is copied to a production disk (forexample MAINT 19E), so the productiondisk also requires this amount of freespace.
| 5767002P| 590| 3390| 3380| 9345
| 38| 46| 46
| 55 200| NOSFS| Test CST/CMS system build disk.
5767002P 505 339033809345
415050
60 000 NOSFS Test server code build disk.
5767002P 599 339033809345
313838
45 600 NOSFS OPTIONAL. Needed if installingwith the RACF ISPF Panels.
5767002P 2B3 339033809345
313838
45 600 5700 OPTIONAL. Needed if installingthe RACF Kanji Feature. Basedisk for RACF Kanji ISPF panels.VMSYS:5767002P.RACF.KANJIOBJ
See the notes following the table.
22 RACF Program Directory
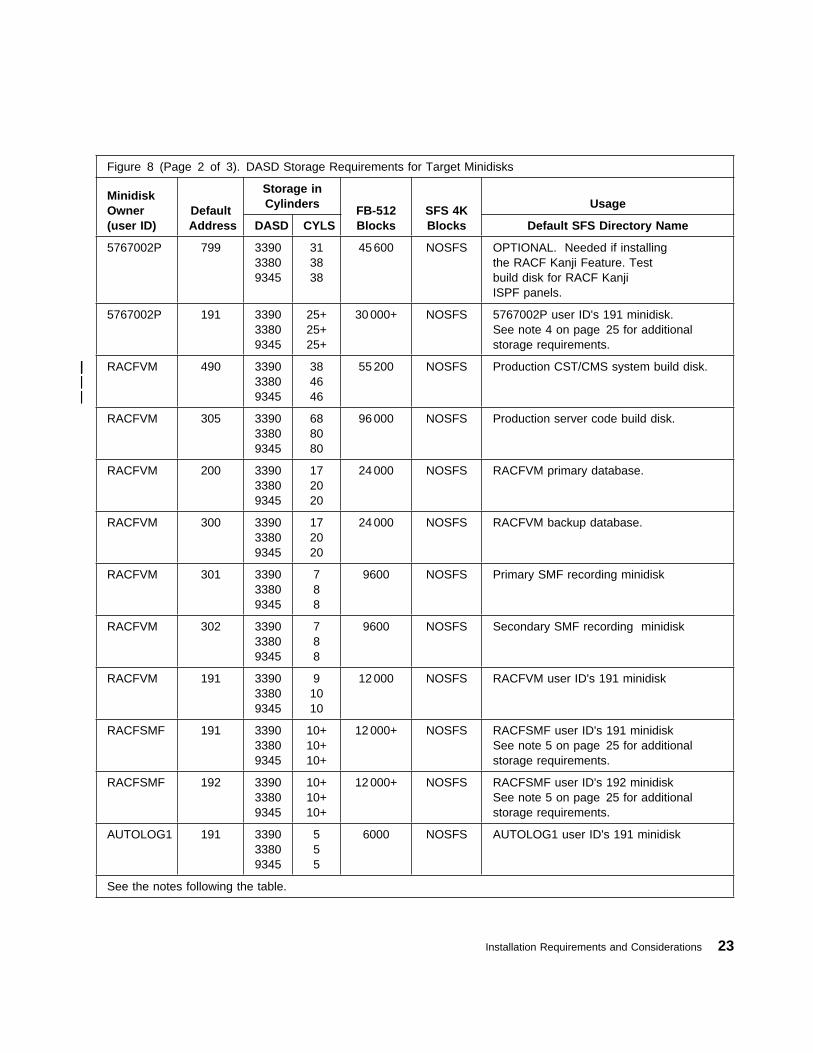
Figure 8 (Page 2 of 3). DASD Storage Requirements for Target Minidisks
MinidiskOwner(user ID)
DefaultAddress
Storage inCylinders FB-512
BlocksSFS 4KBlocks
Usage
DASD CYLS Default SFS Directory Name
5767002P 799 339033809345
313838
45 600 NOSFS OPTIONAL. Needed if installingthe RACF Kanji Feature. Testbuild disk for RACF KanjiISPF panels.
5767002P 191 339033809345
25+25+25+
30 000+ NOSFS 5767002P user ID's 191 minidisk.See note 4 on page 25 for additionalstorage requirements.
| RACFVM| 490| 3390| 3380| 9345
| 38| 46| 46
| 55 200| NOSFS| Production CST/CMS system build disk.
RACFVM 305 339033809345
688080
96 000 NOSFS Production server code build disk.
RACFVM 200 339033809345
172020
24 000 NOSFS RACFVM primary database.
RACFVM 300 339033809345
172020
24 000 NOSFS RACFVM backup database.
RACFVM 301 339033809345
788
9600 NOSFS Primary SMF recording minidisk
RACFVM 302 339033809345
788
9600 NOSFS Secondary SMF recording minidisk
RACFVM 191 339033809345
91010
12 000 NOSFS RACFVM user ID's 191 minidisk
RACFSMF 191 339033809345
10+10+10+
12 000+ NOSFS RACFSMF user ID's 191 minidiskSee note 5 on page 25 for additionalstorage requirements.
RACFSMF 192 339033809345
10+10+10+
12 000+ NOSFS RACFSMF user ID's 192 minidiskSee note 5 on page 25 for additionalstorage requirements.
AUTOLOG1 191 339033809345
555
6000 NOSFS AUTOLOG1 user ID's 191 minidisk
See the notes following the table.
Installation Requirements and Considerations 23
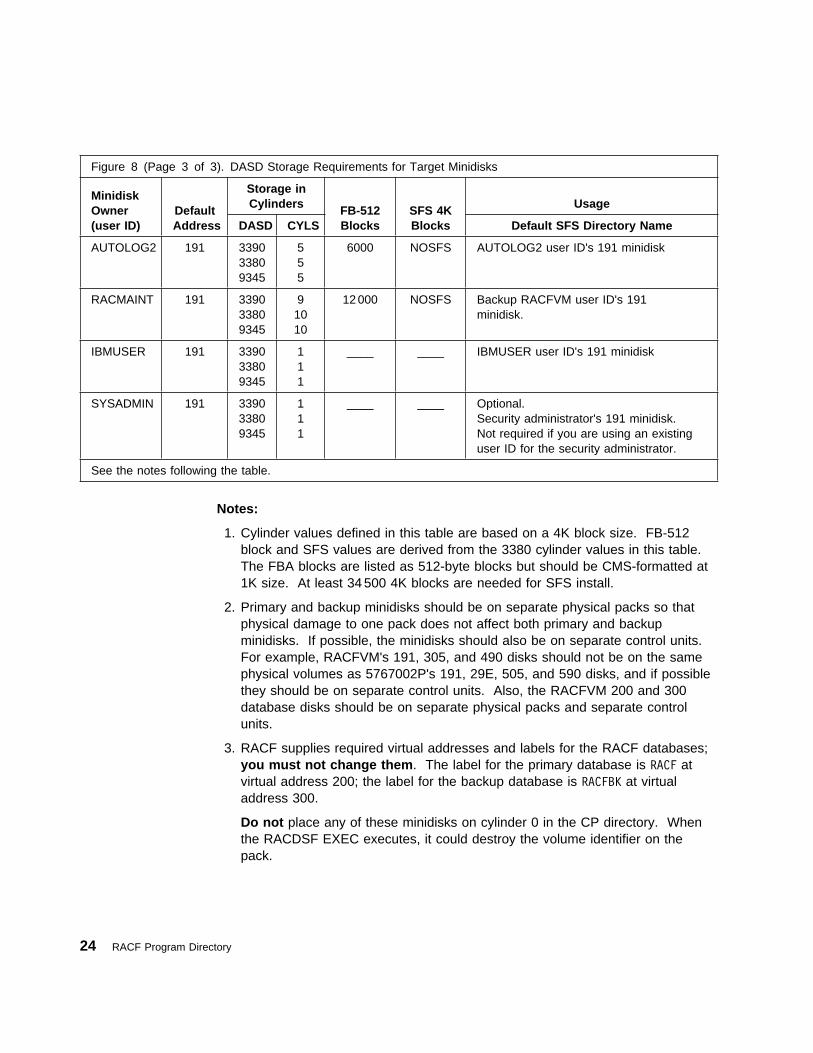
Figure 8 (Page 3 of 3). DASD Storage Requirements for Target Minidisks
MinidiskOwner(user ID)
DefaultAddress
Storage inCylinders FB-512
BlocksSFS 4KBlocks
Usage
DASD CYLS Default SFS Directory Name
AUTOLOG2 191 339033809345
555
6000 NOSFS AUTOLOG2 user ID's 191 minidisk
RACMAINT 191 339033809345
91010
12 000 NOSFS Backup RACFVM user ID's 191minidisk.
IBMUSER 191 339033809345
111
____ ____ IBMUSER user ID's 191 minidisk
SYSADMIN 191 339033809345
111
____ ____ Optional.Security administrator's 191 minidisk.Not required if you are using an existinguser ID for the security administrator.
See the notes following the table.
Notes:
1. Cylinder values defined in this table are based on a 4K block size. FB-512block and SFS values are derived from the 3380 cylinder values in this table.The FBA blocks are listed as 512-byte blocks but should be CMS-formatted at1K size. At least 34 500 4K blocks are needed for SFS install.
2. Primary and backup minidisks should be on separate physical packs so thatphysical damage to one pack does not affect both primary and backupminidisks. If possible, the minidisks should also be on separate control units.For example, RACFVM's 191, 305, and 490 disks should not be on the samephysical volumes as 5767002P's 191, 29E, 505, and 590 disks, and if possiblethey should be on separate control units. Also, the RACFVM 200 and 300database disks should be on separate physical packs and separate controlunits.
3. RACF supplies required virtual addresses and labels for the RACF databases;you must not change them. The label for the primary database is RACF atvirtual address 200; the label for the backup database is RACFBK at virtualaddress 300.
Do not place any of these minidisks on cylinder 0 in the CP directory. Whenthe RACDSF EXEC executes, it could destroy the volume identifier on thepack.
24 RACF Program Directory
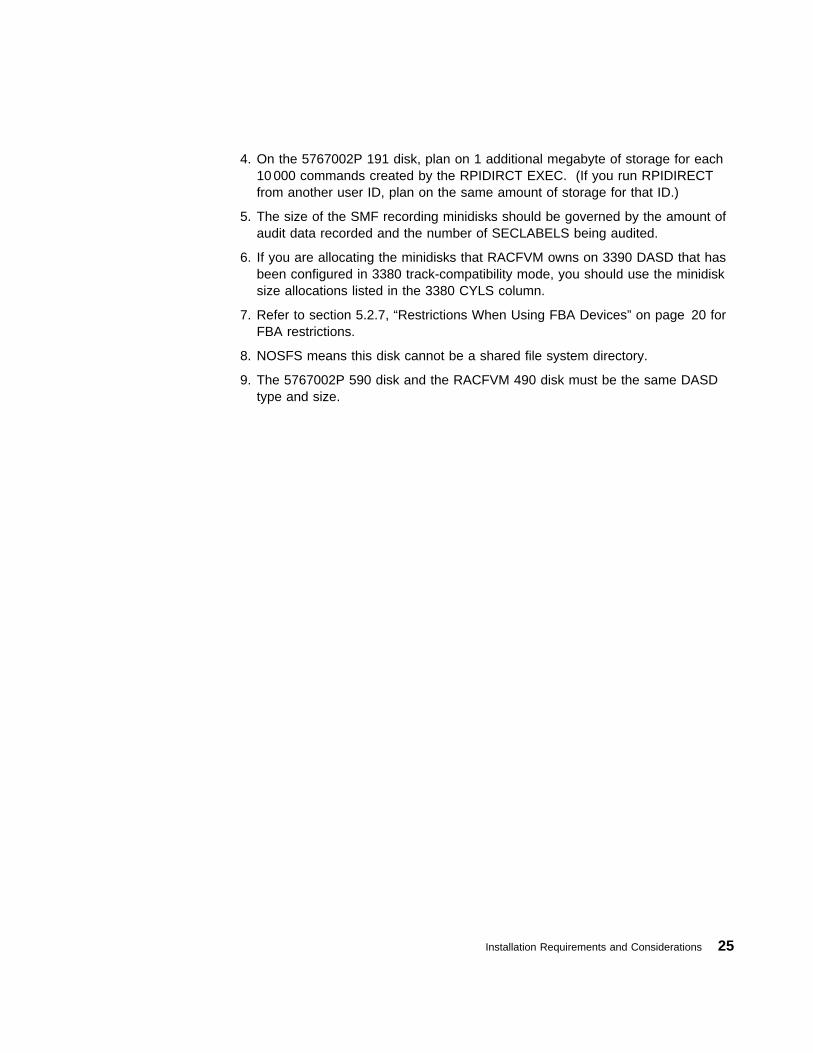
4. On the 5767002P 191 disk, plan on 1 additional megabyte of storage for each10 000 commands created by the RPIDIRCT EXEC. (If you run RPIDIRECTfrom another user ID, plan on the same amount of storage for that ID.)
5. The size of the SMF recording minidisks should be governed by the amount ofaudit data recorded and the number of SECLABELS being audited.
6. If you are allocating the minidisks that RACFVM owns on 3390 DASD that hasbeen configured in 3380 track-compatibility mode, you should use the minidisksize allocations listed in the 3380 CYLS column.
7. Refer to section 5.2.7, “Restrictions When Using FBA Devices” on page 20 forFBA restrictions.
8. NOSFS means this disk cannot be a shared file system directory.
9. The 5767002P 590 disk and the RACFVM 490 disk must be the same DASDtype and size.
Installation Requirements and Considerations 25
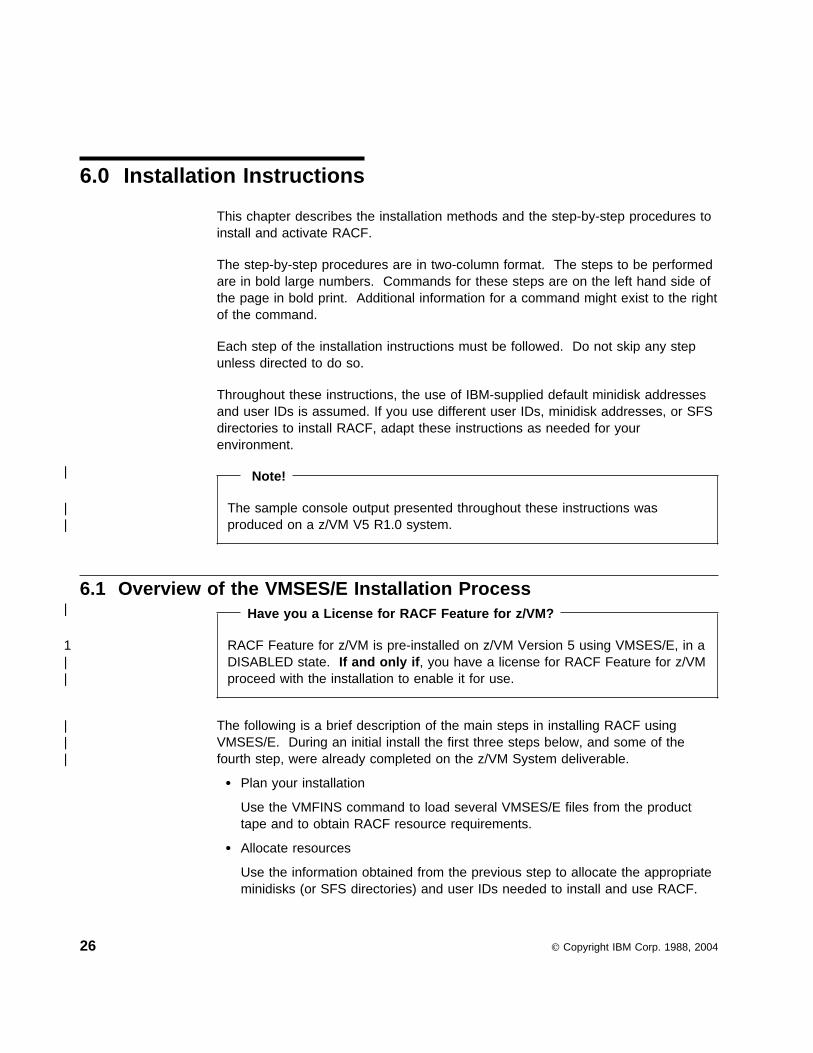
6.0 Installation Instructions
This chapter describes the installation methods and the step-by-step procedures toinstall and activate RACF.
The step-by-step procedures are in two-column format. The steps to be performedare in bold large numbers. Commands for these steps are on the left hand side ofthe page in bold print. Additional information for a command might exist to the rightof the command.
Each step of the installation instructions must be followed. Do not skip any stepunless directed to do so.
Throughout these instructions, the use of IBM-supplied default minidisk addressesand user IDs is assumed. If you use different user IDs, minidisk addresses, or SFSdirectories to install RACF, adapt these instructions as needed for yourenvironment.
| Note!
| The sample console output presented throughout these instructions was| produced on a z/VM V5 R1.0 system.
6.1 Overview of the VMSES/E Installation Process| Have you a License for RACF Feature for z/VM?
1 RACF Feature for z/VM is pre-installed on z/VM Version 5 using VMSES/E, in a| DISABLED state. If and only if, you have a license for RACF Feature for z/VM| proceed with the installation to enable it for use.
| The following is a brief description of the main steps in installing RACF using| VMSES/E. During an initial install the first three steps below, and some of the| fourth step, were already completed on the z/VM System deliverable.
� Plan your installation
Use the VMFINS command to load several VMSES/E files from the producttape and to obtain RACF resource requirements.
� Allocate resources
Use the information obtained from the previous step to allocate the appropriateminidisks (or SFS directories) and user IDs needed to install and use RACF.
26 Copyright IBM Corp. 1988, 2004
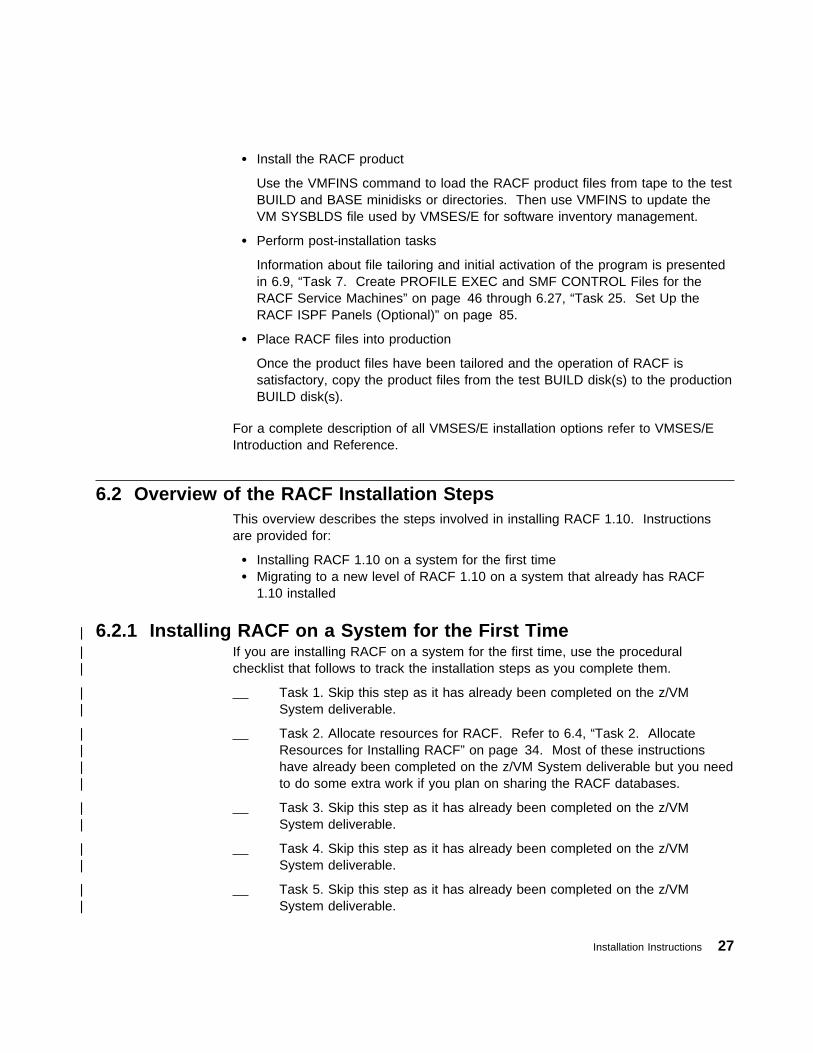
� Install the RACF product
Use the VMFINS command to load the RACF product files from tape to the testBUILD and BASE minidisks or directories. Then use VMFINS to update theVM SYSBLDS file used by VMSES/E for software inventory management.
� Perform post-installation tasks
Information about file tailoring and initial activation of the program is presentedin 6.9, “Task 7. Create PROFILE EXEC and SMF CONTROL Files for theRACF Service Machines” on page 46 through 6.27, “Task 25. Set Up theRACF ISPF Panels (Optional)” on page 85.
� Place RACF files into production
Once the product files have been tailored and the operation of RACF issatisfactory, copy the product files from the test BUILD disk(s) to the productionBUILD disk(s).
For a complete description of all VMSES/E installation options refer to VMSES/EIntroduction and Reference.
6.2 Overview of the RACF Installation StepsThis overview describes the steps involved in installing RACF 1.10. Instructionsare provided for:
� Installing RACF 1.10 on a system for the first time� Migrating to a new level of RACF 1.10 on a system that already has RACF
1.10 installed
| 6.2.1 Installing RACF on a System for the First Time| If you are installing RACF on a system for the first time, use the procedural| checklist that follows to track the installation steps as you complete them.
| Task 1. Skip this step as it has already been completed on the z/VM| System deliverable.
| Task 2. Allocate resources for RACF. Refer to 6.4, “Task 2. Allocate| Resources for Installing RACF” on page 34. Most of these instructions| have already been completed on the z/VM System deliverable but you need| to do some extra work if you plan on sharing the RACF databases.
| Task 3. Skip this step as it has already been completed on the z/VM| System deliverable.
| Task 4. Skip this step as it has already been completed on the z/VM| System deliverable.
| Task 5. Skip this step as it has already been completed on the z/VM| System deliverable.
Installation Instructions 27
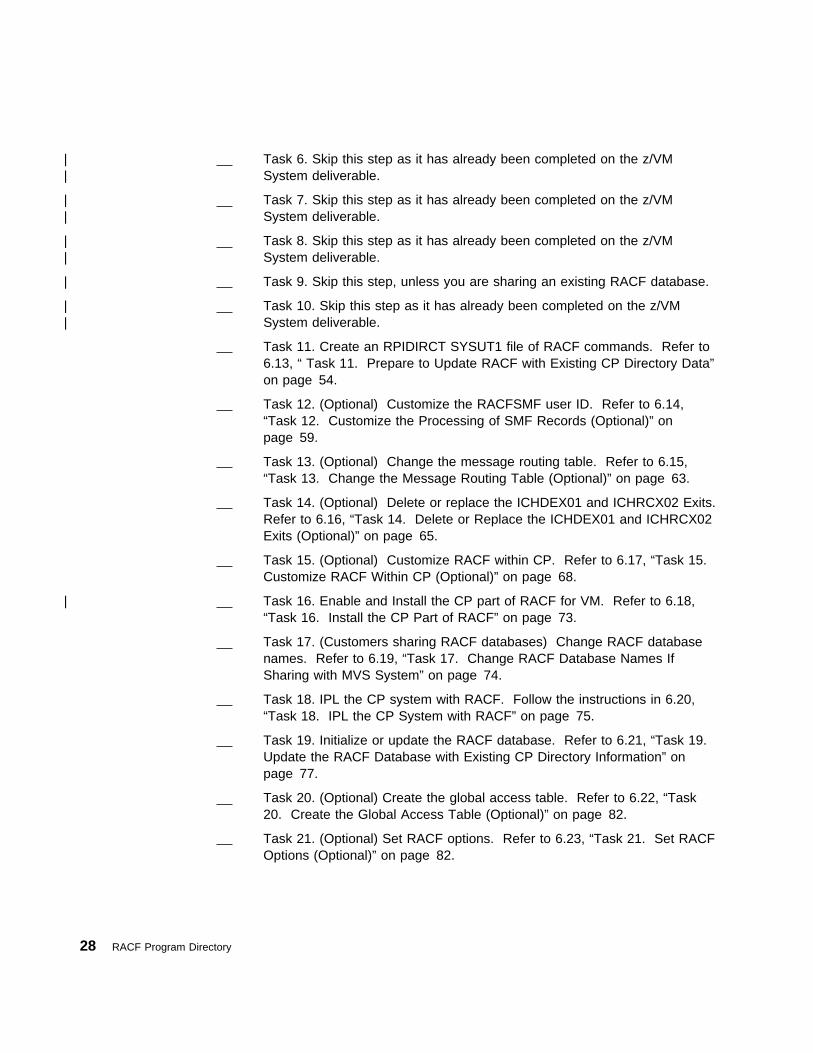
| Task 6. Skip this step as it has already been completed on the z/VM| System deliverable.
| Task 7. Skip this step as it has already been completed on the z/VM| System deliverable.
| Task 8. Skip this step as it has already been completed on the z/VM| System deliverable.
| Task 9. Skip this step, unless you are sharing an existing RACF database.
| Task 10. Skip this step as it has already been completed on the z/VM| System deliverable.
Task 11. Create an RPIDIRCT SYSUT1 file of RACF commands. Refer to6.13, “ Task 11. Prepare to Update RACF with Existing CP Directory Data”on page 54.
Task 12. (Optional) Customize the RACFSMF user ID. Refer to 6.14,“Task 12. Customize the Processing of SMF Records (Optional)” onpage 59.
Task 13. (Optional) Change the message routing table. Refer to 6.15,“Task 13. Change the Message Routing Table (Optional)” on page 63.
Task 14. (Optional) Delete or replace the ICHDEX01 and ICHRCX02 Exits.Refer to 6.16, “Task 14. Delete or Replace the ICHDEX01 and ICHRCX02Exits (Optional)” on page 65.
Task 15. (Optional) Customize RACF within CP. Refer to 6.17, “Task 15.Customize RACF Within CP (Optional)” on page 68.
| Task 16. Enable and Install the CP part of RACF for VM. Refer to 6.18,“Task 16. Install the CP Part of RACF” on page 73.
Task 17. (Customers sharing RACF databases) Change RACF databasenames. Refer to 6.19, “Task 17. Change RACF Database Names IfSharing with MVS System” on page 74.
Task 18. IPL the CP system with RACF. Follow the instructions in 6.20,“Task 18. IPL the CP System with RACF” on page 75.
Task 19. Initialize or update the RACF database. Refer to 6.21, “Task 19.Update the RACF Database with Existing CP Directory Information” onpage 77.
Task 20. (Optional) Create the global access table. Refer to 6.22, “Task20. Create the Global Access Table (Optional)” on page 82.
Task 21. (Optional) Set RACF options. Refer to 6.23, “Task 21. Set RACFOptions (Optional)” on page 82.
28 RACF Program Directory
Task 22. (Optional) Determine audit and control options for VM events.Refer to 6.24, “Task 22. Determine Audit and Control Options for VMEvents (Optional)” on page 83.
Task 23. (Optional) Split the RACF database. Refer to 6.25, “Task 23.Split the RACF Database (Optional, Performance-Related)” on page 84.
Task 24. (Optional) Set up dual registration. Refer to 6.26, “Task 24. SetUp Dual Registration If DirMaint Is Installed (Optional)” on page 84.
Task 25. (Optional) Install the RACF ISPF panels. Refer to 6.27, “Task 25.Set Up the RACF ISPF Panels (Optional)” on page 85.
Task 26. Place RACF into production. Refer to 6.28, “Task 26. PlaceRACF Into Production” on page 93.
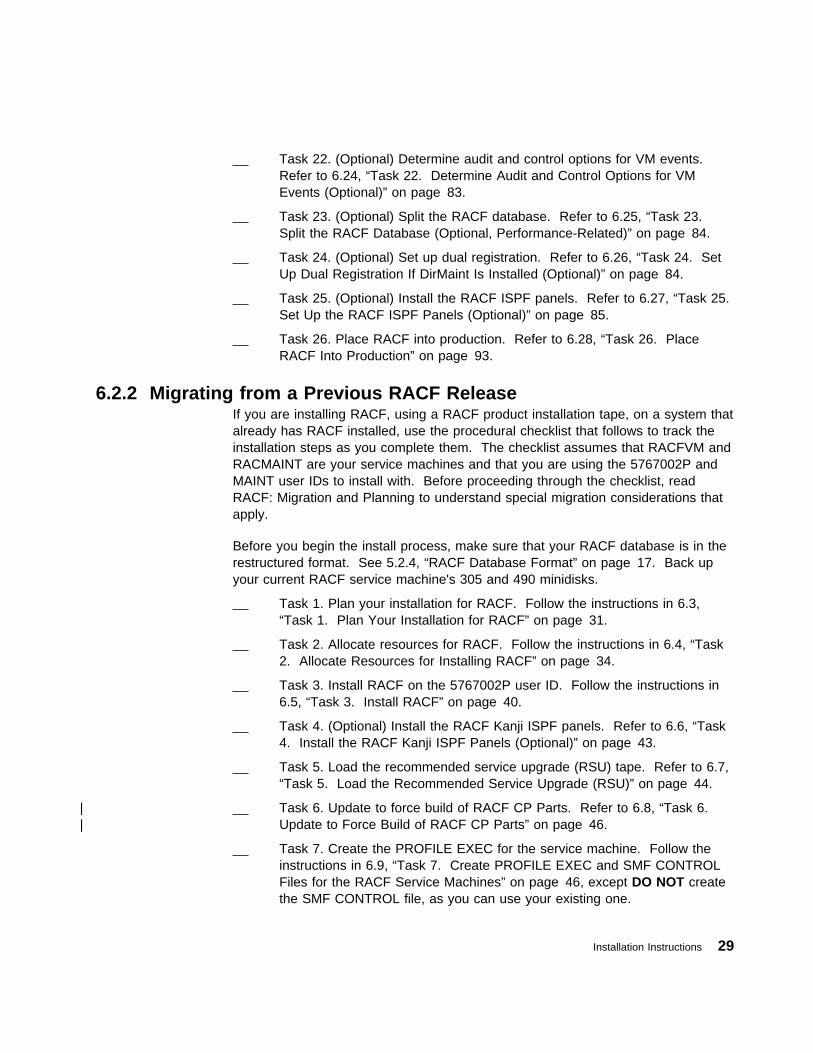
6.2.2 Migrating from a Previous RACF ReleaseIf you are installing RACF, using a RACF product installation tape, on a system thatalready has RACF installed, use the procedural checklist that follows to track theinstallation steps as you complete them. The checklist assumes that RACFVM andRACMAINT are your service machines and that you are using the 5767002P andMAINT user IDs to install with. Before proceeding through the checklist, readRACF: Migration and Planning to understand special migration considerations thatapply.
Before you begin the install process, make sure that your RACF database is in therestructured format. See 5.2.4, “RACF Database Format” on page 17. Back upyour current RACF service machine's 305 and 490 minidisks.
Task 1. Plan your installation for RACF. Follow the instructions in 6.3,“Task 1. Plan Your Installation for RACF” on page 31.
Task 2. Allocate resources for RACF. Follow the instructions in 6.4, “Task2. Allocate Resources for Installing RACF” on page 34.
Task 3. Install RACF on the 5767002P user ID. Follow the instructions in6.5, “Task 3. Install RACF” on page 40.
Task 4. (Optional) Install the RACF Kanji ISPF panels. Refer to 6.6, “Task4. Install the RACF Kanji ISPF Panels (Optional)” on page 43.
Task 5. Load the recommended service upgrade (RSU) tape. Refer to 6.7,“Task 5. Load the Recommended Service Upgrade (RSU)” on page 44.
| Task 6. Update to force build of RACF CP Parts. Refer to 6.8, “Task 6.| Update to Force Build of RACF CP Parts” on page 46.
Task 7. Create the PROFILE EXEC for the service machine. Follow theinstructions in 6.9, “Task 7. Create PROFILE EXEC and SMF CONTROLFiles for the RACF Service Machines” on page 46, except DO NOT createthe SMF CONTROL file, as you can use your existing one.
Installation Instructions 29
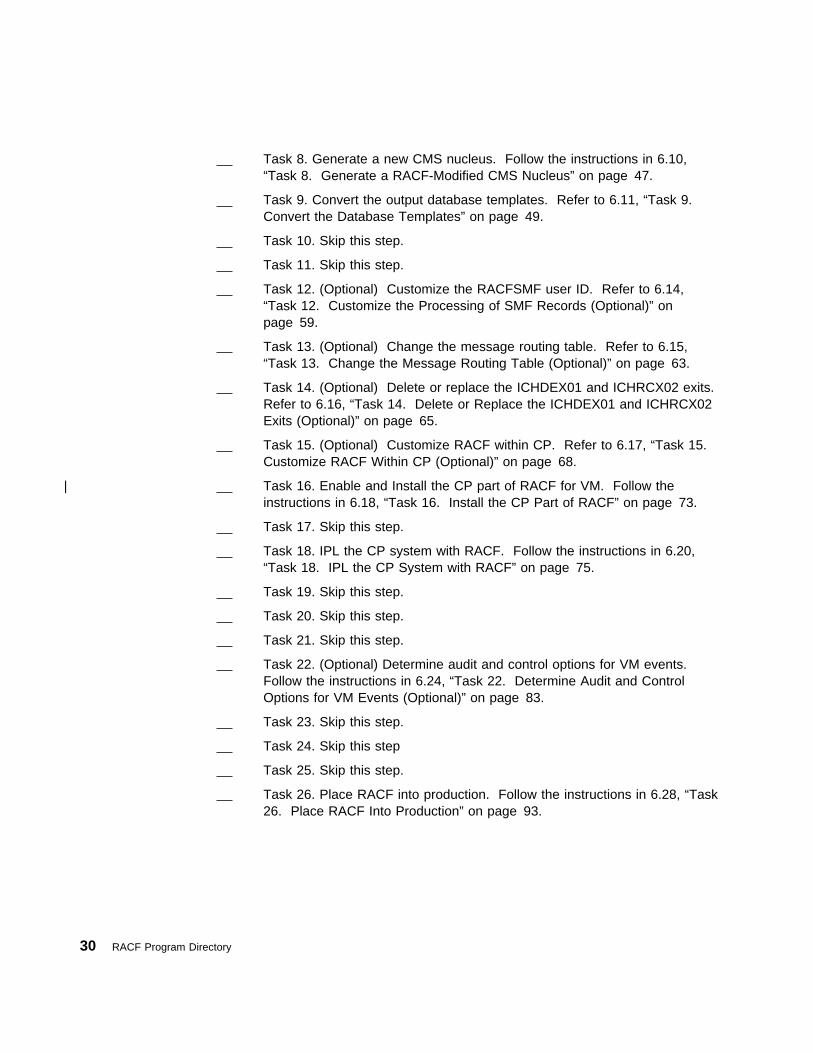
Task 8. Generate a new CMS nucleus. Follow the instructions in 6.10,“Task 8. Generate a RACF-Modified CMS Nucleus” on page 47.
Task 9. Convert the output database templates. Refer to 6.11, “Task 9.Convert the Database Templates” on page 49.
Task 10. Skip this step.
Task 11. Skip this step.
Task 12. (Optional) Customize the RACFSMF user ID. Refer to 6.14,“Task 12. Customize the Processing of SMF Records (Optional)” onpage 59.
Task 13. (Optional) Change the message routing table. Refer to 6.15,“Task 13. Change the Message Routing Table (Optional)” on page 63.
Task 14. (Optional) Delete or replace the ICHDEX01 and ICHRCX02 exits.Refer to 6.16, “Task 14. Delete or Replace the ICHDEX01 and ICHRCX02Exits (Optional)” on page 65.
Task 15. (Optional) Customize RACF within CP. Refer to 6.17, “Task 15.Customize RACF Within CP (Optional)” on page 68.
| Task 16. Enable and Install the CP part of RACF for VM. Follow theinstructions in 6.18, “Task 16. Install the CP Part of RACF” on page 73.
Task 17. Skip this step.
Task 18. IPL the CP system with RACF. Follow the instructions in 6.20,“Task 18. IPL the CP System with RACF” on page 75.
Task 19. Skip this step.
Task 20. Skip this step.
Task 21. Skip this step.
Task 22. (Optional) Determine audit and control options for VM events.Follow the instructions in 6.24, “Task 22. Determine Audit and ControlOptions for VM Events (Optional)” on page 83.
Task 23. Skip this step.
Task 24. Skip this step
Task 25. Skip this step.
Task 26. Place RACF into production. Follow the instructions in 6.28, “Task26. Place RACF Into Production” on page 93.
30 RACF Program Directory
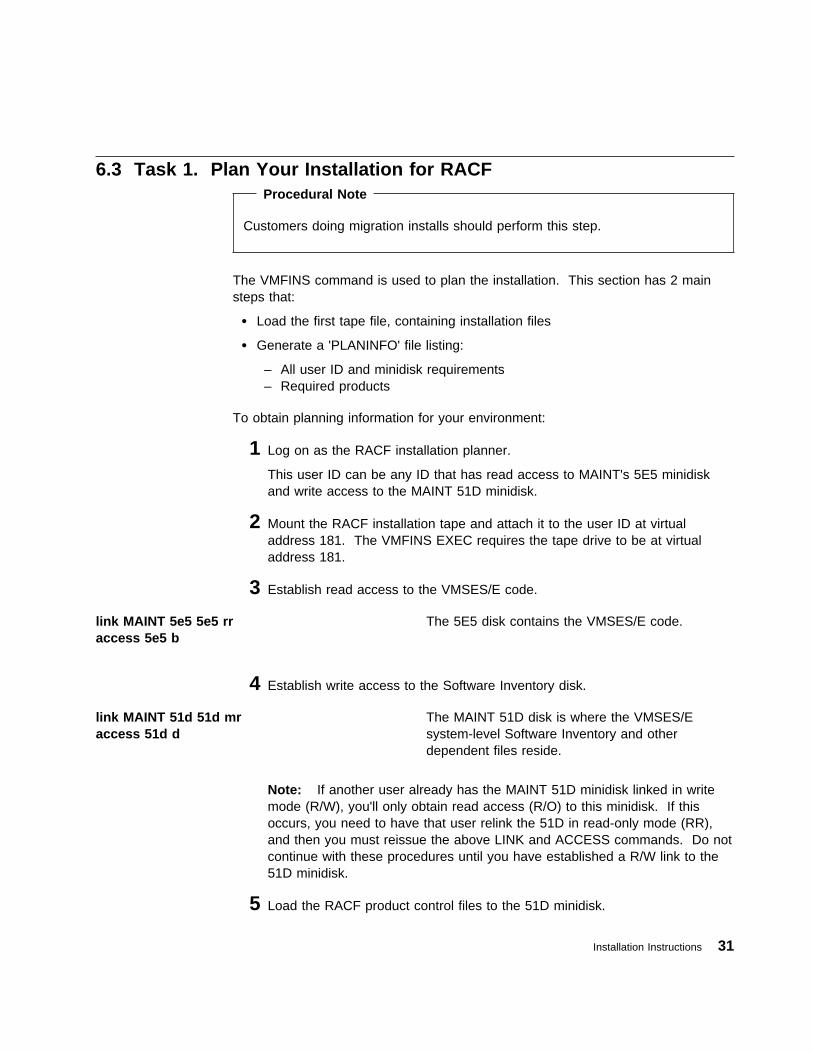
6.3 Task 1. Plan Your Installation for RACF Procedural Note
Customers doing migration installs should perform this step.
The VMFINS command is used to plan the installation. This section has 2 mainsteps that:
� Load the first tape file, containing installation files
� Generate a 'PLANINFO' file listing:
– All user ID and minidisk requirements – Required products
To obtain planning information for your environment:
1 Log on as the RACF installation planner.
This user ID can be any ID that has read access to MAINT's 5E5 minidiskand write access to the MAINT 51D minidisk.
2 Mount the RACF installation tape and attach it to the user ID at virtualaddress 181. The VMFINS EXEC requires the tape drive to be at virtualaddress 181.
3 Establish read access to the VMSES/E code.
link MAINT 5e5 5e5 rraccess 5e5 b
The 5E5 disk contains the VMSES/E code.
4 Establish write access to the Software Inventory disk.
link MAINT 51d 51d mraccess 51d d
The MAINT 51D disk is where the VMSES/Esystem-level Software Inventory and otherdependent files reside.
Note: If another user already has the MAINT 51D minidisk linked in writemode (R/W), you'll only obtain read access (R/O) to this minidisk. If thisoccurs, you need to have that user relink the 51D in read-only mode (RR),and then you must reissue the above LINK and ACCESS commands. Do notcontinue with these procedures until you have established a R/W link to the51D minidisk.
5 Load the RACF product control files to the 51D minidisk.
Installation Instructions 31
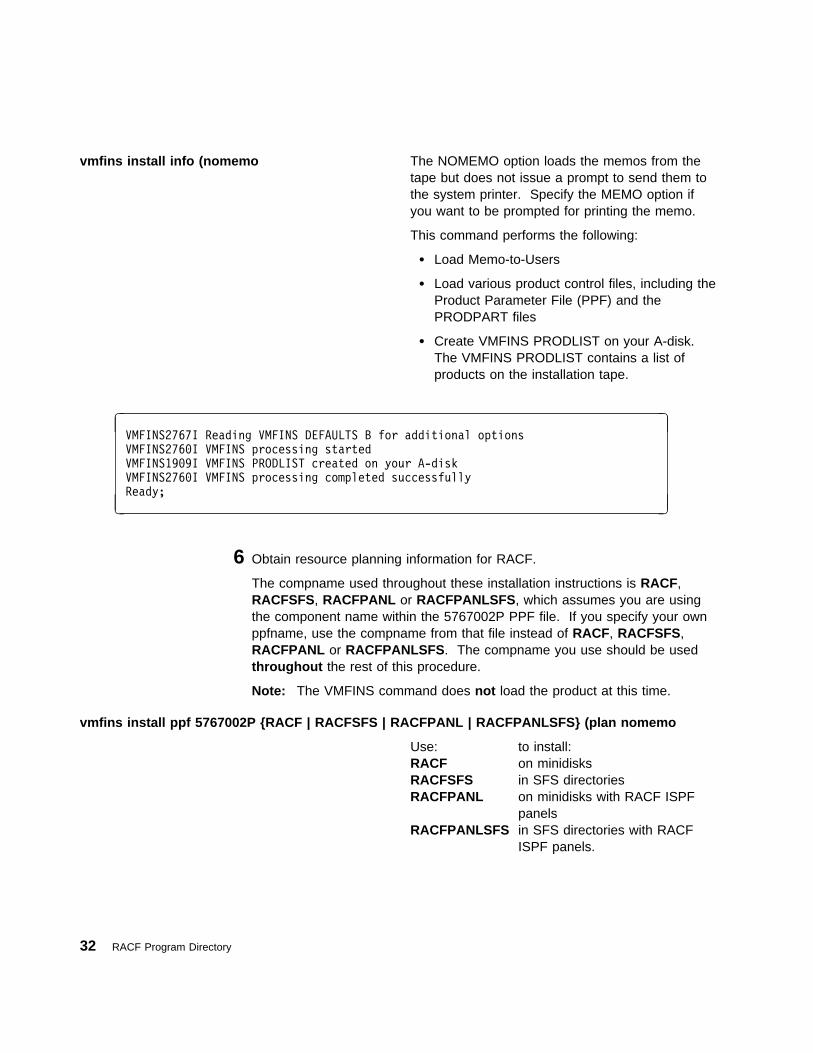
vmfins install info (nomemo The NOMEMO option loads the memos from thetape but does not issue a prompt to send them tothe system printer. Specify the MEMO option ifyou want to be prompted for printing the memo.
This command performs the following:
� Load Memo-to-Users
� Load various product control files, including theProduct Parameter File (PPF) and thePRODPART files
� Create VMFINS PRODLIST on your A-disk.The VMFINS PRODLIST contains a list ofproducts on the installation tape.
� �VMFINS2767I Reading VMFINS DEFAULTS B for additional options
VMFINS276�I VMFINS processing started
VMFINS19�9I VMFINS PRODLIST created on your A-disk
VMFINS276�I VMFINS processing completed successfully
Ready;
- .
6 Obtain resource planning information for RACF.
The compname used throughout these installation instructions is RACF,RACFSFS, RACFPANL or RACFPANLSFS, which assumes you are usingthe component name within the 5767002P PPF file. If you specify your ownppfname, use the compname from that file instead of RACF, RACFSFS,RACFPANL or RACFPANLSFS. The compname you use should be usedthroughout the rest of this procedure.
Note: The VMFINS command does not load the product at this time.
vmfins install ppf 5767002P {RACF | RACFSFS | RACFPANL | RACFPANLSFS} (plan nomemo
Use: to install:RACF on minidisksRACFSFS in SFS directoriesRACFPANL on minidisks with RACF ISPF
panelsRACFPANLSFS in SFS directories with RACF
ISPF panels.
32 RACF Program Directory
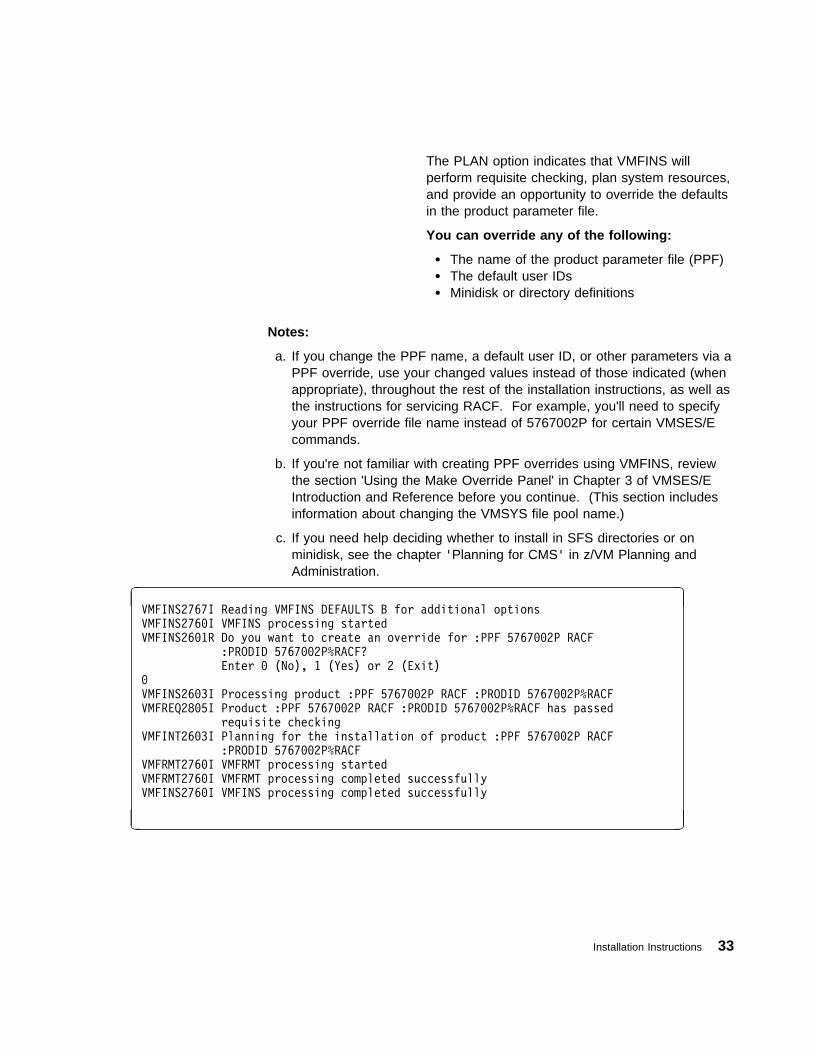
The PLAN option indicates that VMFINS willperform requisite checking, plan system resources,and provide an opportunity to override the defaultsin the product parameter file.
You can override any of the following:
� The name of the product parameter file (PPF)� The default user IDs� Minidisk or directory definitions
Notes:
a. If you change the PPF name, a default user ID, or other parameters via aPPF override, use your changed values instead of those indicated (whenappropriate), throughout the rest of the installation instructions, as well asthe instructions for servicing RACF. For example, you'll need to specifyyour PPF override file name instead of 5767002P for certain VMSES/Ecommands.
b. If you're not familiar with creating PPF overrides using VMFINS, reviewthe section 'Using the Make Override Panel' in Chapter 3 of VMSES/EIntroduction and Reference before you continue. (This section includesinformation about changing the VMSYS file pool name.)
c. If you need help deciding whether to install in SFS directories or onminidisk, see the chapter 'Planning for CMS' in z/VM Planning andAdministration.
� �VMFINS2767I Reading VMFINS DEFAULTS B for additional options
VMFINS276�I VMFINS processing started
VMFINS26�1R Do you want to create an override for :PPF 5767��2P RACF
:PRODID 5767��2P%RACF?
Enter � (No), 1 (Yes) or 2 (Exit)
�
VMFINS26�3I Processing product :PPF 5767��2P RACF :PRODID 5767��2P%RACF
VMFREQ28�5I Product :PPF 5767��2P RACF :PRODID 5767��2P%RACF has passed
requisite checking
VMFINT26�3I Planning for the installation of product :PPF 5767��2P RACF
:PRODID 5767��2P%RACF
VMFRMT276�I VMFRMT processing started
VMFRMT276�I VMFRMT processing completed successfully
VMFINS276�I VMFINS processing completed successfully
- .
Installation Instructions 33
7 Review the install message log ($VMFINS $MSGLOG). If necessary, correctany problems before going on. For information about handling specific errormessages, see z/VM: System Messages and Codes, or use on-line HELP.
vmfview install
6.4 Task 2. Allocate Resources for Installing RACF| Procedural Note
| Customers doing new installs and not sharing existing RACF databases should| review the information in 6.4.1, “General RACF User ID Information” of this step| and then skip to 6.13, “ Task 11. Prepare to Update RACF with Existing CP| Directory Data” on page 54.
| Customers doing new installs and sharing existing RACF databases should| review the information in section 6.4.1, “General RACF User ID Information” and| perform section 6.4.2, “Sharing a RACF Database Information” on page 36 of| this step and then should skip to 6.11, “Task 9. Convert the Database| Templates” on page 49.
| Customers doing migration installs should perform all of this step.
6.4.1 General RACF User ID Information| The planning information in the 5767002P PLANINFO file (which was already| created on the z/VM System deliverable, but was recreated if you are following the| migration steps) was used to create the 5767002P, RACFVM, RACFSMF,| RACMAINT, IBMUSER, AUTOLOG1, AUTOLOG2 and security administrator,| SYSADMIN, user directory entries for minidisk install or SFS install. These user| IDs are already supplied in the CP USER DIRECT file as supplied on the z/VM| System deliverable.
If you are migrating, you may have to update these directories according to theinformation in the new PLANINFO file create in 6.3, “Task 1. Plan Your Installationfor RACF” on page 31
The following is general information about the set up of the different RACF user IDdirectories:
� The RACMAINT user ID is used:
– During installation as the RACF installation verification service machine
34 RACF Program Directory
– As a RACF service machine to test applied service
This user ID can also be used as a backup RACF service machine to theRACFVM user ID, if that user ID becomes unusable. RACMAINT links to thetest build disks that the 5767002P user ID owns.
� To facilitate the recovery procedure, allow RACFVM and RACMAINT allprivilege classes except F. Do not specify class F, because you will want tohave I/O errors reported, and specifying F inhibits the reporting of I/O errors.The minimum required classes are B and G. Specifying class B allowsRACFVM and RACMAINT to enter MSGNOH commands. Always specify thesame minimum and maximum storage sizes on the USER statement for theRACFVM and RACMAINT directory entries.
� The RACF service machines must run in XA mode. The default names for theRACF service machines are RACFVM and RACMAINT.
Attention
Previously, RACF service machines had to run in 370 mode. APARVM60792 (PTF UV99313) removes RACF's dependency on the 370architecture. When this APAR is installed RACF service machines must run
| in XA mode. This APAR is included on the RACF Feature for z/VM.
| � The minimum virtual storage size for the RACF service machines must be| 20MB.
� You should use the recommended IUCV message limit settings for the RACFservice machines as follows:
IUCV JRPI PRIORITY MSGLIMIT 1��
IUCV ANY PRIORITY MSGLIMIT 5�
This limit protects your RACF service machines from being overdriven by CP,as when a networking machine goes into recovery, and potentially leading toover-commitment of virtual resources within the RACF server.
| � RACF supplies required virtual addresses and labels for the RACF databases;| you must not change these. The label for the primary database is RACF at| virtual address 200; the label for the backup database is RACFBK at virtual| address 300.
� An AUTOLOG1 user ID must be set up.
| � You can elect to use an existing user ID for the security administrator. The| default user ID, shipped on the z/VM System deliverable, is SYSADMIN.
Installation Instructions 35
| Procedural Note
| Customers doing new installs and not sharing existing RACF databases should| continue with step 6.13, “ Task 11. Prepare to Update RACF with Existing CP| Directory Data” on page 54.
| All others should continue with the next step.
| 6.4.2 Sharing a RACF Database Information| The MDISK statement for the 200 and 300 disks should specify MW, unless you are| sharing the RACF database between different systems or multiple servers. If you| are sharing the RACF database between different systems, see 5.2.5, “Sharing a| RACF Database” on page 18. If you are sharing the RACF database between| multiple servers, see RACF: System Programmer's Guide.
| Attention
| It is very important that you review the above information about sharing and| set up the appropriate RACF CP user directory entries, etc, if you plan on| sharing.
| Procedural Note
| Customers doing new installs and sharing existing RACF databases should| continue with step 6.11, “Task 9. Convert the Database Templates” on| page 49 after setting up the RACF databases for sharing.
| Customers doing migration installs should continue with the next step.
6.4.3 Installing RACF on Minidisk or in SFS DirectoriesYou should still be logged on as the RACF installation planner.
1 Obtain the user directory entries from the 5767002P PLANINFO file.
Note: The user directory entries are located at the bottom of the resourcesection in the PLANINFO file. These entries contain all of the linksand privilege classes necessary for the 5767002P, RACFVM,RACFSMF, RACMAINT, IBMUSER, AUTOLOG1, AUTOLOG2 andsecurity administrator user IDs. Use the directory entries found in thePLANINFO file as a model for the input to your system directory.
36 RACF Program Directory
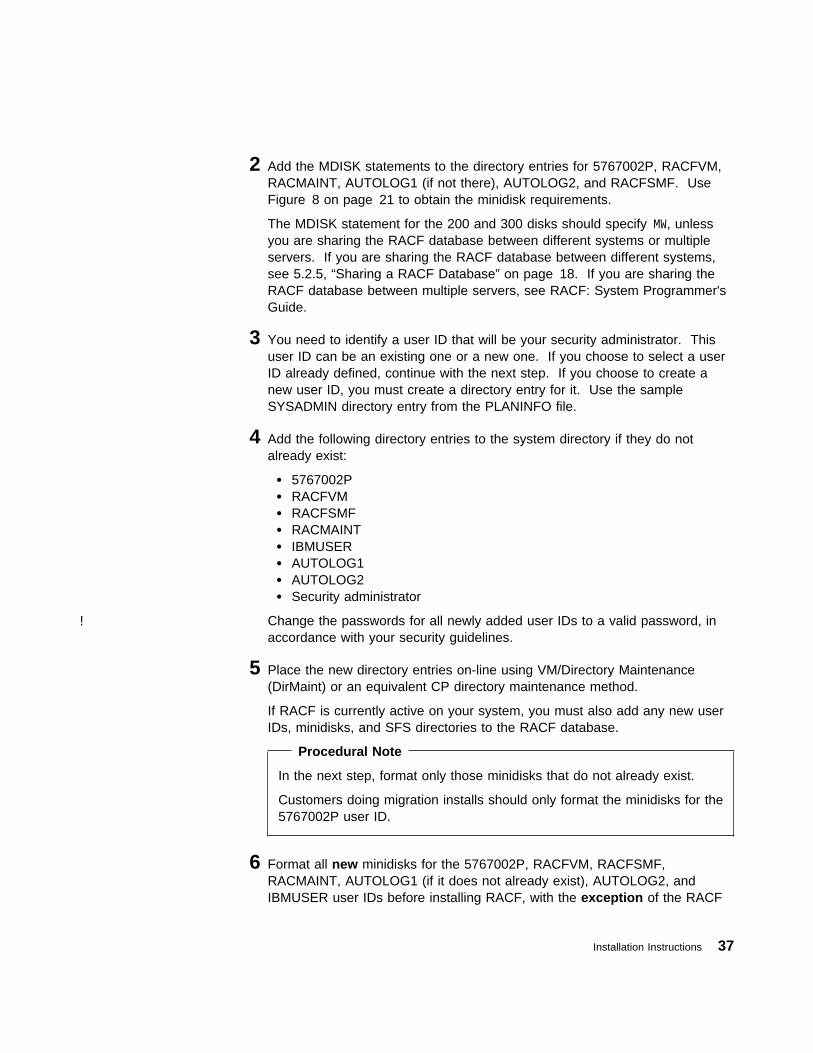
2 Add the MDISK statements to the directory entries for 5767002P, RACFVM,RACMAINT, AUTOLOG1 (if not there), AUTOLOG2, and RACFSMF. UseFigure 8 on page 21 to obtain the minidisk requirements.
The MDISK statement for the 200 and 300 disks should specify MW, unlessyou are sharing the RACF database between different systems or multipleservers. If you are sharing the RACF database between different systems,see 5.2.5, “Sharing a RACF Database” on page 18. If you are sharing theRACF database between multiple servers, see RACF: System Programmer'sGuide.
3 You need to identify a user ID that will be your security administrator. Thisuser ID can be an existing one or a new one. If you choose to select a userID already defined, continue with the next step. If you choose to create anew user ID, you must create a directory entry for it. Use the sampleSYSADMIN directory entry from the PLANINFO file.
4 Add the following directory entries to the system directory if they do notalready exist:
� 5767002P � RACFVM � RACFSMF � RACMAINT � IBMUSER � AUTOLOG1 � AUTOLOG2 � Security administrator
! Change the passwords for all newly added user IDs to a valid password, inaccordance with your security guidelines.
5 Place the new directory entries on-line using VM/Directory Maintenance(DirMaint) or an equivalent CP directory maintenance method.
If RACF is currently active on your system, you must also add any new userIDs, minidisks, and SFS directories to the RACF database. Procedural Note
In the next step, format only those minidisks that do not already exist.
Customers doing migration installs should only format the minidisks for the5767002P user ID.
6 Format all new minidisks for the 5767002P, RACFVM, RACFSMF,RACMAINT, AUTOLOG1 (if it does not already exist), AUTOLOG2, andIBMUSER user IDs before installing RACF, with the exception of the RACF
Installation Instructions 37
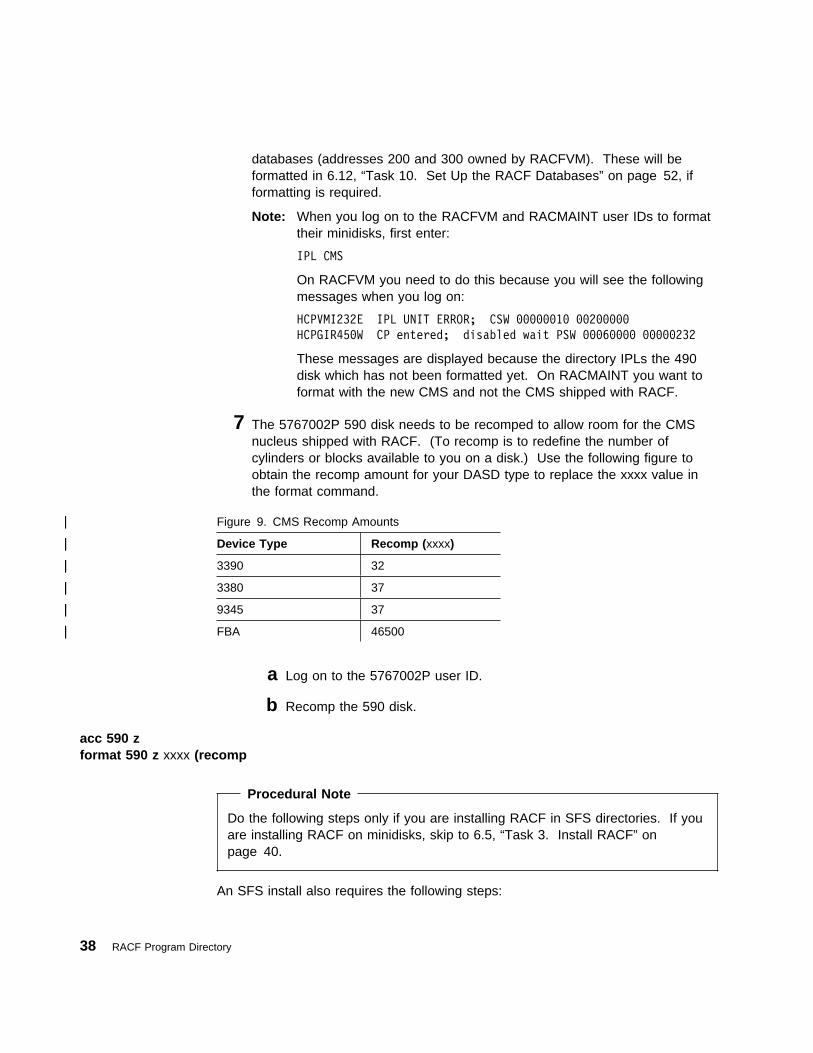
databases (addresses 200 and 300 owned by RACFVM). These will beformatted in 6.12, “Task 10. Set Up the RACF Databases” on page 52, ifformatting is required.
Note: When you log on to the RACFVM and RACMAINT user IDs to formattheir minidisks, first enter:
IPL CMS
On RACFVM you need to do this because you will see the followingmessages when you log on:
HCPVMI232E IPL UNIT ERROR; CSW ������1� ��2�����
HCPGIR45�W CP entered; disabled wait PSW ���6���� �����232
These messages are displayed because the directory IPLs the 490disk which has not been formatted yet. On RACMAINT you want toformat with the new CMS and not the CMS shipped with RACF.
7 The 5767002P 590 disk needs to be recomped to allow room for the CMSnucleus shipped with RACF. (To recomp is to redefine the number ofcylinders or blocks available to you on a disk.) Use the following figure toobtain the recomp amount for your DASD type to replace the xxxx value inthe format command.
a Log on to the 5767002P user ID.
b Recomp the 590 disk.
| Figure 9. CMS Recomp Amounts
| Device Type| Recomp (xxxx)
| 3390| 32
| 3380| 37
| 9345| 37
| FBA| 46500
acc 590 zformat 590 z xxxx (recomp
Procedural Note
Do the following steps only if you are installing RACF in SFS directories. If youare installing RACF on minidisks, skip to 6.5, “Task 3. Install RACF” onpage 40.
An SFS install also requires the following steps:
38 RACF Program Directory
8 Determine the number of 4K blocks that are required for SFS directories byadding up the 4K blocks required for each SFS directory you plan to use.
If you intend to use all of the default RACF SFS directories, the 4K blockrequirements for each are summarized in Figure 8 on page 21.
This information will be used when enrolling the 5767002P user ID to theVMSYS file pool.
9 Enroll user 5767002P in the VMSYS file pool using the ENROLL USERcommand:
enroll user 5767002P vmsys: (blocks blocks blocks is the number of 4K blocks that youcalculated in the previous step.
Note: You must do this from a user ID that is an administrator for theVMSYS file pool.
10 Determine if there are enough blocks available in the file pool to install RACF.! You can obtain this information from the QUERY FILEPOOL STORGRP! command. The output from this command is a list of storage groups in the! file pool and the number of 4K blocks free. If the number of blocks free is
smaller than the total 4K blocks needed to install RACF you need to addspace to the file pool. See z/VM: CMS File Pool Planning, Administration,and Operation for information on adding space to a file pool.
11 Create the necessary subdirectories listed in the 5767002P PLANINFO fileusing the CREATE DIRECTORY command.
set filepool vmsys:create directory vmsys:5767002P.racfcreate directory vmsys:5767002P.racf.objectcreate directory vmsys:5767002P.racf.samplecreate directory vmsys:5767002P.racf.deltacreate directory vmsys:5767002P.racf.applyprodcreate directory vmsys:5767002P.racf.applyalt
See z/VM CMS Command and Utilities Referencefor more information about the CREATEDIRECTORY command.
The list of default RACF SFS directories is provided in Figure 8 on page 21.Note that if you are installing Kanji in SFS directories, you must also create aKanji subdirectory.
Installation Instructions 39
6.5 Task 3. Install RACF Procedural Note
Customers doing migration installs should perform this step.
The ppfname used throughout these installation instructions is 5767002P, whichassumes you are using the PPF supplied by IBM for RACF. If you have your ownPPF override file for RACF, use your file's ppfname instead of 5767002P. Theppfname you use should be used throughout the rest of this procedure.
The compname used throughout these installation instructions is either RACF,RACFSFS, RACFPANL or RACFPANLSFS, which assumes you are using thecomponent name within the 5767002P PPF file. If you specify your own ppfname,you should use the compname from that file instead of RACF, RACFSFS,RACFPANL or RACFPANLSFS. The compname you use should be usedthroughout the rest of this procedure.
1 Log on to the installation user ID 5767002P.
2 Create a PROFILE EXEC containing the ACCESS commands for the MAINT5E5 and 51D minidisks.
xedit profile exec a===> input /**/===> input 'access 5e5 b'===> input 'access 51d d'===> input 'access 590 t'===> file
If either 5E5 or 51D is in an SFS directory,substitute your SFS directory name in the accesscommand.
You MUST use t as the file mode for the 590 disk,because this is what the default PPF file specifies.
3 Execute the profile to access MAINT's minidisks.
profile
4 If the Software Inventory disk (51D) was accessed R/O (read only) thenestablish write access to the Software Inventory disk.
Note: If the MAINT 51D minidisk was accessed R/O, you will need to havethe user who has it linked R/W link it as R/O. You then can issue thefollowing commands to obtain R/W access to it.
link MAINT 51d 51d mraccess 51d d
40 RACF Program Directory
5 Have the RACF installation tape mounted and attached to 5767002P at virtualaddress 181. The VMFINS EXEC requires the tape drive to be at virtualaddress 181.
6 Install RACF.
Notes:
a. If you have already created a PPF override file, you should specify youroverride file name, in place of the default PPF name (5767002P), afterthe PPF keyword for the following VMFINS command.
b. You might be prompted for additional information during VMFINSINSTALL processing depending on your installation environment. If youare unsure how to respond to a prompt, refer to the chapters 'InstallingProducts with VMFINS' and 'Install Scenarios' in VMSES/E Introductionand Reference to decide how to proceed.
vmfins install ppf 5767002P {RACF | RACFSFS | RACFPANL | RACFPANLSFS} (nomemo nolink
Use: to install:RACF on minidisksRACFSFS in SFS directoriesRACFPANL on minidisks with RACF ISPF
panelsRACFPANLSFS in SFS directories with RACF
ISPF panels.
The NOLINK option indicates that you don't wantVMFINS to link to the appropriate minidisks, onlyaccess them if not accessed.
Installation Instructions 41
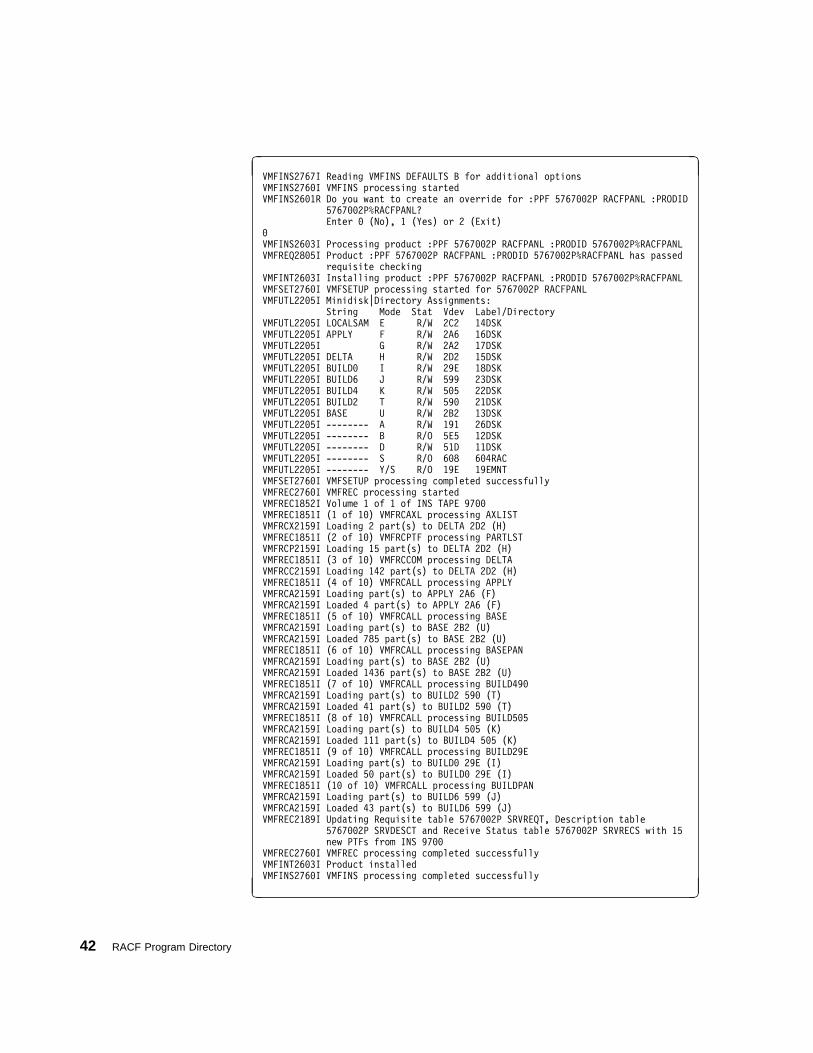
� �VMFINS2767I Reading VMFINS DEFAULTS B for additional options
VMFINS276�I VMFINS processing started
VMFINS26�1R Do you want to create an override for :PPF 5767��2P RACFPANL :PRODID
5767��2P%RACFPANL?
Enter � (No), 1 (Yes) or 2 (Exit)
�
VMFINS26�3I Processing product :PPF 5767��2P RACFPANL :PRODID 5767��2P%RACFPANL
VMFREQ28�5I Product :PPF 5767��2P RACFPANL :PRODID 5767��2P%RACFPANL has passed
requisite checking
VMFINT26�3I Installing product :PPF 5767��2P RACFPANL :PRODID 5767��2P%RACFPANL
VMFSET276�I VMFSETUP processing started for 5767��2P RACFPANL
VMFUTL22�5I Minidisk|Directory Assignments:
String Mode Stat Vdev Label/Directory
VMFUTL22�5I LOCALSAM E R/W 2C2 14DSK
VMFUTL22�5I APPLY F R/W 2A6 16DSK
VMFUTL22�5I G R/W 2A2 17DSK
VMFUTL22�5I DELTA H R/W 2D2 15DSK
VMFUTL22�5I BUILD� I R/W 29E 18DSK
VMFUTL22�5I BUILD6 J R/W 599 23DSK
VMFUTL22�5I BUILD4 K R/W 5�5 22DSK
VMFUTL22�5I BUILD2 T R/W 59� 21DSK
VMFUTL22�5I BASE U R/W 2B2 13DSK
VMFUTL22�5I -------- A R/W 191 26DSK
VMFUTL22�5I -------- B R/O 5E5 12DSK
VMFUTL22�5I -------- D R/W 51D 11DSK
VMFUTL22�5I -------- S R/O 6�8 6�4RAC
VMFUTL22�5I -------- Y/S R/O 19E 19EMNT
VMFSET276�I VMFSETUP processing completed successfully
VMFREC276�I VMFREC processing started
VMFREC1852I Volume 1 of 1 of INS TAPE 97��
VMFREC1851I (1 of 1�) VMFRCAXL processing AXLIST
VMFRCX2159I Loading 2 part(s) to DELTA 2D2 (H)
VMFREC1851I (2 of 1�) VMFRCPTF processing PARTLST
VMFRCP2159I Loading 15 part(s) to DELTA 2D2 (H)
VMFREC1851I (3 of 1�) VMFRCCOM processing DELTA
VMFRCC2159I Loading 142 part(s) to DELTA 2D2 (H)
VMFREC1851I (4 of 1�) VMFRCALL processing APPLY
VMFRCA2159I Loading part(s) to APPLY 2A6 (F)
VMFRCA2159I Loaded 4 part(s) to APPLY 2A6 (F)
VMFREC1851I (5 of 1�) VMFRCALL processing BASE
VMFRCA2159I Loading part(s) to BASE 2B2 (U)
VMFRCA2159I Loaded 785 part(s) to BASE 2B2 (U)
VMFREC1851I (6 of 1�) VMFRCALL processing BASEPAN
VMFRCA2159I Loading part(s) to BASE 2B2 (U)
VMFRCA2159I Loaded 1436 part(s) to BASE 2B2 (U)
VMFREC1851I (7 of 1�) VMFRCALL processing BUILD49�
VMFRCA2159I Loading part(s) to BUILD2 59� (T)
VMFRCA2159I Loaded 41 part(s) to BUILD2 59� (T)
VMFREC1851I (8 of 1�) VMFRCALL processing BUILD5�5
VMFRCA2159I Loading part(s) to BUILD4 5�5 (K)
VMFRCA2159I Loaded 111 part(s) to BUILD4 5�5 (K)
VMFREC1851I (9 of 1�) VMFRCALL processing BUILD29E
VMFRCA2159I Loading part(s) to BUILD� 29E (I)
VMFRCA2159I Loaded 5� part(s) to BUILD� 29E (I)
VMFREC1851I (1� of 1�) VMFRCALL processing BUILDPAN
VMFRCA2159I Loading part(s) to BUILD6 599 (J)
VMFRCA2159I Loaded 43 part(s) to BUILD6 599 (J)
VMFREC2189I Updating Requisite table 5767��2P SRVREQT, Description table
5767��2P SRVDESCT and Receive Status table 5767��2P SRVRECS with 15
new PTFs from INS 97��
VMFREC276�I VMFREC processing completed successfully
VMFINT26�3I Product installed
VMFINS276�I VMFINS processing completed successfully
- .
42 RACF Program Directory
7 Review the install message log ($VMFINS $MSGLOG). If necessary, correctany problems before going on. For information about handling specific errormessages, see z/VM: System Messages and Codes, or use on-line HELP.
vmfview install
6.6 Task 4. Install the RACF Kanji ISPF Panels (Optional) Procedural Note
This is an optional step. Customers doing migration installs should perform thisstep only if you plan to use the RACF Kanji ISPF panels.
Otherwise, skip to 6.7, “Task 5. Load the Recommended Service Upgrade(RSU)” on page 44.
RACF's NLS feature is installed through VMSES/E support using the same user ID,5767002P, as the base. To install the RACF Kanji ISPF panels, follow these steps:
1 Get the requirements for the 2B3 and 799 minidisks for the Kanji ISPF panelsfrom Figure 8 on page 21. Add the minidisks to the 5767002P user IDdirectory and place the directory on-line.
2 Log on to the 5767002P user ID.
3 Format the disks.
4 Have the NLS Kanji ISPF Feature installation tape mounted and attached to5767002P at virtual address 181.
5 Install the RACF Kanji ISPF panels.
vmfins install ppf 5767002Q {RACFK|RACFKSFS} (nomemo nolink
Use RACFK if installing using minidisks orRACFKSFS if installing using SFS.
Installation Instructions 43
6.7 Task 5. Load the Recommended Service Upgrade (RSU) Procedural Note
Customers doing migration installs should perform this step if an IBMRecommended Service Upgrade (RSU) tape was included with the RACFproduct tape.
Otherwise, if an RSU tape has not been included with RACF, continue with 6.8,“Task 6. Update to Force Build of RACF CP Parts” on page 46.
1 You should still be logged on to the 5767002P user ID. Mount the RSU tapeon the tape drive as virtual device 181. You must use 181.
2 Receive the documentation on the tape. This step also loads the cumulativeapply status table (SRVAPPS) which identifies all preapplied servicecontained on the tape. These files are loaded to the 51D disk.
vmfins install info (nomemo
3 Determine the DASD sizes for the disks to receive service.
In order to receive the service from the RSU, you need to have adequatespace available on the alternate APPLY and DELTA disks. The requiredsizes are identified in the RACF documentation (5767002P MEMO D)received in the previous step.
4 Enter the VMFINS command to load the contents of the RSU tape.
vmfins install ppf 5767002P {RACF | RACFSFS | RACFPANL | RACFPANLSFS} (nomemo nolink
Refresh the RACF service disks by loading newservice from the RSU tape.
Use: to install:RACF on minidisksRACFSFS in SFS directoriesRACFPANL on minidisks with RACF ISPF
panelsRACFPANLSFS in SFS directories with RACF
ISPF panels.
The NOLINK option indicates that you don't needVMFINS to link to the appropriate minidisks, onlyaccess them if not accessed.
44 RACF Program Directory
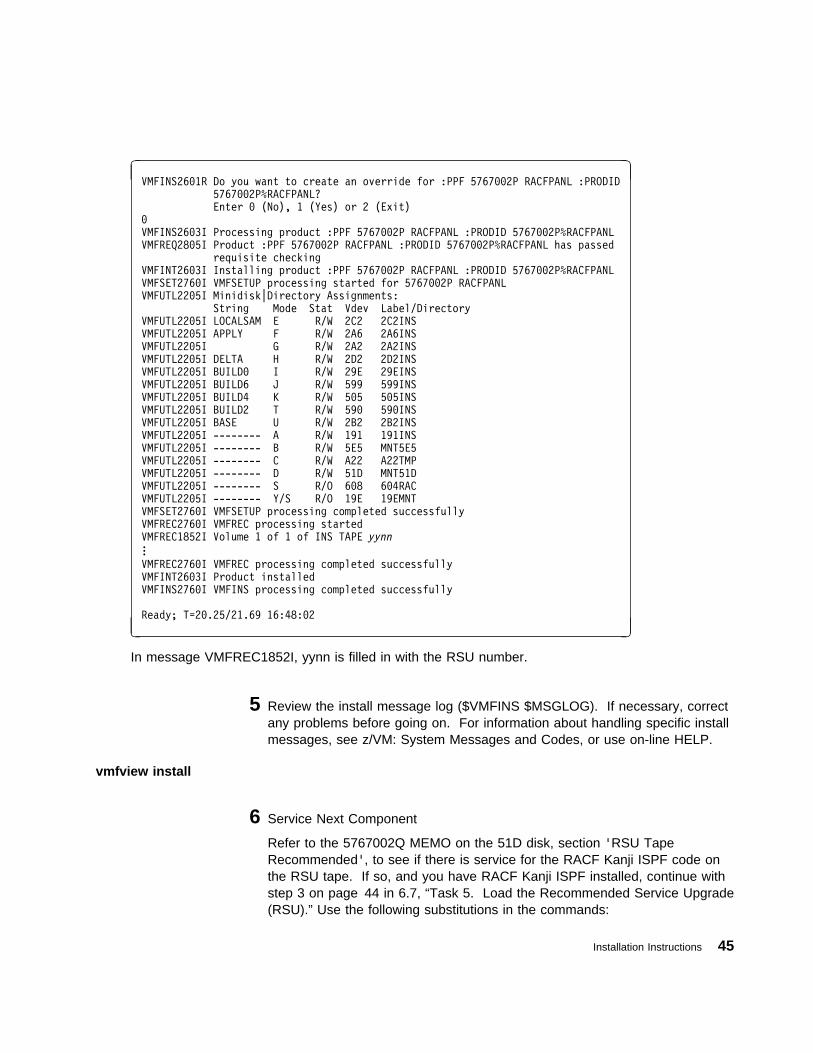
� �VMFINS26�1R Do you want to create an override for :PPF 5767��2P RACFPANL :PRODID
5767��2P%RACFPANL?
Enter � (No), 1 (Yes) or 2 (Exit)
�
VMFINS26�3I Processing product :PPF 5767��2P RACFPANL :PRODID 5767��2P%RACFPANL
VMFREQ28�5I Product :PPF 5767��2P RACFPANL :PRODID 5767��2P%RACFPANL has passed
requisite checking
VMFINT26�3I Installing product :PPF 5767��2P RACFPANL :PRODID 5767��2P%RACFPANL
VMFSET276�I VMFSETUP processing started for 5767��2P RACFPANL
VMFUTL22�5I Minidisk|Directory Assignments:
String Mode Stat Vdev Label/Directory
VMFUTL22�5I LOCALSAM E R/W 2C2 2C2INS
VMFUTL22�5I APPLY F R/W 2A6 2A6INS
VMFUTL22�5I G R/W 2A2 2A2INS
VMFUTL22�5I DELTA H R/W 2D2 2D2INS
VMFUTL22�5I BUILD� I R/W 29E 29EINS
VMFUTL22�5I BUILD6 J R/W 599 599INS
VMFUTL22�5I BUILD4 K R/W 5�5 5�5INS
VMFUTL22�5I BUILD2 T R/W 59� 59�INS
VMFUTL22�5I BASE U R/W 2B2 2B2INS
VMFUTL22�5I -------- A R/W 191 191INS
VMFUTL22�5I -------- B R/W 5E5 MNT5E5
VMFUTL22�5I -------- C R/W A22 A22TMP
VMFUTL22�5I -------- D R/W 51D MNT51D
VMFUTL22�5I -------- S R/O 6�8 6�4RAC
VMFUTL22�5I -------- Y/S R/O 19E 19EMNT
VMFSET276�I VMFSETUP processing completed successfully
VMFREC276�I VMFREC processing started
VMFREC1852I Volume 1 of 1 of INS TAPE yynn...
VMFREC276�I VMFREC processing completed successfully
VMFINT26�3I Product installed
VMFINS276�I VMFINS processing completed successfully
Ready; T=2�.25/21.69 16:48:�2
- .
In message VMFREC1852I, yynn is filled in with the RSU number.
5 Review the install message log ($VMFINS $MSGLOG). If necessary, correctany problems before going on. For information about handling specific installmessages, see z/VM: System Messages and Codes, or use on-line HELP.
vmfview install
6 Service Next Component
Refer to the 5767002Q MEMO on the 51D disk, section 'RSU TapeRecommended', to see if there is service for the RACF Kanji ISPF code onthe RSU tape. If so, and you have RACF Kanji ISPF installed, continue withstep 3 on page 44 in 6.7, “Task 5. Load the Recommended Service Upgrade(RSU).” Use the following substitutions in the commands:
Installation Instructions 45
� Use 5767002Q instead of 5767002P for the ppfname
� Use RACFK (for installing on minidisks) or RACFKSFS (for installing inSFS directories), instead of RACF or RACFSFS for the compname.
| 6.8 Task 6. Update to Force Build of RACF CP Parts| Procedural Note
| Customers doing migration installs should perform this step.
| 1 Update the $SELECT file to force a build of the RACF CP Parts by| VMSES/E.
| vmfrepl hcprpf rpibase0 SERVP2P {RACF | RACFSFS} ( $select nocopy| vmfrepl hcprpg rpibase0 SERVP2P {RACF | RACFSFS} ( $select nocopy| vmfrepl hcprpi rpibase0 SERVP2P {RACF | RACFSFS} ( $select nocopy| vmfrepl hcprpw rpibase0 SERVP2P {RACF | RACFSFS} ( $select nocopy| vmfrepl hcprpd rpibase0 SERVP2P {RACF | RACFSFS} ( $select nocopy| vmfrepl hcprwa rpibase0 SERVP2P {RACF | RACFSFS} ( $select nocopy
| | Use: to install:| RACF on minidisks| RACFSFS in SFS directories
6.9 Task 7. Create PROFILE EXEC and SMF CONTROL Files for theRACF Service Machines
Procedural Note
Customers doing migration installs should perform this step.
Migration installs should copy only the PROFILE EXEC file. You can use yourexisting SMF CONTROL file. If RACF is currently active on your system youmust inactivate it now in order to properly link to its minidisks. To inactivateRACF, issue the following commands from the operator's console, replacingRACFVM with your RACF service machine user ID:
SEND RACFVM SETRACF INACTIVE
YES
FORCE RACFVM
46 RACF Program Directory
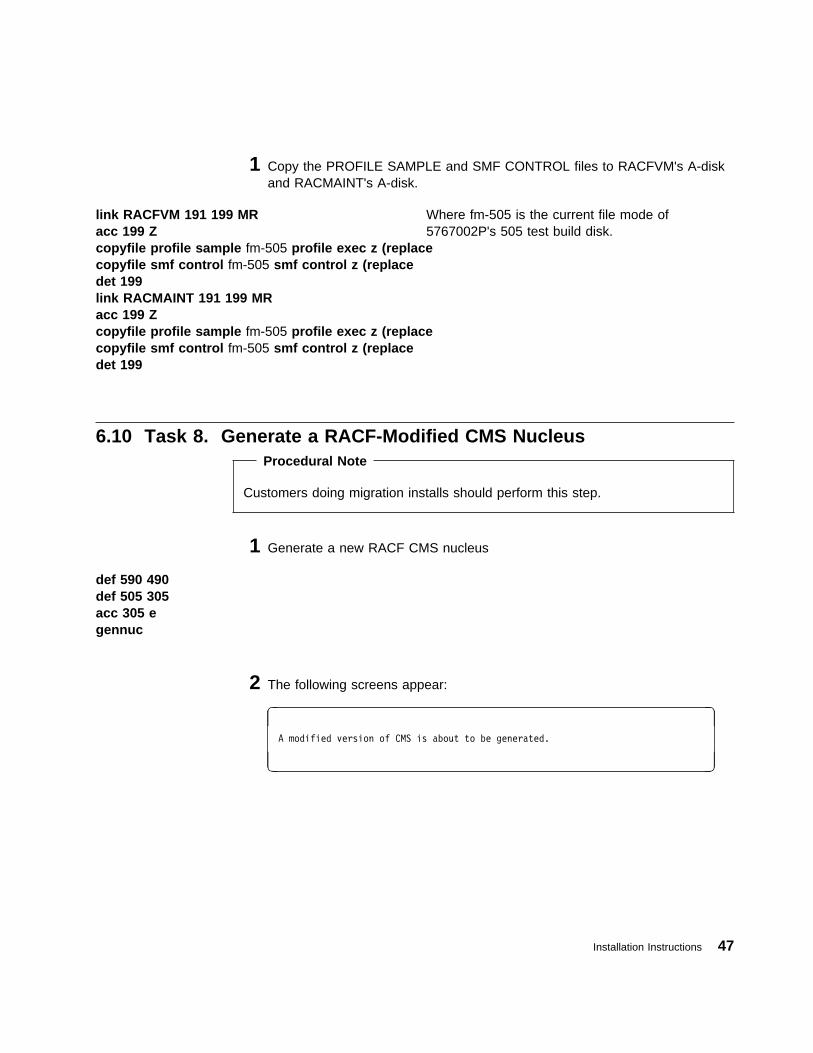
1 Copy the PROFILE SAMPLE and SMF CONTROL files to RACFVM's A-diskand RACMAINT's A-disk.
link RACFVM 191 199 MRacc 199 Zcopyfile profile sample fm-505 profile exec z (replacecopyfile smf control fm-505 smf control z (replacedet 199link RACMAINT 191 199 MRacc 199 Zcopyfile profile sample fm-505 profile exec z (replacecopyfile smf control fm-505 smf control z (replacedet 199
Where fm-505 is the current file mode of5767002P's 505 test build disk.
6.10 Task 8. Generate a RACF-Modified CMS Nucleus Procedural Note
Customers doing migration installs should perform this step.
1 Generate a new RACF CMS nucleus
def 590 490def 505 305acc 305 egennuc
2 The following screens appear:
� �
A modified version of CMS is about to be generated.
- .
Installation Instructions 47
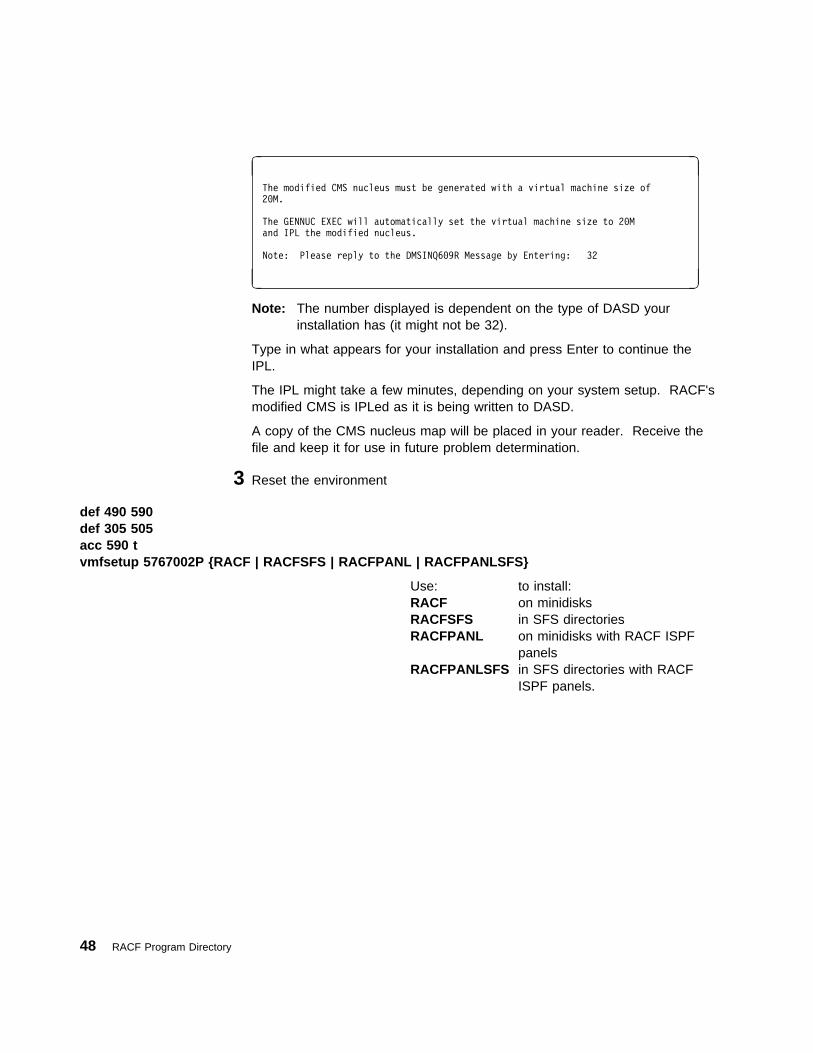
� �
The modified CMS nucleus must be generated with a virtual machine size of
2�M.
The GENNUC EXEC will automatically set the virtual machine size to 2�M
and IPL the modified nucleus.
Note: Please reply to the DMSINQ6�9R Message by Entering: 32
- .
Note: The number displayed is dependent on the type of DASD yourinstallation has (it might not be 32).
Type in what appears for your installation and press Enter to continue theIPL.
The IPL might take a few minutes, depending on your system setup. RACF'smodified CMS is IPLed as it is being written to DASD.
A copy of the CMS nucleus map will be placed in your reader. Receive thefile and keep it for use in future problem determination.
3 Reset the environment
def 490 590def 305 505acc 590 tvmfsetup 5767002P {RACF | RACFSFS | RACFPANL | RACFPANLSFS}
Use: to install:RACF on minidisksRACFSFS in SFS directoriesRACFPANL on minidisks with RACF ISPF
panelsRACFPANLSFS in SFS directories with RACF
ISPF panels.
48 RACF Program Directory
6.11 Task 9. Convert the Database Templates Procedural Note
Customers doing migration installs should perform this step.
Customers doing new installs and sharing an existing RACF database shouldperform this step.
Customers doing new installs and not sharing the RACF database should skipto 6.13, “ Task 11. Prepare to Update RACF with Existing CP Directory Data”on page 54.
The RACF database must have templates at the 1.10 level for RACF to functionproperly. If you are migrating from a previous release of RACF to RACF 1.10, youmust run the RACFCONV EXEC to convert the existing database templates to thecurrent release.
Be sure to run RACFCONV against each primary and backup database on yoursystem.
Note: This is not a conversion to the restructured database format.
If you are sharing the RACF database, you must convert the templates from thesystem with the highest level of RACF. (Note that RACF Version 2 is a higher levelof RACF than RACF 1.10.)
If you are sharing the RACF database with an MVS system that has RACF Version2 installed, in order to update the templates from the MVS system you must haveAPAR OW18980 installed on the MVS system. If you do not update the templates,all VM logon attempts will fail while RACF is up.
To convert the database templates from a VM system:
1 Run RACFCONV EXEC to convert the templates.
Installation Instructions 49
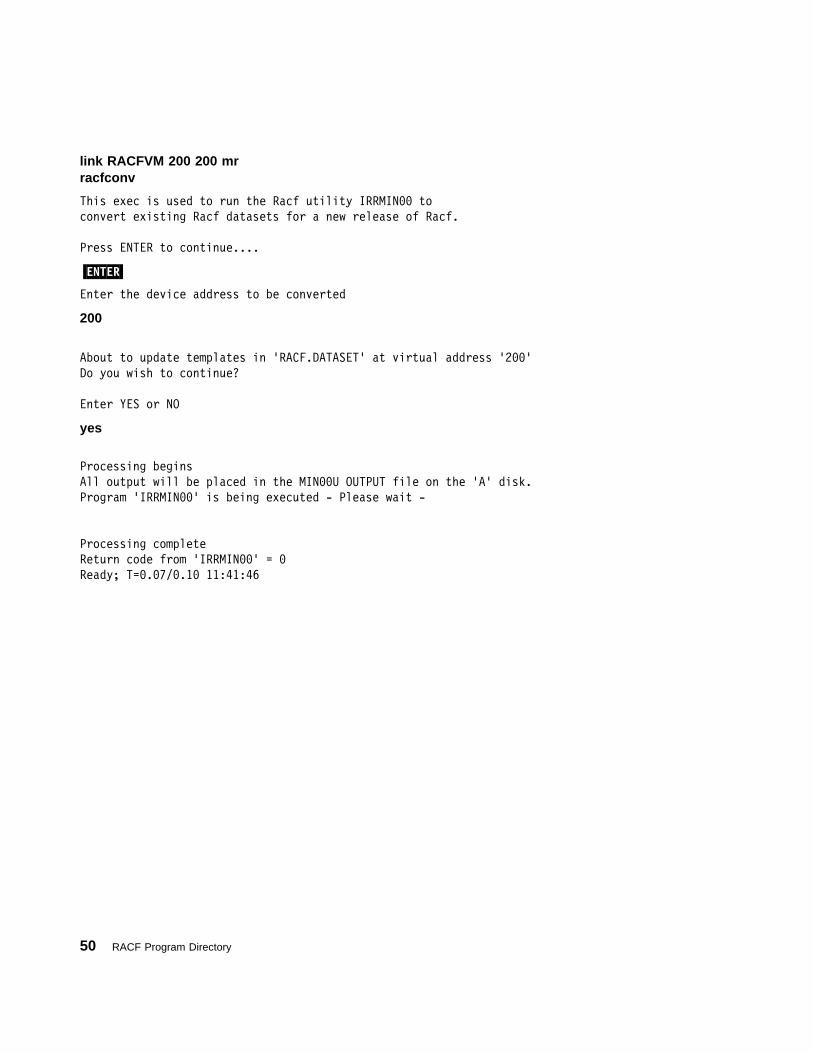
link RACFVM 200 200 mrracfconv
This exec is used to run the Racf utility IRRMIN�� to
convert existing Racf datasets for a new release of Racf.
Press ENTER to continue....
�ENTER�
Enter the device address to be converted
200
About to update templates in 'RACF.DATASET' at virtual address '2��'
Do you wish to continue?
Enter YES or NO
yes
Processing begins
All output will be placed in the MIN��U OUTPUT file on the 'A' disk.
Program 'IRRMIN��' is being executed - Please wait -
Processing complete
Return code from 'IRRMIN��' = �
Ready; T=�.�7/�.1� 11:41:46
50 RACF Program Directory
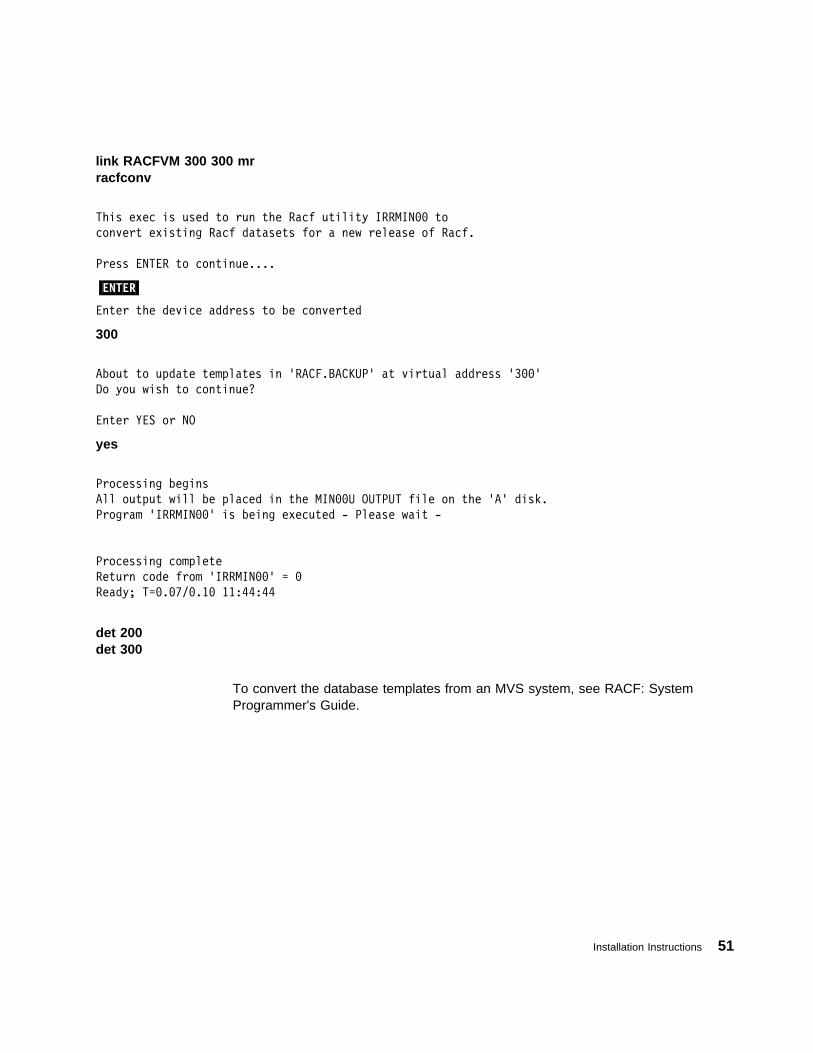
link RACFVM 300 300 mrracfconv
This exec is used to run the Racf utility IRRMIN�� to
convert existing Racf datasets for a new release of Racf.
Press ENTER to continue....
�ENTER�
Enter the device address to be converted
300
About to update templates in 'RACF.BACKUP' at virtual address '3��'
Do you wish to continue?
Enter YES or NO
yes
Processing begins
All output will be placed in the MIN��U OUTPUT file on the 'A' disk.
Program 'IRRMIN��' is being executed - Please wait -
Processing complete
Return code from 'IRRMIN��' = �
Ready; T=�.�7/�.1� 11:44:44
det 200det 300
To convert the database templates from an MVS system, see RACF: SystemProgrammer's Guide.
Installation Instructions 51
6.12 Task 10. Set Up the RACF Databases Procedural Note
| Customers doing new installs and not sharing existing RACF databases shouldskip to 6.13, “ Task 11. Prepare to Update RACF with Existing CP DirectoryData” on page 54.
Customers doing new installs and sharing existing RACF databases should skipto 6.13, “ Task 11. Prepare to Update RACF with Existing CP Directory Data”on page 54.
Customers doing migration installs should skip to 6.14, “Task 12. Customizethe Processing of SMF Records (Optional)” on page 59.
Notes:
1. RACF supplies required virtual addresses and labels for the RACF databases;you must not change these. The label for the primary database is RACF atvirtual address 200; the label for the backup database is RACFBK at virtualaddress 300.
2. Do not place any of these minidisks on cylinder 0 in the CP directory. Whenthe RACDSF EXEC executes, it could destroy the volume identifier on thepack.
6.12.1 Format the RACF Database MinidisksThis section and the next two sections show how to format, allocate and initializethe RACF database minidisks. The database minidisks are 200 and 300. They areowned by the RACFVM user ID.
1 If the RACF databases are on CKD DASD, format using ICKDSF.
link RACFVM 200 200 mrlink RACFVM 300 300 mrracdsf 200 RACFracdsf 300 RACFBK
2 If the RACF databases are on FBA DASD, use the CMS format command.
52 RACF Program Directory
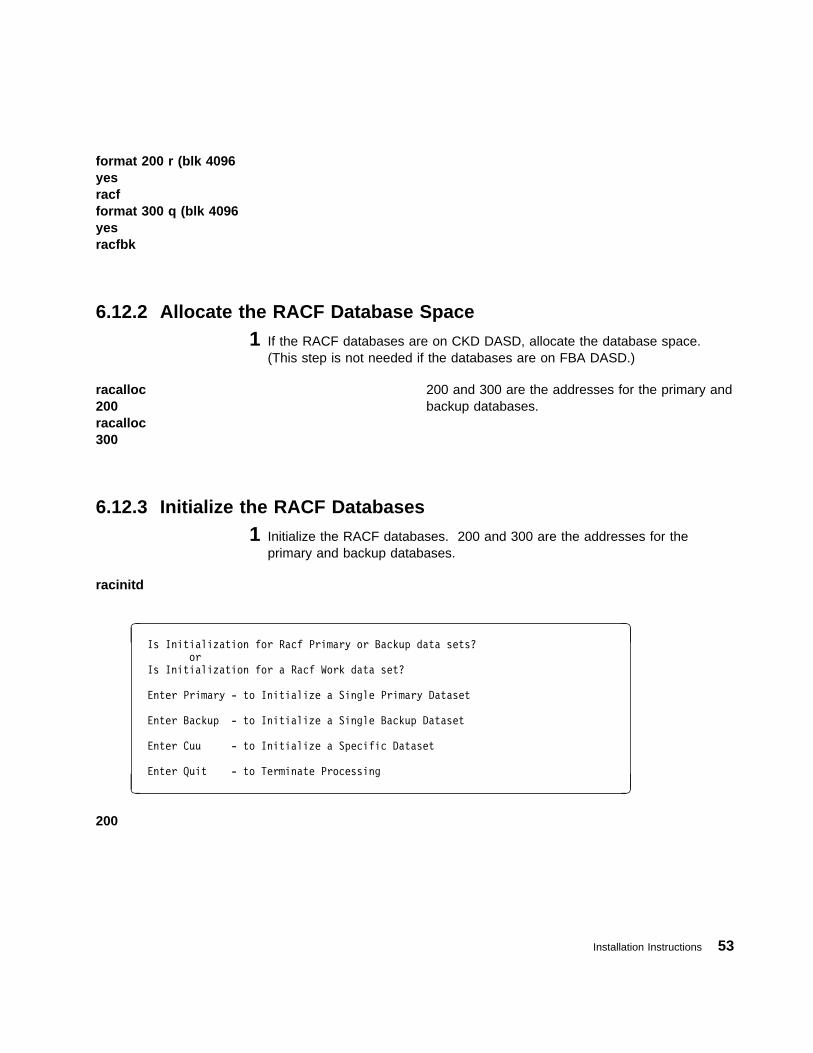
format 200 r (blk 4096yesracfformat 300 q (blk 4096yesracfbk
6.12.2 Allocate the RACF Database Space1 If the RACF databases are on CKD DASD, allocate the database space.
(This step is not needed if the databases are on FBA DASD.)
racalloc200racalloc300
200 and 300 are the addresses for the primary andbackup databases.
6.12.3 Initialize the RACF Databases1 Initialize the RACF databases. 200 and 300 are the addresses for the
primary and backup databases.
racinitd
� � Is Initialization for Racf Primary or Backup data sets?
or
Is Initialization for a Racf Work data set?
Enter Primary - to Initialize a Single Primary Dataset
Enter Backup - to Initialize a Single Backup Dataset
Enter Cuu - to Initialize a Specific Dataset
Enter Quit - to Terminate Processing
- .
200
Installation Instructions 53
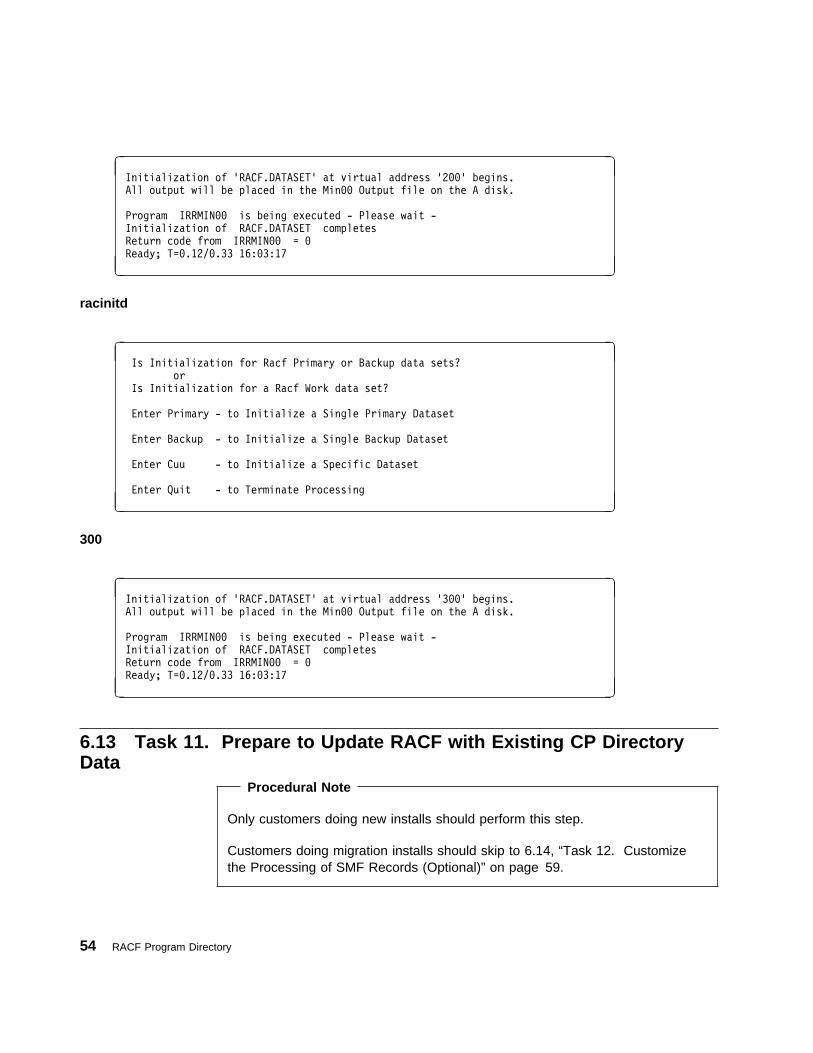
� �Initialization of 'RACF.DATASET' at virtual address '2��' begins.
All output will be placed in the Min�� Output file on the A disk.
Program IRRMIN�� is being executed - Please wait -
Initialization of RACF.DATASET completes
Return code from IRRMIN�� = �
Ready; T=�.12/�.33 16:�3:17
- .
racinitd
� � Is Initialization for Racf Primary or Backup data sets?
or
Is Initialization for a Racf Work data set?
Enter Primary - to Initialize a Single Primary Dataset
Enter Backup - to Initialize a Single Backup Dataset
Enter Cuu - to Initialize a Specific Dataset
Enter Quit - to Terminate Processing
- .
300
� �Initialization of 'RACF.DATASET' at virtual address '3��' begins.
All output will be placed in the Min�� Output file on the A disk.
Program IRRMIN�� is being executed - Please wait -
Initialization of RACF.DATASET completes
Return code from IRRMIN�� = �
Ready; T=�.12/�.33 16:�3:17
- .
6.13 Task 11. Prepare to Update RACF with Existing CP DirectoryData
Procedural Note
Only customers doing new installs should perform this step.
Customers doing migration installs should skip to 6.14, “Task 12. Customizethe Processing of SMF Records (Optional)” on page 59.
54 RACF Program Directory
The RPIDIRCT EXEC helps you to migrate existing CP directory data to a RACFdatabase. It scans the CP directory and translates directory statements into RACFcommands. It places the RACF commands in an output file called RPIDIRCTSYSUT1. You can use this file to initialize new RACF databases if you are notplanning on sharing an existing RACF database, or to modify an existing databaseif you are planning on sharing an existing RACF database.
Before you run RPIDIRCT, you might need to make some changes to the CPdirectory. After you run RPIDIRCT, you might need to make some changes to theRPIDIRCT SYSUT1 file. The following sections have information on CP directoryrequirements, the RPIDIRCT SYSUT1 file and running the RPIDIRCT EXEC.
6.13.1 General CP Directory RequirementsTo avoid potential problems, before running RPIDIRCT check for the following inthe CP directory:
� Duplicate user IDs � NOLOG passwords� Unacceptable characters in user IDs
� ACIGROUP considerations� Group names on POSIXGROUP statements that are duplicates except for case� OpenExtensions-related entries added by the DIRPOSIX EXEC
! Note: The use of OpenEdition has been changed to OpenExtensions.
Duplicate User IDs
If you plan to have VM systems share the RACF database, review their CPdirectories for cases where a user on one system has the same user ID as adifferent user on another system. If you find cases where this occurs, you mustchange one of the user IDs.
NOLOG Passwords
Some user passwords may appear in the directory as NOLOG. You can treatthese users in one of two ways:
� Allow the password to remain as NOLOG.
VM will not permit those users to log on to the system.
� Change the password to UNLOG.
The users will be defined in the RACF database with their user ID revoked.Later, their ability to log on can be resumed.
Installation Instructions 55
Unacceptable Characters in User IDs
RACF does not allow a dash (-), plus (+), colon (:), or underscore (_) in a user ID.Remove these characters from all user IDs that contain them.
RPIDIRCT changes any unacceptable character it finds in a user ID to a dollar sign($).
Understanding the Effect ACIGROUP Has on Resource Names
IBM recommends that the ACIGROUP statement not be used in the USERDIRECT file. If ACIGROUP is used, RPIDIRCT creates the output file RPIDIRCTSYSUT1 with the GROUP name appended to the resource name for the VMMDISKand VMRDR class profiles. For example, USER.191 will appear asGROUP.USER.191. If ACIGROUP is used, VM LOGON processing passes thegroup ID to RACF (making it necessary for the user to be both defined andconnected to the group).
If ACIGROUP is not specified, RPIDIRCT defines the user to default group SYS1.SYS1 is not appended to the resource name.
Group Names on POSIXGROUP Statements that Are Duplicates Except ForCase
Although VM supports mixed-case group names, RACF does not. For example, ifyour CP directory contains the statements:
POSIXGROUP Payroll 1�
POSIXGROUP payroll 2�
RACF creates a PAYROLL group profile, assigning it a GID value of 10.RPIDIRCT issues a warning message when it encounters the secondPOSIXGROUP statement.
OpenExtensions-Related Entries Added by the DIRPOSIX EXEC
When you run the DIRPOSIX utility with the SYSENTRIES option, the utility createsentries that RACF does not support. If you have run this utility, you might need tochange some UID and GID values, and some group names. For more information,see RACF: Security Administrator's Guide.
6.13.1.1 The RPIDIRCT SYSUT1 FileThe commands generated by the RPIDIRCT EXEC are placed in an output filecalled RPIDIRCT SYSUT1. The commands can:
� Add a user to the RACF database� Define a user's minidisks (MDISK statement in the CP directory)� Define a reader for each VM user, permitting the user to access the reader
56 RACF Program Directory
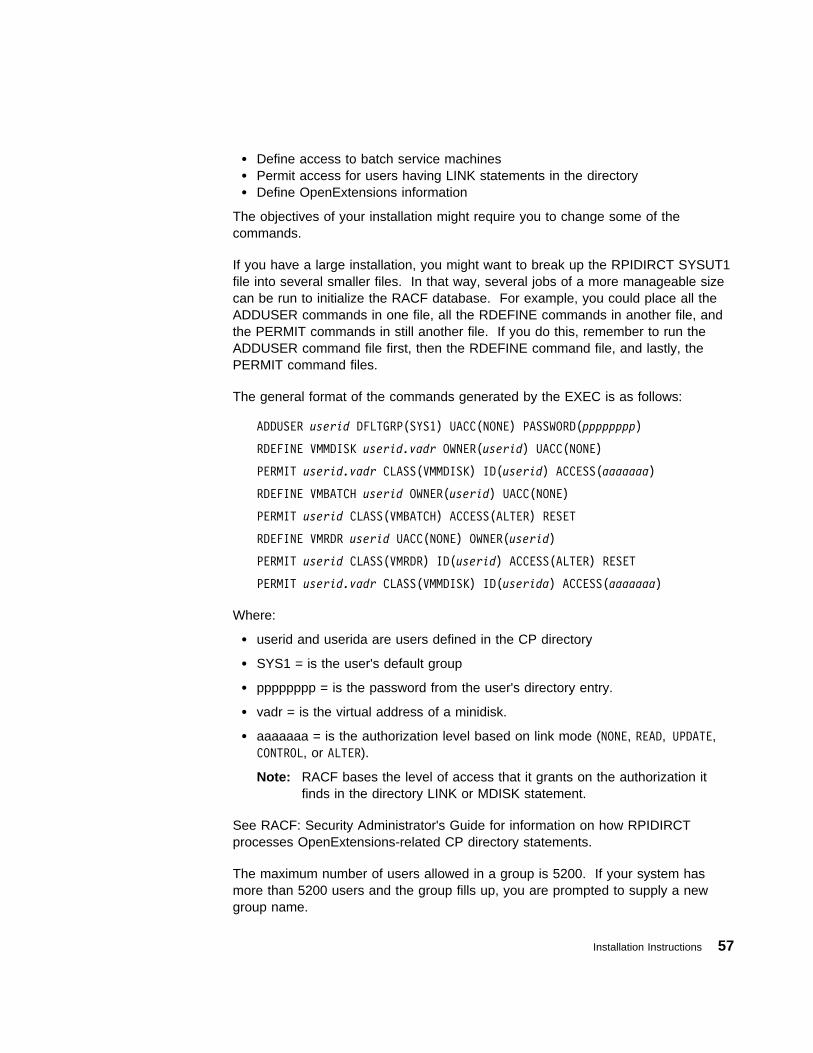
� Define access to batch service machines� Permit access for users having LINK statements in the directory� Define OpenExtensions information
The objectives of your installation might require you to change some of thecommands.
If you have a large installation, you might want to break up the RPIDIRCT SYSUT1file into several smaller files. In that way, several jobs of a more manageable sizecan be run to initialize the RACF database. For example, you could place all theADDUSER commands in one file, all the RDEFINE commands in another file, andthe PERMIT commands in still another file. If you do this, remember to run theADDUSER command file first, then the RDEFINE command file, and lastly, thePERMIT command files.
The general format of the commands generated by the EXEC is as follows:
ADDUSER userid DFLTGRP(SYS1) UACC(NONE) PASSWORD(pppppppp)
RDEFINE VMMDISK userid.vadr OWNER(userid) UACC(NONE)
PERMIT userid.vadr CLASS(VMMDISK) ID(userid) ACCESS(aaaaaaa)
RDEFINE VMBATCH userid OWNER(userid) UACC(NONE)
PERMIT userid CLASS(VMBATCH) ACCESS(ALTER) RESET
RDEFINE VMRDR userid UACC(NONE) OWNER(userid)
PERMIT userid CLASS(VMRDR) ID(userid) ACCESS(ALTER) RESET
PERMIT userid.vadr CLASS(VMMDISK) ID(userida) ACCESS(aaaaaaa)
Where:
� userid and userida are users defined in the CP directory
� SYS1 = is the user's default group
� pppppppp = is the password from the user's directory entry.
� vadr = is the virtual address of a minidisk.
� aaaaaaa = is the authorization level based on link mode (NONE, READ, UPDATE,CONTROL, or ALTER).
Note: RACF bases the level of access that it grants on the authorization itfinds in the directory LINK or MDISK statement.
See RACF: Security Administrator's Guide for information on how RPIDIRCTprocesses OpenExtensions-related CP directory statements.
The maximum number of users allowed in a group is 5200. If your system hasmore than 5200 users and the group fills up, you are prompted to supply a newgroup name.
Installation Instructions 57
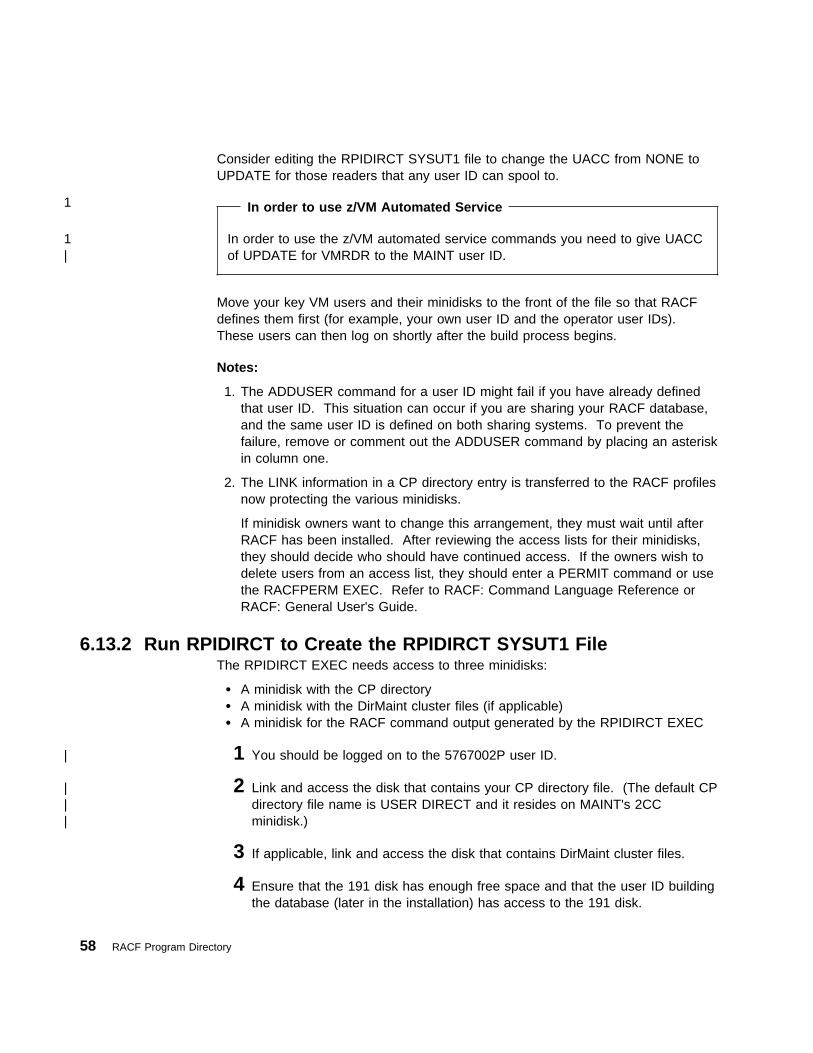
Consider editing the RPIDIRCT SYSUT1 file to change the UACC from NONE toUPDATE for those readers that any user ID can spool to.
1 In order to use z/VM Automated Service
1 In order to use the z/VM automated service commands you need to give UACC| of UPDATE for VMRDR to the MAINT user ID.
Move your key VM users and their minidisks to the front of the file so that RACFdefines them first (for example, your own user ID and the operator user IDs).These users can then log on shortly after the build process begins.
Notes:
1. The ADDUSER command for a user ID might fail if you have already definedthat user ID. This situation can occur if you are sharing your RACF database,and the same user ID is defined on both sharing systems. To prevent thefailure, remove or comment out the ADDUSER command by placing an asteriskin column one.
2. The LINK information in a CP directory entry is transferred to the RACF profilesnow protecting the various minidisks.
If minidisk owners want to change this arrangement, they must wait until afterRACF has been installed. After reviewing the access lists for their minidisks,they should decide who should have continued access. If the owners wish todelete users from an access list, they should enter a PERMIT command or usethe RACFPERM EXEC. Refer to RACF: Command Language Reference orRACF: General User's Guide.
6.13.2 Run RPIDIRCT to Create the RPIDIRCT SYSUT1 FileThe RPIDIRCT EXEC needs access to three minidisks:
� A minidisk with the CP directory� A minidisk with the DirMaint cluster files (if applicable)� A minidisk for the RACF command output generated by the RPIDIRCT EXEC
| 1 You should be logged on to the 5767002P user ID.
| 2 Link and access the disk that contains your CP directory file. (The default CP| directory file name is USER DIRECT and it resides on MAINT's 2CC| minidisk.)
3 If applicable, link and access the disk that contains DirMaint cluster files.
4 Ensure that the 191 disk has enough free space and that the user ID buildingthe database (later in the installation) has access to the 191 disk.
58 RACF Program Directory
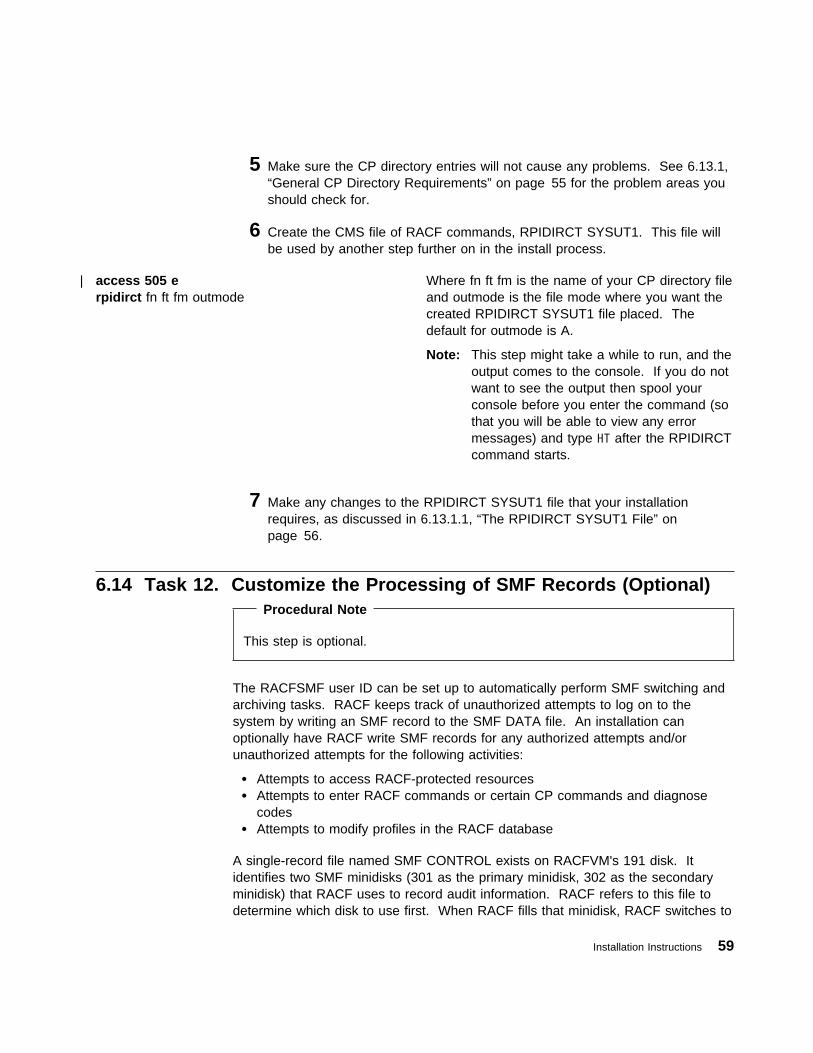
5 Make sure the CP directory entries will not cause any problems. See 6.13.1,“General CP Directory Requirements” on page 55 for the problem areas youshould check for.
6 Create the CMS file of RACF commands, RPIDIRCT SYSUT1. This file willbe used by another step further on in the install process.
| access 505 erpidirct fn ft fm outmode
Where fn ft fm is the name of your CP directory fileand outmode is the file mode where you want thecreated RPIDIRCT SYSUT1 file placed. Thedefault for outmode is A.
Note: This step might take a while to run, and theoutput comes to the console. If you do notwant to see the output then spool yourconsole before you enter the command (sothat you will be able to view any errormessages) and type HT after the RPIDIRCTcommand starts.
7 Make any changes to the RPIDIRCT SYSUT1 file that your installationrequires, as discussed in 6.13.1.1, “The RPIDIRCT SYSUT1 File” onpage 56.
6.14 Task 12. Customize the Processing of SMF Records (Optional) Procedural Note
This step is optional.
The RACFSMF user ID can be set up to automatically perform SMF switching andarchiving tasks. RACF keeps track of unauthorized attempts to log on to thesystem by writing an SMF record to the SMF DATA file. An installation canoptionally have RACF write SMF records for any authorized attempts and/orunauthorized attempts for the following activities:
� Attempts to access RACF-protected resources� Attempts to enter RACF commands or certain CP commands and diagnose
codes� Attempts to modify profiles in the RACF database
A single-record file named SMF CONTROL exists on RACFVM's 191 disk. Itidentifies two SMF minidisks (301 as the primary minidisk, 302 as the secondaryminidisk) that RACF uses to record audit information. RACF refers to this file todetermine which disk to use first. When RACF fills that minidisk, RACF switches to
Installation Instructions 59
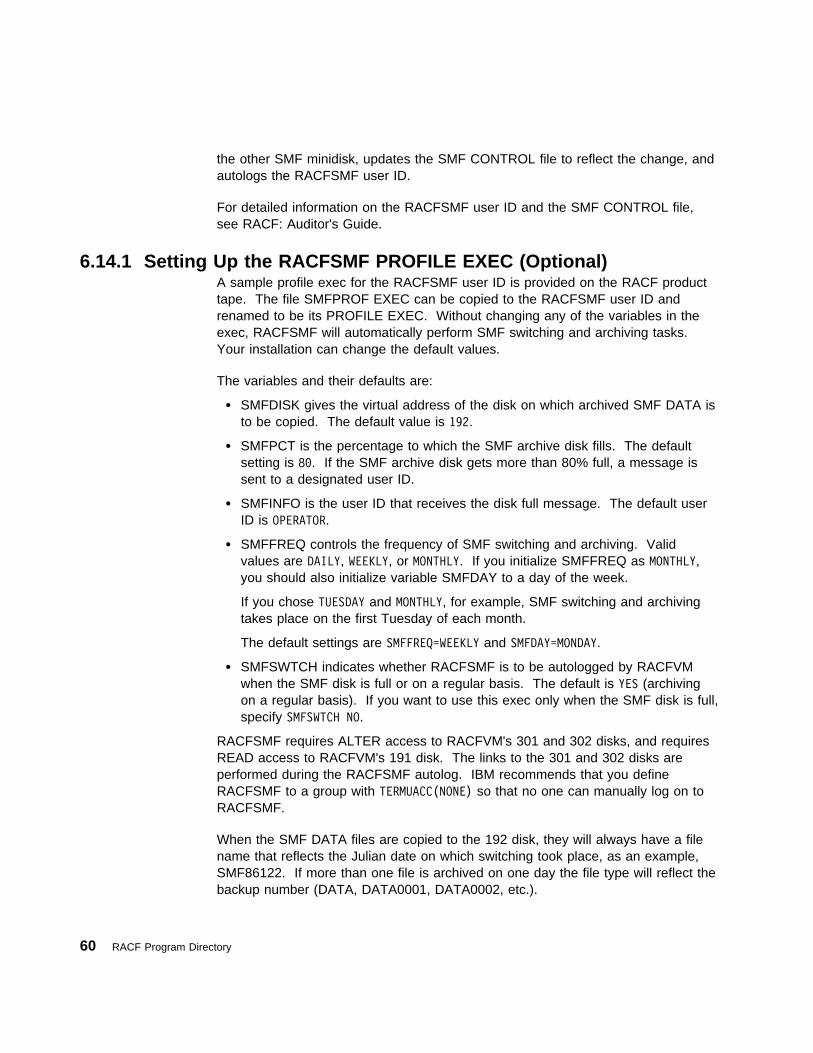
the other SMF minidisk, updates the SMF CONTROL file to reflect the change, andautologs the RACFSMF user ID.
For detailed information on the RACFSMF user ID and the SMF CONTROL file,see RACF: Auditor's Guide.
6.14.1 Setting Up the RACFSMF PROFILE EXEC (Optional)A sample profile exec for the RACFSMF user ID is provided on the RACF producttape. The file SMFPROF EXEC can be copied to the RACFSMF user ID andrenamed to be its PROFILE EXEC. Without changing any of the variables in theexec, RACFSMF will automatically perform SMF switching and archiving tasks.Your installation can change the default values.
The variables and their defaults are:
� SMFDISK gives the virtual address of the disk on which archived SMF DATA isto be copied. The default value is 192.
� SMFPCT is the percentage to which the SMF archive disk fills. The defaultsetting is 8�. If the SMF archive disk gets more than 80% full, a message issent to a designated user ID.
� SMFINFO is the user ID that receives the disk full message. The default userID is OPERATOR.
� SMFFREQ controls the frequency of SMF switching and archiving. Validvalues are DAILY, WEEKLY, or MONTHLY. If you initialize SMFFREQ as MONTHLY,you should also initialize variable SMFDAY to a day of the week.
If you chose TUESDAY and MONTHLY, for example, SMF switching and archivingtakes place on the first Tuesday of each month.
The default settings are SMFFREQ=WEEKLY and SMFDAY=MONDAY.
� SMFSWTCH indicates whether RACFSMF is to be autologged by RACFVMwhen the SMF disk is full or on a regular basis. The default is YES (archivingon a regular basis). If you want to use this exec only when the SMF disk is full,specify SMFSWTCH NO.
RACFSMF requires ALTER access to RACFVM's 301 and 302 disks, and requiresREAD access to RACFVM's 191 disk. The links to the 301 and 302 disks areperformed during the RACFSMF autolog. IBM recommends that you defineRACFSMF to a group with TERMUACC(NONE) so that no one can manually log on toRACFSMF.
When the SMF DATA files are copied to the 192 disk, they will always have a filename that reflects the Julian date on which switching took place, as an example,SMF86122. If more than one file is archived on one day the file type will reflect thebackup number (DATA, DATA0001, DATA0002, etc.).
60 RACF Program Directory
RACFSMF is automatically logged off. The SMF records on the 192 disk are readyfor processing by your installation. Refer to RACF: Auditor's Guide for moreinformation on using SMF records.
1 Link and access RACFSMF's 191 disk.
link racfsmf 191 291 mraccess 291 m
2 Copy the sample PROFILE EXEC for the RACFSMF user ID.
copyfile smfprof exec fm-505 profile exec m (olddate replace
Where fm-505 is the current file mode of5767002P's 505 test build disk.
3 Make any required updates to the PROFILE EXEC.
4 Detach the RACFSMF disk.
det 291
6.14.2 Setting Up the SMF CONTROL File (Optional)At initialization, RACF uses the SMF CONTROL file to determine on which of twominidisks to record SMF records. When RACF fills up the minidisk on which itbegan recording, it uses the SMF CONTROL file to determine the location of thealternate minidisk.
When it switches minidisks, RACFVM updates the CURRENT field in the SMFCONTROL file (on RACFVM's A-disk) to reflect the minidisk that it is now recordingon.
If the default addresses, filemodes, and CPU IDs specified in the file shipped withRACF do not fit the needs of your installation, you can edit the SMF CONTROL fileand change them.
Following is the default SMF control record contained in the SMF CONTROL file:
CURRENT 3�1 K PRIMARY 3�1 K SECONDARY 3�2 K 1���� VMSP CLOSE ��1 SEVER NO � RACFSMF
In this record, the virtual addresses of the SMF minidisks are 3�1 and 3�2. Thefilemode is K, the default maximum buffer size for the SMF DATA file is 1����, andVMSP is the ID of the CPU where RACF generates the SMF records. CLOSE nnnspecifies the number of audit records RACF buffers before they are written to theSMF file. You can specify ���-999; the default value is ��1.
Installation Instructions 61
RACF limits the CPU ID to four characters. It is used as an identifier for SMFrecords and should not be confused with the larger CPU ID in VM systems.
The CLOSE ��1 ensures that the audit requests processed by RACF are notbuffered before being written to the SMF data file.
If you specify CLOSE ���, the file is not explicitly closed by RACF; CMS writes theaudit records when the internal buffer is full. Note that if nnn is large, RACF canwrite more audit records per second, thereby improving system performance.However, more audit records could be lost during a system failure.
The SEVER keyword is initially set to NO. If the installation chooses to set SEVER toYES, RACF will sever the path between CP and RACF when the SMF disks are full,and RACF is unable to continue recording SMF records. Before setting SEVER toYES, installations should consider its effect on system availability.
The � is an internal flag used by RACF, and should not be altered by the user.
RACFSMF is the user ID that is autologged when the 301 or 302 minidisks are filled.
If you XEDIT the SMF CONTROL file, you must not alter the format of the controlrecord: a single space must separate operands. In addition, the SMF CONTROLfile must be a fixed block logical record length of 100.
If you change the SMF CONTROL file, you need to copy it to RACMAINT's 191disk.
1 Link and access RACFSMF's 191 disk.
link racfsmf 191 291 mraccess 291 m
2 Copy the SMF CONTROL file.
link racfvm 191 391 mraccess 391 ncopyfile smf control n = = m (olddate replace
3 Make any required updates to the SMF CONTROL file on the 291 minidisk.
4 Copy the new SMF CONTROL file to the RACFVM and RACMAINT 191A-disks.
62 RACF Program Directory
link racmaint 191 491 mraccess 491 ocopyfile smf control m = = o (olddate replacecopyfile smf control m = = n (olddate replace
5 Detach the RACFSMF, RACFVM, and RACMAINT disks.
det 291det 391det 491
6.15 Task 13. Change the Message Routing Table (Optional) Procedural Note
This step is optional.
RACF simulates OS multiple console support by using the VM MSG, WNG, SMSG,and MSGNOH commands. The simulation uses a routing table (CSTCONS) tosend console messages to VM user IDs.
The CSTCONS routing table shown in Figure 10 is the table shipped with RACFand is called CSTCONS ASSEMBLE. It contains the following:
� The user IDs that receive the text of WTO/WTOR SVCs� The commands (MSG, WNG, SMSG, or MSGNOH) used to send the text of the
WTO/WTOR SVCs� A list of the routing codes each user ID in the table should receive
Installation Instructions 63
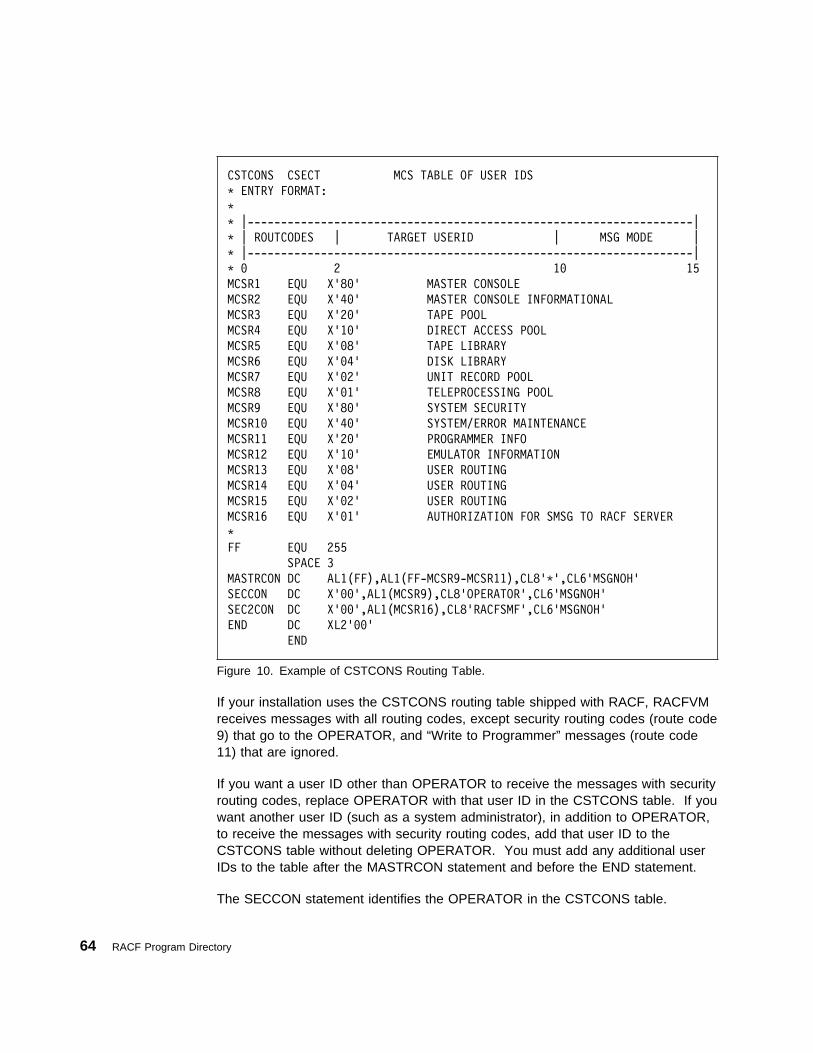
CSTCONS CSECT MCS TABLE OF USER IDS
J ENTRY FORMAT:
J
J |-------------------------------------------------------------------|
J | ROUTCODES | TARGET USERID | MSG MODE |
J |-------------------------------------------------------------------|
J � 2 1� 15
MCSR1 EQU X'8�' MASTER CONSOLE
MCSR2 EQU X'4�' MASTER CONSOLE INFORMATIONAL
MCSR3 EQU X'2�' TAPE POOL
MCSR4 EQU X'1�' DIRECT ACCESS POOL
MCSR5 EQU X'�8' TAPE LIBRARY
MCSR6 EQU X'�4' DISK LIBRARY
MCSR7 EQU X'�2' UNIT RECORD POOL
MCSR8 EQU X'�1' TELEPROCESSING POOL
MCSR9 EQU X'8�' SYSTEM SECURITY
MCSR1� EQU X'4�' SYSTEM/ERROR MAINTENANCE
MCSR11 EQU X'2�' PROGRAMMER INFO
MCSR12 EQU X'1�' EMULATOR INFORMATION
MCSR13 EQU X'�8' USER ROUTING
MCSR14 EQU X'�4' USER ROUTING
MCSR15 EQU X'�2' USER ROUTING
MCSR16 EQU X'�1' AUTHORIZATION FOR SMSG TO RACF SERVER
J
FF EQU 255
SPACE 3
MASTRCON DC AL1(FF),AL1(FF-MCSR9-MCSR11),CL8'J',CL6'MSGNOH'
SECCON DC X'��',AL1(MCSR9),CL8'OPERATOR',CL6'MSGNOH'
SEC2CON DC X'��',AL1(MCSR16),CL8'RACFSMF',CL6'MSGNOH'
END DC XL2'��'
END
Figure 10. Example of CSTCONS Routing Table.
If your installation uses the CSTCONS routing table shipped with RACF, RACFVMreceives messages with all routing codes, except security routing codes (route code9) that go to the OPERATOR, and “Write to Programmer” messages (route code11) that are ignored.
If you want a user ID other than OPERATOR to receive the messages with securityrouting codes, replace OPERATOR with that user ID in the CSTCONS table. If youwant another user ID (such as a system administrator), in addition to OPERATOR,to receive the messages with security routing codes, add that user ID to theCSTCONS table without deleting OPERATOR. You must add any additional userIDs to the table after the MASTRCON statement and before the END statement.
The SECCON statement identifies the OPERATOR in the CSTCONS table.
64 RACF Program Directory
For example, if you want the user ID SYSDA to receive the messages with securityrouting codes, add the statement below after the SECCON statement and beforethe END statement.
THRDCON DC X‘��’, AL1(MCSR9), CL8‘SYSDA’, CL6‘MSGNOH’
This entry in the table causes the system to route security messages to SYSDA inaddition to routing them to the operator.
Notes:
1. If a message is sent to a user who is not logged on when the message is sent,the message is forwarded to RACFVM. The user ID (in parentheses) of theuser for whom the message was intended precedes the message.
2. IBM recommends placing the security administrator in the CSTCONS table sothat the security administrator can receive security-relevant messages andrespond to RACF prompts.
6.15.1 Updating the Message Routing TableTo update the message routing table, do a VMSES/E local modification to theCSTCONS ASSEMBLE and CSTCONS TEXT file.
Follow the steps documented in B.1, “Assemble Full Part Replacement - Example”on page 133 to perform the local modification to CSTCONS files. Use thefollowing substitution values:
� For fn use CSTCONS� For nnnn use 0001� For blist use RPIBL505� For memname use CSTCONS
At the end of the procedure your modified copy of CSTCONS ASSEMBLE andCSTCONS TEXT will be on 5767002P's 505 test build disk. It will be copied toRACFVM's 305 production build disk in the copy to production step later on.
6.16 Task 14. Delete or Replace the ICHDEX01 and ICHRCX02 Exits(Optional)
Procedural Note
This step is optional.
Another way to customize RACF is to delete or replace the ICHDEX01 andICHRCX02 exits.
Installation Instructions 65
6.16.1 The ICHDEX01 ExitTo provide password protection, early releases of RACF included a routine formasking passwords stored on the RACF database. Later, RACF offered the optionof improved password protection using the Data Encryption Standard (DES)algorithm to encrypt passwords. However, some installations already hadinstallation-written exit routines in place that expect masking, not encryption. Toremain compatible with those installations, RACF 1.10 includes a dummyinstallation exit which activates the masking algorithm. This exit (ICHDEX01)always returns a return code of 4 which in turn causes RACF to use the maskingalgorithm for passwords.
If you choose to use the DES algorithm instead of the masking algorithm, you mustdelete the dummy exit from RACFLPA LOADLIB, and re-IPL RACFVM. This samechange should be made to the service machine's 505 disk.
If you deleted the RACF ICHDEX01 exit in a previous release of RACF, make sureyou do the same for RACF 1.10.
Note: If you choose to use the DES algorithm, you must use it on all systems thatshare the RACF database.
For more information, refer to RACF: System Programmer's Guide.
6.16.1.1 Modifying ICHDEX01To local modify the ICHDEX01 TEXT file, create the ASSEMBLE file and thenfollow the instructions in B.3, “Local Modification to Full Part Replacement TextFiles” on page 136, using the following substitution values:
� For fn use ICHDEX01� For nnnn use 0002
Note that you will build libraries RACFOBJ TXTLIB and RACFLPA LOADLIB.
6.16.1.2 Deleting ICHDEX01To delete ICHDEX01 TEXT, follow the instructions in B.3, “Local Modification to FullPart Replacement Text Files” on page 136 using the following substitution values:
� For fn use ICHDEX01
� For blist use RPIBLLPA. You will need to do the steps to get the highest levelof a part and the remove object step for the build list.
� For libname use RACFLPA and for libftype use LOADLIB. You need to copythe library into production.
66 RACF Program Directory
Notes:
1. Note that you will comment out ICHDEX01 TEXT from the RACFLPA LOADLIBonly.
2. You will do the VMFSETUP command and then continue with the step to getthe highest level of the build list.
| 3. You should not do the last step, which is to re-ipl the RACF service machine.
6.16.2 The ICHRCX02 ExitThe RACROUTE REQUEST=AUTH (also known as RACHECK) postprocessingexit, ICHRCX02, is shipped with the RACF for VM product. This exit allows analternate user to access data that a user can access, but which the alternate usercannot normally access. It can be used, for example, to allow users to access arestricted compiler only when submitting a batch job to a specified batch machine.If you do not want this postprocessing exit, delete it.
6.16.2.1 Modifying ICHRCX02If you want to modify ICHRCX02 ASSEMBLE and TEXT, follow the instructions inB.4, “Local Modification to Full Part Assemble and Text Files and Possible BuildList Update” on page 139, using the following substitution values:
� For fn use ICHRCX02� For nnnn use 0002
Note: You will not be adding or deleting anything to a build list, so you can skipthose steps.
6.16.2.2 Deleting ICHRCX02If you are deleting ICHRCX02, you need to local modify the RPIBLLPA build list toreflect this. Follow the instructions in B.4, “Local Modification to Full Part Assembleand Text Files and Possible Build List Update” on page 139, using the followingsubstitution values:
� For fn use ICHRCX02� For blist use RPIBLLPA
Note: You need to do the VMFSETUP step, and then start with the step to get the| highest level of the build list. You should not do the last step, which is to re-ipl the| RACF service machine.
Installation Instructions 67
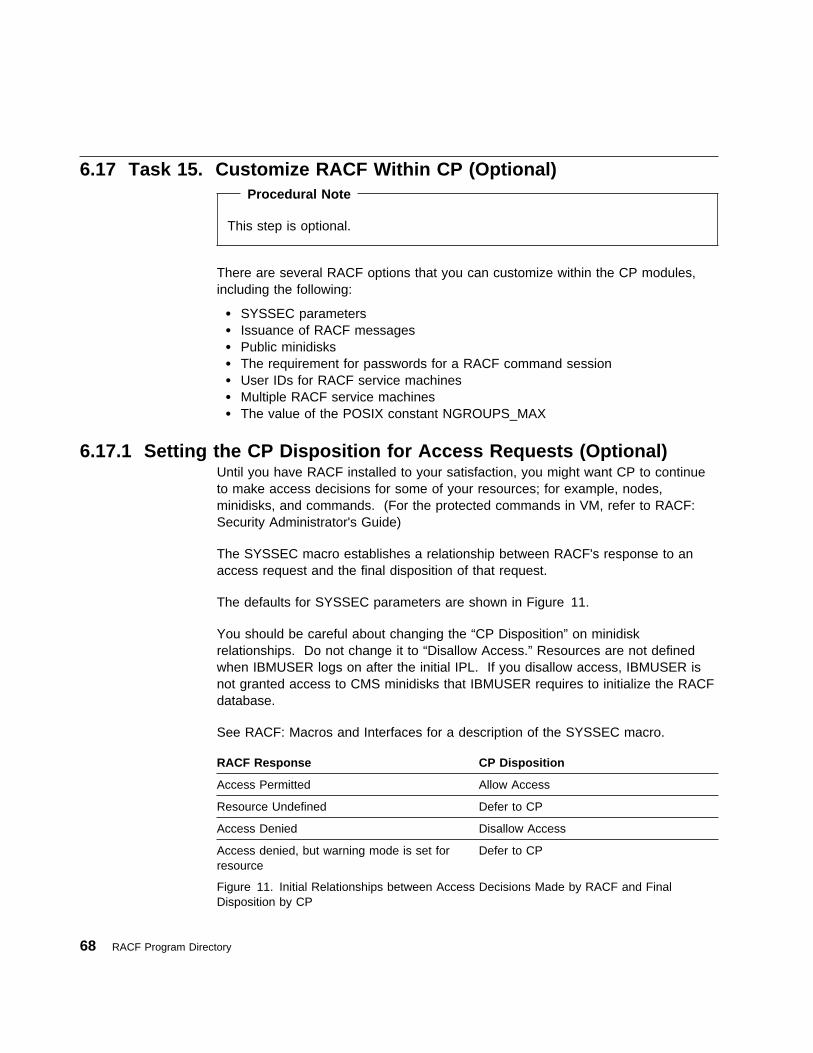
6.17 Task 15. Customize RACF Within CP (Optional) Procedural Note
This step is optional.
There are several RACF options that you can customize within the CP modules,including the following:
� SYSSEC parameters� Issuance of RACF messages
� Public minidisks� The requirement for passwords for a RACF command session� User IDs for RACF service machines� Multiple RACF service machines� The value of the POSIX constant NGROUPS_MAX
6.17.1 Setting the CP Disposition for Access Requests (Optional)Until you have RACF installed to your satisfaction, you might want CP to continueto make access decisions for some of your resources; for example, nodes,minidisks, and commands. (For the protected commands in VM, refer to RACF:Security Administrator's Guide)
The SYSSEC macro establishes a relationship between RACF's response to anaccess request and the final disposition of that request.
The defaults for SYSSEC parameters are shown in Figure 11.
You should be careful about changing the “CP Disposition” on minidiskrelationships. Do not change it to “Disallow Access.” Resources are not definedwhen IBMUSER logs on after the initial IPL. If you disallow access, IBMUSER isnot granted access to CMS minidisks that IBMUSER requires to initialize the RACFdatabase.
See RACF: Macros and Interfaces for a description of the SYSSEC macro.
Figure 11. Initial Relationships between Access Decisions Made by RACF and FinalDisposition by CP
RACF Response CP Disposition
Access Permitted Allow Access
Resource Undefined Defer to CP
Access Denied Disallow Access
Access denied, but warning mode is set forresource
Defer to CP
68 RACF Program Directory
In the figure, if a user attempts to LINK to a minidisk that has not been defined toRACF, the request is deferred to VM. VM permits the user to link if the user hassupplied a valid LINK password.
To update or change the SYSSEC macro invocation parameters in HCPRWA, put alocal modification on to HCPRWA RPIBASE0. See 6.17.8, “Performing a LocalModification to HCPxxx” on page 71 for the steps to local mod HCPRWA.
6.17.2 Suppressing Issuance of RACF Messages (Optional)Options in the SYSSEC macro allow you to suppress the issuance ofRACF-defined error messages which result from unsuccessful authorization checksby RACF (messages issued by the VM operating system are still displayed).Messages can be suppressed for any combination of the resource classesVMMDISK, VMRDR, VMNODE, and VMCMD.
The default is for messages to be displayed. To change the settings, you need tochange the SYSSEC parameters in HCPRWA.
Refer to RACF: Macros and Interfaces for a description of the SYSSEC macro.
To update or change the SYSSEC macro invocation parameters in HCPRWA, put alocal modification on to HCPRWA RPIBASE0. See 6.17.8, “Performing a LocalModification to HCPxxx” on page 71 for the steps to local mod HCPRWA.
6.17.3 Defining Public Minidisks (Optional)Within the CP modules, you can define public minidisks (minidisks for publicaccess). Defining public minidisks can improve performance because read accessto them is automatically granted without calling the RACF service machine. Todefine a minidisk as public, use the GLBLDSK macro to define the minidisk in theglobal minidisk table. For information on the global minidisk table and how toidentify minidisks that can be considered public minidisks, refer to RACF: SystemProgrammer's Guide and RACF: Macros and Interfaces. For information on theGLBLDSK macro, see RACF: Macros and Interfaces.
To update or change the GLBLDSK macro invocation parameters in HCPRWA, puta local modification on to HCPRWA RPIBASE0. See 6.17.8, “Performing a LocalModification to HCPxxx” on page 71 for the steps to local mod HCPRWA.
6.17.4 Requiring Passwords for RACF Command Sessions (Optional)RACF does not require that users enter their passwords to establish RACFcommand sessions. However, if your installation wants its users to enterpasswords for RACF command sessions, you must change the assemblerstatement in HCPRPD from:
&NPWD SETB 1
Installation Instructions 69
to
&NPWD SETB �
To update or change HCPRPD, put a local modification on to HCPRPD RPIBASE0.See 6.17.8, “Performing a Local Modification to HCPxxx” on page 71 for the stepsto local mod HCPRPD.
For information on RACF command sessions, see RACF: Command LanguageReference. Note that a logon password is always required, even if a password isnot required for RACF command sessions.
6.17.5 Changing User IDs for RACF Service Machines (Optional)If you are using user IDs other than RACFVM and RACMAINT for the RACFservice machines, you need to update the RACSERV macro statements inHCPRWA. See RACF: Macros and Interfaces for details on the RACSERV macro.
To update the RACSERV macro statements in HCPRWA, put a local modificationon to HCPRWA RPIBASE0. See 6.17.8, “Performing a Local Modification toHCPxxx” on page 71 for the steps to local mod HCPRWA.
Note: The RACSERV statements must immediately follow the HCPRWATB entrydefinition label in HCPRWA.
6.17.6 Defining Multiple RACF Service Machines (Optional)It is strongly recommended that you install the RACF product and determine theoverall system performance characteristics before you install multiple RACF servicemachines. See RACF: System Programmer's Guide for information on the benefitsof using multiple RACF service machines, how to determine if you need more thana single RACF service machine, and the procedure for installing multiple servicemachines.
If you plan to install multiple RACF service machines, IBM recommends that youmake changes to the RACSERV invocations in HCPRWA as part of RACFinstallation, leaving the other multiple service machine installation tasks for a latertime. This allows you to avoid a CP nucleus regeneration at that time.
To update the RACSERV macro statements in HCPRWA, put a local modificationon to HCPRWA RPIBASE0. See 6.17.8, “Performing a Local Modification toHCPxxx” on page 71 for the steps to local mod HCPRWA.
Note: The RACSERV statements must immediately follow the HCPRWATB entrydefinition label in HCPRWA.
70 RACF Program Directory
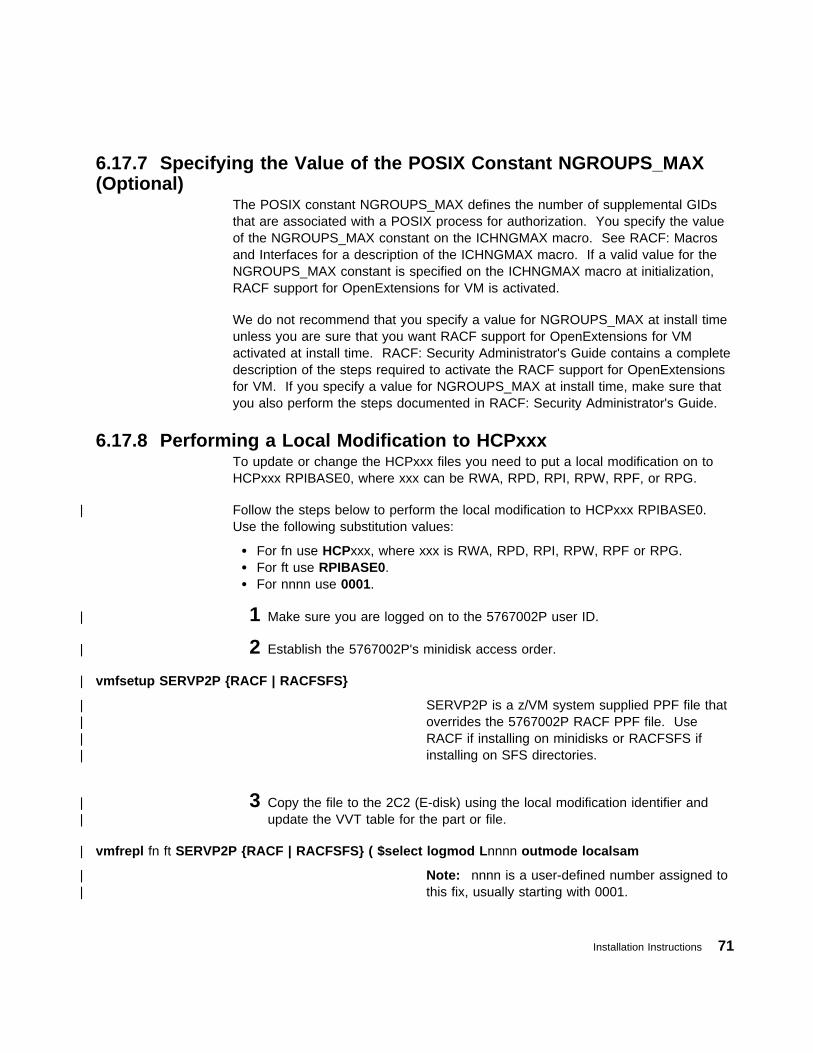
6.17.7 Specifying the Value of the POSIX Constant NGROUPS_MAX(Optional)
The POSIX constant NGROUPS_MAX defines the number of supplemental GIDsthat are associated with a POSIX process for authorization. You specify the valueof the NGROUPS_MAX constant on the ICHNGMAX macro. See RACF: Macrosand Interfaces for a description of the ICHNGMAX macro. If a valid value for theNGROUPS_MAX constant is specified on the ICHNGMAX macro at initialization,RACF support for OpenExtensions for VM is activated.
We do not recommend that you specify a value for NGROUPS_MAX at install timeunless you are sure that you want RACF support for OpenExtensions for VMactivated at install time. RACF: Security Administrator's Guide contains a completedescription of the steps required to activate the RACF support for OpenExtensionsfor VM. If you specify a value for NGROUPS_MAX at install time, make sure thatyou also perform the steps documented in RACF: Security Administrator's Guide.
6.17.8 Performing a Local Modification to HCPxxxTo update or change the HCPxxx files you need to put a local modification on toHCPxxx RPIBASE0, where xxx can be RWA, RPD, RPI, RPW, RPF, or RPG.
| Follow the steps below to perform the local modification to HCPxxx RPIBASE0.Use the following substitution values:
� For fn use HCPxxx, where xxx is RWA, RPD, RPI, RPW, RPF or RPG.� For ft use RPIBASE0.� For nnnn use 0001.
| 1 Make sure you are logged on to the 5767002P user ID.
| 2 Establish the 5767002P's minidisk access order.
| vmfsetup SERVP2P {RACF | RACFSFS}
| SERVP2P is a z/VM system supplied PPF file that| overrides the 5767002P RACF PPF file. Use| RACF if installing on minidisks or RACFSFS if| installing on SFS directories.
| 3 Copy the file to the 2C2 (E-disk) using the local modification identifier and| update the VVT table for the part or file.
| vmfrepl fn ft SERVP2P {RACF | RACFSFS} ( $select logmod Lnnnn outmode localsam
| Note: nnnn is a user-defined number assigned to| this fix, usually starting with 0001.
Installation Instructions 71
| 4 Make your local modification changes to the copy on the LOCALSAM 2C2| disk.
| The modified HCPxxx RPIBASE0 files will be built on 5767002P's 505 test build| disks and then will be copied to the CP maintenance user ID's local modification| disk in step 6.18, “Task 16. Install the CP Part of RACF” on page 73. It is in that| step that your changes will be assembled and built into the CP nucleus.
72 RACF Program Directory
6.18 Task 16. Install the CP Part of RACF Procedural Note
All customers should perform this step.
| The enablement of RACF is needed before RACF can be used.
| The installation of the CP part of RACF, into the CP nucleus, is needed in order to| run RACF.
| Modules HCPRPI, HCPRPD, HCPRPF, HCPRPG, HCPRPW, and HCPRWA are| placeholders in the VM control program and provide the interaction between RACF| and VM. The RACF install replaces the contents of these VM/CP ASSEMBLE files.
| Follow these steps to enable RACF and apply the RACF updates to CP:
| 1 Log on to the CP maintenance ID, MAINT (which is the default user ID).
| 2 Enable RACF, install the CP part of RACF and generate new CP nucleus.
| service racf enable
| The new CP nucleus, with the RACF CP parts, was placed on the secondary| parm disk (default disk address of CF2).
| For your information, a copy of the previous (or currently running) CPLOAD| MODULE is still on the primary (CF1) and tertiary (CF3) parm disks as| CPLOAD MODULE. It is also saved on the secondary parm disk as CPLOLD| MODULE.
Note: If you update the HCPMDLAT macro to add or modify the position of theRACF modules in the CP load list, you should not add these entries to anAUXRPI file. The preferred AUX file will prevent the VM updates frombeing included when the macro is built. See z/VM: Service Guide forinstructions on updating the CP load list.
Installation Instructions 73
6.19 Task 17. Change RACF Database Names If Sharing with MVSSystem
Procedural Note
Follow the instructions in this section only if:
� You are doing a new install
AND
� You are sharing your RACF databases with an MVS system
AND
� The RACF database names on the MVS system are different than thedefault database names shipped with RACF
Otherwise, continue with 6.20, “Task 18. IPL the CP System with RACF” onpage 75.
If the RACF database names on the MVS system are different than those defaultedfor VM, you need to change the RACF database names in the ICHRDSNTASSEMBLE and ICHRDSNT TEXT files to match the MVS system. These filesreside on 5767002P's 505 test build disk. See RACF: System Programmer's Guidefor information on the ICHRDSNT files.
To change the ICHRDSNT ASSEMBLE and TEXT files you must perform a localmodification against them. Follow the steps documented in B.1, “Assemble FullPart Replacement - Example” on page 133 to perform the local modification, usingthe following substitution values:
� For fn use ICHRDSNT.� For nnnn use 0001.� For blist use RPIBL505 and RPIBLLNK. (Do the VMFBLD twice, once for
each buildlist.)� For memname use ICHRDSNT.
At the end of the procedure your modified copies of ICHRDSNT ASSEMBLE,ICHRDSNT TEXT, and the RACFLINK LOADLIB (containing the new ICHRDSNT)will be on 5767002P's 505 test build disk.
74 RACF Program Directory

6.20 Task 18. IPL the CP System with RACF Procedural Note
All customers should perform this step.
| In this task you will IPL your system with the NOAUTOLOG option. After the| system IPL, XAUTOLOG the RACMAINT user ID, which will initialize RACF. At this| time, the CP nucleus with RACF in it, is on the secondary (CF2) parm disk.
If RACF cannot find the database name in the database name table (ICHRDSNT)during initialization, it might be for one of the following reasons:
� The database name specified in ICHRDSNT does not match the data set nameon the database DASD volumes.
� The database name contains an asterisk (*).
� No FILEDEF exists for the RACF database.
In each instance, the system prompts the system operator for a RACF databasename.
From the system operator's console, do one of the following:
Enter: SEND RACMAINT 1RACF.DATASET
replacing RACF.DATASET with your installation's RACF database name
OR
Enter: SEND RACMAINT 1NONE
Note: If you specify SEND RACMAINT 1NONE, RACF is not active for this IPL. This isnot recommended, because most users will not be able to log on to thesystem. (Only RACF servers, or the primary system operator, will be ableto log on using the directory password.)
| 1 Make sure you are logged onto MAINT or equivalent user ID in order to| shutdown the system.
| shutdown
| 2 IPL the system using the CF2 parm disk, as this is where the new CP| nucleus was placed in 6.18, “Task 16. Install the CP Part of RACF” on| page 73.
| To IPL from the CF2 parm disk you need to use the loadparm parameter on| the IPL command; which will display the Stand-Alone Program Loader panel.
Installation Instructions 75

| You will need to know your console address. You can get this by doing a| QUERY CONSOLE.
| Note: The following instruction can be used if you are IPLing second level.| If you are IPLing first level, see the appropriate processor operator's guide for| the system console, for instructions.
| IPL rdev CLEAR LOADPARM cons| rdev is the address of the real DASD device| containing your system residence volume.
| cons is the address of your console
| 3 Change the EXTENT field to a 2 and press the PF10 key to LOAD on the| Stand Alone Program Loader screen. Following is an example of the screen| with EXTENT field filled in with a 2.
| �| �| STAND ALONE PROGRAM LOADER: z/VM VERSION 5 RELEASE 1.�
| DEVICE NUMBER: rdev MINIDISK OFFSET: �������� EXTENT: 2
| MODULE NAME: CPLOAD LOAD ORIGIN: 1���
| --------------------------------IPL PARAMETERS---------------------------
| -----------------------------------COMMENTS------------------------------
| -------------------------------------------------------------------------
| 9= FILELIST 1�= LOAD 11= TOGGLE EXTENT/OFFSET
| -| .
| 4 IPL with NOAUTOLOG.
| When you see the following on the console:
| hh:mm:ss Start ((Warm|Force|COLD|CLEAN) (DRain) (DIsable) (NODIRect)
| hh:mm:ss (NOAUTOlog)) or (SHUTDOWN)
| Reply with the following; along with any other parameters you need:
| NOAUTOLOG
| Answer any other replies the way you would for any other IPL of your VM| system.
76 RACF Program Directory
| 5 Once the system is IPLed you need to type in the following from the system| operator's console.
| XAUTOLOG RACMAINT
| 6 You can then disconnect from the operator and continue with the next task.
Procedural Note
Customers doing migration installs who had previously inactivated RACF shouldactivate it now by issuing:
SEND RACMAINT SETRACF ACTIVE
6.21 Task 19. Update the RACF Database with Existing CP DirectoryInformation
Procedural Note
Only customers doing new installs should perform this step.
Customers doing migration installs should skip to 6.22, “Task 20. Create theGlobal Access Table (Optional)” on page 82.
If you are not sharing another system's existing RACF database you are creating anew RACF database, and you need to initialize your new RACF database withinformation that is in your CP directory.
If you are sharing another system's existing RACF database, then you need toupdate the shared RACF database with information that is in your CP directory.
The CP directory information that you need to update or migrate to the RACFdatabase is contained in the RPIDIRCT SYSUT1 file, in the form of RACFcommands. You created this file in 6.13, “ Task 11. Prepare to Update RACF withExisting CP Directory Data” on page 54.
Installation Instructions 77
Procedural Note
If you are not sharing existing RACF databases with another system, continuewith section 6.21.1, “Initialize the RACF Database (If You Are Not Sharing anExisting Database)” on page 78.
If you are sharing existing RACF databases with another system, continue withsection 6.21.2, “Update the RACF Database (If You Are Sharing an ExistingDatabase)” on page 81.
6.21.1 Initialize the RACF Database (If You Are Not Sharing anExisting Database)
To initialize the RACF database, you need to:
� Log on to the IBMUSER user ID.� Run RPIBLDDS to build the RACF database.� Define the security administrator.
6.21.1.1 Logging On to the IBMUSER User IDThe first time you IPL your system with RACF active, RACF automatically initializesthe RACF database with a set of basic profiles to help you achieve system securityquickly. One of these is the IBMUSER user ID.
IBMUSER is connected to three group profiles named SYS1, VSAMDSET, andSYSCTLG. (VSAMDSET and SYSCTLG are subgroups of SYS1.)
This user ID gives you full authority, including the SPECIAL and OPERATIONSattributes, to use any of the RACF functions. Links in IBMUSER's CP directoryentry (for the system 190 and system 19E disks) are not in the RACF database atthis point. If you are deferring minidisk access decisions for undefined resources toCP, you can ignore the warning messages that RACF is generating.
For more information, refer to RACF: Security Administrator's Guide.
Note: If you specified the CP disposition for Resource Undefined to be “DisallowAccess” (you are not deferring minidisk access decisions), CP does notallow IBMUSER to link to the CMS minidisks. If you did this by mistake,you must go back to 6.17.1, “Setting the CP Disposition for AccessRequests (Optional)” on page 68. Correct any incorrect entries in
| HCPRWA. You will then have to regenerate the CP nucleus (see step 6.18,| “Task 16. Install the CP Part of RACF” on page 73, using only the options| $SELECT and NOCOPY on the VMFREPL command and then update the| HCPxxx existing part on 5767002P's 2C2 (localsam) disk) and then IPL| (see step 6.20, “Task 18. IPL the CP System with RACF” on page 75).
78 RACF Program Directory
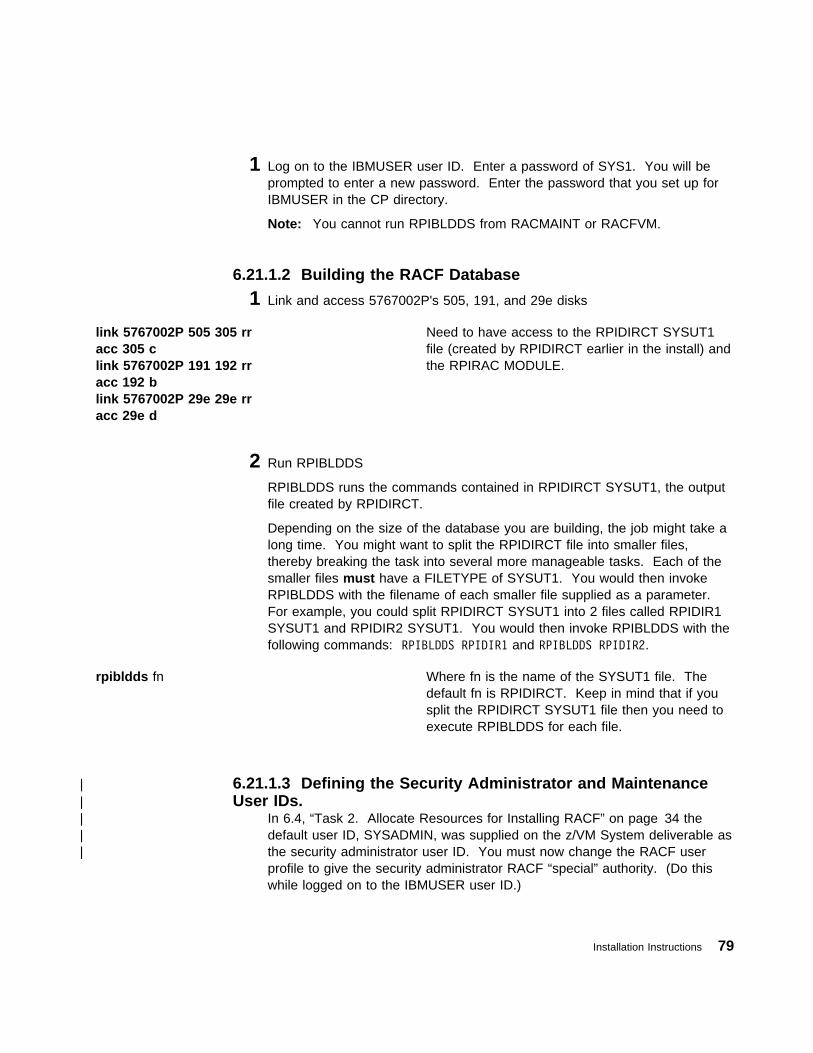
1 Log on to the IBMUSER user ID. Enter a password of SYS1. You will beprompted to enter a new password. Enter the password that you set up forIBMUSER in the CP directory.
Note: You cannot run RPIBLDDS from RACMAINT or RACFVM.
6.21.1.2 Building the RACF Database
1 Link and access 5767002P's 505, 191, and 29e disks
link 5767002P 505 305 rracc 305 clink 5767002P 191 192 rracc 192 blink 5767002P 29e 29e rracc 29e d
Need to have access to the RPIDIRCT SYSUT1file (created by RPIDIRCT earlier in the install) andthe RPIRAC MODULE.
2 Run RPIBLDDS
RPIBLDDS runs the commands contained in RPIDIRCT SYSUT1, the outputfile created by RPIDIRCT.
Depending on the size of the database you are building, the job might take along time. You might want to split the RPIDIRCT file into smaller files,thereby breaking the task into several more manageable tasks. Each of thesmaller files must have a FILETYPE of SYSUT1. You would then invokeRPIBLDDS with the filename of each smaller file supplied as a parameter.For example, you could split RPIDIRCT SYSUT1 into 2 files called RPIDIR1SYSUT1 and RPIDIR2 SYSUT1. You would then invoke RPIBLDDS with thefollowing commands: RPIBLDDS RPIDIR1 and RPIBLDDS RPIDIR2.
rpibldds fn Where fn is the name of the SYSUT1 file. Thedefault fn is RPIDIRCT. Keep in mind that if yousplit the RPIDIRCT SYSUT1 file then you need toexecute RPIBLDDS for each file.
| 6.21.1.3 Defining the Security Administrator and Maintenance| User IDs.| In 6.4, “Task 2. Allocate Resources for Installing RACF” on page 34 the| default user ID, SYSADMIN, was supplied on the z/VM System deliverable as| the security administrator user ID. You must now change the RACF user
profile to give the security administrator RACF “special” authority. (Do thiswhile logged on to the IBMUSER user ID.)
Installation Instructions 79
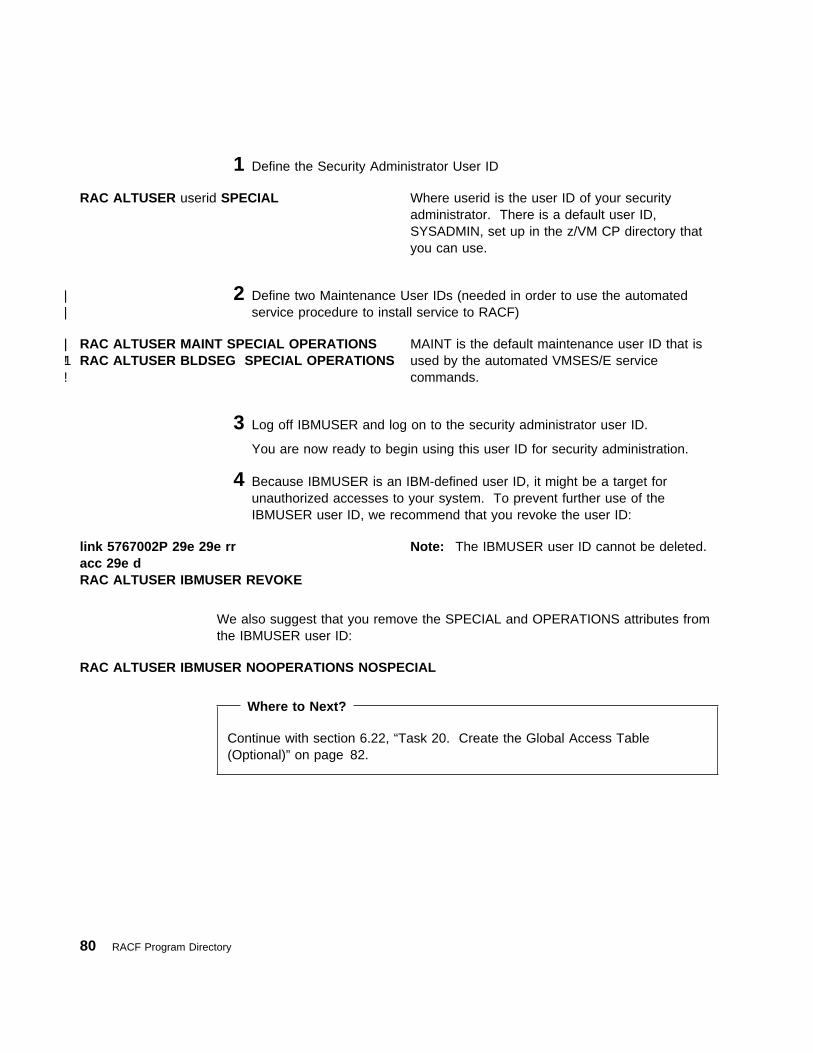
1 Define the Security Administrator User ID
RAC ALTUSER userid SPECIAL Where userid is the user ID of your securityadministrator. There is a default user ID,SYSADMIN, set up in the z/VM CP directory thatyou can use.
| 2 Define two Maintenance User IDs (needed in order to use the automated| service procedure to install service to RACF)
| RAC ALTUSER MAINT SPECIAL OPERATIONS1 RAC ALTUSER BLDSEG SPECIAL OPERATIONS| MAINT is the default maintenance user ID that is! used by the automated VMSES/E service! commands.
3 Log off IBMUSER and log on to the security administrator user ID.
You are now ready to begin using this user ID for security administration.
4 Because IBMUSER is an IBM-defined user ID, it might be a target forunauthorized accesses to your system. To prevent further use of theIBMUSER user ID, we recommend that you revoke the user ID:
link 5767002P 29e 29e rracc 29e dRAC ALTUSER IBMUSER REVOKE
Note: The IBMUSER user ID cannot be deleted.
We also suggest that you remove the SPECIAL and OPERATIONS attributes fromthe IBMUSER user ID:
RAC ALTUSER IBMUSER NOOPERATIONS NOSPECIAL
Where to Next?
Continue with section 6.22, “Task 20. Create the Global Access Table(Optional)” on page 82.
80 RACF Program Directory
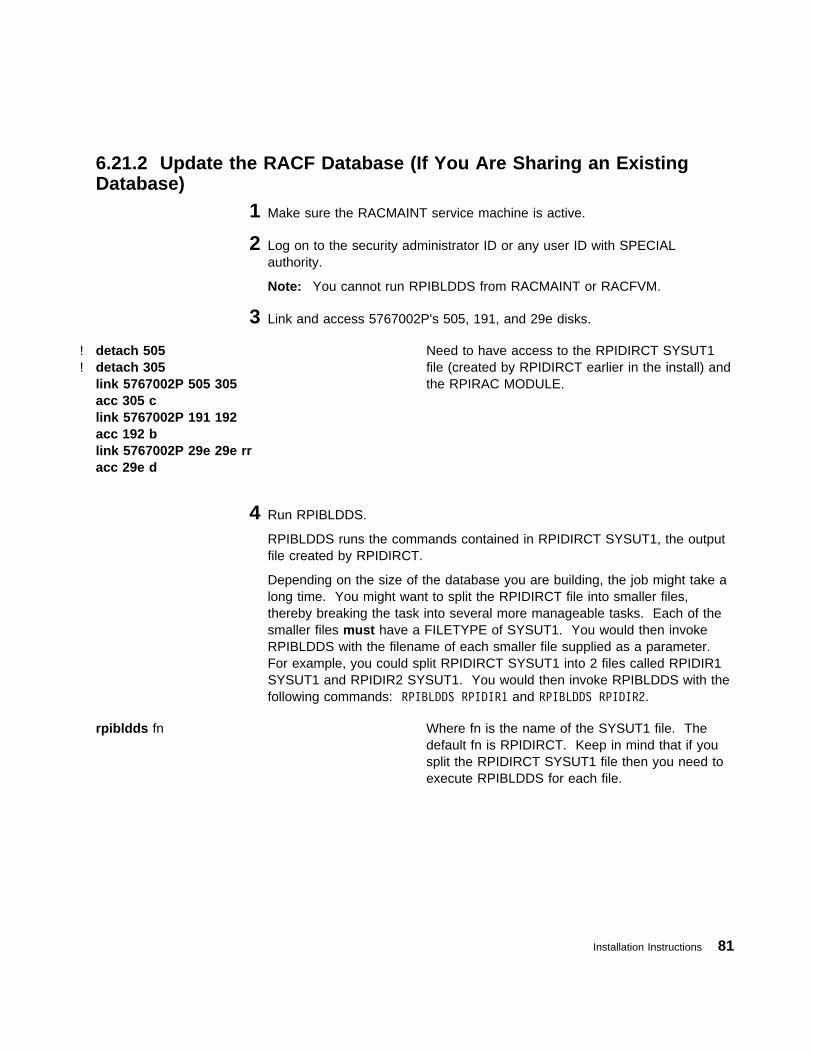
6.21.2 Update the RACF Database (If You Are Sharing an ExistingDatabase)
1 Make sure the RACMAINT service machine is active.
2 Log on to the security administrator ID or any user ID with SPECIALauthority.
Note: You cannot run RPIBLDDS from RACMAINT or RACFVM.
3 Link and access 5767002P's 505, 191, and 29e disks.
! detach 505! detach 305
link 5767002P 505 305acc 305 clink 5767002P 191 192acc 192 blink 5767002P 29e 29e rracc 29e d
Need to have access to the RPIDIRCT SYSUT1file (created by RPIDIRCT earlier in the install) andthe RPIRAC MODULE.
4 Run RPIBLDDS.
RPIBLDDS runs the commands contained in RPIDIRCT SYSUT1, the outputfile created by RPIDIRCT.
Depending on the size of the database you are building, the job might take along time. You might want to split the RPIDIRCT file into smaller files,thereby breaking the task into several more manageable tasks. Each of thesmaller files must have a FILETYPE of SYSUT1. You would then invokeRPIBLDDS with the filename of each smaller file supplied as a parameter.For example, you could split RPIDIRCT SYSUT1 into 2 files called RPIDIR1SYSUT1 and RPIDIR2 SYSUT1. You would then invoke RPIBLDDS with thefollowing commands: RPIBLDDS RPIDIR1 and RPIBLDDS RPIDIR2.
rpibldds fn Where fn is the name of the SYSUT1 file. Thedefault fn is RPIDIRCT. Keep in mind that if yousplit the RPIDIRCT SYSUT1 file then you need toexecute RPIBLDDS for each file.
Installation Instructions 81
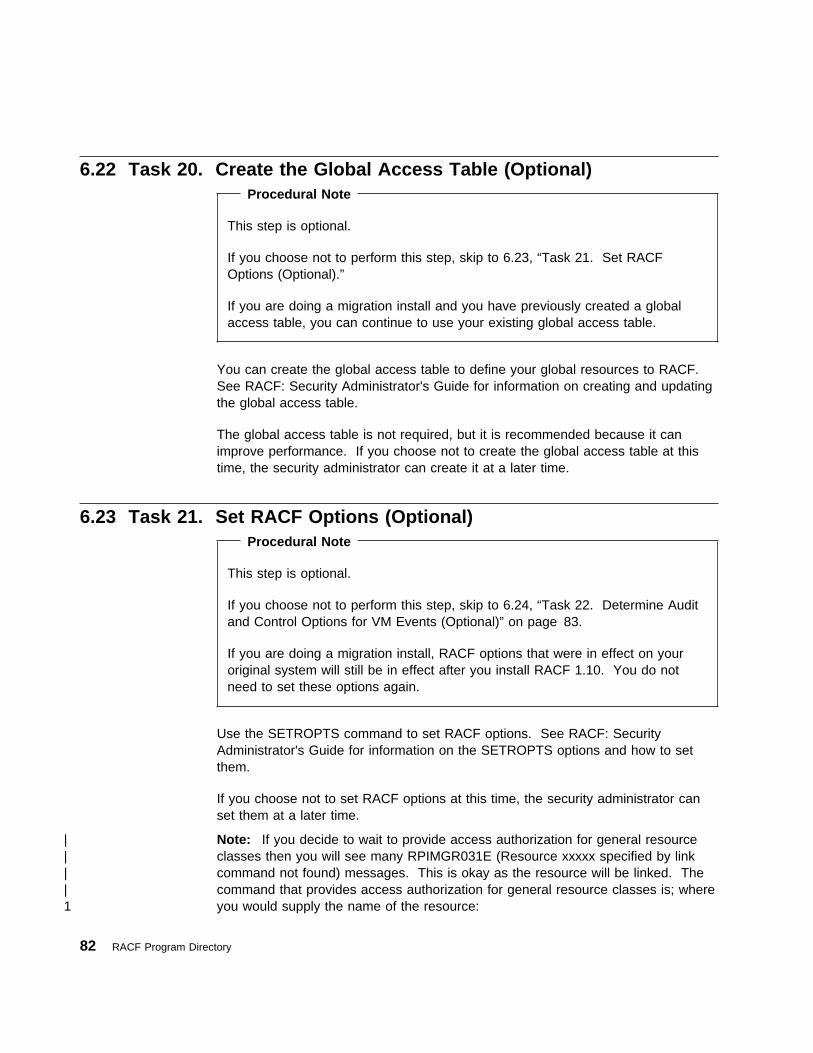
6.22 Task 20. Create the Global Access Table (Optional) Procedural Note
This step is optional.
If you choose not to perform this step, skip to 6.23, “Task 21. Set RACFOptions (Optional).”
If you are doing a migration install and you have previously created a globalaccess table, you can continue to use your existing global access table.
You can create the global access table to define your global resources to RACF.See RACF: Security Administrator's Guide for information on creating and updatingthe global access table.
The global access table is not required, but it is recommended because it canimprove performance. If you choose not to create the global access table at thistime, the security administrator can create it at a later time.
6.23 Task 21. Set RACF Options (Optional) Procedural Note
This step is optional.
If you choose not to perform this step, skip to 6.24, “Task 22. Determine Auditand Control Options for VM Events (Optional)” on page 83.
If you are doing a migration install, RACF options that were in effect on youroriginal system will still be in effect after you install RACF 1.10. You do notneed to set these options again.
Use the SETROPTS command to set RACF options. See RACF: SecurityAdministrator's Guide for information on the SETROPTS options and how to setthem.
If you choose not to set RACF options at this time, the security administrator canset them at a later time.
| Note: If you decide to wait to provide access authorization for general resource| classes then you will see many RPIMGR031E (Resource xxxxx specified by link| command not found) messages. This is okay as the resource will be linked. The| command that provides access authorization for general resource classes is; where1 you would supply the name of the resource:
82 RACF Program Directory
1 RAC SETROPTS CLASSACT(resource)
1 In order to use the automated service procedures to service RACF you have to1 provide access authorization for the following general resource classes:
1 RAC SETROPTS CLASSACT(VMMDISK)
1 RAC SETROPTS CLASSACT(VMRDR)
1 RAC SETROPTS CLASSACT(VMBATCH)
1 RAC SETROPTS CLASSACT(VMSEGMT)
1 If you are using SFS directories for any product's service disks then you will need1 to provide access authorization to the SFS (shared filel system) general resource1 classes.
6.24 Task 22. Determine Audit and Control Options for VM Events(Optional)
Procedural Note
This step is optional.
If you choose not to perform this step, skip to 6.25, “Task 23. Split the RACFDatabase (Optional, Performance-Related)” on page 84.
If you are doing a migration install, and you have VMXEVENT profiles in placethat are auditing and controlling VM events on your system, these profiles willremain active after RACF 1.10 is installed.
When you install RACF 1.10 on VM, by default the following VM events areprotected by RACF:
� APPCPWVL � DIAG0A0 � DIAG0D4 � DIAG0E4 � DIAG280 � LINK � MDISK � RSTDSEG � STORE.C � TAG � TRANSFER.D � TRANSFER.G � TRSOURCE
By default, no VM events are audited.
Installation Instructions 83
If you want to change these default control or audit settings, you must create aVMXEVENT profile and activate it using the SETEVENT command.
For information on controlling VM events, see RACF: Security Administrator'sGuide. For information on auditing VM events, see RACF: Auditor's Guide.
6.25 Task 23. Split the RACF Database (Optional,Performance-Related)
Procedural Note
This step is optional.
If you choose not to perform this step, skip to 6.26, “Task 24. Set Up DualRegistration If DirMaint Is Installed (Optional).”
If all you need is one primary and one backup database, and you are satisfied withthe default performance options, you can skip this step. If you plan to split yourdatabase, see RACF: System Programmer's Guide for information on splittingdatabases.
6.26 Task 24. Set Up Dual Registration If DirMaint Is Installed(Optional)
Procedural Note
This step is optional.
If you choose not to perform this step, skip to 6.27, “Task 25. Set Up the RACFISPF Panels (Optional)” on page 85.
RACF can coexist with the VM Directory Maintenance (DirMaint) product installed.However, to avoid dual maintenance of password processing, you must do thefollowing:
1. Set the CONFIG DATADVH item ESM_PASSWORD_AUTHENTICATION_EXIT= toDVHDA� MODULE (the default is DVHDA� MODULE but it is commented out in theCONFIG DATADVH file). For this to take effect, either IPL DirMaint or enterthe DIRM RLDDATA command.
2. Cancel the DirMaint automatic password expiration warning and user revokingoptions specified in the CONFIG DATADVH file (set options PW_WARN_MODE andPW_LOCK_MODE to MANUAL).
84 RACF Program Directory
3. If you want to record DirMaint activity in RACF SMF records, enable theESM_LOG_RECORDING_EXIT. To do this, set the CONFIG DATADVH itemin ESM_LOG_RECORDING_EXIT to DVHESMLR EXEC. The default isDVHESMLR EXEC, but it is commented out in the CONFIG DATADVH file.For this to take effect, either IPL DirMaint or enter the DIRM RLDDATAcommand.
You must also authorize the DirMaint service machines DIRMAINT,! DATAMOVE, and DIRMSAT to use the RACROUTE interface. For more! information, see Directory Maintenance Facility FL410 Tailoring and! Administration Guide and External Security Interface (RACROUTE) Macro
Reference for MVS and VM.
For further information about using DirMaint with RACF see the information on! external security manager considerations in Directory Maintenance Facility FL410! Tailoring and Administration Guide (SC24-6024), Appendix A 'External Security
Manager Considerations'.
6.27 Task 25. Set Up the RACF ISPF Panels (Optional) Procedural Note
! If you want to use the RACF ISPF panels then you need to follow the steps in! this section to set them up.
Otherwise, skip to 6.28, “Task 26. Place RACF Into Production” on page 93.
6.27.1 Modify the ISPF EXECsRefer to ISPF Version 3 for VM Dialog Management Guide (SC34-4221) forinformation about updating the ISPF panel libraries.
6.27.1.1 Step 1 - Modify the FiledefsFigure 12 on page 86 shows an example of how you should modify the filedefs inyour installation's ISPF EXEC if PDF is installed on your system. For yourconvenience, this example is included on the RACF tape in a file namedISPFRACF EXECSAMP.
Installation Instructions 85
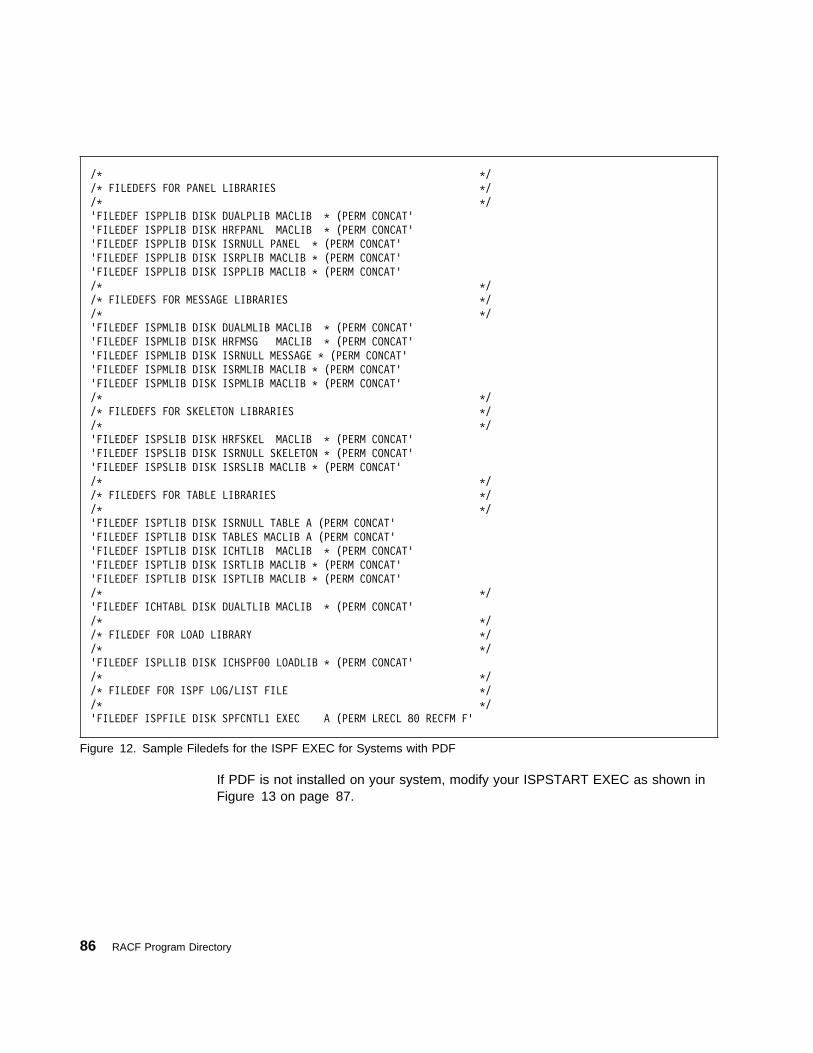
/J J/
/J FILEDEFS FOR PANEL LIBRARIES J/
/J J/
'FILEDEF ISPPLIB DISK DUALPLIB MACLIB J (PERM CONCAT'
'FILEDEF ISPPLIB DISK HRFPANL MACLIB J (PERM CONCAT'
'FILEDEF ISPPLIB DISK ISRNULL PANEL J (PERM CONCAT'
'FILEDEF ISPPLIB DISK ISRPLIB MACLIB J (PERM CONCAT'
'FILEDEF ISPPLIB DISK ISPPLIB MACLIB J (PERM CONCAT'
/J J/
/J FILEDEFS FOR MESSAGE LIBRARIES J/
/J J/
'FILEDEF ISPMLIB DISK DUALMLIB MACLIB J (PERM CONCAT'
'FILEDEF ISPMLIB DISK HRFMSG MACLIB J (PERM CONCAT'
'FILEDEF ISPMLIB DISK ISRNULL MESSAGE J (PERM CONCAT'
'FILEDEF ISPMLIB DISK ISRMLIB MACLIB J (PERM CONCAT'
'FILEDEF ISPMLIB DISK ISPMLIB MACLIB J (PERM CONCAT'
/J J/
/J FILEDEFS FOR SKELETON LIBRARIES J/
/J J/
'FILEDEF ISPSLIB DISK HRFSKEL MACLIB J (PERM CONCAT'
'FILEDEF ISPSLIB DISK ISRNULL SKELETON J (PERM CONCAT'
'FILEDEF ISPSLIB DISK ISRSLIB MACLIB J (PERM CONCAT'
/J J/
/J FILEDEFS FOR TABLE LIBRARIES J/
/J J/
'FILEDEF ISPTLIB DISK ISRNULL TABLE A (PERM CONCAT'
'FILEDEF ISPTLIB DISK TABLES MACLIB A (PERM CONCAT'
'FILEDEF ISPTLIB DISK ICHTLIB MACLIB J (PERM CONCAT'
'FILEDEF ISPTLIB DISK ISRTLIB MACLIB J (PERM CONCAT'
'FILEDEF ISPTLIB DISK ISPTLIB MACLIB J (PERM CONCAT'
/J J/
'FILEDEF ICHTABL DISK DUALTLIB MACLIB J (PERM CONCAT'
/J J/
/J FILEDEF FOR LOAD LIBRARY J/
/J J/
'FILEDEF ISPLLIB DISK ICHSPF�� LOADLIB J (PERM CONCAT'
/J J/
/J FILEDEF FOR ISPF LOG/LIST FILE J/
/J J/
'FILEDEF ISPFILE DISK SPFCNTL1 EXEC A (PERM LRECL 8� RECFM F'
Figure 12. Sample Filedefs for the ISPF EXEC for Systems with PDF
If PDF is not installed on your system, modify your ISPSTART EXEC as shown inFigure 13 on page 87.
86 RACF Program Directory
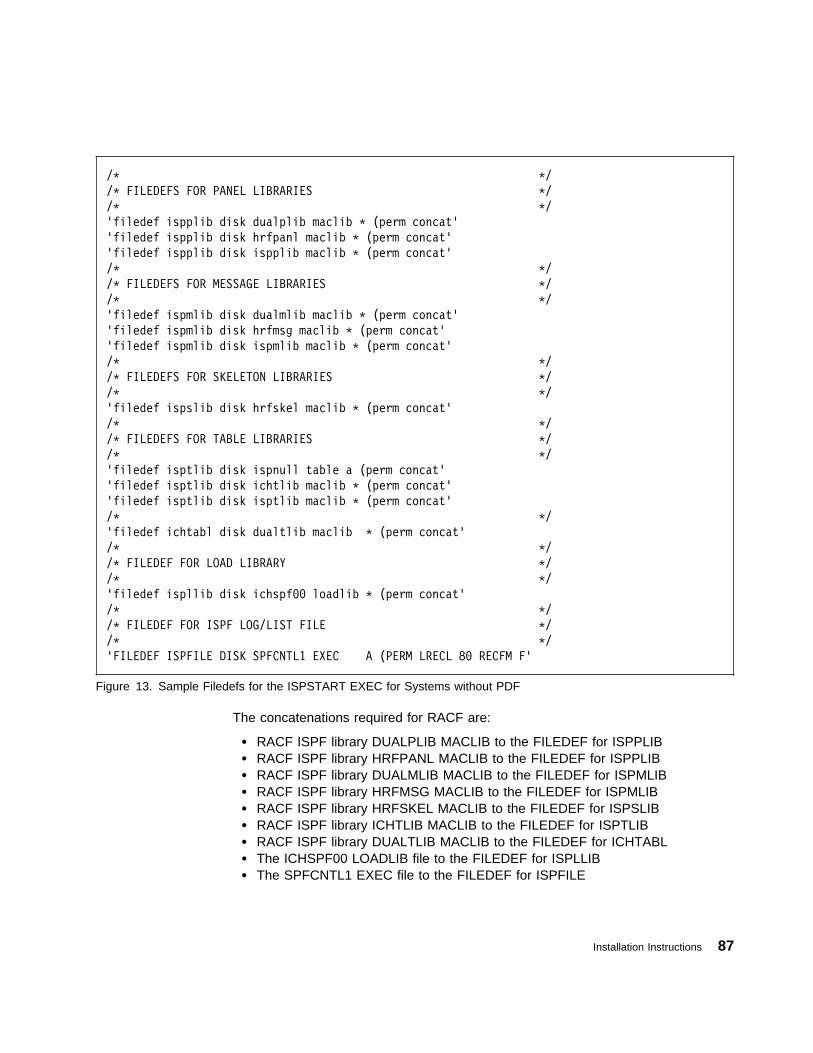
/J J/
/J FILEDEFS FOR PANEL LIBRARIES J/
/J J/
'filedef ispplib disk dualplib maclib J (perm concat'
'filedef ispplib disk hrfpanl maclib J (perm concat'
'filedef ispplib disk ispplib maclib J (perm concat'
/J J/
/J FILEDEFS FOR MESSAGE LIBRARIES J/
/J J/
'filedef ispmlib disk dualmlib maclib J (perm concat'
'filedef ispmlib disk hrfmsg maclib J (perm concat'
'filedef ispmlib disk ispmlib maclib J (perm concat'
/J J/
/J FILEDEFS FOR SKELETON LIBRARIES J/
/J J/
'filedef ispslib disk hrfskel maclib J (perm concat'
/J J/
/J FILEDEFS FOR TABLE LIBRARIES J/
/J J/
'filedef isptlib disk ispnull table a (perm concat'
'filedef isptlib disk ichtlib maclib J (perm concat'
'filedef isptlib disk isptlib maclib J (perm concat'
/J J/
'filedef ichtabl disk dualtlib maclib J (perm concat'
/J J/
/J FILEDEF FOR LOAD LIBRARY J/
/J J/
'filedef ispllib disk ichspf�� loadlib J (perm concat'
/J J/
/J FILEDEF FOR ISPF LOG/LIST FILE J/
/J J/
'FILEDEF ISPFILE DISK SPFCNTL1 EXEC A (PERM LRECL 8� RECFM F'
Figure 13. Sample Filedefs for the ISPSTART EXEC for Systems without PDF
The concatenations required for RACF are:
� RACF ISPF library DUALPLIB MACLIB to the FILEDEF for ISPPLIB� RACF ISPF library HRFPANL MACLIB to the FILEDEF for ISPPLIB� RACF ISPF library DUALMLIB MACLIB to the FILEDEF for ISPMLIB� RACF ISPF library HRFMSG MACLIB to the FILEDEF for ISPMLIB� RACF ISPF library HRFSKEL MACLIB to the FILEDEF for ISPSLIB� RACF ISPF library ICHTLIB MACLIB to the FILEDEF for ISPTLIB� RACF ISPF library DUALTLIB MACLIB to the FILEDEF for ICHTABL� The ICHSPF00 LOADLIB file to the FILEDEF for ISPLLIB� The SPFCNTL1 EXEC file to the FILEDEF for ISPFILE
Installation Instructions 87
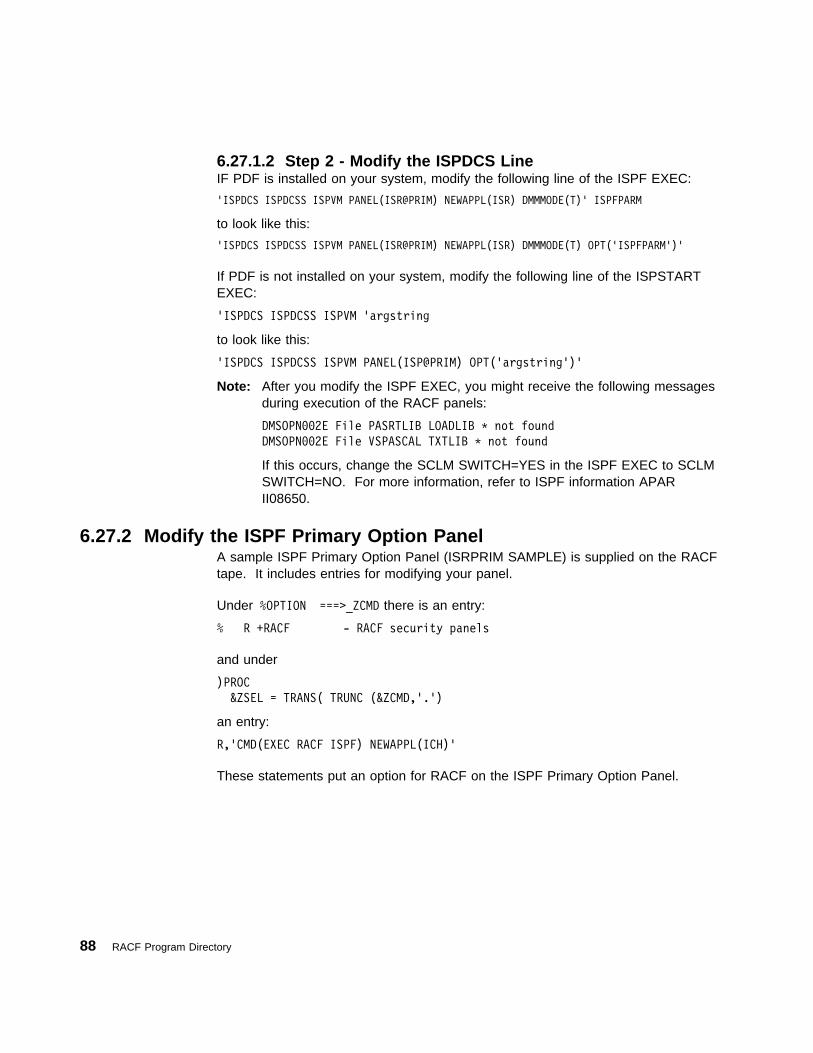
6.27.1.2 Step 2 - Modify the ISPDCS LineIF PDF is installed on your system, modify the following line of the ISPF EXEC:
'ISPDCS ISPDCSS ISPVM PANEL(ISR@PRIM) NEWAPPL(ISR) DMMMODE(T)' ISPFPARM
to look like this:
'ISPDCS ISPDCSS ISPVM PANEL(ISR@PRIM) NEWAPPL(ISR) DMMMODE(T) OPT('ISPFPARM')'
If PDF is not installed on your system, modify the following line of the ISPSTARTEXEC:
'ISPDCS ISPDCSS ISPVM 'argstring
to look like this:
'ISPDCS ISPDCSS ISPVM PANEL(ISP@PRIM) OPT('argstring')'
Note: After you modify the ISPF EXEC, you might receive the following messagesduring execution of the RACF panels:
DMSOPN��2E File PASRTLIB LOADLIB J not found
DMSOPN��2E File VSPASCAL TXTLIB J not found
If this occurs, change the SCLM SWITCH=YES in the ISPF EXEC to SCLMSWITCH=NO. For more information, refer to ISPF information APARII08650.
6.27.2 Modify the ISPF Primary Option PanelA sample ISPF Primary Option Panel (ISRPRIM SAMPLE) is supplied on the RACFtape. It includes entries for modifying your panel.
Under %OPTION ===>_ZCMD there is an entry:
% R +RACF - RACF security panels
and under
)PROC
&ZSEL = TRANS( TRUNC (&ZCMD,'.')
an entry:
R,'CMD(EXEC RACF ISPF) NEWAPPL(ICH)'
These statements put an option for RACF on the ISPF Primary Option Panel.
88 RACF Program Directory

6.27.3 PDF Users: Modify ISPF-Supplied FilesWhere to next?
If you do not have ISPF/PDF installed, skip to 6.27.4, “Non-PDF Users: ModifyISPF-Supplied Files.”
If you have ISPF/PDF installed, continue here.
6.27.3.1 Use the ISPF/PDF Browse FacilityIf your installation has PDF installed, and you want to use the ISPF/PDF browsefacility (rather than XEDIT under CMS), you must modify panel ICHP00 in theRACF ISPF library, DUALPLIB.
In order to use PDF browse, specify &ICHXEDIT='NO' in the ICHP00 COPY file.(The default on the panel is &ICHXEDIT='YES', which provides XEDIT capability).
To update ICHP00 COPY, do a VMSES/E local modification to it.
Follow the steps documented in B.2, “Full Part Replacement (Not Assemble) -Example” on page 135 to perform the local modification to the ICHP00 COPY file.Use the following substitution values:
� For fn use ICHP00.� For ft use COPY.� For ft-abbrv use CPY.� For nnnn use 0001.� For blist use RPIBLDPL.� For memname use ICHP00.
At the end of the procedure your modified copy of ICHP00 COPY is in theDUALPLIB MACLIB on 5767002P's 599 test build disk.
Where to next?
Continue with 6.27.5, “Dual Registration Users Only” on page 91.
6.27.4 Non-PDF Users: Modify ISPF-Supplied Files Procedural Note
If you do not have ISPF/PDF installed, follow the instructions in this section.
Installation Instructions 89
6.27.4.1 Update ICHSFSIN EXECIf PDF is not installed, remove the PDF dependency by ensuring that ichpdf =
"NO" is in the ICHSFSIN EXEC.
To update ICHSFSIN EXEC, do a VMSES/E local modification to it.
Follow the steps documented in B.2, “Full Part Replacement (Not Assemble) -Example” on page 135 to perform the local modification to the ICHSFSIN EXECfile. Use the following substitution values:
� For fn use ICHSFSIN.� For ft use EXEC.� For ft-abbrv use EXC.� For nnnn use 0001.� For blist use RPIBL599.� For memname use ICHSFSIN.
At the end of the procedure your modified copy of ICHSFSIN EXEC is on5767002P's 599 test build disk.
6.27.4.2 Update RACF EXECIf you do not have PDF installed, modify the INIT routine in the RACF EXEC.
Follow the steps documented in B.2, “Full Part Replacement (Not Assemble) -Example” on page 135 to perform the local modification to the RACF EXEC file.Use the following substitution values:
� For fn use RACF.� For ft use EXEC.� For ft-abbrv use EXC.� For nnnn use 0001.� For blist use RPIBL599.� For memname use RACF.
At the end of the procedure your modified copy of RACF EXEC is on 5767002P's599 test build disk.
The following example shows what needs to be changed. The changes aredenoted by the highlighted, commented out, commands.
Note: This exec has been converted from EXEC2 to REXX.
90 RACF Program Directory
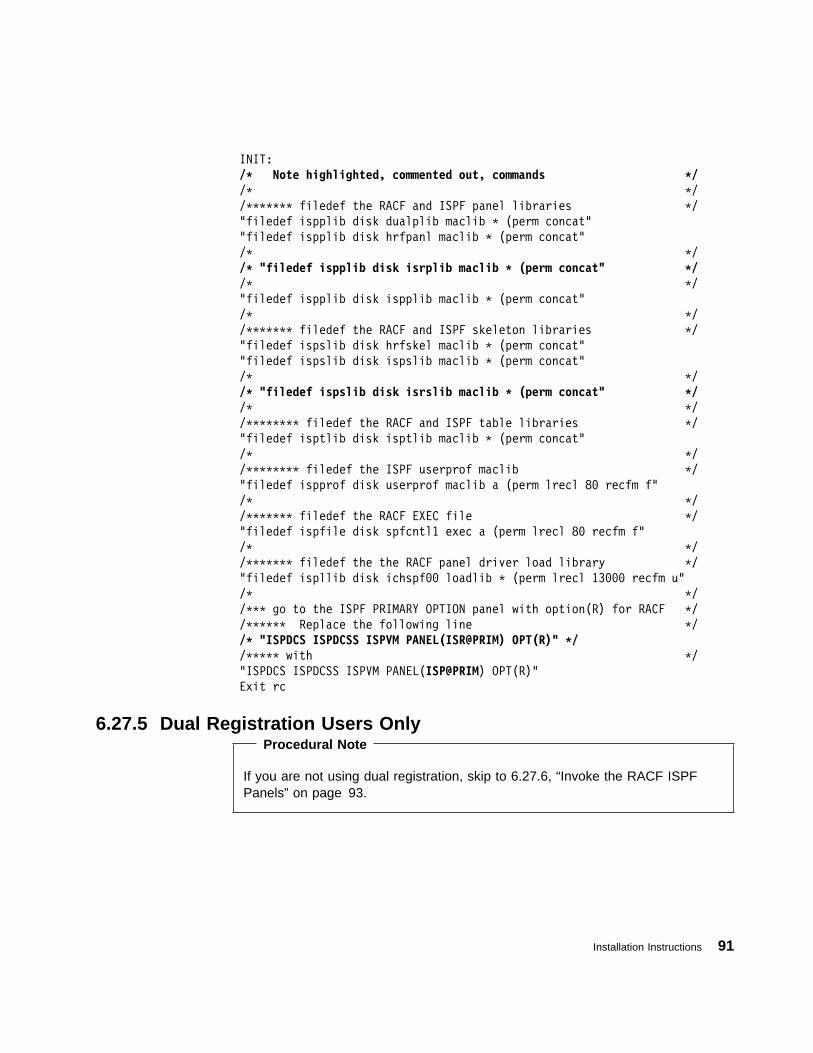
INIT:
/� Note highlighted, commented out, commands �/ /J J/
/JJJJJJJ filedef the RACF and ISPF panel libraries J/
"filedef ispplib disk dualplib maclib J (perm concat"
"filedef ispplib disk hrfpanl maclib J (perm concat"
/J J/
/� "filedef ispplib disk isrplib maclib � (perm concat" �/ /J J/
"filedef ispplib disk ispplib maclib J (perm concat"
/J J/
/JJJJJJJ filedef the RACF and ISPF skeleton libraries J/
"filedef ispslib disk hrfskel maclib J (perm concat"
"filedef ispslib disk ispslib maclib J (perm concat"
/J J/
/� "filedef ispslib disk isrslib maclib � (perm concat" �/ /J J/
/JJJJJJJJ filedef the RACF and ISPF table libraries J/
"filedef isptlib disk isptlib maclib J (perm concat"
/J J/
/JJJJJJJJ filedef the ISPF userprof maclib J/
"filedef ispprof disk userprof maclib a (perm lrecl 8� recfm f"
/J J/
/JJJJJJJ filedef the RACF EXEC file J/
"filedef ispfile disk spfcntl1 exec a (perm lrecl 8� recfm f"
/J J/
/JJJJJJJ filedef the the RACF panel driver load library J/
"filedef ispllib disk ichspf�� loadlib J (perm lrecl 13��� recfm u"
/J J/
/JJJ go to the ISPF PRIMARY OPTION panel with option(R) for RACF J/
/JJJJJJ Replace the following line J/
/� "ISPDCS ISPDCSS ISPVM PANEL(ISR@PRIM) OPT(R)" �/ /JJJJJ with J/
"ISPDCS ISPDCSS ISPVM PANEL(ISP@PRIM) OPT(R)" Exit rc
6.27.5 Dual Registration Users Only Procedural Note
If you are not using dual registration, skip to 6.27.6, “Invoke the RACF ISPFPanels” on page 93.
Installation Instructions 91
6.27.5.1 Set Defaults in PROFILEThe installation of the RACF ISPF panels loads the DUALREG PROFILE file. Thisfile contains default settings for certain fields on the dual registration panels.
To update DUALREG PROFILE you need to do a VMSES/E local modification to it.
Follow the steps documented in B.2, “Full Part Replacement (Not Assemble) -Example” on page 135 to perform the local modification to the DUALREGPROFILE file. Use the following substitution values:
� For fn use DUALREG.� For ft use PROFILE.� For ft-abbrv use PRF.� For nnnn use 0001.� For blist use RPIBL599.� For memname use DUALREG.
At the end of the procedure your modified copy of DUALREG PROFILE will be on5767002P's 599 test build disk.
6.27.5.2 Verify directory entriesThe file DUALREG SKELETON is used by dual registration to create user directoryentries. The directory statements in this file are included in each directory entrycreated by dual registration. You need to make sure its contents are suitable toyour installation.
To modify the DUALREG SKELETON file, do a VMSES/E local modification to it.
Follow the steps documented in B.2, “Full Part Replacement (Not Assemble) -Example” on page 135 to perform the local modification to the DUALREGSKELETON file. Use the following substitution values:
� For fn use DUALREG.� For ft use SKELETON.� For ft-abbrv use SKL.� For nnnn use 0001.� For blist use RPIBL599.� For memname use DUALREG.
At the end of the procedure your modified copy of DUALREG SKELETON will beon 5767002P's 599 test build disk.
92 RACF Program Directory
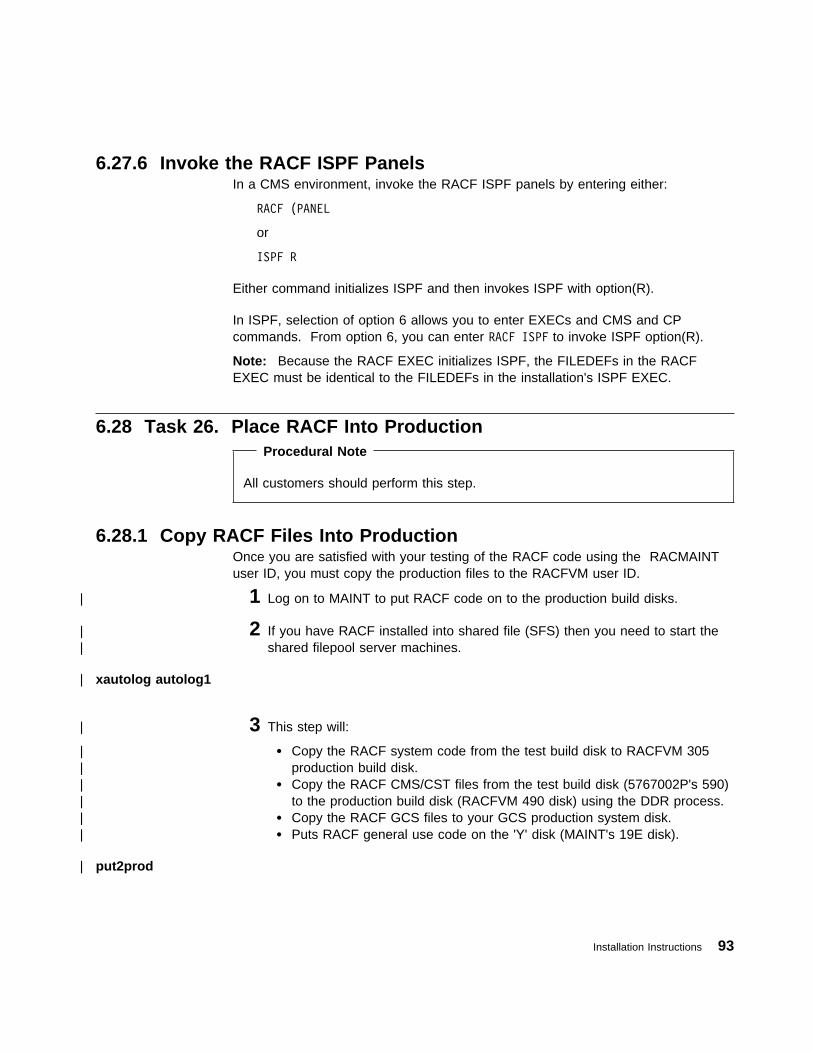
6.27.6 Invoke the RACF ISPF PanelsIn a CMS environment, invoke the RACF ISPF panels by entering either:
RACF (PANEL
or
ISPF R
Either command initializes ISPF and then invokes ISPF with option(R).
In ISPF, selection of option 6 allows you to enter EXECs and CMS and CPcommands. From option 6, you can enter RACF ISPF to invoke ISPF option(R).
Note: Because the RACF EXEC initializes ISPF, the FILEDEFs in the RACFEXEC must be identical to the FILEDEFs in the installation's ISPF EXEC.
6.28 Task 26. Place RACF Into Production Procedural Note
All customers should perform this step.
6.28.1 Copy RACF Files Into ProductionOnce you are satisfied with your testing of the RACF code using the RACMAINTuser ID, you must copy the production files to the RACFVM user ID.
| 1 Log on to MAINT to put RACF code on to the production build disks.
| 2 If you have RACF installed into shared file (SFS) then you need to start the| shared filepool server machines.
| xautolog autolog1
| 3 This step will:
| � Copy the RACF system code from the test build disk to RACFVM 305| production build disk.| � Copy the RACF CMS/CST files from the test build disk (5767002P's 590)| to the production build disk (RACFVM 490 disk) using the DDR process.| � Copy the RACF GCS files to your GCS production system disk.| � Puts RACF general use code on the 'Y' disk (MAINT's 19E disk).
| put2prod
Installation Instructions 93

4 (Optional) If you did the optional install steps to set up the RACF ISPFPanels then copy the RACF ISPF code from the test build disk to the ISPFsystem disk.
link 5767002P 599 599 rraccess 599 eaccess ispf-fm fvmfcopy * * e = = f (prodid 5767002P%RACF olddate replace
Where ispf-fm is the ISPF product system disk.The default is ISPVM 192.
The VMFCOPY command updates the VMSESPARTCAT file on the ISPF code disk.
5 (Optional) If you want the RACF Kanji ISPF code, copy the RACF Kanji ISPFcode from the test build disk to the ISPF system disk.
link 5767002P 799 799 rraccess 799 eaccess ispf-fm fvmfcopy * * e = = f (prodid 5767002P%RACF olddate replace
Where ispf-fm is the ISPF product system disk.The default is ISPVM 192.
The VMFCOPY command updates the VMSESPARTCAT file on the ISPF code disk.
6 (Optional) If you want to use the RACF ISPF or Kanji ISPF code, copy theISPF general use code on to the 'Y' disk (MAINT's 19E disk).
a Log on to MAINT.
b If the English ISPF code is installed, copy the ISPF general user code.
link 5767002P 599 599 rraccess 599 eaccess 19e fvmfcopy RACF EXEC e = = f2 (prodid 5767002P%RACF olddate replacevmfcopy ICHSPF00 LOADLIB e = = f2 (prodid 5767002P%RACF olddate replacevmfcopy DUALREG PROFILE e = = f2 (prodid 5767002P%RACF olddate replacevmfcopy DUALREG SKELETON e = = f2 (prodid 5767002P%RACF olddate replace
The VMFCOPY command updates the VMSESPARTCAT file on the 19E disk.
c If the Kanji ISPF code is installed, copy the Kanji ISPF general usercode.
94 RACF Program Directory
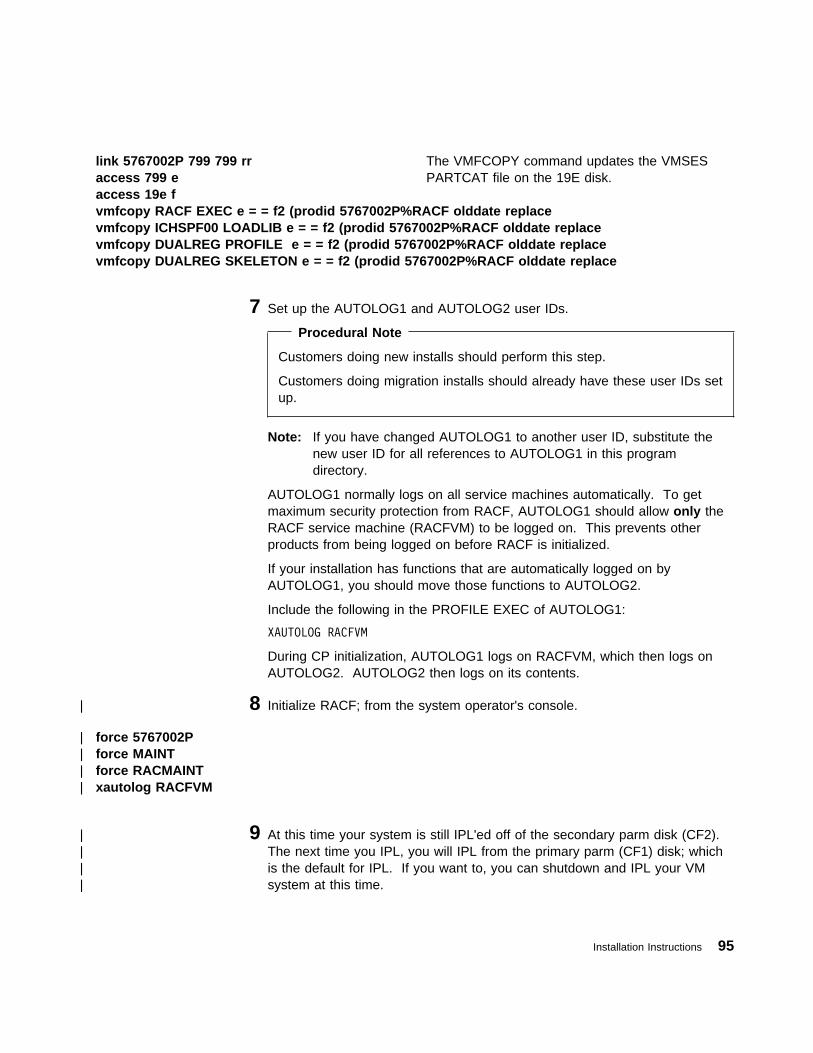
link 5767002P 799 799 rraccess 799 eaccess 19e fvmfcopy RACF EXEC e = = f2 (prodid 5767002P%RACF olddate replacevmfcopy ICHSPF00 LOADLIB e = = f2 (prodid 5767002P%RACF olddate replacevmfcopy DUALREG PROFILE e = = f2 (prodid 5767002P%RACF olddate replacevmfcopy DUALREG SKELETON e = = f2 (prodid 5767002P%RACF olddate replace
The VMFCOPY command updates the VMSESPARTCAT file on the 19E disk.
7 Set up the AUTOLOG1 and AUTOLOG2 user IDs. Procedural Note
Customers doing new installs should perform this step.
Customers doing migration installs should already have these user IDs setup.
Note: If you have changed AUTOLOG1 to another user ID, substitute thenew user ID for all references to AUTOLOG1 in this programdirectory.
AUTOLOG1 normally logs on all service machines automatically. To getmaximum security protection from RACF, AUTOLOG1 should allow only theRACF service machine (RACFVM) to be logged on. This prevents otherproducts from being logged on before RACF is initialized.
If your installation has functions that are automatically logged on byAUTOLOG1, you should move those functions to AUTOLOG2.
Include the following in the PROFILE EXEC of AUTOLOG1:
XAUTOLOG RACFVM
During CP initialization, AUTOLOG1 logs on RACFVM, which then logs onAUTOLOG2. AUTOLOG2 then logs on its contents.
| 8 Initialize RACF; from the system operator's console.
| force 5767002P| force MAINT| force RACMAINT| xautolog RACFVM
| 9 At this time your system is still IPL'ed off of the secondary parm disk (CF2).| The next time you IPL, you will IPL from the primary parm (CF1) disk; which| is the default for IPL. If you want to, you can shutdown and IPL your VM| system at this time.
Installation Instructions 95

RACF is now installed and built on your system.
96 RACF Program Directory

7.0 Service Instructions
! Note - z/VM Automated Service Procedure
! The preferred method for installing service to RACF is to use the z/VM! automated service procedure (use of the SERVICE and PUT2PROD! commands).
! If you have chosen to use the automated procedure to apply preventive (RSU)! and CORrective service to your z/VM system, you need to follow the service! instructions documented in the z/VM: Guide for Automated Installation and! Service manual, instead of those presented here.
Attention - RSU Note
If you are applying a RACF RSU, follow the instructions in Appendix A,“Applying an RSU for RACF” on page 124. You will return to a step in thischapter as specified in that appendix.
This section of the program directory contains the procedure to install CORrectiveservice to RACF. VMSES/E is used to install service for RACF.
To become more familiar with service using VMSES/E, you should read theintroductory chapters in VMSES/E Introduction and Reference. This manual alsocontains the command syntax for the VMSES/E commands listed in the procedure.
Note: Each task in the service instructions must be performed. Each step of eachtask must be followed. Do not skip any step unless directed to do so. Allinstructions showing accessing of disks assume the use of default minidiskaddresses. If you are using different minidisk addresses, or if you are usinga shared file system, change the instructions appropriately.
7.1 VMSES/E Service Process OverviewThe following is a brief description of the main steps in servicing RACF usingVMSES/E.
� Receive Service
The VMFREC command receives service from the delivery media and places iton the Delta disk.
� Merge Service
Copyright IBM Corp. 1988, 2004 97

Use the VMFMRDSK command to clear the alternate apply disk beforereceiving new service. This allows you to easily remove the new service if aserious problem is found.
� Apply Service
The VMFAPPLY command updates the version vector table (VVT), whichidentifies the service level of all the serviced parts. In addition, AUX files aregenerated from the VVT for parts that require them.
� Reapply Local Service (if applicable)
All local service (mods) must be entered into the software inventory to allowVMSES/E to track the changes and build them into the system. Refer toChapter 7 in the z/VM Service Guide for this procedure.
� Build New Levels
The build task generates the serviced level of an object and places the newobject on a test BUILD disk.
� Place the New Service into Production
Once the service is satisfactorily tested it should be put into production bycopying the new service to the production disk.
7.2 Servicing RACF
7.2.1 Task 1. Prepare to Receive Service! Electronic Service (envelope file)
! If you have received the service electronically or on CD-ROM, follow the! appropriate instructions to retrieve and decompress the envelope file to your! A-disk. The decompression is currently done by using the DETERSE MODULE! (shipped with VMSES/E). The file names of the decompressed files will be of! the format:
! � VLSTnum for the documentation envelope! � VPTFnum for the service envelope
! The file type for both of these files must be SERVLINK. You will need to enter! the file name on the VMFREC commands that follow.
The ppfname used throughout these servicing instructions is 5767002P, whichassumes you are using the PPF supplied by IBM for RACF. If you have your ownPPF override file for RACF, you should use your file's ppfname instead of5767002P. The ppfname you use should be used throughout the rest of thisprocedure, unless otherwise stated differently.
98 RACF Program Directory
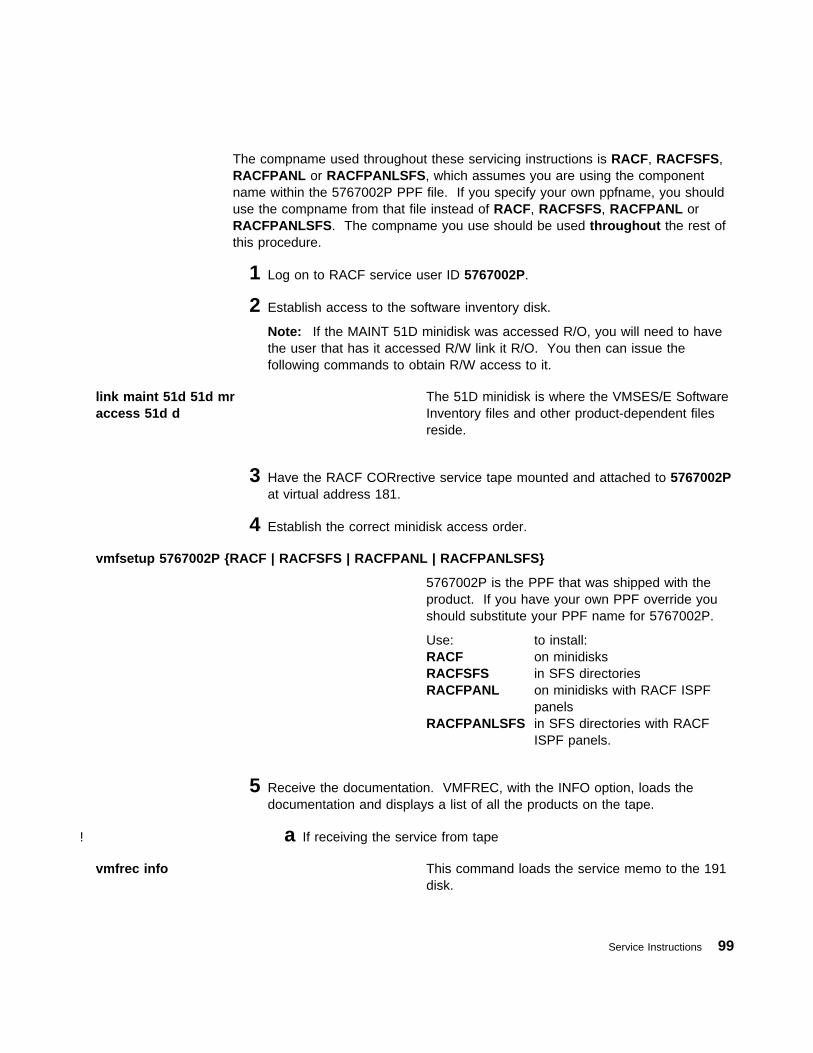
The compname used throughout these servicing instructions is RACF, RACFSFS,RACFPANL or RACFPANLSFS, which assumes you are using the componentname within the 5767002P PPF file. If you specify your own ppfname, you shoulduse the compname from that file instead of RACF, RACFSFS, RACFPANL orRACFPANLSFS. The compname you use should be used throughout the rest ofthis procedure.
1 Log on to RACF service user ID 5767002P.
2 Establish access to the software inventory disk.
Note: If the MAINT 51D minidisk was accessed R/O, you will need to havethe user that has it accessed R/W link it R/O. You then can issue thefollowing commands to obtain R/W access to it.
link maint 51d 51d mraccess 51d d
The 51D minidisk is where the VMSES/E SoftwareInventory files and other product-dependent filesreside.
3 Have the RACF CORrective service tape mounted and attached to 5767002Pat virtual address 181.
4 Establish the correct minidisk access order.
vmfsetup 5767002P {RACF | RACFSFS | RACFPANL | RACFPANLSFS}
5767002P is the PPF that was shipped with theproduct. If you have your own PPF override youshould substitute your PPF name for 5767002P.
Use: to install:RACF on minidisksRACFSFS in SFS directoriesRACFPANL on minidisks with RACF ISPF
panelsRACFPANLSFS in SFS directories with RACF
ISPF panels.
5 Receive the documentation. VMFREC, with the INFO option, loads thedocumentation and displays a list of all the products on the tape.
! a If receiving the service from tape
vmfrec info This command loads the service memo to the 191disk.
Service Instructions 99
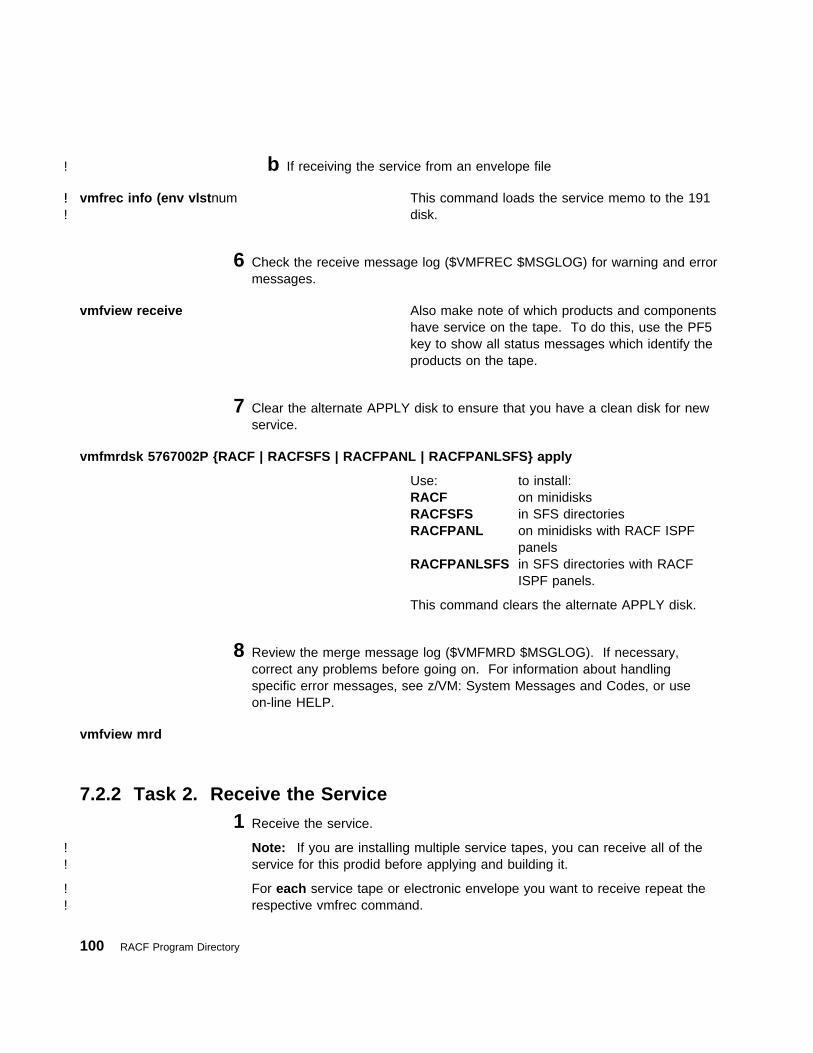
! b If receiving the service from an envelope file
! vmfrec info (env vlstnum! This command loads the service memo to the 191! disk.
6 Check the receive message log ($VMFREC $MSGLOG) for warning and errormessages.
vmfview receive Also make note of which products and componentshave service on the tape. To do this, use the PF5key to show all status messages which identify theproducts on the tape.
7 Clear the alternate APPLY disk to ensure that you have a clean disk for newservice.
vmfmrdsk 5767002P {RACF | RACFSFS | RACFPANL | RACFPANLSFS} apply
Use: to install:RACF on minidisksRACFSFS in SFS directoriesRACFPANL on minidisks with RACF ISPF
panelsRACFPANLSFS in SFS directories with RACF
ISPF panels.
This command clears the alternate APPLY disk.
8 Review the merge message log ($VMFMRD $MSGLOG). If necessary,correct any problems before going on. For information about handlingspecific error messages, see z/VM: System Messages and Codes, or useon-line HELP.
vmfview mrd
7.2.2 Task 2. Receive the Service1 Receive the service.
! Note: If you are installing multiple service tapes, you can receive all of the! service for this prodid before applying and building it.
! For each service tape or electronic envelope you want to receive repeat the! respective vmfrec command.
100 RACF Program Directory
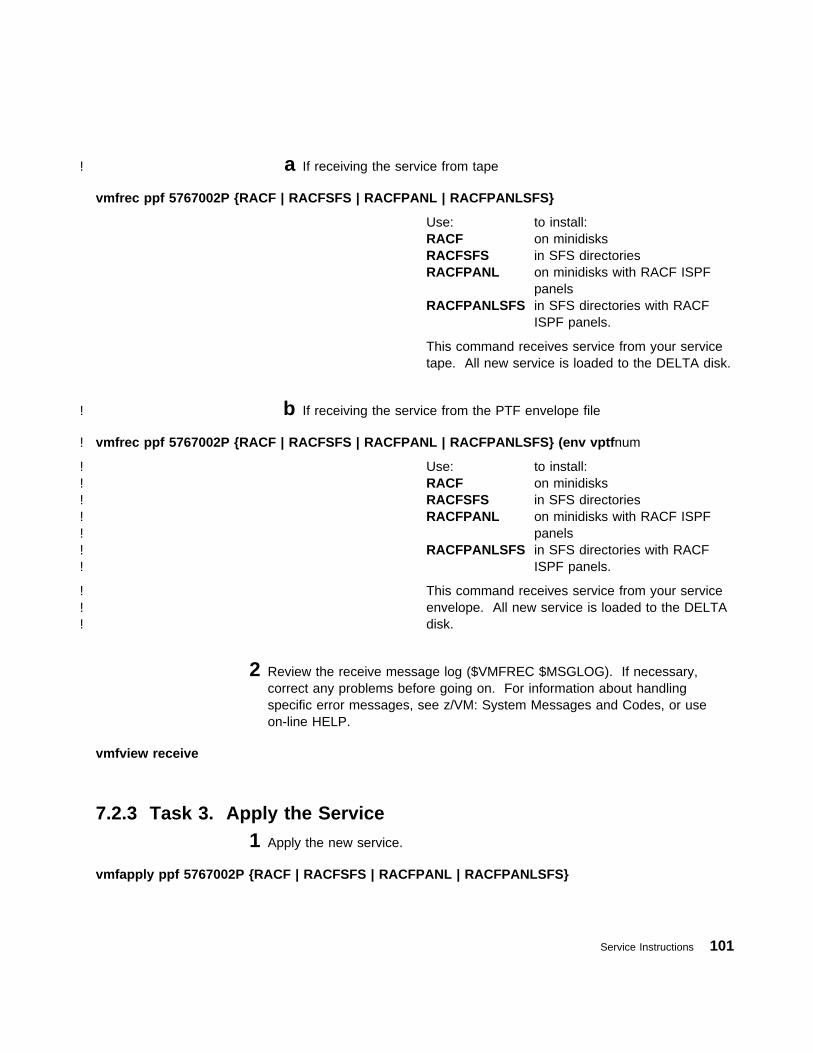
! a If receiving the service from tape
vmfrec ppf 5767002P {RACF | RACFSFS | RACFPANL | RACFPANLSFS}
Use: to install:RACF on minidisksRACFSFS in SFS directoriesRACFPANL on minidisks with RACF ISPF
panelsRACFPANLSFS in SFS directories with RACF
ISPF panels.
This command receives service from your servicetape. All new service is loaded to the DELTA disk.
! b If receiving the service from the PTF envelope file
! vmfrec ppf 5767002P {RACF | RACFSFS | RACFPANL | RACFPANLSFS} (env vptfnum
! Use: to install:! RACF on minidisks! RACFSFS in SFS directories! RACFPANL on minidisks with RACF ISPF! panels! RACFPANLSFS in SFS directories with RACF! ISPF panels.
! This command receives service from your service! envelope. All new service is loaded to the DELTA! disk.
2 Review the receive message log ($VMFREC $MSGLOG). If necessary,correct any problems before going on. For information about handlingspecific error messages, see z/VM: System Messages and Codes, or useon-line HELP.
vmfview receive
7.2.3 Task 3. Apply the Service1 Apply the new service.
vmfapply ppf 5767002P {RACF | RACFSFS | RACFPANL | RACFPANLSFS}
Service Instructions 101
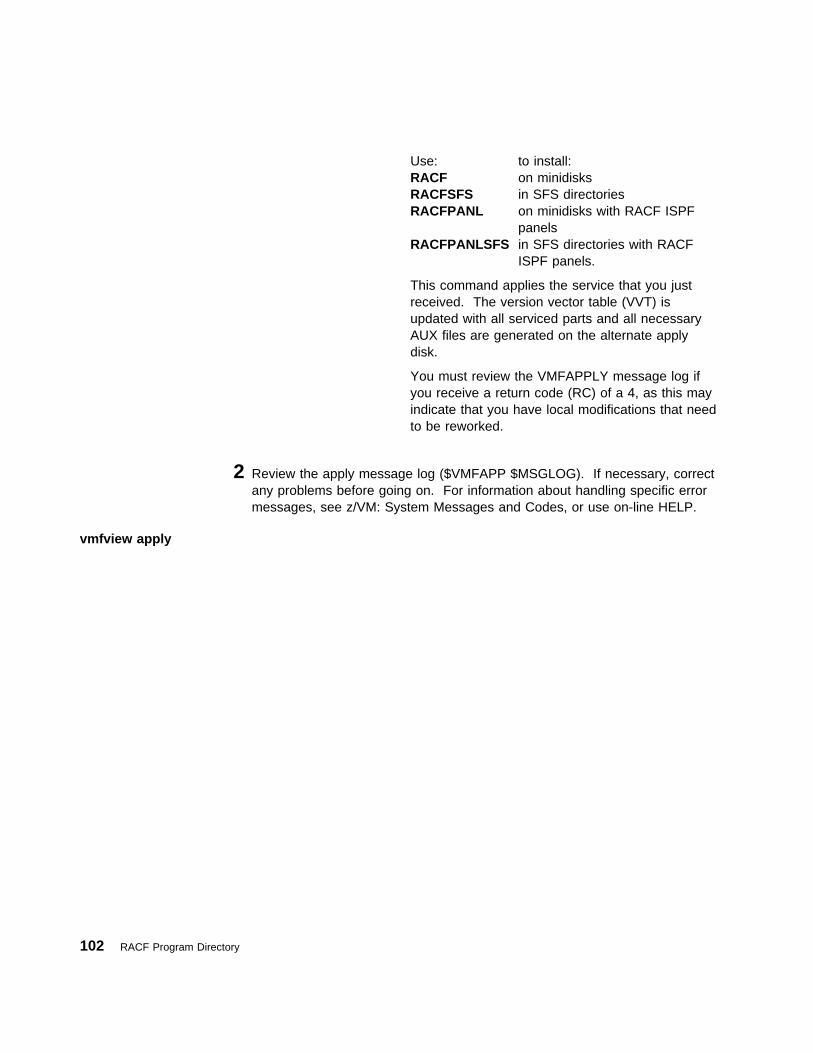
Use: to install:RACF on minidisksRACFSFS in SFS directoriesRACFPANL on minidisks with RACF ISPF
panelsRACFPANLSFS in SFS directories with RACF
ISPF panels.
This command applies the service that you justreceived. The version vector table (VVT) isupdated with all serviced parts and all necessaryAUX files are generated on the alternate applydisk.
You must review the VMFAPPLY message log ifyou receive a return code (RC) of a 4, as this mayindicate that you have local modifications that needto be reworked.
2 Review the apply message log ($VMFAPP $MSGLOG). If necessary, correctany problems before going on. For information about handling specific errormessages, see z/VM: System Messages and Codes, or use on-line HELP.
vmfview apply
102 RACF Program Directory
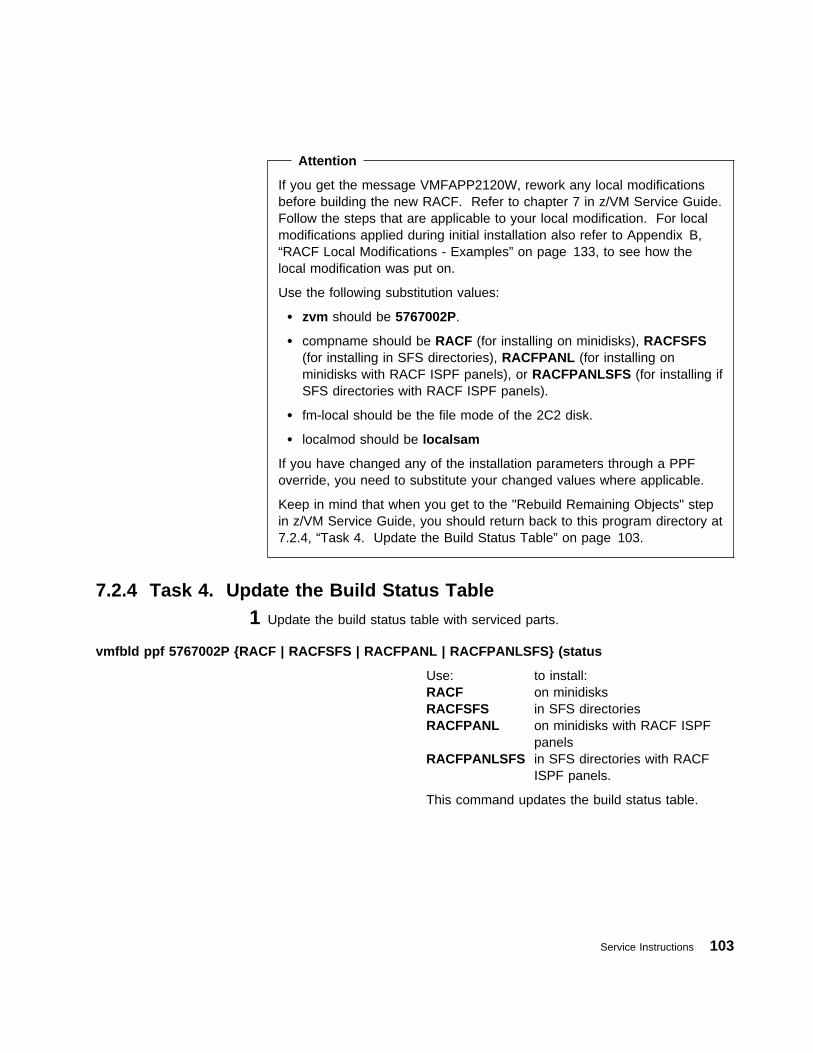
Attention
If you get the message VMFAPP2120W, rework any local modificationsbefore building the new RACF. Refer to chapter 7 in z/VM Service Guide.Follow the steps that are applicable to your local modification. For localmodifications applied during initial installation also refer to Appendix B,“RACF Local Modifications - Examples” on page 133, to see how thelocal modification was put on.
Use the following substitution values:
� zvm should be 5767002P.
� compname should be RACF (for installing on minidisks), RACFSFS(for installing in SFS directories), RACFPANL (for installing onminidisks with RACF ISPF panels), or RACFPANLSFS (for installing ifSFS directories with RACF ISPF panels).
� fm-local should be the file mode of the 2C2 disk.
� localmod should be localsam
If you have changed any of the installation parameters through a PPFoverride, you need to substitute your changed values where applicable.
Keep in mind that when you get to the "Rebuild Remaining Objects" stepin z/VM Service Guide, you should return back to this program directory at7.2.4, “Task 4. Update the Build Status Table” on page 103.
7.2.4 Task 4. Update the Build Status Table1 Update the build status table with serviced parts.
vmfbld ppf 5767002P {RACF | RACFSFS | RACFPANL | RACFPANLSFS} (status
Use: to install:RACF on minidisksRACFSFS in SFS directoriesRACFPANL on minidisks with RACF ISPF
panelsRACFPANLSFS in SFS directories with RACF
ISPF panels.
This command updates the build status table.
Service Instructions 103
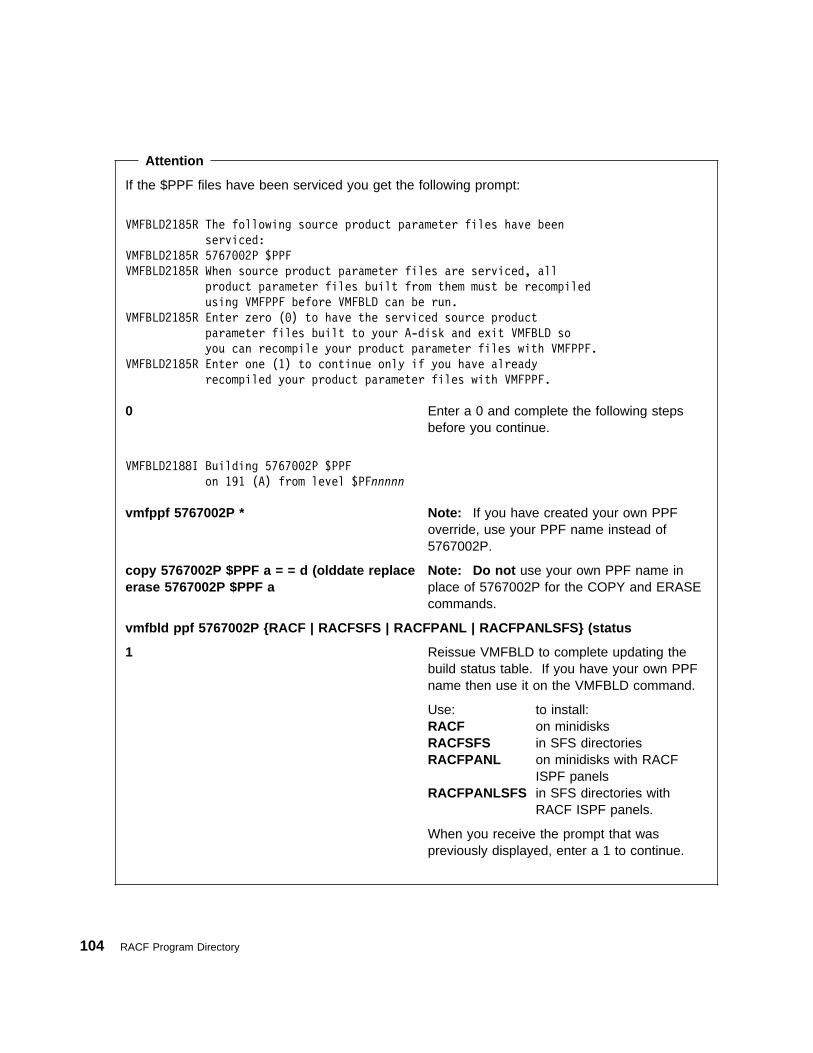
Attention
If the $PPF files have been serviced you get the following prompt:
VMFBLD2185R The following source product parameter files have been
serviced:
VMFBLD2185R 5767��2P $PPF
VMFBLD2185R When source product parameter files are serviced, all
product parameter files built from them must be recompiled
using VMFPPF before VMFBLD can be run.
VMFBLD2185R Enter zero (�) to have the serviced source product
parameter files built to your A-disk and exit VMFBLD so
you can recompile your product parameter files with VMFPPF.
VMFBLD2185R Enter one (1) to continue only if you have already
recompiled your product parameter files with VMFPPF.
VMFBLD2188I Building 5767��2P $PPF
on 191 (A) from level $PFnnnnn
0 Enter a 0 and complete the following stepsbefore you continue.
vmfppf 5767002P * Note: If you have created your own PPFoverride, use your PPF name instead of5767002P.
copy 5767002P $PPF a = = d (olddate replaceerase 5767002P $PPF a
Note: Do not use your own PPF name inplace of 5767002P for the COPY and ERASEcommands.
vmfbld ppf 5767002P {RACF | RACFSFS | RACFPANL | RACFPANLSFS} (status
1 Reissue VMFBLD to complete updating thebuild status table. If you have your own PPFname then use it on the VMFBLD command.
Use: to install:RACF on minidisksRACFSFS in SFS directoriesRACFPANL on minidisks with RACF
ISPF panelsRACFPANLSFS in SFS directories with
RACF ISPF panels.
When you receive the prompt that waspreviously displayed, enter a 1 to continue.
104 RACF Program Directory
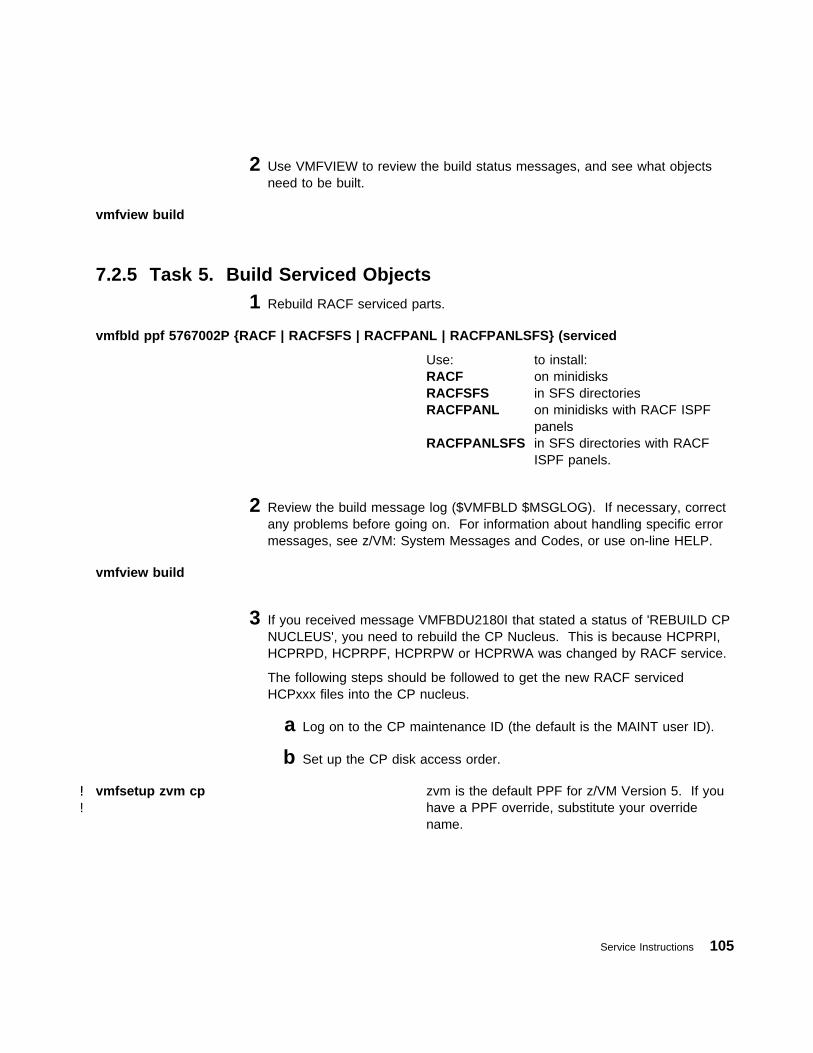
2 Use VMFVIEW to review the build status messages, and see what objectsneed to be built.
vmfview build
7.2.5 Task 5. Build Serviced Objects1 Rebuild RACF serviced parts.
vmfbld ppf 5767002P {RACF | RACFSFS | RACFPANL | RACFPANLSFS} (serviced
Use: to install:RACF on minidisksRACFSFS in SFS directoriesRACFPANL on minidisks with RACF ISPF
panelsRACFPANLSFS in SFS directories with RACF
ISPF panels.
2 Review the build message log ($VMFBLD $MSGLOG). If necessary, correctany problems before going on. For information about handling specific errormessages, see z/VM: System Messages and Codes, or use on-line HELP.
vmfview build
3 If you received message VMFBDU2180I that stated a status of 'REBUILD CPNUCLEUS', you need to rebuild the CP Nucleus. This is because HCPRPI,HCPRPD, HCPRPF, HCPRPW or HCPRWA was changed by RACF service.
The following steps should be followed to get the new RACF servicedHCPxxx files into the CP nucleus.
a Log on to the CP maintenance ID (the default is the MAINT user ID).
b Set up the CP disk access order.
! vmfsetup zvm cp! zvm is the default PPF for z/VM Version 5. If you! have a PPF override, substitute your override
name.
Service Instructions 105
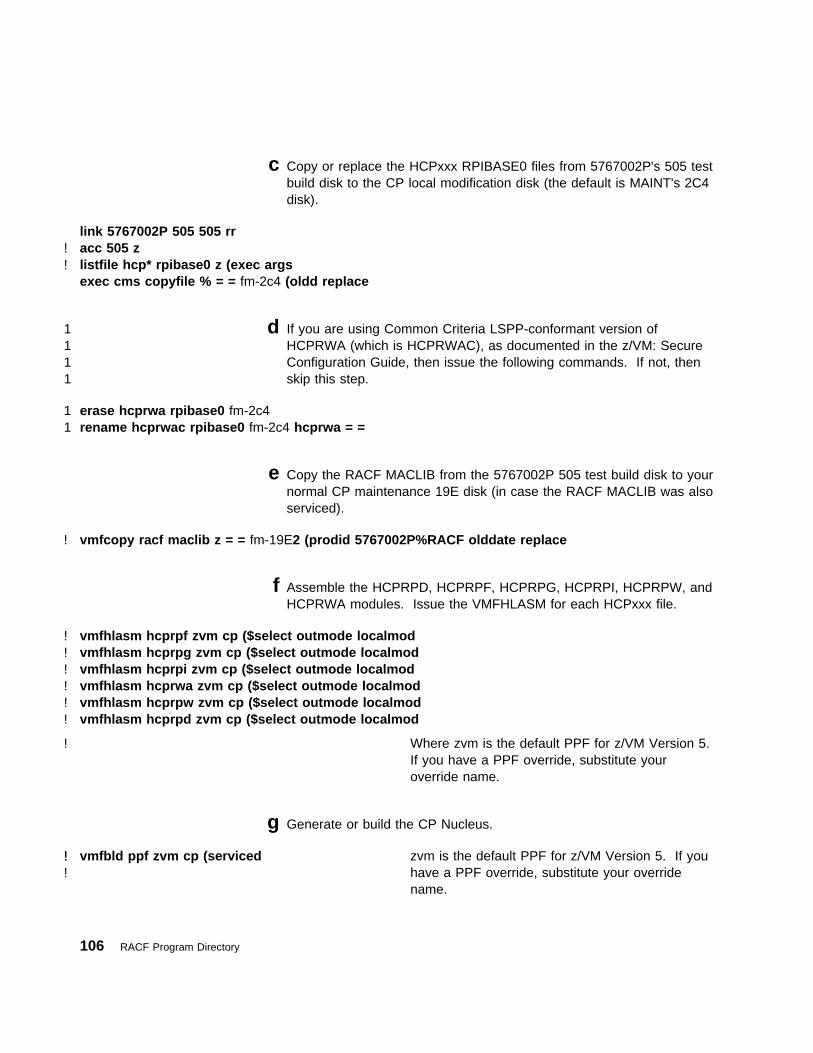
c Copy or replace the HCPxxx RPIBASE0 files from 5767002P's 505 testbuild disk to the CP local modification disk (the default is MAINT's 2C4disk).
link 5767002P 505 505 rr! acc 505 z! listfile hcp* rpibase0 z (exec args
exec cms copyfile % = = fm-2c4 (oldd replace
1 d If you are using Common Criteria LSPP-conformant version of1 HCPRWA (which is HCPRWAC), as documented in the z/VM: Secure1 Configuration Guide, then issue the following commands. If not, then1 skip this step.
1 erase hcprwa rpibase0 fm-2c41 rename hcprwac rpibase0 fm-2c4 hcprwa = =
e Copy the RACF MACLIB from the 5767002P 505 test build disk to yournormal CP maintenance 19E disk (in case the RACF MACLIB was alsoserviced).
! vmfcopy racf maclib z = = fm-19E2 (prodid 5767002P%RACF olddate replace
f Assemble the HCPRPD, HCPRPF, HCPRPG, HCPRPI, HCPRPW, andHCPRWA modules. Issue the VMFHLASM for each HCPxxx file.
! vmfhlasm hcprpf zvm cp ($select outmode localmod! vmfhlasm hcprpg zvm cp ($select outmode localmod! vmfhlasm hcprpi zvm cp ($select outmode localmod! vmfhlasm hcprwa zvm cp ($select outmode localmod! vmfhlasm hcprpw zvm cp ($select outmode localmod! vmfhlasm hcprpd zvm cp ($select outmode localmod
! Where zvm is the default PPF for z/VM Version 5.If you have a PPF override, substitute youroverride name.
g Generate or build the CP Nucleus.
! vmfbld ppf zvm cp (serviced! zvm is the default PPF for z/VM Version 5. If you! have a PPF override, substitute your override
name.
106 RACF Program Directory
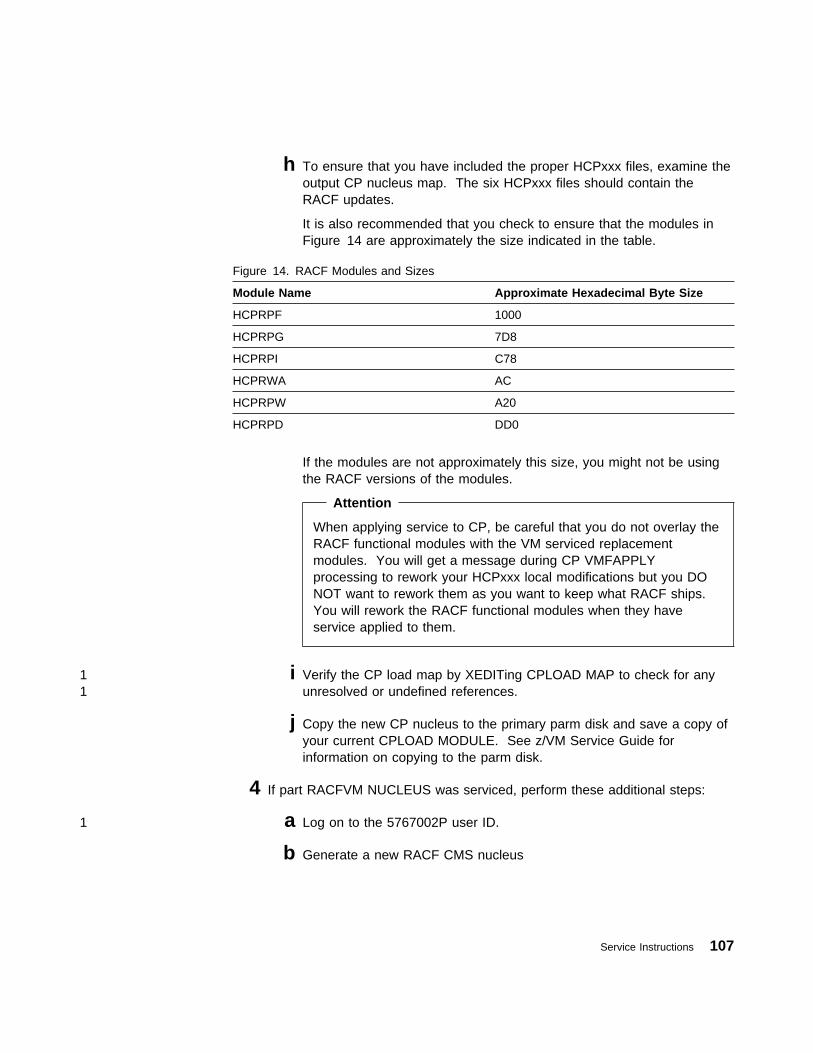
h To ensure that you have included the proper HCPxxx files, examine theoutput CP nucleus map. The six HCPxxx files should contain theRACF updates.
It is also recommended that you check to ensure that the modules inFigure 14 are approximately the size indicated in the table.
If the modules are not approximately this size, you might not be usingthe RACF versions of the modules.
Attention
When applying service to CP, be careful that you do not overlay theRACF functional modules with the VM serviced replacementmodules. You will get a message during CP VMFAPPLYprocessing to rework your HCPxxx local modifications but you DONOT want to rework them as you want to keep what RACF ships.You will rework the RACF functional modules when they haveservice applied to them.
1 i Verify the CP load map by XEDITing CPLOAD MAP to check for any1 unresolved or undefined references.
j Copy the new CP nucleus to the primary parm disk and save a copy ofyour current CPLOAD MODULE. See z/VM Service Guide forinformation on copying to the parm disk.
4 If part RACFVM NUCLEUS was serviced, perform these additional steps:
1 a Log on to the 5767002P user ID.
b Generate a new RACF CMS nucleus
Figure 14. RACF Modules and Sizes
Module Name Approximate Hexadecimal Byte Size
HCPRPF 1000
HCPRPG 7D8
HCPRPI C78
HCPRWA AC
HCPRPW A20
HCPRPD DD0
Service Instructions 107

def 590 490def 505 305acc 305 egennuc
c The following screens appear:
� �A modified version of CMS is about to be generated.
- .
� �The modified CMS nucleus must be generated with a virtual machine
size of 2�M.
The GENNUC EXEC will automatically set the virtual machine size to
2�M and IPL the modified nucleus.
Note: Please reply to the DMSINQ6�9R Message by Entering: 32
- .
Note: The number displayed is dependent on the type of DASD yourinstallation has (it might not be 32).
Type in the number that appears and press Enter to continue the IPL.
The IPL might take a few minutes, depending on your system setup.RACF's modified CMS is IPLed as it is being written to DASD.
A copy of the CMS nucleus map will be placed in your reader. Receivethe file and keep it for use in future problem determination.
d Reset the environment
def 490 590def 305 505acc 590 tvmfsetup 5767002P {RACF | RACFSFS | RACFPANL | RACFPANLSFS}
Use: to install:RACF on minidisksRACFSFS in SFS directoriesRACFPANL on minidisks with RACF ISPF
panelsRACFPANLSFS in SFS directories with RACF
ISPF panels.
108 RACF Program Directory
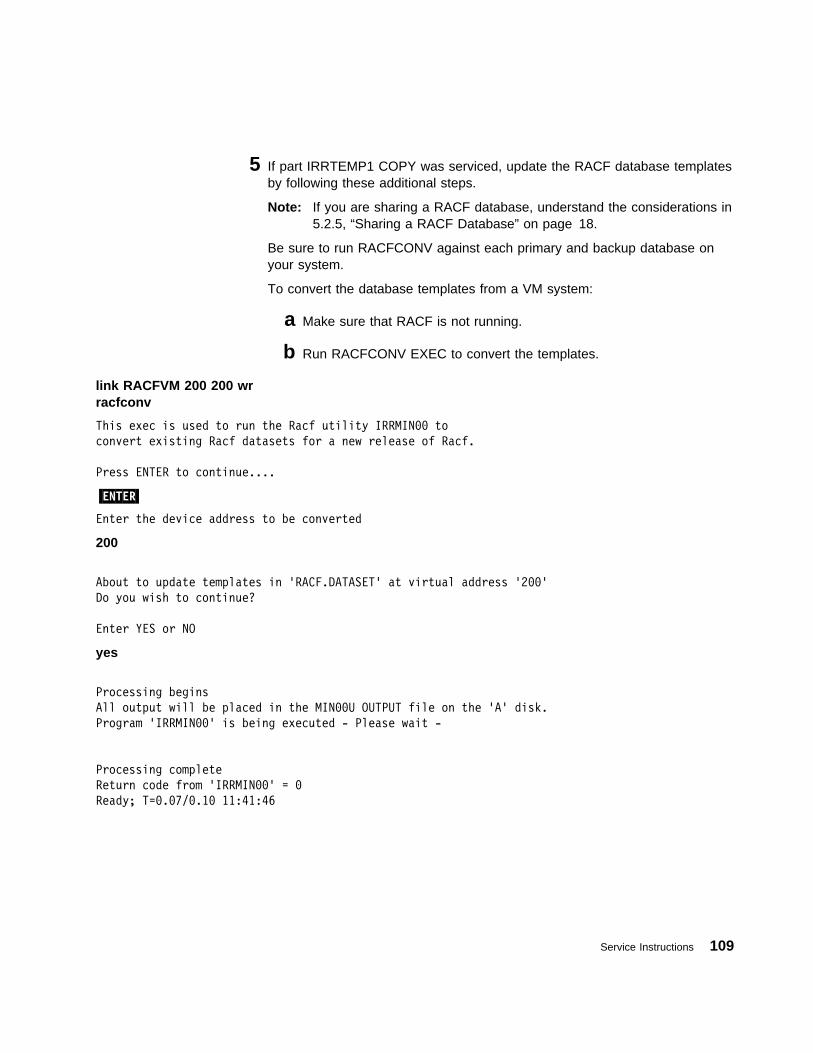
5 If part IRRTEMP1 COPY was serviced, update the RACF database templatesby following these additional steps.
Note: If you are sharing a RACF database, understand the considerations in5.2.5, “Sharing a RACF Database” on page 18.
Be sure to run RACFCONV against each primary and backup database onyour system.
To convert the database templates from a VM system:
a Make sure that RACF is not running.
b Run RACFCONV EXEC to convert the templates.
link RACFVM 200 200 wrracfconv
This exec is used to run the Racf utility IRRMIN�� to
convert existing Racf datasets for a new release of Racf.
Press ENTER to continue....
�ENTER�
Enter the device address to be converted
200
About to update templates in 'RACF.DATASET' at virtual address '2��'
Do you wish to continue?
Enter YES or NO
yes
Processing begins
All output will be placed in the MIN��U OUTPUT file on the 'A' disk.
Program 'IRRMIN��' is being executed - Please wait -
Processing complete
Return code from 'IRRMIN��' = �
Ready; T=�.�7/�.1� 11:41:46
Service Instructions 109
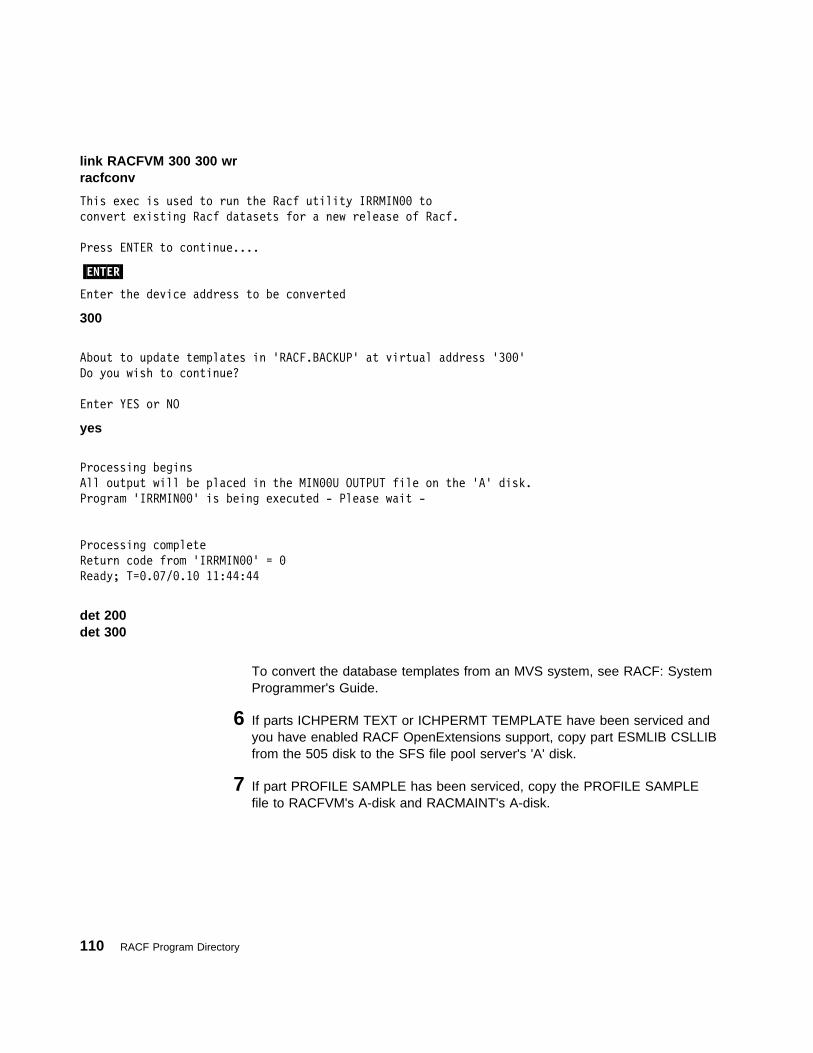
link RACFVM 300 300 wrracfconv
This exec is used to run the Racf utility IRRMIN�� to
convert existing Racf datasets for a new release of Racf.
Press ENTER to continue....
�ENTER�
Enter the device address to be converted
300
About to update templates in 'RACF.BACKUP' at virtual address '3��'
Do you wish to continue?
Enter YES or NO
yes
Processing begins
All output will be placed in the MIN��U OUTPUT file on the 'A' disk.
Program 'IRRMIN��' is being executed - Please wait -
Processing complete
Return code from 'IRRMIN��' = �
Ready; T=�.�7/�.1� 11:44:44
det 200det 300
To convert the database templates from an MVS system, see RACF: SystemProgrammer's Guide.
6 If parts ICHPERM TEXT or ICHPERMT TEMPLATE have been serviced andyou have enabled RACF OpenExtensions support, copy part ESMLIB CSLLIBfrom the 505 disk to the SFS file pool server's 'A' disk.
7 If part PROFILE SAMPLE has been serviced, copy the PROFILE SAMPLEfile to RACFVM's A-disk and RACMAINT's A-disk.
110 RACF Program Directory

link RACFVM 191 199 MRacc 199 Zcopyfile profile sample fm-505 profile exec zdet 199link RACMAINT 191 199 MRacc 199 Zcopyfile profile sample fm-505 profile exec zdet 199
Where fm-505 is the current file mode of5767002P's 505 test build disk.
8 If part SMF CONTROL has been serviced, copy the SMF CONTROL file toRACFVM's A-disk and RACMAINT's A-disk.
link RACFVM 191 199 MRacc 199 Zcopyfile smf control fm-505 smf control zdet 199link RACMAINT 191 199 MRacc 199 Zcopyfile smf control fm-505 smf control zdet 199
Where fm-505 is the current file mode of5767002P's 505 test build disk.
7.2.6 Task 6. IPL the CP System and Test RACF ServiceBefore you place the new service into production you should test it out to makesure it works. You can use the test or backup server user ID RACMAINT.
IPL your system with the NOAUTOLOG option. After the system IPL, XAUTOLOGthe RACMAINT user ID, which initializes RACF.
If ICHRDSNT was serviced and RACF cannot find the database name in thedatabase name table (ICHRDSNT) during initialization, it might be for one of thefollowing reasons:
� The database name specified in ICHRDSNT does not match the data set nameon the database DASD volumes.
� The database name contains an asterisk (*).
� No FILEDEF exists for the RACF database.
Service Instructions 111
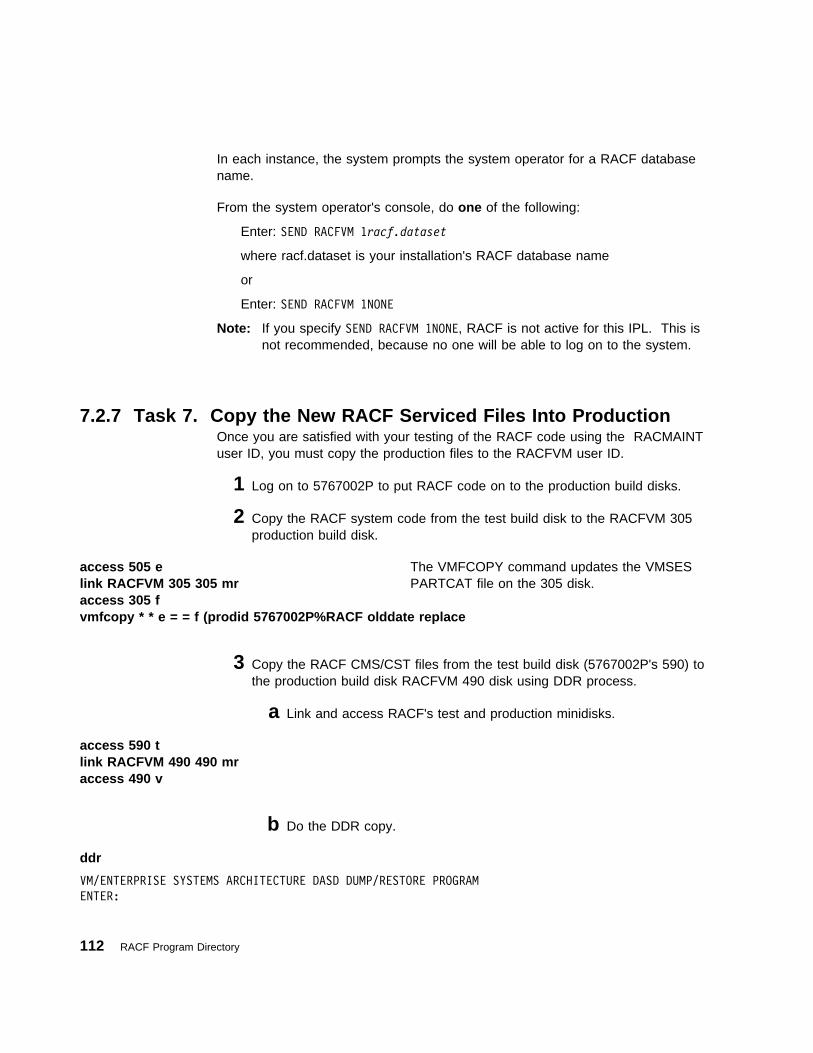
In each instance, the system prompts the system operator for a RACF databasename.
From the system operator's console, do one of the following:
Enter: SEND RACFVM 1racf.dataset
where racf.dataset is your installation's RACF database name
or
Enter: SEND RACFVM 1NONE
Note: If you specify SEND RACFVM 1NONE, RACF is not active for this IPL. This isnot recommended, because no one will be able to log on to the system.
7.2.7 Task 7. Copy the New RACF Serviced Files Into ProductionOnce you are satisfied with your testing of the RACF code using the RACMAINTuser ID, you must copy the production files to the RACFVM user ID.
1 Log on to 5767002P to put RACF code on to the production build disks.
2 Copy the RACF system code from the test build disk to the RACFVM 305production build disk.
access 505 elink RACFVM 305 305 mraccess 305 fvmfcopy * * e = = f (prodid 5767002P%RACF olddate replace
The VMFCOPY command updates the VMSESPARTCAT file on the 305 disk.
3 Copy the RACF CMS/CST files from the test build disk (5767002P's 590) tothe production build disk RACFVM 490 disk using DDR process.
a Link and access RACF's test and production minidisks.
access 590 tlink RACFVM 490 490 mraccess 490 v
b Do the DDR copy.
ddr
VM/ENTERPRISE SYSTEMS ARCHITECTURE DASD DUMP/RESTORE PROGRAM
ENTER:
112 RACF Program Directory
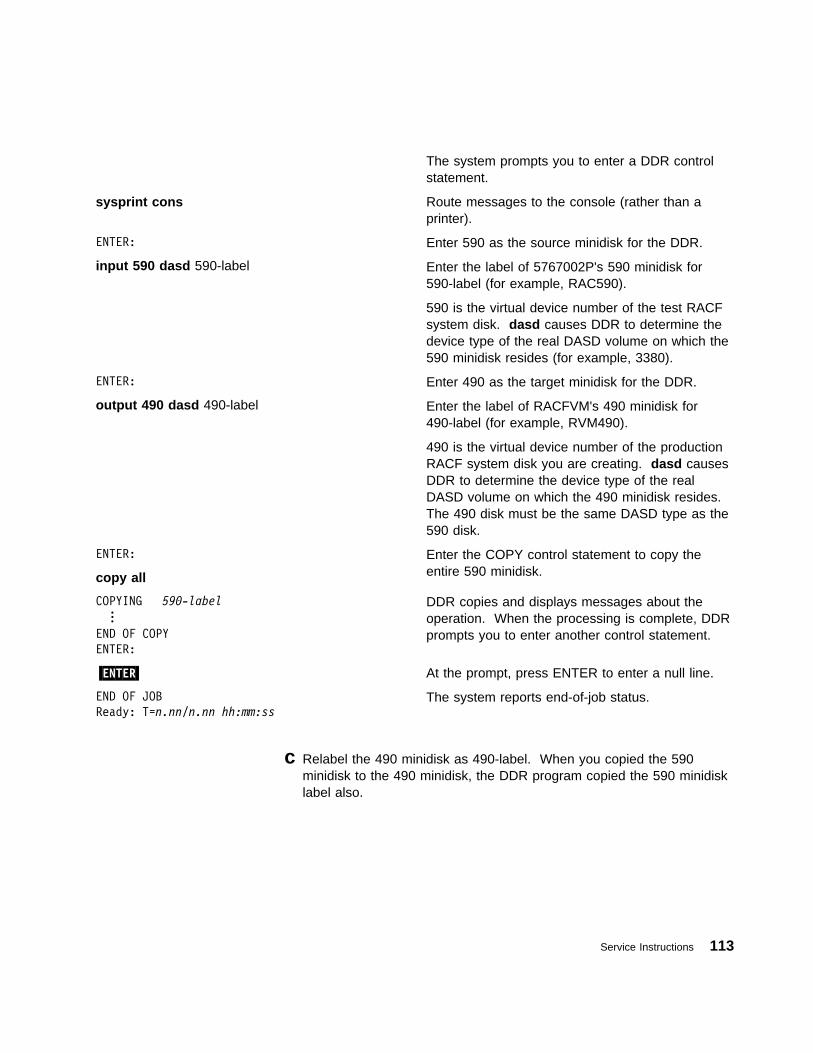
The system prompts you to enter a DDR controlstatement.
sysprint cons Route messages to the console (rather than aprinter).
ENTER:
input 590 dasd 590-label
Enter 590 as the source minidisk for the DDR.
Enter the label of 5767002P's 590 minidisk for590-label (for example, RAC590).
590 is the virtual device number of the test RACFsystem disk. dasd causes DDR to determine thedevice type of the real DASD volume on which the590 minidisk resides (for example, 3380).
ENTER:
output 490 dasd 490-label
Enter 490 as the target minidisk for the DDR.
Enter the label of RACFVM's 490 minidisk for490-label (for example, RVM490).
490 is the virtual device number of the productionRACF system disk you are creating. dasd causesDDR to determine the device type of the realDASD volume on which the 490 minidisk resides.The 490 disk must be the same DASD type as the590 disk.
ENTER:
copy all
Enter the COPY control statement to copy theentire 590 minidisk.
COPYING 59�-label...
END OF COPY
ENTER:
DDR copies and displays messages about theoperation. When the processing is complete, DDRprompts you to enter another control statement.
�ENTER� At the prompt, press ENTER to enter a null line.
END OF JOB
Ready: T=n.nn/n.nn hh:mm:ssThe system reports end-of-job status.
c Relabel the 490 minidisk as 490-label. When you copied the 590minidisk to the 490 minidisk, the DDR program copied the 590 minidisklabel also.
Service Instructions 113
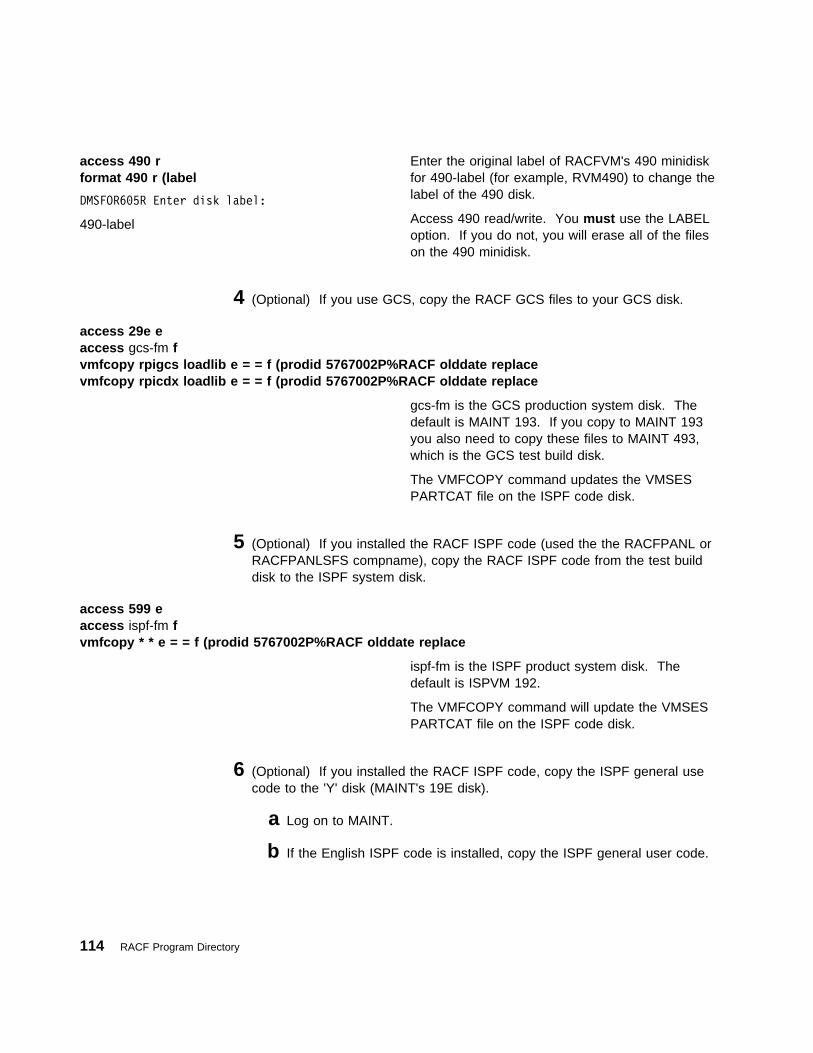
access 490 rformat 490 r (label
DMSFOR6�5R Enter disk label:
490-label
Enter the original label of RACFVM's 490 minidiskfor 490-label (for example, RVM490) to change thelabel of the 490 disk.
Access 490 read/write. You must use the LABELoption. If you do not, you will erase all of the fileson the 490 minidisk.
4 (Optional) If you use GCS, copy the RACF GCS files to your GCS disk.
access 29e eaccess gcs-fm fvmfcopy rpigcs loadlib e = = f (prodid 5767002P%RACF olddate replacevmfcopy rpicdx loadlib e = = f (prodid 5767002P%RACF olddate replace
gcs-fm is the GCS production system disk. Thedefault is MAINT 193. If you copy to MAINT 193you also need to copy these files to MAINT 493,which is the GCS test build disk.
The VMFCOPY command updates the VMSESPARTCAT file on the ISPF code disk.
5 (Optional) If you installed the RACF ISPF code (used the the RACFPANL orRACFPANLSFS compname), copy the RACF ISPF code from the test builddisk to the ISPF system disk.
access 599 eaccess ispf-fm fvmfcopy * * e = = f (prodid 5767002P%RACF olddate replace
ispf-fm is the ISPF product system disk. Thedefault is ISPVM 192.
The VMFCOPY command will update the VMSESPARTCAT file on the ISPF code disk.
6 (Optional) If you installed the RACF ISPF code, copy the ISPF general usecode to the 'Y' disk (MAINT's 19E disk).
a Log on to MAINT.
b If the English ISPF code is installed, copy the ISPF general user code.
114 RACF Program Directory
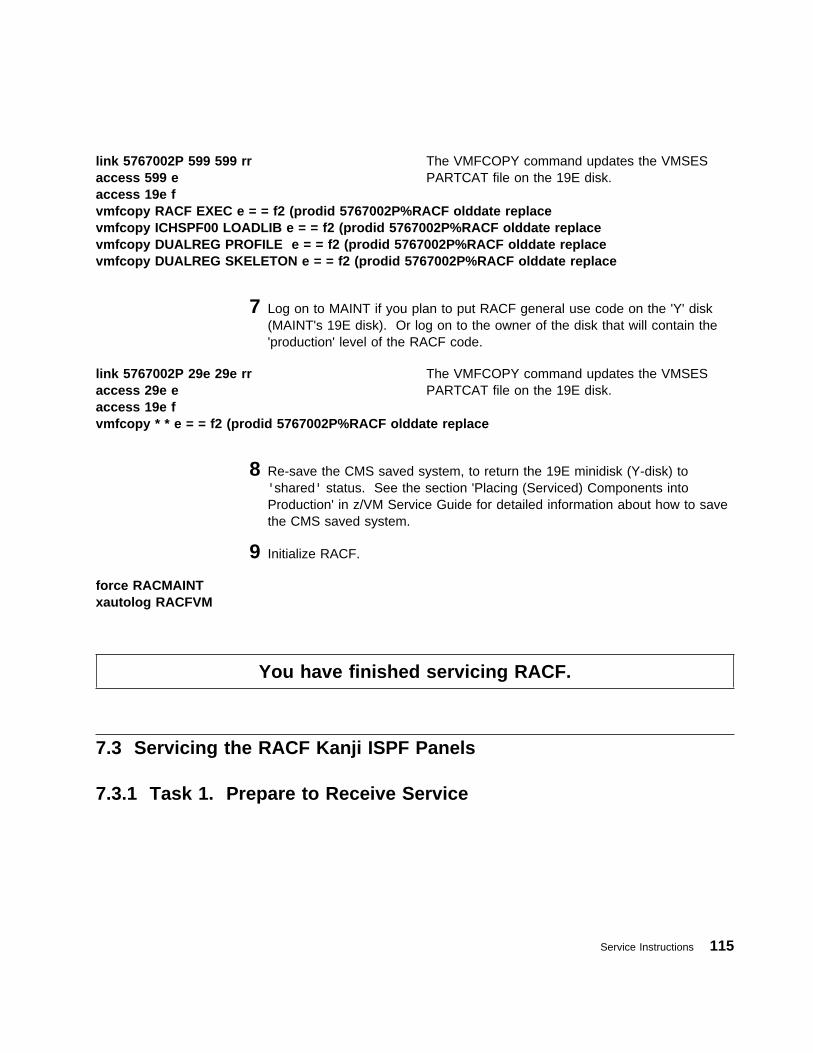
link 5767002P 599 599 rraccess 599 eaccess 19e fvmfcopy RACF EXEC e = = f2 (prodid 5767002P%RACF olddate replacevmfcopy ICHSPF00 LOADLIB e = = f2 (prodid 5767002P%RACF olddate replacevmfcopy DUALREG PROFILE e = = f2 (prodid 5767002P%RACF olddate replacevmfcopy DUALREG SKELETON e = = f2 (prodid 5767002P%RACF olddate replace
The VMFCOPY command updates the VMSESPARTCAT file on the 19E disk.
7 Log on to MAINT if you plan to put RACF general use code on the 'Y' disk(MAINT's 19E disk). Or log on to the owner of the disk that will contain the'production' level of the RACF code.
link 5767002P 29e 29e rraccess 29e eaccess 19e fvmfcopy * * e = = f2 (prodid 5767002P%RACF olddate replace
The VMFCOPY command updates the VMSESPARTCAT file on the 19E disk.
8 Re-save the CMS saved system, to return the 19E minidisk (Y-disk) to'shared' status. See the section 'Placing (Serviced) Components intoProduction' in z/VM Service Guide for detailed information about how to savethe CMS saved system.
9 Initialize RACF.
force RACMAINTxautolog RACFVM
You have finished servicing RACF.
7.3 Servicing the RACF Kanji ISPF Panels
7.3.1 Task 1. Prepare to Receive Service
Service Instructions 115
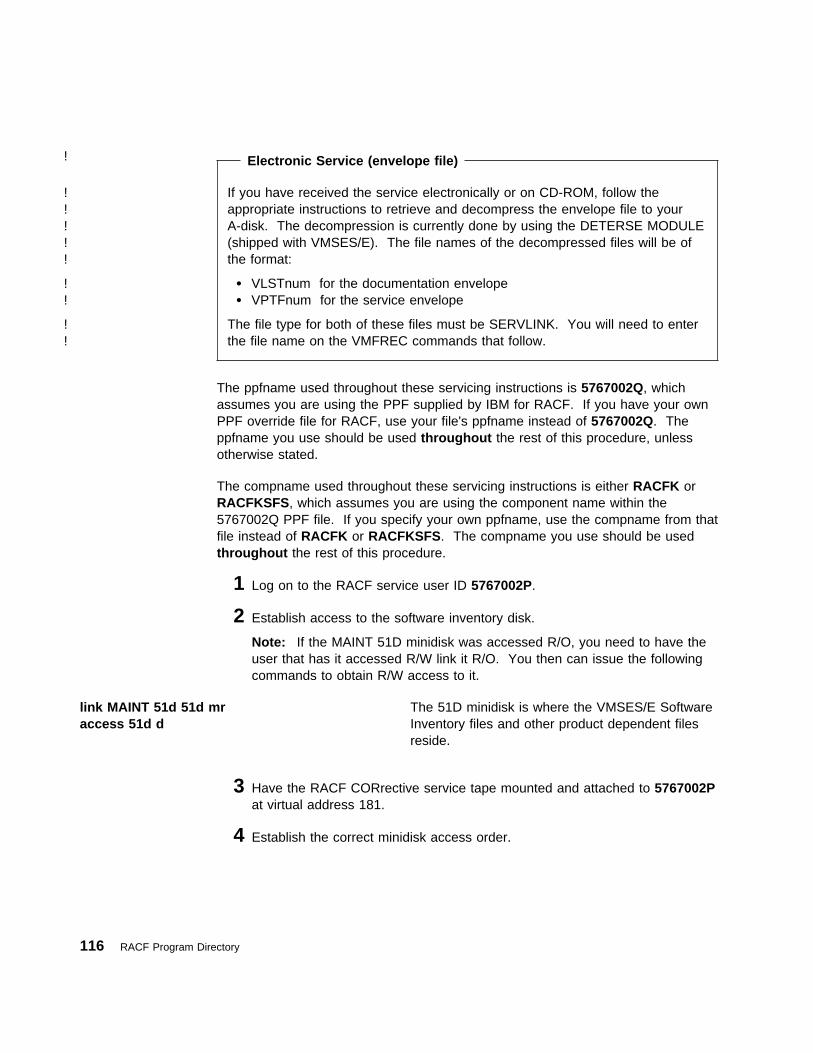
! Electronic Service (envelope file)
! If you have received the service electronically or on CD-ROM, follow the! appropriate instructions to retrieve and decompress the envelope file to your! A-disk. The decompression is currently done by using the DETERSE MODULE! (shipped with VMSES/E). The file names of the decompressed files will be of! the format:
! � VLSTnum for the documentation envelope! � VPTFnum for the service envelope
! The file type for both of these files must be SERVLINK. You will need to enter! the file name on the VMFREC commands that follow.
The ppfname used throughout these servicing instructions is 5767002Q, whichassumes you are using the PPF supplied by IBM for RACF. If you have your ownPPF override file for RACF, use your file's ppfname instead of 5767002Q. Theppfname you use should be used throughout the rest of this procedure, unlessotherwise stated.
The compname used throughout these servicing instructions is either RACFK orRACFKSFS, which assumes you are using the component name within the5767002Q PPF file. If you specify your own ppfname, use the compname from thatfile instead of RACFK or RACFKSFS. The compname you use should be usedthroughout the rest of this procedure.
1 Log on to the RACF service user ID 5767002P.
2 Establish access to the software inventory disk.
Note: If the MAINT 51D minidisk was accessed R/O, you need to have theuser that has it accessed R/W link it R/O. You then can issue the followingcommands to obtain R/W access to it.
link MAINT 51d 51d mraccess 51d d
The 51D minidisk is where the VMSES/E SoftwareInventory files and other product dependent filesreside.
3 Have the RACF CORrective service tape mounted and attached to 5767002Pat virtual address 181.
4 Establish the correct minidisk access order.
116 RACF Program Directory
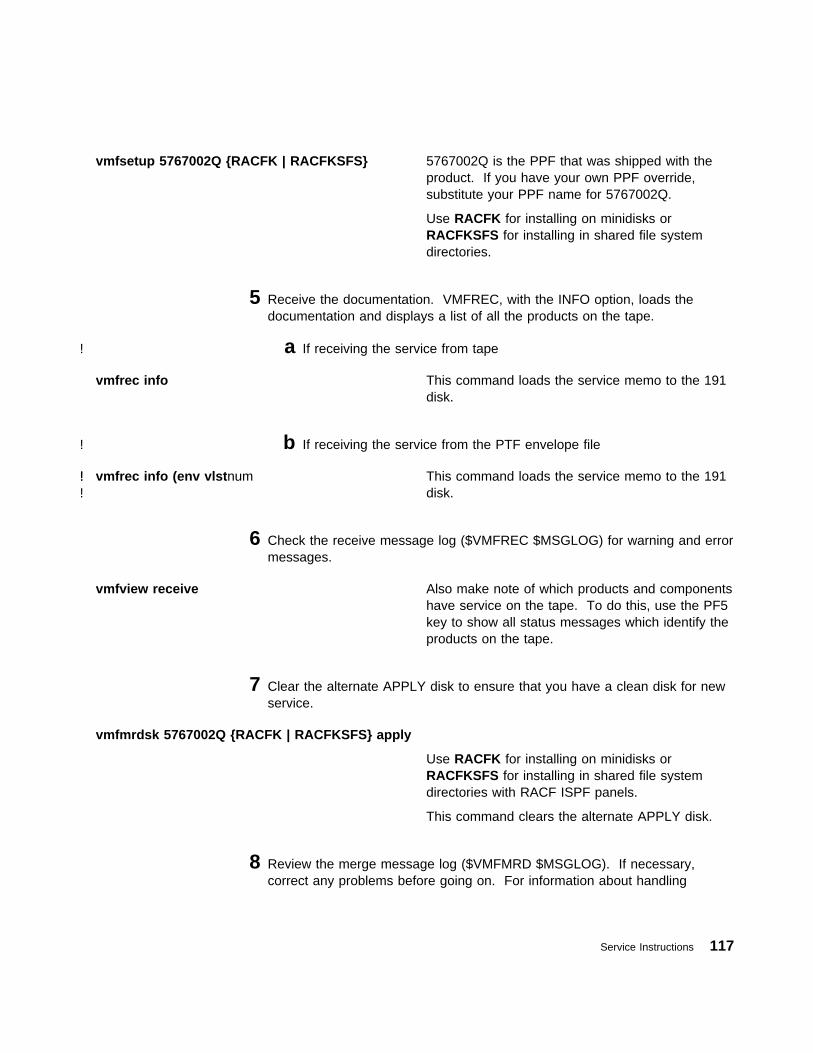
vmfsetup 5767002Q {RACFK | RACFKSFS} 5767002Q is the PPF that was shipped with theproduct. If you have your own PPF override,substitute your PPF name for 5767002Q.
Use RACFK for installing on minidisks orRACFKSFS for installing in shared file systemdirectories.
5 Receive the documentation. VMFREC, with the INFO option, loads thedocumentation and displays a list of all the products on the tape.
! a If receiving the service from tape
vmfrec info This command loads the service memo to the 191disk.
! b If receiving the service from the PTF envelope file
! vmfrec info (env vlstnum! This command loads the service memo to the 191! disk.
6 Check the receive message log ($VMFREC $MSGLOG) for warning and errormessages.
vmfview receive Also make note of which products and componentshave service on the tape. To do this, use the PF5key to show all status messages which identify theproducts on the tape.
7 Clear the alternate APPLY disk to ensure that you have a clean disk for newservice.
vmfmrdsk 5767002Q {RACFK | RACFKSFS} apply
Use RACFK for installing on minidisks orRACFKSFS for installing in shared file systemdirectories with RACF ISPF panels.
This command clears the alternate APPLY disk.
8 Review the merge message log ($VMFMRD $MSGLOG). If necessary,correct any problems before going on. For information about handling
Service Instructions 117
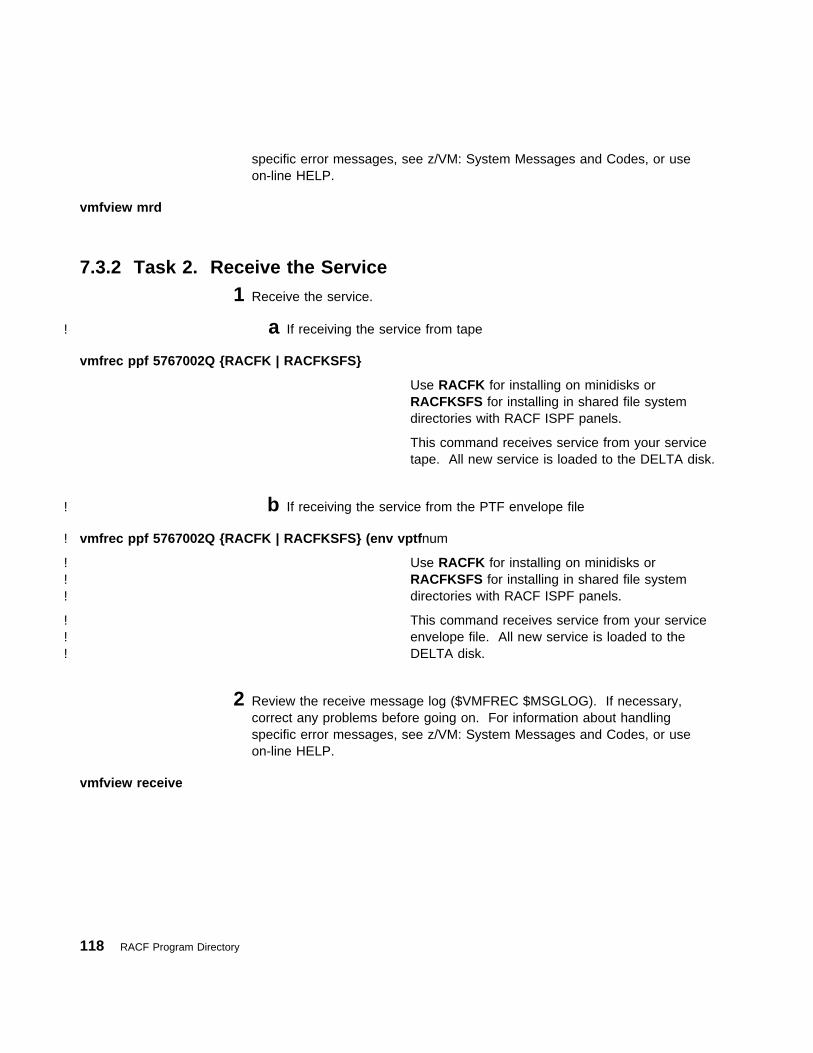
specific error messages, see z/VM: System Messages and Codes, or useon-line HELP.
vmfview mrd
7.3.2 Task 2. Receive the Service1 Receive the service.
! a If receiving the service from tape
vmfrec ppf 5767002Q {RACFK | RACFKSFS}
Use RACFK for installing on minidisks orRACFKSFS for installing in shared file systemdirectories with RACF ISPF panels.
This command receives service from your servicetape. All new service is loaded to the DELTA disk.
! b If receiving the service from the PTF envelope file
! vmfrec ppf 5767002Q {RACFK | RACFKSFS} (env vptfnum
! Use RACFK for installing on minidisks or! RACFKSFS for installing in shared file system! directories with RACF ISPF panels.
! This command receives service from your service! envelope file. All new service is loaded to the! DELTA disk.
2 Review the receive message log ($VMFREC $MSGLOG). If necessary,correct any problems before going on. For information about handlingspecific error messages, see z/VM: System Messages and Codes, or useon-line HELP.
vmfview receive
118 RACF Program Directory
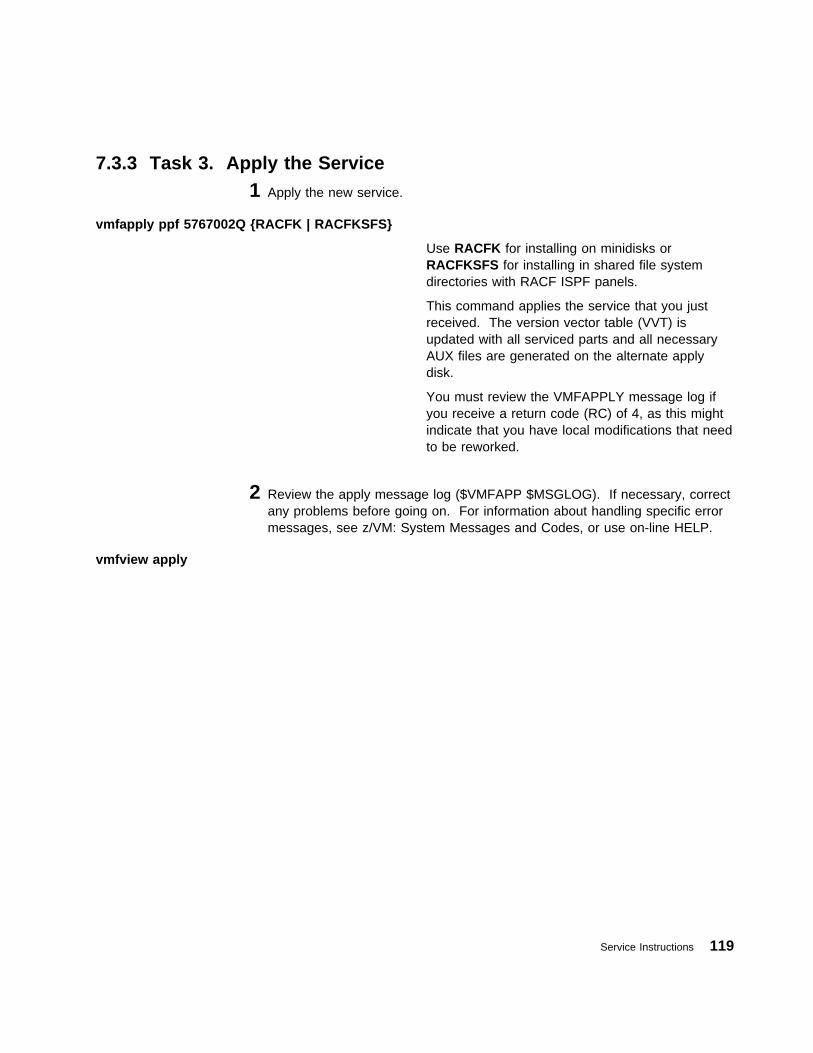
7.3.3 Task 3. Apply the Service1 Apply the new service.
vmfapply ppf 5767002Q {RACFK | RACFKSFS}
Use RACFK for installing on minidisks orRACFKSFS for installing in shared file systemdirectories with RACF ISPF panels.
This command applies the service that you justreceived. The version vector table (VVT) isupdated with all serviced parts and all necessaryAUX files are generated on the alternate applydisk.
You must review the VMFAPPLY message log ifyou receive a return code (RC) of 4, as this mightindicate that you have local modifications that needto be reworked.
2 Review the apply message log ($VMFAPP $MSGLOG). If necessary, correctany problems before going on. For information about handling specific errormessages, see z/VM: System Messages and Codes, or use on-line HELP.
vmfview apply
Service Instructions 119
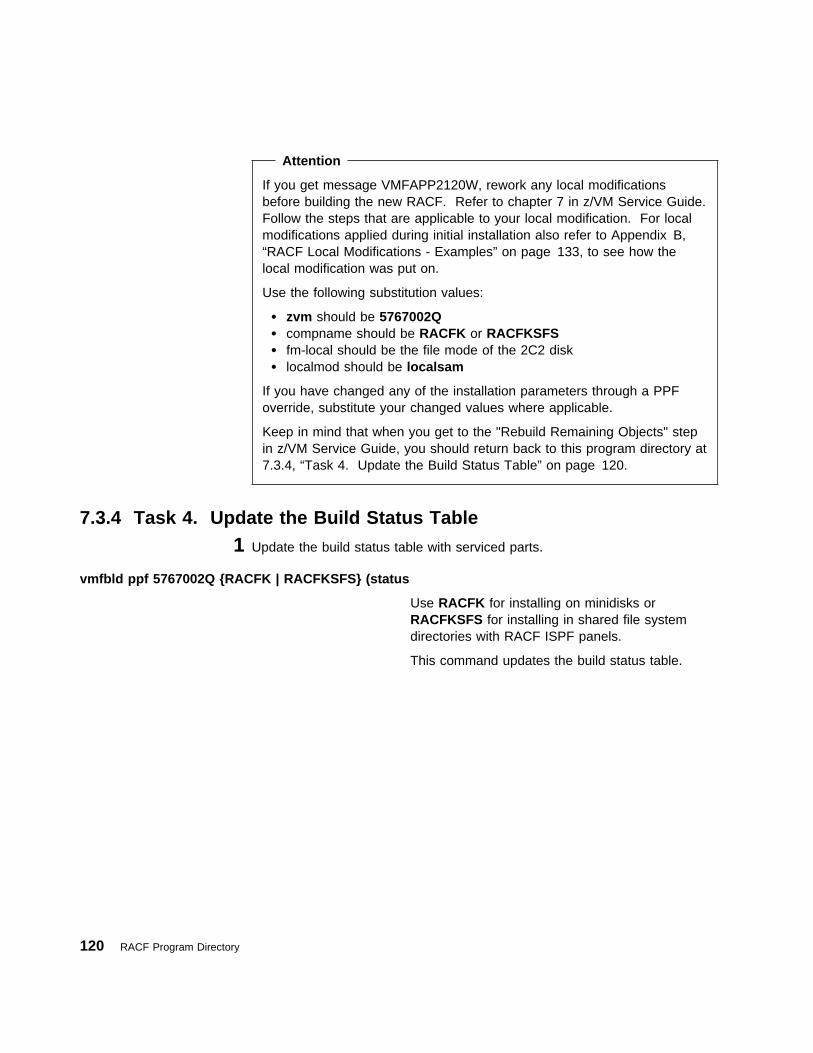
Attention
If you get message VMFAPP2120W, rework any local modificationsbefore building the new RACF. Refer to chapter 7 in z/VM Service Guide.Follow the steps that are applicable to your local modification. For localmodifications applied during initial installation also refer to Appendix B,“RACF Local Modifications - Examples” on page 133, to see how thelocal modification was put on.
Use the following substitution values:
� zvm should be 5767002Q� compname should be RACFK or RACFKSFS� fm-local should be the file mode of the 2C2 disk� localmod should be localsam
If you have changed any of the installation parameters through a PPFoverride, substitute your changed values where applicable.
Keep in mind that when you get to the "Rebuild Remaining Objects" stepin z/VM Service Guide, you should return back to this program directory at7.3.4, “Task 4. Update the Build Status Table” on page 120.
7.3.4 Task 4. Update the Build Status Table1 Update the build status table with serviced parts.
vmfbld ppf 5767002Q {RACFK | RACFKSFS} (status
Use RACFK for installing on minidisks orRACFKSFS for installing in shared file systemdirectories with RACF ISPF panels.
This command updates the build status table.
120 RACF Program Directory
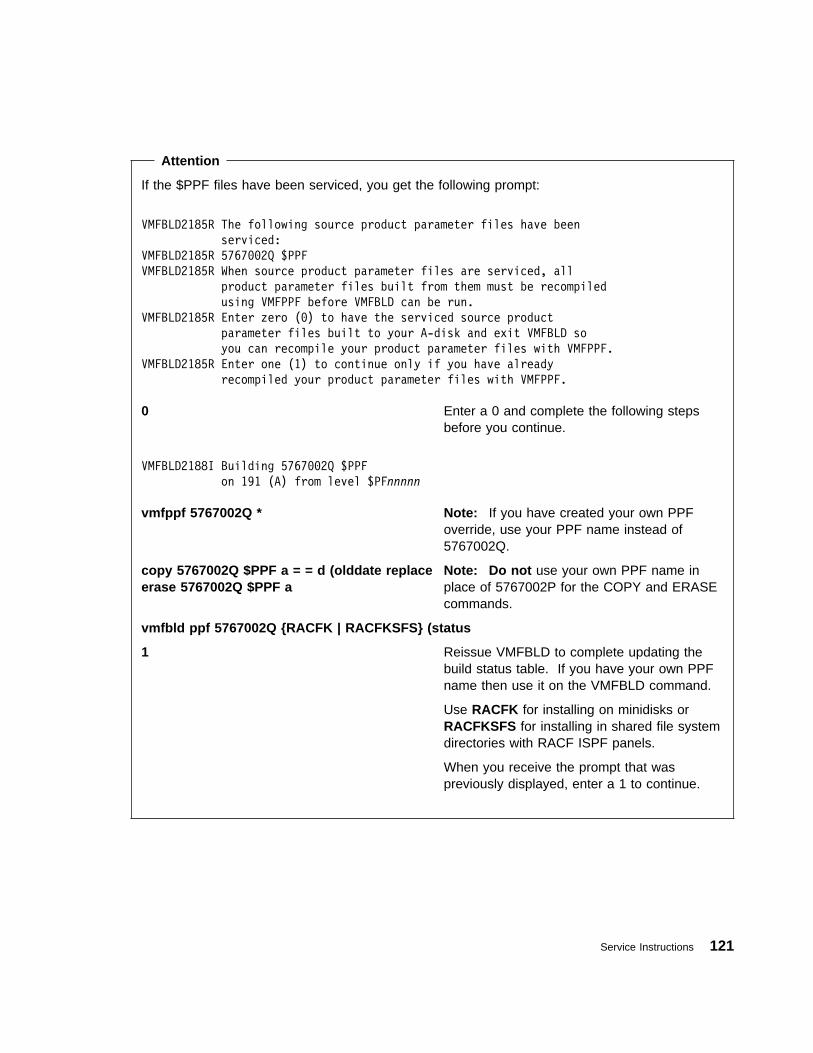
Attention
If the $PPF files have been serviced, you get the following prompt:
VMFBLD2185R The following source product parameter files have been
serviced:
VMFBLD2185R 5767��2Q $PPF
VMFBLD2185R When source product parameter files are serviced, all
product parameter files built from them must be recompiled
using VMFPPF before VMFBLD can be run.
VMFBLD2185R Enter zero (�) to have the serviced source product
parameter files built to your A-disk and exit VMFBLD so
you can recompile your product parameter files with VMFPPF.
VMFBLD2185R Enter one (1) to continue only if you have already
recompiled your product parameter files with VMFPPF.
VMFBLD2188I Building 5767��2Q $PPF
on 191 (A) from level $PFnnnnn
0 Enter a 0 and complete the following stepsbefore you continue.
vmfppf 5767002Q * Note: If you have created your own PPFoverride, use your PPF name instead of5767002Q.
copy 5767002Q $PPF a = = d (olddate replaceerase 5767002Q $PPF a
Note: Do not use your own PPF name inplace of 5767002P for the COPY and ERASEcommands.
vmfbld ppf 5767002Q {RACFK | RACFKSFS} (status
1 Reissue VMFBLD to complete updating thebuild status table. If you have your own PPFname then use it on the VMFBLD command.
Use RACFK for installing on minidisks orRACFKSFS for installing in shared file systemdirectories with RACF ISPF panels.
When you receive the prompt that waspreviously displayed, enter a 1 to continue.
Service Instructions 121
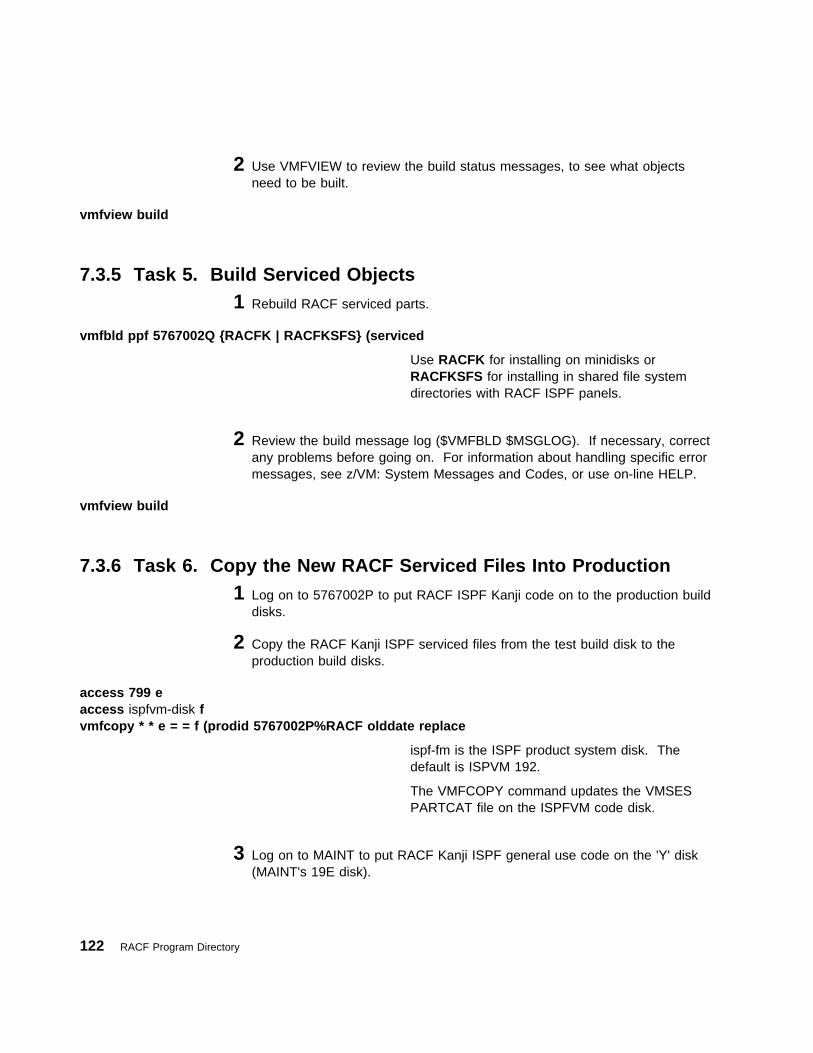
2 Use VMFVIEW to review the build status messages, to see what objectsneed to be built.
vmfview build
7.3.5 Task 5. Build Serviced Objects1 Rebuild RACF serviced parts.
vmfbld ppf 5767002Q {RACFK | RACFKSFS} (serviced
Use RACFK for installing on minidisks orRACFKSFS for installing in shared file systemdirectories with RACF ISPF panels.
2 Review the build message log ($VMFBLD $MSGLOG). If necessary, correctany problems before going on. For information about handling specific errormessages, see z/VM: System Messages and Codes, or use on-line HELP.
vmfview build
7.3.6 Task 6. Copy the New RACF Serviced Files Into Production1 Log on to 5767002P to put RACF ISPF Kanji code on to the production build
disks.
2 Copy the RACF Kanji ISPF serviced files from the test build disk to theproduction build disks.
access 799 eaccess ispfvm-disk fvmfcopy * * e = = f (prodid 5767002P%RACF olddate replace
ispf-fm is the ISPF product system disk. Thedefault is ISPVM 192.
The VMFCOPY command updates the VMSESPARTCAT file on the ISPFVM code disk.
3 Log on to MAINT to put RACF Kanji ISPF general use code on the 'Y' disk(MAINT's 19E disk).
122 RACF Program Directory
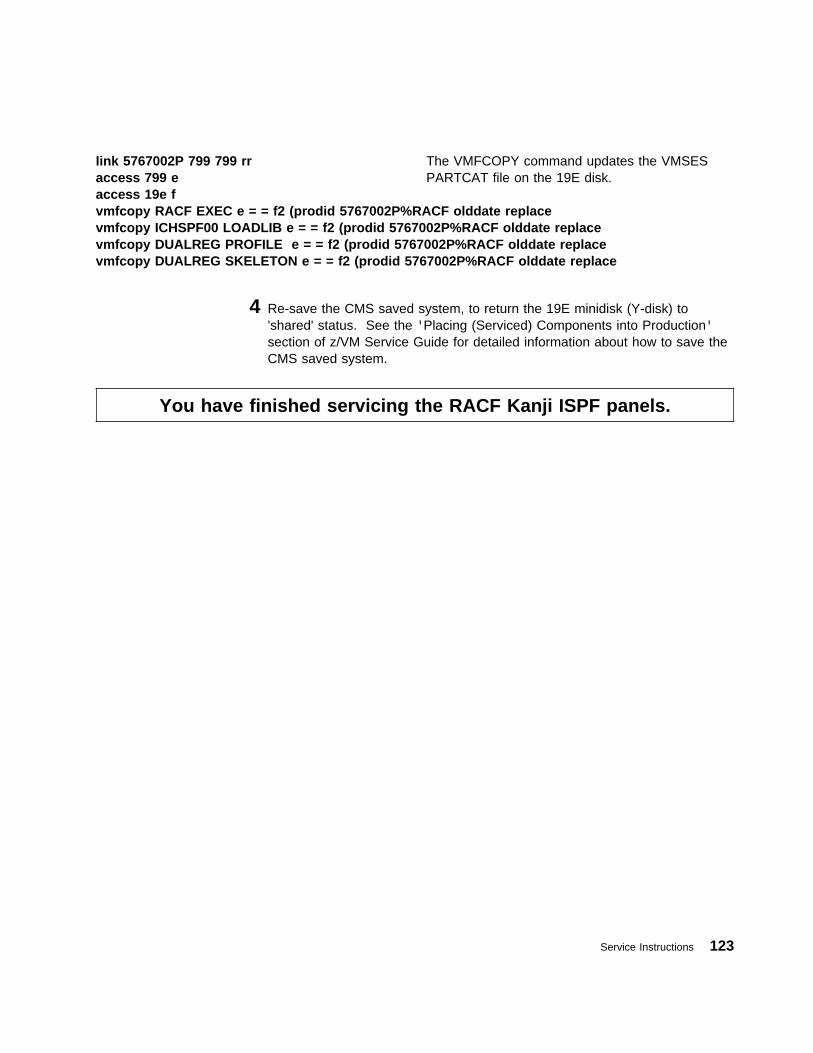
link 5767002P 799 799 rraccess 799 eaccess 19e fvmfcopy RACF EXEC e = = f2 (prodid 5767002P%RACF olddate replacevmfcopy ICHSPF00 LOADLIB e = = f2 (prodid 5767002P%RACF olddate replacevmfcopy DUALREG PROFILE e = = f2 (prodid 5767002P%RACF olddate replacevmfcopy DUALREG SKELETON e = = f2 (prodid 5767002P%RACF olddate replace
The VMFCOPY command updates the VMSESPARTCAT file on the 19E disk.
4 Re-save the CMS saved system, to return the 19E minidisk (Y-disk) to'shared' status. See the 'Placing (Serviced) Components into Production'section of z/VM Service Guide for detailed information about how to save theCMS saved system.
You have finished servicing the RACF Kanji ISPF panels.
Service Instructions 123
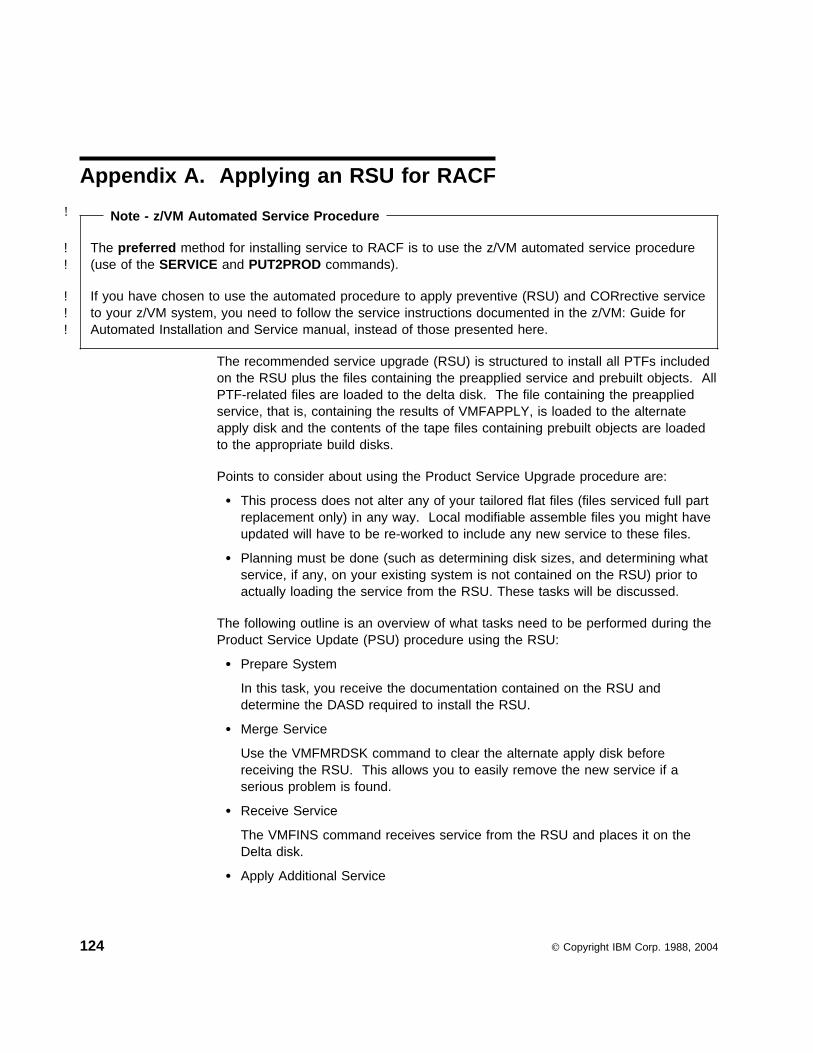
Appendix A. Applying an RSU for RACF
! Note - z/VM Automated Service Procedure
! The preferred method for installing service to RACF is to use the z/VM automated service procedure! (use of the SERVICE and PUT2PROD commands).
! If you have chosen to use the automated procedure to apply preventive (RSU) and CORrective service! to your z/VM system, you need to follow the service instructions documented in the z/VM: Guide for! Automated Installation and Service manual, instead of those presented here.
The recommended service upgrade (RSU) is structured to install all PTFs includedon the RSU plus the files containing the preapplied service and prebuilt objects. AllPTF-related files are loaded to the delta disk. The file containing the preappliedservice, that is, containing the results of VMFAPPLY, is loaded to the alternateapply disk and the contents of the tape files containing prebuilt objects are loadedto the appropriate build disks.
Points to consider about using the Product Service Upgrade procedure are:
� This process does not alter any of your tailored flat files (files serviced full partreplacement only) in any way. Local modifiable assemble files you might haveupdated will have to be re-worked to include any new service to these files.
� Planning must be done (such as determining disk sizes, and determining whatservice, if any, on your existing system is not contained on the RSU) prior toactually loading the service from the RSU. These tasks will be discussed.
The following outline is an overview of what tasks need to be performed during theProduct Service Update (PSU) procedure using the RSU:
� Prepare System
In this task, you receive the documentation contained on the RSU anddetermine the DASD required to install the RSU.
� Merge Service
Use the VMFMRDSK command to clear the alternate apply disk beforereceiving the RSU. This allows you to easily remove the new service if aserious problem is found.
� Receive Service
The VMFINS command receives service from the RSU and places it on theDelta disk.
� Apply Additional Service
124 Copyright IBM Corp. 1988, 2004
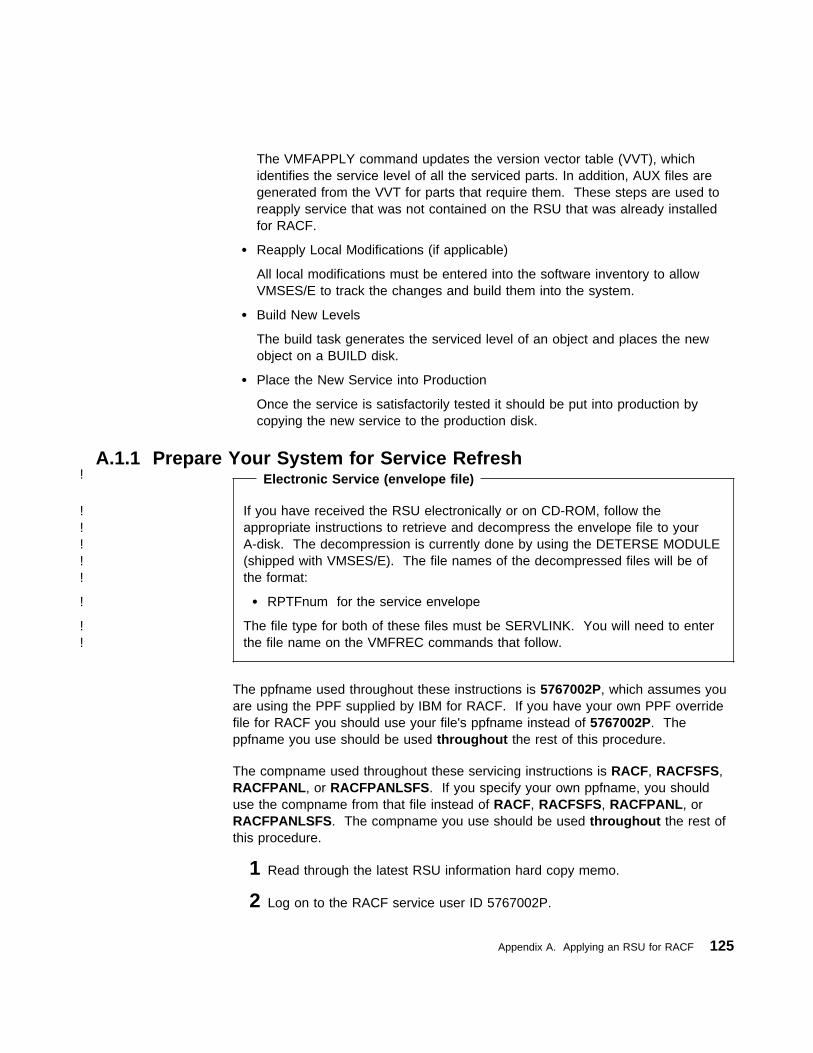
The VMFAPPLY command updates the version vector table (VVT), whichidentifies the service level of all the serviced parts. In addition, AUX files aregenerated from the VVT for parts that require them. These steps are used toreapply service that was not contained on the RSU that was already installedfor RACF.
� Reapply Local Modifications (if applicable)
All local modifications must be entered into the software inventory to allowVMSES/E to track the changes and build them into the system.
� Build New Levels
The build task generates the serviced level of an object and places the newobject on a BUILD disk.
� Place the New Service into Production
Once the service is satisfactorily tested it should be put into production bycopying the new service to the production disk.
A.1.1 Prepare Your System for Service Refresh! Electronic Service (envelope file)
! If you have received the RSU electronically or on CD-ROM, follow the! appropriate instructions to retrieve and decompress the envelope file to your! A-disk. The decompression is currently done by using the DETERSE MODULE! (shipped with VMSES/E). The file names of the decompressed files will be of! the format:
! � RPTFnum for the service envelope
! The file type for both of these files must be SERVLINK. You will need to enter! the file name on the VMFREC commands that follow.
The ppfname used throughout these instructions is 5767002P, which assumes youare using the PPF supplied by IBM for RACF. If you have your own PPF overridefile for RACF you should use your file's ppfname instead of 5767002P. Theppfname you use should be used throughout the rest of this procedure.
The compname used throughout these servicing instructions is RACF, RACFSFS,RACFPANL, or RACFPANLSFS. If you specify your own ppfname, you shoulduse the compname from that file instead of RACF, RACFSFS, RACFPANL, orRACFPANLSFS. The compname you use should be used throughout the rest ofthis procedure.
1 Read through the latest RSU information hard copy memo.
2 Log on to the RACF service user ID 5767002P.
Appendix A. Applying an RSU for RACF 125
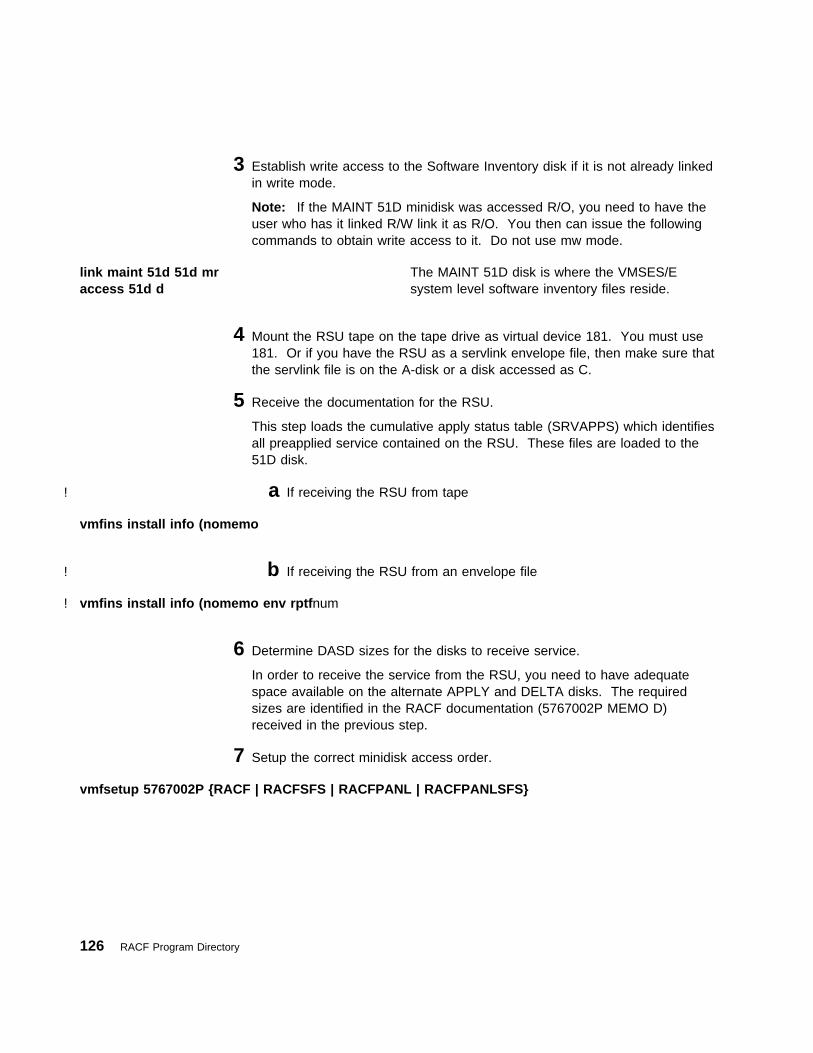
3 Establish write access to the Software Inventory disk if it is not already linkedin write mode.
Note: If the MAINT 51D minidisk was accessed R/O, you need to have theuser who has it linked R/W link it as R/O. You then can issue the followingcommands to obtain write access to it. Do not use mw mode.
link maint 51d 51d mraccess 51d d
The MAINT 51D disk is where the VMSES/Esystem level software inventory files reside.
4 Mount the RSU tape on the tape drive as virtual device 181. You must use181. Or if you have the RSU as a servlink envelope file, then make sure thatthe servlink file is on the A-disk or a disk accessed as C.
5 Receive the documentation for the RSU.
This step loads the cumulative apply status table (SRVAPPS) which identifiesall preapplied service contained on the RSU. These files are loaded to the51D disk.
! a If receiving the RSU from tape
vmfins install info (nomemo
! b If receiving the RSU from an envelope file
! vmfins install info (nomemo env rptfnum
6 Determine DASD sizes for the disks to receive service.
In order to receive the service from the RSU, you need to have adequatespace available on the alternate APPLY and DELTA disks. The requiredsizes are identified in the RACF documentation (5767002P MEMO D)received in the previous step.
7 Setup the correct minidisk access order.
vmfsetup 5767002P {RACF | RACFSFS | RACFPANL | RACFPANLSFS}
126 RACF Program Directory
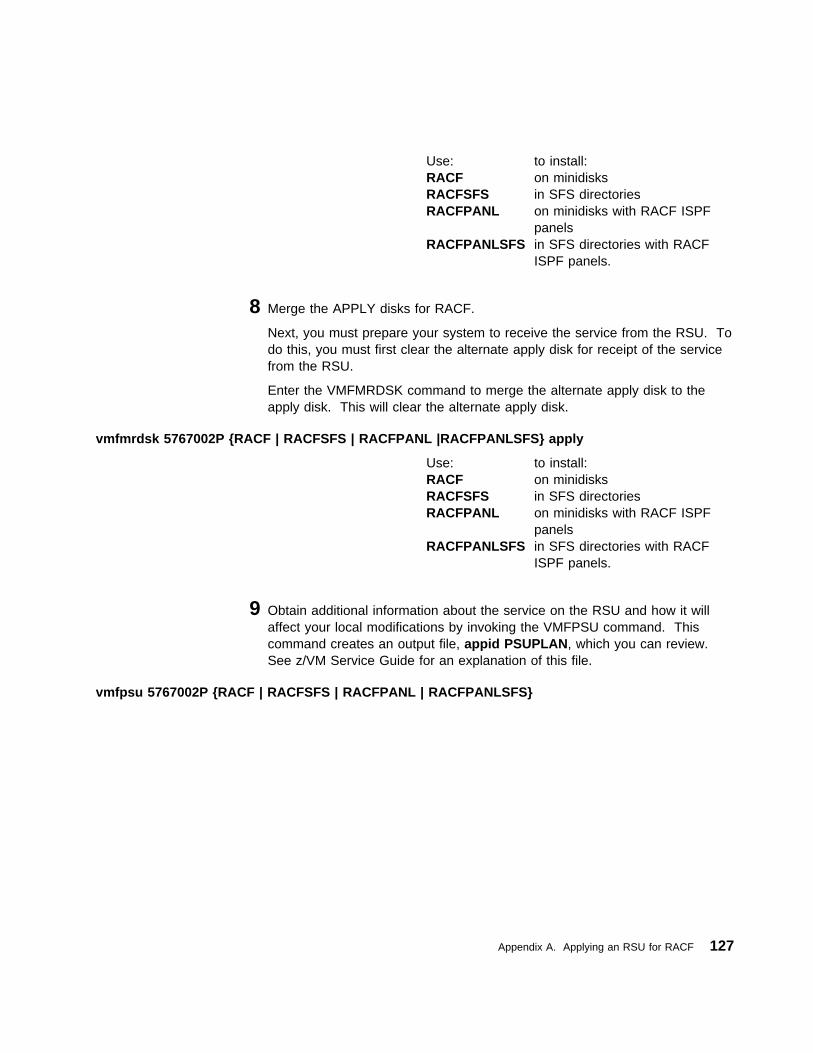
Use: to install:RACF on minidisksRACFSFS in SFS directoriesRACFPANL on minidisks with RACF ISPF
panelsRACFPANLSFS in SFS directories with RACF
ISPF panels.
8 Merge the APPLY disks for RACF.
Next, you must prepare your system to receive the service from the RSU. Todo this, you must first clear the alternate apply disk for receipt of the servicefrom the RSU.
Enter the VMFMRDSK command to merge the alternate apply disk to theapply disk. This will clear the alternate apply disk.
vmfmrdsk 5767002P {RACF | RACFSFS | RACFPANL |RACFPANLSFS} apply
Use: to install:RACF on minidisksRACFSFS in SFS directoriesRACFPANL on minidisks with RACF ISPF
panelsRACFPANLSFS in SFS directories with RACF
ISPF panels.
9 Obtain additional information about the service on the RSU and how it willaffect your local modifications by invoking the VMFPSU command. Thiscommand creates an output file, appid PSUPLAN, which you can review.See z/VM Service Guide for an explanation of this file.
vmfpsu 5767002P {RACF | RACFSFS | RACFPANL | RACFPANLSFS}
Appendix A. Applying an RSU for RACF 127
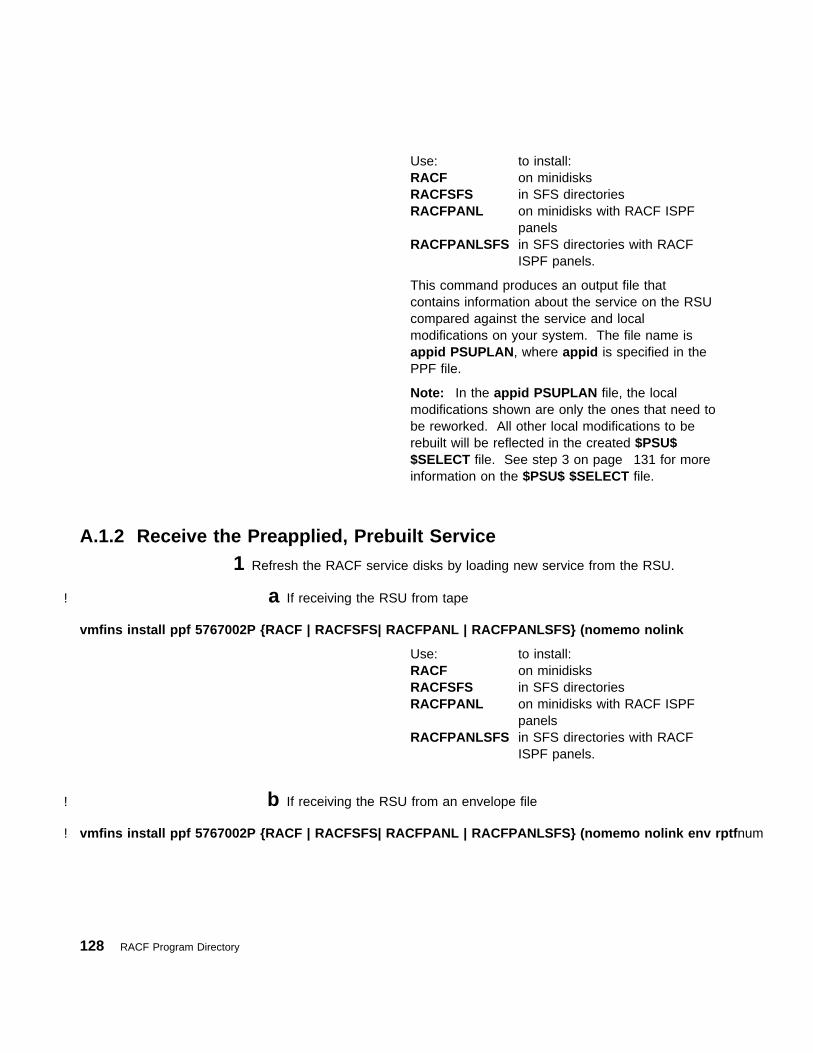
Use: to install:RACF on minidisksRACFSFS in SFS directoriesRACFPANL on minidisks with RACF ISPF
panelsRACFPANLSFS in SFS directories with RACF
ISPF panels.
This command produces an output file thatcontains information about the service on the RSUcompared against the service and localmodifications on your system. The file name isappid PSUPLAN, where appid is specified in thePPF file.
Note: In the appid PSUPLAN file, the localmodifications shown are only the ones that need tobe reworked. All other local modifications to berebuilt will be reflected in the created $PSU$$SELECT file. See step 3 on page 131 for moreinformation on the $PSU$ $SELECT file.
A.1.2 Receive the Preapplied, Prebuilt Service1 Refresh the RACF service disks by loading new service from the RSU.
! a If receiving the RSU from tape
vmfins install ppf 5767002P {RACF | RACFSFS| RACFPANL | RACFPANLSFS} (nomemo nolink
Use: to install:RACF on minidisksRACFSFS in SFS directoriesRACFPANL on minidisks with RACF ISPF
panelsRACFPANLSFS in SFS directories with RACF
ISPF panels.
! b If receiving the RSU from an envelope file
! vmfins install ppf 5767002P {RACF | RACFSFS| RACFPANL | RACFPANLSFS} (nomemo nolink env rptfnum
128 RACF Program Directory
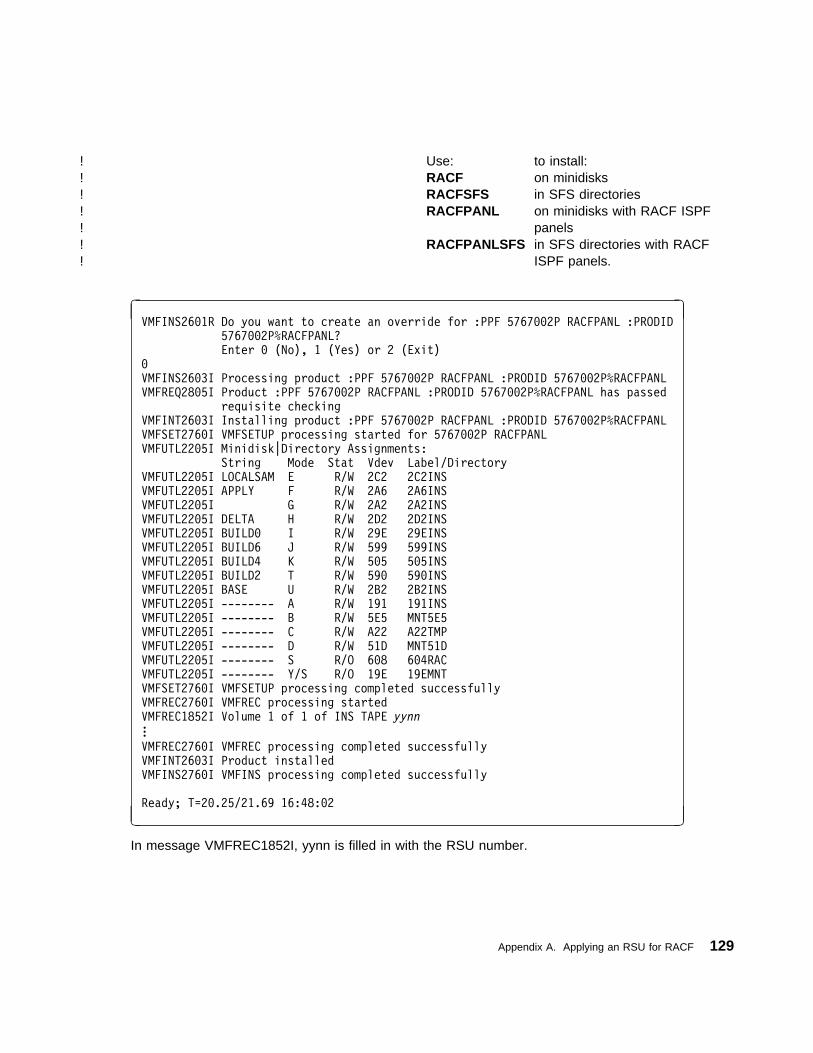
! Use: to install:! RACF on minidisks! RACFSFS in SFS directories! RACFPANL on minidisks with RACF ISPF! panels! RACFPANLSFS in SFS directories with RACF! ISPF panels.
� �VMFINS26�1R Do you want to create an override for :PPF 5767��2P RACFPANL :PRODID
5767��2P%RACFPANL?
Enter � (No), 1 (Yes) or 2 (Exit)
�
VMFINS26�3I Processing product :PPF 5767��2P RACFPANL :PRODID 5767��2P%RACFPANL
VMFREQ28�5I Product :PPF 5767��2P RACFPANL :PRODID 5767��2P%RACFPANL has passed
requisite checking
VMFINT26�3I Installing product :PPF 5767��2P RACFPANL :PRODID 5767��2P%RACFPANL
VMFSET276�I VMFSETUP processing started for 5767��2P RACFPANL
VMFUTL22�5I Minidisk|Directory Assignments:
String Mode Stat Vdev Label/Directory
VMFUTL22�5I LOCALSAM E R/W 2C2 2C2INS
VMFUTL22�5I APPLY F R/W 2A6 2A6INS
VMFUTL22�5I G R/W 2A2 2A2INS
VMFUTL22�5I DELTA H R/W 2D2 2D2INS
VMFUTL22�5I BUILD� I R/W 29E 29EINS
VMFUTL22�5I BUILD6 J R/W 599 599INS
VMFUTL22�5I BUILD4 K R/W 5�5 5�5INS
VMFUTL22�5I BUILD2 T R/W 59� 59�INS
VMFUTL22�5I BASE U R/W 2B2 2B2INS
VMFUTL22�5I -------- A R/W 191 191INS
VMFUTL22�5I -------- B R/W 5E5 MNT5E5
VMFUTL22�5I -------- C R/W A22 A22TMP
VMFUTL22�5I -------- D R/W 51D MNT51D
VMFUTL22�5I -------- S R/O 6�8 6�4RAC
VMFUTL22�5I -------- Y/S R/O 19E 19EMNT
VMFSET276�I VMFSETUP processing completed successfully
VMFREC276�I VMFREC processing started
VMFREC1852I Volume 1 of 1 of INS TAPE yynn...
VMFREC276�I VMFREC processing completed successfully
VMFINT26�3I Product installed
VMFINS276�I VMFINS processing completed successfully
Ready; T=2�.25/21.69 16:48:�2
- .
In message VMFREC1852I, yynn is filled in with the RSU number.
Appendix A. Applying an RSU for RACF 129
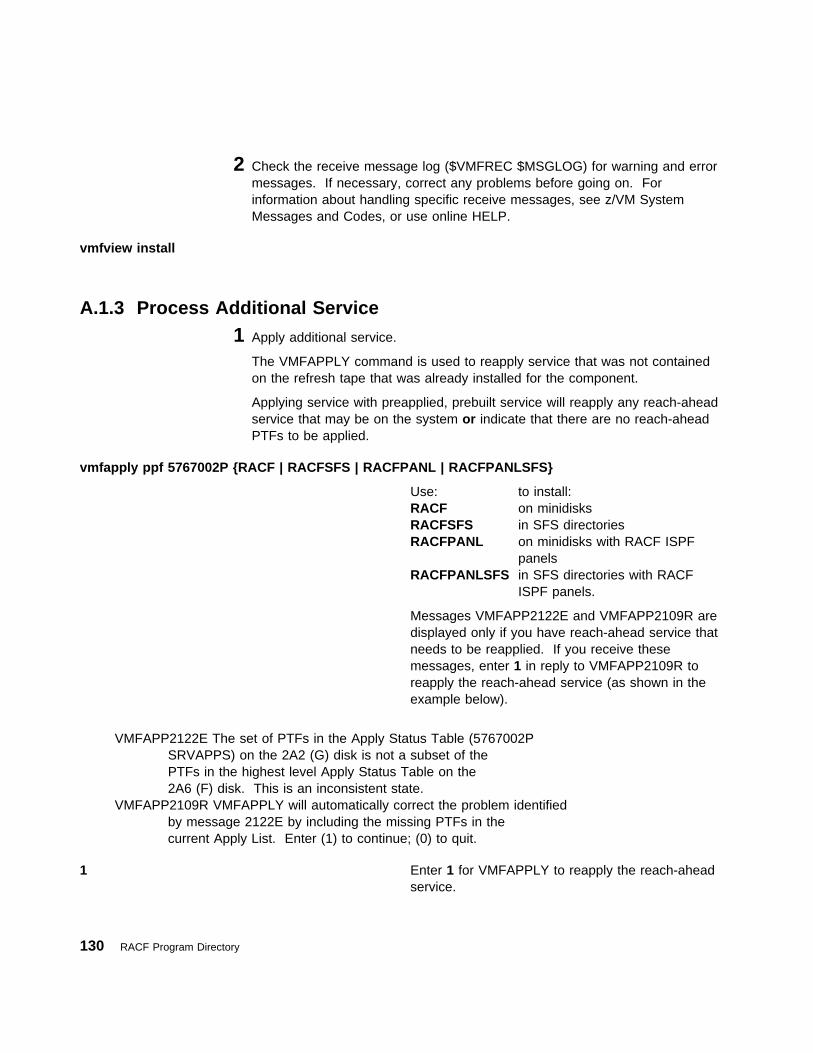
2 Check the receive message log ($VMFREC $MSGLOG) for warning and errormessages. If necessary, correct any problems before going on. Forinformation about handling specific receive messages, see z/VM SystemMessages and Codes, or use online HELP.
vmfview install
A.1.3 Process Additional Service1 Apply additional service.
The VMFAPPLY command is used to reapply service that was not containedon the refresh tape that was already installed for the component.
Applying service with preapplied, prebuilt service will reapply any reach-aheadservice that may be on the system or indicate that there are no reach-aheadPTFs to be applied.
vmfapply ppf 5767002P {RACF | RACFSFS | RACFPANL | RACFPANLSFS}
Use: to install:RACF on minidisksRACFSFS in SFS directoriesRACFPANL on minidisks with RACF ISPF
panelsRACFPANLSFS in SFS directories with RACF
ISPF panels.
Messages VMFAPP2122E and VMFAPP2109R aredisplayed only if you have reach-ahead service thatneeds to be reapplied. If you receive thesemessages, enter 1 in reply to VMFAPP2109R toreapply the reach-ahead service (as shown in theexample below).
VMFAPP2122E The set of PTFs in the Apply Status Table (5767002PSRVAPPS) on the 2A2 (G) disk is not a subset of thePTFs in the highest level Apply Status Table on the2A6 (F) disk. This is an inconsistent state.
VMFAPP2109R VMFAPPLY will automatically correct the problem identifiedby message 2122E by including the missing PTFs in thecurrent Apply List. Enter (1) to continue; (0) to quit.
1 Enter 1 for VMFAPPLY to reapply the reach-aheadservice.
130 RACF Program Directory
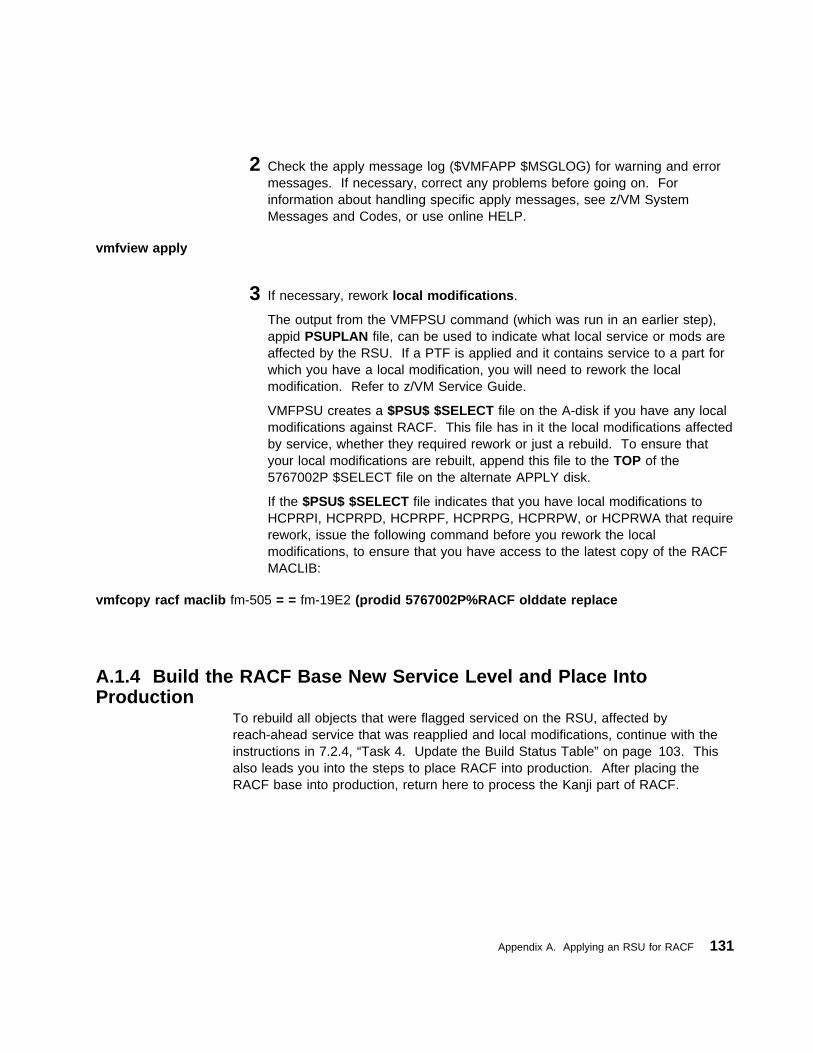
2 Check the apply message log ($VMFAPP $MSGLOG) for warning and errormessages. If necessary, correct any problems before going on. Forinformation about handling specific apply messages, see z/VM SystemMessages and Codes, or use online HELP.
vmfview apply
3 If necessary, rework local modifications.
The output from the VMFPSU command (which was run in an earlier step),appid PSUPLAN file, can be used to indicate what local service or mods areaffected by the RSU. If a PTF is applied and it contains service to a part forwhich you have a local modification, you will need to rework the localmodification. Refer to z/VM Service Guide.
VMFPSU creates a $PSU$ $SELECT file on the A-disk if you have any localmodifications against RACF. This file has in it the local modifications affectedby service, whether they required rework or just a rebuild. To ensure thatyour local modifications are rebuilt, append this file to the TOP of the5767002P $SELECT file on the alternate APPLY disk.
If the $PSU$ $SELECT file indicates that you have local modifications toHCPRPI, HCPRPD, HCPRPF, HCPRPG, HCPRPW, or HCPRWA that requirerework, issue the following command before you rework the localmodifications, to ensure that you have access to the latest copy of the RACFMACLIB:
vmfcopy racf maclib fm-505 = = fm-19E2 (prodid 5767002P%RACF olddate replace
A.1.4 Build the RACF Base New Service Level and Place IntoProduction
To rebuild all objects that were flagged serviced on the RSU, affected byreach-ahead service that was reapplied and local modifications, continue with theinstructions in 7.2.4, “Task 4. Update the Build Status Table” on page 103. Thisalso leads you into the steps to place RACF into production. After placing theRACF base into production, return here to process the Kanji part of RACF.
Appendix A. Applying an RSU for RACF 131
A.1.5 Service the RACF Kanji CodeRefer to the 5767002Q MEMO on the 51D disk, section 'RSU TapeRecommended', to see if there is service for the RACF Kanji ISPF code on theRSU tape. If there is not, you are through with service. Otherwise, continue withA.1.1, “Prepare Your System for Service Refresh” step 7 on page 126, andcontinue until A.1.4, “Build the RACF Base New Service Level and Place IntoProduction” on page 131. Then, to complete the service for the Kanji code, go toA.1.6, “Build the New Kanji Service Level and Place into Production.”
Use the following substitutions in the commands:
� 5767002Q instead of 5767002P for the ppfname
� RACFK (if you are installing on minidisks) or RACFKSFS (if you are installingin SFS directories) instead of RACF or RACFSFS for the compname.
A.1.6 Build the New Kanji Service Level and Place into ProductionTo rebuild all objects that were affected by any RACF Kanji service continue withthe instructions in 7.3.4, “Task 4. Update the Build Status Table” on page 120.This also leads you into the steps to place RACF Kanji ISPF panels into production.
132 RACF Program Directory
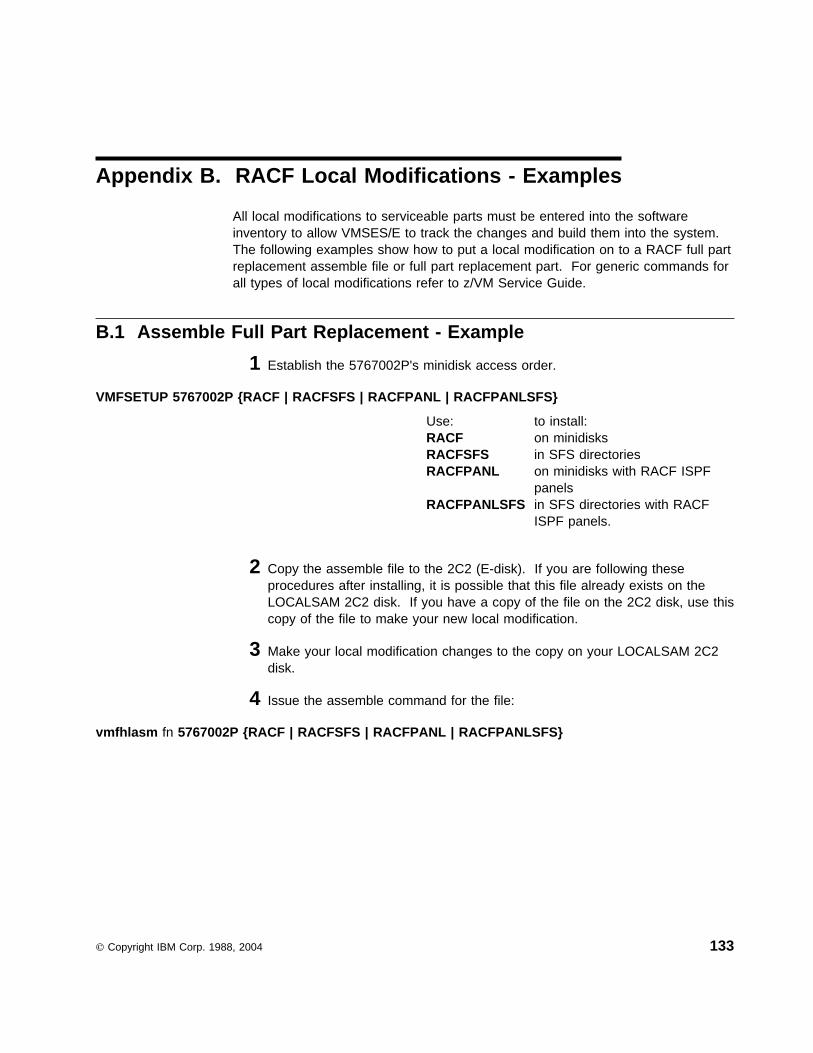
Appendix B. RACF Local Modifications - Examples
All local modifications to serviceable parts must be entered into the softwareinventory to allow VMSES/E to track the changes and build them into the system.The following examples show how to put a local modification on to a RACF full partreplacement assemble file or full part replacement part. For generic commands forall types of local modifications refer to z/VM Service Guide.
B.1 Assemble Full Part Replacement - Example
1 Establish the 5767002P's minidisk access order.
VMFSETUP 5767002P {RACF | RACFSFS | RACFPANL | RACFPANLSFS}
Use: to install:RACF on minidisksRACFSFS in SFS directoriesRACFPANL on minidisks with RACF ISPF
panelsRACFPANLSFS in SFS directories with RACF
ISPF panels.
2 Copy the assemble file to the 2C2 (E-disk). If you are following theseprocedures after installing, it is possible that this file already exists on theLOCALSAM 2C2 disk. If you have a copy of the file on the 2C2 disk, use thiscopy of the file to make your new local modification.
3 Make your local modification changes to the copy on your LOCALSAM 2C2disk.
4 Issue the assemble command for the file:
vmfhlasm fn 5767002P {RACF | RACFSFS | RACFPANL | RACFPANLSFS}
Copyright IBM Corp. 1988, 2004 133
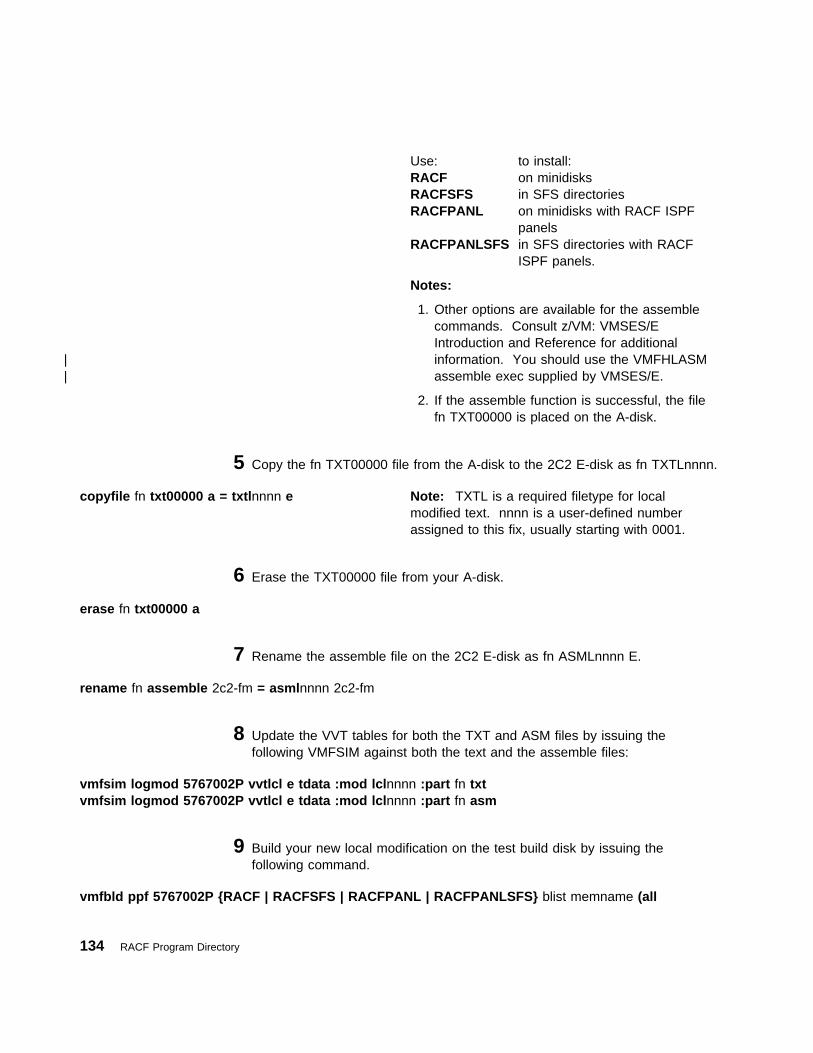
Use: to install:RACF on minidisksRACFSFS in SFS directoriesRACFPANL on minidisks with RACF ISPF
panelsRACFPANLSFS in SFS directories with RACF
ISPF panels.
Notes:
1. Other options are available for the assemblecommands. Consult z/VM: VMSES/EIntroduction and Reference for additional
| information. You should use the VMFHLASM| assemble exec supplied by VMSES/E.
2. If the assemble function is successful, the filefn TXT00000 is placed on the A-disk.
5 Copy the fn TXT00000 file from the A-disk to the 2C2 E-disk as fn TXTLnnnn.
copyfile fn txt00000 a = txtlnnnn e Note: TXTL is a required filetype for localmodified text. nnnn is a user-defined numberassigned to this fix, usually starting with 0001.
6 Erase the TXT00000 file from your A-disk.
erase fn txt00000 a
7 Rename the assemble file on the 2C2 E-disk as fn ASMLnnnn E.
rename fn assemble 2c2-fm = asmlnnnn 2c2-fm
8 Update the VVT tables for both the TXT and ASM files by issuing thefollowing VMFSIM against both the text and the assemble files:
vmfsim logmod 5767002P vvtlcl e tdata :mod lclnnnn :part fn txtvmfsim logmod 5767002P vvtlcl e tdata :mod lclnnnn :part fn asm
9 Build your new local modification on the test build disk by issuing thefollowing command.
vmfbld ppf 5767002P {RACF | RACFSFS | RACFPANL | RACFPANLSFS} blist memname (all
134 RACF Program Directory
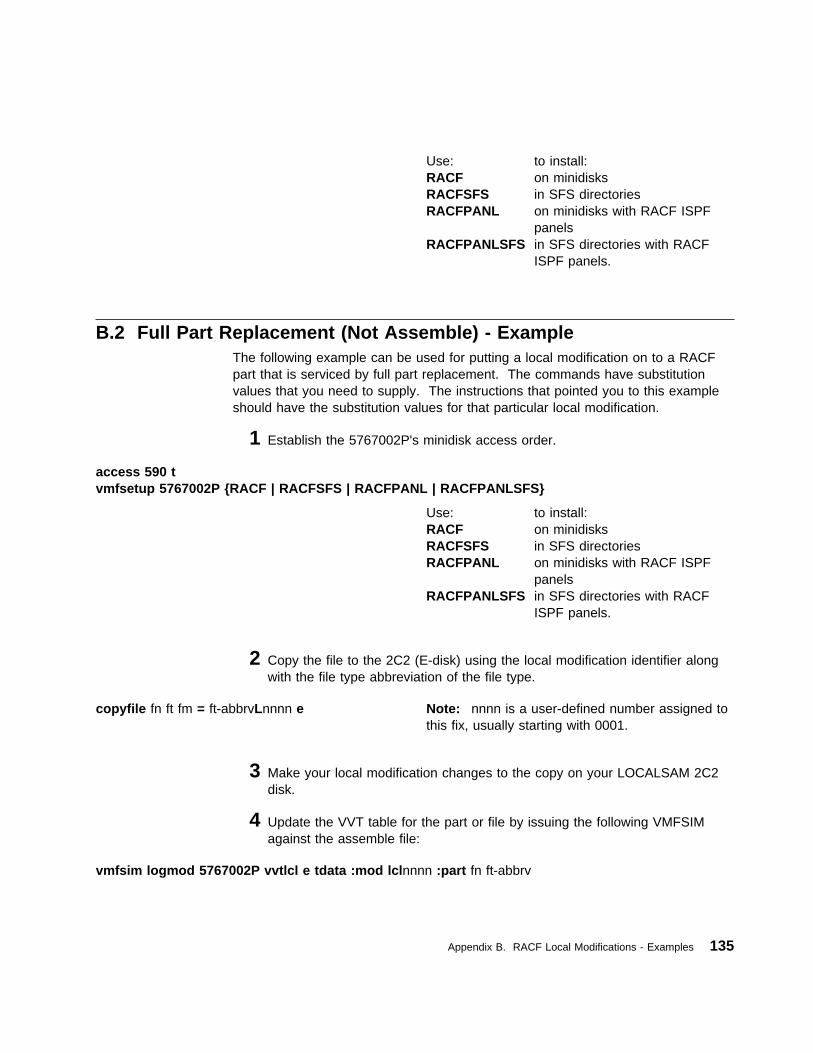
Use: to install:RACF on minidisksRACFSFS in SFS directoriesRACFPANL on minidisks with RACF ISPF
panelsRACFPANLSFS in SFS directories with RACF
ISPF panels.
B.2 Full Part Replacement (Not Assemble) - ExampleThe following example can be used for putting a local modification on to a RACFpart that is serviced by full part replacement. The commands have substitutionvalues that you need to supply. The instructions that pointed you to this exampleshould have the substitution values for that particular local modification.
1 Establish the 5767002P's minidisk access order.
access 590 tvmfsetup 5767002P {RACF | RACFSFS | RACFPANL | RACFPANLSFS}
Use: to install:RACF on minidisksRACFSFS in SFS directoriesRACFPANL on minidisks with RACF ISPF
panelsRACFPANLSFS in SFS directories with RACF
ISPF panels.
2 Copy the file to the 2C2 (E-disk) using the local modification identifier alongwith the file type abbreviation of the file type.
copyfile fn ft fm = ft-abbrvLnnnn e Note: nnnn is a user-defined number assigned tothis fix, usually starting with 0001.
3 Make your local modification changes to the copy on your LOCALSAM 2C2disk.
4 Update the VVT table for the part or file by issuing the following VMFSIMagainst the assemble file:
vmfsim logmod 5767002P vvtlcl e tdata :mod lclnnnn :part fn ft-abbrv
Appendix B. RACF Local Modifications - Examples 135
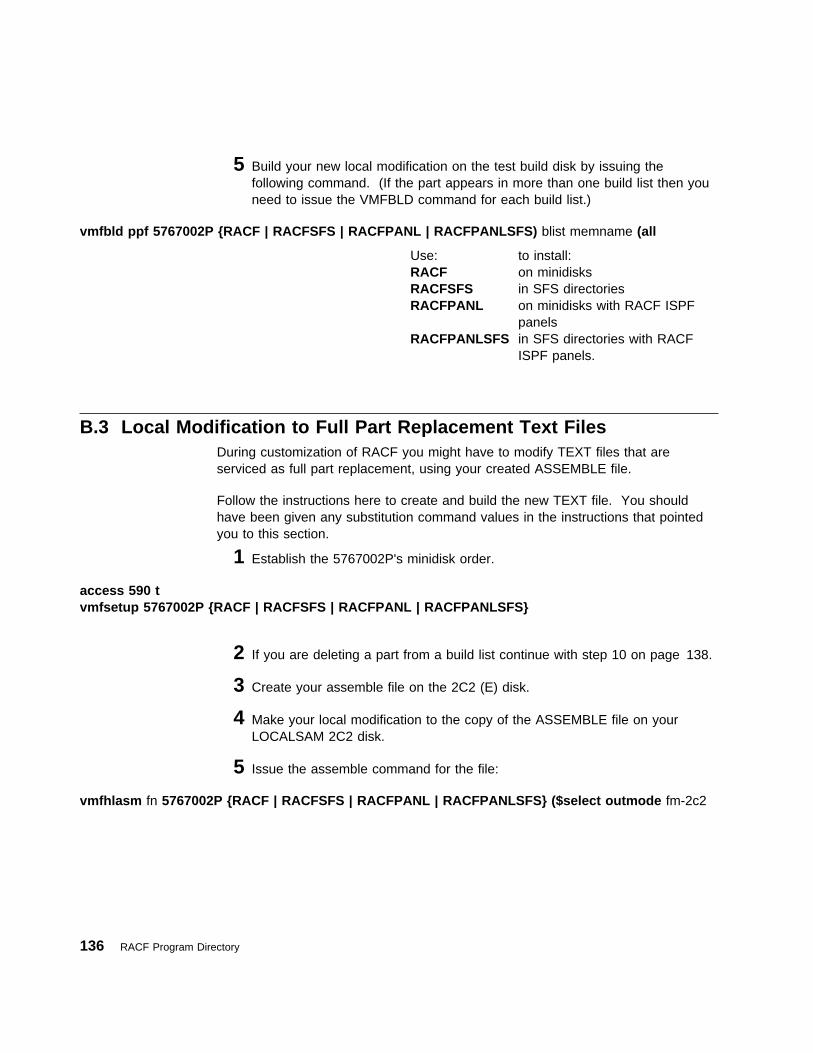
5 Build your new local modification on the test build disk by issuing thefollowing command. (If the part appears in more than one build list then youneed to issue the VMFBLD command for each build list.)
vmfbld ppf 5767002P {RACF | RACFSFS | RACFPANL | RACFPANLSFS) blist memname (all
Use: to install:RACF on minidisksRACFSFS in SFS directoriesRACFPANL on minidisks with RACF ISPF
panelsRACFPANLSFS in SFS directories with RACF
ISPF panels.
B.3 Local Modification to Full Part Replacement Text FilesDuring customization of RACF you might have to modify TEXT files that areserviced as full part replacement, using your created ASSEMBLE file.
Follow the instructions here to create and build the new TEXT file. You shouldhave been given any substitution command values in the instructions that pointedyou to this section.
1 Establish the 5767002P's minidisk order.
access 590 tvmfsetup 5767002P {RACF | RACFSFS | RACFPANL | RACFPANLSFS}
2 If you are deleting a part from a build list continue with step 10 on page 138.
3 Create your assemble file on the 2C2 (E) disk.
4 Make your local modification to the copy of the ASSEMBLE file on yourLOCALSAM 2C2 disk.
5 Issue the assemble command for the file:
vmfhlasm fn 5767002P {RACF | RACFSFS | RACFPANL | RACFPANLSFS} ($select outmode fm-2c2
136 RACF Program Directory

Use RACF for installing on minidisks or RACFSFSfor installing in shared file system directories ORRACFPANL for installing on minidisks with RACFISPF panels or RACFPANLSFS for installing inshared file system directories with RACF ISPFpanels.
Notes:
1. Other options are available for the assemblecommands. Consult z/VM: VMSES/EIntroduction and Reference for additional
| information. You should use the VMFHLASM| assemble exec supplied by VMSES/E.
2. If the assemble function is successful, the filefn TXT00000 is placed on the LOCALSAM 2C2(E) disk.
6 Rename the fn TXT00000 file on the 2C2 E-disk to fn TXTLnnnn.
rename fn txt00000 2c2-fm fn txtlnnnn 2c2-fm Note: TXTL is a required filetype for localmodified text. nnnn is a user-defined numberassigned to this fix.
7 Update the VVT tables for both TEXT (TXT) file by issuing the followingVMFSIM command against the text file:
vmfsim logmod 5767002P vvtlcl 2c2-fm tdata :mod lclnnnn :part fn txt
8 Build your new local modification on the test build disk.
vmfbld ppf 5767002P {RACF | RACFSFS | RACFPANL | RACFPANLSFS} (serviced
Use: to install:RACF on minidisksRACFSFS in SFS directoriesRACFPANL on minidisks with RACF ISPF
panelsRACFPANLSFS in SFS directories with RACF
ISPF panels.
9 Continue with step 13 on page 139.
Appendix B. RACF Local Modifications - Examples 137
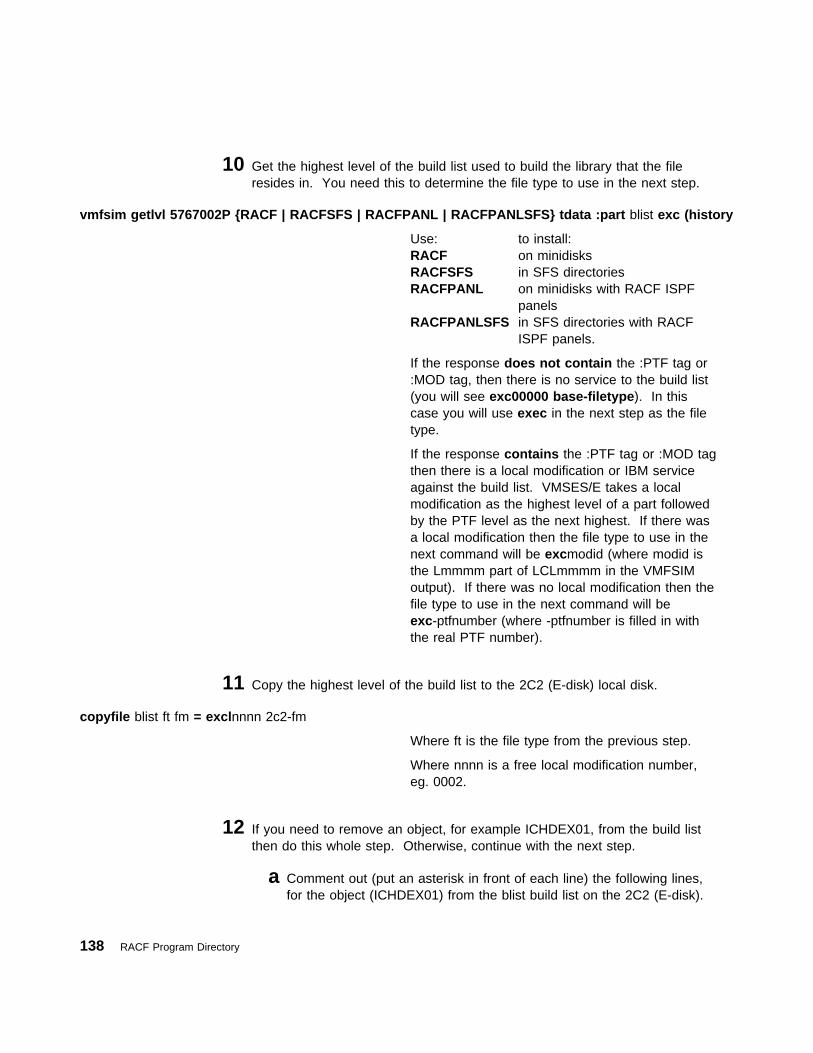
10 Get the highest level of the build list used to build the library that the fileresides in. You need this to determine the file type to use in the next step.
vmfsim getlvl 5767002P {RACF | RACFSFS | RACFPANL | RACFPANLSFS} tdata :part blist exc (history
Use: to install:RACF on minidisksRACFSFS in SFS directoriesRACFPANL on minidisks with RACF ISPF
panelsRACFPANLSFS in SFS directories with RACF
ISPF panels.
If the response does not contain the :PTF tag or:MOD tag, then there is no service to the build list(you will see exc00000 base-filetype). In thiscase you will use exec in the next step as the filetype.
If the response contains the :PTF tag or :MOD tagthen there is a local modification or IBM serviceagainst the build list. VMSES/E takes a localmodification as the highest level of a part followedby the PTF level as the next highest. If there wasa local modification then the file type to use in thenext command will be excmodid (where modid isthe Lmmmm part of LCLmmmm in the VMFSIMoutput). If there was no local modification then thefile type to use in the next command will beexc-ptfnumber (where -ptfnumber is filled in withthe real PTF number).
11 Copy the highest level of the build list to the 2C2 (E-disk) local disk.
copyfile blist ft fm = exclnnnn 2c2-fm
Where ft is the file type from the previous step.
Where nnnn is a free local modification number,eg. 0002.
12 If you need to remove an object, for example ICHDEX01, from the build listthen do this whole step. Otherwise, continue with the next step.
a Comment out (put an asterisk in front of each line) the following lines,for the object (ICHDEX01) from the blist build list on the 2C2 (E-disk).
138 RACF Program Directory
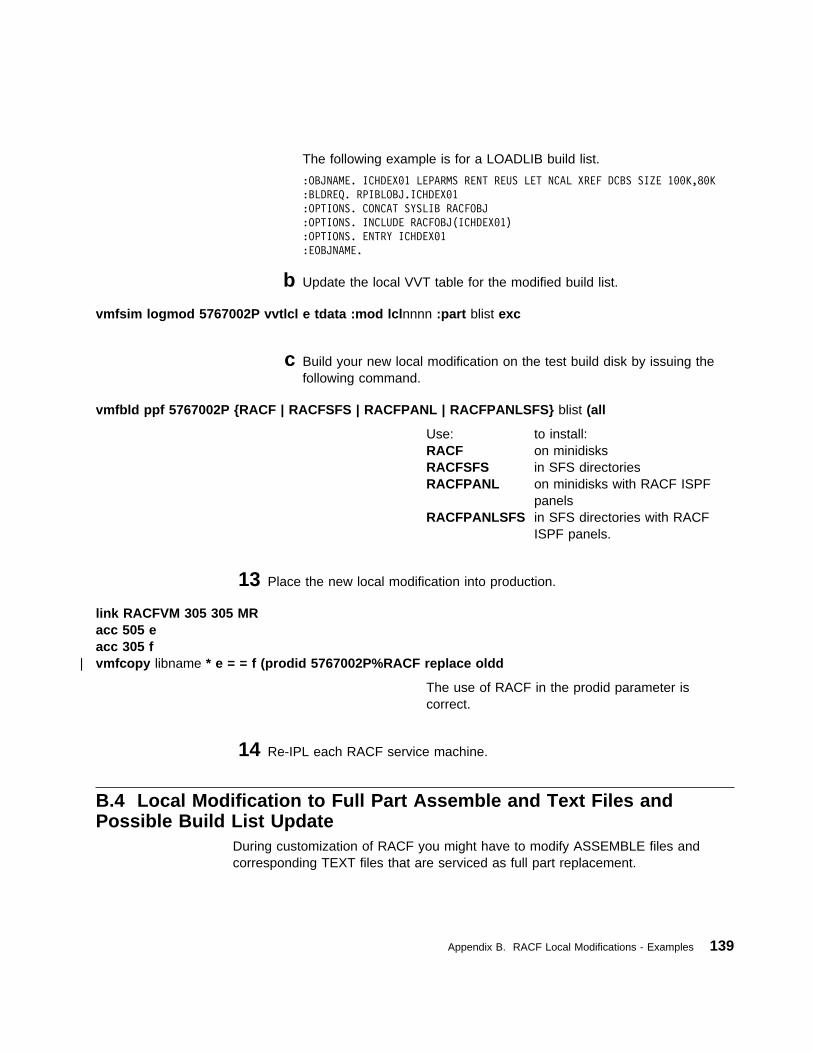
The following example is for a LOADLIB build list.
:OBJNAME. ICHDEX�1 LEPARMS RENT REUS LET NCAL XREF DCBS SIZE 1��K,8�K
:BLDREQ. RPIBLOBJ.ICHDEX�1
:OPTIONS. CONCAT SYSLIB RACFOBJ
:OPTIONS. INCLUDE RACFOBJ(ICHDEX�1)
:OPTIONS. ENTRY ICHDEX�1
:EOBJNAME.
b Update the local VVT table for the modified build list.
vmfsim logmod 5767002P vvtlcl e tdata :mod lclnnnn :part blist exc
c Build your new local modification on the test build disk by issuing thefollowing command.
vmfbld ppf 5767002P {RACF | RACFSFS | RACFPANL | RACFPANLSFS} blist (all
Use: to install:RACF on minidisksRACFSFS in SFS directoriesRACFPANL on minidisks with RACF ISPF
panelsRACFPANLSFS in SFS directories with RACF
ISPF panels.
13 Place the new local modification into production.
link RACFVM 305 305 MRacc 505 eacc 305 f
| vmfcopy libname * e = = f (prodid 5767002P%RACF replace oldd
The use of RACF in the prodid parameter iscorrect.
14 Re-IPL each RACF service machine.
B.4 Local Modification to Full Part Assemble and Text Files andPossible Build List Update
During customization of RACF you might have to modify ASSEMBLE files andcorresponding TEXT files that are serviced as full part replacement.
Appendix B. RACF Local Modifications - Examples 139
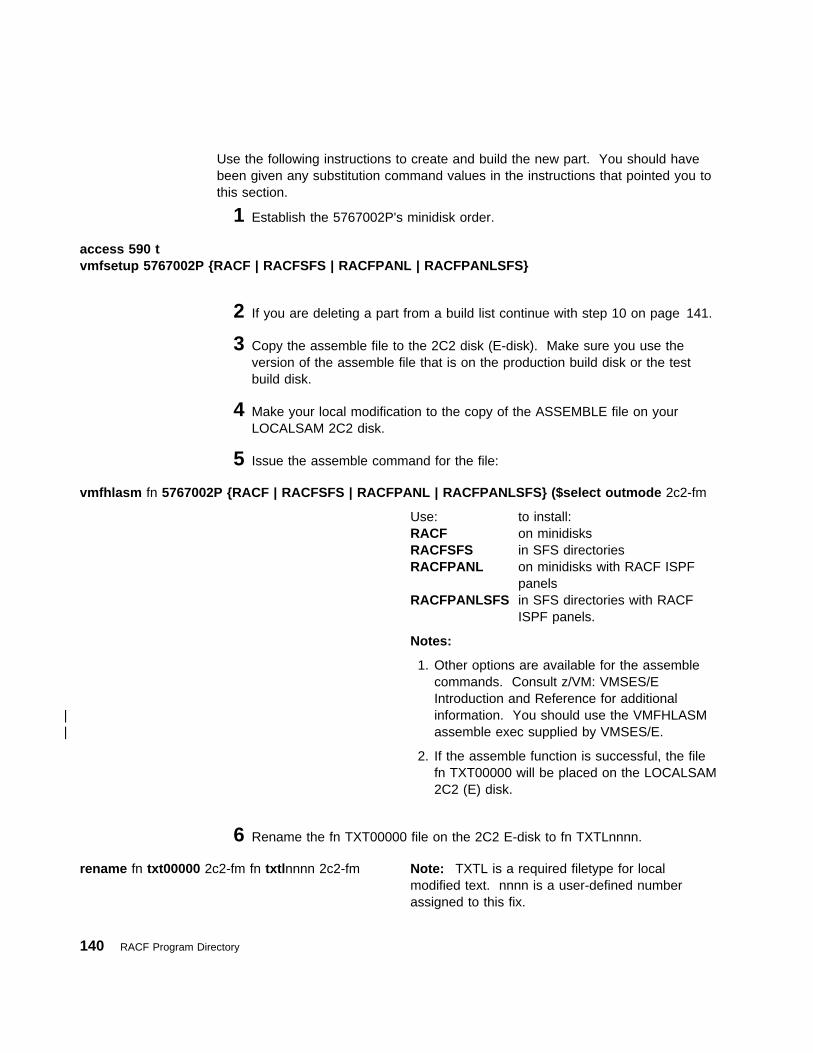
Use the following instructions to create and build the new part. You should havebeen given any substitution command values in the instructions that pointed you tothis section.
1 Establish the 5767002P's minidisk order.
access 590 tvmfsetup 5767002P {RACF | RACFSFS | RACFPANL | RACFPANLSFS}
2 If you are deleting a part from a build list continue with step 10 on page 141.
3 Copy the assemble file to the 2C2 disk (E-disk). Make sure you use theversion of the assemble file that is on the production build disk or the testbuild disk.
4 Make your local modification to the copy of the ASSEMBLE file on yourLOCALSAM 2C2 disk.
5 Issue the assemble command for the file:
vmfhlasm fn 5767002P {RACF | RACFSFS | RACFPANL | RACFPANLSFS} ($select outmode 2c2-fm
Use: to install:RACF on minidisksRACFSFS in SFS directoriesRACFPANL on minidisks with RACF ISPF
panelsRACFPANLSFS in SFS directories with RACF
ISPF panels.
Notes:
1. Other options are available for the assemblecommands. Consult z/VM: VMSES/EIntroduction and Reference for additional
| information. You should use the VMFHLASM| assemble exec supplied by VMSES/E.
2. If the assemble function is successful, the filefn TXT00000 will be placed on the LOCALSAM2C2 (E) disk.
6 Rename the fn TXT00000 file on the 2C2 E-disk to fn TXTLnnnn.
rename fn txt00000 2c2-fm fn txtlnnnn 2c2-fm Note: TXTL is a required filetype for localmodified text. nnnn is a user-defined numberassigned to this fix.
140 RACF Program Directory
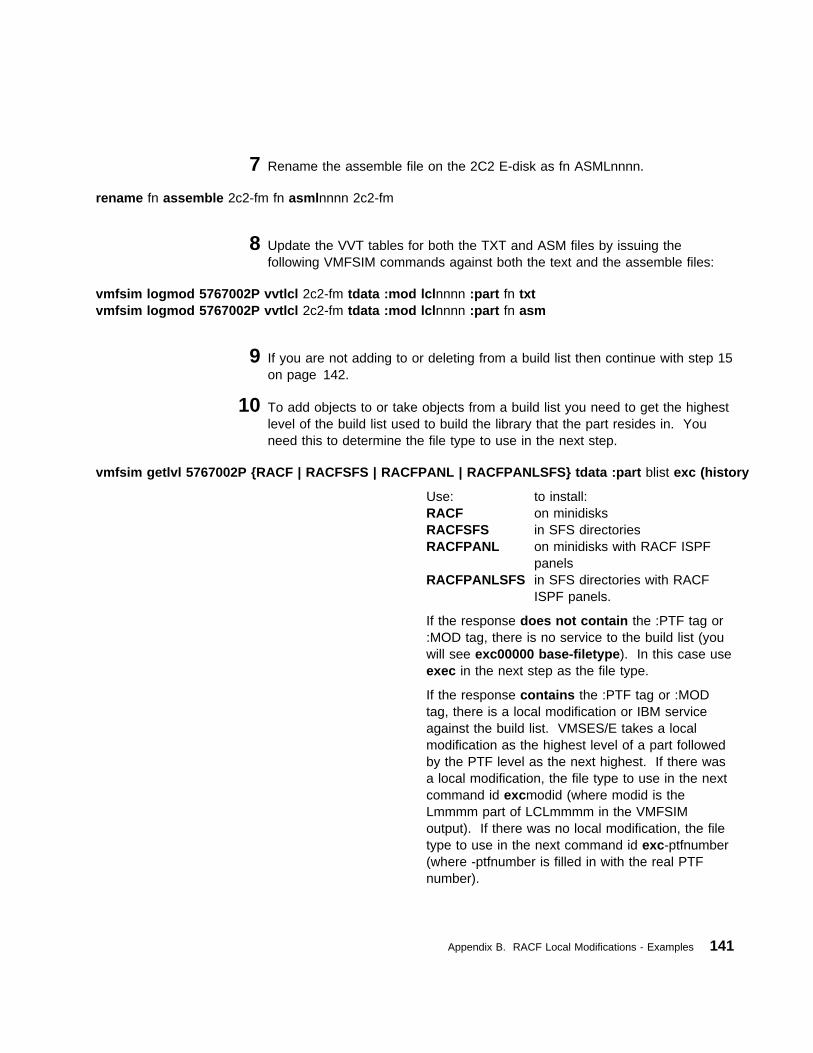
7 Rename the assemble file on the 2C2 E-disk as fn ASMLnnnn.
rename fn assemble 2c2-fm fn asmlnnnn 2c2-fm
8 Update the VVT tables for both the TXT and ASM files by issuing thefollowing VMFSIM commands against both the text and the assemble files:
vmfsim logmod 5767002P vvtlcl 2c2-fm tdata :mod lclnnnn :part fn txtvmfsim logmod 5767002P vvtlcl 2c2-fm tdata :mod lclnnnn :part fn asm
9 If you are not adding to or deleting from a build list then continue with step 15on page 142.
10 To add objects to or take objects from a build list you need to get the highestlevel of the build list used to build the library that the part resides in. Youneed this to determine the file type to use in the next step.
vmfsim getlvl 5767002P {RACF | RACFSFS | RACFPANL | RACFPANLSFS} tdata :part blist exc (history
Use: to install:RACF on minidisksRACFSFS in SFS directoriesRACFPANL on minidisks with RACF ISPF
panelsRACFPANLSFS in SFS directories with RACF
ISPF panels.
If the response does not contain the :PTF tag or:MOD tag, there is no service to the build list (youwill see exc00000 base-filetype). In this case useexec in the next step as the file type.
If the response contains the :PTF tag or :MODtag, there is a local modification or IBM serviceagainst the build list. VMSES/E takes a localmodification as the highest level of a part followedby the PTF level as the next highest. If there wasa local modification, the file type to use in the nextcommand id excmodid (where modid is theLmmmm part of LCLmmmm in the VMFSIMoutput). If there was no local modification, the filetype to use in the next command id exc-ptfnumber(where -ptfnumber is filled in with the real PTFnumber).
Appendix B. RACF Local Modifications - Examples 141
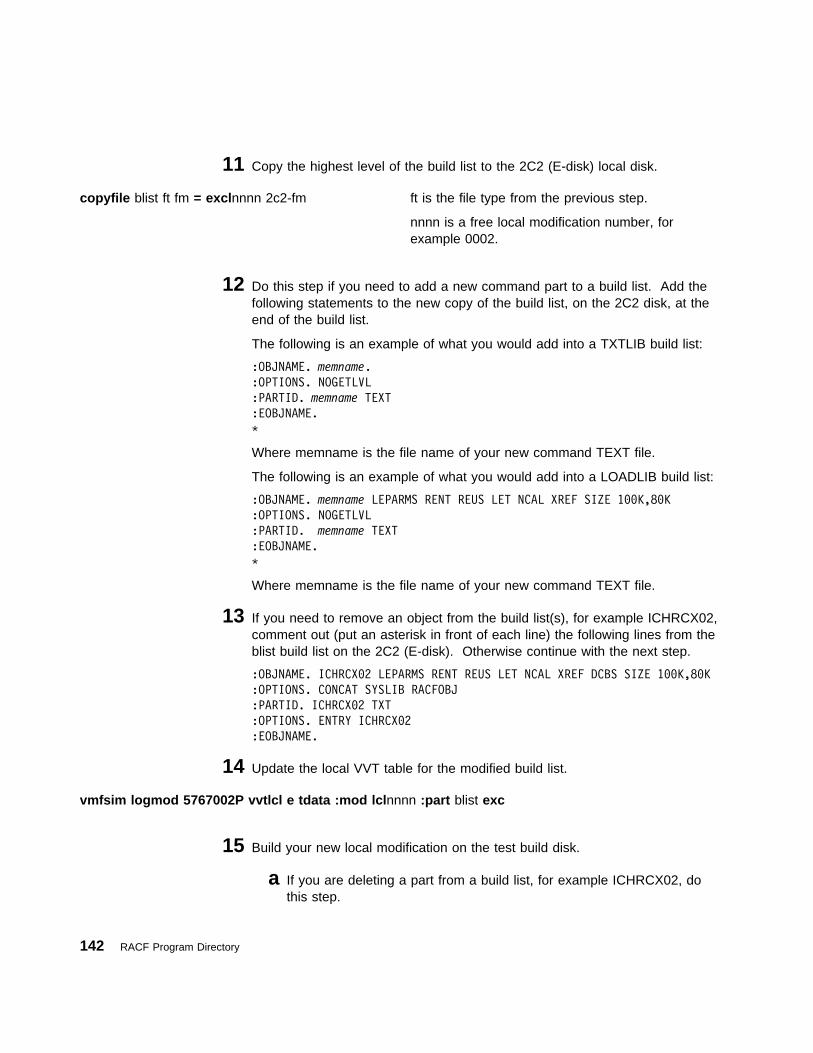
11 Copy the highest level of the build list to the 2C2 (E-disk) local disk.
copyfile blist ft fm = exclnnnn 2c2-fm ft is the file type from the previous step.
nnnn is a free local modification number, forexample 0002.
12 Do this step if you need to add a new command part to a build list. Add thefollowing statements to the new copy of the build list, on the 2C2 disk, at theend of the build list.
The following is an example of what you would add into a TXTLIB build list:
:OBJNAME. memname.:OPTIONS. NOGETLVL
:PARTID. memname TEXT:EOBJNAME.
J
Where memname is the file name of your new command TEXT file.
The following is an example of what you would add into a LOADLIB build list:
:OBJNAME. memname LEPARMS RENT REUS LET NCAL XREF SIZE 1��K,8�K:OPTIONS. NOGETLVL
:PARTID. memname TEXT
:EOBJNAME.
J
Where memname is the file name of your new command TEXT file.
13 If you need to remove an object from the build list(s), for example ICHRCX02,comment out (put an asterisk in front of each line) the following lines from theblist build list on the 2C2 (E-disk). Otherwise continue with the next step.
:OBJNAME. ICHRCX�2 LEPARMS RENT REUS LET NCAL XREF DCBS SIZE 1��K,8�K
:OPTIONS. CONCAT SYSLIB RACFOBJ
:PARTID. ICHRCX�2 TXT
:OPTIONS. ENTRY ICHRCX�2
:EOBJNAME.
14 Update the local VVT table for the modified build list.
vmfsim logmod 5767002P vvtlcl e tdata :mod lclnnnn :part blist exc
15 Build your new local modification on the test build disk.
a If you are deleting a part from a build list, for example ICHRCX02, dothis step.
142 RACF Program Directory
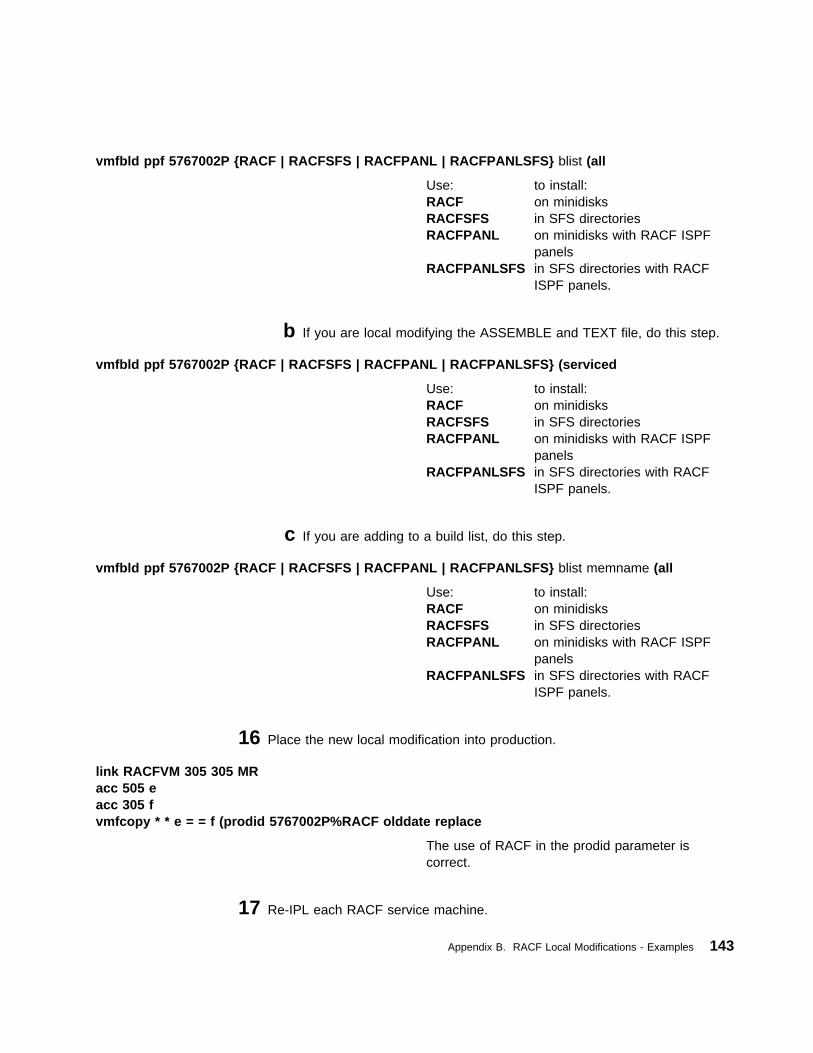
vmfbld ppf 5767002P {RACF | RACFSFS | RACFPANL | RACFPANLSFS} blist (all
Use: to install:RACF on minidisksRACFSFS in SFS directoriesRACFPANL on minidisks with RACF ISPF
panelsRACFPANLSFS in SFS directories with RACF
ISPF panels.
b If you are local modifying the ASSEMBLE and TEXT file, do this step.
vmfbld ppf 5767002P {RACF | RACFSFS | RACFPANL | RACFPANLSFS} (serviced
Use: to install:RACF on minidisksRACFSFS in SFS directoriesRACFPANL on minidisks with RACF ISPF
panelsRACFPANLSFS in SFS directories with RACF
ISPF panels.
c If you are adding to a build list, do this step.
vmfbld ppf 5767002P {RACF | RACFSFS | RACFPANL | RACFPANLSFS} blist memname (all
Use: to install:RACF on minidisksRACFSFS in SFS directoriesRACFPANL on minidisks with RACF ISPF
panelsRACFPANLSFS in SFS directories with RACF
ISPF panels.
16 Place the new local modification into production.
link RACFVM 305 305 MRacc 505 eacc 305 fvmfcopy * * e = = f (prodid 5767002P%RACF olddate replace
The use of RACF in the prodid parameter iscorrect.
17 Re-IPL each RACF service machine.
Appendix B. RACF Local Modifications - Examples 143
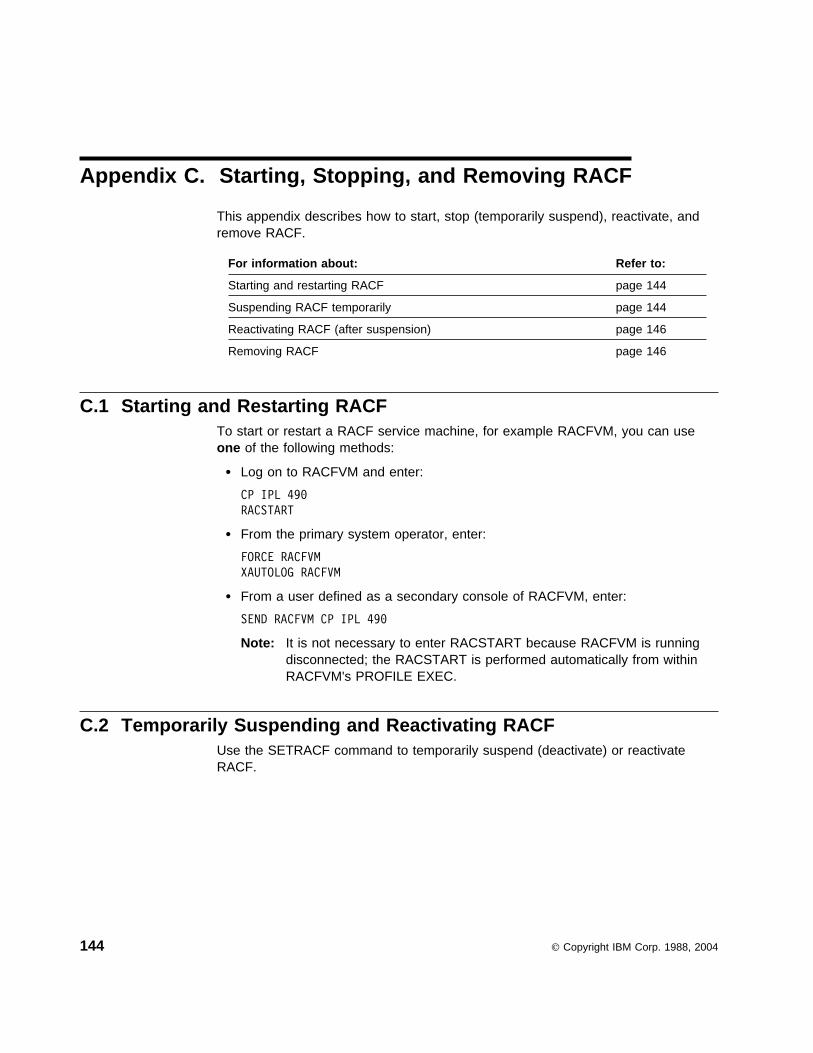
Appendix C. Starting, Stopping, and Removing RACF
This appendix describes how to start, stop (temporarily suspend), reactivate, andremove RACF.
For information about: Refer to:
Starting and restarting RACF page 144
Suspending RACF temporarily page 144
Reactivating RACF (after suspension) page 146
Removing RACF page 146
C.1 Starting and Restarting RACFTo start or restart a RACF service machine, for example RACFVM, you can useone of the following methods:
� Log on to RACFVM and enter:
CP IPL 49�
RACSTART
� From the primary system operator, enter:
FORCE RACFVM
XAUTOLOG RACFVM
� From a user defined as a secondary console of RACFVM, enter:
SEND RACFVM CP IPL 49�
Note: It is not necessary to enter RACSTART because RACFVM is runningdisconnected; the RACSTART is performed automatically from withinRACFVM's PROFILE EXEC.
C.2 Temporarily Suspending and Reactivating RACFUse the SETRACF command to temporarily suspend (deactivate) or reactivateRACF.
144 Copyright IBM Corp. 1988, 2004
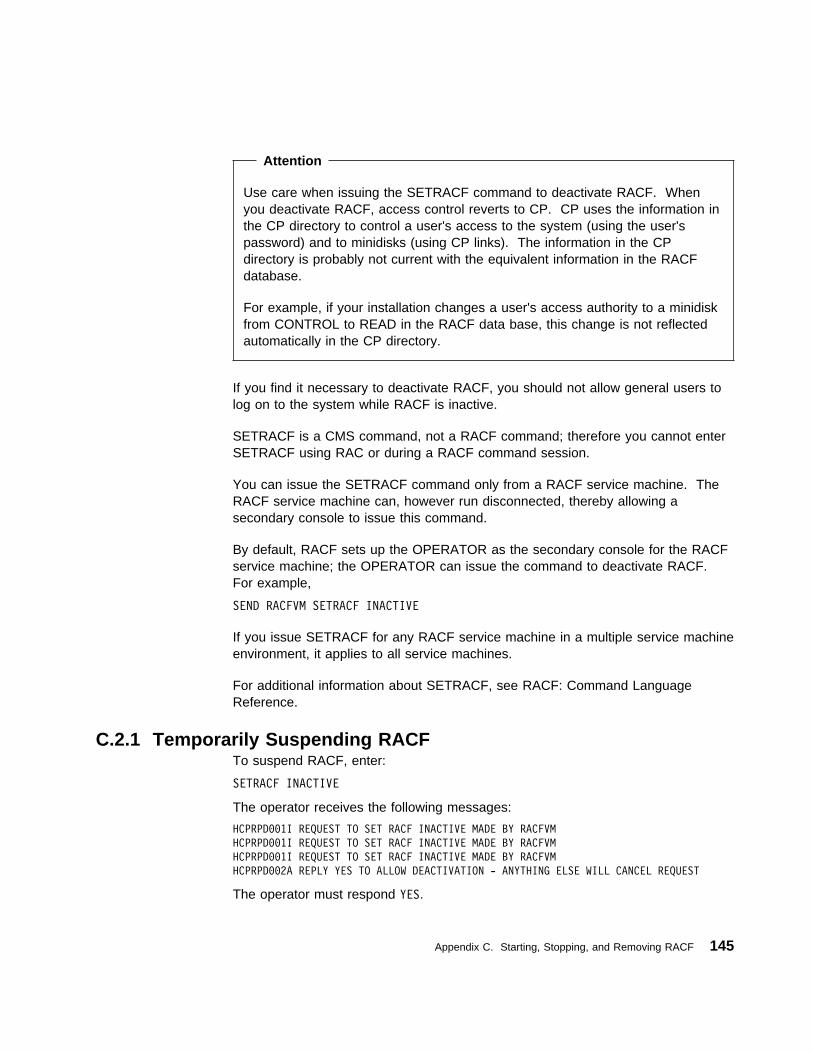
Attention
Use care when issuing the SETRACF command to deactivate RACF. Whenyou deactivate RACF, access control reverts to CP. CP uses the information inthe CP directory to control a user's access to the system (using the user'spassword) and to minidisks (using CP links). The information in the CPdirectory is probably not current with the equivalent information in the RACFdatabase.
For example, if your installation changes a user's access authority to a minidiskfrom CONTROL to READ in the RACF data base, this change is not reflectedautomatically in the CP directory.
If you find it necessary to deactivate RACF, you should not allow general users tolog on to the system while RACF is inactive.
SETRACF is a CMS command, not a RACF command; therefore you cannot enterSETRACF using RAC or during a RACF command session.
You can issue the SETRACF command only from a RACF service machine. TheRACF service machine can, however run disconnected, thereby allowing asecondary console to issue this command.
By default, RACF sets up the OPERATOR as the secondary console for the RACFservice machine; the OPERATOR can issue the command to deactivate RACF.For example,
SEND RACFVM SETRACF INACTIVE
If you issue SETRACF for any RACF service machine in a multiple service machineenvironment, it applies to all service machines.
For additional information about SETRACF, see RACF: Command LanguageReference.
C.2.1 Temporarily Suspending RACFTo suspend RACF, enter:
SETRACF INACTIVE
The operator receives the following messages:
HCPRPD��1I REQUEST TO SET RACF INACTIVE MADE BY RACFVM
HCPRPD��1I REQUEST TO SET RACF INACTIVE MADE BY RACFVM
HCPRPD��1I REQUEST TO SET RACF INACTIVE MADE BY RACFVM
HCPRPD��2A REPLY YES TO ALLOW DEACTIVATION - ANYTHING ELSE WILL CANCEL REQUEST
The operator must respond YES.
Appendix C. Starting, Stopping, and Removing RACF 145
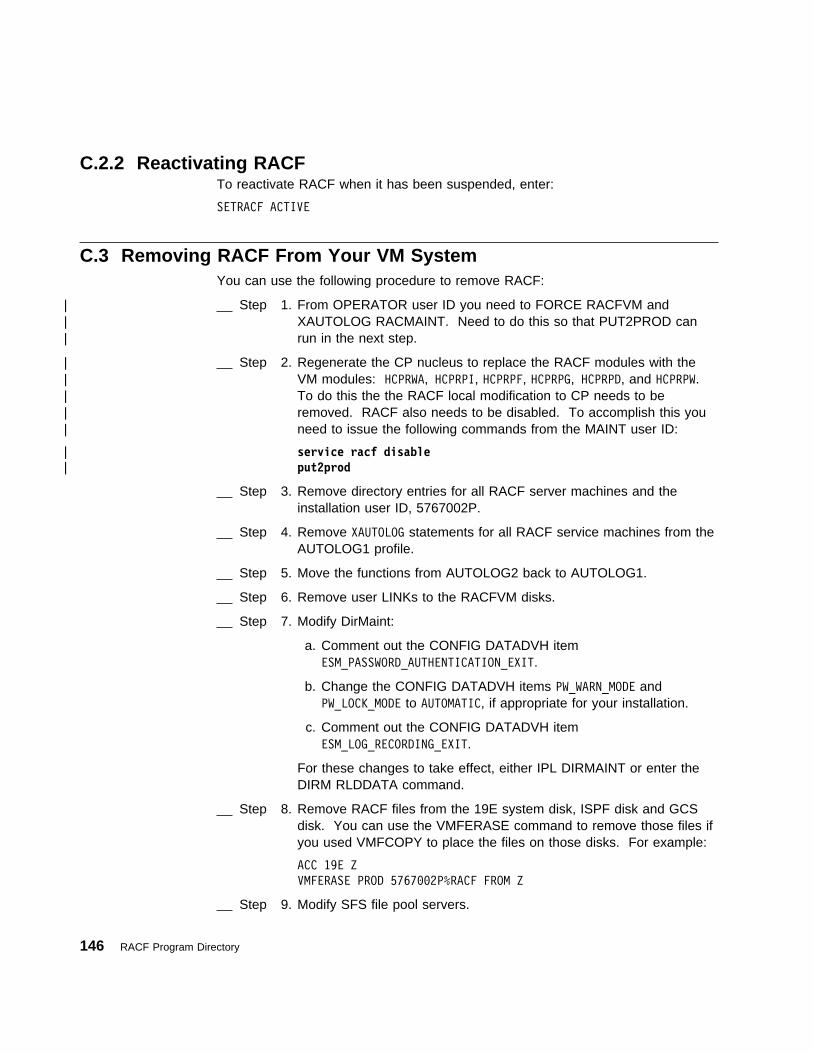
C.2.2 Reactivating RACFTo reactivate RACF when it has been suspended, enter:
SETRACF ACTIVE
C.3 Removing RACF From Your VM SystemYou can use the following procedure to remove RACF:
| Step 1. From OPERATOR user ID you need to FORCE RACFVM and| XAUTOLOG RACMAINT. Need to do this so that PUT2PROD can| run in the next step.
| Step 2. Regenerate the CP nucleus to replace the RACF modules with the| VM modules: HCPRWA, HCPRPI, HCPRPF, HCPRPG, HCPRPD, and HCPRPW.| To do this the the RACF local modification to CP needs to be| removed. RACF also needs to be disabled. To accomplish this you| need to issue the following commands from the MAINT user ID:
| service racf disable| put2prod
Step 3. Remove directory entries for all RACF server machines and theinstallation user ID, 5767002P.
Step 4. Remove XAUTOLOG statements for all RACF service machines from theAUTOLOG1 profile.
Step 5. Move the functions from AUTOLOG2 back to AUTOLOG1.
Step 6. Remove user LINKs to the RACFVM disks.
Step 7. Modify DirMaint:
a. Comment out the CONFIG DATADVH itemESM_PASSWORD_AUTHENTICATION_EXIT.
b. Change the CONFIG DATADVH items PW_WARN_MODE andPW_LOCK_MODE to AUTOMATIC, if appropriate for your installation.
c. Comment out the CONFIG DATADVH itemESM_LOG_RECORDING_EXIT.
For these changes to take effect, either IPL DIRMAINT or enter theDIRM RLDDATA command.
Step 8. Remove RACF files from the 19E system disk, ISPF disk and GCSdisk. You can use the VMFERASE command to remove those files ifyou used VMFCOPY to place the files on those disks. For example:
ACC 19E Z
VMFERASE PROD 5767��2P%RACF FROM Z
Step 9. Modify SFS file pool servers.
146 RACF Program Directory
If you are using RACF to protect SFS resources, disable RACFsupport by changing the server_id DMSPARMS file on each SFS filepool server to specify NOESECURITY instead of ESECURITY.
Step 10. Modify BFS file pool servers.
If you are using RACF to protect BFS resources, disable RACFsupport by doing the following:
a. Change the server_id DMSPARMS file on each BFS file poolserver to specify NOESECURITY instead of ESECURITY.
b. Delete the file ESMLIB CSLLIB from each BFS file pool server.This file probably resides on the A-disk of the server.
c. In the PROFILE EXEC of each BFS file pool server, remove theRTNLOAD DSMPERM statement.
Step 11. Modify RACROUTE applications.
If you have applications or other program products which use theRACROUTE interface, you might have to change them. If you arereplacing RACF with an equivalent security product, that productmight or might not support the RACROUTE interface.
To assist you in determining if any applications are using theRACROUTE interface, you can display which user IDs are authorizedby RACF to issue RACROUTE requests. To do this, use the RLISTcommand to display the access list for the ICHCONN profile in theFACILITY class:
RLIST FACILITY ICHCONN AUTH
Appendix C. Starting, Stopping, and Removing RACF 147
Notices
References in this publication to IBM products,programs, or services do not imply that IBM intends tomake these available in all countries in which IBMoperates. Any reference to an IBM product, program,or service is not intended to state or imply that onlyIBM's product, program, or service may be used. Anyfunctionally equivalent product, program, or service thatdoes not infringe on any of IBM's intellectual propertyrights may be used instead of the IBM product,program, or service. Evaluation and verification ofoperation in conjunction with other products, exceptthose expressly designated by IBM, is the user'sresponsibility.
IBM may have patents or pending patent applicationscovering subject matter in this document. Thefurnishing of this document does not give you anylicense to these patents. You can send licenseinquiries, in writing, to the
IBM Director of LicensingIBM CorporationNorth Castle DriveArmonk, NY 10504-1785U.S.A.
Licensees of this program who wish to have informationabout it for the purpose of enabling: (i) the exchange ofinformation between independently created programsand other programs (including this one) and (ii) themutual use of the information which has beenexchanged, should contact:
IBM CorporationMail Station P3002455 South Road
Poughkeepsie, NY 12601-5400USAAttention: Information Request
Such information may be available, subject toappropriate terms and conditions, including in somecases, payment of a fee.
Trademarks and Service Marks
The following terms are trademarks or service marks ofthe IBM Corporation in the United States or othercountries or both:
BookManagerCICSIBMIBMLinkIMSMVS/ESAMVS/XAOpenExtensionsOS/390RACFRETAINSecureWaySystemPacSystem/370VM/ESAz/Seriesz/VM
Other company, product, and service names may betrademarks or service marks of others.
148 Copyright IBM Corp. 1988, 2004

Glossary
This glossary includes terms and definitions from theIBM Dictionary of Computing, New York: McGraw-Hill,1994.
Aaccess. The ability to obtain the use of a protectedresource.
access authority. An authority related to a request fora type of access to protected resources. In RACF, theaccess authorities are NONE, EXECUTE, READ,UPDATE, CONTROL, and ALTER.
access list. Synonym for standard access list. Seealso conditional access list.
authority. The right to access objects, resources, orfunctions. See access authority, class authority, andgroup authority.
authorization checking. The action of determiningwhether a user is permitted access to a protectedresource. RACF performs authorization checking as aresult of a RACHECK or FRACHECK request.
BBFS. Byte file system.
byte file system (BFS). On VM, a file system forOpenExtensions POSIX files that is organized in atree-like structure of directories. Each directory cancontain files or other directories.
CCDT. Class descriptor table.
class. A collection of RACF-defined entities (users,groups, and resources) with similar characteristics. Theclass names are USER, GROUP, DATASET, and theclasses that are defined in the class descriptor table.
class authority (CLAUTH). An authority enabling auser to define RACF profiles in a class defined in theclass descriptor table. A user can have classauthorities to one or more classes.
class descriptor. RACF-supplied control block for allthe classes in the class descriptor table (which are allthe classes except the USER, GROUP, and DATASETclasses).
class descriptor table (CDT). A table consisting of anentry for each class except the USER, GROUP, andDATASET classes. The table is generated byexecuting the ICHERCDE macro once for each class.
CLAUTH. Class authority.
conditional access list. An access list within aresource profile that associates a condition with a userID or group ID and the corresponding access authority.If a user does not otherwise have the requested access,a conditional access-list entry can allow access if thespecified condition is true. For example, for programaccess to data sets, the condition is that the user mustbe executing the program specified in the access list.See also access list. Contrast with standard access list.
CST (CMS subtasking). An interface program thatenables RACF to execute programs written to run in anOS/VS environment. This is a function of RACF, notVM.
current connect group. The group with which a useris associated, for access-checking purposes, during aterminal session or batch job. On MVS, if a user doesnot specify the current connect group on the LOGONcommand or batch JOB statement, the current connectgroup is the user's default group. On VM, users cannotspecify a group other than their default group. Iflist-of-groups processing is in effect, a user isassociated with all the groups to which the user isconnected. An exception would be that, if the currentconnect group is also found in the global access table,then list-of-groups checking is ignored.
Copyright IBM Corp. 1988, 2004 149
Ddata security. The protection of data fromunauthorized disclosure, modification, or destruction,whether accidental or intentional.
data set profile. A profile that provides RACFprotection for one or more data sets. The information inthe profile can include the data-set profile name, profileowner, universal access authority, access list, and otherdata. See discrete profile and generic profile.
default group. In RACF, the group specified in a userprofile that is the default current connect group.
DFP segment. The portion of a RACF profilecontaining information relating to the users andresources that are managed by the data facility product(DFP).
directory. A file that contains directory entries. Notwo directory entries in the same directory can have thesame name.
directory entry. In OpenExtensions MVS and VM, anobject that associates a filename with a file. Severaldirectory entries can associate names with the samefile.
discrete profile. A resource profile that can provideRACF protection for only a single resource. Forexample, a discrete profile can protect only a singledata set or minidisk.
dual registration. An interface enabling the securityadministrator of a VM system to add a user to the CPsystem directory and the RACF databasesimultaneously.
Eeffective user ID. In OpenExtensions MVS and VM,the current user ID, but not necessarily the user's loginID. For example, a user logged in under a login ID maychange to another user's ID. The ID to which the userchanges becomes the effective user ID until the userswitches back to the original login ID. See also useridentifier (UID).
ESM. External security manager
external security manager. On VM, a program thateither augments or completely replaces theauthorization checking done by file pool serverprocessing.
FFRACHECK request. The issuing of the FRACHECKmacro or the RACROUTE macro withREQUEST=FASTAUTH specified. The primary functionof a FRACHECK request is to check a user'sauthorization to a RACF-protected resource or function.A FRACHECK request uses only in-storage profiles forfaster performance. See also authorization checking.
GGCS. Group Control System.
general resource. Any system resource, other than anMVS data set, that is defined in the class descriptortable (CDT). On MVS, general resources are DASDvolumes, tape volumes, load modules, terminals, IMSand CICS transactions, and installation-defined resourceclasses. On VM, general resources are terminals,minidisks, virtual unit record devices, and RSCS nodes.
general resource profile. A profile that providesRACF protection for one or more general resources.The information in the profile can include the generalresource profile name, profile owner, universal accessauthority, access list, and other data.
generic profile. A resource profile that can provideRACF protection for one or more resources. Theresources protected by a generic profile have similarnames and identical security requirements. Forexample, a generic data-set profile can protect one ormore data sets.
GID. Group identifier
global access checking. The ability to allow aninstallation to establish an in-storage table of defaultvalues for authorization levels for selected resources.RACF refers to this table before performing normalRACHECK processing and grants the request withoutperforming a RACHECK if the requested accessauthority does not exceed the global value. Global
150 RACF Program Directory
access checking can grant the user access to theresource, but it cannot deny access.
group. A collection of RACF-defined users who canshare access authorities for protected resources.
group authority. An authority specifying whichfunctions a user can perform in a group. The groupauthorities are USE, CREATE, CONNECT, and JOIN.
group control system (GCS). A component of VMthat provides multiprogramming and shared memorysupport to virtual machines. It is a saved systemintended for use with SNA products.
group ID. A string of 1 to 8 characters that identifies agroup to RACF. The first character must be A throughZ, #, $, or @. The rest can be A through Z, #, $, @, or0 through 9.
group identifier (GID). In OpenExtensions MVS andVM, a unique number assigned to a group of relatedusers. The GID can often be substituted in commandsthat take a group name as an argument.
group name. A name that uniquely identifies a groupof users to the system.
group profile. A profile that defines a group. Theinformation in the profile includes the group name,profile owner, and users in the group.
Llogging. The recording of data about specific events.
MMVS. Multiple virtual storage. Implies MVS/370,MVS/XA, and MVS/ESA.
Ooperator identification card (OIDCARD). A smallcard with a magnetic stripe encoded with uniquecharacters and used to verify the identity of a terminaloperator to RACF on an MVS system.
owner. The user or group who creates a profile, or is
named the owner of a profile. The owner can modify,list, or delete the profile.
Ppassword. In computer security, a string of charactersknown to the computer system and a user, who mustspecify it to gain full or limited access to a system andto the data stored within it. In RACF, the password isused to verify the identity of the user.
POSIX. Portable Operating System Interface forComputer Environments. An IEEE standard forcomputer operating systems.
profile. Data that describes the significantcharacteristics of a user, a group of users, or one ormore computer resources. See also dataset profile,discrete profile, general resource profile, generic profile,group profile, and user profile.
program access to data sets (PADS). On MVS, aRACF function that enables an authorized user or groupof users to access one or more data sets at a specifiedaccess authority only while running a specifiedRACF-controlled program. See also program control.
program control. On MVS, a RACF function thatenables an installation to control who can runRACF-controlled programs. See also program accessto data sets.
protected resource. A resource defined to RACF forthe purpose of controlling access to the resource.Some of the resources that can be protected by RACFare DASD and tape data sets, VM minidisks, DASDvolumes, tape volumes, terminals, IMS/VS transactions,IMS/VS transaction groups, and any other resourcesdefined in the class descriptor table.
RRACDEF request. The issuing of the RACDEF macroor the RACROUTE macro with REQUEST=DEFINEspecified. Also, using a RACF command to add ordelete a resource profile causes a RACDEF request.
RACF. Resource Access Control Facility.
Glossary 151
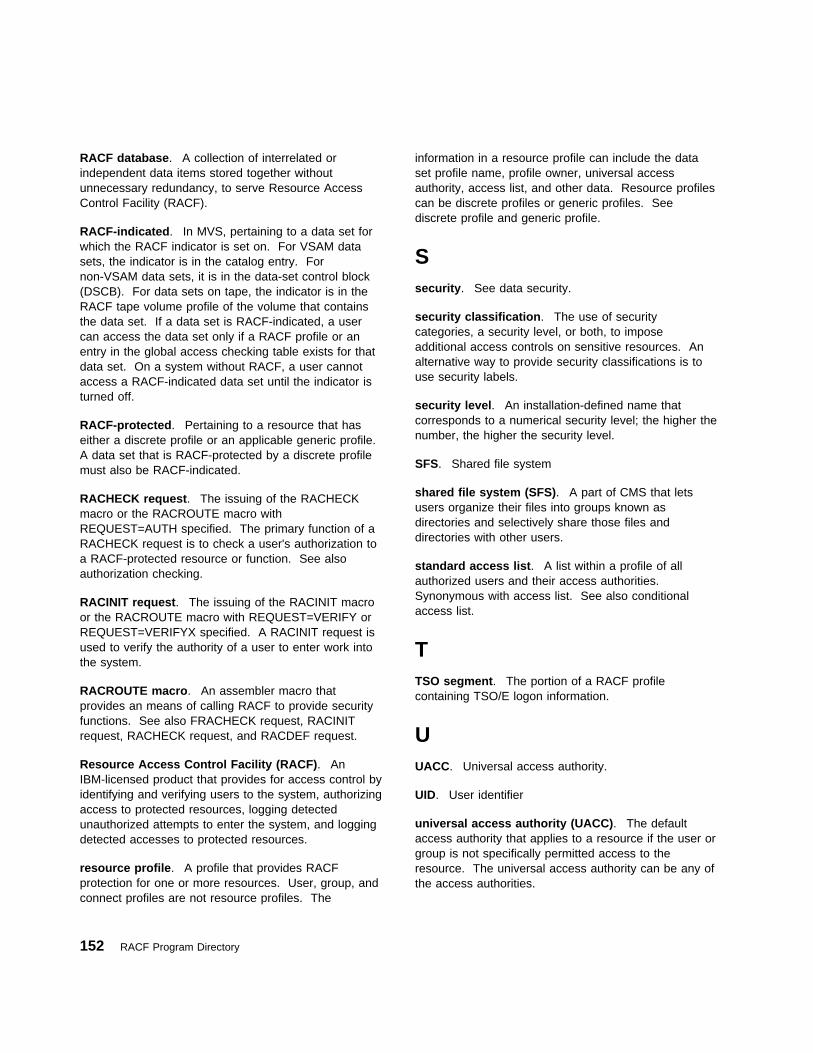
RACF database. A collection of interrelated orindependent data items stored together withoutunnecessary redundancy, to serve Resource AccessControl Facility (RACF).
RACF-indicated. In MVS, pertaining to a data set forwhich the RACF indicator is set on. For VSAM datasets, the indicator is in the catalog entry. Fornon-VSAM data sets, it is in the data-set control block(DSCB). For data sets on tape, the indicator is in theRACF tape volume profile of the volume that containsthe data set. If a data set is RACF-indicated, a usercan access the data set only if a RACF profile or anentry in the global access checking table exists for thatdata set. On a system without RACF, a user cannotaccess a RACF-indicated data set until the indicator isturned off.
RACF-protected. Pertaining to a resource that haseither a discrete profile or an applicable generic profile.A data set that is RACF-protected by a discrete profilemust also be RACF-indicated.
RACHECK request. The issuing of the RACHECKmacro or the RACROUTE macro withREQUEST=AUTH specified. The primary function of aRACHECK request is to check a user's authorization toa RACF-protected resource or function. See alsoauthorization checking.
RACINIT request. The issuing of the RACINIT macroor the RACROUTE macro with REQUEST=VERIFY orREQUEST=VERIFYX specified. A RACINIT request isused to verify the authority of a user to enter work intothe system.
RACROUTE macro. An assembler macro thatprovides an means of calling RACF to provide securityfunctions. See also FRACHECK request, RACINITrequest, RACHECK request, and RACDEF request.
Resource Access Control Facility (RACF). AnIBM-licensed product that provides for access control byidentifying and verifying users to the system, authorizingaccess to protected resources, logging detectedunauthorized attempts to enter the system, and loggingdetected accesses to protected resources.
resource profile. A profile that provides RACFprotection for one or more resources. User, group, andconnect profiles are not resource profiles. The
information in a resource profile can include the dataset profile name, profile owner, universal accessauthority, access list, and other data. Resource profilescan be discrete profiles or generic profiles. Seediscrete profile and generic profile.
Ssecurity. See data security.
security classification. The use of securitycategories, a security level, or both, to imposeadditional access controls on sensitive resources. Analternative way to provide security classifications is touse security labels.
security level. An installation-defined name thatcorresponds to a numerical security level; the higher thenumber, the higher the security level.
SFS. Shared file system
shared file system (SFS). A part of CMS that letsusers organize their files into groups known asdirectories and selectively share those files anddirectories with other users.
standard access list. A list within a profile of allauthorized users and their access authorities.Synonymous with access list. See also conditionalaccess list.
TTSO segment. The portion of a RACF profilecontaining TSO/E logon information.
UUACC. Universal access authority.
UID. User identifier
universal access authority (UACC). The defaultaccess authority that applies to a resource if the user orgroup is not specifically permitted access to theresource. The universal access authority can be any ofthe access authorities.
152 RACF Program Directory
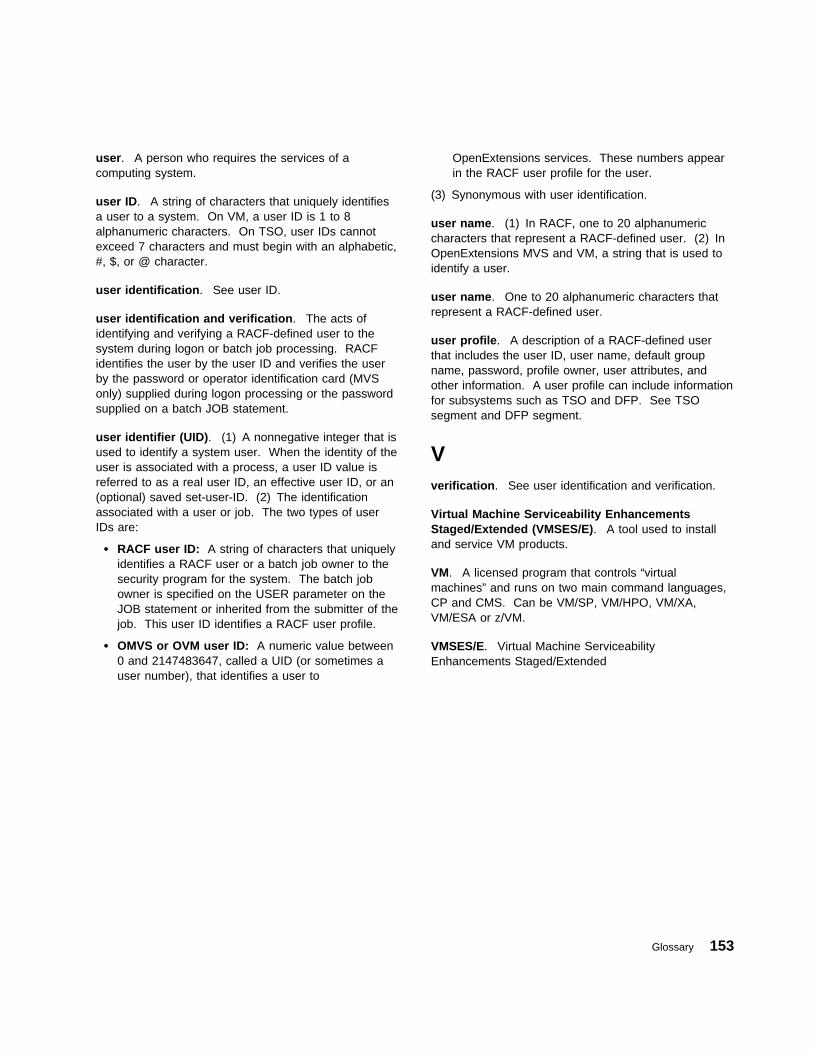
user. A person who requires the services of acomputing system.
user ID. A string of characters that uniquely identifiesa user to a system. On VM, a user ID is 1 to 8alphanumeric characters. On TSO, user IDs cannotexceed 7 characters and must begin with an alphabetic,#, $, or @ character.
user identification. See user ID.
user identification and verification. The acts ofidentifying and verifying a RACF-defined user to thesystem during logon or batch job processing. RACFidentifies the user by the user ID and verifies the userby the password or operator identification card (MVSonly) supplied during logon processing or the passwordsupplied on a batch JOB statement.
user identifier (UID). (1) A nonnegative integer that isused to identify a system user. When the identity of theuser is associated with a process, a user ID value isreferred to as a real user ID, an effective user ID, or an(optional) saved set-user-ID. (2) The identificationassociated with a user or job. The two types of userIDs are:
� RACF user ID: A string of characters that uniquelyidentifies a RACF user or a batch job owner to thesecurity program for the system. The batch jobowner is specified on the USER parameter on theJOB statement or inherited from the submitter of thejob. This user ID identifies a RACF user profile.
� OMVS or OVM user ID: A numeric value between0 and 2147483647, called a UID (or sometimes auser number), that identifies a user to
OpenExtensions services. These numbers appearin the RACF user profile for the user.
(3) Synonymous with user identification.
user name. (1) In RACF, one to 20 alphanumericcharacters that represent a RACF-defined user. (2) InOpenExtensions MVS and VM, a string that is used toidentify a user.
user name. One to 20 alphanumeric characters thatrepresent a RACF-defined user.
user profile. A description of a RACF-defined userthat includes the user ID, user name, default groupname, password, profile owner, user attributes, andother information. A user profile can include informationfor subsystems such as TSO and DFP. See TSOsegment and DFP segment.
Vverification. See user identification and verification.
Virtual Machine Serviceability EnhancementsStaged/Extended (VMSES/E). A tool used to installand service VM products.
VM. A licensed program that controls “virtualmachines” and runs on two main command languages,CP and CMS. Can be VM/SP, VM/HPO, VM/XA,VM/ESA or z/VM.
VMSES/E. Virtual Machine ServiceabilityEnhancements Staged/Extended
Glossary 153
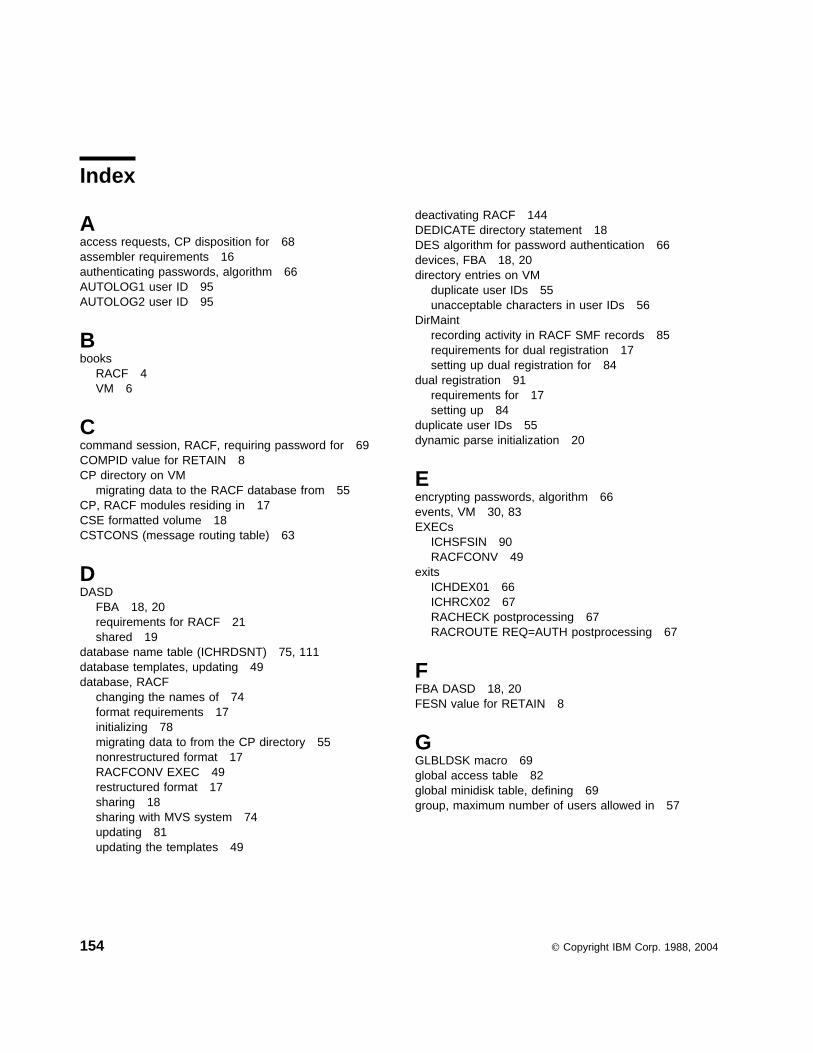
Index
Aaccess requests, CP disposition for 68assembler requirements 16authenticating passwords, algorithm 66AUTOLOG1 user ID 95AUTOLOG2 user ID 95
Bbooks
RACF 4VM 6
Ccommand session, RACF, requiring password for 69COMPID value for RETAIN 8CP directory on VM
migrating data to the RACF database from 55CP, RACF modules residing in 17CSE formatted volume 18CSTCONS (message routing table) 63
DDASD
FBA 18, 20requirements for RACF 21shared 19
database name table (ICHRDSNT) 75, 111database templates, updating 49database, RACF
changing the names of 74format requirements 17initializing 78migrating data to from the CP directory 55nonrestructured format 17RACFCONV EXEC 49restructured format 17sharing 18sharing with MVS system 74updating 81updating the templates 49
deactivating RACF 144DEDICATE directory statement 18DES algorithm for password authentication 66devices, FBA 18, 20directory entries on VM
duplicate user IDs 55unacceptable characters in user IDs 56
DirMaintrecording activity in RACF SMF records 85requirements for dual registration 17setting up dual registration for 84
dual registration 91requirements for 17setting up 84
duplicate user IDs 55dynamic parse initialization 20
Eencrypting passwords, algorithm 66events, VM 30, 83EXECs
ICHSFSIN 90RACFCONV 49
exitsICHDEX01 66ICHRCX02 67RACHECK postprocessing 67RACROUTE REQ=AUTH postprocessing 67
FFBA DASD 18, 20FESN value for RETAIN 8
GGLBLDSK macro 69global access table 82global minidisk table, defining 69group, maximum number of users allowed in 57
154 Copyright IBM Corp. 1988, 2004
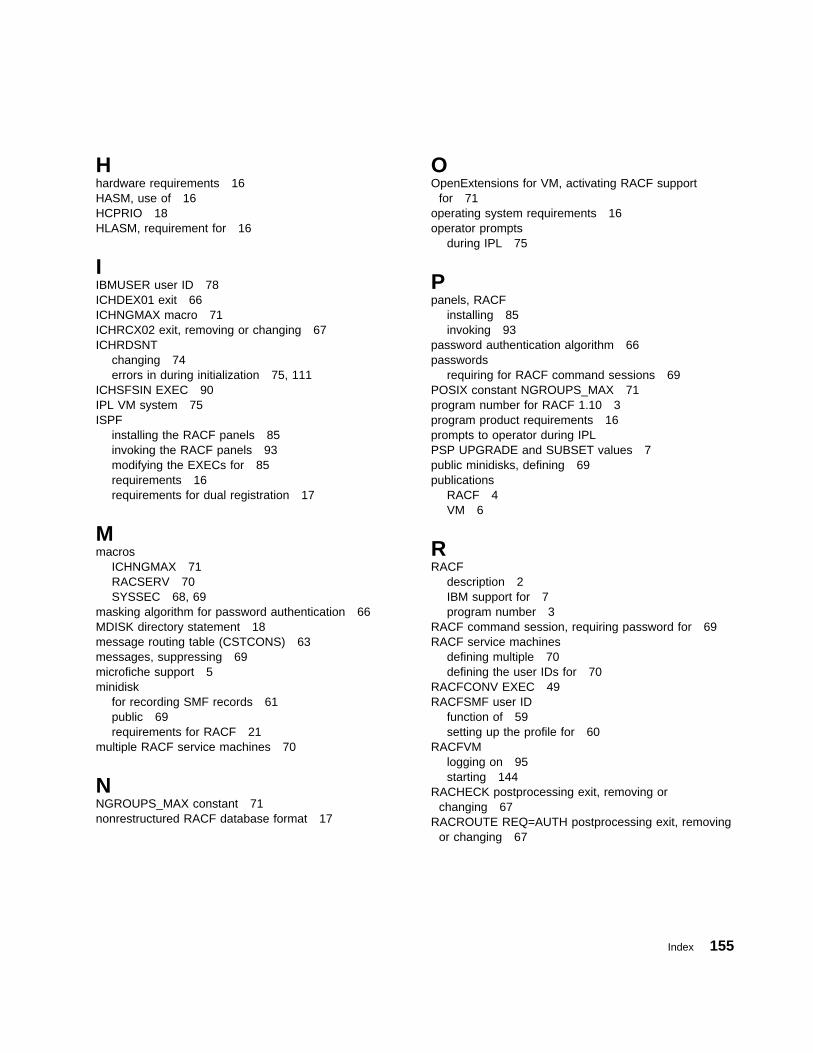
Hhardware requirements 16HASM, use of 16HCPRIO 18HLASM, requirement for 16
IIBMUSER user ID 78ICHDEX01 exit 66ICHNGMAX macro 71ICHRCX02 exit, removing or changing 67ICHRDSNT
changing 74errors in during initialization 75, 111
ICHSFSIN EXEC 90IPL VM system 75ISPF
installing the RACF panels 85invoking the RACF panels 93modifying the EXECs for 85requirements 16requirements for dual registration 17
Mmacros
ICHNGMAX 71RACSERV 70SYSSEC 68, 69
masking algorithm for password authentication 66MDISK directory statement 18message routing table (CSTCONS) 63messages, suppressing 69microfiche support 5minidisk
for recording SMF records 61public 69requirements for RACF 21
multiple RACF service machines 70
NNGROUPS_MAX constant 71nonrestructured RACF database format 17
OOpenExtensions for VM, activating RACF support
for 71operating system requirements 16operator prompts
during IPL 75
Ppanels, RACF
installing 85invoking 93
password authentication algorithm 66passwords
requiring for RACF command sessions 69POSIX constant NGROUPS_MAX 71program number for RACF 1.10 3program product requirements 16prompts to operator during IPLPSP UPGRADE and SUBSET values 7public minidisks, defining 69publications
RACF 4VM 6
RRACF
description 2IBM support for 7program number 3
RACF command session, requiring password for 69RACF service machines
defining multiple 70defining the user IDs for 70
RACFCONV EXEC 49RACFSMF user ID
function of 59setting up the profile for 60
RACFVMlogging on 95starting 144
RACHECK postprocessing exit, removing orchanging 67
RACROUTE REQ=AUTH postprocessing exit, removingor changing 67
Index 155
RACSERV macro 70reactivating RACF 144release value for RETAIN 8requirements
assembler 16hardware 16ISPF 16operating system 16program products 16
restarting RACF 144restructured RACF database format 17RETAIN COMPID, release, and FESN values 8routing messages 63RPIBLDDS 79RPIDIRCT EXEC 55RPIDIRCT SYSUT1
description 56format of generated commands 57how used 55initializing the RACF database with 78running the commands in 79updating the RACF database with 81
Sservice machines, RACF
defining multiple 70defining the user IDs for 70
SETEVENT command 84SETRACF command 144SETROPTS command 82sharing a RACF database 18SMF CONTROL file
function of 59setting up 61
SMF DATA file 59SMF records
controlling processing of 59recording DirMaint activity in 85
software requirements 16starting RACF 144storage requirements for RACF 21suspending RACF 144SYSSEC macro 68, 69
TTCB (trusted computing base), requirements for 17templates, updating 49trusted computing base, requirements for 17
Uuser IDs
AUTOLOG1 95AUTOLOG2 95duplicate 55IBMUSER 78maximum number allowed in a group 57RACFVM 95required for RACF 21unacceptable characters in 56
VView Program Listings (VPL) 5VM events, auditing and controlling 30, 83VM, level required 16VMSES/E 20VMXEVENT profile 84VPL 5
Zz/VM Version 5, level required 16
156 RACF Program Directory
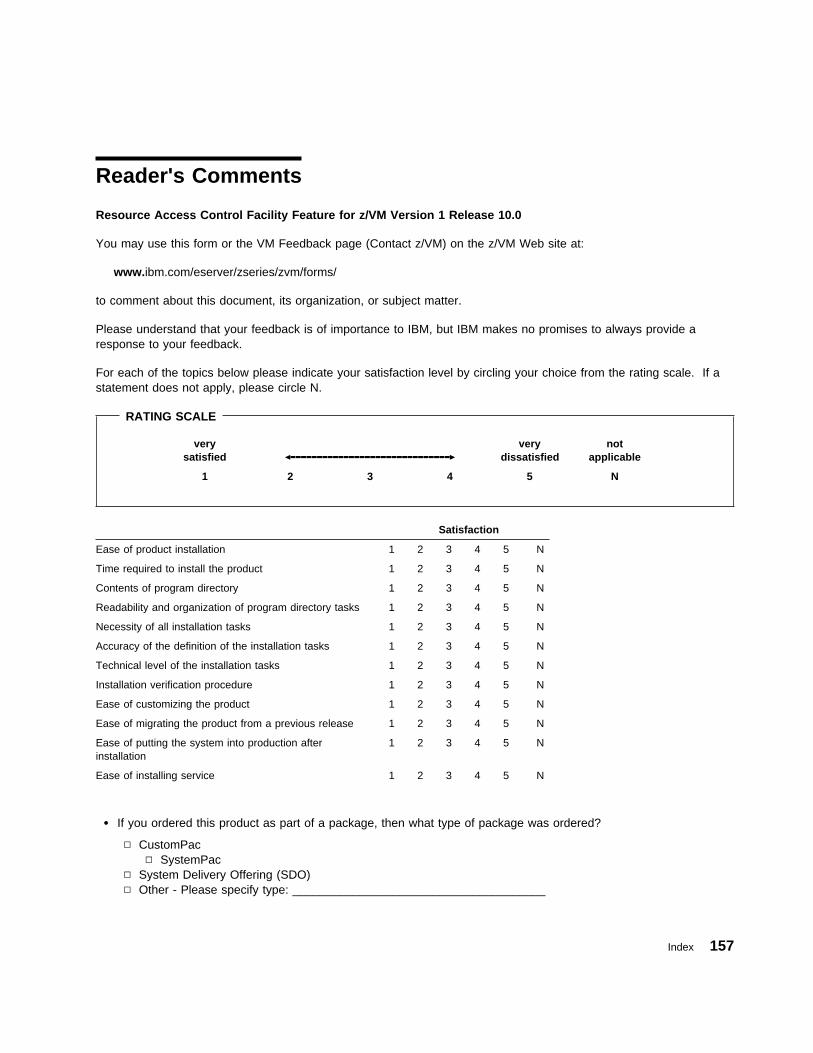
Reader's Comments
Resource Access Control Facility Feature for z/VM Version 1 Release 10.0
You may use this form or the VM Feedback page (Contact z/VM) on the z/VM Web site at:
www.ibm.com/eserver/zseries/zvm/forms/
to comment about this document, its organization, or subject matter.
Please understand that your feedback is of importance to IBM, but IBM makes no promises to always provide aresponse to your feedback.
For each of the topics below please indicate your satisfaction level by circling your choice from the rating scale. If astatement does not apply, please circle N.
RATING SCALE
verysatisfied [\\\\\\\\\\\\\\\\\\\\\\\\\\\\\\]
verydissatisfied
notapplicable
1 2 3 4 5 N
Satisfaction
Ease of product installation 1 2 3 4 5 N
Time required to install the product 1 2 3 4 5 N
Contents of program directory 1 2 3 4 5 N
Readability and organization of program directory tasks 1 2 3 4 5 N
Necessity of all installation tasks 1 2 3 4 5 N
Accuracy of the definition of the installation tasks 1 2 3 4 5 N
Technical level of the installation tasks 1 2 3 4 5 N
Installation verification procedure 1 2 3 4 5 N
Ease of customizing the product 1 2 3 4 5 N
Ease of migrating the product from a previous release 1 2 3 4 5 N
Ease of putting the system into production afterinstallation
1 2 3 4 5 N
Ease of installing service 1 2 3 4 5 N
� If you ordered this product as part of a package, then what type of package was ordered?
� CustomPac � SystemPac
� System Delivery Offering (SDO)� Other - Please specify type: ______________________________________
Index 157

� Is this the first time your organization has installed this product?
� Yes � No
� Were the people who did the installation experienced with the installation of VM products using VMSES/E?
� Yes
How many years of experience do they have? __________
� No
� How long did it take to install this product? ____________________
� If you have any comments to make about your ratings above, or any other aspect of the product installation,please list them below:
Please provide the following contact information:
Name and Job Title
Organization Address Telephone
Thank you for your participation.
Please send the completed form to the following address, or give to your IBM representative who will forward it to theResource Access Control Facility Development group:
IBM CorporationInformation DevelopmentDepartment 55JA, Mail Station P3842455 South RoadPoughkeepsie, New York 12601-5400USA
158 RACF Program Directory


IBM
Printed in U.S.A.
GI11-48�3-��