epicor retail merchandising 4.3.3 stock ledger ledger 4.3.3... · both accounting methods are...
TRANSCRIPT

Epicor RetailMerchandising 4.3.3
Stock Ledger User Guide

© Copyright 2006 ‐ 2012 Epicor Software Corporation and its subsidiaries and affiliates. Epicor is a registered trademark of Epicor Software Corporation. All other trademarks are the property of their respective owners and are acknowledged.
DISCLAIMER
This manual is provided for informational purposes only. Epicor Software Corporation and its affiliates and subsidiaries (hereinafter collectively referred to as “Epicor”) make no representations or warranties with respect to the contents of this manual and Epicor specifically disclaims any and all implied warranties including, but not limited to, merchantability and fitness for any particular purpose. Use of the software is governed by and subject to the terms of your agreement with Epicor.
This manual is subject to change without notice. The contents of this manual are believed to be current and accurate as of its date of publication. Changes to this manual between reprintings and other important information about the software product are made or published in release notes and you are urged to obtain the current release notes for the software product. We welcome user comments and reserve the right to revise this publication and/or make improvements or changes to the products or programs described in this publication at any time, without notice.
Document release date: December 19, 2012
Table of Contents
Preface ...............................................................................1What is Stock Ledger? ......................................................................................................2The basics ..........................................................................................................................5
1. Setting up Stock Ledger ................................................ 8About setting parameters .................................................................................................8System Parameter .............................................................................................................9Stock Ledger Parameters .............................................................................................. 10Merchandise Group Parameters ................................................................................... 12
2. Stock Ledger Components........................................... 14Component setup chart ................................................................................................. 15Transactional database mappings ............................................................................... 17RIM mappings ................................................................................................................ 20
3. Cumulative and Initial Values ..................................... 22Value determination chart ............................................................................................. 23Cumulative Value Mappings .......................................................................................... 24Initial Value Mappings ................................................................................................... 26Accumulation Period Worklist ....................................................................................... 27
4. Infobase Components Worklist................................... 29
5. General Ledger Interface ............................................ 31GL Period ........................................................................................................................ 31General Ledger Account Defaults ................................................................................. 33GL Account Structure ..................................................................................................... 34General Ledger Component Worklist ............................................................................ 37General Ledger Component Map .................................................................................. 38
6. History, Audit Trails and Reports ................................ 39
7. Appendix A: Worksheets ............................................. 41
8. Appendix B .................................................................. 59Using the keyboard instead of the mouse .................................................................... 59Getting help .................................................................................................................... 60Retrieving information from your database ................................................................. 61
PrefaceEpicor Retail Merchandising Solution for retail enterprises streamlines the key processes of business. With the integration of key components including order management, pricing, inventory and margin management, the retailer is equipped with accurate, up-to-the-minute information that facilitates powerful management and analysis of merchandise.
The Merchandising Solution includes the following:Enterprise Data Management offers a single point of entry for all information that defines a retail enterprise, such as locations, vendors, hierarchies, currencies, etc. It feeds common information to all Merchandising applications thereby ensuring that all applications get the same information at the same time.
Product Management allows you to maintain a comprehensive list of the merchandise your company sells that can be used across all selling channels, including the Web, in kiosks, and in catalogs.
Purchase Order Management provides options for managing your entire purchase ordering process, including a seamless communication with the Allocation and Replenishment module. It lets you monitor the progress of buys and their delivery dates, while maintaining strict financial and open-to-buy control, as well as providing a user-defined approval process and in-depth reporting capabilities.
Price Management provides complete support for simulating and executing temporary and permanent price changes (including deal documents, which are a special type of temporary price change) and sending this information to your stores. Price Management allows you to manage prices by any combination of style, style/color, and style/color/location, increasing your return on inventory.
Inventory Management supports all inventory movement transactions including receipts, RTVs, transfers, ASNs, adjustments and physical inventory. Common receiving procedures provide consistency at the warehouse and the stores. Real-time updates and user-defined inventory statuses offer retailers in-depth and timely information for analysis.
Stock Ledger, a component of Inventory Management, allows you to define the components and calculations that interface to your general ledger system in the way that best meets your business needs.
Invoice Matching, a component of Inventory Management, provides your accounts payable system with complete details for matching and reconciling invoices from your vendors.
Warehouse Management streamlines receiving, processing, and distribution, and enables you to accurately monitor items as they move from supplier to store or individual customer. It supports multiple channels and gives you the ability to efficiently manage all warehousing functions.Allocations and Replenishment satisfies the changing merchandise needs of your stores, including a seamless communication with the Purchase Orders module. By enabling you to balance inventories and distributions of merchandise allocated in a pre- and post-allocation environment, its powerful application components serve to increase turns,
What is Stock Ledger? 2
reduce markdowns, improve gross margins, and optimize merchandise performance, to maximize your sales, profits and ROI. Customer Order Management makes store, warehouse and vendor inventory information available to your customers across all selling channels, allowing them to choose when and where to place, pay for and pick up an order.Foundation enables the integration of all functions across your organization, streamlining information flow and simplifying internal processes. It facilitates data transfer across all areas while maintaining security setup.Merchandising Analytics provides decision support for analyzing all retail activities, including sales, orders, receipts, distributions, price changes, inventory adjustments, and returns to vendors.Merchandise Planning enables you to create and manage your merchandise plans at chain level, store level or both. Flexible and unlimited merchandise and location hierarchies streamline the planning of multiple channels, allowing you to develop plans that truly meet the demands at a micro-level.
What is Stock Ledger?Stock Ledger is an application in the Epicor Retail Merchandising Solution that provides information for financial purposes. It calculates, reports and makes available cost values, which are used primarily for determining profitability. If you operate in a multi-jurisdiction organization (defined in the Enterprise Data Management component), cost and retail values are maintained in both home and location currencies, enabling you to report in both.Stock Ledger is completely user-defined: you customize calculations and reporting to best suit your organization's business needs, and define all components and their mapping values. Mapping values include price status, inventory status, price change type and reason code and can be as detailed as you want for the components you want to track.
Trackable components include: Price status Inventory status Price change type Reason code.
Stock Ledger supports both retail inventory method (RIM) and cost inventory method (CIM). Both accounting methods are defined by merchandise group.
A combination of the methods can be used to deal with exception merchandise groups (which follow a different accounting method than the organization). For example, an apparel company uses RIM and, after acquiring a new grouping of hard goods, must apply CIM to it.
RIM components and cumulative values can be calculated and mapped in any user-defined way.
Stock Ledger also provides flexibility in interfacing with third party General Ledger (GL) systems. All components, account structure and the mapping values are user-defined.Stock Ledger can interface to a GL system using a different calendar from the merchandise system. Dates can be mapped so that Stock Ledger provides information based on the GL calendar.
3 Preface
Auditing transactions is simplified through the audit trail provided by Enterprise Data Management. EDM logs all transactions posted to Stock Ledger. The length of time that history is retained is a user-defined setting that allows for the detailed reporting of open and closed periods down to the merchandise/location level and period.
Transactional databaseThe Epicor transactional database, also called “Infobase”, is a collection of tables that store the results of all activity from merchandising transactions.
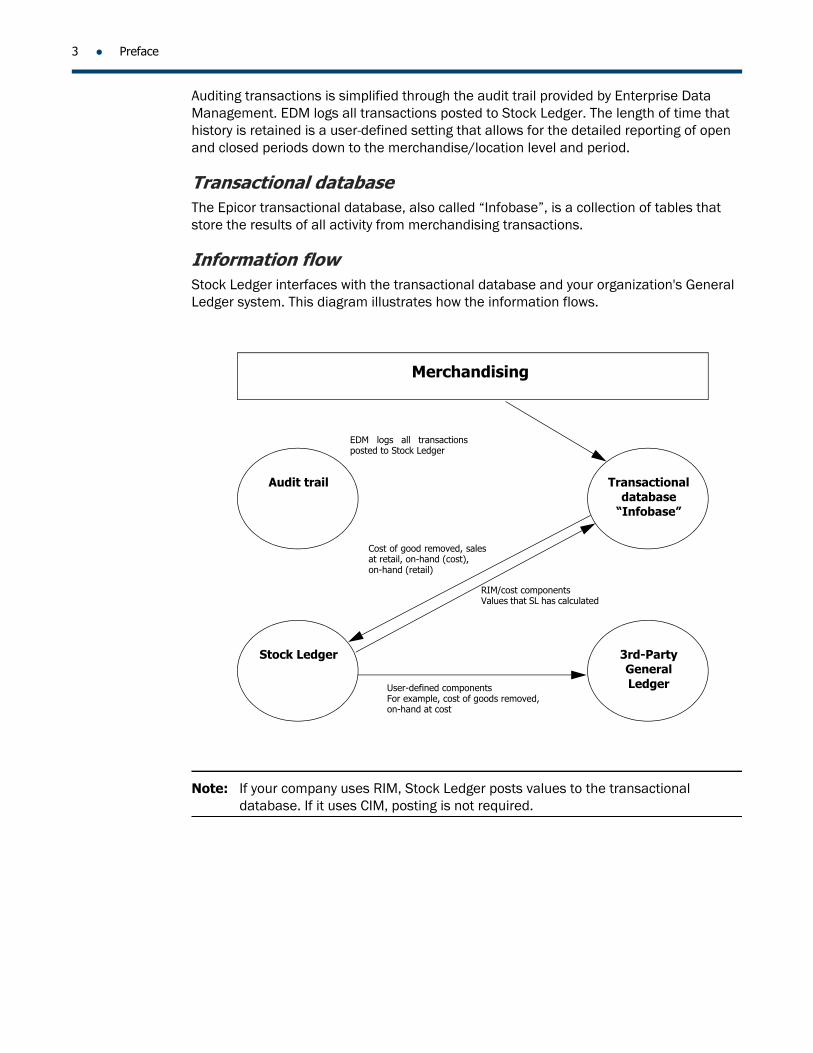
Information flowStock Ledger interfaces with the transactional database and your organization's General Ledger system. This diagram illustrates how the information flows.
Note: If your company uses RIM, Stock Ledger posts values to the transactional database. If it uses CIM, posting is not required.
Merchandising
Audit trail Transactionaldatabase
“Infobase”
Stock Ledger 3rd-PartyGeneralLedgerUser-defined components
For example, cost of goods removed,on-hand at cost
RIM/cost componentsValues that SL has calculated
Cost of good removed, sales at retail, on-hand (cost), on-hand (retail)
EDM logs all transactions posted to Stock Ledger
Menu structure 4
Menu structureStock Ledger (SL) is an integrated component of the the Enterprise Data Management module. It has the following menus: SL Component Worklist: All Stock Ledger components are created and modified in this
work list. The defined SL components are mapped to the appropriate components in the transactional database. RIM components are flagged and the RIM method calculation is defined. Once defined, the RIM components are mapped to the appropriate Stock Ledger components.
Cumulative Value Maps: This table is only required if you use the RIM method for any merchandise groups. Cost and retail cumulative values are mapped to the appropriate components in the transactional database. If you are working in a multi-jurisdictional organization, these values are maintained in both home and location currencies.
GL Component Worklist: This table defines the GL components that will be sent to GL with associated debit and credit accounts. Once defined, the components are mapped to the appropriate Stock Ledger accounts.
GL Account Defaults: This table is used to create all GL accounts that will be sent to GL. Once defined, the components are mapped to the appropriate GL account structure.
IB Component Worklist: This table is required if the RIM method is used. Any components that are defined here will feed back to the transactional database. Initially the system automatically defines 2 components. You add whatever else is required.
Accumulation Period Worklist: Values are maintained in this table. GL Periods: The GL calendar is created and maintained within this table. It must be
defined regardless of whether a third party GL system is being used. Initial Value Maps: This table is required if using the RIM method for any merchandise
groups and if the initial value parameter is set to “On Hand”. The cost and retail initial values will be mapped to the appropriate Stock Ledger components.
5 Preface
The basicsStock Ledger is a Windows-based application and uses standard Windows navigation tools and techniques. Stock Ledger is accessed via the Merchandising, Enterprise Data Management (EDM) module.
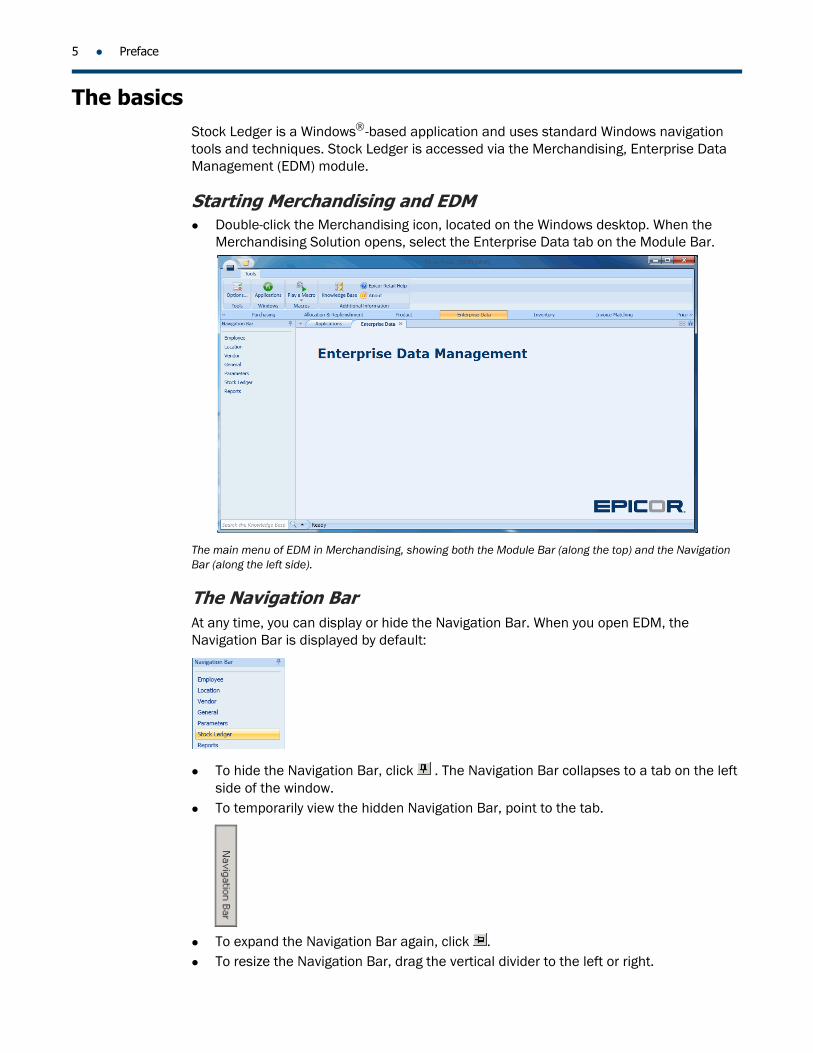
Starting Merchandising and EDM Double-click the Merchandising icon, located on the Windows desktop. When the
Merchandising Solution opens, select the Enterprise Data tab on the Module Bar.
The main menu of EDM in Merchandising, showing both the Module Bar (along the top) and the Navigation Bar (along the left side).
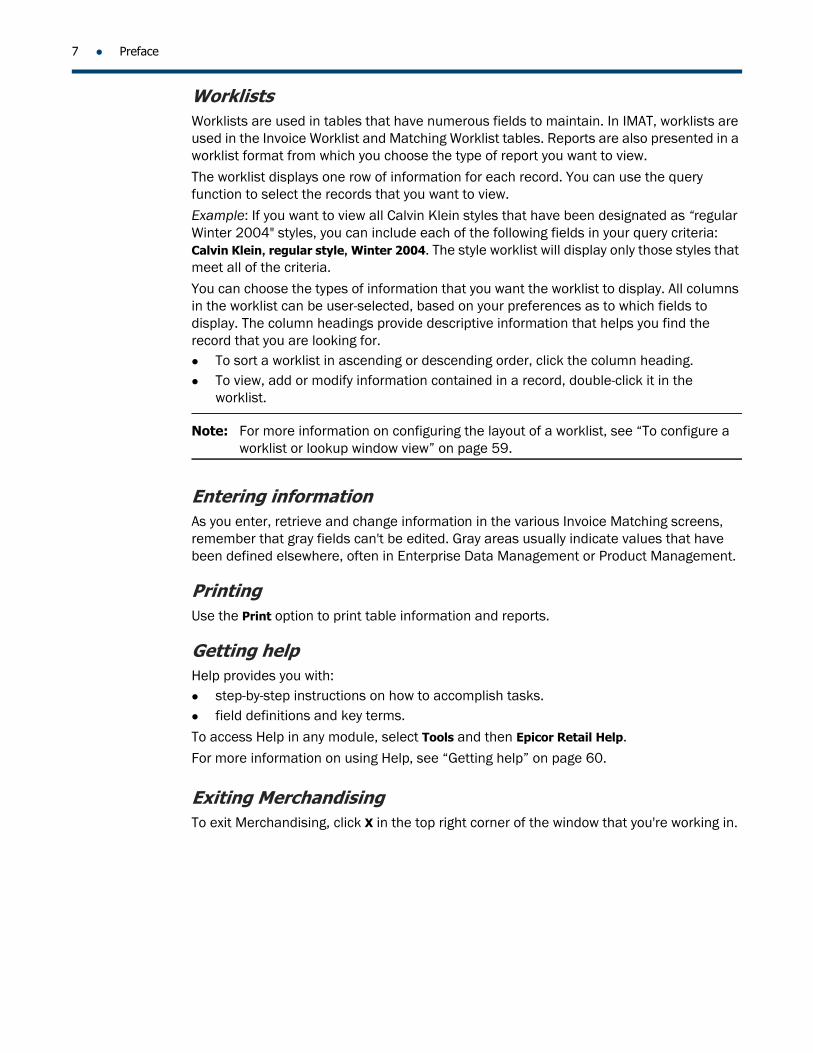
The Navigation BarAt any time, you can display or hide the Navigation Bar. When you open EDM, the Navigation Bar is displayed by default:
To hide the Navigation Bar, click . The Navigation Bar collapses to a tab on the left side of the window.
To temporarily view the hidden Navigation Bar, point to the tab.
To expand the Navigation Bar again, click . To resize the Navigation Bar, drag the vertical divider to the left or right.

System security 6
System securityThe System Administrator uses Enterprise Data Management to define security access to different functional areas within Merchandising for your employee “Role”. A Role defines major job function areas within your organization, such as Buyer or Merchandising Manager. Positions define specific store and/or merchandise responsibilities within a Role, such as Buyer – Girls' Outerwear or Assistant Buyer – Men's Shoes. You can be assigned to one or more Positions.
Since your employee “Position” indicates your degree of responsibility for particular locations and merchandise groups, it can be used to restrict your access still further.
Changing modules within MerchandisingIt isn't necessary to exit and restart Merchandising to switch to a different Merchandising module. On the Module Bar, select the name of the module you want to change to.
Note: Only one of the Merchandising modules can be open at a time. For example, if you open Invoice Matching and then open EDM, Pricing closes and EDM opens. (The exceptions to this are the Purchase Order Management and Allocation & Replenishment modules, which can be open at the same time, along with any one of the other five Merchandising modules.)
QueryThe Query function allows you to define specific search criteria when retrieving information. After you define the search criteria in a Query dialog box, the system returns all information that meets the criteria.
For more information about queries, see “Retrieving information from your database” on page 61.
Calendar
In any date field requiring user input, you can type the date you want or click to open the Calendar.
The Calendar opens at the current month, with the current date circled in red and also noted at the bottom. Click the directional buttons at the top of the Calendar to move forward or backward
by month. Click any date to enter it automatically in the current field.
7 Preface
WorklistsWorklists are used in tables that have numerous fields to maintain. In IMAT, worklists are used in the Invoice Worklist and Matching Worklist tables. Reports are also presented in a worklist format from which you choose the type of report you want to view.
The worklist displays one row of information for each record. You can use the query function to select the records that you want to view.
Example: If you want to view all Calvin Klein styles that have been designated as “regular Winter 2004" styles, you can include each of the following fields in your query criteria: Calvin Klein, regular style, Winter 2004. The style worklist will display only those styles that meet all of the criteria.
You can choose the types of information that you want the worklist to display. All columns in the worklist can be user-selected, based on your preferences as to which fields to display. The column headings provide descriptive information that helps you find the record that you are looking for. To sort a worklist in ascending or descending order, click the column heading. To view, add or modify information contained in a record, double-click it in the
worklist.
Note: For more information on configuring the layout of a worklist, see “To configure a worklist or lookup window view” on page 59.
Entering informationAs you enter, retrieve and change information in the various Invoice Matching screens, remember that gray fields can't be edited. Gray areas usually indicate values that have been defined elsewhere, often in Enterprise Data Management or Product Management.
PrintingUse the Print option to print table information and reports.
Getting helpHelp provides you with: step-by-step instructions on how to accomplish tasks. field definitions and key terms.
To access Help in any module, select Tools and then Epicor Retail Help.For more information on using Help, see “Getting help” on page 60.
Exiting MerchandisingTo exit Merchandising, click X in the top right corner of the window that you're working in.
Depending on whether you will be using RIM or CIM methods, there are certain set up requirements to work with Stock Ledger.
Using RIM completely or partially
If you will be using RIM completely or partially, then you must:
1. Set up all parameters relevant to Stock Ledger in EDM.
2. Define Stock Ledger components and map their RIM and non-RIM components.3. Map Cumulative and Initial Values.
4. Map components to the transactional database (Infobase).
5. Set up the General Ledger Period Table. If you will be using a third party General Ledger system, you must define the interface components.
Using CIM If you will be using CIM, then you must:
1. Set up all parameters relevant to Stock Ledger in EDM.2. Define Stock Ledger components and map their RIM and non-RIM components.
3. Set up the General Ledger Period Table. If you will be using a third party General Ledger system, you must define the interface components.
About setting parametersBefore you can work in Stock Ledger, you must define all parameters in Enterprise Data Management. You must first create merchandise and location hierarchies, the merchandise groups system and calendar in EDM and Product Management before you can define Stock Ledger parameters.
Stock Ledger parameters can be grouped into three types: System parameter—Sets the retention length of Stock Ledger history for auditing and
reporting. Stock Ledger parameters—Specifies the Valuation method (RIM or CIM) and
Accumulation period dependent parameters (for RIM only) Merchandise group parameters—Defines the level where the minimum and maximum
Stock Ledger percentages are maintained and which values are assigned to each group.
See the following pages for details on these parameters.
1 Setting up Stock Ledger
9 Setting up Stock Ledger
System Parameter
Setting the system
parameter
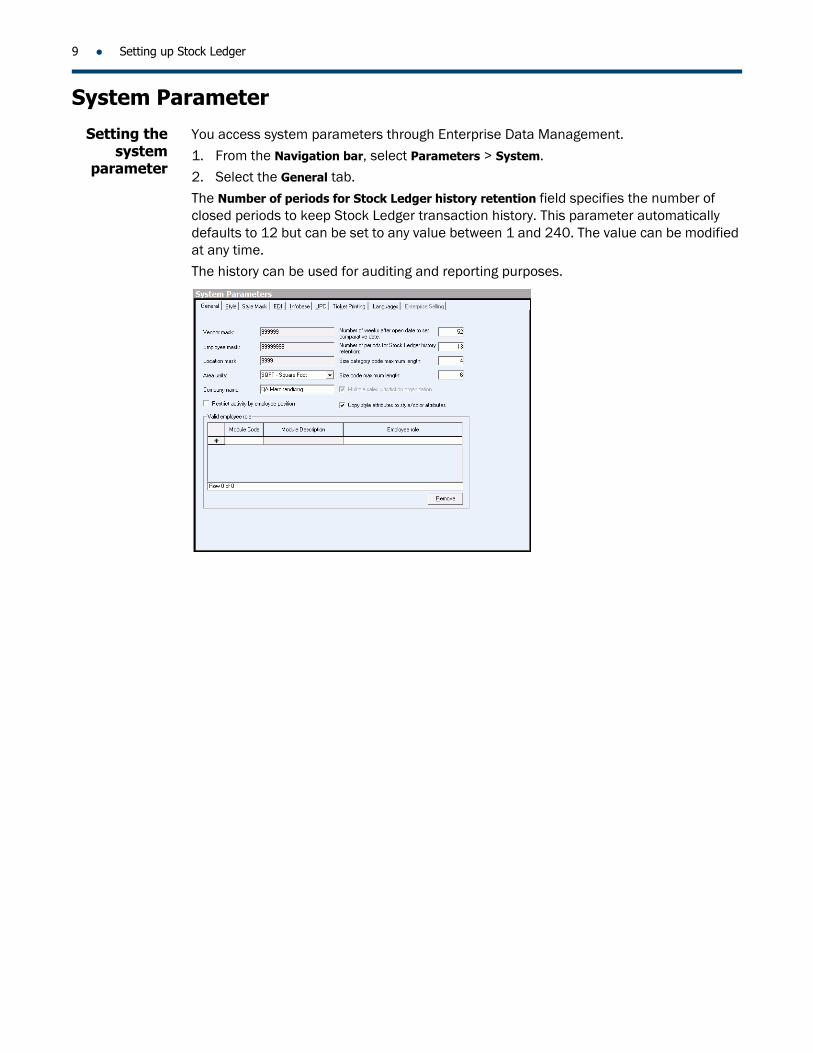
You access system parameters through Enterprise Data Management.
1. From the Navigation bar, select Parameters > System.
2. Select the General tab.The Number of periods for Stock Ledger history retention field specifies the number of closed periods to keep Stock Ledger transaction history. This parameter automatically defaults to 12 but can be set to any value between 1 and 240. The value can be modified at any time.
The history can be used for auditing and reporting purposes.
Stock Ledger Parameters 10
Stock Ledger Parameters
Setting Stock Ledger
parameters
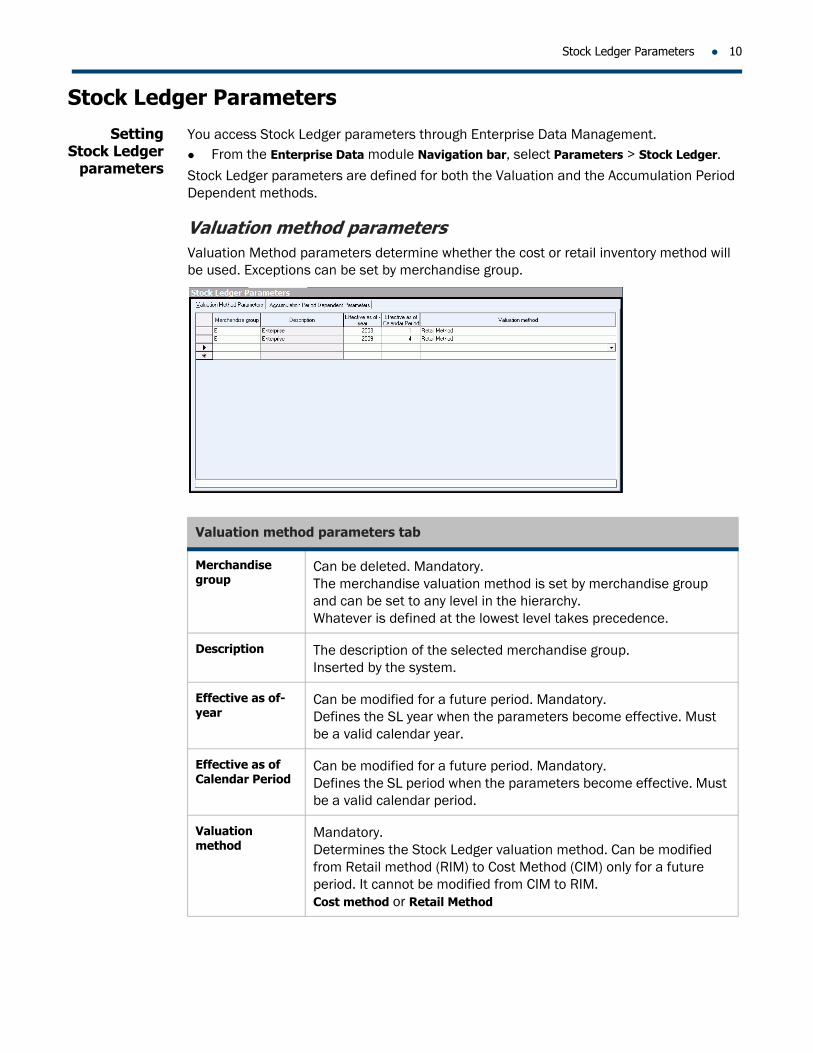
You access Stock Ledger parameters through Enterprise Data Management. From the Enterprise Data module Navigation bar, select Parameters > Stock Ledger.
Stock Ledger parameters are defined for both the Valuation and the Accumulation Period Dependent methods.
Valuation method parametersValuation Method parameters determine whether the cost or retail inventory method will be used. Exceptions can be set by merchandise group.
Valuation method parameters tab
Merchandise group
Can be deleted. Mandatory. The merchandise valuation method is set by merchandise group and can be set to any level in the hierarchy. Whatever is defined at the lowest level takes precedence.
Description The description of the selected merchandise group. Inserted by the system.
Effective as of- year
Can be modified for a future period. Mandatory. Defines the SL year when the parameters become effective. Must be a valid calendar year.
Effective as of Calendar Period
Can be modified for a future period. Mandatory. Defines the SL period when the parameters become effective. Must be a valid calendar period.
Valuation method
Mandatory. Determines the Stock Ledger valuation method. Can be modified from Retail method (RIM) to Cost Method (CIM) only for a future period. It cannot be modified from CIM to RIM. Cost method or Retail Method
11 Setting up Stock Ledger
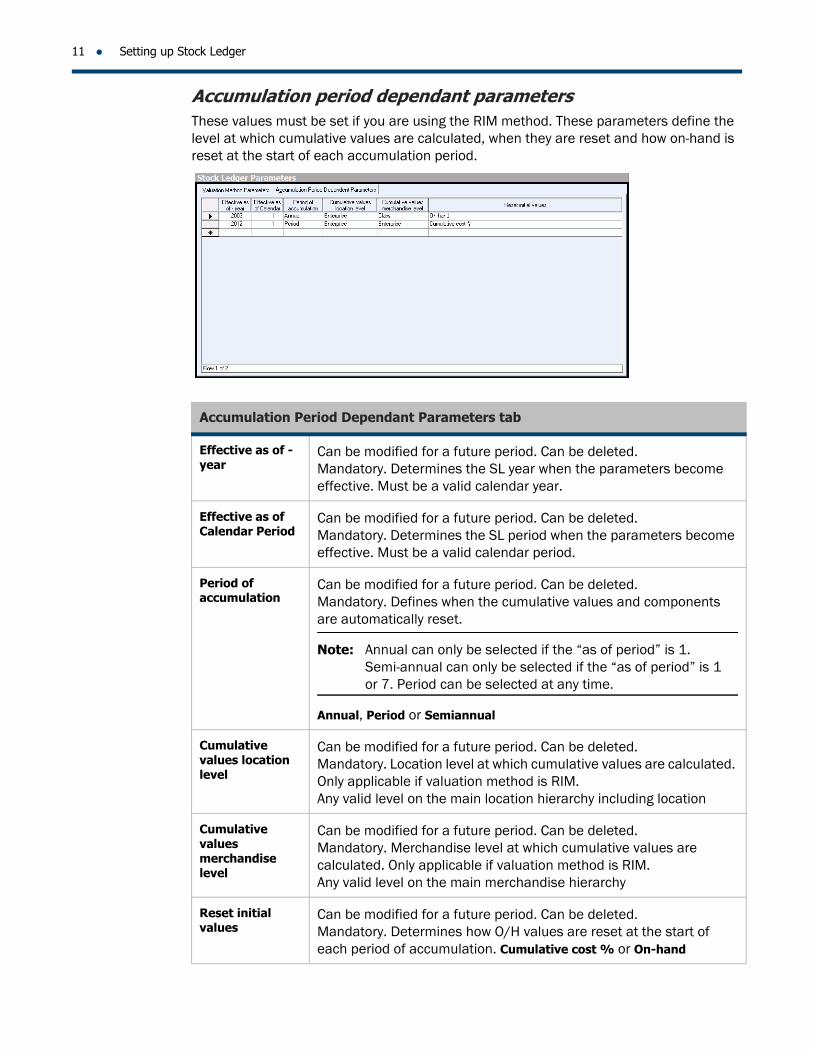
Accumulation period dependant parametersThese values must be set if you are using the RIM method. These parameters define the level at which cumulative values are calculated, when they are reset and how on-hand is reset at the start of each accumulation period.
Accumulation Period Dependant Parameters tab
Effective as of - year
Can be modified for a future period. Can be deleted. Mandatory. Determines the SL year when the parameters become effective. Must be a valid calendar year.
Effective as of Calendar Period
Can be modified for a future period. Can be deleted. Mandatory. Determines the SL period when the parameters become effective. Must be a valid calendar period.
Period of accumulation
Can be modified for a future period. Can be deleted. Mandatory. Defines when the cumulative values and components are automatically reset.
Note: Annual can only be selected if the “as of period” is 1. Semi-annual can only be selected if the “as of period” is 1 or 7. Period can be selected at any time.
Annual, Period or Semiannual
Cumulative values location level
Can be modified for a future period. Can be deleted. Mandatory. Location level at which cumulative values are calculated. Only applicable if valuation method is RIM. Any valid level on the main location hierarchy including location
Cumulative values merchandise level
Can be modified for a future period. Can be deleted. Mandatory. Merchandise level at which cumulative values are calculated. Only applicable if valuation method is RIM. Any valid level on the main merchandise hierarchy
Reset initial values
Can be modified for a future period. Can be deleted. Mandatory. Determines how O/H values are reset at the start of each period of accumulation. Cumulative cost % or On-hand
Merchandise Group Parameters 12
Merchandise Group ParametersThe minimum and maximum cumulative cost percentage (CC%) values are defined at one of the levels in the main merchandise hierarchy. Once defined, users will be prompted to enter values when required. For example, if class level is chosen, then a value must be entered for each class when it is created.
The CC% values are used to define the minimum and maximum CC% values permitted for the group. The CC% values can be set to a number from 0 to 100.
These values will be used to verify cumulative cost percentages and to report on those that fall outside the range. This will be helpful before sending information to the GL. The minimum/maximum CC% will act as alerts to groups that fall outside the ranges.
You access merchandise group parameters through Product Management.
Modifying merchandise
group parameters
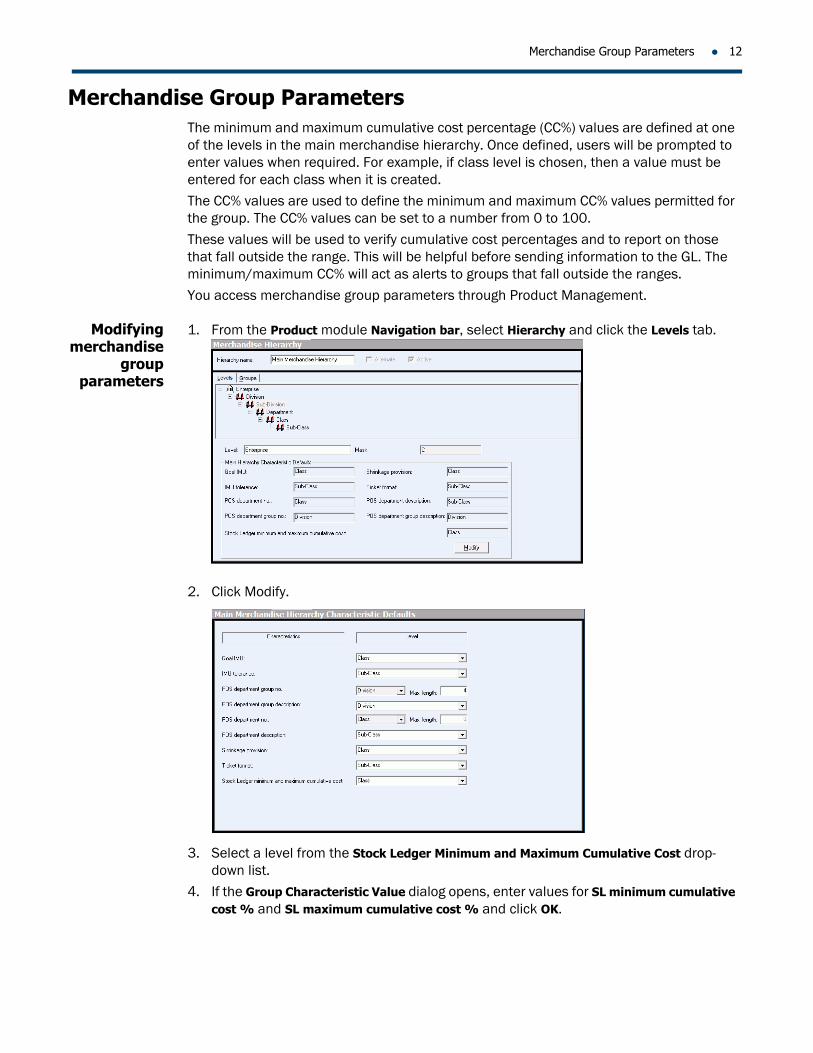
1. From the Product module Navigation bar, select Hierarchy and click the Levels tab.
2. Click Modify.
3. Select a level from the Stock Ledger Minimum and Maximum Cumulative Cost drop-down list.
4. If the Group Characteristic Value dialog opens, enter values for SL minimum cumulative cost % and SL maximum cumulative cost % and click OK.
13 Setting up Stock Ledger
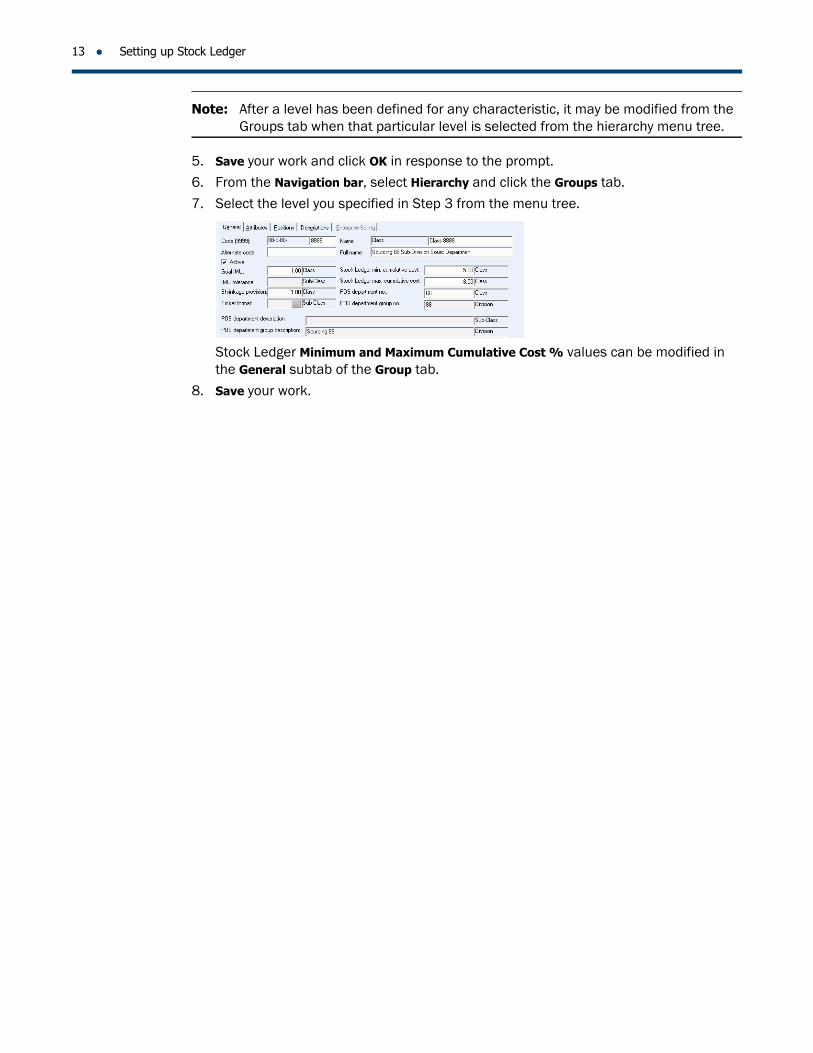
Note: After a level has been defined for any characteristic, it may be modified from the Groups tab when that particular level is selected from the hierarchy menu tree.
5. Save your work and click OK in response to the prompt.6. From the Navigation bar, select Hierarchy and click the Groups tab.
7. Select the level you specified in Step 3 from the menu tree.
Stock Ledger Minimum and Maximum Cumulative Cost % values can be modified in the General subtab of the Group tab.
8. Save your work.
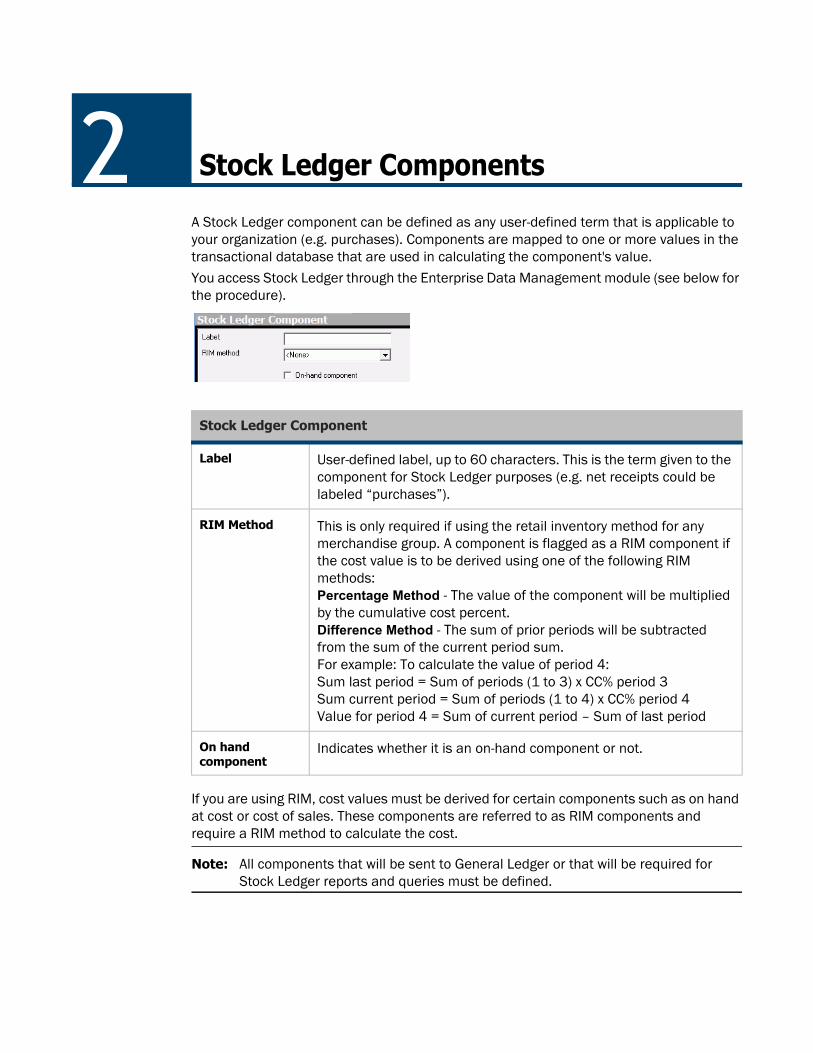
A Stock Ledger component can be defined as any user-defined term that is applicable to your organization (e.g. purchases). Components are mapped to one or more values in the transactional database that are used in calculating the component's value.You access Stock Ledger through the Enterprise Data Management module (see below for the procedure).
If you are using RIM, cost values must be derived for certain components such as on hand at cost or cost of sales. These components are referred to as RIM components and require a RIM method to calculate the cost.
Note: All components that will be sent to General Ledger or that will be required for Stock Ledger reports and queries must be defined.
2 Stock Ledger Components
Stock Ledger Component
Label User-defined label, up to 60 characters. This is the term given to the component for Stock Ledger purposes (e.g. net receipts could be labeled “purchases”).
RIM Method This is only required if using the retail inventory method for any merchandise group. A component is flagged as a RIM component if the cost value is to be derived using one of the following RIM methods: Percentage Method - The value of the component will be multiplied by the cumulative cost percent. Difference Method - The sum of prior periods will be subtracted from the sum of the current period sum. For example: To calculate the value of period 4: Sum last period = Sum of periods (1 to 3) x CC% period 3Sum current period = Sum of periods (1 to 4) x CC% period 4Value for period 4 = Sum of current period – Sum of last period
On hand component
Indicates whether it is an on-hand component or not.
15 Stock Ledger Components
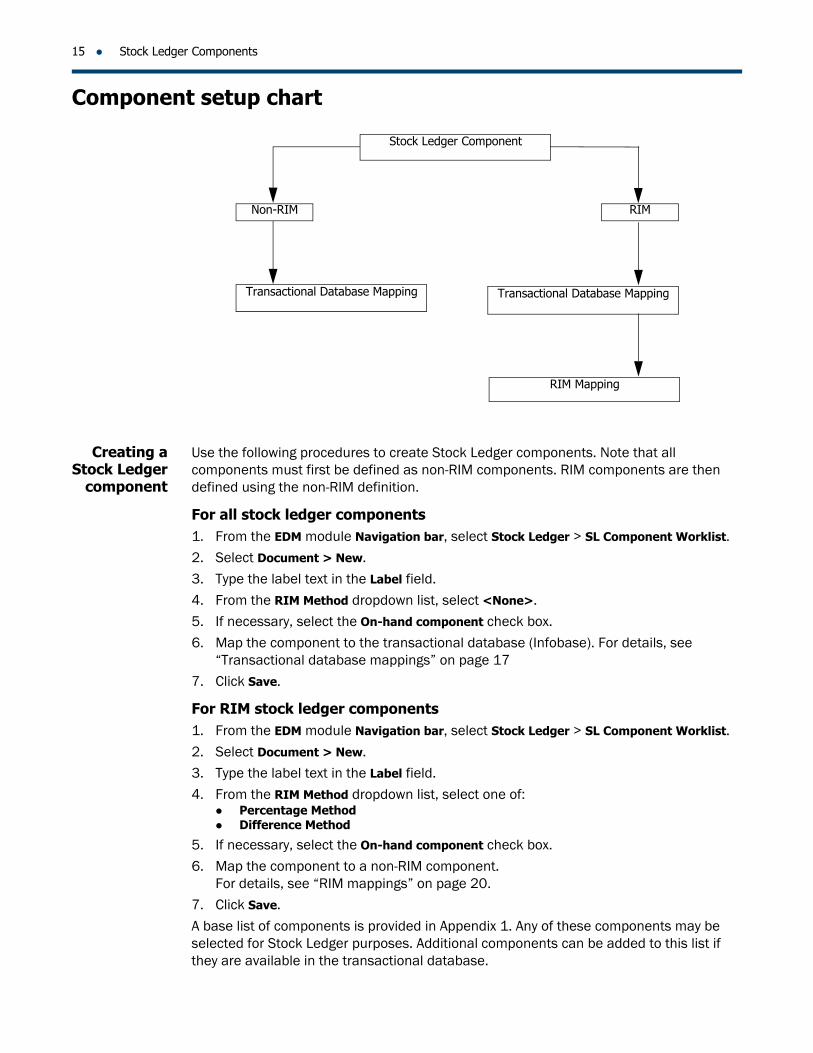
Component setup chart
Stock Ledger Component
Non-RIM RIM
Transactional Database Mapping Transactional Database Mapping
RIM Mapping
Creating a Stock Ledger
component
Use the following procedures to create Stock Ledger components. Note that all components must first be defined as non-RIM components. RIM components are then defined using the non-RIM definition.
For all stock ledger components1. From the EDM module Navigation bar, select Stock Ledger > SL Component Worklist.2. Select Document > New.
3. Type the label text in the Label field.
4. From the RIM Method dropdown list, select <None>.5. If necessary, select the On-hand component check box.
6. Map the component to the transactional database (Infobase). For details, see “Transactional database mappings” on page 17
7. Click Save.
For RIM stock ledger components1. From the EDM module Navigation bar, select Stock Ledger > SL Component Worklist.
2. Select Document > New.3. Type the label text in the Label field.
4. From the RIM Method dropdown list, select one of: Percentage Method Difference Method
5. If necessary, select the On-hand component check box.
6. Map the component to a non-RIM component. For details, see “RIM mappings” on page 20.
7. Click Save.
A base list of components is provided in Appendix 1. Any of these components may be selected for Stock Ledger purposes. Additional components can be added to this list if they are available in the transactional database.
Example 16
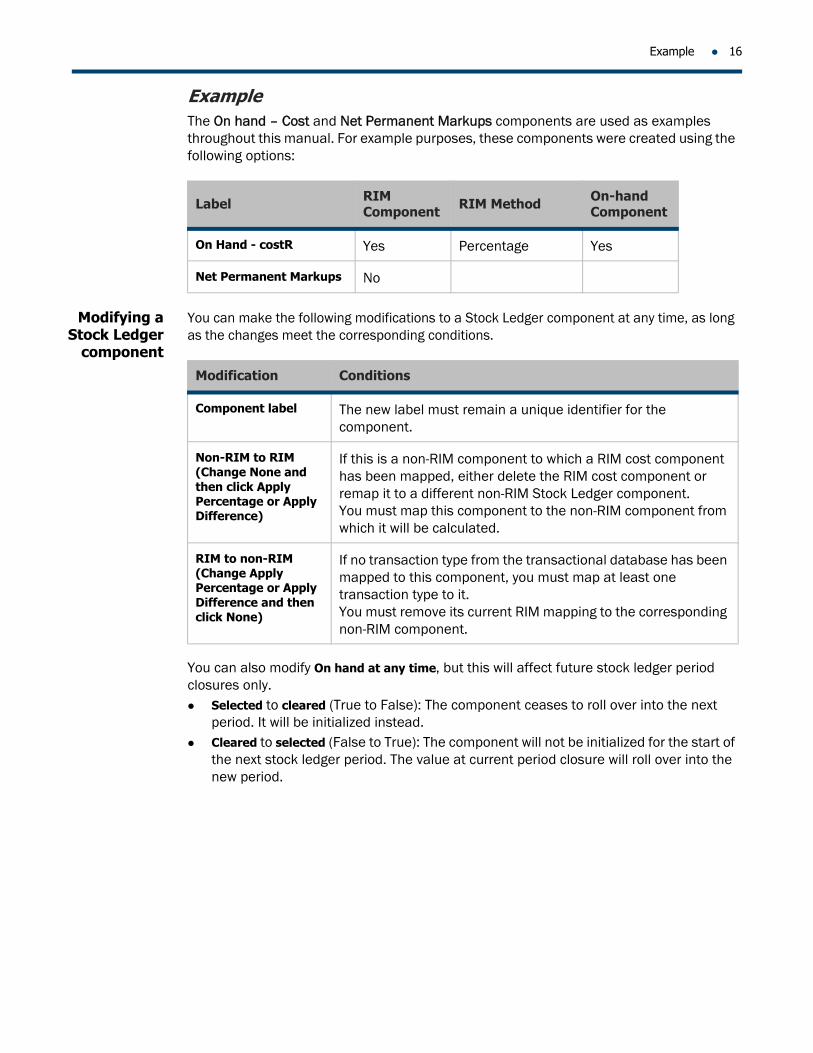
ExampleThe On hand – Cost and Net Permanent Markups components are used as examples throughout this manual. For example purposes, these components were created using the following options:
Modifying a Stock Ledger
component
You can make the following modifications to a Stock Ledger component at any time, as long as the changes meet the corresponding conditions.
You can also modify On hand at any time, but this will affect future stock ledger period closures only. Selected to cleared (True to False): The component ceases to roll over into the next
period. It will be initialized instead. Cleared to selected (False to True): The component will not be initialized for the start of
the next stock ledger period. The value at current period closure will roll over into the new period.
Label RIM Component RIM Method On-hand
Component
On Hand - costR Yes Percentage Yes
Net Permanent Markups No
Modification Conditions
Component label The new label must remain a unique identifier for the component.
Non-RIM to RIM (Change None and then click Apply Percentage or Apply Difference)
If this is a non-RIM component to which a RIM cost component has been mapped, either delete the RIM cost component or remap it to a different non-RIM Stock Ledger component.You must map this component to the non-RIM component from which it will be calculated.
RIM to non-RIM (Change Apply Percentage or Apply Difference and then click None)
If no transaction type from the transactional database has been mapped to this component, you must map at least one transaction type to it. You must remove its current RIM mapping to the corresponding non-RIM component.
17 Stock Ledger Components
Deleting a Stock Ledger
component
You can delete a Stock Ledger component at any time. If you do, you will lose all transaction postings from the transactional database to the component within all open periods. Deleting a Stock Ledger component will not affect its stock ledger history.
Before you can delete a particular Stock Ledger component, you must: Remove any Initial Value mappings for the component. Remove any transactional database component mappings for the component. If this is a non-RIM component to which a RIM cost component has been mapped,
delete the RIM cost component or remap it to a different non-RIM Stock Ledger component.
If this component has been mapped to a General Ledger account, delete the General Ledger account or map a different Stock Ledger component to it.
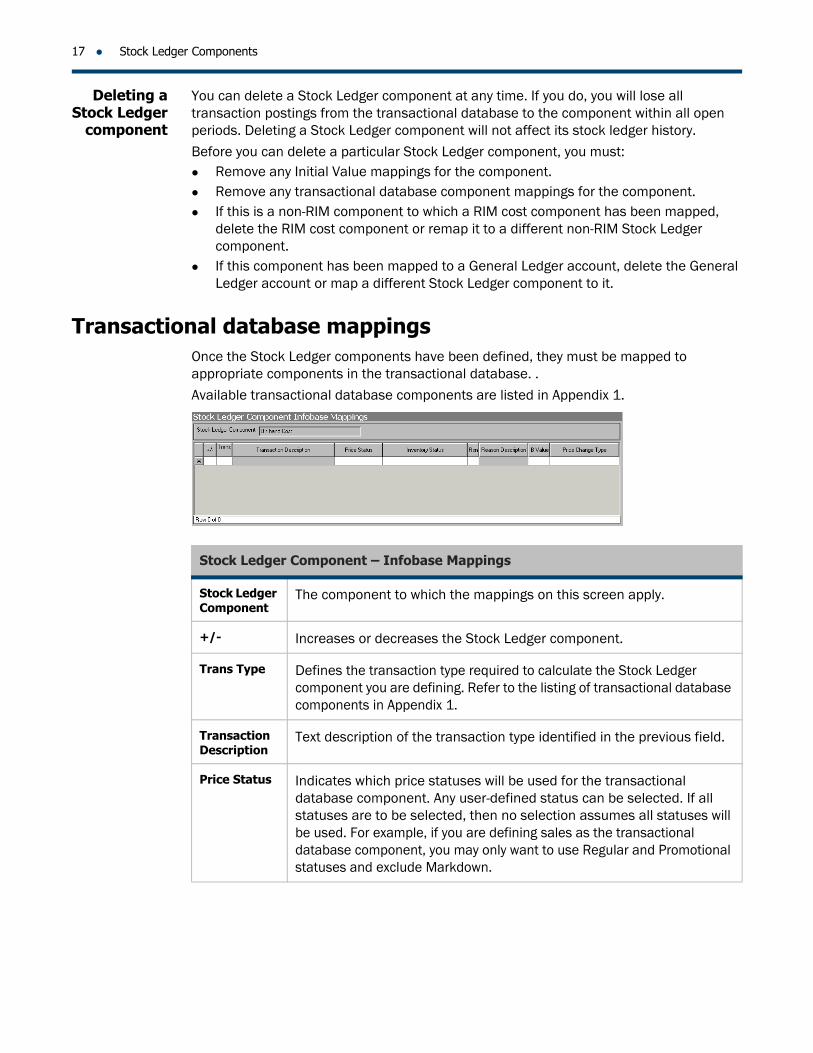
Transactional database mappingsOnce the Stock Ledger components have been defined, they must be mapped to appropriate components in the transactional database. .
Available transactional database components are listed in Appendix 1.
Stock Ledger Component – Infobase Mappings
Stock Ledger Component
The component to which the mappings on this screen apply.
+/- Increases or decreases the Stock Ledger component.
Trans Type Defines the transaction type required to calculate the Stock Ledger component you are defining. Refer to the listing of transactional database components in Appendix 1.
Transaction Description
Text description of the transaction type identified in the previous field.
Price Status Indicates which price statuses will be used for the transactional database component. Any user-defined status can be selected. If all statuses are to be selected, then no selection assumes all statuses will be used. For example, if you are defining sales as the transactional database component, you may only want to use Regular and Promotional statuses and exclude Markdown.
Creating a non-RIM mapping 18
Creating a non-RIM mapping
1. Create a new stock ledger component, using <None> as the RIM Method.See “Creating a Stock Ledger component” on page 15.
2. From the Navigation bar, select Infobase Maps.
3. Select an operator from the +/- operator field.
4. Select a Transaction Type from the Trans drop-down list. 5. Specify the Price Status, Inventory Status, and other information that applies to the
selected transaction type. See the Example below.
6. Repeat steps 3-5 for all the transactions you want to include in the definition.7. Click Save.
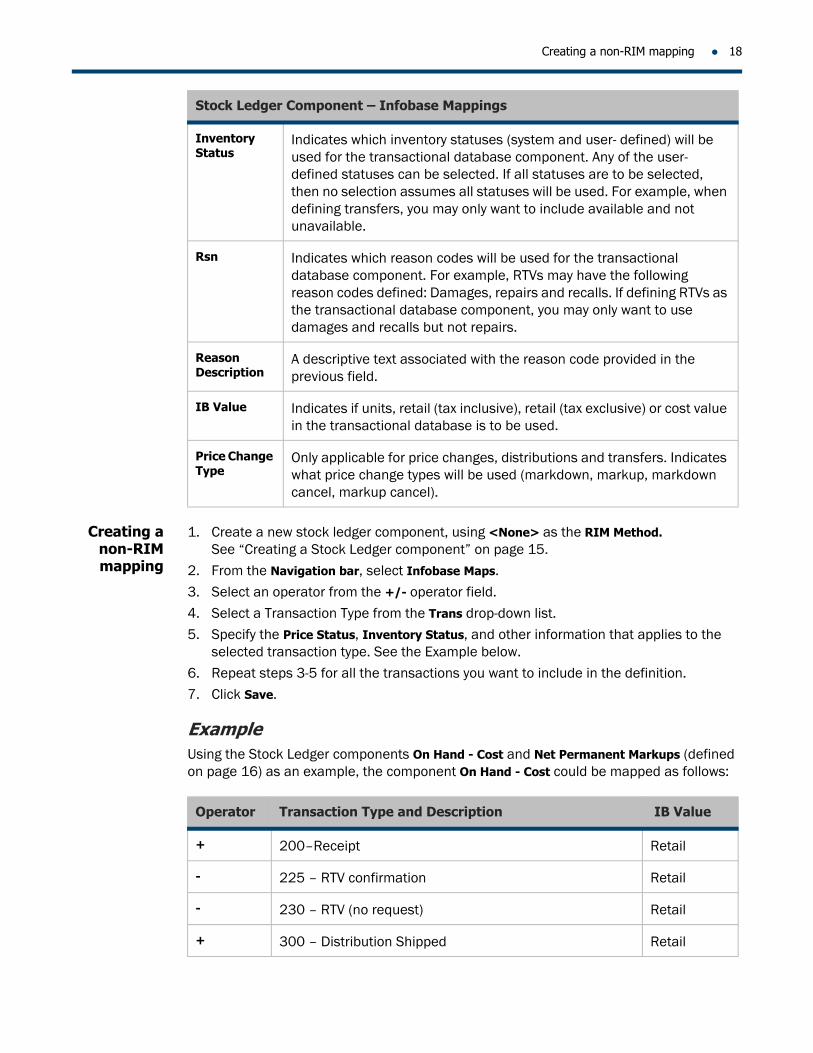
ExampleUsing the Stock Ledger components On Hand - Cost and Net Permanent Markups (defined on page 16) as an example, the component On Hand - Cost could be mapped as follows:
Inventory Status
Indicates which inventory statuses (system and user- defined) will be used for the transactional database component. Any of the user-defined statuses can be selected. If all statuses are to be selected, then no selection assumes all statuses will be used. For example, when defining transfers, you may only want to include available and not unavailable.
Rsn Indicates which reason codes will be used for the transactional database component. For example, RTVs may have the following reason codes defined: Damages, repairs and recalls. If defining RTVs as the transactional database component, you may only want to use damages and recalls but not repairs.
Reason Description
A descriptive text associated with the reason code provided in the previous field.
IB Value Indicates if units, retail (tax inclusive), retail (tax exclusive) or cost value in the transactional database is to be used.
Price Change Type
Only applicable for price changes, distributions and transfers. Indicates what price change types will be used (markdown, markup, markdown cancel, markup cancel).
Stock Ledger Component – Infobase Mappings
Operator Transaction Type and Description IB Value
+ 200–Receipt Retail
- 225 – RTV confirmation Retail
- 230 – RTV (no request) Retail
+ 300 – Distribution Shipped Retail
19 Stock Ledger Components
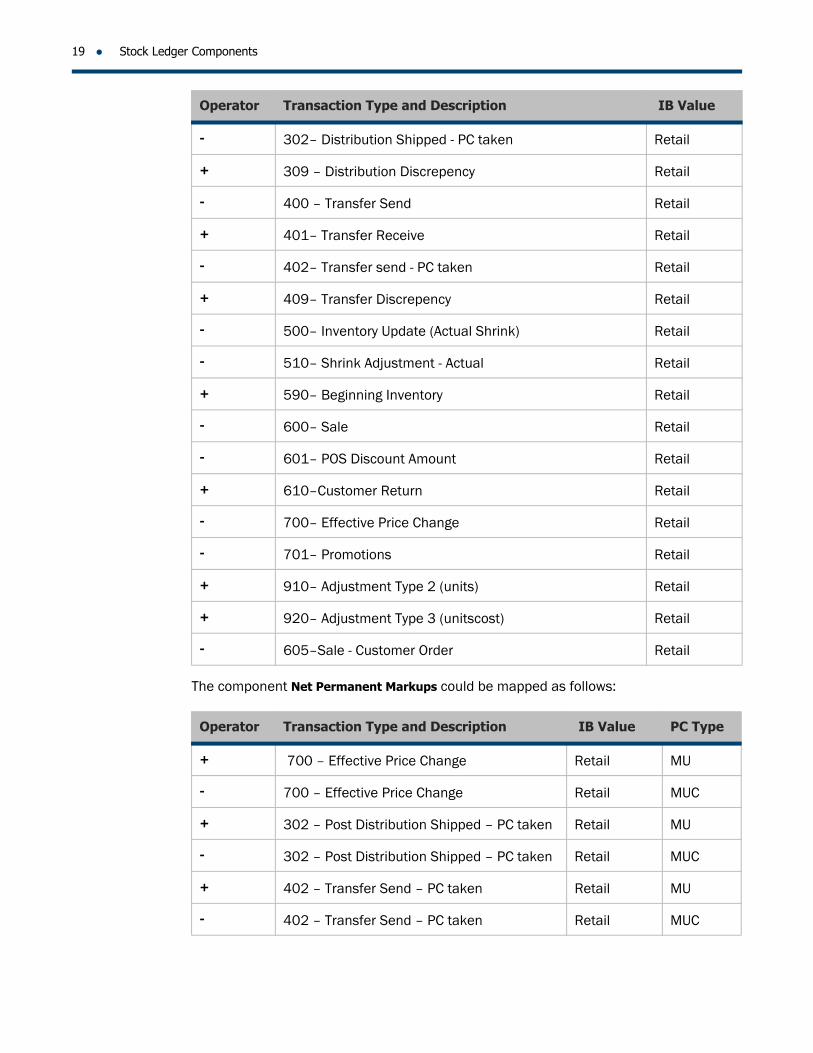
The component Net Permanent Markups could be mapped as follows:
- 302– Distribution Shipped - PC taken Retail
+ 309 – Distribution Discrepency Retail
- 400 – Transfer Send Retail
+ 401– Transfer Receive Retail
- 402– Transfer send - PC taken Retail
+ 409– Transfer Discrepency Retail
- 500– Inventory Update (Actual Shrink) Retail
- 510– Shrink Adjustment - Actual Retail
+ 590– Beginning Inventory Retail
- 600– Sale Retail
- 601– POS Discount Amount Retail
+ 610–Customer Return Retail
- 700– Effective Price Change Retail
- 701– Promotions Retail
+ 910– Adjustment Type 2 (units) Retail
+ 920– Adjustment Type 3 (unitscost) Retail
- 605–Sale - Customer Order Retail
Operator Transaction Type and Description IB Value PC Type
+ 700 – Effective Price Change Retail MU
- 700 – Effective Price Change Retail MUC
+ 302 – Post Distribution Shipped – PC taken Retail MU
- 302 – Post Distribution Shipped – PC taken Retail MUC
+ 402 – Transfer Send – PC taken Retail MU
- 402 – Transfer Send – PC taken Retail MUC
Operator Transaction Type and Description IB Value
RIM mappings 20
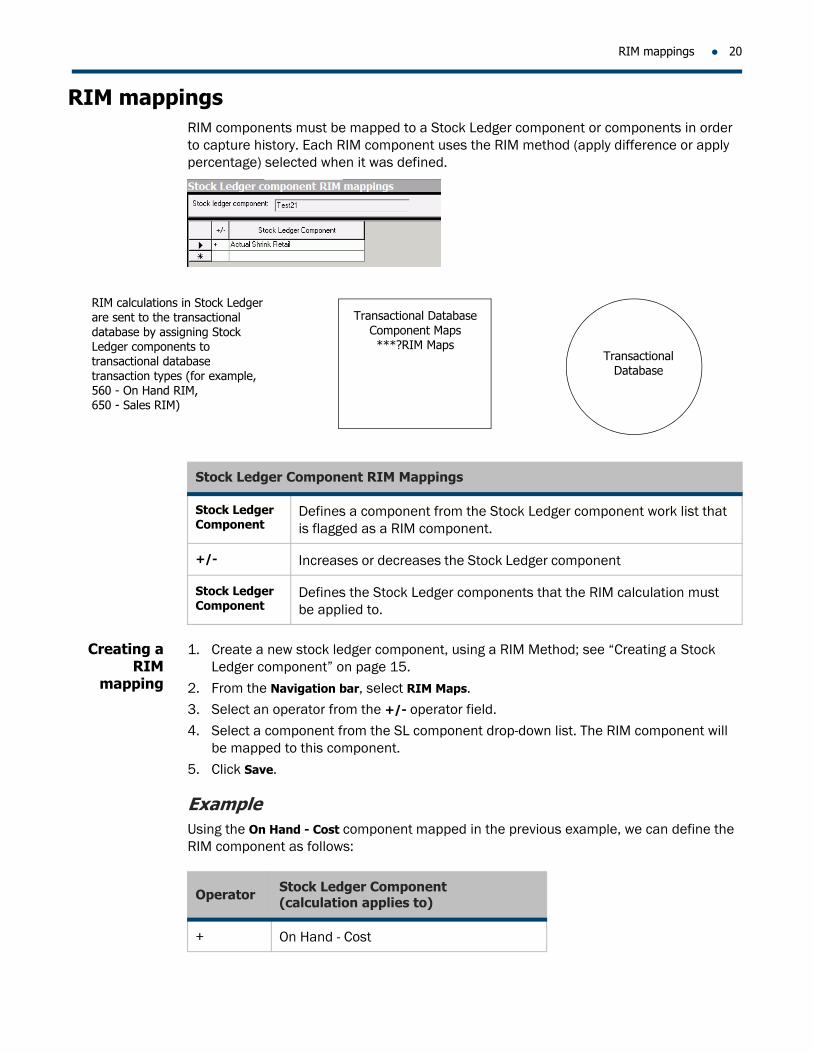
RIM mappingsRIM components must be mapped to a Stock Ledger component or components in order to capture history. Each RIM component uses the RIM method (apply difference or apply percentage) selected when it was defined.
Creating a RIM
mapping
1. Create a new stock ledger component, using a RIM Method; see “Creating a Stock Ledger component” on page 15.
2. From the Navigation bar, select RIM Maps.3. Select an operator from the +/- operator field.
4. Select a component from the SL component drop-down list. The RIM component will be mapped to this component.
5. Click Save.
ExampleUsing the On Hand - Cost component mapped in the previous example, we can define the RIM component as follows:
TransactionalDatabase
Transactional DatabaseComponent Maps***?RIM Maps
RIM calculations in Stock Ledger are sent to the transactional database by assigning Stock Ledger components to transactional database transaction types (for example, 560 - On Hand RIM,650 - Sales RIM)
Stock Ledger Component RIM Mappings
Stock Ledger Component
Defines a component from the Stock Ledger component work list that is flagged as a RIM component.
+/- Increases or decreases the Stock Ledger component
Stock Ledger Component
Defines the Stock Ledger components that the RIM calculation must be applied to.
Operator Stock Ledger Component (calculation applies to)
+ On Hand - Cost
21 Stock Ledger Components
Modifying a RIM
mapping
1. From the Navigate menu, select Stock Ledger > SL Component Worklist.
2. Select Table > Retrieve All.3. Select the SL component to be modified.
4. Select Open.
5. From the Navigation bar, select RIM Maps.6. Make the necessary modifications.
7. Save your work.
Note: If you want to change a non-RIM Stock Ledger component to a RIM component, and a RIM cost component has already been mapped to it, you must delete the RIM cost component or remap it to a different non-RIM Stock Ledger component.
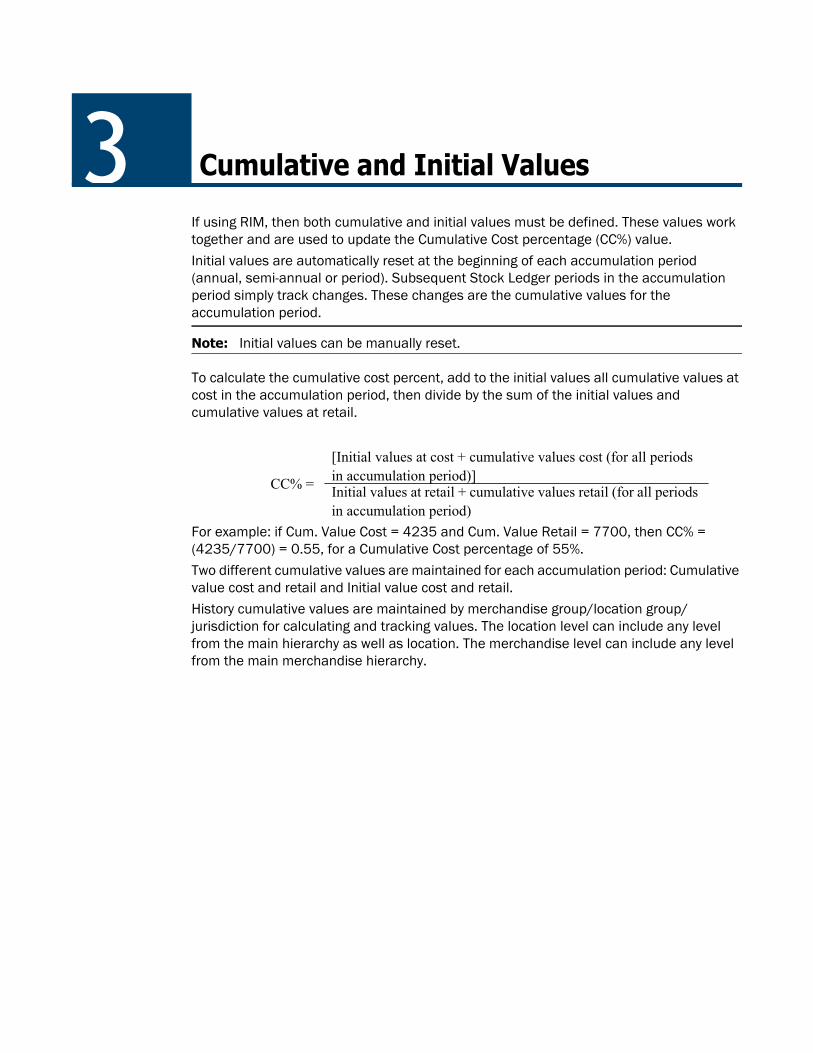
If using RIM, then both cumulative and initial values must be defined. These values work together and are used to update the Cumulative Cost percentage (CC%) value.
Initial values are automatically reset at the beginning of each accumulation period (annual, semi-annual or period). Subsequent Stock Ledger periods in the accumulation period simply track changes. These changes are the cumulative values for the accumulation period.
Note: Initial values can be manually reset.
To calculate the cumulative cost percent, add to the initial values all cumulative values at cost in the accumulation period, then divide by the sum of the initial values and cumulative values at retail.
For example: if Cum. Value Cost = 4235 and Cum. Value Retail = 7700, then CC% = (4235/7700) = 0.55, for a Cumulative Cost percentage of 55%.
Two different cumulative values are maintained for each accumulation period: Cumulative value cost and retail and Initial value cost and retail.History cumulative values are maintained by merchandise group/location group/jurisdiction for calculating and tracking values. The location level can include any level from the main hierarchy as well as location. The merchandise level can include any level from the main merchandise hierarchy.
3 Cumulative and Initial Values
CC% =
[Initial values at cost + cumulative values cost (for all periods in accumulation period)]Initial values at retail + cumulative values retail (for all periods in accumulation period)
23 Cumulative and Initial Values
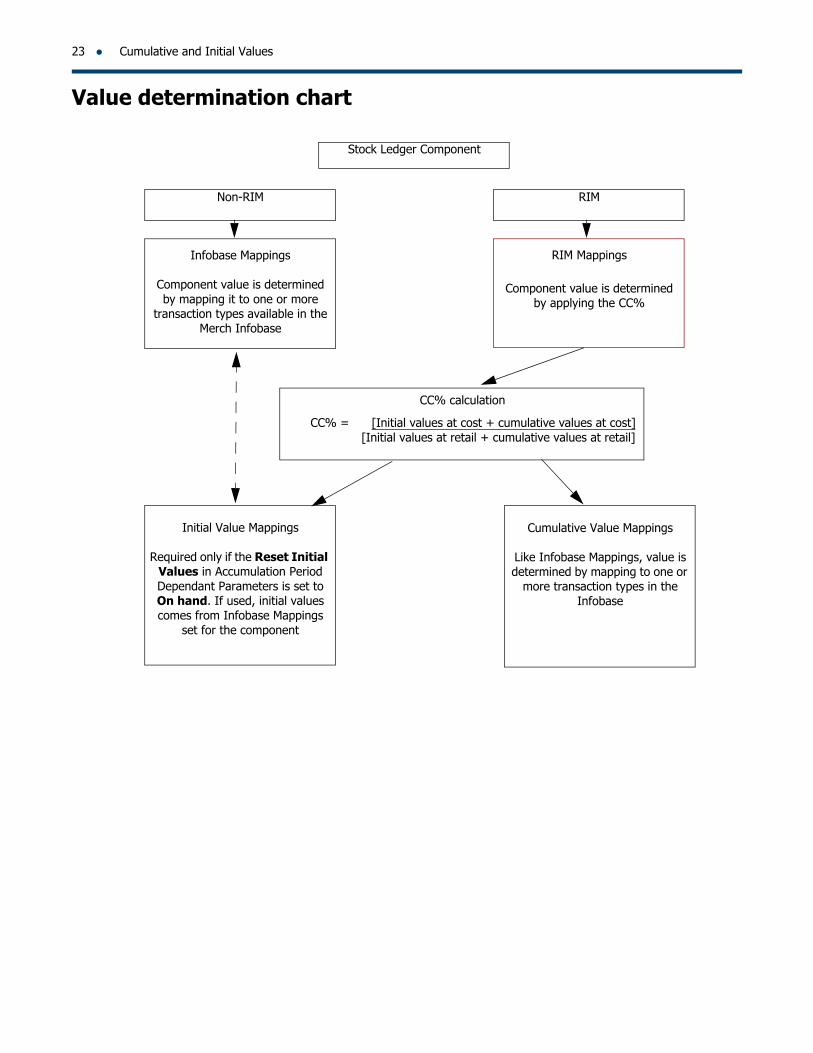
Value determination chart
Stock Ledger Component
Non-RIM RIM
Infobase Mappings
Component value is determined by mapping it to one or more
transaction types available in the Merch Infobase
RIM Mappings
Component value is determined by applying the CC%
CC% calculation
CC% = [Initial values at cost + cumulative values at cost] [Initial values at retail + cumulative values at retail]
Initial Value Mappings
Required only if the Reset Initial Values in Accumulation Period Dependant Parameters is set to On hand. If used, initial values comes from Infobase Mappings
set for the component
Cumulative Value Mappings
Like Infobase Mappings, value is determined by mapping to one or
more transaction types in the Infobase
Cumulative Value Mappings 24
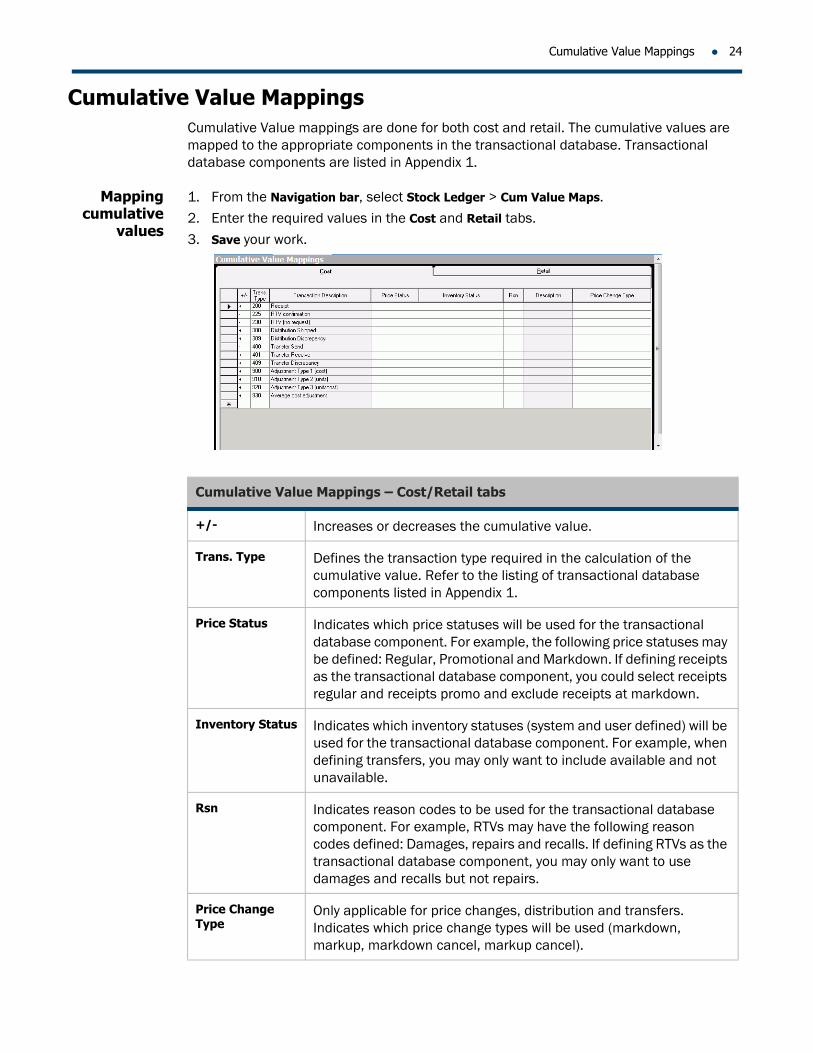
Cumulative Value MappingsCumulative Value mappings are done for both cost and retail. The cumulative values are mapped to the appropriate components in the transactional database. Transactional database components are listed in Appendix 1.
Mapping cumulative
values
1. From the Navigation bar, select Stock Ledger > Cum Value Maps.2. Enter the required values in the Cost and Retail tabs.
3. Save your work.
Cumulative Value Mappings – Cost/Retail tabs
+/- Increases or decreases the cumulative value.
Trans. Type Defines the transaction type required in the calculation of the cumulative value. Refer to the listing of transactional database components listed in Appendix 1.
Price Status Indicates which price statuses will be used for the transactional database component. For example, the following price statuses may be defined: Regular, Promotional and Markdown. If defining receipts as the transactional database component, you could select receipts regular and receipts promo and exclude receipts at markdown.
Inventory Status Indicates which inventory statuses (system and user defined) will be used for the transactional database component. For example, when defining transfers, you may only want to include available and not unavailable.
Rsn Indicates reason codes to be used for the transactional database component. For example, RTVs may have the following reason codes defined: Damages, repairs and recalls. If defining RTVs as the transactional database component, you may only want to use damages and recalls but not repairs.
Price Change Type
Only applicable for price changes, distribution and transfers. Indicates which price change types will be used (markdown, markup, markdown cancel, markup cancel).
25 Cumulative and Initial Values
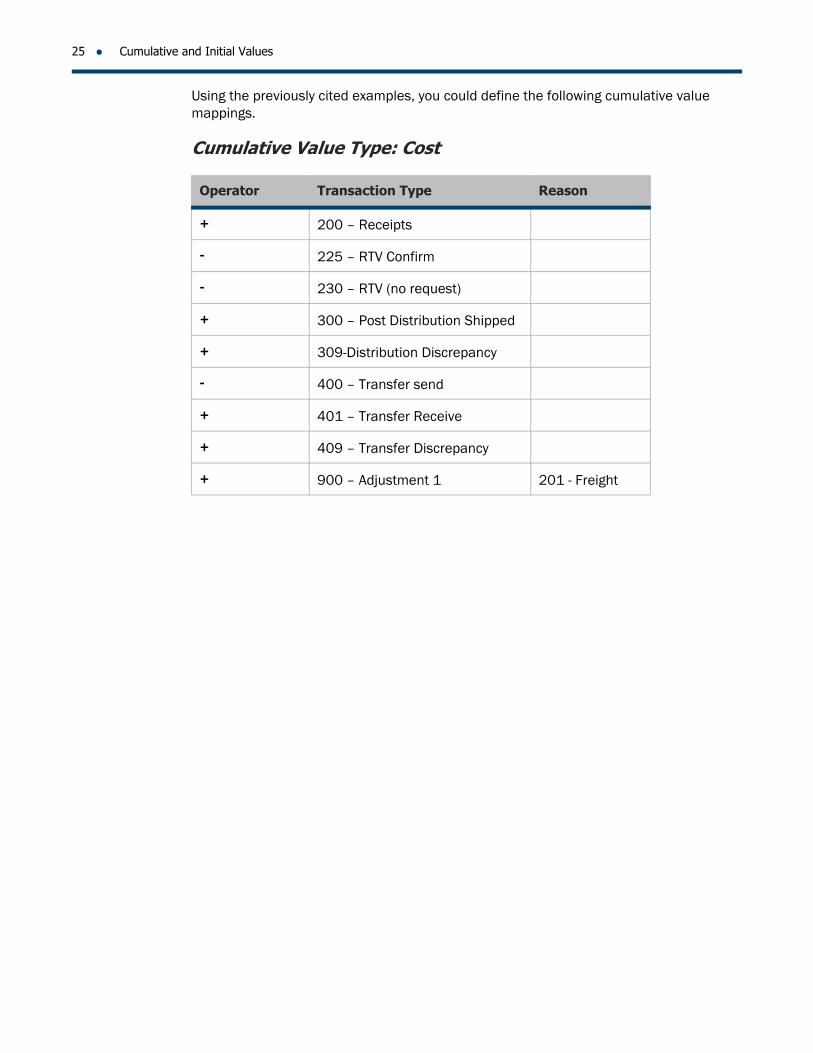
Using the previously cited examples, you could define the following cumulative value mappings.
Cumulative Value Type: Cost
Operator Transaction Type Reason
+ 200 – Receipts
- 225 – RTV Confirm
- 230 – RTV (no request)
+ 300 – Post Distribution Shipped
+ 309-Distribution Discrepancy
- 400 – Transfer send
+ 401 – Transfer Receive
+ 409 – Transfer Discrepancy
+ 900 – Adjustment 1 201 - Freight
Initial Value Mappings 26
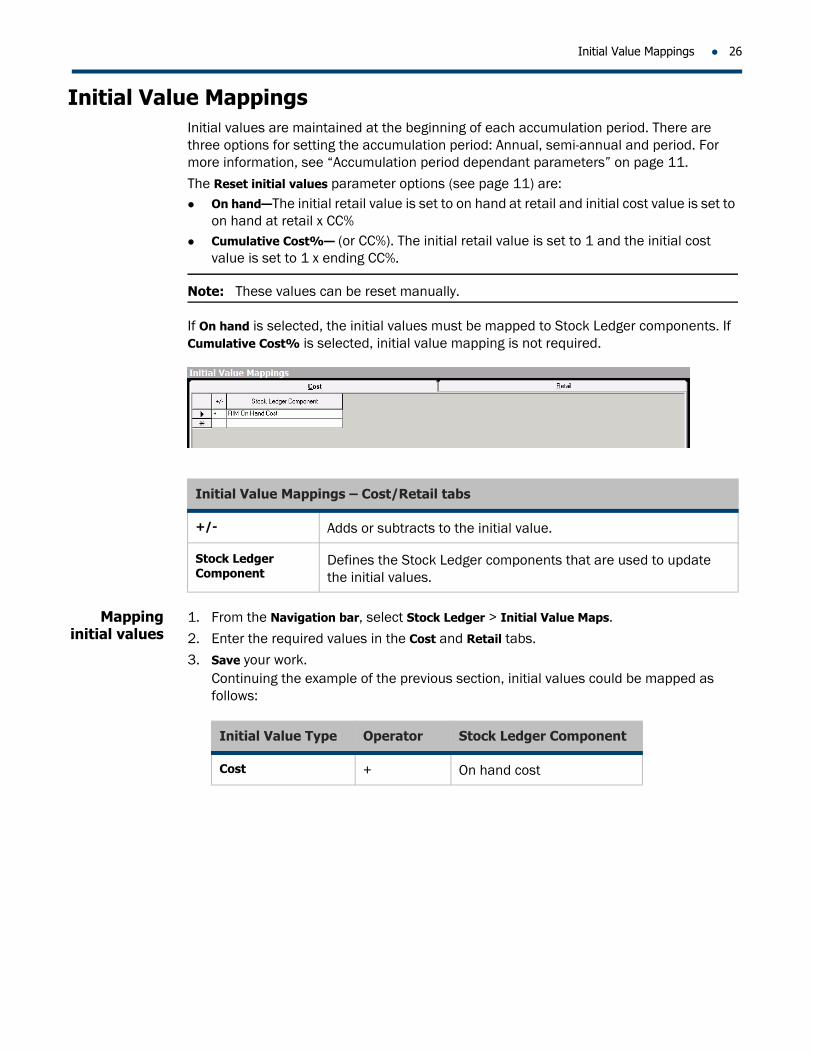
Initial Value MappingsInitial values are maintained at the beginning of each accumulation period. There are three options for setting the accumulation period: Annual, semi-annual and period. For more information, see “Accumulation period dependant parameters” on page 11.
The Reset initial values parameter options (see page 11) are: On hand—The initial retail value is set to on hand at retail and initial cost value is set to
on hand at retail x CC% Cumulative Cost%— (or CC%). The initial retail value is set to 1 and the initial cost
value is set to 1 x ending CC%.
Note: These values can be reset manually.
If On hand is selected, the initial values must be mapped to Stock Ledger components. If Cumulative Cost% is selected, initial value mapping is not required.
Mapping initial values
1. From the Navigation bar, select Stock Ledger > Initial Value Maps.
2. Enter the required values in the Cost and Retail tabs.
3. Save your work.Continuing the example of the previous section, initial values could be mapped as follows:
Initial Value Mappings – Cost/Retail tabs
+/- Adds or subtracts to the initial value.
Stock Ledger Component
Defines the Stock Ledger components that are used to update the initial values.
Initial Value Type Operator Stock Ledger Component
Cost + On hand cost
27 Cumulative and Initial Values
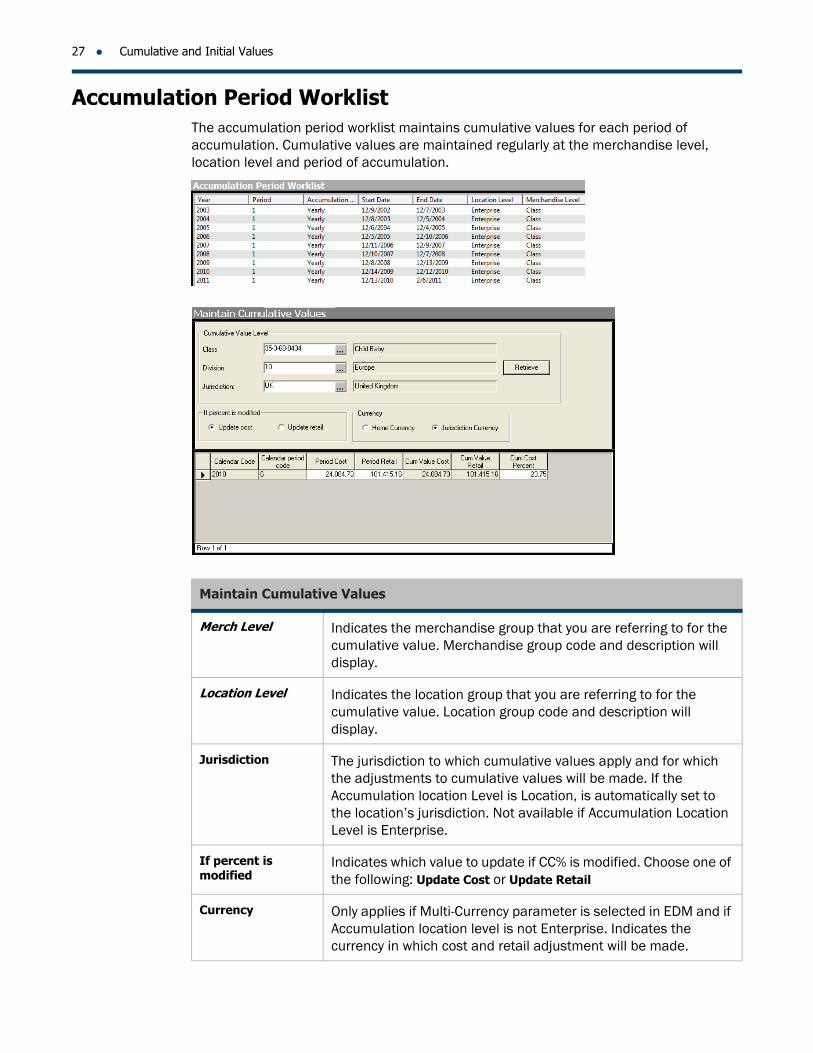
Accumulation Period WorklistThe accumulation period worklist maintains cumulative values for each period of accumulation. Cumulative values are maintained regularly at the merchandise level, location level and period of accumulation.
Maintain Cumulative Values
Merch Level Indicates the merchandise group that you are referring to for the cumulative value. Merchandise group code and description will display.
Location Level Indicates the location group that you are referring to for the cumulative value. Location group code and description will display.
Jurisdiction The jurisdiction to which cumulative values apply and for which the adjustments to cumulative values will be made. If the Accumulation location Level is Location, is automatically set to the location’s jurisdiction. Not available if Accumulation Location Level is Enterprise.
If percent is modified
Indicates which value to update if CC% is modified. Choose one of the following: Update Cost or Update Retail
Currency Only applies if Multi-Currency parameter is selected in EDM and if Accumulation location level is not Enterprise. Indicates the currency in which cost and retail adjustment will be made.
Maintaining cumulative values 28
Maintaining cumulative
values
The cumulative values for a period of accumulation for a particular merchandise group level and location level can be manually adjusted if the system-maintained cumulative values go out of synch. In a multi-jurisdictional organization, values can be entered in the home or location currency.
1. From the Navigation Bar, select Stock Ledger > Accum Period Worklist.2. Select Table > Retrieve All.
3. Select a period from the Accumulation Period Worklist.
4. From the Navigation bar, select Maintain Cum Values.5. Enter the required information.
6. Save your work and click OK.
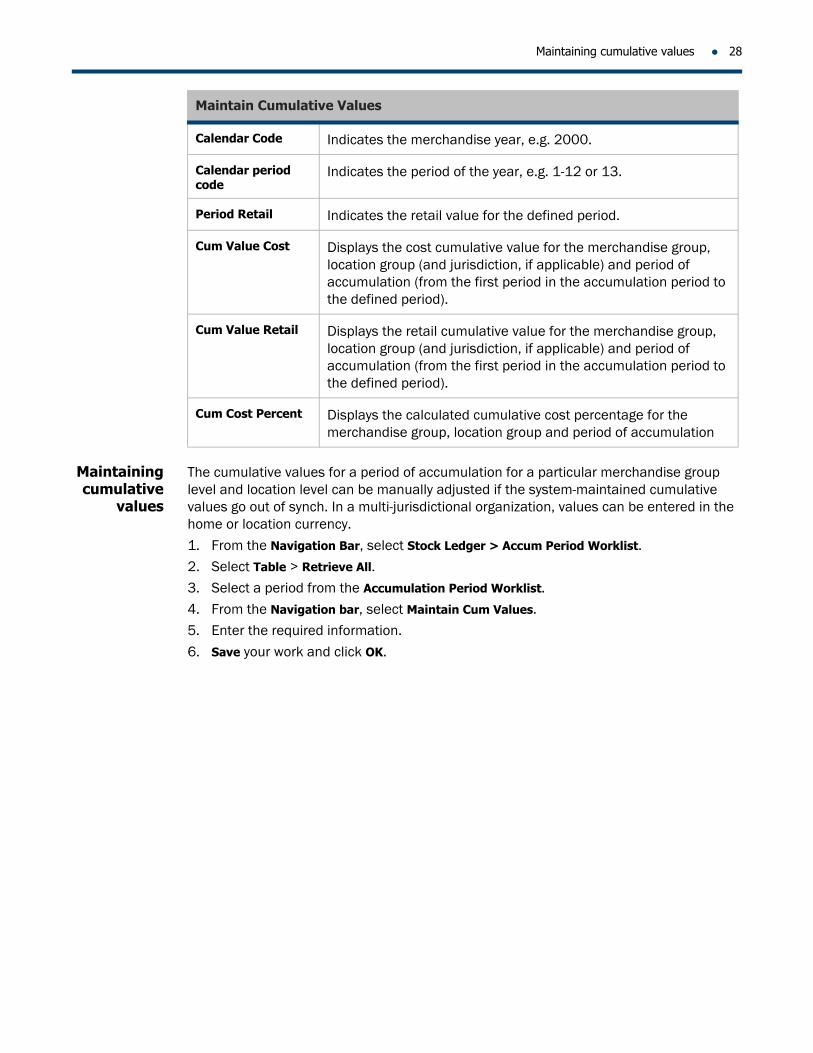
Calendar Code Indicates the merchandise year, e.g. 2000.
Calendar period code
Indicates the period of the year, e.g. 1-12 or 13.
Period Retail Indicates the retail value for the defined period.
Cum Value Cost Displays the cost cumulative value for the merchandise group, location group (and jurisdiction, if applicable) and period of accumulation (from the first period in the accumulation period to the defined period).
Cum Value Retail Displays the retail cumulative value for the merchandise group, location group (and jurisdiction, if applicable) and period of accumulation (from the first period in the accumulation period to the defined period).
Cum Cost Percent Displays the calculated cumulative cost percentage for the merchandise group, location group and period of accumulation
Maintain Cumulative Values
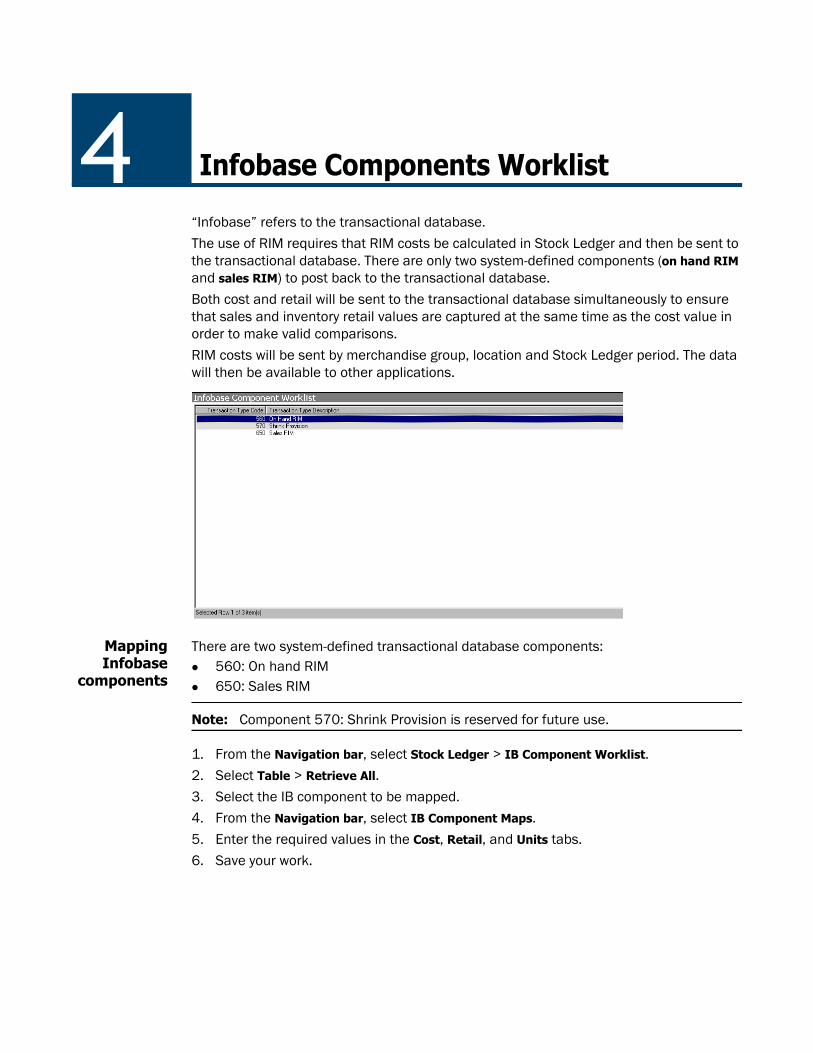
“Infobase” refers to the transactional database.
The use of RIM requires that RIM costs be calculated in Stock Ledger and then be sent to the transactional database. There are only two system-defined components (on hand RIM and sales RIM) to post back to the transactional database.
Both cost and retail will be sent to the transactional database simultaneously to ensure that sales and inventory retail values are captured at the same time as the cost value in order to make valid comparisons.
RIM costs will be sent by merchandise group, location and Stock Ledger period. The data will then be available to other applications.
Mapping Infobase
components
There are two system-defined transactional database components: 560: On hand RIM 650: Sales RIM
Note: Component 570: Shrink Provision is reserved for future use.
1. From the Navigation bar, select Stock Ledger > IB Component Worklist.
2. Select Table > Retrieve All.
3. Select the IB component to be mapped.4. From the Navigation bar, select IB Component Maps.
5. Enter the required values in the Cost, Retail, and Units tabs.
6. Save your work.
4 Infobase Components Worklist
Mapping Infobase components 30
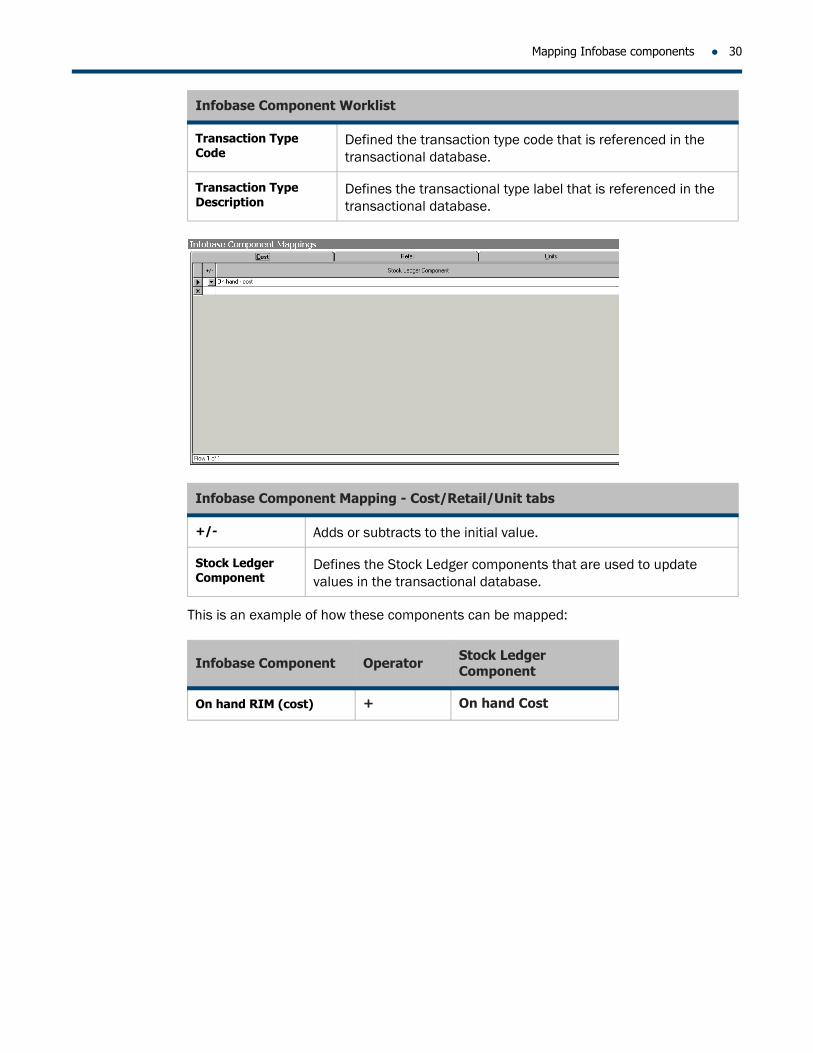
This is an example of how these components can be mapped:
Infobase Component Worklist
Transaction Type Code
Defined the transaction type code that is referenced in the transactional database.
Transaction Type Description
Defines the transactional type label that is referenced in the transactional database.
Infobase Component Mapping - Cost/Retail/Unit tabs
+/- Adds or subtracts to the initial value.
Stock Ledger Component
Defines the Stock Ledger components that are used to update values in the transactional database.
Infobase Component Operator Stock Ledger Component
On hand RIM (cost) + On hand Cost
If your organization is using a third party General Ledger (GL) system, additional GL information will need to be defined for the export. Pipeline is the mechanism used to post data from Stock Ledger to General Ledger.In order to prepare the interface file, the following must be considered: GL period must be defined in the GL calendar: Stock Ledger follows a merchandise
period but GL could follow either a calendar month or merchandise period. All components that will be sent to GL must be defined with the appropriate accounts
to debit and credit. Credits are multiplied by –1 before being sent. GL accounts and account structures determine which data to select and at which level
it should be set. Data can be sent to GL multiple times for a period. The date sent is automatically
captured for each period. A period close flag will prevent transactions from updating GL and prevent Stock Ledger from being able to send information for that period.
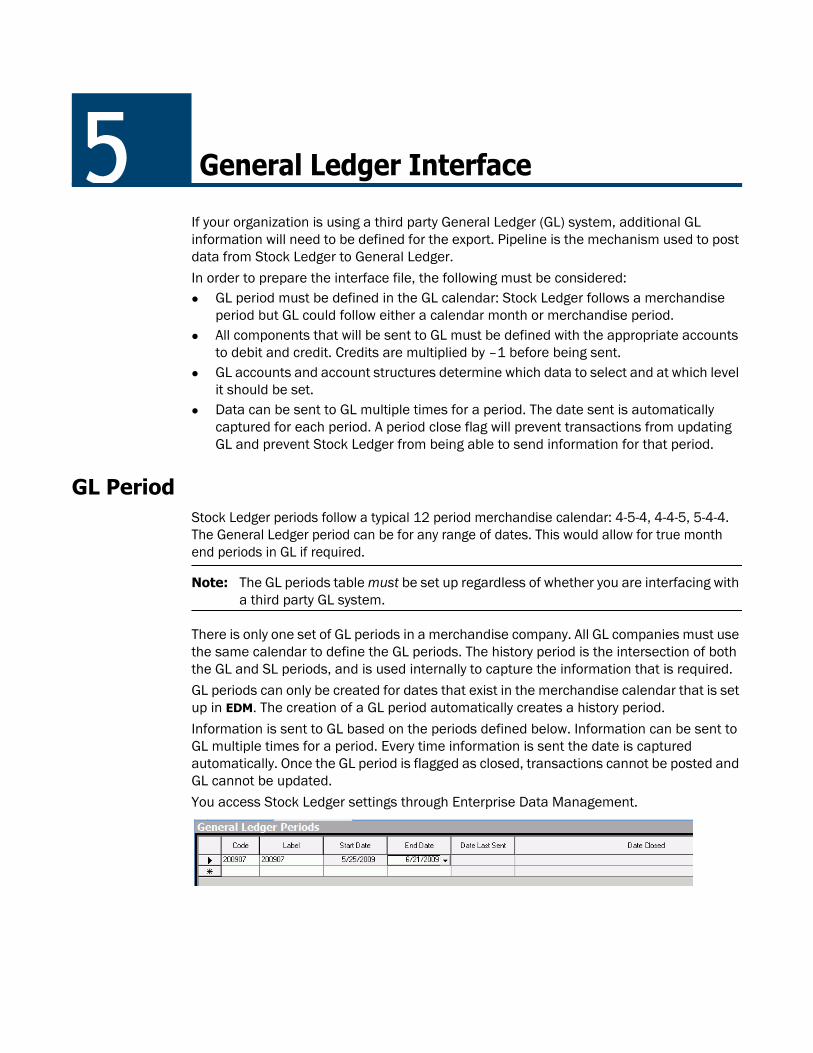
GL PeriodStock Ledger periods follow a typical 12 period merchandise calendar: 4-5-4, 4-4-5, 5-4-4. The General Ledger period can be for any range of dates. This would allow for true month end periods in GL if required.
Note: The GL periods table must be set up regardless of whether you are interfacing with a third party GL system.
There is only one set of GL periods in a merchandise company. All GL companies must use the same calendar to define the GL periods. The history period is the intersection of both the GL and SL periods, and is used internally to capture the information that is required. GL periods can only be created for dates that exist in the merchandise calendar that is set up in EDM. The creation of a GL period automatically creates a history period.
Information is sent to GL based on the periods defined below. Information can be sent to GL multiple times for a period. Every time information is sent the date is captured automatically. Once the GL period is flagged as closed, transactions cannot be posted and GL cannot be updated.You access Stock Ledger settings through Enterprise Data Management.
5 General Ledger Interface
Creating a new GL calendar 32
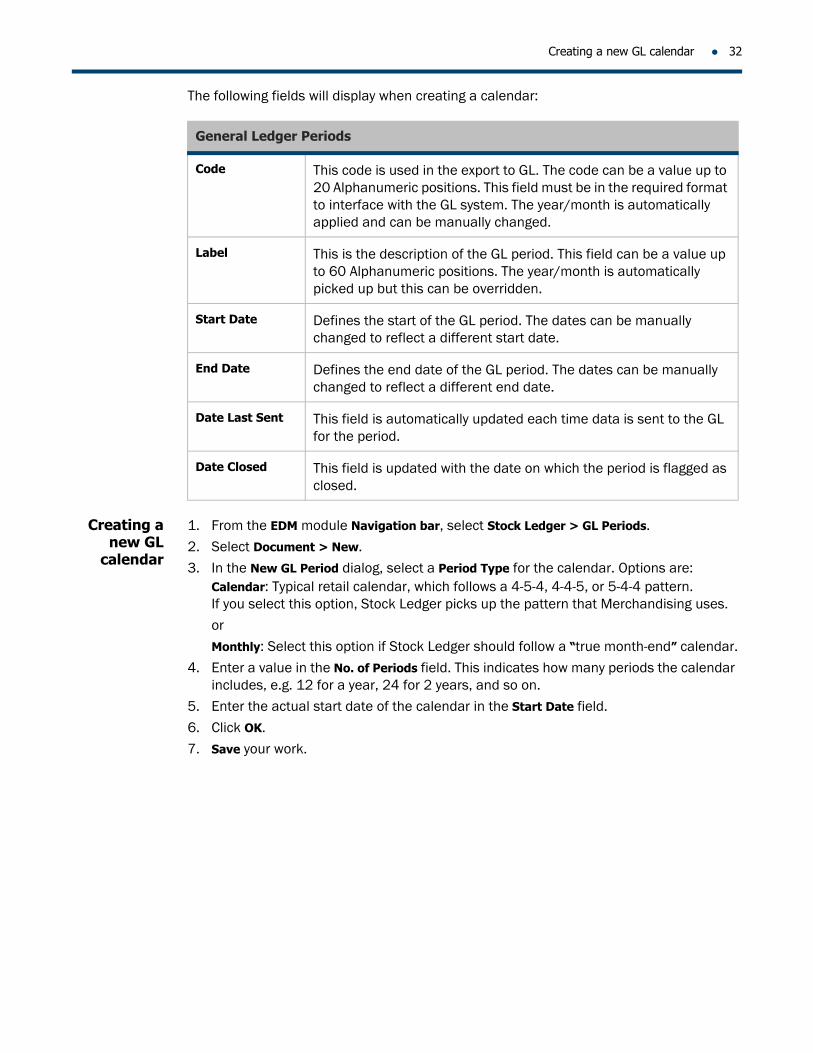
The following fields will display when creating a calendar:
Creating a new GL
calendar
1. From the EDM module Navigation bar, select Stock Ledger > GL Periods.2. Select Document > New.
3. In the New GL Period dialog, select a Period Type for the calendar. Options are: Calendar: Typical retail calendar, which follows a 4-5-4, 4-4-5, or 5-4-4 pattern. If you select this option, Stock Ledger picks up the pattern that Merchandising uses.
orMonthly: Select this option if Stock Ledger should follow a “true month-end” calendar.
4. Enter a value in the No. of Periods field. This indicates how many periods the calendar includes, e.g. 12 for a year, 24 for 2 years, and so on.
5. Enter the actual start date of the calendar in the Start Date field.
6. Click OK.
7. Save your work.
General Ledger Periods
Code This code is used in the export to GL. The code can be a value up to 20 Alphanumeric positions. This field must be in the required format to interface with the GL system. The year/month is automatically applied and can be manually changed.
Label This is the description of the GL period. This field can be a value up to 60 Alphanumeric positions. The year/month is automatically picked up but this can be overridden.
Start Date Defines the start of the GL period. The dates can be manually changed to reflect a different start date.
End Date Defines the end date of the GL period. The dates can be manually changed to reflect a different end date.
Date Last Sent This field is automatically updated each time data is sent to the GL for the period.
Date Closed This field is updated with the date on which the period is flagged as closed.
33 General Ledger Interface
Setting a GL period to
export
This optional parameter is composed of 20 alphanumeric characters that identify a default GL period used by export files to transfer data from Stock Ledger to a third party General Ledger system.
If you choose to define this parameter, its default value is the earliest open GL period in the calendar. You can modify the default to any other open GL period or remove it at any time. Modifications affect future exports only.
This parameter must always be set to an open period. Therefore, if a particular GL period has been set to export, you can't close it until you first remove it from export.1. From the Navigation bar, select Stock Ledger > GL Periods.
2. Select Table >Retrieve All.
3. In Retrieve All, enter a start date, (if required) and click OK.4. Select Table > Set GL period to export.
5. In Set GL export period, enter a period number or use the Lookup button to select a period from the list of defined periods. This will set a new GL period default period.To reset the default to the earliest open GL period, delete the existing entry and save.
6. Save your work and click OK.
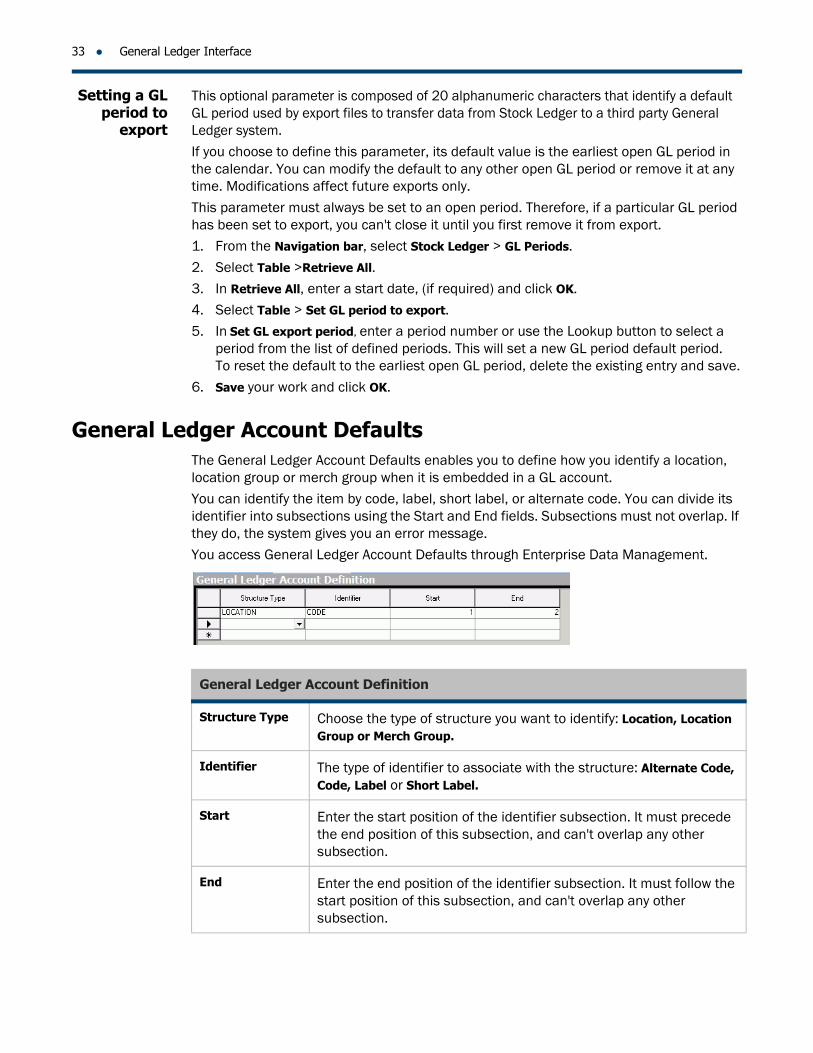
General Ledger Account DefaultsThe General Ledger Account Defaults enables you to define how you identify a location, location group or merch group when it is embedded in a GL account.You can identify the item by code, label, short label, or alternate code. You can divide its identifier into subsections using the Start and End fields. Subsections must not overlap. If they do, the system gives you an error message.You access General Ledger Account Defaults through Enterprise Data Management.
General Ledger Account Definition
Structure Type Choose the type of structure you want to identify: Location, Location Group or Merch Group.
Identifier The type of identifier to associate with the structure: Alternate Code, Code, Label or Short Label.
Start Enter the start position of the identifier subsection. It must precede the end position of this subsection, and can't overlap any other subsection.
End Enter the end position of the identifier subsection. It must follow the start position of this subsection, and can't overlap any other subsection.
Identifying the GL account 34
Identifying the GL
account
1. From the Navigation bar, select Stock Ledger > GL Account Defaults.
2. In the first empty Structure Type field, select a structure type from the drop-down list.3. In the Identifier field, select an identifier from the drop-down list to associate with the
structure.
4. To include a subsection in the identifier, enter values for its start and end positions in the Start and End fields.
5. Save your work and click OK.
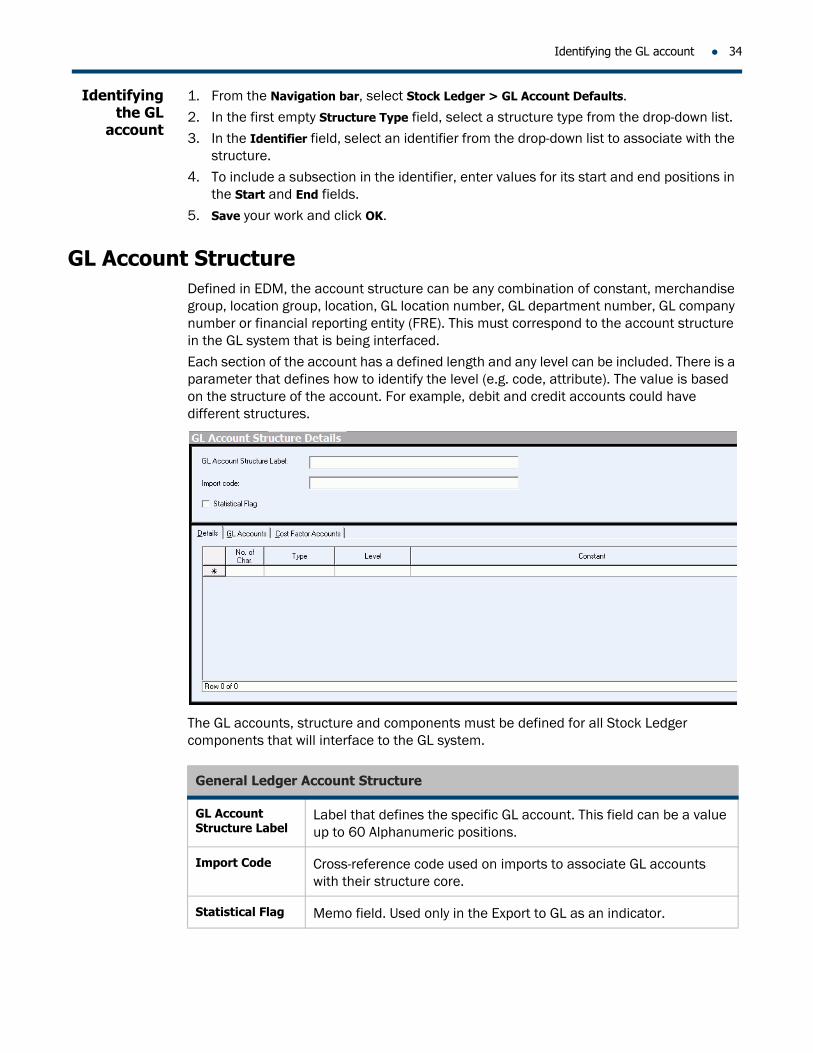
GL Account StructureDefined in EDM, the account structure can be any combination of constant, merchandise group, location group, location, GL location number, GL department number, GL company number or financial reporting entity (FRE). This must correspond to the account structure in the GL system that is being interfaced.Each section of the account has a defined length and any level can be included. There is a parameter that defines how to identify the level (e.g. code, attribute). The value is based on the structure of the account. For example, debit and credit accounts could have different structures.
The GL accounts, structure and components must be defined for all Stock Ledger components that will interface to the GL system.
General Ledger Account Structure
GL Account Structure Label
Label that defines the specific GL account. This field can be a value up to 60 Alphanumeric positions.
Import Code Cross-reference code used on imports to associate GL accounts with their structure core.
Statistical Flag Memo field. Used only in the Export to GL as an indicator.
35 General Ledger Interface
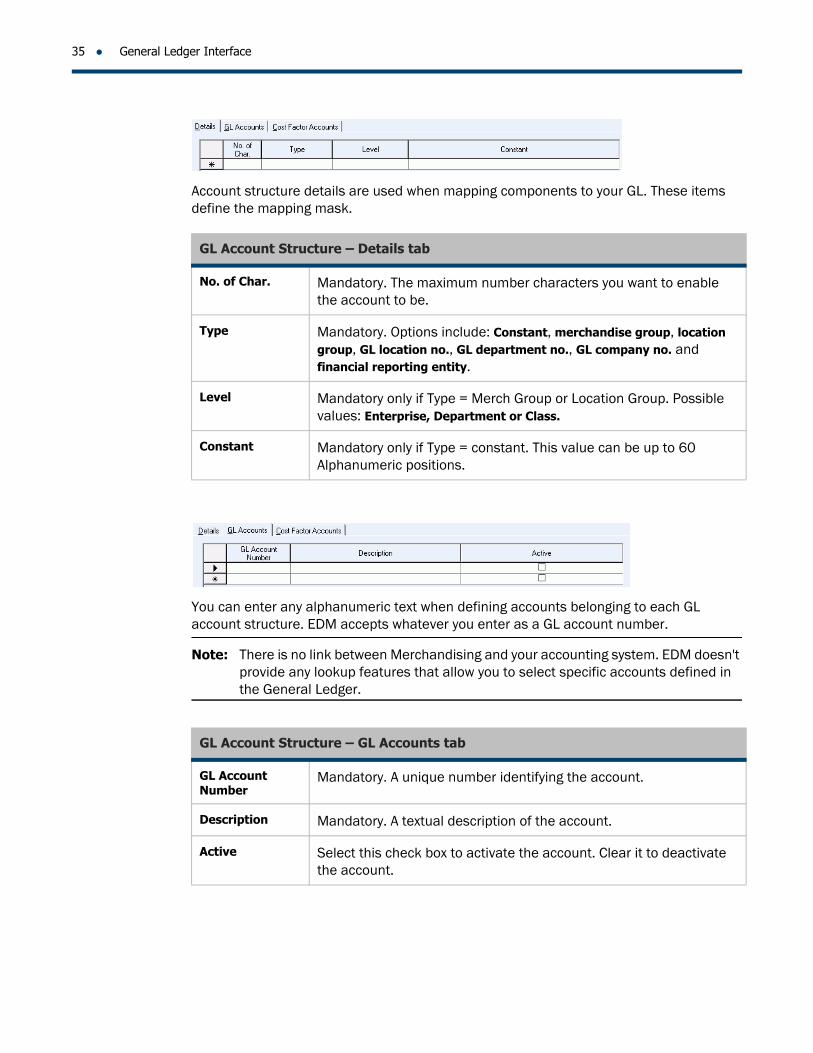
Account structure details are used when mapping components to your GL. These items define the mapping mask.
You can enter any alphanumeric text when defining accounts belonging to each GL account structure. EDM accepts whatever you enter as a GL account number.
Note: There is no link between Merchandising and your accounting system. EDM doesn't provide any lookup features that allow you to select specific accounts defined in the General Ledger.
GL Account Structure – Details tab
No. of Char. Mandatory. The maximum number characters you want to enable the account to be.
Type Mandatory. Options include: Constant, merchandise group, location group, GL location no., GL department no., GL company no. and financial reporting entity.
Level Mandatory only if Type = Merch Group or Location Group. Possible values: Enterprise, Department or Class.
Constant Mandatory only if Type = constant. This value can be up to 60 Alphanumeric positions.
GL Account Structure – GL Accounts tab
GL Account Number
Mandatory. A unique number identifying the account.
Description Mandatory. A textual description of the account.
Active Select this check box to activate the account. Clear it to deactivate the account.
Defining the GL account structure 36
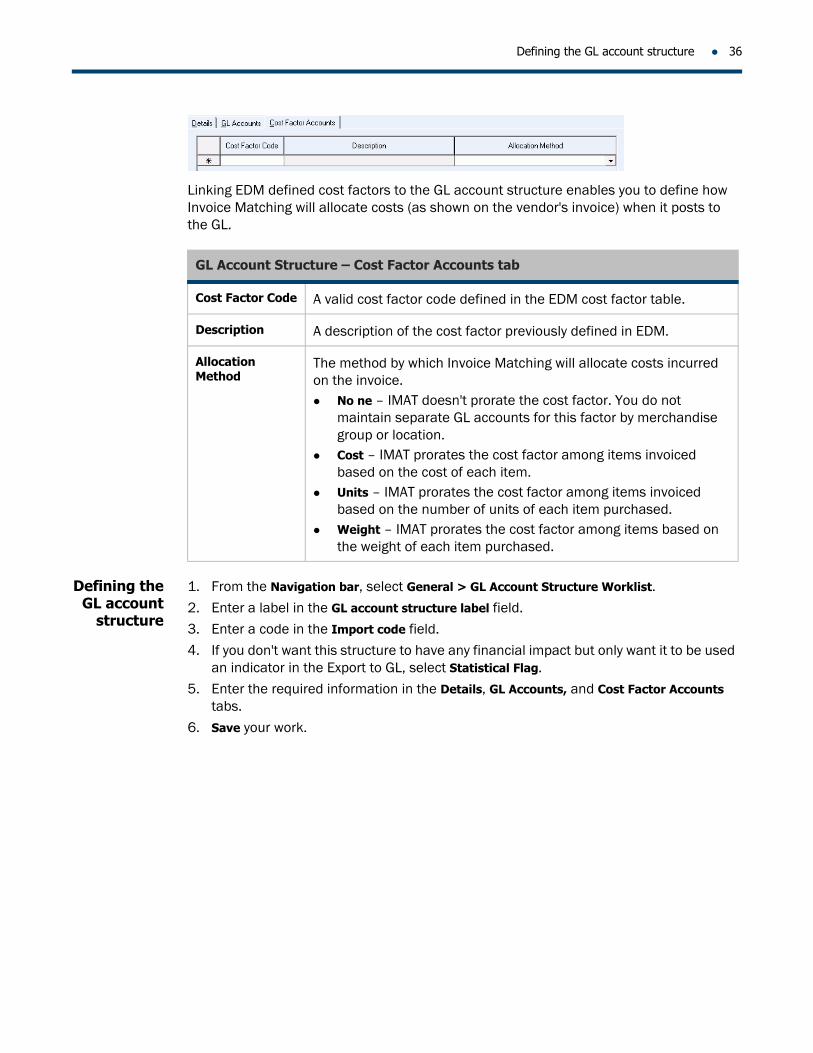
Linking EDM defined cost factors to the GL account structure enables you to define how Invoice Matching will allocate costs (as shown on the vendor's invoice) when it posts to the GL.
Defining the GL account
structure
1. From the Navigation bar, select General > GL Account Structure Worklist.
2. Enter a label in the GL account structure label field.3. Enter a code in the Import code field.
4. If you don't want this structure to have any financial impact but only want it to be used an indicator in the Export to GL, select Statistical Flag.
5. Enter the required information in the Details, GL Accounts, and Cost Factor Accounts tabs.
6. Save your work.
GL Account Structure – Cost Factor Accounts tab
Cost Factor Code A valid cost factor code defined in the EDM cost factor table.
Description A description of the cost factor previously defined in EDM.
Allocation Method
The method by which Invoice Matching will allocate costs incurred on the invoice. No ne – IMAT doesn't prorate the cost factor. You do not
maintain separate GL accounts for this factor by merchandise group or location.
Cost – IMAT prorates the cost factor among items invoiced based on the cost of each item.
Units – IMAT prorates the cost factor among items invoiced based on the number of units of each item purchased.
Weight – IMAT prorates the cost factor among items based on the weight of each item purchased.
37 General Ledger Interface
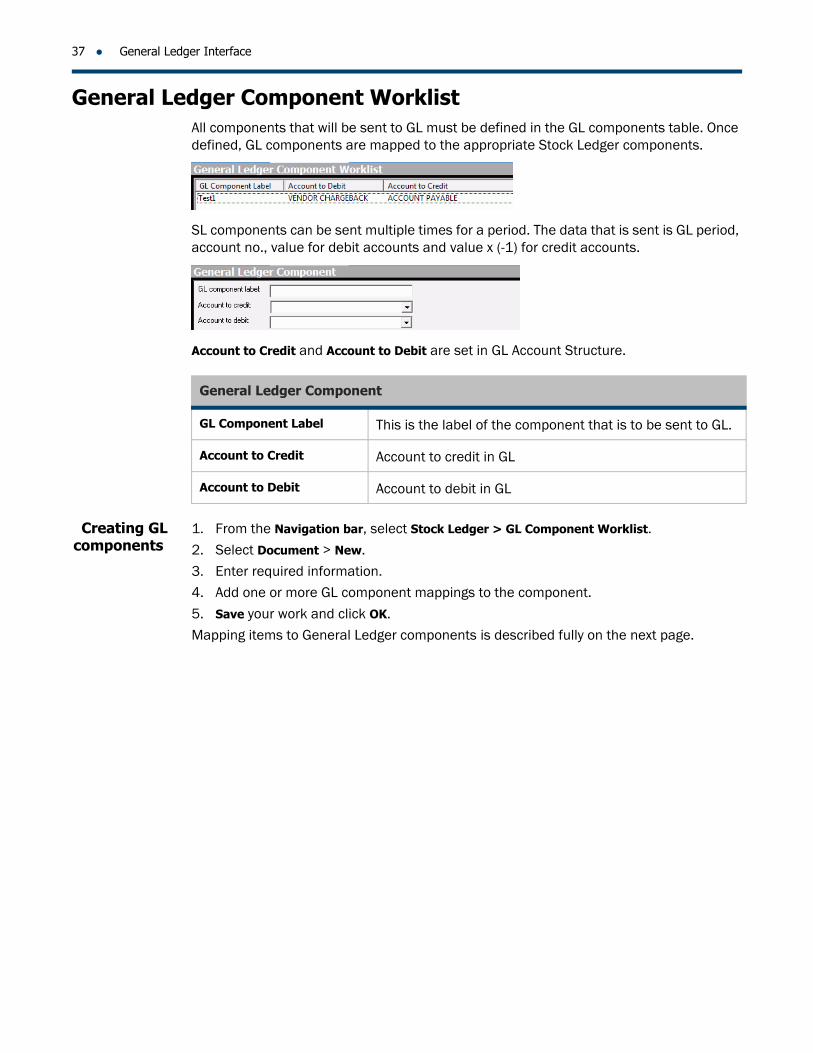
General Ledger Component WorklistAll components that will be sent to GL must be defined in the GL components table. Once defined, GL components are mapped to the appropriate Stock Ledger components.
SL components can be sent multiple times for a period. The data that is sent is GL period, account no., value for debit accounts and value x (-1) for credit accounts.
Account to Credit and Account to Debit are set in GL Account Structure.
Creating GL components
1. From the Navigation bar, select Stock Ledger > GL Component Worklist.
2. Select Document > New.
3. Enter required information.4. Add one or more GL component mappings to the component.
5. Save your work and click OK.
Mapping items to General Ledger components is described fully on the next page.
General Ledger Component
GL Component Label This is the label of the component that is to be sent to GL.
Account to Credit Account to credit in GL
Account to Debit Account to debit in GL
General Ledger Component Map 38
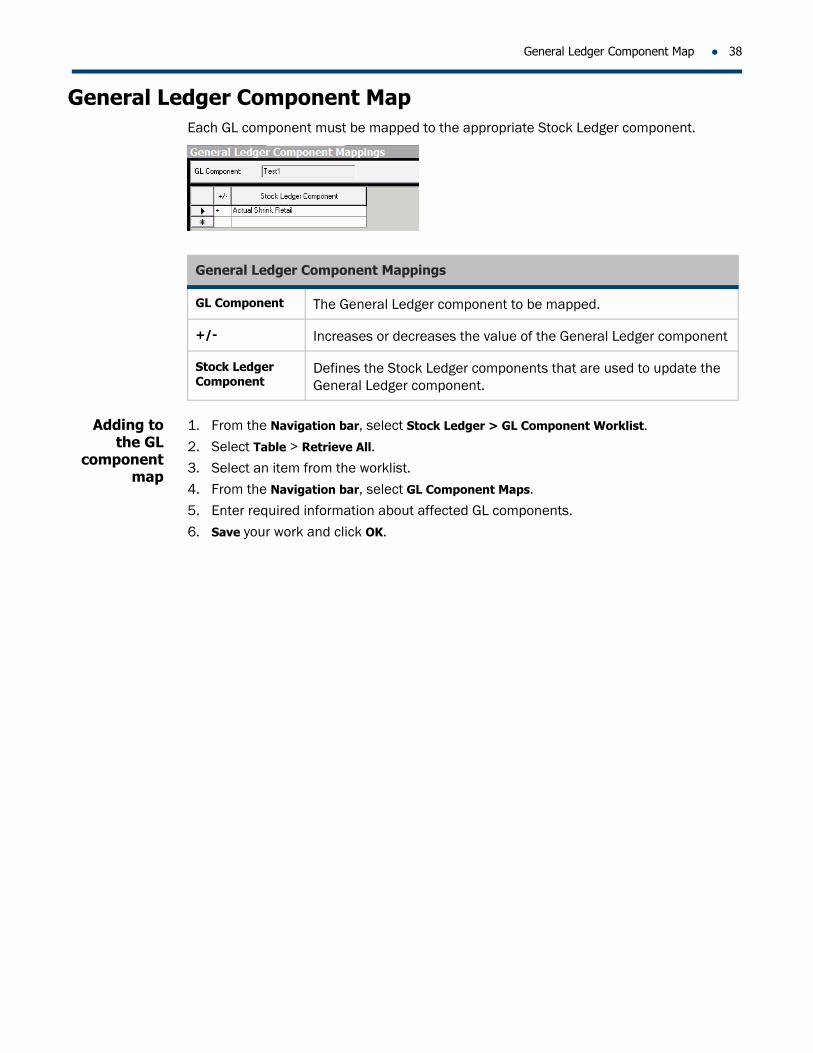
General Ledger Component MapEach GL component must be mapped to the appropriate Stock Ledger component.
Adding to the GL
component map
1. From the Navigation bar, select Stock Ledger > GL Component Worklist.
2. Select Table > Retrieve All.
3. Select an item from the worklist.4. From the Navigation bar, select GL Component Maps.
5. Enter required information about affected GL components.
6. Save your work and click OK.
General Ledger Component Mappings
GL Component The General Ledger component to be mapped.
+/- Increases or decreases the value of the General Ledger component
Stock Ledger Component
Defines the Stock Ledger components that are used to update the General Ledger component.
History is maintained for all Stock Ledger components for a user-defined time frame. History is also maintained for cumulative values if you are using RIM (retail inventory method).At startup time, cumulative values and on hand values in from another system must be brought in.
An audit of all transactions can be done using the EDM audit trail. Reporting and queries are available through Merchandising Analytics, a module that enables you to generate customized views and reports.
Stock Ledger HistoryHistory is maintained for all Stock Ledger components at the lowest level of the main merchandise hierarchy and at the location for each Stock Ledger period. The number of periods of history to keep is defined in the Stock Ledger global parameters. This could be any number of closed periods from 1 to 255.
All periods are available for analysis through reports and queries. This analysis can be for Stock Ledger periods and General Ledger periods.
Cumulative Values HistoryThis history is maintained only for merchandise groups and time periods that use RIM.Cumulative values history is kept by Stock Ledger period, merchandise group and location group (as defined in period of accumulation dependent parameters). Two values are kept as part of this history: Cumulative value cost and cumulative value retail.For any components that use the differences method, it is necessary to maintain period to date accumulations for the components using the differences method.
Initial values are maintained at the beginning of each accumulation period. Subsequent Stock Ledger periods in the accumulation period simply track changes. In order to calculate the cumulative cost percent, sum the initial values and all Stock Ledger periods in the accumulation period.
Startup HistoryAt startup, cumulative values for all merchandise groups defined as RIM and beginning on hand values must be provided. Other historical data cannot be loaded.
6 History, Audit Trails and Reports
Audit Trail 40
Audit TrailThe transactional database is the mechanism for auditing transaction values. The transactional database will be available for all open and closed GL Periods. The number of closed periods kept on file is determined by the Stock Ledger global parameters.
All changes to Stock Ledger parameters, mapping rules and cumulative values are logged on an audit trail provided from Stock Ledger. The following information will be logged: Date and time, user, object affected, action (e.g. insert, update, delete), new value and old value.
ReportingInteractive queries and printed reports will be provided for Stock Ledger periods. Reports will be available as long as the history is available. Once history has been purged, there is no way to retrieve it.
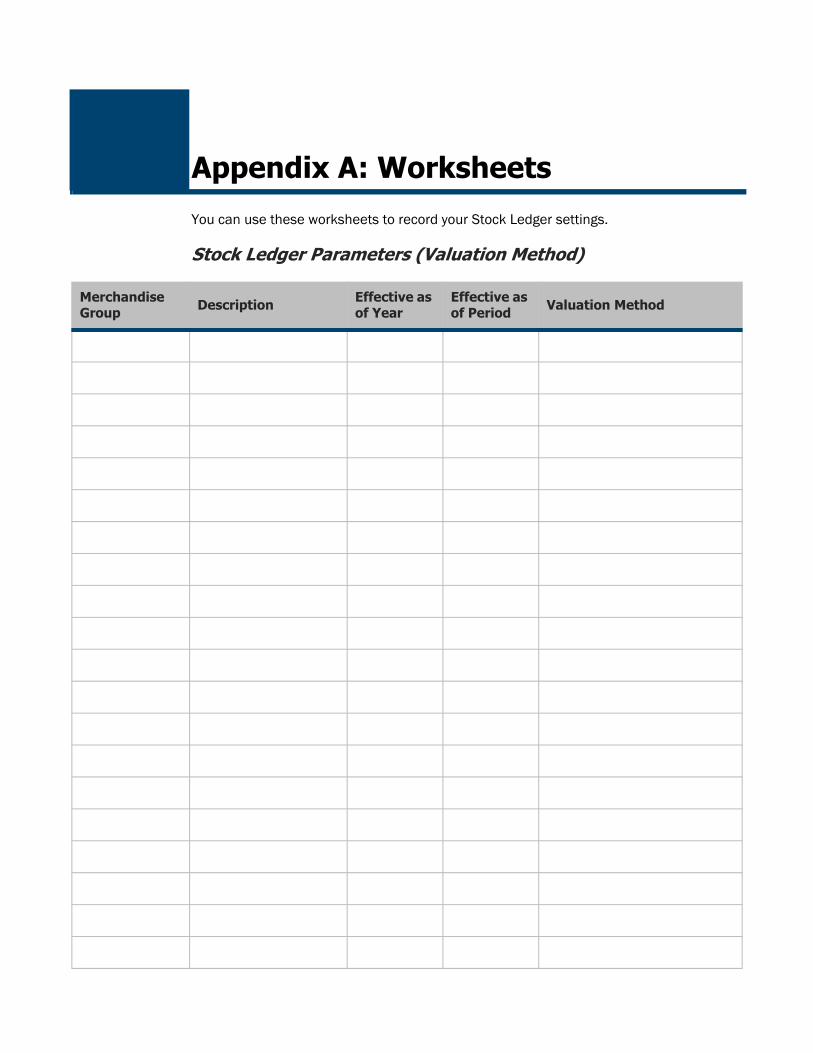
Appendix A: WorksheetsYou can use these worksheets to record your Stock Ledger settings.
Stock Ledger Parameters (Valuation Method)
Merchandise Group Description Effective as
of YearEffective as of Period Valuation Method
Stock Ledger Parameters (Accumulation Period Dependent) 42
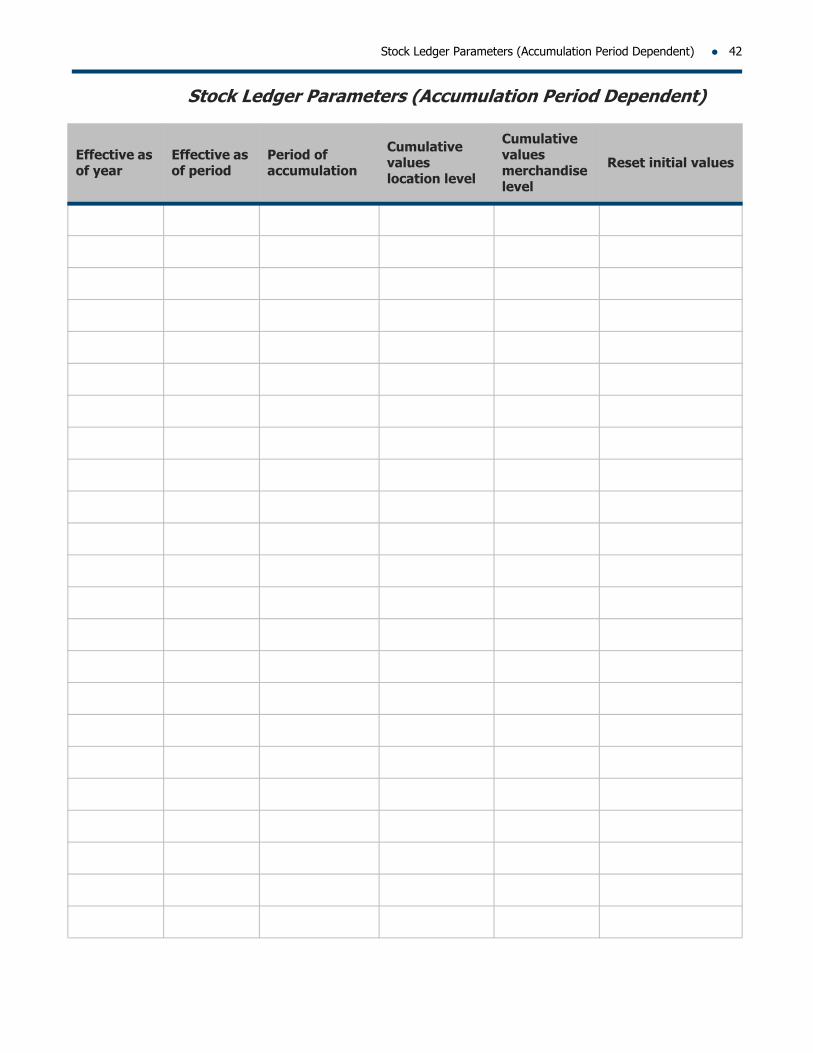
Stock Ledger Parameters (Accumulation Period Dependent)
Effective as of year
Effective as of period
Period of accumulation
Cumulative values location level
Cumulative values merchandise level
Reset initial values
43 Appendix A: Worksheets
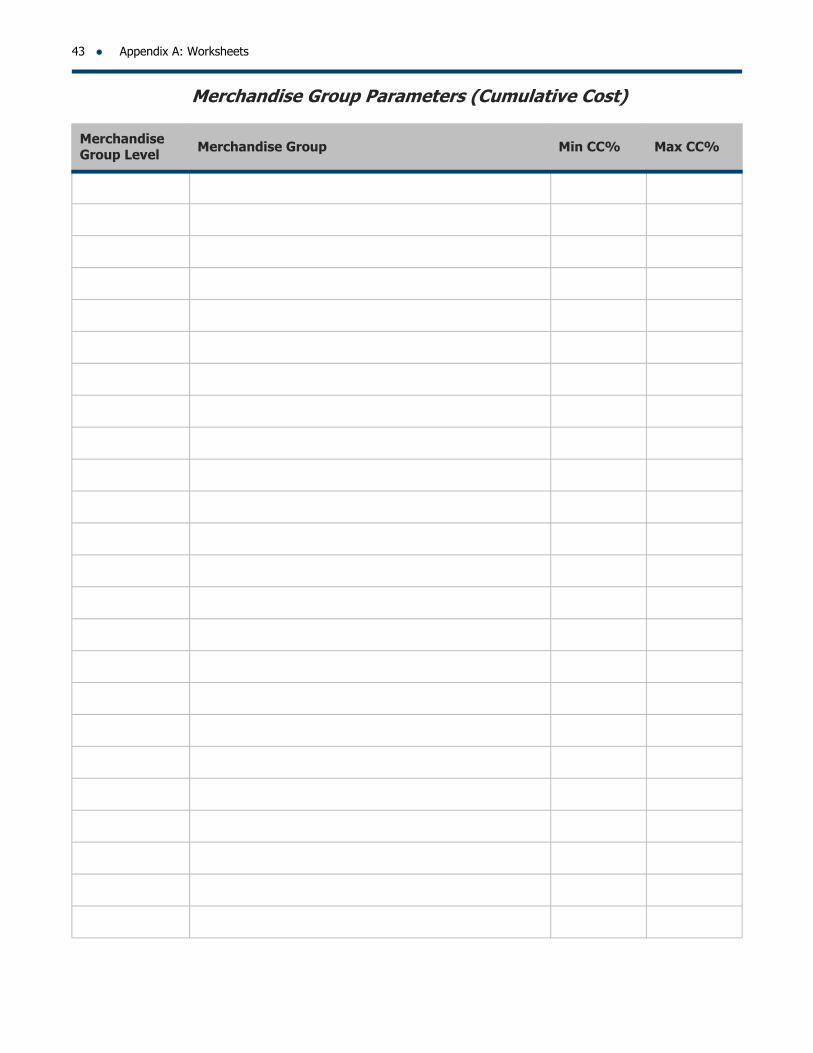
Merchandise Group Parameters (Cumulative Cost)
Merchandise Group Level Merchandise Group Min CC% Max CC%
Stock Ledger Component Worklist 44
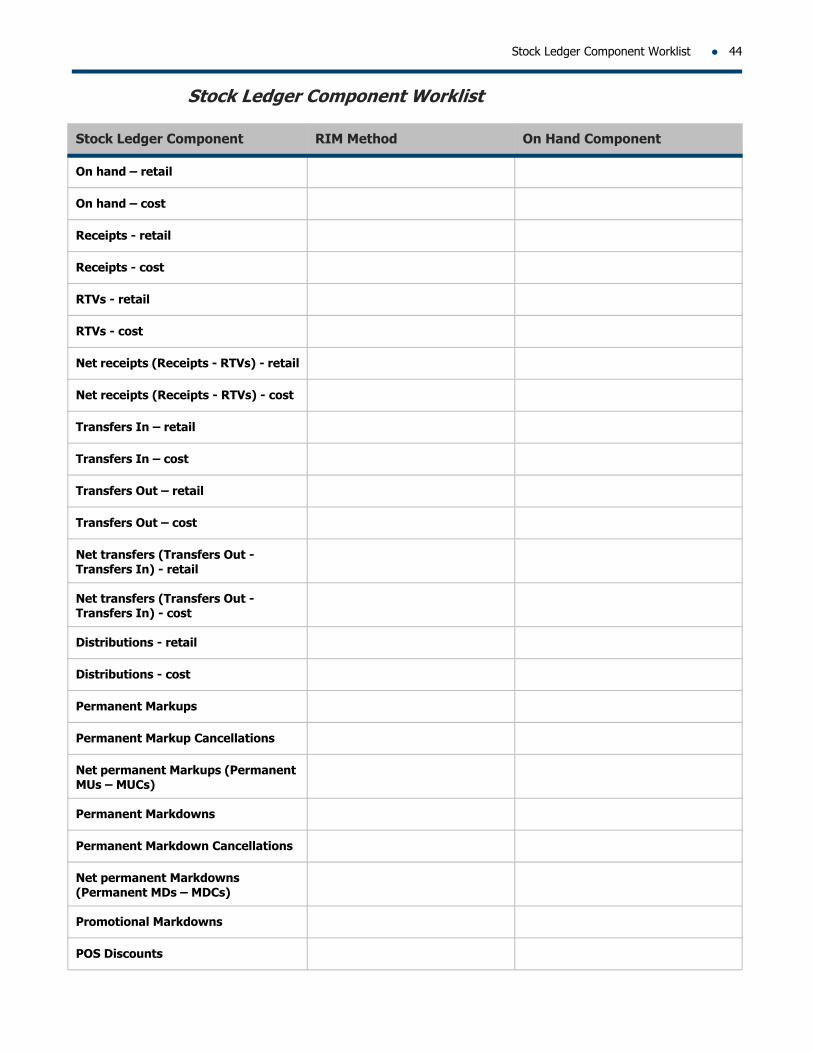
Stock Ledger Component Worklist
Stock Ledger Component RIM Method On Hand Component
On hand – retail
On hand – cost
Receipts - retail
Receipts - cost
RTVs - retail
RTVs - cost
Net receipts (Receipts - RTVs) - retail
Net receipts (Receipts - RTVs) - cost
Transfers In – retail
Transfers In – cost
Transfers Out – retail
Transfers Out – cost
Net transfers (Transfers Out - Transfers In) - retail
Net transfers (Transfers Out - Transfers In) - cost
Distributions - retail
Distributions - cost
Permanent Markups
Permanent Markup Cancellations
Net permanent Markups (Permanent MUs – MUCs)
Permanent Markdowns
Permanent Markdown Cancellations
Net permanent Markdowns (Permanent MDs – MDCs)
Promotional Markdowns
POS Discounts
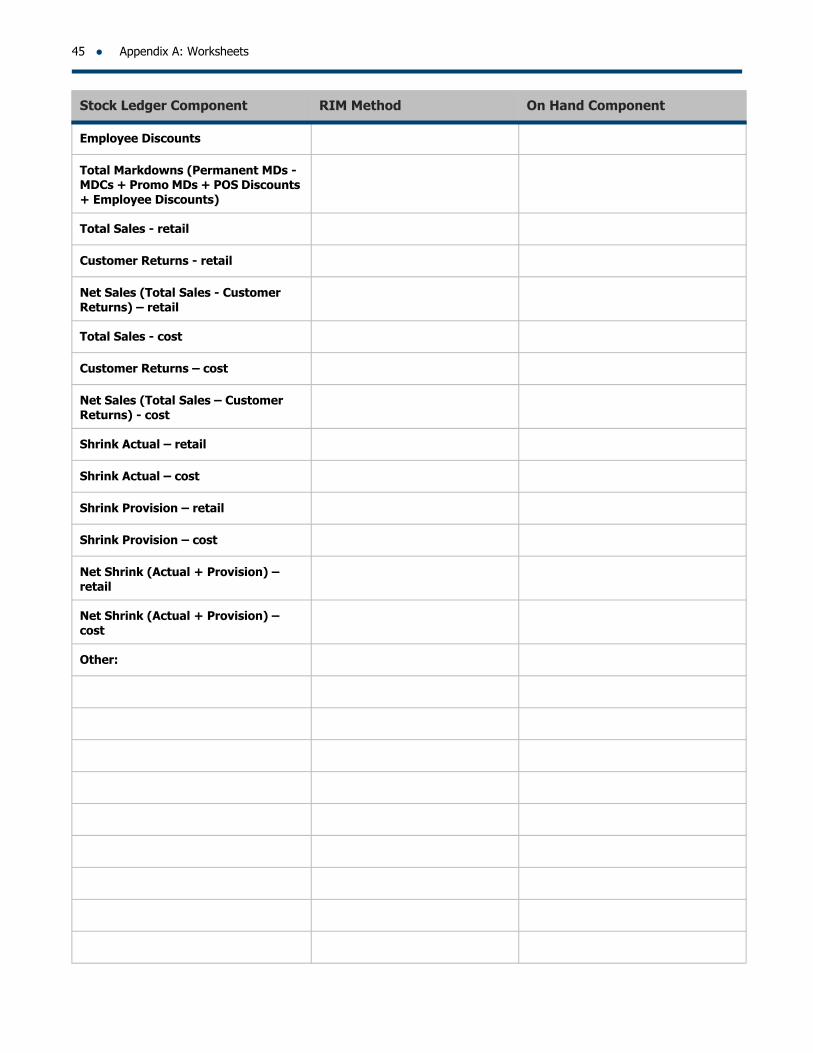
45 Appendix A: Worksheets
Employee Discounts
Total Markdowns (Permanent MDs - MDCs + Promo MDs + POS Discounts + Employee Discounts)
Total Sales - retail
Customer Returns - retail
Net Sales (Total Sales - Customer Returns) – retail
Total Sales - cost
Customer Returns – cost
Net Sales (Total Sales – Customer Returns) - cost
Shrink Actual – retail
Shrink Actual – cost
Shrink Provision – retail
Shrink Provision – cost
Net Shrink (Actual + Provision) – retail
Net Shrink (Actual + Provision) – cost
Other:
Stock Ledger Component RIM Method On Hand Component
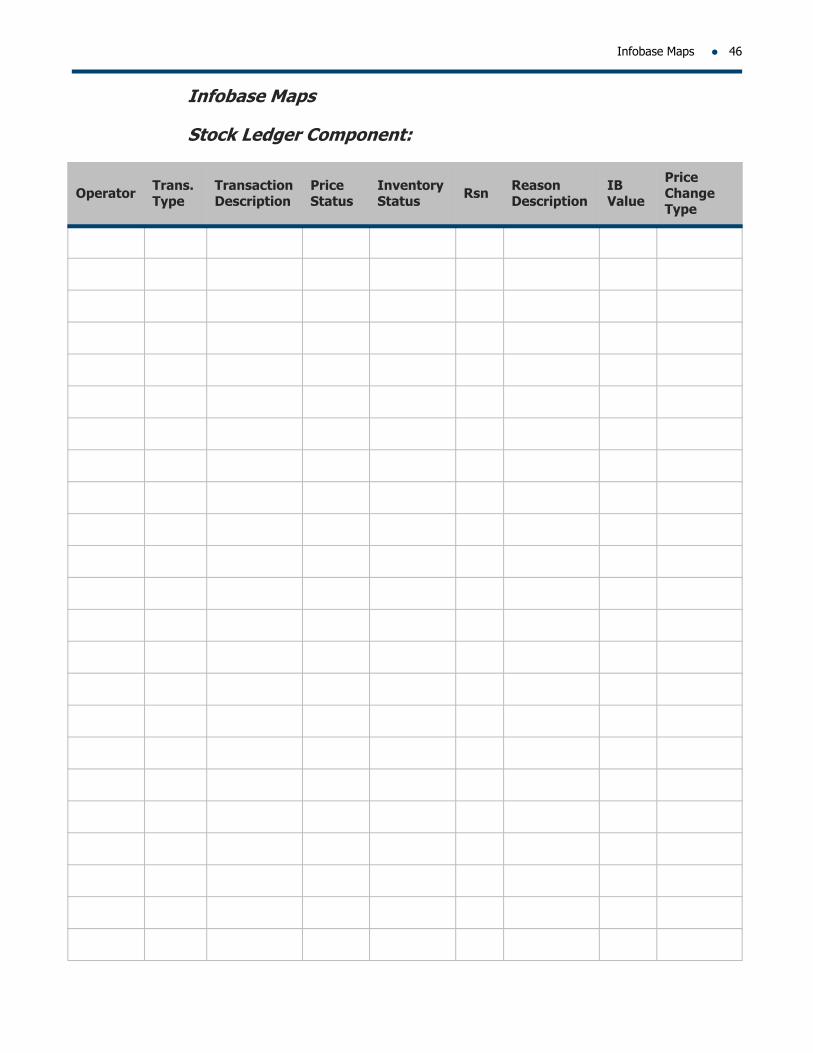
Infobase Maps 46
Infobase Maps
Stock Ledger Component:
Operator Trans. Type
Transaction Description
Price Status
Inventory Status Rsn Reason
DescriptionIB Value
Price Change Type
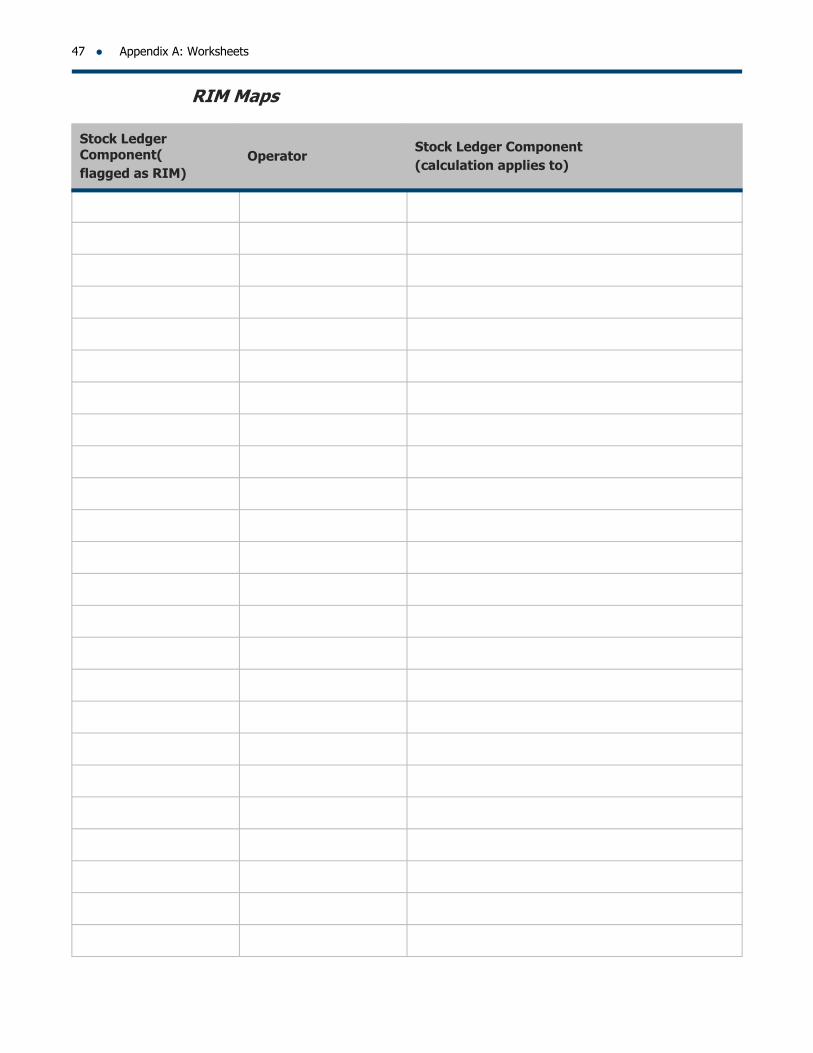
47 Appendix A: Worksheets
RIM Maps
Stock Ledger Component(flagged as RIM)
OperatorStock Ledger Component (calculation applies to)

Cumulative Value Maps 48
Cumulative Value Maps
Cumulative Value Type (Cost / Retail)
Operator Trans. Type
Transaction Description Price Status Inventory
Status Rsn Reason Description
Price Change Type
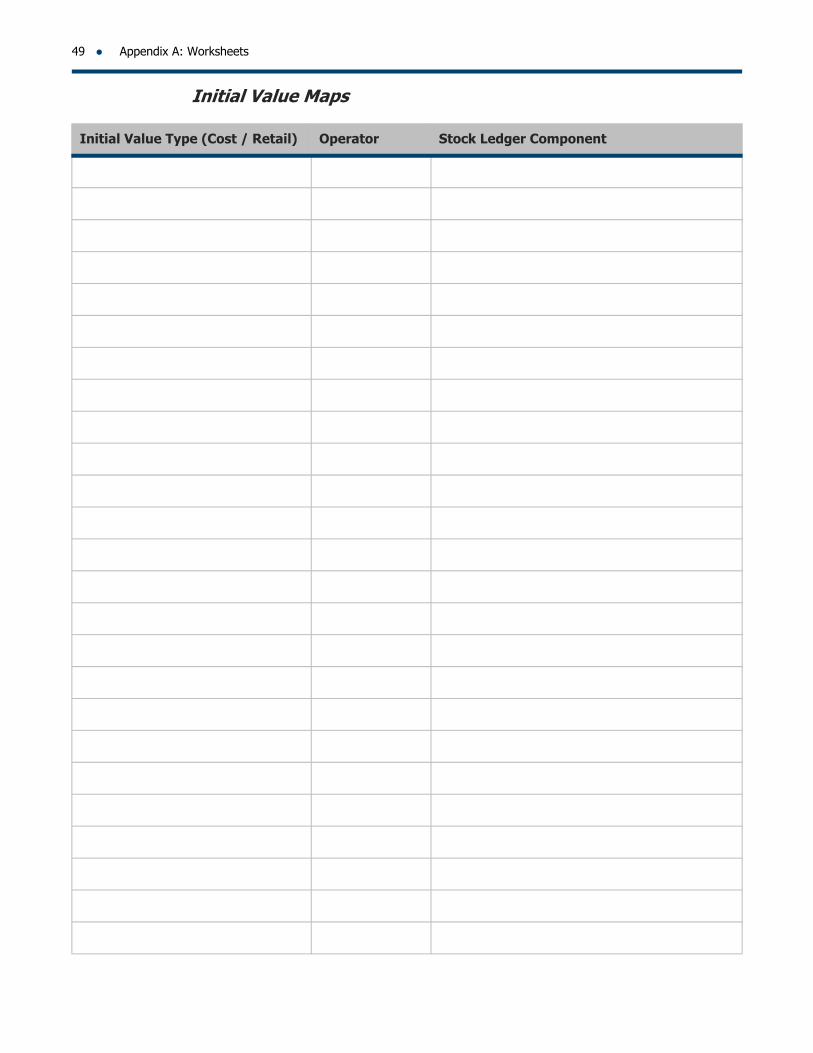
49 Appendix A: Worksheets
Initial Value Maps
Initial Value Type (Cost / Retail) Operator Stock Ledger Component
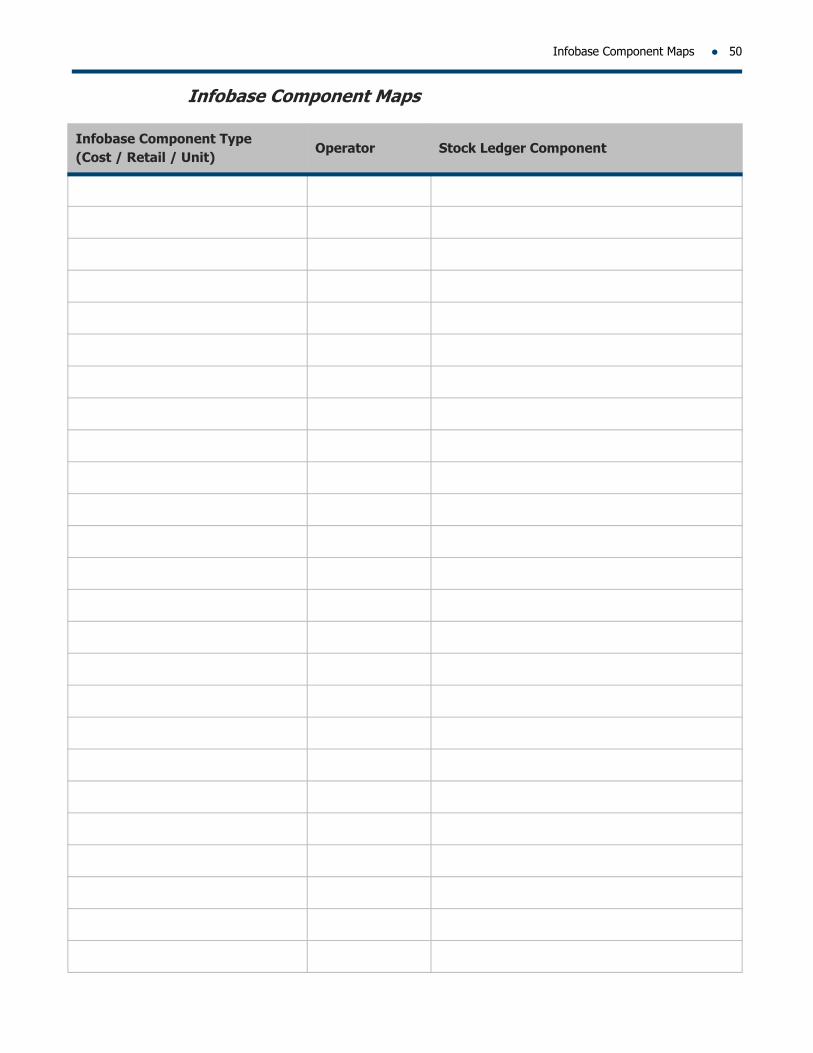
Infobase Component Maps 50
Infobase Component Maps
Infobase Component Type (Cost / Retail / Unit)
Operator Stock Ledger Component
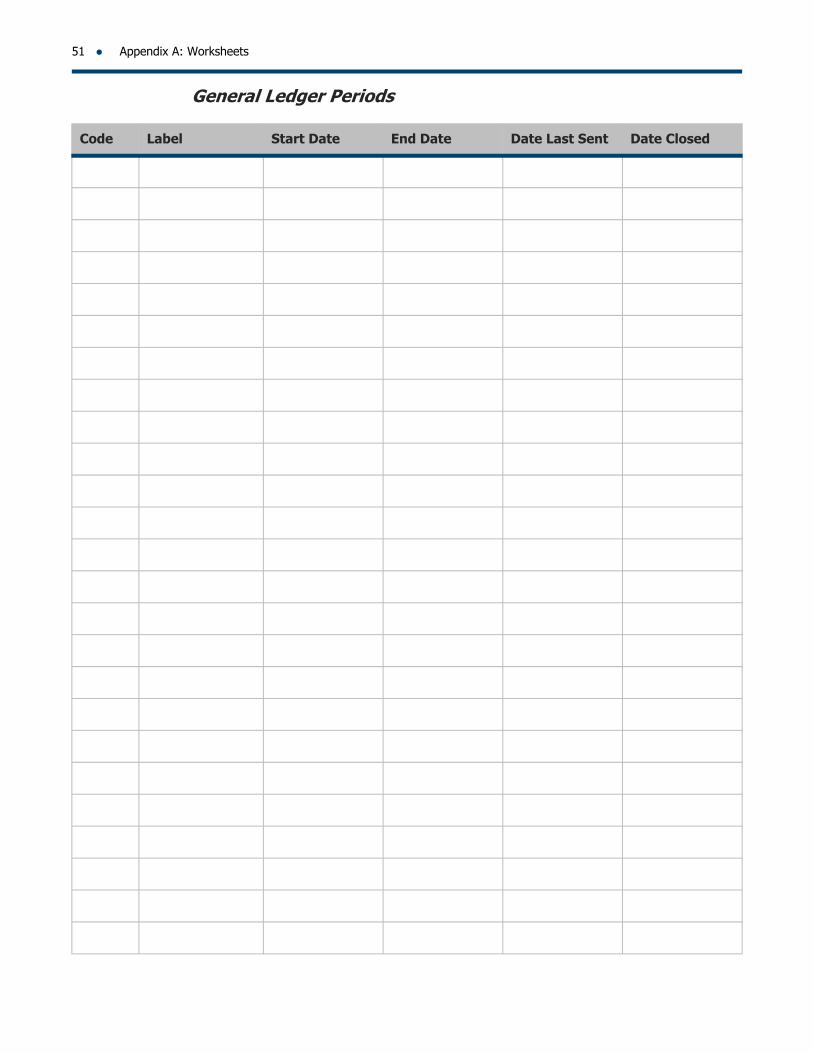
51 Appendix A: Worksheets
General Ledger Periods
Code Label Start Date End Date Date Last Sent Date Closed
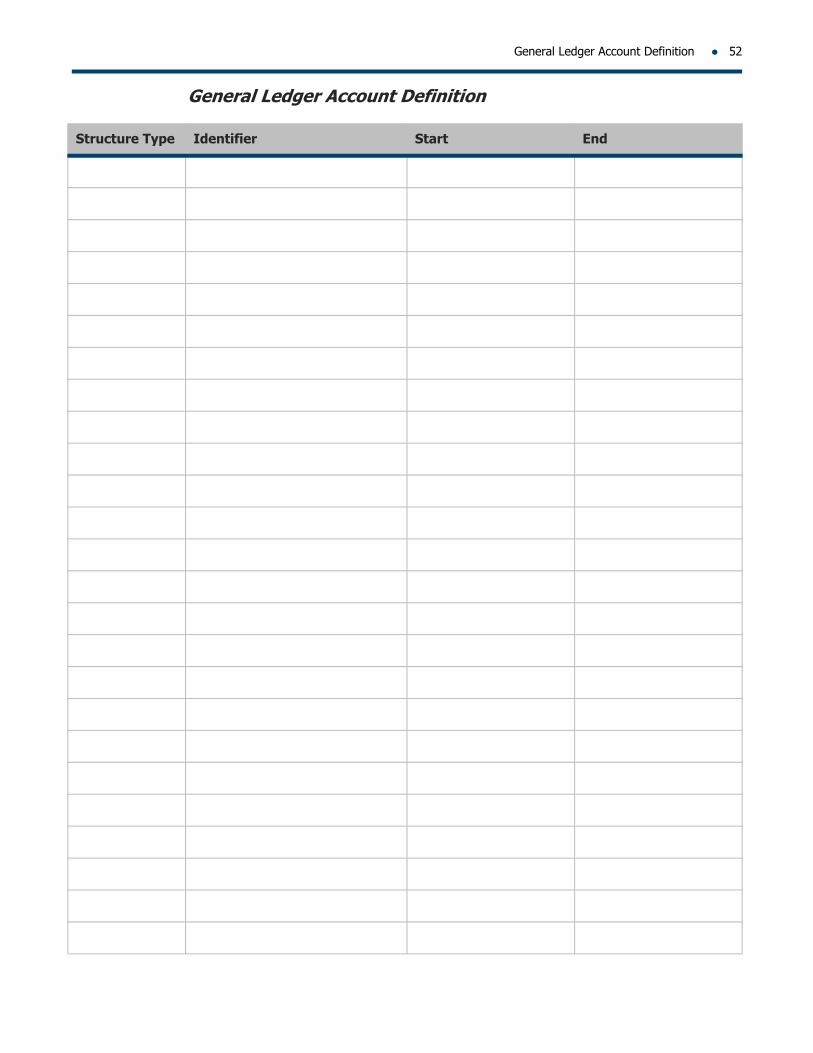
General Ledger Account Definition 52
General Ledger Account Definition
Structure Type Identifier Start End

53 Appendix A: Worksheets
General Ledger Account Structure
GL account structure label Import code Statistical Flag
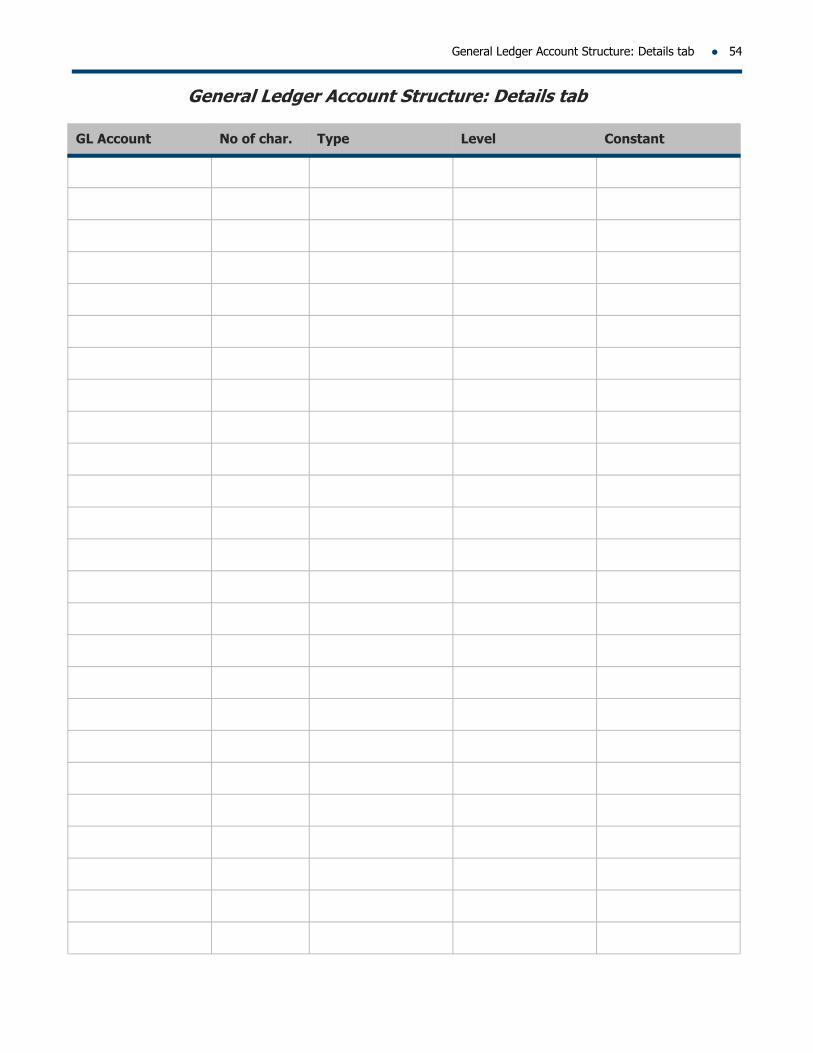
General Ledger Account Structure: Details tab 54
General Ledger Account Structure: Details tab
GL Account No of char. Type Level Constant

55 Appendix A: Worksheets
General Ledger Account Structure: GL Accounts tab
GL Account Number Description Active

General Ledger Account Structure: Cost Factor Accounts tab 56
General Ledger Account Structure: Cost Factor Accounts tab
Cost Factor Code Description Allocation Method

57 Appendix A: Worksheets
General Ledger Component Worklist
GL Component Label Account to Debit Account to Credit

General Ledger Component Maps 58
General Ledger Component Maps
General Ledger Component Operator Stock Ledger Component
Appendix B
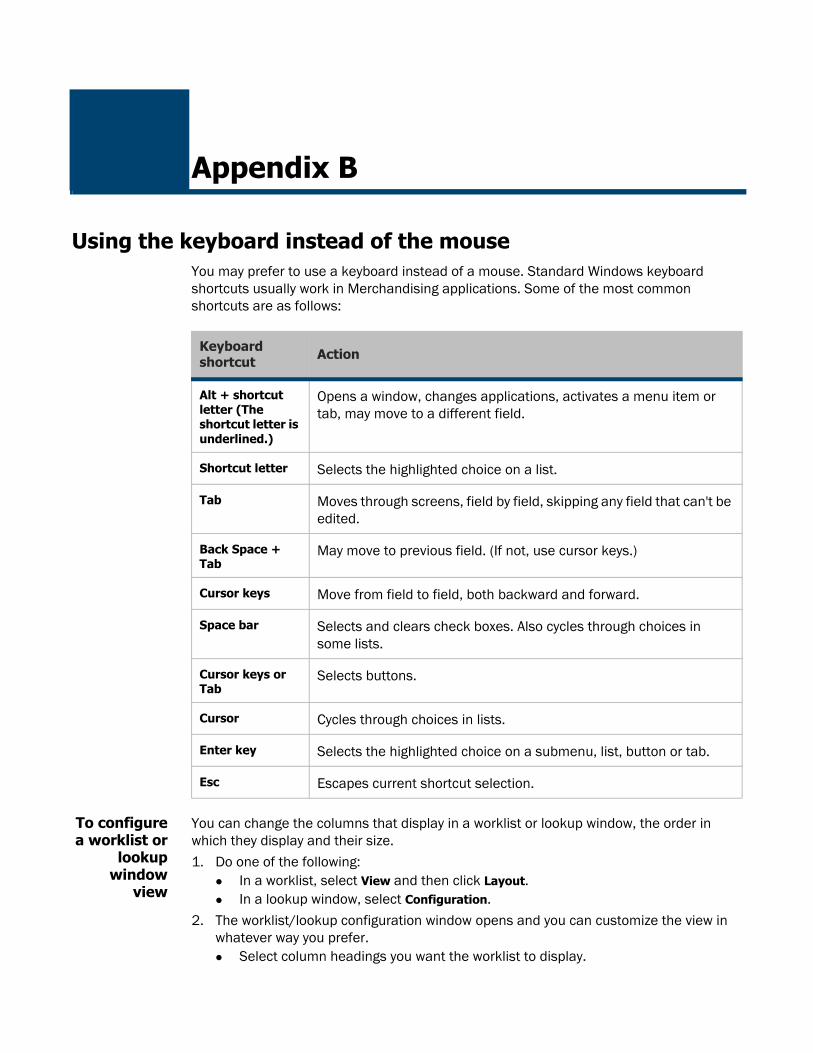
Using the keyboard instead of the mouseYou may prefer to use a keyboard instead of a mouse. Standard Windows keyboard shortcuts usually work in Merchandising applications. Some of the most common shortcuts are as follows:
To configure a worklist or
lookup window
view
You can change the columns that display in a worklist or lookup window, the order in which they display and their size.1. Do one of the following:
In a worklist, select View and then click Layout. In a lookup window, select Configuration.
2. The worklist/lookup configuration window opens and you can customize the view in whatever way you prefer. Select column headings you want the worklist to display.
Keyboard shortcut Action
Alt + shortcut letter (The shortcut letter is underlined.)
Opens a window, changes applications, activates a menu item or tab, may move to a different field.
Shortcut letter Selects the highlighted choice on a list.
Tab Moves through screens, field by field, skipping any field that can't be edited.
Back Space + Tab
May move to previous field. (If not, use cursor keys.)
Cursor keys Move from field to field, both backward and forward.
Space bar Selects and clears check boxes. Also cycles through choices in some lists.
Cursor keys or Tab
Selects buttons.
Cursor Cycles through choices in lists.
Enter key Selects the highlighted choice on a submenu, list, button or tab.
Esc Escapes current shortcut selection.
Getting help 60
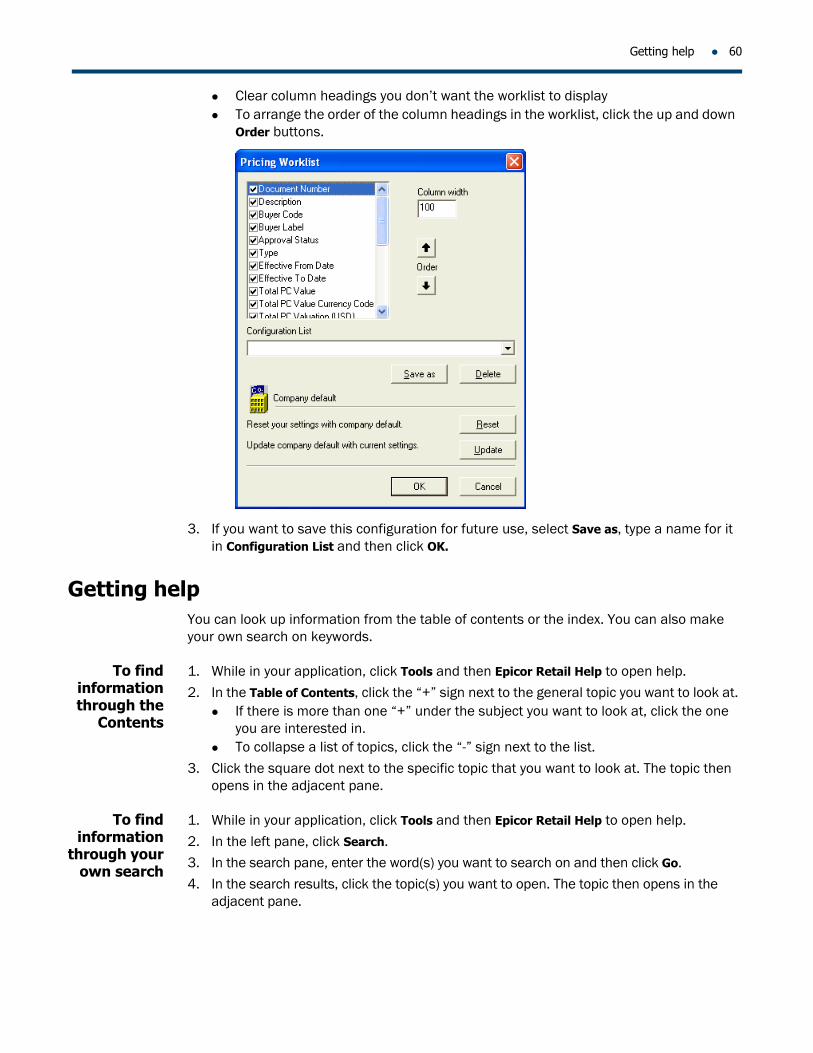
Clear column headings you don’t want the worklist to display To arrange the order of the column headings in the worklist, click the up and down
Order buttons.
3. If you want to save this configuration for future use, select Save as, type a name for it in Configuration List and then click OK.
Getting helpYou can look up information from the table of contents or the index. You can also make your own search on keywords.
To find information through the
Contents
1. While in your application, click Tools and then Epicor Retail Help to open help.
2. In the Table of Contents, click the “+” sign next to the general topic you want to look at. If there is more than one “+” under the subject you want to look at, click the one
you are interested in. To collapse a list of topics, click the “-” sign next to the list.
3. Click the square dot next to the specific topic that you want to look at. The topic then opens in the adjacent pane.
To find information
through your own search
1. While in your application, click Tools and then Epicor Retail Help to open help.
2. In the left pane, click Search.3. In the search pane, enter the word(s) you want to search on and then click Go.
4. In the search results, click the topic(s) you want to open. The topic then opens in the adjacent pane.
61 Appendix B
Other documentation and helpYou can download the latest version of our documentation in electronic format (PDF) from the Premiere section of our web site. Premiere is a restricted to our valued clients and strategic partners. To obtain a password to access documentation, visit http://www.epicor.com/Customers/Pages/CustomerPortal.aspx and click eService: Client Care Portal for Retail Customers. Your existing login and password are effective from this screen; you can also request a password if you don’t have one.
From the Premiere site, select User Documentation and then select the product documentation that you want to download. To view PDF documents, you need Acrobat Reader, which can also be downloaded free from the Premiere site.
Electronic documents can be read on your screen or printed. When viewing a document on-screen, you can search for a topic in the table of contents and select it to jump to it.
Retrieving information from your databaseWhether you want to look at one item, a group consisting of several items, or all items, you must retrieve this information from the database.
To retrieve all
information
On the Data menu in some windows, you can select Retrieve All to retrieve all available records. (This may not always be practical, since some fields have numerous records, for example, you may have hundreds or even thousands of styles.)
To retrieve specific
information
Usually, you retrieve specific information, whether a single item or a range of items. The Merchandising Solution uses two information-retrieval tools: the Lookup window and the Query search window.
1. While in your application, click in the field where you want to enter information, then
press F3. (You can also click if the field contains it, or press F8 to open the Query dialog box.) If a Lookup window opens, double-click the item you want to select. (See “Search
examples” on page 64.) If the Query window opens, complete the following steps to define specific criteria
to narrow your search.
2. In the Field box, click the Down arrow and select an information type for your search.
3. When a Lookup button is available, you can click it to open a Lookup window from which you can choose one or more items to add to the List box.
4. Under Specify using, select your search method. See “Specify using” on page 62 for more information.
5. Under Values, enter your choices and click OK.
Note: Sometimes the Query dialog box opens with default values displayed in the List area. To clear them, select the Clear button. To clear all values displayed in the Criteria section, select the Clear All button.
Specify using 62
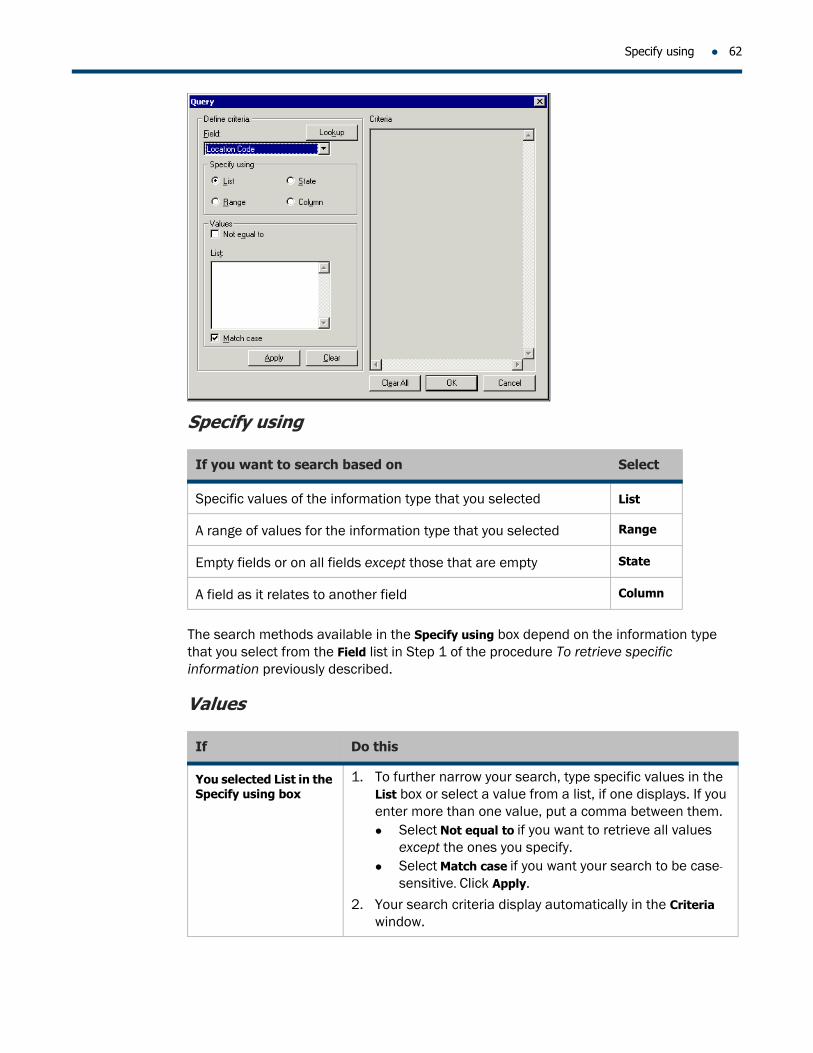
Specify using
The search methods available in the Specify using box depend on the information type that you select from the Field list in Step 1 of the procedure To retrieve specific information previously described.
Values
If you want to search based on Select
Specific values of the information type that you selected List
A range of values for the information type that you selected Range
Empty fields or on all fields except those that are empty State
A field as it relates to another field Column
If Do this
You selected List in the Specify using box
1. To further narrow your search, type specific values in the List box or select a value from a list, if one displays. If you enter more than one value, put a comma between them. Select Not equal to if you want to retrieve all values
except the ones you specify. Select Match case if you want your search to be case-
sensitive. Click Apply.
2. Your search criteria display automatically in the Criteria window.

63 Appendix B
You selected List in the Specify using box
3. Repeat Steps 1-3 on page 61 if you want to enter more search criteria.
4. Click OK to finish your search.
You selected Range in the Specify using box
1. In the From field, type the first value in the range.
2. In the To field, type the second value in the range. Select Not equal to if you want to retrieve all values
except the ones you specify.
Select Match case if you want your search to be case-sensitive.
3. Click Apply. Your search criteria display automatically in the Criteria window.
4. Repeat Steps 1-3 on previous page if you want to enter more search criteria.
5. Click OK to finish your search.
You selected State in the Specify using box
Choose Empty if you want the search to find all records that contain no information in the field you selected.
Choose Not Empty if you want the search to find all records that do contain information in the field you selected.
You selected Column in the Specify using box
1. Select an operator to compare the field you choose in the Field box with the field you choose in the To field. Choices of operators are: “=” (equal to) “<=” (equal to or less than) “<>” (less than or more) “<” (less than), “>=” (equal to or more than) “>” (more than).
2. Click OK to finish your search. (See Query example below.)
If Do this
Search examples 64
Search examples
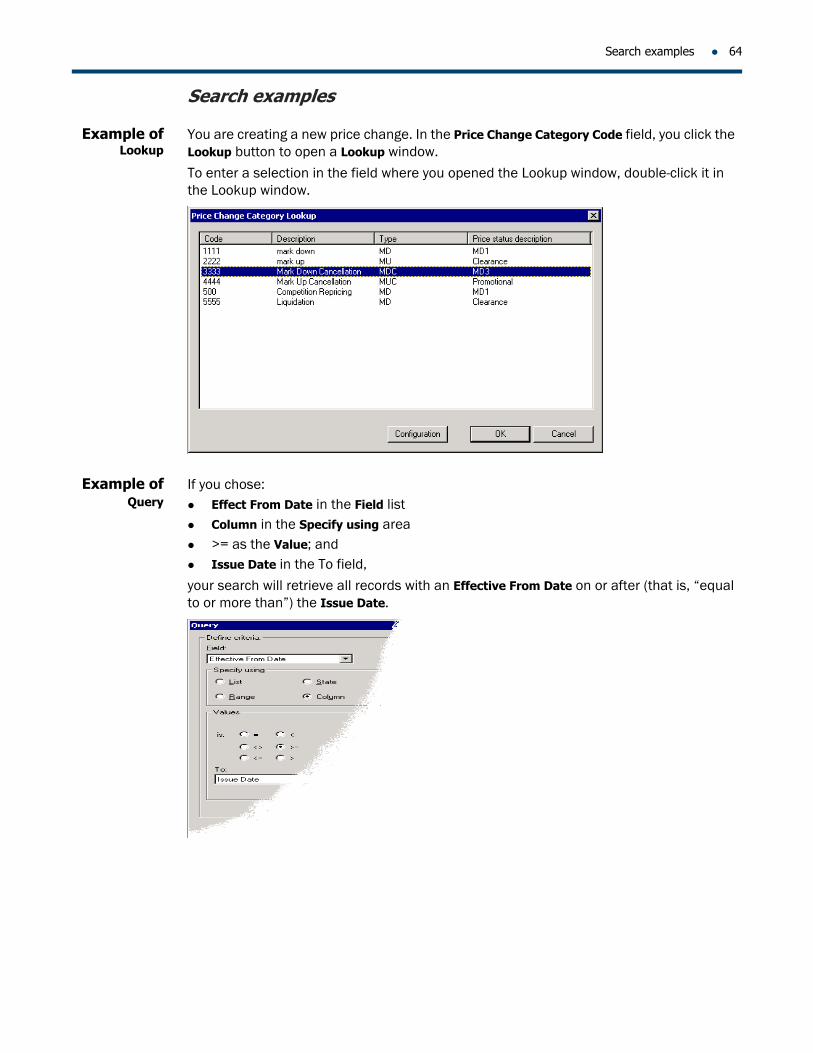
Example of Lookup
You are creating a new price change. In the Price Change Category Code field, you click the Lookup button to open a Lookup window.
To enter a selection in the field where you opened the Lookup window, double-click it in the Lookup window.
Example of Query
If you chose: Effect From Date in the Field list Column in the Specify using area >= as the Value; and Issue Date in the To field,
your search will retrieve all records with an Effective From Date on or after (that is, “equal to or more than”) the Issue Date.