fmm-100 - timetec · pdf fileguide is also available online at . choose ... fingerprint...
TRANSCRIPT

AC100C TA100C
FMM-100UserGuide

Copyright NoticeAllrightsreserved.Nopartofthisbookmaybe reproduced or transmitted in any formor by any means, electronic or mechani-cal, including photocopying, recording, orby any information storage and retrievalsystem, without written permission fromTimetec Computing Sdn Bhd. Every pre-cautionhasbeenmadetosupplycompleteand accurate information. Information inthisdocumentissubjecttochangewithoutpriornotice.
DisclaimerNopersonshouldrelyonthecontentsofthispublication without first obtaining advicefromaqualifiedprofessionalperson.Thecom-pany expressly disclaims all and any liabilityand responsibility to any terminal or user ofthis book, in respect of anything, and of theconsequencesofanything,donebyanysuchpersoninreliance,whetherwhollyorpartially,uponthewholeoranypartofthecontentsofthisbook.
TimeTec compuTing Sdn Bhd
Contents
5-6 Chapter1 GETTING STARTED ViewingtheUserGuideintheInternet TerminalIncludedAccessories IncludedPrintedMaterials RegisteringTerminal
7-9 Chapter2 BASICS IntroductiontoTerminal TerminalOverview MainMenu PowerOn/OffButton Battery •Externalpowersupply CleaningTerminal •CleaningTheBody •CleaningtheFingerprintprism RestartingandResettingTerminal •Restartingtheterminal •ResettingtheTerminal
10-16 Chapter3 USERS Introduction •VoiceMessage MethodsofEnrollment •FingerprintEnrollment •CardEnrollment •PasswordEnrollment MenuOptions •ExpirationOptions •EditUser •DeleteUser •DisplayOptions •UserRole •DefineRole
•AssignRole
17-24 Chapter4 INSTALLATIONS & CONNECTION Installations •MountOnWall •Flexi-Kit Communications •USBPort •TCP/IPPort •PowerSupplyPort •COMKey ConfigureTCP/IPconnection
ConfigureUSBFlashDisc
•Download •Upload •DownloadOption ConfigureWiFi ConfigureGPRS/3GConnection ConfigureWebster LogintoTimeTecCloudtostart
25-30 Chapter5 SYSTEM SetupDateandTime •Tosetdate •TouseDaylightSavingsTime(DLST) •ByDate/Time •ByWeek/Day AttendanceRecordStorageOption •DuplicatePunchPeriod •DisplayUserPhoto •AlphanumericUserID •AttendanceLogAlert •CyclicDeleteATTData •CyclicDeleteATTPhoto •ConfirmScreenDelay(s) •SaveIllegalVerificationRecord •ExpirationRule FingerprintOptions ResetOptions
31-34 Chapter6 PERSONALIZATION UserInterface Voice Bell •EditandDeleteaPresetSchedule •OutputtoExternalBellSiren PunchStateOptions •PunchStateMode •PunchStateRequired ShortcutKeyMappings
35-36 Chapter7 DATA MANAGER DeleteData BackupData
RestoreData
37 Chapter8 ATTENDANCE SEARCH
38 Chapter9 RECEIPT PRINTING DataFieldSetup
PrinterOption
39-40 Chapter10 SHORT MESSAGE DISPLAY AddaShortMessage •SelectMessageType Public,PersonalandDraftList MessageOption
41 Chapter11 WORK CODE AddingaWorkCode AllWorkCodes WorkCodeOptions
42 Chapter12 DIAGNOSTIC
43 Chapter13 SYSTEM INFO DeviceCapacity DeviceInfo FirmwareInfo
44-45 TROUBLESHOOTING “UnabletoConnect”Appears “AdminAffirm”Appears DifficulttoReadFinger TheLEDisBlinkingAllTheTime “DuplicateFinger”Appears RFIDCardDoesn’tRespond NoSound
5
A Packet of Bolts Screwdriver Siren Cable RFID Cards (5 pieces)* Exclusively for TA103C-R model only
DC 5V Power Adaptor
A Packet of Bolts
ScrewdriverDC 5V Power Adaptor
Chapter1
GettingStarted
ViewingtheUserGuideintheInternetTheUserGuideisavailableinthepackagewhenyoupurchasedtheterminal.TheUserGuide is also available online at http://www.timeteccloud.com/hardware. Choose thelanguagethatyoupreferforyourUserGuide.
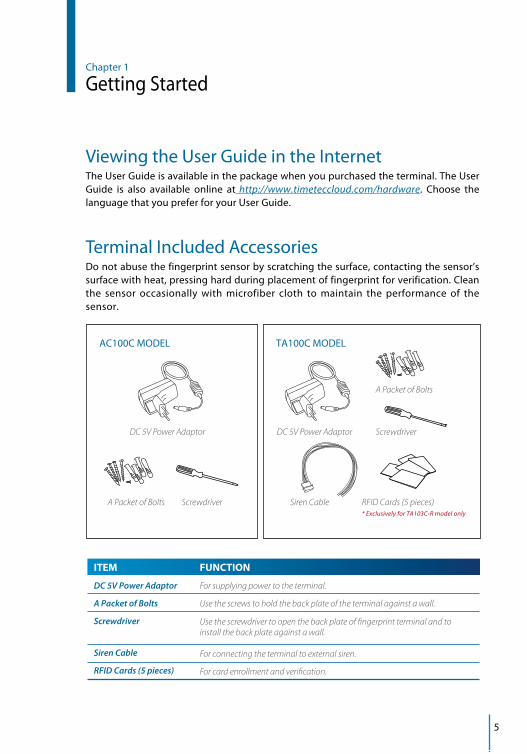
TerminalIncludedAccessoriesDonotabusethefingerprintsensorbyscratchingthesurface,contactingthesensor’ssurfacewithheat,pressinghardduringplacementoffingerprintforverification.Cleanthe sensor occasionally with microfiber cloth to maintain the performance of thesensor.
AC100CMODEL TA100CMODEL
ITEM
DC 5V Power Adaptor
A Packet of Bolts
Screwdriver
Siren Cable
RFID Cards (5 pieces)
FUNCTION
For supplying power to the terminal.
Use the screws to hold the back plate of the terminal against a wall.
Use the screwdriver to open the back plate of fingerprint terminal and to install the back plate against a wall.
For connecting the terminal to external siren.
For card enrollment and verification.
6
IncludedPrintedMaterials• FingerTecComprehensiveCD• QuickStartGuide• Pamphlet• UserEnrollmentTemplateForm• WarrantyCard
RegisteringTerminalMakesurethatyouregisteryourterminal’swarrantywithusathttp://www.fingertec.com/ver2/english/e_warranty.htm
fora36monthwarrantyprotection.
7
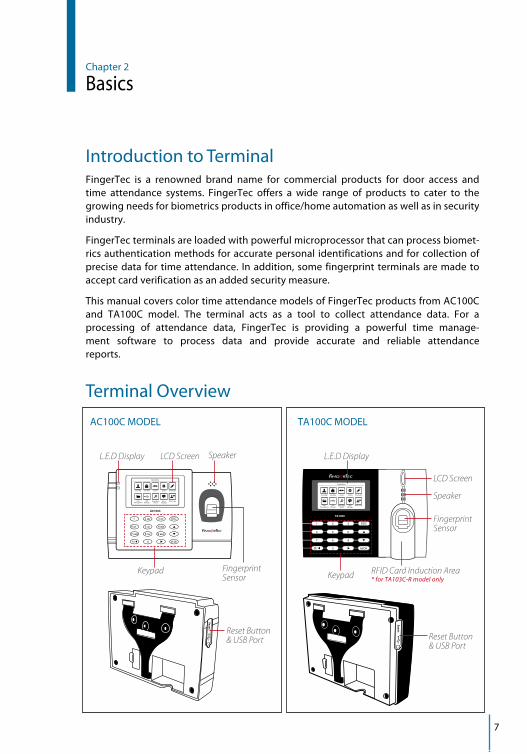
L.E.D Display LCD Screen
Keypad Fingerprint Sensor
Speaker
Reset Button & USB Port
RFID Card Induction Area* for TA103C-R model only
Reset
ResetReset
L.E.D Display
LCD Screen
Keypad
Fingerprint Sensor
Speaker
Reset Button & USB Port
Chapter2
Basics
IntroductiontoTerminalFingerTec is a renowned brand name for commercial products for door access andtime attendance systems. FingerTec offers a wide range of products to cater to thegrowingneedsforbiometricsproductsinoffice/homeautomationaswellasinsecurityindustry.
FingerTecterminalsareloadedwithpowerfulmicroprocessorthatcanprocessbiomet-ricsauthenticationmethodsforaccuratepersonal identificationsandforcollectionofprecisedata for timeattendance. Inaddition,somefingerprintterminalsaremadetoacceptcardverificationasanaddedsecuritymeasure.
ThismanualcoverscolortimeattendancemodelsofFingerTecproductsfromAC100Cand TA100C model. The terminal acts as a tool to collect attendance data. For aprocessing of attendance data, FingerTec is providing a powerful time manage-ment software to process data and provide accurate and reliable attendancereports.
TerminalOverview
AC100CMODEL TA100CMODEL
8
ITEM
LCD Screen
LED Display
Keypad
Fingerprint Sensor
RFID Card Induction Area
Speaker
USB Port
Reset Button
FUNCTION
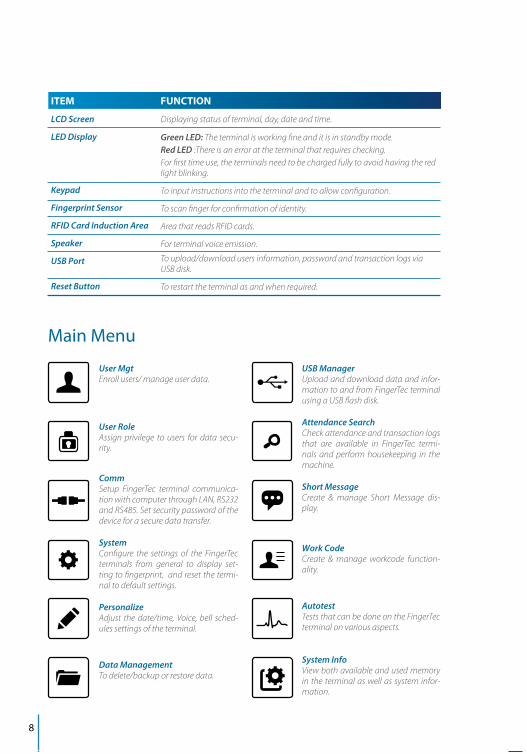
Displaying status of terminal, day, date and time.
Green LED: The terminal is working fine and it is in standby mode. Red LED :There is an error at the terminal that requires checking. For first time use, the terminals need to be charged fully to avoid having the red light blinking.
To input instructions into the terminal and to allow configuration.
To scan finger for confirmation of identity.
Area that reads RFID cards.
For terminal voice emission.
To upload/download users information, password and transaction logs via USB disk.
To restart the terminal as and when required.
User MgtEnroll users/ manage user data.
User RoleAssign privilege to users for data secu-rity.
CommSetup FingerTec terminal communica-tion with computer through LAN, RS232 and RS485. Set security password of the device for a secure data transfer.
SystemConfigure the settings of the FingerTec terminals from general to display set-ting to fingerprint, and reset the termi-nal to default settings. PersonalizeAdjust the date/time, Voice, bell sched-ules settings of the terminal.
Data ManagementTo delete/backup or restore data.
MainMenu
USB ManagerUpload and download data and infor-mation to and from FingerTec terminal using a USB flash disk. Attendance SearchCheck attendance and transaction logs that are available in FingerTec termi-nals and perform housekeeping in the machine.
Short MessageCreate & manage Short Message dis-play.
Work Code Create & manage workcode function-ality.
AutotestTests that can be done on the FingerTec terminal on various aspects.
System InfoView both available and used memory in the terminal as well as system infor-mation.

9
PowerOn/OffButtonUsethepoweron/offbuttontoturntheterminalonoroff.Youcandisablethebuttontoavoidaccidentalshutoffoftheterminal.
BatteryTerminalsoperateusingpowersupplyfromastandardpoweroutlet.Insidetheterminal,thereisanRTCbatteryfortherunningoftheclock.Chargetheterminalforatleast3hoursstraightbeforeyoustartusingit.Whenthereisaseriousdelayintimeortheclockkeepsonrestarting,theRTCneedstobereplaced.
External power supplyMiniUPS(uninterruptedpowersupply)5VandminiUPS12Vprovidemobilepowersupplytotheterminals.ChargetheminiUPSsufficientlyforoptimumperformance.Refertohttp://accessory.fingertec.comformoreinformationaboutaccessories.
CleaningTerminalCleaning The BodyUseadryclothtocleantheterminal’sbody.Donotuseanyliquids,householdcleaners,aerosolspray,solvents,alcohol,ammoniaandabrasivesolutionstocleanthebodyoftheterminalbecauseitcoulddamageit.
Cleaning the Fingerprint PrismCleanthefingerprintprismwithacellophanetapefor(siliconcoatedprism).Viewthevideoonhowtocleanthefingerprintprismatthislinkhttp://www.fingertec.com/newsletter/enduser/cleanfinger.html.Forthenon-coatedprism,pleaseusemicrofibercloth.
RestartingandResettingTerminalIfafeatureisn’tfunctioningasitshould,tryrestartingorresettingtheterminals
Restarting the Terminal PushtheOn/Offbuttonontheterminaltorestarttheterminal.Ifyoucan’trestarttheterminal,oriftheproblempersists,youmightwanttoreset.
Resetting the TerminalResettingtheterminalwillcauseallyoursettingstoreturntotheoriginal factorysettings.
Step 1:PressMenu>System>Reset
Step 2: PressOKtoResetthewholesystemsettingsandrestarttheterminal.
10
Chapter3
Users
IntroductionFingerTecdevicesrecognizeusersbyfacerecognition,fingerprint,cardaccessorasetofpinnumbers.TheDate,TimeDataandUserIDwillbestoredinitsinternalstorageuponverification and will be used to generate reports in accordance with the user’s attend-ance.
Privilegescanbeassignedaccordinglybasedonindividualpermissions.Likewise,aSys-temAdministratorcanhavehisrightsrestrictedorbegivenfullcontrol.AccesscontrolssuchastheabilitytomodifysettingswithinthemenuwillbebarredwhenaSystemAd-ministratorhasbeenassignedtoadevice.Theroleofanadministratorplaysacrucialroleinthevitalityofthedatainthesedevices.
Forexample,NetworkAdministrator(s)canbeallowedtoconfigurecommunicationset-tingsbutnottoenrollnewusers.
Threelevelsofauthoritygoverneachdevice:
• SuperAdministrator Thetopofthehierarchy,SuperAdministratorshave,fullaccesstoallfunctions.
• Administrator TherightsofanAdministratorarelimitedbythepermissionsgrantedbytheSuperAd-
ministrator.Forexample,aNetworkAdministratorcanbeallowedtoconfigurecommu-nicationsettingsbutarenotallowedtoenrollusers.
• User Normalusershavenoaccesstoanyfunctionswithinthedevice.
Bydefault,everyuserenrolledisanormaluser.SuperAdminandAdministratorrolesareallocatedfromthelistofnormalusers,eitherdirectlyfromtheterminalorassignedviaoursoftware.
11
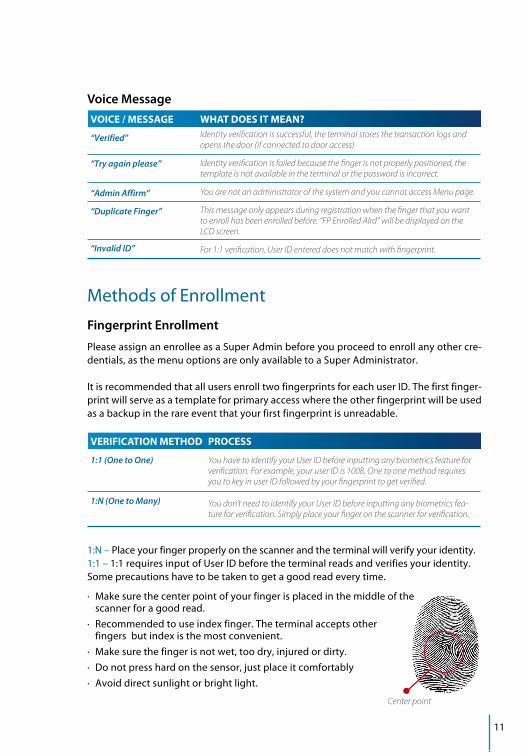
VOICE / MESSAGE
“Verified”
“Try again please”
“Admin Affirm”
“Duplicate Finger”
“Invalid ID”
WHAT DOES IT MEAN?Identity verification is successful, the terminal stores the transaction logs and opens the door (if connected to door access)
Identity verification is failed because the finger is not properly positioned, the template is not available in the terminal or the password is incorrect.
You are not an administrator of the system and you cannot access Menu page.
This message only appears during registration when the finger that you want to enroll has been enrolled before. “FP Enrolled Alrd” will be displayed on the LCD screen.
For 1:1 verification, User ID entered does not match with fingerprint.
VERIFICATION METHOD
1:1 (One to One)
1:N (One to Many)
PROCESS
You have to identify your User ID before inputting any biometrics feature for verification. For example, your user ID is 1008. One to one method requires you to key in user ID followed by your fingerprint to get verified.
You don’t need to identify your User ID before inputting any biometrics fea-ture for verification. Simply place your finger on the scanner for verification.
Center point
Voice Message
MethodsofEnrollmentFingerprint Enrollment
PleaseassignanenrolleeasaSuperAdminbeforeyouproceedtoenrollanyothercre-dentials,asthemenuoptionsareonlyavailabletoaSuperAdministrator.
ItisrecommendedthatallusersenrolltwofingerprintsforeachuserID.Thefirstfinger-printwillserveasatemplateforprimaryaccesswheretheotherfingerprintwillbeusedasabackupintherareeventthatyourfirstfingerprintisunreadable.
1:N–Placeyourfingerproperlyonthescannerandtheterminalwillverifyyouridentity.1:1–1:1requiresinputofUserIDbeforetheterminalreadsandverifiesyouridentity.Someprecautionshavetobetakentogetagoodreadeverytime.
· Makesurethecenterpointofyourfingerisplacedinthemiddleofthe scannerforagoodread.· Recommendedtouseindexfinger.Theterminalacceptsother fingersbutindexisthemostconvenient.· Makesurethefingerisnotwet,toodry,injuredordirty.· Donotpresshardonthesensor,justplaceitcomfortably· Avoiddirectsunlightorbrightlight.
12
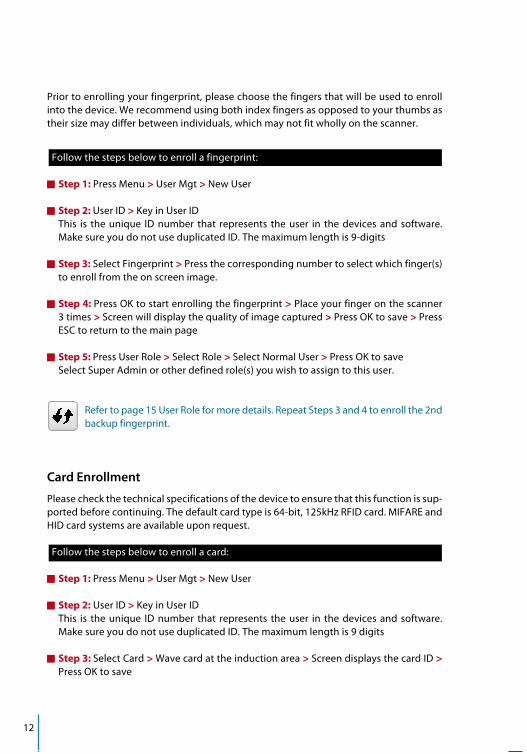
Priortoenrollingyourfingerprint,pleasechoosethefingersthatwillbeusedtoenrollintothedevice.Werecommendusingbothindexfingersasopposedtoyourthumbsastheirsizemaydifferbetweenindividuals,whichmaynotfitwhollyonthescanner.
Followthestepsbelowtoenrollafingerprint:
Step 1:PressMenu>UserMgt>NewUser
Step 2: UserID>KeyinUserID This is the unique ID number that represents the user in the devices and software.
MakesureyoudonotuseduplicatedID.Themaximumlengthis9-digits
Step 3:SelectFingerprint>Pressthecorrespondingnumbertoselectwhichfinger(s)toenrollfromtheonscreenimage.
Step 4: PressOKtostartenrollingthefingerprint>Placeyourfingeronthescanner3times>Screenwilldisplaythequalityofimagecaptured>PressOKtosave>PressESCtoreturntothemainpage
Step 5: PressUserRole>SelectRole>SelectNormalUser>PressOKtosave SelectSuperAdminorotherdefinedrole(s)youwishtoassigntothisuser.
Refertopage15UserRoleformoredetails.RepeatSteps3and4toenrollthe2nd
backupfingerprint.
Card Enrollment
Pleasecheckthetechnicalspecificationsofthedevicetoensurethatthisfunctionissup-portedbeforecontinuing.Thedefaultcardtypeis64-bit,125kHzRFIDcard.MIFAREandHIDcardsystemsareavailableuponrequest.
Followthestepsbelowtoenrollacard:
Step 1:PressMenu>UserMgt>NewUser
Step 2:UserID>KeyinUserID This is the unique ID number that represents the user in the devices and software.
MakesureyoudonotuseduplicatedID.Themaximumlengthis9digits
Step 3: SelectCard>Wavecardattheinductionarea>ScreendisplaysthecardID>PressOKtosave
13
Step 4:PressUserRole>SelectRole>SelectNormalUser>PressOKtosave SelectSuperAdminorotherdefinedrole(s)youwishtoassigntothisuser.
Refertopage15formoredetailsregardingUserRole
Password Enrollment
PasswordverificationshavealessenedsecuritypresenceinAttendanceReportingandAccesscontrolsystems.Despitethis,passwordsaregenerallytheprimarypreferenceforenrollment.FingerTecdevicescanacceptupto8-digitpasswordsinnumericformat.
Followthestepsbelowtoenrollpassword:
Step 1:PressMenu>UserMgt>NewUser
Step 2:UserID>KeyinUserID This is the unique ID number that represent the user in the devices and software.
MakesureyoudonotuseanexistingID.Themaximumlengthis9digits
Step 3: SelectPassword
Step 4:Insertpasswordforthe1sttime>PressOK>Re-enterthepasswordtocon-firm
Step 5:PressUserRole>SelectRole>SelectNormalUser>PressOKtosave SelectSuperAdminorotherdefinedrole(s)youwishtoassigntothisuser.
Refertopage15formoredetailsregardingUserRole
MenuOptionsExpiration Options
Youcansettheexpirationoptionsforeachemployeeifrequired.Oncetheexpirationperiodfortheemployeehasbeenexceeded,accesstothecompanywillberestricted.
Step 1:Toturnonthefunction,PressMenu>System>Attendance>ExpirationRule>PressOKtoturnitON
Step 2: PressMenu>UserMgt>NewUser>ExpirationRule>PressOKtoEnter
Step 3: SelecttheExpirationOptionsasbelow.
14
• Expired Date:Youmustsettheemployees’employmentstartingandendingdate.
• Entries: Youcansetthenumberoftransactionfortheemployeebeforetheirworkingduration expires. For example, once their attendance transaction reaches the limit,theemployee’saccesswillbemarkedas‘expired‘andwillbebarredfromenteringthepremises.
• Expired Date and Entries:Youcansetboththeexpireddateandentriesforoneemployee.Thesettingswilltakeeffectwheneitheroptionhasbeenattained.Forexampleiftheexpireddateissetas11thofJanuarywiththenumberofEntriessetat500,andtheemployeehadhis500thverificationon9thof January, theexpiration rulewill takeplaceon9thofJanuary.
Youcanalsosetfortheusertobedeletedortoremaininthesystemoncetheexpirationoptionshavebeenfulfilled.Formoredetailsonthesesettings,refertorefertopage32ExpirationRule.
Edit User
Name Change, user role, deletion or re-enrollment of fingerprints, card and/or pass-wordscanbemodifiedaftertheenrollmentprocess.HowevertheuserIDispermanentandcannotbechanged.
Toedituserinformation:
Step 1:PressMenu>UserMgt>AllUser>UserID
Step 2:KeyinUserID>PressOKButton> SelectEdit
Step 3: Selectthecredentialstobeedited>SaveandExit.
Delete User
Onlyanadministratorcanperformuserdeletionattheterminal.Todeleteuser(s):
Step 1:PressMenu >UserMgt >AllUser >UserID
Step 2:KeyinUserID >PressOKButton >SelectDelete
Step 3:SelectDeleteUser,UserRole,FingerprintorPassword
Step 4:PressOKButtontodelete >SelectOKtoconfirmdeletion >ESCtoexit.
15
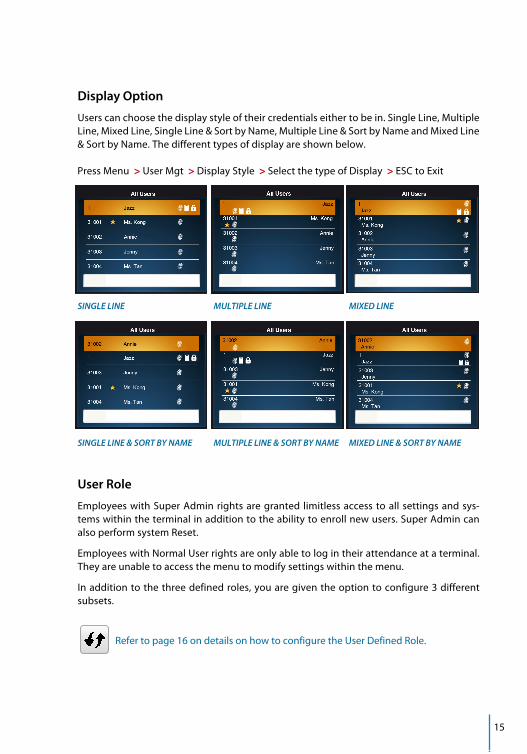
Display Option
Userscanchoosethedisplaystyleoftheircredentialseithertobein.SingleLine,MultipleLine,MixedLine,SingleLine&SortbyName,MultipleLine&SortbyNameandMixedLine&SortbyName.Thedifferenttypesofdisplayareshownbelow.
PressMenu >UserMgt >DisplayStyle >SelectthetypeofDisplay >ESCtoExit
SINGLE LINE MULTIPLE LINE MIXED LINE
SINGLE LINE & SORT BY NAME MULTIPLE LINE & SORT BY NAME MIXED LINE & SORT BY NAME
User Role
EmployeeswithSuperAdminrightsaregranted limitlessaccesstoallsettingsandsys-temswithintheterminalinadditiontotheabilitytoenrollnewusers.SuperAdmincanalsoperformsystemReset.
EmployeeswithNormalUserrightsareonlyabletologintheirattendanceataterminal.Theyareunabletoaccessthemenutomodifysettingswithinthemenu.
Inadditiontothethreedefinedroles,youaregiventheoptiontoconfigure3differentsubsets.
Refertopage16ondetailsonhowtoconfiguretheUserDefinedRole.
16
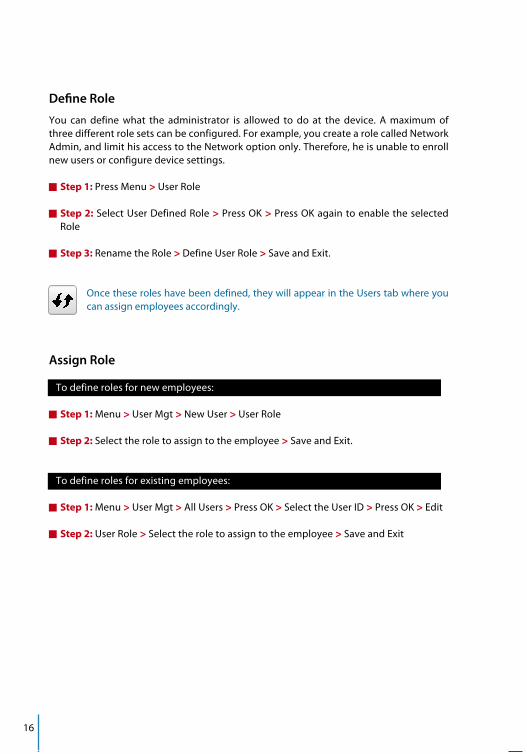
Define Role
You can define what the administrator is allowed to do at the device. A maximum ofthreedifferentrolesetscanbeconfigured.Forexample,youcreatearolecalledNetworkAdmin,andlimithisaccesstotheNetworkoptiononly.Therefore,heisunabletoenrollnewusersorconfiguredevicesettings.
Step 1:PressMenu>UserRole
Step 2:SelectUserDefinedRole>PressOK>PressOKagaintoenabletheselectedRole
Step 3:RenametheRole>DefineUserRole>SaveandExit.
Oncetheseroleshavebeendefined,theywillappearintheUserstabwhereyoucanassignemployeesaccordingly.
Assign Role
Todefinerolesfornewemployees:
Step 1:Menu>UserMgt>NewUser>UserRole
Step 2:Selecttheroletoassigntotheemployee>SaveandExit.
Todefinerolesforexistingemployees:
Step 1:Menu>UserMgt>AllUsers>PressOK>SelecttheUserID>PressOK>Edit
Step 2:UserRole>Selecttheroletoassigntotheemployee>SaveandExit
17
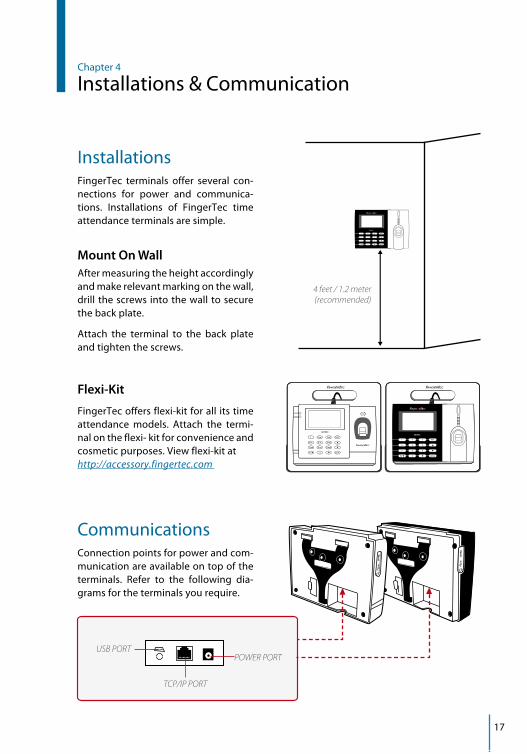
4 feet / 1.2 meter(recommended)
Reset
TCP/IP PORT
USB PORT........
......
Reset
POWER PORT
Chapter4
Installations&Communication
InstallationsFingerTec terminals offer several con-nections for power and communica-tions. Installations of FingerTec timeattendanceterminalsaresimple.
Mount On WallAftermeasuringtheheightaccordinglyandmakerelevantmarkingonthewall,drill thescrewsintothewalltosecurethebackplate.
Attach the terminal to the back plateandtightenthescrews.
Flexi-Kit
FingerTecoffersflexi-kitforallitstimeattendance models. Attach the termi-nalontheflexi-kitforconvenienceandcosmeticpurposes.Viewflexi-kitathttp://accessory.fingertec.com
CommunicationsConnectionpointsforpowerandcom-municationareavailableontopoftheterminals. Refer to the following dia-gramsfortheterminalsyourequire.
18
1 8
TOP
FRONT
1 8
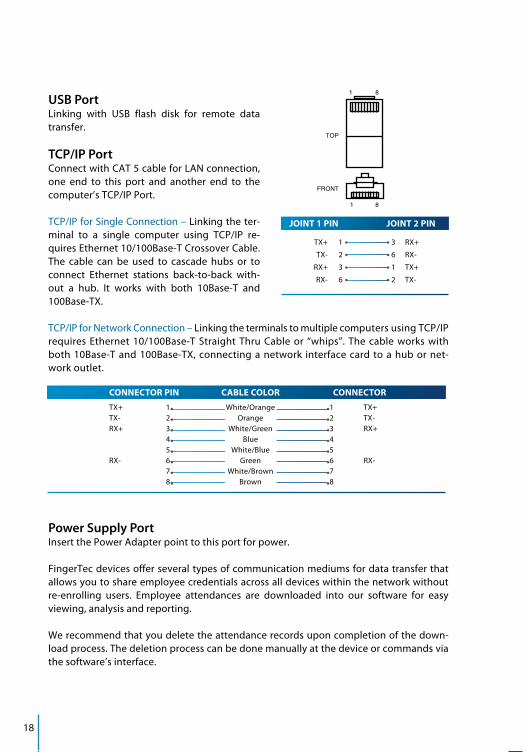
CONNECTOR PIN CABLE COLOR CONNECTOR
TX+ 1• White/Orange •1 TX+TX- 2• Orange •2 TX-RX+ 3• White/Green •3 RX+ 4• Blue •4 5• White/Blue •5RX- 6• Green •6 RX- 7• White/Brown •7 8• Brown •8
JOINT 1 PIN JOINT 2 PIN
TX+ 1• • 3 RX+
TX- 2• • 6 RX-
RX+ 3• • 1 TX+
RX- 6• • 2 TX-
USB Port Linking with USB flash disk for remote datatransfer.
TCP/IP PortConnectwithCAT5cableforLANconnection,one end to this port and another end to thecomputer’sTCP/IPPort.
TCP/IPforSingleConnection–Linkingtheter-minal to a single computer using TCP/IP re-quiresEthernet10/100Base-TCrossoverCable.The cable can be used to cascade hubs or toconnect Ethernet stations back-to-back with-out a hub. It works with both 10Base-T and100Base-TX.
TCP/IPforNetworkConnection–LinkingtheterminalstomultiplecomputersusingTCP/IPrequires Ethernet 10/100Base-T Straight Thru Cable or “whips”. The cable works withboth10Base-Tand100Base-TX,connectinganetwork interfacecard toahubornet-workoutlet.
Power Supply Port InsertthePowerAdapterpointtothisportforpower.
FingerTecdevicesofferseveraltypesofcommunicationmediumsfordatatransferthatallowsyoutoshareemployeecredentialsacrossalldeviceswithinthenetworkwithoutre-enrolling users. Employee attendances are downloaded into our software for easyviewing,analysisandreporting.
Werecommendthatyoudeletetheattendancerecordsuponcompletionofthedown-loadprocess.Thedeletionprocesscanbedonemanuallyatthedeviceorcommandsviathesoftware’sinterface.

19
Thischapterwillprovideinstructionstoguideyouinsettingupthecorrectparameterstoestablishconnectionbetweenyourdevicesandthesoftware.Theavailablecommunica-tionmethodsarelistedbelow:
• TCP/IP
• WiFi(Wireless)*
• GPRSor3G*
• Webster
• RS232/RS485
• USBdrive
*This communication method is only available upon request
Configuring your Device ID should be your first step before continuing with the abovecommunicationmethods.Itiscrucialthateachterminal’suniqueIDisidentifiedandsetapart.Bydefault,allourDeviceIDsaresetto“1”,thereforeyoumustchangetheDeviceIDmanuallyifmultipledevicesareinstalled.
TochangetheTerminalID:
Step 1:Menu>Comm.> PCConnection>DeviceID>OK
Step 2:InsertnewIDbypressingthekeypad>OKtoSave>ESCtoExit
COM KEY Createpasswordforaspecificterminalhere.ThesecuritypasswordknownasCOMKeyis intended for extra security. To conect the terminal with the sofgtware, the COM KeyinsertedintheSoftwaremustbethesameastheoneinsertedintheterminalorelsetheconnectionwillnotbeestablishedeventhoughtheactivationkeyandproductkeyarecorrectlyinserted.
TosettheComm.Key
Step 1:Menu>Comm.> PCConnection>Comm.Key
Step 2:Insertthepasswordbypressingthekeypad>OKtoSave>ESCtoExit
20
Conf.igureTCP/IPconnectionInternetProtocol(IP)isauniquenumericdesignationofeachdevicewithinanetwork.WithoutanassignedIPAddress,itwouldmakeidentifyingaspecificterminaldifficult.The default IP address of each terminal is 192.168.1.201. Connect your terminal via aRJ45(LANcable)toconnecttoyourlocalareanetwork.
TochangetheIPaddress:
Step 1:Menu >Comm.>Ethernet >IPAddress >OK
Step 2:InserttheIPAddress >PressDownarrowtogotothenextcolumn
Seebelowtounderstandeverycolumn.
• IP Address: Known as Internet Protocol Address, the default configuration is192.168.1.201.
• SubnetMask:Setto255.255.255.0bydefault,thisisusedtomanageaspecifiednet-workrange.Youmaychangethesubnetmaskifyouhavemultiplenetworksinyourcompany.
• Gateway: By default, it is configured as 0.0.0.0. Only configure the gateway if thedeviceandPCareondifferentIPranges.
• DNS:DomainNameSystem.Bydefault,theDNShasbeenconfiguredas0.0.0.0.IfyouareusingyourowninternalDNSservers,pleasechangeyourDNStoensurethatitisreflectedaccordingly.
• TCPCOMMPort:Thedefaultportis4370.Onlychangethenumberifyournetworkisunabletoutilizethisport.
• DHCP:DynamicHostConfigurationProtocol.It’susedtoallocatedynamicIPaddress-estoclientsonanetwork.
ConfigureUSBFlashDiscUSBdrivescanbeutilizedtotransferdatabetweenFingerTecdevicesandsoftwareifacableisunavailable.Youcanexportemployees’attendancerecords(transactionlogs)fromthedevicetotheUSBdrive,and importthedatafromthedrivedirectlytoyourmanagementsoftwareandviceversa.
21
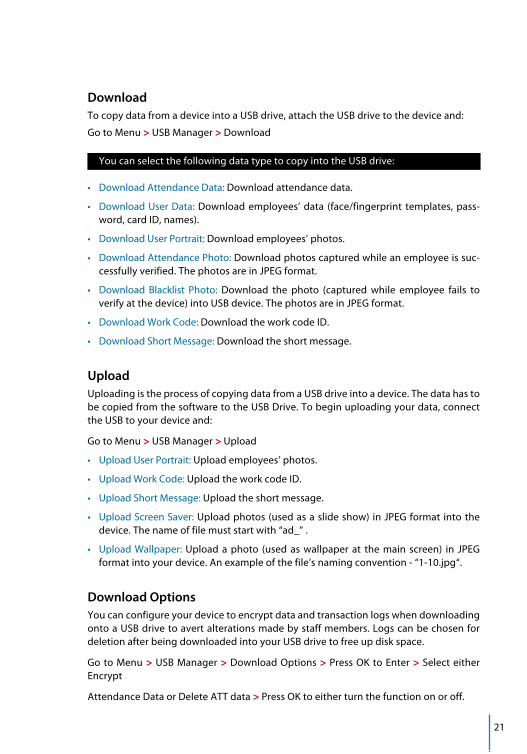
DownloadTocopydatafromadeviceintoaUSBdrive,attachtheUSBdrivetothedeviceand:
GotoMenu>USBManager>Download
YoucanselectthefollowingdatatypetocopyintotheUSBdrive:
• DownloadAttendanceData:Downloadattendancedata.
• DownloadUserData: Download employees’ data (face/fingerprint templates, pass-word,cardID,names).
• DownloadUserPortrait:Downloademployees’photos.
• DownloadAttendancePhoto:Downloadphotoscapturedwhileanemployeeissuc-cessfullyverified.ThephotosareinJPEGformat.
• Download Blacklist Photo: Download the photo (captured while employee fails toverifyatthedevice)intoUSBdevice.ThephotosareinJPEGformat.
• DownloadWorkCode:DownloadtheworkcodeID.
• DownloadShortMessage:Downloadtheshortmessage.
UploadUploadingistheprocessofcopyingdatafromaUSBdriveintoadevice.ThedatahastobecopiedfromthesoftwaretotheUSBDrive.Tobeginuploadingyourdata,connecttheUSBtoyourdeviceand:
GotoMenu>USBManager> Upload
• UploadUserPortrait:Uploademployees’photos.
• UploadWorkCode:UploadtheworkcodeID.
• UploadShortMessage:Uploadtheshortmessage.
• UploadScreenSaver:Uploadphotos(usedasaslideshow) inJPEGformat intothedevice.Thenameoffilemuststartwith“ad_”.
• Upload Wallpaper: Upload a photo (used as wallpaper at the main screen) in JPEGformatintoyourdevice.Anexampleofthefile’snamingconvention-“1-10.jpg“.
Download Options YoucanconfigureyourdevicetoencryptdataandtransactionlogswhendownloadingontoaUSBdrivetoavertalterationsmadebystaffmembers.LogscanbechosenfordeletionafterbeingdownloadedintoyourUSBdrivetofreeupdiskspace.
GotoMenu>USBManager>DownloadOptions>PressOKtoEnter>SelecteitherEncrypt
AttendanceDataorDeleteATTdata>PressOKtoeitherturnthefunctiononoroff.
22
Conf.igureWiFi Awirelessconnection(WiFi)isanavailablehardwarefeatureinsomeFingerTecdevices.Youcanlinkupyourdeviceswiththesoftwareviaawirelessconnection.
ToconfiguretheWiFiconnection:
Step 1: Menu>Comm.>WirelessNetwork>OKtoenableWiFiconnection>ESCtoSaveandExit.
Step 2: WaitforthedevicetoscantheSSIDofyourWiFinetwork.
Step 3: SelecttheSSIDoftheWiFinetwork>OKtoconfirm
Step 4: InserttheWiFipassword>OKtoconfirm
Step 5: SelecttouseDHCPorManualassignIP
Step 6: ESCtoreturntothemainmenu
Step 7: TheWiFiiconappearsonthemainmenu
Conf.igureGPRS/3GConnectionFingerTecdeviceswithbuilt-inGPRSor3Gmodulescanbe installed remotely, in thesituationwherenoother formsofconnectionareavailable.DeviceswithGPRSor3Gconnectionscanonlybeused inconjunctionwith theFingerTecWebsterorTimeTecCloudserverservices.
ToconfigureGPRSor3G:
Step 1: Menu>Comm.>CellularDataNetwork>OKtoenablethefunction>ESCtosaveandexit.
Step 2: Configurethesettings
• CellularDataNetwork:EnablethistouseGPRS/3G• APNSetup:AccessPointNameisthegatewaybetweenaGPRS,3Gor4Gmobilenet-
workandanothercomputer.YoucanedittheAPNname,dialnumber,usernameandpasswordonthistab.
• APN:AccessPointName,usedtoidentifyGPRStype• DialNumber:GPRSAccessNumber• UsernameandPassword:Toaccessthenetworkifyouhavethecorrectcredentials.
23
• HeartbeatServer:EnterthepublicIPaddressofyourWebsterorTimeTecCloudserver.ThedevicefrequentlysendsstatusanddataupdatestoWebsterorTimeTecCloud.Intherarecase that theconnectionto theserverdropsout, thedevicewillperformanautomaticrestart.
• Details:Thisincludesinformationabouttheconnectedmobiledevicessuchasnetworkmode,Telcooperator,IPaddressandthetotaldatasentandreceived.
Conf.igureWebsterFingerTecWebsterisawebstorageapplicationformanagingcontentthataresentfromyourdevices.Thecontentsincludeinformationpertainingtouserverificationcredentials,transactionlogsanddevicesettings.YouwillberequiredtoassignanIPaddresstotheserver to connect all devices via an Internet connection. The public IP address must beenteredintothedevicetoallowaconnection.
ToconfigureWebster,locatethesubmenu“ADMS”.TheoptionswithinthissubmenuareusedtoconnectallWebserversettingssuchastheWebserverIPAddress,portandproxysettings.
Step 1:Menu>Comm.>ADMS>PressOKtoenablethedomainname.
Step 2:Configureallrelatedsettingsinthepage.
• EnableDomainName:YoucanaccessWebsterusingadomainnameintheformatof“http://”onceyouhaveenabledthisfunction.Alternately,youcanentertheIPaddresstoaccessWebster
• ServerAddress:Webster’sPublicIPaddress
• ServerPort:Webster’sserverportnumber
• EnableProxyServer:Ifyouchoosetoenablethisfunction,youmustsettheIPaddressandportnumberoftheproxyserver.YoumaychoosetoentertheproxyIPaddressofyourproxyserverforInternetaccess.
24
LogintoTimeTecCloudtostart
ToinsertTimeTecCloudserverIP>PressMenu>COMM>Web Setup>WebserverIP (50.18.154.243) > Webserver Port (80) > OK (Save) > ESC to return to main screen >Restarttoapplychanges
LogintoTimeTecCloudtostarttosetupyourcompany•Visittowww.timeteccloud.com•Loginbyusingyourusername(emailaddress)andpassword•GotoConfiguration>Wizard>SetupWizard•FollowtheinstructionsunderSetupWizard
25
Chapter5
System
FingerTec devices can be personalised according to preference. These settings includedate/time,storageofin-outrecordsandbiometricverificationrules.YoucanfindtheRe-setoptionwhichallowsyoutoprogramyourdevices todefault factorysettings,underthischapter.
SetupDateandTimeTheDate&Timeisaverycrucialaspectforaccurateloggingofattendanceandtherecordofdooractivityineachcompany.Thedateandtimeoftheterminalwillbedisplayedatthehomescreen.Youcanchoosethedateandtimeformatbasedonyourpreference.
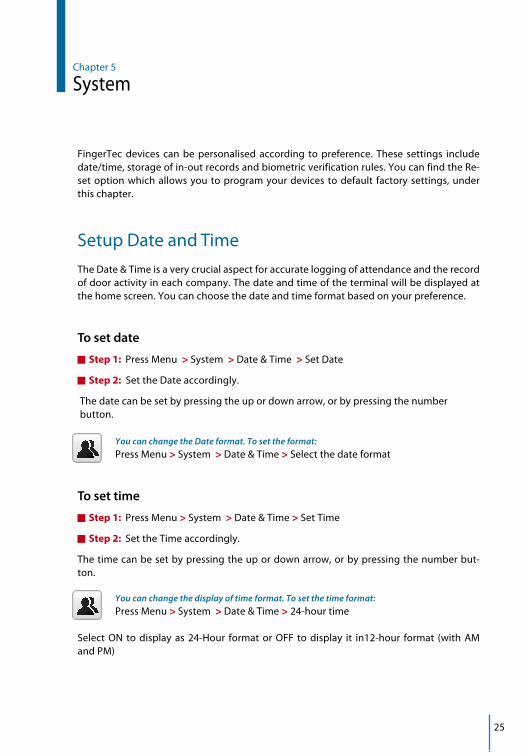
To set date
Step 1: PressMenu >System >Date&Time >SetDate
Step 2: SettheDateaccordingly.
Thedatecanbesetbypressingtheupordownarrow,orbypressingthenumberbutton.
You can change the Date format. To set the format:PressMenu >System >Date&Time>Selectthedateformat
To set time
Step 1: PressMenu>System >Date&Time>SetTime
Step 2: SettheTimeaccordingly.
Thetimecanbesetbypressingtheupordownarrow,orbypressingthenumberbut-ton.
You can change the display of time format. To set the time format:PressMenu> System >Date&Time>24-hourtime
Select ON to display as 24-Hour format or OFF to display it in12-hour format (with AMandPM)
26
To use Daylight Savings Time (DLST)
Daylightsavingtime(DLST)isthepracticeoftemporarilyadvancingclockssothatthedaylightintheafternoonwillbelongerwhereasmorningwillbeshorter.Pleasedisre-gardthisifDLSTdoesnotapplytoyourcountry.
TosettheDLSTsettings:
Step 1: PressMenu>System >Date&Time> DaylightSavingTime> PressOKtoenable
Step 2: SelectDaylightSavingMode>SelecteitherBydate/timeorByweek/day>ConfiguredetailsinDaylightSavingSetup
By Date/Time
ThisoptionisrecommendedifyouknowtheexactdatetheDLSTbegins.Forexample,ifcompanyAwantstosettheDLSTtobeginfromMay3rd22:15hourandendsonJuly10th11:15hour,thissettingshouldbechosen.
Step 1: SetthemonthanddatefortheDLSTtobegin
Step 2: Setthetime(inHH.MMformat)onwhentheDLSTwillbegin.
Step 3: SetthemonthanddatefortheDLSTwillend.
Step 4: SettheendtimeoftheDLSTperiod.
By Week/Day
Thisoption is recommended ifyouwant theDLSTsettings to takeplaceontheexactweek,monthanddayeveryyearregardlessofthedate.Forexample,ifcompanyBwantstosettheDLSTtobeginfromtheSundayofthe2ndweekofFebruaryat1510hourandendsonthe4thweekofMayat1000houreachyear,thissettingshouldbechosen.
Step 1: SetthemonthfortheDLSTtobegin.
Step 2: SettheweekfortheDLSTtobegin.
Step 3: SetthedayfortheDLSTtobegin.
Step 4: Setthetime(inHH.MMformat)onwhentheDLSTwillbegin.
Step 5: SetthemonthfortheDLSTtoend.
Step 6: SettheweekfortheDLSTwillend.
Step 7: SettheenddayoftheDLSTperiod.
Step 8: SettheendtimeoftheDLSTperiod.
27
AttendanceRecordStorageOptionEachtimeaverificationisperformedonthedevice,atransactionlogwillbestoredinsidetheterminal.Theselogsneedtobemanagedtomaintaintheeffectivenessofthedevices.However,youcanonlysetuprulestocontrolattendancecapturingandstorage.
PressMenu>System>Attendance>Selecttypeofrulestoconfigure
Duplicate Punch Period (m)Intheeventthatyouwanttoconsiderallclockingactivitieswithinthepredefinedtimeintervalasasingleclocking,youcanusethissetting.Forexample,iftheINtimeis9:00amandthetimeintervalis15minutes,anyverificationdonebythesameIDwithinthe15minuteswillbeconsideredasasamerecord,takingthefirsttimehe/sheclocksin.Themaximumnumberofminutesthatcanbeenteredis60.
Pressthenumberbuttontoinsertthevalue.
Display User photo
Youcansetthedevicetodisplayaphotooftheemployeeafterasuccessfulverification.Asuccessverifiedindicatorwillappearonthescreenafterhis/herIDandnamehasbeenverified.Youcantransferphotosfromthesoftwaretothedevice.
Thisshouldbeenabledifyouwouldlikethedevicetodisplaytheemployees’photoonscreen.
Alphanumeric User ID
You can set employee IDs with alphanumeric entry for example, ENG1003 representsstaffID1003fromtheEngineeringDepartment.ThisalphanumericIDrecommendedforlarge organizations with multiple departments.The person in charge will know whichdepartment the employees belong to by referring to their ID. Only enable this if yourcompanyintendstoseparateemployeesfromdifferentdepartments.
Attendance Log Alert
You can set the device to prompt an alert message on screen every time it verifies anemployeewhenitsstorageisapproachingthelimit.Thevaluerangesfrom1to99(trans-actioncounts).Thedevicewillalwaysdeleteearlierrecordstofreeupspacetosavethelatestrecord(FIFO,firstinfirstout),ifstorageisfull.Bydefault,thevalueis99.Changeitifyouwanttoapplyanothervalue.
28
Cyclic Delete ATT Data
Youcansetthedevicetodeleteanumberofrecordswhenitsstorageisfull.Thevaluerangeisfrom1to999records.Forexample,youcansetthevalueat500recordsandthedevicewilldeletethefirst500recordstofreeupthespacetostorenewrecords.
Cyclic Delete ATT Photo
Youcansetthedevicetodeleteanumberofstoredphotoswhenitsstorageisfull.Thevaluerangeisfrom1to99.Forexample,youcansetthevalueto50andthedevicewilldeletethefirst50photostofreeupslotstostorenewimages.
Confirm Screen Delay(s)
Youcansetthetimedelayforthedevicetodisplayverificationresults(ID,nameandphoto).Thetimerangeisfrom1sto9s.
Save Illegal Verification Record
Youcansetatimerangetoallowemployeestoverifyforaccess,forexamplefrom9:00amto6:00pm.Employeeswillbeabletoverifyatthedevicebeforeandafterthistimerange,butnoaccesswillbegranted.HoweverthedevicewillrecordtheemployeesIDandattemptedtimeofaccess.Youcansetthedevicetoignoretheserecordstosavestorage.
Expiration Rule
Youcansetlimitsforthedevicetoverifyanemployee,eitherbynumber(forexample100times)orspecificdate(forexample1stofJune).Employeesexceedingthelimitcannolongerverifyatthedeviceorgainaccess.Youcansetthedevicetotakeanyoftheactionbelowwhenthelimithasbeenreached:
• KeepUser,NoAuditFuturePunch:Devicekeepsemployeedatabutwillnotsaveanyattendancerecords.
• Keep User, And Audit Future Punch: Device keeps employee data and attendancerecords.
• DeleteUser:Deviceremovesallemployeedata
29
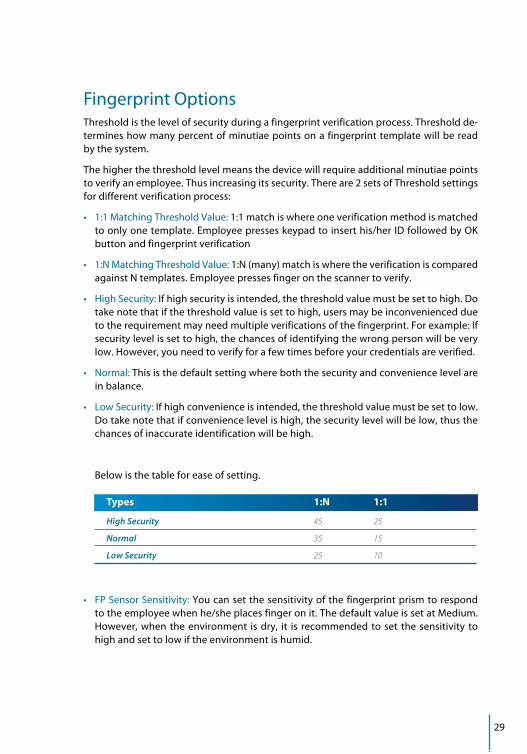
Types 1:N 1:1
High Security 45 25
Normal 35 15
Low Security 25 10
FingerprintOptionsThresholdisthelevelofsecurityduringafingerprintverificationprocess.Thresholdde-termineshowmanypercentofminutiaepointsonafingerprinttemplatewillbereadbythesystem.
Thehigherthethresholdlevelmeansthedevicewillrequireadditionalminutiaepointstoverifyanemployee.Thusincreasingitssecurity.Thereare2setsofThresholdsettingsfordifferentverificationprocess:
• 1:1MatchingThresholdValue:1:1matchiswhereoneverificationmethodismatchedtoonlyonetemplate.Employeepresseskeypadtoinserthis/herIDfollowedbyOKbuttonandfingerprintverification
• 1:NMatchingThresholdValue:1:N(many)matchiswheretheverificationiscomparedagainstNtemplates.Employeepressesfingeronthescannertoverify.
• HighSecurity:Ifhighsecurityisintended,thethresholdvaluemustbesettohigh.Dotakenotethatifthethresholdvalueissettohigh,usersmaybeinconveniencedduetotherequirementmayneedmultipleverificationsofthefingerprint.Forexample:Ifsecuritylevelissettohigh,thechancesofidentifyingthewrongpersonwillbeverylow.However,youneedtoverifyforafewtimesbeforeyourcredentialsareverified.
• Normal:Thisisthedefaultsettingwhereboththesecurityandconveniencelevelareinbalance.
• LowSecurity:Ifhighconvenienceisintended,thethresholdvaluemustbesettolow.Dotakenotethatifconveniencelevelishigh,thesecuritylevelwillbelow,thusthechancesofinaccurateidentificationwillbehigh.
Belowisthetableforeaseofsetting.
• FPSensorSensitivity:Youcansetthesensitivityofthefingerprintprismtorespondtotheemployeewhenhe/sheplacesfingeronit.ThedefaultvalueissetatMedium.However,whentheenvironment isdry, it is recommendedtoset thesensitivity tohighandsettolowiftheenvironmentishumid.
30
• 1:1RetryTimes:Youcansetthemaximumnumberofattemptsfor1:1fingerprintveri-ficationorpasswordverification.Thedevicewilltriggeranalarmsystemwhenthelimithasbeenreached.
• FingerprintAlgorithm:YoumaychoosetouseeitherVX9.0orVX10forfingerprintalgo-rithm.
Note: Both algorithms are not compatible with each other.
• FingerprintImage:Youcanselecttodisplayornottodisplaythefingerprintimagedur-ingverificationorenrolment.
ResetOptionsInaneventyouwanttorestoretheterminalbacktothefactorysettings,youcandosobygoingtoMenu>System>Reset>PressOK.Aconfirmationwindowwillpromptyoubeforetheterminalisreset.Ensurethatyouarecertainofperformingthetaskbeforepro-ceedingtoavoidirreversibledataloss.
31
Chapter6
Personalization
You can manage the display style of your FingerTec device according to your prefer-ence.Theseincludetheuserinterface,voice,bellschedules,punchstateoptions,andshortcutkeymapping.
UserInterfaceTheuserinterfaceisdesignedassuchsothatuserscaninteractwiththedevice.Theseincludetheappearanceofthedevice,responsetime,andthecontentthatispresentedtotheuser.
TosetupthedisplayoftheUserInterface:
GotoMenu>Personalize>UserInterface>PressOKtoEnter>PressarrowandOKbut-tontoenableordisabletheoptions:
• Wallpaper:Youcanchoosewhichwallpapertobedisplayedonthescreen• Language: There are 8 languages preloaded into your device. Select the language
thatfitsyourenvironment
• LockPowerKey:YoucandisabletheON/OFFbuttontopreventpeoplefromtoyingwiththepowerbuttoncausingtheterminaltoshutoff
• MenuScreenTimeout:Thedevicewillreturntomainscreenifyouremaininactiveinthemenuafteracertainperiodoftime.Youcansetthetimedurationforthetimeoutbetween60sto99999s.
• IdleTimetoSlideShow(s):Devicewillstarttoplayslideshows(photo)onitsscreenwhenitisidle.Youcansettheidletimeduration(rangefrom3sto999s)beforetheslideshowsstarttoplay.
• SlideShowInterval(s):Youcansetthetimeintervalbetweeneveryimagefortheslideshow.Theintervalrangesfrom0-99
• IdleTimetoSleep(m):Youcansettheidletimeduration(rangefrom1to30min)tomakethedevicetogointosleepmode.Pressinganybuttonsatthedevicewillmakeitresumeoperations.
• MainScreenStyle:Youcanselect toshowclockdisplaystyleandstatuskeyonthemainscreen.
• CompanyName:Youcaninsertyourcompanynameintothissection.Thenamewillbedisplayedatonthereceiptfromthethermalreceiptprinterafteremployeesreportattendance.
Read more regarding receipt printing in chapter 9.
32
VoiceYoucanchoosetoenableordisablethevoiceprompts,keyboardsoundoradjustthevolumeofthedevice.
GotoMenu>Personalize>Voice>PressOKtoEnter>PressarrowandOKbuttontoenableordisabletheoptions:
• VoicePrompt:You can choose to disable or enable the voice greetings or feedbackduringtheoperations.
• Keyboard Prompt: You can choose to enable or disable the beeping sounds whenpressingonthekeys
• Volume: You can adjust the volume of the voice greetings/feedback and keyboardbeeps
BellYoucanschedulethedevicetoringautomaticallyduringspecifictimes.Thisisaremind-ertoalerttheemployeestostart/endwork,start/endofbreaktimeetc.Toactivatethisfunction,youhavetocreateanewbellschedule.
GotoMenu>Personalize>BellSchedules>PressOKtoEnter>NewBellSchedule>Settheoptionaccordingly:
• BellStatus:Toturnthebellonoroff.
• BellTime:Setthetimeforthebelltoringautomatically.
• Repeat:Setthebelltorepeatoncertaindaysoreveryday.
• BellType:Youcansetforthebelltobetriggeredfromtheinternalbellorfromanex-ternalbellthatiswiredtothedevice.
• RingTone:Selectthebells’preferredringtone
• InternalBellRelay:Specifiesthetimedurationforthealarmtoring(rangesfrom1sto999s).
Edit and Delete a Preset Schedule
Onceyouhavecreatedabellschedule,youcaneditordeletethescheduleentirely.Edit-ingthefunctionissimilartoaddinganewschedule.
33
GotoMenu>Personalize>BellSchedules>PressOK>AllBellSchedule>PressOK>PressDownarrowtoselectthebellschedules>PressOK>PressEdittoedittheexistingscheduleorDeletetodeletetheschedule
Output to External Bell Siren
Youcansetthetypeofexternalbellrelayifyouareusingtheexternalbellsiren.
GotoMenu>Personalize>BellSchedules>PressOK>Options>PressOK>Selectonefromthe3options
• Disable:Disabletheexternalalarm.
• NC1:SelectthisifyourbellsirenisconnectedtoNC1andCOM1port.
• NC2:SelectthisifyourbellsirenisconnectedtoNC2andCOM2port
PunchStateOptionsIntheeventyouwantyouremployeestopressabuttontoconfirmhis/herattendancestatus(forexampleCheck-In,Breakstartsetc)youwillneedtosetthepunchstatefromyourkeyboard’sF1toF8buttons.
Punch State ModeYoucansetthedisplayofthestatuskeys.
GotoMenu>Personalize>PunchStateOptions>PressOK>PunchStateMode>Selectonefrombelow:
• Off:TodisableStatuskeyfunction.Employeesarenotrequiredtopressanybuttonstoreporttheirattendance.ThescreenwillnotdisplayanyStatuskey
• ManualMode:Bydefaultthedevicedoesnotdisplayanystatuskey.PresstheStatusKeytoviewandselectyourattendancestatus.ThestatuskeywillreverttoCheck-Inmodeafteranemployeehasreportedtheirattendance.
• AutoMode:TheStatusKeyswitchestoaspecifiedstatusaccordingtothepredefinedschedule.Employeescannotpressthekeytochangetheirattendancestatus.He/shecanonlyreportattendanceaccordingtothepredefineschedule.YoucansetthetimeunderShortcutKeyMapping(refersection4.5)
• Manual and Auto Mode: The Status Key switches to specific status according to thepredefinedtime.Employeescanverifytheirattendancewithoutpressingthebutton.Howeveryouarestillabletoselectalternativeattendancestatuses.
34
• ManualFixedMode:Thedevicetendstoshowthelastattendancestatusreportedbythepreviousemployee,forexampleCheckOut.TheemployeemustpresstochangetoCheck-Inifhe/shereportstostartwork.
• FixedMode:DevicewillonlydisplayaCheck-instatus.Employeescannotchangethestatusbypressingotherkeys.
Punch State Required
Youcansetthedevicetoonlyacceptverificationafteranemployeepressesthestatuskeytovalidatetheirattendancestatus.Thedevicewillnotrespondtoattemptsiftheemployeefailstovalidatetheirattendancestatus.
ToenablePunchStateRequired:
GotoMenu>Personalize>PunchStateOptions>PressOK>PunchStateRequired> PressOKtoenableordisableit.
ShortcutKeyMappingsYoucanassignsixshortcutsasattendanceor functionalkeys.Onthemain interface,whentheshortcutkeysarepressed,thecorrespondingattendancestatusorfunctioninterfacewilldisplay.
GotoMenu>Personalize>ShortcutKeyMappings>PressOKtoEnter>Select theappropriatekeybypressingthedownarrow>PressOKtochoosethecorrespondingaction
Note: When the Attendance Status shortcut key is selected, you can also set the ‘Auto Switch’ parameter (refer to page 37 regarding Auto Mode).
35
Chapter7
DataManager
Datastoredintheterminalcanbeutilizedtoestablishmanagementrightsorhavespe-cificlogsremoved.Tomanageyourdata:
GotoMenu>DataManagement>PressOKtoEnter
DeleteDataDatastoredintheterminalcanbedeletedwithinyourDataManagementfunction.Be-lowisalistofavailableoptionsinyourterminal:
• DeleteAttendanceData:Deleteallattendancerecords.
• DeleteAttendancePhoto:Deleteallemployees’attendanceimages.
• DeleteBlacklistPhoto:Deletephotosofemployees’capturedduringafailedverifica-tionattempt.
• DeleteAllData:Deletedatarelatedtoface&fingerprintstemplates,IDs,passwords,cardIDandattendancerecords.
• DeleteAccessControl:Deleteaccesscontrolrecords.
• DeleteAdminRole:Removesadministratorprivilegesinyourterminal.Allemployeeswhohadtheprivilegewillidentifyasanormaluser.
• DeleteUserPhoto:Deleteallphotos.
• DeleteWallpaper:Deleteallsavedwallpapers.
• DeleteScreenSavers:Deletescreensavers.
BackupDataLosingvaluabledatacanbediscouraginganddamaging.OurFingerTecterminal(s)of-fertheoptionofbackingupyourconfigurationstoafilewithintheterminalitself,allow-ingforseamlessrestorations.HoweveryoucanchoosetosavethefileontoaUSBdrivetoperformrestorationsonotherterminals.Toinitiateabackup:
GotoMenu>DataManagement>PressOKtoEnter>BackupData>PressOKtoEnter>SelecteitherBackuptoDeviceorBackuptoUSBDisk>Selecttheitemstobebackup>BackupStart

36
RestoreDataYoucanrestorethedatastoredinthedeviceorfromtheUSBdrive.
GotoMenu>DataManagement>PressOKtoEnter>RestoreData>PressOKtoEnter>SelecteitherRestorefromDeviceorRestorefromUSBDisk>Selectthedatatoberestored>StartRestore

37
Chapter8
AttendanceSearch
Thedevicestoresattendancerecords,whichcanbeprocessedbyoursoftwaretopro-ducepayrollcalculationsandotherreports.Thissearchfunctionisaneasytousemod-ulethatallowsyoutocheckandbrowserecordsatyourconvenienceatanytime.
You can choose to display photos together with attendance records.
GotoMenu>AttendanceSearch>PressOK>InserttheuserIDtosearch(leaveblankifyouwanttoseeallemployees)>PressOK
>SelectthetimerangefromthelistorenterspecificdateandtimeattheUserDefined>PressOKtoseeallrecords
38
Chapter9
ReceiptPrinting
YoucanattachyourFingerTecdevicestoathermalreceiptprinter.Whenanemployeereportsforwork,theterminalwillsendapingtotheprintertohaveareceiptprinted,consistingoftheemployees’ID,dateandtimeduringtheverificationprocess.
DataFieldSetupYoucanadjusttheinformationthatyouwanttoprintonareceipt.ThisfunctionhastobeturnedonusingtheFunctionTool.
GotoMenu>Print>PressOKtoEnter>DataFieldSetup>Setthecriteriaaccord-ingly.
• CompanyName:Youcanchoosetodisableorenablethedisplayofyourcompanynameintheattendancerecord.Dotakenotethatyouhavetoconfigurethecom-panynamebeforeitcanbedisplayed.
Refer to chapter 4.1 User Interface on how to set the company name.
• UserID
• Name
• PunchTime
• PunchState
• DeviceID
• PrintTime
• WorkCode
• VerificationMode
PrinterOptionToenableprinting,selectON.Ifyourprinterisequippedwithapapercuttingfunction,turnPaperCuttingONtoautomatetheservice.
39
Chapter10
ShortMessageDisplay
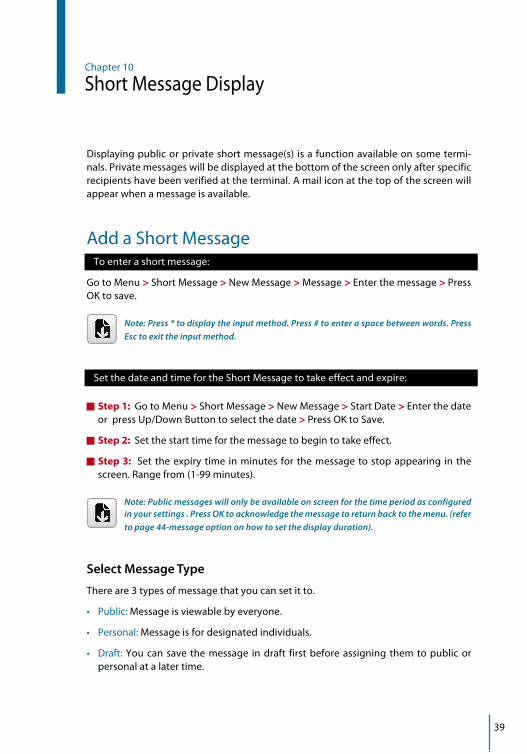
Displayingpublicorprivateshortmessage(s) isafunctionavailableonsometermi-nals.Privatemessageswillbedisplayedatthebottomofthescreenonlyafterspecificrecipientshavebeenverifiedattheterminal.Amailiconatthetopofthescreenwillappearwhenamessageisavailable.
AddaShortMessageToenterashortmessage:
GotoMenu>ShortMessage>NewMessage>Message>Enterthemessage>PressOKtosave.
Note: Press * to display the input method. Press # to enter a space between words. Press Esc to exit the input method.
SetthedateandtimefortheShortMessagetotakeeffectandexpire:
Step 1: GotoMenu>ShortMessage>NewMessage>StartDate>EnterthedateorpressUp/DownButtontoselectthedate>PressOKtoSave.
Step 2: Setthestarttimeforthemessagetobegintotakeeffect.
Step 3: Set theexpiry time inminutes for themessagetostopappearing in thescreen.Rangefrom(1-99minutes).
Note: Public messages will only be available on screen for the time period as configured in your settings . Press OK to acknowledge the message to return back to the menu. (refer to page 44-message option on how to set the display duration).
Select Message Type
Thereare3typesofmessagethatyoucansetitto.
• Public:Messageisviewablebyeveryone.
• Personal:Messageisfordesignatedindividuals.
• Draft: You can save the message in draft first before assigning them to public orpersonalatalatertime.
40
GotoMenu > ShortMessage >NewMessage >MessageType > Select thepreferredmessagetype>PressOKtosave.
Public,PersonalandDraftListYoucanview,editordeletemessagesintheirrespectivelist.
GotoMenu>ShortMessage>SelecteitherPublic,PersonalorDraftfromthelist>Selecttheappropriateactions.
Note: The operations of the ‘edit’ function are similar to that of adding a short message (refer to page 43)
MessageOptionYoucansettheactivedurationofamessagebeforeitisremovedfromthescreen.
GotoMenu>ShortMessage>MessageOptions>Selectthepreferreddelayedtimeordefineityourself>PressOKtosave.
41
Chapter11
WorkCode
AmajorityofFingerTecTerminalsisincorporatedwithafeaturewhichallowuserstoselectareasonforre-entryduringverificationbyselectingaworkcode(forexample,workcode13–OnsiteatCustomers).
AddingaWorkCodeBydefault,ourterminalsdoesnotcontainanyworkcodes.
Toaddaworkcode:
GotoMenu>WorkCode>NewWorkCode>Keyintheworkcode
• ID:TheworkcodeIDsupports1digitto8digitsinlength.
• Name:Shortdescriptionoftheworkcode.
AllWorkCodesAllworkcodescanbeviewed,deletedoredited(withtheexemptionofmodifyingtheIDnumber)intheAllworkcodestab.Theprocessofeditingaworkcodeissimilartoaddingaworkcodeasexplainedin10.1.
Toviewallworkcodes:
GotoMenu>WorkCode>AllWorkcodes>SelecttheWorkcode>PressOKtoSelecteithertoEditorDeletetheselectedWorkCode.
WorkCodeOptionsTheoptiontouseworkcodesmustbeenabledbeforeitcanbeutilized.
ToturnonWorkCode:
GotoMenu>WorkCode>WorkCodeOptions>WorkCodeRequired>PressOKtoturnitON
Note: If you wish to bar employees from entering new workcodes during verification, you must enable the function “Work Code must be defined”. The terminal will reject work codes it cannot match to in its current list.
42
Chapter12
Diagnostic
TheDiagnosticspageallowsyoutoanalyzetheconditionofyourterminal(s)byutiliz-ingaseriesoftests.Onlyadministratorsareauthorizedtoperformthesetests.Toviewthestatusofyourterminal,youcanselectGotoMenu>Autotest:
AllTestThisoptionwillassessthequalityoftheterminalsLCDDisplay,Voice,KeyboardandBiometricSensors.
LCDTestThiswillperformanevaluationtestofyourterminals’displaybygaugingitseffectsunderallcolors,includingpurewhiteandblack.PressOKtocontinuetothenexttestorEsctoStop.
TestVoiceSelectthis functiontoensurethequalityofyourvoicefilesareclearandcomplete.PressingOKtocontinuetothenexttestorEsctoStop.
TestKeyboardThisfunctionteststhekeypadonyourterminal.Pressanykeyonthekeypadtoverifythekeyshownonthedisplaymatchesyourinput.
TestFingerprintSensor
Todeterminetheconditionofthefingerprintsensor,placeyourfingeronthescannerwhenawhitesquare isdisplayed. Ifyouareable toseeyour fingerprintwithin thewhitesquare,yoursensorisfunctioning.
TestCameraThiswilldetermineifthephotostakenbythecameraareclearandacceptable.
TestClockRTCTheRTCtestwillaccuratelyexaminethetime&datetoensurethetimeloggedisac-curate.ClickOKtostartthetest.Every10mspassedwillbedisplayedas1s.
43
Chapter13
SystemInfo
Thisoptionallowsyoutocheckyourterminalsstorage,firmware,algorithmetc.Toaccessyoursysteminformation,GotoMenu>SystemInfo:
DeviceCapacityThenumberofenrolledusers,administrator,passwords,totalfingerprintandattendancerecordswillbedisplayed.
DeviceInfoTheDevicename,serialnumber,MACaddress,FingerprintAlgorithm,PlatformInforma-tion,MCUversion,ManufactureandManufacturedDateandTimewillbeshowninthissection.
FirmwareInfoTheFirmwareversion,BioService,PushService,StandaloneServiceandDevService isavailablefromthistab.
44
Troubleshooting
“UnabletoConnect”AppearsWhenthismessageappears,itmeansthatthesettingsfortheterminalandthecomputerarenotproperlydone.Findoutwhichmethodyouareusingtocon-nect.TheterminaloffersLAN,RS232,RS485andUSBcommunicationmethods.RefertoChapter4tofurtherunderstandthetopic.
“AdminAffirm”AppearsYouarenot theadministratorof this terminal.Onlyanauthorizedadministra-tor of the system is allowed to access the Menu. Any attempt of normal usertoaccesstheMenuwillprompt“AdminAffirm”messageonthescreen.Incasetheadministratororhe/shehasresignedfromthecompany,kindlycontactyourFingerTecauthorizedresellertoaccesstheterminal.
DifficulttoReadFingerFivethingscouldbethecauseofthis:
Enrolment is not properly doneEnrolment is themost importantprocess toensure that the terminalcapturesthe best quality of your fingerprints. Refer to chapter 4 for how to do a goodenrollment.
The location of the terminal is not conduciveThescannerdoesnotworkwellinbright-lightedarea.Coverthescanneralittleifthisisthecauseofthedifficulty.Shiftthelocationareaforabetterperform-ance.
Finger is not properly placedTo get a good read, make sure that your finger’s center points are located atthemiddleofthescanner.Adjustthepositionofyourfingerprintasyouseeitonscreen.
The scanner is not cleaned or it is scratchedCheck the quality of the scanner. If the scanner is dirty, please clean it with amicrofibercloth.Ifitisscratched,contactyourlocalresellerforareplacement.
Did anything happen to your finger lately? Makesurethatthefingerisnotinjured,cutorbruisedwhichcouldcauseitdif-ficultytoread.Thealgorithmreadstheminutiaepointsofyourfingerprint,themoreitcanread,thebettertheresult.
45
TheLEDisBlinkingAllTheTimeYouhavenothingtoworryaboutunlesstheblinkinglightisred.Thegreenblinkinglight is indicatingthat theterminal isunder itsstandbymode.Redblinking lightmaysignalproblemintheterminal.Contactyourresellerforconsultation.
“DuplicateFinger”AppearsFingerTec terminals are intelligent. It will not accept the same fingerprint twiceintoitssystem.Ifyouhaveregisteredafingerintotheterminal,thesystemwouldprompt “duplicate finger” when you try to enroll that finger for another time.Chooseadifferentfingertoproceed.
RFIDCardDoesn’tRespondTwopossibilitiesforthisproblem
Have you registered the card to the terminal?Thecardmustberegisteredtotheterminalbeforeitcanreadtheinformationinthecard.Refertochapter3Userforcardenrolment.
Have you assigned the user ID to the verification group that supports RFID card? WithoutsettingtheterminaltoshowthatyouareunderagroupthatsupportsRFIDcard,theterminalwouldn’treadyourcard.
NoSoundAfewthingscouldcausethisproblem:
The terminal voice mode is silentPerhapssomeonehasturnedoffthevoiceinyourterminalorreduceditsvolumeto0%.RefertoChapter5SystemunderVoicetorectify.
Speaker is damagedOnceyouhaverectifiedthevoicemode,iftheproblempersists,proceedtotestthevoice.GotoChapter8todothetest.Ifnovoiceisbeingemitted,contactyourlocalresellerforsupport.
Formoretroubleshooting,gotohttp://user.fingertec.com/

©2015TimetecComputingSdnBhd.Allrightsreserved.•042015