guide d'utilisation rapide guía de utilización rápida
TRANSCRIPT

Quick start guideGuide d'utilisation rapideGuía de utilización rápidaBedienungsanleitungGuida all'usoGebruikershandleidingManual do utilizador


www.parrot.com
Parrot ASTEROID Mini
.......................................................................................................................................................................13English
.......................................................................................................................................................................33Français
.......................................................................................................................................................................55Español
.......................................................................................................................................................................75Deutsch
.......................................................................................................................................................................97Italiano
.......................................................................................................................................................................117Dutch
.......................................................................................................................................................................137Português
4

5
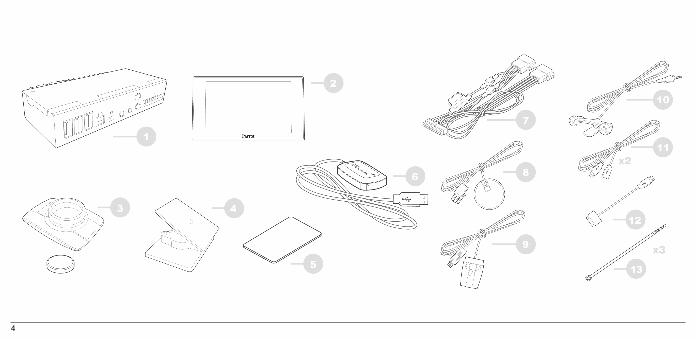
Boîtier électronique / Electronic box / Caja electrónica / Elektronikgehäuse / Centralina elettronica / Caixa electrónica / Elektronicakastje
Ecran / Screen / Pantalla / Display / Display / Ecrã / Scherm
Rallonge USB-iPod / USB-iPod cable extension / Alargador cable USB-iPod / Verlängerungskabel USB-iPod / Prolunga USB-iPod / ExtensãoUSB-iPod / Verlengkabel USB-iPod
Câble écran / Screen cable / Cable pantalla / Displaykabel / Cavo display / Cabo do ecrã / Schermkabel
Câble ISO / ISO cable / Cable ISO / ISO-Kabel / Cavo ISO / Cabo ISO / ISO-kabel
Microphone / Microphone / Micrófono / Mikrofon / Microfono / Microfone / Microfoon
Câble USB / USB cable / Cable USB / USB-Kabel / Cavo USB / Cabo USB / USB-kabel
Câble télécommande / Remote control cable / Cable mando a distancia / Fernbedienungkabel / Cavo telecomando / Cabo do telecomando /Afstandsbedieningkabel
Adhésif / Adhesive tape / Adhesivo / Klebstoff / Adesivo / Adesivo / Plakband
Dongle GPS / GPS dongle / Dongle GPS / GPS-Empf ängers / Antenna GPS / GPS-Dongle / Dongle GPS
Serre câble / Cable fastener / Sujetacable / Kabelklemme / Fascetta serracavi / Kabelklem / Braçadeira de cabo
Télécommande (pile 3 V - CR2032) / Remote control (3 V - CR2032 battery) / Mando a distancia (pila 3 V - CR2032) / Fernbedienung (Batterie 3 V -CR2032) / Telecomando (Pila 3V – CR2032) / Telecomando (Pilha de 3V – CR2032) / Afstandsbediening (Batterij 3V – CR2032)Support de fixation de l’écran / Craddle / Soporte de fijación de la pantalla / Bildschirmhalterung / Supporto di fissaggio display / Suporte de fixação doecrã / Schermsteun

6
ISO installation

7
Audio system with amplifier

8
9

10

11

12

13English
Quick startguide Content
Before you beginInstallationGetting startedPhoneMusicInternetTroubleshootingGeneral information
p.13p.14p.20p.21p.22p.25p.27p.28
Before you begin
About this guide
In order to limit our paper consumptionand as part of our environmentally friendlyand responsible approach, Parrot prefersto put user documents online rather thanprint them out. This simplified guide tothe Parrot ASTEROID Mini is thereforelimited to providing you with the maininstructions that will make it easy for youto use the device. More information canbe found on the support section of ourwebsite, www.parrot.com: the fullmanual, FAQs, tutorials, and more.
Note: iPod® and iPhone® (in iPod mode)
will be referred to as an "iPod" in this

14 English
manual.
Software updates
Download the latest update for free (andconsult the update procedure) on theParrot ASTEROID Mini support page onour website www.parrot.com. Theseupdates will enable you to receive newfeatures and improve the product’scompatibility.
Warnings
All functions requiring an increasedattention should only be used while thevehicle is stationary. Your safety and theone of the other road users prevails overphone calls, music and driving assistance
applications. Be responsible: drivecarefully and pay full attention to yoursurrounding. Parrot denies any liabilityshould you choose not to respect thiswarning.
Use the Parrot ASTEROID Mini with areasonable volume level so that you canhear all external noises while driving.
The Parrot ASTEROID Mini includesNdFeB magnets which can damage objectssensitive to magnetic fields (pacemakers,credit cards, mechanical clocks…).
Installation
Note: We advise our customers to have the
Parrot ASTEROID Mini fitted by a certified
Parrot installer.
Before you begin
Installing the Parrot ASTEROID Mini isdone by inserting it between the carstereo and the vehicle.
Note: If your car stereo is not fitted with ISO
connectors, you need to purchase an ISO
adapter cable to simplify the wiring
procedure. Refer to the Vehicle
compatibility section on the Parrot
ASTEROID Mini support page to check
whether an ISO adapter is necessary on your
15English
vehicle.
Start by removing the car stereo from yourvehicle. You may need release keys to doso.
Refer to your car stereo’s wiring diagram.
Before you install the individualcomponents, check that the installationlocations have been selected in such a waythat the cable length is sufficient toconnect every element. Once theinstallation is complete, make sure that nocables are pinched or trapped.
Use only the ISO cable provided with theParrot ASTEROID Mini.
The connection number indications in thenext sections correspond to the
connections represented on the diagramsp.6 / 7.
Connecting the audio cable
Join the vehicle audio cable to theconnector of the Parrot ASTEROID Mini(Connections 1A and 2).
If your vehicle is equipped with anamplifier, use the Front and Rear Line Outoutputs on the electronic box to avoidsaturation problems such as popping in thespeakers, background noise etc. Use oneor two jack cable(s) to connect the ParrotASTEROID Mini Line out outputs to yourvehicle audio system (Connection 1B onthe diagram p. 7).
Connecting the power cable
1. Unplug the battery before installingthe power cable.
2. Connect the ISO male connectors ofthe Parrot ASTEROID Mini to the carstereo (Connection 3).
3. Join the vehicle’s power supply cableto the ISO female connector of theParrot ASTEROID Mini (Connection4).
The red wire of the Parrot ASTEROIDMini cable must correspond to theconstant +12V supply, the orange wire tothe ignition +12V and the black wire toground. Check that the orange wire is notconnected to the constant +12V supply, as

16 English
you could run down the vehicle’s battery.
Note: In order to check the wiring, connect
the screen before placing it on the
dashboard. Refer to the Checking the wiring
section for more information.
On some vehicles, there is noignition +12V on the vehicle’s connectors.You must therefore connect the orangepower supply wire to the fuse box oranother ignition power source.
Connecting the mute cable
The mute function is used to cut thesound of your car stereo to enable thesound of the Parrot ASTEROID Mini(music, phone calls etc.). Mute in 1, mute
in 2 and mute in 3 are only suggested mutelocations : the choice of the mute-in jackdepends on your car stereo’sconfiguration. Test and verify the mute onthe vehicle then connect the free yellowwire on the ISO cable to the audiosystem’s corresponding mute-in jack(connection 5).
Installing the electronic box
Avoid installing the electronic box nearheating or air-conditioning system or on aspot directly exposed to sunlight.
Make sure the electronic box stays fixedonce it is installed and that it will not movewhile you are driving.
Carefully reinstall the car stereo. Do not
force. If you are short of space behind thecar stereo to install the electronic box,consider installing it in the glove box.
Checking the wiring
To perform the installation check, turn theignition on then off once the ParrotASTEROID Mini is installed: the message“Goodbye!” must be displayed.
If it is not the case, it is necessary toinverse the positions of the red and orangewires. Indeed, the red wire of the powercable must be connected to thepermanent 12V, the orange wire to the 12Vignition and the black wire to the ground.This can be done simply by reversing bothfuse holders located on the Parrot wiring

17English
(connection 7).
Installing the microphone
The optimum location for the microphoneis in the centre of the vehicles roof nearthe rear view mirror. The microphoneideally needs to be less than 60cm’s fromthe users mouth pointing directly towardsthem with no obstructions.
Please take care when routing themicrophone cable through the vehicle tothe desired location, we recommendrouting alongside existing manufacture’swiring looms securing as you go makingsure the microphone cable is not pinchedor trapped.
Warning: Do not run the microphone cable
in such a way as to obstruct or interfere
with the vehicles operation or cause injury
to its occupants. In particular vehicle safety
device such as airbags and other SRS
systems.
Installing the GPS receiver
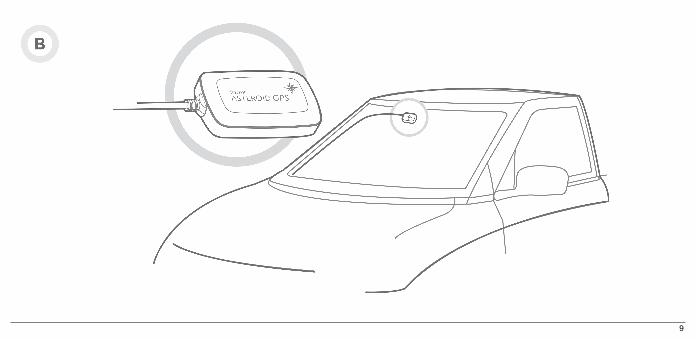
Stick the GPS Receiver in an unobstructedarea inside the car.
Athermic windshields and windows with abuilt-in antenna can interfere with GPSreception and reduce the reliability ofinformation from navigation applications.
The GPS antenna is located onthe side where "ParrotASTEROID GPS" is written andwhere the star-shaped logo is.This logo must always bedirected towards the sky.
If your vehicle has an athermic windshield,stick the GPS Receiver on the windshieldon the non athermic area. The side wherethe star-shaped logo is must be stuck onthe windshield (diagram B p.9).
Note : The non athermic area of the
windshield depends on the model of your
vehicle. It is usually located near the rear
view mirror.
If your vehicle does not have an athermic

18 English
windshield, stick the GPS Receiver on thedashboard. The side where the star-shaped logo is must be visible (diagram Ap.8).
To make sure the adhesive tape adhereswell :
clean the area with an appropriatecleaning product before sticking thesupport ;
once you have stuck the support onthe dashboard, wait for approximately2 hours without handling it.
Installing the USB cables
Connect the USB cables to the ParrotASTEROID Mini. We recommend youconnect all audio cables to the ParrotASTEROID Mini even if you do not plan onusing them. Route the audio cables to asuitable location in your vehicle such asthe glove box or arm rest compartment. Itmay be necessary to drill a hole in yourdashboard to do so. Avoid using USBextension cables.
Make sure you connect the iPod cable toits specific USB port. "iPod" is writtenabove it.
To guarantee an optimal reception qualitywe recommend you do not connect your
internet USB key 3G on the ParrotASTEROID Mini directly : use the USBcable to install your device on thedashboard (or any other open area).
Installing the screen
Warning: Avoid any installation which
could hinder the use of any important
command or hinder the driver's visibility.
Do not install the Parrot ASTEROID Mini in
the airbag deployment area or in a possible
head impact area. Make sure it is not
exposed to the air stream from air vents.
Stick the support on the dashboard(diagram C p.10).
To make sure the adhesive tape adhereswell :

19English
clean the area with an appropriatecleaning product before sticking thesupport ;
once you have stuck the support onthe dashboard, wait for approximately2 hours without handling it.
Remember to remove your screen whenleaving the vehicle to avoid tempting anywould-be thieves and to preventprolonged exposure to sunlight.
Installing the remote control
Stick the remote control support on yourdashboard. To do so, use the adhesivetape located under the support.
To make sure the adhesive tape adheres
well :
clean the area with an appropriatecleaning product before sticking thesupport ;
once you have stuck the support onthe dashboard, wait for approximately2 hours without handling it.
There are two ways to supply power to theremote control : with a battery or byconnecting it to the electronic box.
To supply power with a battery (diagram Dp.11) :
1. Remove the circular plastic part onthe back of the remote by turning itclockwise.
2. Insert a 3V CR2032 battery into theremote control. Make sure thebattery is correctly positioned.
3. Put the circular plastic part back byturning it counterclockwise.
To connect the remote control to theelectronic box (diagram D p.11) :
1. Remove the circular plastic part onthe back of the remote by turning itclockwise.
2. Connect the remote control cableinto the battery compartment andturn it counterclockwise.
3. Connect the remote control cable tothe electronic box, next to the USBconnectors (diagram p.6).

20 English
Getting started
Navigating through the menus
Press the button to access the mainmenu.
Browse through the menus by turning thejogwheel and confirm by pressing thejogwheel.
Press the button to get back to previousmenu.
Press the button to access the pop-upmenu corresponding to the currentapplication. The pop-up menu allows youto change several settings or browse moreeasily through the content of your audiosource or phonebook.
Press the button to get to the track list ifa song is currently being played. Whilenavigating through the menus, press theSRC button to get to the Now Playingscreen.
Connecting a phone via Bluetooth
Note : Refer to the compatibility page of our
website to check if your phone is
compatible with the Parrot ASTEROID Mini
and to consult the specific pairing
procedures for the most common phones :
www.parrot.com/uk/compatibility.
If you are using the Parrot ASTEROID Miniwith your phone for the very first time, youmust initially pair both devices. Once yourtelephone is paired with the Parrot
ASTEROID Mini, the 2 devices willautomatically connect when they areturned on (as well as B luetooth® features)and in proximity of each other.
1. From your phone, start a B luetoothperipheral search and select «ParrotASTEROID Mini».
2. The pairing procedure depends onyour phone model:
If the phone asks you to enterthe B luetooth PIN code, enter“0000”.
If the Parrot ASTEROID Miniand your phone display twocodes, verify that the codes areidentical, then either confirm

21English
or invalidate.> The Parrot ASTEROID Miniscreen will display “Pairingsuccessful”.
Note: Depending on the model of your
phone, you may need to authorize the
connection to the Parrot ASTEROID Mini to
allow further automatic connections. Refer
to the user guide of your phone for more
information.
Synchronising the phonebook
With most of the phones supportingBluetooth technology, the phonebook isautomatically synchronized in the system’smemory. Each time you change yourdirectory, synchronisation will start
automatically the next time the ParrotASTEROID Mini and your phone areconnected.
Warning: Only the contacts stored in the
phone memory are synchronized. If your
contacts are stored in your SIM card
memory, transfer them onto your phone
memory.
Note: Depending on the model of your
phone, you may need to authorize the
access to your contacts to the Parrot
ASTEROID Mini. Refer to the user guide of
your phone for more information.
The automatic synchronization is limitedto 5000 contacts (or phone numbers) foreach paired phone.
Phone
Receiving a call
An incoming call is indicated by a ringtone.The name of the caller is announced if hisnumber is recorded in the phonebook ofthe phone connected to the ParrotASTEROID Mini.
To answer the call, press the button. Press the button to endthe call.
To refuse the call, press the button.

22 English
Making a call via voice recognition
You can make a call using voice recognitiondirectly after automatic synchronization.The Parrot ASTEROID Mini willautomatically recognize the contact youwish to call.
1. Press the button to launch thevoice recognition feature.> The Parrot ASTEROID Mini asksyou the name of the contact you wantto call.
2. Say the name of the contact and thetype of number («WORK»,«MOBILE»...) if there are severalnumbers associated to your contact.> The call is automatically launched if
the voice tag is correctly understood.If it is not the case, a confirmationmessage is asked. Confirm by saying«YES» or «CALL».
Note: At any time, press the button to
exit voice recognition mode.
Music
Using vocal music search
The voice recognition function allows youto select the artist / album you want tohear via voice recognition. This function isonly available if you are using the ParrotASTEROID Mini with a USB / SD / iPodperipheral.
1. Press the button.
2. Say the name of the artist / albumwhen asked to do so.> The list of audio sources connectedto the Parrot ASTEROID Mini andapplications compatible with thevocal music search function which

23English
contain the artist / album that youselected will appear.
Note: Check the albums and artists names
in the metadatas of your music files. These
names may be different from the ones
displayed on your music files titles.
iPod
1. Connect your iPod to the ParrotASTEROID Mini USB cable with theUSB / iPod extension lead.
2. Press the SRC button until the iPodsource is selected.
3. Select one of the classificationcriteria (artist, album, songs, genres,playlist) and press the jogwheel.
4. Select the track and press thejogwheel.
Note: To browse more easily through the
content of your iPod, press the button
and select the first letter of your track /
album / artist.
USB storage device
The Parrot ASTEROID Mini is compatiblewith the majority of USB keys / MP3 audioplayer / external hard drive. There is norestriction in terms of capacity of USBkeys.
MP3 (mpeg1 layer3), AAC, WAV, OGGand WMA formats are supported.
1. Connect your USB device to the USB
cable.
2. Press the SRC button until the USBsource is selected.
3. Select one of the classificationcriteria (artist, album, songs, genres,playlist) and press the jogwheel.
4. Select the track and press thejogwheel.
Note: To browse more easily through the
content of your USB storage device, press
the button and select the first letter of
your track / album / artist.

24 English
SD card
You can use the following SD cards (withadapter if necessary) with the ParrotASTEROID Mini : SD, micro SD , mini SD,SDHC, mini SDHC, micro SDHC. The SDcard capacity must not exceed 32Gb.
MP3 (Mpeg 1 Layer3), AAC, WAV, OGGand WMA formats are supported.
1. Insert the SD card into theappropriate slot located on the rightof the screen, with the contactsurface facing you (diagram E p.12).
2. Press the SRC button until the SDsource is selected.
3. Select one of the classification
criteria (artist, album, songs, genres,playlist) and press the jogwheel.
4. Select the track and press thejogwheel.
Note: To browse more easily through the
content of your USB storage device, press
the button and select the first letter of
your track / album / artist.
Audio player connected via Bluetooth
Note: The Parrot ASTEROID Mini allows you
to use the phone and audio streaming
functions from 2 different phones without
having to disconnect one of them.
You can use the Parrot ASTEROID Mini tolisten to songs stored on your mobile
phone or B luetooth audio device. To do so,your phone / audio device must supportthe B luetooth A2DP profile (AdvancedAudio Distribution Profile).
If you are using a B luetooth audio playerfor the first time, you have to pair bothdevices. If both devices are already paired:
1. Press the SRC button until theBluetooth Audio source is selected.
2. Start playback on your B luetooth audioplayer.

25English
Internet
Connecting a 3G / 4G key
Note: Refer to the compatibility section of
the Parrot ASTEROID Mini on our website to
get the list of 3G / 4G keys compatible with
the Parrot ASTEROID Mini.
1. Connect a 3G key to the ParrotASTEROID Mini using a USB cable.> A pop-up will appear.
2. Select OK to activate the 3Gconnection.> A Status of 3G connection pop-up appears, followed by another pop-upwhich asks for your PIN code.
3. Enter your PIN code using thejogwheel, then select OK. Check theMemorise PIN code option if youwould like your PIN code to be storedeach time you turn on the ParrotASTEROID Mini.
Note: You will be able to change this setting
by selecting S ettings > Netw ork > 3G Key.
4. Select your APN (Access PointName) from the suggested list. Thisinformation is available in thedocumentation provided with your 3Gkey. If your APN is not in the list, youcan add it by selecting Settings >Network > 3G Key > Configuration >New access point.
> The message "3G key configured"appears.
5. Wait approximately 30 seconds untilthe connection is established. Youcan also press the button andbrowse the menus while theconnection is being established.
Sharing a phone 3G connection via Bluetooth
Note: Refer to the compatibility page of our
website to check if your phone allows 3G
connection sharing via Bluetooth and to
consult the corresponding procedure :
www.parrot.com/uk/compatibility.
If you have a phone that supports the DUN(Dial-Up Networking) or PAN (Personal

26 English
Area Network) B luetooth profiles, theB luetooth connecting your phone to theParrot ASTEROID Mini will allow forsharing of the phone's 3G connection.
1. Connect your phone to the ParrotASTEROID Mini via B luetooth.
2. On the Parrot ASTEROID Mini,select Settings > Network >Bluetooth > Configuration.
3. Select your APN (Access PointName) from the suggested list, thencheck Select .
4. Press the button and selectConnect.
5. Allow connection sharing on your
phone. This procedure will varyaccording to your phone model.
Sharing a phone 3G connection via USB
Note: Refer to the compatibility page of our
website to check if your phone allows 3G
connection sharing via USB and to consult
the corresponding procedure :
www.parrot.com/uk/compatibility.
1. Make sure that your phone’s keypad isunlocked.
2. Connect the phone to the ParrotASTEROID Mini using a USB cable/micro-USB and the USB extensioncable provided with the ParrotASTEROID Mini. This connection
also enables you to recharge yourphone’s battery.
3. Select your APN (Access PointName) from the suggested list, thencheck the Select option. You can thenmodify this setting by selectingSettings > Mobile Networks settings> Mobile Access device.> A pop-up indicating that USBconnection sharing has been activatedwill appear.
ASTEROID Market : Using the applications
Several types of applications are availablewith the ASTEROID Market : music,geolocation, driver assistance...

27English
All applications may not be available in allcountries. The use of some applicationsmay need prior subscription.
The Parrot ASTEROID Mini is amultitasking device: several applicationscan run simultaneously. For example, youcan listen to a Webradio station and use adriver assistance application at the sametime.
For more information about installing andusing the available applications, refer tothe ASTEROID Market web page :www.parrotasteroid.com/
asteroidmarket.
Troubleshooting
Before you begin
Make sure the “Goodbye” message isdisplayed on the Parrot ASTEROID Miniscreen when you turn the ignition off.Refer to the Checking the wiring sectionfor more information.
Reset the Parrot ASTEROID Mini. To doso, select Settings > Advanced settings >Restore factory settings.
Make sure you have the latest softwareupdate on your Parrot ASTEROID Mini. Todo so, select Settings > About > DeviceVersion. Compare this number with theone on the Parrot ASTEROID Mini support
page on our website www.parrot.com.
Problems while using the phone function
Make sure your phone is compatible withthe Parrot ASTEROID Mini. To do so,refer to the compatibility page on ourwebsite : www.parrot.com/uk/compatibility.
If your phone is compatible with theParrot ASTEROID Mini and if youalready have the latest software update:
1. Delete the pairing on the ParrotASTEROID Mini. To do so, tapSettings > Advanced settings >Factory settings.
2. On your phone, erase the Parrot

28 English
system from the list of B luetoothperipherals (or reboot your iPhone).
3. Repeat the pairing procedure for the 2devices.
Problems while using the music function
Reboot your iPod / iPhone beforeconnecting it to the Parrot ASTEROIDMini. To reboot your iPhone / iPod:
iPod: press Menu and the centrebutton simultaneously until the iPodreboots.
iPhone: Press the On/Off button andthe Home button simultaneouslyuntil the iPhone reboots. Do nottouch the screen when the message
“Slide to shutdown” appears.
Note: this procedure will not erase any of
your data.
Some problems may occur if the iPod / SDcard / USB device is already connected tothe Parrot ASTEROID Mini before youturn on the ignition. Connect the iPod / SDcard / USB device once the ignition isturned on.
For more information
Refer to the Parrot ASTEROID Minisupport page on our websitewww.parrot.com.
General information
Warranty
Without prejudice of legal warranty, Parrotcontractually warrants during 12 monthsfrom the date of initial purchase by theconsumer (except wearing partsguaranteed for 6 months) that the productis free from defects in materials andworkmanship, upon presentation of proofof purchase (date, place of purchase,serial number of the product) to theretailer or Parrot. During the contractualwarranty period, the defective productmust be returned in its original packagingto the after-sales service of the retailer.
29English
After inspection of the product, Parrot willproceed, at its option, to the replacementor the issue a credit note to the exclusionof any other remedy.Warranty does not cover: upgrading of thesoftware items of the Parrot products withBluetooth cell phones for compatibilitypurpose, data recovery, deterioration ofthe external aspect due to normal wear ofthe product, any damage caused byaccident, misuse, misapplication, or non-Parrot products. Parrot is not responsible for storage, lossor damaged to data during transit or repair.Any product wrongfully declared to bedefective will be returned to sender andinspection, process and carriage costs will
be invoiced to him.
Modifications
The explanations and specifications in thisguide are given for information purposesonly and may be modified without priornotice. They are deemed to be correct attime of going to press. The utmost carehas been taken when writing this guide,aspart of the aim to provide you withaccurate information. However, Parrotshall not be held responsible for anyconsequences arising from any errors oromissions in the guide, nor for any damageor accidental loss of data resulting directlyor indirectly from the use of theinformation herein. Parrot reserves theright to amend or improve the product
design or user guide without anyrestrictions and without any obligation tonotify users. As part of our ongoingconcern to upgrade and improve ourproducts, the product that you havepurchased may differ slightly from themodel described in this guide. If so, a laterversion of this guide might be available inelectronic format at Parrot’s website atwww.parrot.com.
Correct disposal of This Product (WasteElectrical & Electronic Equipment)
This marking shown on the product orits literature, indicates that it should notbe disposed with other household wastesat the end of its working life. To preventpossible harm to the environment or

30 English
human health from uncontrolled wastedisposal, please separate this from othertypes of wastes and recycle it responsiblyto promote the sustainable reuse ofmaterial resources.
Household users should contact eitherthe retailer where they purchased thisproduct, or their local government office,for details of where and how they can takethis item for environmentally saferecycling. Business users should contacttheir supplier and the terms andconditions of the purchase contract. Thisproduct should not be mixed with othercommercial wastes for disposal.
Registered Trademarks
Parrot and the Parrot logo are registered
trademarks of PARROT SA.
The Bluetooth word mark and logos areregistered trademarks owned byBluetooth SIG, Inc. and any use of suchmarks by Parrot S.A. is under license.Bluetooth QDID : B013841, B013839, [-]
"Made for iPod / iPhone" means that anelectronic accessory has been designed toconnect specifically to iPod or iPhone respectively, and has been certified by thedeveloper to meet Apple performancestandards. Apple is not responsible for theoperation of this device or its compliancewith safety and regulatory standards.
iPod and iPhone are trademarks of AppleInc, registered in the US and otherscountries
All other trademarks mentioned in thisguide are protected and are the propertyof their respective owners.
Gracenote, the Gracenote logo andlogotype and "Powered by Gracenote" areeither registered trademarks ortrademarks of Gracenote Inc. in the UnitedStates and/or other countries.
Identification N. 394 149 496 R.C.S. PARIS
Parrot S.A.
Copyright © 2012 Parrot. All RightsReserved.
This device complies with Industry Canada

31English
licence-exempt RSS standard(s).Operation is subject to the following twoconditions: (1) this device may not causeinterference, and (2) this device mustaccept any interference, includinginterference that may cause undesiredoperation of the device.
This equipment complies with FCC’s andIC’s RF radiation exposure limits set forthfor an uncontrolled environment.. Theantenna(s) used for this transmitter mustbe installed and operated to provide aseparation distance of at least 20 cm fromall persons and must not be collocated oroperating in conjunction with.

32

33Français
Guide d'utilisationrapide
Sommaire
Avant de commencerInstallationPremière utilisationTéléphoneMusiqueInternetEn cas de problèmeInformations générales
p.33p.34p.40p.42p.43p.46p.48p.50
Avant de commencer
A propos de ce guide
Afin de limiter notre consommation depapier et dans le cadre de notre démarcheaussi responsable et respectueuse quepossible de l’environnement, Parrotprivilégie la mise en ligne des documentsutilisateurs plutôt que leur impression. Ceguide simplifié du Parrot ASTEROID Minise limite donc à vous fournir lesprincipales instructions qui vouspermettront d’utiliser facilement cetappareil. Vous trouverez plusd’informations sur la section Support denotre site web www.parrot.com : noticecomplète, FAQ, didacticiels...

34 Français
Note : Pour une meilleure lisibilité, l’iPod®
et l’iPhone® seront désignés par le terme
"iPod" dans ce manuel.
Avertissements
Les fonctions requérant une attentionprolongée doivent uniquement êtreutilisées lorsque le véhicule est à l’arrêt.Votre sécurité et celle des autres usagersde la route prime sur les appelstéléphoniques, la musique ou lesapplications d'aide à la conduite. Soyezresponsable : conduisez prudemment etprêtez attention à votre environnement.Parrot dégage toute responsabilité si vouschoisissez d’ignorer cette mise en garde.
Mise à jour
Téléchargez gratuitement la dernière miseà jour de votre produit sur notre site webwww.parrot.com section Support. Cesmises à jour vous permettront debénéficier de nouvelles fonctionnalités etd’améliorer la compatibilité de votreproduit.
Installation
Note: Nous vous recommandons de faire
appel à un professionnel pour cette
installation, notamment à l'un de notre
réseau d'installateurs agréés.
Avant de commencer
L'installation du Parrot ASTEROID Miniconsiste à l'insérer entre l'autoradio et levéhicule.
Note : Les câbles fournis avec le Parrot
ASTEROID Mini sont équipés de connecteurs
ISO. Si votre autoradio n’est pas équipé de
connecteurs ISO, vous devez vous procurer
un câble adaptateur ISO afin de permettre
le montage. Consultez la section

35Français
Compatibilité véhicules sur la page support
du Parrot ASTEROID Mini pour vérifier la
nécessité d'un câble adaptateur.
Commencez par retirer l’autoradiod’origine de votre véhicule. Cetteopération peut nécessiter des clésd’extraction.
Consultez le schéma électrique de votreautoradio.
Avant de fixer les différents éléments duParrot ASTEROID Mini dans l’habitacle,connectez les différents câbles sur leboîtier électronique. Avant de fixerdurablement les composants, contrôlezles longueurs de câbles et vérifiez que lesemplacements soient choisis de sorte que
les longueurs de câbles suffisent pourrelier les pièces détachées les unes auxautres. Assurez-vous que les câbles duParrot ASTEROID Mini ne se retrouventpas pliés ou coincés à l’issue del’installation.
Utilisez impérativement le câble ISOfourni avec le Parrot ASTEROID Mini.
Les indications "Connexion #" dans lesprochaines sections correspondent auxconnexions représentées sur les schémasp.6 / 7.
Connecter le câble audio
Reliez les faisceaux audio du véhicule auxconnecteurs du Parrot ASTEROID Mini(Connexions 1A et 2 sur le schéma p.6).
Si votre véhicule est équipé d’un systèmeaudio avec amplificateur, utilisez lessorties jack Line Out Front et Line OutRear sur le boitier électronique pouréviter tout problème de saturation(claquement dans les haut parleurs,souffle permanent, etc.). Reliez cessorties Line Out à votre système audio enutilisant un ou deux câbles jack pour relierle Parrot ASTEROID Mini à votre systèmeaudio (Connexion 1B sur le schéma p.7).
Connecter le câble d'alimentation
1. Débranchez la batterie avantl’installation du câble d’alimentation.
2. Branchez le connecteur ISO mâle duParrot ASTEROID Mini à l’autoradio

36 Français
(connexion 3).
3. Reliez les faisceaux alimentation duvéhicule au connecteur ISO femelle duParrot ASTEROID Mini (connexion 4).
Le fil rouge du câble doit correspondreau +12V permanent, le fil orange au 12Vaprès-contact et le fil noir à la masse.Vérifiez que votre fil orange n’est pasconnecté au 12V permanent, vousrisqueriez de décharger la batterie duvéhicule.
Note : Afin de procéder à la vérification de
l’installation, connectez d’abord l’écran
sans le placer sur le tableau de bord.
Consultez la section Vérifier l’installation
pour plus d’informations.
Sur certains véhicules, il n’y a pas de +12Vaprès contact sur les connecteurs duvéhicule. Il est alors nécessaire debrancher le fil d’alimentation orange sur laboite à fusible ou sur une autre sourced’alimentation après contact.
Connecter le câble Mute
La fonction Mute permet d’interrompre leson de votre autoradio pour laisser placeau son du Parrot ASTEROID Mini(musique, communications etc.). Le choixde l’entrée Mute (Mute in 1, mute in 2 oumute in 3) dépend de la configuration devotre autoradio. Identifiez l'entrée Mutepuis connectez la au fil jaune libre sur lecâble ISO (connexion 5).
Installer le boitier électronique
Evitez d’installer le boîtier près duchauffage ou de la climatisation ou à unendroit exposé au soleil.
Assurez-vous que le boitier resteimmobile après son installation.
Une fois le boitier installé, ne forcez paslors de la remise en place de l’autoradio. Sila place derrière l’autoradio estinsuffisante, envisagez par exemple ledémontage de la boite à gants.
Vérifier l'installation
Allumez puis coupez le contact de votrevéhicule une fois le Parrot ASTEROIDMini installé : le message « Au revoir »
37Français
doit alors s’afficher à l’écran.
Note : Certains véhicules disposent d’une
temporisation : le Parrot ASTEROID Mini ne
s’éteindra qu’au bout d’un certain temps
après avoir coupé le contact ou retiré la clé,
sans ouvrir ni fermer les portes du véhicule.
Si ce n’est pas le cas, vous devez inverserles positions des fils rouge et orange. Eneffet, le fil rouge du câble d’alimentationdoit être connecté au 12V permanent, le filorange au 12V après-contact et le fil noir àla masse. Cette opération s’effectuesimplement en inversant les deux cossessituées sur le câblage Parrot (connexion 7).
Installer le microphone
Nous vous recommandons de faire glisserle câble dans la gouttière derrière le jointde la portière.
Si le câble passe au dessus des pédales,assurez-vous qu’il est bien fixé.
Avertissement: Ne faites pas passer le câble
du microphone dans les systèmes de
chauffage, de ventilation, de climatisation
ou devant les airbags latéraux.
Assurez-vous que le microphone estinstallé le plus près possible de la tête del’utilisateur. La distance idéale est de 60cm. Installez de préférence le microphoneprès du rétroviseur intérieur.
Orientez le microphone vers la bouche del’utilisateur.
Installation du dongle GPS
Fixez le dongle GPS sur une surface plane,dans une zone sans obstacle à l'intérieurde l'habitacle.
Les pare-brises athermiques et les vitresavec antenne incrustée peuvent interféreravec la réception GPS et réduire la fiabilitédes informations liées aux applications denavigation.
L'antenne GPS du dongle setrouve sur le côté où est écrit"Parrot ASTEROID GPS" et oùse trouve le logo en forme

38 Français
d'étoile. Ce logo doit toujoursêtre orienté vers le ciel.
Si votre véhicule dispose d'un pare-briseathermique, fixez le dongle GPS sur lepare-brise au niveau de la zone nonathermique. Le côté sur lequel se trouvele logo en forme d'étoile doit être collé surle pare-brise (schéma B p.9).
Note : La zone non athermique du pare-
brise dépend du modèle de votre véhicule.
Elle se trouve généralement au niveau du
rétroviseur.
Si votre véhicule ne dispose pas d'un pare-brise athermique, fixez le dongle GPS surle tableau de bord. Le côté sur lequel se
trouve le logo en forme d'étoile doit êtrevisible (schéma A p.8).
Pour assurer une bonne fixation dusupport :
nettoyez la surface de montage avantde coller le support ;
après fixation du support, patientezenviron 2 heures sans le manipuler.
Installation des câbles USB
Connectez les câbles USB au ParrotASTEROID Mini. Nous vousrecommandons de connecter tous lescâbles du Parrot ASTEROID Mini, même sivous ne prévoyez pas forcément de lesutiliser. Faites ressortir les connecteurs
correspondants de votre vide poche ouboîte à gant. Pour cela, il peut êtrenécessaire de percer un trou à l’intérieurde votre tableau de bord. Dans la mesuredu possible, évitez l'utilisation derallonges USB de plusieurs mètres.
Le câble USB sur lequel vous connecterezla rallonge iPod doit impérativement êtreconnecté au port USB blanc prévu à ceteffet. Vous trouverez l’indication "iPod" audessus de celui-ci.
Afin de garantir une qualité de réceptionoptimale, ne connectez pas votre clé 3Gdirectement sur le Parrot ASTEROIDMini : utilisez un câble USB afin del'installer sur le tableau de bord (ou touteautre zone dégagée).
39Français
Installer l'écran
Avertissement : Evitez toute installation
pouvant entraver l’utilisation de
commandes importantes ou pouvant
réduire la visibilité du conducteur.
N’installez pas l'écran là où il pourrait être
propulsé par l’ouverture d’un airbag ou à
proximité d’une bouche d’aération ou d’air
conditionné du véhicule.
Collez le support en plastique sur votretableau de bord (schéma C p.10).
Pour assurer une bonne fixation dusupport :
nettoyez la surface de montage avantde coller le support ;
après fixation du support, patientezenviron 2 heures sans le manipuler.
Afin d’éviter les risques de vol etd’exposition prolongée au soleil, pensez àretirer votre écran lorsque vous quittezvotre véhicule.
Installer la télécommande
Collez le support de la télécommande survotre tableau de bord en utilisant l'adhésifsitué en dessous de celui-ci.
Pour assurer une bonne fixation dusupport :
nettoyez la surface de montage avantde coller le support ;
après fixation du support, patientez
environ 2 heures sans le manipuler.
La télécommande peut être alimentée de2 manières : avec une pile ou en laconnectant au boitier électronique.
Pour alimenter la télécommande par pile(schéma D p.11) :
1. Retirez la pièce en plastiquecirculaire au dos de la télécommandeen la faisant pivoter dans le sens desaiguilles d'une montre.
2. Insérez une pile de type 3V CR2032dans l'emplacement prévu à cet effet.Assurez-vous que la pile estcorrectement orientée.
3. Remettez en place la pièce enplastique circulaire en la faisant

40 Français
pivoter dans le sens inverse desaiguilles d'une montre.
Pour connecter la télécommande auboitier électronique (schéma D p.11) :
1. Retirez la pièce en plastiquecirculaire au dos de la télécommandeen la faisant pivoter dans le sens desaiguilles d'une montre.
2. Connectez le câble au niveau del'emplacement prévu pour la pile etfaites-le pivoter dans le sens inversedes aiguilles d'une montre.
3. Connectez l'autre extrémité du câblesur le boitier électronique, à côté desconnecteurs USB (schéma p.6).
Première utilisation
Naviguer dans les menus
Appuyez sur la touche pour accéder aumenu principal.
Naviguez dans les menus en tournant lamolette, et validez en appuyant sur lamolette.
Pour revenir au menu précédent, appuyezsur la touche .
Appuyez sur la touche pour accéder aumenu contextuel, correspondant àl’application en cours d’utilisation. Lemenu contextuel vous permet notammentd'avoir accès aux fonctionssupplémentaires de l'application, de
modifier certains réglages, ou de parcourirplus rapidement le contenu de votrerépertoire ou de votre source audio.
Pendant la lecture d’un fichier musical,appuyez sur la touche pour revenir aumenu. A l’inverse, lorsque vous naviguezdans les menus, appuyez sur la touche SRCpour revenir au lecteur.
Connecter un téléphone via Bluetooth
Note : Consultez la page compatibilité de
notre site web pour vérifier si votre
téléphone est compatible avec le Parrot
ASTEROID Mini et consulter la procédure
d'appairage correspondante :
www.parrot.com/fr/compatibility.
Si c’est la 1ère fois que vous utilisez un

41Français
téléphone avec le Parrot ASTEROID Mini,vous devez tout d’abord appairer les deuxappareils. Une fois votre téléphoneappairé avec le Parrot ASTEROID Mini, laconnexion entre les 2 appareils seraautomatique dès que les 2 appareils serontallumés à proximité, avec la fonctionB luetooth® activée.
1. Depuis votre téléphone, lancez unerecherche de périphériquesB luetooth® puis sélectionnez «ParrotASTEROID Mini».
2. La procédure d'appairage dépendalors du modèle de votre téléphone :
Si le téléphone vous invite àentrer le code PIN B luetooth,
entrez «0000».
Si le Parrot ASTEROID Mini etvotre téléphone affichent deuxcodes, vérifiez si ces codes sontidentiques puis confirmez ouinfirmez.
> L’écran du Parrot ASTEROID Miniaffiche « Appairage réussi».
Note : Sur certains téléphones, vous devrez
autoriser la connexion au Parrot ASTEROID
Mini pour permettre la connexion
automatique. Consultez le guide utilisateur
de votre téléphone pour plus
d'informations.
Synchroniser le répertoire du téléphone
Avec la plupart des téléphones B luetooth,le répertoire est automatiquementsynchronisé avec la mémoire du système.Chaque fois que vous modifierez votrerépertoire, la synchronisation se relanceraautomatiquement à la connexion suivante.
Avertissement: Seuls les contacts
enregistrés dans la mémoire du téléphone
se synchronisent avec le Parrot ASTEROID
Mini. Si vos contacts sont enregistrés dans
la mémoire de la carte SIM, transférez-les
dans la mémoire du téléphone. Consultez le
guide utilisateur de votre téléphone pour
plus d'informations.
Note : Sur certains téléphones, vous devrez

42 Français
autoriser l'accès du Parrot ASTEROID Mini à
vos contacts pour permettre la
synchronisation. Consultez le guide
utilisateur de votre téléphone pour plus
d'informations.
La synchronisation automatique estlimitée à 5000 contacts (ou numéros detéléphone) par téléphone appairé.
Téléphone
Recevoir un appel
Un appel entrant est indiqué par unesonnerie. Le nom du contact est énoncé sile numéro de ce contact est enregistrédans le répertoire du téléphone connectéau Parrot ASTEROID Mini.
Pour accepter cet appel, appuyez surla touche . Appuyez ensuite sur latouche pour raccrocher.
Pour refuser cet appel, appuyez sur latouche .
Emettre un appel via reconnaissance vocale
Vous pouvez initier un appel parreconnaissance vocale directement aprèsla synchronisation du répertoire de votretéléphone. Le Parrot ASTEROID Minireconnaitra automatiquement le contactde votre répertoire que vous souhaitezappeler.
1. Appuyez sur la touche pour initierle processus de reconnaissancevocale.> Le Parrot ASTEROID Mini vousdemande le nom du contact que voussouhaitez appeler.
2. Prononcez le nom du contact suivi dutype de numéro («BUREAU»,

43Français
«PORTABLE»...) si ce contactdispose de plusieurs numéros.> L’appel vers ce contact estautomatiquement initié si lacommande vocale a été biencomprise.> Dans le cas contraire, le ParrotASTEROID Mini diffuse un messagede confirmation. Confirmez enprononçant «OUI», «APPELLE» ou«APPELER».
Note: A tout moment, appuyez sur la
touche pour annuler la procédure
d'appel.
Musique
Utiliser la reconnaissance vocale musicale
La fonction reconnaissance vocalemusicale vous permet de sélectionner viareconnaissance vocale les artistes oualbums que vous souhaitez écouter. Cettefonction est disponible si vous utilisez leParrot ASTEROID Mini avec unpériphérique de type iPod / USB / SD, ou sivous utilisez une application musicalecompatible avec cette fonction.
1. Appuyez sur la touche sur latélécommande.
2. Enoncez le nom de l'artiste ou del'album que vous souhaitez écouter
lorsque le Parrot ASTEROID Minivous y invite.> La liste des sources audioconnectées au Parrot ASTEROIDMini et des applications musiquecompatibles avec la fonctionreconnaissance vocale contenantl'artiste / album que vous avez choisiapparait.
Note : Vérifiez les noms des artistes et
albums dans les tags (métadonnées) de vos
fichiers musicaux. Ceux-ci peuvent être
différents de ceux affichés dans le titre de
votre morceau.

44 Français
Utilisation avec un iPod
1. Connectez votre iPod au câble USBauquel la rallonge iPod est connectée.
2. Appuyez sur la touche SRC jusqu'àsélectionner iPod.
3. Sélectionnez un des critères declassement (artiste, album,morceaux, playlist) et appuyez sur lamolette.
4. Sélectionnez un morceau et appuyezsur la molette.
Note : Appuyez sur la touche et
sélectionnez la première lettre de votre
artiste, album ou morceau pour naviguer
plus facilement dans le contenu de votre
iPod.
Utilisation avec une clé USB
Le Parrot ASTEROID Mini est compatibleavec la majorité des clés USB / baladeursMP3 / disques dur externes. Il n’existeaucune restriction au niveau de la capacitédes clés USB.
Les fichiers musicaux sur votre clé USBpeuvent être au format MP3 (mpeg1layer3), AAC, WAV, OGG ou WMA.
1. Connectez votre périphérique USBsur le câble USB.
2. Appuyez sur la touche SRC jusqu'àsélectionner USB.
3. Sélectionnez un des critères declassement (artiste, album,morceaux, playlist) et appuyez sur lamolette.
4. Sélectionnez un morceau et appuyezsur la molette.
Note : Appuyez sur la touche et
sélectionnez la première lettre de votre
artiste, album ou morceau pour naviguer
plus facilement dans le contenu de votre clé
USB.
Utilisation avec une carte SD
Vous pouvez utiliser les cartes SDsuivantes (avec adaptateur si nécessaire)avec le Parrot ASTEROID Mini : SD, micro

45Français
SD , mini SD, SDHC, mini SDHC, microSDHC. La capacité de la carte SD ne doitpas dépasser 32Go.
Les fichiers musicaux sur votre carte SDpeuvent être au format MP3 (mpeg1layer3), AAC, WAV, OGG ou WMA.
1. Insérez la carte SD dansl’emplacement prévu à cet effet, situésur le côté droit de l'écran (schéma Ep.12).
2. Appuyez sur la touche SRC jusqu'àsélectionner SD.
3. Sélectionnez un des critères declassement (artiste, album,morceaux, playlist) et appuyez sur lamolette.
4. Sélectionnez un morceau et appuyezsur la molette.
Note : Appuyez sur la touche et
sélectionnez la première lettre de votre
artiste, album ou morceau pour naviguer
plus facilement dans le contenu de votre
carte SD.
Utilisation avec un lecteur audio Bluetooth
Note : Le Parrot ASTEROID Mini vous permet
d’utiliser la fonction téléphonie et
streaming audio via Bluetooth avec 2
téléphones différents, sans avoir à
déconnecter l’un des 2 appareils.
Vous pouvez utiliser le Parrot ASTEROIDMini pour écouter des fichiers musicaux
stockés sur un lecteur audio Bluetooth, sicelui-ci supporte le profil A2DP(Advanced Audio Distribution Profile).
Si vous utilisez le lecteur audio pour la1ère fois, vous devez tout d’abordl'appairer au Parrot ASTEROID Mini. Si lelecteur audio est déjà appairé au ParrotASTEROID Mini :
1. Appuyez sur la touche SRC jusqu’àsélectionner Bluetooth Audio.
2. Lancez la lecture d’un morceau survotre lecteur audio.

46 Français
Internet
Connexion avec une clé 3G / 4G
Note : Consultez la section compatibilité du
Parrot ASTEROID Mini sur notre site web
pour afficher la liste des clés 3G / 4G
compatibles avec le Parrot ASTEROID Mini.
1. Connectez une clé 3G au ParrotASTEROID Mini par l’intermédiaired’un câble USB.> Un pop-up apparait.
2. Sélectionnez OK pour activer laconnexion 3G.> Un pop-up Etat de la connexion 3Gapparait, suivie d'une autre pop-upvous demandant votre code PIN.
3. Entrez votre code PIN en utilisant lamolette puis sélectionnez OK.Cochez l'option Mémoriser le codePIN si vous préférez que le code PINne vous soit pas demandé à chaqueredémarrage du Parrot ASTEROIDMini.
Note: Vous pourrez par la suite modifier ce
réglage en sélectionnant Pa ra m ètres >R ésea u > Clé 3G.
4. Sélectionnez votre APN (AccessPoint Name) dans la liste proposée.Cette information est disponible dansla documentation fournie avec votreclé 3G. Si votre APN ne figure pasdans la liste, vous pouvez l'ajouter ensélectionnant Paramètres > Réseau >
Clé 3G > Configuration > Nouveaupoint d'accès.> Le message "Clé 3G configurée"apparait.
5. Patientez environ 30 secondesjusqu'à ce que la connexion soitétablie. Vous pouvez égalementappuyer sur la touche et naviguerdans les menus pendant que laconnexion s'établit.
Partage de connexion 3G via Bluetooth
Si vous disposez d’un téléphonesupportant le profil B luetooth DUN (Dial-Up Networking) ou PAN (Personal AreaNetwork), la connexion via B luetooth devotre téléphone au Parrot ASTEROID Mini

47Français
vous permettra de partager la connexion3G du téléphone.
Note : Consultez la page compatibilité sur
notre site web pour vérifier si votre
téléphone permet le partage de connexion
3G via Bluetooth et consulter la procédure
correspondante : www.parrot.com/fr/
compatibility.
1. Connectez votre téléphone au ParrotASTEROID Mini via Bluetooth.
2. Sur le Parrot ASTEROID Mini,sélectionnez Paramètres > Réseau >Bluetooth > Configuration.
3. Sélectionnez votre APN (AccessPoint Name) dans la liste proposéepuis cochez l'option Sélectionner.
4. Appuyez sur la touche etsélectionnez Connecter.
5. Autorisez le partage de connexion survotre téléphone. Cette procédurediffère selon le modèle de votretéléphone.
Partage de connexion 3G via USB
Note : Consultez la page compatibilité sur
notre site web pour vérifier si votre
téléphone permet le partage de connexion
3G via USB et consulter la procédure
correspondante : www.parrot.com/fr/
compatibility.
1. Assurez-vous que le clavier de votretéléphone est déverrouillé.
2. Connectez le téléphone au ParrotASTEROID Mini en utilisant le câbleUSB / micro-USB fourni avec votretéléphone. Vous pouvez également le connecter en utilisant la rallongeUSB fournie avec le ParrotASTEROID Mini. Cette connexionpermet également de recharger labatterie de votre téléphone.
3. Sélectionnez votre APN (AccessPoint Name) dans la liste proposéepuis cochez l’option Sélectionner.Vous pourrez par la suite modifier ceréglage en sélectionnant Paramètres> Réseau > USB.> Un pop-up indiquant l’activation dupartage de connexion USB apparait.

48 Français
ASTEROID Market : Utiliser les applications
Vous avez la possibilité d'utiliser plusieurstypes d'applications avec le ASTEROIDMarket : musique, géolocalisation, aide à laconduite. Les applications disponibles sontdifférentes selon le pays d'utilisation.Certaines applications peuvent nécessiterun abonnement.
Le Parrot ASTEROID Mini estmultitâches : plusieurs applicationspeuvent être utilisées en même temps.Vous pouvez par exemple écouter uneWebradio et utiliser une application d'aideà la conduite en même temps.
Pour plus d'informations sur l'utilisation
des applications disponibles, consultez lapage web de l'ASTEROID Market :www.parrotasteroid.com/
asteroidmarket.
En cas de problème
Avant de commencer
Assurez-vous que le message “Au revoir”apparait bien sur l’écran du ParrotASTEROID Mini lorsque vous coupez lecontact du véhicule. Consultez la sectionVérifier l ’insta lla tion pour plusd’informations.
Réinitialisez l’appareil. Pour cela,sélectionnez Paramètres > Paramètresavancés > Réinitialiser.
Vérifiez que vous avez la dernière mise àjour sur le Parrot ASTEROID Mini. Pourcela, sélectionnez Paramètres > A propos> Version. Comparez ce numéro de

49Français
version avec celui indiqué sur la pagesupport du Parrot ASTEROID Mini surnotre site web www.parrot.com.
Problème liés à la fonction téléphonie
Consultez la page compatibilité de notresite web pour vérifier si votre téléphoneest compatible avec le Parrot ASTEROIDMini.
Si votre téléphone est indiqué compatible,et si votre Parrot ASTEROID Mini disposedéjà de la dernière mise à jour, supprimezl'appairage entre les 2 appareils sur leParrot ASTEROID Mini et sur votretéléphone, redémarrez les 2 appareils puisréétablissez la connexion entre les 2appareils.
Problèmes liés à la fonction musique
Réinitialisez votre iPod / iPhone avant dele reconnecter au Parrot ASTEROID Mini.Pour réinitialiser un iPod / iPhone (cetteprocédure n’effacera aucune donnée):
iPod : appuyer simultanément surMenu et sur le bouton central jusqu’àce que l’iPod redémarre.
iPhone / iPod touch : appuyersimultanément sur le bouton On/Offet le bouton Home jusqu’à ce quel’iPhone redémarre. Ne touchez pasl’écran quand le message “Slide toshutdown“ apparaît.
Certains problèmes peuvent apparaitre sile périphérique est déjà connecté au
Parrot ASTEROID Mini lorsque vousmettez le contact. Réessayez enconnectant le périphérique après avoir misle contact.
Pour plus d'informations
Consultez la FAQ disponible sur la pagesupport du Parrot ASTEROID Mini.

50 Français
Informations généralesGarantie
Sans préjudice de la garantie légale et del’application des articles L.211-4, L.211-5 etL.211-12 du code de la consommation etdes articles 1641 à 1646 du code civilfrançais, PARROT garantitcontractuellement pendant une durée de12 mois à compter de la date d’achat initialeffectué par le consommateur (saufpièces d’usure garanties 6 mois), que leproduit est exempt de défaut de matériauxet de fabrication, sur présentation de lapreuve d’achat (date, lieu d’achat, n° desérie du produit) au revendeur ou à Parrot.Pendant la durée de garantie
contractuelle, le produit défectueux devraêtre retourné dans son emballage d’origineauprès du service après-vente durevendeur. Après inspection du produit,Parrot procèdera, à son choix, auremplacement ou à l’émission d’un avoir àl’exclusion de tout autredédommagement. La garantie ne couvre pas la mise à jour deslogiciels inclus dans les produits Parrotavec des téléphones mobiles Bluetooth àdes fins de compatibilité, la récupérationde données, la détérioration extérieuredue à une usure normale du produit, toutdommage causé par accident, uneutilisation anormale ou non autorisée duproduit, un produit non Parrot.
Parrot n’est pas responsable du stockage,de la perte ou de l’endommagement desdonnées durant le transport ou laréparation. Tout produit s’avérant nondéfectueux sera retourné à l’expéditeur etles frais de traitement, de vérification etde transport lui seront facturé.
Modifications
Les explications et spécificationscontenues dans ce guide utilisateur nesont fournies qu’à titre d’information etpeuvent être modifiées sans notificationpréalable. Ces informations sont correctesau moment de l’impression et le plus grandsoin est apporté lors de leur rédaction afinde vous fournir des informations les plus

51Français
précises possible.
Cependant, Parrot S.A. ne saurait êtretenu responsable, directement ou indi rectement, des éventuels préjudices oupertes de données accidentelles résultantd’une erreur ou omission au sein duprésent document. Parrot S.A. se réservele droit d’amender ou améliorer le produitainsi que son guide utilisateur sans aucunerestriction ou obligation de prévenirl’utilisateur. Dans le cadre de l’attentionportée par Parrot S.A. sur l’amélioration denos produits, il est possible que le produitque vous avez acheté diffère légèrementde celui décrit au sein du présentdocument. Dans ce cas, vous pourrezéventuellement trouver une nouvelle
version du guide utilisateur au formatélectronique sur le site www.parrot.com.
Comment recycler ce produit - Déchetsd’équipements électriques etélectroniques
Le symbole sur le produit ou sadocumentation indique qu’il ne doit pasêtre éliminé en fin de vie avec les autresdéchets ménagers. L’éliminationincontrôlée des déchets pouvant porterpréjudice à l’environnement ou à la santéhumaine, veuillez le séparer des autrestypes de déchets et le recycler de façonresponsable. Vous favoriserez ainsi laréutilisation durable des ressources
matérielles. Les particuliers sont invités àcontacter le distributeur leur ayant vendule produit ou à se renseigner auprès deleur mairie pour savoir où et comment ilspeuvent se débarrasser de ce produit afinqu’il soit recyclé en respectantl’environnement. Les entreprises sontinvitées à contacter leurs fournisseurs et àconsulter les conditions de leur contrat devente. Ce produit ne doit pas être éliminéavec les autres déchets commerciaux.
Marques déposées
Parrot, les logos Parrot sont des marquesenregistrées de PARROT SA en France etdans d’autres pays.

52 Français
Le nom et le logo Bluetooth sont desmarques déposées de Bluetooth SIG, Inc.et toute utilisation de ces derniers parParrot S.A. est faite sous licence.
iPod et iPhone sont des marques d’Apple,Inc. déposées aux États-Unis et dansd’autres pays.
"Made for iPod / iPhone" signifie qu'unaccessoire électronique a étéspécialement conçu pour se connecter,respectivement, avec un iPod ou uniPhone et est certifié par le concepteurcomme répondant aux normes deperformance d'Apple. Apple décline touteresponsabilité relative au fonctionnementde ces accessoires ou à leur conformitéaux normes réglementaires et de sécurité.
Le nom « Gracenote », le logo Gracenote,le graphisme Gracenote, la mention« Powered by Gracenote » sont desmarques ou des marques déposées deGracenote aux États-Unis et/ou dansd’autres pays.
Toutes les autres marques de commerceet marques déposées mentionnées dansle présent document sont protégées parCopyright et sont la propriété de leurspropriétaires respectifs.
Déclaration de conformité pour le CE
Parrot SA, 174 quai de Jemmapes, 75010Paris, France, déclare sous son uniqueresponsabilité que le produit décrit dans
le présent guide utilisateur est enconformité avec les normes techniquesEN300328 (v1.8.0), EN301489-1/-17(v2.1.1), EN300220-2 (V2.3.1), EN60950-1: 04/2006 / A11: 2009 / A1 : 2010 / A2 :2011, suivant les dispositions de ladirective R&TTE 1999/5/EC, ainsi qu’avecles exigences de la directive EMC2004/108/CE, de la directive 2006/95/CErelative aux appareils à basse tension et dela directive Automobile 72/245/CEEamendée par la directive 2009/19/CE.
Le présent appareil est conforme aux CNRd'Industrie Canada applicables auxappareils radio exempts de licence.L'exploitation est autorisée aux deux

53Français
conditions suivantes : (1) l'appareil ne doitpas produire de brouillage, et (2)l'utilisateur de l'appareil doit accepter toutbrouillage radioélectrique subi, même si lebrouillage est susceptible d'encompromettre le fonctionnement.
Cet appareil est conforme aux limitesd’exposition au rayonnement RF stipuléespar la FCC et l’IC pour une utilisation dansun environnement non contrôlé. Lesantennes utilisées pour cet émetteurdoivent être installées et doiventfonctionner à au moins 20 cm de distancedes utilisateurs et ne doivent pas êtreplacées près d’autres antennes ouémetteurs ou fonctionner avec ceux-ci.Les installateurs doivent s’assurer qu’une
distance de 20 cm sépare l’appareil (àl’exception du combiné) des utilisateurs.
Parrot S.A. RCS Paris 394 149 496
Copyright © 2012 Parrot. Tous droitsréservés

54

55Español
Guía de utilizaciónrápida Índice
Antes de comenzarInstalaciónPrimera utilizaciónTeléfonoMúsicaInternetEn caso de problemaInformación general
p.55p.56p.62p.64p.65p.68p.70p.72
Antes de comenzar
A propósito de este manual
Con el fin de limitar nuestro consumo depapel y como parte de nuestra actuación lomás responsable y respetuosa posible conel medio ambiente, Parrot prefiere poneren línea los documentos para los usuariosen lugar de imprimirlos.
Este manual simplificado del ParrotASTEROID Mini se limita por tanto aaportarle las principales instrucciones quele permitirán utilizar el aparato confacilidad. Podrá encontrar más informaciónen la sección Apoyo al cliente de nuestrapágina web www.parrot.com: manual

56 Español
completo, preguntas frecuentes,softwares didácticos...
Nota: En este manual, se utiliza el término
"iPod" para denominar tanto a iPod® como
a iPhone®.
Advertencia
Las funciones que requieran una atenciónprolongada se deben utilizar únicamentecuando detenido. Su seguridad y la de lasdemás personas que circulan por lacarretera es más importante que lasllamadas telefónicas, la música o que lasinstrucciones del GPS. Sea responsable:conduzca con prudencia y preste atencióna su entorno. Parrot no asumirá ningunaresponsabilidad si usted opta por ignorar
esta advertencia.
Actualización
Descargue gratis la última actualización delproducto en nuestra página webwww.parrot.com, sección Apoyo alcliente. Las actualizaciones le permitirándisfrutar de nuevas funciones y mejorar lacompatibilidad del producto.
Instalación
Nota: Le recomendamos que acuda a un
profesional para realizar esta instalación,
especialmente a alguno de nuestra red de
instaladores certificados.
Antes de comenzar
La instalación del Parrot ASTEROID Miniconsiste en su instalación entre la radio yel vehículo.
Nota: Los cables incluidos con el Parrot
ASTEROID Mini van equipados con
conectores ISO. Si la radio no viniera
equipada con conectores ISO, deberá
comprar un cable adaptador ISO para
facilitar el montaje. Consulte la sección

57Español
Compatibilidad de vehículos en la página
de soporte del Parrot ASTEROID Mini para
comprobar si necesita un cable adaptador.
Empiece retirando la radio del vehículo. Sepueden necesitar llaves de extracción pararealizar esta operación.
Consulte el esquema eléctrico decableado de la radio del vehículo.
Antes de instalar los distintos elementosdel Parrot ASTEROID Mini, revise lalongitudes de los cables para comprobarque se han elegido de manera que laslongitudes de los cables sean suficientespara conectar las distintas piezas entre sí.Cerciórese de que los cables del ParrotASTEROID Mini no quedan doblados o
pinzados tras la instalación.
Utilice obligatoriamente el cable ISOsuministrado con el Parrot ASTEROIDMini.
Las indicaciones "Conexión #" en lassecciones siguientes corresponden a lasconexiones representadas en losesquemas de la p.6 / 7.
Conexión del cable de audio
Conecte el mazo de cables de audio delvehículo a los conectores del ParrotASTEROID Mini (Conexiones 1A y 2).
Si el vehículo tiene un sistema de audiocon amplificador, utilice las salidas JackLine Out Front y Line Out Rear de la caja
electrónica para evitar problemas desaturación (chasquido en los altavoces,soplo permanente, etc.). Conecte estassalidas Line Out a su sistema de audioutilizando uno o dos cables jack paraconectar el Parrot ASTEROID Mini a susistema de audio (Conexión 1B en elesquema de la p.7).
Conexión del cable de alimentación
1. Desconecte la batería antes de instalarel cable de alimentación.
2. Conecte el conector ISO macho delParrot ASTEROID Mini a la radio(conexión 3).
3. Conecte el mazo de cables de

58 Español
alimentación del vehículo al conectorISO hembra del Parrot ASTEROID Mini(conexión 4).
El cable rojo del cable debe estarconectado a los +12V permanentes, elcable naranja a los 12V después delcontacto y el cable negro a masa.Compruebe que el cable naranja estéconectado a bajo contacto/llave. De locontrario, podría descargar la batería delcoche.
Nota: Para proceder a la verificación de la
instalación, conecte primero la pantalla sin
insertarla en el salpicadero. Consulte la
sección Comprobar la instalación para más
información.
Algunos vehículos no tienen toma de +12Vdespués de contacto en los conectores delvehículo. En estos casos, se debe conectarel cable de alimentación naranja a la caja defusibles o a otra fuente de alimentacióndespués de contacto.
Conexión del cable Mute
La función Mute permite interrumpir elsonido de la radio para dejar paso al sonidodel Parrot ASTEROID Mini (música,comunicaciones, etc.). La elección de laentrada Mute (Mute in 1, mute in 2 o mutein 3) depende de la configuración de laradio. Localice la entrada Mute y conéctelaal cable amarillo libre en el cable ISO(conexión 5).
Instalación de la caja electrónica
Evite instalar la caja cerca de la calefaccióno de la climatización o en un lugarexpuesto al sol.
Asegúrese de que la caja queda inmóviltras su instalación. Procure dejar espaciolibre alrededor del disipador del productopara facilitar la evacuación del calor.
Una vez instalada la caja electrónica, noejerza fuerza al volver a montar la radio ensu sitio. Si no hay suficiente espacio detrásde la radio, la alternativa puede serdesmontar la guantera.
Atención: No toque la centralita mientras
se encuentra en funcionamiento. La
temperatura de la superficie puede ser alta.

59Español
Comprobar la instalación
Encienda y corte el contacto del vehículouna vez que el Parrot ASTEROID Mini estéinstalado: el mensaje "Adiós" debeaparecer en la pantalla.
Si no ocurre esto, deberá invertir lasposiciones del cable rojo y el naranja. Elcable rojo de la alimentación debe estarconectado a los 12V permanentes, el cablenaranja a los 12V después del contacto y elcable negro a masa. Esta operación serealiza fácilmente invirtiendo los dosterminales del cableado Parrot (conexión7).
Instalación del micrófono
Se aconseja pasar el cable por la canaletaque está por detrás de la junta de lapuerta.
Si el cable pasa por encima de los pedales,asegúrese de que quede bien sujeto.
Advertencia: No pase el cable del micrófono
por los sistemas de calefacción, ventilación
o climatización o por delante de los airbags
laterales.
Asegúrese de que el micrófono quedecolocado lo más cerca posible de la cabezadel usuario. La distancia ideal es de 60 cm.Instale el micrófono preferentementecerca del retrovisor interior.
Oriente el micrófono hacia la boca delusuario.
Instalación del dongle GPS
Instale la mochila GPS en una superficieplana, en una zona libre de obstáculos enel interior del habitáculo.
Los parabrisas térmicos y las lunas conantena integrada pueden interferir con larecepción GPS y reducir la fiabilidad de losdatos relacionados con las aplicaciones denavegación.
La antena GPS de la mochila seencuentra del lado en el que sepuede leer "Parrot ASTEROIDGPS" y donde figura el logo en

60 Español
forma de estrella. Este logosiempre debe quedarorientado hacia el cielo.
Si su vehículo dispone de parabrisasatérmico, instale la mochila GPS en elparabrisas, a la altura de la zona noatérmica. El lado en el que figura el logo enforma de estrella debe pegarse en elparabrisas (esquema B p.9).
Nota: La zona no atérmica del parabrisas
puede variar según el modelo de vehículo.
Normalmente suele estar a la altura del
retrovisor.
Si su vehículo no dispone de parabrisasatérmico, instale la mochila GPS en elcuadro de mandos. El lado en el que figura
el logo en forma de estrella debe quedarvisible (esquema A p.8).
Para garantizar una buena fijación delsoporte:
limpie la superficie de montaje antesde pegar el soporte;
tras la fijación del soporte, espereunas dos horas sin manipularlo.
Installation de los cables USB
Conecte los cables USB al ParrotASTEROID Mini. Le recomendamos queconecte todos los cables del ParrotASTEROID Mini, aunque no haya previstoutilizarlos. Haga salir los conectorescorrespondientes de la bandeja o de la
guantera. Para ello, puede ser necesariohacer un agujero dentro del salpicadero.Evite utilizar alargadores USB siempre quesea posible.
Para garantizar una calidad de recepciónóptima, no conecte su pendrive 3Gdirectamente al Parrot ASTEROID Mini,utilice un cable USB para instalar elaccesorio en el salpicadero (u otra zonadespejada).
Instalación de la pantalla
Advertencia: Evite realizar una instalación
que pueda obstaculizar el uso de los
mandos importantes o pueda reducir la
visibilidad del conductor. No instale la
pantalla donde pueda ser propulsada por

61Español
la apertura de un airbag o cerca de una
boca de aireación o de aire acondicionado
del vehículo.
Pegue el soporte de plástico en el cuadrode mandos (esquema C p.10).
Para garantizar una buena fijación delsoporte:
limpie la superficie de montaje antesde pegar el soporte;
tras la fijación del soporte, espereunas dos horas sin manipularlo.
Para evitar riesgos de robo y de exposiciónprolongada al sol, no olvide retirar lapantalla al abandonar el vehículo.
Instalación del mando a distancia
Pegue el soporte del mando a distancia enel cuadro de mandos utilizando el adhesivosituado en la cara inferior del mismo.
Para garantizar una buena fijación delsoporte:
limpie la superficie de montaje antesde pegar el soporte;
tras la fijación del soporte, espereunas dos horas sin manipularlo.
El mando a distancia puede funcionar condos tipos de alimentación: con una pila oconectándolo a la caja electrónica.
Para hacer funcionar el mando con pila(esquema D p.11) :
1. Retire la pieza de plástico circular enla cara posterior del mando a distanciagirándola en sentido de las agujas deun reloj.
2. Introduzca una pila de tipo 3V CR2032en el alojamiento previsto para ello.Asegúrese de que la pila estácorrectamente orientada.
3. Vuelva a colocar la pieza de plásticocircular haciéndola girar en sentidocontrario al de las agujas de un reloj.
Para conectar el mando a distancia a la cajaelectrónica (esquema D p.11) :
1. Retire la pieza de plástico circular enla cara posterior del mando a distanciagirándola en sentido de las agujas de

62 Español
un reloj.
2. Conecte el cable en la zona previstapara el alojamiento de la pila y gíreloen sentido contrario al de las agujasde un reloj.
3. Conecte el otro extremo del cable a lacaja electrónica, junto a losconectores USB (esquema p.6).
Primera utilización
Navegar en los menús
Pulse el botón para acceder al menúprincipal.
Navegue en los menús girando la rueda yvalide pulsando el botón central del Parrot.
Para volver al menú anterior, pulse elbotón .
Pulse el botón para acceder al menú decontexto, correspondiente a la aplicaciónque se está utilizando.
Mientras se está leyendo un archivo demúsica, pulse el botón para volver almenú. Al contrario, cuando esté
navegando en los menús, pulse el botónSRC para volver al lector.
Pulse el botón durante 2 segundos paravisualizar las últimas 6 aplicacionesutilizadas o en uso actual.
Pulse el botón SRC para seleccionar lafuente de procedencia de los archivos deaudio.
Conectar un teléfono móvil
Nota: Consulte la página de
compatibilidad de nuestra página web
para verificar si su teléfono es compatible
con el Parrot ASTEROID Mini y consultar el
procedimiento de emparejamiento
correspondiente: www.parrot.com/es/
compatibility.

63Español
Si es la primera vez que utiliza el teléfonocon el Parrot ASTEROID Mini, primerodeberá emparejar ambos aparatos. Una vezemparejado el teléfono con el ParrotASTEROID Mini, la conexión entre los dosaparatos será automática en cuanto los dosaparatos estén encendidos y a proximidadcon la función B luetooth activada.
1. Desde su teléfono, inicie unabúsqueda de periféricos B luetooth® acontinuación, seleccione "ParrotASTEROID Mini".
2. El procedimiento de enlace dependedel modelo de teléfono:
- Si el teléfono le solicita el códigoPIN B luetooth, introduzca «0000».
- Si el Parrot ASTEROID Mini y elteléfono muestran dos códigos,compruebe si los códigos sonidénticos y confirme o invalide.> La pantalla del Parrot ASTEROIDMini indicará “teléfono enlazado".
Nota: En algunos teléfonos, deberá
autorizar la conexión al Parrot ASTEROID
Mini para permitir la conexión automática.
Consulte la guía de usuario de su teléfono
para más información.
Sincronizar la agenda del teléfono
Con la mayoría de teléfonos Bluetooth, laagenda se sincroniza automáticamente enla memoria del sistema. Cada vez que
modifique su agenda, la sincronización sereiniciará automáticamente en la siguienteconexión.
Advertencia: Sólo se sincronizan los
contactos guardados en la memoria del
teléfono. Si los contactos están guardados
en la memoria de la tarjeta SIM, deberá
transferirlos a la memoria del teléfono.
Consulte la guía de usuario de su teléfono
para más información.
Nota: En algunos teléfonos, deberá
autorizar la conexión al Parrot ASTEROID
Mini para permitir la conexión automática.
Consulte la guía de usuario de su teléfono
para más información.
La sincronización automática está limitadaa 5.000 contactos (o números de

64 Español
teléfono) por cada teléfono emparejado. Teléfono
Recibir una llamada
La llamada entrante se anuncia con unamelodía. Se anuncia el nombre delcontacto si el número de ese contacto estáguardado en la agenda del teléfonoconectado al Parrot ASTEROID Mini.
Para aceptar la llamada, pulse elbotón del mando a distancia o elbotón verde que aparece en lapantalla. A continuación, pulse elbotón del mando a distancia o elbotón rojo de la pantalla para finalizarla llamada.
Para rechazar la llamada, pulse el
botón del mando a distancia o elbotón rojo que aparece en la pantalla.
Hacer una llamada por reconocimiento de voz
Puede hacer una llamada porreconocimiento de voz directamentedespués de sincronizar la agenda delteléfono. El Parrot ASTEROID Minireconocerá automáticamente el contactode su agenda al que desea llamar.
1. Pulse el botón para iniciar elproceso de reconocimiento de voz.> El Parrot ASTEROID Mini le pediráel nombre del contacto al que deseallamar.
2. Diga el nombre del contacto seguido

65Español
del tipo de número (“OFICINA”,“MÓVIL”…) si el contacto tienevarios números.> La llamada a ese contacto se haráautomáticamente si la instrucción devoz ha sido comprendida.> En caso contrario, el sistema manoslibres emitirá un mensaje deconfirmación. Confirme diciendo“SÍ”, “LLAMA” o “LLAMAR”.
Nota: En cualquier momento, puede pulsar
el botón del mando a distancia para
anular el procedimiento de llamada.
Música
Utilización del reconocimiento de voz
El reconocimiento de voz y la función dereconocimiento de voz musical le permiteseleccionar los artistas o los álbumes quedesea escuchar. Esta función se encuentradisponible cuando utiliza el ParrotASTEROID Mini con un periférico tipoiPod/USB/SD, o si utiliza una aplicaciónmusical compatible con esta función.
1. Pulse el botón del mando adistancia.
2. Pronuncie el nombre del artista o delálbum que desea escuchar cuando elParrot ASTEROID Mini se lo indique.
> La lista de fuentes de audioconectadas al Parrot ASTEROID Miniy de aplicaciones de músicacompatibles con la función dereconocimiento de voz que contienenel artista/álbum elegido se muestranen pantalla.
Nota : Compruebe los nombres de los
artistas y álbumes en las etiquetas
(metadatos) de sus archivos de música. Ésta
puede diferir de lo que se muestra en el
título de la canción.
iPod
1. Coecte el iPod al cable iPod.
2. pulse la tecla SRC hasta seleccionar

66 Español
iPod.
3. Seleccione uno de los criterios deordenación (artista, álbum, canción,género, lista de reproducción) y pulsela rueda de selección.
4. Seleccione la canción y pulse la ruedade selección.
Nota: Pulse el botón y seleccione la
primera letra de su artista, álbum o
canción para navegar más fácilmente por
el contenido de su iPod.
USB
El Parrot ASTEROID Mini es compatiblecon la mayoría de memorias USB/reproductores de MP3/discos duros
externos.
No existe ninguna restricción de capacidadde las memorias USB.
Los archivos de música de la memoria USBpueden estar en formato MP3 (mpeg1layer3), AAC, WAV, OGG o WMA.
1. Conecte su dispositivo USB al cableUSB.
2. Pulse el botón SRC del mando adistancia y seleccione USB.
3. Pulse sobre la canción para iniciar lareproducción.
4. Seleccione uno de los criterios deordenación (artista, álbum, canción,género, lista de reproducción) y pulse
la rueda de selección.
Nota: Pulse el botón y seleccione la
primera letra del artista, álbum o canción
para navegar más fácilmente por el
contenido del periférico USB.
Tarjeta SD
Se pueden utilizar las siguientes tarjetasSD (con adaptador según los casos) con elParrot ASTEROID Mini : SD, micro SD,mini SD, SDHC, mini SDHC, micro SDHC.La capacidad de la tarjeta SD no debesuperar los 32 Gb.
Los archivos de música de su tarjeta SDpueden estar en formato MP3 (mpeg1layer3), AAC, WAV, OGG o WMA.

67Español
1. Inserte la tarjeta SD en el alojamientoprevisto para ello situado (esquema Ep.12).
2. Pulse el botón SRC y seleccione SD. También puede pulsar en Explorarpara navegar por el contenido de sutarjeta SD.
3. Seleccione uno de los criterios deordenación (artista, álbum, canción,género, lista de reproducción) y pulsela rueda de selección.
4. Pulse sobre la canción para iniciar lareproducción.
Nota: Pulse el botón y seleccione la
primera letra del artista, álbum o canción
para navegar más fácilmente por el
contenido de su tarjeta SD.
Utilización con un lector de audio Bluetooth
Nota: El Parrot ASTEROID Mini le permite
utilizar la función de telefonía y flujo de
audio vía Bluetooth con dos teléfonos
distintos, sin tener que desconectar uno de
los dos aparatos.
Puede utilizar el Parrot ASTEROID Minipara escuchar archivos de músicaguardados en un lector de audio Bluetoothsi éste soporta el perfil A2DP (AdvancedAudio Distribution Profile).
Si utiliza el lector de audio por primeravez, primero deberá vincularlo al ParrotASTEROID Mini. Si el lector de audio ya
está acoplado al Parrot ASTEROID Mini:
1. Pulse el botón SRC hasta seleccionarBluetooth Audio.
2. Inicie la lectura de una canción en sulector de audio.

68 Español
Internet
Conexión con un dispositivo 3G / 4G
Nota: Consulte la sección de
compatibilidad del Parrot ASTEROID Mini
en nuestra página web para ver la lista de
dispositivos 3G compatibles con el Parrot
ASTEROID Mini.
1. Conecte un dispositivo 3G/4G alParrot ASTEROID Mini a través delcable USB.>Aparecerá una ventana emergente(pop-up).
2. Active la conexión 3G seleccionandoOK.
3. Utilice la rueda para introducir su
código PIN y seleccione OK. Marquela opción Memorizar si prefiere queno se le pida el código PIN cada vezque se encienda el Parrot ASTEROIDMini.
Nota: Más adelante, podrá modificar este
ajuste seleccionando Ajustes > Inalámbrico
y redes > Ajustes de redes móviles.
4. Seleccione su APN (Access PointName) en la lista que aparece. Estainformación se encuentra disponibleen la documentación facilitada con sudispositivo 3G. Si su APN no figura enla lista, puede añadirlo seleccionandoParámetros > Red > Dispositivo 3G >Configuración > Punto de accesopersonalizado > Nuevo punto de
acceso.> Aparece el mensaje "Dispositivo 3Gconfigurado".
5. Espere unos 30 segundos mientras seestablece la conexión. Tambiénpuede pulsar el botón y navegar porlos menús mientras se establece laconexión.
Conexión vía Bluetooth
Si su teléfono soporta el perfil B luetoothDUN (Dial-Up Networking) o PAN(Personal Area Network), la conexión víaB luetooth del teléfono con el ParrotASTEROID Mini le permitirá compartir laconexión 3G del teléfono.
69Español
Nota: Consulte la sección de
compatibilidad del Parrot ASTEROID Mini
en nuestra página web para ver la lista de
dispositivos 3G compatibles con el Parrot
ASTEROID Mini.
1. Autorice compartir la conexión en suteléfono. Este procedimiento puedediferir según el modelo de móvil.
2. Conecte el teléfono al ParrotASTEROID Mini vía B luetooth.
3. En el Parrot ASTEROID Mini,seleccione Parámetros > Red >Bluetooth > Configuración.
4. Seleccione su APN (Access PointName) en la lista que aparece ymarque la opción Seleccionar.
5. Pulse el botón y seleccioneConectar.
6. Autorice la conexión compartida ensu teléfono. Este procedimientopuede variar según el modelo deteléfono.
Compartir una conexión 3G vía USB
Nota: Consulte la página de
compatibilidad en nuestra web para
comprobar si su teléfono permite compartir
la conexión 3G vía USB y consultar el
procedimiento correspondiente:
www.parrot.com/es/compatibility.
1. Asegúrese de que el teclado de suteléfono está desbloqueado y
después conéctelo al ParrotASTEROID Mini utilizando un cableUSB/micro-USB. Esta conexióntambién permite recargar la bateríadel teléfono.
2. Seleccione su APN (Access PointName) en la lista que aparece ymarque la opción Seleccionar. Másadelante, podrá modificar este ajusteseleccionando Parámetros > Red >USB.> Aparecerá una ventana emergente(pop-up) indicando la activación de laconexión compartida vía USB.

70 Español
ASTEROID Market:Utilizar las aplicaciones
Puede utilizar varios tipos de aplicacionescon el ASTEROID Market : música,geolocalización, ayuda a la conducción,navegación embarcada y puntos de interésconectados. Las aplicaciones disponiblesson diferentes según el país de utilización.
Algunas aplicaciones pueden necesitaruna suscripción.
El Parrot ASTEROID Mini es multitarea: sepueden utilizar varias aplicaciones a la vez.Por ejemplo, puede escuchar una Radiopor internet mientras utiliza una aplicaciónde ayuda a la conducción.
Para más información sobre la utilización yla instalación de las aplicaciones
disponibles, consulte la página web delsoporte del ASTEROID Market :www.parrotasteroid.com/asteroidmarket
En caso de problema
Antes de comenzar
Asegúrese de que, al cortar el contacto desu vehículo, aparece en la pantalla delParrot ASTEROID Mini el mensaje"Adiós". Consulte la sección Comprobar lainstalación para más información.
Reinicie el aparato. Para ello, seleccionePreferencias > Preferencias Avanzadas >Configuración Fábrica.
Compruebe que tiene instalada en elParrot ASTEROID Mini la últimaactualización. Para ello, seleccioneParámetros > Acerca de > Versión.Compare este número de versión con el

71Español
indicado en la página de soporte del ParrotASTEROID Mini en nuestra página webwww.parrot.com.
Función de telefonía
Compruebe la compatibilidad del teléfonocon el Parrot ASTEROID Mini. Para ello,consulte la página de compatibilidad ennuestra web: www.parrot.com/es/
compatibility.
Si su teléfono aparece como compatible ysi el Parrot ASTEROID Mini ya tiene laúltima actualización, elimine elemparejamiento entre los 2 aparatos en elParrot ASTEROID Mini y en su teléfono,apague y vuelva a encender los 2 aparatos yrestablezca la conexión entre los mismos.
Función música
Reinicie el iPod/iPhone antes de volverlo aconectar al Parrot ASTEROID Mini. Parareiniciar un iPod/iPhone (el proceso noborrará ningún dato):
iPod: pulse simultáneamente elMenú y el botón central hasta que seinicie de nuevo el iPod.
iPhone/iPod touch: pulsesimultáneamente el botón On/Off yel botón Home hasta que el iPhone sereinicie. No toque la pantalla cuandoaparezca el mensaje "Slide toshutdown”.
Puede producirse algún problema si eldispositivo ya está conectado al Parrot
ASTEROID Mini en el momento de ponerel contacto. Pruebe de nuevo conectandoel dispositivo una vez puesto el contacto.
Para más información
Consulte la página de soporte del ParrotASTEROID Mini en nuestra página webwww.parrot.com.

72 Español
Información generalGarantía
Sin perjuicio de la garantía legal, elproducto tienen una garantía contractualde 12 meses desde la fecha de comprainicial efectuada por el usuario, que cubrecualquier defecto de materiales y defabricación presentando la prueba decompra (ticket de caja, factura) aldistribuidor. Mientras esté vigente lagarantía contractual, el productodefectuoso deberá ser devuelto en suembalaje original al servicio posventa deldistribuidor. PARROT procederá, a suelección, a la sustitución o la emisión deun abono con exclusión de cualquier otra
compensación. La garantía no cubre lapérdida de datos, los daños causados poraccidente, un uso anormal o no autorizadodel producto o un producto que no seaParrot. Parrot no se responsabiliza delalmacenaje, pérdida o deterioro de losdatos durante el transporte o lareparación. Cualquier productoconsiderado no defectuoso será devueltoal remitente y le serán facturados losgastos de gestión, de comprobación y detransporte.
Modificaciones
Las explicaciones y especificacionescontenidas en este manual sonmeramente informativas y pueden ser
modificadas sin previo aviso. Seconsideran correctas en el momento deenviar la publicación a imprenta. Estemanual se ha redactado con el máximocuidado, con el fin de proporcionarle unainformación precisa. Sin embargo, Parrotno asume responsabilidad alguna por lasconsecuencias derivadas de los errores uomisiones que pueda haber en el manual,ni por los daños o pérdidas accidentales dedatos que se produzcan comoconsecuencia directa o indirecta del usode la información aquí contenida. Parrot sereserva el derecho a modificar o mejorar eldiseño del producto o el manual de usuariosin restricciones y sin la obligación denotificárselo a los usuarios. En aras de

73Español
actualizar y mejorar nuestros productos,es posible que el producto que usted hayaadquirido sea ligeramente distinto almodelo que se describe en este manual.En tal caso, tiene a su disposición unaversión más reciente de este manual enformato electrónico en la página web deParrot: www.parrot.com.
Eliminación correcta de este producto(material eléctrico y electrónico dedescarte)
La presencia de esta marca en el productoo en el material informativo que loacompaña, indica que al finalizar su vidaútil no deberá eliminarse junto con otrosresiduos domésticos. Para evitar los
posibles daños al medio ambiente o a lasalud humana que representa laeliminación incontrolada de residuos,separe este producto de otros tipos deresiduos y recíclelo correctamente parapromover la reutilización sostenible derecursos materiales. Los usuariosparticulares pueden contactar con elestablecimiento donde adquirieron elproducto, o con las autoridades localespertinentes, para informarse sobre cómo ydónde pueden llevarlo para que seasometido a un reciclaje ecológico y seguro.Los usuarios comerciales puedencontactar con su proveedor y consultar lascondiciones del contrato de compra. Esteproducto no debe eliminarse mezclado
con otros residuos comerciales.
Marcas registradas
Parrot y el logotipo Parrot son marcasregistradas de PARROT SA en Francia y enotros países.
El nombre y el logo B luetooth son marcasregistradas de Bluetooth ® SIG, Inc. yParrot S.A. utiliza estos últimos bajolicencia.
“Made for iPod / iPhone” significa que unaparato electrónico fue especialmentediseñado para conectarse a un iPod o uniPhone, respectivamente, y fue certificadopor un desarrollador con el fin desatisfacer los resultados estándares de

74 Español
Apple. Apple no es responsable delfuncionamiento de este dispositivo o desu conformidad con las normas deseguridad y regulatorios.
iPod y iPhone son marcas de Apple, Inc.registradas en Estados Unidos y en otrospaíses.
Gracenote®, el logo y el logotipo deGracenote, y el logo "Powered byGracenote" son marcas registradas omarcas comerciales de Gracenote, Inc. enEstados Unidos y/o en otros países.
Todas las demás marcas comerciales ymarcas registradas citadas en el presentedocumento están protegidas por Copyrighty son propiedad de sus respectivospropietarios.
Copyrights
Identification N. 394 149 496 R.C.S. PARIS
Parrot S.A.
Copyright © 2012 Parrot.

75Deutsch
BedienungsanleitungInhalt
Bevor Sie beginnenInstallationErste NutzungTelefonMusikInternetBei ProblemenAllgemeine Hinweise
p.75p.77p.83p.85p.86p.88p.91p.93
Bevor Sie beginnen
Zu diesem Leitfaden
Wir wollen unseren Papierverbraucheinschränken und soverantwortungsbewusst undumweltfreundlich wie möglich handeln.Daher zieht Parrot es vor, Dokumente fürdie Benutzer im Internet zuveröffentlichen,anstatt sie auszudrucken.Diese vereinfachte Anleitung des ParrotASTEROID Mini beschränkt sich daher aufdie wichtigsten Anweisungen, damit Siedieses Gerät leicht benutzen können.Weitere Angaben finden Sie im BereichSupport auf unserer Websitewww.parrot.com: Vollständige Anleitung,

76 Deutsch
häufige Fragen, Lernsoftware...
Hinweis: Aus Gründen der besseren
Leserlichkeit werden der iPod® und das
iPhone® (im Musikmodus) in dieser
Anleitung als „iPod“ bezeichnet.
Kompatible Telefone oder Tablet-Computer
werden als „Smartphone“ bezeichnet.
Warnhinweise
Funktionen, die Ihre Aufmerksamkeit fürlängere Zeit in Anspruch nehmen, dürfennur bei stehendem Fahrzeug ausgeführtwerden. Ihre eigene Sicherheit und die deranderen Verkehrsteilnehmer hat Vorrangvor Telefonanrufen, Musik oderAnwendungen zur Fahrhilfe. Seien Sieverantwortungsvoll: Fahren Sie vorsichtig
und achten Sie auf Ihre Umgebung. Parrotübernimmt keinerlei Haftung, falls Siebeschließen, diese Warnung zuignorieren.
Nutzen Sie den Parrot ASTEROID Mini ineiner vernünftigen Lautstärke, so dass Siejederzeit während der Fahrt auch nochAußengeräusche wahrnehmen können.
Update der Software
Das letzte Update Ihres Parrot ASTEROIDMini können Sie kostenlos von unsererWebsite www.parrot.com aus demBereich Support herunter laden (und sichgleichzeitig über das Update-Verfahreninformieren). Dank dieser Updateskönnen Sie neue Funktionen nutzen und
die Kompatibilität des Parrot ASTEROIDMini verbessern.
Sie können Aktualisierungen auchherunterladen wenn das ParrotASTEROID Mini mit dem Internetverbunden ist. Die Verfügbarkeit wird inder Informationsleiste angezeigt.

77Deutsch
Installation
Hinweis: Wir empfehlen, sich für die
Installation an einen Fachmann zu wenden,
insbesondere an eine Person aus dem Netz
der zugelassenen Installateure.
Vorbemerkung
Bei der Installation des Parrot ASTEROIDMini muss das Gerät zwischen demAutoradio und dem Fahrzeugangeschlossen werden.
Hinweis: Die mit dem Parrot ASTEROID Mini
mitgelieferten Kabel sind mit ISO-Steckern
versehen. Sollte Ihr Autoradio über keine
ISO-Stecker verfügen, müssen Sie sich für die
Montage ein ISO-Adapterkabel besorgen.
Schauen Sie auf der Support-Seite unter
"Kompatibilität Fahrzeuge" des Parrot
ASTEROID Mini , um die Notwendigkeit eines
Adapterkabels zu überprüfen.
Entfernen Sie zuerst das Original-Autoradio aus Ihrem Fahrzeug. DieserVorgang kann die Verwendung vonAusbauschlüsseln erfordern.
Ziehen Sie den Schaltplan IhresAutoradios zu Rate.
Vor dem Befestigen der verschiedenenBauteile des Parrot ASTEROID Mini imFahrgastraum, schließen Sie dieverschiedenen Kabel an dasElektronikgehäuse an. Vor demendgültigen Anschluss der Bauteile bitte
die Kabellänge kontrollieren undüberprüfen, dass die Einbauorte sogewählt wurden, dass die Kabellänge zurVerbindung der Einzelteile untereinanderausreichend ist. Überprüfen Sie, dass dieKabel des Parrot ASTEROID Mini nach derMontage weder geknickt noch gequetschtwerden.
Verwenden Sie unbedingt das mit demParrot ASTEROID Mini mitgelieferte ISO-Kabel.
Die Angaben "Verbindung #" in dennächsten Abschnitten entsprechen denabgebildeten Verbindungen in derAbbildung auf S.6 / 7.

78 Deutsch
Anschluss des Audio-Kabels
Die Audio-Kabelbündel des Fahrzeugs andie Stecker des Parrot ASTEROID Minianschließen (Verbindungen 1A und 2).
Wenn Ihr Fahrzeug mit einem Audio-System mit Verstärker ausgestattet ist,verwenden Sie die Jack Line Out Frontund Line Out Rear-Ausgänge desElektronikgehäuses, umSättigungsprobleme (Knacken derLautsprecher, permanentes Rauschen) zuvermeiden. Verbinden Sie diese Line Out-Ausgänge mit Ihrem Audio-System miteinem oder zwei Jack-Kabeln, um denParrot ASTEROID Mini mit Ihrem Audio-System (Verbindung 1B in der AbbildungS.7) zu verbinden.
Anschließen des Netzkabels
1. Die Batterie vor der Installation desStromkabels abklemmen.
2. Den ISO-Stecker des ParrotASTEROID Mini an das Autoradioanschließen (Verbindung 3).
3. Die Kabelbündel für dieSpannungsversorgung des Fahrzeugsmit der ISO Buchse des ParrotASTEROID Mini verbinden(Verbindung 4).
Die rote Kabelader muss der +12V-Dauerstromversorgung, dieorangenfarbige Ader der 12V-Versorgungüber Zündung und die schwarze Ader derMasse entsprechen. Überprüfen Sie, dass
die orangenfarbige Kabelader nicht an die12V Dauerstromversorgung angeschlossenist. Sonst besteht die Gefahr, dieFahrzeugbatterie zu entladen.
Hinweis: Zur Überprüfung des Einbaus
zunächst das Display anschließen, ohne es
auf dem Armaturenbrett zu befestigen.
Weitere Angaben enthält der Abschnitt
"Prüfung der Installation".
An bestimmten Fahrzeugen gibt es an denSteckern des Fahrzeugs keinen +12 V-Anschluss über Zündung. In diesem Fallmuss die orangenfarbige Ader an denSicherungskasten oder an eine andereSpannungsquelle über Zündungangeschlossen werden.

79Deutsch
Anschluss des Mute-Kabels
Mit der Mute-Funktion können Sie denTon Ihres Autoradios für den Ton desParrot ASTEROID Mini unterbrechen(Musik, Gespräche usw.). Die Wahl desMute-Eingangs (Mute in 1, Mute in 2 oderMute in 3) hängt von der KonfigurationIhres Autoradios ab. Suchen Sie denMute-Eingang und schließen Sie ihn an diefreie gelbe Kabelader des ISO-Kabels an(Verbindung 5).
Montage des Elektronikgehäuses
Vermeiden Sie es, das Gehäuse neben derHeizung, der Klimaanlage oder an einemder Sonne ausgesetzten Ort zuinstallieren.
Überprüfen Sie, ob das Gehäuse nachdem Einbau fest sitzt. Achten Sie darauf,dass um den Kühlkörper herum genügendPlatz ist, damit die Wärme besserabgeleitet werden kann.
Bitte vorsichtig den Wiedereinbau desAutoradios durchführen und nichtgewaltsam vorgehen. Wenn hinter demAutoradio nicht genügend Platz für dieElektronikbox vorhanden sein sollten,dann kann auch ein Einbau in dasHandschuhfach in Betracht gezogenwerden.
Prüfung der Anlage
Dazu nach dem Einbau des ParrotASTEROID Mini die Zündung desFahrzeugs einschalten und anschließendausschalten: Die Mitteilung " AufWiedersehen " muss im Displayerscheinen.
Ist das nicht der Fall, müssen dieAnschlüsse der roten und derorangefarbenen Kabelader vertauschtwerden. Die rote Ader des Stromkabelsmuss mit dem 12 V Dauerstrom, dieorangefarbene mit den 12 V über dieZündung und die schwarze mit der Masseverbunden werden. Dazu brauchen nur diebeiden Kabelschuhe der Parrot-Verkabelung vertauscht zu werden

80 Deutsch
(Verbindung 7).
Installation des Doppel-Mikrofons
Wir empfehlen, das Kabel entlang derVertiefung der Türdichtung zu führen.
Wenn das Kabel oberhalb der Pedalenverläuft, darauf achten, dass es richtigbefestigt ist.
Hinweis: Das Mikrofonkabel darf nicht in
der Heizungs-, Belüftungs- oder
Klimaanlage oder vor den seitlichen
Airbags verlaufen.
Achten Sie darauf, dass das Mikrofon sonah wie möglich in der Nähe des Kopfesdes Benutzers installiert ist. Die idealeEntfernung beträgt 60 cm. Das Mikrofon
wird am Besten in der Nähe desRückspiegels im Innenraum angebracht.
Das Mikrofon auf den Mund desBenutzers ausrichten.
Installation des GPS-Dongle
Befestigen Sie den GPS-Dongle imInneren der Fahrgastzelle auf einerebenen Oberfläche in einem Bereich ohneHindernisse.
Die athermischen Windschutzscheibenund Fensterscheiben, mit integrierterAntenne, können mit dem GPS-Empfanginterferieren und die Zuverlässigkeit, dermit den Navigationsanwendungenverbundenen Informationen,beeinträchtigen.
Die GPS-Antenne desEmpfängers befindet sich aufder Seite, wo "ParrotASTEROID GPS" steht undsich das sternförmige Logobefindet. Dieses Logo mussimmer zum Himmel zeigen.
Wenn Ihr Fahrzeug eine athermischeWindschutzscheibe hat, befestigen Sieden GPS-Dongle auf der Höhe des nicht-athermischen Bereichs an derWindschutzscheibe. Die Seite, auf dersich das sternförmige Logo befindet, mussauf die Windschutzscheibe geklebtwerden (Abbildung B S.9).
Hinweis: Wo sich der nicht-athermische

81Deutsch
Bereich der Windschutzscheibe befindet,
hängt vom Modell Ihres Fahrzeugs ab. Er
befindet sich im Allgemeinen auf der Höhe
des Rückspiegels.
Wenn Ihr Fahrzeug keine athermischeWindschutzscheibe hat, befestigen Sieden GPS-Dongle am Armaturenbrett. DieSeite, auf der sich das sternförmige Logobefindet, muss sichtbar sein (Abbildung AS.8).
Für die ordnungsgemäße Befestigung derHalterung wie folgt vorgehen:
Die Montagefläche vor demAufkleben der Halterung reinigen.
Nach der Befestigung der Halterungca. 2 Stunden warten.
Anbrigen die USB-Kabel
Schließen Sie die iPod®- und USB-Kabelden Parrot ASTEROID Mini an. Wirempfehlen, alle Kabel des ParrotASTEROID Mini anzuschließen, auchwenn Sie nicht unbedingt planen, sie zuverwenden. Führen Sie dieentsprechenden Steckverbindungen überdas Ablage- oder Handschuhfach heraus.
Um eine optimale Empfangsqualität zugewährleisten, schließen Sie Ihren 3G-Stick oder GPS-Dongle nicht direkt an denParrot ASTEROID Mini an: Verbinden Siedas Zubehör mit einem USB-Kabel amArmaturenbrett (oder einer anderenübersichtlichen Stelle).
Montage des Displays
Achtung: Installieren Sie das Gerät nicht so,
dass die Nutzung wichtiger Befehle oder die
Sicht des Fahrers beeinträchtigt werden.
Installieren Sie das Display nicht dort, wo es
beim Auslösen eines Airbags
weggeschleudert werden könnte, und auch
nicht in der Nähe eines Lüftungsausgangs
des Fahrzeugs.
Kleben Sie die Kunststoffhalterung auf IhrArmaturenbrett (Schema C S.10).
Für die ordnungsgemäße Befestigung derHalterung wie folgt vorgehen:
Die Montagefläche vor demAufkleben der Halterung reinigen.

82 Deutsch
Nach der Befestigung der Halterungca. 2 Stunden warten.
Um Diebstahl und längererSonnenexposition vorzubeugen,empfehlen wir, das Display abzunehmen,wenn Sie das Fahrzeug verlassen.
Installation der Fernbedienung
Kleben Sie die Halterung für dieFernbedienung mithilfe des auf derRückseite der Halterung angebrachtenKlebebands auf Ihr Armaturenbrett.
Für die ordnungsgemäße Befestigung derHalterung wie folgt vorgehen:
Die Montagefläche vor demAufkleben der Halterung reinigen.
Nach der Befestigung der Halterungca. 2 Stunden warten.
Die Fernbedienung kann entweder mitBatterien betrieben oder mit demElektronikgehäuse verbunden werden.
Batteriebetrieb (Schema D S.11) :
1. Drehen Sie den rundenKunststoffverschluss auf derHinterseite der Fernbedienung imUhrzeigersinn, um ihn zu lösen.
2. Legen Sie eine Batterie 3V CR2032 indas dafür vorgesehene Fach ein.Vergewissern Sie sich, dass dieBatterie richtig eingelegt ist.
3. Setzen Sie den rundenKunststoffverschluss wieder an
seinen Platz und drehen Sie ihn gegenden Uhrzeigersinn, um dasBatteriefach zu verschließen.
Anschluss an das Elektronikgehäuse(Schema D S.11) :
1. Drehen Sie den rundenKunststoffverschluss auf derHinterseite der Fernbedienung imUhrzeigersinn, um ihn zu lösen.
2. Schließen Sie das Kabel imBatteriefach an und drehen Sie esgegen den Uhrzeigersinn.
3. Schließen Sie das andere Ende desKabels an das Elektronikgehäuseneben den USB-Anschlüssen an(Schema S.6).

83Deutsch
Erste Nutzung
Menü-Navigation
Drücken Sie die Taste , um insHauptmenü zu gelangen.
Drehen Sie zur Menü-Navigation amReglerrad und bestätigen Sie durchDrücken der mittleren Parrot-Taste.
Um zum vorherigen Menüzurückzukehren, drücken Sie die Taste .
Drücken Sie die Taste , um insKontextmenü zu gelangen (je nach dergerade benutzten Anwendung).
Drücken Sie während des Abspielenseiner Musikdatei die Taste , um zu Menü
zurückzukehren. Umgekehrt gelangen Siebei der Menü-Navigation durch Drückender Taste „SOURCE“ zurück zum Abspiel-Laufwerk.
Drücken Sie 2 Sekunden lang die Taste ,um die letzten 6 Anwendungen, die Siegenutzt haben oder nutzen, anzuzeigen.
Drücken Sie die Taste SRC, um die QuelleIhrer Audio-Dateien auszuwählen.
Kopplung Ihres Bluetooth-Mobiltelefons
Hinweis: Prüfen Sie auf unserer Website
unter dem Thema „Kompatibilität“, ob Ihr
Telefon mit dem Parrot ASTEROID Mini
kompatibel ist, und beachten Sie die
jeweilige Zuordnungsmethode:
www.parrot.com/de/compatibility.
Wenn Sie zum ersten Mal ein Telefon mitdem Parrot ASTEROID Mini nutzen, dannmüssen Sie zunächst die beiden Gerätzuordnen. Wenn Ihr Telefon dem ParrotASTEROID Mini zugeordnet ist, dannerfolgt die Verbindung beider Geräteautomatisch, sobald die beiden Gerätenicht weit voneinander entfernteingeschaltet werden und die B luetooth®-Funktion aktiviert ist.
1. Von Ihrem Telefon aus starten Sieeine Suche nach B luetooth®Peripheriegeräten und wählen dann"Parrot ASTEROID Mini" aus.
2. Das Kopplungsverfahren hängt vomModell Ihres Telefons ab:
84 Deutsch
Wenn Ihr Telefon Sie auffordert,den Bluetooth-Pincodeeinzugeben, geben Sie „0000“ein.
Wenn der Parrot ASTEROIDMini und Ihr Telefon zwei Codesanzeigen, prüfen Sie, ob dieseCodes identisch sind undbestätigen Sie dies oder brechenab.> Das Display des ParrotASTEROID Mini zeigt an:"Kopplung erfolgreich".
Hinweis: Bei bestimmten Telefonen müssen
Sie die Herstellung der Verbindung mit dem
Parrot ASTEROID Mini für die automatische
Verbindungsherstellung gestatten. Nähere
Informationen entnehmen Sie bitte dem
Benutzerhandbuch Ihres Telefons.
Verwendung des Adressbuchs
Bei den meisten B luetooth-Telefonenwerden die Kontakte im Speicher desSystem automatisch synchronisiert. Nachjeder Änderung Ihres Verzeichnisses wirddie Synchronisation bei der nächstenVerbindung automatisch neu gestartet.
Achtung: Nur die im Speicher Ihres Telefons
erfassten Kontakte werden synchronisiert.
Wenn Ihre Kontakte im Speicher der SIM-
Karte abgelegt sind, müssen Sie sie in den
Speicher des Telefons transferieren. Nähere
Informationen entnehmen Sie bitte dem
Benutzerhandbuch Ihres Telefons.
Anmerkung: Je nach Modell Ihres
Telefongeräts werden Sie auf dem Telefon
gegebenenfalls aufgefordert, die
Übertragung des Verzeichnisses zu
bestätigen.
Die automatische Synchronisation ist auf5000 Kontakte (oder Telefonnummern)pro zugeordnetem Telefon begrenzt.

85Deutsch
Telefon
Anrufannahme
Ein eingehender Anruf wird durch einenKlingelton angezeigt. Der Name desKontakts wird angesagt, wenn dieNummer dieses Kontakts in dem mit demParrot ASTEROID Mini verbundenenTelefonverzeichnis aufgeführt ist.
Wenn Sie den Anruf annehmenmöchten, drücken Sie die Taste.
Wenn Sie den Anruf ablehnenmöchten, drücken Sie die Taste.
Einen Anruf über Spracherkennung tätigen
Sie können einen Anruf direkt nach derSynchronisation IhresTelefonverzeichnisses durchSpracherkennung initiieren. Der ParrotASTEROID Mini erkennt automatisch denKontakt Ihres Verzeichnisses, den Sieanrufen wollen.
1. Drücken Sie die Taste , um dieSpracherkennung zu initiieren.> Der Parrot ASTEROID Mini fragt Sienach dem Namen des Kontakts, denSie anrufen wollen.
2. Sagen Sie den Kontaktnamen undanschließend die Art der Nummer("BÜRO", "HANDY"...), sofern
diesem Kontakt mehrere Nummernzugeordnet sind.> Der Kontakt wird automatischangerufen, wenn dieSprachanweisung richtig verstandenwurde.> Ansonsten kommt vomFreisprechsystem eineBestätigsmeldung. Bestätigen Sie mit"JA", "RUF AN" oder "ANRUFEN".
Hinweis: Durch Drücken der Taste den
Spracherkennungsbetrieb wieder verlassen.

86 Deutsch
Musik
Musik-Spracherkennungsfunktion
Mit der Musik-Spracherkennungsfunktionkönnen Sie über die SpracherkennungKünstler oder Alben auswählen, die Siesich gern anhören möchten. DieseFunktion ist verfügbar, wenn Sie denParrot ASTEROID Mini mit einemAnschlussgerät vom Typ iPod/USB/SDverwenden oder wenn Sie eine mit dieserFunktion kompatible Musikanwendungnutzen.
1. Drücken Sie die Taste .
2. Sagen Sie den Namen des Künstlersoder des Albums, den/das Sie gerne
hören möchten, wenn der ParrotASTEROID Mini Sie dazu auffordert.> Es erscheint die Liste mit den anden Parrot ASTEROID Miniangeschlossenen Audioquellen sowiedie mit demSpracherkennungsfunktionkompatiblen Musikanwendungen mitden ausgewählten Künstler/Album.
Hinweis: Prüfen Sie die Namen der Artisten
und Alben in den Tags (Metadaten) Ihrer
Musikstücke. Die Namen können anders als
der im Titel des Stücks angezeigte sein.
iPod
1. Schließen Sie Ihren iPod an das iPod-Kabel an.
2. Drücken Sie die Taste SRC undwählen Sie iPod.
3. Wählen Sie eines derKlassierungskriterien aus (Artist,Album, Titel, Typ, Playlist) unddrücken Sie auf das Reglerrad.
4. Wählen Sie den Titel aus und drückenSie auf das Reglerrad.
Hinweis: Drücken Sie die Taste und
wählen Sie den ersten Buchstaben Ihres
Künstlers, Albums oder Titels aus, um
leichter durch den Inhalt Ihres iPod zu

87Deutsch
browsen.
SD-Karte
Folgende SD-Karten (gegebenenfalls mitAdapter) können Sie mit dem ParrotASTEROID Mini nutzen: SD, micro SD,mini SD, SDHC, mini SDHC, micro SDHC.Die maximale Speicherkapazität der SD-Karte beträgt 32 GByte.
Die Musikdateien auf Ihrer SD-Kartekönnen im Format MP3 (mpeg1 layer3),AAC, WAV, OGG oder WMAabgespeichert sein.
1. Setzen Sie die SD-Karte am hierfürvorgesehenen Platz an der rechtenSeite des Displays ein (Abbildung E
S.12).
2. Drücken Sie die Taste SRC undwählen Sie SD.
3. Wählen Sie eines derKlassierungskriterien aus (Artist,Album, Titel, Typ, Playlist) unddrücken Sie auf das Reglerrad.
4. Drücken Sie auf den Titel, um dieWiedergabe zu starten.
Hinweis: Drücken Sie die Taste und
wählen Sie den ersten Buchstaben Ihres
Künstlers, Albums oder Titels aus, um
leichter durch den Inhalt Ihrer SD-Karte zu
browsen.
USB-Stick
Der Parrot ASTEROID Mini ist mit denmeisten USB-Sticks/MP3-Playern/externen Festplatten kompatibel.Hinsichtlich der Kapazität der USB-Sticksbestehen keine Beschränkungen. DieMusikdateien auf Ihrem USB-Stick könnenim Format MP3 (mpeg1 layer3), AAC,WAV, OGG oder WMA abgespeichertsein.
1. Schließen Sie Ihr USB-Anschlussgerät an das USB-Kabel an.
2. Drücken Sie die Taste SRC undwählen Sie USB.
3. Wählen Sie eines derKlassierungskriterien aus (Artist,

88 Deutsch
Album, Titel, Typ, Playlist) undbestätigen Sie mit dem Reglerrad.
4. Drücken Sie auf den Titel, um dieWiedergabe zu starten.
Hinweis: Drücken Sie die Taste und
wählen Sie den ersten Buchstaben Ihres
Künstlers, Albums oder Titels aus, um
leichter durch den Inhalt Ihres USB-
Peripheriegeräts zu browsen.
Bluetooth-Audio-Laufwerk
Hinweis: Der Parrot ASTEROID Mini erlaubt
den Gebrauch der Telefoniefunktion und des
Audio-Streaming über Bluetooth mit 2
verschiedenen Telefonen, ohne Abstecken
eines der 2 Geräte.
Sie können den Parrot ASTEROID Minizum Wiedergeben von Musikdateienverwenden, die auf einem B luetooth-Audio-Laufwerk gespeichert sind, wenndieses das Profil A2DP (Advanced AudioDistribution Profile) unterstützt.
Vor der ersten Verwendung des Audio-Laufwerks müssen Sie dieses zunächst mitdem Parrot ASTEROID Mini koppeln.Wenn das Audio-Laufwerk bereits mitdem Parrot ASTEROID Mini verkoppeltist:
1. Drücken Sie die Taste SRC undwählen Sie Bluetooth-Audio.
2. Starten Sie die Wiedergabe einesTitels auf Ihrem Audio-Laufwerk.
Internet
Verbindung mit einem 3G/4G-Stick
Hinweis: Auf unserer Website, unter
Kompatibilität des Parrot ASTEROID Mini,
können Sie die Liste mit den 3G/4G-Sticks
einsehen, die mit dem Parrot ASTEROID Mini
kompatibel sind.
1. Schließen Sie über das USB-Kabeleinen 3G/4G-Stick an das ParrotASTEROID Mini an.> Es erscheint ein Popup-Fenster.
2. Aktiveren Sie die 3G-Verbindungdurch Auswählen OK.Der Status der 3G-Verbindung wirdangezeigt, gefolgt von einem

89Deutsch
weiteren Popup-Fenster, in welchemSie aufgefordert werden, Ihren PIN-Code einzugeben.
3. Geben Sie anhand des EinstellradsIhren PIN-Code ein, und wählen Sieanschließend OK. Haken Sie dieOption PIN-Code speichern an, wennSie vermeiden möchten, dass Sie beijedem Neustart des ParrotASTEROID Mini nach dem PIN-Codegefragt werden
Hinweis: Sie können diese Einstellung später
ändern, indem Sie Parameter > Wireless und
ohne Netz > Mobiles Datennetz auswählen.
Wählen Sie aus den Anschlussgeräten Ihren
3G/4G-Stick, wählen Sie PIN vergessen,
anschließend Vergessen.
4. Wählen Sie Ihren APN (Access PointName) in der angezeigten Liste aus.Diese Information ist in der mit Ihrem3G-Stick mitgeliefertenDokumentation verfügbar. Wenn IhrAPN nicht in der Liste enthalten ist,können Sie diesen hinzufügen, indemSie Parameter > Netzwerk > 3G-Stick> Konfiguration > NeuerZugangspunkt auswählen.Es erscheint die Meldung "3G-Stickkonfiguriert".
5. Warten Sie ca. 30 Sekunden, bis dieVerbindung aufgebaut ist. Sie könnenebenfalls die Taste drücken undwährend des Aufbaus der Verbindungin den Menüs blättern.
Anschluss über Bluetooth
Wenn Sie ein Telefon besitzen, welchesdas Profil B luetooth® DUN (Dial-UpNetworking) oder PAN (Personal AreaNetwork) unterstützt, haben Sie anhandder Verbindung über B luetooth IhresTelefons an das Parrot ASTEROID Minidie Möglichkeit der gemeinsamenNutzung einer 3G-Verbindung desTelefons.
Hinweis: Überprüfen Sie auf unserer
Website, unter Kompatibilität, ob Ihr
Telefon für die gemeinsame Nutzung von
3G-Verbindungen über Bluetooth geeignet
ist und beachten Sie die entsprechende
Vorgehensweise: www.parrot.com/de/
compatibility.

90 Deutsch
1. Schließen Sie Ihr Telefon überB luetooth an den Parrot ASTEROIDMini an.
2. Wählen Sie auf dem ParrotASTEROID Mini Präferenzen >Netzwerk > Bluetooth >Konfiguration.
3. Wählen Sie Ihren APN (Access PointName) in der angezeigten Liste aus.Auswählen.
4. Drücken Sie die Taste und wählenSie Anschließen.
5. Lassen Sie die gemeinsame Nutzungder Verbindung auf Ihrem Telefon zu.Dieser Vorgang ist je nach dem
Modell Ihres Telefonsunterschiedlich.
Anschluss über USB
Falls Ihr Telefon die gemeinsame Nutzungeiner 3G-Verbindung über USBunterstützt, schließen Sie Ihr Telefon miteinem USB-Kabel/USB-Mikrokabel (nichtmitgeliefert) an den Parrot ASTEROIDMini an, um somit die gemeinsameNutzung der 3G-Verbindung des Telefonsnutzen zu können.
Hinweis: Überprüfen Sie auf unserer Website
unter Kompatibilität ob Ihr Telefon für die
gemeinsame Nutzung von 3G-
Verbindungen über USB geeignet ist und
beachten Sie die entsprechende
Vorgehensweise: www.parrot.com/de/
compatibility.
1. Überprüfen Sie, dass die TastaturIhres Telefons gesperrt ist undschließen Sie es mit dem USB-Kabel/USB-Mikrokabel an den ParrotASTEROID Mini an. DieseVerbindung erlaubt auch denAustausch der Batterien IhresTelefons.
2. Wählen Sie Ihren APN (Access PointName) in der angezeigten Liste undhaken Sie die Option Auswählen an.Sie können diese Einstellung späterändern, indem Sie Parameter > Netz >USB wählen.

91Deutsch
> Ein Popup-Fenster zeigt dieAktivierung der Funktion„Persönlicher Hotspot USB“ an.
Hinweis: Nähere Informationen entnehmen
Sie bitte der Bedienerführung Ihres Telefons.
Gebrauch der Anwendungen
Sie können mit dem ASTEROID Marketmehrere Anwendungstypen nutzen:Musik, Geolokalisierung, Fahrhilfe. Dieverfügbaren Anwendungen hängen vomLand ab, in dem sie angewendet werden.
Für bestimmte Anwendungen ist einAbonnement erforderlich.
Der Parrot ASTEROID Mini kann fürmehrere Anwendungen gleichzeitig
genutzt werden. Sie können z. B. einWebradio hören und gleichzeitig eineAnwendung zur Fahrhilfe nutzen.
Weitere Informationen über die Nutzungder verfügbaren Anwendungen sind derWebsite von ASTEROID Market zuentnehmen: www.parrotasteroid.com/
asteroidmarket.
Bei Problemen
Vorbemerkung
Überprüfen Sie, dass die Mitteilung "AufWiedersehen" richtig auf dem Display desParrot ASTEROID Mini angezeigt wird,wenn Sie die Zündung des Fahrzeugsausschalten. Weitere Angaben enthält derAbschnitt "Prüfung der Installation".
Reinitialisieren Sie das Gerät. Wählen SieEinstellungen > erweiterte Einstellungen> Werkseinstell.
Stellen Sie sicher, dass Sie über dieneueste Aktualisierung des ParrotASTEROID Mini verfügen. Wählen Siedafür Einstellungen > Allgemeines >

92 Deutsch
Version. Vergleichen Sie dieseVersionsnummer mit der Nummer auf derSupportseite des Parrot ASTEROID Miniauf unserer Website www.parrot.com.
Sie können Aktualisierungen auchherunterladen wenn das ParrotASTEROID Mini mit dem Internetverbunden ist. Die Verfügbarkeit wird inder Informationsleiste angezeigt.
Telefonie-Funktion
Prüfen Sie, ob Ihr Telefon mit dem ParrotASTEROID Mini kompatibel ist. GehenSie hierzu auf unsere Website aufKompatibilität: www.parrot.com/de/
compatibility.
Wenn Ihr Telefon als kompatibel
angegeben wird und wenn Ihr ParrotASTEROID Mini bereits über die letzteAktualisierung verfügt, dann löschen Siedie Zuordnung zwischen den 2 Geräten amParrot ASTEROID Mini und an IhremTelefon. Starten Sie die 2 Geräte erneutund stellen Sie die Verbindung zwischenden 2 Geräten wieder her.
Musik-Funktion
Reinitialisieren Sie Ihren iPod/Ihr iPhone,bevor das Gerät wieder mit dem ParrotASTEROID Mini verbunden wird.Vorgehensweise zur Reinitialisierung desiPod/iPhone (hierdurch werden keineDaten gelöscht):
iPod: Gleichzeitig auf Menü und die
mittlere Taste drücken, bis der iPodsich wieder einschaltet.
iPhone/iPod touch: Gleichzeitig dieTaste On/Off und die Taste Homedrücken, bis sich das iPhone wiedereinschaltet. Das Display nichtberühren, wenn die Meldung „ZumAusschalten schieben“ erscheint.
Manche Probleme können entstehen,wenn das Anschlussgerät beimEinschalten der Zündung bereits mit demParrot ASTEROID Mini verbunden ist.Wiederholen Sie den Vorgang undverbinden Sie dabei das Gerät erst nachdem Einschalten der Zündung.

93Deutsch
Weitere Informationen
Weitere Informationen finden Sie auf derSupport-Seite des Parrot ASTEROID Miniauf unserer Website www.parrot.com.
Allgemeine HinweiseGarantie
Unbeschadet der gesetzlichen Garantiesichert PARROT für eine Dauer von 12Monaten ab dem ursprünglichen Datumdes Kaufs durch den Konsumenten beiVorlage eines Kaufnachweises (mitDatum, Ort des Kaufs und Seriennummerdes Artikels) an den Händler oder anParrot (Verschleißteile haben eineGarantie von 6 Monaten) vertraglich zu,dass das Produkt keine Material- oderHerstellungsfehler aufweist. Währenddes Garantiezeitraums muss dasfehlerhafte Produkt in seinerursprünglichen Verpackung dem
Kundenservice des Händlers retourniertwerden. Nach Inspektion des Produktskann Parrot dieses nach eigenemErmessen ersetzen oder erstatten, jedeweitere Entschädigung ist ausgeschlossen.
Änderungen
Die in dieser Anleitung enthaltenenBeschreibungen und technischenSpezifikationen dienen ausschließlich derInformation und können Änderungen ohnevorhergehende Ankündigung unterliegen.Zum Zeitpunkt des Drucks galten dieenthaltenen Angaben als zutreffend. Beider Verfassung dieser Anleitung wurde

94 Deutsch
größte Sorgfalt auf deren Inhaltangewendet, damit Ihnen möglichstpräzise Informationen bereitgestelltwerden können. Parrot haftet jedochweder für Folgen, die sich aus ggf. indieser Anleitung enthaltenen Fehlernoder Unterlassungen ergeben, noch fürSchäden oder den versehentlichen Verlustvon Daten als direkte oder indirekte Folgeder Verwendung der enthaltenenInformationen. Parrot behält sich dasRecht vor, das Produktdesign oder dieBedienungsanleitung zu ändern bzw. zuverbessern, ohne dass diesbezüglichBeschränkung vorliegen und ohne jedeVerpflichtung, die Benutzer hiervon inKenntnis zu setzen. Wir sind stets bemüht
Aktualisierungen und Verbesserungen anunseren Produkten vorzunehmen. So kannes sein, dass das Produkt das Sie gekaufthaben, sich leicht unterscheidet vom indieser Anleitung beschriebenen Modell.Sollte das der Fall sein, steht eine neuereVersion dieses Handbuchs inelektronischer Form auf der ParrotWebsite www.parrot.com zur Verfügung.
Korrekte Entsorgung dieses Produkts(Elektromüll)
Die Kennzeichnung auf dem Produkt bzw.auf der dazugehörigen Literatur gibt an,dass es nach seiner Lebensdauer nichtzusammen mit dem normalenHaushaltsmüll entsorgt werden darf.
Entsorgen Sie dieses Gerät bitte getrenntvon anderen Abfällen, um der Umweltbzw. der menschlichen Gesundheit nichtdurch unkontrollierte Müllbeseitigung zuschaden. Recyceln Sie das Gerät, um dienachhaltige Wiederverwertung vonstofflichen Ressourcen zu fördern. PrivateNutzer sollten den Händler, bei dem dasProdukt gekauft wurde, oder diezuständigen Behörden kontaktieren, um inErfahrung zu bringen, wie sie das Gerät aufumweltfreundliche Weise recycelnkönnen. Gewerbliche Nutzer sollten sichan Ihren Lieferanten wenden und dieBedingungen des Verkaufsvertragskonsultieren. Dieses Produkt darf nichtzusammen mit anderem Gewerbemüll

95Deutsch
entsorgt werden.
Eingetragene Marken
Parrot und die Parrot-Logos sind inFrankreich und in anderen Länderneingetragene Marken der Firma PARROTSA.
Der Name „Bluetooth“ und das B luetooth-Logo sind eingetragene Marken der FirmaBluetooth® SIG, Inc., und jegliche Nutzungdieses Namens und dieses Logos durchdie Parrot SA erfolgt im Rahmen einerLizenz.
iPod, iPhone und Apple sind in den USAund in anderen Ländern eingetrageneMarken der Firma Apple, Inc.
"Made for iPod / iPhone" bedeutet, dassein elektronisches Zusatzgerät für denAnschluss an iPod und iPhone-Modellekonstruiert ist und vom Entwicklerdahingehend zertifiziert wurde, dass esden Apple-Leistungsnormen entspricht.Apple übernimmt keine Verantwortungfür den Betrieb dieses Geräts oder dieEinhaltung von Sicherheits- undgesetzlichen Standards.
Gracenote®, das Gracenote-Logo und dieLogoschriftart sowie das Logo „Poweredby Gracenote“ sind eingetragene Markenoder Marken von Gracenote in denVereinigten Staaten von Amerika und/oder anderen Ländern.
Alle anderen Handelsmarken und
eingetragenen Marken, die in diesemDokument vorkommen, sindurheberrechtlich geschützt und dasEigentum ihrer jeweiligen Eigentümer.
Copyright
Copyright © 2012 Parrot. Alle Rechtevorbehalten.

96

97Italiano
Guida all'uso Indice
Prima di iniziareInstallazionePrimo utilizzoTelefonoMusicaInternetProblemi frequentiInformazioni generali
p.97p.98p.104p.106p.107p.110p.113p.114
Prima di iniziare
A proposito di questa guida
Per limitare il nostro consumo di carta enell’ambito della nostra azioneresponsabile volta alla tuteladell’ambiente, abbiamo sceltol’immissione on line dei documentidestinati agli utenti, che quindi nonsaranno più stampati. La presente guidasemplificata del Parrot ASTEROID Mini silimita quindi a dare le principali istruzioniche vi consentiranno di utilizzarefacilmente questo apparecchio. Troveretemaggiori informazioni nella sezioneSupporto del nostro sito webwww.parrot.com.

98 Italiano
Nota: In questo manuale, il termine "iPod"
verrà utilizzato per indicare iPod e iPhone.
Avvertenza
Le funzioni che richiedono un'attenzioneprolungata devono essere utilizzate solo aveicolo fermo. La propria sicurezza equella degli altri utenti della strada sonopiù importanti delle telefonate, dellamusica o delle applicazioni di assistenzaalla guida. Mantenere un comportamentoresponsabile: guidare con prudenza eprestare attenzione al proprio ambiente.Parrot declina ogni responsabilità nel casoin cui si decida di ignorare tali avvertenze.
Utilizzare il Parrot ASTEROID Mini con unlivello di volume ragionevole, in maniera
da poter sentire in qualsiasi momento irumori esterni durante la guida.
Aggiornamento del software
Scaricate gratuitamente l’ultimoaggiornamento del Parrot ASTEROID Mininel nostro sito web www.parrot.com, allasezione Supporto. Questi aggiornamenti vipermetteranno di utilizzare le nuovefunzionalità e di migliorare la compatibilitàdel Parrot ASTEROID Mini.
Installazione
Nota: Per eseguire l'installazione, si
raccomanda di ricorrere ad un
professionista esperto, rivolgendosi in
particolar modo alla nostra rete di
installatori autorizzati.
Prima di iniziare
L'installazione del Parrot ASTEROID Miniconsiste nell'inserirlo tra l'autoradio e ilveicolo.
Nota: I cavi forniti in dotazione con il
Parrot ASTEROID Mini sono provvisti di
connettori ISO. Se l'autoradio non è dotata
di connettori ISO, occorre procurarsi un
cavo adattatore ISO per consentire il

99Italiano
montaggio. Consultare la sezione
Compatibilità veicolo alla pagina di
assistenza di Parrot ASTEROID Mini per
verificare l'eventuale necessità di un cavo
adattatore.
Incominciare rimuovendo l'autoradiooriginale dal veicolo. Questa operazionepotrebbe richiedere l'uso di chiavi diestrazione.
Consultare lo schema elettricodell'autoradio.
Prima di fissare i vari elementi del ParrotASTEROID Mini nell'abitacolo, collegare idiversi cavi alla centralina elettronica.Prima di fissare definitivamente icomponenti, controllare le lunghezze dei
cavi assicurandosi che le varie posizionivengano scelte in modo tale che i cavisiano sufficientemente lunghi da collegarei vari elementi l'uno all'altro. Accertarsiche, al termine dell'installazione, i cavi delParrot ASTEROID Mini non risultinopiegati o incastrati.
Si raccomanda di utilizzare il cavo ISOfornito con il Parrot ASTEROID Mini.
Le indicazioni "Connessione #" nelleprossime sezioni corrispondono alleconnessioni rappresentate negli schemi apag. 6 / 7.
Collegamento del cavo audio
Collegare i fasci di cavi audio del veicolo aiconnettori del Parrot ASTEROID Mini(connessioni 1A e 2).
Se il veicolo è dotato di un impianto audiocon amplificatore, utilizzare le uscite JackLine Out Front e Line Out Rear presentisulla centralina elettronica per evitareproblemi di saturazione (colpi neglialtoparlanti, soffio permanente, ecc.).Collegare le uscite Line Out all'impiantoaudio utilizzando uno o due cavi Jack percollegare il Parrot ASTEROID Miniall'impianto audio (connessione 1B sulloschema a pag.7).

100 Italiano
Collegamento del cavo di alimentazione
1. Scollegare la batteria prima di installareil cavo di alimentazione.
2. Collegare il connettore ISO maschio delParrot ASTEROID Mini all'autoradio(connessione 3).
3. Collegare i fasci di cavi di alimentazionedel veicolo al connettore ISO femminadel Parrot ASTEROID Mini(connessione 4).
Il filo rosso del cavo deve corrispondereal +12V permanente, il filo arancione al 12Vpost-contatto e il filo nero alla massa.Verificare che il filo arancione non siacollegato al 12V permanente: sirischierebbe di scaricare la batteria del
veicolo.
Nota: Per procedere alla verifica
dell'installazione, collegare innanzitutto il
display senza sistemarlo sul quadro
comandi. Per maggiori informazioni
consultare la sezione Verifica
dell'installazione.
Su alcuni veicoli il +12V post-contatto nonè presente sui connettori dell'automezzo.In tal caso, è necessario collegare il filo dialimentazione arancione alla scatola deifusibili o ad un'altra sorgente dialimentazione post-contatto.
Collegamento del cavo Mute
La funzione Mute permette diinterrompere l'audio dell'autoradio perlasciare spazio a quello del ParrotASTEROID Mini (musica, conversazioni,ecc.). La scelta dell'ingresso Mute (mutein 1, mute in 2 o mute in 3) dipende dallaconfigurazione dell'autoradio. Individuarel'ingresso Mute e quindi collegarlo al filogiallo libero sul cavo ISO (connessione 5).
Installazione della centralina elettronica
Non installare la centralina vicino alriscaldamento o al climatizzatore né in unpunto esposto al sole.
Dopo l'installazione, assicurarsi che la

101Italiano
centralina sia saldamente fissata. Lasciareattorno al radiatore dell'apparecchio lospazio sufficiente per facilitare ladispersione del calore.
Installata la centralina, risistemarel'autoradio senza forzare. Se lo spaziodietro l'autoradio è insufficiente,prevedere ad esempio lo smontaggio delvano portaoggetti.
Attenzione: non toccare la centralina
mentre è in funzione. La temperatura
superficiale potrebbe essere molto alta.
Verifica dell'installazione
Accendere e quindi spegnere il motore delveicolo dopo avere installato il Parrot
ASTEROID Mini : il messaggio "Arrivederci " dovrà comparire sul display.
Se il messaggio non appare, invertire leposizioni dei fili rosso e arancione. Inconclusione, il filo rosso del cavo dialimentazione deve essere collegato al 12Vpermanente, il filo arancione al 12V post-contatto e il filo nero alla massa. Questaoperazione si effettua semplicementeinvertendo i due capicorda posti sulcablaggio Parrot (connessione 7).
Installazione del doppio microfono
Si raccomanda di fare scivolare il cavo nellacanalina di scolo dietro la guarnizione dellaportiera.
Se il cavo passa sopra i pedali, assicurarsi
che sia saldamente fissato.
Avvertenza: Non fare passare il cavo del
microfono negli impianti di riscaldamento,
ventilazione e climatizzazione o davanti
agli airbag laterali.
Assicurarsi che il microfono sia installato ilpiù vicino possibile alla testadell'utilizzatore. La distanza ideale è di 60cm. Installare il microfono preferibilmenteaccanto al retrovisore interno.
Orientare il microfono verso la boccadell'utilizzatore.

102 Italiano
Installazione del dongle GPS
Fissare il dongle GPS su una superficiepiana, in una zona priva di ostacoliall'interno dell'abitacolo.
I parabrezza atermici e i vetri con antennaintegrata possono interferire con laricezione GPS e ridurre l'affidabilità delleinformazioni legate alle applicazioni dinavigazione.
L'antenna GPS è situata sul latoin cui compaiono la dicitura"Parrot ASTEROID GPS" e illogo a forma di stella. Questologo deve sempre essererivolto verso l'alto.
Se il veicolo possiede un parabrezza
atermico, fissare il dongle GPS sulparabrezza a livello della zona nonatermica. Il lato su cui compare il logo aforma di stella deve essere incollato alparabrezza (schema B a pag.9).
Nota: La zona non atermica del parabrezza
dipende dal modello del veicolo. Questa
zona è solitamente situata a livello del
retrovisore.
Se il veicolo non possiede un parabrezzaatermico, fissare il dongle GPS sul quadrocomandi. Il lato su cui compare il logo aforma di stella deve essere visibile(schema A a pag.8).
Per assicurare un corretto fissaggio delsupporto:
pulire la superficie di montaggioprima di incollare il supporto;
dopo avere fissato il supporto,attendere circa 2 ore senzamaneggiarlo.
Installazione del cavo USB
Collegare i cavi iPod®, e USB al ParrotASTEROID Mini Si consiglia di collegaretutti i cavi del Parrot ASTEROID Minianche se non si prevede necessariamentedi utilizzarli. Far uscir fuori i connettoricorrispondenti dal proprio ripostiglio ovano portaoggetti. A tale scopo, potrebbeessere necessario realizzare un foroall’interno del cruscotto. Nei limiti delpossibile, evitare l’utilizzo di prolunghe

103Italiano
USB.
Per garantire una qualità ottimale dellaricezione, non collegare la propria chiave3G direttamente sul Parrot ASTEROIDMini: utilizzate un cavo USB per installarel’accessorio sul cruscotto (o altra zonalibera).
Installazione del display
Avvertenza: Evitare qualsiasi installazione
che possa intralciare l'uso di comandi
importanti o ridurre la visibilità del
conducente. Non installare il display dove
potrebbe essere scagliato dall'apertura di
un airbag o in prossimità di una bocchetta
di aerazione o dell'aria condizionata del
veicolo.
Incollare il supporto in plastica sul quadrocomandi (schema C a pag.10).
Per assicurare un corretto fissaggio delsupporto:
pulire la superficie di montaggioprima di incollare il supporto;
dopo avere fissato il supporto,attendere circa 2 ore senzamaneggiarlo.
Per evitare i rischi di furto e di esposizioneprolungata al sole, rimuovere il displayquando si lascia il veicolo incustodito.
Installazione del telecomando
Incollare il supporto del telecomando alquadro comandi servendosi dell'adesivopresente nella parte inferiore.
Per assicurare un corretto fissaggio delsupporto:
pulire la superficie di montaggioprima di incollare il supporto;
dopo avere fissato il supporto,attendere circa 2 ore senzamaneggiarlo.
Il telecomando può essere alimentato indue modi: con una pila oppurecollegandolo alla centralina elettronica.
Per alimentare il telecomando con una pila

104 Italiano
(schema D a pag.11) :
1. Rimuovere l'elemento tondo inplastica posto sul retro deltelecomando, facendolo ruotare insenso orario.
2. Inserire una pila del tipo 3V CR2032nell'apposito alloggiamento.Assicurarsi che la pila sia orientatanella giusta direzione.
3. Riposizionare l'elemento tondo inplastica, facendolo ruotare in sensoantiorario.
Per collegare il telecomando alla centralinaelettronica (schema D a pag.11) :
1. Rimuovere l'elemento tondo inplastica posto sul retro del
telecomando, facendolo ruotare insenso orario.
2. Collegare il cavo a livellodell'alloggiamento per la pila e farloruotare in senso antiorario.
3. Collegare l'altra estremità del cavoalla centralina elettronica, a fianco deiconnettori USB (schema a pag.6).
Primo utilizzo
Navigazione nei menu
Premere il tasto per accedere al menuprincipale.
Navigare nei menu girando la rotella econfermare premendo il tasto centraleParrot.
Per ritornare al menu precedente,premere il tasto .
Premere il tasto per accedere almenu contestuale, corrispondenteall’applicazione in corso d’uso.
Durante la lettura di un file musicale,premere il tasto per ritornare al menu.

105Italiano
Inversamente, per tornare al lettorequando si naviga tra i menu, premere iltasto SRC.
Tenere premuto il tasto per 2 secondiper visualizzare le ultime 6 applicazioniutilizzate o in corso di utilizzo.
Premere il tasto SRC per selezionare lasorgente dei file audio.
Accoppiare un telefono cellulare
Nota: Consultate la pagina Compatibilità
del nostro sito web per verificare se il
telefono è compatibile con il Parrot
ASTEROID Mini e quindi consultare la
relativa procedura di abbinamento:
www.parrot.com/it/compatibility.
Se è la prima volta che si utilizza untelefono con il Parrot ASTEROID Mini, èinnanzitutto necessario abbinare i 2apparecchi. Una volta abbinato il telefonocon il Parrot ASTEROID Mini, laconnessione tra i 2 apparecchi si stabiliràautomaticamente non appena sitroveranno accesi nelle vicinanze e con lafunzione B luetooth® attivata.
1. Dal telefono lanciate una ricerca diperiferiche B luetooth® e quindiselezionate "Parrot ASTEROID Mini".
2. La procedura di abbinamento dipendequindi dal modello del telefono:
Se il telefono chiede di inserire ilcodice PIN B luetooth, digitare
"0000".
Se Parrot ASTEROID Mini e iltelefono visualizzano due codici,assicurarsi che siano identici equindi confermare o annullare.> Sul display di Parrot ASTEROIDMini apparirà il messaggio"Abbinamento riuscito".
Nota: Su alcuni telefoni, per consentire la
connessione automatica, occorre
autorizzare la connessione a Parrot
ASTEROID Mini. Per maggiori informazioni
consultate la documentazione del telefono.

106 Italiano
Sincronizzazione della rubrica telefonica
Con la maggior parte dei telefoniB luetooth, la rubrica vieneautomaticamente sincronizzata con lamemoria del sistema. Ogni volta che larubrica viene modificata, lasincronizzazione si riesegueautomaticamente alla connessionesuccessiva.
Avvertenza: Solo i contatti salvati nella
memoria del telefono si sincronizzano con il
Parrot ASTEROID Mini. Se i contatti sono
salvati nella memoria della scheda SIM, è
necessario trasferirli nella memoria del
telefono. Per maggiori informazioni
consultare la documentazione del telefono.
Nota: Su alcuni telefoni è necessario
autorizzare l'accesso del Parrot ASTEROID
Mini ai contatti per consentire la
sincronizzazione. Per maggiori
informazioni consultare la documentazione
del telefono.
La sincronizzazione automatica è limitata a5.000 contatti (o numeri telefonici) pertelefono abbinato.
Telefono
Per ricevere una chiamata
Le chiamate in entrata sono segnalate dauna suoneria. Il nome del contatto èannunciato se il numero di tale contatto èregistrato nella rubrica del telefonocollegato al Parrot ASTEROID Mini.
Se si intende accettare una chiamatain entrata, premere il tasto . Perterminare la chiamata, premere iltasto .
Se si intende rifiutare una chiamata inentrata, premere il tasto .

107Italiano
Per effettuare una chiamata
È possibile iniziare una chiamata tramite ilriconoscimento vocale subito dopo lasincronizzazione della rubrica deltelefono. Il Parrot ASTEROID Miniriconoscerà automaticamente il contattodella rubrica che si desidera chiamare.
1. Premere il tasto per iniziare ilprocesso di riconoscimento vocale.> Il Parrot ASTEROID Mini chiederà ilnome del contatto che si intendechiamare.
2. Pronunciare il nome del contattoseguito dal tipo di numero("LAVORO", "CELLULARE", ecc.) seper il contatto sono disponibili diversi
numeri.> La chiamata di questo contatto iniziaautomaticamente se il comandovocale è stato compresocorrettamente.> In caso contrario, il kit viva voceemette un messaggio di richiesta diconferma. Confermare pronunciando"SÌ", "CHIAMA" o "CHIAMARE".
Nota: In qualunque momento è possibile
premere il tasto per uscire dalla
modalità di riconoscimento vocale.
Musica
Ricerca musicale ad attivazione vocale
Met de spraakherkenningsfunctie voormuziek kunt u de artiesten of albums die uwilt beluisteren, via spraakherkenningselecteren. Deze functie is beschikbaar alsu de Parrot ASTEROID Mini gebruikt meteen randapparaat zoals iPod / USB / SD, ofals u een muziektoepassing gebruikt diecompatibel is met deze functie.
1. Premere il tasto .
2. Pronunciare il nome dell'artista odell'album che si desidera ascoltarequando il Parrot ASTEROID Miniinvita a farlo.

108 Italiano
> Comparirà l'elenco delle sorgentiaudio connesse al Parrot ASTEROIDMini e delle applicazioni musicalicompatibili con la funzione diriconoscimento vocale e contenentil'artista/l'album prescelto.
Nota : Verificate i nomi degli artisti e degli
album nei tag (metadati) dei file musicali.
Possono infatti esservi differenze rispetto a
quanto visualizzato nel titolo del brano.
iPod
1. Collegare l'iPod al cavo iPod.
2. Premere il tasto SRC e selezionareiPod.
3. Selezionate uno dei criteri di
classifica (artista, album, brani,genere, playlist) e premete lamanopola.
4. Premere il brano per avviarne lariproduzione.
Nota: Premete il tasto e selezionate la
prima lettera dell'artista, dell'album o del
brano per spostarvi più facilmente
all'interno del contenuto dell'iPod.
Scheda SD
È possibile utilizzare le seguenti schedeSD (se necessario, con adattatore) con ilParrot ASTEROID Mini : SD, micro SD,mini SD, SDHC, mini SDHC, micro SDHC.La capacità della scheda SD non deve
superare i 32 GB.
I file musicali presenti sulla scheda SDpossono essere in formato MP3 (mpeg1layer3), AAC, WAV, OGG o WMA.
1. Inserire la scheda SD nell'appositoslot situato sulla destra del display(schema E a pag.12).
2. Premere il tasto SRC e selezionareSD.
3. Selezionate uno dei criteri diclassifica (artista, album, brani,genere, playlist) e premete lamanopola.
4. Premere il brano per avviarne lariproduzione.

109Italiano
Nota: Premete il tasto e selezionate la
prima lettera dell'artista, dell'album o del
brano per spostarvi più facilmente
all'interno del contenuto della scheda SD.
Chiavetta USB
Parrot ASTEROID Mini è compatibile conla maggior parte delle chiavette USB, deilettori MP3 e degli hard disk esterni. Nonesiste alcun limite per quanto concerne lacapacità delle chiavette USB.
I file musicali sulla chiavetta USB possonoessere in formato MP3 (mpeg1 layer3) oWMA.
1. Collegare la periferica USB al cavoUSB.
2. Premere il tasto SRC e selezionareUSB.
3. Selezionate uno dei criteri diclassifica (artista, album, brani,genere, playlist) e premete lamanopola.
4. Premere il brano per avviarne lariproduzione.
Nota: Premete il tasto e selezionate la
prima lettera dell'artista, dell'album o del
brano per spostarvi più facilmente
all'interno del contenuto della periferica
USB.
Utilizzo con un lettore audio Bluetooth
Nota: Parrot ASTEROID Mini consente di
utilizzare la funzione telefonia e streaming
audio tramite Bluetooth con 2 telefoni
diversi, senza che sia necessario scollegare
uno dei 2 apparecchi.
È possibile utilizzare Parrot ASTEROIDMini per ascoltare file musicali archiviatisu un lettore audio Bluetooth seques'ultimo supporta il profilo A2DP(Advanced Audio Distribution Profile).
Se il lettore audio viene utilizzato per laprima volta, è innanzitutto necessarioabbinarlo al Parrot ASTEROID Mini. Se illettore audio è già abbinato al ParrotASTEROID Mini :

110 Italiano
1. Premere il tasto SRC e selezionareAudio Bluetooth.
2. Avviare la riproduzione di un branosul lettore audio.
Internet
Connessione con chiavetta 3G/4G
Nota: Consultare la sezione Compatibilità
del Parrot ASTEROID Mini sul nostro sito
web per visualizzare l'elenco delle chiavette
3G/4G compatibili con il Parrot ASTEROID
Mini.
1. Collegare una chiavetta 3G/4G alParrot ASTEROID Mini mediante ilcavo USB.> Apparirà un pop-up.
2. Attivate la connessione 3Gselezionando OK.> Apparirà il pop-up Stato dellaconnessione 3G seguito da un altro
pop-up che chiede di inserire ilcodice PIN.
3. Inserite il codice PIN utilizzando larotella e quindi selezionate OK.Spuntate l'opzione Memorizza ilcodice PIN se preferite che il codicePIN non vi venga richiesto ad ogniriavvio di Parrot ASTEROID Mini.
Nota: Questa regolazione può essere
modificata anche in seguito selezionando
Impostazioni > Rete > Chiavetta 3G.
4. Selezionate il vostro APN (AccessPoint Name) dall'elenco proposto.Questa informazione è disponibilenella documentazione fornita con lachiavetta 3G. Se l'APN non compare

111Italiano
nell'elenco, è possibile aggiungerloselezionando Impostazioni > Rete >Chiavetta 3G > Configurazione >Nuovo access point.> Apparirà il messaggio "Chiavetta 3Gconfigurata".
5. È necessario attendere circa 30secondi affinché si stabilisca laconnessione. È anche possibilepremere il tasto e spostarsi neimenu mentre si stabilisce laconnessione.
Connessione tramite Bluetooth
Se si possiede un telefono che supporta ilprofilo B luetooth® DUN (Dial-UpNetworking) o PAN (Personal Area
Network), la connessione tramiteB luetooth del telefono al ParrotASTEROID Mini consente di condividerela connessione 3G del telefono stesso.
Nota: Consultare la pagina Compatibilità
sul nostro sito web per verificare se il
telefono consente di condividere la
connessione 3G tramite Bluetooth e quindi
consultare la relativa procedura:
www.parrot.com/it/compatibility.
1. Collegate il telefono a ParrotASTEROID Mini mediante B luetooth.
2. Su Parrot ASTEROID Miniselezionate Preferenze > Rete >Bluetooth > Configurazione.
3. Selezionate il vostro APN (Access
Point Name) dall'elenco proposto equindi spuntate l'opzioneSelezionate.
4. Premete il tasto e selezionateConnetti.
5. Autorizzate la condivisione dellaconnessione sul telefono. Questaprocedura può essere diversa aseconda del modello di telefono.
Connessione tramite USB
Se si possiede un telefono che supporta lacondivisione della connessione 3G tramiteUSB, collegare il telefono al ParrotASTEROID Mini con un cavo USB/micro-USB (non fornito) per condividere la

112 Italiano
connessione 3G del telefono stesso.
Nota: Consultare la pagina Compatibilità
sul nostro sito web per verificare se il
telefono consente di condividere la
connessione 3G tramite USB e consultare la
relativa procedura: www.parrot.com/it/
compatibility.
1. Accertarsi che la tastiera del telefonosia sbloccata, quindi collegarlo alParrot ASTEROID Mini servendosi diun cavo USB/micro-USB. Questaconnessione consente anche diricaricare la batteria del telefono.
2. Se necessario, selezionare il proprioAPN (Access Point Name)dall'elenco proposto e quindi
spuntare l'opzione Seleziona. Questaimpostazione può essere modificataanche in seguito selezionandoImpostazioni > Rete > USB.> Apparirà un pop-up che indical’attivazione della condivisione dellaconnessione USB.
Utilizzare le ASTEROID Market applicazioni
È possibile utilizzare diversi tipi diapplicazioni con il ASTEROID Market :musica, geolocalizzazione, assistenza allaguida. Le applicazioni disponibili sonodiverse a seconda del paese di utilizzo.
Alcune applicazioni possono richiedere unabbonamento.
Il Parrot ASTEROID Mini è un sistemamultitasking: possono infatti essereutilizzate più applicazioni incontemporanea. Ad esempio, è possibileascoltare una Webradio e utilizzare altempo stesso un'applicazione diassistenza alla guida.
Per ulteriori informazioni sull'utilizzodelle applicazioni disponibili è possibileconsultare la pagina web dell'ASTEROIDMarket: www.parrotasteroid.com/
asteroidmarket.

113Italiano
Problemi frequenti
Prima di iniziare
Assicurarsi che il messaggio "Arrivederci"compaia sul display del Parrot ASTEROIDMini allo spegnimento del motore delveicolo. Per maggiori informazioniconsultare la sezione Verificadell'installazione.
Resettare l'apparecchio. A tale scopo,selezionare preferenze > preferenzeavanzate > impost.predef.
Accertarsi di avere installato l'ultimoaggiornamento disponibile sul ParrotASTEROID Mini. A tale scopo,selezionare Impostazioni > Informazioni
su > Versione. Confrontare questonumero di versione con quello indicatonella pagina di assistenza del ParrotASTEROID Mini sul nostro sito webwww.parrot.com.
Problemi relativi alla funzione telefonia
Verificare la compatibilità del telefono conil Parrot ASTEROID Mini. A tale scopo,consultare la pagina Compatibilità sulnostro sito web: www.parrot.com/it/
compatibility.
Se il telefono viene indicato comecompatibile e il Parrot ASTEROID Minipossiede già l'ultimo aggiornamento,rimuovere l'abbinamento tra i 2 apparecchisul Parrot ASTEROID Mini e sul telefono,
riavviarli entrambi e quindi ripristinare laconnessione tra di essi.
Problemi relativi alla funzione musica
Resettare l'iPod/iPhone prima diriconnetterlo al Parrot ASTEROID Mini.Per resettare un iPod/iPhone (procedurache non cancella alcun dato):
iPod: premere contemporaneamenteMenu e il tasto centrale fino a quandol'iPod non si riavvia.
iPhone/iPod touch: premerecontemporaneamente i tastiAccendi/Spegni e Home fino aquando l'iPhone non si riavvia. Nontoccare il display quando appare il

114 Italiano
messaggio "Scorrere per spegnere".
Alcuni problemi possono comparire se laperiferica è già connessa al ParrotASTEROID Mini quando si accende ilmotore. Ripetere la proceduraconnettendo la periferica dopo avereacceso il motore.
Per ulteriori informazioni
Consultare la pagina di assistenza delParrot ASTEROID Mini sul nostro sitoweb www.parrot.com.
Informazioni generaliGaranziaSenza pregiudizio alcuno per la garanzialegale, Parrot garantisce contrattualmenteper 12 mesi, a partire dalla datadell'acquisto iniziale effettuato dalconsumatore (ad esclusione deicomponenti soggetti ad usura, garantiti per6 mesi), che questo prodotto è privo didifetti del materiale e di fabbricazione,dietro presentazione al rivenditore o aParrot della prova d'acquisto (data, luogod'acquisto e numero di serie del prodotto). Per l'intera durata della garanziacontrattuale, il prodotto difettoso dovràessere riconsegnato nell'imballo originale
al servizio di assistenza post-vendita delrivenditore. Dopo avere ispezionato ilprodotto, Parrot procederà, a suadiscrezione, alla sostituzione oall'emissione di una nota di credito, adesclusione di ogni altra forma dirisarcimento.
Modifiche
Le spiegazioni e le specifiche riportatenella presente guida sono solo a scopoinformativo e possono subire modifichesenza preavviso. Tali informazioni sono daconsiderarsi corrette al momento dellapubblicazione. La presente guida è stataredatta prestando grande attenzione, alfine di fornire ai clienti informazioni
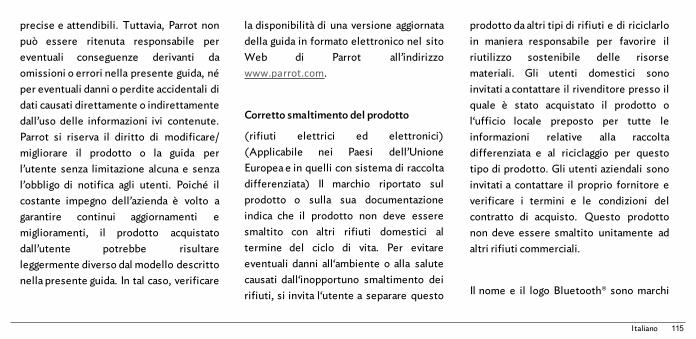
115Italiano
precise e attendibili. Tuttavia, Parrot nonpuò essere ritenuta responsabile pereventuali conseguenze derivanti daomissioni o errori nella presente guida, néper eventuali danni o perdite accidentali didati causati direttamente o indirettamentedall’uso delle informazioni ivi contenute.Parrot si riserva il diritto di modificare/migliorare il prodotto o la guida perl’utente senza limitazione alcuna e senzal’obbligo di notifica agli utenti. Poiché ilcostante impegno dell’azienda è volto agarantire continui aggiornamenti emiglioramenti, il prodotto acquistatodall’utente potrebbe risultareleggermente diverso dal modello descrittonella presente guida. In tal caso, verificare
la disponibilità di una versione aggiornatadella guida in formato elettronico nel sitoWeb di Parrot all’indirizzowww.parrot.com.
Corretto smaltimento del prodotto
(rifiuti elettrici ed elettronici)(Applicabile nei Paesi dell’UnioneEuropea e in quelli con sistema di raccoltadifferenziata) Il marchio riportato sulprodotto o sulla sua documentazioneindica che il prodotto non deve esseresmaltito con altri rifiuti domestici altermine del ciclo di vita. Per evitareeventuali danni all‘ambiente o alla salutecausati dall‘inopportuno smaltimento deirifiuti, si invita l‘utente a separare questo
prodotto da altri tipi di rifiuti e di riciclarloin maniera responsabile per favorire ilriutilizzo sostenibile delle risorsemateriali. Gli utenti domestici sonoinvitati a contattare il rivenditore presso ilquale è stato acquistato il prodotto ol‘ufficio locale preposto per tutte leinformazioni relative alla raccoltadifferenziata e al riciclaggio per questotipo di prodotto. Gli utenti aziendali sonoinvitati a contattare il proprio fornitore everificare i termini e le condizioni delcontratto di acquisto. Questo prodottonon deve essere smaltito unitamente adaltri rifiuti commerciali.
Il nome e il logo Bluetooth® sono marchi

116 Italiano
depositati di Bluetooth® SIG, Inc. e il loroutilizzo da parte di Parrot S.A. avviene incondizioni di licenza.
Parrot e i loghi Parrot sono marchiregistrati di PARROT SA in Francia e inaltri paesi.
“Made for iPod / iPhone” significa chel’accessorio elettronico è statoappositamente progettato per collegarsiall’iPod / iPhone e che è stato certificatodal produttore come conforme aglistandard prestazionali di Apple. Apple nonè responsabile del funzionamento deldispositivo o della sua conformità airequisiti di sicurezza.
iPod e iPhone sono marchi di Apple, Inc.depositati negli Stati Uniti e in altri paesi.
Gracenote®, il logo e il logotipo Gracenotee il logo "Powered by Gracenote" sonomarchi commerciali registrati o marchicommerciali di Gracenote, Inc. negli StatiUniti e/o in altri paesi.
Tutti gli altri marchi citati in questa guidasono protetti e di proprietà dei rispettivititolari.
Copyrights
Identification N. 394 149 496 R.C.S. PARIS
Parrot S.A.
Copyright © 2012 Parrot.

117Dutch
Gebruikershandleiding
Inhoudsopgave
Voordat u begintInstallatieHet eerste gebruikTelefoonMuziekInternetProblemen verhelpenAlgemene informatie
p.117p.118p.124p.126p.127p.130p.132p.134
Voordat u begint
Over deze gids
Om ons papierverbruik te beperken en inhet kader van onze zo verantwoordelijkmogelijke aanpak op het gebied vanmilieubehoud, geeft Parrot er de voorkeuraan om documentatie online beschikbaarte stellen in plaats van deze af te drukken.Deze vereenvoudigde gids voor de ParrotASTEROID Mini geeft u dus slechts debelangrijkste instructies die u nodig heeftom dit apparaat makkelijk te gebruiken. Uvindt meer informatie in het onderdeelSupport van onze websitewww.parrot.com: completedocumentatie, FAQ…

118 Dutch
Opmerking: Ten behoeve van de
leesbaarheid worden de iPod® en de
iPhone® in deze handleiding aangeduid
met de term "iPhone".
Waarschuwingen
De functies die langere tijd de aandachtopeisen, mogen alleen gebruikt wordenwanneer de auto stilstaat. Uw veiligheiden die van de andere weggebruikers isbelangrijker dan telefoongesprekken,muziek of rijhulpmiddelen. Weesverantwoordelijk: rijd voorzichtig en let opuw omgeving. Parrot wijst elkeverantwoordelijkheid af indien u dezewaarschuwing negeert.
Gebruik de Parrot ASTEROID Mini met
een redelijk geluidsvolume. Zo kunttijdens het rijden altijd horen wat zichbuiten afspeelt.
Updates
Download gratis de laatste update voor uwproduct op onze website www.parrot.com
gedeelte Hulp. Via deze updatesprofiteert u van nieuwe functies en eenverbeterde compatibiliteit van uwproduct.
Installatie
Opmerking: Wij adviseren om deze
installatie te laten uitvoeren door een
vakman, met name een installateur die is
aangesloten bij ons netwerk van erkende
installateurs.
Voordat u begint
De installatie van de Parrot ASTEROIDMini bestaat erin het apparaat tussen deautoradio en het voertuig te plaatsen.
Opmerking: De kabels die worden geleverd
bij de Parrot ASTEROID Mini zijn voorzien
van ISO-aansluitingen. Als uw autoradio
niet is uitgevoerd met ISO-aansluitingen,
moet u een ISO-adapterkabel kopen om de

119Dutch
montage te kunnen uitvoeren. Zie het
gedeelte over voertuigcompatibiliteit op de
hulppagina van de Parrot ASTEROID Mini
om te controleren of u een ISO-
adapterkabel nodig heeft.
Verwijder eerst de originele autoradio uituw voertuig. Het kan zijn dat u hiervoorspeciale sleutels nodig heeft.
Raadpleeg het elektrisch schema van uwautoradio.
Sluit voordat u de verschillendeonderdelen van de Parrot ASTEROID Miniin de auto vastzet, eerst de verschillendekabels aan op het elektronicakastje. Wachtmet het definitief vastzetten van deonderdelen tot u de kabellengtes
gecontroleerd heeft en zeker weet dat dekabelloop zodanig gekozen is dat de kabelslang genoeg zijn om de onderdelen opelkaar aan te sluiten. Overtuig u ervan datde kabels van de Parrot ASTEROID Mini naafloop van de installatie nergens gekniktzijn of bekneld zitten.
Gebruik alleen de bij de Parrot ASTEROID
Mini geleverde ISO-kabel.
De aanwijzingen "Aansluiting #" in devolgende paragrafen komen overeen metde aansluitingen in de afbeeldingen oppag.6 / 7.
De audiokabel aansluiten
Sluit de audiodraden van het voertuig aanop de aansluitingen van de ParrotASTEROID Mini (Aansluiting 1A en 2).
Als uw voertuig voorzien is van eenaudiosysteem met versterker, gebruikt ude uitgangen Jack Line Out Front en LineOut Rear op het elektronicakastje omverzadigingsproblemen (kraken van deluidsprekers, permanente ruis, enz.) tevermijden. Sluit deze Line Out-uitgangenaan op uw audiosysteem met behulp vaneen of twee jackkabels om de ParrotASTEROID Mini op uw audiosysteem aante sluiten (Aansluiting 1B in de figuur oppag.7).

120 Dutch
De voedingskabel aansluiten
1. Ontkoppel de accu voordat u devoedingskabel aansluit.
2. Sluit de ISO-stekker van de ParrotASTEROID Mini aan op de autoradio(aansluiting 3).
3. Sluit de voedingskabel van het voertuigaan op de ISO-stekkerbus van de ParrotASTEROID Mini (aansluiting 4).
De rode draad van de kabel moet wordenaangesloten op de +12V continuspanning,de oranje draad op het 12Vinschakelcontact en de zwarte draad op demassa. Overtuig u ervan dat de oranjedraad niet is aangesloten op de 12Vcontinuspanning, omdat u anders het
risico loopt dat de accu van het voertuigwordt ontladen.
Opmerking: Sluit om de installatie te
controleren eerst het scherm aan zonder dit
op het dashboard te plaatsen. Raadpleeg
het onderdeel "De installatie controleren"
voor meer informatie.
Sommige voertuigen hebben geen +12Vinschakelcontact op de aansluitingen. Indat geval moet de oranje voedingsdraadworden aangesloten op de zekeringdoos ofeen andere geschikte voedingsbron.
De mutekabel aansluiten
Met de functie Mute kunt u het geluid vande autoradio onderbreken om naar de
Parrot ASTEROID Mini te luisteren(muziek, communicatie, enz.). De keuzevoor een van de mute-ingangen (mute in 1,mute in 2 of mute in 3) hangt af van deconfiguratie van uw autoradio. Kies dejuiste mute-ingang en sluit die vervolgensaan op de vrije gele draad van de ISO-kabel(aansluiting 5).
Het elektronicakastje installeren
Installeer het elektronicakastje niet in debuurt van de verwarming of airco, noch opeen plek waar het blootstaat aan de zon.
Zorg ervoor dat het kastje na installatieonbeweeglijk vast zit. Houd ruimte vrijrond de radiator van het product om dewarmte te kunnen afvoeren.

121Dutch
Als het kastje eenmaal geïnstalleerd is,mag het niet meer worden geforceerdtijdens installatie van de radio. Als deruimte achter de autoradio onvoldoendeis, kunt u bijvoorbeeld overwegen hethandschoenenkastje te demonteren.
De installatie controleren
Zet het contact van uw voertuig aan en uitzodra de Parrot ASTEROID Minigeïnstalleerd is. Het bericht "Tot ziens"moet nu op het scherm wordenweergegeven.
Als dat niet zo is, moet u de rode en geledraad omwisselen. De rode draad van devoedingskabel moet worden aangeslotenop de 12V continuspanning, de oranje
draad op het 12V inschakelcontact en dezwarte draad op de massa. Dit doet u doorde twee kabelschoenen op de kabels vanParrot te verwisselen (aansluiting 7).
Installatie van de dubbele microfoon
Wij raden u aan om het snoer door de gootachter de afdichting van de deur te leiden.
Als het snoer boven de pedalen langsloopt, maak het dan goed vast.
Waarschuwing: Leid het microfoonsnoer
niet door het verwarmings-, ventilatie- of
aircosysteem en laat het niet voor de
zijairbags langs lopen.
Installeer de microfoon zo dicht mogelijkbij het hoofd van de gebruiker. De ideale
afstand is 60 cm. Installeer de microfoonbij voorkeur dicht bij deachteruitkijkspiegel.
Richt de microfoon op de mond van degebruiker.
Installeren van de gps-dongle
Bevestig de gps-dongle in de auto op eenvlak oppervlak zonder obstakels.
Warmtewerende voorruiten en voorruitenmet geïntegreerde antenne kunnen zorgenvoor storing van de gps-ontvangst,waardoor de gegevens vannavigatietoepassingen minderbetrouwbaar worden.

122 Dutch
De antenne van de gps-donglebevindt zich aan de kant van hetsterlogo en de inscriptie"Parrot ASTEROID GPS". Ditlogo moet altijd naar de luchtgericht zijn.
Bevestig de gps-dongle op het niet-warmtewerende deel van de voorruit alsuw voertuig een warmtewerende voorruitheeft. De kant met het sterlogo moet opde voorruit geplakt worden (zie figuur Bpag.9).
Opmerking: De plaats van de niet-
warmtewerende zone op de voorruit
verschilt per automodel. Meestal zit deze
zone bij de achteruitkijkspiegel.
Bevestig de gps-dongle op het dashboardals uw voertuig geen warmtewerendevoorruit heeft. De kant met het sterlogomoet zichtbaar zijn (zie figuur A pag.8).
Zorg dat de steun goed vastzit door:
het montageoppervlak te reinigenvoordat u de steun vastlijmt;
wacht na het lijmen van de steunongeveer 2 uur voor u de steunmanipuleert.
Installatie van de USB-snoeren
Sluit de iPod®-snoeren, de USB-snoerenaan op de Parrot ASTEROID Mini. Wijraden u aan om alle snoeren van de ParrotASTEROID Mini aan te sluiten, zelfs als u
niet noodzakelijk van plan bent om ze tegebruiken. Trek de overeenkomstigeaansluitingen door uw rommelbakje ofhandschoenenkastje naar buiten. Mogelijkmoet u daarvoor een gat in uw dashboardboren. Vermijd indien mogelijk het gebruikvan USB-verlengsnoeren.
Het iPod-snoer moet absoluut op dedaartoe voorziene, witte USB-poortaangesloten worden. Boven deze poortstaat "iPod".
Voor een optimale kwaliteit van deontvangst mag u uw 3Gstick nietrechtstreeks op de Parrot ASTEROID Miniaansluiten: gebruik een USB-kabel om hetaccessoire op het dashboard (of eenandere vrije zone) te plaatsen.

123Dutch
Het scherm installeren
Waarschuwing: Installeer het scherm
zodanig dat belangrijke
bedieningselementen goed toegankelijk zijn
en het zicht van de bestuurder niet wordt
belemmerd. Installeer het scherm niet op
plaatsen waar het door een geactiveerde
airbag kan worden geraakt, noch in de
buurt van een opening van het ventilatie- of
aircosysteem van het voertuig.
Lijm de plastic steun op het dashboard(figuur C pag.10).
Zorg dat de steun goed vastzit door:
het montageoppervlak te reinigenvoordat u de steun vastlijmt;
wacht na het lijmen van de steun
ongeveer 2 uur voor u de steunmanipuleert.
Om diefstal en langdurige blootstellingaan de zon te voorkomen, moet u hetscherm verwijderen als u uw voertuigverlaat.
De afstandsbediening installeren
Lijm de steun voor de afstandsbedieningop het dashboard met behulp van dekleefstrip aan de onderkant van de steun.
Zorg dat de steun goed vastzit door:
het montageoppervlak te reinigenvoordat u de steun vastlijmt;
wacht na het lijmen van de steunongeveer 2 uur voor u de steun
manipuleert.
De afstandsbediening kan op 2 manierenvan stroom worden voorzien: met eenbatterij of via een aansluiting op hetelektronicakastje.
Batterij plaatsen (figuur D pag.11) :
1. Verwijder het ronde plastic dekselaan de achterkant van deafstandsbediening door het rechtsomte draaien.
2. Plaats een batterij van het type 3VCR2032 in het batterijvak. Controleerof de batterij in de juiste richtinggeplaatst is.
3. Plaats het ronde plastic deksel terugdoor het linksom te draaien.

124 Dutch
Afstandsbediening aansluiten op hetelektronicakastje (figuur D pag.11) :
1. Verwijder het ronde plastic dekselaan de achterkant van deafstandsbediening door het rechtsomte draaien.
2. Sluit de kabel aan in het batterijvak endraai hem linksom.
3. Sluit het andere uiteinde van de kabelaan op het elektronicakastje, naast deUSB-aansluitingen (figuur pag.6).
Het eerste gebruik
Door de menu's bladeren
Druk op de toets om het hoofdmenu teopenen.
Blader door de menu's door aan descrolknop te draaien, en bevestig door opde middelste Parrot-knop te drukken.
Druk op de toets om terug te keren naarhet vorige menu.
Druk op de toets om het contextmenute openen, overeenkomstig de toepassingdie op dat ogenblik gebruikt wordt. Aan dehand van het contextmenu kunt u metname bepaalde instellingen wijzigen ofsneller door de inhoud van uw
telefoonboek of uw audiobron bladeren.
Druk tijdens het lezen van eenmuziekbestand op de toets , om terug tekeren naar het menu. Als u daarentegendoor de menu's bladert, drukt u op de knopSRC om terug te keren naar de lezer.
Door het menu van de bronnen bladeren
Druk op de knop SRC, om de bron van uwaudiobestanden te selecteren.
Een telefoon verbinden via Bluetooth
Opmerking: Raadpleeg de
compatibiliteitspagina op onze website om
te controleren of uw telefoon compatibel is
met de Parrot ASTEROID Mini en raadpleeg

125Dutch
de bijbehorende koppelingsprocedure:
www.parrot.com/nl/compatibility.
Als u voor het eerst een telefoon met deParrot ASTEROID Mini gebruikt, moet ude twee apparaten eerst koppelen. Als uwtelefoon met de Parrot ASTEROID Minigekoppeld is, worden de 2 apparatenautomatisch met elkaar verbondenwanneer ze in elkaars nabijheid wordeningeschakeld, met de functie B luetooth®geactiveerd.
1. Zoek via uw telefoon naar B luetooth®-apparaten en selecteer vervolgens"Parrot ASTEROID Mini".
2. De koppelingsprocedure hangt van uwtelefoon af:
Als uw telefoon vraagt om depincode voor B luetooth voert u"0000" in.
Als de Parrot ASTEROID Mini enuw telefoon allebei een codeweergeven, moet u controlerenof de twee codes gelijk zijn eneen bevestiging of ontkenninggeven.> Het scherm van de ParrotASTEROID Mini toont"Koppelen gelukt".
Opmerking: Op sommige telefoons moet u
verbinding met de Parrot ASTEROID Mini
toestaan om automatisch verbinding te
kunnen maken. Zie de
gebruikershandleiding van uw telefoon
voor meer informatie.
Het telefoonboek synchroniseren
Bij de meeste B luetooth telefoons wordende contacten automatischgesynchroniseerd met hetsysteemgeheugen. Wanneer u uwcontacten wijzigt, worden ze bij devolgende verbinding automatisch opnieuwgesynchroniseerd.
Waarschuwing: Alleen de contacten uit het
telefoongeheugen worden
gesynchroniseerd met de Parrot ASTEROID
Mini. Breng uw contacten over naar het
telefoongeheugen als ze zijn opgeslagen op
de simkaart. Raadpleeg de

126 Dutch
gebruikershandleiding van uw telefoon
voor meer informatie.
Opmerking: Op sommige telefoons moet u
de Parrot ASTEROID Mini toegang tot uw
contacten verlenen om de synchronisatie te
kunnen uitvoeren. Zie de
gebruikershandleiding van uw telefoon
voor meer informatie.
De automatische synchronisatie is beperkttot 5000 contacten (oftelefoonnummers) per gekoppeldetelefoon.
Telefoon
Een gesprek aannemen
Een inkomend gesprek wordt aangegevendoor een beltoon. De naam van het contactwordt gemeld als het nummer van hetcontact opgeslagen is in de contactenlijstvan de telefoon die is aangesloten op deParrot ASTEROID Mini.
Als u dit gesprek wilt aannemen,drukt u op de toets . Drukvervolgens op de toets om hetgesprek te beëindigen.
Als u dit gesprek wilt weigeren, druktu op de toets .
Bellen via spraakherkenning
Direct na synchronisatie met decontactenlijst van uw telefoon kunt ubellen via spraakherkenning. De ParrotASTEROID Mini herkent automatisch hetcontact uit uw contactenlijst dat u wiltbellen.
1. Druk op de toets om despraakherkenning te starten.> De Parrot ASTEROID Mini vraagt unaar de naam van het contact dat uwilt bellen.
2. Spreek de naam van het contact uit,gevolgd door het soort nummer("KANTOOR", "GSM"...) als datcontact verschillende nummers

127Dutch
heeft.> Als het gesproken commando goedbegrepen is, wordt automatischbegonnen met bellen.> Is dat niet het geval, dan wordt ombevestiging gevraagd door hethandsfree systeem. Bevestig door"JA", "BEL" of "BELLEN" TEZEGGEN.
Let op: druk op ieder ogenblik op de toets
om de spraakherkenningsmodus te
verlaten.
Muziek
De spraakherkenning voor muziek gebruiken
Met de spraakherkenningsfunctie voormuziek kunt u de artiesten of albums die uwilt beluisteren, via spraakherkenningselecteren. Deze functie is beschikbaar alsu de Parrot ASTEROID Mini gebruikt meteen randapparaat zoals iPod / USB / SD, ofals u een muziektoepassing gebruikt diecompatibel is met deze functie.
1. Druk op de toets .
2. Noem de naam van de artiest of hetalbum dat u wilt beluisteren wanneerde Parrot ASTEROID Mini u daaromvraagt.
> De lijst met audiobronnen van deParrot ASTEROID Mini verschijnt,waarop de muziektoepassingen metspraakherkenningsfunctie wordenaangegeven die de door u gekozenartiest of het album kunnenaanbieden.
Opmerking: Controleer de namen van de
artiesten en albums in de tags (metadata)
van uw muziekbestanden. Ze kunnen
verschillen van de weergave in de titel van
het nummer.
iPod
1. Sluit uw iPod aan op de iPod-kabel.
2. Druk op de toets SRC en selecteer

128 Dutch
iPod.
3. Kies één van de indelingscriteria(artiest, album, nummers, soort,playlist) en druk op de scrolknop.
4. Kies het muziekbestand en druk op descrolknop.
Let op: druk op de toets en selecteer de
eerste letter van uw artiest, album of
nummer, om gemakkelijker door de inhoud
van uw iPod te bladeren.
SD-kaart
U kunt (indien nodig met adapter) devolgende SD-kaarten gebruiken met deParrot ASTEROID Mini : SD, micro SD ,mini SD, SDHC, mini SDHC, micro SDHC.De capaciteit van de SD-kaart mag nietgroter zijn dan 32 GB.
De muziekbestanden op uw SD-kaartkunnen de indeling MP3 (mpeg1 layer3),AAC, WAV, OGG of WMA hebben.
1. Steek de SD-kaart in de daartoebestemde sleuf aan de rechterkantvan het scherm (figuur E pag.12).
2. Druk op de toets SRC en selecteerSD.
3. Kiest u één van de indelingscriteria(artiest, album, nummers, soort,playlist) en drukt u op de scrolknop.
4. Druk op het nummer om het af tespelen.
Let op: druk op de toets en selecteer de
eerste letter van uw artiest, album of
nummer, om gemakkelijker door de inhoud
van uw SD-kaart te bladeren.
USB-stick
De Parrot ASTEROID Mini is compatibelmet de meeste USB-sticks, MP3-spelersen externe harde schijven. U kunt USB-sticks met elke capaciteit gebruiken.
De muziekbestanden op uw USB-stick

129Dutch
kunnen de indeling MP3 (mpeg1 layer3),AAC, WAV, OGG of WMA hebben.
1. Sluit uw USB-randapparaat aan op deUSB-kabel.
2. Druk op de toets SRC en selecteerUSB.
3. Kiest u één van de indelingscriteria(artiest, album, nummers, soort,playlist) en drukt u op de scrolknop.
4. Druk op het nummer om het af tespelen.
Let op: druk op de toets en selecteer de
eerste letter van uw artiest, album of
nummer, om gemakkelijker door de inhoud
van uw USB-apparaat te bladeren.
Audiospeler via Bluetooth
Opmerking: Met de Parrot ASTEROID Mini
kunt u telefoneren en audio streamen via
Bluetooth op 2 verschillende telefoons,
zonder dat u een van de twee apparaten
hoeft los te koppelen.
U kunt de Parrot ASTEROID Minigebruiken om muziekbestanden tebeluisteren die zijn opgeslagen op eenBluetooth audiospeler, als de speler hetprofiel A2DP (Advanced AudioDistribution Profile) ondersteunt.
Als u de audiospeler voor het eerstgebruikt, moet u hem eerst koppelen aande Parrot ASTEROID Mini. Als deaudiospeler al gekoppeld is aan de Parrot
ASTEROID Mini :
1. Druk op de toets SRC van deafstandsbediening (of druk op Muziekop het scherm) en selecteer AudioBluetooth.
2. Speel een nummer af op uwaudiospeler.
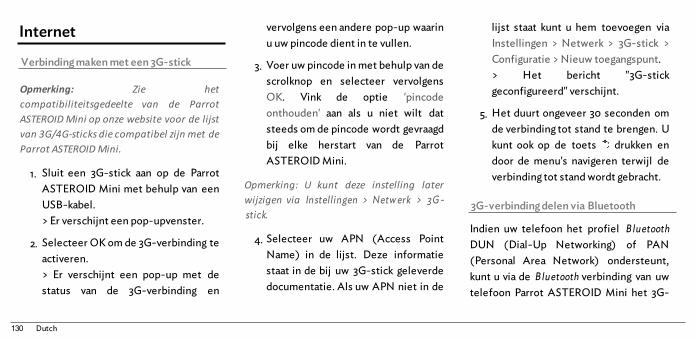
130 Dutch
Internet
Verbinding maken met een 3G-stick
Opmerking: Zie het
compatibiliteitsgedeelte van de Parrot
ASTEROID Mini op onze website voor de lijst
van 3G/4G-sticks die compatibel zijn met de
Parrot ASTEROID Mini.
1. Sluit een 3G-stick aan op de ParrotASTEROID Mini met behulp van eenUSB-kabel.> Er verschijnt een pop-upvenster.
2. Selecteer OK om de 3G-verbinding teactiveren.> Er verschijnt een pop-up met destatus van de 3G-verbinding en
vervolgens een andere pop-up waarinu uw pincode dient in te vullen.
3. Voer uw pincode in met behulp van descrolknop en selecteer vervolgensOK. Vink de optie 'pincodeonthouden' aan als u niet wilt datsteeds om de pincode wordt gevraagdbij elke herstart van de ParrotASTEROID Mini.
Opmerking: U kunt deze instelling later
wijzigen via Instell ingen > Netw erk > 3G -stick.
4. Selecteer uw APN (Access PointName) in de lijst. Deze informatiestaat in de bij uw 3G-stick geleverdedocumentatie. Als uw APN niet in de
lijst staat kunt u hem toevoegen viaInstellingen > Netwerk > 3G-stick >Configuratie > Nieuw toegangspunt.> Het bericht "3G-stickgeconfigureerd" verschijnt.
5. Het duurt ongeveer 30 seconden omde verbinding tot stand te brengen. Ukunt ook op de toets drukken endoor de menu's navigeren terwijl deverbinding tot stand wordt gebracht.
3G-verbinding delen via Bluetooth
Indien uw telefoon het profiel B luetoothDUN (Dial-Up Networking) of PAN(Personal Area Network) ondersteunt,kunt u via de B luetooth verbinding van uwtelefoon Parrot ASTEROID Mini het 3G-

131Dutch
netwerk van de telefoon delen.
Opmerking: Ga naar de
compatibiliteitspagina op onze website om
te controleren of uw telefoon deling van de
3G-verbinding via Bluetooth ondersteunt.
Daar vindt u ook de bijbehorende
procedure: www.parrot.com/nl/
compatibility.
1. Verbind uw telefoon met de ParrotASTEROID Mini via Bluetooth.
2. Op de Parrot ASTEROIDMiniselecteert u Instellingen >Netwerk > Bluetooth > Configuratie.
3. Selecteer uw APN (Access PointName) in de lijst en vink vervolgensde optie Selecteren aan.
4. Druk op de toets en selecteerVerbinden.
5. Geef op uw telefoon toestemmingvoor het delen van de verbinding.Deze procedure verschilt pertelefoontype.
3G-verbinding delen via USB
Opmerking: Ga naar de
compatibiliteitspagina op onze website om
te controleren of uw telefoon deling van de
3G-verbinding via USB ondersteunt. Daar
vindt u ook de bijbehorende procedure:
www.parrot.com/fr/compatibility.
1. Zorg dat de toetsen van uw telefoonontgrendeld zijn.
2. Verbind de telefoon met de ParrotASTEROID Mini via de bij uwtelefoon geleverde USB/micro-USBkabel. U kunt de telefoon ookaansluiten met de USB-verlengkabeldie geleverd is bij de ParrotASTEROID Mini. Via deze verbindingkunt u tevens de batterij van uwtelefoon opladen.
3. Selecteer uw APN (Access PointName) in de lijst en vink vervolgensde optie Selecteren aan. U kunt dezeinstelling later wijzigen viaInstellingen > Netwerk > USB.> Er verschijnt een pop-up dieactivering van de gedeelde USB-verbinding aangeeft.

132 Dutch
De toepassingen gebruiken
U kunt meerdere soorten toepassingengebruiken met de ASTEROID Market :muziek, geolocatie, rijhulp. Debeschikbare toepassingen verschillen perland waarin de autoradio gebruikt wordt.
Voor bepaalde toepassingen hebt umogelijk een abonnement nodig.
De Parrot ASTEROID Mini kanmultitasken: er kunnen verschillendetoepassingen tegelijk worden gebruikt. Ukunt bijvoorbeeld een webradiobeluisteren en tegelijkertijd eenrijhulptoepassing gebruiken.
Ga voor meer informatie over het gebruikvan de beschikbare toepassingen naar de
webpagina van de ASTEROID Market:www.parrotasteroid.com/
asteroidmarket.
Problemen verhelpen
Voordat u begint
Controleer of het bericht "Tot ziens" ophet scherm van de Parrot ASTEROID Miniverschijnt wanneer u het contact van hetvoertuig uitzet. Raadpleeg het onderdeel"De installatie controleren" voor meerinformatie.
Reset het apparaat. Hiertoe kiest uvoorkeuren > geavanceerde voorkeuren >fabrieksinstel.
Controleer of de laatste updategeïnstalleerd is op de Parrot ASTEROIDMini. Selecteer daartoe Instellingen >Informatie > Versie. Vergelijk dit

133Dutch
versienummer met het nummer op dehulppagina van de Parrot ASTEROID Miniop onze website www.parrot.com.
Opmerking: U kunt de updates voor uw
Parrot ASTEROID Mini ook downloaden als
het apparaat verbonden is met internet. In
de meldingsbalk wordt aangegeven of er
een update beschikbaar is.
Problemen met de telefoonfunctie
Controleer of uw telefoon compatibel ismet de Parrot ASTEROID Mini. Gadaarvoor naar de compatibiliteitspagina oponze website: www.parrot.com/nl/
compatibility.
Als aangegeven wordt dat uw telefoon
compatibel is en als uw Parrot ASTEROIDMini al van de laatste update voorzien is,maakt u de koppeling tussen de tweeapparaten ongedaan op de ParrotASTEROID Mini en uw telefoon, start ubeide apparaten opnieuw op en brengt ude verbinding tussen de twee apparatenopnieuw tot stand.
Problemen met de muziekfunctie
Reset uw iPod/iPhone voordat u opnieuwverbinding maakt met de ParrotASTEROID Mini. Een iPod / iPhoneresetten doet u als volgt (met dezeprocedure worden geen gegevens gewist):
iPod: druk gelijktijdig op Menu en opde middelste knop tot de iPod
opnieuw opstart.
iPhone/iPod touch: druk tegelijkertijdop de knop On/Off en op de knopHome tot de iPhone opnieuw opstart.Raak het scherm niet aan, wanneerhet bericht "Zet uit" verschijnt.
Sommige problemen kunnen zichvoordoen als het randapparaat al met deParrot ASTEROID Mini is verbondenwanneer u het aanzet. Probeer hetnogmaals door pas verbinding te makennadat u het apparaat heeft aangezet.
Voor meer informatie
Zie de hulppagina van de ParrotASTEROID Mini op onze website

134 Dutch
www.parrot.com. Algemene informatieGarantieOnverminderd de wettelijke garantie,geeft PARROT voor dit product eencontractuele garantie van 12 maanden opmateriaal- en productiefouten (metuitzondering van slijtdelen, waarvoor eengarantie van 6 maanden geldt). De garantiegaat in op de aankoopdatum en kan wordenopgeëist door het aankoopbewijs (datum,aankoopplaats, serienummer van hetproduct) te tonen aan de verkoper of aanParrot. Tijdens de contractuelegarantieperiode wordt het defecteproduct in de oorspronkelijk verpakkingteruggestuurd naar de klantenservice van
de verkoper. Na inspectie van het productgaat Parrot naar eigen keuze over totvervanging of uitgifte van een tegoedbon,met uitsluiting van elke andereschadeloosstelling.
Wijzigingen
De uitleg en de specificaties in dezegebruikershandleiding worden uitsluitendgegeven ter informatie en kunnen zondervoorafgaande kennisgeving wordengewijzigd. Deze informatie was correct bijhet ter perse gaan en de grootste zorgwerd gewijd aan de samenstelling ervan,om u zo nauwkeurig mogelijke informatiete verschaffen.

135Dutch
Parrot S.A. kan echter niet direct ofindirect verantwoordelijk wordengehouden voor eventuele schade oftoevallig verlies van gegevensvoortvloeiend uit een fout of weglating indit document. Parrot S.A. behoudt zich hetrecht voor het product of degebruikershandleiding te wijzigen ofverbeteren zonder enige beperking enzonder verplichting om de gebruikerdaarover te informeren. In het kader vande aandacht die Parrot S.A. schenkt aan deverbetering van onze producten, kan hetproduct dat u hebt gekocht enigszinsverschillen van het in dit documentbeschreven product. In dat geval kunt umisschien een nieuwe versie van de
elektronische gebruikershandleidingvinden op de website www.parrot.com.
Hoe dit product te recycleren - afvoer vanelektrische en elektronische producten
Het symbool op het product of dedocumentatie geeft aan dat het productaan het einde van de levensduur nietweggegooid mag worden met het gewonehuisvuil. Ongecontroleerde afvoer vanafval kan het milieu of de gezondheidschaden. Scheid dit afval daarom vanandere afvalsoorten en recycleer het opverantwoorde wijze. Zo draagt u bij totduurzaam hergebruik van grondstoffen.Particulieren worden verzocht contact op
te nemen met de verkoper die hen hetproduct verkocht heeft of bij de gemeenteinlichtingen in te winnen over hoe en waarze dit product zo kunnen afvoeren dat hetop milieuvriendelijke wijze kan wordenhergebruikt. Bedrijven worden verzochtcontact op te nemen met hun leveranciersen de voorwaarden in het verkoopcontractte raadplegen. Het product mag nietsamen met ander commercieel afvalworden weggegooid.
Gedeponeerde handelsmerken
Parrot en de logo's van Parrot zijngeregistreerde merken van PARROT SA inFrankrijk en andere landen.

136 Dutch
De naam en het logo van Bluetooth zijngedeponeerde handelsmerken vanBluetooth ® SIG, Inc. en elk gebruik hiervandoor Parrot S.A. gebeurt onder licentie.
Het logo “Made for iPod / iPhone”betekent dat een elektronisch accessoirespecifiek voor iPod / iPhone, is ontwikkelden dat zijn ontwikkelaar voldoet aan deprestatienormen van Apple. Apple is nietverantwoordelijk voor het functionerenvan dit systeem of de conformiteit ervanmet de veiligheidsnormen.
iPod en iPhone zijn gedeponeerdehandelsmerken van Apple, Inc. in deVerenigde Staten en andere landen.
Gracenote®, het Gracenote-logo en -logotype en het logo "Powered by
Gracenote" zijn handelsmerken ofgedeponeerde handelsmerken vanGracenote in de Verenigde Staten en/ofandere landen.
Alle andere in dit document genoemdehandelsmerken en gedeponeerdehandelsmerken zijn eigendom van hunrespectieve eigenaren en wordenbeschermd door auteursrecht.
Copyrights
Identification N. 394 149 496 R.C.S. PARIS
Parrot S.A.
Copyright © 2012 Parrot.

137Português
Manual doutilizador
Ìndice
Antes de começarInstalaçãoPrimeira utilizaçãoTelefoneMúsicaInternetNo caso de problemasInformação geral
p.137p.138p.144p.146p.147p.149p.152p.153
Antes de começar
Acerca deste guia
De modo a limitar o nosso consumo depapel, e no ambito do nosso procedimentotambem responsavel e respeitando aomaximo o ambiente, a Parrot privilegia acolocacao online dos documentos para osutilizadores, em vez de os imprimir. Esteguia simplificado do Parrot ASTEROIDMini limita-se a fornecer-lhe as principaisinstrucoes, que lhe irao permitir utilizarfacilmente este aparelho. Encontrara maisinformacoes na seccao Suporte do nossowebsite www.parrot.com: Manualcompleto, perguntas frequentes, softwaredidactico…

138 Português
Nota: Para uma melhor legibilidade, iPod®
e iPhone® serão designados pelo termo
"iPhone" neste manual.
Avisos
As funções que necessitam de umaatenção prolongada devem ser utilizadasapenas quando o veículo está parado. Asua segurança e a dos outros condutoresestá acima das chamadas telefónicas,música ou aplicações de ajuda à condução.Seja responsável: Conduza com prudênciae preste atenção ao que o rodeia. A Parrotrecusa qualquer responsabilidade casoescolha ignorar esta advertência.
Utilize o Parrot ASTEROID Mini com umnível de volume razoável, de modo a poder
ouvir a qualquer momento os ruídosexteriores durante a condução.
Actualizações
Descarregue gratuitamente a últimaactualização do seu produto no nossowebsite www.parrot.com na secçãoSuporte. Estas actualizações irão permitir-lhe beneficiar de novas funcionalidades emelhorar a compatibilidade do seuproduto.
Instalação
Nota: Recomendamos que contacte um
profissional para proceder a esta
instalação, em especial na nossa rede de
instaladores certificados.
Antes de começar
A instalação do Parrot ASTEROID Miniconsiste em inseri-lo entre o auto-rádio eo veículo.
Nota: Os cabos fornecidos com o Parrot
ASTEROID Mini vêm equipados com
conectores ISO. Se o seu auto-rádio não vier
equipado com conectores ISO, deve
adquirir um cabo adaptador ISO para
permitir a montagem. Consulte a secção de

139Português
Compatibilidade dos veículos na página de
suporte do Parrot ASTEROID Mini para
verificar se é necessário um cabo
adaptador.
Comece por retirar o auto-rádio de origemdo seu veículo. Esta operação podenecessitar de chaves de extracção.
Consulte o esquema eléctrico do seuauto-rádio.
Antes de fixar os diferentes elementos doParrot ASTEROID Mini no habitáculo,conecte os diferentes cabos na caixaelectrónica. Antes de fixar duravelmenteos componentes, controle oscomprimentos dos cabos e certifique-sede que os locais destes são escolhidos de
modo a que os comprimentos de cabo sãosuficientes para ligar as peças amovíveisumas às outras. Certifique-se de que oscabos do Parrot ASTEROID Mini não ficamdobrados ou torcidos após a instalação.
Utilize obrigatoriamente o cabo ISO
fornecido com o Parrot ASTEROID Mini.
As indicações "Conexão #" nas próximassecções correspondem às conexõesrepresentadas nas imagens p.6 / 7.
Conectar o cabo de áudio
Ligue os feixes de áudio do veículo aosconectores do Parrot ASTEROID Mini(Conexões 1A e 2).
Se o seu veículo vier equipado com umsistema de áudio com amplificador, utilizeas saídas Jack Line Out Front e Line OutRear na caixa electrónica, para evitarqualquer problema de saturação (estalidonos altifalantes, sopro permanente, etc.).Ligue estas saídas Line Out ao seu sistemade áudio, utilizando um ou dois cabos jackpara ligar o Parrot ASTEROID Mini ao seusistema de áudio (Conexão 1B na imagemp.7).
Ligar o cabo da alimentação
1. Desligue a bateria antes de instalar ocabo da alimentação.
2. Ligue o conector ISO macho do ParrotASTEROID Mini ao auto-rádio

140 Português
(conexão 3).
3. Ligue os feixes de alimentação doveículo ao conector ISO fêmea do ParrotASTEROID Mini (conexão 4).
O fio vermelho do cabo deve corresponderao de +12V permanente, o fio cor-de-laranja ao de +12V pós-contacto e o fiopreto ao de terra. Certifique-se de que oseu fio cor-de-laranja não está ligado ao de12V permanente, pois arriscar-se-ia adescarregar a bateria do veículo.
Nota: De modo a proceder à verificação da
instalação, ligue primeiro o ecrã sem o
colocar no painel de bordo. Consulte a
secção "Verificar instalação" para obter
mais informações.
Em determinados veículos, não existe fiode +12V pós-ignição nos conectores doveículo. Depois, é necessário ligar o fio daalimentação cor-de-laranja na caixa dosfusíveis ou noutra fonte de alimentaçãoapós o contacto.
Conectar o cabo Mute
A função Mute permite interromper o somdo seu auto-rádio para dar lugar ao som doParrot ASTEROID Mini (música,comunicações, etc.). A escolha da entradaMute (Mute in 1, mute in 2 ou mute in 3)depende da configuração do seu auto-rádio. Identifique a entrada Mute, depoisconecte-a ao fio amarelo livre no cabo ISO(conexão 5).
Instalar a caixa electrónica
Evite instalar a caixa perto do aquecimentoou ar condicionado, ou num local expostoao sol.
Certifique-se de que a caixa permaneceimóvel após a instalação. Deixe espaço emtorno do radiador do produto para facilitara evacuação do calor.
Quando a caixa estiver instalada, não forcedurante a colocação do auto-rádio. Se oespaço atrás do auto-rádio forinsuficiente, tente, por exemplo, adesmontagem do porta-luvas.

141Português
Verificar a instalação
Ligue e depois corte o contacto do seuautomóvel quando tiver o ParrotASTEROID Mini instalado: A mensagem"Adeus" deve aparecer no ecrã.
Se não for o caso, deverá inverter asposições dos fios vermelho e cor-de-laranja. Na verdade, o fio vermelho docabo da alimentação deverá ser ligado a 12Vpermanente, o fio cor-de-laranja a 12Vpós-contacto e o fio preto à terra. Estaoperação é efectuada simplesmenteinvertendo os dois terminais que seencontram nos cabos da Parrot (conexão7).
Instalação do duplo microfone
Recomendamos que faça deslizar o cabopela ranhura atrás da junta da porta.
Se o cabo passar por cima dos pedais,certifique-se de que fica bem fixado.
Aviso: Não passe o cabo do microfone pelos
sistemas de aquecimento, ventilação ou ar
condicionado, ou à frente dos airbags
laterais.
Certifique-se de que o microfone ficainstalado o mais próximo possível dacabeça do utilizador. A distância ideal é de60 cm. Instale, de preferência, omicrofone perto do retrovisor interior.
Oriente o microfone para a boca do
utilizador.
Instalação do dongle GPS
Fixe o dongle GPS sobre uma superfícieplana, numa zona sem obstáculos nointerior do habitáculo.
Os pára-brisas atérmicos e os vidros comantena incrustada podem interferir com arecepção do GPS e reduzir a fiabilidade dasinformações ligadas às aplicações denavegação.
A antena GPS do dongle estáno lado onde está indicado"Parrot ASTEROID GPS" eonde se encontra o logótipo emforma de estrela. Este logótipo

142 Português
deve ser sempre orientadopara cima.
Se o seu veículo possuir um pára-brisasatérmico, fixe o dongle GPS no pára-brisasao nível da zona não atérmica. O lado ondeestá o logótipo em forma de estrela deveestar colado no pára-brisas (esquema Bpág.9).
Nota: A zona não atérmica do pára-brisas
depende do modelo do seu veículo. Ela
encontra-se habitualmente ao nível do
retrovisor.
Se o seu veículo não possuir um pára-brisas atérmico, fixe o dongle GPS nopainel de instrumentos. O lado onde está
o logótipo em forma de estrela deve estarvisível (esquema A pàg.8).
Para assegurar uma boa fixação do suporte:
Limpe a superfície de montagemantes de colar o suporte;
Após a fixação do suporte, esperecerca de 2 horas sem o manusear.
Instalação do cabo USB
Conecte os cabos do iPod® e USB ao ParrotASTEROID Mini. Recomendamos queconecte todos os cabos do ParrotASTEROID Mini, mesmo que ache quenão os vai utilizar. Faça os conectorescorrespondentes saírem pelocompartimento para moedas ou porta-
luvas. Para isso, poderá ser necessáriofazer um buraco no interior do seu painelde bordo. Na medida do possível, evite autilização de extensões USB.
O cabo para iPod deve obrigatoriamenteser ligado à porta USB branca prevista paraeste efeito. Encontrará a indicação iPod naparte superior desta.
De modo a garantir uma qualidade derecepção óptima, não conecte a sua pen 3Gdirectamente no Parrot ASTEROID Mini:Utilize um cabo USB, de modo a instalar oacessório no painel de bordo (ou outrazona afastada).

143Português
Instalar o ecrã
Aviso: Evite qualquer instalação que possa
impedir a utilização de comandos
importantes ou que possa reduzir a
visibilidade do condutor. Não instale o ecrã
onde possa ser atirado devido à activação
de um airbag ou perto de uma saída de
ventilação ou de ar condicionado do
veículo.
Cole o suporte de plástico no seu painel deinstrumentos (esquema C pág.10).
Para assegurar uma boa fixação do suporte:
Limpe a superfície de montagemantes de colar o suporte;
Após a fixação do suporte, espere
cerca de 2 horas sem o manusear.
De modo a evitar riscos de roubo e deexposição prolongada ao sol, retire o ecrãquando sair do veículo.
Instalar o telecomando
Cole o suporte do telecomando no seupainel de instrumentos utilizando oadesivo na parte inferior deste.
Para assegurar uma boa fixação do suporte:
Limpe a superfície de montagemantes de colar o suporte;
Após a fixação do suporte, esperecerca de 2 horas sem o manusear.
O telecomando pode ser alimentado de 2
modos: com uma pilha ou ligando à caixaelectrónica.
Para alimentar o telecomando com pilha(esquema D pág.11) :
1. Retire a tampa de plástico circular naparte traseira do telecomando,girando-a no sentido dos ponteiros dorelógio.
2. Insira uma pilha do tipo 3V CR2032 nolocal previsto para este efeito.Certifique-se de que a pilha écolocada correctamente.
3. Volte a colocar a tampa de plásticocircular, girando-a no sentido inversoao dos ponteiros do relógio.
Para ligar o telecomando à caixa
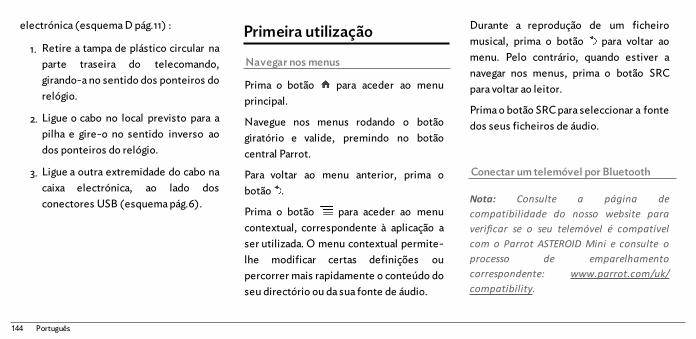
144 Português
electrónica (esquema D pág.11) :
1. Retire a tampa de plástico circular naparte traseira do telecomando,girando-a no sentido dos ponteiros dorelógio.
2. Ligue o cabo no local previsto para apilha e gire-o no sentido inverso aodos ponteiros do relógio.
3. Ligue a outra extremidade do cabo nacaixa electrónica, ao lado dosconectores USB (esquema pág.6).
Primeira utilização
Navegar nos menus
Prima o botão para aceder ao menuprincipal.
Navegue nos menus rodando o botãogiratório e valide, premindo no botãocentral Parrot.
Para voltar ao menu anterior, prima obotão .
Prima o botão para aceder ao menucontextual, correspondente à aplicação aser utilizada. O menu contextual permite-lhe modificar certas definições oupercorrer mais rapidamente o conteúdo doseu directório ou da sua fonte de áudio.
Durante a reprodução de um ficheiromusical, prima o botão para voltar aomenu. Pelo contrário, quando estiver anavegar nos menus, prima o botão SRCpara voltar ao leitor.
Prima o botão SRC para seleccionar a fontedos seus ficheiros de áudio.
Conectar um telemóvel por Bluetooth
Nota: Consulte a página de
compatibilidade do nosso website para
verificar se o seu telemóvel é compatível
com o Parrot ASTEROID Mini e consulte o
processo de emparelhamento
correspondente: www.parrot.com/uk/
compatibility.

145Português
Se for a 1ª vez que utiliza um telemóvelcom o Parrot ASTEROID Mini, deveprimeiro emparelhar os dois aparelhos.Quando o telemóvel estiver emparelhadoao Parrot ASTEROID Mini, a conexãoentre os 2 aparelhos será automáticaquando os 2 aparelhos forem ligados pertoum do outro com a função B luetooth®activada.
1. A partir do seu telemóvel, inicie umaprocura de dispositivos B luetooth®Depois seleccione "Parrot ASTEROIDMini".
2. O processo de emparelhamentodepende então do modelo do seutelemóvel:
Se o telemóvel o convidar ainserir o código PIN B luetooth,insira "0000".
Se o Parrot ASTEROID Mini e oseu telemóvel apresentarem doiscódigos, verifique se os códigossão idênticos e depois confirmeou anule.> O ecrã do Parrot ASTEROIDMini apresenta"Emparelhamento efectuado comsucesso".
Nota: Nalguns telemóveis, deverá autorizar
a conexão ao Parrot ASTEROID Mini para
permitir a conexão automática. Consulte o
manual de utilizador do seu telemóvel para
mais informações.
Sincronizar o directório do telemóvel
Com a maioria dos telemóveis B luetooth, odirectório é sincronizadoautomaticamente com a memória dosistema. Sempre que modificar o seudirectório, a sincronização é reiniciadaautomaticamente na conexão seguinte.
Aviso: Apenas os contactos gravados na
memória do telemóvel são sincronizados.
Se os seus contactos estiverem guardados
na memória do cartão SIM, transfira-os
para a memória do telemóvel. Consulte o
manual de utilizador do seu telemóvel para
mais informações.

146 Português
Nota: Nalguns telemóveis, deverá autorizar
o acesso do Parrot ASTEROID Mini aos seus
contactos para permitir a sincronização.
Consulte o manual de utilizador do seu
telemóvel para mais informações.
A sincronização automática está limitada a5000 contactos (ou números detelemóvel) por telemóvel emparelhado.
Telefone
Receber uma chamada
Quando receber uma chamada, ouvirá umtoque. O nome do contacto é anunciado seo número deste contacto fizer parte dodirectório do telemóvel ligado ao ParrotASTEROID Mini.
Para aceitar esta chamada, prima obotão . A seguir, prima o botão para terminar a chamada.
Para recusar esta chamada, prima obotão .
Fazer uma chamada por reco vocal
Pode iniciar uma chamada porreconhecimento vocal directamente apósa sincronização do directório do seutelemóvel. O Parrot ASTEROID Mini iráreconhecer automaticamente o contactodo seu directório que deseja contactar.
1. Prima o botão para iniciar oprocesso de reconhecimento vocal.> O Parrot ASTEROID Mini pede-lheo nome do contacto que desejacontactar.
2. Pronuncie o nome do contacto,seguido do tipo de número("TRABALHO", "TELEMÓVEL"...) seeste contacto tiver vários números.

147Português
> A chamada para este contacto éiniciada automaticamente, caso ocomando de voz seja compreendidocorrectamente.> Caso contrário, o kit mãos-livresemite uma mensagem deconfirmação. Confirme, pronunciado"SIM", "CHAMAR" ou"TELEFONAR".
Nota: A qualquer momento, prima o botão
para cancelar o processo de chamada.
Música
Utilizar o reconhecimento vocal musical
A função de reconhecimento vocal musicalpermite-lhe seleccionar através doreconhecimento vocal os artistas ouálbuns que desejar escutar. Esta funçãoestá disponível se utilizar o ParrotASTEROID Mini com um periférico dotipo iPod / USB / SD, ou se utilizar umaaplicação musical compatível com estafunção.
1. Prima o botão .
2. Diga o nome do artista ou do álbumque deseja escutar quando ParrotASTEROID Mini lho pedir.
> A lista das fontes de áudioconectadas ao Parrot ASTEROID Minie das aplicações musicais compatíveiscom a função de reconhecimentovocal com o artista/álbum queescolheu aparece.
Nota: Verifique os nomes dos artistas e
álbuns nas tags (metadados) dos seus
ficheiros musicais. Estes podem ser
diferentes dos apresentados no título da
sua faixa.
iPod
1. Conecte o seu iPod ao cabo do iPod.
2. Prima o botão SRC e seleccione iPod.
3. Prima a faixa para iniciar a sua
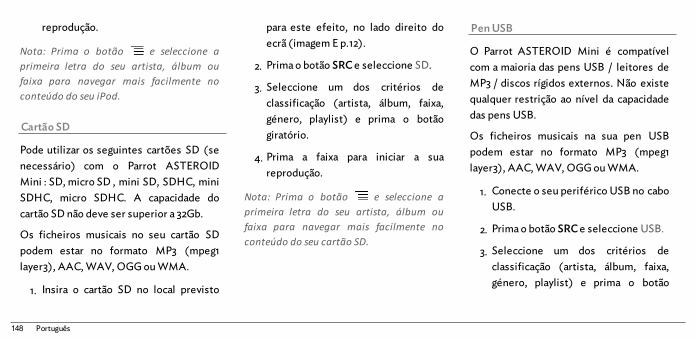
148 Português
reprodução.
Nota: Prima o botão e seleccione a
primeira letra do seu artista, álbum ou
faixa para navegar mais facilmente no
conteúdo do seu iPod.
Cartão SD
Pode utilizar os seguintes cartões SD (senecessário) com o Parrot ASTEROIDMini : SD, micro SD , mini SD, SDHC, miniSDHC, micro SDHC. A capacidade docartão SD não deve ser superior a 32Gb.
Os ficheiros musicais no seu cartão SDpodem estar no formato MP3 (mpeg1layer3), AAC, WAV, OGG ou WMA.
1. Insira o cartão SD no local previsto
para este efeito, no lado direito doecrã (imagem E p.12).
2. Prima o botão SRC e seleccione SD.
3. Seleccione um dos critérios declassificação (artista, álbum, faixa,género, playlist) e prima o botãogiratório.
4. Prima a faixa para iniciar a suareprodução.
Nota: Prima o botão e seleccione a
primeira letra do seu artista, álbum ou
faixa para navegar mais facilmente no
conteúdo do seu cartão SD.
Pen USB
O Parrot ASTEROID Mini é compatívelcom a maioria das pens USB / leitores deMP3 / discos rígidos externos. Não existequalquer restrição ao nível da capacidadedas pens USB.
Os ficheiros musicais na sua pen USBpodem estar no formato MP3 (mpeg1layer3), AAC, WAV, OGG ou WMA.
1. Conecte o seu periférico USB no caboUSB.
2. Prima o botão SRC e seleccione USB.
3. Seleccione um dos critérios declassificação (artista, álbum, faixa,género, playlist) e prima o botão

149Português
giratório.
4. Prima a faixa para iniciar a suareprodução.
Nota: Prima o botão e seleccione a
primeira letra do seu artista, álbum ou
faixa para navegar mais facilmente no
conteúdo do seu dispositivo USB.
Utilizar com um leitor de áudio Bluetooth
Nota: O Parrot ASTEROID Mini permite-lhe
utilizar a função de telefonia e streaming de
áudio através de Bluetooth com 2
telemóveis diferentes, sem que tenha de
desconectar um dos 2 aparelhos.
Pode utilizar o Parrot ASTEROID Mini paraouvir ficheiros de música armazenados
num leitor de áudio Bluetooth, se estesuportar o perfil A2DP (Advanced AudioDistribution Profile).
Se utilizar o leitor de áudio pela 1ª vez,deve primeiro emparelhá-lo ao ParrotASTEROID Mini. Se o leitor de áudio jáestiver emparelhado ao Parrot ASTEROIDMini :
1. Prima o botão SRC e seleccione AudioBluetooth.
2. Inicie a reprodução de uma faixa noseu leitor de áudio.
Internet
Conexão com uma pen 3G
Nota: Consulte a secção de
compatibilidade do Parrot ASTEROID Mini
no nosso website para conhecer a lista de
pens 3G/4G compatíveis com o Parrot
ASTEROID Mini.
1. Ligue uma pen 3G ao ParrotASTEROID Mini através de um caboUSB.> Abre-se uma janela pop-up.
2. Seleccione OK para activar a conexão3G.> Aparece uma janela pop-up doestado da conexão 3G, seguida de

150 Português
outra janela pop-up a pedir-lhe o seucódigo PIN.
3. Insira o seu código PIN utilizando obotão giratório e seleccione OK.Escolha a opção Memorizar o códigoPIN se preferir que o código PIN nãolhe seja pedido em cada ligação doParrot ASTEROID Mini.
Nota: A seguir, poderá modificar esta
definição seleccionando Pa râ m etros > R ede> Pen 3G.
4. Seleccione o seu APN (Access PointName) na lista proposta. Estainformação está disponível nadocumentação fornecida com a suapen 3G. Se o seu APN não aparecer na
lista, pode adicioná-la, seleccionandoParâmetros > Rede > Pen 3G >Configuração > Novo ponto deacesso.> Aparece a mensagem "Pen 3Gconfigurada".
5. Espere cerca de 30 segundos até quea conexão seja estabelecida. Tambémpode premir o botão e navegar nosmenus enquanto a conexão éestabelecida.
Partilha da conexão 3G por Bluetooth
Se tiver um telemóvel que suporte o perfilB luetooth DUN (Dial-Up Networking) ouPAN (Personal Area Network), a conexãoatravés de B luetooth do seu telemóvel ao
Parrot ASTEROID Mini permite-lhepartilhar a conexão 3G do telemóvel.
Nota: Consulte a página da
compatibilidade no nosso website para
verificar se o seu telemóvel permite
partilhar a conexão 3G por Bluetooth e
consultar o respectivo procedimento:
www.parrot.com/uk/compatibility.
1. Conecte o seu telemóvel ao ParrotASTEROID Mini via Bluetooth.
2. No Parrot ASTEROID Mini,seleccione Parâmetros > Rede >Bluetooth > Configuração.
3. Seleccione o seu APN (Access PointName) na lista proposta, depoisescolha a opção Seleccionar.

151Português
4. Prima o botão e seleccioneConectar.
5. Autorize a partilha de conexão no seutelemóvel. Este procedimento difere,de acordo com o modelo do seutelemóvel.
Partilha da conexão 3G por USB
Nota: Consulte a página da
compatibilidade no nosso website para
verificar se o seu telemóvel permite
partilhar a conexão 3G por USB e consultar
o respectivo procedimento:
www.parrot.com/fr/compatibility.
1. Certifique-se de que o teclado do seutelemóvel está desbloqueado.
2. Conecte o seu telemóvel ao ParrotASTEROID Mini utilizando o caboUSB/micro USB fornecido com o seutelemóvel. Também pode conectá-loutilizando a extensão USB fornecidacom o Parrot ASTEROID Mini. Estaconexão permite também recarregar abateria do seu telemóvel.
3. Seleccione o seu APN (Access PointName) na lista proposta, depoisescolha a opção Seleccionar. A seguir,poderá modificar esta definiçãoseleccionando Parâmetros > Rede >USB.> Aparece uma janela pop-up a indicara activação da partilha de conexãoUSB.
ASTEROID Market : Utilizar as aplicações
Pode utilizar vários tipos de aplicaçõescom o ASTEROID Market : Música,geolocalização, ajuda à condução. Asaplicações disponíveis são diferentes deacordo com o país de utilização.
Algumas aplicações podem necessitar deuma subscrição.
O Parrot ASTEROID Mini é multi-tarefas:Várias aplicações podem ser utilizadas emsimultâneo. Por exemplo, pode escutaruma Webradio e utilizar uma aplicação deajuda à condução em simultâneo.
Para obter mais informações acerca dautilização das aplicações disponíveis,consulte a página web do ASTEROID

152 Português
Market: www.parrotasteroid.com/
asteroidmarket.No caso de problemas
Antes de começar
Certifique-se de que a mensagem "Adeus"aparece no ecrã do Parrot ASTEROID Miniquando cortar o contacto do veículo.Consulte a secção "Verificar instalação"para obter mais informações.
Reinicie o aparelho. Para isso, seleccionePreferências > preferências avançadas >predefinições.
Verifique se tem a última actualização noParrot ASTEROID Mini. Para isso,seleccione Parâmetros > Acerca > Versão.Compare este número da versão comaquele indicado na página de suporte do
Parrot ASTEROID Mini no nosso websitewww.parrot.com.
Nota: Também pode descarregar as
actualizações do seu Parrot ASTEROID Mini
quando este estiver ligado à Internet. A
disponibilidade de uma actualização é-lhe
indicada na barra de notificação.
Problemas ligados à função de telefonia
Verifique a compatibilidade do seutelemóvel com o Parrot ASTEROID Mini.Para isso, consulte a página dacompatibilidade no nosso website:www.parrot.com/uk/compatibility.
Se o seu telemóvel for indicado comocompatível, e se o seu Parrot ASTEROID

153Português
Mini já tiver a última actualização, elimineo emparelhamento entre os 2 aparelhos noParrot ASTEROID Mini e no seutelemóvel, reinicie os 2 aparelhos e depoisvolte a estabelecer a conexão entre os 2aparelhos.
Problemas ligados à função da música
Reinicie o seu iPod / iPhone antes devoltar a fazer a ligação ao ParrotASTEROID Mini. Para reiniciar um iPod /iPhone (este procedimento não apagaráquaisquer dados):
iPod: Prima em simultâneo Menu e obotão central até que o iPod sejareiniciado.
iPhone / iPod touch: Prima emsimultâneo o botão On/Off e o botãoHome até que o iPhone sejareiniciado. Não toque no ecrã quandoa mensagem "Faça deslizar paradesligar" aparecer.
Podem aparecer alguns problemas se operiférico já estiver conectado ao ParrotASTEROID Mini quando efectuar ocontacto. Volte a tentar, conectando odispositivo após ter efectuado o contacto.
Para obter mais informações
Consulte a página de suporte do ParrotASTEROID Mini no nosso websitewww.parrot.com.
Informação geralGarantiaSem prejuízo da garantia legal, a PARROTgarante contratualmente, por um períodode 12 meses a partir da data de comprainicial efectuada pelo consumidor(excepto peças de desgaste garantidas 6meses), que o produto está isento dedefeitos no que respeita aos materiais e aofabrico, mediante apresentação docomprovativo de compra (data, local decompra, nº de série do produto) aorevendedor ou à Parrot. Durante a vigênciada garantia contratual, o produtodefeituoso deverá ser devolvido na suaembalagem de origem ao serviço pós-
154 Português
venda do revendedor. Após inspecção doproduto, a Parrot procederá, à sua escolha,à substituição ou emissão de um haver,excluindo qualquer outro dano.
ModificaçõesAs explicações e especificações contidasneste manual do utilizador apenas sãofornecidas a título informativo e podemser modificadas sem aviso prévio. Estasinformações estão correctas aquando daimpressão e foi prestada a maior atençãoaquando da sua redacção para lhe fornecerinformações com a maior precisãopossível.
No entanto, a Parrot S.A. não irá assumirqualquer responsabilidade, directa ou
indirecta, por prejuízos ou perdas dedados acidentais resultantes de um erroou omissão no presente documento. AParrot S.A. reserva-se o direito de alterarou melhorar o produto, bem como orespectivo manual do utilizador, semqualquer restrição ou obrigação de avisar outilizador. No âmbito da atenção prestadapela Parrot S.A. para melhorar os nossosprodutos, é possível que o produto queadquiriu seja ligeiramente diferente dodescrito no presente documento. Nestecaso, poderá eventualmente encontraruma nova versão do manual do utilizadorem formato electrónico no websitewww.parrot.com.
Como reciclar este produto – Resíduos deequipamentos eléctricos e electrónicos
O símbolo no produto ou respectivadocumentação indica que não deve sereliminado, no termo da sua vida útil, comos outros resíduos domésticos. Tendoconta que a eliminação incontrolada dosresíduos pode prejudicar o ambiente ou asaúde humana, por favor, separe-o dosoutros tipos de resíduos e recicle-o deforma responsável. Dessa forma, iráfavorecer a reutilização sustentável dosrecursos materiais. Pede-se aosparticulares que contactem o distribuidorque lhes vendeu o produto ou que seinformem junto da câmara da suaresidência para saberem onde e como

155Português
podem eliminar este produto para que sejareciclado respeitando o ambiente. Pede-se igualmente às empresas que contactemos seus fornecedores e consultem ascondições do respectivo contrato devenda. Este produto não deve sereliminado com os restantes resíduoscomerciais.
Marcas registradas
Parrot, os logótipos Parrot são marcasregistradas da PARROT SA em França enoutros países.
O nome e o logótipo Bluetooth são marcasregistradas da Bluetooth ® SIG, Inc. equalquer utilização destas pela Parrot S.A.
é feita sob licença.
O logótipo “Made for iPod / iPhone”significa que foi desenvolvido umacessório electrónico especificamentepara o iPod / iPhone e que o seu fabricantecertifica que responde às normas dedesempenho Apple. A Apple não seresponsabiliza pelo funcionamento destedispositivo ou pela sua conformidade comas normas de segurança.
iPod e iPhone são marcas da Apple, Inc.registradas nos Estados Unidos e noutrospaíses.
Gracenote®, o logo e logótipo Gracenote, eo logo "Powered by Gracenote" são marcascomerciais registadas ou marcascomerciais da Gracenote nos Estados
Unidos e/ou outros países.
Todas as marcas comerciais e marcasregistradas mencionadas no presentedocumento são protegidas por Direitos deAutor e são propriedade dos seusrespectivos proprietários.
Copyrights
Identification N. 394 149 496 R.C.S. PARIS
Parrot S.A.
Copyright © 2012 Parrot.

156

157

158

Technical supportIf you have any questions regarding your Parrot product, contact our hotline by phone or using our technical contact form available on ourwebsite (support section).
China : [+86] 755 8203 3307Europe : [+33] 1 48 03 60 69 (Spoken languages : French, English and Spanish)France : 01 48 03 60 69Germany : 0900 1727768Hong Kong : [+852] 2736 1169Italy : [+39] 02 59 90 15 97Spain : [+34] 902 404 202UK : [+44] (0)844 472 2360USA : [+1] (877) 9 Parrot (toll free)Our hotline is at your disposal from Monday to Friday. Refer to our website for more information about the service hours.
FCCID:RKXMKi2
