hands-on lab manual - amazon s3 · pdf filehands-on lab manual dell storage hands-on lab...
TRANSCRIPT

Hands-on Lab Manual
Dell Storage Hands-on Lab Instructions
Storage provisioning using the Dell Compellent vSphere Web Plug-in
Estimated Completion Time: 30 Minutes
Introduction
Audience
The audience for this document is technical professionals who wish to learn more about using the Dell Compellent
VMware vSphere Client Plug-in.
Reminder: This is a virtualized lab environment running pre-release builds of all the Storage Center 6.7 firmware and
Enterprise Manager Software, so expect performance to be slower than other labs - please be patient. Some of the
steps you may be asked to perform in the lab will take longer to execute than it would normally take in a typical
production environment. The features and their implementation as shown in the lab are subject to change. No
decision to purchase a product should be made based on this technical preview.
What we will be doing
This lab will take you through “a day in the life” of a VMware administrator using the Dell Compellent vSphere Client
Plug-in.
In this lab you will:
1) Provision Multiple Datastores
2) View Volume Statistics
3) Extend a VMFS Datastore
4) Create an Example Virtual Machine
5) Take a Replay of the datastore
6) Delete the virtual machine and recover it
7) Remove storage from the ESXi host
8) Explore Performance Statistics
Hands-on Lab Manual
Lab instructions
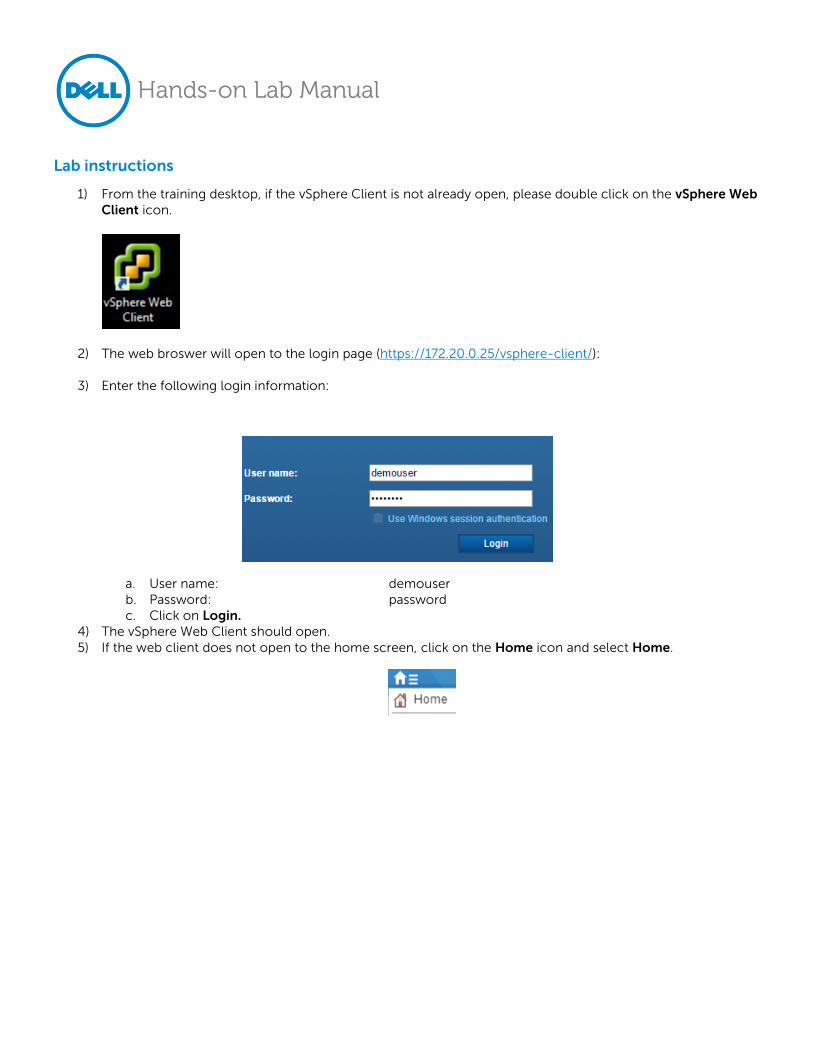
1) From the training desktop, if the vSphere Client is not already open, please double click on the vSphere Web
Client icon.
2) The web broswer will open to the login page (https://172.20.0.25/vsphere-client/):
3) Enter the following login information:
a. User name: demouser
b. Password: password
c. Click on Login.
4) The vSphere Web Client should open.
5) If the web client does not open to the home screen, click on the Home icon and select Home.

Hands-on Lab Manual
6) From the Home pane, scroll down and click on the Dell Storage configuration Icon.
a. Items of interest: (Exploratory section)
i. The Getting Started tab shows the web client plug-in architecture and how all of the pieces
interact to provide functionality and reporting capabilities.
ii. The Summary tab will show basic controller health and details as well as networking
information.
iii. The Monitor tab will show disk pool usage and capacity as well as overall system
performance statistics.
iv. The Manage tab should be predefined with the credentials required to connect and manage
the Storage Center system for this lab.
7) From the Navigator Bar on the left, click Hosts and Clusters.
Provisioning Multiple Datastores
8) If the architecture tree isn’t already expanded, then expand it to reveal the ESXi cluster.
9) Right-click on Lab_Cluster, then select All Dell Storage Actions, then Add Multiple Datastores…
10) The Add Datastores wizard will start.
a. Storage Center:
i. Select the Storage Center 73900
ii. Click on Next.
b. Volume:
i. Volume Name: AppVol
ii. Size: 10 GB iii. Volume Folder: StandardVolumes
iv. Click on Next.
c. Storage Profile:
i. Select Recommended (All Tiers).
ii. Click on Next.
d. Replay Profiles:
i. Select Daily.
ii. Click on Next.
e. Mapping LUN:
i. Select a LUN number: (Pick Default LUN).
ii. Click on Next.
f. Datastore Properties:

Hands-on Lab Manual
i. The Datastore name should be: AppVol
ii. Inventory Location: CML
iii. Click on Next.
g. Multiple Datastore Properties:
i. Number of Datastores: 2 (In the interest of time, please only create 2 datastores)
ii. Start Numbering at: 100
iii. Click Next
h. Summary:
i. Verify the settings.
ii. Click on Finish.
Note: Within the Recent Tasks area at the bottom of the vSphere client window, you can
monitor the progress. Expanding All Users’ Tasks will futher expand the detail of the tasks
being executed to create the datastores. Once the Executing Dell Storage Task status
registers as Completed, you can continue.
Viewing volume statistics
11) Click on the Storage tab icon. a. NOTE: You may need to rescan for newly created datastores by right clicking on the CML datacenter,
selecting Storage, then Rescan Storage.

Hands-on Lab Manual
12) From within the volume listing, select the AppVol100, then Monitor, then Dell Storage.
a. The General view should be displayed. This will show general information about the volume.
b. Select Usage Statistics. This will show the storage usage of the volume as well as data progression
statistics.
Note: The color pink indicates that VMware has written 6.23 MB of storage to the Tier 1 RAID 10 to
initialize the VMFS filesystem. The color blue shows that the system is consuming 12.47 MB including
the RAID 10 overhead.
c. Click on Connectivity Info to display mapping information details between the array and the host.
d. Click on Volume Replays. Since no Replays have been taken of this volume yet, there should be
nothing displayed but the Active Replay space. The “Active Replay” is a term used to describe the
space that has been written to a volume which will be frozen when the next replay is taken. It can
also be thought of as the pages classified as active, writable, and accessible within the volume.
e. Click on Replications/Live Volumes. Since replication has not been configured on this volume there
are no statistics to display.
Hands-on Lab Manual
Expanding a VMFS datastore
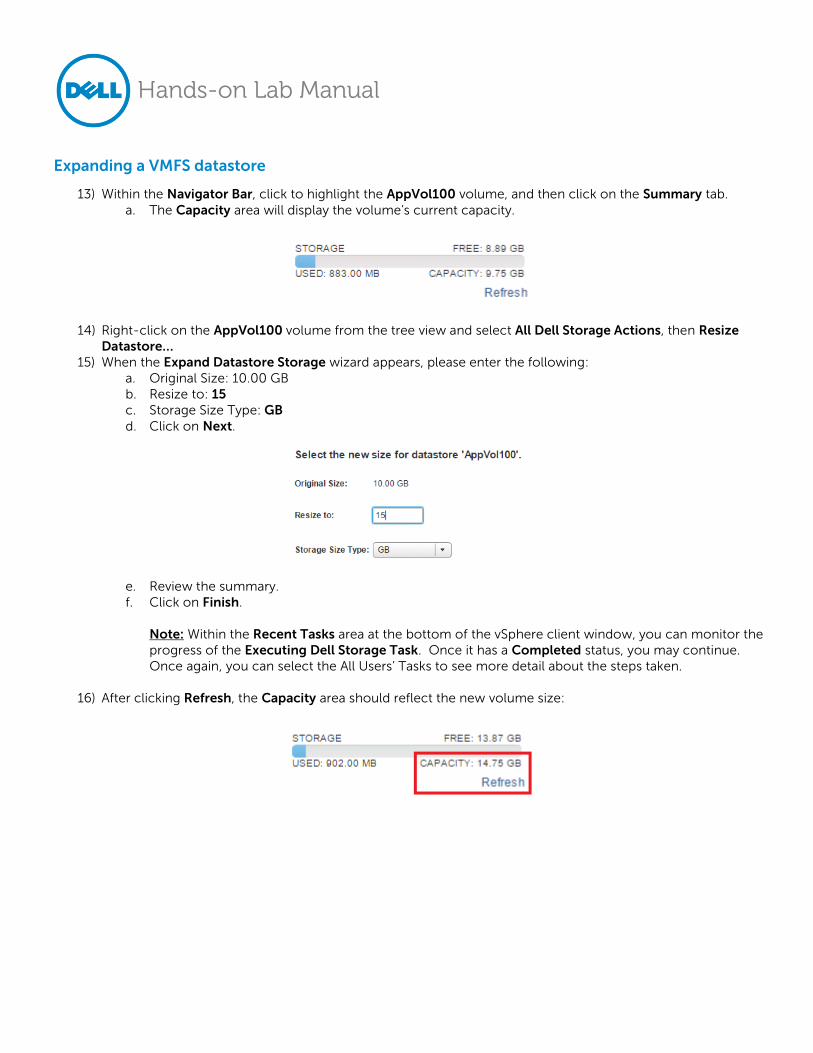
13) Within the Navigator Bar, click to highlight the AppVol100 volume, and then click on the Summary tab.
a. The Capacity area will display the volume’s current capacity.
14) Right-click on the AppVol100 volume from the tree view and select All Dell Storage Actions, then Resize
Datastore…
15) When the Expand Datastore Storage wizard appears, please enter the following:
a. Original Size: 10.00 GB
b. Resize to: 15
c. Storage Size Type: GB
d. Click on Next.
e. Review the summary.
f. Click on Finish.
Note: Within the Recent Tasks area at the bottom of the vSphere client window, you can monitor the
progress of the Executing Dell Storage Task. Once it has a Completed status, you may continue.
Once again, you can select the All Users’ Tasks to see more detail about the steps taken.
16) After clicking Refresh, the Capacity area should reflect the new volume size:

Hands-on Lab Manual
Create example virtual machine
17) Next, you will create a new virtual machine to add some data to your datastore.
a. On the Navigator Bar, click on Hosts and Clusters.
b. Right-click on Lab_Cluster then select New Virtual Machine, then New Virtual Machine.
i. Select a creation type:
1. Select: Create a new virtual machine
2. Click on Next.
ii. Select a name and folder
1. Enter a name for the virtual machine: Test1
2. Click on Next.
iii. Select a compute resource
1. Expand Lab_Cluster, then select esx1
2. Click on Next
iv. Select Storage:
1. Select AppVol100
2. Click on Next
v. Select compatibility:
1. Compatible with: ESXI 6.0 and later
2. Click on Next
vi. Select Guest OS:
1. Guest OS family: Windows
2. Guest OS version: Microsoft Windows Server 2008 R2 (64-bit).
3. Click on Next. vii. Customize hardware:
1. New Hard Disk: 10 GB
2. All remaining settings: (default settings)
3. Click on Next.
viii. Ready to Complete screen:
1. Review the settings.
2. Click on Finish.
Note: Within the Recent Tasks area at the bottom of the vSphere client window, you
can monitor the progress of the Create virtual machine task. Once it has finished,
you may continue.

Hands-on Lab Manual
Create a Replay of the Datastore
18) In the Navigator pane, switch back to the Datastore view. Click to highlight AppVol100.
19) Right click on AppVol100, select All Dell Storage Actions, then Replays, then Create Replay… to start the Create Replay wizard.
a. Replay Properties:
i. Expiration: 1 Day.
ii. Description: Pre-Patches iii. Click on Next.
b. Snapshot Options:
i. Create Temporary VMware Snapshot: (leave this box unchecked).
1. Since the VM is powered off, a consistent snap is not needed.
ii. Click on Next.
c. Ready to Complete:
i. Review the settings.
ii. Click on Finish.
Note: Within the Recent Tasks area at the bottom of the vSphere client window, you can
monitor the progress of the Executing Dell Storage task as the Reply is created. Once it has
finished, you may continue.
Delete the virtual machine
20) Now that you have obtained a good Replay of the virtual machine, you will now delete the Test1 virtual
machine. Click the Hosts and Clusters icon to return to view the virtual machines and hosts.
21) From the tree view on the left-hand side of the screen:
a. Right-click on the virtual machine named Test1
b. Select Delete from Disk.
Hands-on Lab Manual
c. Click on Yes.
Recover the virtual machine from a Replay
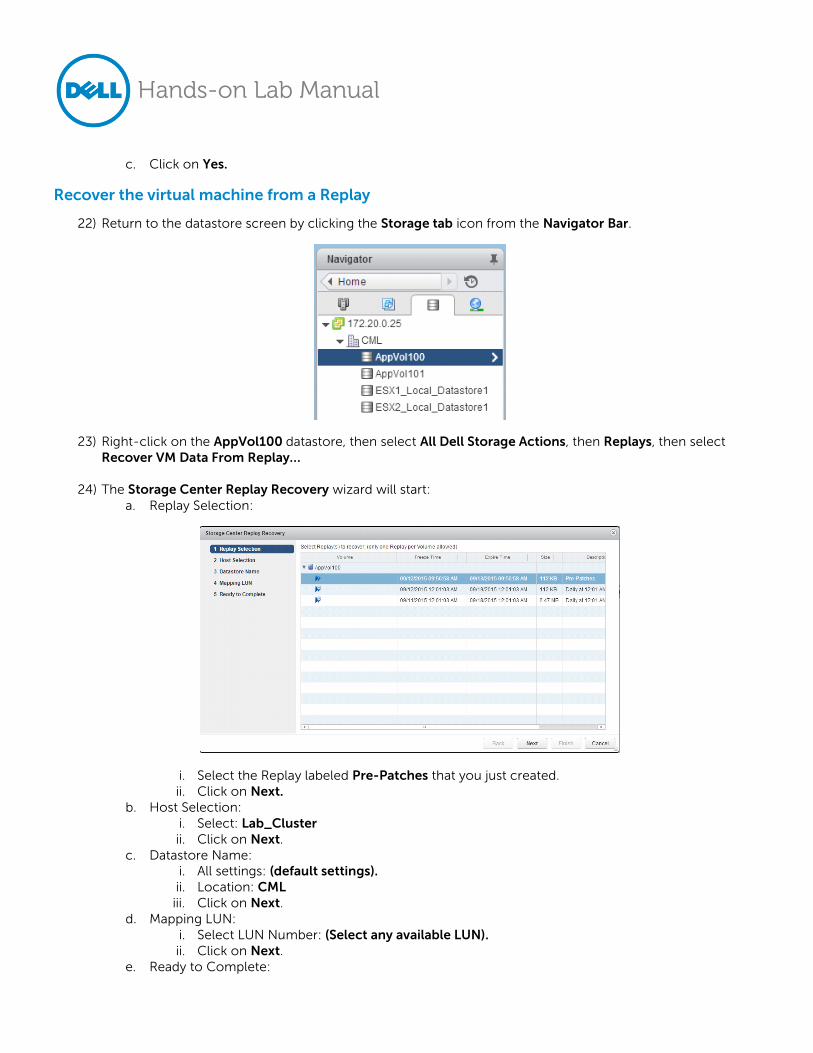
22) Return to the datastore screen by clicking the Storage tab icon from the Navigator Bar.
23) Right-click on the AppVol100 datastore, then select All Dell Storage Actions, then Replays, then select Recover VM Data From Replay…
24) The Storage Center Replay Recovery wizard will start:
a. Replay Selection:
i. Select the Replay labeled Pre-Patches that you just created.
ii. Click on Next.
b. Host Selection:
i. Select: Lab_Cluster
ii. Click on Next.
c. Datastore Name:
i. All settings: (default settings).
ii. Location: CML
iii. Click on Next.
d. Mapping LUN:
i. Select LUN Number: (Select any available LUN).
ii. Click on Next.
e. Ready to Complete:
Hands-on Lab Manual
i. Review the settings.
ii. Click on Finish.
Note: Recovery of the datastore will take several minutes to complete. Within the Recent
Tasks area at the bottom of the vSphere client window, you can monitor the tasks associated
with the recovery. Once the Executing Dell Storage Task registers Completed, you may
continue.
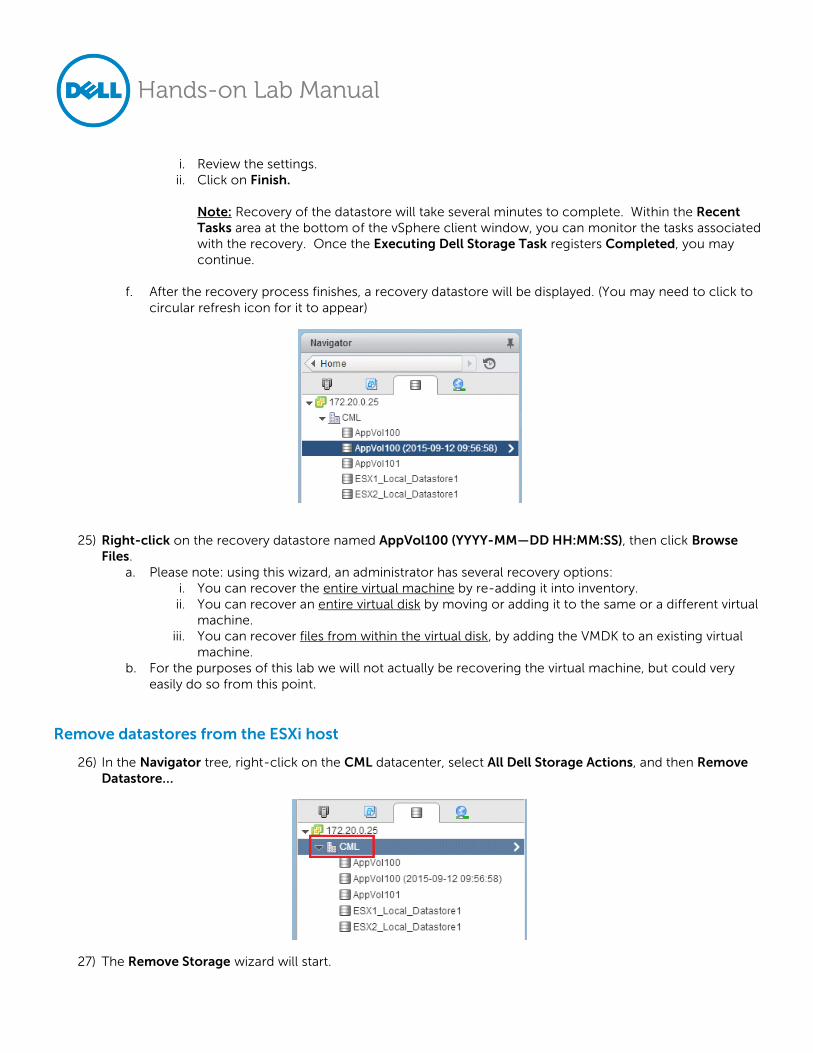
f. After the recovery process finishes, a recovery datastore will be displayed. (You may need to click to
circular refresh icon for it to appear)
25) Right-click on the recovery datastore named AppVol100 (YYYY-MM—DD HH:MM:SS), then click Browse
Files.
a. Please note: using this wizard, an administrator has several recovery options:
i. You can recover the entire virtual machine by re-adding it into inventory.
ii. You can recover an entire virtual disk by moving or adding it to the same or a different virtual
machine.
iii. You can recover files from within the virtual disk, by adding the VMDK to an existing virtual
machine.
b. For the purposes of this lab we will not actually be recovering the virtual machine, but could very
easily do so from this point.
Remove datastores from the ESXi host
26) In the Navigator tree, right-click on the CML datacenter, select All Dell Storage Actions, and then Remove
Datastore…
27) The Remove Storage wizard will start.
Hands-on Lab Manual
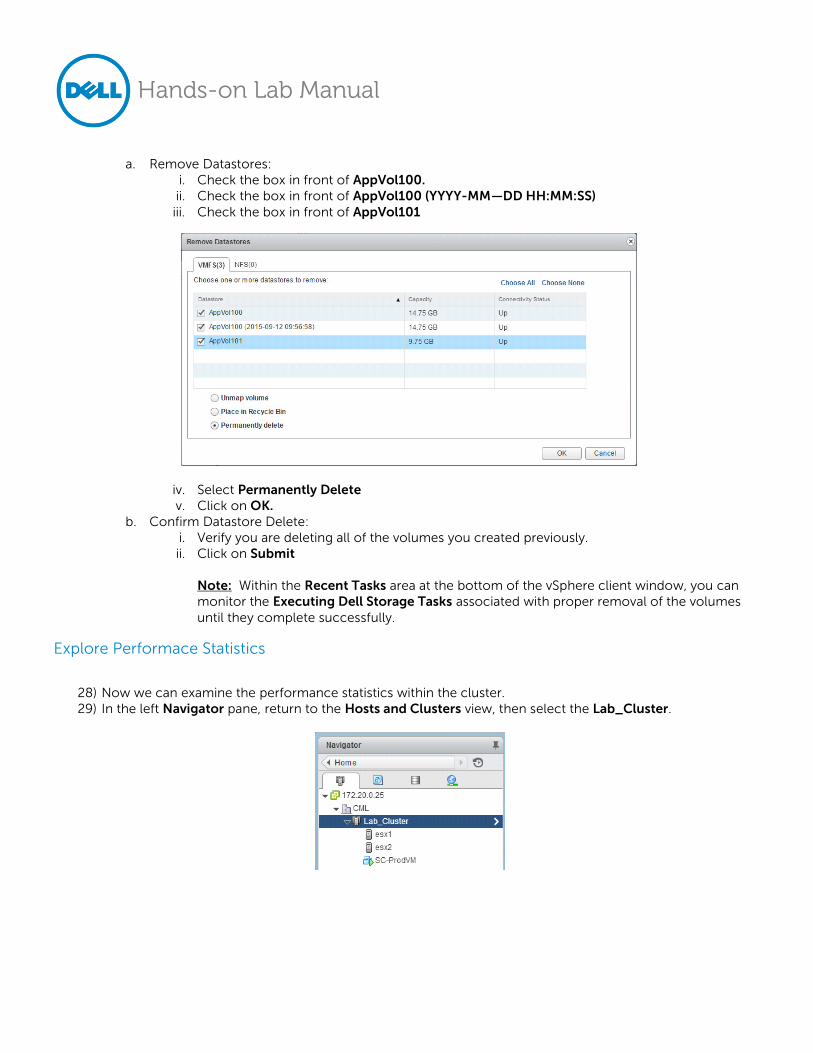
a. Remove Datastores:
i. Check the box in front of AppVol100.
ii. Check the box in front of AppVol100 (YYYY-MM—DD HH:MM:SS)
iii. Check the box in front of AppVol101
iv. Select Permanently Delete
v. Click on OK.
b. Confirm Datastore Delete:
i. Verify you are deleting all of the volumes you created previously.
ii. Click on Submit
Note: Within the Recent Tasks area at the bottom of the vSphere client window, you can
monitor the Executing Dell Storage Tasks associated with proper removal of the volumes
until they complete successfully.
Explore Performace Statistics
28) Now we can examine the performance statistics within the cluster.
29) In the left Navigator pane, return to the Hosts and Clusters view, then select the Lab_Cluster.
Hands-on Lab Manual
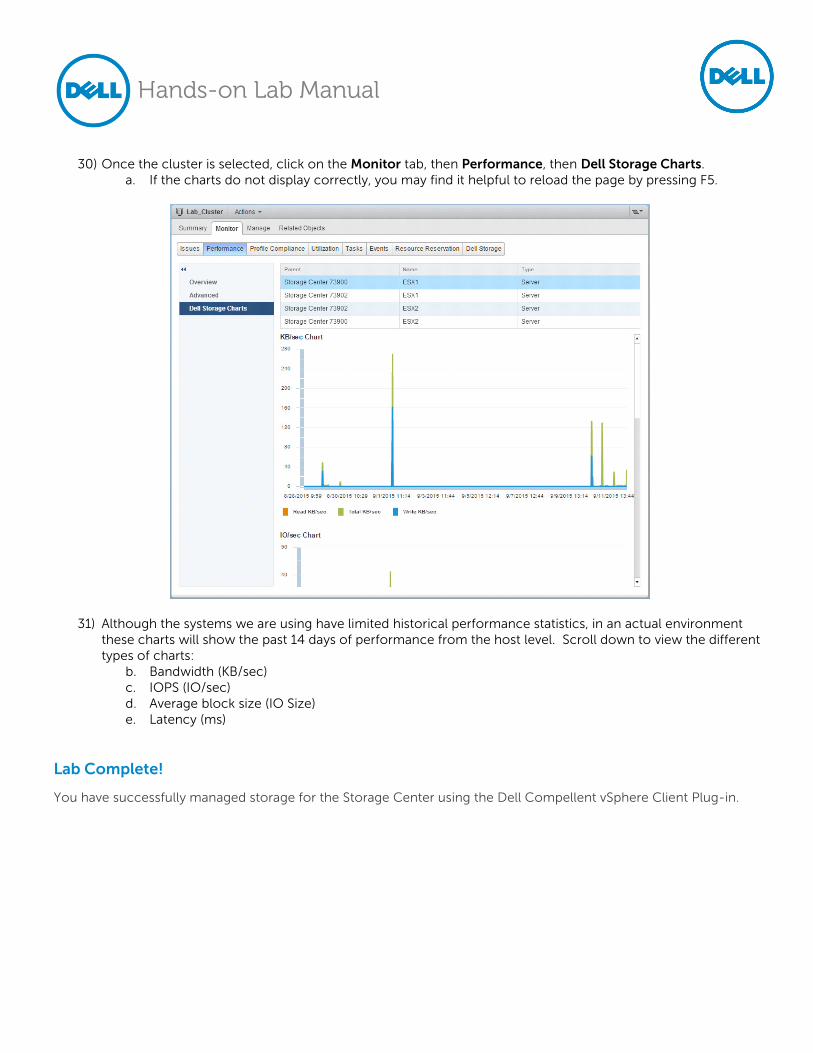
30) Once the cluster is selected, click on the Monitor tab, then Performance, then Dell Storage Charts.
a. If the charts do not display correctly, you may find it helpful to reload the page by pressing F5.
31) Although the systems we are using have limited historical performance statistics, in an actual environment
these charts will show the past 14 days of performance from the host level. Scroll down to view the different
types of charts:
b. Bandwidth (KB/sec)
c. IOPS (IO/sec)
d. Average block size (IO Size)
e. Latency (ms)
Lab Complete!
You have successfully managed storage for the Storage Center using the Dell Compellent vSphere Client Plug-in.