homebrew buddipole variant -
TRANSCRIPT
Homebrew Buddipole Variant By
Paul – AE5JU
History: The Buddipole is a portable dipole using telescoping whips on the ends of center arms, with loading coils between the arms and whips. Originally a homebrew item made from pvc pipe fittings, and rather flimsy. Later they produced a commercial version.
http://www.qsl.net/w3ff/
http://www.buddipole.com/buddipole.html
Just what we need for emergency services, portable, the ability to work various HF bands. So, mine's going to be a little stronger than the pvc homebrew Buddipole. I live in a place you can for sure buy hardware!
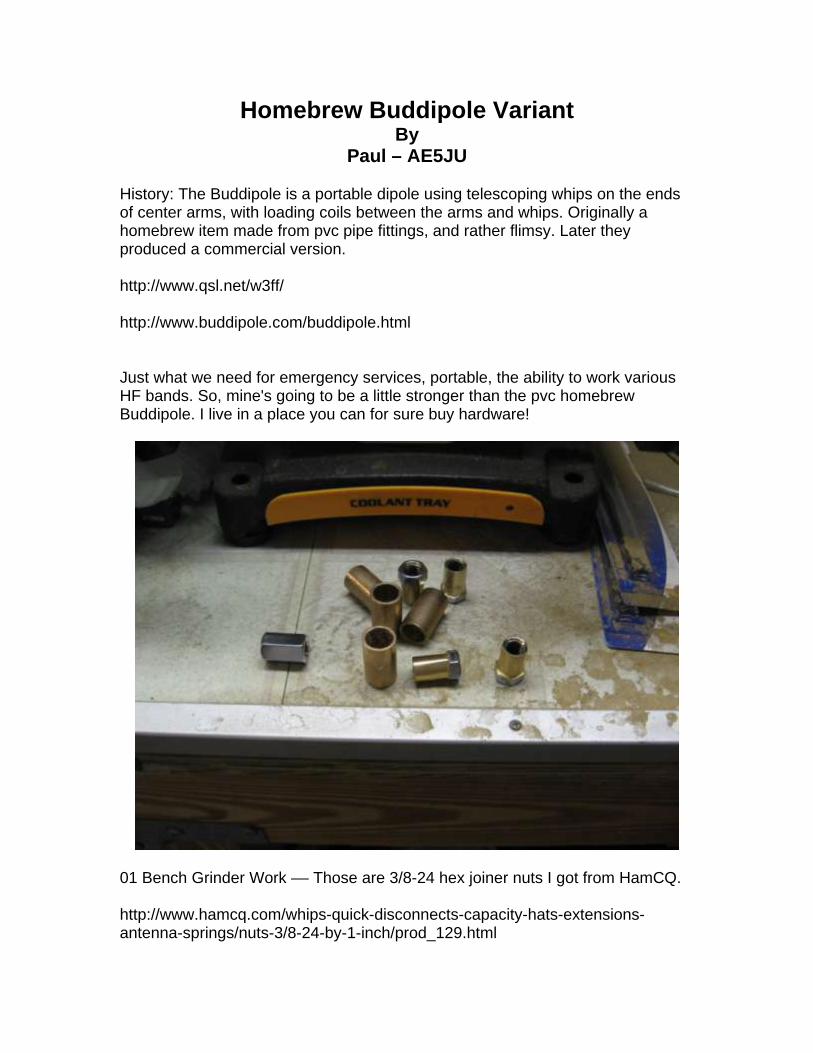
01 Bench Grinder Work –– Those are 3/8-24 hex joiner nuts I got from HamCQ.
http://www.hamcq.com/whips-quick-disconnects-capacity-hats-extensions-antenna-springs/nuts-3/8-24-by-1-inch/prod_129.html
They are really brass with a nickle plating. Also some 1/2" ID bronze sleeve bearings. (1/2" ID x 1-1/8" long) Why? Brass and Bronze are non-inductive, and this will be near the loading coils. I ground down the outside of the nuts to slip fit halfway into the bronze sleeves. The bronze sleeves were obtained from the local hardware store. You'll see why in a minute. I am the Grand Master of the bench grinder, almost. Fellow ham club member Frank, noticing my skint up knuckle said, "Why didn't you just slip the nut over a wood dowel and..." So NOW you tell me, Frank!
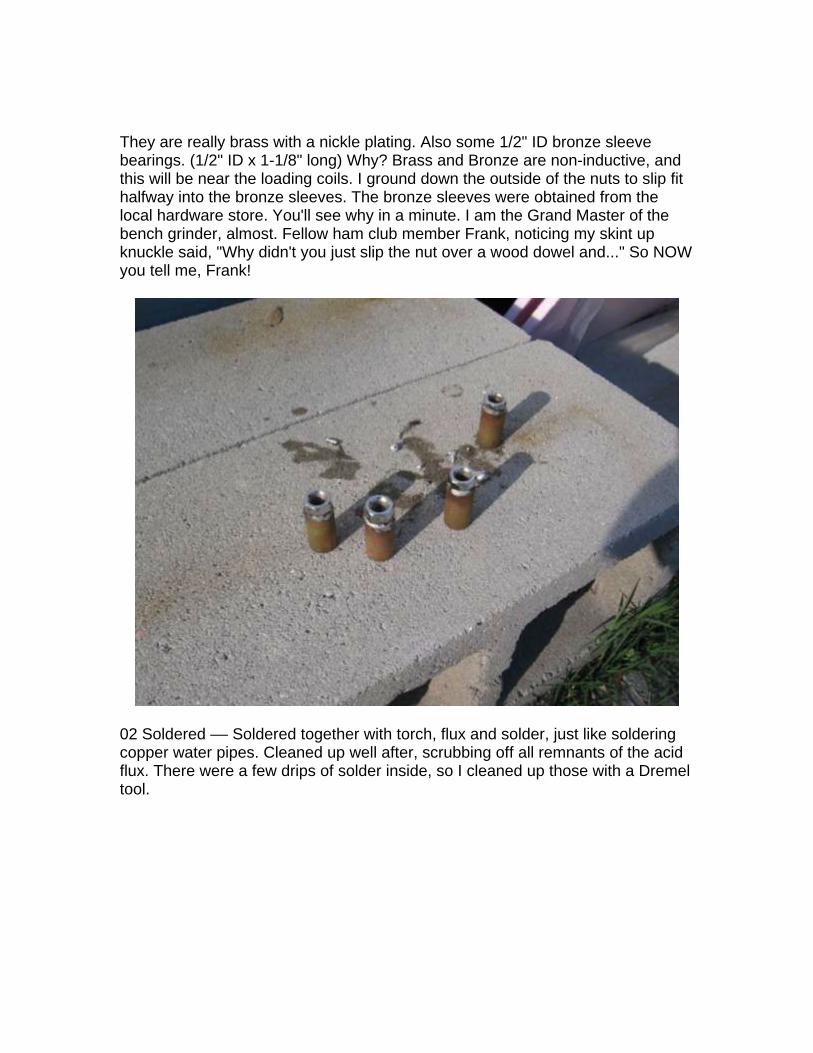
02 Soldered –– Soldered together with torch, flux and solder, just like soldering copper water pipes. Cleaned up well after, scrubbing off all remnants of the acid flux. There were a few drips of solder inside, so I cleaned up those with a Dremel tool.
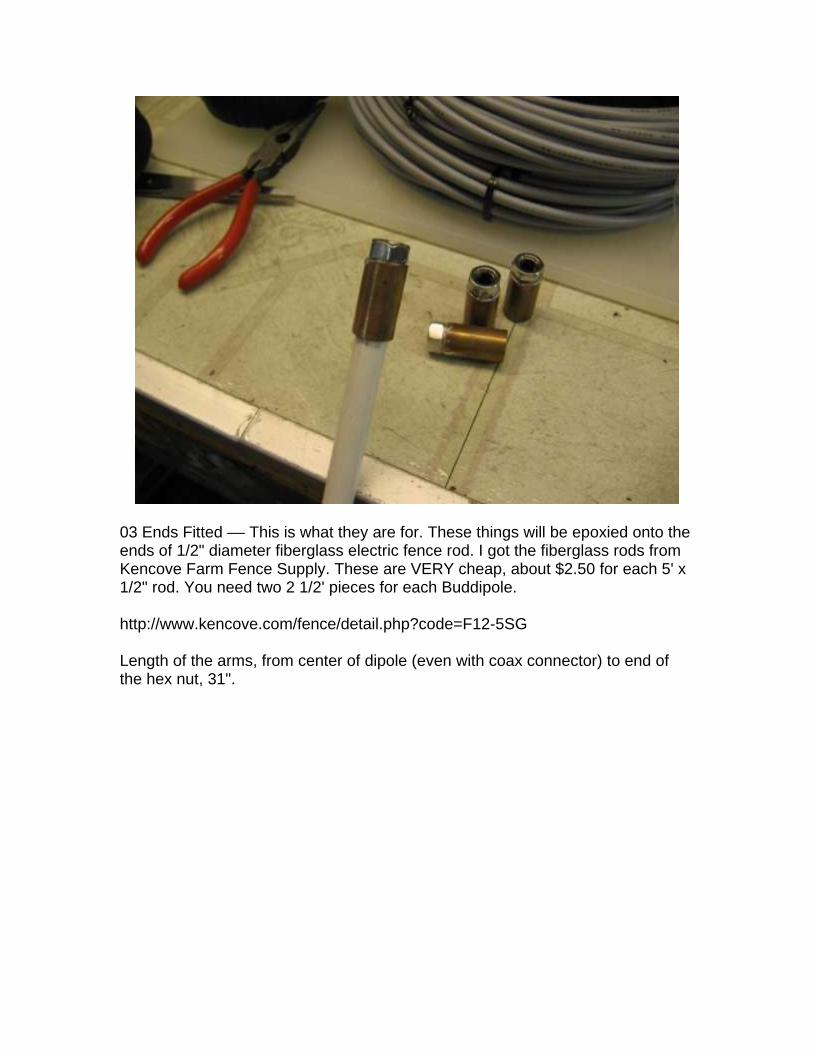
03 Ends Fitted –– This is what they are for. These things will be epoxied onto the ends of 1/2" diameter fiberglass electric fence rod. I got the fiberglass rods from Kencove Farm Fence Supply. These are VERY cheap, about $2.50 for each 5' x 1/2" rod. You need two 2 1/2' pieces for each Buddipole.
http://www.kencove.com/fence/detail.php?code=F12-5SG
Length of the arms, from center of dipole (even with coax connector) to end of the hex nut, 31".
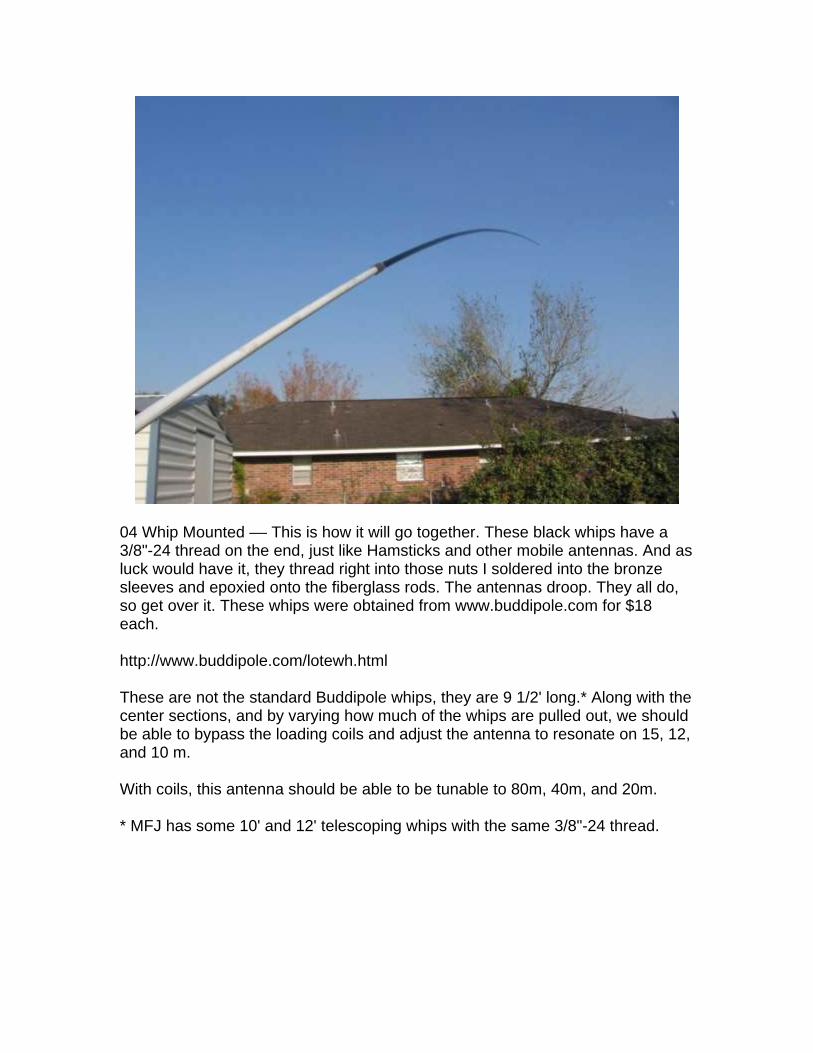
04 Whip Mounted –– This is how it will go together. These black whips have a 3/8"-24 thread on the end, just like Hamsticks and other mobile antennas. And as luck would have it, they thread right into those nuts I soldered into the bronze sleeves and epoxied onto the fiberglass rods. The antennas droop. They all do, so get over it. These whips were obtained from www.buddipole.com for $18 each.
http://www.buddipole.com/lotewh.html
These are not the standard Buddipole whips, they are 9 1/2' long.* Along with the center sections, and by varying how much of the whips are pulled out, we should be able to bypass the loading coils and adjust the antenna to resonate on 15, 12, and 10 m.
With coils, this antenna should be able to be tunable to 80m, 40m, and 20m.
* MFJ has some 10' and 12' telescoping whips with the same 3/8"-24 thread.
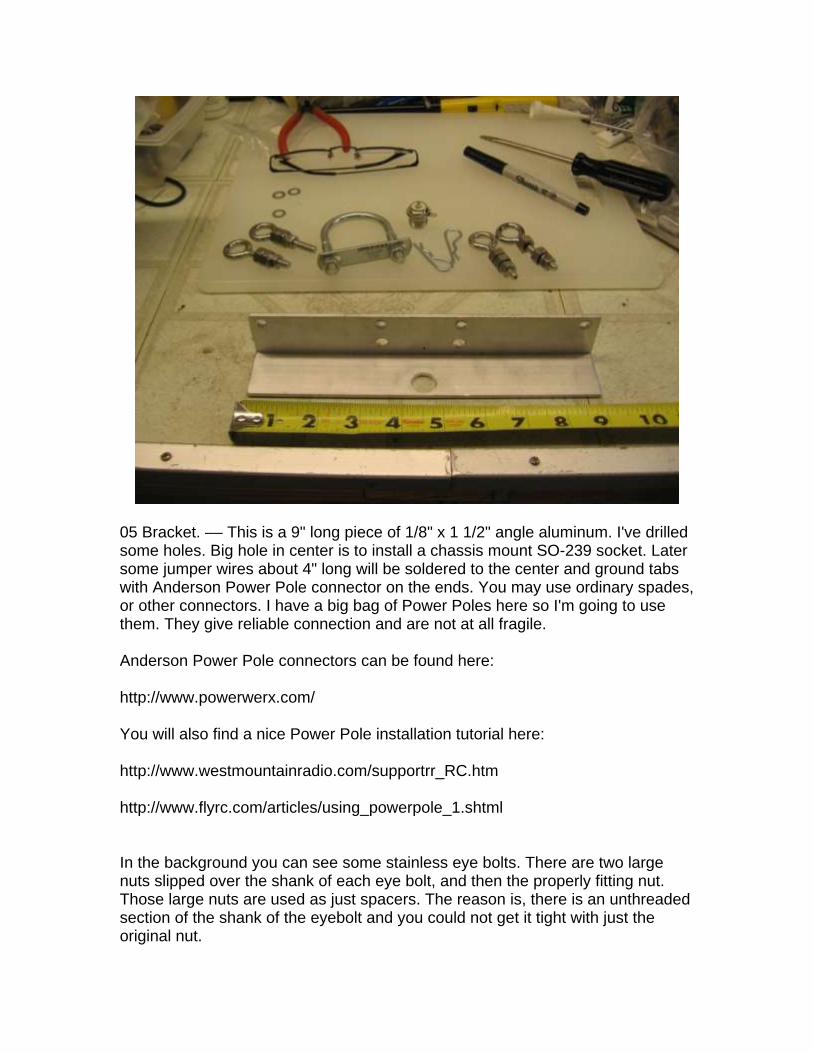
05 Bracket. –– This is a 9" long piece of 1/8" x 1 1/2" angle aluminum. I've drilled some holes. Big hole in center is to install a chassis mount SO-239 socket. Later some jumper wires about 4" long will be soldered to the center and ground tabs with Anderson Power Pole connector on the ends. You may use ordinary spades, or other connectors. I have a big bag of Power Poles here so I'm going to use them. They give reliable connection and are not at all fragile.
Anderson Power Pole connectors can be found here:
http://www.powerwerx.com/
You will also find a nice Power Pole installation tutorial here:
http://www.westmountainradio.com/supportrr_RC.htm
http://www.flyrc.com/articles/using_powerpole_1.shtml
In the background you can see some stainless eye bolts. There are two large nuts slipped over the shank of each eye bolt, and then the properly fitting nut. Those large nuts are used as just spacers. The reason is, there is an unthreaded section of the shank of the eyebolt and you could not get it tight with just the original nut.
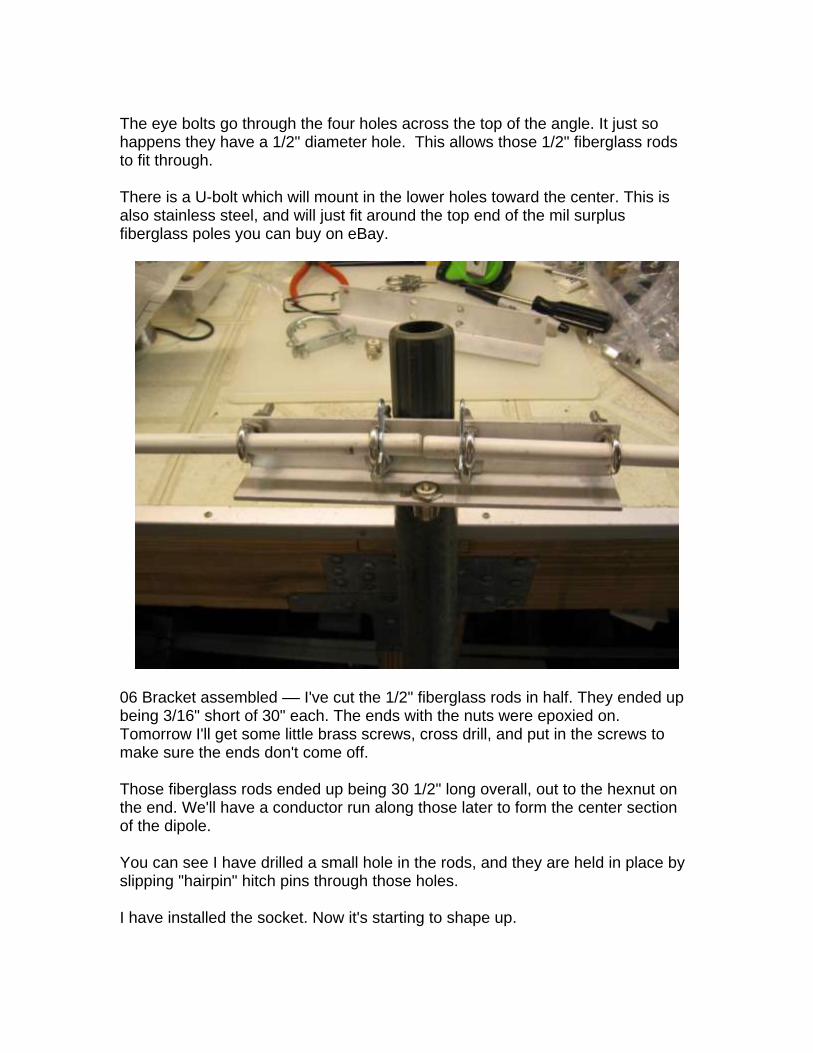
The eye bolts go through the four holes across the top of the angle. It just so happens they have a 1/2" diameter hole. This allows those 1/2" fiberglass rods to fit through.
There is a U-bolt which will mount in the lower holes toward the center. This is also stainless steel, and will just fit around the top end of the mil surplus fiberglass poles you can buy on eBay.
06 Bracket assembled –– I've cut the 1/2" fiberglass rods in half. They ended up being 3/16" short of 30" each. The ends with the nuts were epoxied on. Tomorrow I'll get some little brass screws, cross drill, and put in the screws to make sure the ends don't come off.
Those fiberglass rods ended up being 30 1/2" long overall, out to the hexnut on the end. We'll have a conductor run along those later to form the center section of the dipole.
You can see I have drilled a small hole in the rods, and they are held in place by slipping "hairpin" hitch pins through those holes.
I have installed the socket. Now it's starting to shape up.

The green fiberglass mast poles are military surplus ones you can find on eBay and at hamfests. They are 48" long. They are not really antenna masts, but are used to hold up camoflage netting. They sell for about $20 for a 12 pc set, with about another $20 or so for shipping. You only need about 4 or 5 of these mast pieces, so, split the set with a friend like I did.
Used masts http://cgi.ebay.com/ws/eBayISAPI.dll?ViewItem&item=150315895044
New masts http://cgi.ebay.com/ws/eBayISAPI.dll?ViewItem&item=150316253303
Everything is a little "loosey-goosey" right now, just finger tight. I'll take it all apart in a bit and reassemble with locktite on all of the nuts and bolts, and the nut on the SO-239 socket.
I'll use a Dremel cutoff wheel and cut off the excess threads on the eye bolts. Also, I will make the U-bolt only just tight enough to make the bracket snug. It is tightening around the plastic end of the mast tube. To keep it from shifting around, before I install the U-bolt for the final time I'll put a glob of epoxy putty between the pole and bracket. The U-bolt nuts will get an application of Locktite, also.
The bracket can be left on that top section for transport and storage. The arms come off, the coax comes off, there is no need for the bracket to come off.
First I used a Dremel fiber cut off wheel to remove the excess length of the eyebolts. I made sure there were no sharp bits left. I used plenty of Locktite to make sure everything stays tight.
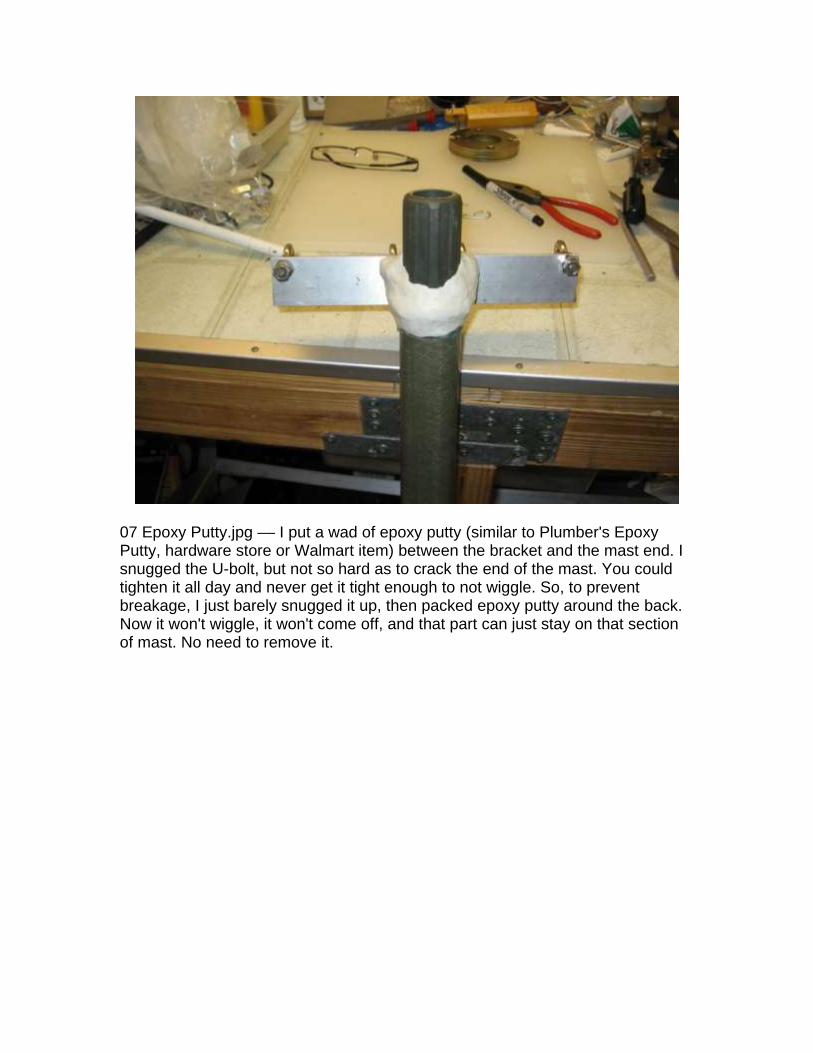
07 Epoxy Putty.jpg –– I put a wad of epoxy putty (similar to Plumber's Epoxy Putty, hardware store or Walmart item) between the bracket and the mast end. I snugged the U-bolt, but not so hard as to crack the end of the mast. You could tighten it all day and never get it tight enough to not wiggle. So, to prevent breakage, I just barely snugged it up, then packed epoxy putty around the back. Now it won't wiggle, it won't come off, and that part can just stay on that section of mast. No need to remove it.
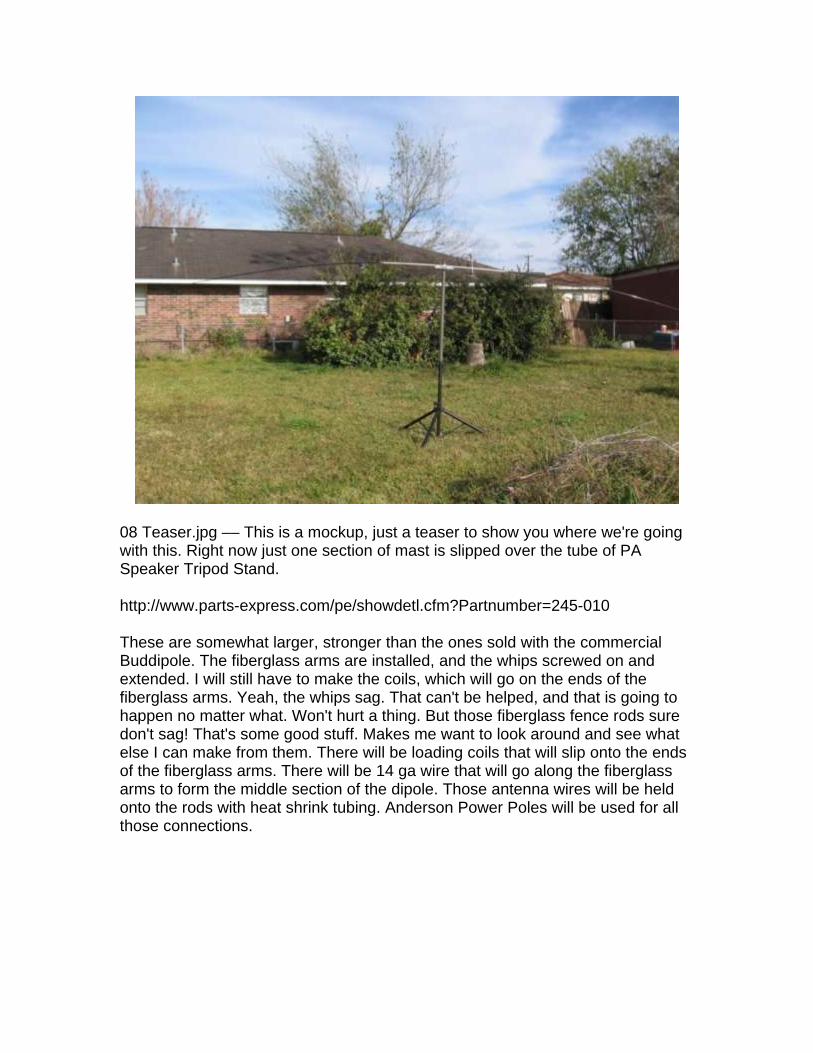
08 Teaser.jpg –– This is a mockup, just a teaser to show you where we're going with this. Right now just one section of mast is slipped over the tube of PA Speaker Tripod Stand.
http://www.parts-express.com/pe/showdetl.cfm?Partnumber=245-010
These are somewhat larger, stronger than the ones sold with the commercial Buddipole. The fiberglass arms are installed, and the whips screwed on and extended. I will still have to make the coils, which will go on the ends of the fiberglass arms. Yeah, the whips sag. That can't be helped, and that is going to happen no matter what. Won't hurt a thing. But those fiberglass fence rods sure don't sag! That's some good stuff. Makes me want to look around and see what else I can make from them. There will be loading coils that will slip onto the ends of the fiberglass arms. There will be 14 ga wire that will go along the fiberglass arms to form the middle section of the dipole. Those antenna wires will be held onto the rods with heat shrink tubing. Anderson Power Poles will be used for all those connections.
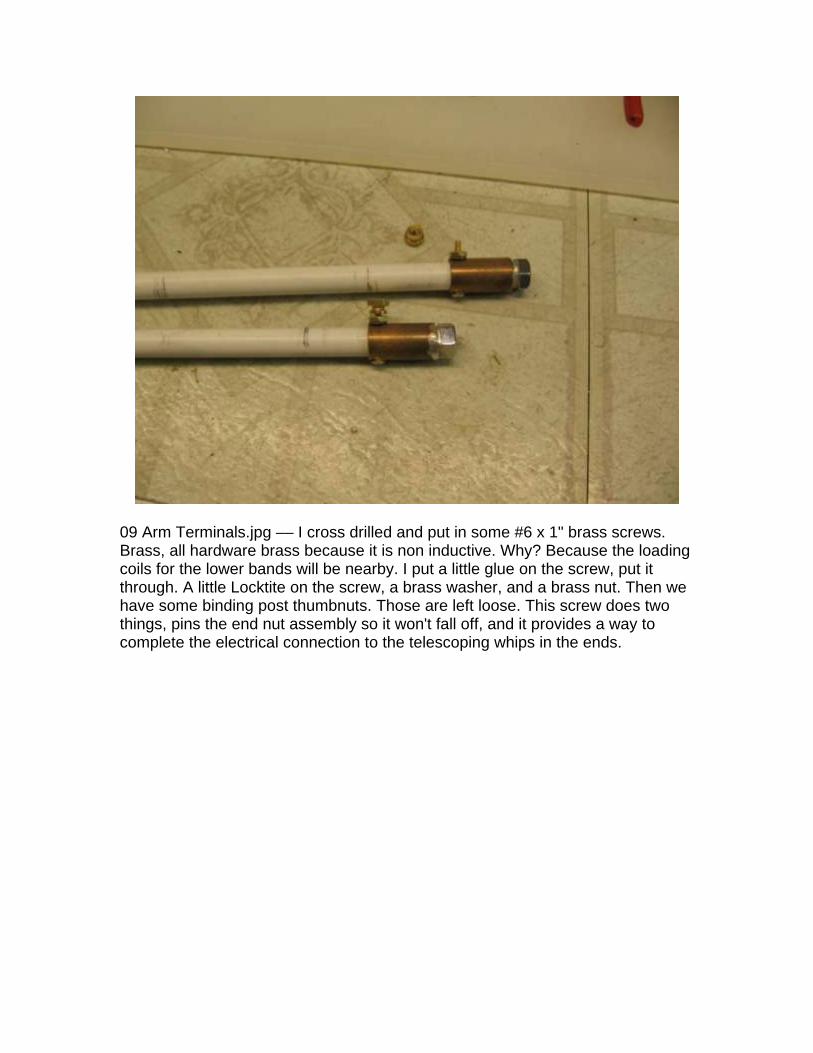
09 Arm Terminals.jpg –– I cross drilled and put in some #6 x 1" brass screws. Brass, all hardware brass because it is non inductive. Why? Because the loading coils for the lower bands will be nearby. I put a little glue on the screw, put it through. A little Locktite on the screw, a brass washer, and a brass nut. Then we have some binding post thumbnuts. Those are left loose. This screw does two things, pins the end nut assembly so it won't fall off, and it provides a way to complete the electrical connection to the telescoping whips in the ends.
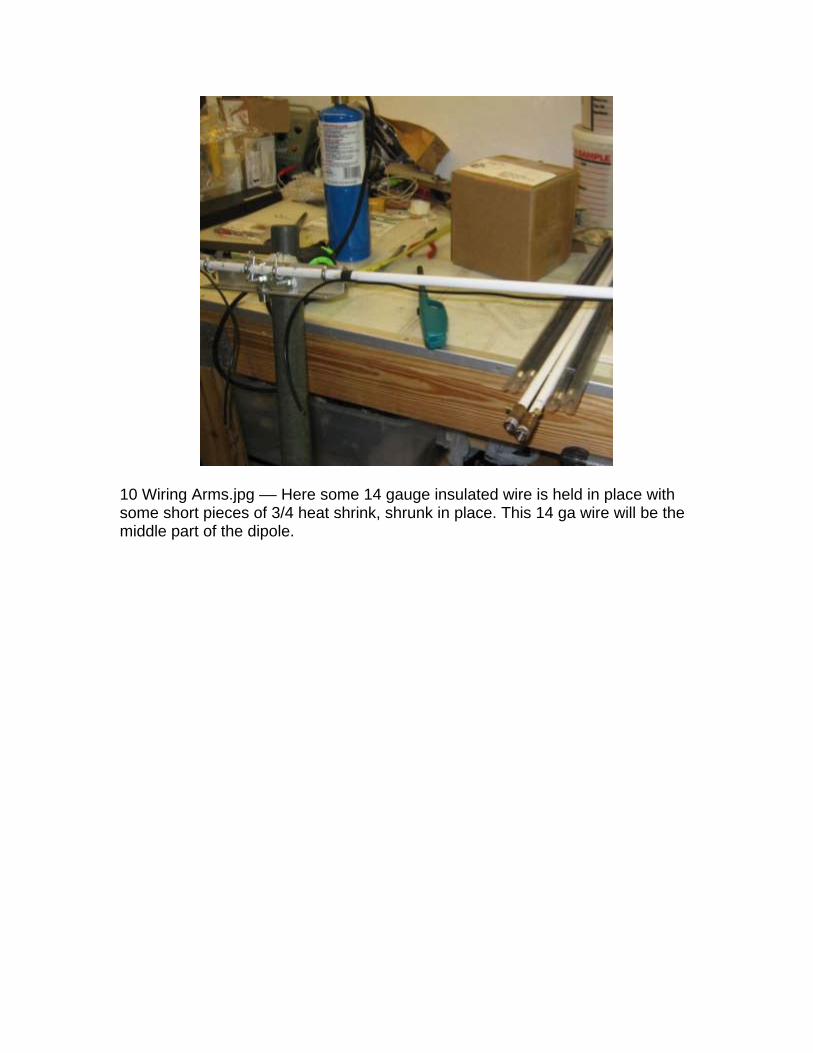
10 Wiring Arms.jpg –– Here some 14 gauge insulated wire is held in place with some short pieces of 3/4 heat shrink, shrunk in place. This 14 ga wire will be the middle part of the dipole.
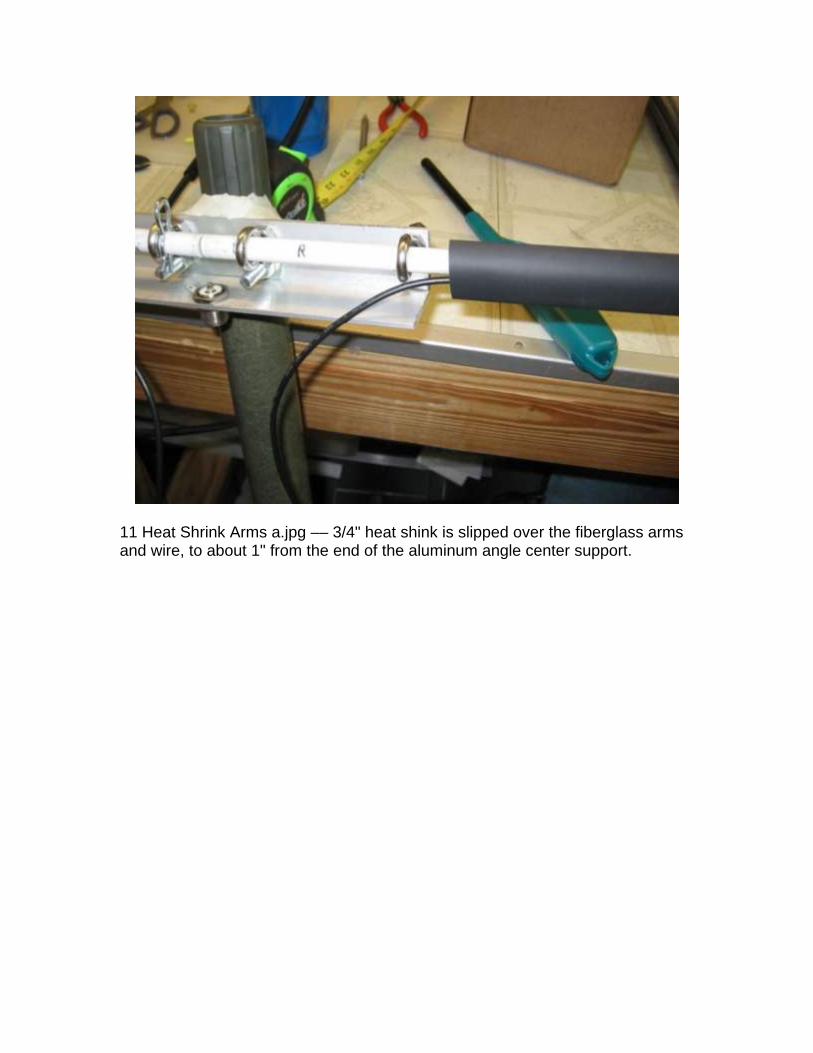
11 Heat Shrink Arms a.jpg –– 3/4" heat shink is slipped over the fiberglass arms and wire, to about 1" from the end of the aluminum angle center support.
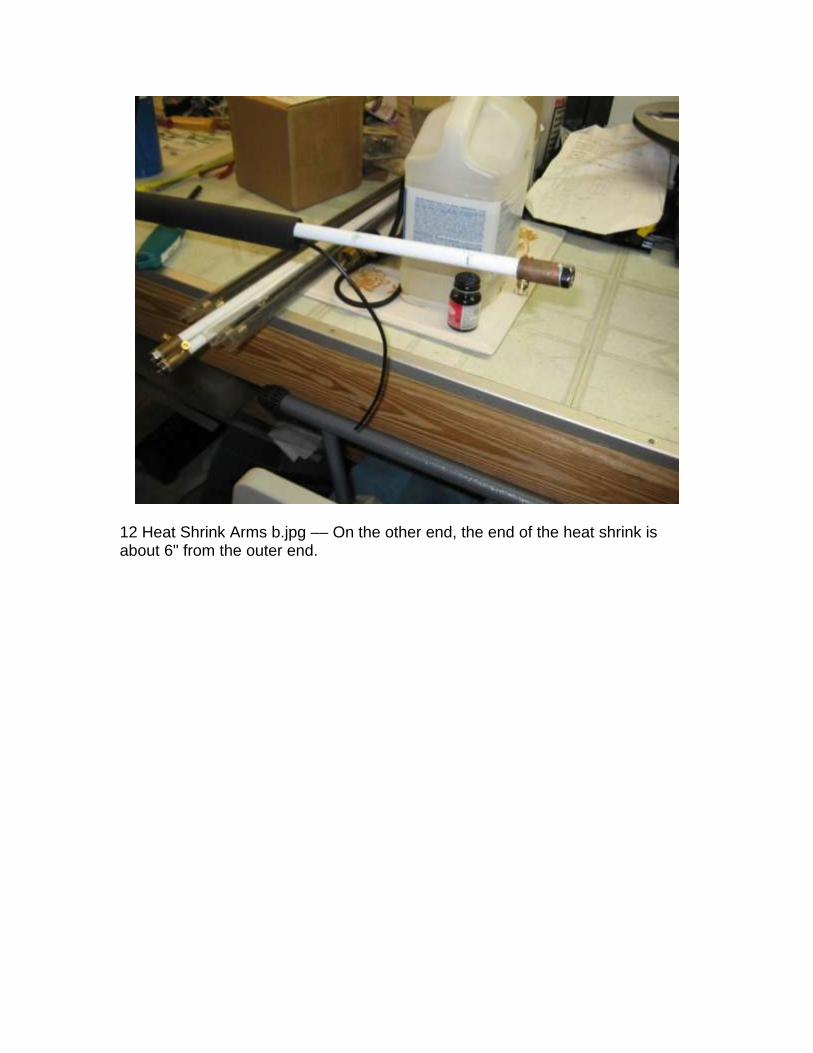
12 Heat Shrink Arms b.jpg –– On the other end, the end of the heat shrink is about 6" from the outer end.
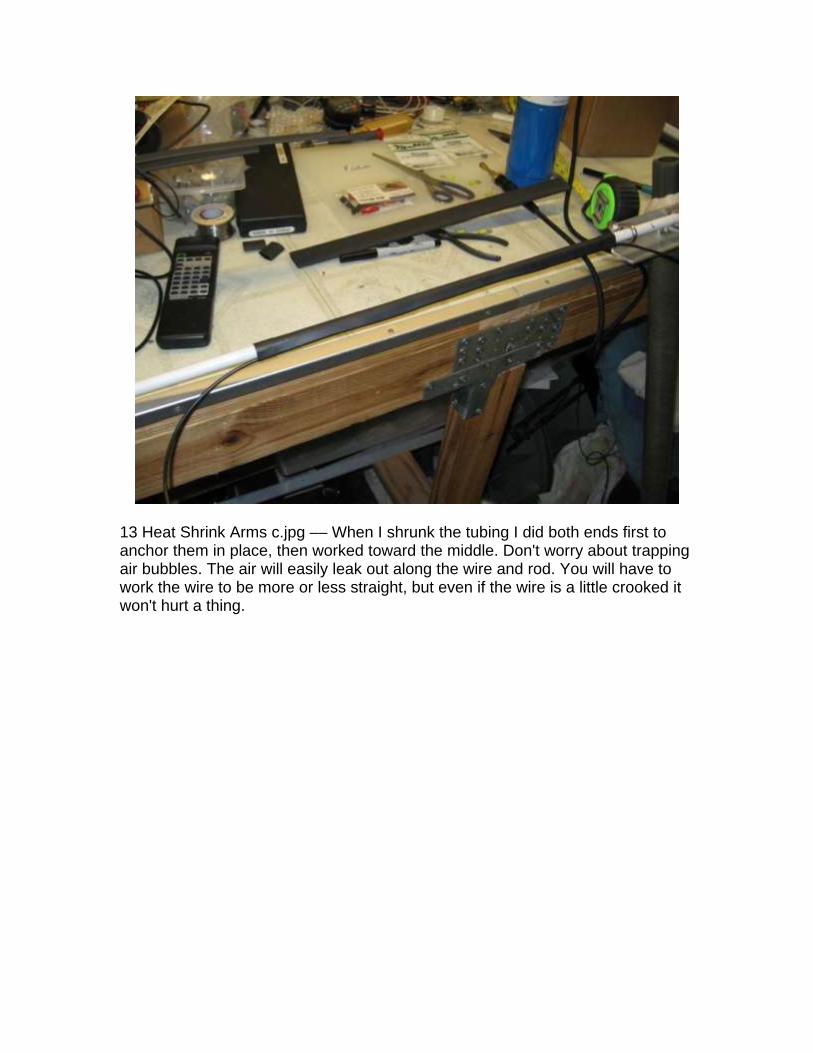
13 Heat Shrink Arms c.jpg –– When I shrunk the tubing I did both ends first to anchor them in place, then worked toward the middle. Don't worry about trapping air bubbles. The air will easily leak out along the wire and rod. You will have to work the wire to be more or less straight, but even if the wire is a little crooked it won't hurt a thing.
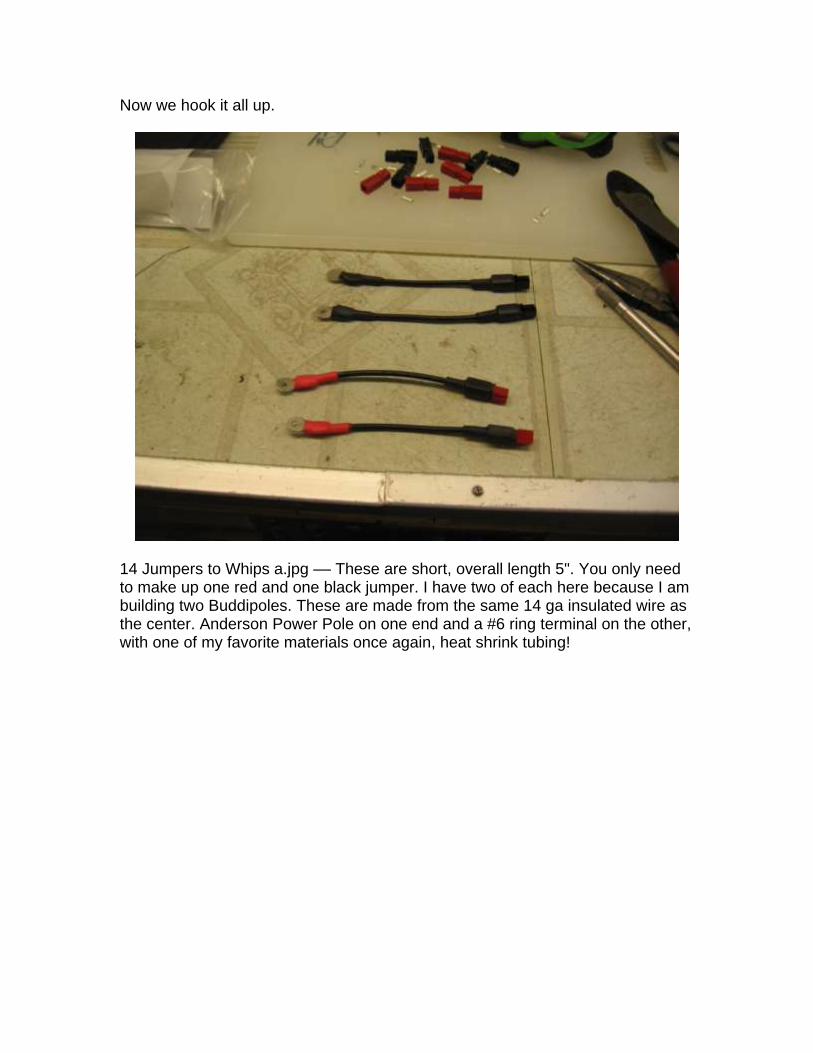
Now we hook it all up.
14 Jumpers to Whips a.jpg –– These are short, overall length 5". You only need to make up one red and one black jumper. I have two of each here because I am building two Buddipoles. These are made from the same 14 ga insulated wire as the center. Anderson Power Pole on one end and a #6 ring terminal on the other, with one of my favorite materials once again, heat shrink tubing!


