how to extend rapidminer...
TRANSCRIPT

How toExtend
RapidMiner 5


How to Extend RapidMiner 5White Paper
Rapid-Iwww.rapid-i.com

c© 2012 by Rapid-I GmbH. All rights reserved.
No part of this publication may be reproduced, stored in a retrieval system, or
transmitted, in any form or by means electronic, mechanical, photocopying, or
otherwise, without prior written permission of Rapid-I GmbH.
Contents
1 Introduction 1
2 Using the Scripting Operator 3
2.1 Writing the Script . . . . . . . . . . . . . . . . . . . . . . . . . . . . 4
2.2 Connecting with other Operators . . . . . . . . . . . . . . . . . . . 6
3 The RapidMiner data storage strategy 9
3.1 The Example Table . . . . . . . . . . . . . . . . . . . . . . . . . . . 10
3.2 The ExampleSet and its Attributes . . . . . . . . . . . . . . . . . . 11
3.3 More than one ExampleSet . . . . . . . . . . . . . . . . . . . . . . . 14
3.4 Changing data on the fly . . . . . . . . . . . . . . . . . . . . . . . . 15
3.5 The ExampleSet layer stack . . . . . . . . . . . . . . . . . . . . . . 16
4 Creating your own Extension 19
5 Building Operators 21
5.1 Our first operator . . . . . . . . . . . . . . . . . . . . . . . . . . . . 21
5.2 Adding Ports . . . . . . . . . . . . . . . . . . . . . . . . . . . . . . . 22
5.3 Declaring operators to RapidMiner . . . . . . . . . . . . . . . . . . 24
5.4 Adding preconditions to input ports . . . . . . . . . . . . . . . . . . 26
5.5 Adding generation rules to the output ports . . . . . . . . . . . . . 28
5.6 Adding documentation to the operators . . . . . . . . . . . . . . . . 30
5.7 Creating super operators . . . . . . . . . . . . . . . . . . . . . . . . 31
5.8 Adding a PortExtender . . . . . . . . . . . . . . . . . . . . . . . . . 33
5.9 Adding meta data transformation rules . . . . . . . . . . . . . . . . 34
I
5.10 Doing the work . . . . . . . . . . . . . . . . . . . . . . . . . . . . . 36
5.11 Defining parameters . . . . . . . . . . . . . . . . . . . . . . . . . . . 36
5.12 Using Parameters . . . . . . . . . . . . . . . . . . . . . . . . . . . . 39
5.13 Adding dependencies to parameters . . . . . . . . . . . . . . . . . . 40
6 Building special data objects 43
6.1 Defining the object class . . . . . . . . . . . . . . . . . . . . . . . . 44
6.2 Processing your own IOObjects . . . . . . . . . . . . . . . . . . . . 46
6.3 Taking a look into your IOObject . . . . . . . . . . . . . . . . . . . 51
6.4 Leaving the 80’s . . . . . . . . . . . . . . . . . . . . . . . . . . . . . 53
7 Publishing a RapidMiner Extension 59
7.1 The extension bundle . . . . . . . . . . . . . . . . . . . . . . . . . . 59
7.2 The ant build file . . . . . . . . . . . . . . . . . . . . . . . . . . . . 63
8 Using advanced Extension mechanism 69
8.1 The PluginInit class . . . . . . . . . . . . . . . . . . . . . . . . . . . 69
8.2 Adding custom configurators . . . . . . . . . . . . . . . . . . . . . . 70
8.2.1 Usage . . . . . . . . . . . . . . . . . . . . . . . . . . . . . . . 71
8.2.2 Customizing the configuration panel . . . . . . . . . . . . . . 75
8.3 Adding custom GUI elements . . . . . . . . . . . . . . . . . . . . . 78
8.4 Adding custom actions to the GUI . . . . . . . . . . . . . . . . . . . 81

1 Introduction
If you are reading this tutorial, you probably have already installed RapidMiner 5
and gained some experience by playing around with the enormous set of operators.
Chances are that you already have been part of the RapidMiner Community for
some time and it already has been quite a while ago, since you last developed
your own extension. Back then you might have developed for RapidMiner 4.x,
in which case you will probably notice the great number of changes from version
4.6 to 5.0 immediately:
• The new flow layout gives a complete new quality of insight into your pro-
cesses, even for untrained users.
• The typed ports give detailed information what kind of input is desired and
make process design a much simpler game.
• Where you had to remember the name of attributes in earlier versions, you
now can select them from a drop-down menu, even if the process has never
been run!
These and several other improvements make the life of today’s data analysts
much easier and they can spend much more time with their family instead of
having to wait for a restarted process because of a typo in an attribute’s name.
But even with the huge amount of functions provided by RapidMiner, sometimes
you have a problem at hand, that is unsolvable or only solvable with what seems
to be a too complex process. Then you have two choices:
1
1. Introduction
On the one hand you could use the built-in scripting operator for writing a quick
and dirty hack. If this solves your problem, very well, go ahead. Chapter “Using
the Scripting Operator” will illustrate how to access the RapidMiner API without
even starting an IDE.
The other solution is to build your own extension to RapidMiner, providing new
operators and new data objects with all the functionality of RapidMiner 5. This
option is more heavy weight, so it really depends on the task at hand and the
need for reusability, if it’s worth to go this way.
If it’s a more general problem or if you are going to implement something like
a new learning scheme, building an extension is definitively the best way to let
the community participate in your work: You let all members profit from your
achievements and they will give you valuable feedback. And always keep in mind,
that it’s a good feeling to know, that your piece of software is still used by someone
and you didn’t waste all the time you spent hunting bugs.
As a more experienced user, you might already have written a plug-in for the old
versions of RapidMiner. Then you will be confronted with the down-side of all
the advantages of version 5: We unfortunately had to break with the backward
compatibility to 4.x. All these features simply didn’t fit into the old plug-in
framework, and so we decided to rather publish a new extension mechanism than
artificially limiting its possibilities. That’s why you will have to change some
code in order to port your old plug-ins to RapidMiner 5.
Where we thought it helpful, there will be short hints. For easily recognizing
these paragraphs, they will be shaded with light gray, so that you might skip
uninteresting parts without missing valuable information.
2
2 Using the Scripting Opera-tor
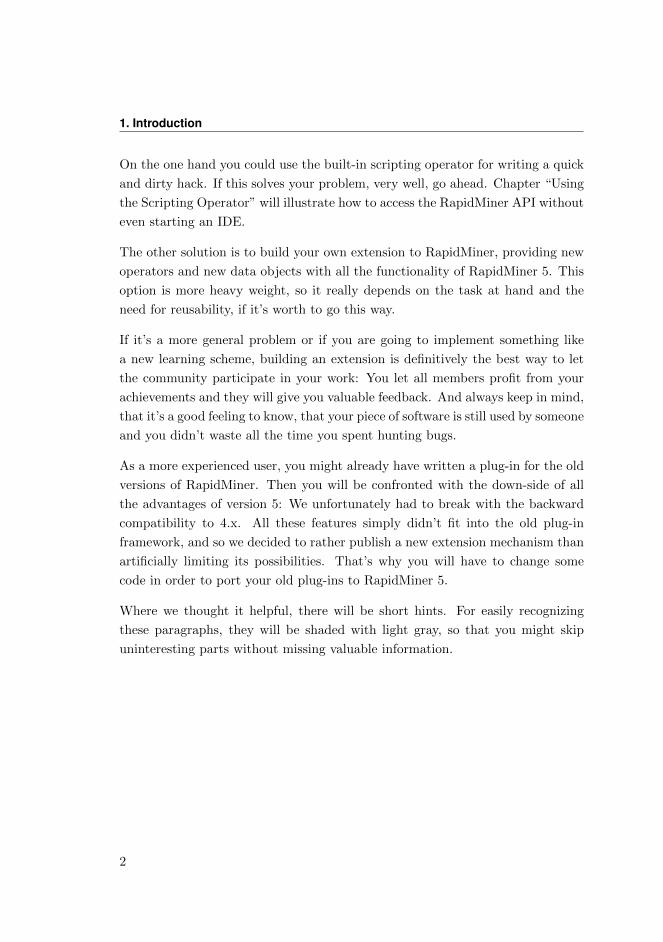
Using the Scripting Operator Let’s assume we have the following situation: We
get data from a machine, that counts the seconds since it was switched on. Each
entry in this log file has this time stamp. Unfortunately other data sources we are
going to use have an absolut time stamp. So we have to transform the relative
format into a regular date and time format. Since RapidMiner doesn’t provide an
operator solving this particular problem, we decide to write a small script. This
problem doesn’t seem to be worth the effort of building a complete extension,
because we can’t believe there are many other machines around, that don’t have
an integrated clock, and so don’t expect to be able to reuse an extension. Hence
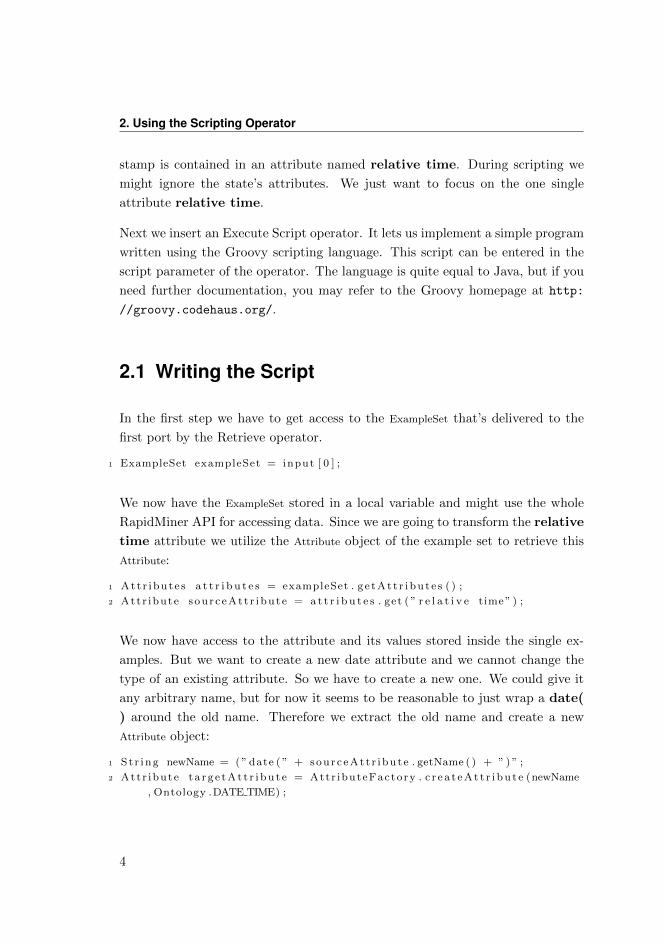
we prefer to build a simple process, which should do the trick:
Figure 2.1: A simple process for applying a script
As a first step we are going to load the data and then directly apply our script.
As a last step we will do some date adjustment, but we will come back to this
later. After loading we have an ExampleSet consisting of a number of attributes,
describing the machine’s state. They are called att1, att2 to att500. The time
3
2. Using the Scripting Operator
stamp is contained in an attribute named relative time. During scripting we
might ignore the state’s attributes. We just want to focus on the one single
attribute relative time.
Next we insert an Execute Script operator. It lets us implement a simple program
written using the Groovy scripting language. This script can be entered in the
script parameter of the operator. The language is quite equal to Java, but if you
need further documentation, you may refer to the Groovy homepage at http:
//groovy.codehaus.org/.
2.1 Writing the Script
In the first step we have to get access to the ExampleSet that’s delivered to the
first port by the Retrieve operator.
1 ExampleSet exampleSet = input [ 0 ] ;
We now have the ExampleSet stored in a local variable and might use the whole
RapidMiner API for accessing data. Since we are going to transform the relative
time attribute we utilize the Attribute object of the example set to retrieve this
Attribute:
1 Att r ibute s a t t r i b u t e s = exampleSet . g e tAt t r i bu t e s ( ) ;
2 Attr ibute sourceAt t r ibut e = a t t r i b u t e s . get ( ” r e l a t i v e time ” ) ;
We now have access to the attribute and its values stored inside the single ex-
amples. But we want to create a new date attribute and we cannot change the
type of an existing attribute. So we have to create a new one. We could give it
any arbitrary name, but for now it seems to be reasonable to just wrap a date(
) around the old name. Therefore we extract the old name and create a new
Attribute object:
1 St r ing newName = ( ” date ( ” + sourceAt t r ibut e . getName ( ) + ” ) ” ;
2 Attr ibute t a r g e t A t t r i b u t e = Attr ibuteFactory . c r e a t e A t t r i b u t e (newName
, Ontology .DATE TIME) ;
4
2.1. Writing the Script
If we execute this script, it will crash, because it doesn’t know the Ontology class,
which defines the value types of RapidMiner’s attributes. To solve this problem,
we have to import it manually, as we would have to do with any class, that’s not
part of the standard imports. So we will add the following line at the top of the
script:
1 import com . rapidminer . t o o l s . Ontology ;
To put it all together, we should have a script like this:
1 import com . rapidminer . t o o l s . Ontology ;
2
3 ExampleSet exampleSet = input [ 0 ] ;
4 Att r ibute s a t t r i b u t e s = exampleSet . g e tAt t r i bu t e s ( ) ;
5 Attr ibute sourceAt t r ibut e = a t t r i b u t e s . get ( ” r e l a t i v e time ” ) ;
6 St r ing newName = ( ” date ( ” + sourceAt t r ibut e . getName ( ) + ” ) ” ;
7 Attr ibute t a r g e t A t t r i b u t e = Attr ibuteFactory . c r e a t e A t t r i b u t e (newName
, Ontology .DATE TIME) ;
Now we have created a new attribute, but it has not been attached to any of the
underlying data columns, yet. What we have to do now, is to connect the new
Attribute with the values of the old one. We could insert a new column into the
data table, or just reuse the old. Since reusing saves copying of the data, we take
this approach here. The mechanics of the data storage will be described in the
next chapter in detail.
1 t a r g e t A t t r i b u t e . setTableIndex ( sourceAt t r ibute . getTableIndex ( ) ) ;
Now the new date attribute will use the old integer values as if they would
have been dates. The problem is that the formats are not compatible: The
date attribute will save dates using milliseconds after the 1st of January 1970.
The integer in our attribute contained the seconds after the first start up of the
machine. At first we will tackle the problem with the wrong unit. We have
to multiply each entry with 1000 to convert the seconds to milliseconds. The
problem is, that we cannot access the new attribute yet, because it isn’t part of
the example set. We will change that, by adding it to the example sets’ attributes
and removing the old attribute:
1 a t t r i b u t e s . addRegular ( t a r g e t A t t r i b u t e ) ;
2 a t t r i b u t e s . remove ( sourc eAt t r ibut e ) ;
5
2. Using the Scripting Operator
Only thing we have to do now is to iterate over all examples, get the value of the
attribute, multiply it with 1000 and write it back. This is fairly easy:
1 for ( Example example : exampleSet ) {2 double timeStampValue = example . getValue ( t a r g e t A t t r i b u t e ) ;
3 example . setValue ( ta rge tAt t r ibute , timeStampValue ∗ 1000) ;
4 }
All we have to do now is to return the example set. If we want to return more
than one data object, we could wrap it in an array. The outgoing ports of the
script operator will deliver the corresponding object in the array: The first port
the first element of the array, the second the second and so on. This time, we
simply could return the single object, because we only have one output. The
complete code now looks like:
1 import com . rapidminer . t o o l s . Ontology ;
2
3 ExampleSet exampleSet = input [ 0 ] ;
4 Att r ibute s a t t r i b u t e s = exampleSet . g e tAt t r i bu t e s ( ) ;
5 Attr ibute sourceAt t r ibut e = a t t r i b u t e s . get ( ” r e l a t i v e time ” ) ;
6 St r ing newName = ( ” date ( ” + sourceAt t r ibut e . getName ( ) + ” ) ” ;
7 Attr ibute t a r g e t A t t r i b u t e = Attr ibuteFactory . c r e a t e A t t r i b u t e (newName
, Ontology .DATE TIME) ;
8 t a r g e t A t t r i b u t e . setTableIndex ( sourceAt t r ibut e . getTableIndex ( ) ) ;
9 a t t r i b u t e s . addRegular ( t a r g e t A t t r i b u t e ) ;
10 a t t r i b u t e s . remove ( sourc eAt t r ibut e ) ;
11
12 for ( Example example : exampleSet ) {13 double timeStampValue = example . getValue ( t a r g e t A t t r i b u t e ) ;
14 example . setValue ( ta rge tAt t r ibute , timeStampValue ∗ 1000) ;
15 }16
17 return ( exampleSet ) ;
2.2 Connecting with other Operators
If you take a look at the screenshot above showing the process, we have connected
the first port of the scripting operator with the following operator. We want to
6
2.2. Connecting with other Operators
use this operator to adjust the date: We have written a script to transform the
seconds after startup time into a date format. But this is now relative to the
1st January 1970 and not to the startup time. So we want to use the Adjust
Date operator to correct this. With correct parameter settings, it will add the
difference between the startup time of the machine and the 1st January 1970.
But when trying to select the correct attribute, we notice one of the limitations
of the scripting operator: It doesn’t take care of the meta data of data objects.
Every information in the meta data is lost and so one cannot select the attributes
in the drop down list, we have to type it manually. The process then works, but
if you have become used to the benefits from the meta data transformation, you
probably won’t like to loose them, especially not in a more complex process setup.
The only way of not loosing them when writing your own code is to build your
own Extension to RapidMiner. The next chapters will show how this works, and
how meta data can be treated correctly.
7


3 The RapidMiner data storagestrategy
Chances are that you have made first contact with the RapidMiner API for
accessing data in the script above. If you are already an experienced Rapid-
Miner developer and have already written plug-ins for RapidMiner 4.x, you are
already familiar with the underlying data structures, you might skip this part.
Although there have been several improvements in details, the concepts haven’t
been changed.
If you still read this, you might ask, why there’s a complete section about such
a simple thing like storing data. But storing data isn’t as simple as it sounds, if
we have certain requirements like they occur frequently in data mining tasks.
• High data volume with both a high number of rows which might grow into
the millions and in the same time a high number of columns. Especially in
text mining tasks, working on over 100.000 columns is very common.
• Data might be sparse, that means that only a very small fraction of entries
differs from a default value.
• Data is accessed in many different ways, sequentially or in random order,
read or written or both.
• Data manipulation is crucial, but not only single values have to be altered.
In many applications hole columns or rows must be added or removed. For
cross-validation complete folds have to be selected or deselected.
9

3. The RapidMiner data storage strategy
• Data might be of different types like numbers, dates, times, words or whole
texts.
• Some columns might have a different meaning, as well in reality as for
the analysis. One might be the classification, others might be input from
sensors.
• The order of rows must be changeable; some algorithms need a random
sequence, some other a special ordering.
These requirements need a special treatment and this makes everything a little
bit more complex. What you have seen in the script example above was the
surface of a layer concept, we will describe in detail now. In the next section we
will begin our introduction with the basement: The ExampleTable.
3.1 The Example Table
The ExampleTable is designed for storing the actual raw data. In this first level,
the data hasn’t any meaning yet and is always saved as number. It is organized
row-wise, that means, that the single values are first bundled into their rows and
these rows are then combined to a table. Hence each row must have exactly the
same number of columns.
ExampleTablecolumn 1 colum 2 column 3 column m
row 1
row 2
row 3
row 4
row n
Figure 3.1: The inner structure of an ExampleTable. Columns exist only logically
as indicated by the dotted lines.
10
3.2. The ExampleSet and its Attributes
We see this in the image above, where the single numerical values are shown as
black boxes inside the grey boxes of the rows. The columns are logically present,
that means each value can be addressed using the column index, but since the
columns are not represented by objects, they are only indicated by the dotted
lines. The ExampleTable combines an arbitrary number of these rows, which are
represented by the DataRow interface.
There are some different implementations of the DataRow interface, using either
different java number types like double, float or int for data storage or saving the
row in a sparse manner: Values different from zero are stored together with an
index, so if one retrieves the value of column x, the array of indices is searched for
x, if found the respective value will be returned. The different data types may save
memory consumption hence a float only consumes four bytes and saves the four
bytes compared to a double. But this is paid with a loss of precision: Rounding
errors might occur, or if you switch to integer representation, the fractional part
is lost.
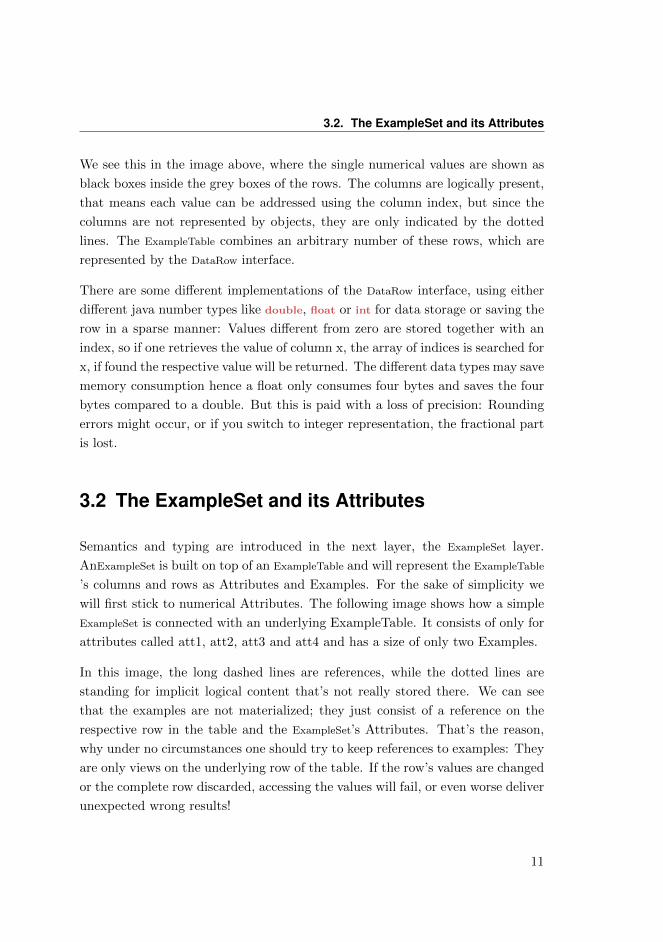
3.2 The ExampleSet and its Attributes
Semantics and typing are introduced in the next layer, the ExampleSet layer.
AnExampleSet is built on top of an ExampleTable and will represent the ExampleTable
’s columns and rows as Attributes and Examples. For the sake of simplicity we
will first stick to numerical Attributes. The following image shows how a simple
ExampleSet is connected with an underlying ExampleTable. It consists of only for
attributes called att1, att2, att3 and att4 and has a size of only two Examples.
In this image, the long dashed lines are references, while the dotted lines are
standing for implicit logical content that’s not really stored there. We can see
that the examples are not materialized; they just consist of a reference on the
respective row in the table and the ExampleSet’s Attributes. That’s the reason,
why under no circumstances one should try to keep references to examples: They
are only views on the underlying row of the table. If the row’s values are changed
or the complete row discarded, accessing the values will fail, or even worse deliver
unexpected wrong results!
11
3. The RapidMiner data storage strategy
row 1
row 2
column 1 column 2 column 3 column 4
ExampleTable
example 1
example 2
attribute 2 attribute 3 attribute 4attribute 1
n n n n
ExampleSet
att1 att2 att3 att4
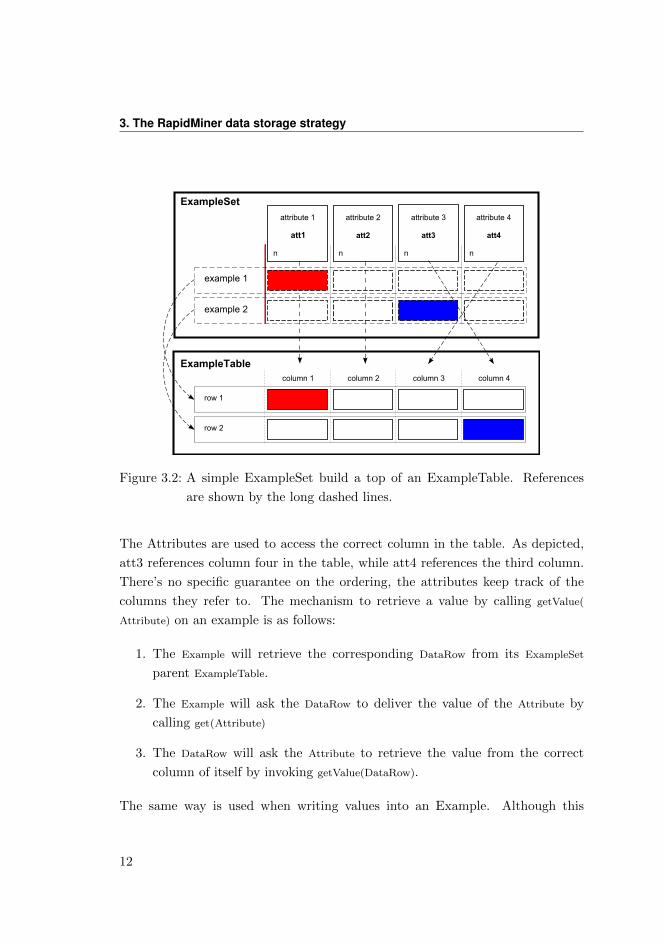
Figure 3.2: A simple ExampleSet build a top of an ExampleTable. References
are shown by the long dashed lines.
The Attributes are used to access the correct column in the table. As depicted,
att3 references column four in the table, while att4 references the third column.
There’s no specific guarantee on the ordering, the attributes keep track of the
columns they refer to. The mechanism to retrieve a value by calling getValue(
Attribute) on an example is as follows:
1. The Example will retrieve the corresponding DataRow from its ExampleSet
parent ExampleTable.
2. The Example will ask the DataRow to deliver the value of the Attribute by
calling get(Attribute)
3. The DataRow will ask the Attribute to retrieve the value from the correct
column of itself by invoking getValue(DataRow).
The same way is used when writing values into an Example. Although this
12
3.2. The ExampleSet and its Attributes
mechanism seems to be more complex than it needs to, we will see, that it allows
a flexible view concept that wouldn’t be possible otherwise. Anyway we are now
familiar how to retrieve values, but as mentioned above, we have concentrated
our focus on numerical values. How are nominal values stored and accessed? The
underlying ExampleTable only stores numbers, so how should this be possible? The
key to this is the Attribute object. It does not only store a name, that is printed
bold in the picture above, and not only a type like numerical, nominal or date,
but it also may contain a NominalMapping. This object is a Map, translating the
numerical values into Strings and vice versa. So if you want to set an Example’s
value of a nominal attribute, you might call:
1 example . setValue ( a t t r i bu t e , ”new value ” ) ;
And for getting the nominal value:
1 St r ing value = example . getNominalValue ( a t t r i b u t e ) ;
If the value is unknown a new entry in the mapping will be created. The index of
this mapping will be stored as numerical value in the ExampleTable. So be carefully
when directly manipulating the ExampleTable or when accessing the indices behind
the nominal values! Changes might result in undesired behaviour. The methods
for manipulating the numerical values look quite different and we have used them
already in the script example. Anyway we will describe them again in more detail:
1 double value = 9d ;
2 example . setValue ( a t t r i bu t e , va lue ) ;
And for getting the nominal value:
1 double value = example . getValue ( a t t r i b u t e ) ;
One special value is the missing value. There are several possibilities why a
specific value might be missing and we have to cope with that. In RapidMiner
several operators handle missing values, but what do we do during programming?
Missing values are simply encoded as Double.NaN. So you will receive a NaN when
getting the value and have to pass a NaN when you want to set a value unknown.
On nominal attributes you simply could pass null as String for the nominal value.
13
3. The RapidMiner data storage strategy
Beside from being used for accessing the data, the Attribute object holds addi-
tional information about the column. We already have seen that an Attribute is
of a certain type, which is depicted by the small n in the graphic, n for numerical
attributes, nom for nominals. There are a few other types like date, time and
the subtypes of nominal text, polynominal and binominal.
How the attribute is used during analysis is controlled by its role. There are
several predefined roles like label and prediction, cluster, weight, batch and several
more. You are free to set user defined roles in RapidMiner using the Set Role
operator, but these are not interpreted by RapidMiner operators. All attributes
with a role have in common, that they are not treated as regular attributes and
hence are not used for analysis, if not required as their special role like the label
for learning from examples. The Attributes object of an ExampleSet manages the
special roles. It offers several methods for manipulating these rules. Please keep
in mind, that iterating over the single Attributes of an Attributes Object does only
iterate over the regular attributes! If you want all attributes the allAttributes ()
method must be used.
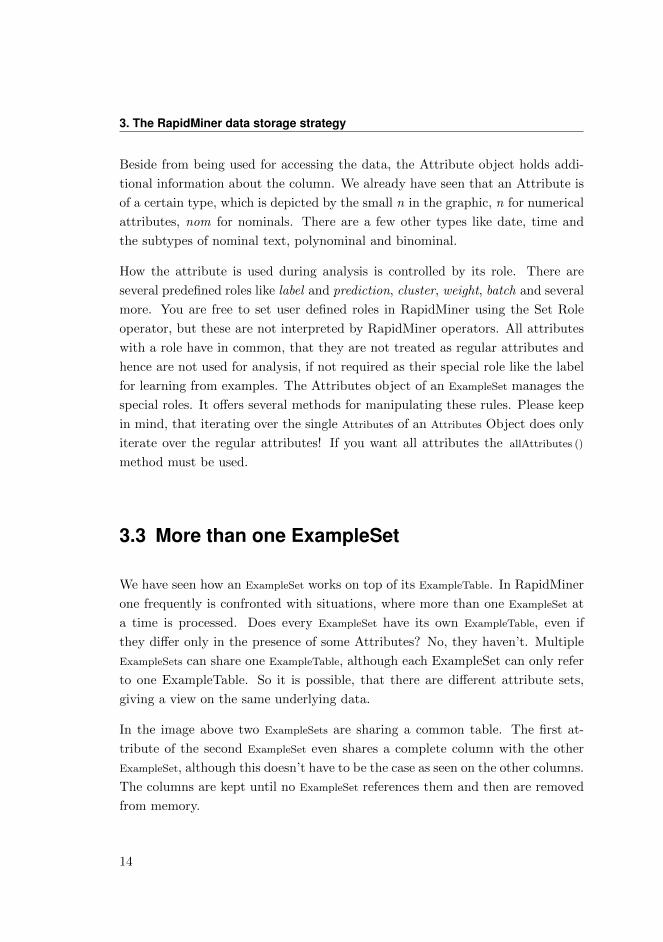
3.3 More than one ExampleSet
We have seen how an ExampleSet works on top of its ExampleTable. In RapidMiner
one frequently is confronted with situations, where more than one ExampleSet at
a time is processed. Does every ExampleSet have its own ExampleTable, even if
they differ only in the presence of some Attributes? No, they haven’t. Multiple
ExampleSets can share one ExampleTable, although each ExampleSet can only refer
to one ExampleTable. So it is possible, that there are different attribute sets,
giving a view on the same underlying data.
In the image above two ExampleSets are sharing a common table. The first at-
tribute of the second ExampleSet even shares a complete column with the other
ExampleSet, although this doesn’t have to be the case as seen on the other columns.
The columns are kept until no ExampleSet references them and then are removed
from memory.
14
3.4. Changing data on the fly
row 1
row 2
column 1 column 2 column 3 column 4
ExampleTable
example 1
example 2
ExampleSet
attribute 1
n
att1
attribute 2
n
att2
attribute 3
n
att3
attribute 5
n
att4
example 2
example 1
attribute 1
n
kunde
attribute 2
n
name
ExampleSet
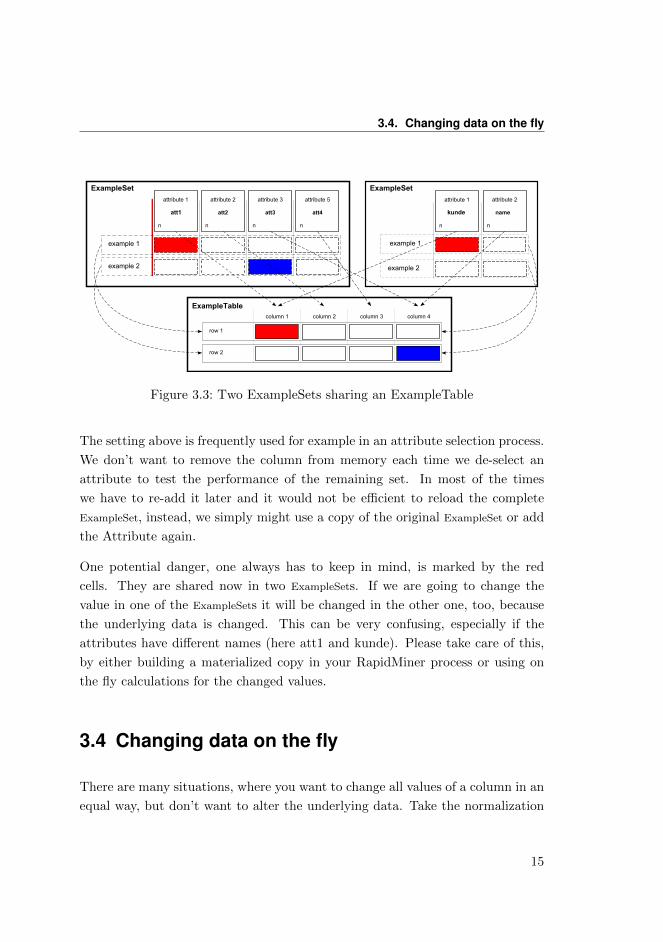
Figure 3.3: Two ExampleSets sharing an ExampleTable
The setting above is frequently used for example in an attribute selection process.
We don’t want to remove the column from memory each time we de-select an
attribute to test the performance of the remaining set. In most of the times
we have to re-add it later and it would not be efficient to reload the complete
ExampleSet, instead, we simply might use a copy of the original ExampleSet or add
the Attribute again.
One potential danger, one always has to keep in mind, is marked by the red
cells. They are shared now in two ExampleSets. If we are going to change the
value in one of the ExampleSets it will be changed in the other one, too, because
the underlying data is changed. This can be very confusing, especially if the
attributes have different names (here att1 and kunde). Please take care of this,
by either building a materialized copy in your RapidMiner process or using on
the fly calculations for the changed values.
3.4 Changing data on the fly
There are many situations, where you want to change all values of a column in an
equal way, but don’t want to alter the underlying data. Take the normalization
15
3. The RapidMiner data storage strategy
for an example, where each value is transformed in the same way, but you must
use the same data elsewhere in the process. In this case you can make the
calculation each time a value is requested. This might even save computation
time and memory, if the values are requested only once, like it is frequent the
case when applying a model or even during training for some models.
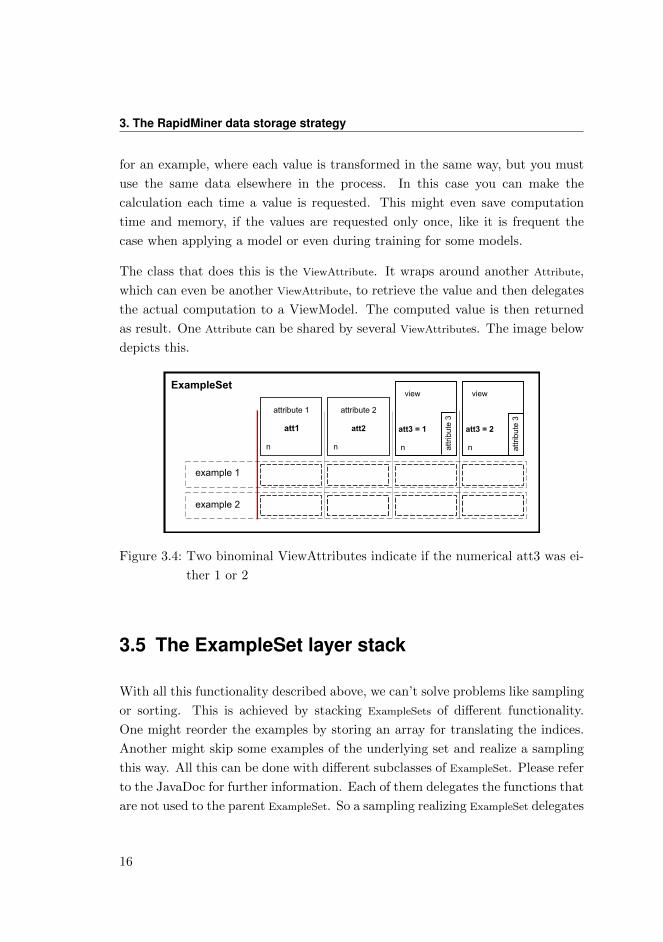
The class that does this is the ViewAttribute. It wraps around another Attribute,
which can even be another ViewAttribute, to retrieve the value and then delegates
the actual computation to a ViewModel. The computed value is then returned
as result. One Attribute can be shared by several ViewAttributes. The image below
depicts this.
example 1
example 2
attribute 2attribute 1
n n
ExampleSet
att1 att2
n
att3 = 1
view
attr
ibut
e 3
n
att3 = 2
view
attr
ibut
e 3
Figure 3.4: Two binominal ViewAttributes indicate if the numerical att3 was ei-
ther 1 or 2
3.5 The ExampleSet layer stack
With all this functionality described above, we can’t solve problems like sampling
or sorting. This is achieved by stacking ExampleSets of different functionality.
One might reorder the examples by storing an array for translating the indices.
Another might skip some examples of the underlying set and realize a sampling
this way. All this can be done with different subclasses of ExampleSet. Please refer
to the JavaDoc for further information. Each of them delegates the functions that
are not used to the parent ExampleSet. So a sampling realizing ExampleSet delegates
16
3.5. The ExampleSet layer stack
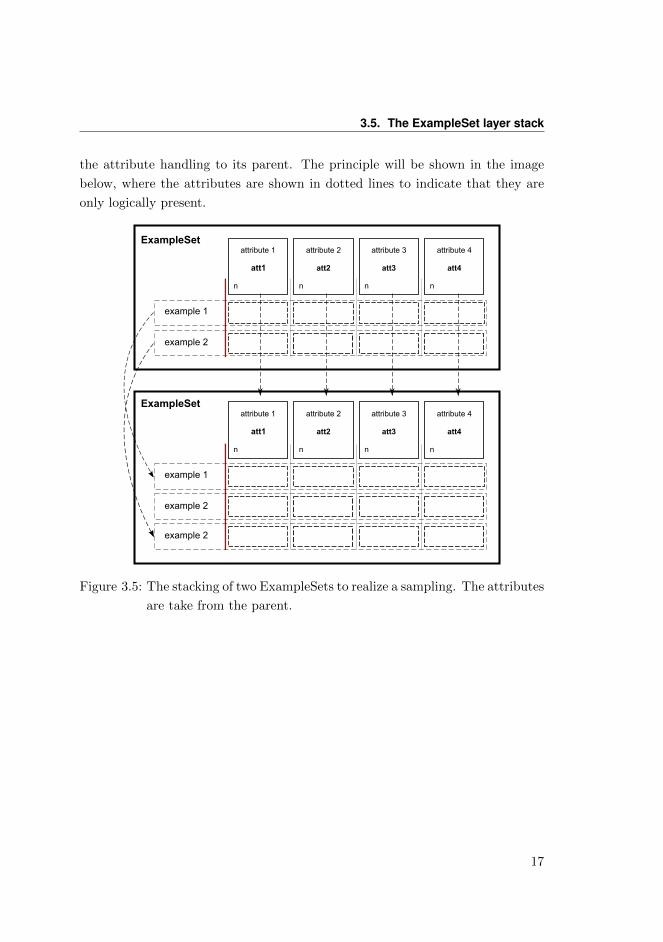
the attribute handling to its parent. The principle will be shown in the image
below, where the attributes are shown in dotted lines to indicate that they are
only logically present.
example 1
example 2
attribute 1
n
ExampleSet
att1
attribute 2
n
att2
attribute 3
n
att3
attribute 4
n
att4
ExampleSet
example 1
example 2
attribute 1
n
att1
attribute 2
n
att2
attribute 3
n
att3
attribute 4
n
att4
example 2
Figure 3.5: The stacking of two ExampleSets to realize a sampling. The attributes
are take from the parent.
17


4 Creating your own Extension
When you are going to build your own Extension, you will need Java with version
1.6 and above as well as an IDE like Eclipse. The example projects that come with
this tutorial are Eclipse projects, so we strongly recommend using Eclipse, which
is freely available at Eclipse.org. On our website you will find a tutorial how to
check out the latest version of RapidMiner from the svn repository. Please test
if it starts by creating a debug configuration and starting the RapidMinerGUI class.
If started from Eclipse, RapidMiner will only allocate as much RAM as de-
fault for any java program: 64 MB. Since this is really insufficient for most
real data mining applications, you will have to increase this. Select Run / Debug
Configurations. . . and select the one for RapidMiner. Got to the Arguments tab
and enter −Xmx256m. You might enter any number after Xmx, but ensure that
that much megabytes of RAM are available. Especially on 32 bit systems the
maximum is relatively low around 1.5 GB.
After you have done this, we will add two additional projects: One is the tuto-
rial extension that already contains everything described in the next chapters.
Whenever you are not sure, there is example code. The other one is an Exten-
sion template, where you only change a few file names and entries to adapt it for
your own Extension. You might use it while reading for experimenting with own
implementations of what is described here.
Together with this tutorial you got two zip files. Each of them contains one of
the projects, which we will now import into Eclipse.
19
4. Creating your own Extension
4. Select Import. . . from the File menu.
5. When the selection menu for the project type opens, select Existing Projects
into Workspace from the General folder and click next.
6. The Import Projects page appears. Select the radio button before Select
archive file : and select one of the two zip files with the Browse button.
7. The project will be listed in the Projects window. Select it by checking it
and click Finish.
8. The project will show up in the Package Explorer. Repeat the steps for the
second zip file.
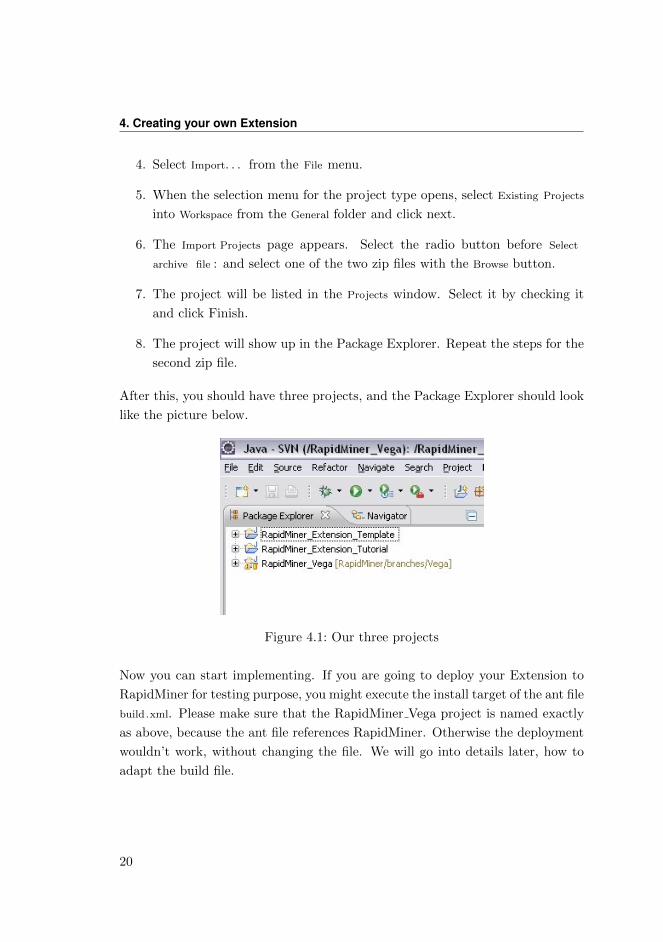
After this, you should have three projects, and the Package Explorer should look
like the picture below.
Figure 4.1: Our three projects
Now you can start implementing. If you are going to deploy your Extension to
RapidMiner for testing purpose, you might execute the install target of the ant file
build.xml. Please make sure that the RapidMiner Vega project is named exactly
as above, because the ant file references RapidMiner. Otherwise the deployment
wouldn’t work, without changing the file. We will go into details later, how to
adapt the build file.
20
5 Building Operators
There are two types of operators in RapidMiner: Normal operators and such
which contain one or more sub processes. We call the second type super operator,
to differentiate from the normal operators. For getting some training we will start
to implement a normal operator. Once finished, we will show how to transfer these
techniques to the super operators and which special concerns might arise there.
5.1 Our first operator
What to do, if we want to implement the above functionality in an Extension
instead of a script? Basically we would have to write a special class. If you made
you decision for another IDE than Eclipse, create a new project and make sure,
that RapidMiner is in the class path, either as .jar file or checked out from source-
forge.net in a separate project. Our website contains additional information and
a guide how to check out RapidMiner.
The next step is to create the new class. Each normal operator has to extend
Operator or a subclass of Operator. There are many subclasses for more special-
ized operators like learning or preprocessing operators, but we will focus on the
simplest case. If you are interested in more, take a look at the type hierarchy of
Operator in the API documentation or the IDE itself.
If you have created your class, you must implement a one argument constructor
receiving an OperatorDescription as parameter. This is needed by RapidMiner in
order to create the operator. The class file will look like that:
21
5. Building Operators
1 package com . rapidminer . operator . p r e p r o c e s s i n g . t rans fo rmat ion ;
2
3 import com . rapidminer . operator . Operator ;
4 import com . rapidminer . operator . OperatorDescr ipt ion ;
5
6 /**
7 * This is the Numerical2Date tutorial operator.
8 *
9 * @author Sebastian Land
10 */
11 public class Numerical2DateOperator extends Operator {12
13 /**
14 * Constructor
15 */
16 public Numerical2DateOperator ( OperatorDescr ipt ion
d e s c r i p t i o n ) {17 super ( d e s c r i p t i o n ) ;
18 }19 }
5.2 Adding Ports
Before writing the working part of the operator, we want to define ports to get
input from the process or delivering results. Having operators without any ports
is not suggested, since the execution order in the process would be undefined.
How to define these ports? You simply add them as private variable using the
following lines of code:
1 private InputPort exampleSetInput = get InputPorts ( ) . c r ea tePor t ( ”
example s e t ” ) ;
2 private OutputPort exampleSetOutput = getOutputPorts ( ) . c r ea tePor t ( ”
exampleset ” ) ;
Please mention, that you have to set unique names for the ports of one operator.
If you want to follow the name convention, you are recommended to write the
names in lower case and use blanks to separate words. If you would add this
22
5.2. Adding Ports
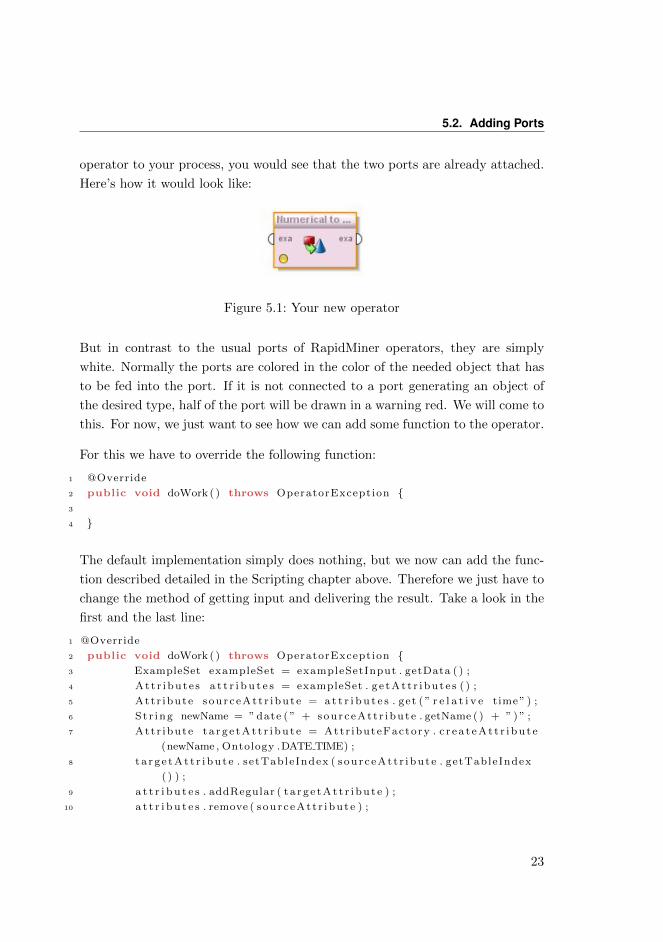
operator to your process, you would see that the two ports are already attached.
Here’s how it would look like:
Figure 5.1: Your new operator
But in contrast to the usual ports of RapidMiner operators, they are simply
white. Normally the ports are colored in the color of the needed object that has
to be fed into the port. If it is not connected to a port generating an object of
the desired type, half of the port will be drawn in a warning red. We will come to
this. For now, we just want to see how we can add some function to the operator.
For this we have to override the following function:
1 @Override
2 public void doWork ( ) throws OperatorException {3
4 }
The default implementation simply does nothing, but we now can add the func-
tion described detailed in the Scripting chapter above. Therefore we just have to
change the method of getting input and delivering the result. Take a look in the
first and the last line:
1 @Override
2 public void doWork ( ) throws OperatorException {3 ExampleSet exampleSet = exampleSetInput . getData ( ) ;
4 Att r ibute s a t t r i b u t e s = exampleSet . g e tAt t r i bu t e s ( ) ;
5 Attr ibute sourceAt t r ibute = a t t r i b u t e s . get ( ” r e l a t i v e time ” ) ;
6 St r ing newName = ” date ( ” + sourceAt t r ibute . getName ( ) + ” ) ” ;
7 Attr ibute t a r g e t A t t r i b u t e = Attr ibuteFactory . c r e a t e A t t r i b u t e
(newName , Ontology .DATE TIME) ;
8 t a r g e t A t t r i b u t e . setTableIndex ( sourceAt t r ibut e . getTableIndex
( ) ) ;
9 a t t r i b u t e s . addRegular ( t a r g e t A t t r i b u t e ) ;
10 a t t r i b u t e s . remove ( sourc eAt t r ibut e ) ;
23
5. Building Operators
11
12 for ( Example example : exampleSet ) {13 double timeStampValue = example . getValue (
t a r g e t A t t r i b u t e ) ;
14 example . setValue ( ta rge tAt t r ibute , timeStampValue ∗1000) ;
15 }16
17 exampleSetOutput . d e l i v e r ( exampleSet ) ;
18 }
We see that one call suffices to retrieve the ExampleSet from the input port. And
the single line 17 delivers the result to the output port. We could execute this
operator and would receive the same output as with the scripting operator above.
If you already have written operators in previous RapidMiner versions, you will
remember the two methods getInputClasses and getOutputClasses, which defined
the input and output classes back then. The simplest way is to delete these
needless methods and create one port per input object. If your operator doesn’t
use a fixed number of objects, you could insert a PortExtender, but we will come
back to this when describing super operators.
Beside this, you will have to exchange the main working method. Instead of the
deprecated apply method you now have to implement the doWork method. Since
it doesn’t receive anything as input and is of type void, you are forced to use
the ports for retrieving input and delivering output.
5.3 Declaring operators to RapidMiner
Once we have implemented an operator, we want to test it in RapidMiner. Unfor-
tunately RapidMiner isn’t prophetic, (Actually it could be, but using data mining
methods for guessing class usage would be overkill) so we will have to specify it
in a file. The file in the template project is called OperatorsTemplate.xml, but in
general we will refer to this file as the operator descriptor. RapidMiner knows
which file is as descriptor, because it is linked with a property in the manifest file
24
5.3. Declaring operators to RapidMiner
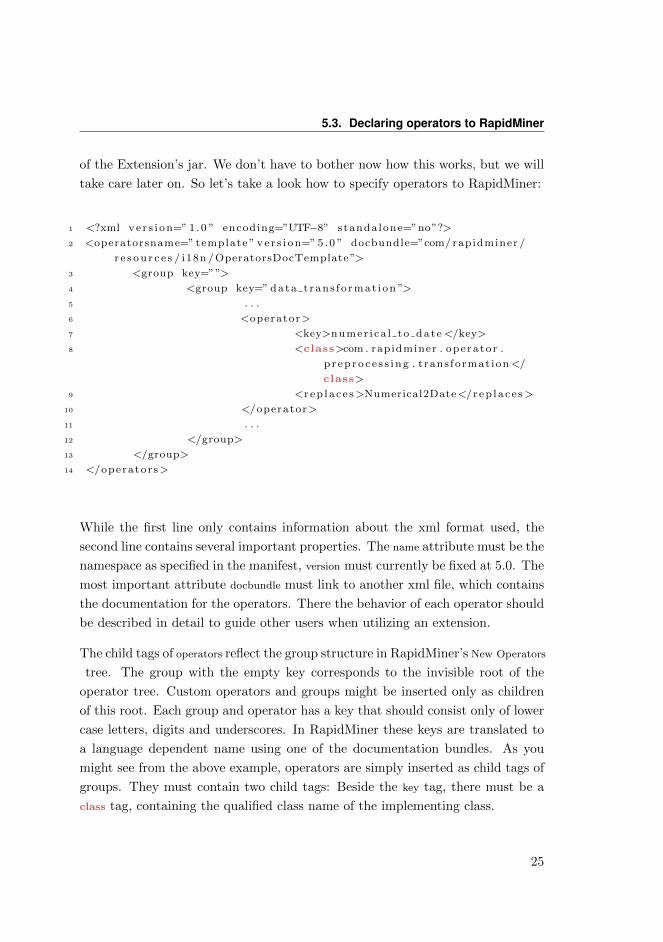
of the Extension’s jar. We don’t have to bother now how this works, but we will
take care later on. So let’s take a look how to specify operators to RapidMiner:
1 <?xml ve r s i o n=” 1 .0 ” encoding=”UTF−8” standa lone=”no”?>
2 <operatorsname=” template ” v e r s i on=” 5 .0 ” docbundle=”com/ rapidminer /
r e s o u r c e s / i18n /OperatorsDocTemplate”>
3 <group key=””>
4 <group key=” data t rans fo rmat ion ”>
5 . . .
6 <operator>
7 <key>numer i ca l to date </key>
8 <class>com . rapidminer . operator .
p r e p r o c e s s i n g . t rans format ion </
class>
9 <r ep l a c e s>Numerical2Date</r ep l a c e s>
10 </operator>
11 . . .
12 </group>
13 </group>
14 </operators>
While the first line only contains information about the xml format used, the
second line contains several important properties. The name attribute must be the
namespace as specified in the manifest, version must currently be fixed at 5.0. The
most important attribute docbundle must link to another xml file, which contains
the documentation for the operators. There the behavior of each operator should
be described in detail to guide other users when utilizing an extension.
The child tags of operators reflect the group structure in RapidMiner’s New Operators
tree. The group with the empty key corresponds to the invisible root of the
operator tree. Custom operators and groups might be inserted only as children
of this root. Each group and operator has a key that should consist only of lower
case letters, digits and underscores. In RapidMiner these keys are translated to
a language dependent name using one of the documentation bundles. As you
might see from the above example, operators are simply inserted as child tags of
groups. They must contain two child tags: Beside the key tag, there must be a
class tag, containing the qualified class name of the implementing class.
25
5. Building Operators
Optionally there might be a replaces tag. It specifies how this operator was called
in 4.x versions of RapidMiner. If it is set, each operator with that name will be
replaced during import of a 4.x process automatically with this new operator.
That might be important for renaming the operators to obey the new naming
schema.
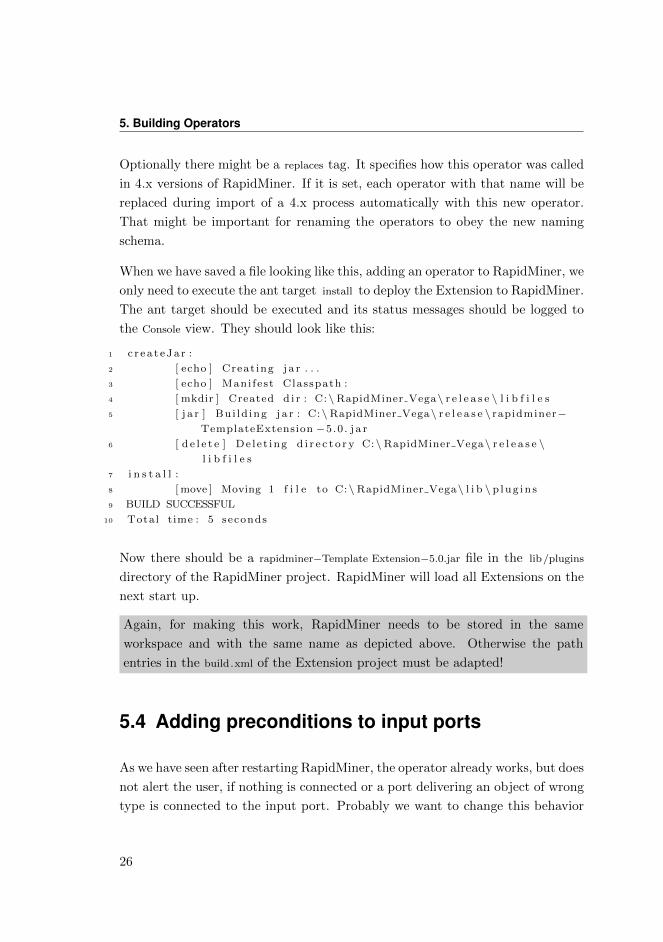
When we have saved a file looking like this, adding an operator to RapidMiner, we
only need to execute the ant target install to deploy the Extension to RapidMiner.
The ant target should be executed and its status messages should be logged to
the Console view. They should look like this:
1 c r e a t eJa r :
2 [ echo ] Creat ing j a r . . .
3 [ echo ] Mani fest Classpath :
4 [ mkdir ] Created d i r : C:\RapidMiner Vega\ r e l e a s e \ l i b f i l e s
5 [ j a r ] Bui ld ing j a r : C:\RapidMiner Vega\ r e l e a s e \ rapidminer−TemplateExtension −5.0 . j a r
6 [ d e l e t e ] De l e t ing d i r e c t o r y C:\RapidMiner Vega\ r e l e a s e \l i b f i l e s
7 i n s t a l l :
8 [ move ] Moving 1 f i l e to C:\RapidMiner Vega\ l i b \ p lug in s
9 BUILD SUCCESSFUL
10 Total time : 5 seconds
Now there should be a rapidminer−Template Extension−5.0.jar file in the lib/plugins
directory of the RapidMiner project. RapidMiner will load all Extensions on the
next start up.
Again, for making this work, RapidMiner needs to be stored in the same
workspace and with the same name as depicted above. Otherwise the path
entries in the build.xml of the Extension project must be adapted!
5.4 Adding preconditions to input ports
As we have seen after restarting RapidMiner, the operator already works, but does
not alert the user, if nothing is connected or a port delivering an object of wrong
type is connected to the input port. Probably we want to change this behavior
26
5.4. Adding preconditions to input ports
to ease the use of the operator. This can be done by adding preconditions to the
ports. These preconditions will register errors, if they are not fulfilled and are
registered during construction time of the operator. So we will have to add a few
code fragments to the constructor. For example this precondition will check if a
compatible IOObject is delivered:
1 public Numerical2DateOperator ( OperatorDescr ipt ion d e s c r i p t i o n ) {2 super ( d e s c r i p t i o n ) ;
3
4 exampleSetInput . addPrecondit ion ( newSimplePrecondit ion (
exampleSetInput , newMetaData ( ExampleSet . class ) ) ) ;
5 }
Since this is one of the most common cases, there exists a shortcut to achieve
this. We can specify the target IOObject class already when constructing the input
port:
1 private InputPort exampleSetInput = get InputPorts ( ) . c r ea tePor t ( ”
example s e t ” , ExampleSet . class ) ;
There are many more special preconditions, which for example test if an example
set satisfies some conditions, if it contains a special attribute of a specific role, or
if the attribute with a name is inserted. In this case, we could add a precondition
that tests, if the attribute relative time is part of the input example set.
1 exampleSetInput . addPrecondit ion (new ExampleSetPrecondit ion (
exampleSetInput , new St r ing [ ] {” r e l a t i v e time ” } , Ontology .
ATTRIBUTE VALUE) ) ;
The ExampleSetPrecondition is more powerful than required here. In fact, it can
check not only if fixed names are part of the example set, but also if the regular
attributes are of a certain type, which special attributes have to be contained and
of which type they must be. We don’t need this here, so we chose a constructor
ignoring most options and insert the most general value type for not making any
condition. If we insert the operator into a process without connecting an example
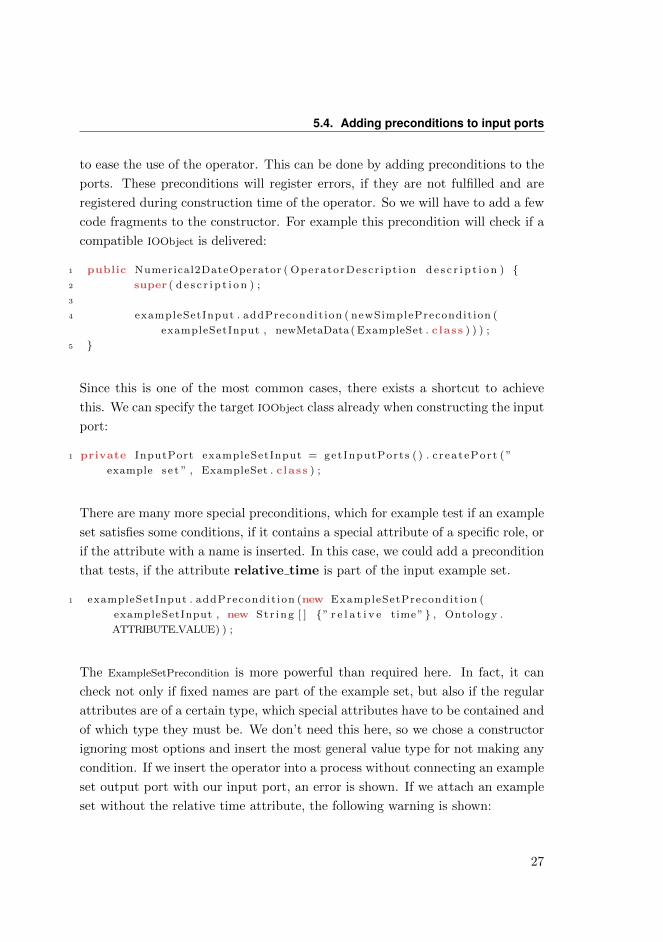
set output port with our input port, an error is shown. If we attach an example
set without the relative time attribute, the following warning is shown:
27
5. Building Operators
Figure 5.2: A warning is shown if the precondition is not fulfilled.
In addition to the getInputClasses / getOutputClasses approach of 4.x now much
more detailed conditions might be formulated. You might even write your own
precondition to check on any information that is part of the meta data. You
could even create your own errors with special error messages and Quick Fixes.
5.5 Adding generation rules to the output ports
If we take a look at our process, there is still something missing. Although we
now get the behavior on the input port we know from RapidMiner’s operators,
we still have an uncolored output port and the subsequent operator alerts, that
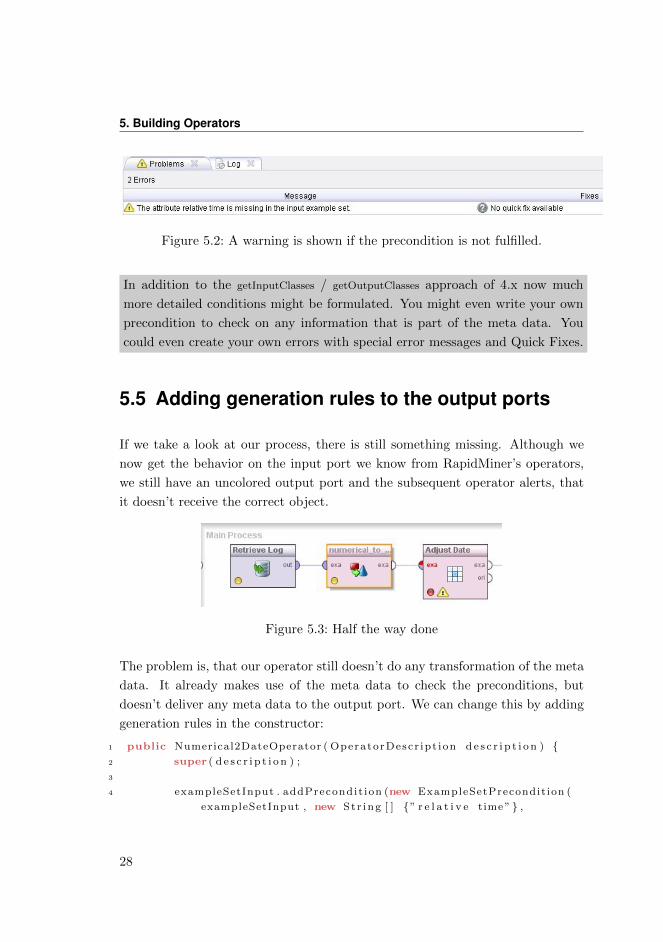
it doesn’t receive the correct object.
Figure 5.3: Half the way done
The problem is, that our operator still doesn’t do any transformation of the meta
data. It already makes use of the meta data to check the preconditions, but
doesn’t deliver any meta data to the output port. We can change this by adding
generation rules in the constructor:
1 public Numerical2DateOperator ( OperatorDescr ipt ion d e s c r i p t i o n ) {2 super ( d e s c r i p t i o n ) ;
3
4 exampleSetInput . addPrecondit ion (new ExampleSetPrecondit ion (
exampleSetInput , new St r ing [ ] {” r e l a t i v e time ” } ,
28
5.5. Adding generation rules to the output ports
Ontology .ATTRIBUTE VALUE) ) ;
5
6 getTransformer ( ) . addPassThroughRule ( exampleSetInput ,
exampleSetOutput ) ;
7 }
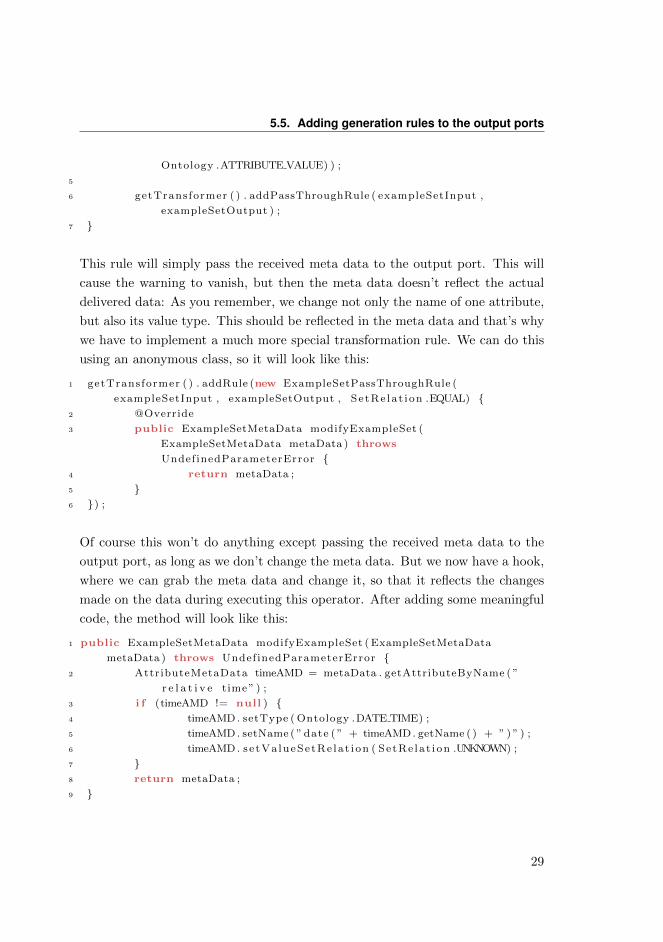
This rule will simply pass the received meta data to the output port. This will
cause the warning to vanish, but then the meta data doesn’t reflect the actual
delivered data: As you remember, we change not only the name of one attribute,
but also its value type. This should be reflected in the meta data and that’s why
we have to implement a much more special transformation rule. We can do this
using an anonymous class, so it will look like this:
1 getTransformer ( ) . addRule (new ExampleSetPassThroughRule (
exampleSetInput , exampleSetOutput , Se tRe la t ion .EQUAL) {2 @Override
3 public ExampleSetMetaData modifyExampleSet (
ExampleSetMetaData metaData ) throws
UndefinedParameterError {4 return metaData ;
5 }6 }) ;
Of course this won’t do anything except passing the received meta data to the
output port, as long as we don’t change the meta data. But we now have a hook,
where we can grab the meta data and change it, so that it reflects the changes
made on the data during executing this operator. After adding some meaningful
code, the method will look like this:
1 public ExampleSetMetaData modifyExampleSet ( ExampleSetMetaData
metaData ) throws UndefinedParameterError {2 AttributeMetaData timeAMD = metaData . getAttributeByName ( ”
r e l a t i v e time ” ) ;
3 i f (timeAMD != null ) {4 timeAMD . setType ( Ontology .DATE TIME) ;
5 timeAMD . setName ( ” date ( ” + timeAMD . getName ( ) + ” ) ” ) ;
6 timeAMD . se tVa lueSetRe la t i on ( SetRe la t i on .UNKNOWN) ;
7 }8 return metaData ;
9 }
29
5. Building Operators
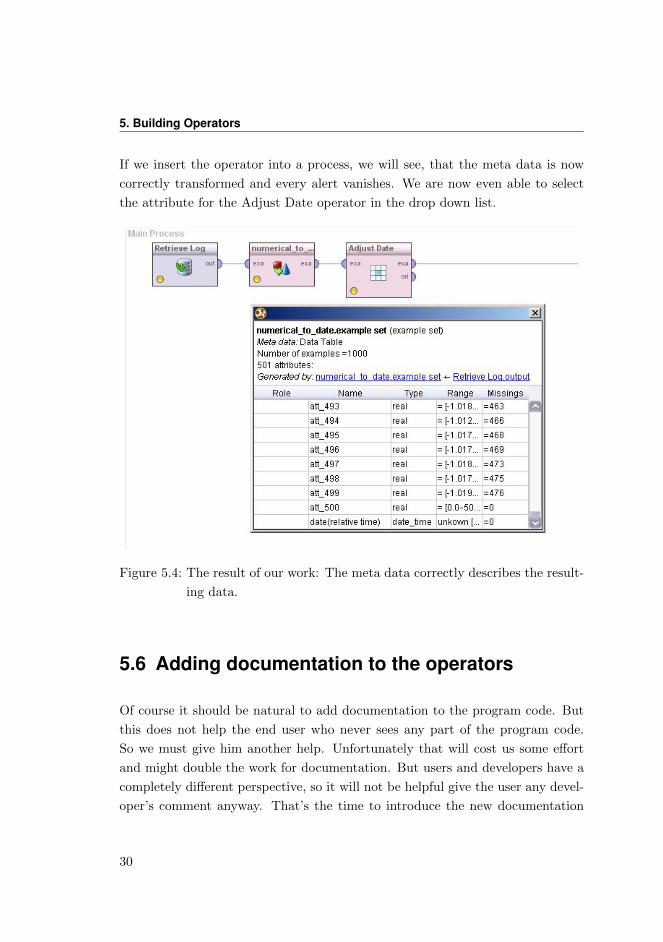
If we insert the operator into a process, we will see, that the meta data is now
correctly transformed and every alert vanishes. We are now even able to select
the attribute for the Adjust Date operator in the drop down list.
Figure 5.4: The result of our work: The meta data correctly describes the result-
ing data.
5.6 Adding documentation to the operators
Of course it should be natural to add documentation to the program code. But
this does not help the end user who never sees any part of the program code.
So we must give him another help. Unfortunately that will cost us some effort
and might double the work for documentation. But users and developers have a
completely different perspective, so it will not be helpful give the user any devel-
oper’s comment anyway. That’s the time to introduce the new documentation
30
5.7. Creating super operators
mechanism of RapidMiner 5.
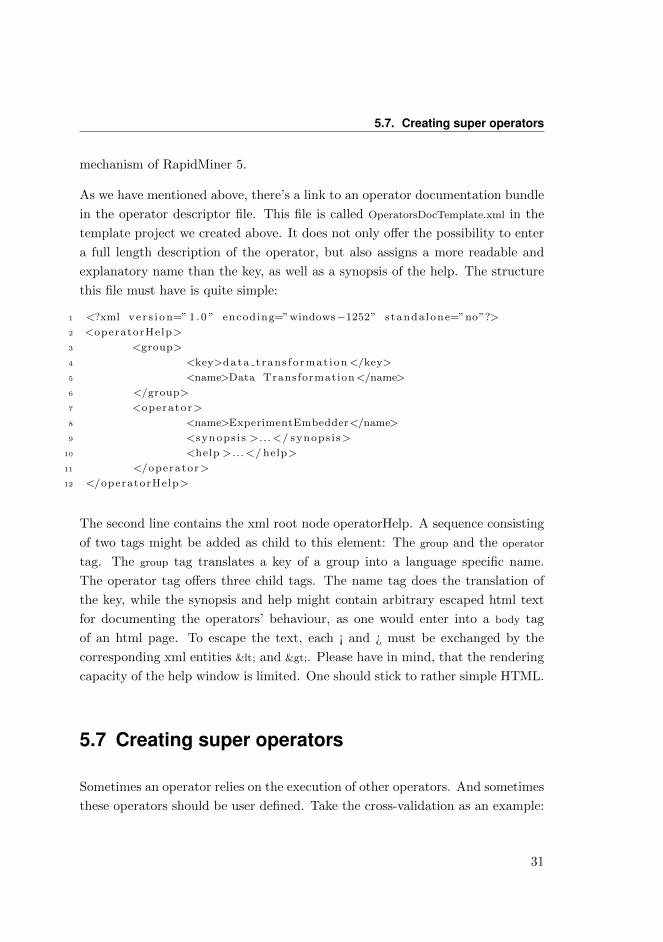
As we have mentioned above, there’s a link to an operator documentation bundle
in the operator descriptor file. This file is called OperatorsDocTemplate.xml in the
template project we created above. It does not only offer the possibility to enter
a full length description of the operator, but also assigns a more readable and
explanatory name than the key, as well as a synopsis of the help. The structure
this file must have is quite simple:
1 <?xml ve r s i o n=” 1 .0 ” encoding=”windows−1252” standa lone=”no”?>
2 <operatorHelp>
3 <group>
4 <key>data t rans format ion </key>
5 <name>Data Transformation</name>
6 </group>
7 <operator>
8 <name>ExperimentEmbedder</name>
9 <synops i s > . . .</ synops i s>
10 <help > . . .</ help>
11 </operator>
12 </operatorHelp>
The second line contains the xml root node operatorHelp. A sequence consisting
of two tags might be added as child to this element: The group and the operator
tag. The group tag translates a key of a group into a language specific name.
The operator tag offers three child tags. The name tag does the translation of
the key, while the synopsis and help might contain arbitrary escaped html text
for documenting the operators’ behaviour, as one would enter into a body tag
of an html page. To escape the text, each ¡ and ¿ must be exchanged by the
corresponding xml entities < and >. Please have in mind, that the rendering
capacity of the help window is limited. One should stick to rather simple HTML.
5.7 Creating super operators
Sometimes an operator relies on the execution of other operators. And sometimes
these operators should be user defined. Take the cross-validation as an example:
31
5. Building Operators
The user might specify the learner and the way how performance is measured
and then it executes these subprocesses as it needs. This section will describe
how you can implement your own super operators.
Let’s assume, we have a process that should be executed once every minute,
checking something inside a database. If you would have the RapidMiner Enter-
prise Analytics Server, this would be only two clicks away. But the order is stuck
somewhere inside another department and you need a solution really fast. So let’s
build a super operator that re-executes its inner operators every minute. In order
to do this, we have again to create a new class, but this time it has to extend the
OperatorChain class. The name of the super class is somehow misleading, because
there is no chain anymore, but we stick to this name because of historical reasons.
As with a simple operator, we have to implement a constructor. The empty class
looks like this:
1 /**
2 * This super operator will execute it’s inner process infinitely
3 * once every minute.
4 * @author Sebastian Land
5 */
6 public class L o o p I n f i n i t e l y extends OperatorChain {7
8 /**
9 * Constructor
10 */
11 public L o o p I n f i n i t e l y ( OperatorDescr ipt ion d e s c r i p t i o n ) {12 super ( d e s c r i p t i o n , ”Executed Process ” ) ;
13 }14 }
In contrast to the simple operator we must give the super constructor the names of
the subprocesses, we are going to create inside our super operator. The number
of names we pass to the super constructor determines the number of created
subprocesses. If you want to follow the naming convention, you should start each
word uppercase and use blanks to separate words. Later we might access these
subprocesses by index to execute them. But let’s first define some ports to pass
data to the super operator.
32
5.8. Adding a PortExtender
5.8 Adding a PortExtender
We could do this in exactly the same manner we did with the simple operator. But
since we don’t know which data should be passed to the inner process, we want
to do it now in a more general way, so that the user is able to pass any number
and any type of object to the inner process. You might know this behavior from
the Loop operator of RapidMiner. The code for adding this PortPairExtender looks
like this:
1 private f ina l PortPairExtender inputPortPairExtender = new
PortPairExtender ( ” input ” , get InputPorts ( ) , getSubprocess (0 ) .
ge t InnerSource s ( ) ) ;
Beside the PortPairExtender there’s also a PortExtender available, but we want an
equal number of input and output ports. The PortPairExtender takes care of this,
so we don’t have to do anything else. Let’s take a closer look at the constructor.
In addition to the name, we have to specify to which input ports the extender
should attach. The getInputPorts method delivers the input ports of the current
operator, so the port extender is attached on the left side of the operator box.
The paired ports are added to the inner sources of the first subprocess. You see,
that you can access the subprocesses via the getSubprocess method. If you are
familiar with RapidMiner’s integrated super operators like the Loop operator,
you know that there are always input ports on the left and output ports on the
right of the subprocess. But for distinguishing these ports from the in- and output
ports of the super operator, we call them inner sources and inner sinks. In fact
an inner source is technically an output port for the super operator, because he
has to deliver data to this port, while the inner sink is an input port for the super
operator where it can retrieve the output of the subprocesses from.
If we would want to deliver outputs from our loop, we could add the following
second variant of the PortPairExtender to collect the outputs from all iterations
and pass them as a collection to the output of our super operator:
1 private f ina l Col l ec t ingPortPa i rExtender outExtender = new
Col l ec t ingPortPa i rExtender ( ” output ” , getSubprocess (0 ) .
g e t Inne rS inks ( ) , getOutputPorts ( ) ) ;
33
5. Building Operators
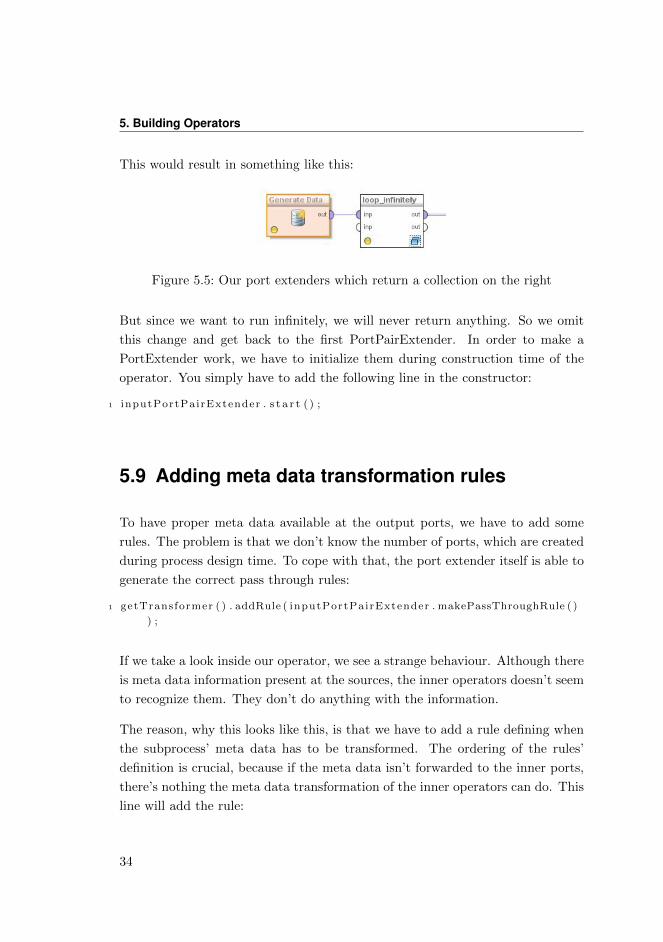
This would result in something like this:
Figure 5.5: Our port extenders which return a collection on the right
But since we want to run infinitely, we will never return anything. So we omit
this change and get back to the first PortPairExtender. In order to make a
PortExtender work, we have to initialize them during construction time of the
operator. You simply have to add the following line in the constructor:
1 inputPortPairExtender . s t a r t ( ) ;
5.9 Adding meta data transformation rules
To have proper meta data available at the output ports, we have to add some
rules. The problem is that we don’t know the number of ports, which are created
during process design time. To cope with that, the port extender itself is able to
generate the correct pass through rules:
1 getTransformer ( ) . addRule ( inputPortPairExtender . makePassThroughRule ( )
) ;
If we take a look inside our operator, we see a strange behaviour. Although there
is meta data information present at the sources, the inner operators doesn’t seem
to recognize them. They don’t do anything with the information.
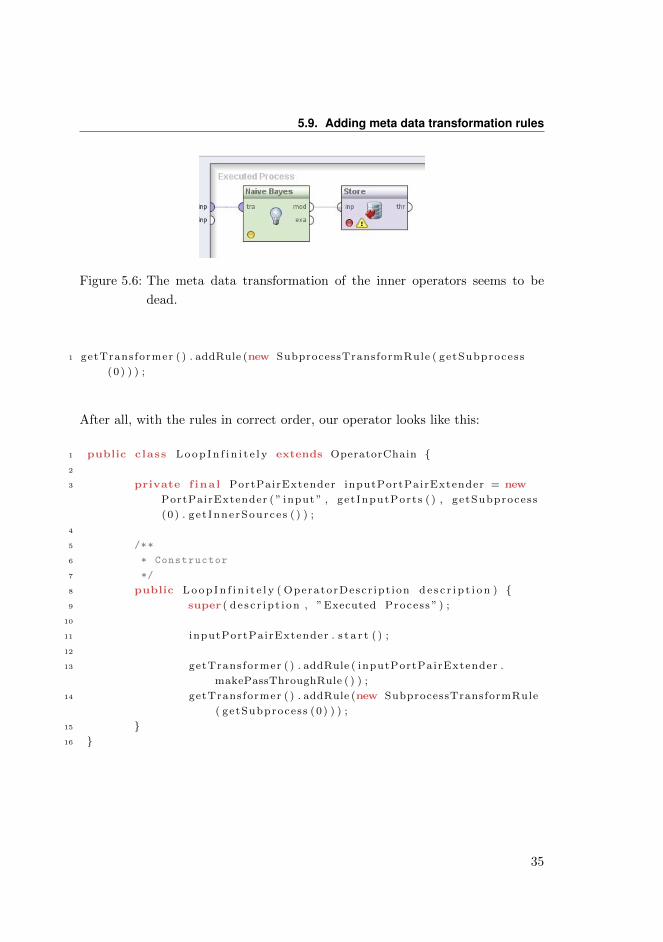
The reason, why this looks like this, is that we have to add a rule defining when
the subprocess’ meta data has to be transformed. The ordering of the rules’
definition is crucial, because if the meta data isn’t forwarded to the inner ports,
there’s nothing the meta data transformation of the inner operators can do. This
line will add the rule:
34
5.9. Adding meta data transformation rules
Figure 5.6: The meta data transformation of the inner operators seems to be
dead.
1 getTransformer ( ) . addRule (new SubprocessTransformRule ( getSubprocess
(0 ) ) ) ;
After all, with the rules in correct order, our operator looks like this:
1 public class L o o p I n f i n i t e l y extends OperatorChain {2
3 private f ina l PortPairExtender inputPortPairExtender = new
PortPairExtender ( ” input ” , get InputPorts ( ) , getSubprocess
(0 ) . ge t InnerSource s ( ) ) ;
4
5 /**
6 * Constructor
7 */
8 public L o o p I n f i n i t e l y ( OperatorDescr ipt ion d e s c r i p t i o n ) {9 super ( d e s c r i p t i o n , ”Executed Process ” ) ;
10
11 inputPortPairExtender . s t a r t ( ) ;
12
13 getTransformer ( ) . addRule ( inputPortPairExtender .
makePassThroughRule ( ) ) ;
14 getTransformer ( ) . addRule (new SubprocessTransformRule
( getSubprocess (0 ) ) ) ;
15 }16 }
35
5. Building Operators
5.10 Doing the work
What’s still missing in our operator is code that calls the subprocess. The idea
is pretty simple: First pass the input data to the inner sources, since it never
changes, we can do this outside the loop. Then loop infinitely and execute the
inner process. To ensure that we can stop the process using the stop button,
we should add the method checkForStop inside the loop. A better alternative
especially for looping operators is the inApplyLoop method. It will not only check
if the process must be stopped, but also resets the loop time of this operator, so
that it can be accessed by the Log operator. So we decide for the later:
1 @Override
2 public void doWork ( ) throws OperatorException {3 inputPortPairExtender . passDataThrough ( ) ;
4 while ( true ) {5 inApplyLoop ( ) ;
6 getSubprocess (0 ) . execute ( ) ;
7 }8 }
You see that we have full control over which subprocess is executed when.
In contrast to the old RapidMiner versions, where the subprocess was rather
implicitly defined by the position of the child operators inside the chain, they
are now clearly separated. This eases not only the process design and increases
the understandability of a process, but makes writing super operators easier, too.
Over and above the old and complex method for defining, which operator has
to deliver which class, is now the same as for all operators. All you have to do
is to reformulate the old getInnerOperatorCondition method as a new input port
precondition.
5.11 Defining parameters
That’s already very nice and does the infinite execution. But we have the prob-
lem, that we want the process to be executed every minute. And hence this
36
5.11. Defining parameters
interval might change or be different in other settings we want to avoid hard
coding it. It’s now time for defining our first parameter. Parameters are pre-
sented to the users in the parameter tab of RapidMiner, where they can alter
the parameter’s values. There are several types of parameters available for defin-
ing real or integer numbers, strings, collections of strings in comboboxes either
editable or not. Special types for selecting an attribute or several attributes are
available, too. The most complex parameter type might even define an own GUI
component as a configuration wizard.
Parameters might be either normal or expert parameters. The last aren’t shown,
when the user did not switch to expert mode. So it’s good practice to define
parameters as expert whose effect is only understandable by those who have
deeper knowledge of the underlying algorithm. All of these parameters must
have default values otherwise the user is bothered with defining a parameter he
cannot understand. That would be even worse than showing it with a reasonable
default value.
Further guidance might be offered to the user by defining parameter dependencies.
Some parameters are only used if other parameters are set to specific parameters.
A simple and well known example is the use of a local random seed. Many of
RapidMiner’s operators offer the possibility to take random numbers from a local
random generator instead of using the global random number sequence. This is
useful for ensuring reproducible results in sub parts of your process. If you want
use such a local random generator, this must be initialized with a so called seed.
So if you check the parameter use local random seed of the X-Validation operator,
a field is shown to insert such a seed. Technically the field is shown, because all
its dependencies were satisfied. This time there has only been one, namely the
use local random seed parameter has to be checked, but in general there might
be arbitrary conditions.
Using these dependencies show the user in each situation which parameter will
have an effect and he isn’t bothered with irrelevant parameters. If you are familiar
with the great amount of parameters kernel based methods like the SVM offer,
you probably will immediately understand, why this is important.
Let’s do something practical and add parameters to our operator. In fact, we
37
5. Building Operators
just have to overwrite one method:
1 @Override
2 public List<ParameterType> getParameterTypes ( ) {3 return super . getParameterTypes ( ) ;
4 }
We see, that we must return a list of ParameterType’s. If we are extending
another operator or some abstract class providing basic functionality, we have to
call the super method in order to retrieve the parameters defined there. Otherwise
the functionality provided by the super class might fail, because we don’t have
defined the needed parameters.
For now, we want to add a parameter defining the number of seconds between
the starts of subprocess execution. Using an integer for that, it would look like
that:
1 @Override
2 public List<ParameterType> getParameterTypes ( ) {3 List<ParameterType> types = super . getParameterTypes ( ) ;
4 types . add (new ParameterTypeInt (PARAMETER FREQUENCY, ” This
parameter d e f i n e s the number o f seconds between the
s t a r t o f two subsequent subproces s execut i on s . ” , 1 ,
I n t e g e r .MAX VALUE, 5 , fa l se ) ) ;
5 return types ;
6 }
First of all we retrieve the list of ParameterTypes of the super class and then
add our own parameter. This is of type integer and shall be named with the
public constant PARAMETER FREQUENCY. The following string should describe
the functionality of this parameter type and is shown in the tool tip of this
parameter. The three integer values define the minimal, the maximal and the
default value. The last parameter determines if the parameter is expert or not.
In this case we decided, that this parameter is quite understandable.
Before we can take a look at the result, we have to add the constant to the class.
This is important, to give API users access to the parameters if they want to
utilize this operator internally. Otherwise they would have to retype the string
and if then the parameter name is changed because of any reason, might be a
38
5.12. Using Parameters
typo or something similar, each utilizing class would have to be adapted, too. To
avoid this, simply define a public constant:
1 public stat ic f ina l St r ing PARAMETER FREQUENCY = ” frequency ” ;
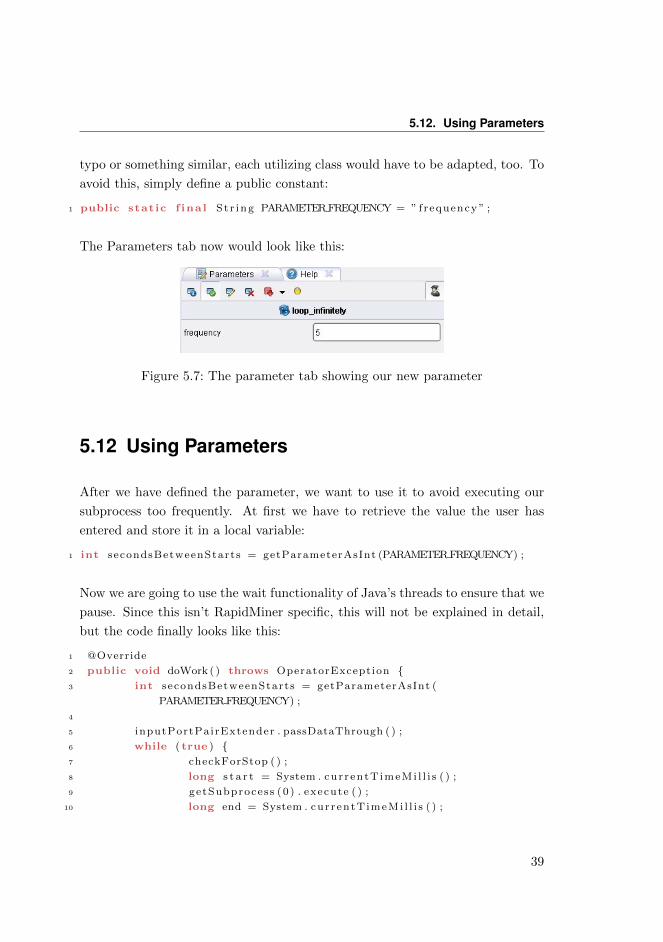
The Parameters tab now would look like this:
Figure 5.7: The parameter tab showing our new parameter
5.12 Using Parameters
After we have defined the parameter, we want to use it to avoid executing our
subprocess too frequently. At first we have to retrieve the value the user has
entered and store it in a local variable:
1 int secondsBetweenStarts = getParameterAsInt (PARAMETER FREQUENCY) ;
Now we are going to use the wait functionality of Java’s threads to ensure that we
pause. Since this isn’t RapidMiner specific, this will not be explained in detail,
but the code finally looks like this:
1 @Override
2 public void doWork ( ) throws OperatorException {3 int secondsBetweenStarts = getParameterAsInt (
PARAMETER FREQUENCY) ;
4
5 inputPortPairExtender . passDataThrough ( ) ;
6 while ( true ) {7 checkForStop ( ) ;
8 long s t a r t = System . cur r entT imeMi l l i s ( ) ;
9 getSubprocess (0 ) . execute ( ) ;
10 long end = System . cur r entT imeMi l l i s ( ) ;
39

5. Building Operators
11
12 long wait = ( secondsBetweenStarts ∗ 1000) − ( end −s t a r t ) ;
13 i f ( wait > 0) { // if we have to wait anyway
14 try {15 Thread . s l e e p ( wait ) ;
16 } catch ( Inter ruptedExcept ion e ) {17 // Don’t do anything: Only executing
too early
18 }19 }20 }21 }
5.13 Adding dependencies to parameters
Chances are we want to have the process to re-execute as fast as possible. We
could enter something link a zero into the parameter field to achieve this, but
this isn’t very selfexplanatory. To avoid this, we are going to add a Boolean
parameter determining if there’s any time restriction for the execution. Only if
this one is checked, we want the user to see the parameter field for the seconds.
So we introduce another parameter with its constant:
1 public stat ic f ina l St r ing PARAMETER RESTRICT FREQUENCY = ”
r e s t r i c t f r e q u e n c y ” ;
2
3 . . .
4
5 @Override
6 public List<ParameterType> getParameterTypes ( ) {7 List<ParameterType> types = super . getParameterTypes ( ) ;
8 types . add (new ParameterTypeBoolean (
PARAMETER RESTRICT FREQUENCY, ” I f checked , the f requency
o f subproces s execut ion might be r e s t r i c t e d . ” , false ,
fa l se ) ) ;
9
10 ParameterType type = new ParameterTypeInt (
PARAMETER FREQUENCY, ” This parameter d e f i n e s the number
o f seconds between the s t a r t o f two subsequent
40
5.13. Adding dependencies to parameters
subproces s execut i on s . ” , 1 , I n t e g e r .MAX VALUE, 5 , fa l se )
;
11 type . reg i s terDependencyCondit ion (new
BooleanParameterCondition ( this ,
PARAMETER RESTRICT FREQUENCY, true , true ) ) ;
12 types . add ( type ) ;
13
14 return types ;
15 }
For registering the condition, we had to remember the type in a local variable,
which must be added to the list separately. But then it’s fairly easy to add
a condition. Here we add a BooleanParameterCondition, which needs to have
a reference to a ParameterHandler. For operators, this is the operator itself.
The second method argument is the name of the referenced parameter. The two
Boolean values indicate if the parameter becomes mandatory if the condition is
satisfied and the second defines the value the referenced parameter must have in
order to fulfil this satisfied.
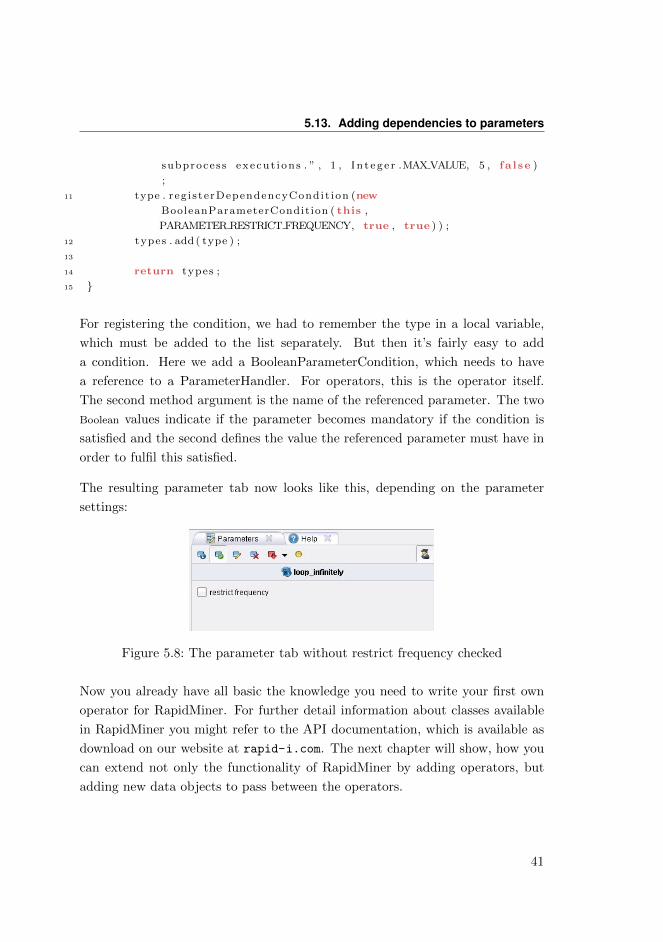
The resulting parameter tab now looks like this, depending on the parameter
settings:
Figure 5.8: The parameter tab without restrict frequency checked
Now you already have all basic the knowledge you need to write your first own
operator for RapidMiner. For further detail information about classes available
in RapidMiner you might refer to the API documentation, which is available as
download on our website at rapid-i.com. The next chapter will show, how you
can extend not only the functionality of RapidMiner by adding operators, but
adding new data objects to pass between the operators.
41
5. Building Operators
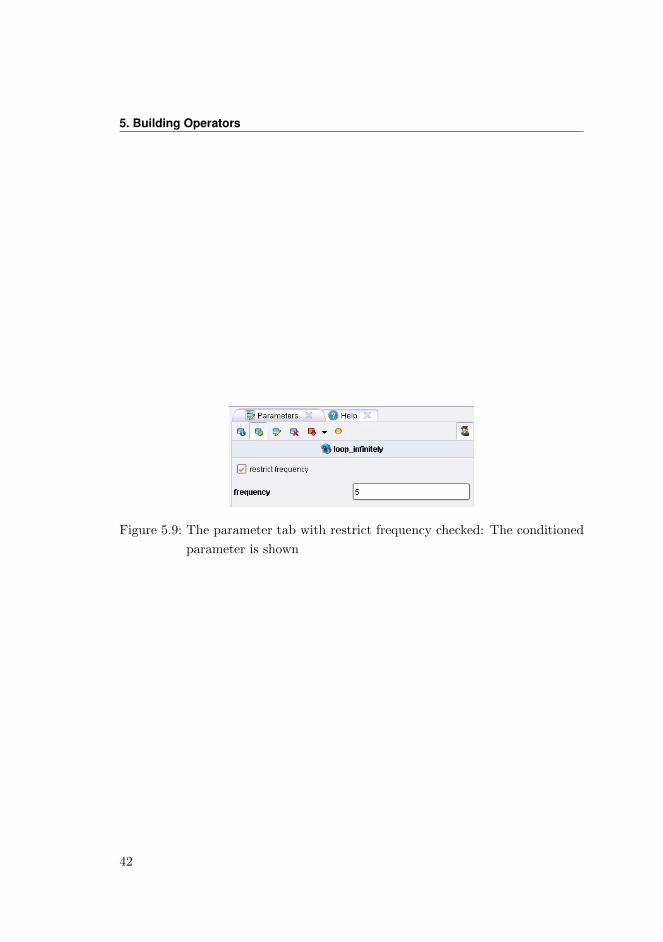
Figure 5.9: The parameter tab with restrict frequency checked: The conditioned
parameter is shown
42

6 Building special data objects
If you are from the scientific community or trying to integrate RapidMiner with
another program, you will sooner or later face the problem, that the standard data
objects don’t fulfil all your requirements. Let’s assume for example you are going
to analyze data recorded from some sort of game engine. You are planning to use
machine learning algorithms to make the characters played by the computer a
little bit smarter. The format the original data comes can’t directly be expressed
as a table. So you have to write some preprocessing steps anyway and you decide
to do this in RapidMiner. The plan is to make everything as modular as possible.
Although you could simply write one operator that reads in the data from a file,
and does all the translation and feature extraction, you decide, that it would be
best to split it up. With this modularity, it will be much easier to extend the
mechanism later on and optimize the steps separately.
This can be achieved as follows. Users who are familiar with the time series or
the text processing extension are already familiar with this approach. We have
one super operator which loads the data and passes it to an inner sub process.
Inside this sub process, a special data object, representing the current data is
passed from one operator to the next, each one changing the data or adding new
information. This added data is finally written into a table which is returned as
an ExampleSet to the subsequent RapidMiner operators, which now do the actual
learning. We already learned how to build operators, both normal and super
operators, and how to pass data between them. Now we are going to define a
new data object.
43
6. Building special data objects
6.1 Defining the object class
First of all, we have to define a new class that should hold the information
we need. This class must implement the interface IOObject, but it is recom-
mended to extend ResultObjectAdapter instead. This abstract class has already
implemented much of the non special functionality and is suitable for the most
cases. Only in special circumstances where you already have a class that might
hold the game data and provide some important functionality, it might be a
better idea to extend this class and let it implement the interface. An empty
implementation would look like that:
1 package com . rapidminer . game ;
2
3 import com . rapidminer . operator . ResultObjectAdapter ;
4
5 /**
6 * This class contains the game date , recorded during
7 * runtime of the game.
8 *
9 * @author Sebastian Land
10 */
11 public class GameDataIOObject extends ResultObjectAdapter {12
13 private stat ic f ina l long se r ia lVer s ionUID =
1725159059797569345L ;
14 }
This is only an empty object, that doesn’t hold any information. We will add
some content now:
1 package com . rapidminer . game ;
2
3 import com . rapidminer . operator . ResultObjectAdapter ;
4
5 /**
6 * This class contains the game date , re corded during
7 * runtime of the game.
8 *
9 * @author Sebastian Land
10 */
44
6.1. Defining the object class
11 public class GameDataIOObject extends ResultObjectAdapter {12
13 private stat ic f ina l long se r ia lVer s ionUID =
1725159059797569345L ;
14
15 private GameData data ;
16
17 public GameDataIOObject (GameData data ) {18 this . data = data ;
19 }20
21 public GameData getGameData ( ) {22 return data ;
23 }24 }
This class already gives access to an object of the class GameData, which shall
be the representative for everything we want to access. This might be more
complex in real-world applications, but you might conclude how things work in
general. Now we want to extract attribute values from the game data, which the
super operator can store into a table. This data table might then be returned
as example set for learning. This should be done by operators contained in the
super operator’s sub process. Each of them could retrieve the GameData from
the GameDataIOObject and attach one or more attributes. Only one GameData is
treated per execution of the sub process and each becomes a single example of
the resulting ExampleSet.
So we need a mechanism to add data to the IOObject. For making things less
complicated, we assume that we only have numerical attributes. This way we
save the effort of remembering the correct types of the data. Let’s add a Map for
storing the values with identifier as local variable:
1 private Map<Str ing , Double> valueMap = new HashMap<Str ing , Double>()
;
Then we extend the GameDataIOObject with two methods for accessing the map:
1 /**
2 * This sets a value of this GameDataIOObject , which is later on
extracted
45
6. Building special data objects
3 * as an attribute in the resulting ExampleSet.
4 */
5 public void setValue ( S t r ing i d e n t i f i e r , double value ) {6 valueMap . put ( i d e n t i f i e r , va lue ) ;
7 }8
9 /**
10 * For extracting all identifiers / values
11 */
12 public Map<Str ing , Double> getValueMap ( ) {13 return valueMap ;
14 }
6.2 Processing your own IOObjects
Using these methods we now might implement our first operator, which extracts
properties of the GameData. Let’s assume each situation in the game is about a
character of a specific age. We might want to extract its age as an attribute. For
doing that, we are going to build an ExtractAgeOperator. The idea is that this
operator will be executed in the subprocess and attaches the age as a value to
the GameDataIOObject it received and will return it again. From there it is passed
to the next operator and so on. For implementing this logic, we will first exercise
what we have learned in the section “Creating super operators” and implement
the super operator:
1 import java . u t i l . L inkedLis t ;
2 import java . u t i l . L i s t ;
3
4 import com . rapidminer . example . ExampleSet ;
5 import com . rapidminer . operator . OperatorChain ;
6 import com . rapidminer . operator . OperatorDescr ipt ion ;
7 import com . rapidminer . operator . OperatorException ;
8 import com . rapidminer . operator . por t s . InputPort ;
9 import com . rapidminer . operator . por t s . OutputPort ;
10 import com . rapidminer . operator . por t s . metadata .
SubprocessTransformRule ;
11
12 /**
46
6.2. Processing your own IOObjects
13 * This operator will feed all GameData objects to it’s inner sub
process and
14 * will execute it in order to build an example set from the
extracted
15 * key value pairs.
16 *
17 * @author Sebastian Land
18 */
19 public class ProcessGameDataOperator extends OperatorChain {20
21 private OutputPort innerGameDataSource = getSubprocess (0 ) .
ge t InnerSource s ( ) . c r ea tePor t ( ”game data ” ) ;
22 private InputPort innerGameDataSink = getSubprocess (0 ) .
g e t Inne rS inks ( ) . c r ea tePor t ( ”game data ” ) ;
23 private OutputPort exampleSetOutput = getOutputPorts ( ) .
c r ea tePor t ( ”example s e t ” ) ;
24
25 public ProcessGameDataOperator ( OperatorDescr ipt ion
d e s c r i p t i o n ) {26 super ( d e s c r i p t i o n , ” Property Extract ion ” ) ;
27
28 /** very short and insufficient meta data
transformation: Should be much
29 * more sophisticated.
30 */
31
32 getTransformer ( ) . addGenerationRule (
innerGameDataSource , GameDataIOObject . class ) ;
33 getTransformer ( ) . addRule (new SubprocessTransformRule
( getSubprocess (0 ) ) ) ;
34 getTransformer ( ) . addGenerationRule ( exampleSetOutput ,
ExampleSet . class ) ;
35 }36
37 @Override
38 public void doWork ( ) throws OperatorException {39 List<GameData> loadedData = new LinkedList<GameData
>() ;
40 loadedData . add (new GameData ( ) ) ;
41 /**
42 * Iterate over all GameData objects and feed them
through the subprocess one by one.
43 * Extending ExampleSet each time by one example
47
6. Building special data objects
44 */
45 ExampleSet r e s u l t S e t = null ;
46 for (GameData gameData : loadedData ) {47 innerGameDataSource . d e l i v e r (new
GameDataIOObject ( gameData ) ) ;
48 getSubprocess (0 ) . execute ( ) ;
49 GameDataIOObject r e s u l t = innerGameDataSink .
getData ( ) ;
50
51 i f ( r e s u l t S e t == null )
52 r e s u l t S e t = c r e a t e I n i t i a l E x a m p l e S e t (
r e s u l t ) ;
53 else
54 extendExampleSet ( r e s u l t S e t , r e s u l t ) ;
55 }56
57 exampleSetOutput . d e l i v e r ( r e s u l t S e t ) ;
58 }59
60 /**
61 * This method has to extend the given resultSet by the
example extracted from
62 * the result object.
63 */
64 private void extendExampleSet ( ExampleSet r e s u l t S e t ,
GameDataIOObject r e s u l t ) {65 }66
67 /**
68 * This will create the first initial example set from the
result object.
69 * At first the MemoryExampleTable will be created to
storing the data , then
70 * for each entry in the map an attribute is created and put
together into an
71 * example set.
72 */
73 private ExampleSet c r e a t e I n i t i a l E xa m p l e S e t ( GameDataIOObject
r e s u l t ) {74 return null ;
75 }76 }
48

6.2. Processing your own IOObjects
Figure 6.1: The above operator after inserting it into a process
Of course this operator still lacks all real functionality consisting of reading the
game data from a source of some kind, probably depending on some parameter
settings specifying the location. But the previous sections should have made it
clear, which steps one would have to go, if one has such a task at hand.
Now we want to build one of the inner operators:
1 package com . rapidminer . operator . game . e x t r a c t o r s ;
2
3 import com . rapidminer . operator . Operator ;
4 import com . rapidminer . operator . OperatorDescr ipt ion ;
5 import com . rapidminer . operator . OperatorException ;
6 import com . rapidminer . operator . game . GameDataIOObject ;
7 import com . rapidminer . operator . por t s . InputPort ;
8 import com . rapidminer . operator . por t s . OutputPort ;
9
10 /**
11 * A simple extractor of properties of a game data object.
12 *
13 * @author Sebastian Land
14 */
15 public class ExtractAgeOperator extends Operator {16
17 /** defining the ports */
18 private InputPort gameDataInput = get InputPorts ( ) . c r ea tePor t
( ”game data ” , GameDataIOObject . class ) ;
19 private OutputPort gameDataOutput = getOutputPorts ( ) .
c r ea tePor t ( ”game data ” ) ;
20
21 /**
22 * The default constructor needed in exactly this signature
23 */
49
6. Building special data objects
24 public ExtractAgeOperator ( OperatorDescr ipt ion d e s c r i p t i o n ) {25 super ( d e s c r i p t i o n ) ;
26
27 /** Adding a rule for meta data transformation:
GameData will be passed through */
28 getTransformer ( ) . addPassThroughRule ( gameDataInput ,
gameDataOutput ) ;
29 }30
31 @Override
32 public void doWork ( ) throws OperatorException {33 GameDataIOObject input = gameDataInput . getData ( ) ;
34
35 ext rac tVa lues ( input ) ;
36
37 gameDataOutput . d e l i v e r ( input ) ;
38 }39
40 /**
41 * This method could extract arbitrary properties from the
GameData and put it as a key value pair into
42 * the GameDataIOObject. Each pair will become a single
attribute in the resulting ExampleSet and hence
43 * each execution of the subprocess must result in exactly
the same number of pairs.
44 * Otherwise for some examples there are undefined
attributes.
45 */
46 private void ext rac tVa lue s ( GameDataIOObject input ) {47 input . setValue ( ”Age” , input . getGameData ( ) . getAge ( ) ) ;
48 }49 }
This is just a simple example for extracting one attribute, adding it and passing
the object. Of course it is a good idea to let this operator inherit from an
AbstractExtractionOperator which already provides all functionality that is shared
among all extraction operators. Then only the method extractValues have to be
implemented and one could concentrate on the real problem of extracting the
values. The image below shows a sub process with four extraction operators.
50
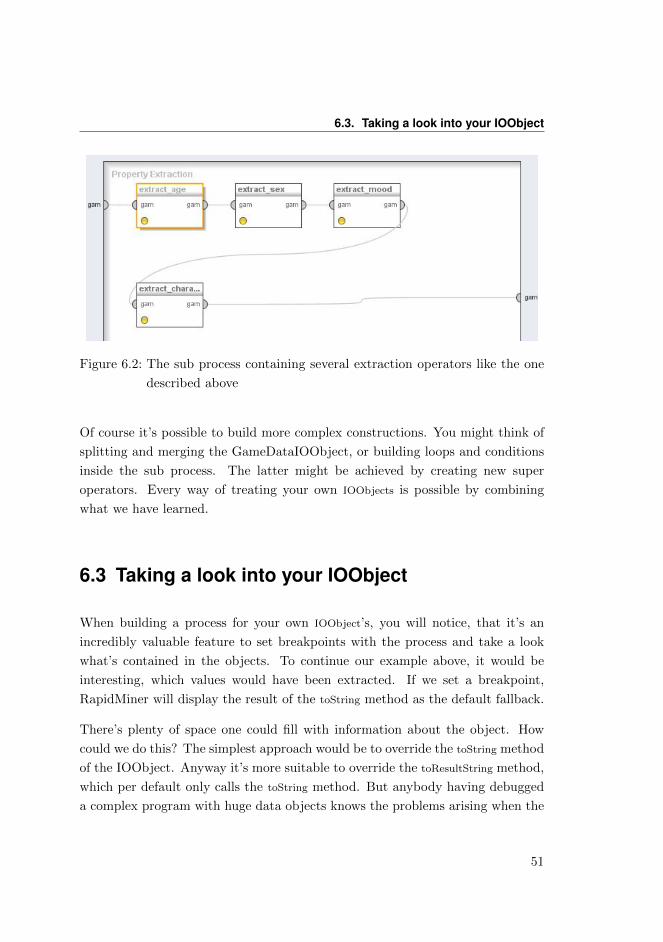
6.3. Taking a look into your IOObject
Figure 6.2: The sub process containing several extraction operators like the one
described above
Of course it’s possible to build more complex constructions. You might think of
splitting and merging the GameDataIOObject, or building loops and conditions
inside the sub process. The latter might be achieved by creating new super
operators. Every way of treating your own IOObjects is possible by combining
what we have learned.
6.3 Taking a look into your IOObject
When building a process for your own IOObject’s, you will notice, that it’s an
incredibly valuable feature to set breakpoints with the process and take a look
what’s contained in the objects. To continue our example above, it would be
interesting, which values would have been extracted. If we set a breakpoint,
RapidMiner will display the result of the toString method as the default fallback.
There’s plenty of space one could fill with information about the object. How
could we do this? The simplest approach would be to override the toString method
of the IOObject. Anyway it’s more suitable to override the toResultString method,
which per default only calls the toString method. But anybody having debugged
a complex program with huge data objects knows the problems arising when the
51
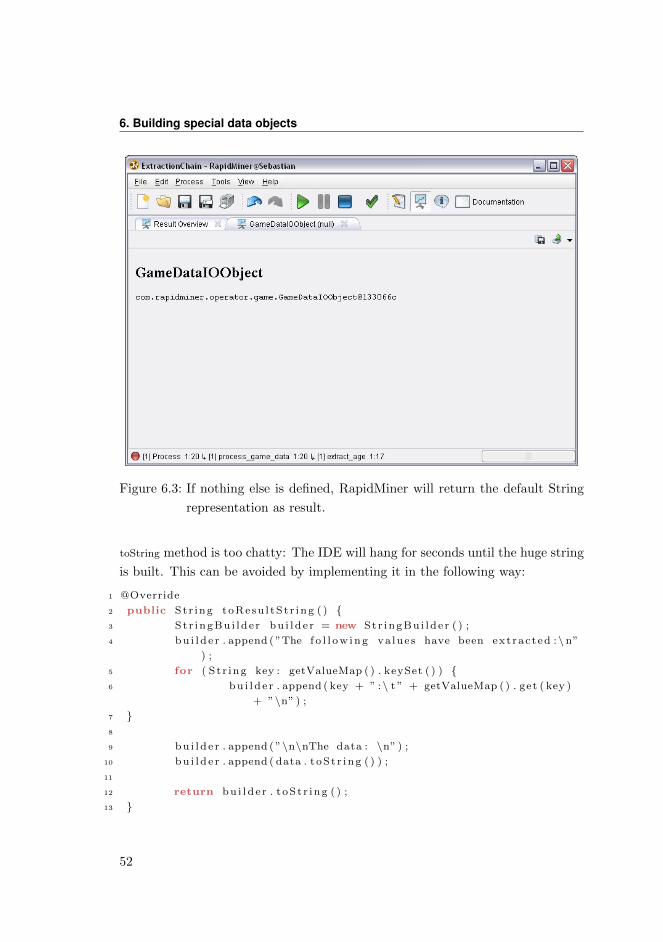
6. Building special data objects
Figure 6.3: If nothing else is defined, RapidMiner will return the default String
representation as result.
toString method is too chatty: The IDE will hang for seconds until the huge string
is built. This can be avoided by implementing it in the following way:
1 @Override
2 public St r ing toResu l tS t r i ng ( ) {3 St r i ngBu i l d e r b u i l d e r = new St r i ngBu i l d e r ( ) ;
4 b u i l d e r . append ( ”The f o l l o w i n g va lue s have been ext rac t ed :\n”
) ;
5 for ( S t r ing key : getValueMap ( ) . keySet ( ) ) {6 b u i l d e r . append ( key + ” :\ t ” + getValueMap ( ) . get ( key )
+ ”\n” ) ;
7 }8
9 b u i l d e r . append ( ”\n\nThe data : \n” ) ;
10 b u i l d e r . append ( data . t oS t r i ng ( ) ) ;
11
12 return b u i l d e r . t oS t r i ng ( ) ;
13 }
52

6.4. Leaving the 80’s
Figure 6.4: The result of overwriting the method.
6.4 Leaving the 80’s
Although text output has its advantages, writing Courier characters on screen
seems a little bit outdated since the late eighties. How do we add nice represen-
tations to the output as done with nearly all core IOObjects of RapidMiner?
RapidMiner uses a renderer concept for displaying the various types of IOObject
s. There’s some configuration file specifying which renderers are used for which
classes of IOObjects. We will see how to extend this xml file, but currently we
want to concentrate on implementing a renderer for our GameDataIOObject.
The interface Renderer must be implemented for this purpose. Here we extend
the AbstractRenderer, which will have most of the methods already implemented for
us. Most of the methods are used for handling parameters, since renderers might
53
6. Building special data objects
have parameters as operators do. They are used during automatic reporting of
objects and control the output. The handling of these parameters and their value
is done by the abstract class, all we have to do is to take their values into account
when rendering. Here are the methods we have to implement:
1 public class GameDataRenderer extends AbstractRenderer {2
3 @Override
4 public Reportable c r ea teRepor tab l e ( Object renderab le ,
IOContainer ioConta iner , int desiredWidth , int
des i r edHe ight ) {5 return null ;
6 }7
8 @Override
9 public St r ing getName ( ) {10 return ”GameData” ;
11 }12
13 @Override
14 public Component getVisual izat ionComponent ( Object renderab le
, IOContainer ioConta iner ) {15 return null ;
16 }17 }
The first method must return an object of a class implementing one of the sub
interfaces of Reportable, but this should not be treated here. One could take
a look at the interfaces and some of the implementations in the core to get an
example. In this tutorial we will focus on the visualization inside the RapidMiner
graphical user interface.
Attention: Since RapidMiner 5 the IOContainer will be empty or null in any case.
It cannot be used anymore and only remains for compatibility reasons. Please
make sure your renderers do not depend on it!
The second method returns an arbitrary Java Component used for displaying
content in Swing. Everything is possible, but since we want to see the val-
ues as a table, we are going to render it as such. We don’t have to imple-
ment everything ourselves, we might use a subclass of the AbstractRenderer, the
54

6.4. Leaving the 80’s
AbstractTableModelTableRenderer. As the name already indicates, it will show a
table based upon a table model. All we have to do is to return this table model:
1 /**
2 * A renderer for the extracted values of GameDataIOObjects
3 *
4 * @author Sebastian Land
5 */
6 public class GameDataRenderer extends
AbstractTableModelTableRenderer {7
8 @Override
9 public St r ing getName ( ) {10 return ” Extracted Values ” ;
11 }12
13 @Override
14 public TableModel getTableModel ( Object renderab le ,
IOContainer ioConta iner , boolean i sRepor t ing ) {15 i f ( r enderab l e instanceof GameDataIOObject ) {16 GameDataIOObject ob j e c t = ( GameDataIOObject )
r ende rab l e ;
17 f ina l List<Pair<Str ing , Double>> va lue s =
new ArrayList<Pair<Str ing , Double>>() ;
18 for ( S t r ing key : ob j e c t . getValueMap ( ) .
keySet ( ) ) {19 va lue s . add (new Pair<Str ing , Double>(
key , ob j e c t . getValueMap ( ) . get (
key ) ) ) ;
20 }21
22 return new AbstractTableModel ( ) {23 private stat ic f ina l long
se r ia lVer s ionUID = 1L ;
24
25 @Override
26 public int getColumnCount ( ) {27 return 2 ;
28 }29
30 @Override
31 public int getRowCount ( ) {32 return va lue s . s i z e ( ) ;
55
6. Building special data objects
33 }34
35 @Override
36 public St r ing getColumnName ( int
column ) {37 i f ( column == 0)
38 return ” Att r ibute ” ;
39 return ”Value” ;
40 }41 @Override
42 public Object getValueAt ( int
rowIndex , int columnIndex ) {43 Pair<Str ing , Double> pa i r =
va lue s . get ( rowIndex ) ;
44 i f ( columnIndex == 0)
45 return pa i r . g e t F i r s t
( ) ;
46 return pa i r . getSecond ( ) ;
47 }48 } ;
49 }50 return new DefaultTableModel ( ) ;
51 }52 }
There are some other convenience methods in the AbstractTableModelTableRenderer
for changing the appearance of the table. For example the following methods
change the behaviour of the table by enabling or disabling some features:
1 @Override
2 public boolean i s S o r t a b l e ( ) {3 return fa l se ;
4 }5
6 @Override
7 public boolean i s A u t o r e s i z e ( ) {8 return fa l se ;
9 }10
11 @Override
12 public boolean isColumnMovable ( ) {13 return true ;
14 }
56
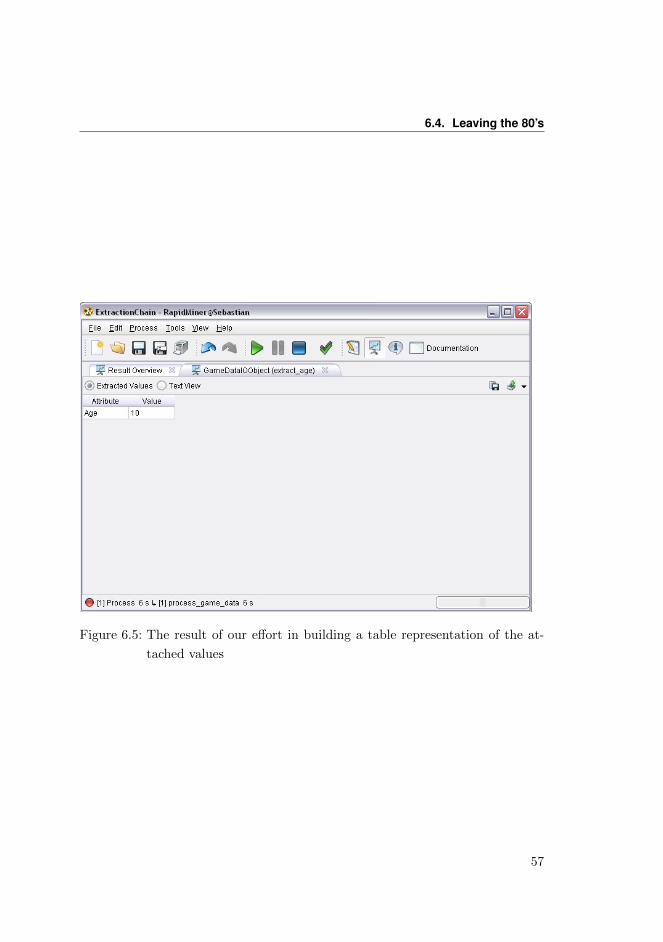
6.4. Leaving the 80’s
Figure 6.5: The result of our effort in building a table representation of the at-
tached values
57

7 Publishing a RapidMiner Ex-tension
Now we should be able to create our own operators, even super operators, process
meta data, build loops over our own IOObjects and render the results. The only
problem is: How to get this into RapidMiner? For most people it’s not an
appropriate option to check out the repository version of RapidMiner, extend
it by own functions and then update the code and merge conflicts each time
the code base is changed. Another problem is, that this is only deployable by
building a complete RapidMiner. But don’t worry: RapidMiner 5 offers a flexible
extension mechanism that will solve all problems of that kind.
7.1 The extension bundle
At first we want to take a look into the tutorial extension that comes with this
guide. As all RapidMiner Extensions it comes as a single jar file. If we open it
with a common archiver as WinRAR, WinZip or similar, we see, that it simply
consists of several zipped files.
The license and short license .txt are describing the license of this extension. Since
RapidMiner is licensed under the AGPL 3, all Extensions should use the same
license for avoiding legal issues.
The META−INF directory contains the usual MANIFEST.MF as well as the ABOUT.
59

7. Publishing a RapidMiner Extension
Figure 7.1: Content of the tutorial extension’s jar file.
NFO, which describes the functionality of this Extension and may contain a short
text. This gives the user an orientation when the Extension shows up in the
update and installation mechanism, where he might download new Extensions in
a convenient way. Additionally this text will show up in the about box of this
Extension, available in the About installed extensions menu .
The most important file for the Extension is the manifest. It contains all the
information that RapidMiner needs to find out, where to find the files for the
operator configuration, their documentation and several other things. Let’s take
a look in this file:
1 Manifest−Vers ion : 1 . 0
2 Ant−Vers ion : Apache Ant 1 . 7 . 1
3 Created−By : 10.0−b23 ( Sun Microsystems Inc . )
4 Implementation−Vendor : rapid−i
5 Implementation−T i t l e : Tuto r i a l Extension
6 Implementation−URL: www. rapid−i . com
7 Implementation−Vers ion : 5 . 0 . 0 0 0
8 S p e c i f i c a t i o n−T i t l e : Tuto r i a l Extension
9 S p e c i f i c a t i o n−Vers ion : 5 . 0 . 0 0 0
10 RapidMiner−Vers ion : 5 . 0
11 RapidMiner−Type : RapidMiner Extension
12 Plugin−Dependencies :
13 Extension−ID : r m x t u t o r i a l
14 Namespace : t u t o r i a l
15 I n i t i a l i z a t i o n −Class : com . rapidminer . P l u g i n I n i t T u t o r i a l
16 IOObject−Desc r ip to r : /com/ rapidminer / r e s o u r c e s / i o o b j e c t s T u t o r i a l .
xml
17 Operator−Desc r ip to r : /com/ rapidminer / r e s o u r c e s / Operator sTutor ia l .
xml
18 ParseRule−Desc r ip to r : /com/ rapidminer / r e s o u r c e s / p a r s e r u l e s T u t o r i a l .
xml
19 Group−Desc r ip to r : /com/ rapidminer / r e s o u r c e s / groupsTutor ia l .
60
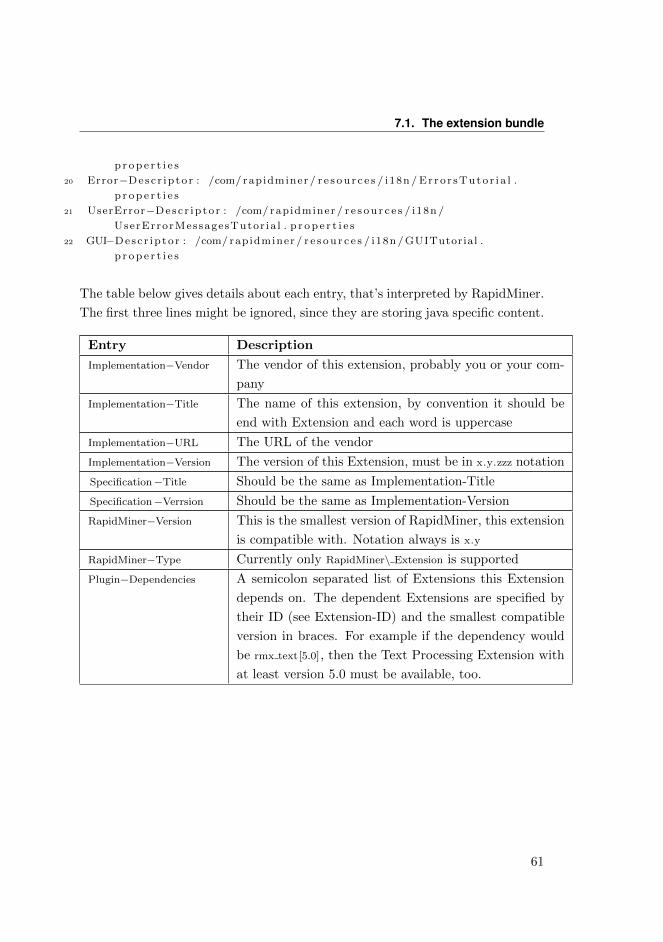
7.1. The extension bundle
p r o p e r t i e s
20 Error−Desc r ip to r : /com/ rapidminer / r e s o u r c e s / i18n / Er ro r sTuto r i a l .
p r o p e r t i e s
21 UserError−Desc r ip to r : /com/ rapidminer / r e s o u r c e s / i18n /
UserErrorMessagesTutor ia l . p r o p e r t i e s
22 GUI−Desc r ip to r : /com/ rapidminer / r e s o u r c e s / i18n / GUITutorial .
p r o p e r t i e s
The table below gives details about each entry, that’s interpreted by RapidMiner.
The first three lines might be ignored, since they are storing java specific content.
Entry Description
Implementation−Vendor The vendor of this extension, probably you or your com-
pany
Implementation−Title The name of this extension, by convention it should be
end with Extension and each word is uppercase
Implementation−URL The URL of the vendor
Implementation−Version The version of this Extension, must be in x.y.zzz notation
Specification−Title Should be the same as Implementation-Title
Specification−Verrsion Should be the same as Implementation-Version
RapidMiner−Version This is the smallest version of RapidMiner, this extension
is compatible with. Notation always is x.y
RapidMiner−Type Currently only RapidMiner\ Extension is supported
Plugin−Dependencies A semicolon separated list of Extensions this Extension
depends on. The dependent Extensions are specified by
their ID (see Extension-ID) and the smallest compatible
version in braces. For example if the dependency would
be rmx text[5.0], then the Text Processing Extension with
at least version 5.0 must be available, too.
61
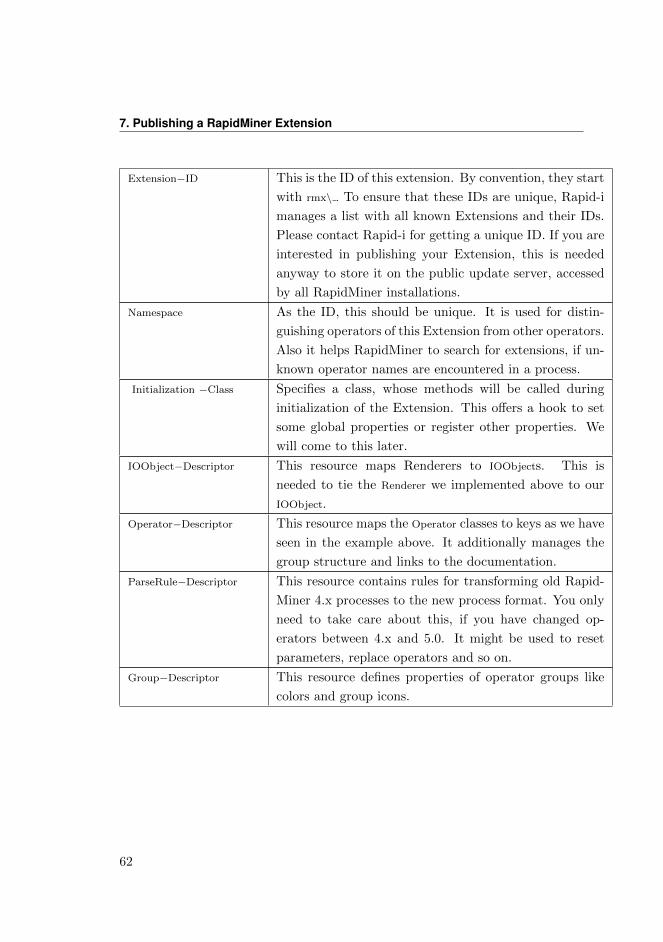
7. Publishing a RapidMiner Extension
Extension−ID This is the ID of this extension. By convention, they start
with rmx\ . To ensure that these IDs are unique, Rapid-i
manages a list with all known Extensions and their IDs.
Please contact Rapid-i for getting a unique ID. If you are
interested in publishing your Extension, this is needed
anyway to store it on the public update server, accessed
by all RapidMiner installations.
Namespace As the ID, this should be unique. It is used for distin-
guishing operators of this Extension from other operators.
Also it helps RapidMiner to search for extensions, if un-
known operator names are encountered in a process.
Initialization −Class Specifies a class, whose methods will be called during
initialization of the Extension. This offers a hook to set
some global properties or register other properties. We
will come to this later.
IOObject−Descriptor This resource maps Renderers to IOObjects. This is
needed to tie the Renderer we implemented above to our
IOObject.
Operator−Descriptor This resource maps the Operator classes to keys as we have
seen in the example above. It additionally manages the
group structure and links to the documentation.
ParseRule−Descriptor This resource contains rules for transforming old Rapid-
Miner 4.x processes to the new process format. You only
need to take care about this, if you have changed op-
erators between 4.x and 5.0. It might be used to reset
parameters, replace operators and so on.
Group−Descriptor This resource defines properties of operator groups like
colors and group icons.
62
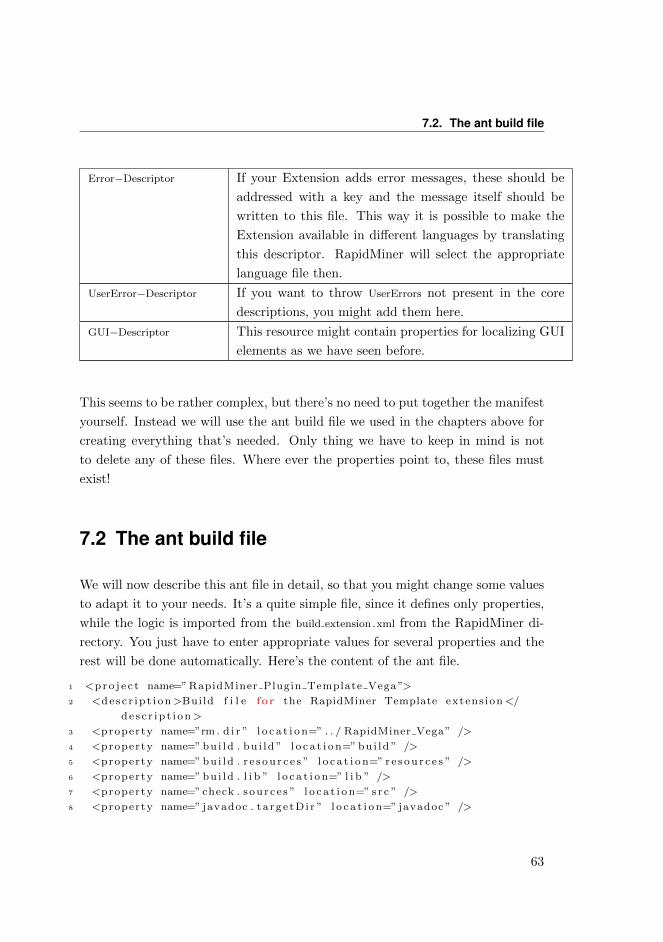
7.2. The ant build file
Error−Descriptor If your Extension adds error messages, these should be
addressed with a key and the message itself should be
written to this file. This way it is possible to make the
Extension available in different languages by translating
this descriptor. RapidMiner will select the appropriate
language file then.
UserError−Descriptor If you want to throw UserErrors not present in the core
descriptions, you might add them here.
GUI−Descriptor This resource might contain properties for localizing GUI
elements as we have seen before.
This seems to be rather complex, but there’s no need to put together the manifest
yourself. Instead we will use the ant build file we used in the chapters above for
creating everything that’s needed. Only thing we have to keep in mind is not
to delete any of these files. Where ever the properties point to, these files must
exist!
7.2 The ant build file
We will now describe this ant file in detail, so that you might change some values
to adapt it to your needs. It’s a quite simple file, since it defines only properties,
while the logic is imported from the build extension .xml from the RapidMiner di-
rectory. You just have to enter appropriate values for several properties and the
rest will be done automatically. Here’s the content of the ant file.
1 <p r o j e c t name=” RapidMiner Plugin Template Vega ”>
2 <d e s c r i p t i o n >Build f i l e for the RapidMiner Template extens ion </
d e s c r i p t i o n >
3 <property name=”rm . d i r ” l o c a t i o n=” . . / RapidMiner Vega” />
4 <property name=” bu i ld . bu i ld ” l o c a t i o n=” bu i ld ” />
5 <property name=” bu i ld . r e s o u r c e s ” l o c a t i o n=” r e s o u r c e s ” />
6 <property name=” bu i ld . l i b ” l o c a t i o n=” l i b ” />
7 <property name=” check . s ou r c e s ” l o c a t i o n=” s r c ” />
8 <property name=” javadoc . t a rg e tD i r ” l o c a t i o n=” javadoc ” />
63
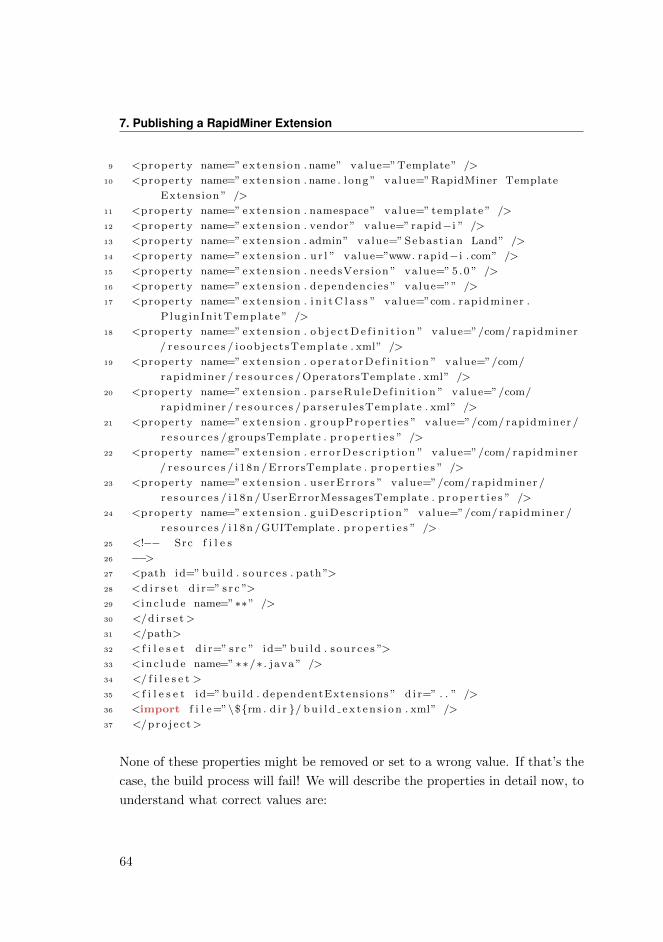
7. Publishing a RapidMiner Extension
9 <property name=” extens i on . name” value=”Template” />
10 <property name=” extens i on . name . long ” value=”RapidMiner Template
Extension ” />
11 <property name=” extens i on . namespace” value=” template ” />
12 <property name=” extens i on . vendor ” value=” rapid−i ” />
13 <property name=” extens i on . admin” value=” Sebast ian Land” />
14 <property name=” extens i on . u r l ” va lue=”www. rapid−i . com” />
15 <property name=” extens i on . needsVers ion ” value=” 5 .0 ” />
16 <property name=” extens i on . dependenc ies ” value=”” />
17 <property name=” extens i on . i n i t C l a s s ” value=”com . rapidminer .
Plug inIn i tTemplate ” />
18 <property name=” extens i on . o b j e c t D e f i n i t i o n ” value=”/com/ rapidminer
/ r e s o u r c e s / ioob ject sTemplate . xml” />
19 <property name=” extens i on . o p e r a t o r D e f i n i t i o n ” value=”/com/
rapidminer / r e s o u r c e s / OperatorsTemplate . xml” />
20 <property name=” extens i on . pa r s eRu l eDe f i n i t i on ” value=”/com/
rapidminer / r e s o u r c e s / parseru lesTemplate . xml” />
21 <property name=” extens i on . g roupProper t i e s ” va lue=”/com/ rapidminer /
r e s o u r c e s / groupsTemplate . p r o p e r t i e s ” />
22 <property name=” extens i on . e r r o r D e s c r i p t i o n ” value=”/com/ rapidminer
/ r e s o u r c e s / i18n / ErrorsTemplate . p r o p e r t i e s ” />
23 <property name=” extens i on . u s e rEr ro r s ” value=”/com/ rapidminer /
r e s o u r c e s / i18n / UserErrorMessagesTemplate . p r o p e r t i e s ” />
24 <property name=” extens i on . gu iDe s c r i p t i on ” value=”/com/ rapidminer /
r e s o u r c e s / i18n /GUITemplate . p r o p e r t i e s ” />
25 <!−− Src f i l e s
26 −−>27 <path id=” bu i ld . s ou r c e s . path”>
28 <d i r s e t d i r=” s r c ”>
29 <i n c l ude name=”∗∗” />
30 </d i r s e t >
31 </path>
32 < f i l e s e t d i r=” s r c ” id=” bu i ld . s ou r c e s ”>
33 <i n c l ude name=” ∗∗/∗ . java ” />
34 </ f i l e s e t >
35 < f i l e s e t id=” bu i ld . dependentExtensions ” d i r=” . . ” />
36 <import f i l e=”\${rm . d i r }/ b u i l d e x t e n s i o n . xml” />
37 </pro j e c t>
None of these properties might be removed or set to a wrong value. If that’s the
case, the build process will fail! We will describe the properties in detail now, to
understand what correct values are:
64

7.2. The ant build file
Property Description
rm.dir Defines the path to the RapidMiner project relative
to this file.
build.build This is the build directory of your project relative
to this file. Should be build
build. resources This is the resource directory of your project. This
is used to separate program files from other re-
sources like icons and the mentioned configuration
files. Please keep in mind that you should have
a complete package structure below this directory,
too. In Eclipse you should use it as source folder.
By default it should be resources.
build. lib This is the directory of the libraries used by your
Extension. All . jar files stored in this directory will
be extracted and copied into the resulting jar file,
so that all classes are available.
check.sources This should point to your source directory, which
must be src and must not be changed. It is used for
performing some checks, listing you formal problems
in your classes.
javadoc.targetDir This property points to the sub directory of the
RapidMiner release directory, where the java doc will
be generated. This will be used during deploying the
release, but as well might be used for generating the
Java API documentation during development using
the ant target javaDoc.generate.
extension.name The name of the extension.
extension.name.long This must be a combination of the extension.name
value with prepended RapidMiner and appended
Extension: RapidMiner <extension.name> Extension
extension.namespace Corresponds to the namespace entry of the manifest
described above.
65

7. Publishing a RapidMiner Extension
extension.vendor Corresponds to the Implementation−Vendor entry of
the manifest described above.
extension.admin In fact this entry isn’t used anywhere. It is just used
for pointing to a person you might contact if you
want to contribute to the Extension or have found
a bug.
extension.url Corresponds to the Implementation−URL entry of the
manifest described above.
extension.needsVersion Corresponds to the RapidMiner−Version entry of the
manifest described above.
extension.dependencies Corresponds to the Plugin−Dependencies entry of the
manifest described above.
extension. initClass Corresponds to the Initialization −Class entry of the
manifest described above.
extension. objectDefinition Corresponds to the IOObject−Descriptor entry of the
manifest described above.
extension. operatorsDefinition Corresponds to the Operator−Descriptor entry of the
manifest described above.
extension.parseRuleDefinition Corresponds to the ParseRule−Descriptor entry of the
manifest described above.
extension.groupProperties Corresponds to the Group−Descriptor entry of the
manifest described above.
extension.errorDescription Corresponds to the Error−Descriptor entry of the
manifest described above.
extension.userErrors Corresponds to the UserError−Descriptor entry of the
manifest described above.
extension.guiDescription Corresponds to the GUI−Descriptor entry of the man-
ifest described above.
build.sources.path Must specify a path containing all sources that must
be used for the Extension. The sources of Rapid-
Miner are automatically included.
build.sources A fileset on the sources used for publishing the
source code.
66

7.2. The ant build file
build.dependentExtensions A fileset containing all build.xml files of dependent
Extensions. The files will be used for building the
Extension, so that this extension can link against its
. jar file.
67

8 Using advanced Extensionmechanism
So far we have got a basic introduction and you should now be able to imple-
ment our own operators. This chapter will show some more advanced options to
modify RapidMiner. This will cover the PluginInit class as well as creating custom
dockable windows, which will be available as view in the perspectives.
8.1 The PluginInit class
This class offers hooks for changing some of RapidMiner’s behavior during startup,
before any operator is executed. The class used is specified in the Initialization
−Class entry of the manifest file. This class does not have to extend any super
class, since its methods are accessed via reflection. There are four methods that
are called during startup of RapidMiner:
1 public stat ic void i n i t P l u g i n ( )
The initPluging method will be called directly after the extension is initialized.
This is the first hook during start up. No initialization of the operators or ren-
derers has taken place when this is called.
1 public stat ic void i n i tGu i ( MainFrame mainframe )
69

8. Using advanced Extension mechanism
This method is called during start up as the second hook. It is called before the
GUI of the mainframe is created. The MainFrame is passed as an argument to
register GUI elements. The operators and renderers have been registered in the
meanwhile.
1 public stat ic void i n i tF ina lCheck s ( )
initFinalChecks is the last hook before the splash screen is closed, third in the row.
8.2 Adding custom configurators
Figure 8.1: A configuration dialog for CRM connections.
Imagine that you want to create a RapidMiner extention which offers an operator
for reading data from a CRM system. Your operator will need the information
about how to access the CRM, such as an URL, a username or a password. One
approach would be to add text fields to the parameters of the operator and let
the user type in the required information. Though this may seem convenient at
first, it gets quite uncomfortable if you want to use the same information about
the CRM in another RapidMiner process or operator, as you have to type in the
70

8.2. Adding custom configurators
information multiple times. A way of dealing with that problem is to define the
CRM connection globally and let the user select the CRM they want to get data
from.
This is a scenario where the so called Configurators come in handy. A configurator
manages items of a certain type globally and enables to create, edit and delete
them though a custom configuration dialog. For this example, we will implement
a configurator for CRM entries, which automatically allows us to configure those
entries with a dialog, accessible through the “Tools” menu. Moreover, a config-
urator can be used along with a drop-down list which allows the user to easily
select a CRM connection in the configuration of our operator.
8.2.1 Usage
In order to implement your own configurator, you need to know the following
classes:
Configurable is an item which can be modified through a Configurator
Configurator instantiates and configures subclasses of Configurable
ConfigurationManager is used to register Configurators in RapidMiner
ParameterTypeConfigurable is a ParameterType which creates a drop-down list
for configurators and can be used in the configuration settings of operators
The first thing we have to do is to create a new class describing a single CRM
connection entry, which implements the Configurable interface. It is advised to
extend AbstractConfigurable instead, because by doing so, we don’t have to deal
with handling parameter values. In this case, you don’t have to write any code
that deals with the actual configuration:
1 import com . rapidminer . t o o l s . c o n f i g . Abst ractConf igurab le ;
2
3 public class CRMConfigurable extends AbstractConf igurab le {4
5 /** Actual business logic of this configurable. */
6 public CRMConnection connect ( ) {
71
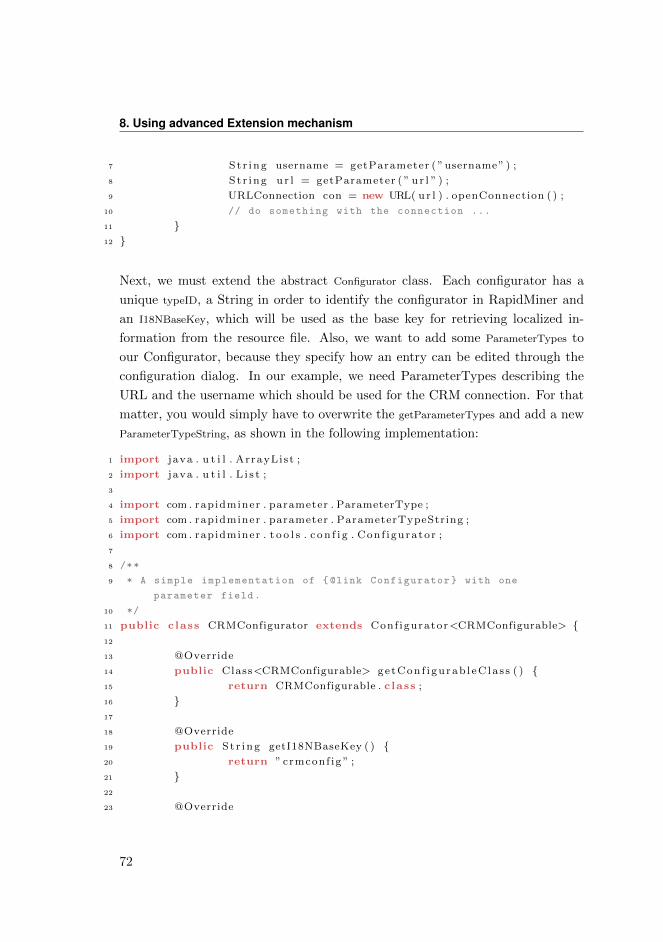
8. Using advanced Extension mechanism
7 St r ing username = getParameter ( ”username” ) ;
8 St r ing u r l = getParameter ( ” u r l ” ) ;
9 URLConnection con = new URL( u r l ) . openConnection ( ) ;
10 // do something with the connection ...
11 }12 }
Next, we must extend the abstract Configurator class. Each configurator has a
unique typeID, a String in order to identify the configurator in RapidMiner and
an I18NBaseKey, which will be used as the base key for retrieving localized in-
formation from the resource file. Also, we want to add some ParameterTypes to
our Configurator, because they specify how an entry can be edited through the
configuration dialog. In our example, we need ParameterTypes describing the
URL and the username which should be used for the CRM connection. For that
matter, you would simply have to overwrite the getParameterTypes and add a new
ParameterTypeString, as shown in the following implementation:
1 import java . u t i l . ArrayList ;
2 import java . u t i l . L i s t ;
3
4 import com . rapidminer . parameter . ParameterType ;
5 import com . rapidminer . parameter . ParameterTypeString ;
6 import com . rapidminer . t o o l s . c o n f i g . Conf igurator ;
7
8 /**
9 * A simple implementation of {@link Configurator} with one
parameter field.
10 */
11 public class CRMConfigurator extends Conf igurator<CRMConfigurable> {12
13 @Override
14 public Class<CRMConfigurable> ge tCon f i gu rab l eC la s s ( ) {15 return CRMConfigurable . class ;
16 }17
18 @Override
19 public St r ing getI18NBaseKey ( ) {20 return ” crmconf ig ” ;
21 }22
23 @Override
72
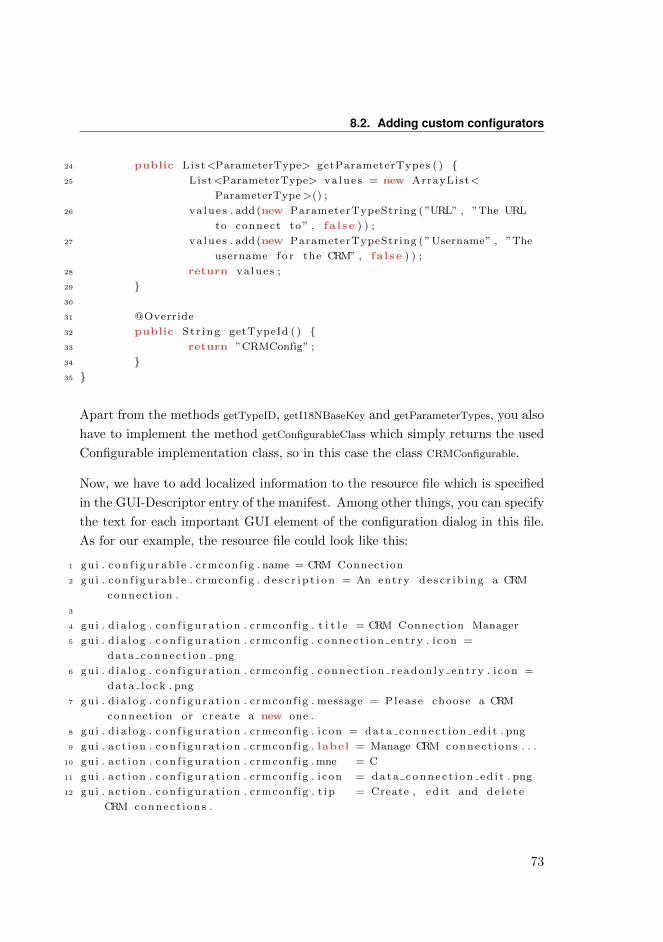
8.2. Adding custom configurators
24 public List<ParameterType> getParameterTypes ( ) {25 List<ParameterType> va lue s = new ArrayList<
ParameterType >() ;
26 va lue s . add (new ParameterTypeString ( ”URL” , ”The URL
to connect to ” , fa l se ) ) ;
27 va lue s . add (new ParameterTypeString ( ”Username” , ”The
username f o r the CRM” , fa l se ) ) ;
28 return va lue s ;
29 }30
31 @Override
32 public St r ing getTypeId ( ) {33 return ”CRMConfig” ;
34 }35 }
Apart from the methods getTypeID, getI18NBaseKey and getParameterTypes, you also
have to implement the method getConfigurableClass which simply returns the used
Configurable implementation class, so in this case the class CRMConfigurable.
Now, we have to add localized information to the resource file which is specified
in the GUI-Descriptor entry of the manifest. Among other things, you can specify
the text for each important GUI element of the configuration dialog in this file.
As for our example, the resource file could look like this:
1 gui . c o n f i g u r a b l e . crmconf ig . name = CRM Connection
2 gui . c o n f i g u r a b l e . crmconf ig . d e s c r i p t i o n = An entry d e s c r i b i n g a CRM
connect ion .
3
4 gui . d i a l o g . c o n f i g u r a t i o n . crmconf ig . t i t l e = CRM Connection Manager
5 gui . d i a l o g . c o n f i g u r a t i o n . crmconf ig . connec t i on ent ry . i con =
data connect ion . png
6 gui . d i a l o g . c o n f i g u r a t i o n . crmconf ig . c onnec t i on r eadon ly en t ry . i con =
data l o ck . png
7 gui . d i a l o g . c o n f i g u r a t i o n . crmconf ig . message = Please choose a CRM
connect ion or c r e a t e a new one .
8 gui . d i a l o g . c o n f i g u r a t i o n . crmconf ig . i con = d a t a c o n n e c t i o n e d i t . png
9 gui . a c t i on . c o n f i g u r a t i o n . crmconf ig . label = Manage CRM connect ions . . .
10 gui . a c t i on . c o n f i g u r a t i o n . crmconf ig . mne = C
11 gui . a c t i on . c o n f i g u r a t i o n . crmconf ig . i con = d a t a c o n n e c t i o n e d i t . png
12 gui . a c t i on . c o n f i g u r a t i o n . crmconf ig . t i p = Create , e d i t and d e l e t e
CRM connect ions .
73
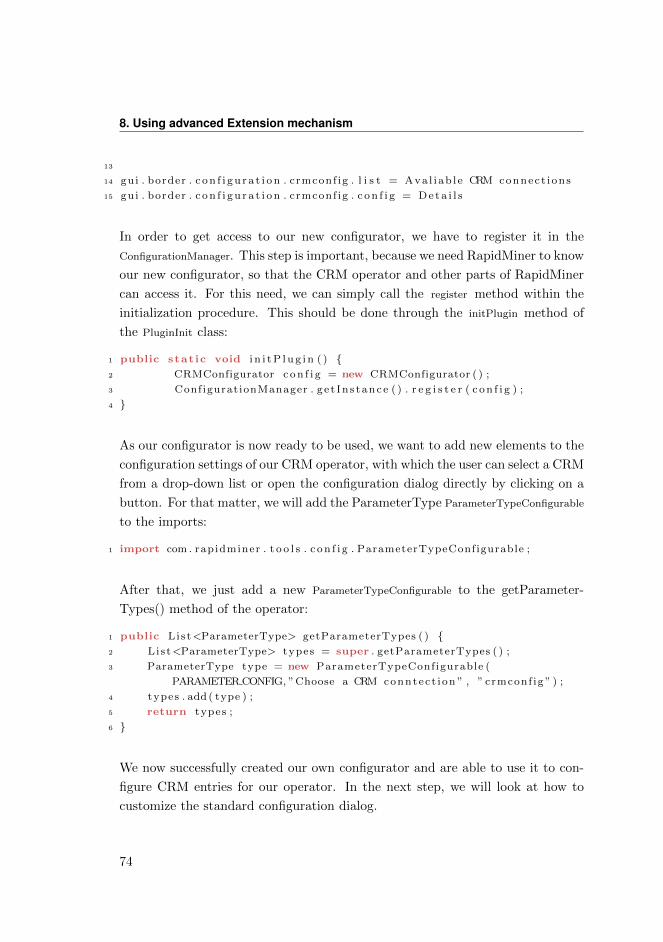
8. Using advanced Extension mechanism
13
14 gui . border . c o n f i g u r a t i o n . crmconf ig . l i s t = Ava l i ab l e CRM connect ions
15 gui . border . c o n f i g u r a t i o n . crmconf ig . c o n f i g = D e t a i l s
In order to get access to our new configurator, we have to register it in the
ConfigurationManager. This step is important, because we need RapidMiner to know
our new configurator, so that the CRM operator and other parts of RapidMiner
can access it. For this need, we can simply call the register method within the
initialization procedure. This should be done through the initPlugin method of
the PluginInit class:
1 public stat ic void i n i t P l u g i n ( ) {2 CRMConfigurator c o n f i g = new CRMConfigurator ( ) ;
3 ConfigurationManager . g e t In s tance ( ) . r e g i s t e r ( c o n f i g ) ;
4 }
As our configurator is now ready to be used, we want to add new elements to the
configuration settings of our CRM operator, with which the user can select a CRM
from a drop-down list or open the configuration dialog directly by clicking on a
button. For that matter, we will add the ParameterType ParameterTypeConfigurable
to the imports:
1 import com . rapidminer . t o o l s . c o n f i g . ParameterTypeConfigurable ;
After that, we just add a new ParameterTypeConfigurable to the getParameter-
Types() method of the operator:
1 public List<ParameterType> getParameterTypes ( ) {2 List<ParameterType> types = super . getParameterTypes ( ) ;
3 ParameterType type = new ParameterTypeConfigurable (
PARAMETER CONFIG, ”Choose a CRM conntec t i on ” , ” crmconf ig ” ) ;
4 types . add ( type ) ;
5 return types ;
6 }
We now successfully created our own configurator and are able to use it to con-
figure CRM entries for our operator. In the next step, we will look at how to
customize the standard configuration dialog.
74
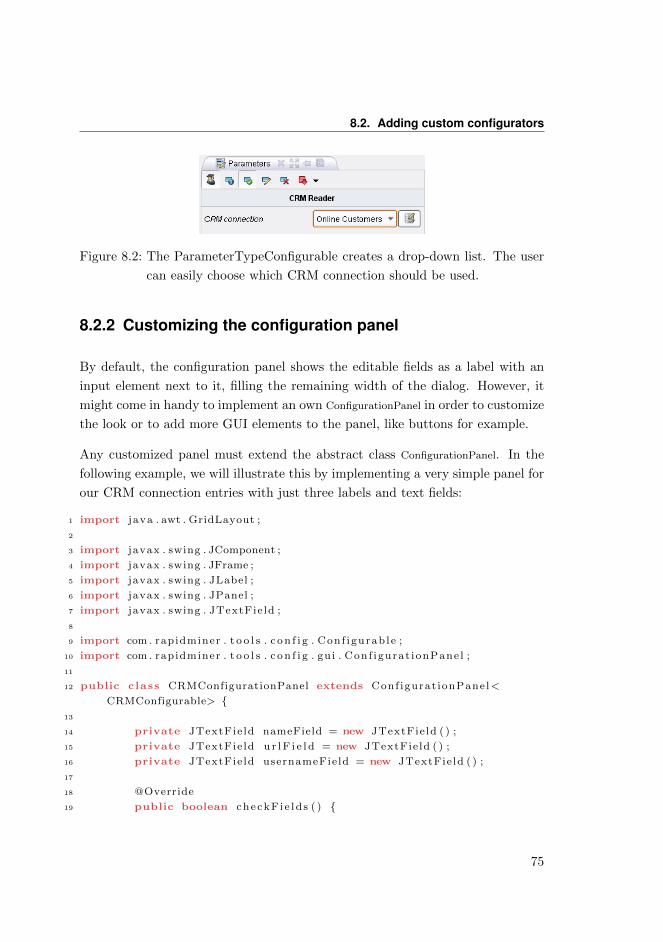
8.2. Adding custom configurators
Figure 8.2: The ParameterTypeConfigurable creates a drop-down list. The user
can easily choose which CRM connection should be used.
8.2.2 Customizing the configuration panel
By default, the configuration panel shows the editable fields as a label with an
input element next to it, filling the remaining width of the dialog. However, it
might come in handy to implement an own ConfigurationPanel in order to customize
the look or to add more GUI elements to the panel, like buttons for example.
Any customized panel must extend the abstract class ConfigurationPanel. In the
following example, we will illustrate this by implementing a very simple panel for
our CRM connection entries with just three labels and text fields:
1 import java . awt . GridLayout ;
2
3 import javax . swing . JComponent ;
4 import javax . swing . JFrame ;
5 import javax . swing . JLabel ;
6 import javax . swing . JPanel ;
7 import javax . swing . JTextFie ld ;
8
9 import com . rapidminer . t o o l s . c o n f i g . Conf igurab le ;
10 import com . rapidminer . t o o l s . c o n f i g . gu i . Conf igurat ionPane l ;
11
12 public class CRMConfigurationPanel extends Conf igurat ionPanel<
CRMConfigurable> {13
14 private JTextFie ld nameField = new JTextFie ld ( ) ;
15 private JTextFie ld u r l F i e l d = new JTextFie ld ( ) ;
16 private JTextFie ld usernameField = new JTextFie ld ( ) ;
17
18 @Override
19 public boolean checkF i e ld s ( ) {
75
8. Using advanced Extension mechanism
20 // validates the user input
21 return u r l F i e l d . getText ( ) . s tartsWith ( ” http :// ” ) ?
true : fa l se ;
22 }23
24 @Override
25 public JComponent getComponent ( ) {26 // returns a custom GUI component
27 GridBagConstraints c = new GridBagConstraints ( ) ;
28 c . anchor = GridBagConstraints . FIRST LINE START ;
29 c . weighty = 0 ;
30 c . weightx = 1 ;
31 c . f i l l = GridBagConstraints .BOTH;
32 c . gr idwidth = GridBagConstraints .REMAINDER;
33
34 JPanel panel = new JPanel (new GridBagLayout ( ) ) ;
35 panel . add (new JLabel ( ”Name : ” ) , c ) ;
36 panel . add ( nameField , c ) ;
37 panel . add (new JLabel ( ”URL: ” ) , c ) ;
38 panel . add ( u r lF i e l d , c ) ;
39 panel . add (new JLabel ( ”Username : ” ) , c ) ;
40 panel . add ( usernameField , c ) ;
41
42 c . weighty = 1 ;
43 panel . add (new JPanel ( ) , c ) ;
44 return panel ;
45 }46
47 @Override
48 public void updateComponents ( CRMConfigurable c o n f i g u r a b l e ) {49 // used to update the Panel , according to the given
configurable
50 nameField . setText ( c o n f i g u r a b l e . getName ( ) ) ;
51 u r l F i e l d . setText ( c o n f i g u r a b l e . getParameter ( ”URL” ) ) ;
52 usernameField . setText ( c o n f i g u r a b l e . getParameter ( ”
Username” ) ) ;
53 }54
55 @Override
56 public void updateConf igurable ( CRMConfigurable c o n f i g u r a b l e )
{57 // reads field values from the panel and updates the
parameter values of the configurable
76
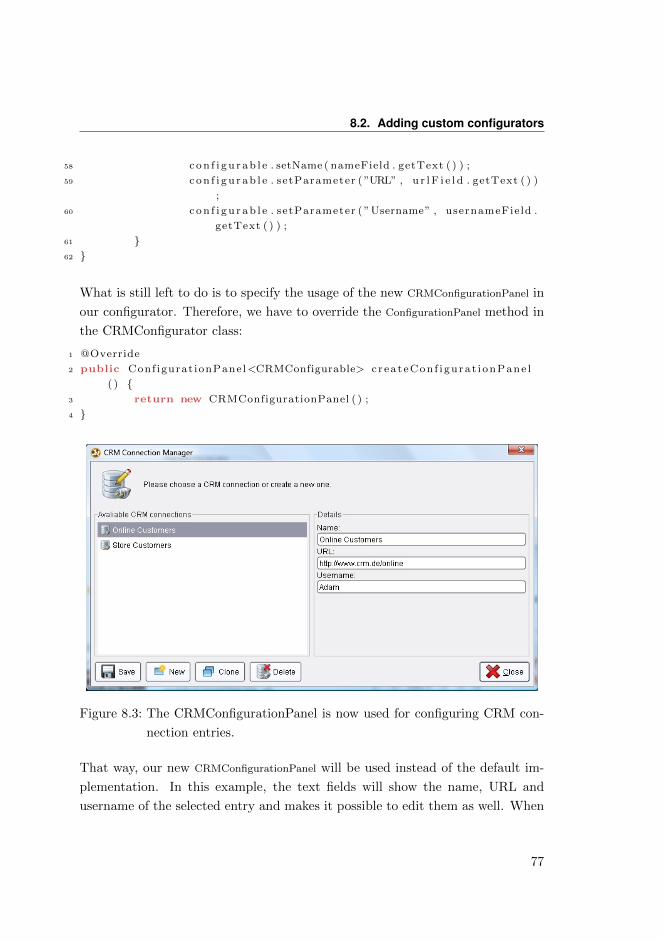
8.2. Adding custom configurators
58 c o n f i g u r a b l e . setName ( nameField . getText ( ) ) ;
59 c o n f i g u r a b l e . setParameter ( ”URL” , u r l F i e l d . getText ( ) )
;
60 c o n f i g u r a b l e . setParameter ( ”Username” , usernameField .
getText ( ) ) ;
61 }62 }
What is still left to do is to specify the usage of the new CRMConfigurationPanel in
our configurator. Therefore, we have to override the ConfigurationPanel method in
the CRMConfigurator class:
1 @Override
2 public Conf igurat ionPanel<CRMConfigurable> c r ea t eCon f i gura t i onPane l
( ) {3 return new CRMConfigurationPanel ( ) ;
4 }
Figure 8.3: The CRMConfigurationPanel is now used for configuring CRM con-
nection entries.
That way, our new CRMConfigurationPanel will be used instead of the default im-
plementation. In this example, the text fields will show the name, URL and
username of the selected entry and makes it possible to edit them as well. When
77
8. Using advanced Extension mechanism
it comes to saving the user input, a validation of the input will be requested
through calling the checkFields method, after which updateConfigurable is called in
order to get the input from our panel. This way, you can easily create your own
custom configuration panels and organize it the way you want.
8.3 Adding custom GUI elements
The PluginInit class offers the ability to modify the GUI. We will add a single new
window here for demonstration purpose. All we have to do is to implement a
new class implementing the Dockable interface and a component that is delivered
by the Dockable. Since Dockable is part of the library vldocking. jar and not part of
RapidMiner itself, we have to add it to the class path. In Eclipse this is possible
by configuring the Java Build Path in the Project Properties. There’s a tab called
Libraries where one can add jar files from other projects. We select the vldocking
. jar from the lib directory of the RapidMiner project. After we have done this,
we will implement a class that combines being the Dockable as well as being the
delivered Component:
1 package com . rapidminer ;
2
3 import java . awt . BorderLayout ;
4 import java . awt . Component ;
5
6 import javax . swing . JLabel ;
7 import javax . swing . JPanel ;
8
9 import com . rapidminer . gu i . t o o l s . ResourceDockKey ;
10 import com . v l s o l u t i o n s . swing . docking . DockKey ;
11 import com . v l s o l u t i o n s . swing . docking . Dockable ;
12
13 /**
14 * A very simple example of a new dockable window.
15 * @author Sebastian Land
16 */
17 public class SimpleWindow extends JPanel implements Dockable {18
19 private stat ic f ina l long se r ia lVer s ionUID = 1L ;
20
78
8.3. Adding custom GUI elements
21 private f ina l DockKey DOCK KEY = new ResourceDockKey ( ”
t u t o r i a l . simple window ” ) ;
22
23 private JLabel label = new JLabel ( ” He l lo user . ” ) ;
24
25 public SimpleWindow ( ) {26 // adding content to this window
27 setLayout (new BorderLayout ( ) ) ;
28 add ( label , BorderLayout .CENTER) ;
29 }30
31 public void s e tLabe l ( S t r ing labe lText ) {32 this . label . setText ( labe lText+”TEST” ) ;
33 System . out . p r i n t l n ( labe lText ) ;
34 r e v a l i d a t e ( ) ;
35 }36
37 @Override
38 public Component getComponent ( ) {39 return this ;
40 }41
42 @Override
43 public DockKey getDockKey ( ) {44 return DOCK KEY;
45 }46 }
While the content of the window is rather simple and only a variant of the well
known Hello World program, we see the new concept of the ResourceDockKey. A
DockKey contains information about a Dockable, for example it stores the name and
the icon of this window. The ResourceDockKey will retrieve this information from
the GUI resource bundle that is loaded in a language dependent manner from a
resource file. This file is specified in the GUI−Descriptor entry of the manifest. So
the window title and tooltip can be translated without changing the source code
and the correct language is automatically chosen. In the template project, the
GUI properties file is called GUITemplate.properties. This is an example of what
might describe the new window:
1 gui . dockkey . t u t o r i a l . s imple window . name = A very s imple Window
2 gui . dockkey . t u t o r i a l . s imple window . i con = window2 . png
79
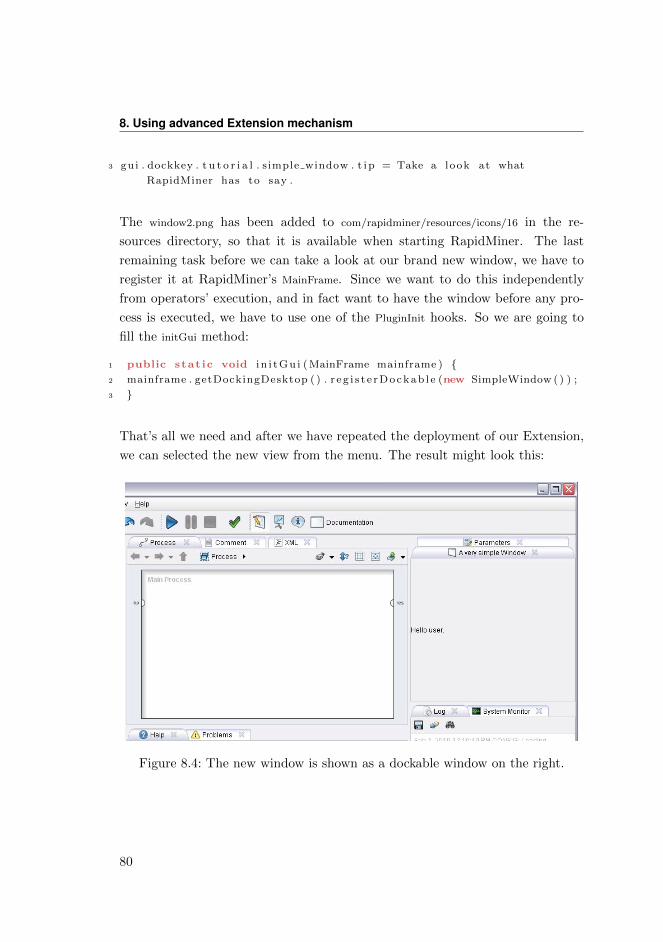
8. Using advanced Extension mechanism
3 gui . dockkey . t u t o r i a l . s imple window . t i p = Take a look at what
RapidMiner has to say .
The window2.png has been added to com/rapidminer/resources/icons/16 in the re-
sources directory, so that it is available when starting RapidMiner. The last
remaining task before we can take a look at our brand new window, we have to
register it at RapidMiner’s MainFrame. Since we want to do this independently
from operators’ execution, and in fact want to have the window before any pro-
cess is executed, we have to use one of the PluginInit hooks. So we are going to
fill the initGui method:
1 public stat ic void i n i tGu i ( MainFrame mainframe ) {2 mainframe . getDockingDesktop ( ) . r e g i s t e rD ock ab l e (new SimpleWindow ( ) ) ;
3 }
That’s all we need and after we have repeated the deployment of our Extension,
we can selected the new view from the menu. The result might look this:
Figure 8.4: The new window is shown as a dockable window on the right.
80
8.4. Adding custom actions to the GUI
8.4 Adding custom actions to the GUI
Usually one might add buttons and other interactive elements on new GUI win-
dows. RapidMiner uses a flexible mechanism to ensure, that the GUI still remains
language independent. Therefore it makes use of the same properties file, we al-
ready used for specifying the title of the window. We will show this on the
example of adding a new menu to the menu bar of the main window. We will
extend the initGui method in this way:
1 public stat ic void i n i tGu i ( MainFrame mainframe ) {2 f ina l SimpleWindow simpleWindow = new SimpleWindow ( ) ;
3 mainframe . getDockingDesktop ( ) . r e g i s t e rD ock ab l e ( simpleWindow ) ;
4
5 JMenu menu = new ResourceMenu ( ” t u t o r i a l . t u t o r i a l ” ) ;
6 mainframe . getMainMenuBar ( ) . add (menu) ;
7 }
The ResourceMenu behaves similar to the ResourceDockKey and will retrieve it’s
settings from the resource bundle. When might add three properties per menu:
1 gui . a c t i on . menu . t u t o r i a l . t u t o r i a l . label = Tutor i a l
2 gui . a c t i on . menu . t u t o r i a l . t u t o r i a l . mne = T
3 gui . a c t i on . menu . t u t o r i a l . t u t o r i a l . t i p = This menu conta in s e n t r i e s
for this t u t o r i a l .
The label will be used as name, while the mne is the mnemonic for this menu
entry. The case of this letter defines where in the word the underscore will be
placed. The text in the tip property will be show up as tool tip.
But this isn’t very satisfactory. Although we have an additional menu, we don’t
have any option in there, so we will add an action. Again, we will use a resource
based variant that will gather all required information from the GUI properties.
The method will finally look like this:
1 public stat ic void i n i tGu i ( MainFrame mainframe ) {2 f ina l SimpleWindow simpleWindow = new SimpleWindow ( ) ;
3 mainframe . getDockingDesktop ( ) . r e g i s t e rD ock ab l e ( simpleWindow )
;
4
5 JMenu menu = new ResourceMenu ( ” t u t o r i a l . t u t o r i a l ” ) ;
81
8. Using advanced Extension mechanism
6 menu . add (new ResourceAction ( true , ” t u t o r i a l . g r e e t i n g s ” , ”
Earth l ing ” ) {7 private stat ic f ina l long se r ia lVer s ionUID = 1L ;
8
9 @Override
10 public void act ionPerformed ( ActionEvent e ) {11 simpleWindow . s e tLabe l ( ” Greet ings ! ” ) ;
12 }13 }) ;
14
15 mainframe . getMainMenuBar ( ) . add (menu) ;
16 }
We have added a menu entry, by specifying a new ResourceAction. The action
will give a name to the menu entry and an icon if present, as well as a tooltip. The
constant true in the constructor will force the usage of a 16 pixel icon instead of
a larger size. Each action reads five properties, all of which begin with gui.action.
followed by the key, a dot and then the property identifier. The five property
identifiers are
• label, which describes the text visible in the menu,
• mne for choosing the mnemonic,
• tip for the tooltip,
• icon for the icon ,
• acc for specifying a short cut to this action.
This could be F3 or control pressed F3 as examples. See KeyStroke class of Java and
especially the getKeyStroke method documentation for details. The property file
might contain something like that:
1 gui . a c t i on . t u t o r i a l . g r e e t i n g s . label = Greet {0} !
2 gui . a c t i on . t u t o r i a l . g r e e t i n g s . mne = G
3 gui . a c t i on . t u t o r i a l . g r e e t i n g s . acc = c o n t r o l p re s sed F3
4 gui . a c t i on . t u t o r i a l . g r e e t i n g s . t i p = Act ivate s the g r e e t i n g s .
5 gui . a c t i on . t u t o r i a l . g r e e t i n g s . i con = in format ion . png
82

8.4. Adding custom actions to the GUI
Another feature is the {0}. This will be replaced with the string value of the first
argument given to the constructor of any resource based element after the resource
identifier key. In the above example the first and only additional parameter is the
String “Earthling” and hence the menu entry will be named Greet Earthling! This
mechanism works for all label and tooltips in all resource based GUI elements.
Figure 8.5: The new menu with the single entry.
83


