how to: fit new trim including chrome door handles...re-fitting the door card is the reverse...
TRANSCRIPT
How To: Fit new trim including chrome door handlesEver since upgrading to a V6 from my Silver and Black I've always been disappointed with the interior. It just felt a bit
drab but when I worked out what parts I needed and phoned Peugeot, it was going to work out £170 + VAT to replace the pieces.
ashtray - £61 glovebox facia panel - £47 drivers facia panel - £35
chrome door handles - £30
There was no way I was paying that for a couple of pieces of plastic. Fortunately I contacted ade1122 and he sent me all the ebony trim parts plus the chrome door handles for £60. A much more reasonable price.
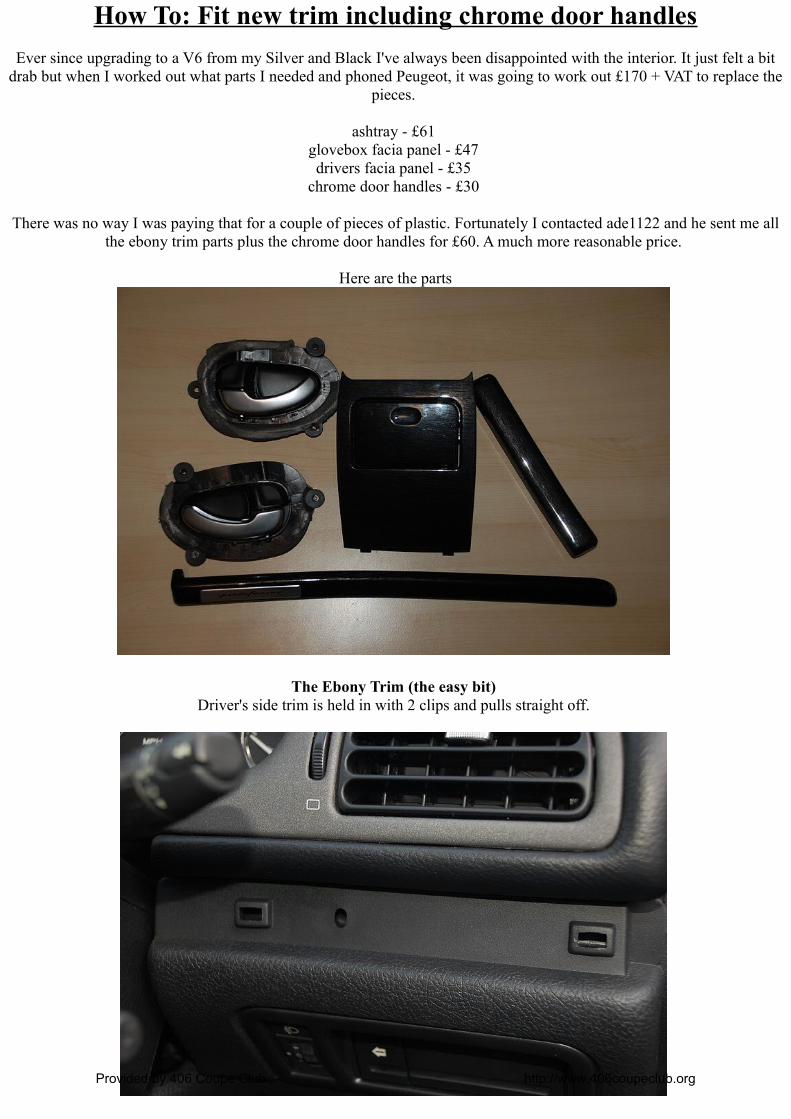
Here are the parts
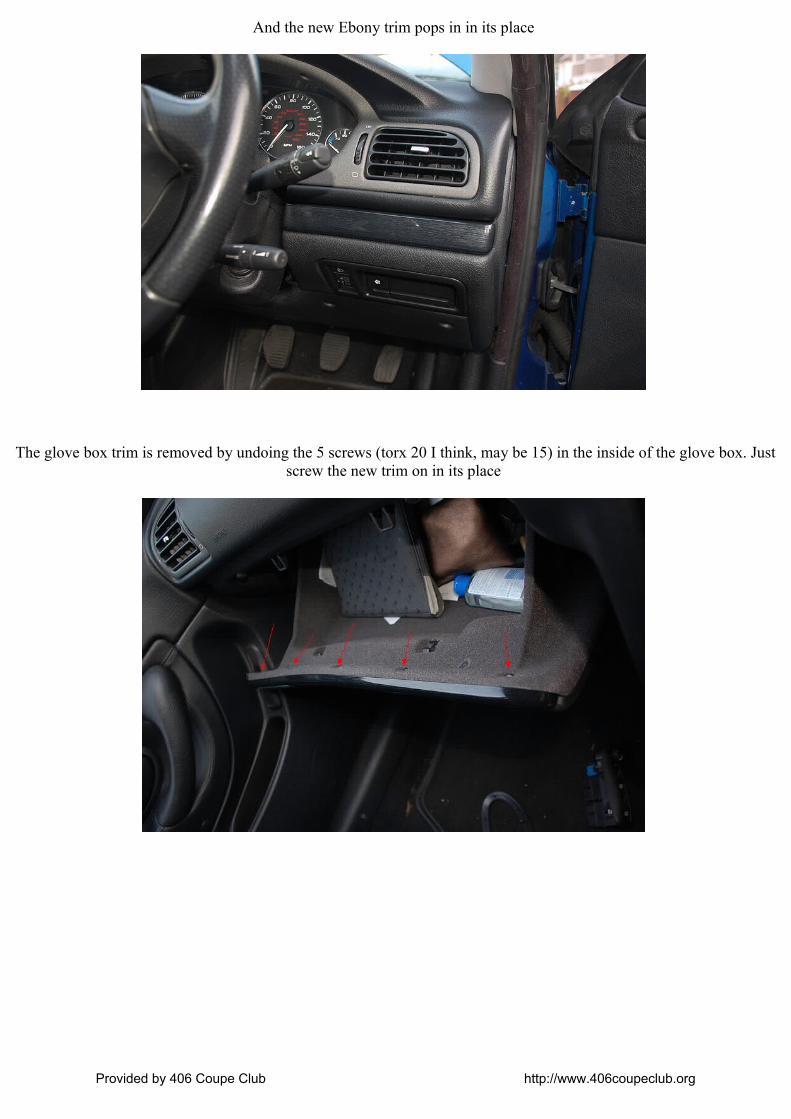
The Ebony Trim (the easy bit) Driver's side trim is held in with 2 clips and pulls straight off.
Provided by 406 Coupe Club http://www.406coupeclub.org
And the new Ebony trim pops in in its place
The glove box trim is removed by undoing the 5 screws (torx 20 I think, may be 15) in the inside of the glove box. Just screw the new trim on in its place
Provided by 406 Coupe Club http://www.406coupeclub.org

Open the ashtray, pop your hand in and lift upwards. The whole panel should come out. Pull out the ashtray light before removing completely. Reverse process with the new console
The door handles (the more difficult part)
Tools needed:- Torx 20 screw driver bit - some sort of spatula or flat head screw driver
- gaffer tape - scissors
- machine bolts, nuts and washers (could use self tapping screws instead) - metal drill bits
- drill bit collars (not essential but for piece of mind) - stanley knife
First prise out the safety light from the bottom of the door by placing the spatula under the bottom and lifting up and out. Disconnect the light unit and put to one side
Provided by 406 Coupe Club http://www.406coupeclub.org

Prise out the electric window and wing mirror controller. I found placing the spatula nearer to the bottom worked best. remove all three connectors.
Prise off the door handle surround
prise out the stopper in the centre of the door and unscrew the bolt inside securing the bottom of the door pull handle to the door. I requires a T20 torx piece. It is a bit awkward to locate the screw driver in the screw as it's up at a 45 deg angle.
Provided by 406 Coupe Club http://www.406coupeclub.org

Now remove the screw holding the top end of the door pull handle to the door with the T20 screw driver
Remove the black panel covering the bolts for the wing mirror. Slide a spatula or screw driver under the panel and lift upward. It's very important to slide it up and not prise it outwards as it's held on via a small disk in a channel. the plastic is
very brittle and snaps easily. Don't worry about the seal, it will flex out of the way
The last bolt to take out is just below the black panel. prise out the round cover. This again requires a T20 piece. I found that the screw driver adapter I had was just slightly too wide for the hole so I ended up losening the screw off by putting the torx piece in a pair of mole grips. I only had this bolt on the passenger side for some reason. the wing mirror on the
driver side is held in by a shorter bolt with a hex head. This may just be from some previous work. Once the screw is out the tube it sits in can be pulled out
Provided by 406 Coupe Club http://www.406coupeclub.org
To take the door card off start pulling it away at the bottom and up the sides. once it is loose it should just lift up and unhook from the door. If the card has never been taken off before it will take a bit of effort to release and there will be lots
of horrible snapping sounds. This is just the plastic pins that hold the card on coming out.
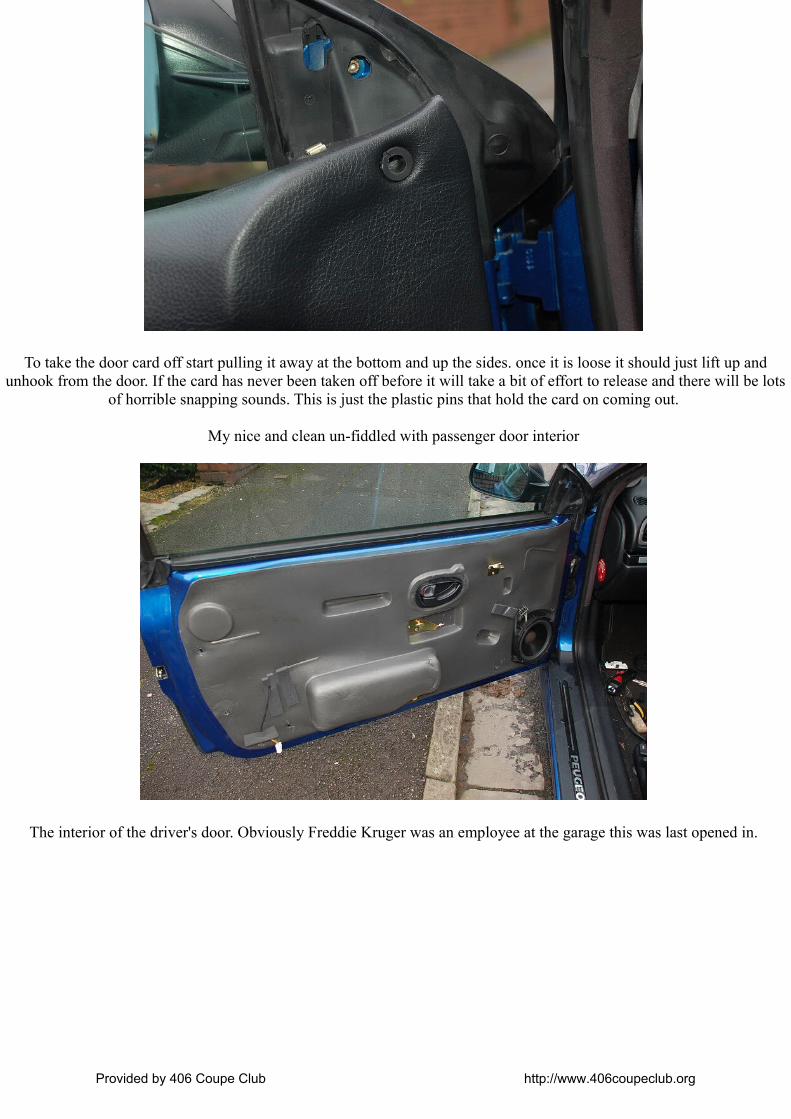
My nice and clean un-fiddled with passenger door interior
The interior of the driver's door. Obviously Freddie Kruger was an employee at the garage this was last opened in.
Provided by 406 Coupe Club http://www.406coupeclub.org

If the sound proofing on your door hasn't been butchered before you need to make some strategic cuts in it to gain access. Trim all the way around the door handle to be replaced as close to the plastic as possible. Then cut up one side, along the top and down the other side of the rectangular bulge in the door. There is a large piece of foam behind. To take the foam out bend unp the metal piece that's dug into the top and pull the foam out and down. You should be able to see two more similar strips inside holding the foam in position, just flatten them out of the way. There may also be some black sealant
on the foam. cut this away with a stanley knife and lift the foam block out.
Release the rod that connects the door handle to the door lock. This can be done by looking behind the door handle from the top. Just pull the rod towards you (away from the door) against the spring and it should drop down.
Provided by 406 Coupe Club http://www.406coupeclub.org
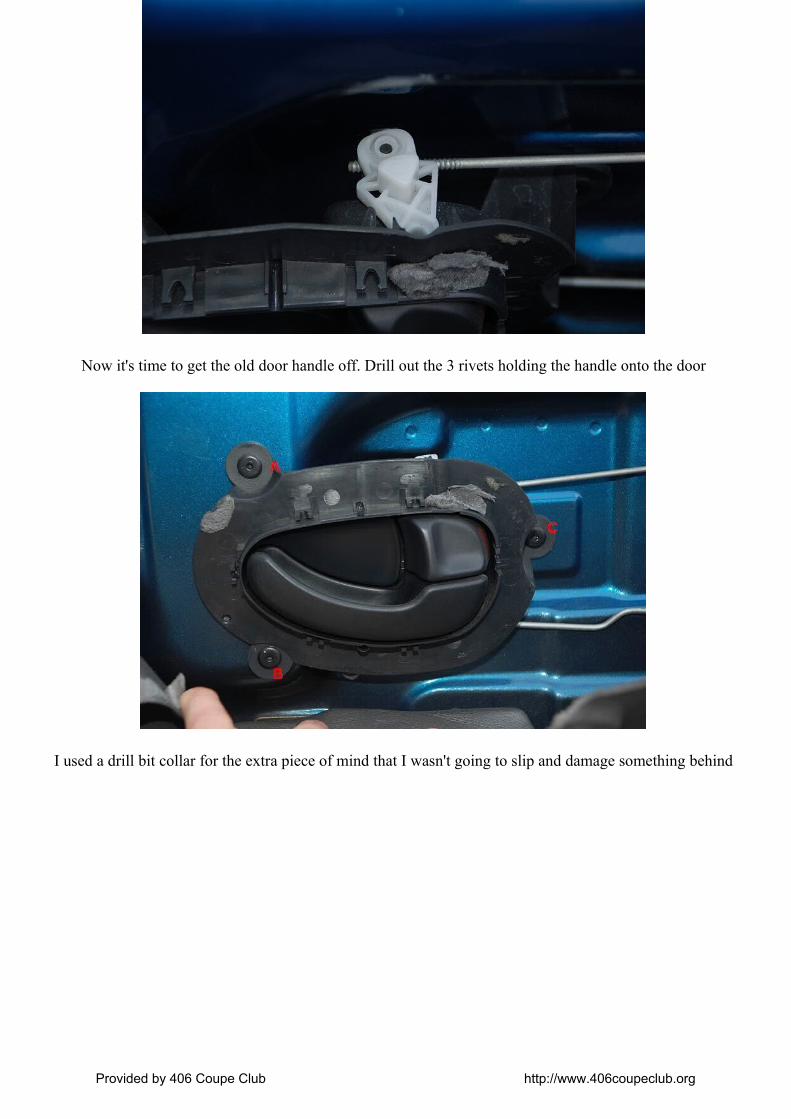
Now it's time to get the old door handle off. Drill out the 3 rivets holding the handle onto the door
I used a drill bit collar for the extra piece of mind that I wasn't going to slip and damage something behind
Provided by 406 Coupe Club http://www.406coupeclub.org
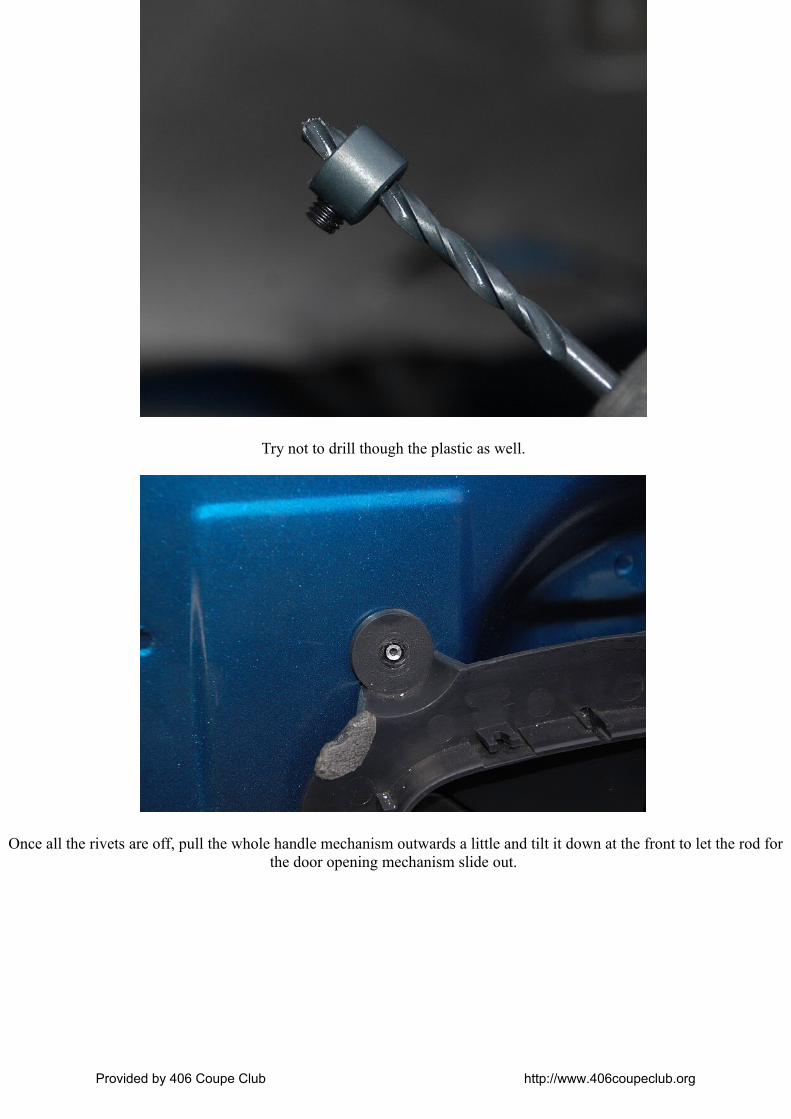
Try not to drill though the plastic as well.
Once all the rivets are off, pull the whole handle mechanism outwards a little and tilt it down at the front to let the rod for the door opening mechanism slide out.
Provided by 406 Coupe Club http://www.406coupeclub.org

remove the stubs of the old rivets from the door. This can be a bit tricky and I don't know that there's a right or wrong way to do it. I continued drilling as much as possible but found that often the rivet would just spin around on the end of the bit making a horrific metal on metal screeching sound. If this happened I took the mole grips to what was left and squashed it
about a bit till it would fit though the hole. I also drilled the holes a tad wider at this point to take the bolts I was using. That all depends on what method you're using to secure the new handles on
You may need to retrieve the spring from the back of the old handle if your replacement doesn't have one. Use a pair of long nose pliers either side of the plastic pin in the photo and pull down. Fix the spring using the pin in the new door
handle in the same orientation
Slip the door opening rod into the hole on the back of the new handle and position against the door. I used some machine bolts and nuts with some washers to secure the new handle on
Provided by 406 Coupe Club http://www.406coupeclub.org
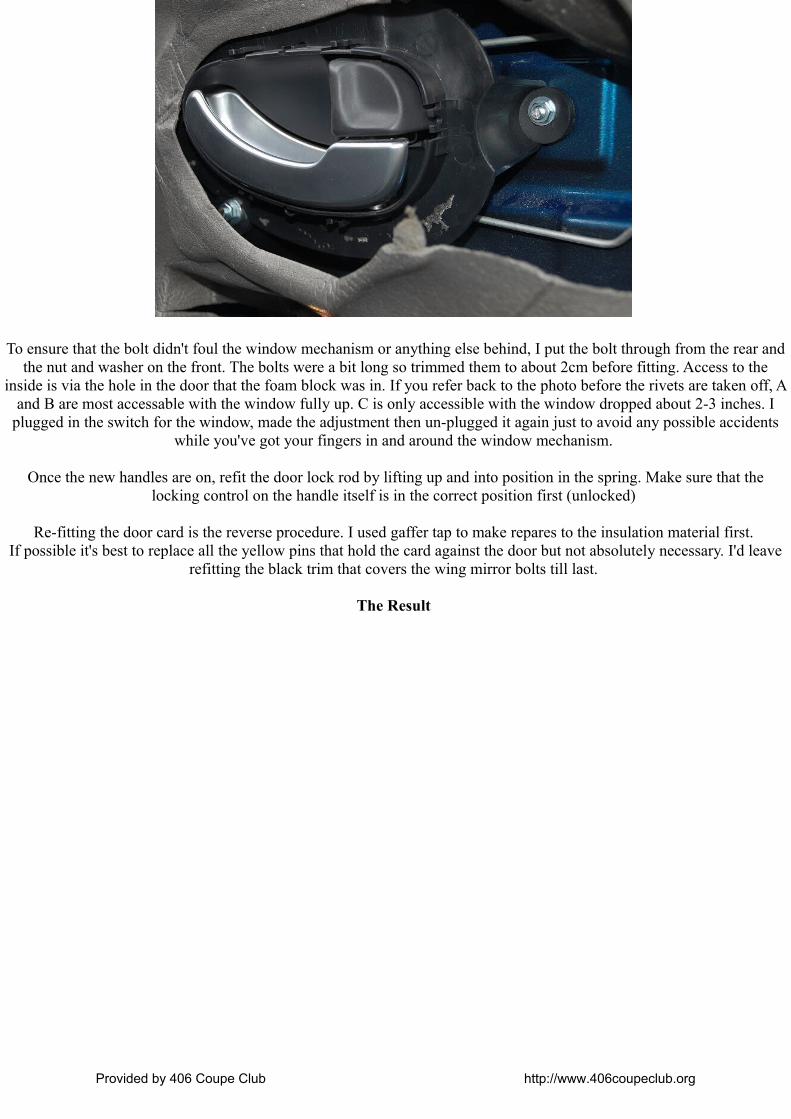
To ensure that the bolt didn't foul the window mechanism or anything else behind, I put the bolt through from the rear and the nut and washer on the front. The bolts were a bit long so trimmed them to about 2cm before fitting. Access to the
inside is via the hole in the door that the foam block was in. If you refer back to the photo before the rivets are taken off, A and B are most accessable with the window fully up. C is only accessible with the window dropped about 2-3 inches. I
plugged in the switch for the window, made the adjustment then un-plugged it again just to avoid any possible accidents while you've got your fingers in and around the window mechanism.
Once the new handles are on, refit the door lock rod by lifting up and into position in the spring. Make sure that the locking control on the handle itself is in the correct position first (unlocked)
Re-fitting the door card is the reverse procedure. I used gaffer tap to make repares to the insulation material first. If possible it's best to replace all the yellow pins that hold the card against the door but not absolutely necessary. I'd leave
refitting the black trim that covers the wing mirror bolts till last.
The Result
Provided by 406 Coupe Club http://www.406coupeclub.org

Provided by 406 Coupe Club http://www.406coupeclub.org