importing/georeferencing google imagery into arcmap...
TRANSCRIPT
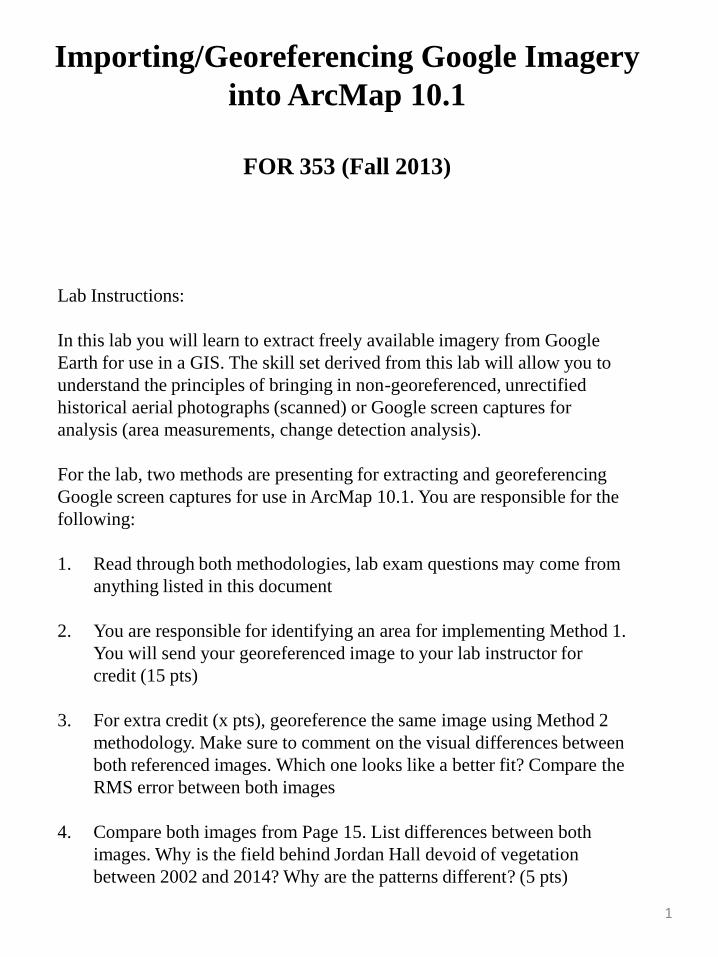
Importing/Georeferencing Google Imagery
into ArcMap 10.1
FOR 353 (Fall 2013)
Lab Instructions:
In this lab you will learn to extract freely available imagery from Google
Earth for use in a GIS. The skill set derived from this lab will allow you to
understand the principles of bringing in non-georeferenced, unrectified
historical aerial photographs (scanned) or Google screen captures for
analysis (area measurements, change detection analysis).
For the lab, two methods are presenting for extracting and georeferencing
Google screen captures for use in ArcMap 10.1. You are responsible for the
following:
1. Read through both methodologies, lab exam questions may come from
anything listed in this document
2. You are responsible for identifying an area for implementing Method 1.
You will send your georeferenced image to your lab instructor for
credit (15 pts)
3. For extra credit (x pts), georeference the same image using Method 2
methodology. Make sure to comment on the visual differences between
both referenced images. Which one looks like a better fit? Compare the
RMS error between both images
4. Compare both images from Page 15. List differences between both
images. Why is the field behind Jordan Hall devoid of vegetation
between 2002 and 2014? Why are the patterns different? (5 pts)
1

ArcMap 10 now allows you to bring in imagery as basemaps (Method 2) to your
project. However, this requires a robust network connection because you are constantly
feeding in live data from their servers. As an alternative method to bring in satellite
imagery into ArcMap, the following tutorial guides you through the steps of bringing in
selected screenshots from Google Earth into ArcMap. One huge advantage of using
Google Earth imagery is that you will be able to bring in historical data that is now
available.
Method 1: (Georeferencing without basemap data)
GOOGLE EARTH
You will navigate to the location in Google Earth that you want to bring in to
ArcMap. Then, you will add 4 control points on each corner of the image, record their
latitude/longitude coordinates, and export the image as a jpg file.
1. Open Google Earth
2. In the Layers panel (Sidebar), turn everything off
3. Go to Tools -> Options, and change the “Show Lat/Long” option to “Decimal
Degrees
4. Navigate to the area and extent that you want to use in ArcMap
2
5. Press “r” on your keyboard. This will reset the view angle to be “top down” and
rotates the map so that it is “north up”
6. Press F11 to make your map go full screen
7. Click on the “add placemark” button
8. Move the icon from the middle of the screen to the top left corner of the map
(make sure to leave the ‘New Placemark’ dialogue open, this will allow you to left
click-hold-move; also don’t place the icon in the absolute upper left corner
otherwise it won’t be visible when you save your image)
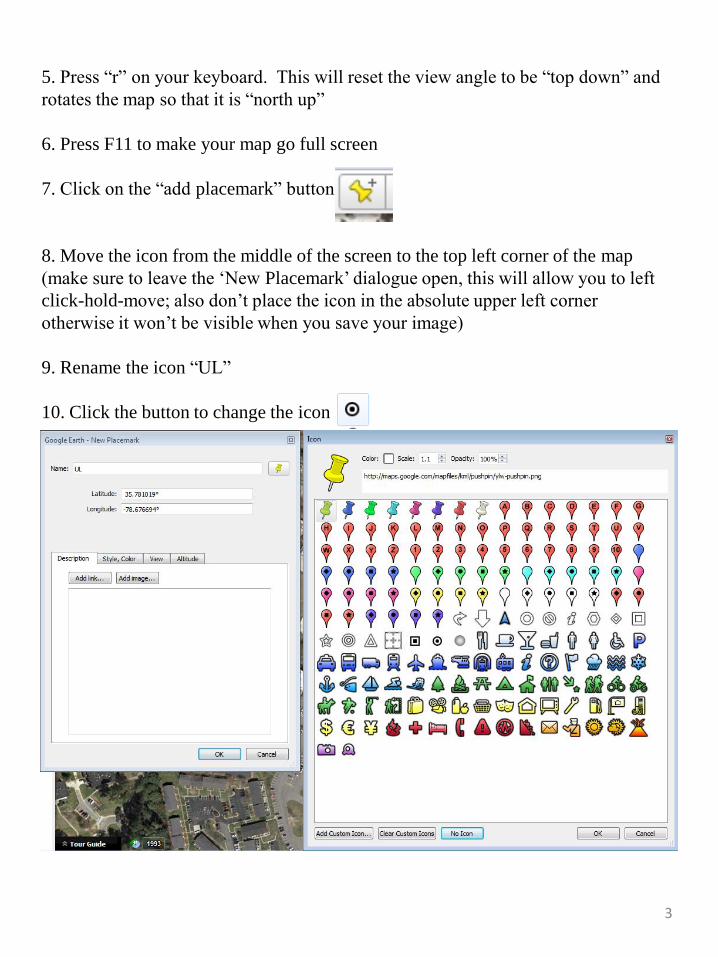
9. Rename the icon “UL”
10. Click the button to change the icon
3
12. Jot down (or copy and paste) the latitude and longitude coordinates somewhere
you can access later
13. Repeat the process and add icons for UR, BL, BR
14. Now it’s time to export the image. Go to File -> Save -> Save Image and save
your file
ARCMAP
Now you will import your Google Earth image, and georeference it based on the 4
control points you created.
1.Open ArcMap
2.Go to View -> Data Frame Properties and select the Coordinate System tab
3.Choose Predefined -> Geographic Coordinate Systems -> World -> WGS 1984
4.Go to Customize -> Toolbars -> Georeferencing
5.Add the image file from Google to ArcMap. If it prompts you to build pyramids,
click ok
6.Zoom into the top left corner of your satellite image
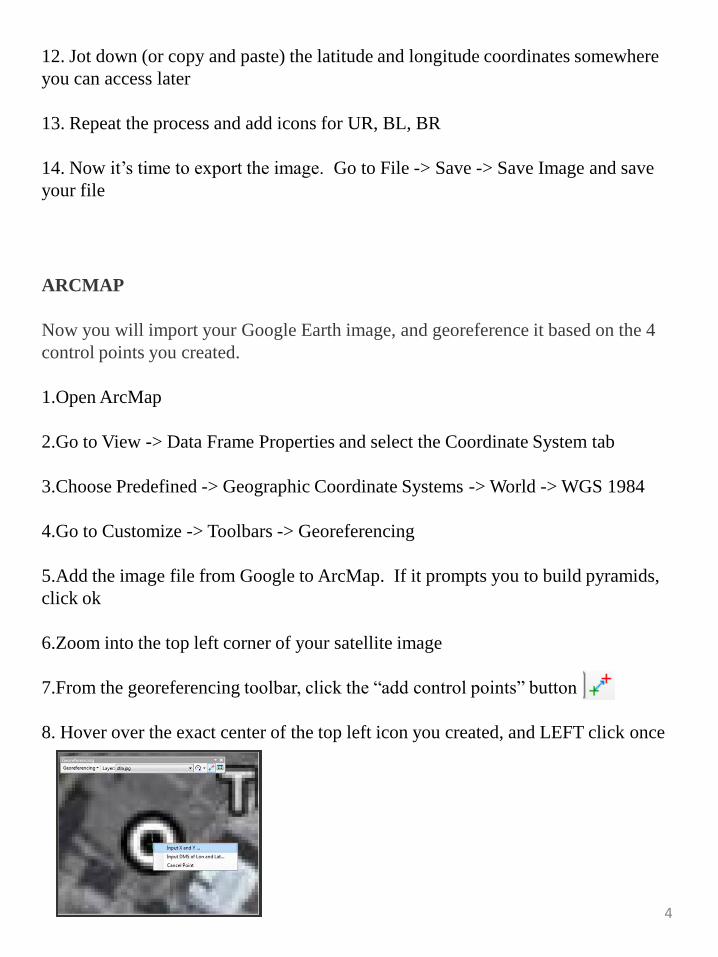
7.From the georeferencing toolbar, click the “add control points” button
8. Hover over the exact center of the top left icon you created, and LEFT click once
4
9. Now, RIGHT click once and click on “Input X and Y…”
10. Add the correct coordinates for your Top-left control point.
WARNING: Remember that “X” is LONGITUDE and “Y” is LATITUDE
11. Repeat the process for the remaining 3 control points. If the map has
disappeared from your view port, just right click on the layer, and select “zoom to
layer”
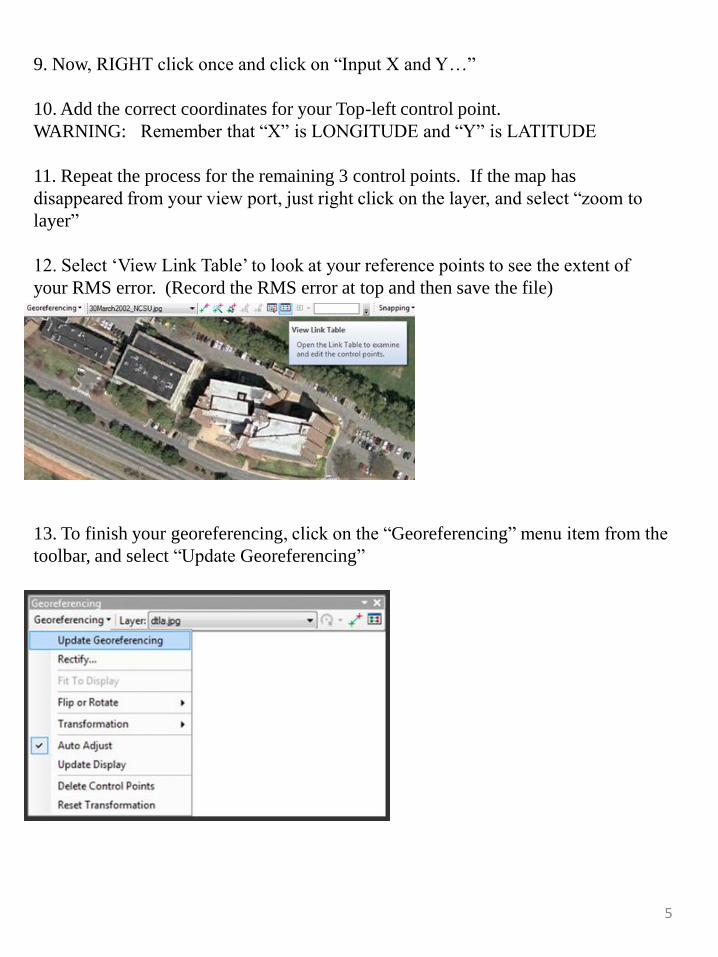
12. Select ‘View Link Table’ to look at your reference points to see the extent of
your RMS error. (Record the RMS error at top and then save the file)
13. To finish your georeferencing, click on the “Georeferencing” menu item from the
toolbar, and select “Update Georeferencing”
5
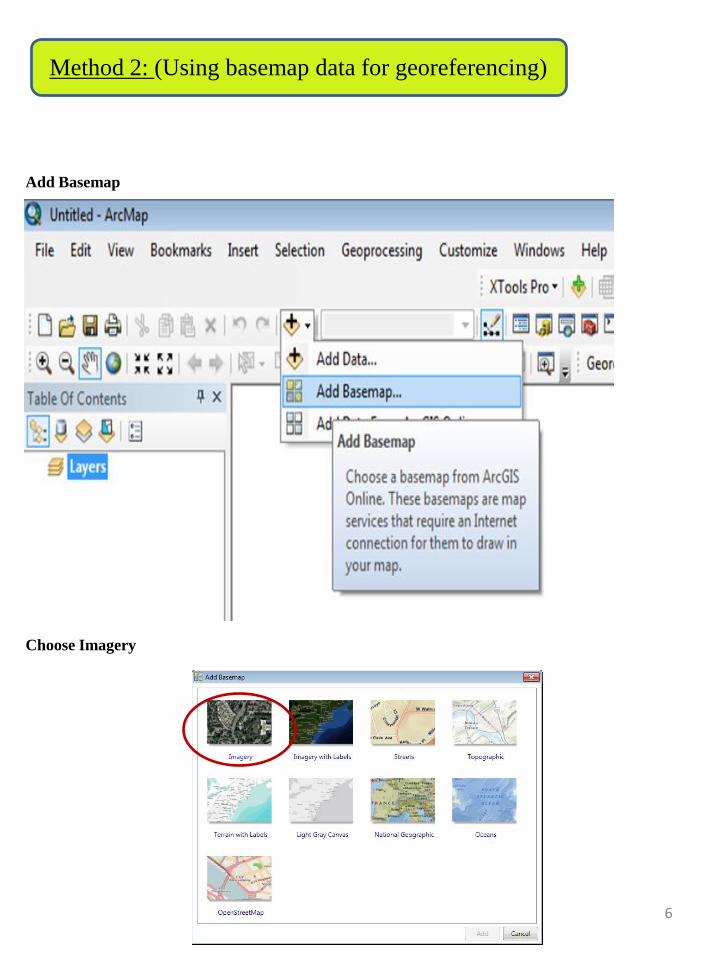
Add Basemap
Choose Imagery
Method 2: (Using basemap data for georeferencing)
6
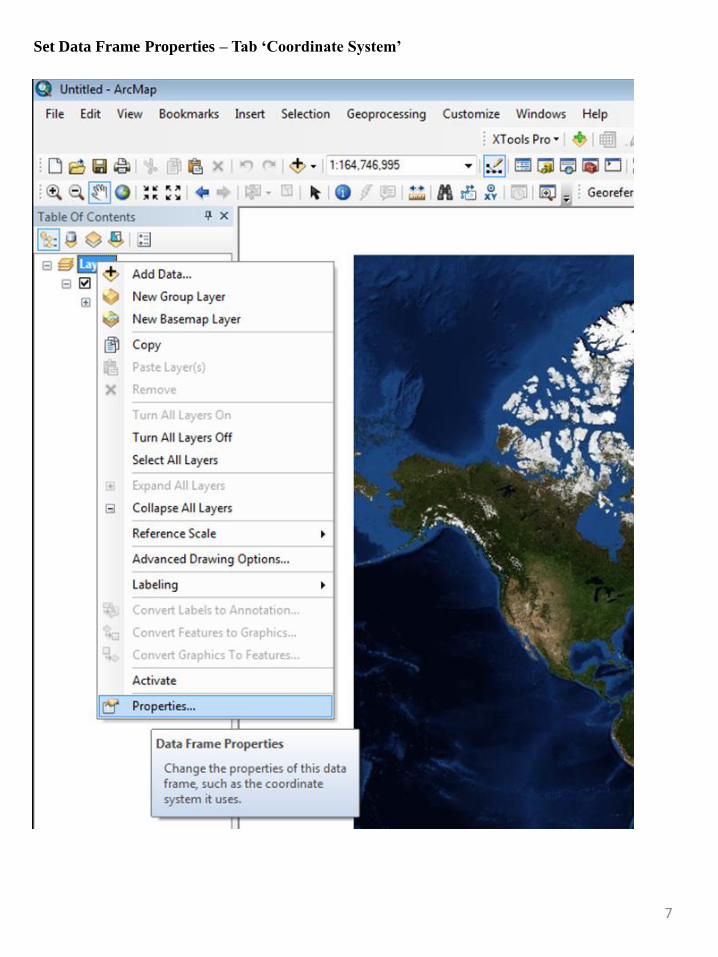
Set Data Frame Properties – Tab ‘Coordinate System’
7

Coordinate System: Projected Coordinate Systems UTM NAD 1983 UTM Zone 17
8
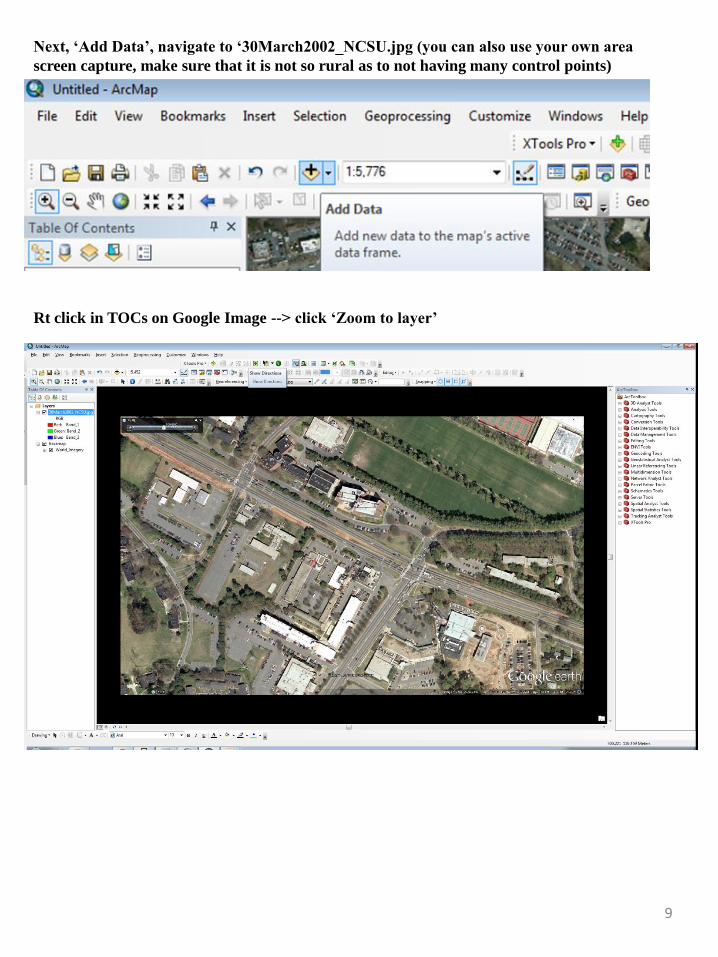
Next, ‘Add Data’, navigate to ‘30March2002_NCSU.jpg (you can also use your own area
screen capture, make sure that it is not so rural as to not having many control points)
Rt click in TOCs on Google Image --> click ‘Zoom to layer’
9
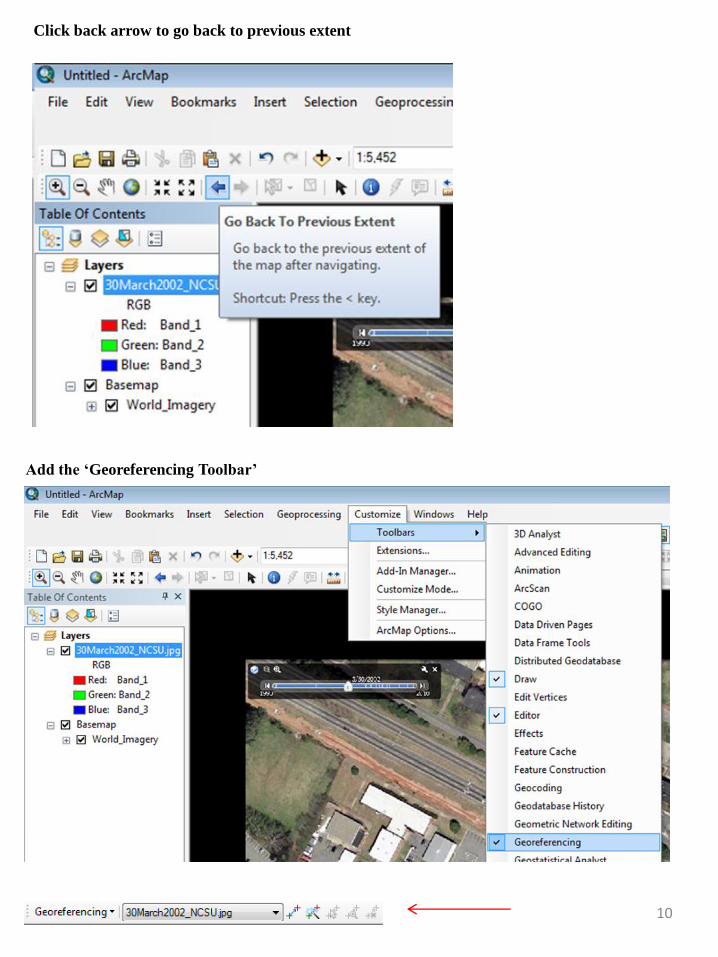
Click back arrow to go back to previous extent
Add the ‘Georeferencing Toolbar’
10
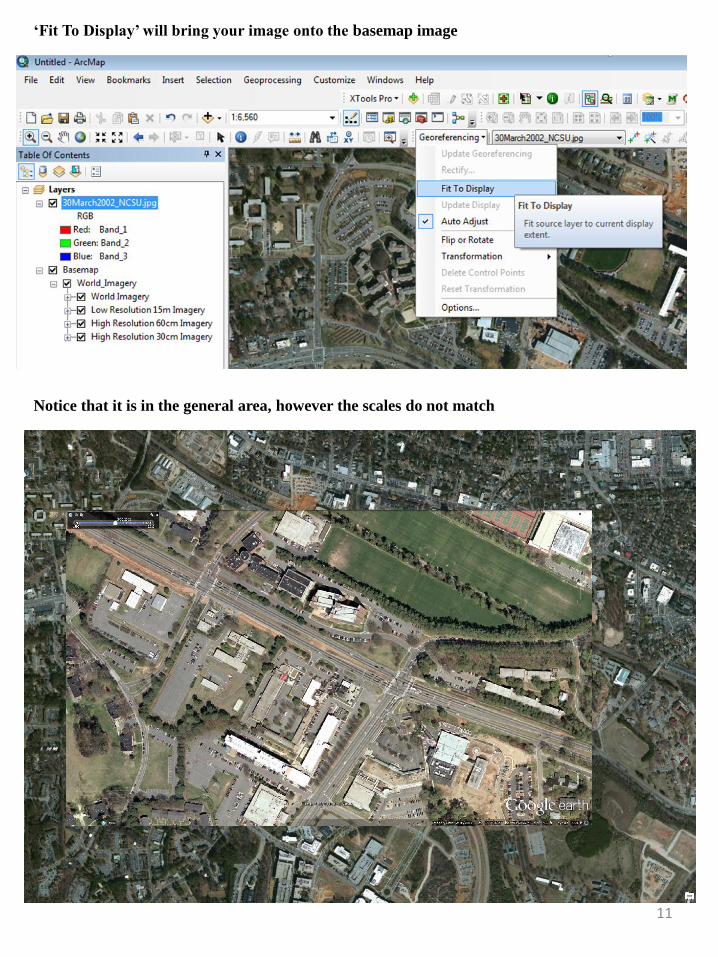
‘Fit To Display’ will bring your image onto the basemap image
Notice that it is in the general area, however the scales do not match
11
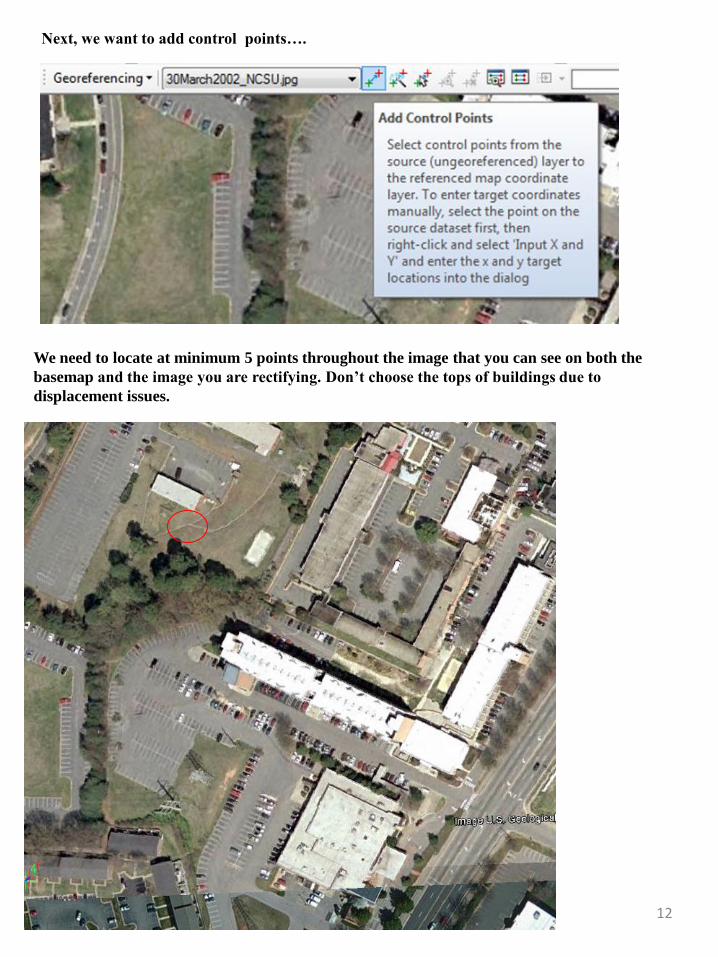
Next, we want to add control points….
We need to locate at minimum 5 points throughout the image that you can see on both the
basemap and the image you are rectifying. Don’t choose the tops of buildings due to
displacement issues.
12
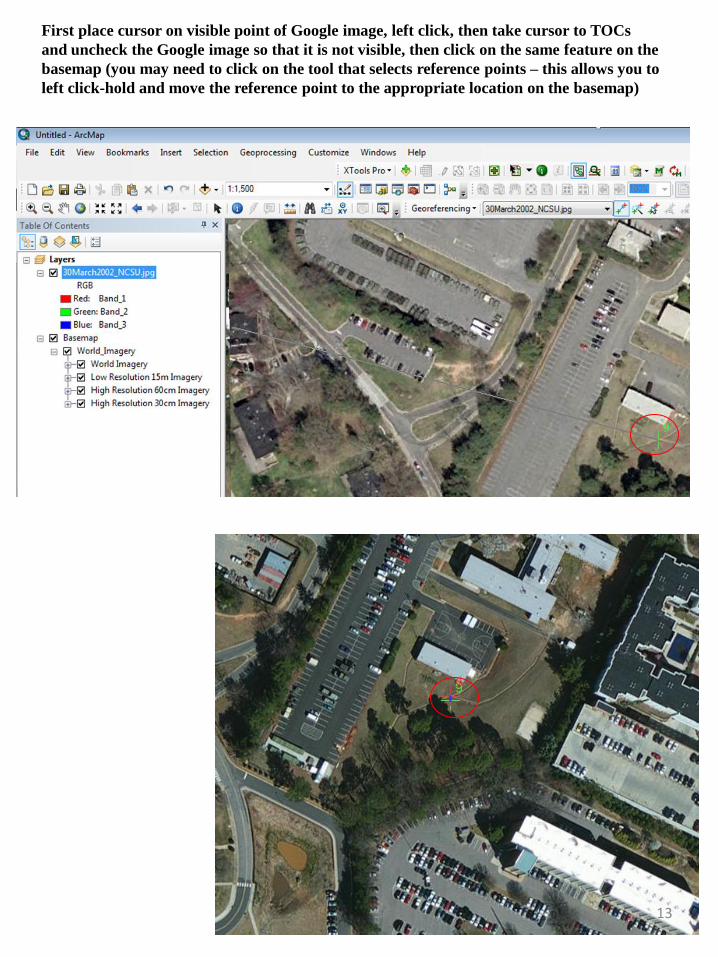
First place cursor on visible point of Google image, left click, then take cursor to TOCs
and uncheck the Google image so that it is not visible, then click on the same feature on the
basemap (you may need to click on the tool that selects reference points – this allows you to
left click-hold and move the reference point to the appropriate location on the basemap)
13
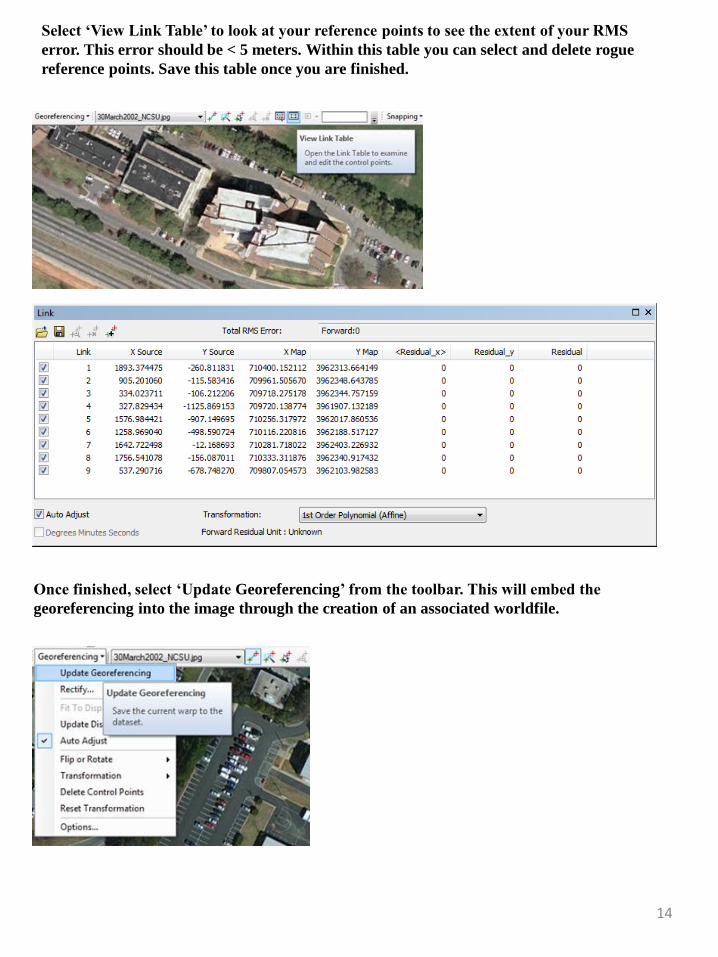
Select ‘View Link Table’ to look at your reference points to see the extent of your RMS
error. This error should be < 5 meters. Within this table you can select and delete rogue
reference points. Save this table once you are finished.
Once finished, select ‘Update Georeferencing’ from the toolbar. This will embed the
georeferencing into the image through the creation of an associated worldfile.
14
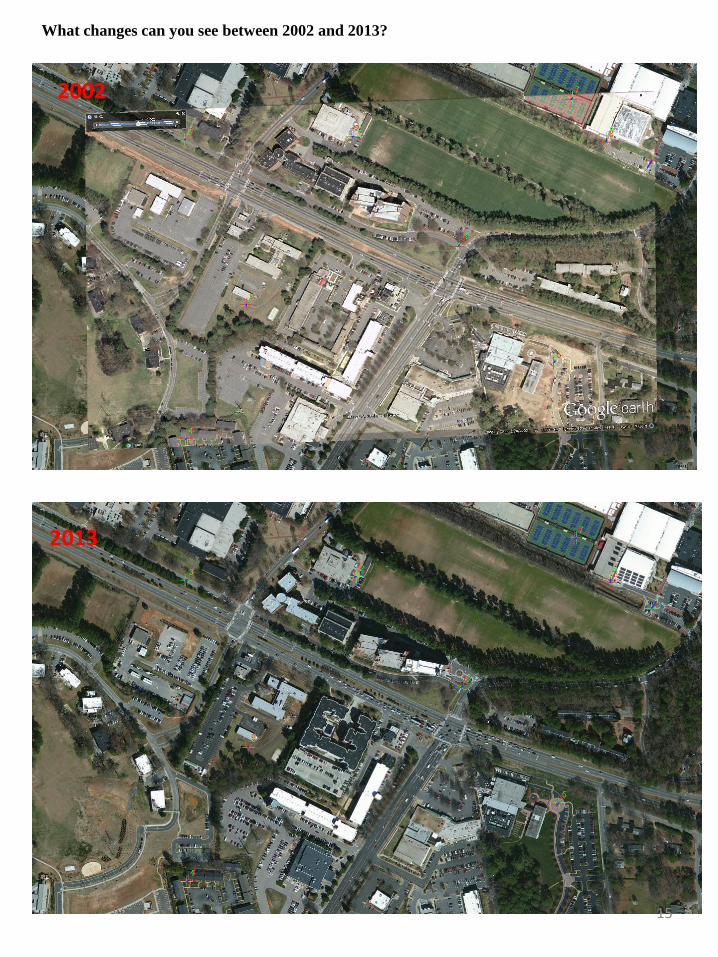
What changes can you see between 2002 and 2013?
2002
2013
15