installation instructions for uniguard ansi b11.0, b11.19, en953 … · installation instructions...
TRANSCRIPT
Installation Instructions for Uniguard© ANSI B11.0, B11.19, EN953 Coupling Guard
Coupling guards used in an ATEX classified environment must be constructed from a non-sparking material.
Uniguard ®Machine Guards are non-sparking and do not conduct static electricity.
Under certain circumstances there is a possibility of static charge build up.
SAFETY FIRST!
WARNINGBefore assembly or disassembly of the coupling guard is performed, the motor must be de-energized, the motor controller/starter put in a locked-out position and a caution tag placed at the starter indicating the disconnect.
Replace coupling guard before resuming normal operation of the pump.
Uniguard Machine Guard Company assumes no liability for avoiding this practice.
READ ALL INSTRUCTIONS BEFORE ATTEMPTING INSTALLATION
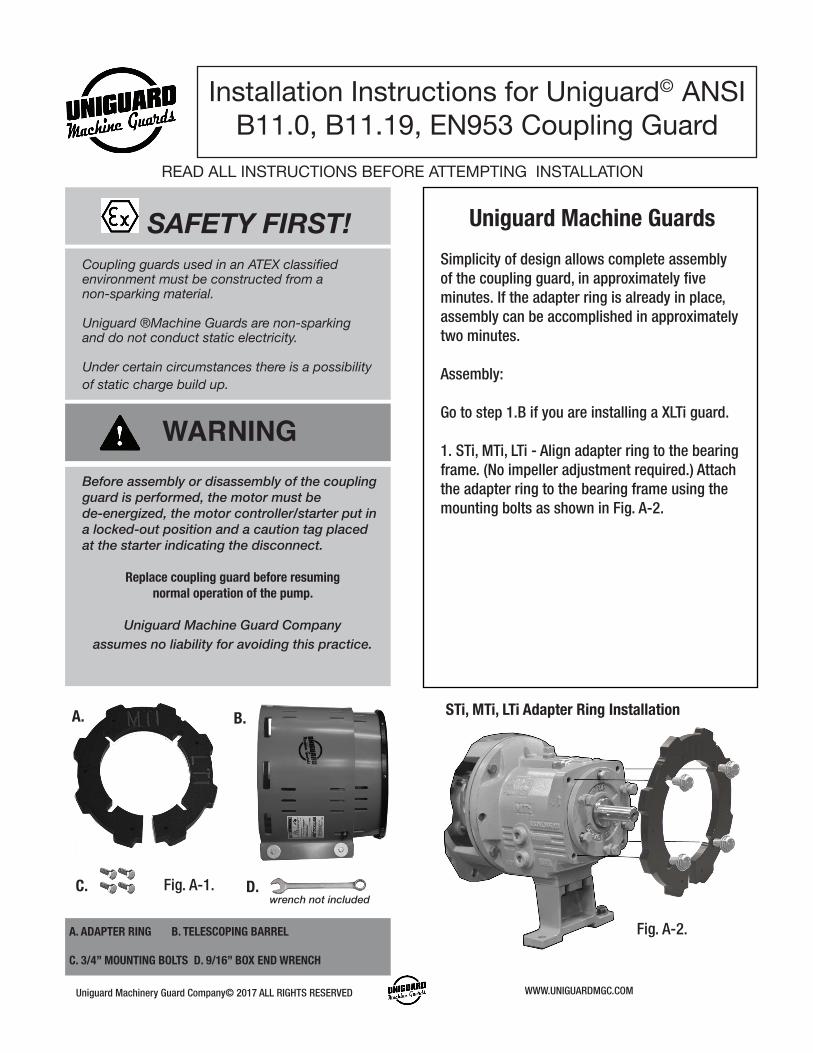
A. B.
C.
A. ADAPTER RING B. TELESCOPING BARREL
C. 3/4” MOUNTING BOLTS D. 9/16” BOX END WRENCH
Uniguard Machine GuardsSimplicity of design allows complete assembly of the coupling guard, in approximately five minutes. If the adapter ring is already in place, assembly can be accomplished in approximately two minutes.
Assembly:
Go to step 1.B if you are installing a XLTi guard.
1. STi, MTi, LTi - Align adapter ring to the bearing frame. (No impeller adjustment required.) Attach the adapter ring to the bearing frame using the mounting bolts as shown in Fig. A-2.
D.
STi, MTi, LTi Adapter Ring Installation
Fig. A-1.
Fig. A-2.
Uniguard Machinery Guard Company© 2017 ALL RIGHTS RESERVED WWW.UNIGUARDMGC.COM
wrench not included
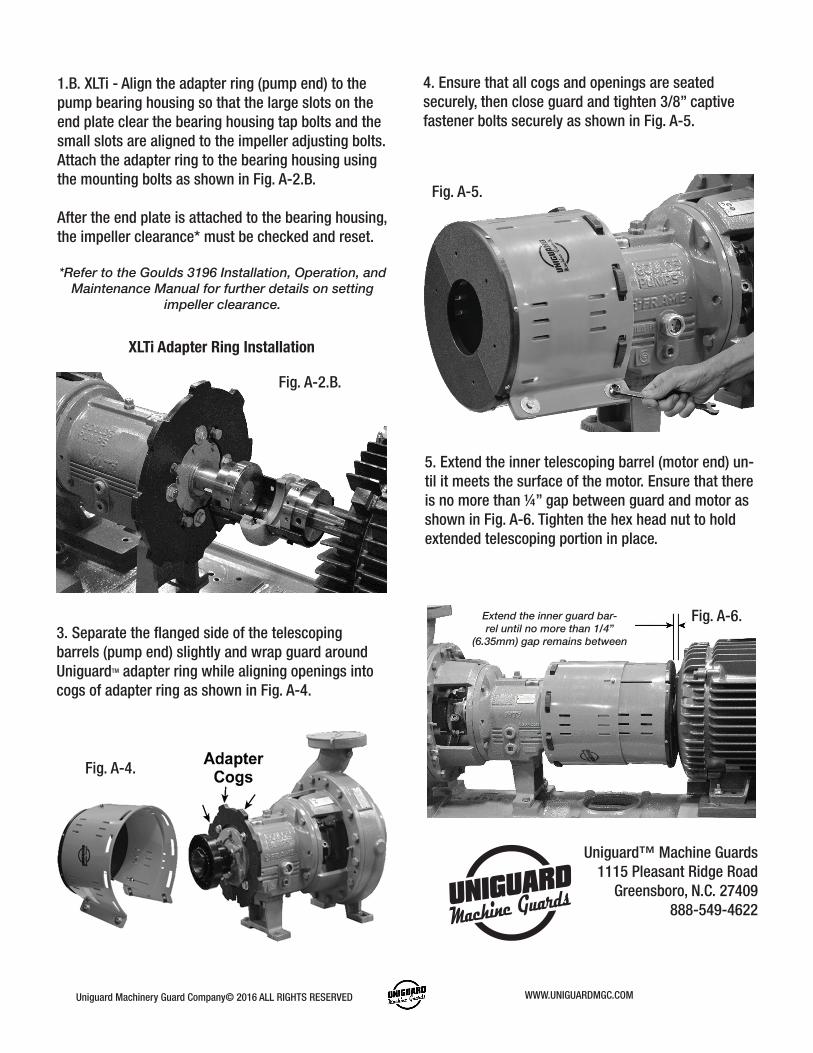
1.B. XLTi - Align the adapter ring (pump end) to the pump bearing housing so that the large slots on the end plate clear the bearing housing tap bolts and the small slots are aligned to the impeller adjusting bolts. Attach the adapter ring to the bearing housing using the mounting bolts as shown in Fig. A-2.B.
After the end plate is attached to the bearing housing, the impeller clearance* must be checked and reset.
*Refer to the Goulds 3196 Installation, Operation, and Maintenance Manual for further details on setting
impeller clearance.
3. Separate the flanged side of the telescoping barrels (pump end) slightly and wrap guard around UniguardTM adapter ring while aligning openings into cogs of adapter ring as shown in Fig. A-4.
4. Ensure that all cogs and openings are seated securely, then close guard and tighten 3/8” captive fastener bolts securely as shown in Fig. A-5.
5. Extend the inner telescoping barrel (motor end) un-til it meets the surface of the motor. Ensure that there is no more than ¼” gap between guard and motor as shown in Fig. A-6. Tighten the hex head nut to hold extended telescoping portion in place.
Fig. A-2.B.
XLTi Adapter Ring Installation
Fig. A-5.
Fig. A-6.
Fig. A-4.
Extend the inner guard bar-rel until no more than 1/4”
(6.35mm) gap remains between
Uniguard™ Machine Guards1115 Pleasant Ridge Road
Greensboro, N.C. 27409888-549-4622
Uniguard Machinery Guard Company© 2016 ALL RIGHTS RESERVED WWW.UNIGUARDMGC.COM