instructions for using uci replay and camtasia relay 4.0 · page 3 of 9 updated on 6/15/2012...
TRANSCRIPT
Page 1 of 9 Updated on 6/15/2012
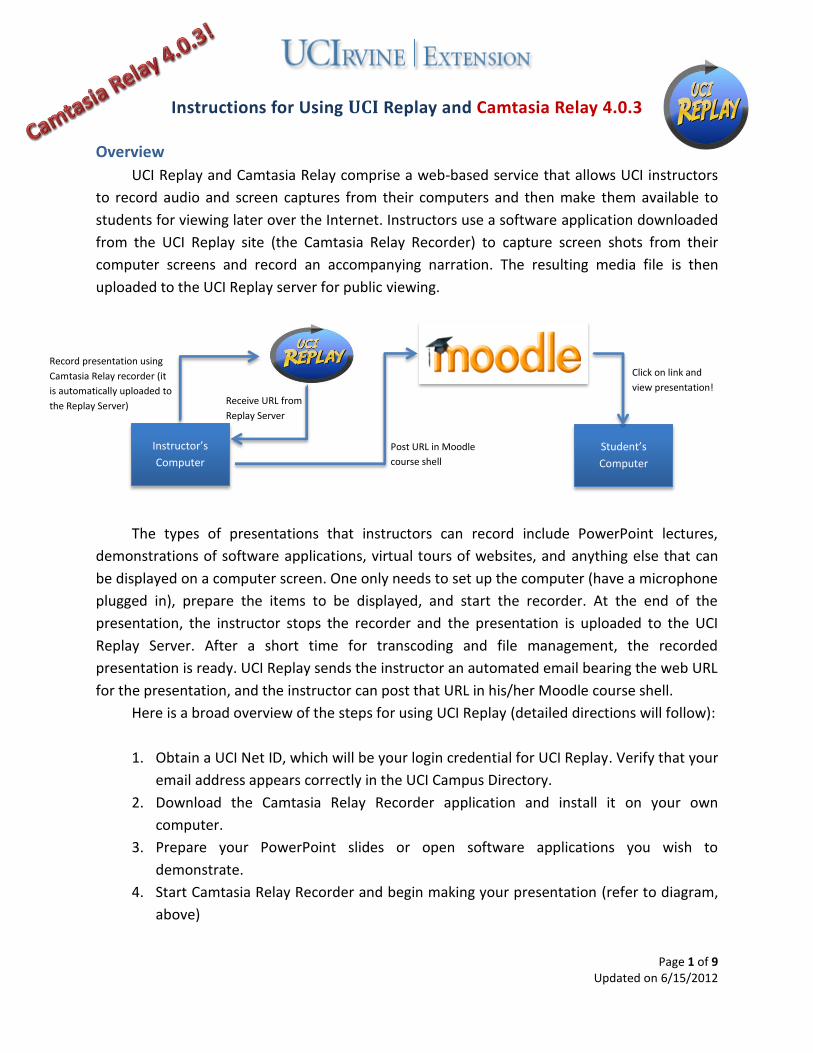
Receive URL from
Replay Server
Post URL in Moodle
course shell
Click on link and
view presentation!
Record presentation using
Camtasia Relay recorder (it
is automatically uploaded to
the Replay Server)
Instructions for Using UCI Replay and Camtasia Relay 4.0.3
Overview
UCI Replay and Camtasia Relay comprise a web-based service that allows UCI instructors
to record audio and screen captures from their computers and then make them available to
students for viewing later over the Internet. Instructors use a software application downloaded
from the UCI Replay site (the Camtasia Relay Recorder) to capture screen shots from their
computer screens and record an accompanying narration. The resulting media file is then
uploaded to the UCI Replay server for public viewing.
The types of presentations that instructors can record include PowerPoint lectures,
demonstrations of software applications, virtual tours of websites, and anything else that can
be displayed on a computer screen. One only needs to set up the computer (have a microphone
plugged in), prepare the items to be displayed, and start the recorder. At the end of the
presentation, the instructor stops the recorder and the presentation is uploaded to the UCI
Replay Server. After a short time for transcoding and file management, the recorded
presentation is ready. UCI Replay sends the instructor an automated email bearing the web URL
for the presentation, and the instructor can post that URL in his/her Moodle course shell.
Here is a broad overview of the steps for using UCI Replay (detailed directions will follow):
1. Obtain a UCI Net ID, which will be your login credential for UCI Replay. Verify that your
email address appears correctly in the UCI Campus Directory.
2. Download the Camtasia Relay Recorder application and install it on your own
computer.
3. Prepare your PowerPoint slides or open software applications you wish to
demonstrate.
4. Start Camtasia Relay Recorder and begin making your presentation (refer to diagram,
above)
Instructor’s
Computer
Student’s
Computer
Page 2 of 9 Updated on 6/15/2012
5. When your presentation is finished, click “submit” and wait for an email from the UCI
Replay server containing the URL to your presentation. Note, this email is sent to your
UCI email address ([email protected]).
Obtain a UCI Net ID
Go to https://ucinetid2.nacs.uci.edu/cgi/activate.cgi and follow the directions. You will
need your UC Irvine employee ID number, which you can find on your employment contract
(also called your teaching agreement) in the upper left part labeled “Campus ID.” (For Extension
instructors, this number should begin with an “X.”)
Please note that if you are hired as an independent contractor, you will not automatically
have a UCI Net ID. To get one, please contact your department planning director or program
representative and ask him/her to authorize a sponsored UCI Net ID.
A Note About UCI Email Addresses
Your UCI Net ID forms the first part of your UCI email address. For example:
UCI Net ID: smithj
UCI Email Address: [email protected]
As discussed in more detail below, the UCI Replay system will send you an email to your
UCI address containing links to your recording. The system uses the UCI Campus Directory to
find email addresses so you need to make sure that your directory listing is correct. Here is how
to check this.
1. Go to http://www.uci.edu and enter your name in the search box on the upper
right. Click “People.” This brings up your directory listing.
2. Check to make sure that your email address is listed. To add an email address or to
specify an alternative delivery point, click on “Update data in the directory” below
your directory listing.
3. Click on the link “PHUpdate” to log into the system using your UCI Net ID. This
brings up your directory update form.
4. Look for “email.” You can specify “OIT Mailbox Services,” which has automatic
emails go to your “uci.edu” address, or you can specify “Other” and enter another
email address such as a personal address.
5. Click the button “Submit Change Request” when you are finished.
You can find additional information about UCI’s email services here: http://oit.uci.edu/email/.
Page 3 of 9 Updated on 6/15/2012
Download the Camtasia Relay Recorder
Complete information about UCI Replay and Camtasia Relay is available from
http://replay.uci.edu/About_UCI_Replay.
Log Into the UCI VPN Site (if you are accessing the site from off-campus)
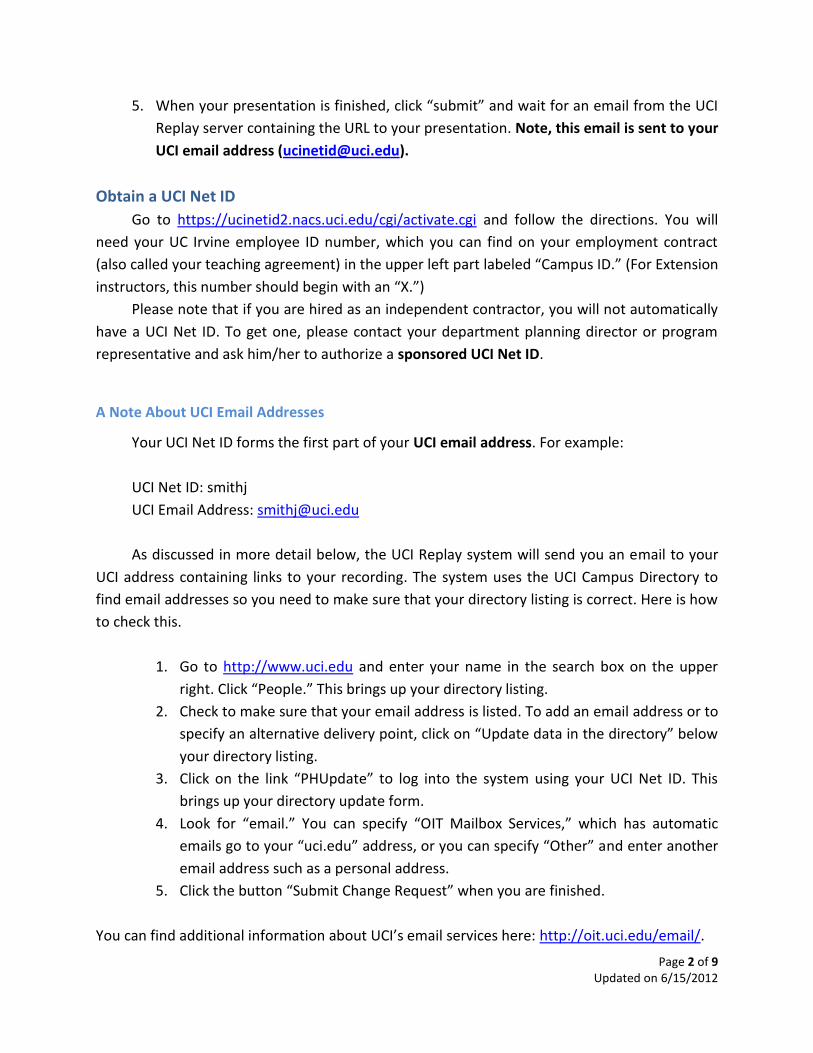
Start by going to this website: https://vpn.nacs.uci.edu/. The login window shown below
appears:
Enter your UCI Net ID and password. (Leave the GROUP setting as “default”) and click
“login.” The following window appears:
Important: If you are accessing the Internet from outside of the UCI campus, you will need
to login through UCI’s VPN site, first, in order to download the Camtasia Relay recorder
(described below).
Page 4 of 9 Updated on 6/15/2012
Download the Camtasia Relay Recorder
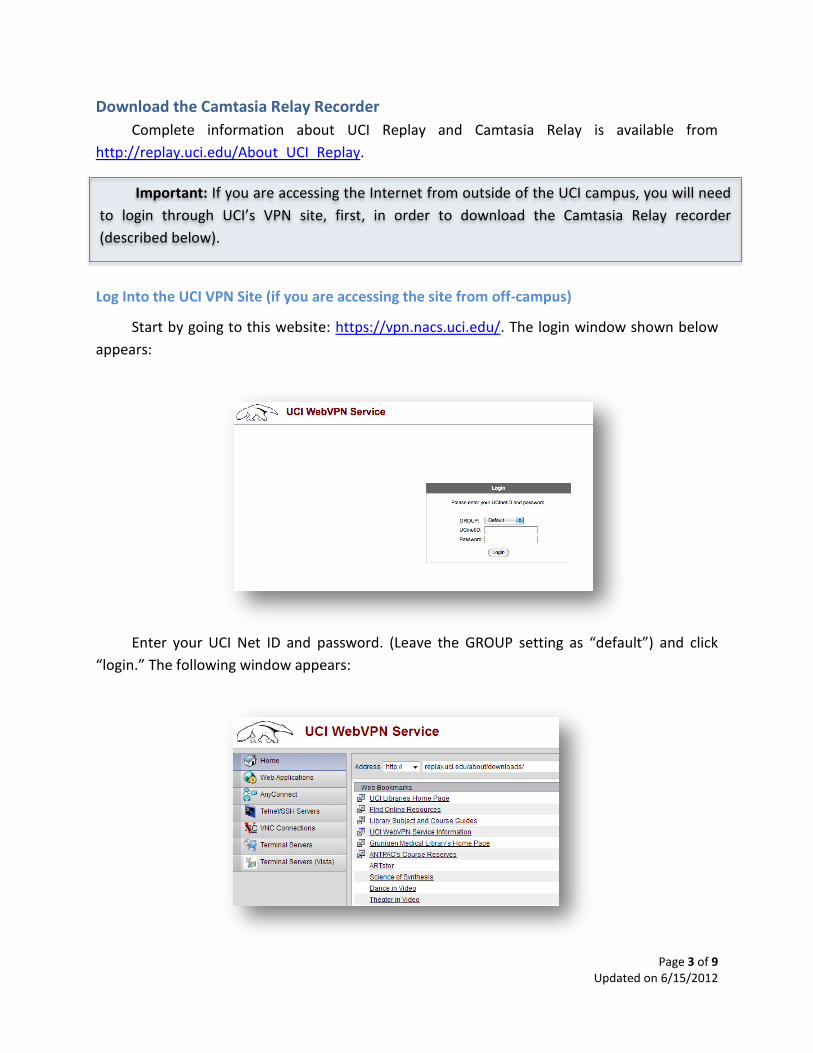
Enter “replay.uci.edu/about/downloads/” into the Address line precisely as shown above.
Make sure that you enter it within the VPN window – not the browser’s URL line. Hit your
“Return” button and the UCI Replay download page appears.
Choose the Appropriate Version for Your Computer
Click on the version that is appropriate for your computer and follow the installation
directions. Note that you are downloading Version 4.0, which is the most recent release.
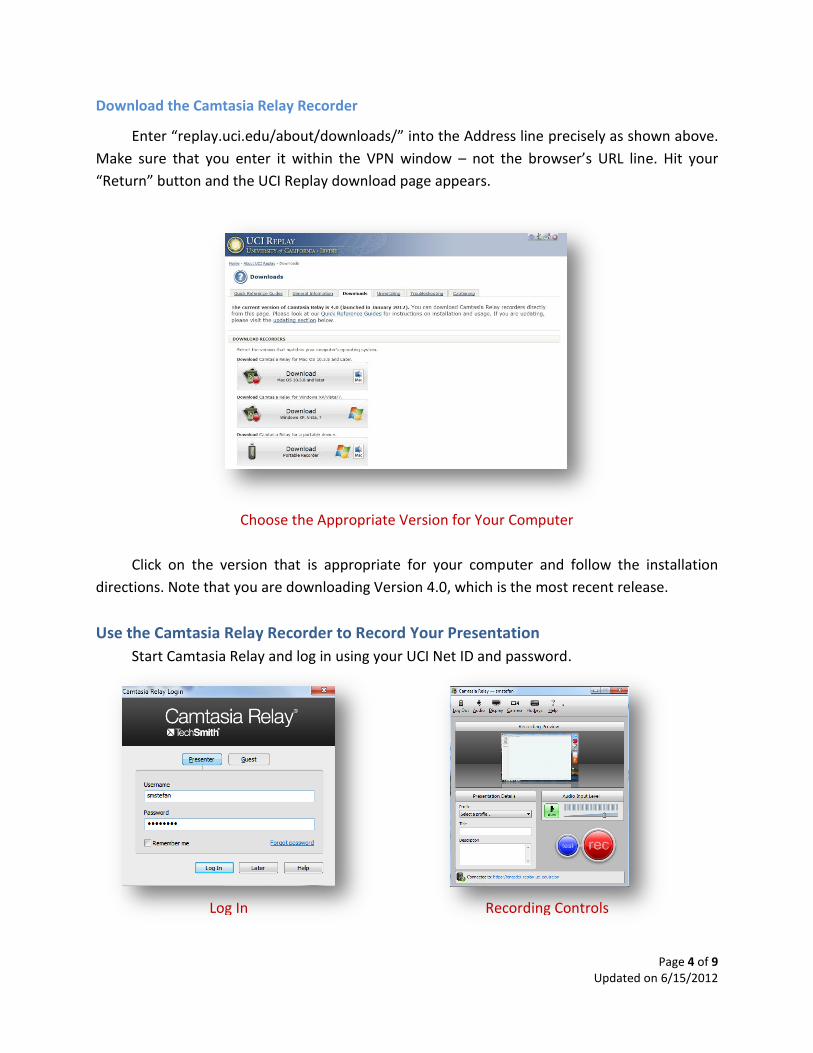
Use the Camtasia Relay Recorder to Record Your Presentation
Start Camtasia Relay and log in using your UCI Net ID and password.
Log In Recording Controls
Page 5 of 9 Updated on 6/15/2012
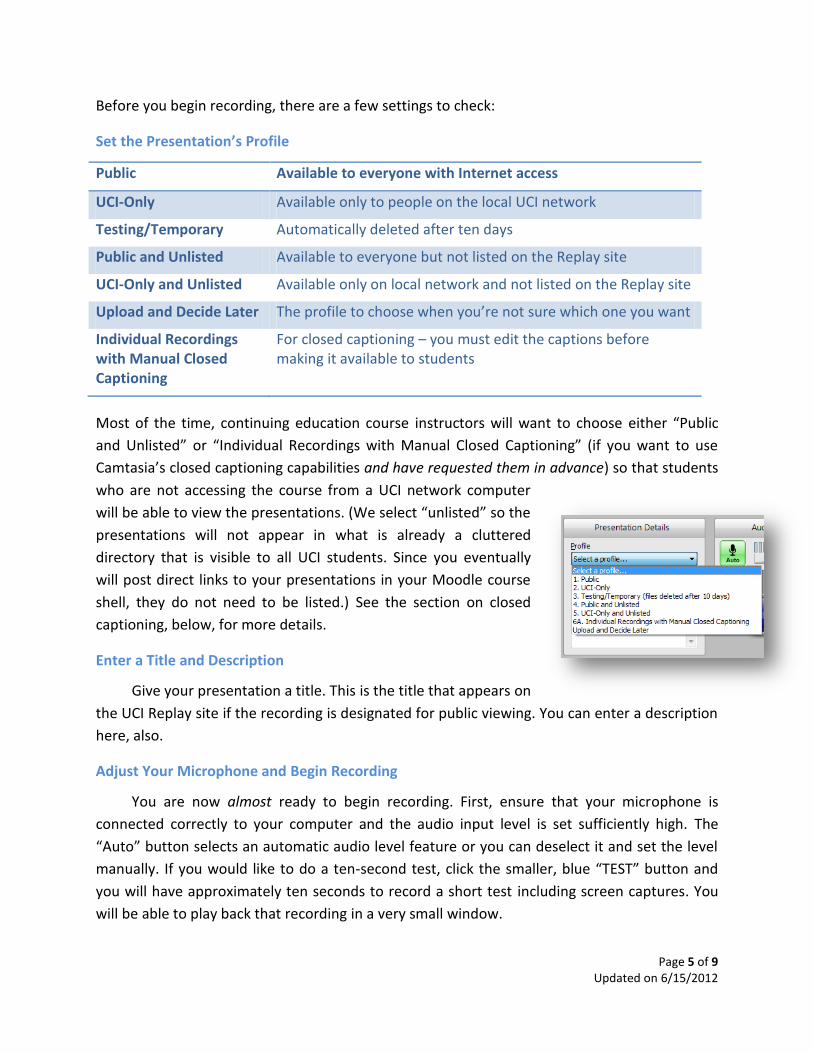
Before you begin recording, there are a few settings to check:
Set the Presentation’s Profile
Public Available to everyone with Internet access
UCI-Only Available only to people on the local UCI network
Testing/Temporary Automatically deleted after ten days
Public and Unlisted Available to everyone but not listed on the Replay site
UCI-Only and Unlisted Available only on local network and not listed on the Replay site
Upload and Decide Later The profile to choose when you’re not sure which one you want
Individual Recordings with Manual Closed Captioning
For closed captioning – you must edit the captions before making it available to students
Most of the time, continuing education course instructors will want to choose either “Public
and Unlisted” or “Individual Recordings with Manual Closed Captioning” (if you want to use
Camtasia’s closed captioning capabilities and have requested them in advance) so that students
who are not accessing the course from a UCI network computer
will be able to view the presentations. (We select “unlisted” so the
presentations will not appear in what is already a cluttered
directory that is visible to all UCI students. Since you eventually
will post direct links to your presentations in your Moodle course
shell, they do not need to be listed.) See the section on closed
captioning, below, for more details.
Enter a Title and Description
Give your presentation a title. This is the title that appears on
the UCI Replay site if the recording is designated for public viewing. You can enter a description
here, also.
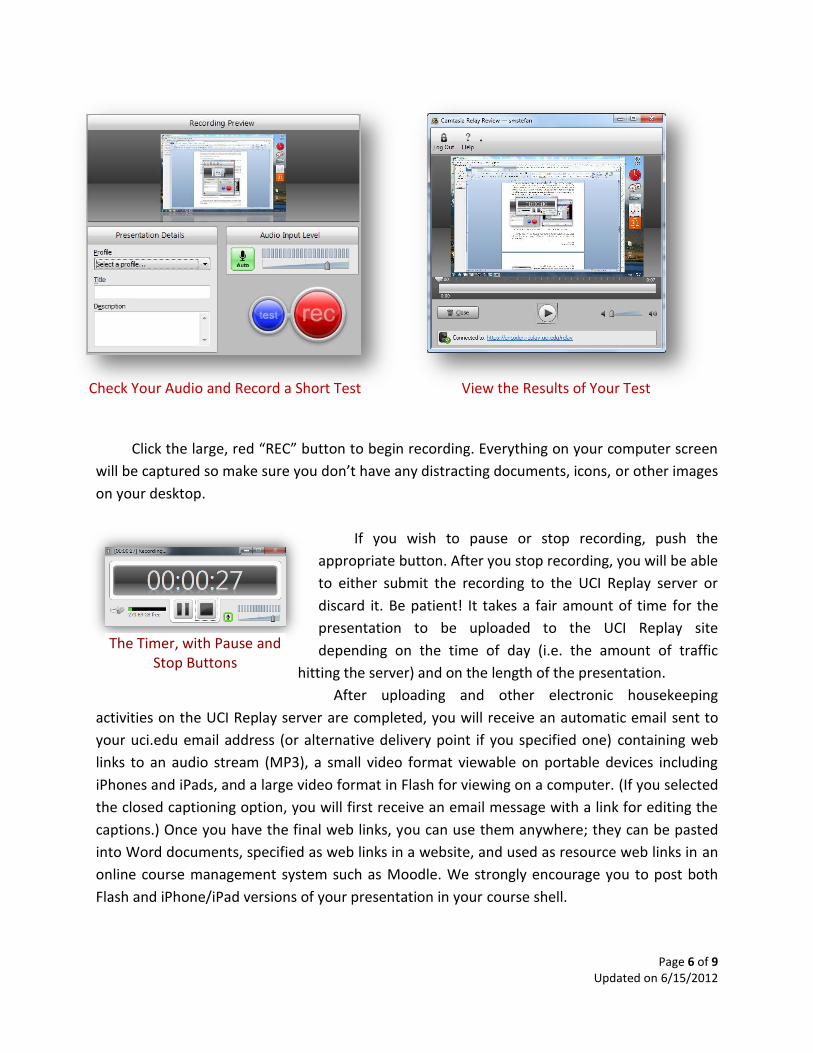
Adjust Your Microphone and Begin Recording
You are now almost ready to begin recording. First, ensure that your microphone is
connected correctly to your computer and the audio input level is set sufficiently high. The
“Auto” button selects an automatic audio level feature or you can deselect it and set the level
manually. If you would like to do a ten-second test, click the smaller, blue “TEST” button and
you will have approximately ten seconds to record a short test including screen captures. You
will be able to play back that recording in a very small window.
Page 6 of 9 Updated on 6/15/2012
Click the large, red “REC” button to begin recording. Everything on your computer screen
will be captured so make sure you don’t have any distracting documents, icons, or other images
on your desktop.
If you wish to pause or stop recording, push the
appropriate button. After you stop recording, you will be able
to either submit the recording to the UCI Replay server or
discard it. Be patient! It takes a fair amount of time for the
presentation to be uploaded to the UCI Replay site
depending on the time of day (i.e. the amount of traffic
hitting the server) and on the length of the presentation.
After uploading and other electronic housekeeping
activities on the UCI Replay server are completed, you will receive an automatic email sent to
your uci.edu email address (or alternative delivery point if you specified one) containing web
links to an audio stream (MP3), a small video format viewable on portable devices including
iPhones and iPads, and a large video format in Flash for viewing on a computer. (If you selected
the closed captioning option, you will first receive an email message with a link for editing the
captions.) Once you have the final web links, you can use them anywhere; they can be pasted
into Word documents, specified as web links in a website, and used as resource web links in an
online course management system such as Moodle. We strongly encourage you to post both
Flash and iPhone/iPad versions of your presentation in your course shell.
The Timer, with Pause and Stop Buttons
Check Your Audio and Record a Short Test View the Results of Your Test
Page 7 of 9 Updated on 6/15/2012
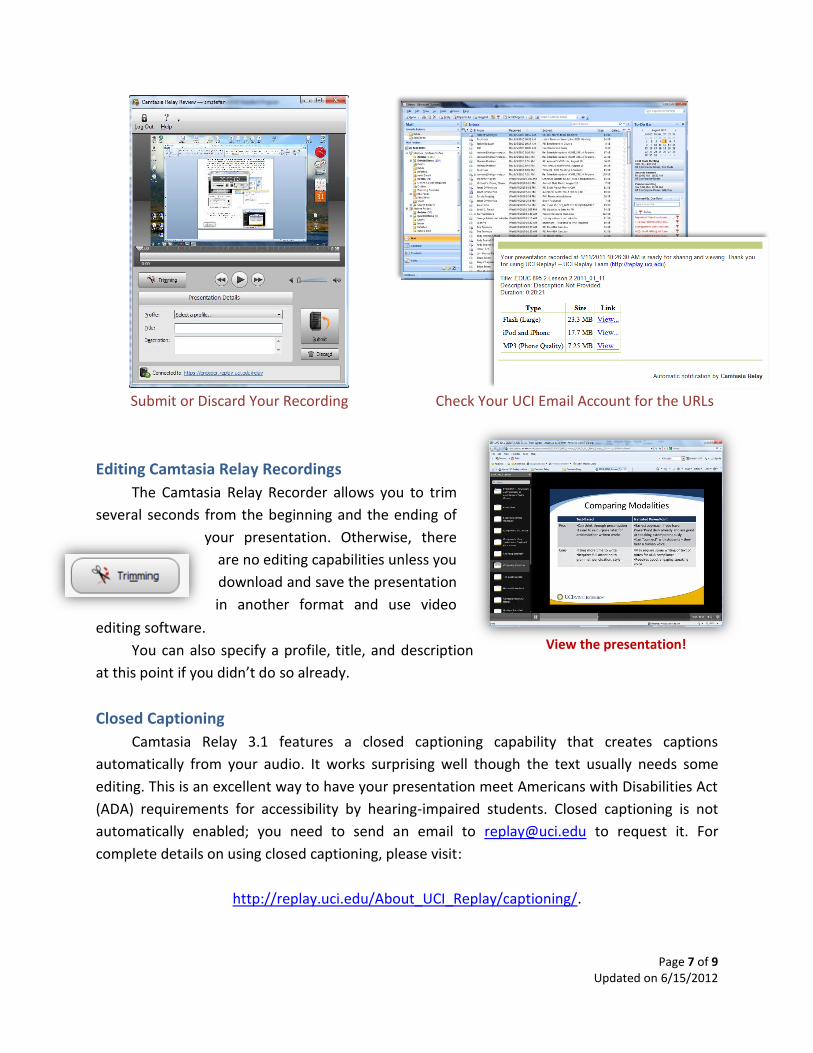
Submit or Discard Your Recording Check Your UCI Email Account for the URLs
Editing Camtasia Relay Recordings
The Camtasia Relay Recorder allows you to trim
several seconds from the beginning and the ending of
your presentation. Otherwise, there
are no editing capabilities unless you
download and save the presentation
in another format and use video
editing software.
You can also specify a profile, title, and description
at this point if you didn’t do so already.
Closed Captioning
Camtasia Relay 3.1 features a closed captioning capability that creates captions
automatically from your audio. It works surprising well though the text usually needs some
editing. This is an excellent way to have your presentation meet Americans with Disabilities Act
(ADA) requirements for accessibility by hearing-impaired students. Closed captioning is not
automatically enabled; you need to send an email to [email protected] to request it. For
complete details on using closed captioning, please visit:
http://replay.uci.edu/About_UCI_Replay/captioning/.
View the presentation!
Page 8 of 9 Updated on 6/15/2012
While Extension does not officially require presentations with recorded audio to have
transcripts, the time is coming when this will become a requirement for all courses. We
encourage you to try this feature when you record your next presentation. (Note that you
cannot add captions to a presentation that has already been published.)
As an alternative to closed captioning, you can write a script or a set of detailed notes for
each slide and include them in the PowerPoint “notes” section, and then upload a PDF copy of
your presentation in “notes format” to your course shell.
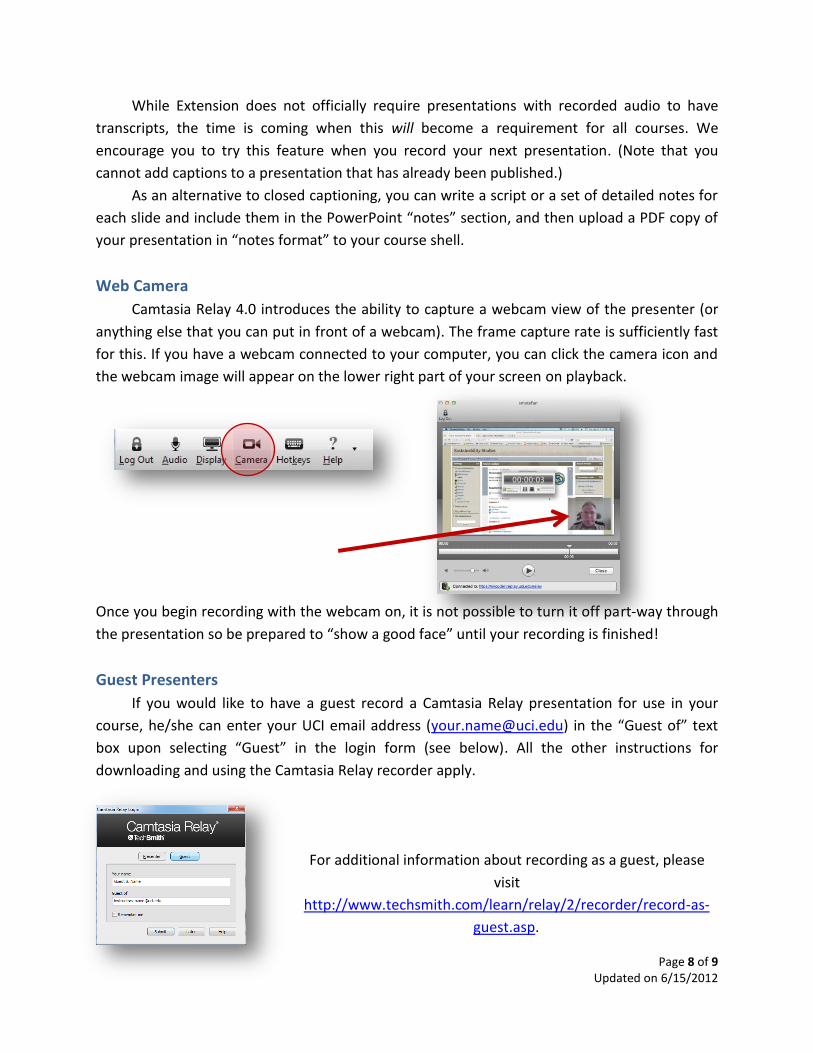
Web Camera
Camtasia Relay 4.0 introduces the ability to capture a webcam view of the presenter (or
anything else that you can put in front of a webcam). The frame capture rate is sufficiently fast
for this. If you have a webcam connected to your computer, you can click the camera icon and
the webcam image will appear on the lower right part of your screen on playback.
Once you begin recording with the webcam on, it is not possible to turn it off part-way through
the presentation so be prepared to “show a good face” until your recording is finished!
Guest Presenters
If you would like to have a guest record a Camtasia Relay presentation for use in your
course, he/she can enter your UCI email address ([email protected]) in the “Guest of” text
box upon selecting “Guest” in the login form (see below). All the other instructions for
downloading and using the Camtasia Relay recorder apply.
For additional information about recording as a guest, please
visit
http://www.techsmith.com/learn/relay/2/recorder/record-as-
guest.asp.
Page 9 of 9 Updated on 6/15/2012
Where to Get Help
General information about UCI Replay and Camtasia Relay (on UCI’s Office of
Information Technology website):
http://replay.uci.edu/about/general/
Technical problems or questions regarding UCI Replay or Camtasia Relay:
o First, visit the UCI Replay troubleshooting web page:
http://replay.uci.edu/About_UCI_Replay/troubleshooting/
o If that doesn’t help, contact the Office of Instructional Computer (OIT) via email
at [email protected]. (Note: This is a main campus office, not an Extension office.)
Questions about adding the URL for your presentation to your Moodle course shell:
o Contact Billy Ryoo in the Distance Learning Center
o Email: [email protected]
Questions about using Camtasia Relay effectively pedagogically:
o Contact Stefano M. Stefan
o Email: [email protected]