interactive - computrainer
TRANSCRIPT
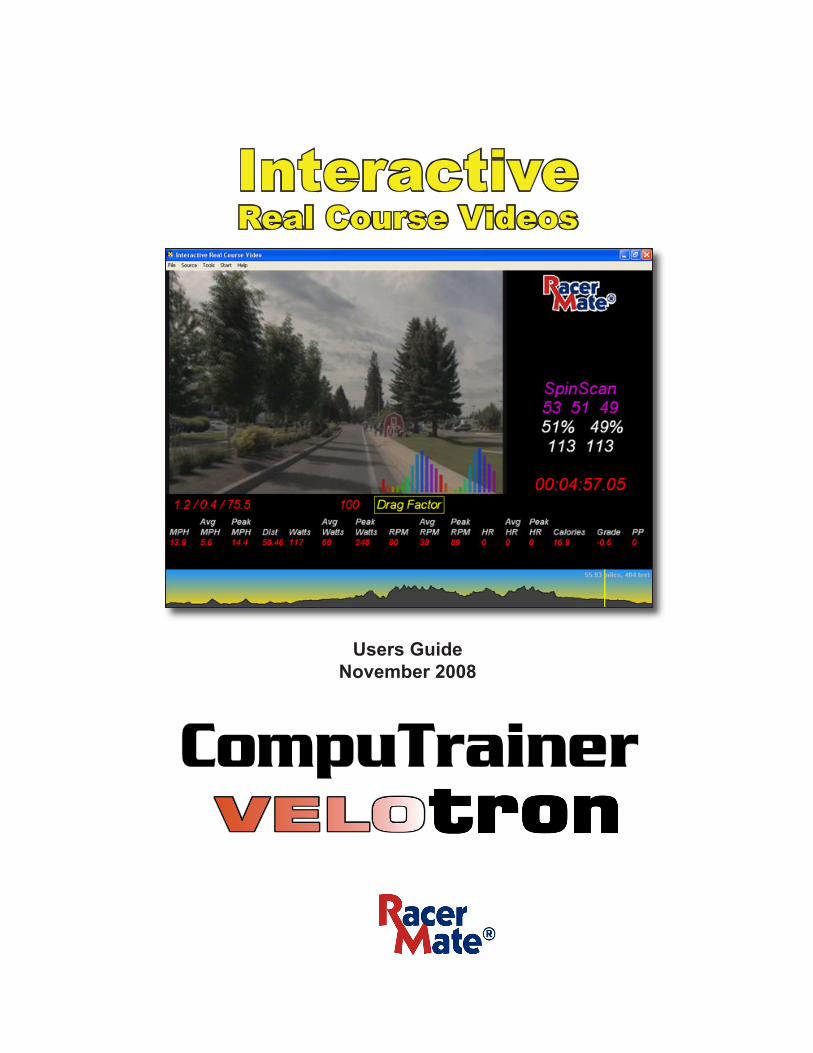
Users GuideNovember 2008
Interactive Real Course Videos

�
Table of ContentsSystem Requirements....................................................................... 3Installation Instructions - Interactive Real Course Videos...... 4 If the Install menu does not appear .................................. 4Uninstall Instructions - Interactive Real Course Videos.......... 4Software Updates for Interactive Real Course Videos.............. 4Registering Interactive Real Course Videos................................ 5 Registration Instructions - Computer connected to the Internet............................ 5 If the registration wasn’t successful................................. 5 Registration Instructions - Remote Internet computer.............................................. 5Using your Interactive Real Course Video Software.................. 6
Setup your Interactive Real Course Video Software..................6 Rider Setup............................................................................. 6 Setting you Communication Port............................................6 Setting Race Screen Options................................................. 6Starting a Video - Realtime ......................................................... 7Starting a Race in the Middle of a Course .............................. 7Completing a Race ........................................................................ 7Race Performance Files ............................................................... 8Saving a Race Performance ......................................................... 8Switching from a Saved File to a Realtime Race....................... 8Starting a Video - Saved File....................................................... 8Technical Appendix......................................................................... 9 Demo Mode............................................................................... 9 Vid.ini....................................................................................... 9PC and Keyboard Shortcuts.......................................................... 10Troubleshooting.............................................................................. 10Software updates .......................................................................... 10Privacy Policy................................................................................. 10Security ......................................................................................... 10Index................................................................................................ 11License Agreement.......................................................................... 12

�
System RequirementsMinimum Computer System Requirements for Interactive Real Course Videos:
• Pentium 4 class computer (or faster) • Windows XP/Vista. • DirectX version 9.0 or higher (included) • DVD-ROM drive for installation of software. • 64MB Video RAM (minimum) 1�8MB or higher (optimum) • Xvid Video Codec (included)• Microsoft C++ redistributable (included)
Hardware System Requirements for Interactive Real Course Videos:
• CompuTrainer Pro or Lab system • Handlebar Controller version �5.4� or higher (45.4� for Drag Factor functions)• Velotron (for Velotron version). No update currently required.• Serial Port or USB to Serial adapter.
To order upgrade CompuTrainer components (if needed) visit:http://www.computrainer.com/rm_inc/sales/upgrades.html
4
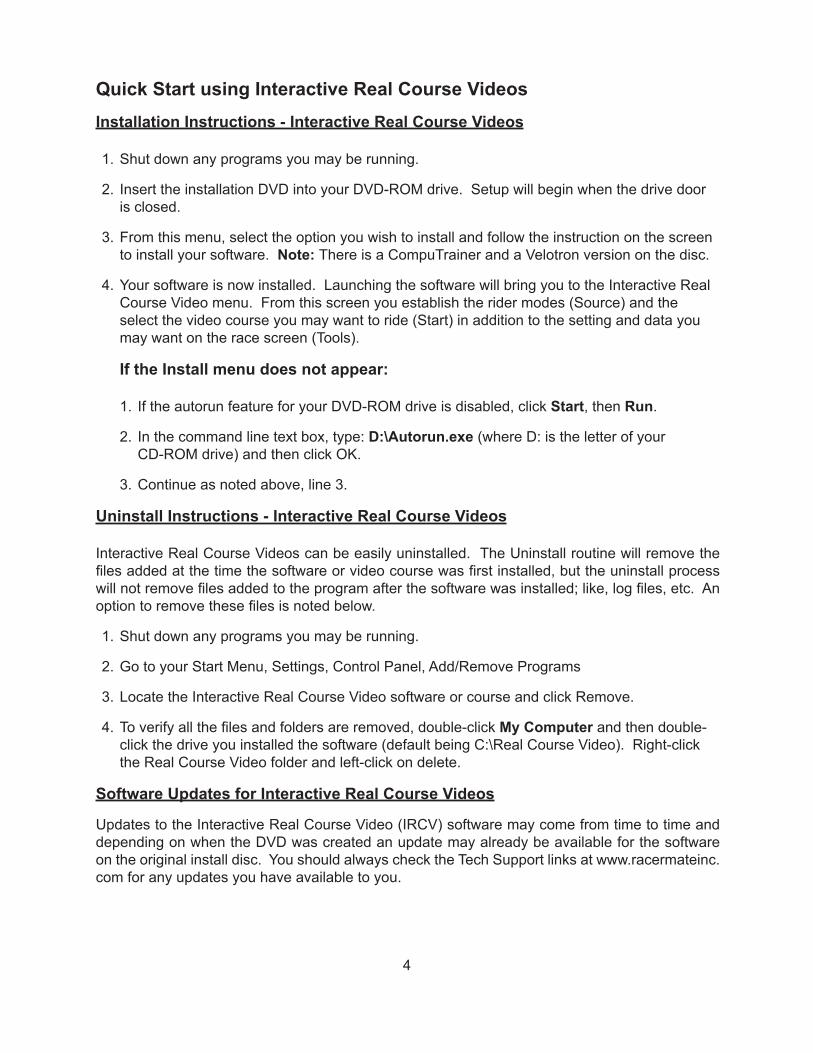
Quick Start using Interactive Real Course VideosInstallation Instructions - Interactive Real Course Videos
Shut down any programs you may be running.
Insert the installation DVD into your DVD-ROM drive. Setup will begin when the drive door is closed.
From this menu, select the option you wish to install and follow the instruction on the screen to install your software. Note: There is a CompuTrainer and a Velotron version on the disc.
Your software is now installed. Launching the software will bring you to the Interactive Real Course Video menu. From this screen you establish the rider modes (Source) and the select the video course you may want to ride (Start) in addition to the setting and data you may want on the race screen (Tools).
If the Install menu does not appear:
If the autorun feature for your DVD-ROM drive is disabled, click Start, then Run.
In the command line text box, type: D:\Autorun.exe (where D: is the letter of your CD-ROM drive) and then click OK.
Continue as noted above, line �.
Uninstall Instructions - Interactive Real Course Videos
Interactive Real Course Videos can be easily uninstalled. The Uninstall routine will remove the files added at the time the software or video course was first installed, but the uninstall process will not remove files added to the program after the software was installed; like, log files, etc. An option to remove these files is noted below.
Shut down any programs you may be running.
Go to your Start Menu, Settings, Control Panel, Add/Remove Programs
Locate the Interactive Real Course Video software or course and click Remove.
To verify all the files and folders are removed, double-click My Computer and then double-click the drive you installed the software (default being C:\Real Course Video). Right-click the Real Course Video folder and left-click on delete.
Software Updates for Interactive Real Course Videos
Updates to the Interactive Real Course Video (IRCV) software may come from time to time and depending on when the DVD was created an update may already be available for the software on the original install disc. You should always check the Tech Support links at www.racermateinc.com for any updates you have available to you.
1.
�.
�.
4.
1.
�.
�.
1.
�.
�.
4.

5
Registering Interactive Real Course VideosRegistration Instructions - Computer connected to the Internet
Install the Interactive Real Course Video (IRCV) application and Video Course.
Launch the IRCV application and go to Start - Video and choose the video you want to register.
If the video is not registered, you will be prompted to register. Choose Yes to register.
You will then be asked for your First Name, Last Name, and e-mail address. These are all required fields. When done, click OK. (See Page 10 for our Privacy Statement).
If your Internet connection was successful to communicate with our registration server, there should be a “Registration Success” message. Click OK to close that message and the video will open in a registered form.
If the registration wasn’t successful: If an error occurs, you can try to register again as normal, or attempt a manual registration as shown below. The following registration routine was designed for those who do not have their CompuTrainer systems connected to the Internet. If you use the following steps and you are connected to the Internet on your CompuTrainer computer, just ignore the steps referring to copying and moving the reg files between computers.
Registration Instructions - Remote Internet computer
During the video course installation a Registration Key was created within the C:\RCVReg folder for the video you installed. For instance if you installed Ironman™ Coeur d’Alene, the registration file for this is CDA.reg. You will need to transfer this file to your Internet computer and upload it to the RacerMate registration server (the best way to do this is with a USB pocket drive). You only need to get this tiny little “Reg” file off your CompuTrainer computer and onto your Internet computer.
Launch Windows Explorer or My Computer and browse to the C:\RCVReg folder Locate the reg file for the video you are registering and copy it to a pocket drive, floppy, or burn it to a CD-ROM.
Go to the computer you have connected to the Internet.
Go to the following web page: www.racermate.net/RCVreg.php
On this page you will be asked to enter your name and e-mail address. Then “upload” the Reg file to the registration server by browsing to the drive containing the Reg file.
You will then be provided a very long code you’ll be able to copy and paste into a simple text file (use Notepad.exe) you will name reg.txt.
Copy that reg.txt file onto your transport drive, or disc, and move it back to the CompuTrainer computer.
Open the file vid.ini from within the Real Course Video application and you will see a section in this file called Registration. Copy the long code from the text file on your transport drive into this section of vid.ini, close it and save changes. Your course should now be registered.
1.
�.
�.
4.
5.
1.
�.
�.
4.
5.
6.
7.
If you don’t see the correct “reg file” in the C:\RCVReg folder, check the IRCV web forum first. Then, if necessary, contact RacerMate technical support @ �06-5�4-7�9� for assistance.

6
Using your Interactive Real Course Video Software
The basic attempt in designing the Interactive Real Course Video (IRCV) software was to make it as familiar and simple for existing users of CompuTrainer software. It contains a similar structure as does the CompuTrainer Coaching Software and a few similarities as well with the �D software screens. It is our hope that this simplicity of setup and use will minimize the learning curve and get you on the bike quickly.
Setup your Interactive Real Course Video software
Rider Setup: Choose Source New and create a rider profile for you and any other potential rider. This screen contains the basic setup parameters for each rider.
You will notice you can set the FTP, which is used to enable the TSS/IF/NP values on the race screen. The values are used by permission from the Training Peaks™ group of software.
When you have finished entering your data, click on OK to display the Save dialog where you will give the setup a user name in the “Save as:” line. Click OK to save after typing in a name.
On future attempts to the run the IRCV software, where a rider will be different than the previous rider, choose Source / Open to choose a rider that may exist. If you need to edit the rider information, now is the time to do it. It will append the rider data if changes are made.
Setting your Communication Port: The Communication port is set in the Source menu (Comm Port...), or search for it in the Tools menu by selection Test Comm Ports. When the search is complete on the latter option, the Comm Port setting under Source will be established automatically.
Setting Race Screen Options: Set the race screen options in the Tools / Options menu. It is here you establish the data you see on the Race Screen Data Bar. Similar to the �D Software, the Data Bar will allow you to select as few or as many items as you want to see as well as displaying metric data. Be aware the more items you select the smaller the fonts will become to accommodate your selections.
Selecting Wide Screen will adjust some of the settings for the screen layout. These settings have been preset, but you can adjust them for your particular screen size. If you find one of the two settings (Wide Screen either checked or not) do not offer what you’d like to see for video width, or if you would like to make the video almost full screen, please refer to the technical appendix at the rear of this manual for details on adjusting these settings.
Select Color determines the color of your data bar and rider cursor color.
Please Note: Wind, though an option, is not active in IRCV yet, but is included for future compatibility. There are also Velotron specific functions not shown in the picture above and also in the Tools menu.

7
Starting a Video - Realtime: The difference between Realtime and Saved File mode is whether you have an opponent rider or not. Realtime means you have no other previous performance data on the screen, whereas Saved File loads a previous performance recording for you to compete with. Each setting locks out the Start menu for the other to help keep things in order.
To begin, select Source - RealTime
Select Start, Video. This will allow you to browse to the various video subfolders, where the video.avi file is found (where video.avi may be cda.avi or kona.avi, etc.). Double-click the AVI file to load the video.
Select Start - Last Video to load the last video selected without needing to browse for it.
Please Note: When the video is present on the screen the Data Bar should NOT say No Communication if the CompuTrainer is plugged in and turned on and the correct Communications Port was selected under Source / Comm Port...
F1 on the Handlebar Controller will start and pause the race. If you would like to recalibrate your CompuTrainer in the middle of a ride, you can press F1 to pause and calibrate just like our other software. Details on this function are found in the technical appendix at the rear of this manual.
RESET causes the Save Performance dialog to appear, with options to cancel, etc.
F2 will scroll through the SpinScan graphs. SpinScan data is always displayed on the right video panel above the timer.
Starting a Race in the middle of the course.
You can begin a ride at any point within the video course. This happens using Ctrl-G on the PC keyboard. The Ctrl-G distance must not exceed the length of the video course.
Please Note: Corrections were often needed to synchronize the video data with the course data, which was collected using a GPS. Some of these corrections required lengthy time-offsets, which will be displayed under normal riding conditions by the display of “You are here” images on the race course that will last as long as needed until the offset is completed. Using the Ctrl-G feature to place your rider on the course after time offsets may require these time offsets to occur consecutively before you can begin to ride the course, which will be evident by starting the ride and seeing time running and distance accruing with you seemingly not moving down the road. In these cases, you must continue to pedal until the offset(s) have been reached at which point the video will begin. Improvements to eliminate this issue are being looked into.
Finishing a Race. You can finish the ride or end at any time during the during. As previously noted you can press the RESET key on your Handlebar Controller and display the Save Performance dialog. If you press RESET during a ride by accident, you will be given the opportunity to Cancel and continue riding.

8
Performance Files: Performance Files are saved with a UserName/CourseName/Date/Time.3DP convention within the folder C:/Real Course Video/Perfs. These files are fully compatible for use as an opponent in Real Course Video as well as CompuTrainer �D. They can also be viewed and exported in the Computrainer Coaching Software.
Saving a Race Performance file: At the end of a ride, or after any RESET key press, you will be prompted to save a performance file.
F1 will save the performance with your name, the course name, the date and time.�DP
F2 will not save a performance file.
F3 to Cancel if you pressed RESET during a ride and didn’t mean to do so. This option does not appear in the dialog if the rider crosses the finish line.
Switching from RealTime to a Saved Race Performance file
To refresh the application to change the Start or Source menu, or to change Options, hit the “R” key on the PC keyboard, or the RESET on the Handlebar Controller. You can now change settings in the various menus.
Starting a Video - Saved File: Loading a saved file performance loads not only the performance, but will also load the correct video that is associated with this video. This means you can only share performance files with fellow users who have also purchased the same video.
To begin select Source -Saved File.
Now choose Start - Performance and load a performance, if available, from the Perfs folder. This will load the performance file and enable the second data bar. A Lead display will also appear below the RacerMate logo.
Selecting Last Performance loads the very last performance you saved (i.e., Lastperf.�DP) and will continue to select the very next lastperf.3DP file at each reset/save routine within one session. This will allow you to ride the same section of course at increasing tempos. Selecting Last Selected Performance is similar to loading Last Video. It’s just going to load the last performance file you road against by selection.
During a race against a Saved Race Performance, there will be a new line of data representing the pervious performance data and the word LEAD will appear below the RacerMate logo in the upper right corner of the screen. The Lead will change colors to represent the rider who is in the lead and by how far. There will also be a cursor for the performance race on the profile display. If the performance was from a Ctrl-G ride, the video will load to the original Ctrl-G location.

9
Technical Appendix - Special Features
Demo Mode: Select Demo mode to watch the video without riding the bike. After you have loaded a video, you can use your page-up and page-down keys to speed up and slow down the movie in 5 MPH increments.
Vid.ini: This is the control file for IRCV and it resides in the Real Course Video folder. There are a few items in this file you can edit using Notepad to adjust what you see on the screen or enable certain features as follows:
[options] ;Standard Screen Settings video right percentage=.75000 max side font size=45 ;Wide Screen Settings WS video right percentage=.60000 WS max side font size=35
Fullscreen=true/false (if true, removes all data and is video only. Velotron only 11/2008)
These settings determine the width of the video on the screen in percentage and the side font size “cap”. You can customize these settings based upon the screen size and resolution of your monitor. For instance, if you have a wide screen monitor, you may want to leave the wide screen setting as is, but adjust the Standard setting to make the video take up .99000 of the screen for the largest video possible. These settings will squeeze out other data, like the side data or the Data Bar data, so be careful. If you go smaller, you may want to “cap” the max side font to �0 points to keep it from growing too large. Play with them. The defaults are shown here, so you can always go back to these if you mess things up.
course scale=0.400000
This setting determines the height of the course profile. Again, this might give you the room you need to get the largest video, yet still see data in your Data Bar you can read without a microscope.
bars window scale factor=0.350000
This setting allows you to display any size of SpinScan bars or Polar graph on the Video inlay. .990000 would fill the video window with a bar graph.
top color=5, 167, 251 bottom color=251, 237, 5
This setting allows you to adjust the two colors that make up the “Sky gradient” above the course profile. These are RGB color numbers.
save report=false
Setting this option to true will display the Save Report dialog. Please note that this feature has some known issues and will not display the Save Report dialog when saving a race prior to the finish line. This feature will be fixed and the option will be added to the Options Screen.
show course info=true
This setting displays the course name and length max elevation gain data on the course profile.
10
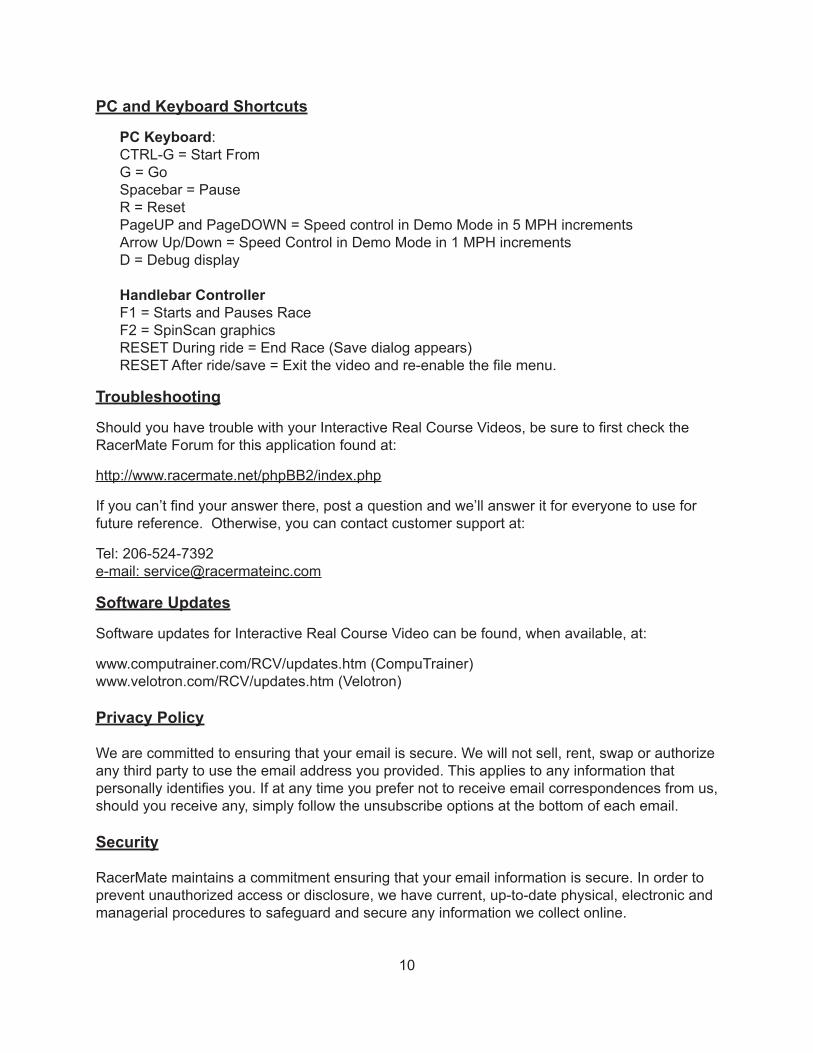
PC and Keyboard Shortcuts
PC Keyboard:CTRL-G = Start FromG = GoSpacebar = PauseR = ResetPageUP and PageDOWN = Speed control in Demo Mode in 5 MPH incrementsArrow Up/Down = Speed Control in Demo Mode in 1 MPH incrementsD = Debug display
Handlebar ControllerF1 = Starts and Pauses RaceF� = SpinScan graphicsRESET During ride = End Race (Save dialog appears)RESET After ride/save = Exit the video and re-enable the file menu.
Troubleshooting
Should you have trouble with your Interactive Real Course Videos, be sure to first check the RacerMate Forum for this application found at:
http://www.racermate.net/phpBB�/index.php
If you can’t find your answer there, post a question and we’ll answer it for everyone to use for future reference. Otherwise, you can contact customer support at:
Tel: �06-5�4-7�9�e-mail: [email protected]
Software Updates
Software updates for Interactive Real Course Video can be found, when available, at:
www.computrainer.com/RCV/updates.htm (CompuTrainer)www.velotron.com/RCV/updates.htm (Velotron)
Privacy Policy
We are committed to ensuring that your email is secure. We will not sell, rent, swap or authorize any third party to use the email address you provided. This applies to any information that personally identifies you. If at any time you prefer not to receive email correspondences from us, should you receive any, simply follow the unsubscribe options at the bottom of each email.
Security
RacerMate maintains a commitment ensuring that your email information is secure. In order to prevent unauthorized access or disclosure, we have current, up-to-date physical, electronic and managerial procedures to safeguard and secure any information we collect online.
11
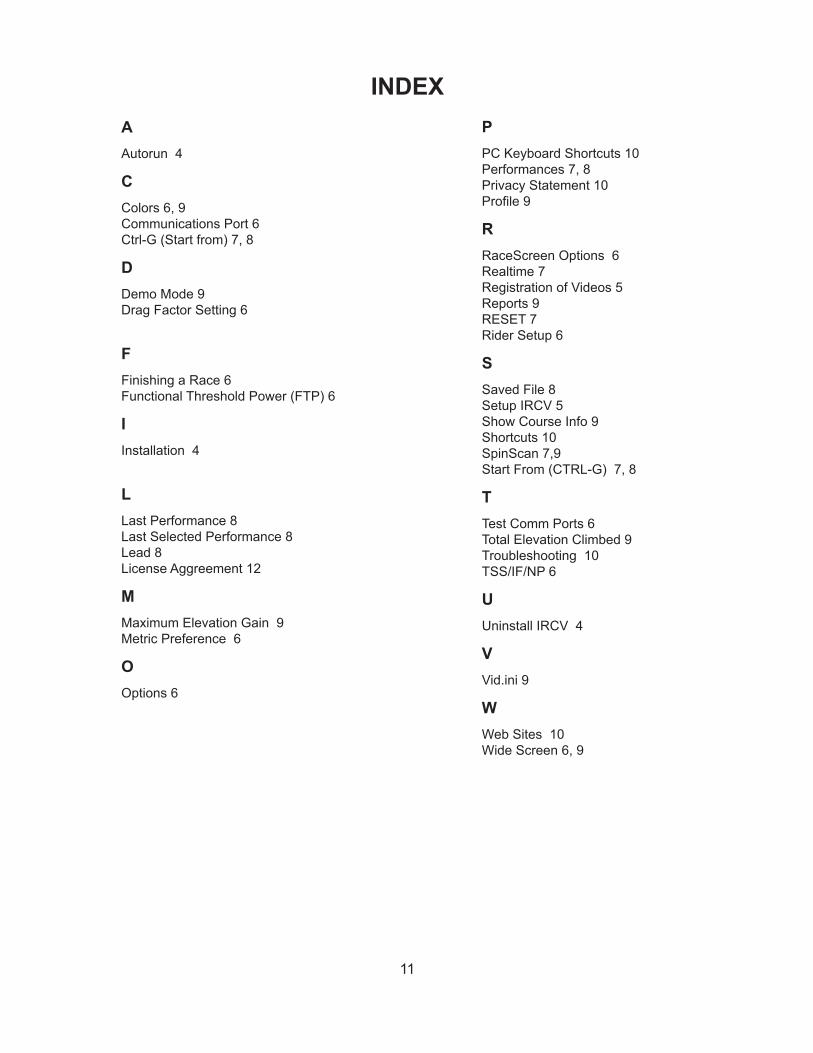
AAutorun 4
CColors 6, 9Communications Port 6Ctrl-G (Start from) 7, 8
DDemo Mode 9Drag Factor Setting 6
FFinishing a Race 6Functional Threshold Power (FTP) 6
IInstallation 4
LLast Performance 8Last Selected Performance 8Lead 8License Aggreement 1�
MMaximum Elevation Gain 9Metric Preference 6
OOptions 6
PPC Keyboard Shortcuts 10Performances 7, 8Privacy Statement 10Profile 9
RRaceScreen Options 6Realtime 7Registration of Videos 5Reports 9RESET 7Rider Setup 6
SSaved File 8Setup IRCV 5Show Course Info 9Shortcuts 10SpinScan 7,9Start From (CTRL-G) 7, 8
TTest Comm Ports 6Total Elevation Climbed 9Troubleshooting 10TSS/IF/NP 6
UUninstall IRCV 4
VVid.ini 9
WWeb Sites 10Wide Screen 6, 9
INDEX

1�
RacerMate Incorporated Software License AgreementImportant — Read carefully before opening or downloading this software packet. This is a legal agreement between you (either an individual or an entity) and RacerMate Incorporated. By opening the accompanying sealed software package or downloading the software from the Internet, you acknowledge that you have read and accept the following RacerMate License Agreement. If you do not want to be bound by the terms of this Agreement, promptly return the unopened software package and the accompanying hardware and instruction booklet to RacerMate for a full refund. Internet customers cannot return or receive a refund for this software unless RacerMate Technical Support determines the software will not run on the intended computer. If RacerMate Technical Support determines that the intended PC did not meet minimum system requirements at the time of download, a refund will not be authorized.
It is the responsibility of the customer to determine whether their PC “appears to meet” minimum system requirements. If RacerMate determines the computer in which the software was installed on met minimum system requirements and the software will not run correctly with currently available hardware and/or software drivers, RacerMate Technical Support will authorize a refund of the purchase price.
1) License. This License Agreement permits you to use one copy of the enclosed Software program(s) on a single computer. The software is in “use” on a computer when it is loaded into permanent memory (e.g., hard disk, or other storage device) of that computer.
2) Copyright. The entire contents of this disc and the compilation of the software are copyrighted and protected by both United States copyright laws and international treaty provisions. You may make only (a) one copy of the Software for backup or archival purposes or (b) transfer the Software to a single hard disk, provided you keep the original for backup or archival purposes. None of the material on the CD-ROM or floppy disc or material within the Operating Manual may ever be distributed, in original or modified form, for commercial purposes.
3) Other Restrictions. You may not rent or lease the Software. You may transfer the Software and user documentation on a permanent basis provided you retain no copies and the recipient agrees to the terms of this agreement. You may not reverse engineer, decompile, or disassemble the Software except to the extent that applicable law expressly prohibits the foregoing restriction. If the software is an update or has been updated, any transfer must include the most recent update and all prior versions. By opening the CD-ROM and/or installing the software package you are agreeing to be bound by this license agreement. Once installed, this software cannot be returned or a refund of the purchase be made unless authorized by RacerMate Technical Support. Software downloaded via the Internet cannot be returned or refunded unless authorized by RacerMate Technical Support.
4) Limited Warranty. RacerMate warrants that the software and disc are free from defects in materials and workmanship for a period of thirty (30) days from the date of purchase. If RacerMate receives notice within the warranty period of defects in material or workmanship, RacerMate will replace the defective disc. RacerMate’s entire liability and your exclusive remedy shall be limited to replacement of the Software, which is returned to RacerMate with a copy of your receipt. This Limited Warranty is void if failure of the Software has resulted from accident, abuse, or misapplication. Any replacement of the software will be warranted for the remainder of the original warranty period. This warranty is for the Software disc only and does not imply to or reduce other warranties RacerMate has established for the hardware this Software is used with.
5) No Liability For Consequential Damages. To the extent permitted by applicable law, in no event shall RacerMate be liable for any damages whatsoever arising out of the use of or inability to use the Software, even if RacerMate has been advised of the possibility of such damages. Because some states/jurisdictions do not allow the exclusion or limitation of liability for consequential or incidental damages, the above limitation may not apply to you.

�016 NE Blakeley St.Seattle, WA 98105
Phone (�06) 5�4-66�5Toll Free (800) 5��-�610
Fax (�06) 5��-4961www.racermateinc.com