libelium-telefonica iot platform development kit quick ... · 20.3. telefonica service setup in the...
TRANSCRIPT

Libelium-Telefonica IoT Platform Development KitQuick Start Guide

-2-
IoT Application Development Kit
INDEX
1. Identify the products ........................................................................................................................... 3
2. Open the box ........................................................................................................................................ 3
3. Identify Meshlium device and antennas ............................................................................................ 3
4. Antennas set up ................................................................................................................................... 4
5. Power set up ......................................................................................................................................... 4
6. Internet set up ..................................................................................................................................... 5
7. Checking data received at Meshlium ................................................................................................. 6
8. Now you can receive data ................................................................................................................... 7
9. Get Ready to send Data ....................................................................................................................... 7
10. Open the box ..................................................................................................................................... 7
11. Recharge Plug & Sense! ..................................................................................................................... 8
12. Antennas set up ................................................................................................................................. 8
13. Identify Plug & Sense! family ............................................................................................................ 9
14. Check connection diagram ............................................................................................................. 11
15. Sensors setup ................................................................................................................................... 11
16. Connect sensors ............................................................................................................................... 12
17. Connect Solar Panel ........................................................................................................................ 12
18. Turn ON Plug & Sense! ..................................................................................................................... 13
19. Checking if data is received ............................................................................................................ 14
20. Next Steps ........................................................................................................................................ 1420.1. Setting up TELEFONICA online ..........................................................................................................................................1420.2. Setting up Meshlium .............................................................................................................................................................1520.3. TELEFONICA service setup ..................................................................................................................................................16

-3-
IoT Application Development Kit
1. Identify the products
2. Open the box
3. Identify Meshlium device and antennas
-4-
IoT Application Development Kit
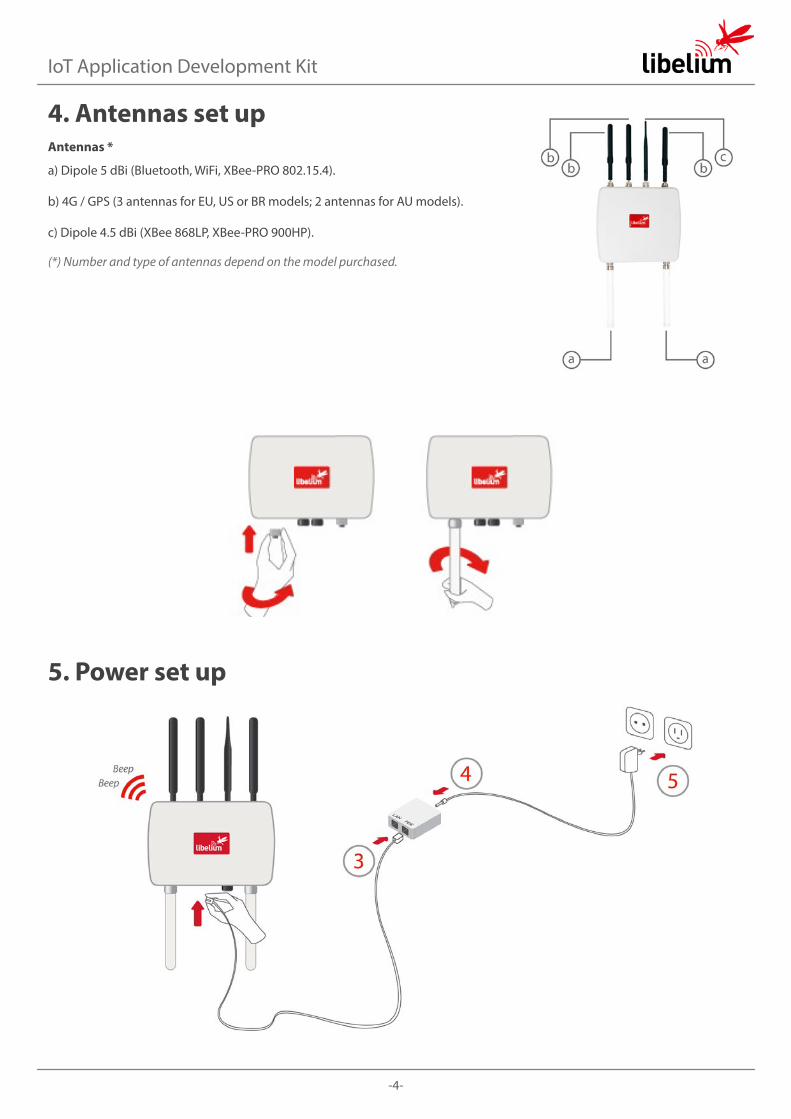
4. Antennas set upAntennas *
a) Dipole 5 dBi (Bluetooth, WiFi, XBee-PRO 802.15.4).
b) 4G / GPS (3 antennas for EU, US or BR models; 2 antennas for AU models).
c) Dipole 4.5 dBi (XBee 868LP, XBee-PRO 900HP).
(*) Number and type of antennas depend on the model purchased.
5. Power set up
-5-
IoT Application Development Kit
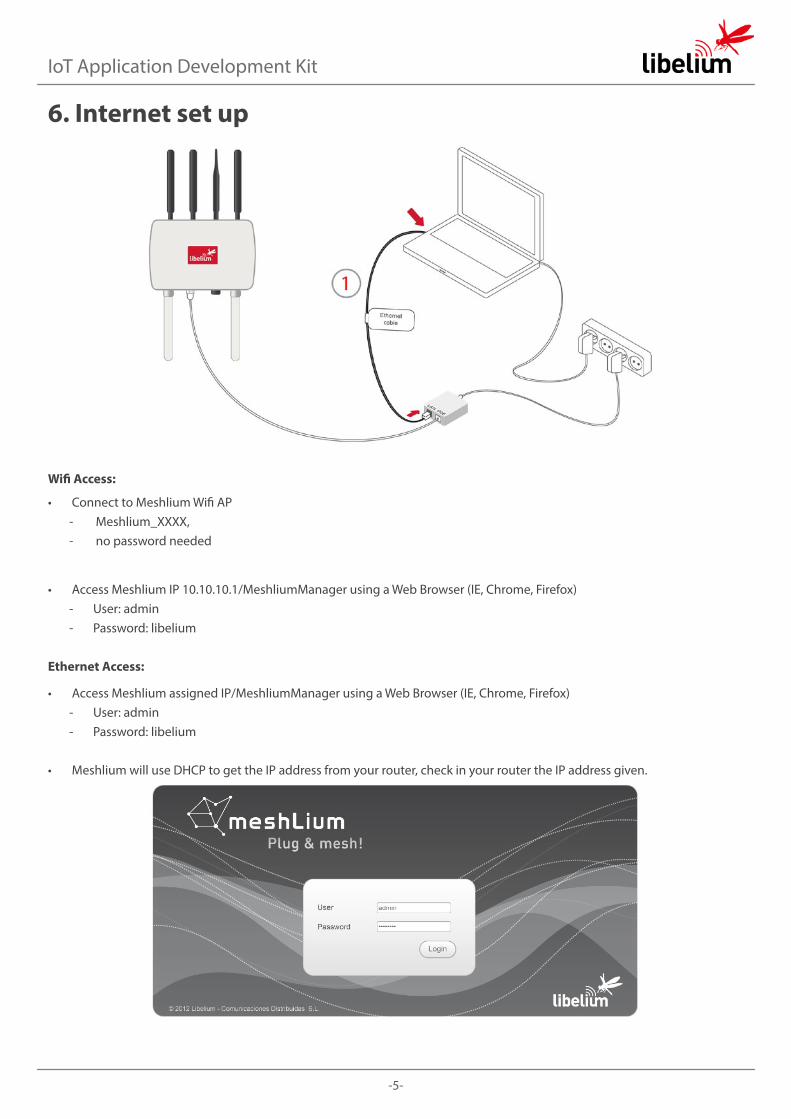
6. Internet set up
Wifi Access:
• Connect to Meshlium Wifi AP - Meshlium_XXXX, - no password needed
• Access Meshlium IP 10.10.10.1/MeshliumManager using a Web Browser (IE, Chrome, Firefox) - User: admin - Password: libelium
Ethernet Access:
• Access Meshlium assigned IP/MeshliumManager using a Web Browser (IE, Chrome, Firefox) - User: admin - Password: libelium
• Meshlium will use DHCP to get the IP address from your router, check in your router the IP address given.

-6-
IoT Application Development Kit
7. Checking data received at Meshlium
-7-
IoT Application Development Kit
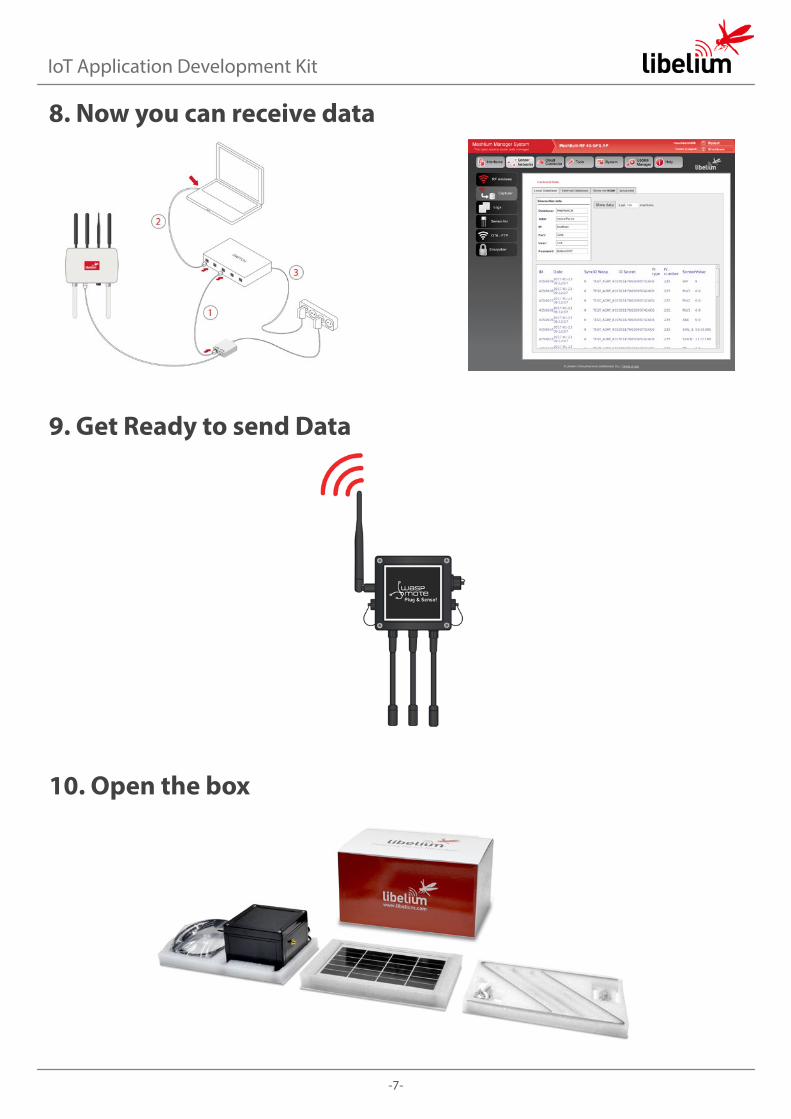
8. Now you can receive data
9. Get Ready to send Data
10. Open the box
-8-
IoT Application Development Kit
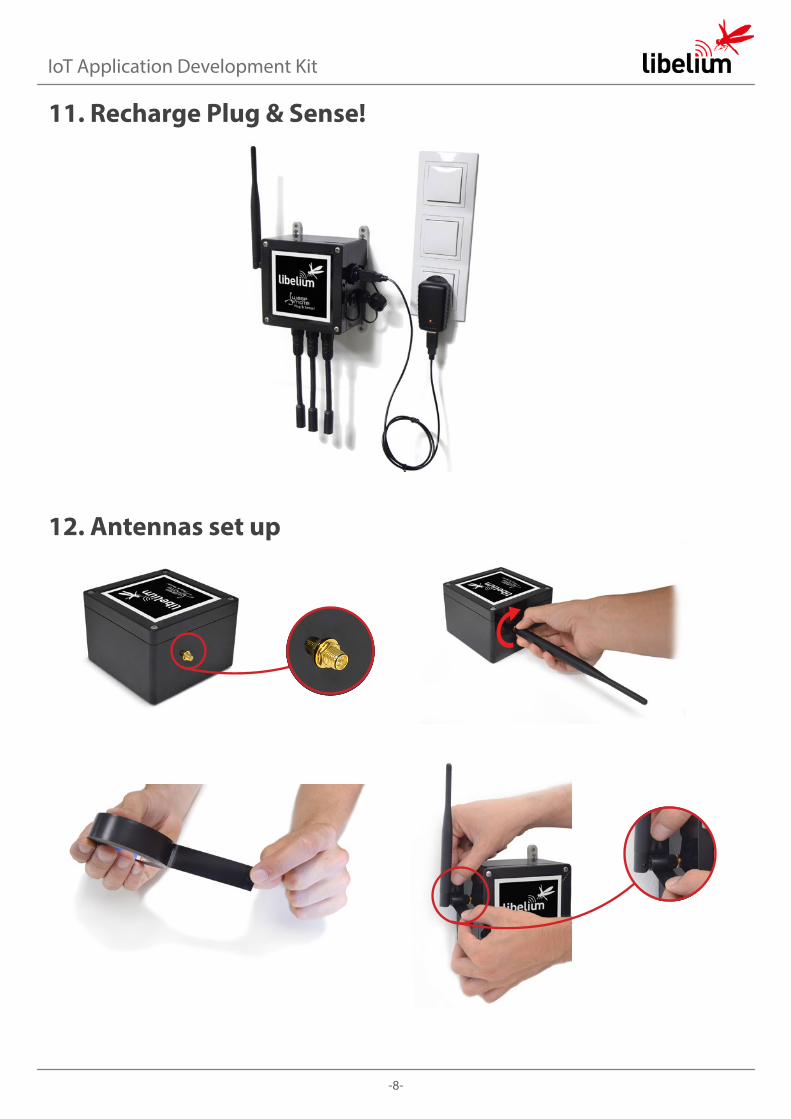
11. Recharge Plug & Sense!
12. Antennas set up
-9-
IoT Application Development Kit
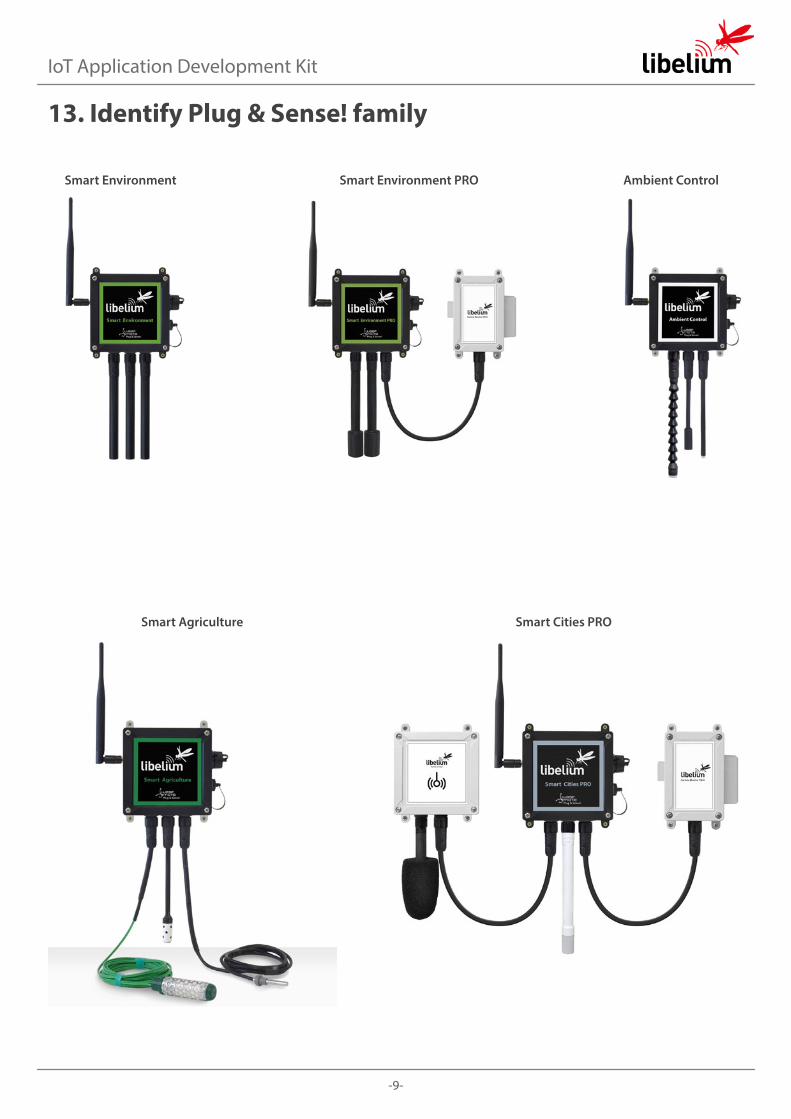
13. Identify Plug & Sense! family
Smart Environment Ambient ControlSmart Environment PRO
Smart Agriculture Smart Cities PRO

-10-
IoT Application Development Kit
Smart Water
Smart Security
Smart Parking Radiation Control
4-20 mA Current Loop
Smart Water Ions
-11-
IoT Application Development Kit
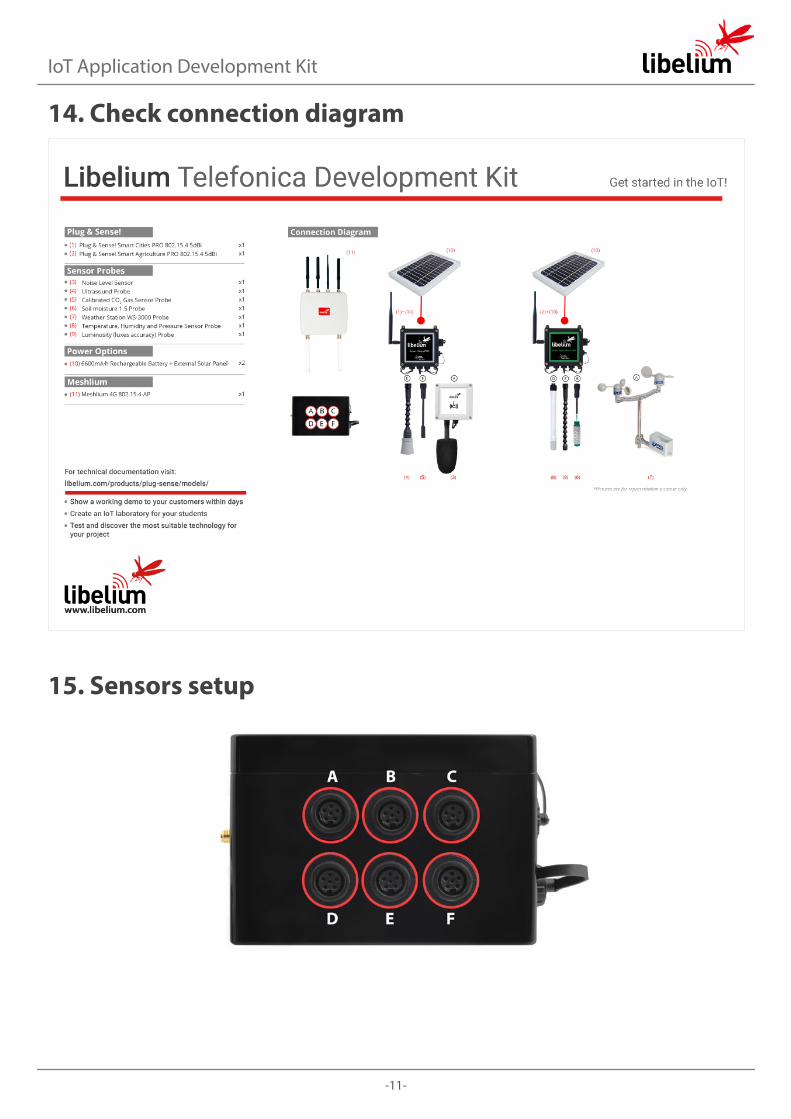
14. Check connection diagram
15. Sensors setup
-12-
IoT Application Development Kit
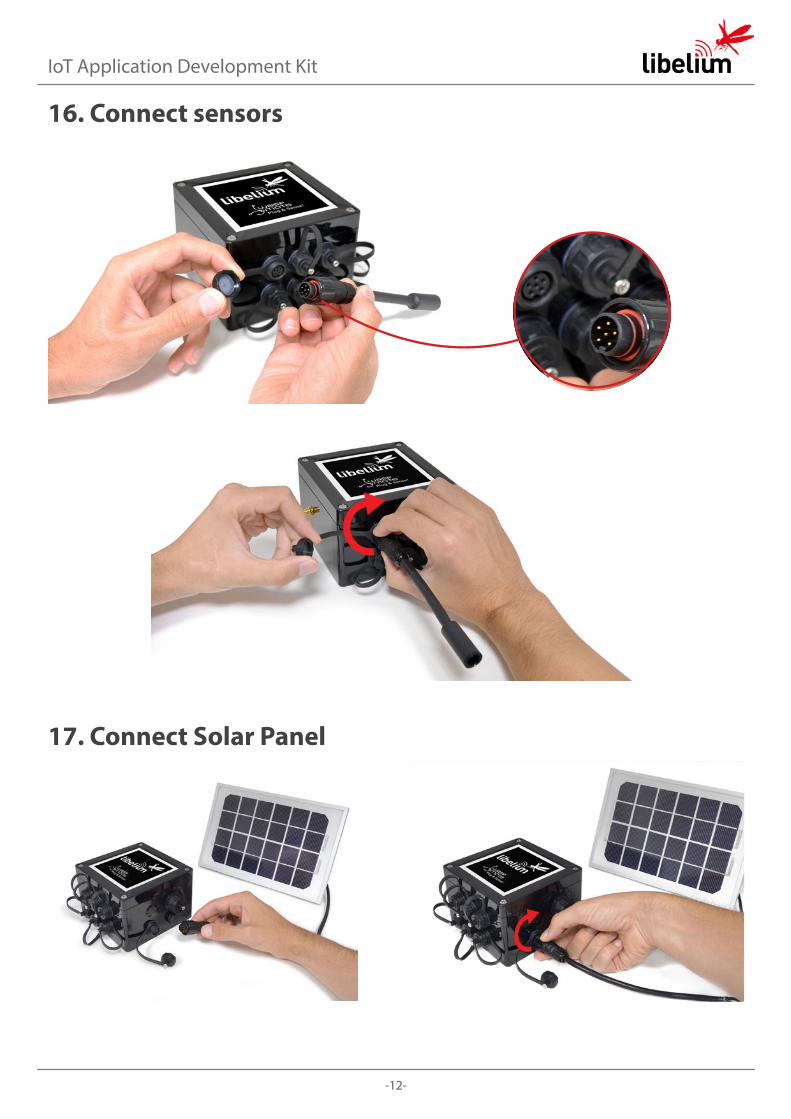
16. Connect sensors
17. Connect Solar Panel
-13-
IoT Application Development Kit
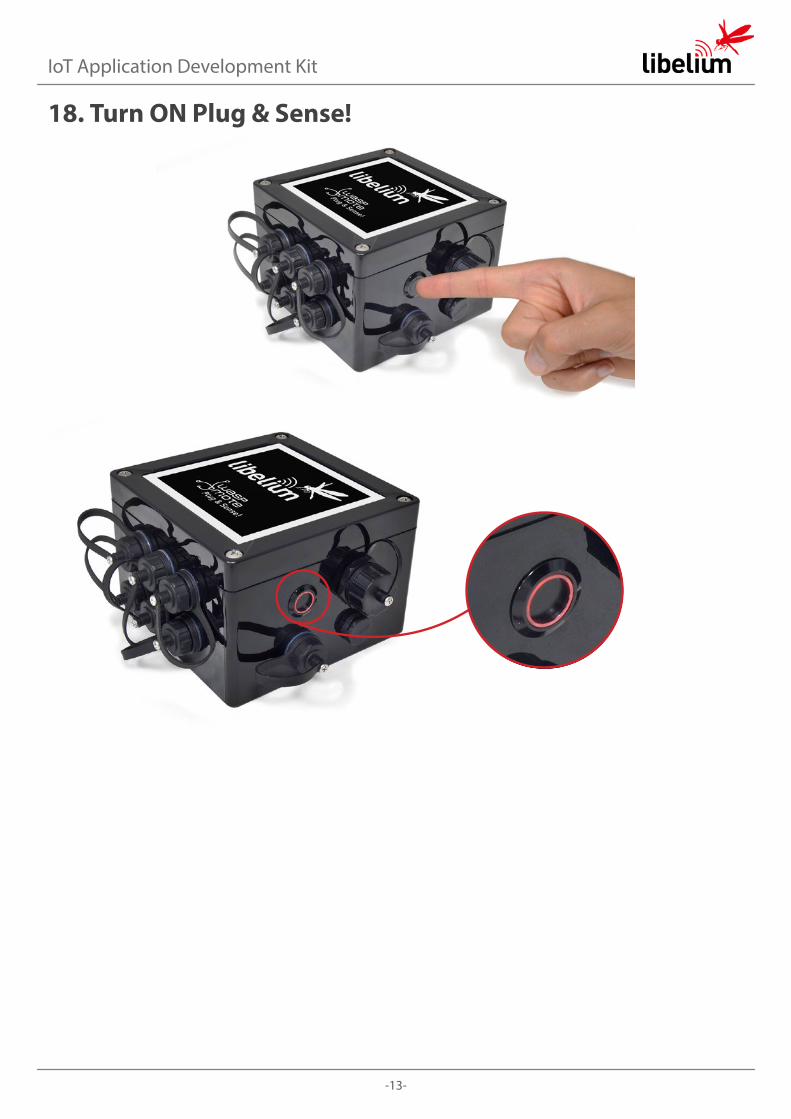
18. Turn ON Plug & Sense!

-14-
IoT Application Development Kit
19. Checking if data is received • Access to Meshlium as explained before in page 5-6. • To check that your Plug & Sense! is sending data, see the ID_Wasp. The ID_Wasp of each Plug & Sense! can be found in the
details sticker.
20. Next StepsCheck the following instructions for setting up Meshlium working with the ESRI platform.
20.1. Setting up TELEFONICA onlinehttp://www.ttcloud.net:8008/#/
Telefonica will give you the credentials to access to the IOT Platform
-15-
IoT Application Development Kit
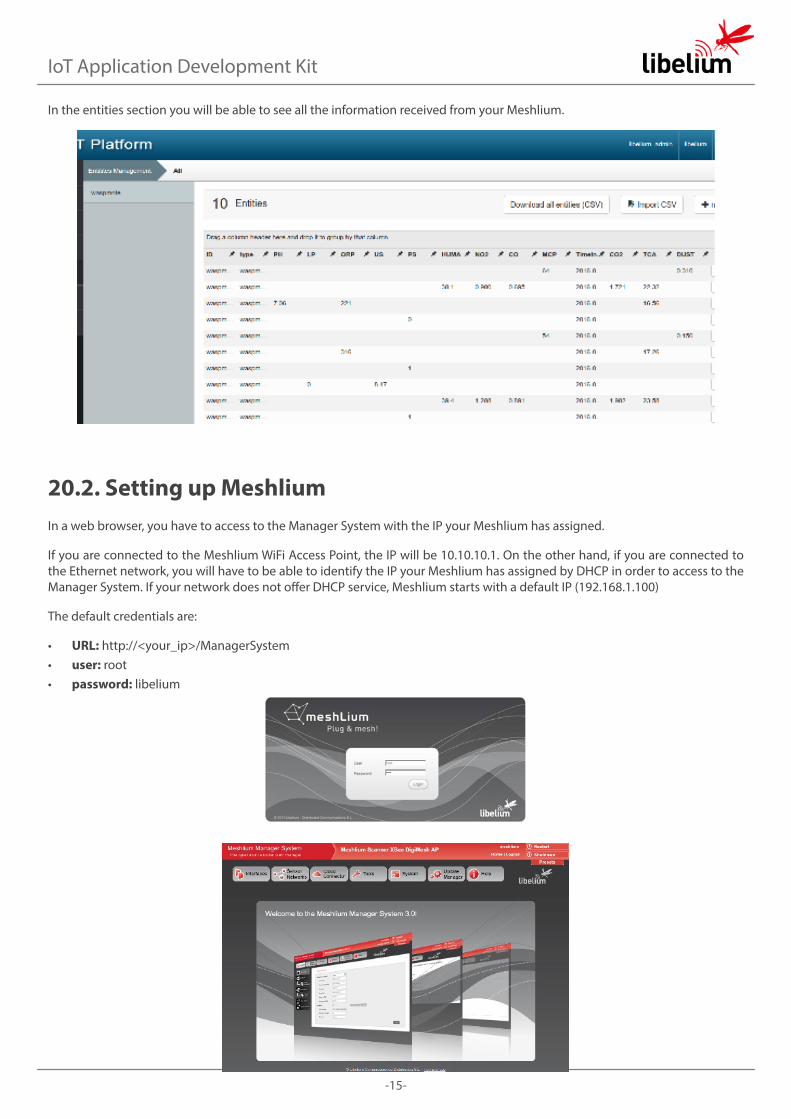
In the entities section you will be able to see all the information received from your Meshlium.
20.2. Setting up MeshliumIn a web browser, you have to access to the Manager System with the IP your Meshlium has assigned.
If you are connected to the Meshlium WiFi Access Point, the IP will be 10.10.10.1. On the other hand, if you are connected to the Ethernet network, you will have to be able to identify the IP your Meshlium has assigned by DHCP in order to access to the Manager System. If your network does not offer DHCP service, Meshlium starts with a default IP (192.168.1.100)
The default credentials are:
• URL: http://<your_ip>/ManagerSystem • user: root • password: libelium
-16-
IoT Application Development Kit
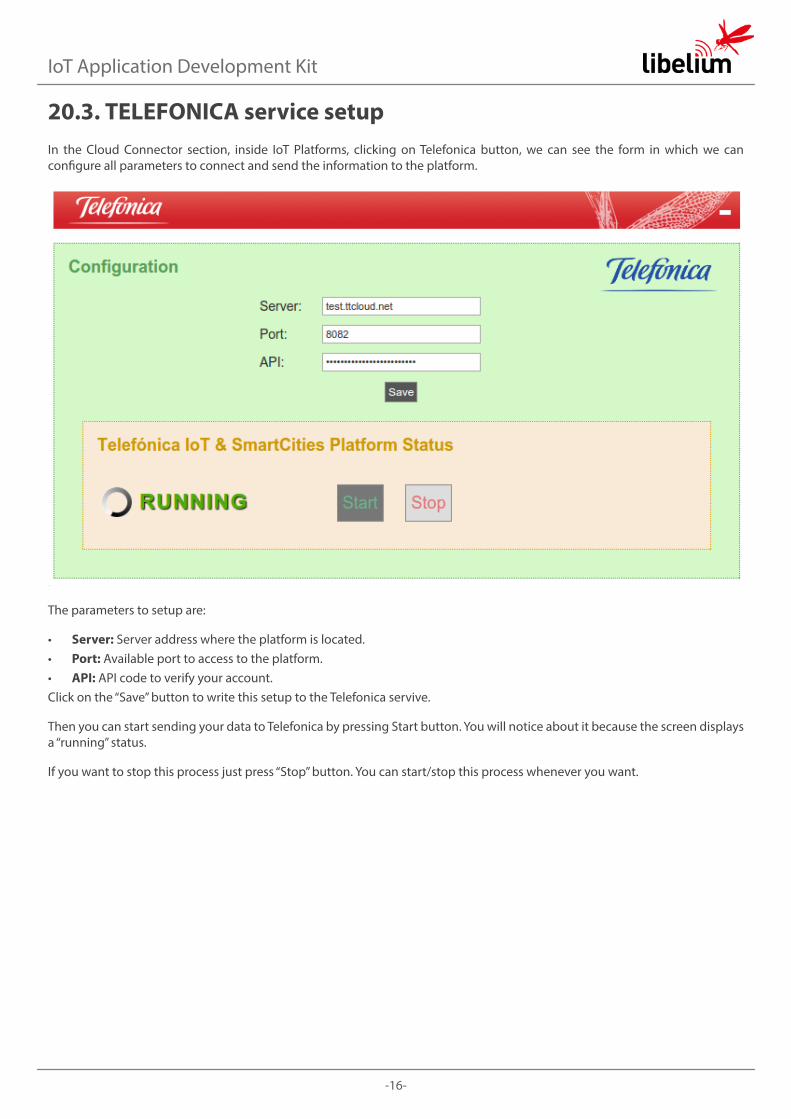
20.3. TELEFONICA service setupIn the Cloud Connector section, inside IoT Platforms, clicking on Telefonica button, we can see the form in which we can configure all parameters to connect and send the information to the platform.
.
The parameters to setup are:
• Server: Server address where the platform is located. • Port: Available port to access to the platform. • API: API code to verify your account.
Click on the “Save” button to write this setup to the Telefonica servive.
Then you can start sending your data to Telefonica by pressing Start button. You will notice about it because the screen displays a “running” status.
If you want to stop this process just press “Stop” button. You can start/stop this process whenever you want.